ALIDA
If you have found this walkthrough via google search or via another site then you have probably not visited my site.
A lot more very detailed game walkthroughs can be found on my site at: www.pcgameswalkthroughs.nl
2019:
Walkthrough
by: Louis Koot
Alida
is a Windows 95/98 game, but works fine when I played it with WindowsXP and also with Windows 7.
Originally, Alida was released on 5 CD-ROMs, but there is also a DVD version. The only difference between the CD-ROM version and the DVD
version is that with the DVD version you are no longer constantly changing CDs.
There is no difference
Do
not expect a splashing and graphically great game.
Alida is a "photo-realistic" game, something like Myst 1 and Rhem.
This makes it more a puzzle game than a real Adventure game. You play the game
in a small screen that is then surrounded by black edges.
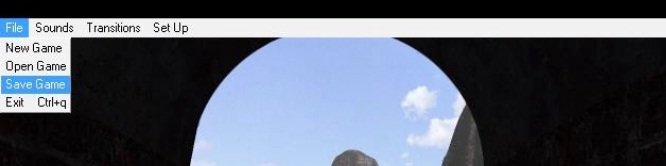
A
gray Windows bar pops up in which you see the options: "File"
"Sounds", "Transition" and "Set Up". Well, those
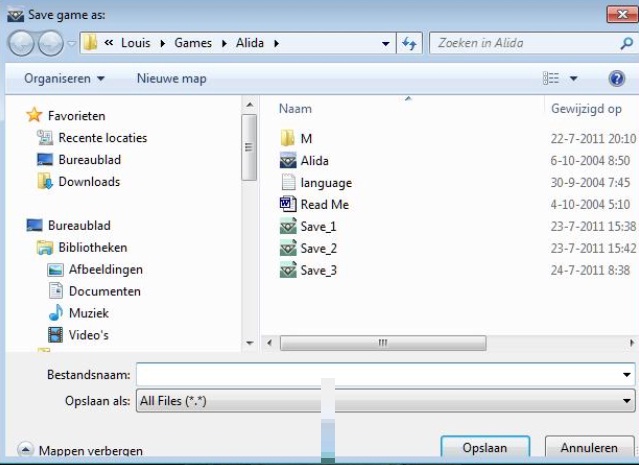
options speak for themselves. To Save the game, click on "Save Game".
You then have to "tell" the game where it should store your Saves.
By default the game
stores the Alida Saves in the Alida game folder, but you can also create a
folder yourself, for example in the "My Documents folder" where you
then save the Alida Save Games in
The
story:
Alida
is an island that lies about 16 miles off the coast of the mainland in the
ocean. It is an artificial island. The island has the shape of a gigantic
guitar. Alida was created by the members of the Alida Band, a young and
successful rock and roll band. The band members, Arin, Luke, Juno and Leval,
have referred to Alida as a theme park, but the island has considerably cut down
on their earnings as a band. In addition, the Band has become a bit forgotten so
that there are few paying visitors to the Alida island.
On
the Alida island each member of the band has its own safe in which they have
stored their share of the "booty". These safes are protected, against the penetration of unauthorized
persons, by all
kinds of complicated puzzles.
The manager of the band, one Kivas, convinced the band members to store the
fortune of the band in one central safe and this has happened. Each member of the
band keeps in his safe a piece of the code with which the Central Safe can be
opened. Arin has one day left the Alida island and since then nothing has been
heard from him.
Chapter
1: The "Fingers Hall"
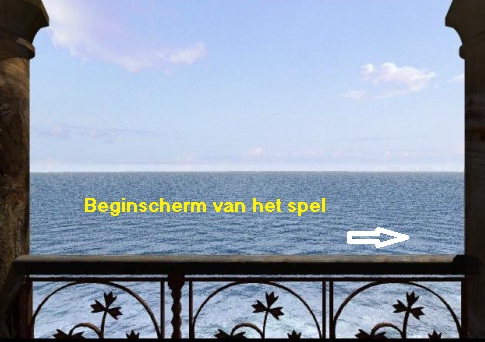
The game starts with a short movie in which the wife of Arin, Julia, sends you to Alida and asks you to find Arin and to take him back home.
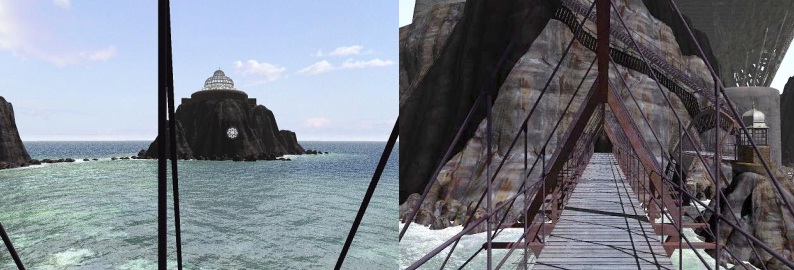
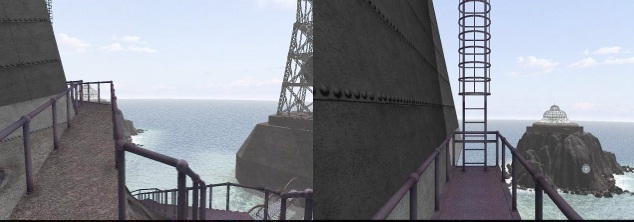
You then stand on a gallery and look out over the ocean. Turn right.
You look over the gallery and you see a passage on the other side. But, on the right you also see the entrance of a corridor.
You can also see a rock from the ocean and on top of that rock
you see a glass dome. Go forward 1 time and turn right.
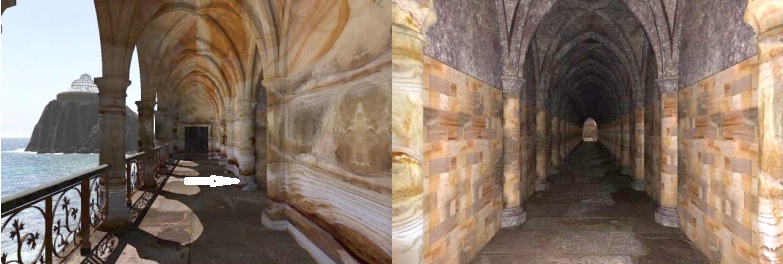
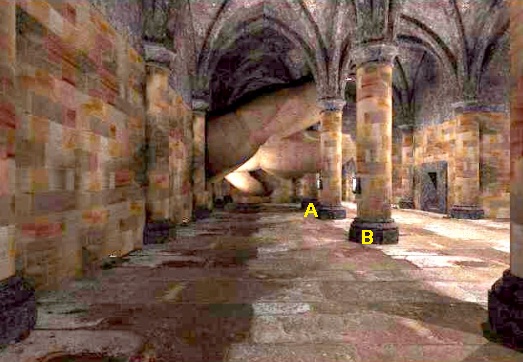
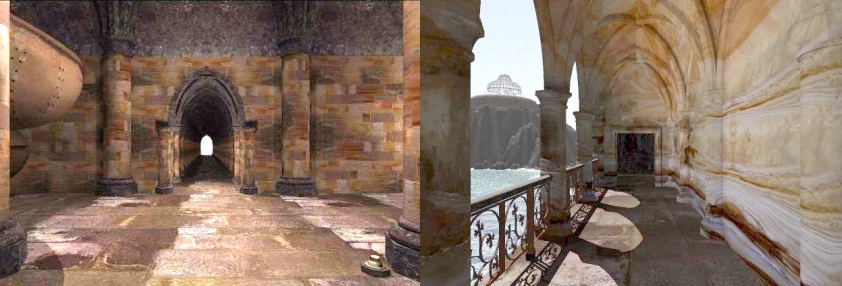
You stand in front of the entrance of a long vaulted corridor. Go 6 times ahead through the corridor.
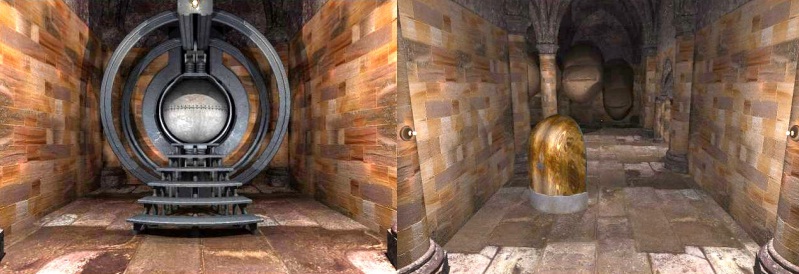
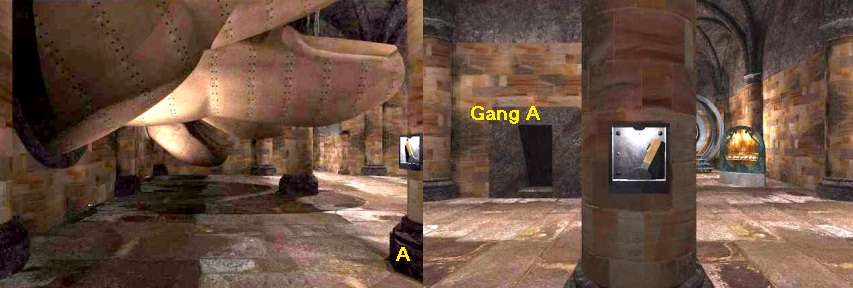
You end up in a large hall with columns. Turn to the left.
You look into a deep and curvaceous alcove.
Arin's
Niche
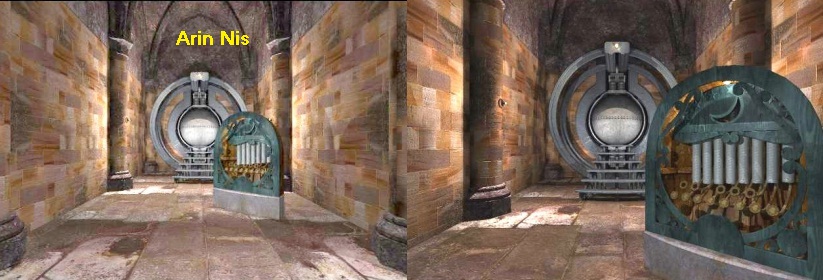
Call
this the Left Alcove / niche and this is Arin's niche. In this Alcove you see a Puzzle
Cabinet and in the back you see a staircase going up to a round
"door". That round "door" is the access to Arin's
"safe" in the Switch. Go 1 time ahead to the Puzzle Cabinet. Then
place your cursor on the puzzle cabinet. Your cursor becomes a magnifier
and with this you can zoom in on objects. So zoom in on the Puzzle
Cabinet. This is the "Moon Organ" and this thing was made by Arin, the
guy you are looking for. View the organ at ease.
|
Arin's
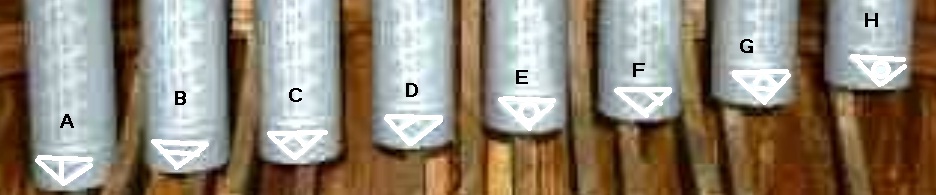
Moon Organ: At
the top you see a Half Moon and in it you see a black Tube. You see 8 Gray Tubes
in the Moon organ they. Call the Tubes, from left to right, as A, B, C, D, E,
F, G, H. and number the "white" keys 1 to 8
|
Turn
left through the left edge of the screen. You look at the round "door"
at the top of the stairs. Go forward 2 times. You are at the top of the stairs
and with your nose against the round "door". This is not a door but
this is a so-called "T-Runner". A "T-Runner" is a transport
device and they are designed by the genius of the band, and that is Juno.
However, the thing does not open. Place your cursor at the edge of the screen,
left or right. Your cursor then becomes the "turn-around", so turn around. You
look from the steps to the Golden backside of the "Moon
Organ".
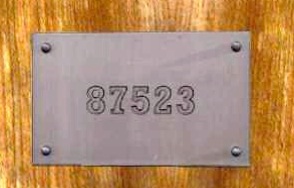
If you look closely then see that there is a gray plate on the back of the organ. Go 1 time forward and zoom in 2 times on that gray image via your magnifier.
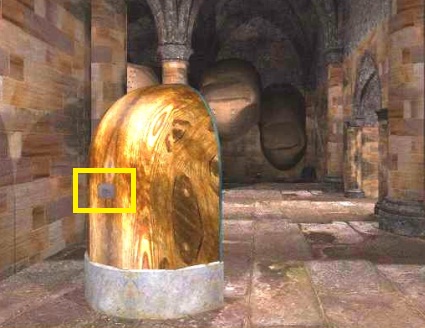
There is a number on the plate and that number is 87523. Write down
the number.
Zoom
out 2 times via the Minus magnifier. Go 1 time ahead, right next to the organ.
My heaven ...... from the other wall of the big hall a few gigantic fingers are
pointing into the hall. What a strange affair ..... Turn left. You are zoomed in again
on the front of the Moon Organ. Say .......Shall we try something? 87523 ...
could that be a code? Click on the "white" keys: 8, 7, 5, 2, 3 and
.....

5 Black Tubes emerge. Each Black Tube then sits between 2 Gray Tubes. Well ..... nice, but "So What" ..........
Turn clockwise and go 2 times forward towards the gigantic fingers and then turn counter clockwise so that you look through the big hall again.
You see the entrance of Corridor A.
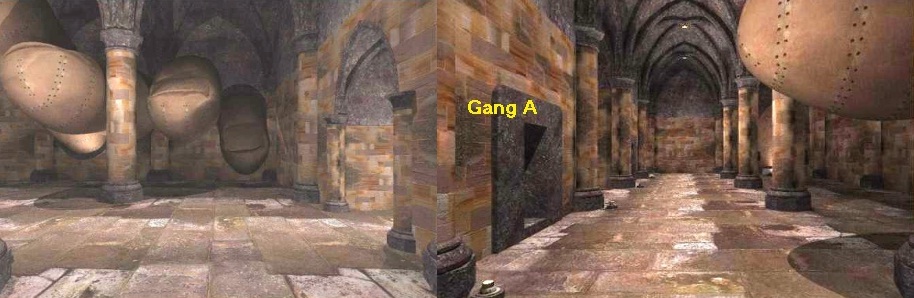
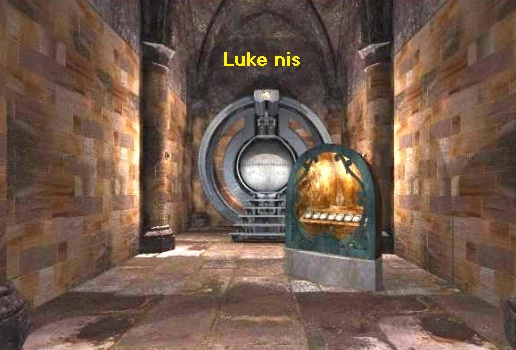
Go forward 3 times and then turn left. You look into a deep vaulted Alcove again. This is the Middle Alcove and this is the Alcove of Luke.
The
"T-Runner" door in the back is the entrance to the area of Luke.
|
Luke's
Alcove
The
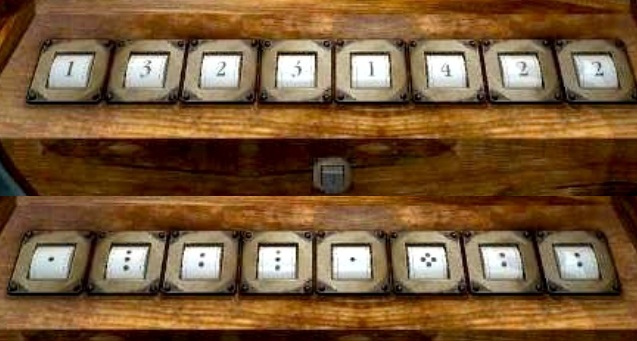
Puzzle Cabinet is therefore from Luke. Go forward 1 time and zoom in on the
Puzzle Cabinet. You see 8 white buttons and below that you see a small gray
square button. You
can set the numbers 1, 2, 3, 4 on each of the 8 white buttons if you click on
each of those buttons.
Give
it a try, so press the gray button and keep it pressed until the number on each
white button changes to dots A
button with the number 1 then gets 1 dot. A
button with the number 2 then gets 2 dots. A
button with the number 3 then gets 3 dots. A
button with the number 4 then gets 4 dots. |
This
is also nice to know but you have no idea what to do with this knowledge. Turn
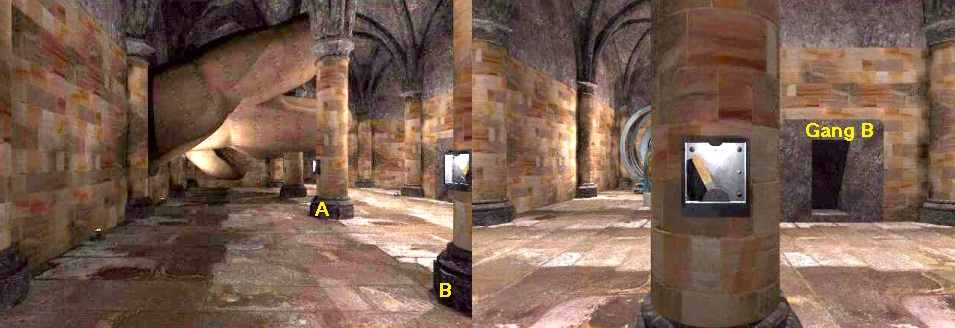
right and enter the main hall 2 times forward. Turn left again and ...... you
look further through the hall and see the entrance to Corridor B and you see a
huge Plectrum in the corner. Go forward until you can go no further and then
turn left again. You now look into the last Alcove and this is the niche of
Juno.
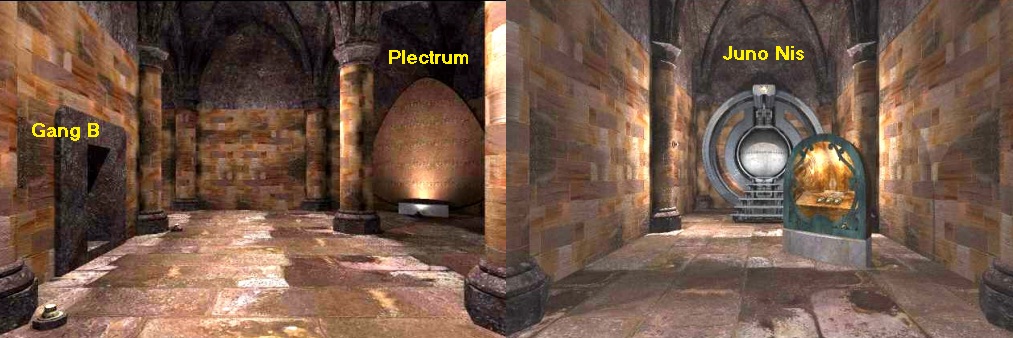
The "T-runner" door, in the back of the niche, is the entrance to Luke's area of the guitar and these are the so-called "Potentiometers".
Of course there is also a Puzzle Cabinet in this
niche.
|
Juno's
Niche: Go
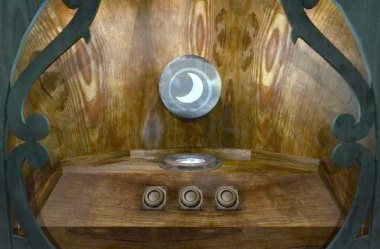
forward 1 time and zoom in on the Puzzle Cabinet. The
Puzzle Cabinet from Juno has 3 buttons. If you click on the 3 buttons you will
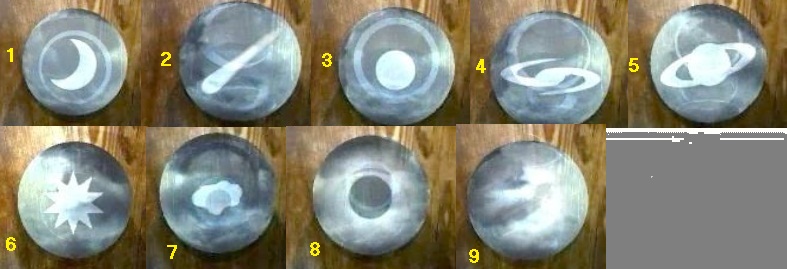
see a Holographic Globe. In the sphere you then see a celestial body. The sphere
is rotating.
By
clicking on the 3 buttons each time you get to see 9 times a different heavenly
body. Each of the 3 buttons shows you the same 9 celestial bodies. The only
difference is the color, although you have to stare very well to see the color
difference. The
holograms under the left button have a Blue Glow, the holograms under the middle
button have a Red Glow and the holograms under the right button have a Green
Glow. If
you place the hand-cursor on such a hologram, and then DO NOT CLICK, you will
see flashes of light. These light flashes can be short or long and each of the 9
holograms gives you a different number of light flashes. So these are 9 Codes. So
find the Light Flash code for each of the 9 holograms and write them down too.
Because I find it difficult to name the celestial bodies, I have just numbered
them with the "Half Moon" being number 1.
The
light flash codes are:
|
Corridor
B: right door
Go
forward 2 times and turn right. You look back through the hall and see the
entrance to Corridor B again.
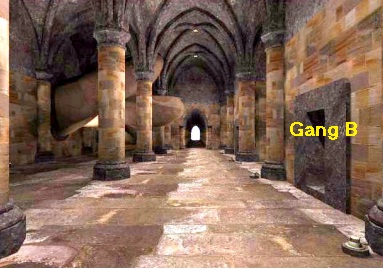
1
time forward and turn right. You now look into corridor B. Go forward 3 times
through Gang B and .... Bang ... Ah ... you bump your nose against the
back wall of Corridor B.
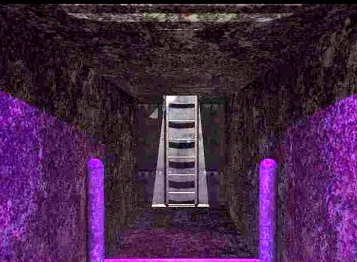
So
go forward 1 time and turn left. You look through a pyramid shaped corridor.
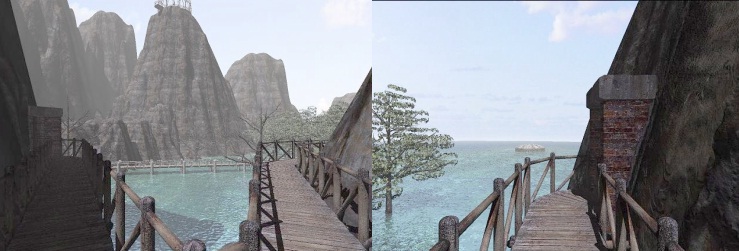
Follow this corridor forward 6 times. You are outside and you are standing on a
bridge.
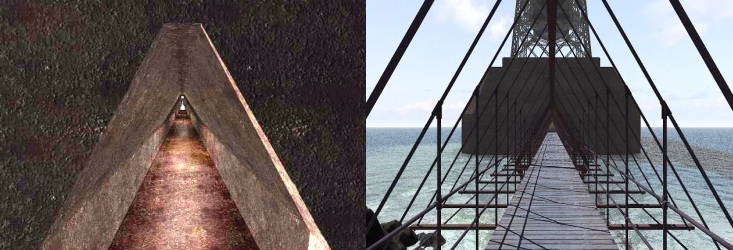
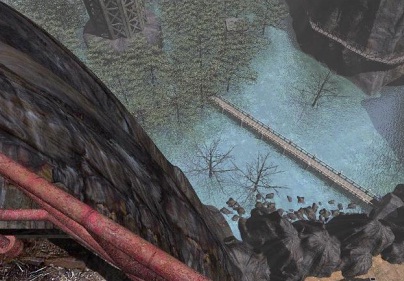
The
bridge goes to a rock on witch stands a kind of "derrick" on witch the
neck of the guitar rests. Go forward 2 times to the middle of the bridge. Then
stand for a moment and turn left. You can see the rock on witch the Glass Dome
stands. In the rock you see a large round window. This is the rock that you saw
from the other side when you stood at the gallery.
Turn
left again. You look back to the pyramid shaped corridor and you see that a
long metal staircase goes up along the rock wall. Turn back 2 times to the
right, or left, and then continue forward over the bridge and then further
through the rocky corridor below the tower. You are then in front of
a door. There is a round peephole in the tip of the door.
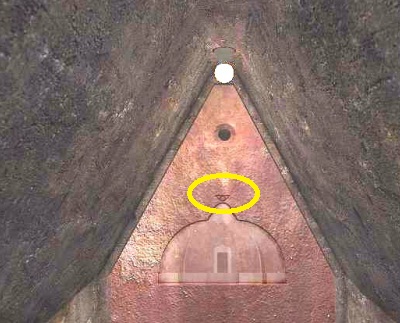
On
the door you see an image of a dome. Above the tip of the dome you see an
inverted triangle with an empty circle in it. Hela .... didn't you see such a
triangle on 1 of the gray Tubes of the "Moon Organ"? Wasn't that on
Tube E? Write down somewhere on a piece of paper that you have seen this
triangle symbol here on this door.
Zoom
in on the round peephole. You look into a space, but it is too small and unclear
to determine what that space is. Zoom out and turn around via the "turn
around fist". Go forward 14 times, back through the corridor and across the
bridge and through the pyramid shaped corridor. Then turn right, move forward 1
time, turn left, and move forward 3 times. You are back in the "Fingers
Hall".
Corridor
B: Left Door
Turn
left, 1 time forward, right and go forward 1 more time. You are now in front of
the Plectrum. Turn right. You now stand behind the pillars in the middle of the
hall and look at the fingers. There are 4 pillars. The 2 middle pillars each
stand for Corridor A and for Corridor B. On the back of those 2 pillars you see
a cupboard.
Go
forward 1 time. On the right-hand side of your screen you will see just that
Pillar in front of Corridor B. Now click with your finger on the box on
this pillar. You stand in front of the pillar and the cupboard. There is a lever
in the box and the lever is now to the right. Click on the handle to move it to
the Left.
The
lever goes to the left and you hear, in the distance, a sound as if something
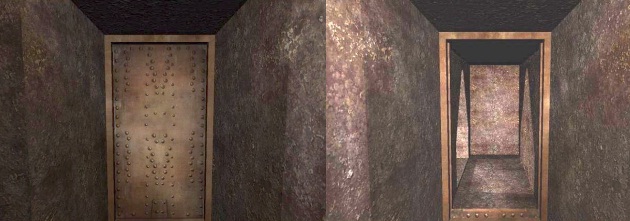
had opened. Click with your hand on the entrance to corridor B and then walk through
corridor B to the back. Turn right and see ...... the entrance to the pyramid corridor
and the bridge is now closed. Turn left twice and see ..... the left door is now
open. So go ahead and turn right. Follow this corridor 6 times forward and you will be standing outside on
a bridge again. To the right is the bridge you were on earlier. The bridge where
you are on now goes to a small "gazebo".
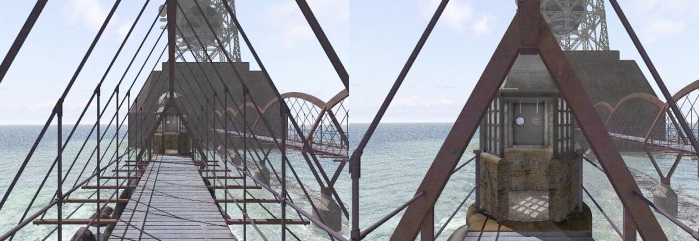
Go
forward 2 times. You are in the small "gazebo". 2 large round
"Clappers" hang in front of the window. If you look out the window you will see the
"derrick" on the large block of concrete. That is not a derrick but
that is the "Peghead" of the guitar. The "Peghead" is the
front of the guitar's neck where the pegs are,
used to tension the strings. Under the "Peghead" you see a large black
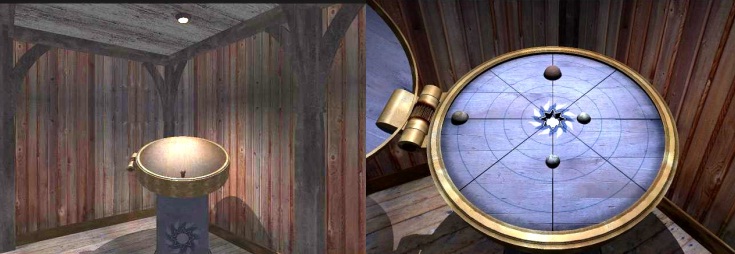
Dome.
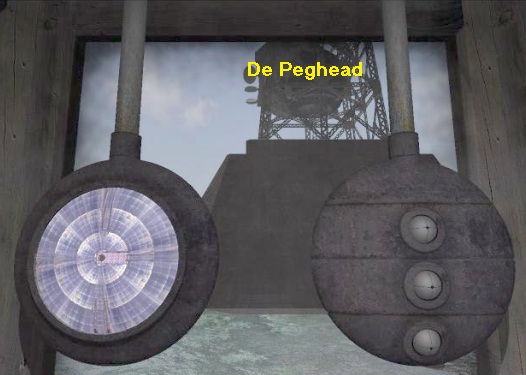
It is a bit difficult to explain, but the left Clap is a Viewer and you see the inside of that black Dome under the "Peghead". If you look closely at the viewer, you see that the inside of the Dome is divided into 4 sections. You see 3 ladders and a platform. The right "Clap" is the "Controls" for those 3 ladders in the Black Dome. In the right "clapper" you see 3 round convex buttons. You can rotate those 3 round buttons, that is, you can turn those 3 buttons up, down, left and right with your hand.
To do this, place
your hand on such a button and then click the left mouse button and keep it
pressed while turning the button up, down, left or right. The intention is that
with these 3 knobs, you get the 3 ladders inside the black Dome in one line. But
unfortunately you have no idea how to do this. So you have to look for a clue
before you can solve this puzzle.
Corridor
A:
Turn
right and go forward 2 times and turn right again. You are again in front of
corridor A. Go forward 3 times through corridor A and .... Surprise .... again a closed
metal door. Turn around through your "turn around" and go forward 3
times, back to the "Fingers Hall". Turn left and go forward 1 time.
You are then again in front of the middle Alcove. Turn right and go forward 1
time to the wall. Turn right again. You are now near the "Fingers" and
on the right side of your screen you see the pillar that stands at corridor A. You
will also see a lever box on this pillar. Click on the box and you will be
placed right in front of the pillar. The lever is now to the left.
Click on the lever to turn the lever to the right and ......... again you hear, in the distance, the sound of a door opening.
Click to the left of the pillar on the entrance to Gang A and then continue forward 3 times through corridor A.
Fortunately, that metal door is now open. You look into the Central Safe.
Go forward 1once. You bump your nose against a large glass window. Through the window you look into the Central Safe.
Turn right. A circular corridor runs past
the vault. Go forward 1 time and then turn left. You are in front of the safe
door.
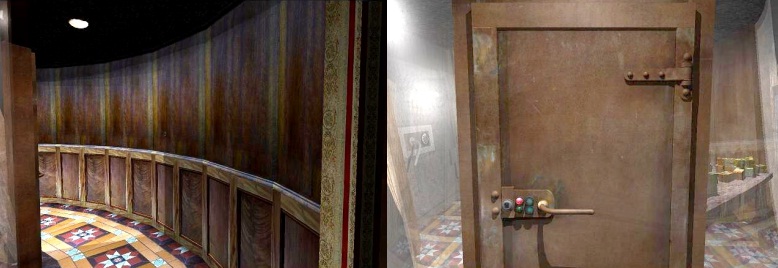
Just
zoom in on the lock of the vault door and then click on the door handle. Oh well
..... if life was that simple .... Of course the safe door is locked. Next to
the door handle you see 2 buttons, one below the other. The red light next to
the top button lights up. The green light next to the lower button is not lit.
You can keep clicking on those 2 buttons until Forever, but you cannot open this
door. Zoom out and turn right and continue forward 2 times and you are at the
end of this round corridor. Turn right .... Hello ... an elevator.
Enter
the elevator. You automatically turn around in the elevator and you see the
elevator button on the right. Click on the lift button and ...... The lift will
take you a long way up and then stop. You have reached the roof. There is a
window in front of you and a console in front of the window. Go forward to the
console.
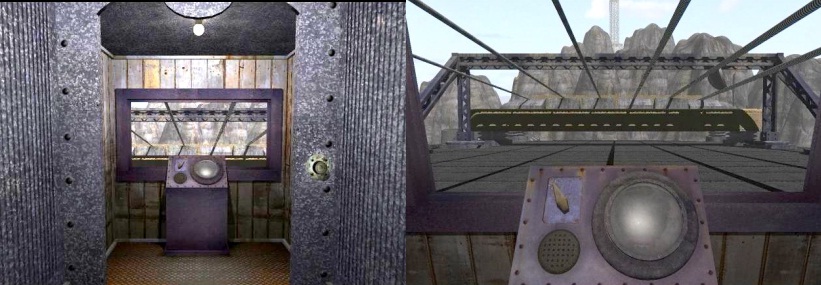
Take
a look out the window. You are now just below the gigantic strings of the
guitar. At the back of the roof you see the "Bridge" over which the 6
strings go. At the rear right you see the "Plectrum". The console has
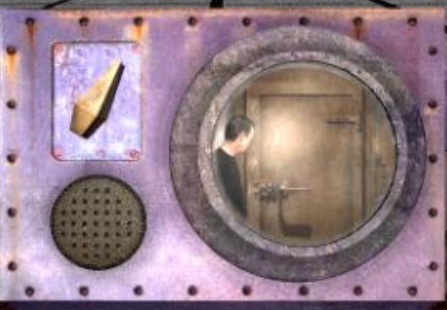
a large round screen that is now closed and a button that is now facing right.
Under the button there is speaker. Press the button. The button goes to the left
and ...... The "Plectrum" now goes from right to left and
"strikes" all 6 strings and you hear which tones the strings make. The
"Plectrum" then goes back to the right and the round screen opens. You
see the vault door and ..... very briefly you see a guy appear at the vault
door. The guy just stands still for a moment and then quickly disappears.
Well
... because you have played the guitar, the guy now knows that you are present
on this island. Until now he was not aware of your presence. Turn around via the
"turn around fist" and enter the elevator again, press the elevator
button and you go down again. Get out of the elevator, turn left and follow the
round corridor 3 times forward, turn left and go back into the "Fingers
Hall" by 4 times forward.
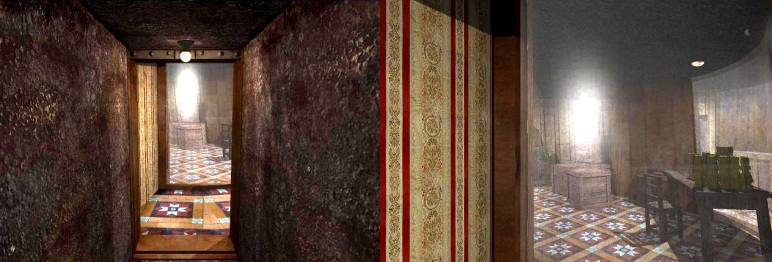
You look out over the ocean again. Turn right and go forward 3
times, turn right and ..... you are in a rectangular "mine" corridor.
The
Safe of Arin
Part
1:
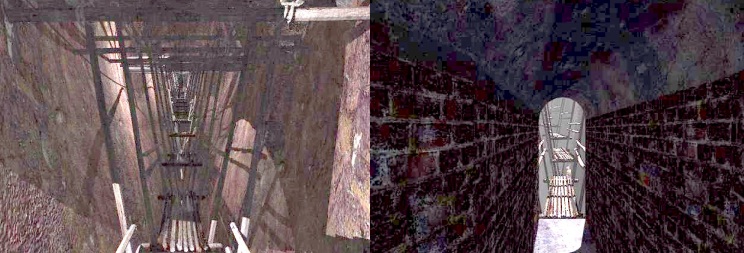
Follow the mine corridor 3 times forward, left and 4 times forward. It is getting dark in the hallway. You are now standing in the hallway on an iron bridge.
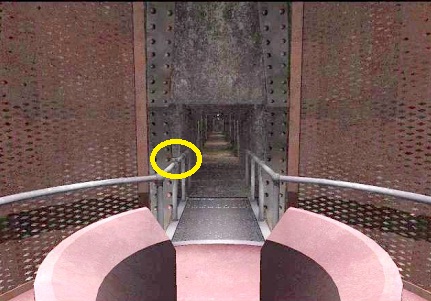
Go
forward one more time. You can hardly see it, but you are standing in front of a
round platform in the hallway.

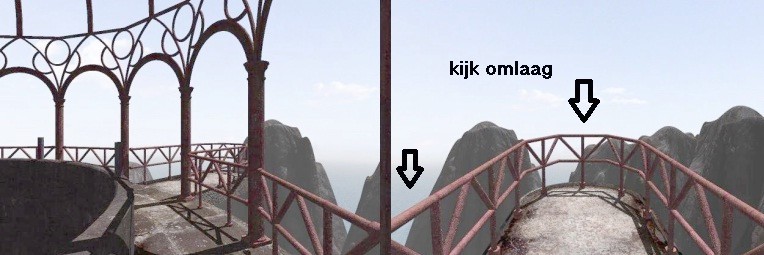
Turn right and then place your cursor in the middle of the bottom of the screen. Your cursor becomes the "Downwards finger", so look down.
You look at the
right railing of the bridge where you are standing and on the pole of the
railing is a White Button.
Click
on the White Button and ...... the light will now go on in this part of the
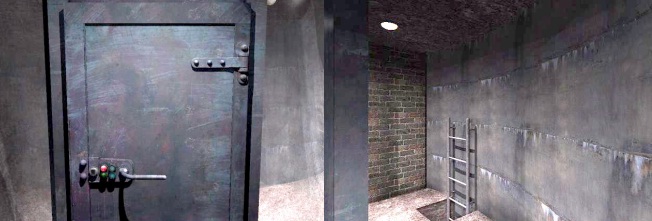
corridor. Look up again via the "Upwards finger" and turn left. Now
you can see that you are really standing in front of a round platform. The
corridor continues beyond this platform. There is a round wall in the middle of
the platform and a hole in the floor inside the round wall. You can see the top
of a ladder sticking out of that hole. Now simply go forward 2 times and you
will be on the other side of the round platform and again on a bridge.
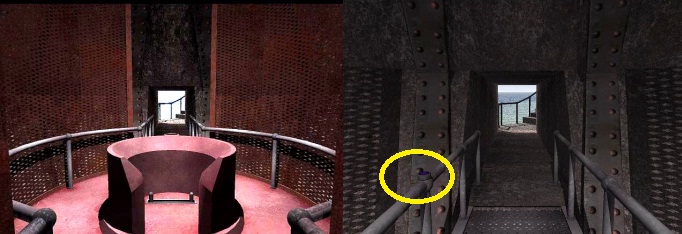
You will now see a Blue Button on the left railing. Turn around via the "turn around fist". You are now directly behind the round wall.
Look down via the "Downwards finger". On the pillar you see a kind of button. Zoom in on it.
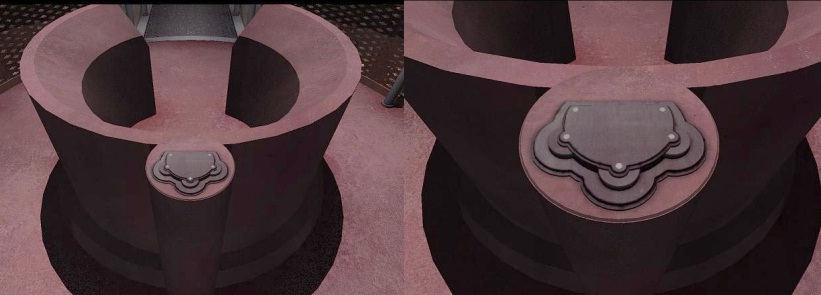
It is a "layered" button. On the top layer you see 5 white dots.
The front 3 dots are above 3 dials that you can turn by standing on it with your
hand and then pressing your left mouse button. Then hold down your mouse button
while moving your mouse left or right and then release your mouse. You then see
those buttons turning. But nothing happens. Zoom out and look up again via the
"Upwards finger". Go forward 2 times, back to the White Button.
Turn left, look down and click the white button again. The light goes out again.
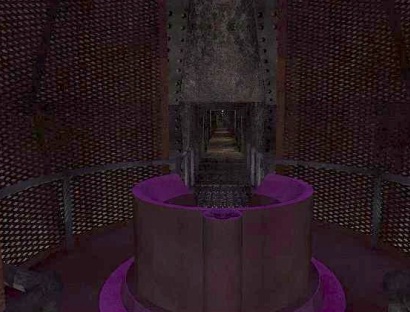
Look up again, turn left and now move forward 3 times, turn left and look down. Click on the Blue Button. A bluish light will now shine

Look up again, turn left and
go forward once more to the round wall on the round platform. The light now
casts a bluish glow over the platform.
Look down again at that weird button on the pillar and zoom in again. The blue light now ensures that you see 6 small triangles on the button.
You now see small triangles in front of and on the 3 dials.
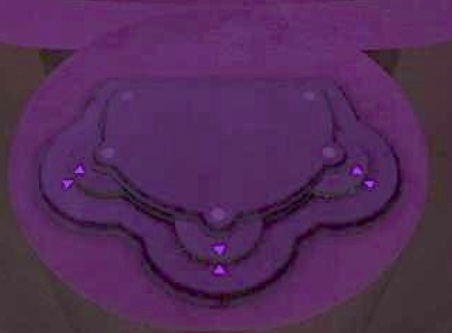
Now turn the 3 dials until the triangle
on the buttons is exactly pointing to the triangles in front of the buttons.
As soon as this is done, the normal light comes on again and the ladder rises from the platform. Look up again and go forward 1 time towards the White Button.
Then
turn around again via the "Turn around" and look up along the ladder
via the "Upward pointing finger".
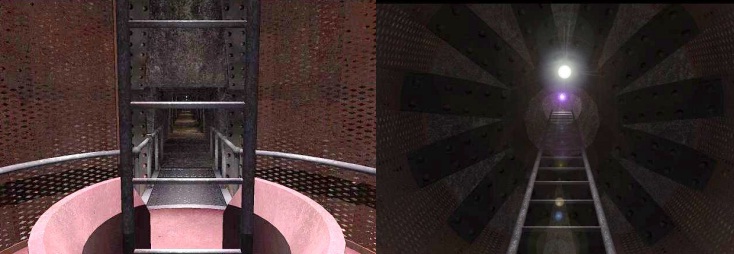
Then
click Forward on the ladder and you will climb up 1 time. Then click the
"Upwards Finger" twice to get to the top of the ladder. You will see a
2nd ladder in front of you.
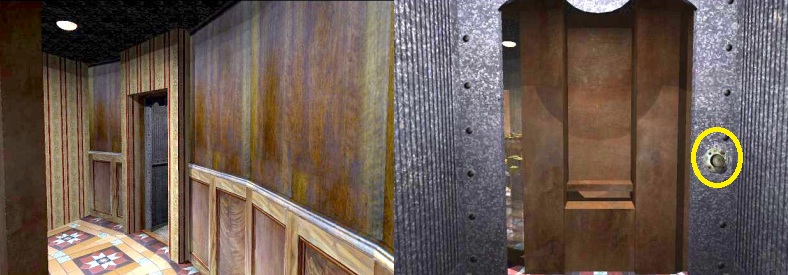
Go
forward 2 times and also climb the 2nd ladder all the way up via the
"Upwards finger". At the top of the 2nd ladder, turn right. You look
again into a circular corridor. A bare corridor this time. Go forward 1 time and
turn right. You stand in front of a window and look into Arin's Safe. A guy
appears behind the window. It is Arin and he shows you a necklace that he has
around his neck.
Arin
is apparently locked up in his own safe. Arin disappears again. Turn left and go
forward 1 time and turn right again. You stand in front of the vault door and
this is exactly the same type of door as the central vault and this door will
not open.
Descend both ladders back to the round platform
in the mine corridor and then continue forward 4 times through the last part of
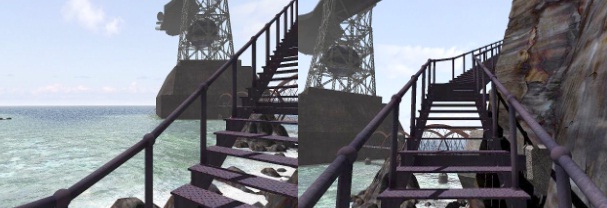
the corridor and you will be standing outside and at the foot of the long metal
staircase that rises on the outside of the rock and that you saw when you stood
on the bridges behind Gang B of the "Fingers Hall".
The
Black Dome
Click
on the stairs. You climb the first steps on the stairs. Well, go all the way up
the stairs. Along the way you can stand still for a moment to turn around and
enjoy the view. After you have gone up the stairs 7 times you are upstairs. Turn
right 2 times and follow the iron path 3 times forward to a ladder.
At
the ladder, turn a little to the right. Just above your head is the Neck of the
guitar that ends in the "Peghead". Turn back to the ladder. Look up
the ladder and then click Forward in the ladder hole. Then climb via the upwards
finger up twice. When you reach the top of the ladder, turn right. A Walkway is
hanging under the Neck of the guitar.
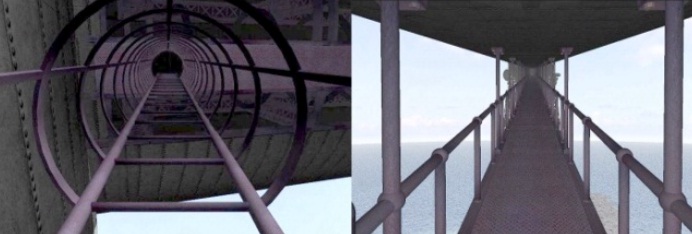
Go forward 5 times over the Walkway to the end. You now see the "Peghead" of the guitar, just above you. You can almost touch the tensioning buttons with which the strings can be tightened. Turn right. You are standing in front of the top of a ladder
Look down via the "Downwards finger". Click in the
round ladder hole and then descend further down this ladder via 2 times the
"Downwards finger" and then turn left.
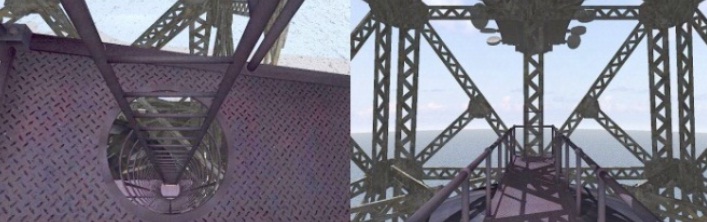
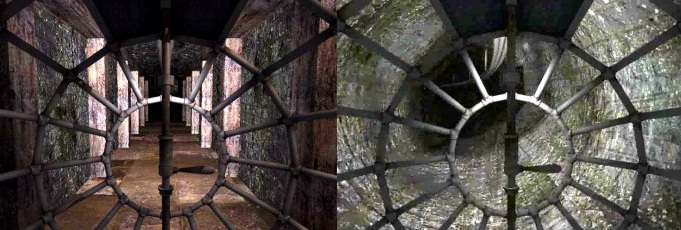
You
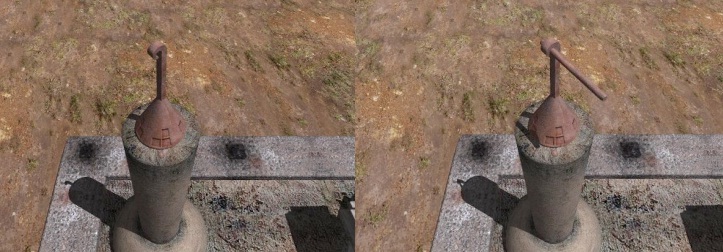
are now on a short iron path, on top of the "roof" of the black dome.
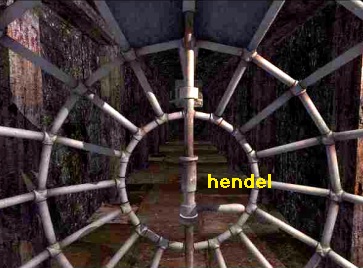
Go forward 2 times to the ladder that goes down at the end. Look down via the
"Downwards finger". The ladder goes down through a round shaft into
the black dome, but the shaft is closed by a round lattice that you cannot open.

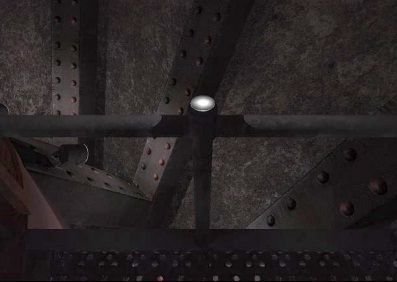
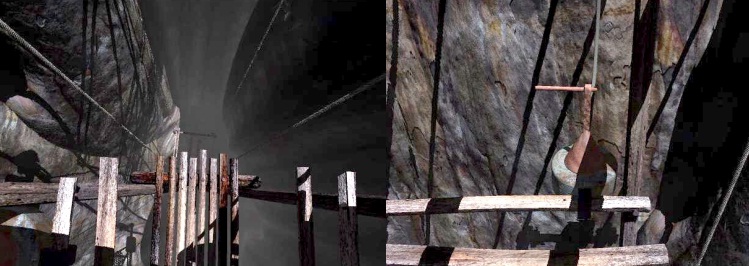
Look up again via the "Upward Finger" and turn 2 times clockwise. You look back over the path and you now see a small round pipe on the left railing.
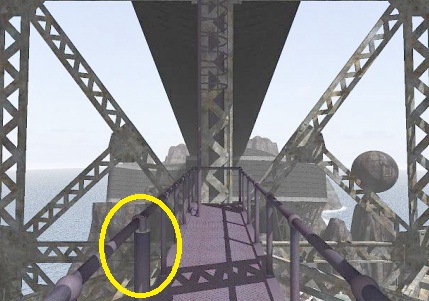
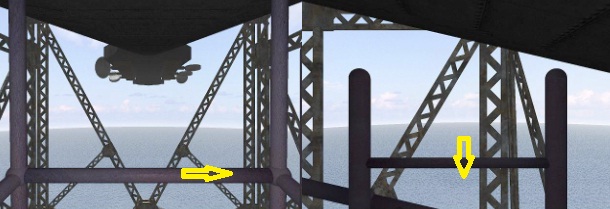
Zoom in on that round pipe. You stand in front of the pipe. Zoom in twice on the top of the pipe.
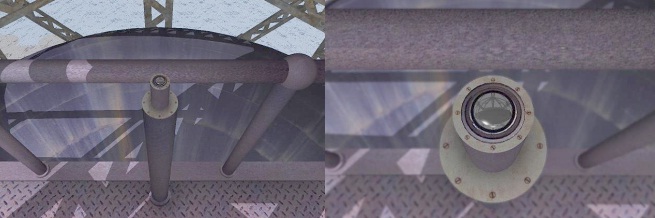
It appears to be a viewing pipe and through the pipe you now look INTO the Black Dome.
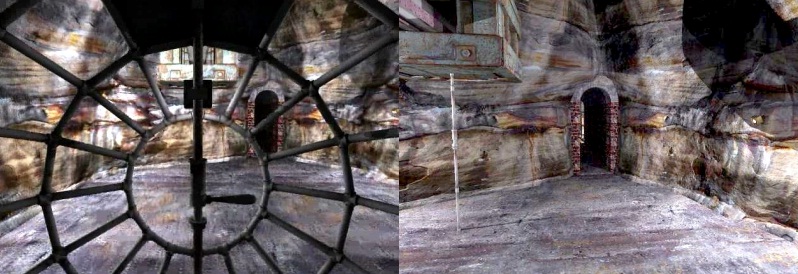
In fact you now see what you already saw in the left
"Clapper" of the arbor. You see 3 ladders and, at the bottom of the
dome, a platform.
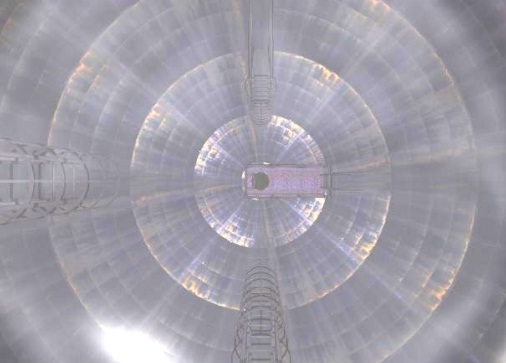
Those
3 ladders are hanging at different heights in the dome. However, they are the 3
segments of THE SAME LADDER. To reach the platform, the 3 segments must be
suspended below each other, so that you can then descend via the ladder to the
platform at the bottom of the dome. The segment that you see on the left is the
top segment, which now goes down behind you via the shaft. As soon as you manage
to "tie" those 3 ladder segments together, the round lattice hatch
will open and you can descend into the dome here. That "getting in
line" of the 3 ladder segments must therefore be done in the arbor, with
the 3 buttons on the right "clapper". But you still don't know how to
do that.
For now you can't do anything more on the "Peghead" side of the guitar. It is time to investigate the "sound box" of the guitar.
You have to go back to the gallery via the ladders, the iron stairs and the
"mine corridor". So zoom 3 times out of the pipe and then go:
2
times forward, left, look up the ladder and climb up. Turn right and go back
over the Walkway Bridge. Turn right, look down and descend the ladder. Turn left
or right 2 times and go forward 3 times over the iron path. Then turn left
twice, click on the iron staircase and then descend it all the way again until
you get back into the mine corridor. Follow the mine corridor 10 times forward, right, 3
times forward, left and go forward into the gallery. On the other side of the
gallery you see another entrance to a "mine corridor". Go forward 4
times across the gallery and you are in that new mine corridor. Go forward one
more time, left and ...... it is only a short corridor and in the back you see a
round cage with a red chair in it.
Go forward to the cage and click with your finger on the red chair. You sit down and automatically turn to a lever.
Click on the lever and ...... The light comes on and .... the cage turns out to be a means of transport ... a so-called "Cage Runner" and ........
in this thing you now glide through a long and round tunnel and.........
you will be delivered in a Cave. You start with:
Chapter
2:
Part
1:
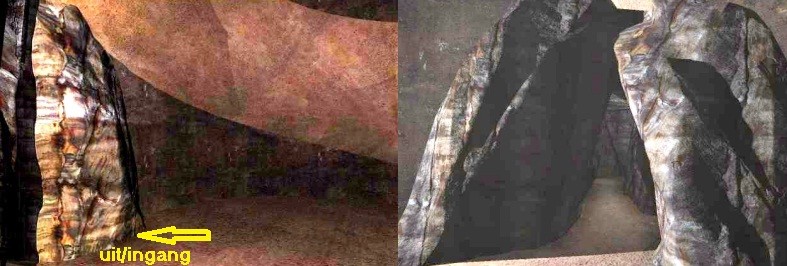
The "Cage Runner" has delivered you to a cave and has come to a halt. Turn right and exit the "Cage Runner" 1 time forward. Then turn left.
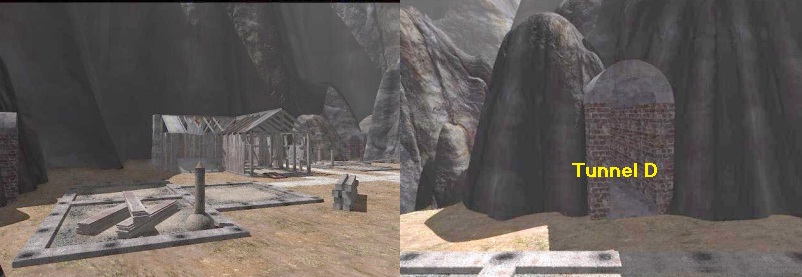
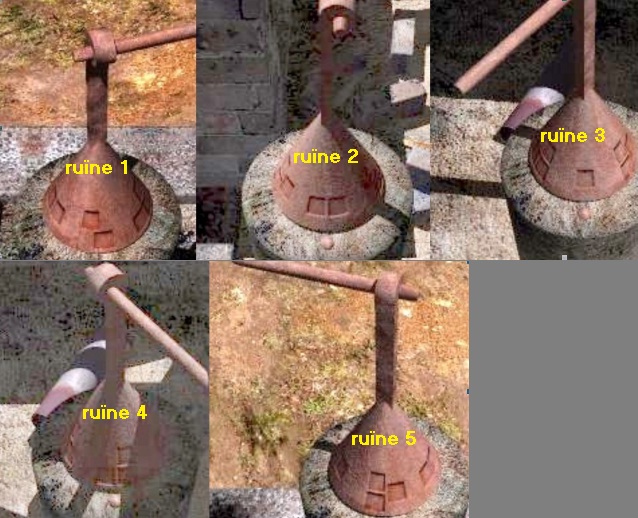
You see the entrance / exit of the cave. Go forward 3 times. You are outside in an open space among the rocks. Stand still for a moment. You will be able to see it all much clearer from the "Lookout Tower", but there are 5 ruined houses here. Of 3 of the houses only the foundations are left, but of 2 of the houses there is still quite a bit standing. You are now between 2 of those ruins and in front of you is a 3rd ruin. There are also 5 tunnels that give access to other areas. In the distance you see a tower pointing into the sky ..... that is the Jack tower.
Go forward to the cottage, in front of you. You are in
front of ruin 3. Turn left. You will then see the foundations of ruin 1.
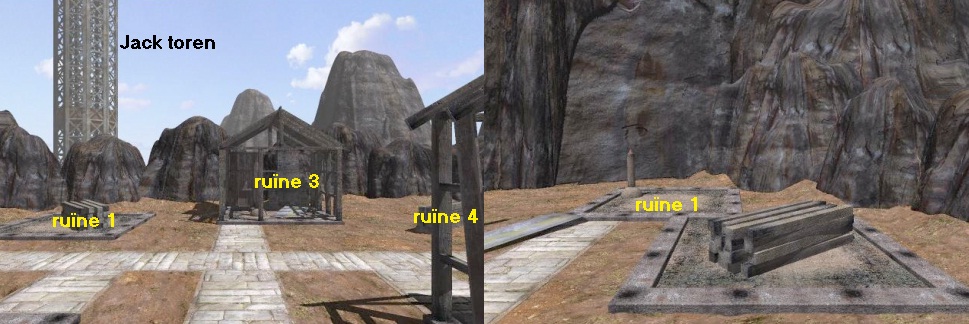
Go
forward 1 click and then turn left. You look back to the entrance / exit of the
"Cage Runner" cave. In front of you is the foundation of ruin 1. On
the left you see ruin 4. You seethe entrance to the "Cage Runner" cave
,Tunnel
A, and right in the corner you now see Tunnel B.
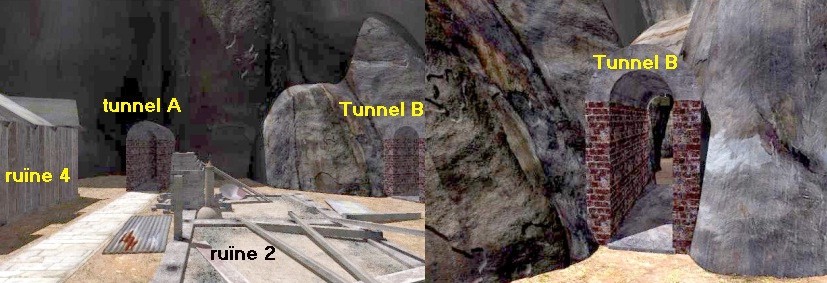
Click with your finger on Tunnel B and you will be right in front of it.
Then advance 5 times through Tunnel B, which gradually becomes narrower and eventually brings you into the cave under the Watchtower.
Turn right. Along the wall a circular
"driveway" goes up.
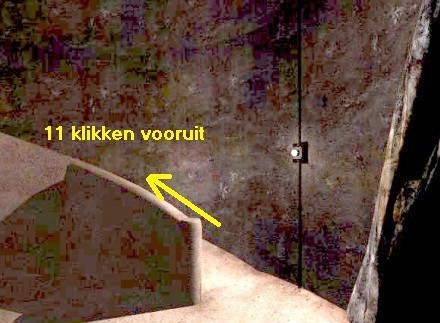
Go forward 11 times to end up on top of the watchtower. You then stand on top of the lookout tower and look out over the ocean.
Just before you is a round high Metal Tower. That is the "Jack
Tower" and we will go there soon.
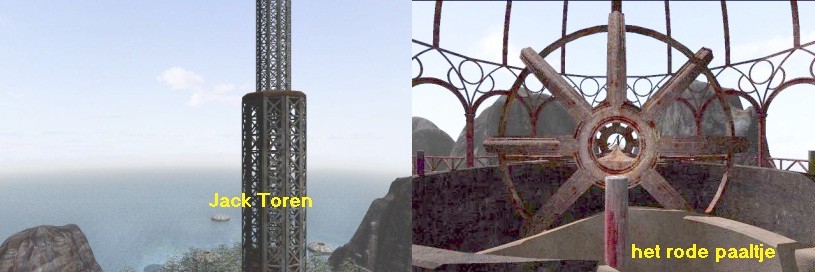
Now
turn 2 times, left or right. You look back at the "driveway" and you
now see that there is a sort of wheel hanging above the centre of the tower. In
the "centre circle" of the wheel you can see a large swirling
"N". The "wheel" is a Compass. You are therefore on the
north side of the watchtower. Just in front of your nose, so on the inner
balustrade of the tower, is a small round metal pole. The pole is red.
You
can walk all the way around the watchtower and we will do that because there are
a total of 8 of those small round posts on the inner railing and they all have a
different color. It is important that you note the colors and also the order of
the pole. So we walk around the tower counter clockwise.
So turn right
and go forward 1 time and turn left. You are standing in front of a Green Pole. Turn right, 1
time forward and turn left. A Yellow Pole. Turn right, 1
time forward and turn left. A White Pole. Turn right, 1
time forward and turn left. A blue pole. Turn right, 1
time forward and turn left. A Purple Pole. Turn to the
right, 1 time forward and turn RIGHT and go forward onto the
"Balcony".
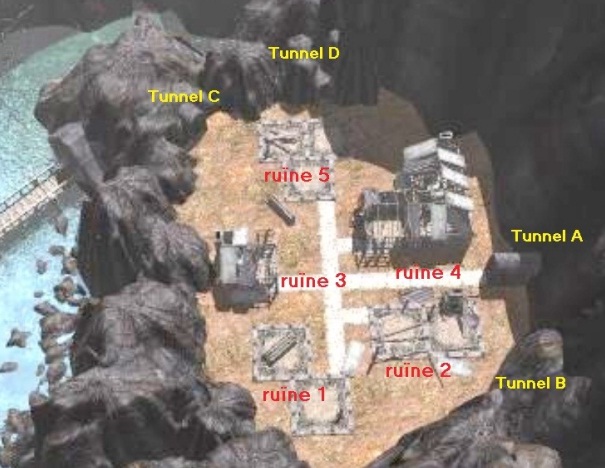
At the end of
the "Balcony" you look down through the "downward finger"
and you now see a beautiful overview of the area where those ruins are. You can see all
5 ruins and 4 tunnels. Note that the foundations of the ruins are squares that
form a certain pattern.
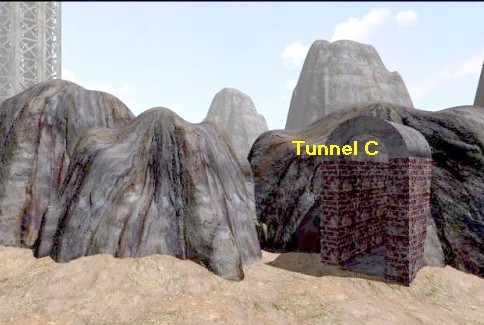
Tunnel B goes
to the lookout tower, where you are now. Tunnel C goes
to the Jack Tower footbridge. Tunnel D goes
to a path that goes up along the rocks. Look up again
through the up pointing finger and turn left. You see that "Jack
Tower" again. Look down again.
You now see a
path going on the rocks on the other side. That is the path that can be reached
via Tunnel D. Look up again
and turn left and go forward 1 time, right, 1 time forward and turn left. You
are standing in front of a 2nd Purple Pole. Turn right, 1
time forward and turn left again. You are standing in front of a Green / Blue
Pole. Turn right, 1
time forward and turn left. You are back at the Red Pole and therefore back at
the top of the "driveway" that is now an "exit". You have walked
around the entire tower and have therefore discovered that there are 8 small
round poles on the inner balustrade, each with a different color. So if you go
over the tower counter clockwise you come across these posts: Red, Green,
Yellow, White, Blue, Purple, Purple, Blue / Green. This is knowledge that will
only help you later. |
Click on the right next to the red pole with your finger. You are then again at the top of the entrance / exit.
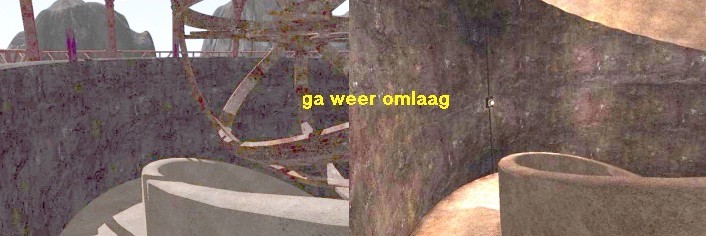
Descend 9 or 10 times down and then zoom in, with your "plus magnifier" at the entrance to the cave tunnel.
Then go
forward 3 times, back through Tunnel B, outside. You are back in the area with
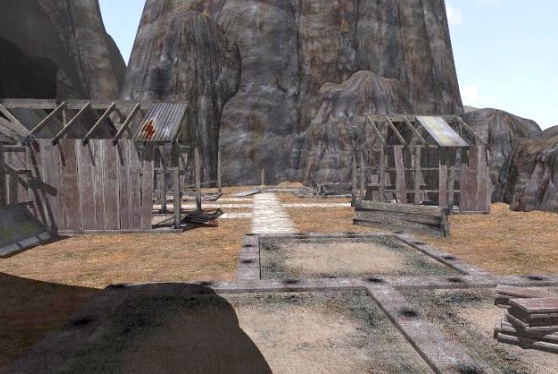
the 5 ruined huts. You see the ruins 2, 3 and 4.
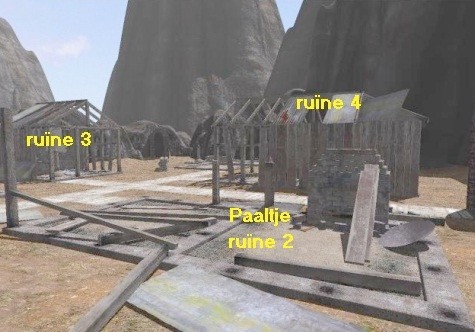
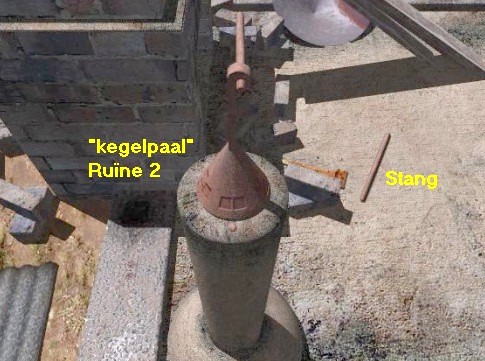
Go forward twice over the foundation of ruin 2, to the side of ruin 4.
You then automatically turn to the right and look down at a round stone pole with a pink cone on it.
I call this a "cone pole" and this is the "cone
pole" of ruin 2.
|
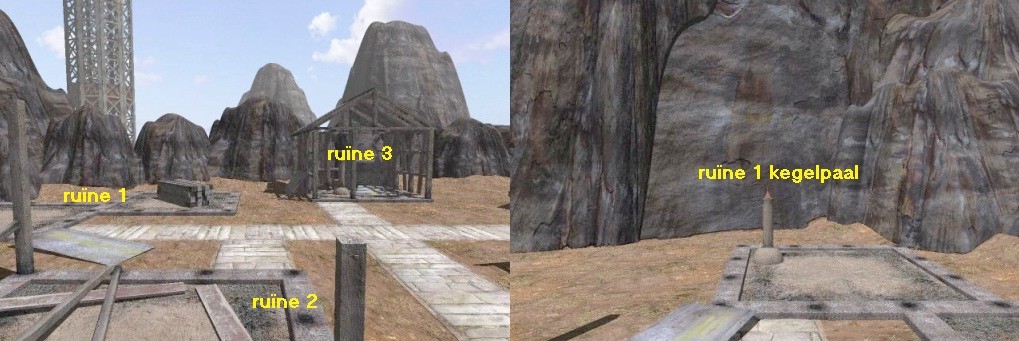
Go to the Cone Pole in ruin 1 and view it in close-up. This pole already has a rod, so turn right 2 times and go forward 3 times.
Left next to you is ruin 3 and right next to you is
ruin 4.
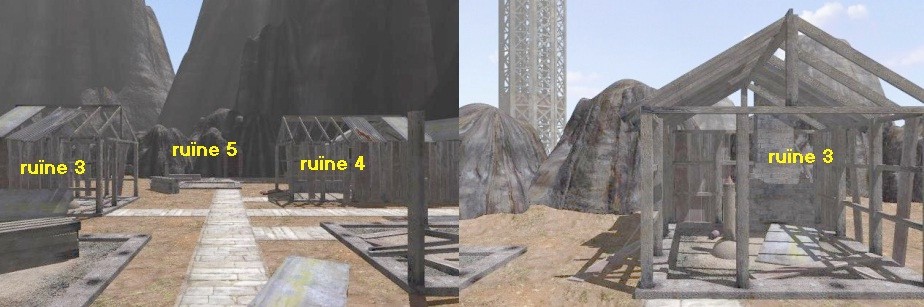
Ruins
3 and 4 are still recognizable as houses. Straight ahead you see the foundation
of ruin 5 and the entrance to Tunnel D. Turn left and go forward into ruin 3.
Then zoom in on the "Cone pole". This pole also has a twist rod, so
zoom out. Turn right and go forward 1 time and turn right again. You are now
standing in front of ruin 4.
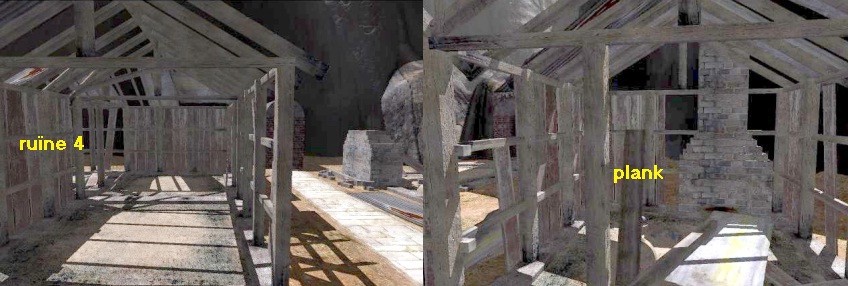
Enter ruin 4 2 times forward and then turn left. You look into the side room. Now move your cursor over the screen until you get the zoom in on a slanted up shelf.
Then zoom in on the shelf and then click on the shelf to remove it and you will
see the "cone pole".
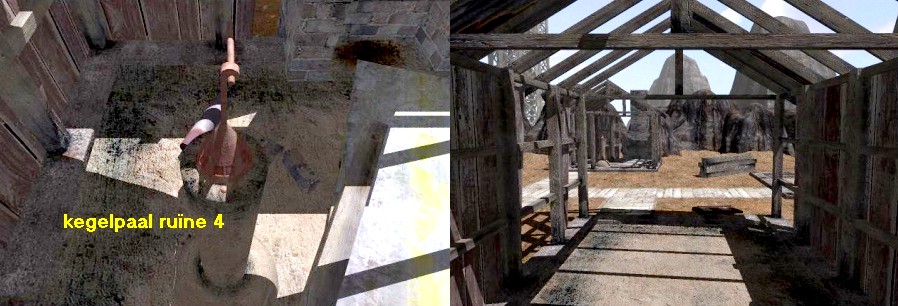
This
pole also has a turning rod. Zoom out, turn left and go forward 2 times to walk
out of ruin 4 again.
Turn
right. You now look at the foundation of ruin 5 and you now also see the
entrance to Tunnel D.
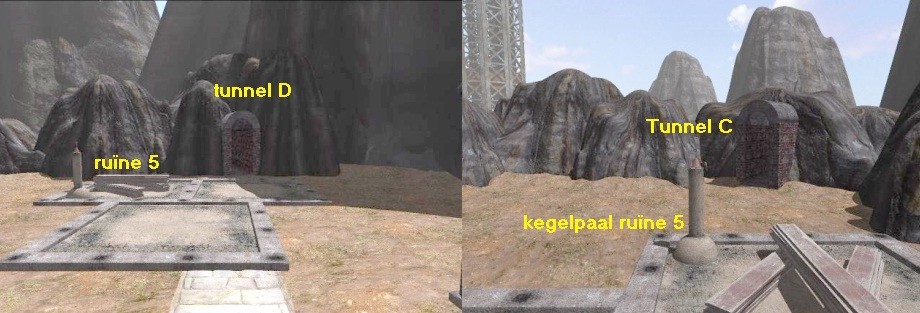
Go
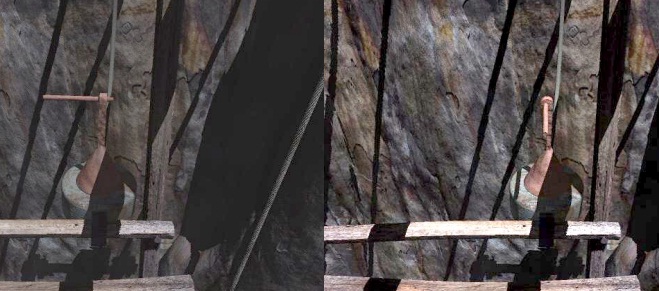
forward 2 times and turn left. You see the "cone pole" of ruin 5 and
behind it you see the entrance to Tunnel C. Click with your finger on the
"cone pole" to zoom in on it. He ..... the cone has no turning rod.
Well ... click your rod that you grabbed at ruin 2 on the cone to attach it to
the cone.
Look
up again via the "upward finger" and go forward to Tunnel C.
Follow
tunnel C 3 times ahead. You go down a staircase in the tunnel, then turn left
and go outside one more time.
You
are now standing on the wooden footbridge in the lake and in front of you is the
"Jack Tower".
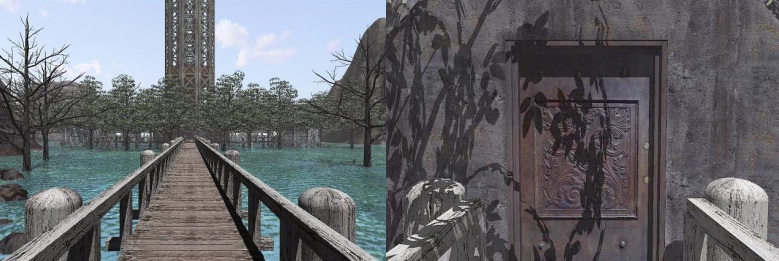
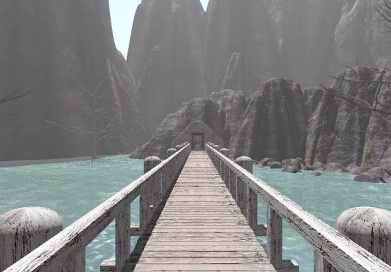
Follow
the walkway 5 times forward. You are standing in front of the beautiful wooden
entrance door of the "Jack Tower". Unfortunately the door is locked.
Turn around and walk back 1 time.
Chapter
3:
Part
1:
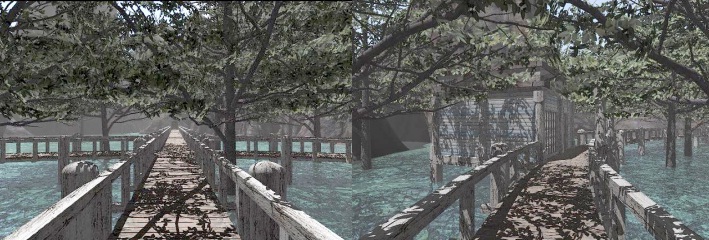
You stand on the junction of the wooden walkway with the Jack Tower behind you.
The
walkway goes all the way around the Jack Tower and there are 4 log cabins along
the round walkway. Each member of the band has their own log cabin.
Turn
right and go forward 2 times to Log cabin A. Log cabin A is Luke's cabin.
Log
cabin A: Luke
Turn
left and click on the doorknob of the Log cabin door. The door will open and you
will automatically go inside. Turn left. Luke's cabin is a bare cabin. You stand
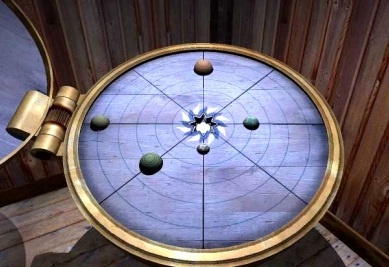
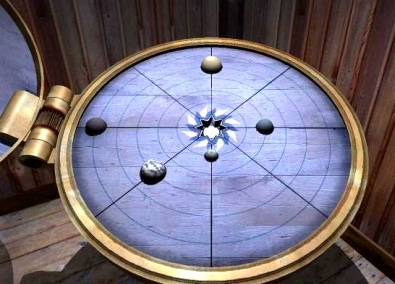
in front of a Planets Column. On the column you see the Sun symbol and on top of
the column is a large Golden Dish. Click on the button of the dish. The dish
opens. The Sun is in the centre and there are 4 planets around the sun. Only the
planet left next to the sun revolves. You have to press the Sun because the Sun
has to stay pressed. So click on the Sun.
The
Sun is pressed and now stays pressed. Zoom out via the "minus
magnifier" and turn left. There is a chair in front of the window.
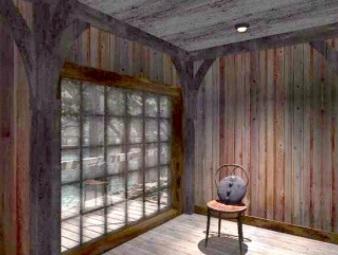
There
is a round plate on the chair. Zoom in on the round plate:
The
"Ladder puzzle of the Black Dome"
Part
1:
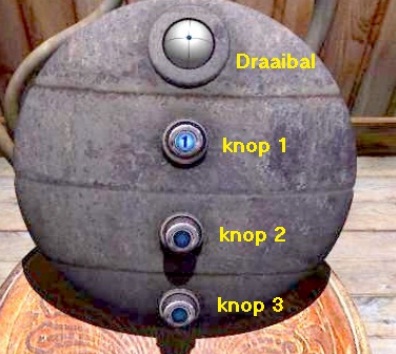
The round plate contains a gray rotating ball, but you cannot click on it now. There are 3 blue buttons under the Rotating Ball. The 3 blue buttons are now EMPTY.
Call the gray ball the "Spinning Ball". Name the top
button as Button 1. The middle button as Button
2 and the bottom button as Button 3.
What
is the purpose of this now? Do you remember those 2 "Clappers", in the
gazebo behind the left door of corridor B in the "Fingershall". I
told you that the Left Clapper showed the interior of the Black Dome with the 3
ladder segments. The Right "Clapper" contains 3 gray Balls with which
you have to get those 3 ladders underneath each other in the Black Dome. Well
.... You should now figure out how to do this on this round device. It's pretty
complicated, so pay attention. First we will practice:
|
Click Button 1.
Button 1 lights up and the number 1 appears on Button 1. At the same
time, black lines and a black dot appear on the Spinning Ball. You can now
turn the Ball to the right, left, up or down. You turn the
Spinning Ball by standing with your "hand" in the middle of the
Spinning Ball. Then press and
hold your left mouse button. Your hand is then pressed. Now drag your
hand to the right off the Spinning Ball and then release your mouse button. The Spin Ball
then rotates 1 turn clockwise and on Button 1 the number 1 disappears and this
now shows either the number 2 or an empty space. In this way you
can also turn the rotary knob one turn to the left, up or down. Each time the
activated button will show either a number or a blank area. |
The
intention is that you find out in this way how to turn the Spin Ball to get the
numbers 1, 2, 3, 4, 5 visible on buttons 1, 2 and 3 in succession. Why? Well,
the inside of the Black Dome, under the "Peghead", is divided into 5
segments. Each of the 3 ladder segments must therefore be rotated through those
5 segments in order to hang directly underneath each other under the lattice
hatch. The 3 rotating balls on the right-hand clapper in the arbor thus
"operate" each a ladder segment. The order in which you have to turn
those 3 Balls is therefore different for every Balls.
|
Enough
practice now. Now first put this puzzle back into the starting position by first
zooming out via the "minus magnifier" and then zooming in again via
the "plus magnifier". Let's start and we start with Button
1. Click Button 1.
The button is activated and the number 1 appears on the button. Turn the Ball 1
clockwise to the right. Button 1 becomes empty. Turn the Ball
once again to the right 1 time. Number 2 appears on Button 1. Turn the Ball
once again to the right 1 time. Number 3 appears on Button 1. Now turn the
rotary ball up 1 time. Number 4 appears. Turn the Spin
Ball up again 1 time. Blank flag. Turn the Spin
Ball up again 1 time. Number 5 appears. So the correct
order is: Right, Right, Right, Up, Up, Up Click Button 2.
The button is activated and the number 1 appears on the button. Turn the rotary
ball up 1 time. Number 2 appears on Button 2. Turn the ball
once to the left. Empty area on Button 2. Turn the ball
once to the left. Number 3 appears on Button 2. Turn the
Turning Ball one more time to the left. Number 4 appears on Button 2. Turn the rotary
ball up. Number 5 appears on Button 2. So the correct
order is: Up, Left, Left, Left, Up. Click Button 3.
Button 3 is activated and the number 1 appears on the button. Turn the rotary
ball to the right. Number 2 on Button 3. Turn the rotary
ball up. Empty area on Button 3. Turn the rotary
ball up. Number 3 on button 3. Turn the rotary
ball to the right. Number 4 on Button 3. Turn the rotary
ball up. Digit 5 on Button 3. So the correct
order is: Right, Up, Up, Right, Up. Zoom
out and turn left and click on the doorknob to exit Luke's cabin.Outside, turn
left again and continue forward 4 times over the round walkway to the next log
cabin. Turn left and click on the door knob of: |
Log
cabin B: Juno:
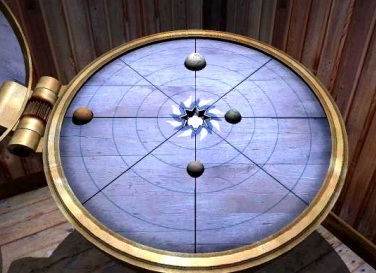
You go back in automatically. Turn left and zoom in on the Pedestal with round disc. Click on the button again to open the disc.
In Juno's disc, 5 planets revolve around the sun. Click on the sun again to press in the sun and then zoom out again.
Turn left. There is a table by the window. Zoom in on the table. On the table is a blue book and a golden round "cookie tin".
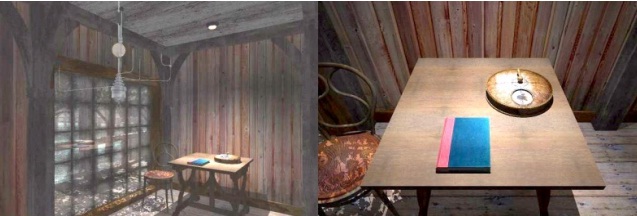
Zoom in on the
blue book. Then click on the book to open it and then click on the right cover
page to go to the first readable pages. This is:
|
Juno's
Journal: Well
...... enjoy reading. Read the entire journal. They are 15 readable pages and
they give you not only some background information but also instructions about
some puzzles that you need to solve. Pay particular attention to the drawings. On the first
two pages, Juno tells something about the original inhabitants of the Alida
island and you see a drawing of a "cone pole". Juno also talks about
"fortifications" that the original inhabitants built in the bay of the
island. Pages 3 and 4
tell something about a "Walkway". The original residents
"sealed" the access to the walkway and each resident had a piece of
code that could be used to open the access. Pages 5 and 6
tell about a "Bi-Sphere". That seems to be a kind of sphere containing
2 smaller ones and the whole seems to be an age-old machine. On pages 7 and
8 you can read that Juno has not been able to penetrate the
"Bi-Sphere" but that the case has been integrated into the modified
T-Runner that they have called the T-Flyer. This T-Flyer can be programmed to
fly to any point in the 3D Space. Pages 9 and 10
tell about a "Quantum Gate" and include a drawing of it. The right
combination of "Active Points" opens an "Space of Empty
Matter". The 1st Sphere is the departure location, the 2nd Sphere is the
arrival location. Pages 11, 12,
13 and 14 tell about an experiment by Juno in which he has connected 2
Bi-Spheres and this caused a FLASH. All objects in the room started to move and
were sucked into the height. Juno himself was also sucked up and everything and
everyone in the room were in weightless condition and hovered and turned through
the room. Juno found himself in a "Weightless Hole in Space". Juno was
"freed" from his plight by the other band members, but to this day he
is unable to turn the experiment off. So that "Black Hole" still
exists in that room. Page 15 finally
tells you that the Safe Doors are equipped with very Sensitive Microphones. When
you have read the journal, you zoom out by clicking on the left or right next to
the journal with your "minus magnifier". The
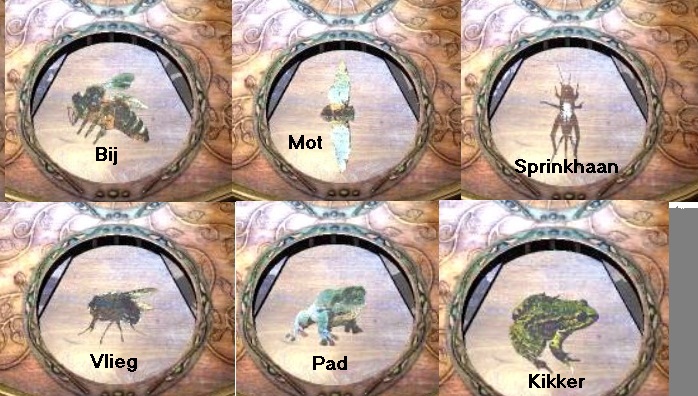
"Whatbit" This
round can is a so-called "Whatbit". There is a lever on it and in the
lever there is a button that you can click on. Under the handle you see a round
window in which you now see a black image of an insect.
Click on the
button of the lever. The window will open and you will see a coloured version of
the insect and you will hear the sound that this insect makes. Wait until the
sound has stopped and the window has closed. Then click on the handle. The lever
turns a quarter turn to the right and back again and another insect appears in
the window. Click on the
button again and the window will open again and you will hear the sound of this
insect again. Then do this a
number of times. Make a note of which insect or animal you see and listen to the
sounds that these insects / animals make. There are 6
insects / animals so you hear 6 sounds. Record the noises with the insects /
animals. Successively
see and hear the:
Have
you noted all this down? Then zoom out 2 times. Turn left and click on the doorknob
to leave Juno's cabin.Outside, turn left again and go forward 4 times to the
next log cabin. Turn left and click on the doorknob and you enter: |
Log
cabin C: Leval:
5 planets revolve around the sun. Click on the sun again to press it in and zoom out again.
Turn left again and zoom in again on the Planet Disc. Press the button
again to open the disc.Turn left. Well ... Leval's cabin is completely empty so turn left again
and click on the doorknob to leave the cabin again.Outside, turn left again and
go forward 4 times to the last log cabin. Turn left again and click on the
doorknob to go inside.
Log
cabin D: Arin:
Turn
left again and zoom in again on the disc. Press the button to open the disc.
Turn
left. There is a table by the window. On the table is a small cupboard with 3
drawers and there are also 3 devices on the table. There is a drawing on the
wall.
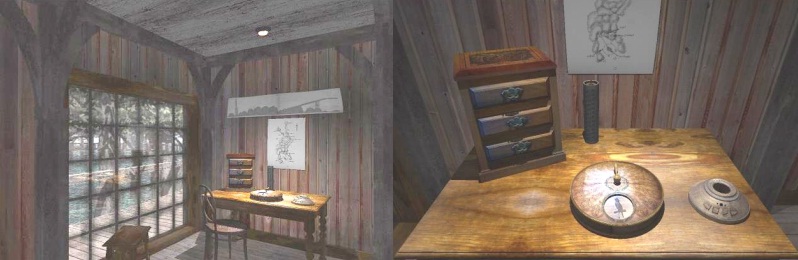
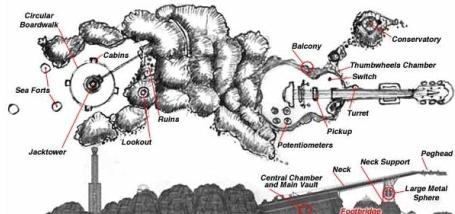
Zoom
in on the table. You can just see the bottom of the drawing hanging on the wall.
Zoom in on the drawing and you will see the whole drawing. It is a sketch of the
Alida Island. You can zoom in further on the upper half of the sketch to view it
in close-up. You can then scroll down to the bottom half of the drawing via the
down finger. This is the sketch that I pasted at the top of this walkthrough.
Zoom
out of the sketch and zoom in on the chest of drawers. You can open the 3
drawers. However, the top drawer contains nothing interesting.
Open
the middle drawer. In the middle drawer is a letter and a number of photos
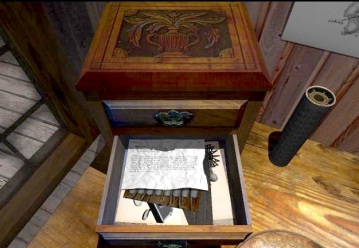
Zoom in on the
letter. It is a note from Kivas, the band's manager but also Arin's twin
brother. Read the note and then zoom out.

When you have
viewed the contents of the Middle drawer completely, close the drawer and open
the Lower Drawer. A newspaper clipping is in the lower drawer. a photo and a
sketch.
Arin's
"Whatbit"
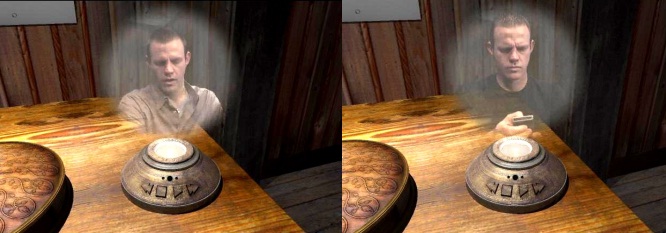
Then
zoom in on the gray device. This is a Holograph. There are 4 buttons. Number
them, from left to right, 1, 2, 3, 4. Click on button 3. You will now see a
video with Arin. Watch the video and pay attention to what Arin looks like. In
this video Arin wears a gray shirt and Arin is clearly left-handed. Arin wears a
wedding ring on his left. You can view 7 films with Arin
·
In the first
film, Arin plays a short tune on a piano. When the first video is finished,
click on Button 4 and then on Button 3 again to view the next video with Arin.
·
Every time a
movie ends, click on buttons 4 and 3 to see the next video. You can watch a
total of 7 videos.
·
The first film
is the film in which Arin plays a tune on the piano. Then you see 5 videos in
which Arin tells everything about the Alida Island and the gigantic guitar.
·
Pay close
attention to the 7th video. Do you not see another Arin in this? In the first 6
films, Arin wears a gray shirt and is clearly left-handed.
·
In the last
video, however, Arin wears a black T-shirt and is right-handed ..... Is this
Arin? No .... in the 7th video you see Kivas, Arin's twin brother posing as
Arin.
·
If you want to
see the videos again, always press button 1 until you have the 1st film in front
again. If you have watched all the videos, zoom out a few times.
Turn
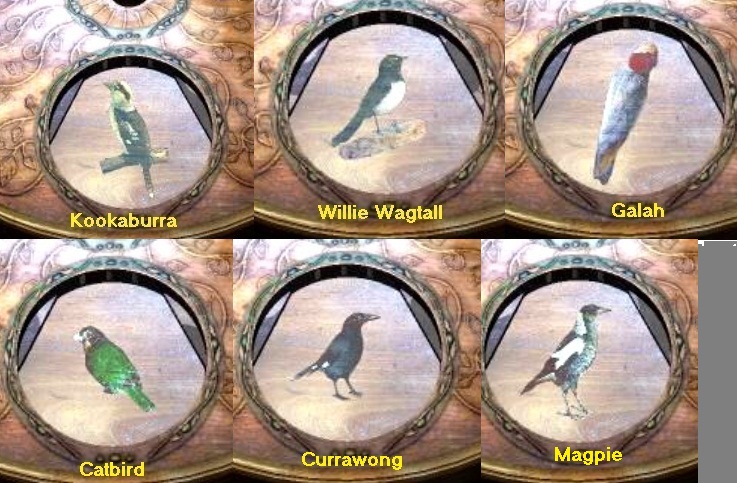
left and click the doorknob to leave Arin's Cabin. Good .... Now it's just
getting hard. In Juno's Hut you have heard the sounds of 6 insects / toad /
frog. In Arin's Hut you have heard the sounds of 6 birds. Bird sounds can also
be heard in certain places on the round walkway and also the sound of one of the
insects. You must determine at which places you hear those bird sounds and the
insect sounds. So you have to recognize the birds by their sounds and that
insect too. To be able to do this well, first go back to the junction for the
Jack Tower. When you get out of Arin's cabin, turn left and go forward 2 times.
You are then at the crossing again. On the right is the Jack Tower and on the
left the bridge goes to Tunnel D.
Which
Insect and bird do you hear where:We will now first determine which insect can
be heard outside here.
·
Go forward
again 4 times over the round walkway. You are then exactly in between Hut A and
Hut B.
·
LISTEN .......
ignore the bird sounds and only listen to the sound of an INSECT. Which INSECT
DO YOU HEAR? I think that's the sound of the MOTH.
·
Go forward 4
times again. You are then between Hut B and Hut C. Listen to the sound of an
Insect again. Again you hear the MOTH sound.
·
Go forward 4
times again. You are then between Hut C and D. Again you will hear the MOTH.
·
Go forward 4
times again and you will be back at the junction and you will hear the MOTH
again.
·
So of the 6
animals that you have heard in Juno's cabin, you only hear the MOTH along the
round walkway and always exactly between the 4 Cabins.
·
So walk the
same round again on the round walkway.
·
Always stand
exactly between the huts and listen to the bird sounds.
·
Between the
Hutten van Luke and Juno you can hear the Currawong Bird.
·
Between the
huts of Juno and Leval you can hear Kookaburra Bird.
·
You will hear
the Catbird Bird between the huts of Leval and Arin
·
At the
intersection, so between the huts of Arin and Luke, you can hear the Magpie
Bird.
Follow the bridge back to Tunnel B and go through
Tunnel B back to the area with the 5 ruins.
Chapter
4: The Ruins:
Part
2: The "Cone poles puzzle"
You
step out of Tunnel C into the ruin area and stand just before the foundation of
what was once house 5. So behind ruin 5 is Tunnel D.
You
have already gone through Tunnel A, Tunnel B and Tunnel C, but not yet through
Tunnel D. Perhaps you are curious about where Tunnel D will take you? Go forward
2 times, over the foundation of ruin 5, and then turn left. You are at the
entrance to Tunnel D. Go forward 1 time. You are in Tunnel D. Tunnel D is a
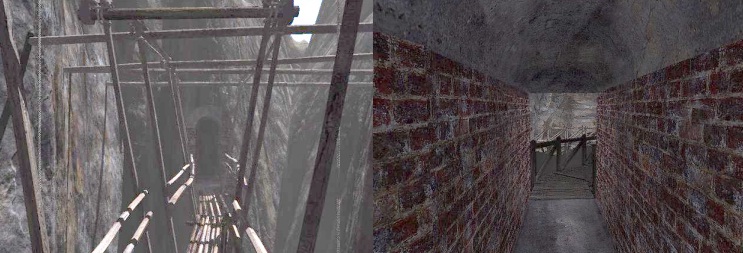
narrow brick tunnel. Go forward 2 times and you will come out of Tunnel D and
you will find yourself in a very narrow gorge and on a hanging wooden jetty
path.
Follow the jetty path through the gorge 4 times ahead and you will be in an in-between tunnel. Go forward 2 times and you step out of the tunnel.
The gap has now
become a little wider and the jetty path is now a kind of "staircase".

Continue
forward 4 times. You cannot continue. However, you are not yet at the end of the
gorge. You see the entrance to a tunnel in front of you again. Look down through
the downward finger. Oops ..... it is quite a deep gap. So a piece of the wooden
jetty path is missing here. This piece of path hangs deep below you on the
bottom of the gorge.
Look
up again through the up-pointing finger and then turn left. Next to the path you
can just see the Pink Cone of such a "Cone Pole". Click on the pink
cone's swivel bar. Unfortunately ..... the cone will not turn. Turn left and go
all the way back through the gap to the 5 ruins.
 \
\
You
have to get that missing part of the scaffolding path in the gorge up and you
have to be able to turn that pink cone in the gorge. We will now activate that
cone here at the 5 ruins.
For each of the
5 ruins, the number and shape of those squares are different. So what you have
to do first is to stand in front of each of the 5 ruins and then see what the
foundation of that ruin looks like. Draw a map of the foundations.
It should all look like
this
Once you have done this, and of course done correct, you will enter Tunnel D again and go all the way forward to the point in the gorge where you cannot go further. Then turn left again and click again on the rod of the Pink Cone and ...... The cone now turns around and ..
the missing part of the path comes up. So continue now 7 times ahead.
You then cross the last part of the scaffolding
path and go into the last tunnel and this is a stair tunnel that goes down
After
advancing 7 times you are out of the gorge and the last tunnel and you are on
the "Walkway" that goes along the rocks.
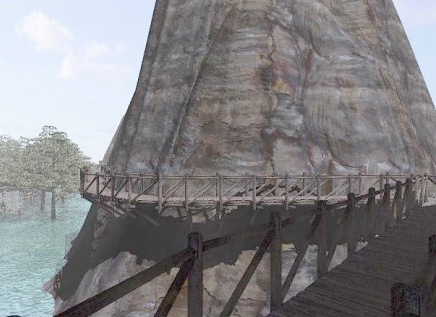
If you look to the left for a moment you will see that you are now behind the "Jack Tower". Turn right again and continue 3 times forward on the wooden path.
You can't go any farther and look out over the ocean through the
high rocks. Turn around via the "turn around fist".
You came from the left path, so now continue on the right path 12 times ahead. You have then reached the end of the "Walkway".
Turn right. You are
standing in front of the entrance of a tunnel that goes deep down into the rock.
Follow the tunnel forward 6 times and you will end up in the:
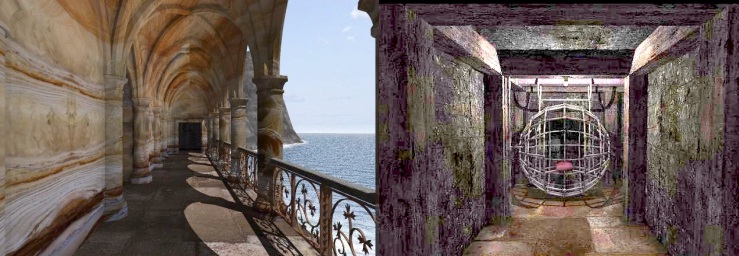
The
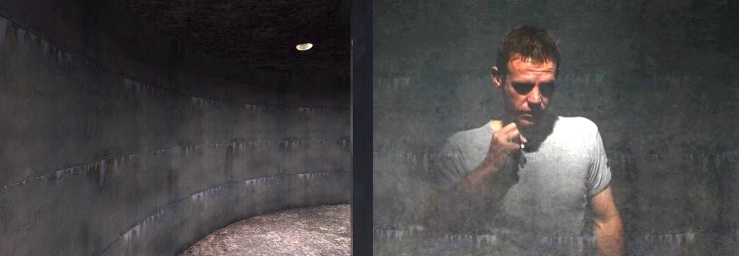
Bunker:
Good. You are in a round cave. As soon as you enter the cave you will see that 2 more tunnels end up in the cave. There is a balcony above the right-hand tunnel. There is a well in the middle of the floor of the cave. Go ahead. You are then exactly in the middle of the cave on the well. Standing on the well you turn 2 times left or right. You then look back to the tunnel from which you have just come. Call this Tunnel 1.
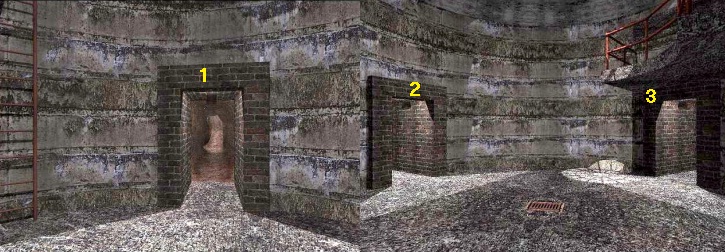
To the left of Tunnel 1 you see a ladder. You can click
on that ladder and then climb up via the iupwards finger to end up on that
balcony, but it is pretty useless to do this. So leave it alone. Looking at
Tunnel 1, turn right 1 time and look at Tunnel 2. Then turn right 2 times and
you look at Tunnel 3. Click in the entrance to Tunnel 3 and follow tunnel 3 then
7 times forward. Tunnel 3 first goes down and then up again via a stone
staircase and ends at the:
|
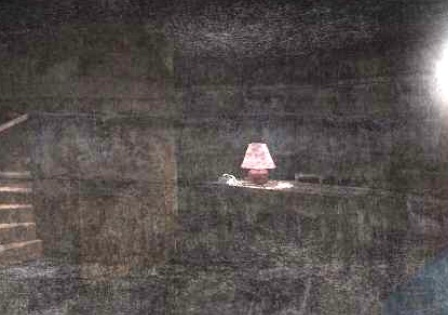
Juno's
vault: You
are standing in front of a blue / gray wall. Turn left and go 1 time forward
into the circular corridor and then turn right. You can now look into Juno's
safe through the window. At the back of the safe you will see a table lamp. The
table lamp keeps going on and off. The table lamp does this according to a
certain pattern
Study
the turning on and off of the table lamp for a while. You will discover that the
table lamp makes 3 different on and off series. So what you should pay attention
to is how long the table lamp is always ON. The table lamp is always short,
long, short, long on. The light does this in 3 different series. Between the 3
series there is always a short or longer break in which the light is off. So
it's a code. Write down these 3 series of short or long periods in which the
light is ON.
|
Then
turn right and go back through the tunnel to the cave. Stand back on the well
and turn to Tunnel 2. Click in the entrance to tunnel 2 and also follow this
tunnel 7 times forward. You will enter the 2nd round cave. Here too there is a
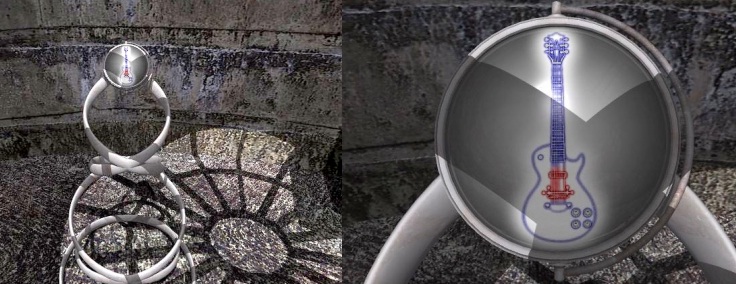
well in the middle and here too a balcony hangs to the right. But there are no
other tunnels. Just in front of the balcony, so behind the well, you see a kind
of "spiral". Go forward to the well and then zoom 1 on the
"Spiral". At the top of the spiral is a round window in which you see
a drawing of a guitar. It is a Blue Guitar, but the part on the sound box where
a guitarist usually plays the strings is red. Zoom in on the window. Along the
right side of the round window is a round gray bar
Click
on the gray bar. The bar swings over to the left side of the window and you now
see a short film in the window.
You
see that button with which you let the Plectrum go over the strings.
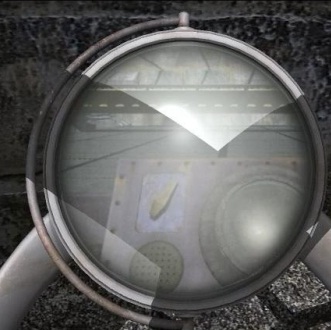
With
this video they want to make it clear that you have to push that button again to
let the Plectrum go over the strings again and let them vibrate again.
Well,
you are ready in this part of the island for now. So now you have to go back to
the guitar side of the island, so you have to go back to the Cage Runner. Zoom
out twice and turn around and go back through the tunnel to the front cave. Then
turn around to tunnel 1, click in the entrance and follow Tunnel 1 back outside,
to the wooden path. Once out again, turn left and follow the wooden path 12
times forward and you will be back where you look out over the ocean between the
rocks. Turn around here again via the turning finger and now follow the left
path back to the tunnel. Go through the tunnel and the gorge and Tunnel D and
you are back in the area with the 5 ruins. Go forward and then left so that you
look into Tunnel A between ruins 4 and 2.
Tunnel
A is the entrance to the Cage-Runner cave, so go forward 4 times. You are back
for the Cage Runner.
Chapter
5: Back at the Guitar:
2011:
Original Dutch Walkthrough
by: Louis Koot
2019: English translation by: Dick Leeuw