
Alter Ego
2021: Walkthrough by: Louis Koot
If you have found this walkthrough via google search or via another site then you have probably not visited my site.
A lot more very detailed game walkthroughs can be found on my site at: www.pcgameswalkthroughs.nl
|
Alter Ego is a point and click adventure game from 2010 and the story is set in 1894, in the south of England. Iin the game you are Timothy Moor. --Pressing your spacebar key will skip the intro movie, but why on earth would you want to do that? |
Intro:
Southern England: November 12, 1894
Plymouth: Harbor:
Timothy Moor has been caught as a stowaway on board a barge and chained to the deck for the remainder of the voyage ... Timothy has become quite seasick as the ship sails into Plymouth harbor to anchor there. Timothy is then handed over, quite roughly, to the bobby who's on duty.
The bobby lets Timothy feel how hard his baton is a few times .... All Timothy's meager possessions, including a locket, have been taken from him by the boat's bosun. Timothy thinks the loss of the medallion is the worst because it was the only memento of his parents he had ... Timothy is an orphan and he grew up in an orphanage. Timothy wants that medallion back ........ So when Bobby is not paying attention, Timothy manages to escape ....... Timothy dives into the water ......

Under water we see how Timothy swims into the sewersystem of Plymouth

We then switch briefly to Detective Bristol, who reads the Plymouth newspaper.

Detective Briltol leest in de krant over het overlijden van Sir William Arthur Lewis, ook wel het "Witte Beest" genaamd. Volgens de arts die het lichaam heeft onderzocht is Sir William Arthur een natuurlijke dood gestorven. De datum van de begrafenis is nog niet vastgesteld, of in ieder geval nog niet bekend gemaakt. Deze Sir William Arthur Lewis werd vaak van diverse misdaden beschuldigd, maar er kon nooit iets bewezen worden. Je krijgt dan controle over de game want we belanden bij Timothy in:
Chapter 1:
A: Free yourself from handcuffs.
Get out the sewer:
Timothy has ended up in the smelly sewer through the underwater pipe. Timothy's hands are still handcuffed and the first thing that needs to be done is to get rid those handcuffs. It is also not very fresh and healthy to just keep walking around in shorts, so a set of clothes wouldn't be crazy either. Left and right there's a high ledge. In the left wall you see the opening of a sewer pipe, but it is closed off with a fence. The right ledge is closed with a decorative arrowhead grille fence and there is also a long plank on the right ledge. Using the iron ladder rungs, Timothy can now only climb up to the right ledge. So click with your red arrow cursor on the ladder rungs and ...... Timothy climbs, albeit with some difficulty because of his handcuffed hands, up the right ledge.

Look at the barred gate and look at the long plank. Timothy has to go to the other side, so to the left ledge. But first try to see if Timothy can take the handcuffs off his wrists; Move your cursor to the bottom of the screen to open the inventory. In inventory Timothy now only has the icon of his handcuffed hands. Take the hand icon from inventory and click it on the grille and ...

.... Timothy puts his cuffed hands around the fence and then tries with all his might to rip those damned handcuffs from his wrists, but it doesn't work.
However, this does break of an Spearhead from the fence ..... Pick up the iron Broken Spearhead

Timothy stores the Spearhead in his pockets, so the thing is now in the inventory ... it is again amazing how such shorts can have such deep pockets.
Ok .... Left click on the plank and ..... Timothy flips the plank and the plank is the "bridge" to reach the other side.

So walk over the plank to the left ledge, ........... do that by clicking on the plank or by left clicking on the sewer pipe in the left wall. Look, so right click when Timothy is on the left ledge, at the sewer pipe .... Timothy can smell the fresh air outside but unfortunately ..... the gate in front of the sewer pipe is locked with a padlock. Try if Timothy can force the padlock with the Spearhead ...... the Spearhead is too big ..... the tip of the Spearhead goes into the padlock but Timothy can't do anything with it. Look, so right click on, the piece of wall to the left of the archway. Then use the Spearhead on the stones of the walland .......

... with the Spearhead Timothy then scrapes grout from the joints causing 1 stone to come loose .... Left click on the now loose stone and ........

Timothy rips the stone from the wall. In inventory combine the stone with the Spearhead and then take that combo from inventory and ram with it on the padlock of the round fence and ........

..... Timothy then breaks the padlock with brute force ..... the round gate then opens, so dive into the round opening and ...

..... Timothy ends up in the basement of the:
Laundry factory:
Laundry cellar
Timothy sits under the Sewer Cap, which is in the floor near the washing machine, the large L-shaped stone bin with a rotating wheel.

Click on the Sewer Cap to let Timothy climb out of the well.

To the left is a staircase and between the stairs and the washing machine there are 2 tubs with dirty laundry. Right click and left click on the dirty laundry ....... Timothy then walks around the washing machine to see the laundry ..... they are clothes and Timothy needs clothes but he doesn't want the dirty clothes and besides. ..... as long as Timothy is handcuffed he can't put on any clothes. Double-click on the bottom step of the stairs to climb up the stairs to the:
Dry attic:
Timothy ends up in the drying attic and here he meets Emily Gray, the laundry girl. Emily is startled when Timothy suddenly shows up. A conversation follows, in which you have to click with your left mouse button to keep up the progress. So Emily knows that the police are looking for Timothy, a policeofficer has even been here. Emily then decides that Timothy doesn't really look like a criminal, and besides, she doesn't like the police that much. Timothy can stay but he has to be quiet because that bobby can come back.
Speak to Emily again to continue talking to her through all of the conversation options that you get.

Timothy apologizes once again for scaring Emily. Emily wants to help Timothy remove the handcuffs, but she doesn't have the strength. When the bobby returns, Emily will not betray Timothy. When you have discussed everything with Emily, close the conversation via "Leave" and then look at everything here in the attic with the right mouse button.

There are sheets hanging from the clotheslines and you can look at the smallest sheet (Bed Sheet). In the right post, from the passage to the laundry, is a rusty iron hook. In the middle of the attic is a Mangle, or "drying centrifuge". Check out the bed sheet hanging on the clothesline. Check out the rusty iron hook. View the Mangle Left click on the Mangel .......
Timothy has the idea of putting his handcuffs in the mangle, but then he needs Emily to turn the spinning wheel. So go talk to Emily again and then ask her for her help with the Mangle via "Ask for help with the mangle" ....... But when Timothy explains what he is up to with the Mangle, Emily gets totally stressed ..... No way she will let Timothy use the mangle to remove his handcuffs ... the mangle could break and Emily then will be"out of a job" ..... In his thoughts Timothy gets angry with Emily but of course he can't show that to the girl, so offer Emily your help via "Offer help" ...... Emily is still working here so late because she has broken the washing machine inbasement ..... Timothy offers to fix the washing machine if he can use the mangle to get off his handcuffs. But Emily doesn't buy it ..... Timothy will have to fix the washing machine first.
So go back down the stairs to the cellar. The washing machine is the large L-shaped stone bin with the rotary wheel on the side. The rotary wheel is attached to the mechanism where the 3 mixer hooks are attached that move the water and the laundry. In the Mechanism a cover is open ..... Left click on the top of the mechanism and ...... Timothy takes a fuse from the mechanism.

Go back up the stairs, to the drying attic and speak to Emily again and tell her that the washing machine is working again via "The task is done". Emily, however, is not satisfied yet because she now wants Timothy to throw soap in the washing machine and she then gives him a lump of soap ..... Timothy would prefer to refuse and do other things with Emily but he needs her to get off his handcuffs come off, so obediently he says it will do the job. So go back to the washing machine and throw in the lump of soap and then click on the rotary wheel to dissolve the soap so that there is now soapy water in the washing machine. Take Timothy's handcuffed hands from inventory and click with them in the soapy water and .....

....... Timothy dips his cuffed hands in the soapy water so that the handcuffs become slippery and may be pulled off his wrists. Go back to Emily in the attic. Meanwhile, Emily has put fresh clothes on the mangle for Timmy and she goes downstairs to resume work, so that Timothy can put on the clothes in the meantime. When Emily has disappeared, take the cuffed hands from inventory again and click with them on the rusty hook that sticks into the support post by the stairs and ..........

..... Finally Timbo manages to free himself from the handcuffs ........ We then switch to Emily in the basement because a policeman knocks on the door who wants to come in to investigate whether the wanted criminal is hiding here. Emily however knows how to get rid of the bobby.
B: Getting your Locket back:
We then return to Timothy, who in the meantime has put on the clothes Emily has laid out for him. Tim would like his locket back.
The handcuffs are still on the floor, under the rusty hook. Pick up the handcuffs because you will need them in a minute.

Then go down the stairs. Emily is ironing the dry laundry. Walk to Emily and speak to her again and thank her for the clothes and for brushing off the policeman. Then ask Emily if she wants to lure the boatsman who stole your things, including the locket, here via "Ask Emily to entice the sailor" ......... Emily wants to do that, but then Timothy has to do the laundry, after having searched all the pockets of the laundry for any items that may still be in them. Emily then disappears to fets the boatsman
Left click again on the bin with dirty laundry, to the left of the washing machine ..... Now Timothy takes a pile of dirty laundry from the bin. Timothy really doesn't want to go through the pockets of the dirty laundry, so immediately squeeze the dirty laundry into the washing machine and then click on the wheel to wash it. When Timmy has finished spinning, take the wet laundry out of the soapy water and ..........

...... When Tim puts the laundry back in the laundry basket he finds a Wet tobacco pouch among the laundry and he regrets not having searched the laundry before he put it in the washing machine. You then have the wet tobacco pouch in inventory. Go back to the attic and then use the wet tobacco pouch on the mangle to squeeze most of the water out of it.

Back to the cellar and then put the tobacco pouch in the fireplace and ....

..... Timmy puts the tobacco pounch on the mantelpiece to let it dry further by the heat of the fire in the fireplace ........ Emily then returns and she has taken the boatsman with her, who is outside is at the door. Timothy wants to see for himself whether the boatsman is at the door ....... Go back to the attic. Behind the mangle is a window in the wall. Click on the window to open it and then click again to look out the window and .......

....... indeed .... that boatsman is walking back and forth in the courtyard of the laundry.

Click "Return Back" on the window to return to the attic and then return down to the cellar. Take the now dry tobacco pouch from the mantelpiece.

Go back upstairs and look out the window again. Right under the attic window, where Timothy now looks out through, is a wooden bench. The boatsman keeps walking back and forth across the courtyard and keeps standing in front of the entrance gate and then comes back again ... Wait until the boatsman walks away to the left and does not see the wooden bench ... Then quicly take the tobacco pouch from inventory and click it on the wooden bench and ......

....... Timothy throws the tobacco pounch on the wooden bench and then he quickly withdraws. Look out the window again and see ...
.... the boatsman is now sitting on the bench and has confiscated the tobacco bag ..... Take the handcuffs from inventory and click on the boatsman and .....

....... well ... the handcuffs are quite heavy, so they hit the boatsman hard hits hard ... Boatman falls unconscious to the ground .....
Back out of the window and run down and then out into the courtyard through the bottom right.

Search the unconscious boatsman and ...... Timmy finds his cap and locket.

Right click in inventory on the Cap and ...... Tim had sewn a letter from his friend Brian into the lining of his cap and he is now removing that letter from the hat. Right-click on this "Brian Letter" and ...... Tim will read the letter aloud ........ Brian would like to go to America with Tim. Three weeks after Brian wrote the letter, a ship leaves for America and until then Brian will be waiting for Tim every night at a pub called the "Salted Cheek".
Click on the door to go back in and talk to Emily again and ask her for the address of the "Salted Cheek" pub . Emily gets quite angry because the Salted Cheek is the most popular brothel in the town, but Emily gives Tim the address and then shows him the door. Well .... go back to the courtyard and double click on the entrance gate and .......

....... you will now get the map of Plymouth .....The laundry and the Pub are now available on the map as locations where Tim can go. Click on the Pub location and ....

....... we then see that detective who reads further in the newspaper about the death of The White Beast .....
Sir William's body will be placed in the family tomb because the requested cremation was refused. Then click "Continue" to proceed to
C: Find your friend Brian:
The Salted Cheek pub:
Tim has ended up in the whorehouse where he is immediately approached by a guy sitting at the table by the window.
The guy wants to play a game of dice with Timmy but he has no money so refuse

Then talk to the poker player again and ask him about Brian and about the knife in the table.
Poker guy says he hasn't seen anyone who looks like Brian enter the whore's tent. Poker threatens to stab Tim with his knife, but Tim is not impressed. Tim thinks that poker sits close at the door to be able to quickly run out the place when the need arises. Close the conversation with Pokertje via "Leave".
In the corner, on the stage, sits a blind violinist and there is also a piano there. The blind violinist has a saucer at his foot were the audience can throw in coins to make the violinist whine a tune on his false violin. A mural is still faintly visible on the wall of the stage. To the left is the entrance to the brothel and the Bouncer stand guard there and also a Streetwalker girl, which I think is a euphemism for whore. Via the bottom right you walk to the bar counter. But first go talk to the bouncer ........The bouncer thinks Timmy wants to go upstairs to the whores, and he threatens to break Tim's jaw. Bouncer says there are currently no customers with the girls.
Walk through the bottom right to the bar counter. Timothy is starting to get a little nervous because that Brian is nowhere to be seen. Behind the bar stand the Innkeeper and the waitress. At the table to the left, a drunk guest is sleeping off his intoxication and in the alcove is a Mysterious Figure. In the back wall you can see the cellar door.

Go talk to the waitress ......... the girl only wants to talk to Tim when he orders something, but unfortunately Timothy has no money. If you pay attention, you will see that the innkeeper every so often bends down to check the beer tap under the bar counter. You can only talk to the innkeeper when he is standing upright, if the inkeeper looks under the bar counter then you can not talk to him. So, when the innkeeper is standing up, talk to the him and ask him about your friend Brian through "Describe Brian" and then ask about the other topics ......
The innkeeper seems to be afraid of something and on principle never talks about his guests, so he doesn't want to say if he saw Brian. Tim finds out that the police raided the pub just a few hours ago. If you inquire further about the police raid, Timothy learns that the cops weren't looking for him, but that the raid was linked to the death of Sir William "The White Beast" Arthur, also known as "Mad William" . Rumor has it that "Mad William" killed as many as 50 people. When there's nothing more to talk about, you say goodbye..
Right-click and left-click with your talking cursor on the drunk guest ..... The guest is unable to wake up, but his coat hangs over his chair. Look at the coat and Timo searches the coat but finds no money, only the brass buttons are worth stealing but he innkeeper however has a good view of the jacket ....... To steal the copper buttons off the jacket you have to left click on the jacket but Tim doesn't want to do that as long as the innkeeper is looking. And of course the in nkeeperwill no longer bend down to look at the beer tap under his counter.
So speak to the innkeeper again and then use the option "Distract attention: Ask about the bar" ...... Tim tries to convince the innkeeper that his beer tap is not working properly, but the man does not buy it. Then use the option "Distract attention:" Ask for a drink "and ........ Timothy persuades the innkeeper to mix a" Mad Williams "drink, in honor of the dead Sir William. Tim mentions some ingredients that must be in the drink and eventually the bar innkeeperwill bend over to find an ingredient
Quickly now ...... as soon as the innkeeper bend down quickly left click on the drunk guest's coat to tear off the brass buttons

When you have the brass buttons, walk back to the front of the pub via the bottom left, so to the bouncer and the poker guy.
Walk to the blind violinist and look at the saucer, which is on the floor in front of the violinist's right foot. Then take the brass buttons from inventory and click on the saucer and .....

Timmy throws a brass button on the saucer but immediately steals some change, while the poor blind man plays his tune ... well ... you're not such a nice boy as Timothy, but what do you want ..... it is a matter of survival in the 19th century. Go back to the bar and talk to the waitress again and, now that Tim has some change, order a drink via "Order a drink" ......... the waitress then pours a glass for Timothy and puts it on the counter.
Talk to the waitress again because now that you've ordered something she will wants to talk, but she doesn't want to say everything she knows ..... Ask the girl about the pub and ask her about Brian. However, the waitress does not want to say anything about Brian ...... first Timothy has to prove that he is who he says he is, and not an undercover cop .. So show your medallion to the waitress and ....
The mysterious stranger screams that he wants meat ....... Tim then shows the medallion to the girl and also mentions his name and the waitress is convinced and she says that she has something for Tim. But just when the waitress wants to tell you more, she is called by her boss because she has to collect meat from the cellar for that mysterious stranger. The waitress then disappears into the basement and the stranger follows her .... Tim doesn't have a good feeling about this.
The cellar door is closed again. Left click on the cellar door ..... the stranger has locked the door behind him. Go talk to the innkeeper and ask him about the waitress ...... We now hear that the waitress is called Inez .... Timothy expresses his concern about Inez, but the boss thinks that Inez can take care of herself. After some insistence Tim gets the key to the cellar door, so click with that key on the cellar door ........

.... but .... Tim can't get the door open yet because the stranger has left another key in the keyhole on the other side of the door. Go talk to the innkeeper again and ask him for something to put the key out of the door via "Ask for tools" and ...... the innkeeper then gives Tim a corkscrew. So click with the corkscrew on the cellar door and ....... Tim puts the key out of the keyhole with the corkscrew. Click again with the key on the door and ..... finally the door will unlock, so click the exit arrow on the door to end up in the cellar

Tim sneaks into the basement and we hear how Inez is being harassed by the stranger ..... Tim wants to come to Inez's aid but is knocked out by the stranger.

After some time, when Tim has regained his senses, he overhears, through the cellar window, a conversation between the stranger and his boss, apparently called "Goodbye Jack". "Goodbye Jack" orders the stranger to gather all the men in the cemetery for a job and they will meet there in an hour.

Look around you in the cellar. There is a barrel against the stone arch and a rope hangs above the barrel. Behind the wine rack are a few large hams. You can also see that barred window in the wall. Behind Tim is a round drain cover in the floor. On the left is a dark corner, where the stranger came out and where Inez was, and there is a table with a Meat Cleaver in it ...... first view everything with your right mouse button and then left click on the hams, meat cleaver and the window
Timmy is very hungry but with his hands or his teeth he cannot pull a piece of meat off the hams. If you try to pull the meat cleaver out of the table, it doesn't work either and Tim firmly refuses to go back into the sewer. There is a bunch of garlic hanging from the rope, but when you left click on the rope, Tim screams that he needs the meat cleaver to split the rope.
When you have looked at everything here and tried to get the meat cleaver and the rope then you go back upstairs, into to inn room, and look ..... Inez is back because she is again in front of the alcove. Go talk to Inez again ..... use the following options "Try to gain a bit of gratitude" and / or "Try to gain a bit of her respect" and then use the "Show the Medallion" option as the last one an........

Inez isn't grateful to Tim because she is sure that Tim would not have come to her aid if she had told him the information about Brian earlier. Tim is impressed by Inez's wit, who then tells that Brian was here but ran off when the police raided the pub. Brian is hiding in the cemetery.
Well ..... it is getting busy in the cemetery because Tim wants to go there too. So walk to the front of the pub and then leave the pub through the front door and ....... on the map click on the cemetery location, because this location has now also become available thanks to Inez .....
Cemetery
Continue to the entrance gate of the cemetery. The gate is guarded by a dog.
Click on the entrance gate and ....... Behind the gate a barking dog appears ....

Tim isn't looking forward to going through the gate as long as that fucking dog on the other side is drooling. A bell hangs in the gate to the left. To the right of the gate, the wall is covered with ivy and there is also a round and barred hole in the wall, behind the gas lamp post. Just past that lamppost, a few paving stones have disappeared from the road surface (Broken pavement). Look at the bell and then left click on the bell ..... The bell misses the clapper so no matter how many times Tim pulls the bell, it makes no sound. Left click on the bell again to take the bell off the wall.

In inventory combine the bell with the brass buttons Tim puts 1 brass button in the bell. Hang the bell back on the wall and then left click on it again and .......

Tim pulls the bell again and the bell now makes a sound and because of this the old cemetery guard comes up and he is somewhat "pissed off" that Timmy has sounded the bell because "the dead deserve their rest". The guard asks if Tim was sent by Baker but of course Tim denies this. Continue to talk to the guard through all options ....

....... The elderly guard has not seen Brian and he warns Tim not to climb over the fence because the dog has not been fed for 3 days and therefore it would likes a bite of human meat. But for 10 pounds, the guard wants to let Tim enter the cemetery and restrain the dog. We learn that the guard is terrified of the dead "Mad William", now buried here in his graveyard. If you ask about the Salted Cheek pub, the guard will tell you that he lost his belongings in that pub during a game of poker with Poker guy, and that included a silver watch that did not belong to the guard. The guard panics because if the person who owns that silver watch finds out that the watch is missing, the guard is not sure of his life. So offer the guard your help and ...... well ... after some urging from Tim, the guard agrees to let Tim enter the cemetery if he returns the watch.
When you have used all talk options, say goodbye to the guard. Via the middle left you return to the pub, but before you do that you first left click the gas lantern to the right of the gate. Tim hears something hissing and you hit the close-up of the lamppost and the round wall hole .... At the back of the lamppost the gas valve is sticking out and gas is leaking from the valve, but you cannot smell gas, only hear the hissing of it. Left click on the valve ...... Tim thinks it is a pity that more gas does not leak out ..... Click the Exit arrow to go out of the close-up and then return to the map (To the Street) and then go back to the:
Salted Cheek pub:
Poker guy is of course still at his table waiting for his next victim to "undress" with foul play. Talk to Poker again and make sure he still has the silver watch, so use the option "Asertain whether he has the watch" and ........ Poker guy is not retarded so he immediately understands that the graveyard guard has told Tim about the watch. Poker immediately doubles his price for the watch because he knows that the guard will get the knife men after him if he cannot return the watch to the owner. Use the "Play" option to challenge Mr. Poker, but he refuses because Tim did not want to play poker with him before and he is not giving anyone a second chance.
Walk back and talk to the inn keeper and complain about Poker via "Complain about the poker player" ..... Tim says that Poker robs the potential customers of the pub and stole a silver watch from an old man. The innkeeper gets pissed off, because he now understands why so few customers order a beer or want to fuck the hookers. The Innkeeper goes to Poker, who is called Jeffrey, and put him out of the bar and then tells Tim that he knows nothing about a watch and doesn't want to talk about it. Walk back to Poker's table, which has been thrown out of the pub. But Poker's knife is still in the table, so take the knife.

Walk back to the bar and click on the cellar door to return to the cellar. Walk to the Hams and cut a piece of meat from the hams with your newly acquired knife .....
Above the barrel, which is in front of the wine rack, hangs a rope with garlic ..... use the knife on the rope to cut of a length of rope.

Go back upstairs and leave the pub again through the front door and go back, via the map, to the:
Cemetery:
Get rid of the dog
Back at the entrance of the cemetery you now walk all the way to the right, to the hole in the street. Use the knife on the hole and ...

Tim pries a Paving Stone out of the street. Left click again on the lamppost, which is in front of the wall hole, to get back into the close-up of the gas valve
Ram with the paving stone on the valve to break the valve off the pole and ...

.... without the valve, the gas flows freely out of the pole and through the hole in the wall into the cemetery. Now to lure dog.
You will automatically leave the close- up. Combine the rope with the meat in inventory and then hang the rope / meat combo in the round wall hole, behind the lamppost and .......

The dog approaches the meat and is knocked unconscious by the gas. If you have heard the dog squeak, then the dog is unconscious behind the wall hole on the ground. Now left click on the gate and ...... Timbo climbs over the fence and ends up in the cemetery, near the church. To the right of the church is another gate .... Go through that gate and ..........

Brian is sleeping on a bench .....

Tim shakes Brian awake and the two talk for a moment, mainly about that "Goodbye Jack", who is the leader of the local gangster gang and for whom the cemetery is their area of operations. Brian doesn't want to stay here. The gang of "Goodbye Jack" could show up here any moment. Brian then walks away to the right, so follow Brian to the right and ...... Tim ends up at a wall with urn safes .... Brian cannot be seen because he has already climbed over the wall to the left.

Left click on the iron gates, which are fixed on top of the stone wall ..... but those fences are too high and the stone wall is too slippery to climb up. On the stone wall hangs the ruin of a stone fountain .... Look at the fountain and then left click on it ...... Tim judges the fountain as too rickety to try to climb on it to get to the fence above it. To the left of the fountain is a tombstone .... Try if Tim wants to climb on that tombstone ..... but unfortunately .... the tombstone collapses due to Tim's weight. Go back one screen to the left, to the bench that Brian was sitting on. Left click on the wooden bench to lift the bench ..... your cursor is then the bench ..... drag the bench cursor to the right and then double click it to return to the urn wall with the bench and the stone fountain and .....

... Tim pushes and drags the wooden bench to the fountain wall. Left click on the bench and .........

Tim then manages to climb over the wall via the bench and Brian takes him to a safe hiding place ...
Tim wonders where on earth they should get the boat tickets for the trip to America from. We now continue with:
Chapter 2: november 13, 1894:
Detective Sergeant Briscol:

Politiebureau:
Je bent nu detective sergeant Briscol en je bent net gepromoveerd en overgeplaatst naar Plymouth. Briscol verheugt zich hierover want per slot van rekening heeft ie hier 3 jaar op moeten wachten. Dit wordt dus je eerste werkdag als detective sergeant te Plymouth. Klik "Continue" om verder te gaan. Briscol wordt door de koetsier afgezet bij de poort van het politiebureau en hij rekent af.
Police station:
You are now Detective Sergeant Briscol and you have just been promoted and transferred to Plymouth. Briscol is happy about this because after all he had to wait 3 years for this promotion. So this will be your first day working as a detective sergeant at Plymouth. Click "Continue" to continue. Briscol is dropped off by the driver at the gate of the police station and he settles the bill.

Go through the gate to enter the police station and ........
..... At the desk of the duty officer, Bristol hears a discussion between the duty officer and a pimp who is protesting the arrest of one of his hookers. That hooker walked the street in the middle of the night, drunk, singing and then emptied the contents of her stomach on the bobby who came to arrest her. The pimp tells a sad story about his hooker, but the duty officer does not buy it. Briscol thinks the policeman's straightforwardness is fine and he thinks he will feel at ease here ....... Briscol does not yet know that the duty officer's straightforwardness will break him up considerably later on........

When the discussion between the duty officer and the pimp is over, speak to the duty officer and say you're there via "Report for duty" ..............
Briscol tells the duty officer that he is the new detective. However, the officer does not know anything about it and does not have Briscol's warrant card in his drawer. The officer then leaves to find the papers about Briscol's arrival. Briscol is waiting at the counter and meanwhile gets robbed of his papers by the hooker.

The duty officer then returns but has not found Briscol's warrant card.
Briscol then wants to show his transfer papers to the duty officer but then finds out to his horror that he no longer has the papers ......
Briscol hopes he has lost the papers, because if he has to tell that he was robbed, it will immediately end his career as a detective. Talk to hooker Floozie and her pimp and ask both for the papers ..... Of course both say they don't know anything. Go outside, via the stairs ....... back outside Briscol searches the path but of course does not find his papers .... Briscol then wonders if he left the papers in the carriage but immediately decides that is nonsense. Go back in ...... Back inside you right click on the whore and also on her pimp .......... Briscol wonders if the hooker has stolen his papers and if there is a plan behind it , Briscol thinks the pimp is too stupid and what should the whore do with his papers?
Talk to the duty officer again and ask him for information about the hooker and the pimp via "Ask about the suspects" ..... the officer tells us that both the hooker and her pimp are known thieves / pickpockets ....... now Briscol understands what happened, but he can hardly tell the duty officer. Close the conversation via "Leave". Talk to the whore again and then use the "Push her ..." option .....
Briscol tells the whore that he knows she rolled his papers and advises her to return the papers if she does not want to end up in jail immediately. However, the whore laughs at Briscol because she doesn't believe he is from the police and she threatens Briscol with a beating from her pimp. The pimp then gets involved and tells his whore that it doesn't look good for them and that he can beat up Briscol later.

You can now indefinitely continue to address the whore to try to get your papers back, but that will only result in a repetition of the previous. Instead, talk to the duty officer again and use all the other options you get, so use the options "Use the authority of the senior rank", "Persuade him to cooperate", "Confide" and "Denounce the robber. "..... none of these options help to convince the duty officer that the new detective is really Briscol but all this will be heard by the pimp, who now knows that Briscol is with the police.
Then go talk to the whore again and use the "Push her" option again and ...... the whore threatens again to let Briscol beat up by her pimp and ...... Pimp gets involved again but he now knows that Briscol is a detective and he orders his whore to return the papers because otherwise she will no longer have to count on his protection and that is actually the death sentence for a whore.

When the pimp has run away again speak to the whore and use the "Take the stolen stuff back" option and this time the whore picks eggs for her money and gives Briscol his papers back. Give the papers (Transfer papers and Warrant Card) to the duty agent and ........ Briscol can pick up his new Warrant Card in a few days, but he will already receive the keys to his office, which is next to the stairs. lies. However, Briscol cannot speak to his superior, Inspector Powell as he is off to London for a few days. However, the duty agent will call Powell to inform him that Briscol has arrived and his work has started. Pick up the keys from the counter.

View the keys in inventory, so right click on the keys .... they are 2 keys, a large and a small one. The big key is for your office door, but what is the small key for? Ask the duty agent what the small key is for via "Find out what the other Key is for" ..... the duty agent doesn't know either, the keys belonged to Briscol's predecessor. To the left of the stairs is the gate to the archive and you see 3 doors. Briscol's office is at the end of the hall, so double click on that door and ..... Briscol will run to the door. Use the keys on the door and then enter your office.

Office:
'Tis a nice office but it is quite a mess and Briscol is quite indignant about that ..... they could have cleaned up anyway. So leave your office immediately. The pimp and his whore have since disappeared. Call the duty agent again and use the "Complain about the mess" option ...... The agent tells that Briscol's predecessor Inspector Lockey, who retired last month, has no one ever allowed into his office, but he offers to send a cleaning lady over tonight to clean the office. Briscol agrees, but in the meantime will put his predecessor's belongings in a box himself. Go back to your office by double clicking on your office door.

There is a safe in the cupboard. View the safe ..... Briscol cannot open the safe because he does not know the code. So go to the duty agent again and ask him for the code for the safe ... the duty agent looks in his papers and he finds the original safe code and that is 8, 8, 8, 3, 4, hopefully still update this code because perhaps Briscol's predecessor changed the code. Return to your office and left click on the safe to get in the close-up.
|
Open up safe: The safe door has 5 compartments, a turntable with numbers and the door handle. Number the 5 boxes, from left to right, 1 to 5. The 5 boxes are closed but the numbers of the code must be in the boxes.
the safe will open automatically. There is a wooden box in the safe.
Take the box from the safe and get out of the close-up. Right-click in inventory on the box and ..... Briscol takes a magnifying glass (Magnifier), tweezers (Tweezers) and a brush (Paint Brush) from the box. |
Now that Briscol has "cracked" the safe, it is time to tidy up the office by putting all the items belonging to Briscol's predecessor in the big box on the floor in front of the desk. So pick up all the junk (Garbage Ready to Be Thrown Out) and dump it in the big box. These are the stack of papers in the left corner and also the papers in the right corner of the box. Under the right window is a large chest and in front of the chest is a bag of plaster on the floor, which you also pick up and throw in the box. And on the left side of the desk you will find a stack of papers that you also have to put in the box

Once you have collected all the junk from your predecessor in the box, the phone, which hangs on the right wall, will ring so left click the phone to answer it and ......
Briscol gets his first case.

Something is going on at St. Patrick's Church and Briscol is ordered to go there and bring an bobby with him. Briscol notes a number of things in a notebook that he puts in his pocket. So right click in inventory the notebook (Notes) and then click on the drawing of the St. Patrick's Church ....

.... Briscol then repeated his assignment ......... Father Mulkehey has requested an agent. Leave the close-up and then your office and go back to talk to the duty agent and ask him to arrange for an agent to come with Briscol to church via "Ask for an attendant". The duty agent will then arrange an agent who will be Sergeant Carter. So leave the desk and wait for Sergeant Carter and when he appears we end up back at the:

St Patrick's Church and Graveyard:
Carter wants to go straight back to the station, but Briscol wants him to stay with him and stand guard at the gate. Well ..... Briscol is inspector and Carter is a sergeant so he has no choice but to do as he is told. You can hear the elderly guard's dog barking over and over, so the animal has survived Timothy's gas attack.
The gate is open, so go through the gate and meet Father Mulkehey.

Talk to the pastor, who actually expected Briscol's predecessor Lockey and at first doesn't believe Briscol is a cop because Briscol can't show his Warrant card yet. The pastor then disappears to the left of the church and he wants Briscol to follow him. So go, via the left side, to the left of the church (Around the Church) and .......

You will see Mulkehey walking away from the cemetery, so follow the pastor by clicking on the tree ........
Briscol ends up at the broken-open tomb of the noble Lewis family. Mulkehey discovered that the Tomb was broken open when he was looking for gravedigger Talbot, who, as is often the case, sleeps off his intoxication between the gravestones. This corner of the cemetery is home to the burial houses of the city's wealthy notables, and an incident like this could hurt the church's reputation, Mulkehey said. When Briscol says he wants to take a look inside the tomb, the fretful old pastor almost gets a heart paralysis, because that would mean a desecration of the grave. Briscol then asks Mulkehey if he still wants to find that gravedigger Talbot because he wants to ask the man a few questions. Mulkehey then runs away to find his gravedigger.
Behind Briscol some broken parts of the tomb door lie on the ground. Look at those door parts .......

Briscol thinks something is wrong ..... left click on the door parts to hear Briscol's thoughts about it. Then enter the tomb ...... it is quite dark inside and after a few seconds we hear Mulkehey calling ..... Briscol then steps outside again to find a rather excited Mulkehey ...... The gravedigger / guard Talbot is murdered and Mulkehey takes Briscol to the corpse, where previously stood the wooden bench that Timothy dragged to climb over the wall. You automatically got into the close-up of Talbot's corpse. Talbot's throat was slit .... Right click and left click the fatal throat wound .......

Talbot's throat seems to have been bitten by one other wild animal, says Briscol. Search the corpse's clothes by left-clicking the dark jacket that the corpse wears over the lighter colored vest and ..... Briscol takes a vial of pure alcohol from the jacket pocket. Get out of the close-up. Behind Briscol is a water pump ..... Look, so right click, the water pump ..... Briscol thinks the killer may have washed the blood from his hands at the water pump and maybe he left traces. So take the magnifying glass from inventory and click it on the water pump to carry out further investigation,

Briscol finds nothing ... there is not a speck of blood on the pump. Go one screen to the right, to the urn lockers and ...... Briscol finds here the body of Talbot's dog ...... The dog's vertebra is broken, as if someone had spoken to the dog from a great height . Right click and left click the dead dog ....... Briscol rules out the possibility that the dog has bitten Talbot's throat because of the fractured vertebra and when you left click Briscol sees that the dog has something in its mouth. So use the tweezers on the dog cadaver and ........

..... between the teeth of the dead animal, Briscol finds a piece of cloth, which he keeps in his pocket and records his findings in the notebook. Also click with the magnifying glass on the dead dog (Close Vicinity) ....... Briscol then examines the ground, behind the carcass, but finds nothing. Also look with the magnifying glass on the fence on top of the stone wall ..... no trace of the culprit can be found. Go back to the Talbot body and look at the body in close-up again, so left click the body. Take the piece of cloth that you have plucked out of the dog's mouth and click on the clothes of the corpse ..... the piece of cloth does not match with Talbot's clothes ..... it is a total of one different substance, so Briscol concludes that the dog fought with someone else, and died in the process.
Right-click in inventory the notebook of Briscol ....., Briscol makes notes in the form of small sketches ....

Click on the dog and on the body of Talbot and listen to Briscol's conclusions .....
Briscol now knows for sure that Talbot was not attacked by his own dog and also that Talbot did not oppose his killer because he was completely drunk. ...... The dog has tried to defend its owner, but the animal had to pay for it with death. Furthermore, we will have to wait for the autopsy to know the exact cause of death.
Go out of all close-ups and then go one screen to the left, via the bottom left, and ....... Briscol then automatically makes a circle around the cemetery and then comes back to the body ..... Briscol has no other Found "fresh" bodies. Go back up the stairs to the church ......... Father Mulkehey is back, so walk up to him and speak to him and ask the pitiable old pastor anything there is to ask ....
Mulkehey buried Sir William after sunset last night at the request of the family. The police were present at the funeral because of expected problems with the local population. After the funeral Mulkehey went straight to bed. Mulkehey has asked for Detective Sergeant Lockley because he was deeply interested in all things Sir William. Lockley also wanted to look inside the Tombs of the Lewis family but got no permission from the family. Mulkehey hasn't seen that Lockley in weeks, and he didn't know Talbot's dog is dead either.
When you have discussed everything with Mulkehey, say goodbye and leave the cemetery via the path that goes down to the bottom of your screen. Briscol then naturally has a short conversation with Carter, who must remain on duty here and not allow anyone to enter the cemetery, although Carter struggles. Go to the map via the bottom right (To the Town) and return to the:
Police station:
Walk back through the gate into the police station and enter your office again. Click on the phone to report the murder of Talbot to your chief, Inspector Powell. But Powell is gone for a while and won't be back for 2 hours. Briscol wants to use this time usefully with some more research on the cemetery. So leave your office and the police station and travel, via the map, back to the:
Graveyard:

Carter is arguing with a journalist who wants to enter the cemetery, but he is not allowed to. The journalist sulks at the gate and his bicycle is against Carter's wall. The journalist's camera bag is on the bicycle's luggage carrier. Go talk to the reporter and then use the "Questioning" option to question the boy and then use all the conversation options. The journalist is here for an article on Sir William that he is working on. The journalist did not know Sir William personally but has heard all kinds of horror stories about him. The journalist doesn't want to go away. When you're done with the journalist, talk to Carter. Ask Carter about the journalist ..... The journalist's name is Nathaniël Forrest. Forrest is always the first on the scene when something has happened somewhere and then takes pictures, writes a piece and then posts it in the local newspaper, the Courier, and people like to read his pieces. Ask Carter for matches too, via "Ask for matches" ..... Carter then gives Briscol his box of matches. Talk to Carter again and use the remaining call options to get rid of that. Check out journalist Forrest's bicycle. Go through the gate again into the cemetery and then to the left of the church and through to the Tombs of the Lewis family
Lewis Tomb:

Go inside. In the center of the tomb is an open, but empty, coffin. Left click and right click on the coffin ...... Briscol finds it strange that there is an empty coffin in the tomb and he makes a note of it in his notebook. At the bottom left is a large standing candlestick .... right click and left click that candlestick ...... Briscol touches the candlestick and concludes that the thing is stone cold and has not burned in ages. Take the Bottle of Alcohol from inventory and empty the bottle into the candlestick and then light the alcohol with the matches, which you obtained from Carter and ............

....we hebben dan licht in de tombe........Kijk naar de tegelvloer........rechts van de kandelaar zie je steeds even iets glinsteren, in een spleet tussen 2 vloertegels.......Gebruik het pincet op de spleet en.......Briscol vist een rode edelsteen op uit de spleet, waarvan hij vermoed dat het geen echt juweel is.
.... we then have light in the tomb ........ Look at the tiled floor ........ to the right of the candlestick you always see something glistening, in a gap between 2 floor tiles .. ..... Use the tweezers on the crack and ....... Briscol fishes out a red gem from the crack, which he suspects is not a real jewel.

in inventory look at the red jewel with your magnifying glass and ....... well ..... it is a very real diamond .....
Left and right in the walls are the coffins of the dead members of the Lewis family ...... Look, right click and left click, the 6 boxes sticking in the left wall and listen to what Bristol has to say about it .. .... It strikes Briscol that there are only male members of the family and that none of them have lived more than 40 years ....... When you have looked at the chests in the left wall and you have put the jewel between the floor tiles, you walk back outside. Right click or left click the Tomb, to the left of the Lewis Tomb ..... that tomb is undamaged ..... Walk back one screen to the left, to the side of the church. Left click in the field with the tombstones ....... Briscol then remarks that it does not look like grave robbers have been at work and therefore that vandals have deliberately destroyed the Lewis Tomb. Go back to the front of the church where Mulkehey still stands. Talk to Mulkehey and use all call options .......
Mulkehey tells extensively about Sir William, who was the last of the Lewis family, who died yesterday and was raised by his grandmother Lady Miriam. During the funeral ceremony in the tomb the coffin remained closed, at the request of Lady Miriam and Mulkehey is deeply shocked when Briscol says that the coffin is now open and empty in the tomb. When Briscol suggests that Sir William may not be dead and that his death and burial was staged by Lady Miriam, Mulkehey thinks that this is a far-fetched theory. But Briscol also suggests that some locals may have forced the tomb to see if their hated William was actually dead in the coffin. But it could also be that it's all just a diversion by common thieves, so Briscol asks Mulkehey to check his church's inventory to see if anything has been stolen from the church.
The conversation is then over and Mulkehey disappears into his church to see if nothing has been stolen. Also leave the cemetery and ....... back at the entrance gate we see that journalist Forrest has disappeared, but Carter is still faithfully on guard. Have a chat with Carter and ask him where the journalist has gone via "Find out where the journalist has gone" ..... Carter, who has known journalist Forrest longer than today, does not think Forrest has gone away.... After all, there are other ways to get into the cemetery than through the gate, which Carter is guarding. Opposite the gate is a monument ..... the monument is a long column (Plaque Monument) and it stands in memory of the many inhabitants of Plymouth who died during the great plague epidemic of the 18th century. Left click the monument and ......

Briscol goes to investigate the monument and finds a cigarette butt there, which he picks up from the ground and puts it in his pocket. In inventory, examine the cigarette butt (Cigarette Butt) with your magnifying glass ..... it is a hand-rolled cigarette but Briscol thinks the tissue paper used is strange. Carter has told you before when you asked him for matches that he smokes a cigarette every now and then, so talk to Carter again and ask him about the cigarette butt via "Show the cigarette" .
Carter says that the cigarette is made of good tobacco and that the tissue paper used is unusual, and expensive. Carter also notes that someone who rolls their own cigarettes usually takes the time to do so, so that cigarette roller must have stood by the monument for a while. Briscol then suspects that the smoker has been smoking here last night, because otherwise the cigarette would have been picked up by other passers-by ..... that smoker could well be a valuable witness to the events of last night here in the cemetery.
Carter has thus expressed his suspicion that journalist Forrest may well have climbed over the wall to enter the cemetery. Let's see if Carter is right about this, so bounce through the gate back into the cemetery and then go back to the Talbot body through the gate to the right of the church and ... Die Carter is not that stupid because Briscol catches the journalist with the body and ........

..... Forrest is shocked and runs away to the urn wall ...... Follow Forrest and .....
when we arrive at the body of the dog there is nothing more to see of Forrest but Briscol hears something ........
Left click the wooden bench and ........

Briscol climbs over the wall, just like Timbo did before, but also on the other side of the wall there is nothing to see anymore of Forrest but ..........
In front of the barrel there are shards of glass (Shards of Glass) .... Forrest has broken his photo glass plate ....... Pick up the glass shards .......

Right-click in inventory the glass shards ...... If Briscol could put the shards back together then he could see which photos Forrest took, but unfortunately some shards are missing. Double click on the bridge to return to the main gate of the cemetery, go through the main gate back to the church and back to the Talbot body because in his hurry to get away Forrest left his camera near the body. Right click the camera. ..... Briscol wonders how many photos Forrest was able to take in the short time he stood here before he was caught by Briscol ...... Briscol notes down a few things in his notebook. Left click the camera to find out that Forrest has taken the glass plate out of the camera. Open the inventory, right click the notebook and then click on all the new sketches that Briscol has drawn to hear his thoughts. Exit the cemetery, through the main gate in front of the church, and return to the police station via the map.
Police station:
Go to your office and use the phone again to call your boss, Inspector Powel ....... Powel is now present at headquarters and Briscol explains the situation to his supervisor and also tells him that there may be a photo of the Talbot body may appear in the local paper because of Forrest. Briscol will now be assigned the case to solved it
NB: If Briscol doesn't want to call his boss now, but says he hasn't investigated all the clues yet, it means you forgot to do something somewhere. For example, I forgot to examine the red diamond in inventory with the magnifying glass. If this also happens to you, check what you have not done and then do it anyway.
We are leaving Briscol now because we will continue as:
Timothy Moor:
Stable:
Timmy and Brian survived the night in a horse stable .... Click "Continue" or click on Tim or Brian to continue. Tim tries to wake up Brian, who is still sleeping, but doesn't succeed very well. Click with the talking cursor on the sleeping Brian ....... Tim pushes a bit against Brian and as a result a knife falls from his pocket and Tim picks up the knife automatically.

Against the green wooden side wall of the horse stables is a wooden stool and on that stool is a wax candle. Pick up the wax candle ...... it turns out to be a tea light. On the corner is a wooden bucket ...... the bucket is empty and Tim does not want to pick up the heavy bucket and carry it now. At the bottom right is a wooden cart and behind the wooden cart you see a green wall post .... Look at the green painted wall post (Column) ....... Tim feels the post and feels a half loose splinter on it .... Cut out the splinter from the post with the knife you just picked up. Walk back to Brian who is still sleeping and poke him in the ass with the splinter to finally wake him up. Then talk to your friend and ask him about his plan to get money for the crossing to America ...
Brian has been approached by someone who wants the documents from his father's safe and is willing to pay a lot for them. So Brian has to break into his father's house and crack the safe to steal the documents. However, Tim first has to explore the situation around the house to see how they can get in and out safely and unseen. Brian tells where the house is and how to get there ....... the house is on Paradise Street.
Leave the stable and travel, via the map, to the house in:
Paradise Street:

In the front yard, behind the entrance gate, a servant is sweeping things up with a broom. Speak to the servant .......... the servant, however, does not feel like talking and so he cuts off Tim. There is a lamppost on the corner to the left. Check out the lamppost ... it is a modern pole with electric light ..... Left click the lamppost ...... Tim thinks that the light from the lantern could be a problem if they try to break into the house. View, right click and left click, the wall fence in the side street ...... Tim thinks he can climb over the fence, even without a ladder ...... If you left click on the fence, Tim does not want to cross the wall now climbing, because of the servant who is sweeping in front of the house. Tim needs help to distract the servant for a while.
Find the Exit arrow, bottom right, and then double-click it to return to the map and return to the horse stable. Back in the barn you will talk to Brian again and ask him for help via "Ask for help" and ..... Brian will now also go to the house in Paradise street to take care of that servant. So leave the stable again and return, via the map, back to Paradisestreet and ......... Well ..... Brian was faster and is already in a busy conversation with the servant ..... Left click again on the side fence and ......

Tim climbs over the wall and ends up in the garden at the back of the house. A staircase leads to the terrace.
Just before the stairs is the cellar door and by the stairs is the kitchen window ..... above the kitchen window hangs some laundry.

Double click on the steps, in front of the cellar door ...... Tim will then stand right in front of the cellar door .... Look at the cellar door and try if the door opens ........ Tim doesn't want He's saving that for tonight, now he wants to steal the house keys. Walk back by clicking on the ground behind Tim. Left click on the kitchen window and ..... Tim opens the window .....

double click in the now open kitchen window and ....... Tim peeks into the kitchen and we hear the lady of the house talking to Liza, the kitchen maid, about a bottle of wine ........ Tim wants that Liza to lure outside to talk to her. There is a bottle of wine on the tray ...... Try to get the bottle of wine but ........ the window closes before Tim can get the bottle and just in time he manages to get his hands back to pull. The kitchen window is therefore closed again. Slide the window open again and then look inside again but ...... now quickly take the wood splinter from inventory and click it on the top of the window (Window Frame) to secure the window so that it can no longer be closed fall. Then take the wine bottle and ...

Tim then hears that Madam is coming and he quickly withdraws ... we then hear that Liza is going to get out of here because there is no bottle of wine in the kitchen. Liza has to get a fresh bottle from the cellar. Get Tim down the steps to the basement door again. When Tim is standing in front of the cellar door again, use the corkscrew on the wine bottle in inventory to rip the cork out of the bottle. Then use the cork on the cellar door .....

Tim rams the cork into the keyhole and then goes back over the wall to the street because he has to wait a moment for poor Liza to arrive at the cellar door with her keys and then find she can't get in. Immediately climb back over the wall and ...... Liza is now crying in the garden because she cannot open the cellar door. and Tim automatically starts a conversation with her ...

Tim pretends to be asking for a job, but Liza tells him that her lord and master are not hiring new staff. Klojo Timbo makes an effort to be nice to Liza but she sends him away. Probably stealing the wine was too much and Tim wants to try to calm Liza down. Click the exit arrow, behind the large basin, to climb back over the wall to the street. Find the map and travel back to:
Stable:

Run to the blanket that Brian was sleeping on. Left click the blanket and ....... Tim searches the blanket and finds a box of matches that fell from Brian's pockets. A horseshoe (Lucky Horseshoe) hangs above the green barn doors and a rake (Dung Fork) leans against the wall to the left of the doors. Check out the horseshoe and rake.

Take the rake and use the rake on the horseshoe to grab the horseshoe from the wall .......
Tim will pick up the horseshoe from the ground by himself. Exit the stable and return to :
The House in Paradise Street:
Climb over the side wall into the garden again and give the horseshoe, as a lucky charm, to Liza and then talk to her ......Liza's master is very sick and she says there is a secret hallway that leads from her boss's bedroom to the wine cellar. When Tim offers to help Liza with the cellar door, she gives him the keys. Combine the keys with the matches in inventory ...... Liza becomes a bit suspicious but Tim reassures her and he makes the keys red hot. Combine the hot keys with the tea light to make a wax print of the keys ..... Again Tim has to reassure that suspicious, but rather silly, Liza. Tim then has a wax print of the keys in the tea light.
Right click, above the cellar door, on the stone railing of the patio ...... Tim thinks the back door, on top of the patio, is the best way to enter the house. Exit back from the garden, through the exit behind the tub and ....... Tim gives Brian a sign that he has the house keys and he breaks off his conversation with the servant and disappears back to the horse stable. Go back to the stable and talk to Brian and "Give him the key imprint" and ...... Brian knows a blacksmith who can make the keys and the 2 go to sleep .... but Tim can not sleep like that and thinks about the impending burglary and his plan to go to America. Click on Tim or click "Continue" to continue
Night:
It's night. Brian is already disappearing to Paradise Street. So also exit the stable and go to Paradise Street. Brian stands in front of the front gate and grumbles because the keys don't fit. Tim hadn't told Brian that the keys only fit the patio doors and the cellar door. Brian leaves and climbs over the side wall into the garden.
So climb over the side wall again. Brian warns Tim not to make a noise because there is a guard on the terrace sitting in a chair. Brian says that guard has a gun. Brian panics slightly but Tim proposes to enter the house through the basement and the secret corridor. Brian then gives the keys back to Tim. Walk down the steps to return to the cellar door. First use the corkscrew on the cellar door to pull the cork out of the keyhole again and then open the door with the keys and ...

Tim and Brian then go into the basement. It's dark in the basement. They can make light, but then the basement windows must first be covered to ensure that the light cannot be seen from the outside, and that covering must be done on the outside. So go back outside. There are 2 basement windows. 1 cellar window is under the kitchen window and the other cellar window is in the middle segment of the long wall of the terrace, where the large basin is located.
The large tub is full of water. Left click the large basin to try to slide the basin in front of the cellar window ...... but the basin is much too heavy to move ..... the basin must be lighter and that means that the water has to be removed. There is a hole in the basin, but that hole is closed with a cork. Use your knife on the sink to stick out the cork and ........

... the water then flows out of the basin, but the knife breaks and you are lost. Left click again on the, now empty, basin, and ...... now Tim pushes the basin in front of the basement window, but the noise makes the guard wake up for a moment ...... luckily he falls asleep immediately . In the grass, the water from the basin has made a mud pool (Mud). A filthy mop (Rag) is lying on the floor in front of the stone terrace stairs. Go get the mop and then walk back to the basin and then dip the mop in the mud pool.

Then walk to the kitchen window and stick the dirty wet mop on the basement window, under the kitchen window and .......

... finished ... hopefully both basement windows are now light-tight, so go back to the Basement. Brian has now turned on the light and has descended to a lower part of the basement in search of the secret passage. Brian hasn't found that secret passage yet and is grumbling. Look around the basement, so right click and left click on all the things you can do that on.

Above the hole through which Brian went down is a large round ornament on the wall that you are viewing. In the corner are 3 large wine barrels ... view the 3 wine barrels. View the well. On the edge of the well is an iron bar ... look at the iron bar. In the stone arch passage is a wine rack and by the wine rack hangs a candlestick, without a candle, on the wall .... view the candlestick and left click on it ..... In the front cellar is a wine press ..... view the wine press ......
..... once you've checked it all out and Brian will call you .... Brian will sweep Tim to find a crowbar, so now grab that iron bar that's on the well and throw the rod down through the wine cellar hole to Brian . Brian has discovered a loose stone in a wall and he uses the rod on that stone and ...... the large round ornament, above the hole, turns open and ...... Brian accidentally has the secret passage opened.

Double click in the round opening and ...... through the secret corridor Tim ends up in the:
Office:

Find the safe ..... the secret corridor opens into the fireplace. Right click and left click again on everything where you can do that. An oval mirror hangs above the fireplace. There is a carpet in front of the fireplace. To the left and right of the fireplace are doors. On the left wall is a table with a chess set on it and on the right wall are 2 bookcases. Three crossbows hang on the wall between the 2 bookcases. And in the foreground is a desk. Right click and left click the oval mirror, the rug, the chess set, the left bookcase, the crossbows and the desk.
The round chess table is nailed to the floor and cannot be turned and Tim finds it strange that the chessboard with the black pieces is facing the chair. If you right click the crossbows you will see them in close-up ... try to take the 3 crossbows from the wall, but that is not possible ..... the middle crossbow hangs upside down in each of the 3 arches see you have a hole in the end of the bow. Get out of the close-up. The door to the right of the fireplace is locked, so exit the room through the left door to the:
Library:

The entire right wall is taken up by numbered bookcases and there is also a bookcase on the narrow wall. The seat consists of a round table, 2 comfortable chairs and a sofa. Clothes hang over the back of the right chair. In front of the bookcase, which stands on the narrow wall, is a globe. To the left of that bookcase is a small cupboard and next to that cupboard is a large and heavy candlestick with 2 candles. In the back wall is a door to the hall. View everything again, so right click and left click on everything again.
Tim searches the clothes hanging over the chair, but finds nothing. Tim can't do anything with the globe and the candlestick is too big and too heavy so Tim doesn't take the thing with him. Go, via the bottom right, back to the office and ..... the door, to the right of the fireplace, is now open, so exit now through the right door to the:
Bedroom:

Brian is already snooping around here while the master of the house is sleeping. Brian is looking for the code for the safe because according to him the old man wrote that code down somewhere. Brian wants Tim to look for the safe in the study in the meantime. But before you walk back to the study, take a good look around here in the bedroom.
The old man is sleeping in a four-poster bed and a bell chorus hangs above his pillow. Watch the bell chord
Tim walks around the bed to watch the bell cord. Tim is then on the right by the bed. Left click on the pillow and .....

Brian almost has a heart attack from shock when he sees Tim reach under the pillow and the old man moves in his sleep for a moment ..... but Tim finds a torn book page under the pillow and he wonders why the old man under his pillow. Right click in inventory on the just found book page (Torn out Page) ...... the page is about crossbows and Tim wants to know where the rest of the book is. Show the page to Brian .....

In the meantime Brian has found a tobacco box, but he cannot open the box. Brian gives the tobacco box to Tim, who brags that opening the box is a breeze. However, Tim first wants to find the book where that page about crossbows has been torn out. There is an open book in the chair, but that book is about horses and Tim does not find that interesting. Where do you think Tim could find that book on crossbows? Leave the bedroom to the study and proceed to the:
Library:
The bookcases, on the right wall, are numbered A, B, C, D.
Take the crossbow page from inventory and click with the page, one by one, on the bookcases A, B, C, D and .......

Tim does not find the book about crossbows in any of the 4 cupboards. A ladder leans against cupboard D. The top parts of the cupboards can be reached via the ladder. The ladder blocks Tim's view of the books in cabinet D, so left click the ladder to slide the ladder to the right. Then click again with the crossbow page on box D and .......

Tim finds the crossbow book and rips it out of the closet. View, so right click, the book in inventory (Open book) and ......
in the book the old man has hidden a Crank Handle. Tim no longer needs the book and you immediately lose it. Go back to the:
Office:
Left click again on the crossbows, which hang on the wall between the 2 bookcases. You can see the 3 crossbows in close-up again. There is a hole in each of the 3 crossbows. Put the Crank in each of the 3 holes, and that does not have to be in a certain order but just do it from left to right ...... with the crank Tim then tightened the 3 crossbows and .....

.... as soon as you have tightened all 3 crossbows you will hear a rattling sound and you go out of the close-up ....... The rattling sound came from under the floor ...... Walk to the chess table and left click on the table again and ....... this time the table rotates and this makes the left bookcase slide to the left and ...... Tim found the wall safe because it was hidden behind the left bookcase.

Left click the safe to view it in close-up ....... the safe has a rotary knob with 5 boxes underneath where the numeric code should be placed ..... it works just like the safe in Briscol's office, but Tim doesn't know the number code yet. So get out of the close-up. Would the safe code be hidden in the tobacco box? Right click in inventory the tobacco box .... it turns out again that Timpy is not only a huge bastard but also a bastard with a big mouth because he cannot open the tobacco box. Brutal force must be used to open the tobacco box. Dive into the fireplace to return to the basement through the secret corridor. There is a wine press in the front of the cellar. Walk to the wine press and use the tobacco box on it and ......... Tim throws the tobacco box into the press ...... Left click the wine press and .......

Timmy gently squeezes open the tobacco box. Right-click in inventory the now "cracked" tobacco box and the expensive cigars are broken but Tim does read an inscription,19.4.58,would this be the code being the safe. Go back through the secret corridor to the:
Office
Zoom in again on the wall safe. The safe works in the same way as the safe in Briscol's office.
Number the boxes, under the turntable and from left to right, 1 to 5. The code is 1, 9, 4, 5, 8

Click in box 1 to open it and then click the turntable until box 1 shows the number 1. Then click box 2 to open it and then click the turntable until you have number 9 in box 2 .... then continue with boxes 3, 4 and 5. In box 3 the 4 should be, in box 4 the 5 should be and the 8 should be in box 5. You automatically leave the close-up and see that the safe opens but In the bedroom the old man wakes up to the noise and calls for help ... Brian panics ...... People will come through the hall and the library, so quickly go to the library and left click on the large standing candlestick again ..... The candlestick is then your cursor ..... Click with the candlestick cursor the Exit at the bottom right to return to the office and ......

....... Tim runs back to the study and closes the library door and blocks the door with the candlestick. Tim immediately wants to plead but Brian screams that he first has to take the documents from the safe, so look in the safe and then take the documents that are on the middle shelf in the safe ......... Tim takes the top pack of documents and .......

You go out of the close-up for a moment because Brian enters the study ..... Brian wants to weigh immediately but Tim says there is more stuff in the safe ..... Brian screams that you have to take the things from the safe so look in the safe again and take the rest of the documents out. Dive into the fireplace to go back into the secret hallway cellar and then run out of the cellar via the steps by the wine press and ....

..... Timmy is grabbed by the Police and they have already caught Brian ..... we continue with Briscol in:
Chapter 3: November 14, 1894:
Detective Sergeant Briscol:
Police station:
Bristol is in his office and has read an article in the newspaper about the murder of the cemetery and the opened tomb. Briscol wants to call his boss Powel about this, but is just too late because he is already called by Powel and he is not amused about the newspaper article and the photos. After the conversation, Briscol notes down a few things in his notebook. Briscol still has many questions.
View the notebook in inventory again and click on all the new sketches to hear Briscol's wanderings, such as ...
Why and by whom was gravedigger Talbot murdered? .... the coroner's report is waiting. Where is Sir William's corpse because the coffin in the Lewis Tomb is empty ?. Is it all Lady Miriam's plan to protect her grandson William? Who is the smoker who smoked the cigarette at the monument? Why didn't Father Mulkehey want anyone to enter the Lewis tomb?
When you've heard all of Briscol's musings, put the notebook away again. Briscol has put all the evidence he has collected so far in the safe and also stored his service pistol in it. Left click the safe and Briscol takes out the evidence but he leaves his gun in the safe. In inventory you have all the items that Briscol has collected before and he now wants to investigate some items more closely. On the right wall, just past the telephone, is a small table with a microscope on it. Take the piece of cloth, that you have tucked between the teeth of the dead dog, from inventory and click it on the microscope and .....

.... Briscol looks at the piece of fabric through the microscope and then says that the fabric is of high quality. Briscol automatically puts the piece of fabric back in his jacket pocket. Combine in inventory the glass shards, from the photo plate of journalist Forrest, with the newspaper that contains the half photo of Forrest and ..... the photo in the newspaper is then complete ... Right click in inventory on the Reconstructed Photograph and ...... Briscol then says that there is something strange about the angle in which the photo was taken and that he wants to look at the position of the camera again. Leave the office and ........ Briscol goes to talk to the duty agent and he orders the duty agent to arrange for journalist Forrest to be arrested. Then talk to the duty agent again and then use all the options you get ...

...... the report of the inquest of Talbot's body has not arrived yet ..... the officer advises Briscol to call the morgue himself to inquire about the autopsy report. Briscol's warrant card is also not available yet. Briscol orders the officer to ensure that journalist Forrest's camera, which was seized yesterday, is put back in exactly the same place in the cemetery because he wants to investigate the position of the camera in relation to the corpse. . Briscol also wants to open the chest of his predecessor, Lockley, but the duty agent cannot help.
When you have discussed everything with the duty agent, go back to the office and use the phone to call the morgue ...
we experience that the pathologist has examined the body of Talbot and he wants to tell Briscol his findings, but Briscol prefers to have it on paper. The pathologist promises to send his report to the police station as soon as possible. The pathologist did not perform an autopsy on Sir William's body. The Lewis family doctor examined Sir William's body and signed the death certificate. Briscol also inquires with the pathologist about the interest of predecessor Lockley in the Lewis family ..... the pathologist suspects that Lockley kept notes about the Lewis family in his office
When the conversation with the pathologist is over, look again at Lockley's box, which is under the right window ..... Yep .... the box is well locked and as you know, if you go over the box, Lockley has the keys. Go back to the duty agent and speak to him again and now ask him about Lockley's notes via "Ask about Inspector Lockley's notes" ... the agent refers Briscol to the archive and he then lays the keys to the archive at the counter. Take the key from the desk. ... Briscol puts the key on the ring that also contains the key to his office. The archive is behind the gate, so use the keys on the gate and then enter.

Archive

The archive is in the basement of the police station. There are 2 shelves on the left wall and boxes on the right wall. Nothing of interest can be found in the right shelf cupboard. At the bottom of the left cupboard is a large metal box, but Briscol cannot pull that box out of the cupboard because there is a broom in front of it and that broom is there to prop up the unstable cupboard shelf. Briscol cannot remove the broom because then the board falls down. Right click and left click the cardboard boxes on the right wall ..... Briscol finds a sachet of gypsum powder and puts it in his pocket. Exit the archive and exit the police station and find the map and travel to:
Graveyard:
Agent Carter is still, or again, on guard at the main gate and a conversation follows. Carter has had to stop some people who wanted to go to Sir William's tomb. There are now 4 officers guarding the cemetery. Walk through the main gate and then enter the church. This is the 1st time that Briscol enters the church. Father Mulkehey is standing in the hall at the baptismal fund and there is a small conversation, after which you click with the talk cursor to continue to talk with the pastor via conversation options that you then get.
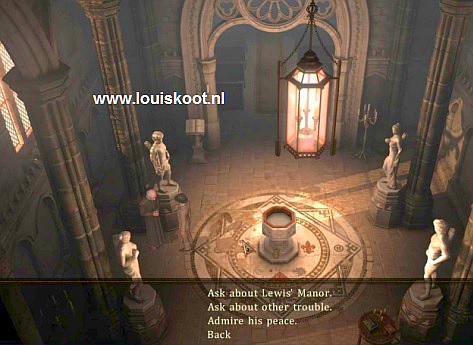
Briscol asks if Mulkehey would like to make an appointment for him with Lady Miriam, as he would like to talk to the Lady. But Mulkehey is not on speaking terms with the old Lady so he cannot help Briscol to speak to her. Take a look around the hall, so right click and left click on all "hotspots" and then leave the church, through the bottom center. Go back to the Lewis Tomb, via the left side of the church
Lewis Tomb:
Go back in and look around again. The lid of the coffin is next to the coffin. Left click the coffin lid ....... Briscol turns the lid over so you can examine the inside of the lid, so do that ..... Briscol sees scratches that he wants to take a closer look at. So use the magnifying glass on the lid and ...... Briscol discovers pieces of fingernail in the scratches and he picks the fingernail pieces out of the scratches with his tweezers ......

According to Briscol, this is proof that Sir William was still alive when he entered the coffin. The only question is whether Sir William came out of the box independently or whether he had help. Briscol makes another sketch in his notebook, so open the notebook and click on all the new sketches to hear Briscol's conclusions. The sketch of Lady Miriam has now also circled Briscol ...... Sir Wiliam is therefore buried alive, but was this Lady Miriam's plan?
Exit the tomb and return to the front of the church and then disappear through the right gate to where the dead body of gravedigger Talbot lay yesterday. The duty agent has arranged for journalist Forrest's camera to be put back here. Of course Talbot's corpse is no longer here, because he is sleeping his Eternal sleep on the cutting table of the anatomic pathologist. Take the newspaper photo from inventory and click it on the camera and .......

.... Briscol examines everything and concludes that Forrest photographed the body before the police arrived. And Forrest did that from where Briscol is now ..... Forrest then put the camera in front of the stairs to mislead the police. Briscol wonders if Forrest killed the gravedigger in a cynical attempt to increase sales of his pussy newspaper. Briscol notes his findings in the notebook again, so check out the new sketch "A journalistic fraud". Left click the grass where Talbot's body lay and ...

... Briscol discovers a shoe print in the grass and you can see the print in close-up. Right click the print ... the gravedigger wore rubber boots so the print is not from the gravedigger. Briscol wants to make a plaster cast of the shoe print before it rains, but he currently only has a bag of dry gypsum powder with him. Get out of the close-up ... the plaster cast will have to wait ... but first try to talk to Lady Miriam. Leave the cemetery and look up the map and then travel to the:
Lewis Manson:
Briscol ends up in front of the hermetically sealed entrance gate of the Lewis Estate. Behind the right lion is the electric doorbell on the gate, so ram on the doorbell ... the hatch in the gate is opened by a maid who won't let Briscol in because she can't show his Warrant Card to prove that he of the police. Return to the map and go back to:
Police station:
Go inside and to the counter and grab the duty agent in the ass and put pressure on him to finally come up with your Warrant Card via "Claim the warrand card" and ...... after some struggle the agent goes away anyway and when he comes back it turns out that, of course entirely coincidentally, Briscol's warrant card has just been delivered and he puts the shitty card on the counter. So grab the Warrand Card and return to the:
Lewis Manson:
Do not ring the bell again, but immediately click with the warrant card on the open hatch in the gate and ...

... Briscol shows the maid his card and she will open the gate, so go in and ........ Briscol meets the maid in the garden and she takes it into the house. Maid says that Milady does not want to see anyone in person, but that she wants to talk to Briscol on the phone, but our energetic detective is not satisfied with that. The maid then disappears to report Milady Briscol's displeasure. Bristol can wait in the hall.

The telephone hangs on the right side of the stairs and there is also a sofa. A heavy black cloth hangs above the sofa. That cloth covers a mirror or a painting, which is the custom in a house where a member of the family has died. Left click on that cover and ...... Briscol opens the cloth a little and we see that it covers a painting ...... We see a hand ..... Right click on the painting and .. ....... you hit in the close-up of the hand ...... the hand wears a heavy ring on the ring finger ...... click the ring, right click and left click ..... The ring has a red gem so take your own red diamond from inventory and click it on the ring and .....
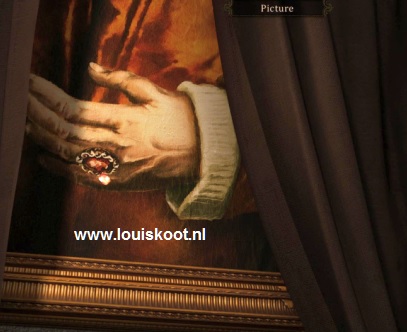
..... the diamond from the Lewis Tomb is the same as the one in the ring ......
You automatically go out of the close-up because the maidservant returns with the announcement that Milady does not consider receiving a simple flat foot like Briscol in her boudoir, then the police must at least send the police commissioner. But, in order not to come across as an aristocratic snob, Milady wants to talk to Briscol on the phone ..... The phone will ring, so click the phone to chat with Milady Miriam .....
Lady Miriam has already spoken to Briscol's chief and is thus aware of the breach of the Lewis tomb. Lady Miriam further states that the chest remained closed throughout the ceremony due to Sir William's deformities. The Lady also tells that she has infinity with Mulkehey because he did not want to bury Sir William but to cremate it.
The maid has walked to the left and is dusting a bust and she has been doing that throughout the entire telephone conversation and she will continue to do that until Eternity if you don't get rid of her misery, so go talk to the girl and use all options.
The girl says that she has only been employed by Lady Miriam this morning so she does not know anything about the family doctor and she does not know anything about the death certificate, which was issued by the doctor. But the girl then leaves to ask her mistress and that takes a while ....... Meanwhile Bristol wonders whether there is a Lady Miriam in the house. The maid then returns and tells Briscol again that Milady does not wish to receive him.
Now give the diamond to the girl ..... Briscol asks the girl to show the diamond to Lady Miriam and the girl walks away again to do so. While the girl is now gone, look at the cupboard, which shows the bust that the girl was dusting ...... Briscol opens the drawer in the cupboard and steals the leather gloves and Sir William's Diary from the drawer and .......

.... the girl comes back and catches Briscol but he talks himself out of this situation The maid says the diamond is indeed the diamond from Sir William's ring that he wore when he entered the chest. The maid also says that her Lady has become very upset and then returns the diamond to Briscol. Briscol now has so much stuff in his pockets that you have to use the inventory scroll arrows to see everything. Leave the house to the garden. Reach the main gate by clicking the bottom left, near the fountain. But don't do that ... go through the left gate into the courtyard and the barn.

Sir William's Dog:
The well is located in the middle of the courtyard. At the top right, Briscol sees Sir William's dog, safely locked behind the fence. The dog is in the courtyard of the barn (Shed). Against the shed is a shelter under which the logs for the fireplace are stacked and there is also a chopping block with an ax in it and a wooden stake (Wooden Peg) in front of the chopping block. To the left is the back door of the main house. View everything. The shed is locked and the well is full of water. Pick up the wooden stake.

Go back to the front of the house through the gate and then back in through the front door. In the hall, talk to the girl again and ask if you can borrow the dog via "Borrow Sir William's dog" ......... after some talking back and forth, because the girl wants it to her mistress ask, Briscol gets permission to borrow the dog. So say goodbye and return to the barn yard and now click on the dog with the talk cursor and ... automatically Briscol takes the dog and automatically ends up, with the dog, at the.....
Graveyard:
The dog sniffs around in front of the Lewis Tomb. Take the leather gloves from inventory and click on the dog and .....

.... the dog imprints the scent in his head and picks up a trail and runs away ...... follow the dog to the side of the church and then further to the front of the church and ..... .. At the dead tree, in front of the church, the dog discovers something ..... the dog sniffs a little and then walks on to the main gate and disappears from the screen. In front of the lawn where the dead tree is located, the dog has discovered shoe prints ......

... left click the shoe print and then right click in the close-up the shoe print ..... it is the same print that Briscol discovered in the grass where Talbot's body lay ..... Bristol also wants to make a plaster print of this print but he still only has dry plaster. The dog has walked to the main gate, so follow the dog further and ...... the dog continues to the monument and starts sniffing at the gate and then barks ....... The track ends here at the canal ..... Briscol hopes that they have not thrown Sir William into the canal and he makes notes in his notebook .......
Open the notebook ...... The coffin is now circled in red ....Click the coffin sketch again to hear Briscol's new thoughts about it ........ So Briscol thinks Sir William has disappeared through the sewer. The dog has a passage to the sewer channel ..... there is a ladder to descend to the channel, which is essentially the open sewer of the city. The chain that must close the passage is loose. Look at that chain with your magnifying glass and

Briscol sees a second piece of fabric hanging on the chain and he stores it in inventory (Second Cloth Sample). Right-click and left-click the ladder (Sewage Line) ...... Briscol concludes that Sir William's corpse has been squeezed into the canal here, but he does not think about going down to the sewer because he has subordinates for that, like Carter ...... Talk to Officer Carter and ...... Briscol orders Carter to search the channel with some agents for Sir William's body. Walk to the right to get to the map and then return to the:
Police station:
Go inside and dive back into the Archive. The broom thus supports a shaky shelf in the left cupboard, and the broom prevents Briscol from pulling the metal box out of the cupboard. Unpack the wooden Peg and use it on the unstable cabinet shelf and ...... Briscol then clamps the stake under the leg of the cabinet to make the cabinet more stable. Now left click the broom to push the broom away and then left click the box (Suitcase) to remove the box / suitcase from the cupboard. Take the keys from inventory and click on the suitcase to open the padlock and open the suitcase.

Left click the opened suitcase to look inside and keep doing so until Briscol has read all of Lockley's notes about Mad William ....... Briscol also reads in a newspaper article the phone number of Dr. Steward, the Lewis family physician. and he makes a note of that in his notebook, which you have to click on so that Briscol can call that number in a minute. Leave the archive and ... The duty agent calls Briscol because the coveted autopsy report has finally arrived, so pick up the autopsy report at the counter.

Right click the report in inventory to read it ........ Briscol reads that gravedigger Talbot has bled to death from the wound on his neck, which was probably caused by a claw. However, Briscol doesn't believe an animal did it. Go to your office and use the phone to call that Dr. Steward. Briscol gets Steward's wife on the link who tells that her husband has been missing since Sir William's funeral and that she has reported the missing person to the police. Briscol tries to reassure the lady but he is not very successful.
When Briscol has finished telephone calls, take the Second Cloth Sample that you picked from the chain at the entrance of the cemetery and use the piece of cloth on the microscope ...... also this piece of cloth is of high quality. Then, in inventory, combine the two pieces of cloth with each other and ... well ... the two pieces of fabric are identical to each other but Briscol wants more evidence so put the combined pieces of fabric under the microscope and......Indeed ... identical, so when these pieces of cloth come off Sir William's clothing he was bitten by the dead dog and then fled into the sewer. Briscol wants to talk to Sir William's tailor.
To find out the address of Sir William's tailor, right click in inventory Sir William's diary ....... Wilson Street is where the tailor has his workshop. Go back to the counter and ask the duty agent for the report of the day of Sir William's funeral via "Claim the record about the missing doctor" and ...... the duty agent confirms that Mrs. Steward has indeed reported her husband missing on the day of the funeral. The doctor went to the funeral but did not return home. Briscol then wonders whether the doctor issued a false death certificate and whether he also retrieved Sir William from the coffin. Leave the station and return to the map, where the tailor's workshop has now been added as a new location. So travel to Wilson Street now:
Sir William's tailor:

De kleermaker staat links van zijn winkel bij een fonteintje. Klik op de deur van de winkel......de winkel is gesloten. Op de stoep staat een metalen vuilnisvat. Rechtsklik en linksklik het metalen vuilnisvat.........Briscol ziet dat iemand de krant van vandaag, waar het artikel over de verdwijning van Sir William's lijk in staat, heeft weggegooid. Briscol vermoed dat de eigenaar van de krant bang is geworden en dat het de man is die bij het fonteintje staat. Ga praten met de kleermaker, die bij het fonteintje staat en vraag de man waar ie zo bang voor is en vraag hem dan over het krantenartikel via "Remind him about the newspaper article"....
...De kleermaker heeft inderdaad die krant weggegooid. Toen de kleermaker vanmorgen bij zijn winkel kwam bleek de deur open te zijn, maar er was niets gestolen. De kleermaker vertelt dat ie een reservesleutel bij de fontein bewaart maar die sleutel is niet gebruikt. De kleermaker is bang geworden toen hij over de verdwijning van Sir William las in de krant.
Als het gesprek ten einde is gekomen klik je "Back". Pak dan de 2 stukjes stof uit inventory en klik ermee op de kleermaker en....
The tailor is standing at a fountain to the left of his shop. Click on the door of the shop ... the shop is closed. There is a metal garbage can on the sidewalk. Right click and left click the metal trash can .....Briscol sees that someone has thrown out today's newspaper, which contains the article about the disappearance of Sir William's corpse. Briscol suspects that the owner of the newspaper has become scared and that it is the man standing by the fountain. Go talk to the tailor standing by the fountain and ask the man what he is so afraid of and then ask him about the newspaper article via "Remind him about the newspaper article" ....
... The tailor did indeed throw that newspaper away. When the tailor came to his shop this morning, the door turned out to be open, but nothing had been stolen. The tailor says he keeps a spare key at the fountain, but that key has not been used. The tailor got scared when he read about Sir William's disappearance in the newspaper.
When the conversation has ended, click "Back". Then take the 2 pieces of fabric from inventory and click with them on the tailor and ....

..... The tailor says that the fabric is Indian silk and that it is used for silk men's scarves. Sir William wore 3 silk scarves. There is a slight color difference in the two pieces of fabric, so they are from 2 different scarves, and it is quite possible to cover half the face with such a scarf. ....Well ..... this is all there is you get out of the tailor. It is time to give the other suspects a closer look. Double click the exit arrow, bottom right, and then travel back to the graveyard via the map:
Graveyard:
Father Mulkehey:
Lady Miriam has informed Briscol that she got into a fight with Father Mulkehey because he wanted Sir William to be cremated instead of buried in the family tomb. So go into the church and talk to the pastor again at the baptism and accuse him of stealing Sir William's corpse via "Charge for the deliberate theft of the body" ...... Briscol shows the priest that he is Suspect is considered and that he is not allowed to leave town. Also ask the priest about Dr. Lewis, via "Ask about the missing doctor" ....... Briscol asks if Mulkehey saw at the funeral and spoke to anyone, but Mulkehey claims he knows nothing. Also tell the priest that the canal is being searched for Sir William's corpse, via "Anounce the search of the canal" ......... Mulkehey needs fresh air and is walking outside ....
Briscol concludes that while the priest is not telling the truth, he is probably not the murderer. Follow Mulkehey outside and then show him the clipped fingernails (Human Nails) ....... Briscol extensively explain to Mulkehey his theory that Sir William was put alive in the coffin ..... Mulkehey gets upset and says that this is not possible because Dr. After all, Steward signed the death certificate. Then Carter walks up and he screams that they have fished a body out of the canal,it's the body of that Dr. Steward.

The body is under the bridge, on the other side of the cemetery.
Mulkehey hears this too and tells Briscol something urgent, but he asks the priest to wait here because he wants to see the body first.
Briscol removes the priest from his suspect list.
Dr. Steward:
Exit the cemetery through the main gate and then double click the Exit arrow behind the monument (Go around the Cemetery) to end up at the bridge over the canal, where Agent Robbins is guarding Steward's body. Robbins notifies Briscol of his findings. Briscol concludes that his theory of a Lewis family plot involving Sir William's funeral is totally wrong now that Steward has been murdered. Briscol has to start all over again. Examine the body ........ Steward has a deep wound on his neck but not a drop of blood is visible. Now that we are here at the canal Briscol can make plaster with the gypsum powder. Take the wooden box from inventory and fill it with water from the canal.

In inventory, throw the gypsum powder (Plaster) in the box and we have wet plaster.
Go, via the bridge, back to the main gate and then on to the church and go talk to Father Mulkehey again at the church ...
Mulkehey now tells that on the night after the funeral he heard an argument and screams in the cemetery. Mulkehey got scared so he hid. Mulkehey now also tells that he saw a discussion between Steward and Lady Miriam during the funeral ceremony in the tomb. Mulkehey wanted to look in the box, but the Lady forbade him. Bristol thinks this was why Steward did not go home after the funeral but stayed in the cemetery and saw what happened.
Now go to the place where Talbot's body was and zoom in again on the shoe print in the grass.
There are some leaves in the print, so wipe the leaves with your brush.
Then pour some plaster into the impression and ..... wait a few seconds and then take the plaster impression ......

... this is the 1st shoe imprint (Cast of the First Shoe Imprint). Go to the tree in front of the church and zoom in on the shoe print there as well. Wipe the leaves away from the print with your brush and then pour plaster into the print. Then wait a few seconds again and then take the imprint .... this is the 2nd shoe imprint (Cast of the Second Shoe Imprint). Combine both prints in inventory ...... the 2 prints are of 2 different shoes. Click with print 2 on Mulkehey .....

Briscol says the print for the church was not made by Mulkehey's shoe. Exit the graveyard and return to the Steward body. Use the 2nd print on the corpse, but the print for the church is not from Steward's shoes either. Go back to the main gate and then via the bottom right to the map and now travel back to the:
Lewis House:
Go in through the gate and then through the front door into the house and go down the hall to chat with the maidservant and tell her that Dr. Lewis was sent to the Eternal Hunting Fields via "Announce the death of the doctor". The girl will immediately tell her mistress and when she comes back after a few seconds the phone will ring because Milady is quite shocked by the message and wants to talk to Briscol. So pick up the phone and .......
Briscol now hears from Lady Miriam what the fight between her and Steward was about ..... Steward wanted to peek into the coffin because he suddenly started to doubt whether Sir William was really dead. The Lady refused because she thought it was nonsense. Briscol now tells the Lady that her grandson was really not dead but was still alive, he was put in the coffin and all the tomb. The Lady almost has a heart attack and Briscol sends the maid to her room. Briscol immediately removes the Lady from his list of suspects and offers the Lady police protection, because after all, the gravedigger Talbot and Dr. Steward have been murdered, 2 persons directly related to the so-called death of Sir William. However, Lady Miriam refuses to take police protection.
When the telephone conversation between Briscol and the Lady is over, leave the house and look up the map again through the main gate. Travel back to:
The police station:
Go inside and ..... the duty officer calls Briscol and tells that they have the printer of the newspaper of journalist Forrest in jail. The printer helped Forrest escape when the police came to grab Forrest by the collar. The duty agent explains to Briscol where the cell is. So double click, at the top left behind the counter and .........

.... Briscol ends up in the:
Cell:
There are 2 people locked up in the cell. The printer of the newspaper is staring out the window and the other detainee is Timothy.
Question the printer and use whatever options you get.

However, the printer pretends to know nothing. But when Briscol asks about the angle in which Forrest took the photo of Talbot's corpse and then accuses Forrest of the murders, the printer gets nervous after all. Bristol advises the printer to count his buttons again.
It makes no sense now to let Briscol talk to Tim ..... Briscol doesn't know yet that he needs Tim and Brian to solve his case ... that realization will come later. So leave the cell and the police station and .... outside the gate, Briscol contemplates that he must go back to talk to the printer again ..... maybe the printer has changed his mind ..... So go back to inside and ........ the duty agent says that the printer wants to speak to Briscol because apparently he wants to make a confession now ...... So go back to the cell and speak to the printer again and then use the "Listen to the confession" and ......

The printer now admits that Forrest was at Talbot's body before Briscol and shot a picture of the body. That morning Forrest had received a tip note from one of his informants. Just before the police came to arrest Forrest, Forrest received another tip note and the printer could read the address on the note ... it was the address of the tailor shop on Wilson Street.
Exit the cell and the police station and find the map and then return to the:
Tailor on Wilson Street:
The tailor is no longer outside and the shop door is locked. But the tailor has said that he has hidden a spare key under the fountain, so left click the fountain and .....

Briscol finds the key. So use the key on the shop door and then step inside and Briscol discovers the tailor's body and Briscol is knocked unconscious .....the next day Briscol is back in his office where he looks at a photo in the newspaper in desperation ........... the picture shows Briscol kneeling by the body of the tailor ....... We then end up in:

Hoofdstuk 4: 15 November 1894:
Timothy Moor and Detective Briscol.
Timothy Moor
Cell:
Timothy is in the cell contemplating his situation .... Click "Continue" or click on Timothy to continue. Tim would like to know what's going on. Tim got up from the bunk ... printer man stays on the bunk. There is only 1 bed in the cell and a hole in the floor serves as a toilet. View the blanket / mattress (Pallet) on which the printer is sitting. Look at the window and look at the hole in the floor that serves as a toilet.
Then go and talk to the printer man...... However the printer man does not want to talk to Tim. Knock on the cell door ..... a policeman looks through the door hatch and Tim says he is hungry ..... Tim does not get food from the policeman, but he gives Tim an old newspaper, so that he can at least read something and remain calm. Look at the newspaper in inventory and ..... Tim reads about the murder of the gravedigger, in the cemetery where he and Brian have been. When the newspaper has been read, click again with the talking cursor on printer man ...... Tim thinks that printer man has been pressured by Briscol to make his confession . Then click on printer man with the newspaper and ...........
Printer now tells Tim about the "White Beast" and Sir William. Tim then realizes he was in the cemetery that night and wonders if he can negotiate with the police a more lenient punishment for the burglary at Brian's father's house, on the pretext that he knows something about the night in which gravedigger Talbot has been murdered. Tim wants to know who the detective is who questioned Drukkertje, so ask Drukkertje, but he doesn't know the name either.
Click with the newspaper on the cell door ....... the bobby opens the door hatch again and Tim tells the that he wants to talk to the detective about the events in the cemetery ... the bobby then calls Briscol's name and Tim then demands to speak to Briscol. The bobby is going to report it and comes back a moment later and tells Tim that Briscol is not present, but that he left a message for him.
Tim doesn't trust it that much, so click on printer man again and ........ Tim asks if printer manhe wants to pass on a message to Briscol, when he is released ..... and ..... it will be night and printer man has since been released. Tim is now alone in the cell and he is getting a bit restless. Knock on the cell door again ..... Tim demands to see Briscol but he has, after his debacle at the tailor, locked himself in his office and he does not want to speak to anyone. Click on the bunk to go to sleep and ......... the next morning Tim is taken out of the cell and taken to Briscol's office:
Detective Briscol:
Briscol is on the phone with his boss and when that is done Timbo is brought in. Tim offers Briscol a deal ..... a reduced sentence for his story ..... Briscol promises to do his best and Timmy then tells what happened the night of Talbot's murder in the cemetery ..... Tim tells about "Goodbye Jack" and about Brian. Briscol looks at Tim's soles of shoes and sees that Tim's soles match the prints found in the cemetery and only then does he believe that Tim was in the cemetery.
Tim is taken back to the cell and ...... a while later Tim gets a visit from Briscol in the cell ...... The police have arrested "Goodbye Jack" but he does not want to talk. Briscol wants to send Jack, Tim and Brian together in a prison car to the prison ... on the way Tim has to learn more about Jack ... in exchange for his cooperation, Briscol will put a good word for Tim at the judge .............. The prison car then sets off from the police station to take "Goodbye Jack, Tim and Brian, to prison .........

Briscol then receives terrible news ....... the prisoners have escaped and the agents who accompany the transport, including the driver, have been murdered. Briscol's chief, Chief Inspector Powel, has announced that he will come to the station to speak with Briscol in person. Briscol fears this will be the end of his career with the flat-footed brigade. We continue with:
Timothy Moor:
Theatre:
Jack has overpowered and strangled the bobby's during the transport and the three of them escaped. Tim doesn't remember anything about what happened after that, because they got stupid drunk. Tim regrets the death of the bobby's and he has no idea where he is now ..... Click in the screen to continue and ......

We have ended up in a theatre and Tim and Brian are gagged on stage. Talk to Brian ........ Brian tells Tim to kick the big candlestick behind Tim towards him.
Open the inventory and take out Tim's feet and click with the feet on the large candlestick and ...

... Tim kicks the candlestick over and ...... the candlestick falls to the floor behind Tim and ......... Goodbye Jack comes on stage and he knows that Tim has betrayed him to the police . Jack is then joined by the man he and his gang work for, the Night Rider, who has his face covered with a scarf. The Night Rider orders Jack to give Brian and Tim an injection and then bury the 2 alive on Gallows Hill, because they can't dump the bodies in the canal because it's teeming with police. And that's how it happens ... ..

Gallows Hill:
Tim comes to his senses in a coffin .... Jack has fulfilled his assignment and he has put Tim and Brian, each separately, in a coffin and them buried alive.

Tim tries to overcome his panic in order to think logically. Your screen is completely black ....... move your cursor to the top center of the screen ..... you will then read "Something Soft" ..... move the cursor to the bottom of the screen to enter the inventory. to open. In inventory are the feet of Tim, the Hand of Tim and the Face of Tim. Take the Hand from inventory and move the hand upwards and .... a few centimeters below "Something Soft" the hand will flash ..... Click the hand on the spot, so where the hand flashes under "Something Soft" and........

Tim breaks his nails because he tore off a piece of the inner lining of the lid of the box and "Something Soft" has now changed into "Massive Wood".
Now take Tim's feet from inventory and move them up to "Massive Wood" and when the feet start flashing then click and do that 3 times in a row

........ so take the feet from inventory again after the 1st time and click again on "Massive Wood" and do this a 3rd time ....... Each time Tim says "It won't move, but I won't give up. Not Yet ". If you have kicked the inside of the lid 3 times with your feet, then you right click in inventory on Tim's head and ....... Tim lets out a loud cry and that is heard by Adieu Jack, who with a shovel next to the freshly dug grave ......

Then click again with Tim's feet on the "Massive Wood" spot and this time Tim manages to break the lid and ...... Adieu Jack is shocked to death because who thinks the dead have come back to life and runs away and Tim scrambles out of the box. Jack's shovel is at the freshly dug grave. Look at the grave ..... Tim thinks Brian is in the grave and Jack hasn't had time to close the grave yet. Take the shovel and click it on the freshly dug grave and ...

Tim starts digging and ......... Tim finds Brian in the grave but unfortunately ...... Brian is dead. Tim wants to find a priest to give Brian the last rites. An oil lamp is burning near the stone wall and in front of that oil lamp is Adieu Jack's Tas (Bag). Behind the oil lamp is a dead tree with a bird's nest. Left click the bag and ..... in the bag Tim finds a poster of the theater, but the poster is not complete. Tim puts the incomplete poster in his pocket anyway (Remains of a Theater Leaflet). Left click the bird's nest ...... Tim takes a Stinking Egg from the nest.

Right click in inventory the theater poster ...... Tim cannot read the address of the theater but maybe he can ask someone.
Double click the Exit arrow in the gate to end up on the map and then travel to the graveyard.
Church:
Enter through the main gate and then into the church. Talk to Priest Mulkehey, who is at the bottom right of the small round offering table
Mulkehey is his grumpy self and does not want to go to Gallows Hill with Tim to give Brian his Christian funeral. Gallows Hill is not sacred ground ... there are only murderers and suicides buried there and Mulkehey wants nothing to do with that because of his faith. Mulkehey doesn't even want to give Tim a cross to put on Brian's grave. If Tim wants help, he should come back in the morning.
The conversation is then over.
Tim is angry ... ... take the rotten egg from inventory and throw the egg in the baptismal found, which is in the middle of the hall ......

it is going to smell like rotting eggs in the church hall. Then speak to Mulkehey again andTim complains about the stench of the "Holy Water" and Mulkehey then walks away to get clean holy water. When Mulkehey is gone, right click on the small round table and then steal the rosary

Verlaat de kerk en het kerkhof en ga, via de plattegrond, terug naar:
Leave the church and the graveyard and go back, via the map, to:
Gallows Hill:
Place the rosary in Brian's grave.

Tim then closes the grave and when he is finished right click and left click on the grave. Tim asks for forgiveness and vows to make Adieu Jack pay for his deed. If you have not yet taken the Theater Pamphlet out of Jack's bag, do this now. Tim has to ask someone in the state for the address of the theater and he only knows one person in town ..... Emily. View the map and travel back to the:
Laundry:
Tim ends up in the laundry yard. Walk to the door and knock ..... Tim says who he is and Emily lets him in and in the laundry cellar there is a conversation. Emily has heard that Tim has been helping the Salted Cheek pub waitress and she is grateful to him for it. Show the Theater pamphlet to Emily and .......

Tim tells Emily that his friend Brian is dead and Emily then tells Tim where to find the theater.
Exit the laundry, through the bottom right and then through the gate in the courtyard and travel to the Theater:
Night Rider
Theater and Sewers:

In the theater, Tim just sees that the Night Rider has killed Adieu Jack on stage. The Night Rider runs away and Tim runs after him and finds, on the right behind the stage, the guy who was harassing the waitress in the pub and then knocked him down. The man was attacked from behind and also dead.

Follow the Night Rider through the door on the left and ...... Tim ends up in the sewer. The Night Rider apparently had a boat ready here and has therefore disappeared. Tim has no boat available so he has to continue on foot. Double click on the left edge of the screen to continue to the next screen and ..........

.... your screen will go black for a moment while you hear Tim and then Tim has ended up at a crossroads of the underground sewer .......

Tim has lost track and wants to return to the theater.
So go back to the right and then to the right again and Tim is back with the dead guy behind the stage of the theater.
Right click and Left click now the corpse ...... Tim doesn't find anything useful on the corpse. Go down one screen to the stage.
Tim then sees that Adieu Jack has something in his dead right hand ... it is a scarf ...

Left click the scarf and ..... Tim takes the scarf and then ...... Briscol enters ............
Briscol accuses Tim of killing the bobby's and Jack. Tim explains how it really all happened from the moment they escaped from the police car. Briscol has been fired from the police force but he still wants to know what is going on and he wants to continue talking to Tim in church. You will automatically get the map in front of you, so travel to the Cemetery:
Church:
You are still Timothy Moor.
Enter the church and ... Bristol is already in the church and another conversation follows. Briscol wants to make a deal with Tim ... Briscol will get Tim's ticket to America in exchange for his help. Tim agrees and the conversation is then over. Immediately speak to Briscol again and then continue talking through all the conversation options you get .....
Briscol tells Tim that someone is murdering all the witnesses, Talbot the gravedigger, Dr. Steward, Adieu Jack, the tailor, and the guy from the pub and Brian have already been killed. This, according to Briscol, has all to do with Sir William who, again according to Briscol, was accidentally buried alive and is most definitely not a vampire. Tim tries to point out that the old man he and Brian robbed was still alive when they were arrested, but Briscol thinks this matters.
If you use the option "Show the theater leaflet" then Tim shows Briscol the theater poster and ......

Briscol then recognizes the paper on which the poster is printed ...... it is the same paper as the cigarette butt he found at the entrance of the cemetery. Briscol now understands that Jack was waiting for someone at the monument and Tim thinks it must have been the Night Rider.
Toon vervolgens de sjaal aan Briscol via "Show the scarf" optie......
Then show the scarf to Briscol via "Show the scarf" option ......

Briscol confiscates the scarf because this changes otherwise and he orders Tim to go to the tailor's shop to steal the order book there.
Say goodbye to Briscol, leave the church and cemetery and find the map and travel to the:
Wilson Street and Church:
The tailor's shop door is unlocked, so go in and we immediately switch back to Briscol in the church. Briscol is talking to Mulkehey about Tim .......... Briscol still believes Tim is a murderer, but he has no choice but to work with him. Then Tim comes back and has the tailor's order book and gives the book to Briscol. We then get another screen in which we see Tim and Briscol looking at a map. Click "Continue" or click in the screen to continue.
Briscol then talks to Tim about one Lord Gismond, an eccentric person who travels a lot and wears a mask. This Gismond has bought a number of plots of land from Sir William. Gismond's house is right above the spot where Tim lost the Night Rider's trail in the sewers. Briscol wants Tim to go back to the sewer and he will arrange a boat.
Click bottom center to leave the church .... but .... Tim says he doesn't want to go into the sewer through the theater because it might be swarming with agents. Tim wants to ask the priest if there is another entrance to the sewer here in the church. At the top of the screen, click in the big gate to call Father Mulkehey ....... but Tim doesn't know the priest's name and doesn't want to just shout anything. Walk back to the round offering table and left click on the table again and ........ Tim then reads the name of the priest. Left click again in the big gate and now Tim calls Mulkehey but he does not respond because he does not want to talk to Tim.
Click again at the bottom of the screen to leave the church. Tim then pretends to leave the church by hitting the church door and Mulkehey thinks Tim is gone and comes running, sees Tim and wants to disappear again. But Tim addresses the priest and he stops after all.
Click with the talking cursor on the priest and ask him and Tim asks if there is an entrance to the sewer in the church. and............

Mulkehey then shows Tim the entrance and that is in the toilet in the basement of the church ..... your screen goes black again and then Tim is back in the sewer, at the crossroads of canals and here he meets Briscol who has a boat has arranged. Briscol tells Tim to follow channel A and then look for where the Night Rider has docked his boat. Then Tim has to look around and come back here to report.
Briscol tied the rowboat to the railing with a rope. Left click the rope to release it ....

Tim stores the rope in inventory. Get in the rowboat and ..... Tim automatically sails into Canal A and ...
your screen goes black again while Tim is rowing through channel A and then Tim is at the end, wherever the Night Rider ended up.
the Cellars of Lord Gismond:
A stone staircase. There is a poster on the wall and Tim can hide behind the poster, but that is not necessary yet. Left and right a semicircular iron gate ....

Left click the left gate and Tim breaks a Iron Spearhead off the gate and puts it in his pocket. Walk up the stairs and ....... At the top of the stairs Tim peeks through a crack in the iron door into a cellar. The heavy door is locked on the inside with a heavy beam. Use the Iron Spearhead on the door Latch and .....

Tim manages to swing away the beam and open the door and then he walks into the basement ....... We hear piano music ..., .... Through the passage we see the next stone staircase. To the right of the passage is a bricked-up door (Walled up Door). A chain hangs on the left column of the passage and a pulley with hook and rope hangs above the chain. To the left of the wall hangs a wagon wheel ...

First view everything via right click and ...... Left click on the chain .... Tim wants to grab the chain but the chain falls to the ground and the noise is heard by Lord Gismond who steers the Night Rider to the basement to see who caused that noise ....... Quickly double click on the doors to descend back to the dock and left click on the poster and .... ..

Tim makes himself very thin and presses himself hard against the poster and ..... the Night Rider comes to take a look but sees no one and returns to his boss Lord Gismond and we hear that Lord Gismond gives the order to see if their "friend" is still there .....
Go back to the basement via the stairs ..... back in the basement Tim says there must be another room here. Left click the wagon wheel ...... the wagon wheel turns but nothing else happens. Left click on Rope with Hook. Tim grabs the hook and the hook is your cursor ...... Attach the Hook to the wagon wheel and .......

Tim then turns the wagon wheel again and a secret hatch in the floor opens in front of the bricked-up door ...

Go down the new stairs and Tim ends up in a deeper cellar where a man is hanging on chains.

Right click and then left click the chained man butthe man is dead and Tim steals his ring View the ring in inventory, the ring has no stone. Tim then hears both men talking. Try to open cooling cell butTim refuses to do that, afraid he is of freezing to death there. Go back up the stairs and ........ At the top of the stairs Tim hears that the Night Rider suspects someone has entered and he now wants to search the cellars thoroughly ....... Tim quickly runs back down. .... Where can Tim hide ........ Try to walk into the cooling cell again and ...... this time Tim has no choice and so he walks into the cooling cell and ..... ... the door closes behind Tim and locks ....... Tim is now locked up in the very cold cold room
Cooling Cell:
Tim over hears the Night Rider and that Lord in the basement ..... we hear that the Night Rider is killing anyone who could point to the Lord, but he leaves Briscol and journalist Forrest alone. The journalist will be suspected by the police of the murder of the gravedigger and Briscol has already been fired from the police. The dead guy in the basement will be buried by the Night Rider on Gallows Hill and then both gentlemen will pack their bags and leave Plymouth.

Tim has locked himself in the cold store and he will freeze here if he doesn't escape. Left click the heavy door ... you will see the door from the other side .....

Left click the door handle .... but Tim cannot reach it .... Click the exit arrow, bottom right, to return to the cold store. Perhaps Tim can switch off the dilapidated cooling installation ..... That cooling installation hangs in the alcove, to the right of the door ..... View the installation and then left click on the turning wheel of the installation ....... the turning wheel is frozen hard and it hurts Tim's hand when he touches it
There is a manhole cover in the floor ..... Left click the manhole cover ........ Tim tries to lift the cover, but this does not work either, because the cover is frozen stiff in the floor. To the left of the door is a container containing seeds in salt. Left click that container and .... Tim takes a handful of salt from the container. Put the salt in the drain ... the ice melts with the salt ..... Left click on the drain cover and now Tim manages to lift the cover and put it in his pocket. Immediately use the manhole cover on the turning wheel of the cooling installation to ram the ice off.

Then left click the turning wheel again and ...... now Tim turns the wheel and the installation stops blowing cold air. It immediately becomes a bit more pleasant in the room. A large piece of meat hangs on the right wall, above a fold-out chopping board with a huge knife. The meat is hanging on a hook ..... Look at the hook and look at the meat .....

The meat is frozen rock hard and the hook is deep in it. Try to get the hook but Tim is unable to get the hook out of the deep frozen meat. Left click the meat and .... Tim puts the meat, with the hook in it, on the chopping board .... Left click the huge chopping knife to chop the hook out of the lump of meat but ...... the knife remains stuck in the meat and Tim can't get it out anymore ...... Tim still has salt left, so sprinkle salt on the meat to make it softer ..... Left click the cleaver again and .... Tim chops continue through the meat and then put the knife up again ...... The hook is now loose from the meat so grab the hook

Left click the door again and ... You see the door from the other side again .....
Combine the hook with the rope in inventory and then use this combo on the door handle and ...

with the hook Tim manages to pull the handle up and open the door. Tim throws the hook away but keeps the rope
On to the End:
Escape:
So leave the cold room and run up the stairs and at the top, Tim is discovered and he flees to the dock and ........

act fast now because if you are too slow Tim will be shot by the Night Rider ...
Quickly take the Rope from inventory and tie it around the left semicircular fence ...

Tim ties the rope to both fences. When Tim has attached the rope to the fences left click the poster again and .........

Tim makes himself thin again and pushes himself against the poster. The Night Rider comes down the stairs and trips over the rope and Tim now takes out the Night Rider. Walk up the wooden jetty and click on the rope with which the rowing boat is attached and then step into the boat and ..........

...... Tim goes back to the church, where Briscol is waiting for him. Tim tells the whole story to Briscol but he does not believe it completely .........
Take the Ring from inventory and click it on Briscol and .....

......kijk naar het EINDE.........
Briscol is very satisfied because the matter has been resolved. So the dead chained guy in Lord Gismond's basement was Sir William and the Night Rider and that Lord Gismond is dead. For Briscol and the police the case has been resolved and Briscol is confident that he will regain his position with the police .......... The conversation will then continue in the courtyard of the laundry. Briscol has kept his word and bought the ticket for the crossing to America and Tim gets his ticket

Tim warns Briscol that this Lord Gismond is still alive and he has been lubricated, but Briscol does not want to know about this because the case is further covered up. Briscol advises Tim to board the ship right now to take the long sea voyage to America and start a new life there, never to return to England.

.........THE END......
2021: Walkthrough by: Louis Koot

