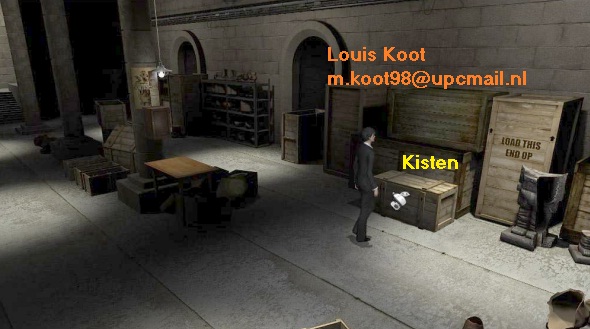
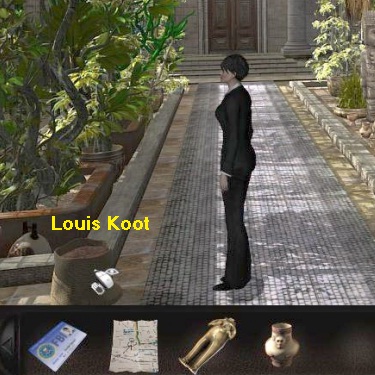
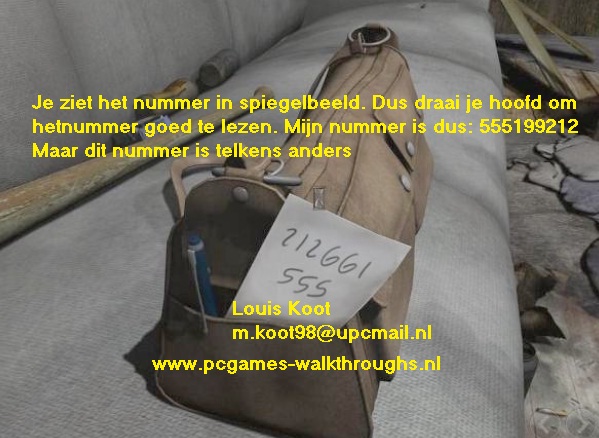
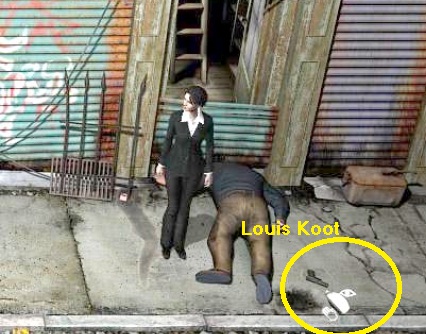
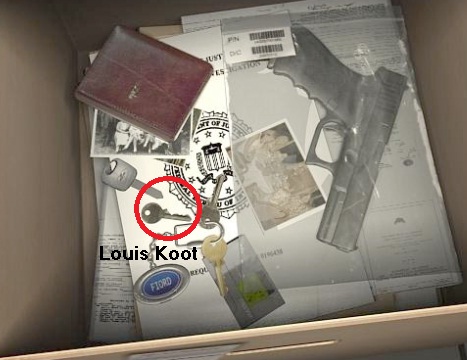
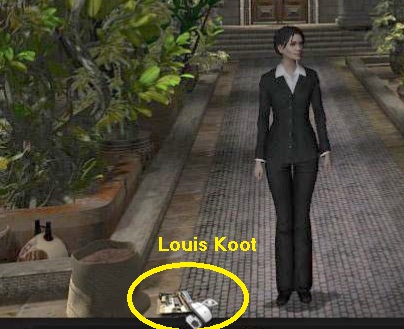
2020: Walkthrough by: Louis Koot
If you have found this walkthrough via google search or via another site then you have probably not visited my site.
A lot more very detailed game walkthroughs can be found on my site at: www.pcgameswalkthroughs.nl
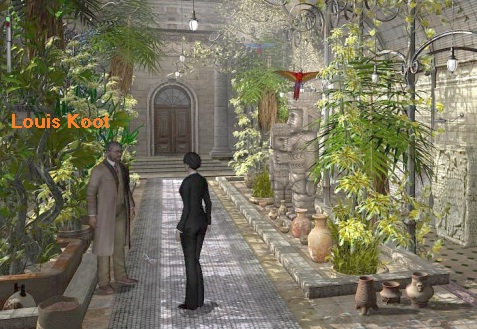
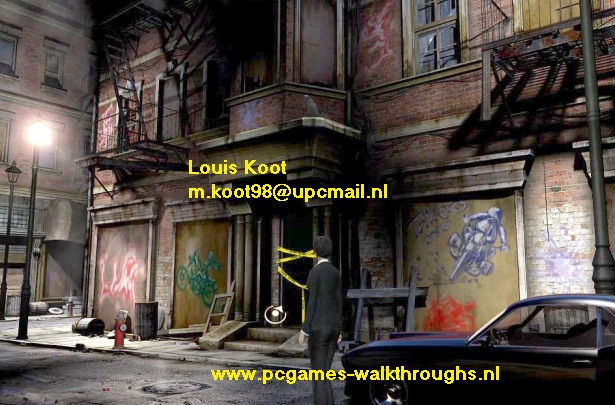
You are Nicole Bonnet, a young FBI agent and as green as grass. Yet you are put on the case of a serial killer. Searching for his victims among the city's rich and famous, this serial killer uses a rather strange knife as a murder weapon. Another peculiarity is that the killer leaves a coin with each body. Also not very common is the fact that the murderer always cuts the heart out of his victims.
|
The game starts with a video in which FBI agent Nicole Bonnet will report to the observation address, but unfortunately .........
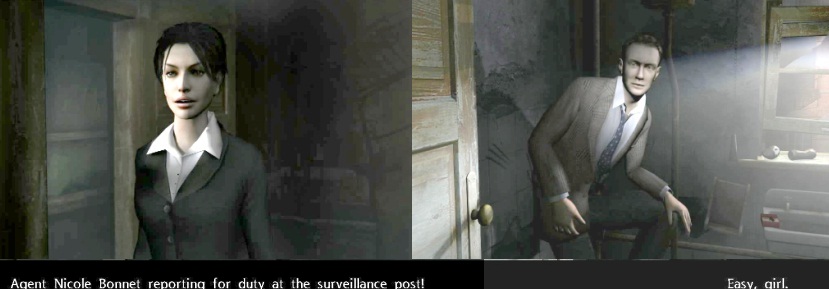
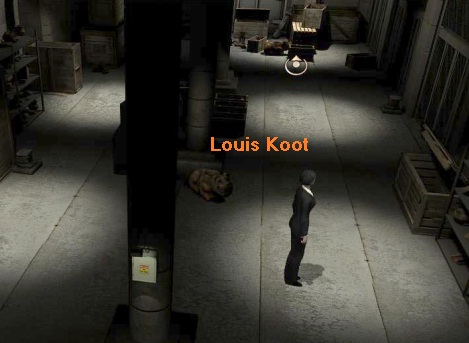
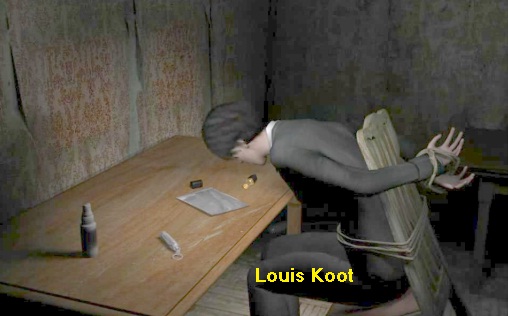
........ the already present FBI agent, James, sends her away again to ....... get coffee. James should not have done that because when Nicole returns with 2 steaming cups of coffee, shots sound and she finds James fatally hit. "Take the message to Nick" ..... the fatally stricken FBI man just manages to say and then he release his last breath and then he is dead. Nicole tries to track down the murderer but unfortunately ....
Agent James' lifeless body is then disposed off in a body bag

You end up on the start screen of the game.
Click on "New Game" to start the game now and ...... The game really starts in the office of Nicole's boss who gives her an important assignment.
Part 1: New York
Chapter 1: Day 1
FBI building:
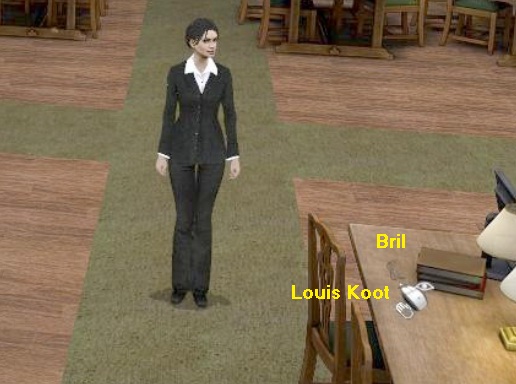
Nicole is in the office of her boss, Chaser. Chaser is sitting at his desk typing on his laptop computer. Click on Chaser with the talk cursor to talk to him.
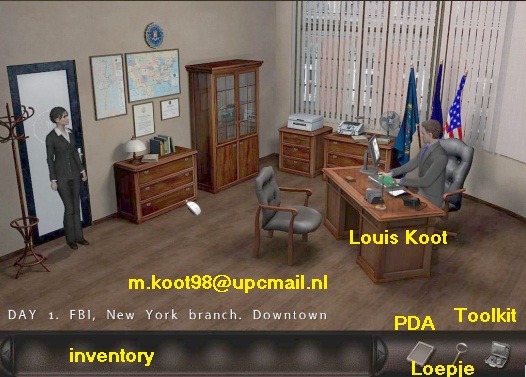
Chaser tells Nicole that getting shot is an occupational hazard for an FBI agent. Although your partner has just died in her arms, it is "business as usual" and Nicole has to write down the events in the observation house neatly in a report. Chaser then calls his secretary, Ruth, to ask if your new partner, Nick, has already arrived. But that Nick is not there yet. Nicole gets 5 minutes to type and print her report.
The "conversation" is then over. Exit the office through the door. Nicole ends up with Ruth, Chaser's secretary.
A conversation naturally ensues between Nicole and Ruth about the death of James, the FBI agent who was so tragically killed. There is a printer / fax machine on Ruth's desk
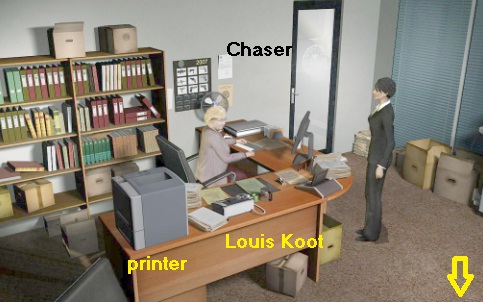
When this talk is over, go one screen to the right via the bottom right. You will then see the rest of the "office".
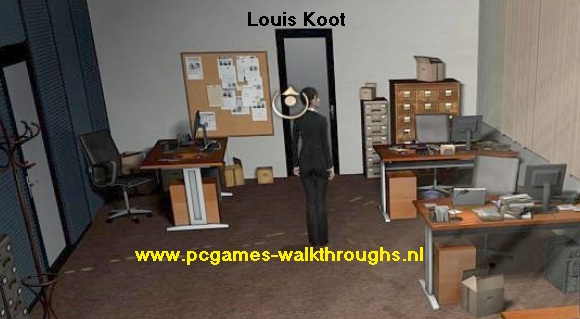
There are 5 desks. The desk, at the bottom of your screen, is Ruth's desk. Nicole's desk is the next desk
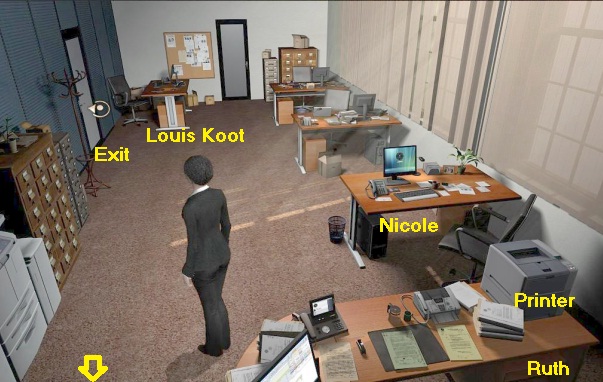
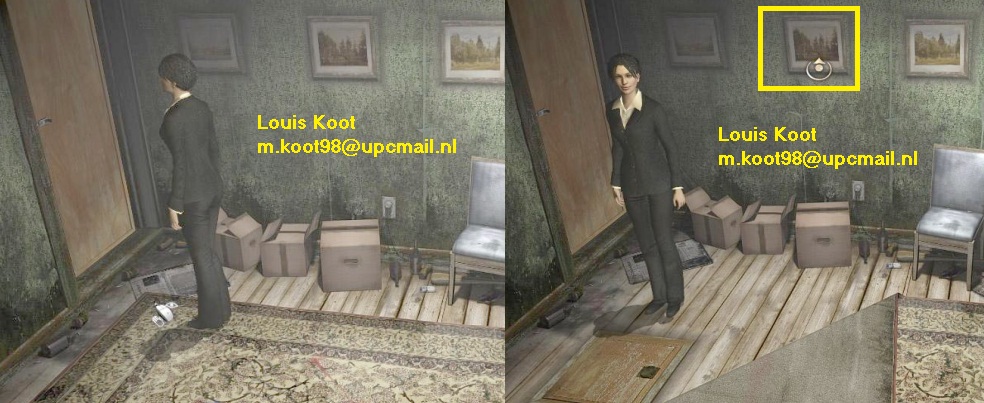
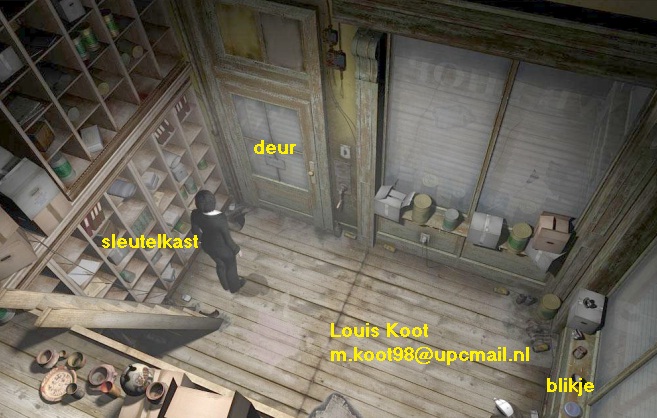
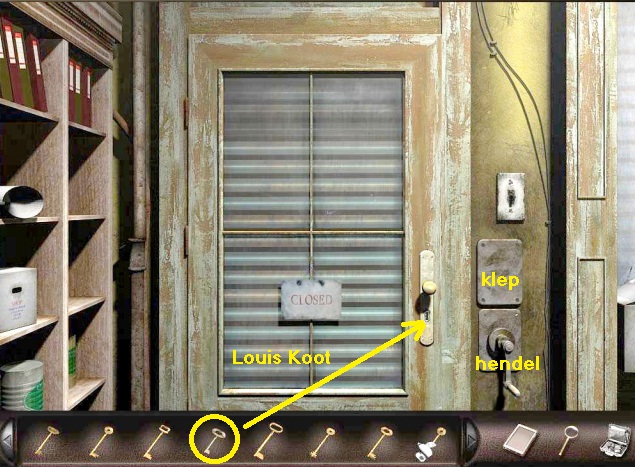
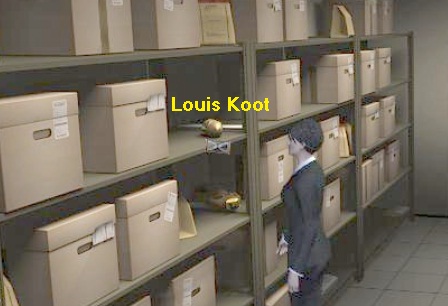
The door at the back of the room leads to a pantry. To the left of that door is a notice board with notices. The door in the left wall, next to the coat rack and the filing cabinets, is the exit to the large central hall. Exit the office through that door. Nicole then ends up on the passage above the central hall of the FBI building.
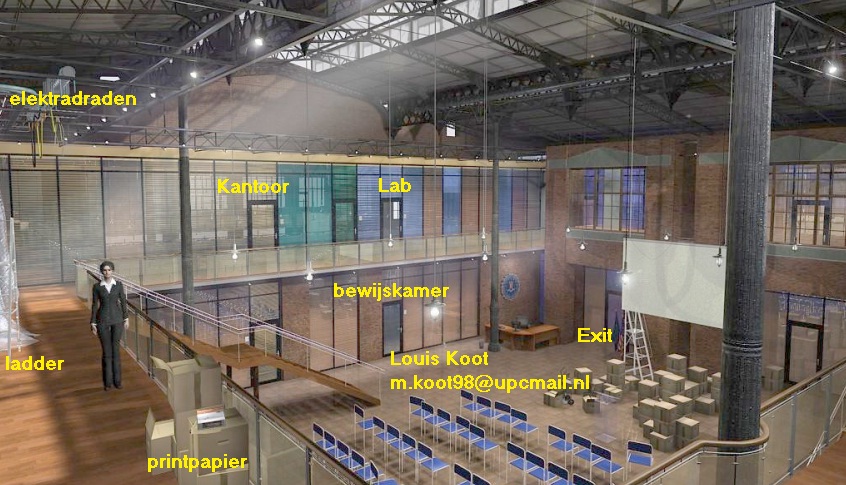
You can go down the stairs to the ground floor, but don't do that. You can see 2 more doors to the right of the office door. The rightmost door is the laboratory door. On the ground floor you will see the door to the evidence room. You will see a stack of boxes at the bottom left of the screen. There is a pack of paper on those boxes. There is also a ladder there and above that ladder you can see electrical wires. Double click on that stack of boxes with your right mouse button and .......

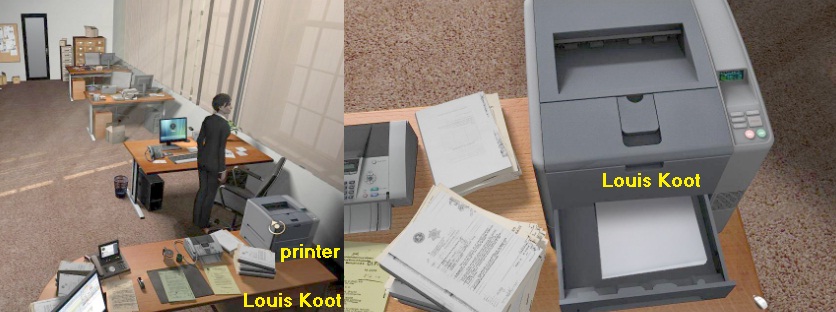
Nicole walks to the boxes and tells you that there is printing paper in them. So take the pack of paper on top of the boxes and you have 500 sheets of printing paper. Go back to the office by double clicking on the door where Nicole came out. Stand between Ruth's desk and Nicole's desk and then double click on the Printer / fax machine. You are then in the close-up of the printer / fax machine. The paper tray is located at the bottom of the machine. Click on the paper tray to extend it. Then take the printing paper from your inventory and put the paper in the drawer of the printer. Then close the drawer of the printer.
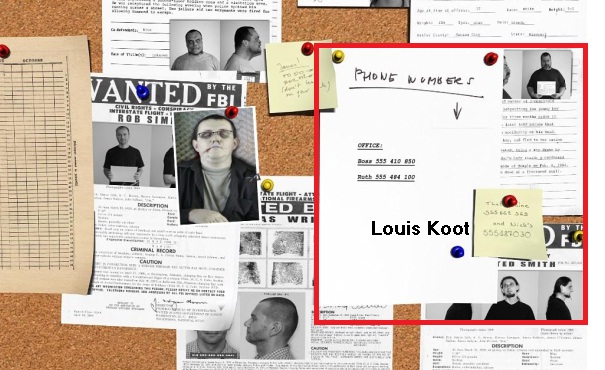
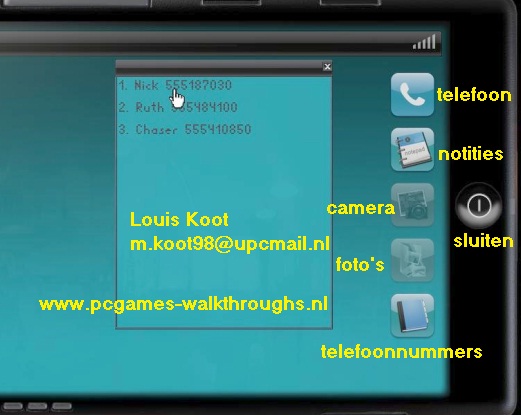
Go out of the close-up, via the arrow on the right side of the printer. Double click on the bulletin board on the wall to the left of the pantry door. You end up in the close-up of the bulletin board. Nicole sees a small note on the notice board with the phone number of Nick, her new partner. She also sees the phone number of Chaser (Boss) and Ruth.
In the black bar, below the game screen, you will find the Inventory, the PDA, a Loupe and the Toolkit. Open your PDA. Your PDA has 5 functions.
From top to bottom these are: Phone, Documents / Notes, Camera, Photos, Phonebook.
Click on the phone book and you will see that the 3 phone numbers that you have just seen are now there. Click on Nick's phone number to call him.
Unfortunately ..... Nick does not answer. Zoom out of the bulletin board and run, via the bottom left, to Ruth. Talk to Ruth again.
Ruth says that Nick has not shown himself for a week and has not reported where he is. Ruth also tells that Nick has a new phone number. Ruth will email Nick's new phone number to your computer.
Walk another screen to the right and now zoom in on Nicole's desk and see ..... On Nicole's computer screen is Nick's new phone number.
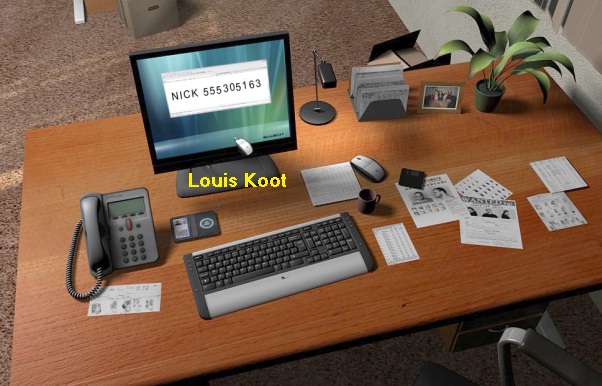
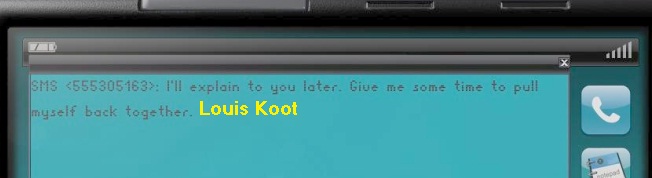
In the phone book of your PDA, the old number is immediately replaced by this new number. Stay in the close-up of Nicole's desk and call Nick again from the phone book in your PDA. You get Nick's Voicemail and you leave a message. Please wait patiently for a few seconds .... after a few seconds your PDA will pop open and you will receive a text message from Nick saying "I'll explain to you later. Give me some time to pull myself together".
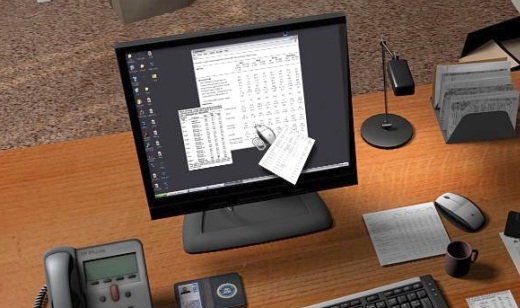
NB: You may have to get out of the close-up of Nicole's desk first to receive Nick's text message. I didn't have to, but in some versions of the game you may have to zoom out of the desk first to receive the text message. When you have called Nick and received his text message, zoom back in on Nicole's desk, if you were zoomed out. Click on the keyboard and Nicole types her report on James's death. The report appears as a word document on Nicole's computer screen.
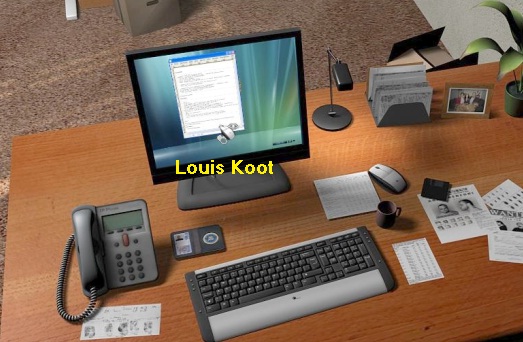
So click on the document in the computer screen to print it. When the printing is done, zoom out of Nicole's desk.
Then zoom in again on the Printer, which is on Ruth's desk. and grab the printed report from the printer.
Zoom out and walk back to Ruth and then go back into Chaser's office through the door at Ruth.
Take the printed report from your inventory and give it to Chaser.
Chaser now wants to get Nicole off the case of James's murder. Nicole protests but Chaser cannot be relented. Nicole will be Nick's assistant on a "hard case". Talk to Chaser until he says nothing new and repeats himself. Chaser talks about the case Nick is working on. You get to see shocking images during Chaser's story.
3 men were brutally murdered, with an unusual murder weapon. The victims are: Engineer Henry Fairbanks, Accountant Mark Chestum and Doctor Andrew Haig. The murderer cut the hearts of all 3 victims with a rather oddly shaped knife. As a "calling card", the murderer has always left behind a coin.
When Chaser has finished, click on him again with your talking cursor to continue talking. Chaser then continues to talk about the strange knife that the killer uses and you will receive a drawing of this strange murder weapon in your inventory. When you can't talk to Chaser anymore, leave his office and go back to Ruth.
Another short conversation with Ruth follows. Nicole says she will go to the Museum of Pre-Columbian Art. Ruth talks about the museum doorman. Nick thinks he saw that doorman smuggle some powder out of the museum through the back door.
When Ruth has nothing more to say, walk further into the office hall and then go out through the door in the left wall. Nicole is then back on the walkway above the central hall. Double click on the stairs and Nicole runs downstairs. The entire FBI building is currently under renovation. At the back left you see a desk and there is also the exit, at the flags. It makes no sense to look at that desk, so double click on the exit door and Nicole ends up on the street outside. Nicole says that this FBI building used to be a parking garage.
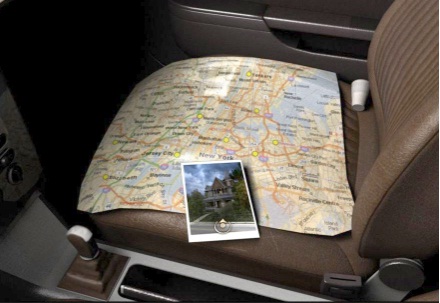
Nicole's black car is parked aroubd the right corner of the building. Double click on Nicole's car.
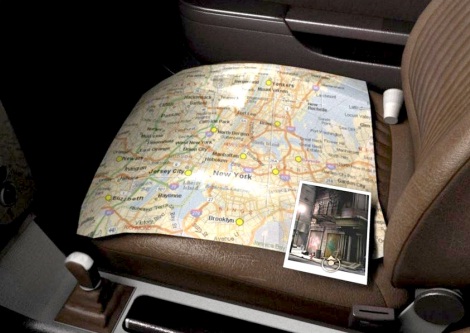
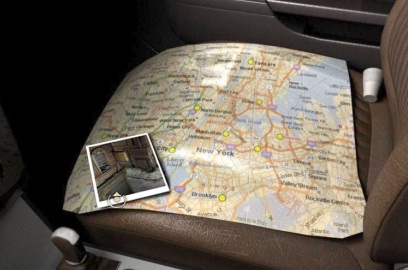
You enter the close-up screen of the passenger seat. On the chair is the map of the New York area.

Nicole travels quickly to the various locations via the map. Available locations can be seen as photos on the map. In order to make new locations available, you have to make sure, by having the right conversations and / or by finding the right items, that these locations become available. At the moment there is only 1 new location available and that is the Museum of Pre-Columbian Art. So click on the museum photo and we end up at the:
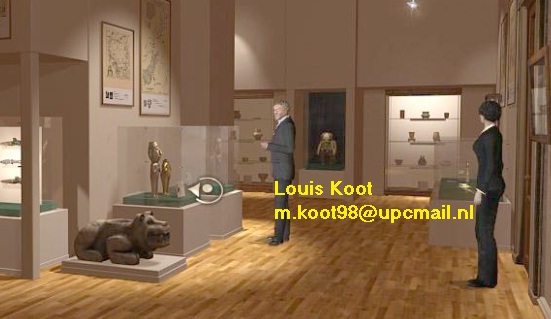
Museum of Pre-Columbian Art:
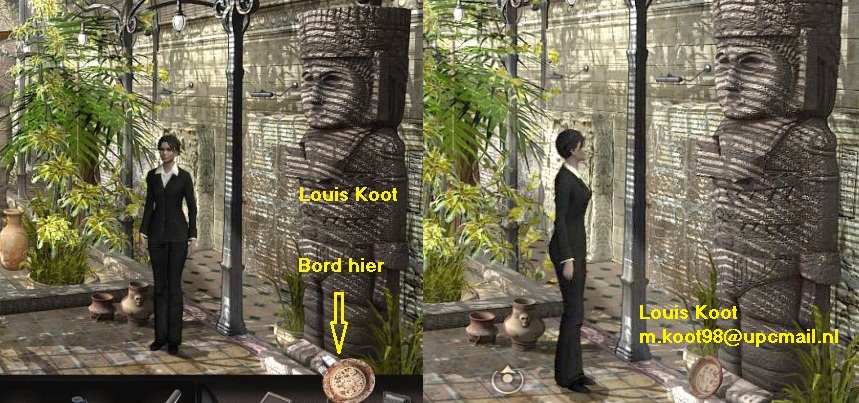
Enter the museum. Nicole ends up in the entrance hall of the museum. On the left is the doorman behind the desk. In the corner, to the right of the doorman's desk, is the stairs to the museum's storage cellars. Through the large entrance, between the 2 large Aztec statues, you reach the large exhibition hall.
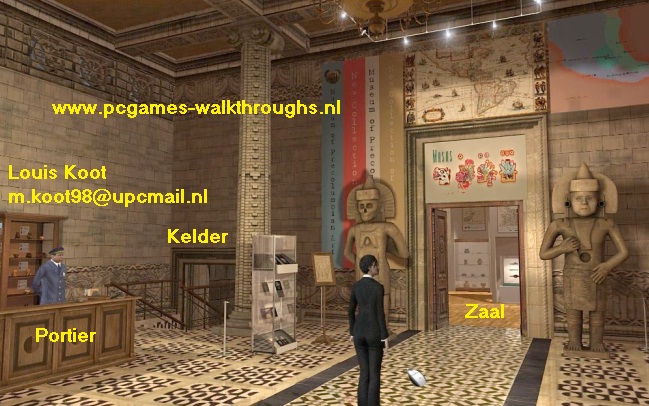
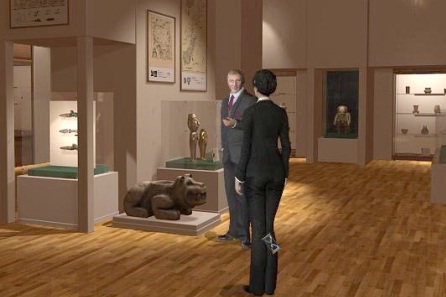
Talk to the doorman. The doorman explains that the museum is closed. Nicole says she's an FBI agent and that she wants to speak to the museum director. The doorman explains to Nicole where to find Director Warren. Enter the exhibition hall and Director Warren comes to greet Nicole.
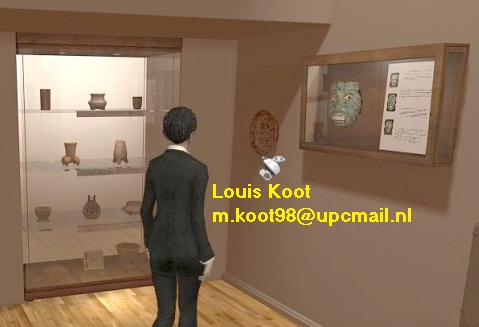
Nicole explains why she's here and Director Warren directs Nicole to a display case, displaying antique Aztec knives.
You can see that display case with the Aztec knives behind Nicole and director Warren. Continue to that display case. In the display case are 3 Aztec knives,
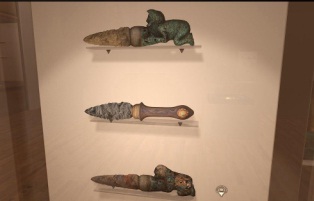
None of these 3 knives resemble the strange knife the killer uses. Zoom out.
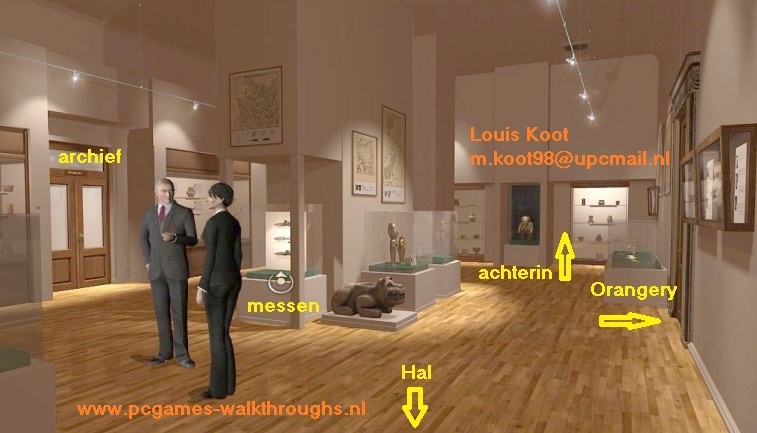
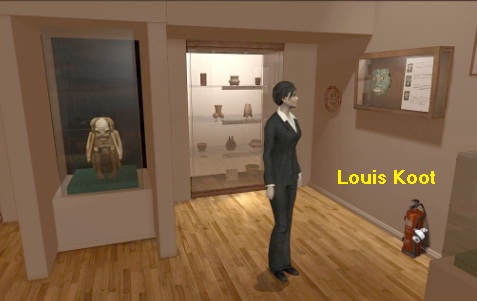
Director Warren has disappeared. On the right side of the column you will see a display case with 2 golden statues. Remember this display case for later. In the back right of the room you see, in the back wall, a display case with a mummy. The glass doors, on the left, are the doors to the Archives Room. In the right wall you see the door to the Orangery. Go up one screen to that mummy display case. Nicole is then in the right corner of the room. You see the mummy and you see a fire extinguisher against the right wall.
Look at the fire extinguisher. The fire extinguisher is still in good condition. Take the Fire Extinguisher.
Go back to the entrance hall and talk to the doorman again and do so until he tells you nothing new.
The porter now says that the museum does not often lend parts of its collection to other museums. Click again with your talking cursor on the doorman to continue talking. You will experience that the museum has recently sent a load of objects to a museum in Bogota, including knives. The porter now also tells that most of the knife collection is displayed in a room on the 1st floor. Nicole, however, needs permission from the director to continue browsing the museum and the porter will give Nicole the director's phone number.
Try to go to the basement (Down to Storage) by the stairs in the corner next to the porter's desk. However, the doorman screams that there is nothing to be seen down there. You also need permission from the director to search the cellars. So call Director Warren from the phone book in your PDA. Unfortunately ... Warren has turned off his cell phone. Talk to the doorman again and ..... Nicole plays the pathetic FBI agent and the doorman allows her to quickly snoop around the basement. So double click on the cellar stairs again and we end up in the cellars.

However, it is very dark here in the cellar. So go right back upstairs and talk to the doorman again. Nicole asks what's going on with the light in the cellars. The doorman says that sometimes the light works and sometimes it doesn't. Nicole has to do something with switches to turn on the light. So go back to the basement.
Cellar:
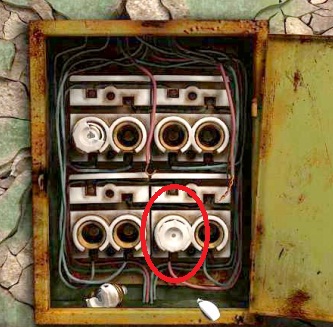
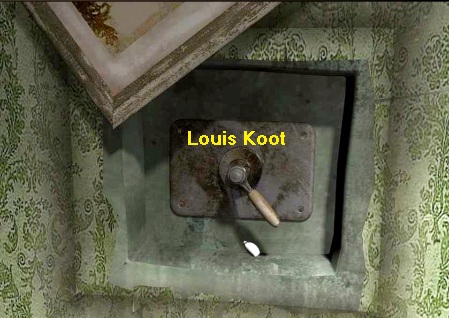
You see a switch box in the middle of your screen.

Double click on the switch box and Nicole opens the box and she sees 5 switches. You can click the switches up or down. If a switch is red, it is up. If a switch is blue, it is down. This puzzle is different each time. There are 5 places in the basement where you can turn on a lamp with these 5 switches. The switches influence each other. You have to turn some switches up and others down.
I can't tell you which switches should be up and which switches should be down. That is always different. You'll have to mess around with these 5 switches yourself to figure out which ones to leave up and which ones to turn down to get the 5 lights in the basement on.
First turn up all switches and then lower them one by one, always zooming out to see how many lights are on. This time it was like this for me:
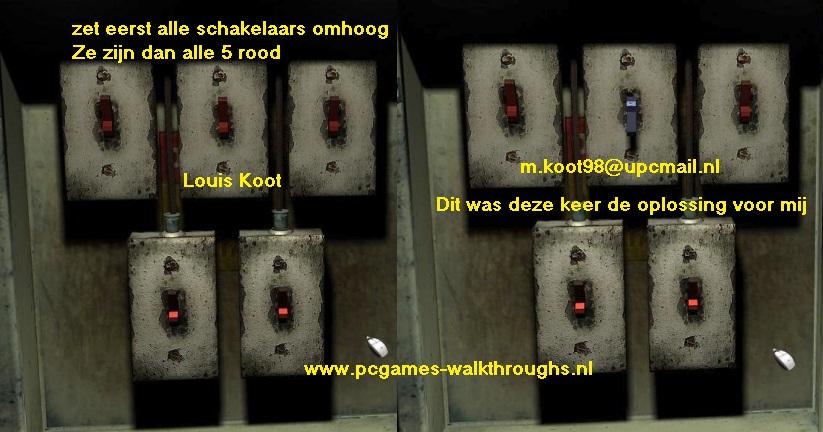
So mess with the 5 switches and always go out of the close-up to see which lamps are on in the basement.
If the 5 lights are on in the basement, you have done it right
Nicole can now go to the front left, rear left and rear right. If these 5 lamps are not burning all 5, then you have not clicked the correct switches down. You will have to try a little more with the switches because if not all 5 lamps are on, Nicole will not be able to reach all places in the basement.
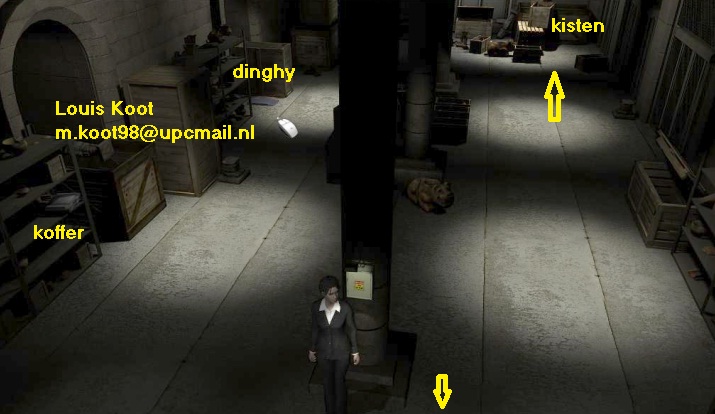
If you have all 5 lamps on, you will see that 2 lamps are on on the left and 3 on the right side. At the back left you see a scaffolding and a large chest. Between that position and that large chest is an inflatable Rubber Boat (Dighny). Look at that Dighny with your right mouse button. Nicole then walk over to the Dighny to check it out.
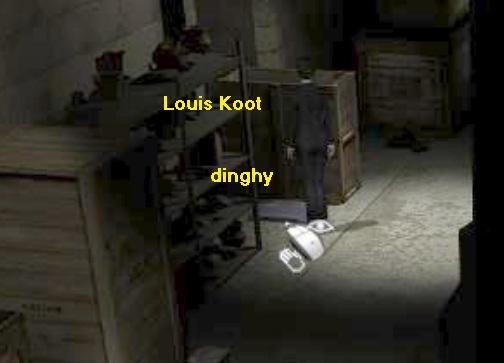
The Dighny is not inflated. Take the Dighny to store the thing in inventory. To the left you see a gate.
There is also a scaffolding in front of that gate. On one of the shelves of that rack is a flat gray Suitcase (Flight Case).
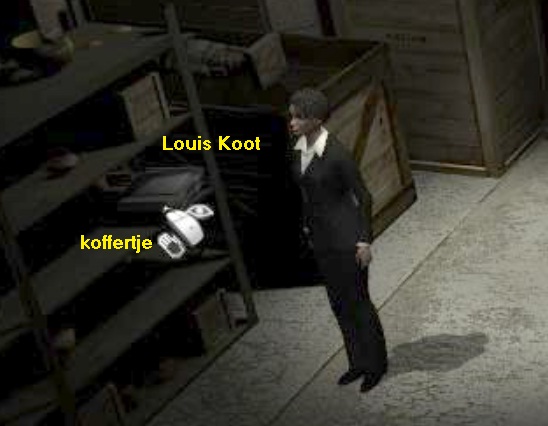
Look at the gray Suitcase and then take it. There is something in this gray Suitcase . Walk to the right.... You will see crates at the back of the cellar.
Double click with your arrow cursor on those crates and Nicole will walk further through the basement and thus end up in the back of the basement room.
Large crates stand against the long wall. There is a crate on the floor in front of the stack of 2 crates. Check out those crates
Nicole tries to view the bottom crate, but the front crate is in the way. For some obscure reason, Nicole finds these crates suspicious. Try to see if Nicole can open the crates. That does not work. Now place your cursor on the right side of the crate. You will then get a click spot called "Gap between crates". Look at this gap.
So there is a narrow space between the crate that is on the floor and the 2 crates behind it. Take the Dighny from your inventory and now click the Dighny in the space between the crates (Use Dighny + Gab between crates). Nicole stuffs the flat Dighny between the crates. Take the Fire extinguisher (Fire exinguisher) from your inventory and then click the fire extinguisher on the Dighny (Use Fire extinguisher + Folded-up rubber dighny) and .....
Nicole inflates the Dighny with the fire extinguisher, pushing the heavy crate from its place.
You can no longer take the fire extinguisher and the dighny. So you can now reach the 2 large crates that are on top of each other.
In your inventory, click with your left mouse button on the briefcase (Flight Case) to open this case. The case contains a portable X-ray scanner. Click in the briefcase to take out the X-ray scanner. Then take the X-ray scanner from your inventory and click it on the bottom of the 2 large boxes (Use Portable X-ray scanner + crate).
Nicole looks through the scanner and then sees what is in the big crate. The crate contains the museum's knife collection.
There should be four pairs of knives but ..... of the top right pair the 2nd knife is missing. The missing knife is like the one on the drawing of the murder weapon. Click the red Off button to put the scanner back into storage. Walk back to the beginning of the cellar via the top left. In inventory, put the X-ray scanner back in the briefcase and then place the briefcase back in the position where you took it from.
Then go back upstairs to the entrance hall via the bottom of the screen. Talk to the doorman again.
The porter now shows Nicole an inventory list of what should be in the knife crate. After this you walk out of the museum via the bottom of the screen.
NB: if you try to leave the museum with the X-ray scanner, you are not allowed. You must first put the X-ray scanner back in the case and then place the case back in the position. Nicole will also not want to leave the museum if you have forgotten to talk to the doorman last about an inventory of the knives in the box.
Outside again, Nicole receives a text message from Nick and your PDA will pop open.
In the text message Nick reports that a 4th murder has been committed. John Rudolf, a stockbroker, was murdered and his body was found on Staten Island. The murder appears to have all the characteristics of the serial killer. Close the PDA and click on Nicole's car. The new murder location is now available on the map and that is the "Stockbroker's villa".
Click on the picture and Nicole ends up at:
Stockbroker's Villa:

One of New York's finist is on duty in front of the villa. Talk to policeman Jeff Macgregor and then enter the villa.
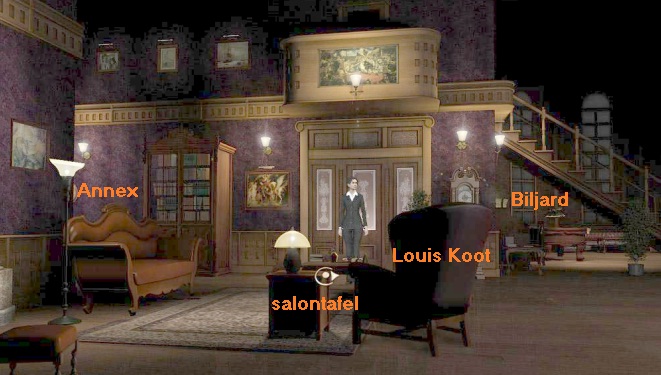
You can go one screen to the left, to the Annex. On the right you see the stairs to the balcony. Under the stairs you see the billiards (pool) table. Agent Macgregor has said the body was found on the pool table. Nicole is now in the sitting room of the villa. Right in front of the front door is a coffee table. Continue to the coffee table.
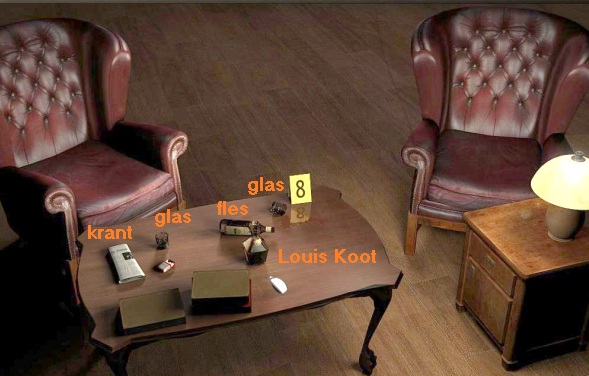
On the coffee table you see a newspaper, a glass, a whiskey bottle, a carafe and a fallen glass with the number 8 sign next to it. Since everything in the house can be proof, Nicole doesn't want to touch anything with her bare hands. So you can't grab the newspaper now. Look at the 2 glasses and the whiskey bottle / carafe. Also check out the right seat. Nicole thinks the right seat has been moved. Click on the right chair and Nicole moves the chair back to the left.
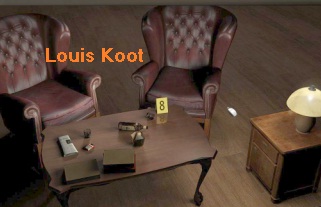
Zoom out of the coffee table.
Because you have just moved the chair back to the coffee table, you now see that there is a business card on the spot where the chair used to be.

Look at the business card and then pick up the business card. Nicole doesn't believe the business card was left by the killer. Look at the business card in your inventory. The card belongs to one Allan Branford, a collector. Branford's phone number is stored in your phone book and Nicole plans to call that Allan Branford tomorrow. Now go one screen to the left, to the Annex.

The right wall is full of photos. In the left corner is a coat rack that also serves as an umbrella stand. There is an umbrella in the coat rack. Look at the umbrella and then take the Umbrella. Zoom in on the photos that hang on the right wall. Look at the photo that hangs in the bottom center.
If you try to grab that photo, Nicole says she doesn't need the photo right now.
Zoom out and go back to the sitting room via the bottom of the screen. Then go to the Billiard table by clicking under the stairs.
Officer Macgregor already told you that Rudolf's body was found on the billiard table. Apparently, the killer used the billiard table as an operating table to cut Rudolf's heart from his dead body. It's a bloody mess. Zoom in on the billiard table. Nicole walks around to the right side of the billiard table and you can see the table in close-up.
The Billiard table puzzle:
In the ball slot you see a blue billiard ball. Watch the billiard ball. It's the No. 2 ball. Grab the blue Billiard Ball. So there are 6 holes in the billiard table where the balls have to be pushed through. Look at the left center hole. Nicole wonders whether CSI has looked in those holes.
There is something hidden in one of the holes of the pool table and you have to use the blue pool ball to find it. This is again a "random" puzzle. Put the blue billiard ball in each of the 6 holes. The ball gets stuck in one of the 6 holes and that is the hole with something in it. The ball returns to the slot through the other 5 holes.
So keep taking the ball out of the slot and then put the ball in the next slot and do this until you find the slot where the ball does not come back. Just start with the left back hole and then the right back hole, then the left center hole and the right center hole, and then the left front and the right front hole. For me, the right center hole was the right hole.
When you have found the hole where the ball gets stuck in, click in your inventory, with your left mouse button, on the umbrella. Nicole breaks the umbrella and you are left with a Spoke. Then use the Spoke on the hole where the billiard ball got stuck in (Use Spoke from an umbrella + Pocket) and .... the blue ball comes back but now takes a small yellowish Statue (A figurine) with it.
Grab the Figurine. It is the head of a pre-Columbian statuette.
Zoom out of the billiard table, walk one screen back to the left and then exit the villa again through the front door.
Nicole has had enough for today and she says goodbye to Agent Jeff. Click on Nicole's car and ......Nicole has a nightmare and then you end up in:
Chapter 2: Day 2:
FBI Building:
It's the next morning and Nicole has parked her car around the corner from the FBI building. You'd expect a smart FBI agent to find the front door of her office. But Nicole apparently cannot. So double-click on the entrance door of the FBI building so that Nicole finally realizes that she really has to go in. Once inside, Nicole tells you that she wants to put the Golden Head in the evidence vault.
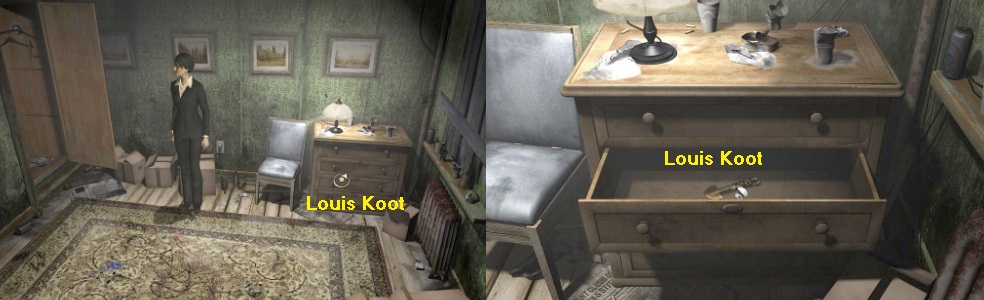
However, first go upstairs, via the top left, and then, through the office door, re-enter the agents office. In the office, Nicole notices that the carpet has been soiled by muddy footsteps. Continue to Ruth and talk to Ruth again. You chat with Ruth about your still absent partner, Nick. Ruth reports that Nick apparently was in the office last night.
There is now a small keycard on Ruth's desk. Grab the Keycard. Apparently this Keycard was already meant for you anyway, so it's a bit strange that Ruth just didn't point it out to you. With this keycard all doors in the FBI building will open for Nicole. Walk back down one screen. Nicole notices Nick's muddy footsteps towards her desk. What was Nick doing at Nicole's desk? Zoom in on Nicole's desk. At the back right of Nicole's desk is a plant and in front of the plant is now a folded paper boat (Origami).
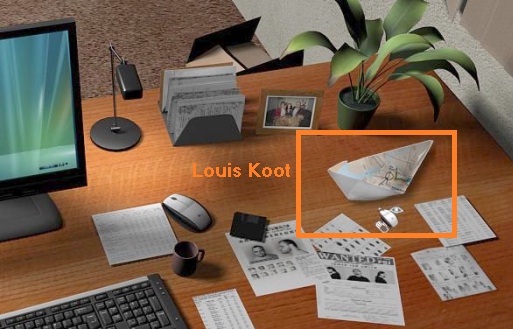
Take the paper boat and then click on it in your inventory to unfold it. It turns out to be a city map. The place where James was murdered is indicated by a circle and Nick wants to meet Nicole there. You cannot enlarge the map further. Zoom out of Nicole's desk and walk back to Ruth and then enter Chaser's office. Talk to Chaser.
Nicole brings her boss up-to-date on the case and she also tells about the golden head she found in Rudolf's billiard table. Chaser thinks Nicole should go back to the museum to investigate those knives further and also find out if Director Warren can produce an alibi. Click on Chaser again and Nicole then tells that she found the business card of one Allan Branford in Rudolf's villa.
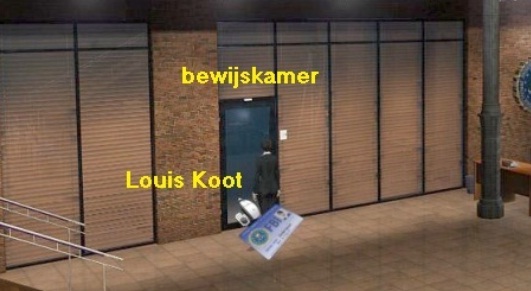
Call Branford via your phone book in your PDA, but there is no answer. Exit Chaser's office and go back to the lower hall of the building. When Nicole is back downstairs in the large hall you will see a door on the left. That is the door of the Evidence Deposit. Double click on the door. The door is locked, so use the Keycard on the door and Nicole goes inside. Take the Head (Figurine) from your inventory.
Place the Head in the shelving unit, on the empty spot (Use The Head of a figurine + Deposit shelf).

Exit the evidence room. Back in the hall you call Director Warren again via the telephone book in your PDA.
Warren is now recording and Nicole makes an appointment to meet him at the museum. That Allan Branford turns out to be a good friend of Warren and by chance Branford is also at the museum and he really wants to talk to Nicole. Well ... isn't this "kill two birds with one stone"?
Exit the FBI building. Click outside on Nicole's car again and then on the picture of the museum to go back to the:
Museum of Pre-Columbian Art:
Enter the museum again and walk straight to the large exhibition hall. Warren is already waiting for Nicole.
Talk to Warren. When nothing more is said, click on Warren again and repeat this until nothing new is said.
Warren says Branford is waiting for you in the next room. The box with the knives has unfortunately already been shipped to Bogota. Warren gets a little upset when he finds out that you sniffed in the basement yesterday without his permission. Warren appears to know the 4th victim, John Rudolf. As an alibi, Warren says he was at a concert at the Lincoln Center. Warren says works by Rachmaninov and Prokofiew were performed. Warren was there with Allan Branford.
When you've talked to Warren in full, so when he said Branford is waiting for you in the Orangery, double-click the Orangery door on the right wall. Nicole ends up in the museum's Orangery Room. Allan Branford is here. Talk to Branford and do it again and again until nothing new is said.
Nicole tries a trick to see if Warren's alibi is real. Branford confirms Warren's alibi, however, and Nicole tells Branford that John Rudolf was murdered last night. Branford says he last saw Rudolf 6 months ago. Branford knew the other 3 murdered men too and it looks like he got a little scared. Branford uses a Spanish word during the conversation which means "Grafschenner" (Grave robber).
If you don't get anything meaningful anymore from Branford, you return to the exhibition hall.
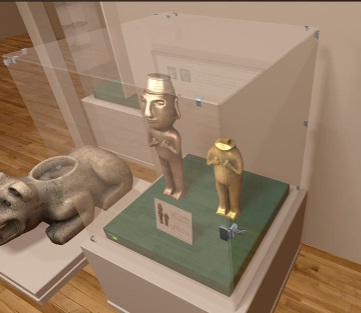
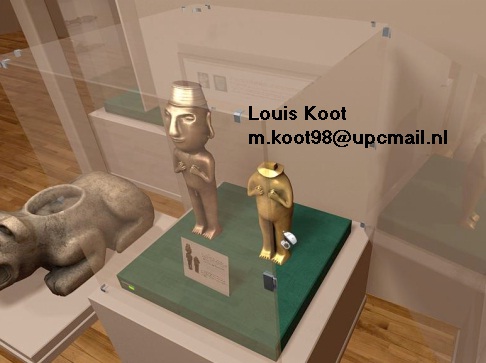
Warren stands in front of a display case with 2 golden figurines (Golden figurines).
Zoom in on that display case and see .... the right statue is missing the head and let that be exactly the head you found in Rudolf's billiard table.
Nicole would like to examine the statue more closely, but she needs Warren's permission. So zoom out and talk to Warren again.
Nicole asks if she can take the statue with her, but she has to fill in a form. So leave the museum and go back to the:
FBI building:
Go back inside and upstairs to your office. Walk to Ruth again. Nicole automatically asks Ruth for an application form and Ruth says Nicole can find such a form in the storage room. So go back down one screen and then double click on the door of the storage room, next to the notice board. Nicole ends up in the staroge room
Have a look through the 2 shelves closets. In the left closet are Flashlights, Plastic Bags and Batteries.
In the other closet you will find Gloves, Luminol and the wanted forms.
Nicole now only wants to take a form, she does not want to take all those other things now. So grab a Form. Right-click in your inventory on the Blank Form so that you read that the FBI logo is on it. Go back to Ruth and give the form to Ruth (Use Blank Form + Ruth).

Ruth then says that Chaser must give his permission to fill out the form. You will not get the form back from Ruth. So enter Chaser's office. Talk to Chaser. Nicole tells Chaser about Warren's and Banford's alibi and that she wants to investigate the statue from the museum. Chaser then instructs Ruth to fill out the form. Go back to Ruth and ..... Nicole asks if Ruth has finally filled out the form and it is now. The completed document is now on Ruth's desk. Grab the now completed form.
Exit the FBI building, click on Nicole's car and drive back to the:
Museum of Pre-Columbian Art:
Go back inside and straight on to the exhibition hall. Director Warren is still standing by the golden figurine display case.
So give the form to Warren and Nicole can borrow the statue.
Warren tells Nicole to ask the doorman to take the statue out of the display case. So go back to the entrance hall and talk to the doorman again and ...... Nicole asks the doorman to open the display case. The doorman says the display case will be open when Nicole returns to it. So go back into the exhibition hall and zoom in again on the golden figurines display case.
The right side of the display case is the glass door of the display case,
click on it to open the door and then grab the Headless Statue from the display case and ...
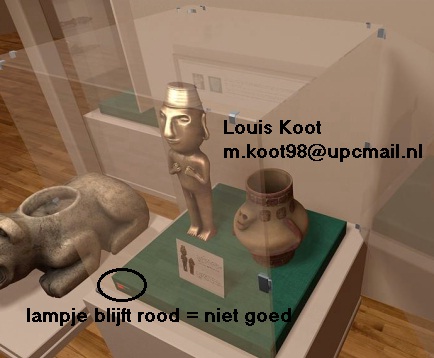
..... The alarm of the display case goes off. Nicole must now ensure that this alarm is turned off again. At the bottom left you see the red alarm light flickering. Nicole has to replace the statue with something that has exactly the same weight as the statue so that the alarm goes off again and that light will be green again. Zoom out and go to the Orangery through the Orangery door
The Vases Puzzle:
This is another "Random" puzzle, so I can't give you an exact solution again. If I were you I would SAVE first.
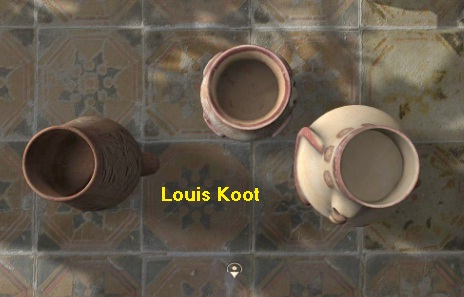
At the bottom left of the Orangery is an open bag containing Potting soil. To the right are 3 Vases (Vases).
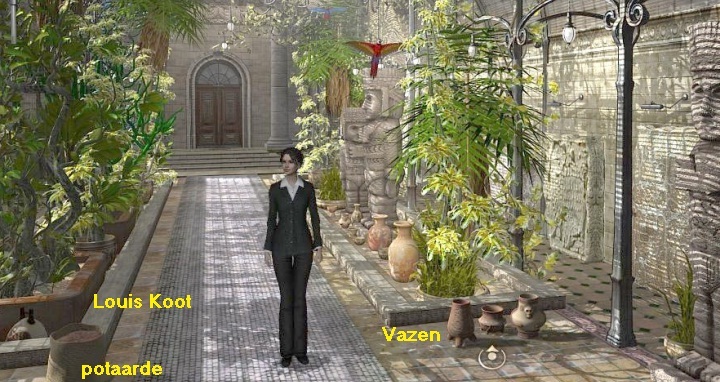
Those 3 vases are of different size and weight. You have to fill one of the 3 vases with potting compost from the bag. Then place the vase in the gold figurine display case and hope that the vase has the correct weight. As said ... this is another puzzle whose solution is always different. So I can't tell you which of the three vases is the right vase and how many handfuls of potting compost you have to put in it. You may even not have to put soil in a vase at all because sometimes an empty vase is sufficient.
A: Try with EMPTY vases first:
Nicole can only carry 1 vase at a time. So zoom in on the 3 vases and then take the left vase.
Zoom out and go back to the display case. Zoom in again on the display case and then put the vase in it.
If you are lucky then this empty vase is the right one and the alarm will be turned off. You are then ready right away. If not, take the vase back from the display case and go back to the Orangery. Put the vase back with the other 2 vases and then pick up the middle vase. Then go and put the middle vase, empty, in the display case. If the alarm does not go off even with the empty middle vase, try it with the empty right vase.
For me the left EMPTY vase was the right one, but that doesn't have to be the case with you. It is very possible that you will have to fill one of the vases with potting compost from the bag. In that case you will have to repeat this whole thing, but with soil in the vases. I will also explain this briefly
B: If you have to put EARTH in the vases:
You can only put 2 hands of soil in each vase. Zoom in on the 3 vases. Pick up one of the 3 vases. Zoom out. Grab a handful of Pot Soil from the bag.
Combine the potting soil with the vase in your inventory to put the earth in the vase.
Grab another handful of potting compost from the bag, but don't put it in the vase yet.
Go back to the display case and zoom in on it again. Place the pot (where you put soil in once) in the display case.
If the alarm does not go off, take the pot back from the display case. In inventory you then put the 2nd portion of soil in the pot and then you put the pot back in the display case. If the alarm does not go off then this pot, with 2 portions of soil in it, is not the right pot. Then take the vase from the display case and go back to the Orangery. Put the vase back with the other 2 vases. Repeat this whole thing with the middle vase and, if also the middle vase is not the right one, also with the right vase.
NB: I did this thing both ways, so without soil and with soil in the vases.
The outcome was always the same for me ... the left EMPTY vase was always the right vase for me to place in the display case.
When you finally put the correct vase in the display case, the alarm will go off again. The red light is then green. Zoom out of the display case and go back to the entrance hall. Nicole then goes on to the doorman, who makes some stupid comment. Exit the museum and click on Nicole's car and look .... there is a new location available and that is the Abandoned House.
Click on the new location and Nicole will end up at:
The Abandoned House:
Nicole is back at the house where her partner James was murdered and here she has an appointment with Nick. However, Nicole is a bit late and she hopes Nick will be too. The house you need to enter is the house with the yellow police tape.
So go in there. Nicole is then on the 1st floor in the hallway. You can go further up the stairs and you can go one screen to the left. Go one screen to the left.
At the back left is the entrance to an apartment. Back right is a kitchen.
Enter the Apartment. In the apartment you enter the bathroom. Nicole stops in the bathroom door.
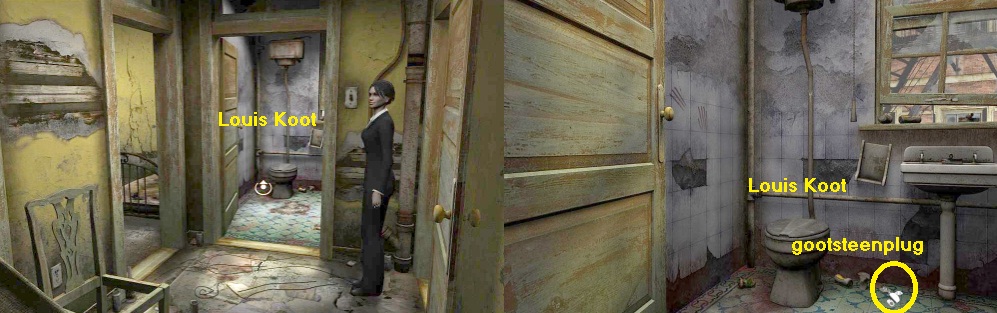
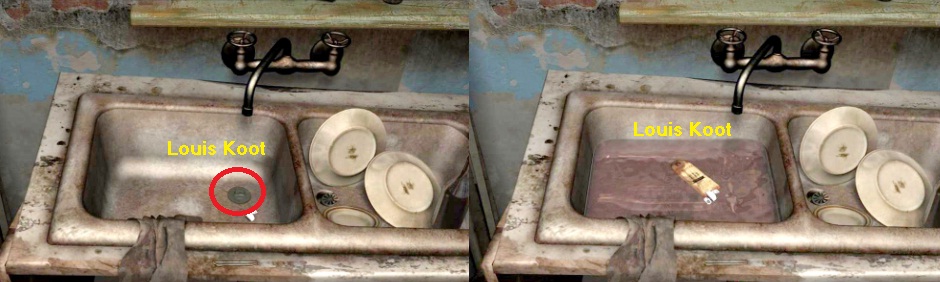
There is a gray Rubber Sink Plug (Rubber plug) on the floor under the sink. Grab the rubber plug.
Step back and then go left into the room. There is a hairbrush on the table at the bottom of your screen. Grab the Hairbrush.
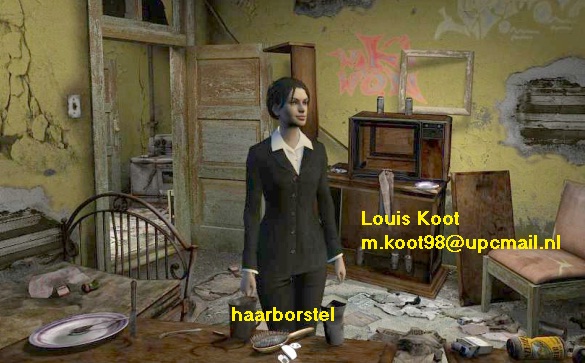
In your inventory, click with your left mouse button on the hairbrush and .... you remove the metal brushes from the hairbrush. You then have a hairbrush without the brushes (Wire brush with missing bristels) and a heap of metal brushes (A handful of bristels from the wire brush). Exit the room and return to the corridor. Now enter the kitchen. To the right of the refrigerator is a low cupboard (Kitchentable). There is a yellow paper on this box. There is a whiskey bottle in the refrigerator. Under the window is the kitchen sink.
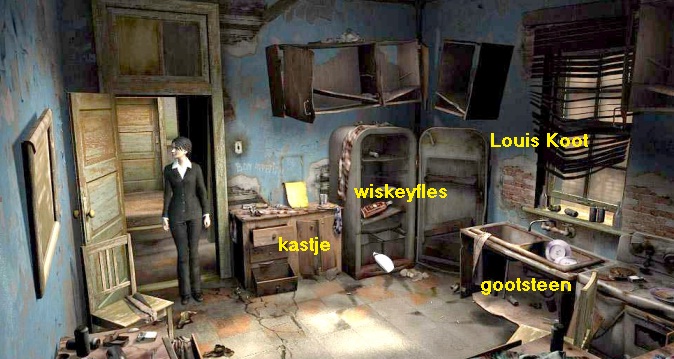
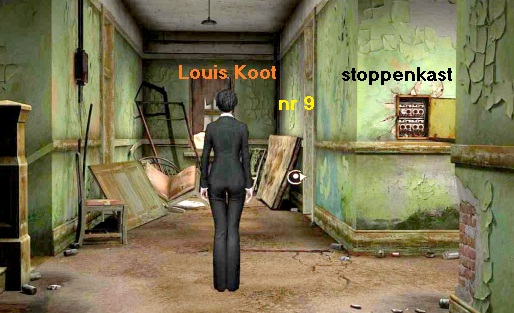
Grab the Whiskey bottle from the refrigerator. Zoom in on the cupboard, which is to the left of the refrigerator. You will then see the yellow paper, but you cannot use it now. Get out of the close-up and return to the hallway. Back in the hall, Nicole says there is another apartment on the other side of the hall. So walk down one screen via the bottom of the screen and you will see the end of the corridor. On the right is Apartment 9. On the wall, to the right, you see an open fuse box.
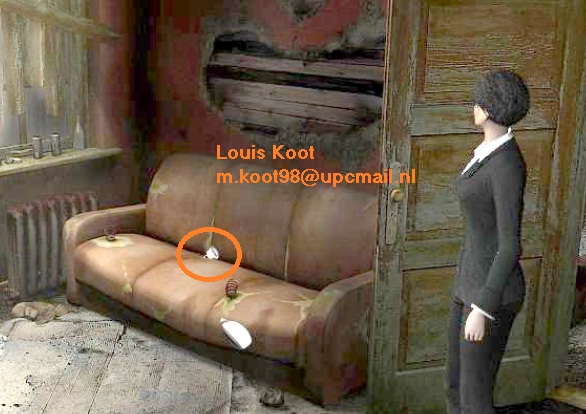
Enter Apartment 9. There is nothing to be found in the first room. So go into the 2nd room and ...
Nicole is not alone in apartment 9. A guy is sitting on the couch and Nicole is shocked and takes the man under the spot.
The man's name is Tatum Joel, or Joel Tatum. Talk to Tatum and repeat it several times until he tells nothing new.
Tatum says that Nick was here half an hour ago. Nick has given Tatum something to give to Nicole. However, Tatum can no longer remember where he left it.
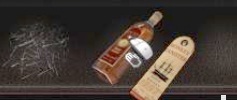
Try to refresh Tatum's memory with the bottle of whiskey you took from the refrigerator. So give Tatum the bottle of whiskey
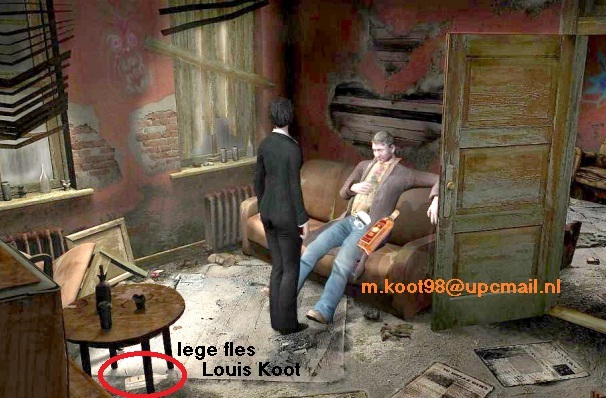
However, Tatum does not want this cheap brand of whiskey. Put the whiskey bottle back in your inventory. There is an empty bottle under the round table. Grab the empty Bottle. It's an empty whiskey bottle. Exit apartment 9. Back in the hallway, go down another screen and then back to the kitchen. Back in the kitchen, zoom in on the counter. Take the Plug from your inventory. Click the Plug in the drain of the left sink. Take the empty bottle from your inventory and put the bottle in the left sink. Now click on one of the two taps to fill the sink with water. This will soak the label off the bottle. Grab the Whiskey label.
In inventory, click the Label on the full Whiskey bottle.
Go back to Tatum Joel in apartment 9. Now give Tatum the bottle of Whiskey again and .... this time Tatum will take the bottle and he will give Nicole an Origami Bird from Nick. Left click on the Origami Bird to expand it. There is a message from Nick on it "James --- MOBILE" reads Nicole. Click in the doorway to exit the room and ...... Nicole sends Joel away. Your screen goes black for a moment and then you are back in the room where Joel was sitting on the couch. You can now see a white burnt-out fuse between the cushions of the sofa. Grab the Fuse. Nicole thinks the fuse can still be repaired.
Go back to the hall. Back in the hallway you now zoom in on the Fuse box, which is in the right wall.
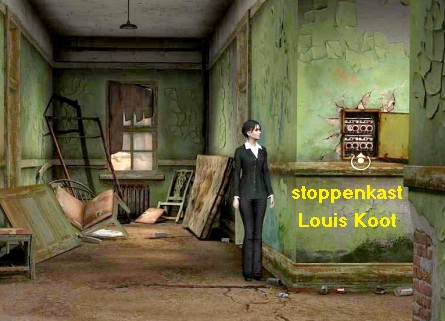
You can see that there are 8 fuses in the box. However, the only place you can put a fuse in is the second to last.
Put the burnt-out plug in that hole. (Use Fuse + Fuse socket). So nothing happens.
Take the fuse back from the box. Then combine in inventory the brushes of the hairbrush with the fuse (Use A handfull of bristles from the wire brush + Fuse) and you have repaired the fuse. Put the now repaired fuse back in the box but ..... The fuse blows again. Take the Fuse out of the box and fix the thing again with the metal brushes of the hairbrush. Go back to the kitchen. Back in the kitchen, you now zoom in on the Kitchen table that is next to the refrigerator against the wall.
He... that yellow paper has disappeared and you now see a socket with a broken fuse. Take the Flattened origami paper from your in ventory and click it on the fuse in the socket and ........ Nicole then pulls the fuse out of the socket and the fuse is on the cupboard. Go back to the fuse box and zoom in again. Put the repaired fuse back in the box and the fuse will no longer burn, because you have removed the broken plug in the kitchen. The lights in the hall are now on. Zoom out of the box and walk one screen to the left (Staircase view) to the stairs. Double click on the up stairs to continue up.
Nicole then comes to the small landing between 2 stairs. She cannot go further up.
Below the boarded-up window is a radiator that has almost faded to dust. There is something white on the floor in front of the radiator.
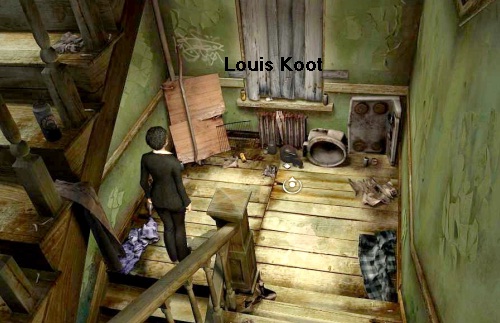
Zoom in on the radiator (Look more closely). You zoom in on a hole in the floorboards. There is a cell phone in the hole. Try to get hold of the cell phone. That won't work because your hands are too big for the hole. Take the Hairbrush (without brushes) from your inventory and click it on the mobile phone in the floor hole.
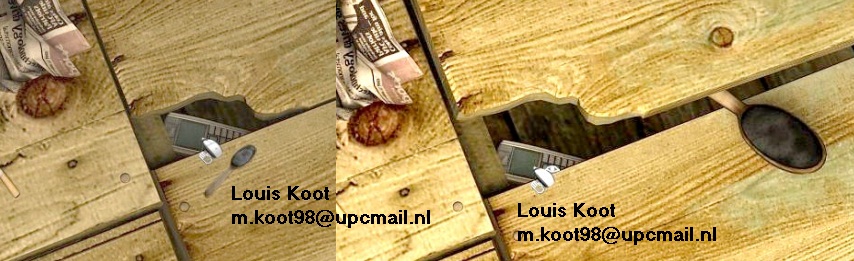
Nicole lifts the floorboard slightly with the hairbrush. Now click on the cell phone again and Nicole can now pick up the phone. It's James's cell phone. Grab the Hairbrush again. Look at the phone in your inventory. The phone is broken but Nicole thinks she can still retrieve the data from the phone. Zoom out and go back down the stairs to the 1st floor and then exit the house, on the right side of the stairs (Exit to street level). Back on the street, click on Nicole's car again and drive back to the:
FBI Building:
Evidence room:
Go back inside and in the main hall you enter the Evidence room again by clicking on the door with your Keycard. In the evidence room, Nicole notices that the Golden Head has disappeared. Take the Headless figurine from your inventory and place the figurine in the Deposit shelf. There are boxes in the rack. In the box, to the right of the box where you placed the statue, is a box containing James's things (Box of James's things). You have to let Nicole walk back to the door to find that box. Right under the "Deposit shelf" you will find a box labeled "Box of tailor's supplies".
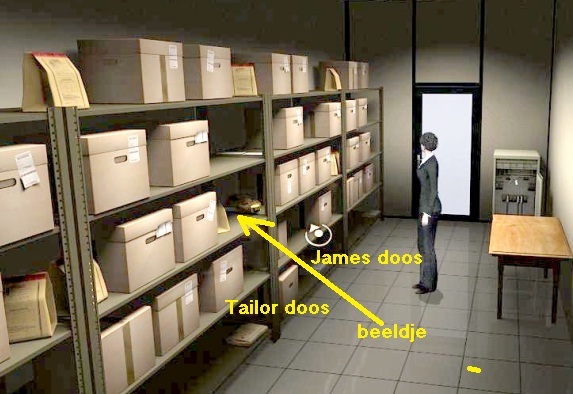
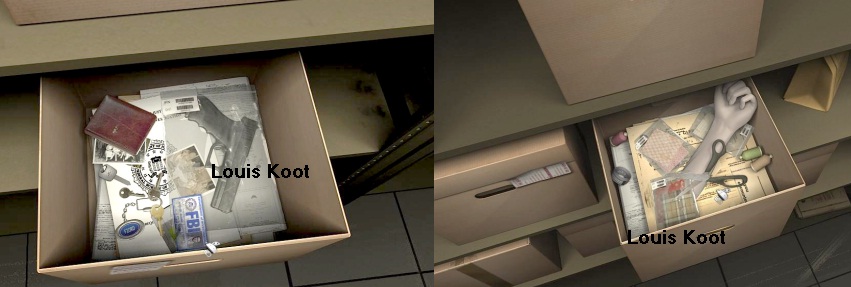
Then zoom on that box and then grab James's ID card from the box. Zoom out again. Also zoom in on the "Tailor" box and then grab the large Scissors.
Zoom out again, leave the evidence room and go up the stairs. At the top of the stairs, Nicole is back on the upper aisle.
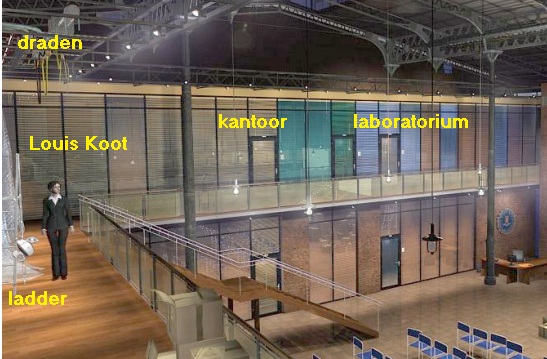
Don't go to your office just yet. You will see a ladder on the left edge of your screen. Above the ladder a bundle of wires comes out of the ceiling (Hanging wires). Click once on the ladder to slide the ladder under those wires. Then click with your zoom arrow on the hanging wires and Nicole climbs the ladder and you are zoomed in on the hanging wires.
On the left hangs a blue and a brown wire (Cables). Take the Scissors from your inventory and click with it on that blue and brown wire (Use Scissors + Cables).
You cut off a piece of blue and brown wire. Put the scissors back and zoom out. Click once again on the ladder to slide it back to the left. To the right of Nicole's office door you will see 2 more doors, one green and one brown. The brown right door is the laboratory door. Double click on the Laboratory door and Nicole will enter there.
Laboratory:
On the cabinet, which is against the right wall, is an "analyzer" and a "Sample analyzer". To the right of the door is a cupboard on wheels.
On that cupboard on wheels is a Jar with swabs. Next to that jar is the "Victim's blood test results"
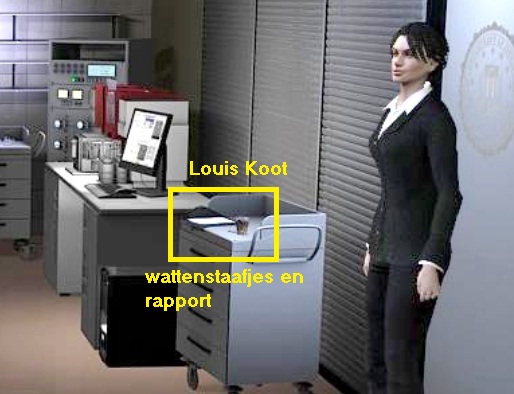
Click on the cotton bud jar to take out a handful of Clean swabs. Also see the "Victim's blood test result" report. Left click on the cotton buds in your inventory to pick up 1 cotton bud. Then click with one cotton swab on James's ID card (Use Clean swab + James's ID). You clean James's ID card with the cotton swab. Right click to put the, now dirty, cotton swab back in your inventory. Exit the laboratory and go to your office.Enter the storage room again. Now that you have James's cell phone and ID card, you can grab almost anything important from the storage room. So grab a Flashlight, a Battery, a Plastic bag, a pair of Gloves and a bottle of Luminol.
Look at all these items in your inventory. The Batteries are for a telephone. The plastic bag is for holding evidence. You must put on the gloves if you want to touch evidence. With the Luminol, blood stains become visible when you shine on it with the Lamp. Exit the storage room and zoom in on Nicole's desk.
Repair James's cell phone:
You are in the close-up of Nicole's desk. You now have to repair James's cell phone and you cannot do that in your inventory. You have to do that by first putting the things you need on Nicole's desk. The work area on Nicole's desk is the lower left corner, below the phone on Nicole's desk.Take James's cell phone from your inventory and place it on the bottom left of the desk. Pick up the 2 Wires (Cables) and click the wires slightly to the right of the cell phone (Use Cables + Desk). You then put the wires on the phone. Take the Battery from your inventory and also click the battery slightly to the right of the wires (Use Battery + Desk) that you clicked on the cell phone. You attach the battery to the wires and then zoom in further on the now repaired phone.
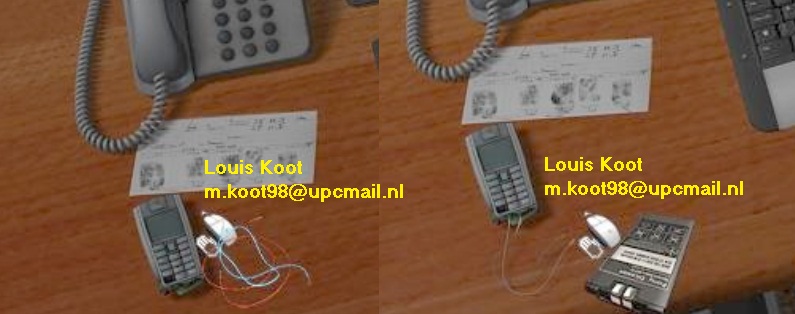
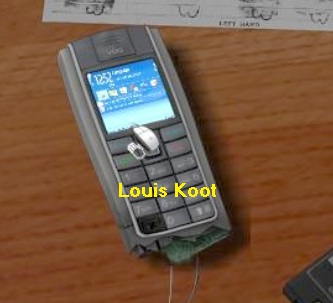
However, you need James's pin code to use the cell phone. Right-click in your inventory on James's ID card and Nicole will read a number: XFAD8673. 8673 is then the pin code for James's mobile phone. Now you have to dial this number on the phone which is a bit tricky because it is so small. So you have to click with your hand cursor on the keys 8, 6, 7, 3 on the phone. Hold your cursor over a number key and, at the top of your screen, you can read whether you have the correct number key. It is very easy to click a wrong key because the phone is small and your cursor is relatively large. If you enter a wrong number, you can Delete it again by clicking on the red telephone receiver button (top right). So enter pin code 8673 and then click on the blue square OK button and you are "in". Pictures appear on the screen of the mobile phone.
Click on the screen to transfer the photos from the cell phone to Nicole's computer. The cell phone then burns through and is now no longer usable.
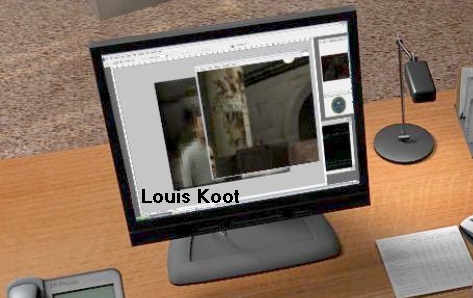
Zoom out and see .... on Nicole's computer screen you now see a, very vague, photo.
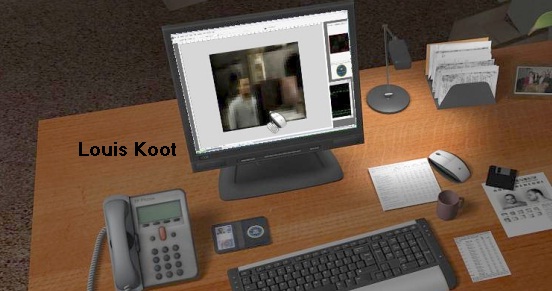
Click on the computer screen to sharpen the picture. It is a picture of Huaquero, the villain James watched. James was convinced that this Huaquero is the serial killer. Nicole thinks the photo was taken in Huaquero's hideout. Zoom out of the desk and exit the FBI building. Outside again click on Nicole's car and look ...
... a new location is available and it is "Thugs's Hideout", the Villain's Lair. Click on the picture and Nicole ends up at:
Hideout of the Villain:
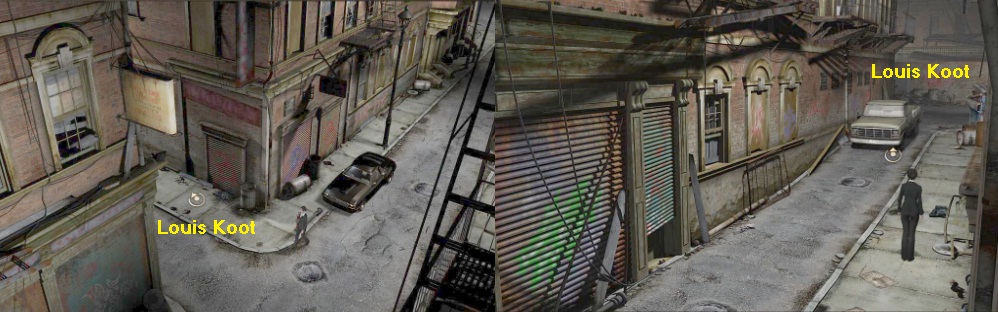
Nicole is in one of the slums of New York again and is standing at the entrance of a narrow alley (Alley).
So go up the alley. left, in and then further up the alley to the pick-up truck at the back of the alley.
You will then see the back of the pick-up truck. Something is on the ground near the left rear wheel of the truck. It turns out to be a Crowbar.
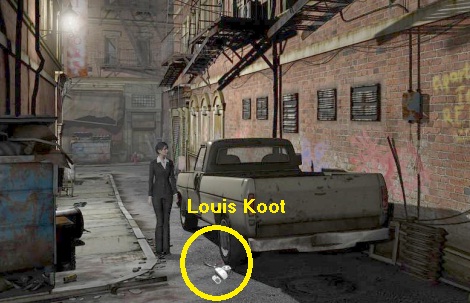
Grab the Crowbar. The crowbar prevented the pick-up from moving away. Now zoom in on the pick-up truck.
Nicole then looks in through the door window. The Handbrake is located between the driver's seat and the passenger seat.
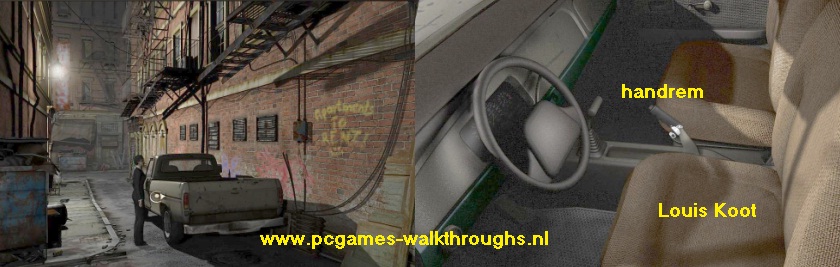
Click on the Handbrake and ........ the pick-up will drive forward, to the entrance of the alley. The Pick-Up Truck is now exactly below a raised fire ladder.Take the Crowbar from your inventory and click it on the firee scape ladder that hangs right above the Pick-up (Use Crowbar + Ladder)
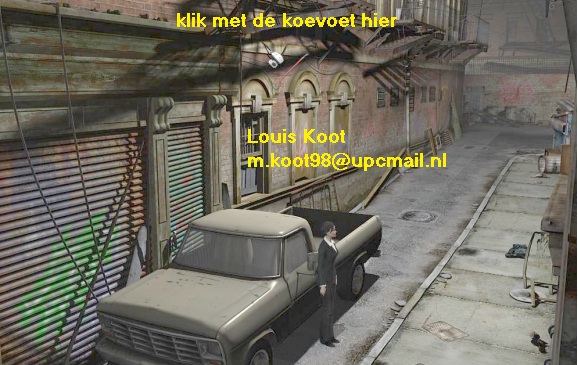
Nicole climbs on top of the car and pulls down the fire ladder with the help of the crowbar and she then climbs up the fire ladder.
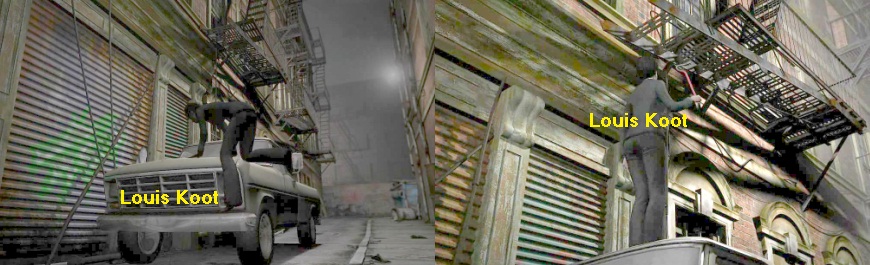
Nicole is then on the iron fire escape balcony. Both windows are closed. In front of the right window is a rickety air conditioner. Zoom in on the Air conditioner. The thing also works. Take the crowbar from your inventory again and then ram the crowbar into the rotating fan of the Air Conditioner (Use Crowbar + Air-conditioner fan blades) and ....
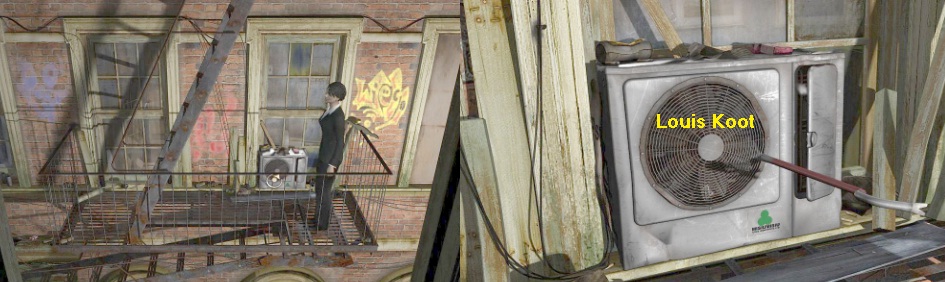
..... the air conditioner is now broken and a guy opens the left window to get fresh air in.
Zoom out and ..... then click in the now opened left window. Nicole overhears a conversation between the villain Huaquero and an accomplice.
SAVE YOUR GAME before entering through the window. Enter through the left window.
Once inside, you must ensure that Nicole does not make a sound. The gangsters are still inside. You can see one of the gangsters in the next room through the opened room door. There is a bag on the gray sofa. Nicole has to take a picture of the bag that's on the gray sofa. But the floorboards creak, so to reach the sofa without a sound, you now have to move Nicole through the room via small steps.
First click in the doorway so Nicole notices that there's someone is in the next room. Now you can move Nicole around the room in small steps. Nicole is standing on a part of the wooden floor that is a bit darker than the rest of the floor. Stay on the dark part of the floor and then move Nicole to the right until she is in the HERE spot. Then, slowly and carefully, move Nicole past the cupboard and the boxes until she is next to the right boxes at the door. Then make sure Nicole looks at the couch.
When you have Nicole in the right place, open the PDA and in the PDA screen click on the Photo Camera button and ........
... You take a picture of the bag that is on the couch and you see a piece of paper with a telephone number. However, you will see the phone number mirrored
The telephone number that you now see is different each time, but it always starts with 555. The rest of the number, however, is determined "randomly". You see the phone number in mirror image, so turn your head to view the number "upside down" and you will know the number. So with me this number is: 555252911. To get the gangsters out of the next room, Nicole now has to call up this phone number . So click on the phone button in the PDA screen and the phone will appear on the screen.
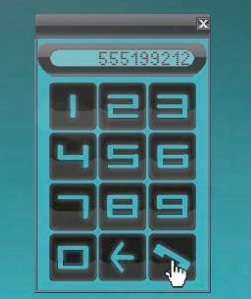
Then enter the found telephone number, in my case that is 555252911 and click on the telephone receiver button. If there is already a different number in the display, you can first remove that number from the display with the Arrow key. Nicole calls up the gangster's phone and you hear the gangster walk away. Wait until you have automatically left the PDA screen and then walk into the next room
The room has a wooden tiled floor. There are 2 tables and a chair and a large closet.
Click on the left cupboard door of the large cupboard and ... Nicole opens the left cupboard door and discovers a secret passage in the back wall of the cupboard. Double click in the closet (The back of the closet) and ..... Nicole opens the secret door and you look into the next room
Go through the closet to the:
Secret room:
The game now makes an AUTOSAVE, and for good reason because it will soon be exciting and difficult. On the right is a chest of drawers.
Zoom in on the chest of drawers. There are 4 drawers in the cabinet. Number them, from top to bottom, 1, 2, 3, 4. Click on Tray 2 to open it.
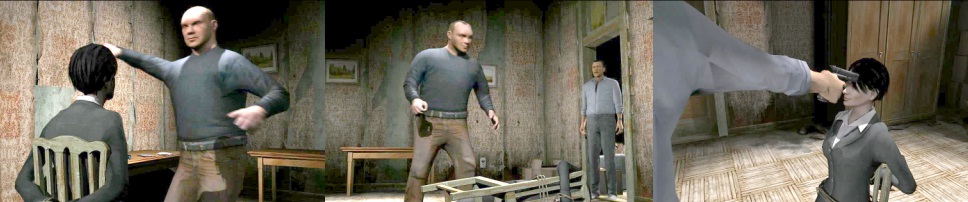
In the drawer is the Ritual Dagger that has disappeared from the museum. Try to get the dagger and ...... Nicole gets a hit on the head ...
Nicole has been too careless and she is tied to the chair in the previous room.
The gangster Huaquero wants to kill Nicole but Nicole just manages to prevent this by telling an excuse
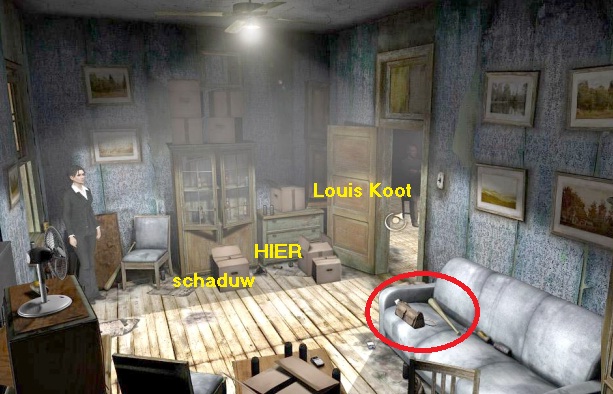
Nicole is thus tied to a chair in the room with the wooden floor tiles. You have to be fast and you cannot make a sound. Nicole has to reach the table in the left corner and you have to do that by sliding Nicole with chair and all over the floor tiles. But some tiles are making noise and others are cracked.
You can only slide Nicole over the tiles that are not making a sound. You shouldn't take too long either. If you make a noise or take too long, the henchman of the gangster Huaquero will return to knock Nicole unconscious again and you have to start all over again. If you miss 3 times, Nicole will be shot and it is GAME OVER. Then you have to load the AUTOSAVE to start over from the chest of drawers in the secret room. Your cursor is now an almost invisible spiral. Click with the spiral cursor on the tile where you want Nicole to go. That has to done be tile by tile. You cannot skip a tile.
Here is the correct route
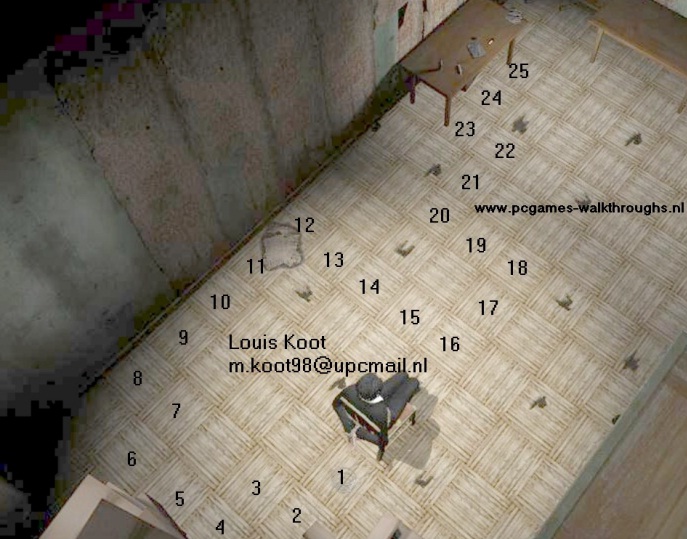
When you have reached Tile 16, you quickly continue the route to Tile 25
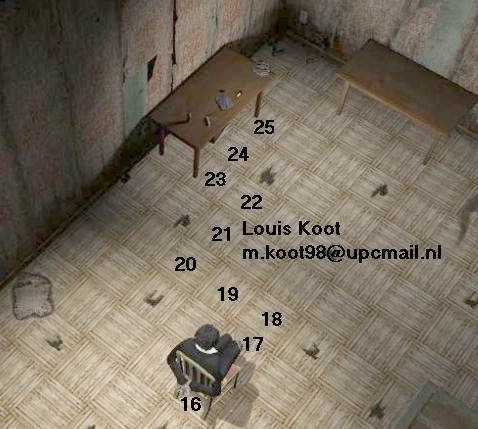
Safely on tile 25, at the table, Nicole will free herself. You see this in a short cutscene
After the cutscene, quickly click on the left cupboard door again and then go through the cupboard to the secret room.
Nicole automatically locks the secret door so that the gangsters cannot enter. Zoom in again on the chest of drawers.
The dagger is still in the opened 2nd drawer. Do NOT grab the dagger but click on the dagger with the Luminol.
Then click with the Lamp on the dagger and Nicole will find blood stains on the dagger.
Click on the dagger with the Gloves to safely take the dagger from the drawer. Nicole automatically puts the dagger in a plastic bag.
Zoom out of the drawer. There is a carpet on the floor. Look at the top left corner of the carpet. Nicole says that corner of the carpet is more worn out than the rest of the carpet. Click on the left corner of the carpet and .... Nicole folds a large corner of the carpet and .... she finds a trapdoor in the floor.
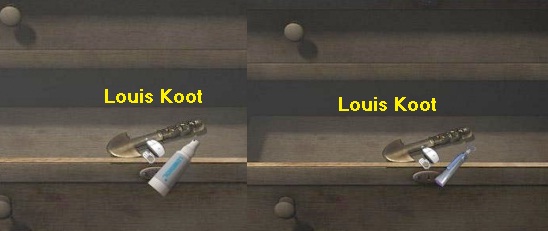
Look at the Trapdoor. Try to open the trapdoor. That does not work. Behind Nicole are 4 paintings on the wall. Count from left to right and then zoom in on the 2nd painting (The Cold of Morning). Click, in the close-up, on the painting and .... Nicole discovers a lever behind the painting. Click on the lever and zoom out.
Now click on the trapdoor again and ... now it opens.
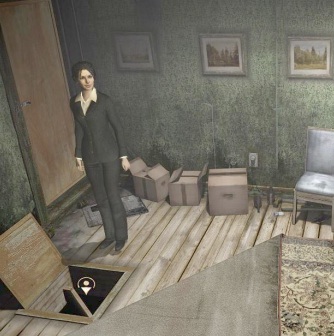
Double click in the opened trapdoor and .... Nicole ends up in the basement.
However, you can see that the villian also wants to go into the basement, but he changes his mind.
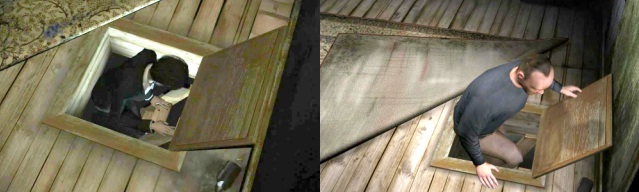
basement
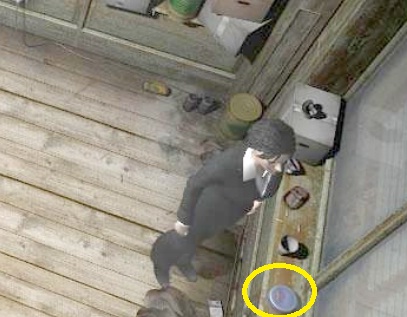
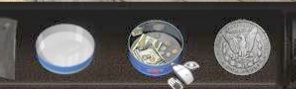
To the left of Nicole is a shelving unit. There is a keybox in the shelving unit. Right in front of Nicole is the exit door. On the right you see the window with a windowsill. On that windowsill is a flat gray and round can. You can see that can in at the bottom right of your screen. Check out that can). Nicole thinks she could use the can. So grab that round gray can.
In inventory left click on the can to open it. There is money in the round tin. Left click on the can again and Nicole takes out a Coin.
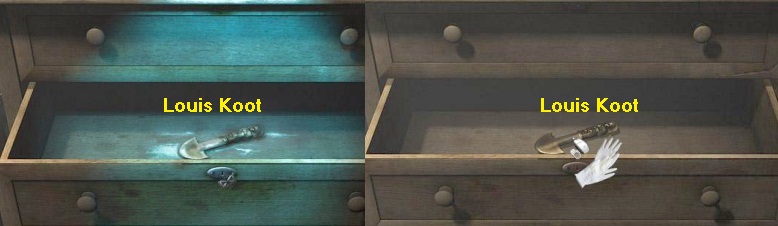
In the rack, on the left, is a Keybox. Zoom in on the Keybox. View the Keybox. The Keybox has a glass door. Try to open the glass door. It does not work. Take the Coin from your inventory and click it on the glass door and ..... the door will open. There are 8 keys in the keybox.
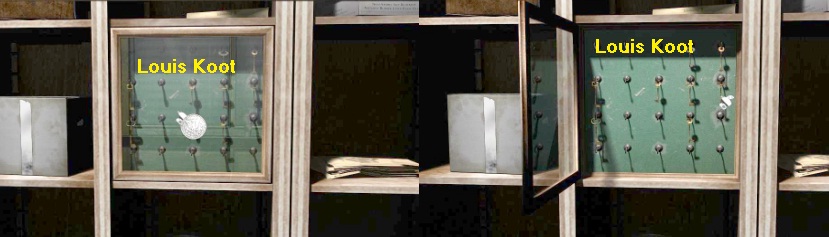
Click on one of the keys and Nicole takes all 8 keys from the keybox Zoom out. Zoom in on the exit door, the door has a window. There is a roller shutter on the outside. The keyhole is located under the doorknob. To the right of the door is the lever for the roller shutter. Above the lever is a lid that covers the roller shutter mechanism.
One of the 8 keys fits in the keyhole of this door. So try out the keys one by one by clicking on the keyhole with each key. It turns out that the smallest key is the correct one. When Nicole has unlocked the door with the smallest key, click the doorknob to open the door. Nicole cannot leave the cellar yet because of the roller shutter. Click on the Roller shutter lever. The roller shutter then rises slightly but falls back. Zoom in on the lid (Roller-blind mechanism) above the lever. The lid is secured with 4 screws. Click on each screw with the Coin to loosen it. You have to do that one by one, so always take the coin from inventory again and then click on the next screw.
When you have removed the 4 screws you will see the roller shutter mechanism. You see a spring below the gears. On the left the spring is attached to a Ratchet. That Ratchet is broken. You can fix the Ratchet with one of the keys. So click again, one by one, with your keys on the Ratchet. You will then find the correct key and the Ratchet will be repaired with the key.
Zoom out and now click on the Roller shutter lever again and ......
The shutter now goes all the way up but .... the gangster is at the door with the gun drawn.
However, the gangster is disabled by the reclining shutter and Nicole ends up outside in the alley.
Nicole's Gun is to the right of the gangster. Grab the Gun and go one screen to the right and .....
Nicole runs away and runs to the Abandoned building where gangster Huaquero is arrested by Nick.
We end up in Day 3 and in the FBI Building where Huaquero is being questioned. Nicole has a chat with Ruth and then we are back in Chaser's office.
Chapter 3: Day 3: New York
FBI Building:
Talk extensively with Chaser again until he says nothing more meaningful. Chaser is not exactly happy with how Huaquero's arrest went. He is afraid that Huaquero's lawyer will argue that the arrest did not follow the rules. Chaser also raises some doubts about his own agent Nick. Because let's be honest ... where is Nick actually? We haven't seen that Nick once so far.
Laboratory:
Exit Chaser and go to the Laboratory. Nicole now wants to compare the blood traces on the ritual dagger with the blood traces of the victims. On the trolley is a jar with cotton buds and the "Blood test report" (Victim's blood test result). You've taken the cotton buds before. Previously, you could only view that blood test report. Now you can get it. So take the "Blood test report" from the trolley.
|
The cabinets, which are on the back wall, have an "Analyzer" and a "Sampler Analyzer". Zoom in on the Analyzer.
In inventory, pick up a clean cotton swab and click it on the bag containing the ritual dagger to take a blood sample from it. You then have a "Dirty swab". To the left of the "Sample testing equipment" are 2 racks with test tubes (Test vials). Take a Test Tube from the right rack. Combine the "Dirty swab" with the Test tube in inventory. You then have a "Vial with a swab". Take another Test Tube from the right rack. Take the Test tube with a swab from your inventory and click it on the sample testing equipment. The device will analyze. You will see a small red arrow on the screen of the test device.
That red arrow is the "Transfer switch". Click on the "Transfer switch" to send the test result to Nicole's computer. Zoom out and exit the lab and go back to your office. |
Office:
Zoom in again on your desk and .... on Nicole's computer screen you will see the results of the blood test (Blood tests results from Huaquero's knife). Take the Blood test result from your inventory and click it on Nicole's computer screen to compare the victims' blood test report with the result of the dagger test.
So Henry Fairbanks's blood is on the dagger and Nicole thinks this evidence is enough to convict Huaquero. Zoom out of your desk and go to Ruth. Chaser is talking to Ruth and tells that Huaquero was murdered. Have a chat with Ruth and then leave the office.
Evidence room;
Go to the downstairs hall and click again with your Keycard on the Evidence room door to re-enter the evidence room. In the evidence room you zoom in again on the box that contains James's things (Box of James's things). There are 4 keys in the box. 2 of the keys are on a FORD key ring. Take the key above the FORD key ring. You then have the "James's Key".
Zoom out of the box and then take the Head of a Pre-Colombian figurine and the Headless golden figurine from the shelving unit
Combine the Head with the Statue in your inventory and .... the Head will open. Something is hiding in the Head.
Left click on the head and you take out a Bag of White Powder. That white powder needs to be analyzed, so go back to the lab.
Laboratory:
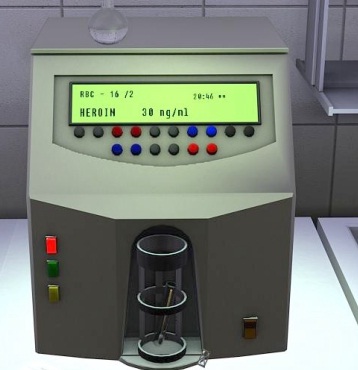
Now zoom in on the right Sampler Analyzer. In your inventory, combine a cotton swab with the bag of white powder. In any case, the White Powder is not sugar. Put the cotton swab (Swab with sample) in the test tube that you had already taken. Then click on the Analyzer with the Test Tube and the thing tells you that the white powder is Heroin.
Zoom out, exit the lab and go back to your office. Zoom in again on Nicole's desk.
Now click a few times on Nicole's keyboard. Nicole "patches up" Huaquero's photo.
Keep clicking the keyboard until Nicole recognizes the background in the photo as the basement of the Museum of Pre-Colombian Art. In the photo Nicole sees a poster that she also saw in the basement of the museum. You can no longer click on the keyboard. Zoom out and exit the FBI building. Once outside, click on Nicole's car again and travel back to:
Museum of Pre-Colombian Art:
Go back inside. Nicole will automatically talk to the doorman who announces that Director Warren is not there and that Nicole must have a court order to enter the basement. So go to the Exhibition Hall. Go to the Mummy display case at the back right of the room. You are then back in the corner where you got the Fire Extinguisher in Chapter 1. A narrow display case hangs on the right wall and a plate (bowl) to the left of that display case.
Grab that Plate off the wall. Walk back down one screen and then enter the Archive, through the double doors on the left.
Archive:
To the left is a bookcase and a shelving unit. There are 2 tables on the right. On the front table is a Laboratory magnifying glass.
On the back wall is a narrow yellow / blue box. To the left of that narrow box is a roll of aluminum foil.
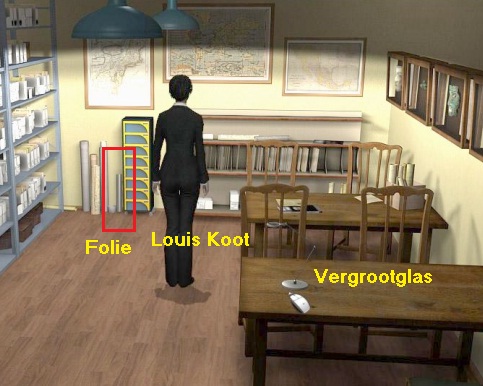
Grab the Magnifying Glass from the front table. Grab the roll of aluminum foil. Exit the archive and go to the:
Orangery:
At the bottom right is a large statue. Continue to that statue. Nicole has to get the doorman leave his desk and to do that she has to sound the alarm. She has to do that by raising the temperature here in the Orangery. And she has to do that with this statue. There is a temperature sensor on the left side of the plants. There is a white border at the bottom of the image. You don't get an eye on it and you don't get a hand on it.
Take the Plate (Bowl) from your inventory and place the Plate on the white border at the bottom of the statue.
Then take the aluminum foil from your inventory and click the foil on the plate.
Then take the Magnifying glass from your inventory and also click it on the plate and ...

A light beam then goes from the board to the temperature sensor and this triggers the alarm. Go back to the exhibition hall and ...
........ Nicole will automatically talk to the doorman. Go quickly to the entrance hall and then quickly, via the basement stairs, to the basement:
Basement:
If all is well, the 5 lamps in the basement are still on. If that is not the case in your game, you will have to turn the lights back on with the switches. Walk back to the back of the basement and .... Nicole now sees the Poster that she also saw on the Huaquero photo. Zoom in on the Poster.
The poster is attached to a round pillar and above a box. Click with James's key on the box to open it.
There is a scale in the box. Take a cotton swab from your inventory and click it on the scale to get a sample. Nicole automatically puts the cotton swab back in a bag. Look at the cotton swab and you will learn that there's now Heroin on it. Zoom out. You will now receive a text message from Nick. A 5th victim has been found in the Metro.

Nicole doesn't understand. Huaquero was the murderer, right? And Huaquero was murdered, right?
Exit the cellar and the museum. Click on Nicole's car and travel to it now:
Metro station (Subway):
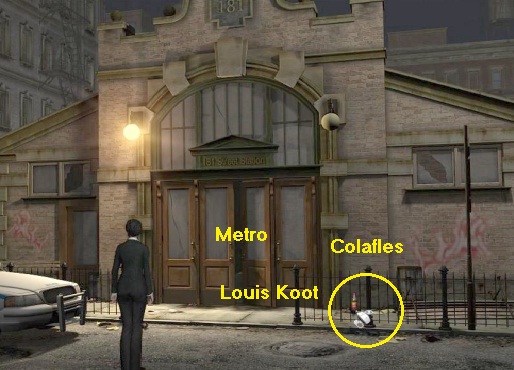
You are at the 181street metro station. In the building complex you see the BANG BANK. In the building, to the left of the BANG BANK, you will see a shop. To the right of the shop is the front door of an apartment building (Tenement). The entrance to the metro station is the low building where number 18 is on the top facade. Continue to the entrance of the metro station. There is a Coca Cola bottle to the right of the entrance.
Grab the Cola bottle. The bottle is still full of cola. Enter the station. Nicole ends up underground on the platform of the metro line.
Agent Jeff is standing by the body, which is already in a body bag. Talk to Agent Jeff.
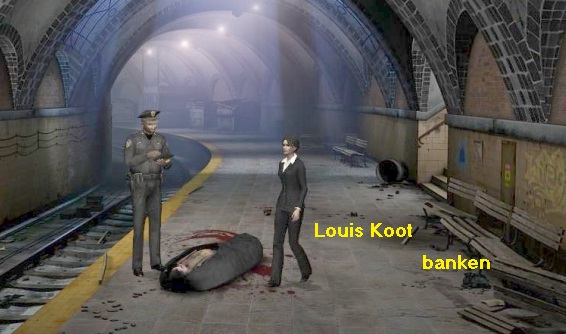
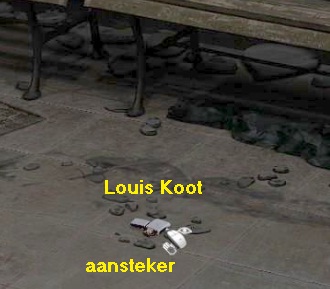
When agent Jeff has nothing more to say, right-click on the body to view it. The victim is drunkard Joel Tatum. On the wall to the right are some wooden benches. Zoom in on those wooden benches. Just in front of the benches there is a Lighter on the ground. Take the lighter.
Zoom out and then, via the bottom of the screen, go down one screen and then walk one screen further, to the scaffolding that is at the end of the platform. There is a blue petrol jerry can in front of the scaffolding and a blue pincer on the scaffolding. Newspapers are lying on the floor to the right of the jetty. In the back wall of the tunnel, behind the scaffolding, you see a round grid.
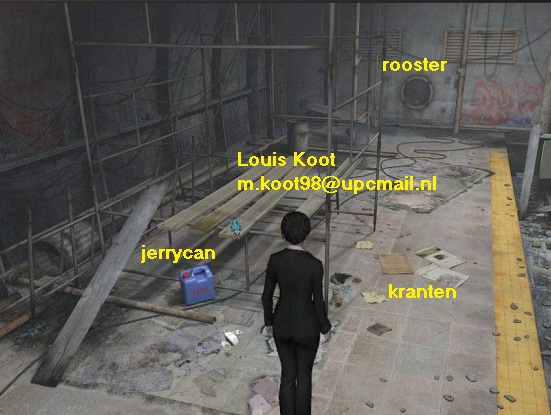
Take the blue Jerrycan (Gas can) and then grab the Newspaper from the ground. Nicole doesn't need the Pliers. When you pick up the papers, Nicole says they were used to wipe the floor ... to wipe footprints ??? In inventory Left click on the newspapers to roll them up. You then have 3 rolled up newspapers.
Go to that round grid. It is the grid of a ventilation tunnel and you see a Champagne bottle in the tunnel. The grid is secured with 4 wing nuts. Click on one of the wing nuts. Unfortunately .... the wing nuts are rusted. Well .... you have a bottle of cola, and what works better against rust than cocacola? So click with the Cola bottle on 1 of the wing nuts and you have "de-rusted" all 4 nuts.

Put the Cola bottle back away with a right click and then click on each of the 4 wing nuts to remove them. Then click on the grid to also remove it. The ventilation tunnel is teeming with filthy beetles. If you want to grab the Champagne bottle, Nicole won't do that while those beetles are around. Place the Rolled Up Newspapers on the Champagne bottle. In inventory, combine the blue Jerrycan with the Lighter (not the other way around) to fill the lighter with gasoline. Then click with the Lighter on the newspapers and ..

the beetles gets burned. So, after the cutscene, grab the Champagne bottle. There is a note in the Champagne bottle.

Zoom out of the grid and walk 2 screens back to the corpse and agent Jeff and then exit the metro station via the stairs in the right wall. Outside again you walk one screen further down, via the bottom of the screen. You are then back on the overview screen and see the BANG BANK building again. Now go to the front door, to the right of the shop.
You cannot go in, but the towbar hangs on the door.
You now have to carefully move your cursor to get the hand / eye cursor on the towbar. Then click on the towbar and Nicole pulls off the hook and you have the thing in your inventory. Then combine the Towbar with the Champagne bottle to fish the note out of the bottle. Then left click on the rolled up note and .... It is Joel Tatum's Art Diploma from New York University. Shees ... was that drunkard an ecducated man? Walk back one screen, click on Nicole's car and Day 3 is over. You end up in:
Chapter 4: Day 4:
FBI Building:
Go back inside and up the stairs again to the upper aisle and go back to the:
Laboratory:
Zoom in again on the left Analyzer and then take another empty Test Tube from the racks.
In inventory you then put the cotton swab, which is in the plastic bag, in the test tube.
Stay in the close-up and go one screen to the left and you are again in front of the right Analyzer. Then place the Test Tube back into the Analyzer and wait for the result. The cotton swab also contains Heroin, so the museum is "dirty". Zoom out and go to Ruth in your office. Talk to Ruth. The conversation goes back to normal and is about Chaser. Chaser is not there and Ruth gives some background information about Chaser. Talk to Ruth until nothing new comes out of Ruth.
Nicole talks about Joel Tatum's diploma and you experience that the other 4 victims also studied at the University of New York and that they were about the same age. Nicole wants to look all this up in the library of the University. So leave Ruth and the FBI building and drive Nicole's car to:
The library:

Go inside. Nicole ends up in a long hallway. To the left is the door to the Microfilm Room.
However, first walk through the corridor via the bottom of the screen. You will then see the Microfilm Room door, but now also the door of the Reading Room.
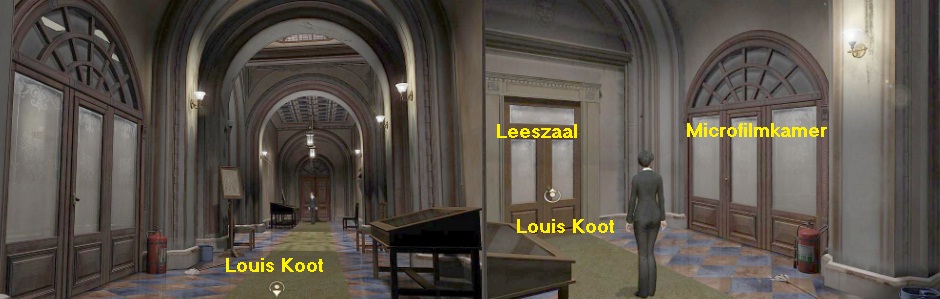
First go to the:
Reading room:
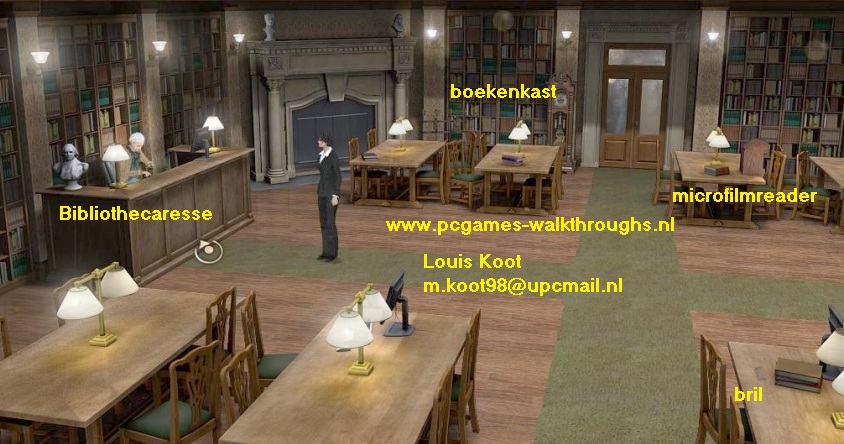
The librarian sits behind the desk on the left. Talk to the librarian. This lovable lady has lost her glasses
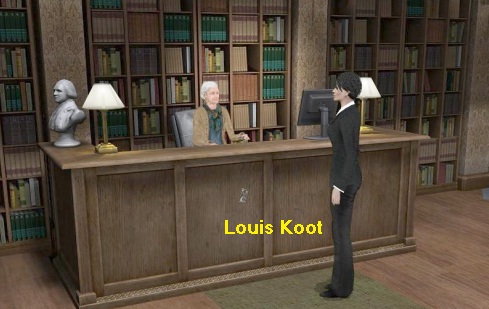
Nicole identifies herself and then asks if she can see the 1982-1896 year class book of New York University. Talk to the librarian a few more times. The librarian is alone in the building and she will close the library in a few minutes. But Nicole can go and find the class book herself and then give it to the librarian. Go back, via the bottom right, one screen to return to the overview screen of the room. Then go to the bookcase to the left of the entrance.
In the close-up screen of the bookcase, scroll through the boxes with your cursor until you find the 1986 NYU Yearbook.
Then grab that red book from the shelf and go back to the librarian. Then give the Yearbook to the librarian. Nicole lists the names of the 5 victims and the librarian looks them up in the book. However, a page has been torn from the book. Continue to talk to the librarian.
The Librarian explains that there is also a microfilm of the yearbook and that this microfilm can be viewed in the microfilm room. Unfortunately, the librarian wants to close the library now, so Nicole will have to come back tomorrow. Talk to the librarian again and Nicole convinces her to stay a while until Nicole is done in the microfilm room. Talk to the librarian again so she can open the drawers of the microfilm room cabinets. The librarian does this via a button in her desk. Exit the reading room into the hallway. Then click on the Microfilm room door to enter it now
Microfilm room and reading room:
On the wall are 2 blue cupboards with a lot of drawers in them. So in all those drawers are the microfilms and all drawers are now locked because the librarian just locked them. Continue to the chest of drawers. There are far too many drawers to search and Nicole has no idea in which drawer to look for the class yearbook microfilm in. So go back to the librarian and talk to her again. The librarian has now found the catalog number of the microfilm, which is 01-044-86.
Go back to the microfilm room and now zoom in on the blue drawers. Nicole notices that the numbers on the drawers don't match the catalog number that the librarian just told her. First, all numbers on the drawers start with 00 and second, there are no dashes between the numbers. Zoom out and go back to the librarian and talk to her again to ask her about the numbers on the drawers. The librarian now tells that the numbers on the drawers are the new catalog system. The number she found is still from the old system. Keep clicking on the librarian and she will explain the difference between the old and the new filing system.
In the old system, the filing system consisted of a two-digit catalog number, such as 01, then a three-digit position number, such as 044, and then the two-digit year number, such as 086. In the new system, the catalog number has 3 digits, so 001, the position number also has three digits, so 044 and the year number 4 digits, so 1986. With this knowledge you know that 01-044-86 corresponds to 0010441986. Go back to the microfilm room and zoom in on the drawers again. The drawer you are looking for is in the leftmost column. The top 5 drawers in the left column go from 00104419864 to 00104419869. Click on the drawer with number 00104419867 to open it.
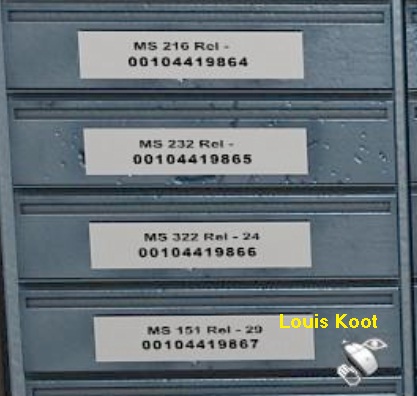
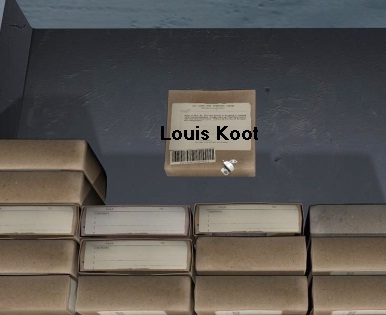
In the drawer is a box with microfilms (Boxed microfilm). Grab the box of Microfilms.
Zoom out and go back to the librarian in the reading room. Talk to the librarian again and do that twice. The librarian then tells Nicole that the microfilm viewing device is on the other side of the reading room. Walk back one screen to the right so that you are again on the large overview screen of the room. The Microfilmreader is on the table to the right of the entrance.
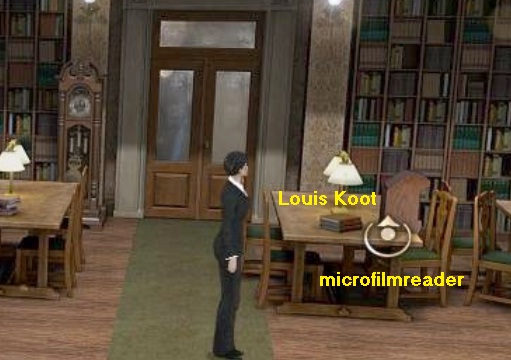
Zoom in on the Microfilm Reader.
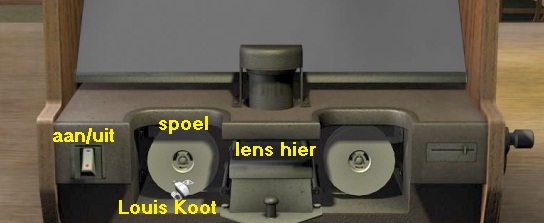
Below the screen you will see 2 empty reels. The on / off button is on the left. Take the left reel from the reader.
Then combine the Microfilm box (Boxed microfilm) with the Reel in your inventory to wind the film on the reel.
If you try to combine the reel with the Microfilm this will not work. You really have to click the Microfilm box onto the empty reel. Then put the reel back in place under the reader screen. Then switch on the reader with the on / off button and ..... a very blurred image will appear on the screen.
Click on the blurry image in the screen. The Reader has no lens. Zoom out, bottom left or bottom right, out of the reader.
The librarian's glasses are on the table at the bottom right of the overview screen.
Grab the Glasses and go back to the librarian. Give the Glasses to the librarian and then talk to her again. Nicole says that the optical lens of the reader is broken. The librarian says she has found a lens. Talk to the librarian again and she puts the Lens on the counter. It's a tiny thing, but it's in the middle of the counter.

So grab the Lens from the desk and go back to the Microfilm Reader.
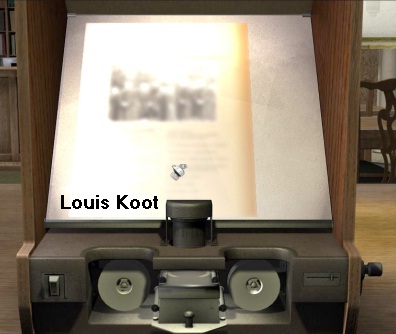
Place the Lens in the drawer, between the two reels and .... on the screen the document is now clearly visible.
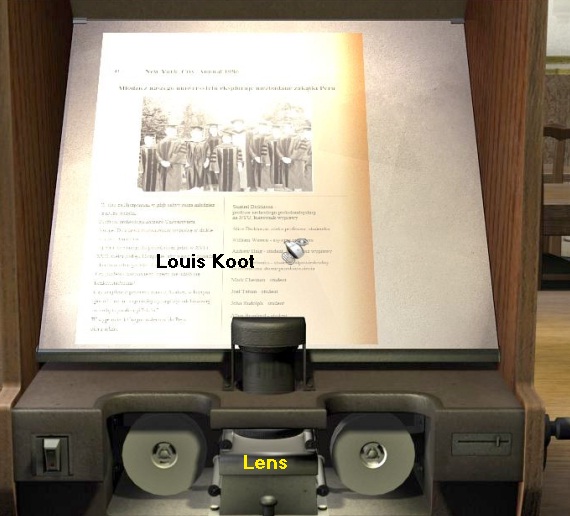
Right click on the screen to read the document Nicole is reading aloud and she reads about:
........ an expedition to the Amazon, led by Samuel Dickinson. Dickinson was assisted by his daughter and William Warren. In addition, students Haig, Fairbanks, Chestum, Tatum, Rudolph, Branford and Raches also attended. Raches' body was found in the wilderness. Dickinson and his daughter were missing. Warren took over and brought the others home. Haig, Farrbanks, Chestum, Tatum, Rudolf and Raches have since been murdered. Warren and Branford are the only ones from the original expedition still alive.
When Nicole is done reading, right-click again on the document in the reader screen and Nicole continues reading. When Nicole is finished for the second time, she expresses her suspicion about director Warren and makes a copy of the Expedition members list (List of expedition members) which then disappears to your inventory. Zoom out of the reader and go back to the librarian. Talk to the librarian again to thank her for her help. Nicole arranges transportation for the kind old lady to take her home in a police car. You're done here, so exit the reading room and walk down the hall to the front door and then outside. Click on Nicole's car and drive back to it:
Museum of Pre-Colombian Art:
Enter and through the exhibition room to the archive room. Director Warren is in the archive.
Take the List of expedition members and click on Warren with it.
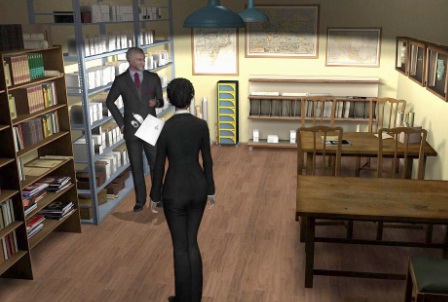
Nicole talks to Warren about the expedition and the fact that 5 members of that expedition have already been killed in the past few days. Warren doesn't feel guilty or fear for his own life. Continue talking to Warren and you'll find out that not all of the Expedition's names are on the list.
Juan Alvarado later joined the expedition. This Juan Alvarado is an archaeologist and he lives in Cusco, which is Peru. Huaquero was also part of the expedition. Huaquero was a grave robber and offered his help in the search for the missing Dickinson and his daughter. In payment for his services, Huaquero later demanded a large sum of money. Huaquero believes the expedition members have cheated on him.
When Warren has nothing more to say, you leave the museum again. Outside again you will meet Banford.
Talk to Banford until he has nothing new to say either. Keep talking to Banford and he'll tell you more about Juan Alvarado.
Banford and Alvarado became friends during the expedition 20 years ago and were recently in touch. Banford thinks Alvarado is the killer who has already killed 5 ex-members of that expedition. So Branford doesn't believe the murders are happening because of a curse from the Incas. Banford is afraid of Alvarado. Juan Alvarado was in New York when the murders happened, but has since gone back to Peru. Alvarado called Branford and left a message. Alvarado also sent a letter with a photo of his home in Cusco, to Banford, with the address and sacred icon. Unfortunately, during his busy work at the museum, Banford lost the photo in the museum.
When Banford has nothing more to say, go back into the museum. However before Nicole goes back into the museum she automatically calls Ruth and asks her if she wants to find out whether Juan Alvarado really flew back to Peru. Enter the museum again and go back to Warren in the archive room. Talk to Warren again and keep doing that until the Warden has nothing more to say. From Warren you will now learn more about Huaquero and about things that occurred during the expedition of 20 years ago.
During the expedition, shards and old Spanish coins were found, the value of which is said to be not very high. Huaquero therefore helped the students to smuggle the shards and coins out of the country. Warren wanted nothing to do with drugs and he forbade Huaquero to hide the drugs in the objects. Warren thinks Huaquero wants to charge him for the murders. Warren has notified Chaser of his suspicion over the phone. Nicole is very surprised about this because Chaser has not told her about this.
When you've finished talking to Warren, go to the Orangery.
The photo of Juan Alvarado's house is on the ground next to the bag of potting compost. Take the photo and exit the Orangery.
Nicole receives a call from Ruth in the exhibition room. Ruth says that Alvarado has indeed left America. Nicole then asks Ruth to book 2 plane tickets to Peru, the necessary visas and 2 hotel rooms for her and Nick. Then Nicole calls Nick but, as usual, does not answer. Exit the museum and drive back to:
FBI building:
Go back inside and to the office and talk to Ruth again. Ruth has arranged everything for Nicole's trip to Peru. Nick still hasn't checked in, but Chaser is back in his office. Enter Chaser's office and talk extensively with Chaser until he tells you nothing new.
Nicole gives Chaser an update on what she has discovered so far about the expedition 20 years ago and that the murders are related to that expedition. Chaser says he informed Nick of Warren's suspicions about Huaquero and that Nick should have told you this. Nick forgot about this. Nicole thinks that the shards and coins found may have been valuable after all and that one of the expedition members knew about this and has concealed it. Nicole tells Chaser about her nightmare and that she therefore thinks she should go to Peru to continue the investigation into the murders there. Chaser gets angry and forbids Nicole to fly to Peru and orders Nicole to take a day off.
Go back to Ruth and talk to Ruth again. Nicole doesn't tell Ruth that Chaser doesn't let her fly to Peru. Nick still hasn't come forward. Ruth suggests that Nicole should fly to Peru alone and then let Nick know the address of the hotel. Exit the FBI building ......

...... Nicole decides to go against Chaser's orders and still fly to Per
u. Finally, Chaser has given her a day off, and what she does in her spare time has nothing to do with Chaser. So Nicole flies to Peru and you end up in:
2020: Walkthrough by: Louis Koot