2020: Walkthrough by: Louis Koot
If you have found this walkthrough via google search or via another site then you have probably not visited my site.
A lot more very detailed game walkthroughs can be found on my site at: www.pcgameswalkthroughs.nl
Intro:
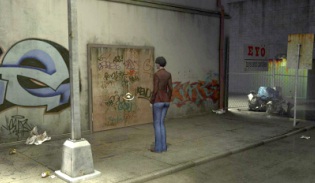
It is night ..... a red car parks along the sidewalk. A young woman gets out of the red car.
While the young woman shuts down her car, she feels someone behind her and she turns and .........

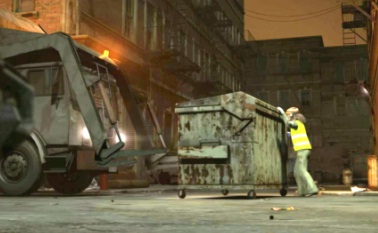
It's early in the morning. A garbage man pushes a large garbage container down an alley to a large garbage truck.
The garbage truck starts to lift the container to empty it into the "belly" of the garbage truck.
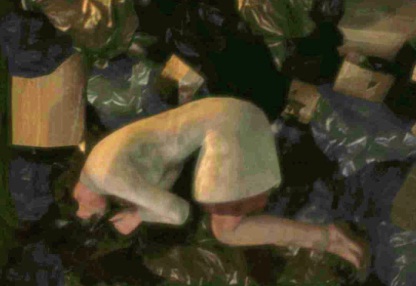
In the garbage container is ..... the young woman from the red car .... Is the young woman dead?
In any case, the woman was gagged and thrown in the smelly garbage container as if she were a piece of bulky waste.
The garbage truck will then start to lift the container.
A playing card is blown out of the container and the garbage collector picks up the card. The playing card is full of blood.
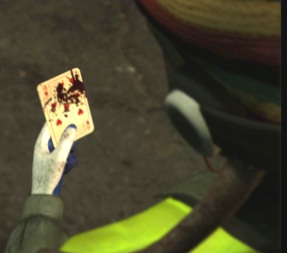
For a moment it seems that the young garbage man has realized that something bad is going on, but no .... he just puts the playing card back in the container. The garbage truck lifts the container and the contents are dumped in the garbage truck. The young woman ends up in the garbage truck and ... she's still alive.
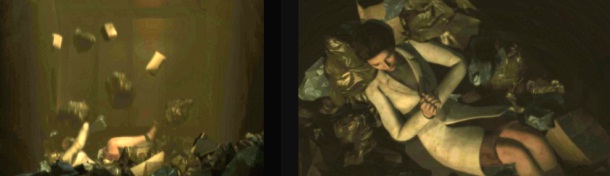
The young woman manages to rip the tape from her mouth and immediately realizes the terrible fate that awaits her in seconds.
The young woman starts screaming in agony and screaming and screaming .....
But unfortunately ..... the garbage men does not hear the screams of the young woman and .... In the garbage truck the young woman is pressed to a pulp ..........
She's dead ... ... murdered by a garbage truck. What a devilish way to kill someone ........
Chapter 1: 19 Oktober 2009:
New York, Jersey City:
A: Apartment of Nicole Bonnet:
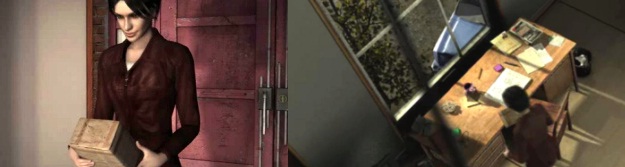
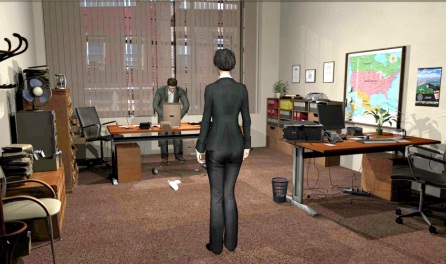
Our young heroine, FBI agent Nicole Bonnet, has taken a vacation after her Hunt for the Puppeteer and is in her Jersey City, New York apartment, when she receives a package and puts it on her desk.
Nicole's phone will then ring. It's Ruth, her boss's secretary, who calls to find out how Nicole is doing.
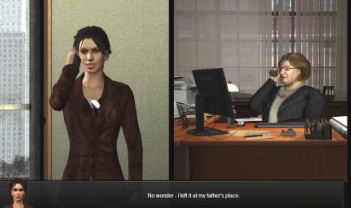
You can quickly go through the dialogs by clicking with your left mouse button. After this rather useless telephone conversation, Nicole is standing in front of her desk. The only important thing you have experienced is that Nicole left her cell phone with her father. Nicole cannot be reached by mobile phone. Feel free to take a look around Nicole's 1 room apartment. You can view items by right clicking on them. So Right Click is viewing and Left Click is take. Right click also makes Nicole run
Click with your magnifying cursor on the desk to go to the close-up of the desk. View the items that are / are on the desk. So Nicole has put the package she just received on the desk. There is a drawer in the chair. Open the drawer in the chair and then view the contents. Nicole tells you that there is a map of New York (City map) in the chair drawer. Take the map from the drawer.
Take the Package. The package is stored in the inventory. Move your cursor down to the bottom of the screen. The Inventory will then open. At the far right of the inventory you see a question mark and a tool box. By clicking on the question mark you make all Hotspots and Exits visible on the screen. Clicking on the toolbox will take you to the Main Menu screen where you can save, load and exit the game. Right-click in inventory on the Package. You will then see the Package in the Close-up screen.
Nicole tells that there is no sender on the package, and she thinks this is suspicious. Left and right there is an arrow on the close-up screen. By clicking the arrows you can rotate the objects in this close-up screen all the way around to view it from all sides. You close the close-up screen by clicking the big X. Close the close-up screen to return to the close-up of the desk.
On the left is Nicole's phone, but you can't use it yet. Niciole's red diary is in front of the telephone, but you can't get that either. There is a green notepad next to the diary. Take the green notepad (Notes). The green notepad is also stored in the inventory. Zoom out of the desk, via the down arrow at the bottom left or bottom right.
Nicole needs something to open the package. Look around the room. In the foreground you see Nicole's kitchen. To the left of the ledge of the kitchen is a glass of water. Take the glass of water. In the right wall you see the green room door. Nicole's work table is located to the right of the green door. Click with your magnifying cursor on the work table to zoom in on it. There is a black highlighter on the table.
Take the black Highlighter (Felt-tip pen). Zoom out of the table. The Balcony (Mezzanine) is also on the right wall, which is accessible via the stairs.
The balcony is Nicole's bedroom. Exit the room through the green door. Nicole ends up in her hallway.
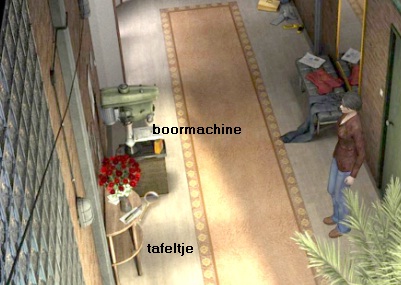
On the left wall is a small table with a vase of red roses on it. On the other small table is a real drill.
Zoom with your magnifying glass in on the 2 tables and the drill. On the rose table is a letter opener (Paperknife), intended to open the mail.
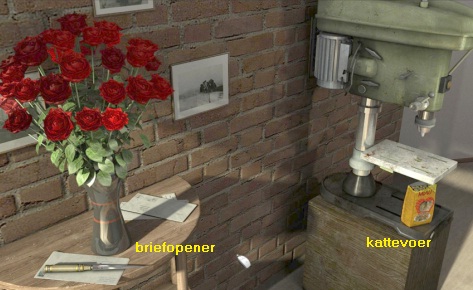
On the drill is a box of Cat food. Take the letter opener and get the box of cat food. Zoom out and go back to Nicole's spacious sitting room through the green door. Go up the stairs to the balcony / Mezzanine. Hoover, Nicole's cat, lies lazily on Nicole's bed. Well .... cats are just lazy animals. You really have to give them a bad kick if they want to take action to catch mice, for example.
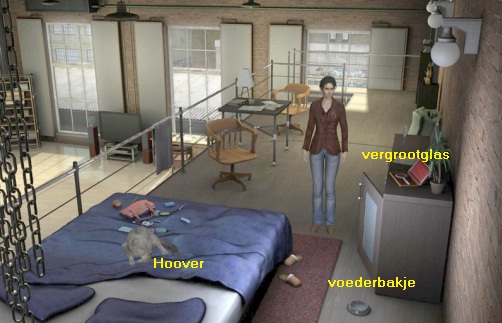
Behind the lazy cat is Nicole's purse and things that came out of the purse. There is a dresser on the wall. On the dresser is a flat box with a magnifying glass in it. Grab the Magnifying glass. On the floor, in front of Nicole's bed, is cat Hoover's food bowl. Click with your magnifying cursor on the bed to get in the close-up of the bed.
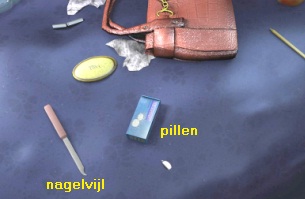
Then grab the Nail file and the blue box containing Alkazetzer pills. Zoom out.
You now have all the necessary items to open the Package. Open the inventory. Pick up the Letter Opener (Paperknife) and click with it on the Package (Parcel) to unpack the package. Right click to put the letter opener back in your inventory. So now you have opened the package and the following items have come out of the package: a Metal Box, a Newspaper and the Packaging (Wrapping) of the package. Right-click on the Packaging (Wrapping) to view it in the close-up screen. A symbol is drawn on the inside of the packaging.
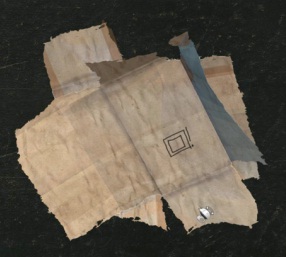
The symbol consists of 2 squares and an exclamation mark.
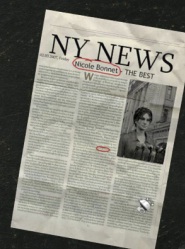
Close the close-up screen. Right click on the Newspaper in inventory to read the newspaper in the close-up screen.
The newspaper article turns out to be about Nicole Bonnet. Nicole's name and the word Serial Killer are circled in red.
Close the close-up screen. Right-click in inventory on the Metal Box to view this box more closely. The box is locked. Take the Nail file from your inventory and click it on the lock of the metal box. Nicole uses the nail file to pick open the box. Stay in the close-up screen and use the arrows on the side to turn the box so you can see that there are two items in the box.
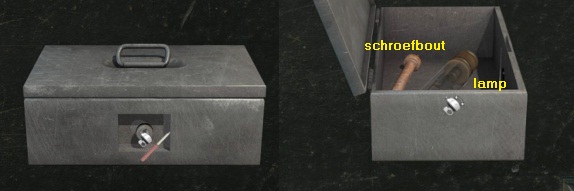
In the box is a glass lamp tube (Bulb) and a thick rusty metal screw bolt (Rusty bolt). Right click on the lamp tube and ..... Nicole gets a vision of a moving train. Open the inventory again and right click on the metal box again to put it back in the close-up screen. If you do not see the lamp and the screw in the box, turn the box over so that you can see the screw and the lamp again. Left click on the lamp tube to take it out of the box. Nicole says there is an inscription on the lamp tube, but the inscription is too small to be able to read it. So take the Magnifying glass from your inventory and place the magnifying glass on the bottom of the lamp tube and ...
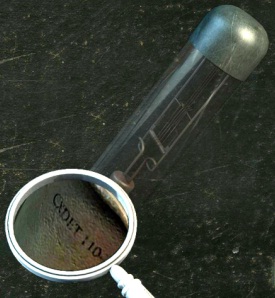
Nicole can now read the inscription and she reads "CXDET 110 ..." Right click to put the magnifying glass away again. Close the close-up screen. Open your inventory again and right click on the metal box again. Now take the rusty Screw Bolt from the box. Nicole reports that there is also an inscription engraved in the round top of the screw. But because of the rust, she cannot read this inscription. Close the close-up screen. Now left click in inventory on the blue box of Alkazetzer tablets to take the tablets out of the box.
Then combine the Alkazetzer tablets with the Glass of water to dissolve the tablets in the glass. You then have a glass with rust remover. Then combine the rusty Screw Bolt with the Glass to insert the screw into the glass. The rust remover will now clean the screw. Left click on the glass to take the, now stainless, screw out of the glass. You have now lost the glass. Right click on the Bolt to bring the bolt back into the close-up screen. Take the Magnifying glass from your inventory again and then move the magnifying glass up the screw.
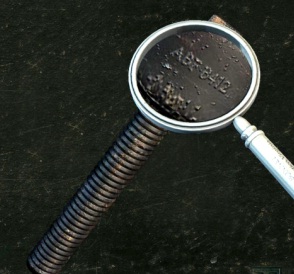
Nicole now reads the inscription etched into the round edge of the screw. Nicole reads: "ABF-6412". Nicole thinks the 2 inscriptions are related and she thinks Wang, the tech guy from the FBI, can figure out what the inscriptions mean. Put the magnifying glass back and close the close-up screen. Go down the stairs again and zoom in on Nicole's desk again. Nicole's phone is on the back left of the desk. Left click on the phone and Nicole will automatically call Wang.
Wang will look up the FBI database to see what the 2 inscriptions mean and will call Nicole back as soon as he finds out.
The conversation is then automatically over.
You now have to wait for Wang to call back. If you have already taken the Highlighter and the Green Notepad, Nicole tells that she can use these 2 items to write down what she will hear from Wang in a minute. Walk around or just wait until you hear the phone ring. This can take a minute or 5. When you hear the phone, zoom in on the desk again and left click on the phone to pick it up again.
It is Wang calling back and he has info about the screw bolt and the lamp tube.
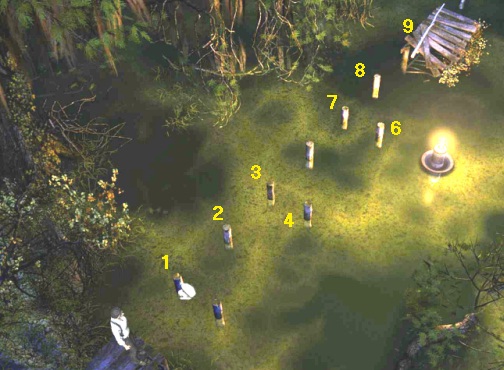
Wang tells Nicole the addresses where the old screw bolt and lamp tube come from. There are 3 stations and 3 theaters.
Nicole has automatically noted the 6 addresses that she received from Wang on 6 green notepad papers and you now have these 6 green papers in your inventory.
Right click in inventory on the 6 green papers to read the addresses. The addresses are:
|
Nicole now has to make these 6 addresses visible on the map of New York. If you haven't taken the Map of New York from the desk chair drawer yet, do so now. When you have the Map of New York, zoom in again on Nicole's work table, to the right of the green room door. Open your inventory and scroll to the map of New York (City Map). Take the Map from inventory and click the Map on the table top. Nicole places the Map unfolded on the table.
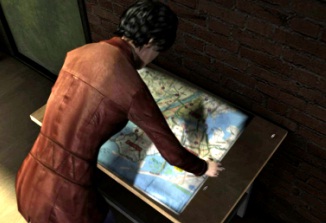
You now have to click the 6 green address papers in the correct places on the map. The map shows the various neighborhoods of New York, such as Brooklyn, Queens, Manhattan and the Bronx. The 6 addresses are located in those neighborhoods. So pick up a green note and then click on the right place on the map. Nicole will tell you whether you have clicked the paper in the right place, or whether it is the wrong place.
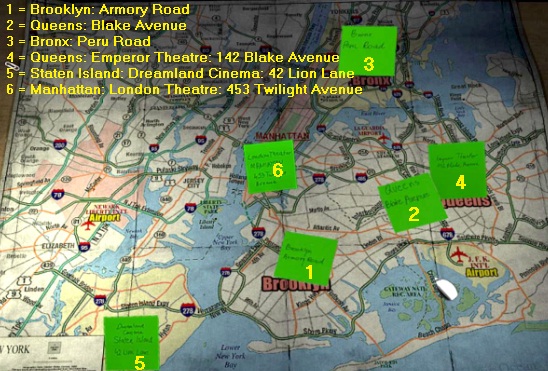
When you have clicked all 6 address papers in the correct place on the map then Nicole notes that all the addresses with information about the screw and the dock in Queens, Blake Avenue and Emperorer Theater and, are together. That doesn't seem like a coincidence to Nicole and she wants to go there to investigate it further.
Get out of the close-up of the table. Go back up the stairs to the balcony (Mezzanine) and walk back to Niciole's bed. Nicole will refuse to leave her apartment if you forget to feed cat Hoover. So take the pack of Cat Food from your inventory and click it on Hoover's food bowl to fill the bowl with cat food. And look ..... when it comes to eating cats are not lazy at all. Go back down to the hall and then click on the large exit door at the back of the hall to exit the apartment.
Nicole rijd in haar auto naar:
B: Queens: Blake Avenue
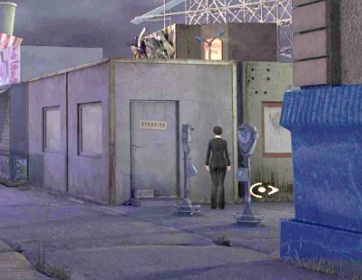
Outside the Theatre:
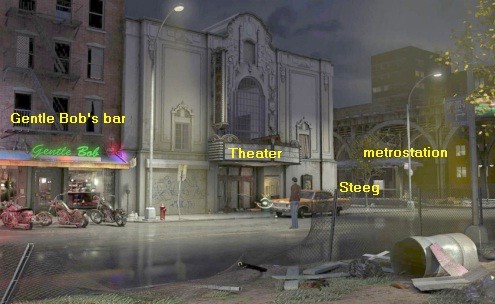
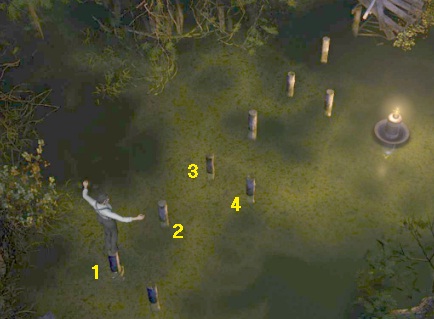
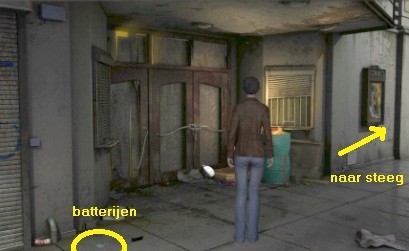
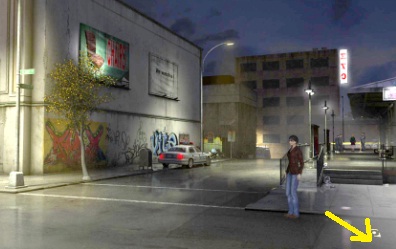
It is evening and Nicole has parked her car in front of the movie theater on Blake Avenue. To the left of the Gentle Bob's Bar and to the right of the theater is an alley. 3 motorcycles are parked in front of the Gentle Bob Bar. Continue to the Theater entrance) The theater is no longer in use and the entrance is used by vagrants as a place to sleep. View (right click) everything you can view. The entrance is locked with a chain and a padlock, so Nicole won't be able to enter the theater through this front door. You have to look carefully, but at the bottom left of the screen you see a blue pack of Batteries on the ground. Pick up the Batteries.
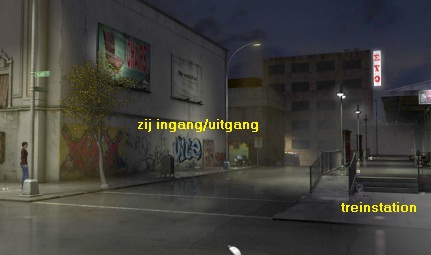
Walk, via the right edge of the screen, one screen to the right and .... Nicole ends up at the corner of Blake Avenue with the Arden alley
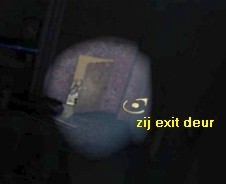
On the right is the train station (Platform). You can now see the side wall of the theater and the artist's entrance (Theater exit) is located in the side wall.
Double click on the artist's entrance and .... Nicole runs over to it, but unfortunately has to realize that this side entrance is also locked.
Go back to the front of the Theater (Square) and then continue to the:
Gentle Bob Bar:

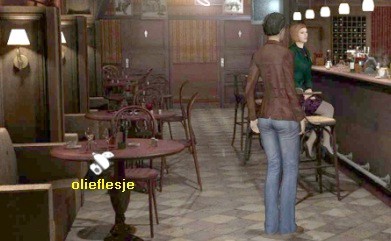
There are 3 motorcycles parked in front of the Gentle Bob Bar. Check out the motorcycles. Something is on the ground near the front wheel of the center motorcycle. It's a screwdriver but you can't get it right now. Enter the bar. 2 bikers are seated at a table. At the bar is a girl and a man and the bartender leans behind the bar.
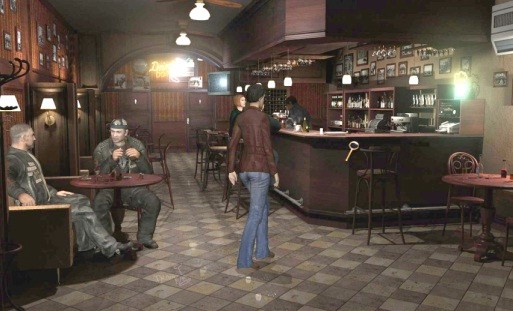
Wait for the bartender to lean on the narrow part of the bar and then click on bartender with the talk cursor. Nicole takes a seat at the bar and orders a drink.
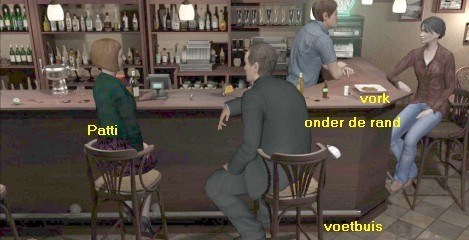
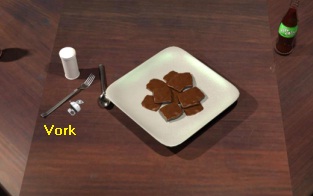
So there are also a girl and a guy at the bar. The guy tries to pick up the girl with the excuse that she is his "blind date". After the bartender brings Nicole her drink, the guy turns his attention to Nicole in an attempt to pick her up. Nicole does not like this and the man continues his attempt to hit onvthe other girl. There is nothing you can do, just listen to the conversation between the girl and the, somewhat tipsy, man. Also note that next to Nicole there is a white saucer with chocolate cookies and that there is a fork next to that saucer.
The man's name is Jack and he says he's a journalist. The girl is called Patti and she says she is studying medicine and later hopes to become a famous surgeon. Patti plays Jack's game a bit and has no objection to having a drink at Jack's expense. The conversation goes on for a while, but at a certain point Patti decides that she needs to powder her nose. Patti gets up and walks to the restrooms, and this is the signal for Nicole to get up too.
You have control over Nicole again. Patti has gone to the restroom. Wait for the bartender to lean against the short part of the bar again and then quickly click on him again with your talk cursor to talk to him now. The topics you can talk about will then appear at the bottom of your screen. Always use ALL options in conversations, never skip a option.
So talk to the bartender through the options. After the first set of options, you will be given the opportunity to ask the bartender about the Movie theater. So ask the bartender more about the theater and he will tell you that he once heard one of his guests tell that, as a child and with a friend, they had crept in through the toilet window at the rear of the theater.
Close the conversation when you have gone through all the options. Nicole gets up again and then stands in front of the corner of the bar. During the conversation with the bartender you saw again that there is a white saucer with cookies on the corner of the bar. Click with your magnifying cursor on the corner of the bar (Counter corner) to see the bar corner in close-up. The white plate contains some chocolate cookies. There is a fork to the left of the plate. Get the Fork and step back to get out of the close-up.
In the back you see, on the left, the men's toilet and, on the right, the ladies' toilet. Aim your forward cursor to the ladies' room and then go to it.
Student Patti is smoking a cigarette in the ladies. Talk to Patti.
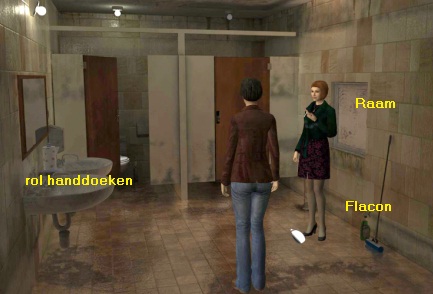
Patti is seriously considering to go with Jack. Patti then disappears after she has first flattened her cigarette on the floor. When Patti disappears, you hear Nicole say she needs some fresh air. There is a window in the wall at Nicole. At the window is a broom and a bottle of glass cleaner. Behind Nicole are 2 washbasins. There is a roll of Paper towels on the washbasins.
Take the roll of Paper Towels. Click with your magnifying cursor on the window to view the window in close-up. There is a handle on the right side of the window. Click on the handle to open the window and ...... Well ... the outside of the window is closed by a barred shutter. Move your cursor to the right of the window. Halfway up the right-hand window pillar you can just see a piece of the Padlock that locks the bars on the outside.
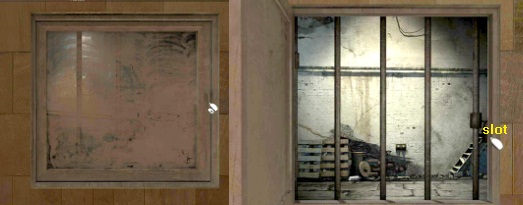
Right click on the padlock to hear Nicole say the lock is very rusty. Step back to get out of the close-up. There is a broom and a bottle of glass cleaner (Spray bottle) by the window. Take the Bottle of glass cleaner (Spray bottle) and then walk back into the bar via the bottom of the screen. Back in the bar you notice that the 2 bikers and also journalist Jack have left. However, Patti is back in her place at the bar. Exit the bar at the bottom of the screen. The 3 motorcycles have disappeared, which makes sense because the bikers have left the bar.

However, the screwdriver is still at the curb and now you can view and grab the screwdriver. Pick up the screwdriver and go back into the bar. Go back to the Ladies Room and zoom in again on the still open window. Take the just found Screwdriver from your inventory and click it on the padlock of the bars. Unfortunately ... the screwdriver turns out not to be the right tool to break open the rusty padlock. With a right click, store the screwdriver again and step back again. Go back to the bar and talk to Patti now and use all possible conversation options again.

Patti is not having a lucky day today. Her car is broken, so she has to take the train today. To make things a bit worse for Patti, the batteries of her MP3 player are also empty, so Patti cannot listen to her favorite music during her train journey. Nicole automatically gives the batteries she found outside the bar to Patti.
Patti says that she's not a student but a hairdresser. Patti has a regular customer around here, a Vietnam war veteran, who operated the movie projector in the movie theater long ago. Patty knows that her customer once had a key to the lattice window in the toilet, in order to steal a bottle of whiskey in the bar unnoticed. The veteran hid the key in the tube that serves as a footrest at the barcounter
When you have used all the conversation options again, the conversation will end automatically and Nicole has left the close-up.
At the bottom of the bar counter is the copper tube that serves as a footrest for the customers who sit at the bar.
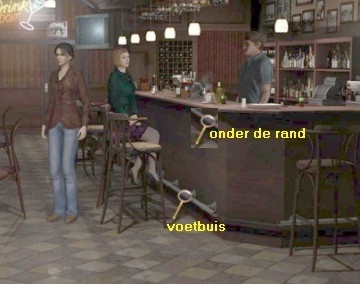
With your magnifying cursor zoom in on the foot tube. In close-up, Nicole reports that there is a button on the front of the tube. Left click on the button to remove it from the tube. Left click again on the, now open, front of the tube and .... Nicole reports that something is hidden in the tube, but that she cannot get it out with her fingers.
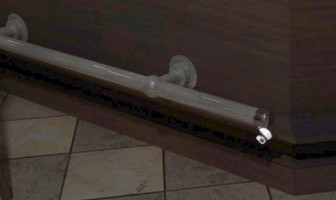
Take the Fork from your inventory and click with the fork on the front of the tube and .... Unfortunately ..... also with the fork it is not possible to get into the tube.
Get out of the close-up. Move your cursor up to the leaning edge of the bar.

Your cursor will become your magnifying cursor again, so click to look under the edge of the barcounter and see ..... someone has stuck a piece of chewing gum under the edge of the barcounter. Nicole refuses to take the gum with her hands, so take the fork from your inventory again and click on the gum to take the gum with the fork.
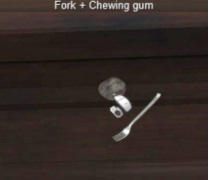
Zoom out and zoom in again on the foot tube, at the bottom of the barcounter. So the gum is on the fork. Take the fork from your inventory again and click with the fork again on the beginning of the tube and .... You hear "Click" and the fork automatically disappears back to your inventory. Now look at the fork in inventory (Right click on the fork) and see ...... A key is now sticking to the chewing gum.
Click on the key to remove the key from the fork. You can see that this key is also rusty. Close the close-up screen and step back. You have seen that the key is rusty and the padlock on the toilet window is also rusty. Oil is needed to lubricate the key and padlock. Look at the table where the bikers used to sit. On that table is a small bottle (Bottle).
View the bottle. Nicole reports that it is an edible oil bottle, but also that the bottle is empty. Take the empty Oil bottle and speak to the bartender again and ask the man for Oil and Nicole gets a full bottle of cooking oil from the bartender. Go back to the ladies room and zoom in again on the open window. In inventory, combine the full bottle of Oil with the rusty key to lubricate the key. Then take the key from inventory and click it on the padlock and .... The padlock will finally open.
Nicole is ecstatic and screams that she can finally open the barred window.
So left click on 1 of the grating bars (Grating) to open the grating window and ..... go outside through the window. Nicole lands on the:
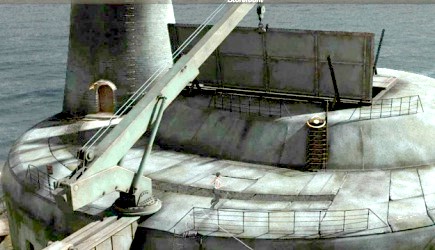
Courtyard
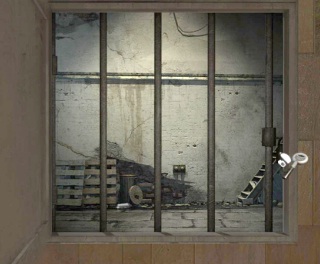
Nicole is now at the rear side of the theater. A rickety staircase goes up the facade to a rickety door. The right corner of the courtyard is full of junk. Walk one screen to the left via the bottom left. You will then see the rear facade of Gentle Bob's bar and the toilet window that Nicole has opened
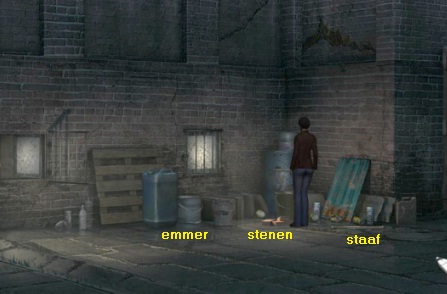
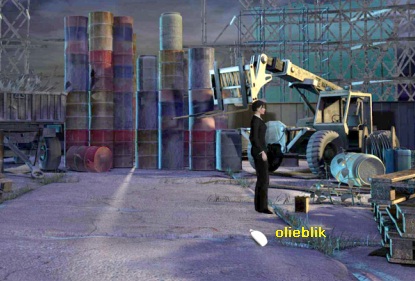
In the corner, by the window of the men's toilet is again a lot of junk. Examine the pile of junk. There is a gray Bucket in front of the men's toilet window. There is also a green bucket and a few Bricks next to that green bucket. To the right of the green bucket is an iron rod. Check out the gray bucket, the bricks, and iron bar. Get the Gray Bucket, get the Bricks and get the Iron Bar.
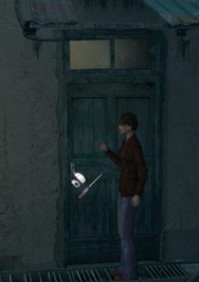
Walk back to the previous screen via the bottom of the screen and then go up the stairs along the facade to the door. At the top of the rickety stairs, Nicole is standing in front of the back door of the theater. Left click on the door and .... Nicole reports that the door is locked and that the door handle has disappeared. Above the door is a window with 2 panes. Right click on the window and Nicole reports that the window is slightly open. Take the screwdriver from inventory. Click with the screwdriver on the door, but then where the door handle should be.
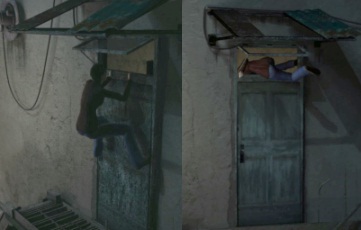
Nicole puts the screwdriver in the hole where the door handle should be.
The screwdriver is now in the door and can now serve as a footrest. Take the iron bar from inventory and click it on the window and .....

Nicole climbs up with the screwdriver to open the window further with the help of the iron rod.
After the cutscene, click with your forward cursor in the now open window and ....
Nicole klimt door het raam naar binnen en beland nu in het theater:
Nicole climbs in through the window and now ends up in the theater:
Inside the theatre:
Hall:
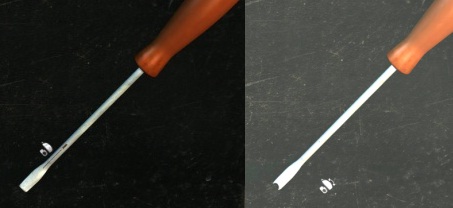
Look around the hall. At the bottom left is a table and on that table you will find an empty film reel and a small screwdriver.
To the right of the "Control Room" door is a key box with 1 more key in it. You can go further down the stairs, right in front of the notice board.
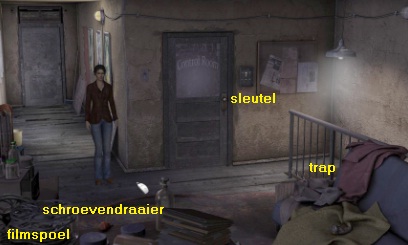
Take the empty Film Reel and the Small Screwdriver from the table. Take the key from the key box.
Enter the Control Room by clicking on the Control Room door with your forward cursor.
Control Room:
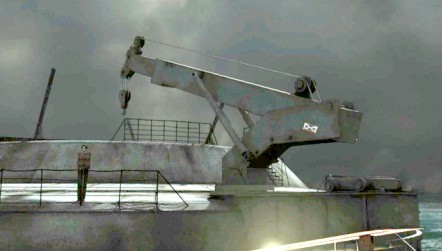
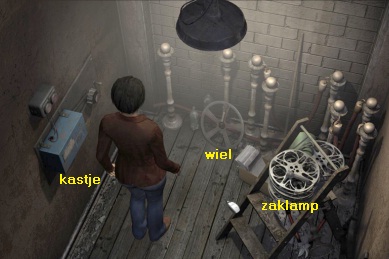
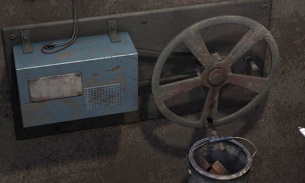
This control room is therefore the Projector room of the cinema and there are 2 large green film projectors. The 2 enormous projectors both stand in front of a metal sliding window so that the projectors can project the film to the screen in the filmroom. On the left wall is a workbench and on the wall, behind the rear projector, is a lamp box / amplifier.
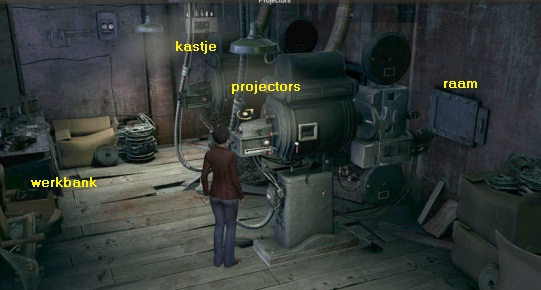
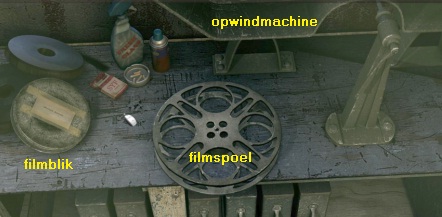
Now first walk to the workbench. The film reel winding machine is on the workbench and there is an empty film reel.
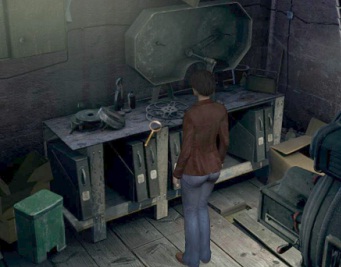
Click with your magnifying cursor on the workbench to go in close-up. In the center of the table is a large empty film reel.
On the left is a film reel box with Nicole's name on it. View the film reel box and the empty film reel.
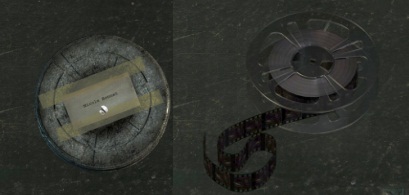
Take the reel box with Nicole's name on it and take the empty reel too. Right-click in inventory on the film reel box to view it in close-up
Left click, in the close-up screen, on the reel box. A small full reel comes out and Nicole wants to see what is on the film.
To be able to play the film in the projectors, the film must first be transferred to a larger spool. Close the close-up screen and zoom in, with your magnifying cursor, on the film reel winding machine. Take 1 of your 2 empty film reels from your inventory and then click this empty reel on the right pin of the machine. Then take the small full spool from your inventory and click it on the left pin of the machine.
On the stand of the winding machine, the crank handle sticks, but the crank handle is broken. Zoom in on the crank handle.
You will see a hole at the bottom of the handle. Take the small screwdriver from your inventory and insert it into the hole of the crank handle.
The crank handle then has a button again.
Left click on the "Button" and ...... The machine does its job and the film is put from the small reel onto the large reel. Take the big reel and then step back twice. Nicole is back behind the 2 projectors. Now zoom in on the Amplifier box, which is behind the left projector on the wall. You get into the close-up of the box.
In the black panel you see a thick black button and 2 small black buttons. Left click on the left small black button and .......
....... the lights at the top of the box go on and Nicole concludes that this must be good. Step back. Nicole is now behind both projectors.
Zoom in on the back of the right-hand projector. You will then see the right side of the projector in close-up and this part is called the Projector Lamphouse.
At the bottom left is the On / Off switch of the projector. You will see a small window and a handle.
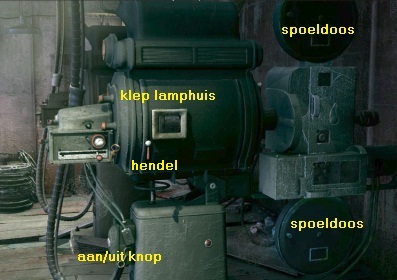
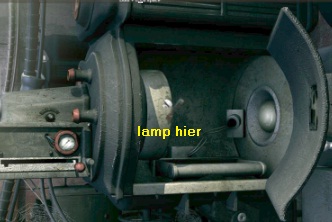
At the front are the top and bottom film reel boxes, where the reels with the film have to be put in. Zoom in further on the lever. Right-click on the lever and .... the cover will open and you will now look into the lamp housing of the projector and see that there is no lamp in this projector. At the start of the game, Nicole has received a package. In that package was a metal box and from that box you took a screw and a tube lamp. Open your inventory and scroll through your items to the Tubular Lamp (Bulb). Take the tube lamp from inventory and place the lamp in the lamp house of the projector. You do this by clicking with the lamp on the round holder that you see in the left of the lamp house.
Close the cover and step back. The top and bottom Film Reel Boxes hang in front of the Lamp House, where the film reels must be placed.
Zoom in on the bottom film reel box and open it by clicking the button on the left edge.
Take your 2nd empty film reel from inventory and put it in the film reel box. Close the reel box and zoom out. Zoom in on the top film reel box and open it as well and then put your full film reel in it. Close the film box and step back again. At the bottom left is the On/Off Switch of the projector. Left click on the on / off Switch and .... Unfortunately ..... the lamp you just have placed in the projector only burns for a short while but then it gives up. Step back and zoom in on the left projector. Using the handle, open the lamp cover and then take the Lamp from this left projector.
Zoom out and zoom in again on the right-hand projector and open the cover of the lamp housing again. Remove the burned-out bulb, which disappears to your inventory. Then place the lamp of the left projector (Projector bulb) in the lamp housing. Zoom out twice and now zoom in on the right sliding window. Click on the handle of the slider to move the slider to the right. Nicole then reports that the window is very dirty. The window needs to be cleaned. In inventory, combine the bottle of glass cleaner (Spray bottle) with the roll of Paper towels to get a soaked towel. Take the soaking wet towel from inventory and click it on the window to clean the window with it.
Step back and walk back to the projectors via the forward cursor. Then zoom in on the right-hand projector again. You are then again in the close-up of the side of the right projector. Left click on the On / Off Switch again and ..... Nicole says that she cannot start the film yet because in the cinema the curtain off the film screen is still closed . Nicole has to open the curtain off the film screen in the room first. Step back 3 times. Nicole is back in the hall. Go down the stairs in front of the notice board to the cinema (Auditorium):
Movie theater:
It is pitch dark in the cinema. But to the right behind you, you see a door ajar and behind that door a light is burning.
That door is the door to the back room. Go there, so double click with your forward cursor on the illuminated door.
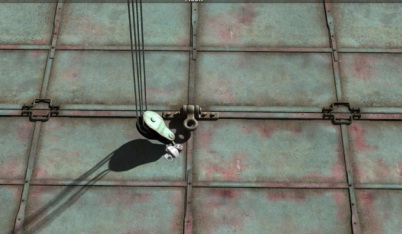
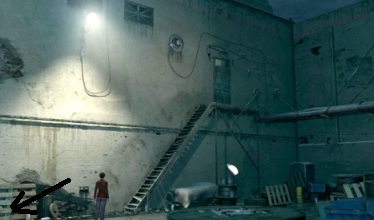
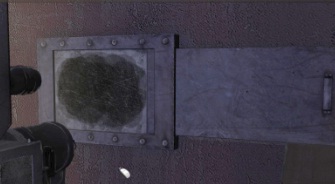
The back room is small and narrow. There is a small wooden staircase with film reels on it. There is a flashlight on top of the film reels. There is a blue box on the left wall. That blue box is the mechanism for opening and closing the large curtain. There are also a number of metal posts. A metal wheel leans against one of the metal posts.
Take the flashlight from the stairs and take the metal wheel. Then zoom in on the blue box. Above the blue box is a knob box with 2 round red knobs. To the right of the box you also see a red button in a gear. A drive belt runs over the sprocket to the blue box. The buttons above the blue box do not work. Take the metal wheel from your inventory and then click the wheel on the gear.

Click on the handle of the wheel and then hold down your left mouse button. Then turn the wheel to the left, so with the left mouse button pressed, until you hear a cracking sound. You cannot turn the wheel any further. You hear the curtain slide open in the cinema. You have to release your mouse button, but this will make the wheel turn back automatically and the curtain will close again.
How to prevent the wheel from turning back. Stay in the close-up of the blue box. Combine the Bricks with the gray bucket in inventory to put the bricks in the bucket. Leave the bucket in inventory. Grab the handle of the wheel again and turn the wheel anti-clockwise until you can no longer turn. Release the lever and very quickly take the Bucket with the stones from your inventory and click with the bucket on the handle of the wheel to hang the heavy bucket on the wheel.
Due to the weight of the bucket, the wheel will not turn back now and the curtain in front of the film screen will remain open. You can see the curtain slide open in a short cutscene. Exit the close-up of the blue box and exit the room, via the bottom of the screen. In the cinema, Nicole automatically switches on the found flashlight and at the bottom right of the screen you have the light beam of the flashlight.
In the light beam you get the Exit arrow, so double click to leave the cinema and .... Nicole is back upstairs at the control room.
Control room:
Enter the control room again and walk back to the projectors. Zoom in again on the right projector and click on the On / Off switch of the projector and ..... watch the movie ....
The movie shows some of Nicole's recordings from the previous 2 Art of Murder cases.
There is also always a kind of symbol on screen and that symbol consists of 2 squares with the letters Vd in it and an exclamation mark.
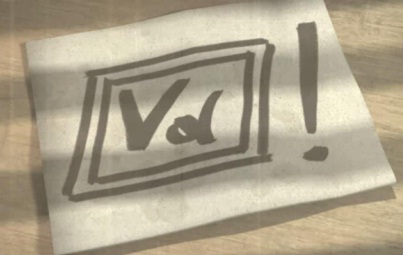
You have to remember this symbol so I would just draw it over . Nicole is deeply troubled by the knowledge that someone has apparently been following and filming her for a while and wonders what this means. Nicol thinks that the symbol has an important meaning.
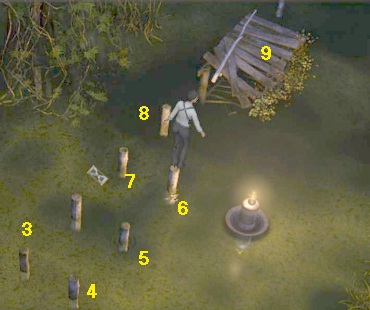
After the movie you leave the control room by clicking 3 times at the bottom of the screen. Back in the hall, click with the forward cursor on the exit door (Yard door), at the back of the hall, to go back to the courtyard ... but ...... Just before Nicole reaches the door the floor collapses. The Yard door is no longer accessible, so Nicole must find another exit from the theater. Go back to the:
Movie theater:
In the cinema, Nicole automatically shines her flashlight to the door of the back room. Move your cursor to the right of the back room door. You then get an oblique arrow to the Side Exit. Double click to the Side Exit and Nicole runs over to it and then stands in front of the exit door. On the left you can still see the light coming from the back room. Click on the Exit door but .... unfortunately the exit is locked. Move your cursor to the right over the dark wall, until your cursor becomes the magnifying cursor.

Then click with the magnifying cursor on the dark wall and ...
...... In the light of the flashlight you see a notice board on which the diagram of the seats in the cinema hass been stuck.
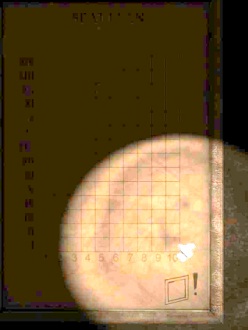
Move your cursor down, to the bottom right. You will see a square with an exclamation mark at the bottom right of the diagram. It's the same square symbol you saw in the movie, but now the letters Vd are missing. Could the letters Vd, which were on the square in the film, be a seat number, so indicate one of the seats in the auditorium? V is the Roman Numeral 5 and d is the 4th letter of the alphabet. So you have to look for seat number 4 in the 4th row. Step back 2 times. Nicole is standing on the right, at the back room door, and she now shines with her flashlight to the left, along the stage.
Now find the left down forward arrow in the middle of your screen and then double click and ..... Nicole will then stand in front of the stage and look into the room.
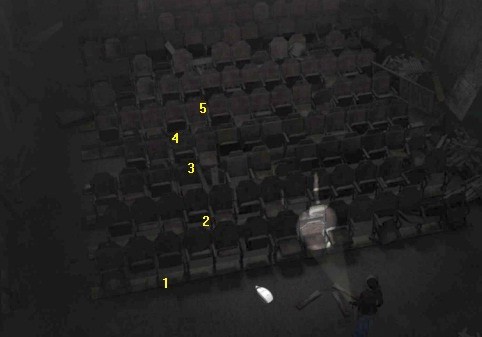
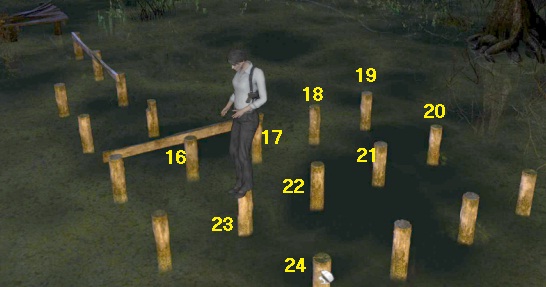
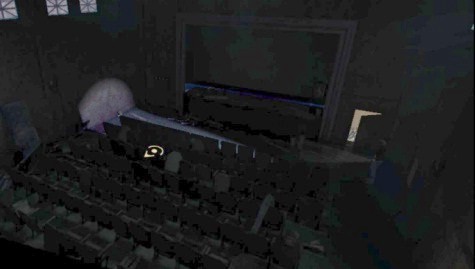
You now see the rows of seats. Now count the rows of seats from front to back, 1, 2, 3, 4, 5 and then click on the 5th row of seats and ...
Nicole walks to the left to the 5th row of seats and then finds a Piece of Metal on the 4th seat in the 5th row.
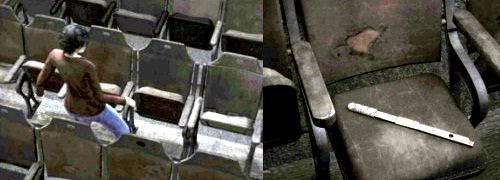
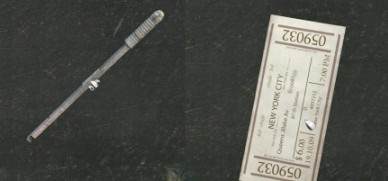
Nicole puts the rod in inventory herself. Look at the rod in inventory in close-up. Nicole says the rod must be part of a device. A Train Ticket is stuck in the middle of the bar. Left click on the train ticket to remove it from the bar. It is a valid train ticket for today's 7am train from Queens-Blake Avenue station
Close the close-up screen. Nicole is now on the left side at the 5th row of seats. Walk, via the bottom left, back to the Exit door, right next to the door of the back room. Nicole is then again in front of the closed exit door. Take the newly found rod from inventory and click it on the exit door to break open the exit door.
Then go out, via the forward cursor, through the now opened exit door and ......
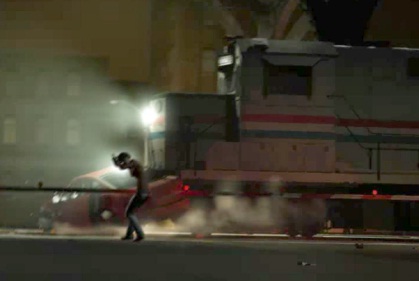
Nicole comes out of the theater through the side door. Across the street is the Queens-Blake Avenue train station.
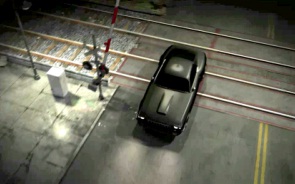
Nicole sees a red car standing still on the level crossing. There is a man in the red car.
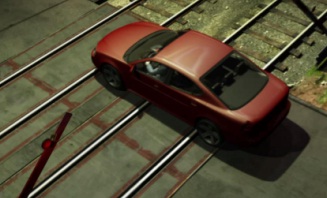
The car is stationary on the train tracks and the man cannot get his car started. A train is coming and it can not brake in time.
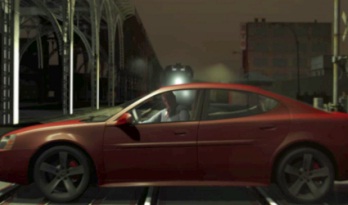
Nicole runs to the car but there is nothing more she can do to help the man.
The man fails to get out of the car on time and ... the train rams the car and the man is dead.
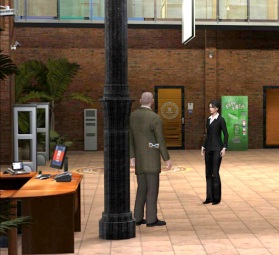
Moments later, the FBI agents arrived and are investigating the case.
Railway station:

Nicole is standing at the edge of the platform. With Nicole, a police officer and FBI tech guy Wang are crouching down, studying the platform. At the bottom right is Patti and 2 male spectators. The red car and the train are on the rails. To the left is a yellow tape barrier and there is a lump of concrete on the ground. Click your talk cursor on FBI tech Wang to talk to him about the "accident". Nicole tells Wang that it was not an accident and that she also wants to check the area to see if Wang has not overlooked any traces. Wang thinks he hasn't missed anything.
Gather Evidence:
Pick up the Block of concrete, which is below the yellow police tape on the left. It's a pretty heavy lump of concrete.
Walk, via the right edge of the screen, one screen to the right (Platform). You will then see the entire roof of the platform.
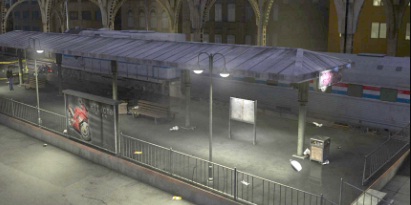
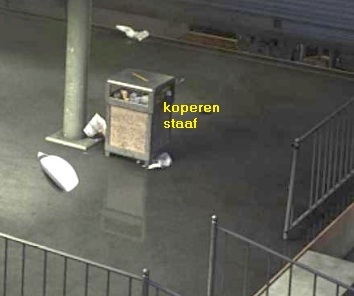
To the far right is a waste bin and also the steps to go up and down the platform. There is a copper rod on the waste bin.
Nicole is on the far left. Continue to the waste bin and then take the Copper Rod that is on top.
Then go up the stairs to the alley. Nicole is back at the intersection of the alley and Blake Avenue.
Go through a screen at the bottom right (Grade crossing) to the:
Railroad crossing:
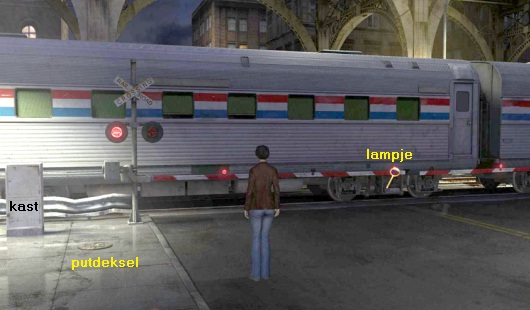
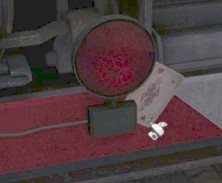
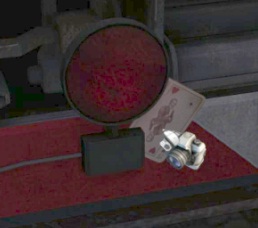
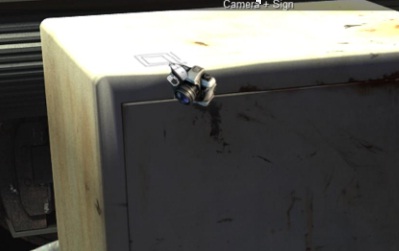
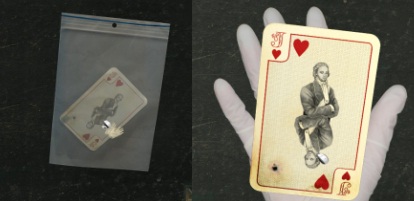
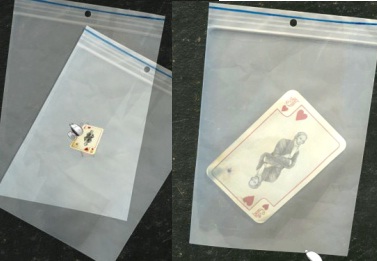
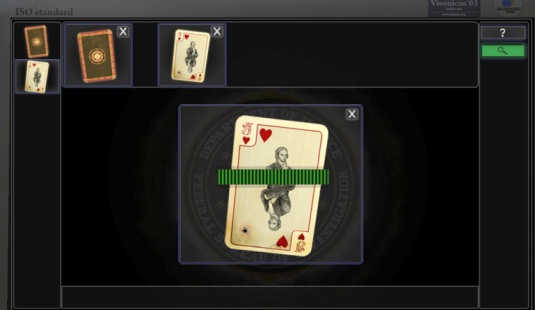
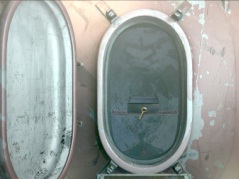
The disaster train blocks the crossing and the barriers are down. On the left you see a round manhole cover in the sidewalk. Behind the manhole cover is a gray box. Red lights flash on the barriers. Take a closer look at the middle red flashing light with your magnifying cursor. There is a playing card behind the flashing light. It is the king of hearts card.
Right click on the playing card. Nicole reports that she has to take a picture of it. If you try to take the playing card, Nicole doesn't want to do this. You can't just pick up evidence. You will need a camera and gloves, etc. to safely retrieve and document the evidence. So step back again. Take a closer look at the manhole cover and also the gray cabinet. The manhole cover is richly decorated and has a hole in the middle. You can't do anything with it yet. The gray box contains the mechanism to open and close the barriers, but the box is locked. However, on top of the cupboard you see the square symbol. Go back to Wang on the platform by the accident car. Talk to Wang again and tell him you found evidence, so use the "Traces" option then the "Evidence" option and Nicole says she needs a camera to photograph the evidence. At Wang and the agent stand Wang's Toolbox.
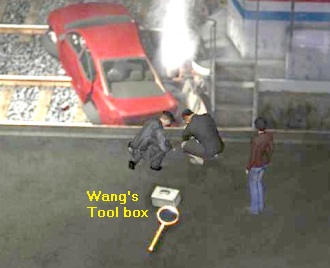
Zoom in on Wang's Toolbox and then click on the lock to open the toolbox lid.
Take the Plastic Evidence Bags and the Camera from the box and zoom out again.
Go back to the level crossing and zoom in again on the 3rd red flashing light of the barrier.
Take the camera from inventory and click it on the playing card to take a picture of it.
After you have taken a picture of it, take the plastic evidence bags from inventory and also click on the playing card to put the playing card in an evidence bag. Nicole reports that she now wants to return to the movie theater to collect and secure evidence there as well. But don't do that just yet. Step out of the close-up and zoom in on the gray cupboard again. The square symbol is drawn on top of the gray case. Take the camera from your inventory again and take a picture of the square symbol.
Zoom out and zoom in again on the round manhole cover. Take the Copper Rod from inventory and insert the rod into the hole in the middle of the manhole cover
Then take the piece of concrete from inventory and ram with the piece of concrete on top of the copper rod.
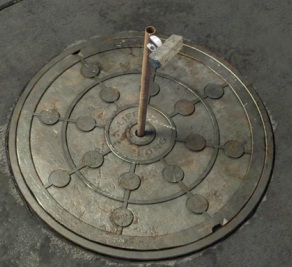
You flatten the top of the rod with the concrete. Pick up the Rod again to put it back in inventory. Zoom out of the manhole cover and zoom in on the gray cupboard again. Take the copper rod from inventory again and now insert the rod in the lock of the cupboard. Then click twice on the rod and .... you open the door of the cupboard.
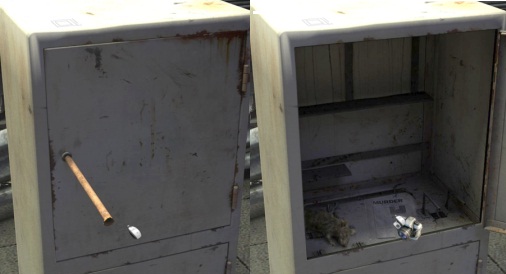
In the cupboard is a dead rat and a newspaper page. Take a photo, with the camera, of the newspaper and then take the newspaper from the cupboard using your plastic proof bags. In the inventory close-up screen, view the bag where the newspaper is now in. The article describes an older murder from a month ago. Nicole groans that she should give the evidence to Wang, but we don't care about that yet. Zoom out and go back to the intersection (Alley) and then to the side entrance of the theater.
Enter the theater again through the side entrance.
Movie theater:
Zoom in again on the seat schedule, on the right of the exit door. Move your cursor down again to the right, to the square symbol, at the bottom right of the diagram.
Take a picture of the symbol with the camera. Zoom out and go to the overview screen of the room via the bottom of the screen.
Then go out of the room via the bottom right to the upper hall and enter the Control Room again.
Control Room:
Zoom in on the front projector again and open the lamp housing cover again using the lever. Take the Lamp (Bulb) from the projector. Zoom out and zoom in on the bottom reel box. Open the lower film reel box and take out the full film reel again. Exit the control room and exit the theater via the side exit in the cinema room and go back to Wang on the platform. Talk to Wang again and use all conversation options again to show him the evidence.
Nicole shows Wang only the playing card and the newspaper about the old murder. Wang does not receive the evidence because you must first return the camera and the empty evidence bags to Wang's toolbox. When the conversation has ended, zoom in again on Wang's toolbox. Open the toolbox again and place the Camera and the empty plastic evidence bags back in the box, Zoom out and speak to Wang again and talk to him again through all the conversation options and .... Now Nicole gives Wang the bag with the playing card and the bag with the newspaper article about the old murder.
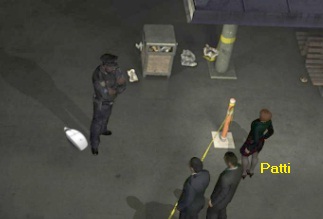
Meanwhile, hairdresser Patti is still patiently waiting at the bottom right.
Talk to Patti and ask her about the accident and all other topics and this chapter will come to an end .....
Patti was dozing off on the platform bench as she scooped the train into the red car. Patti didn't see anyone else on the platform.
Patti, like Nicole, also lives in Jersey and Nicole gives Patti a ride home and you end up in:
Chapter 2: October 20, 2009
New York: The Bronx: FBI Building:
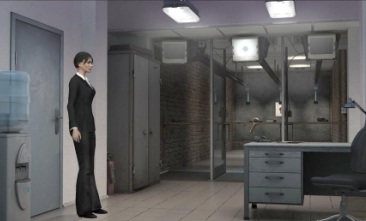
Laboratory:
It's the next day and Nicole and Wang are in Wang's engineering lab.
Nicole now also has her cell phone in inventory, so she can now make cell phone calls. Talk to Wang and use all conversation options again
After Nicole's comment that the train / car collision was not an accident, Wang examined the car and it turns out ... There was a chip built into the car, which allowed someone with a remote control to shut off the engine and lock the doors . So it was an assassination attempt ..... Wang says the expert who came to watch said you could use the remote control from a distance of up to 100 meters.
There was nothing more to be found of the victim's cell phone, but Wang did find a sheet of paper. Despite the blood, there was still a text on it: "Holland Street 7 pm". Holland Street is close to the theater. So the victim had an appointment with someone there.
Nicole suspects the murderer is a gambler and she is sure that the murder and everything in the theater is related. Wang hasn't had time to examine the playing card yet. Nicole asks if she can scan the evidence and look it up in the database. Wang struggles a bit but eventually he gives in, as long as Nicole does it through her own computer.
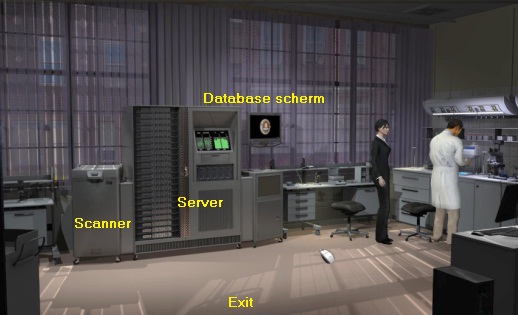
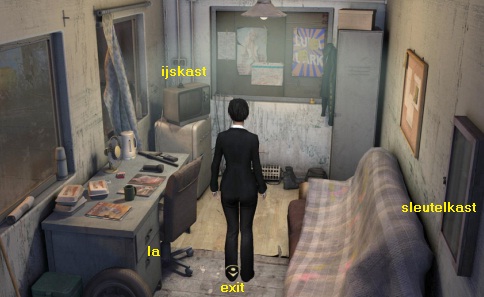
When you're done with Wang, take a look around. Wang is busy at his desk. The large server computer cases stands against the windows. The Scanner is located to the left of the server. The "Database user screen" hangs on the right side of the server. Exit the lab at the bottom of the screen. On the landing (Mezzanine), Nicole meets the expert Wang was talking about.
The expert is called Jason Emmerick and he says that it should take no more than a minute to install such a chip in a car, as long as you know how to do it. Emmerick goes on to say that he worked on the stealth technique in the army and is now retired and now often fishes on the coast. Emmerick is rather curious and wants to know what Nicole thinks about the case. Whether the perpetrator is the victim's family, or whether it is a serial killer, but Nicole keeps a low profile. Emmerick says that he currently no longer has business cards of his own, but he would like Nicole's card if he urgently wants to tell her something. Nicole's cards are on her desk. Nicole walks away to her office to pick up a business card.
Nick Romski, Nicole's colleague, is messing around behind his desk. Nicole's desk is the front desk. On the wall, behind Nico's desk, is a map of America. Zoom in on Nicole's desk. Nicole is shocked because her computer has been taken apart a bit. To the left of the keyboard is an FBI Magnetic card and above it is a Box with business cardS

Bekijk de computer. de magneetkaart en de visitekaartjes. De magneetkaart geeft Nicole toegang tot de schietbaan. Pak de FBI Magneetkaart en pak het doosje met de Visitekaartjes. Bekijk de visitekaartje in close-up in je inventory. Het zijn de visitekaartjes van Nick. Stap weg bij Nicole's bureau en ga praten met Nick Romski en gebruik alle praatopties.
Nick is ontslagen en hij is bezig zijn bureau uit te ruimen. Het ontslag van Nick komt hard aan bij Nicole. De reden voor het ontslag van Nick is gelegen in de gebeurtenissen zoals die worden vertelt in Art of Murder 2 The hunt for the Puppeteer. In dat avontuur heeft Nick, in Marseille, Nicole's leven gered, maar daarbij heeft hij toen alle regels overtreden. Nick heeft er wel vrede mee en hij is van plan om zijn eigen priv�-detectivebureau beginnen. Nick hoopt dat Nicole zo nu en dan werk voor hem vind in de database. En als Nicole ooit genoeg heeft van de FBI dan is ze zeer welkom om bij hem te komen werken. Het vertrek van Nick is ook de reden dat de techneuten van de FB! de computer van Nicole hebben gesloopt. Nick geeft Nicole haar eigen visitekaartjes terug.
Na het gesprek met Nick verlaat je het kantoor,via onderkant scherm, naar de hal (Mezzanine). Nicole staat dan bovenaan de trap.
Ga de trap af naar beneden. Nicole is dan in de beneden hal, of te wel in de:
Receptie hal:
Look at the computer. the magnetic card and the business cards. The magnetic card gives Nicole access to the shooting range. Take the FBI magnetic card and take the box with the business cards. View the business card in close-up in your inventory. They are Nick's business cards. Step away from Nicole's desk and go talk to Nick Romski using all the talking options.
Nick is fired and he's clearing out his desk. Nick's resignation hits Nicole hard. The reason for Nick's firing lies in the events narrated in Art of Murder 2 The Hunt for the Puppeteer. In that adventure, Nick saved Nicole's life in Marseille, but he then broke all the rules. Nick is at peace with it and plans to start his own private detective agency. Nick hopes Nicole will occasionally find work for him in the database. And if Nicole ever gets tired of the FBI she is very welcome to come and work for him. Nick's departure is also the reason that the FBI destroyed Nicole's computer. Nick gives Nicole her own business cards back.
After the conversation with Nick you leave the office, via the bottom of the screen, to the hall (Mezzanine). Nicole is then at the top of the stairs.
Go down the stairs. Nicole is then in the downstairs hall, or in the:
Reception hall:
Expert Emmerick is at the desk. Go talk to Emmerick again and use the "Calling Card" option and Nicole gives Emmerick one of her business cards. Emmerick disappears but he thinks he and Nicole will meet again. Go back up the stairs. Upstairs again, the door by the stairs is Nicole's office. You can also see the blue door of the laboratory and, in the foreground, the door of Ruth's office (Secretary office). Click with your arrow cursor on the door of Ruth's office
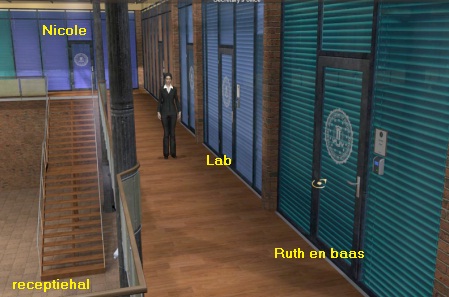
Ruth:
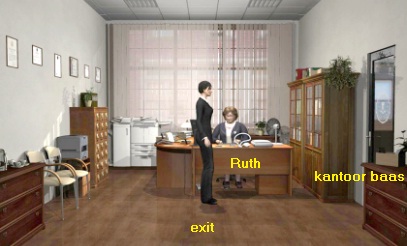
Ruth, de secretaresse van Nicole's nieuwe baas Jeff Kurtz, zit achter haar bureau. Rechts is de deur van het kantoor van de baas. Praat met Ruth en gebruik weer alle opties.
Ruth werkt al 40 jaar bij de FBI, maar ook Ruth weet niet waarom Nick zo plotseling vertrekt. De offici�le reden is, dat hij op eigen verzoek ontslag heeft genomen. Nicole wil haar baas spreken, maar die is niet aanwezig. Ruth vertelt Nicole dat ze naar de schietbaan moet voor haar verplichte schietoefening.
Leave the secretariat via the bottom edge of the screen. Nicole is then back on the balcony. The laboratory is to the left of the secretariat. Go to the:
Laboratory:
Wang is still working on his investigation. Talk to Wang again and use all conversation options again.
Since Nicole's computer is broken, she wants to use Wang's terminal to search the database. Wang is willing to help her when Nicole goes to shooting practice in his place. Nicole agrees and gets Wang's magnetic card so she can do the shooting practice as Wang.
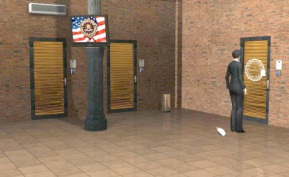
Exit the laboratory and go down the stairs to the reception hall. Downstairs in the large hall you see 3 doors and a green soft drink machine. The door to the left of the soft drink machine is the door to the Sapper Room. The doors to the right of the soft drink machine are of the Interrogation room and the Monitoring room. The exit doors are on the left.

At the far right a monitor hangs from the round pillar. Place your arrow cursor at the round pillar on which the monitor hangs.
You will then get the "Rooms in the Corner" available. So double click and Nicole runs to the corner behind the monitor pillar. You will then see 3 ribbed doors.
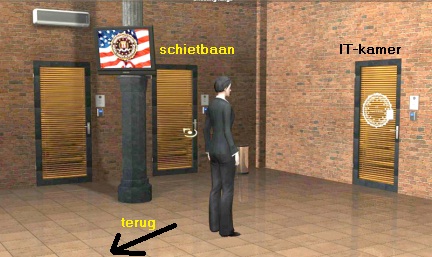
The left door is not available, but the door behind the pillar to the right is the shooting range door. The door in the other wall is the IT room door. A magnetic Card reader hangs next to each of the doors. Take Wang's magnetic card from inventory and click it on the card scanner of the shooting range door. Nicole runs Wang's card through the scanner. Now click on the door and Nicole ends up on the:
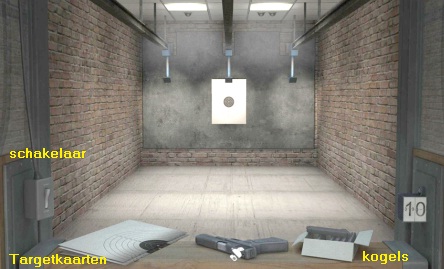
Shooting range: Wang's test:
|
Nicole has "signed up" as Wang and now has to take the shooting test for Wang. Behind the desk are the 3 booths of the shooting range. Each booth has a shelf with a gun on it. Click with your magnifying glass on the shelf in the middle booth to enter that booth.
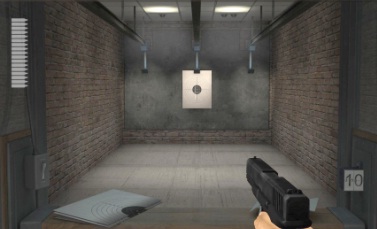
On the left wall is the switch to bring up the Target card. The gun is on the shelf. To the left of the gun are new Target cards. To the right of the gun is a box of bullets. It's simple ... Take the gun that is on the shelf and shoot the gun at the Target card that hangs in front of the bare wall and then try to hit the black circle.
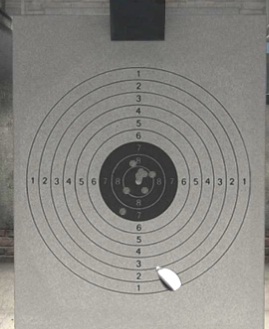
When Nicole says it's good enough for Wang you can stop firing. You don't need to look at the target, so once Nicole says it's enough you can leave the shooting range. To see if you were also a good or mediocre shooter, zoom in on the switch and click the switch to bring up the Target . As you can see I haven't done that bad yet.
NB: If you run out of bullets and Nicole has not indicated that you have shot well, you have to try again with new bullets and a new target card. Then zoom in on the switch and click to bring up the old target card. Zoom out of the switch and then click on the stack of target cards that is on the shelf. You then replace the old target card with a new one. Click on the bullets box to equip the gun with fresh bullets. Send the new target card back again by clicking the switch again and start shooting again and then do it better than last time. |
Get out of the booth and exit the shooting range and go back upstairs to the lab
Laboratory:
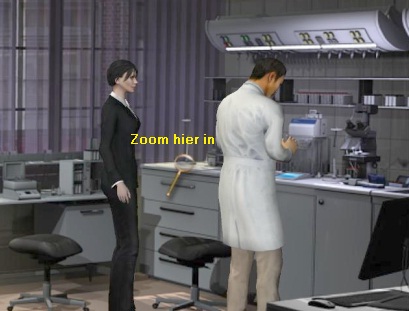
Talk to Wang again and use the "Shooting Range" option and .... Nicole informs Wang that she took the shooting test for him and gives Wang back his magnetic card. Wang is working at his desk. Click on the work table to the left of Wang to zoom in on the left part of the work table.
On this part of the table is the bag containing the king of hearts card that Nicole found at the railway crossing.
There is also a box with bags and a larger box with plastic gloves.
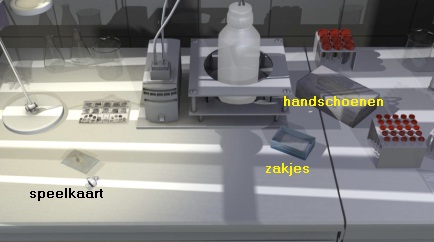
Take the bag with the King of Hearts card. Take a few bags from the box with bags and take a pair of gloves from the big box. Step back.
Nicole is now allowed to use Wang's computer terminal to log into the FBI database. To the right of the large computer server is a monitor and that is the "Database user screen". To the left of the server is the Scanner. Zoom in, with your magnifying cursor, on the Scanner:
Scanner
Nicole reports that the scanner is directly connected to the database so anything Nicole scans here, she can look up and compare immediately. There is a blue button in the lid of the scanner. Click on top of the scanner to open the cover. Stay in the close-up.
View, so right click on, the Jack of hearts card in inventory (Jack of hearts in evidence bag). Nicole reports that she can use the card as proof. Nicole has to take the playing card out of the plastic bag to put it in the scanner. Stay in the close-up screen of the playing card. Take the plastic Gloves from inventory and click, in the close-up screen, on the bag that contains the playing card. Nicole now takes the card out of the bag.
Close the close-up screen. In inventory, the playing card is then "glued" to the gloves. Take the gloves with the playing card from inventory and click them in the scanner device to put the card in the scanner. Close the lid of the scanner and click on the blue button and ..... the scanner scans 1 side of the playing card. Open the scanner again and then right-click on the playing card to turn the card over.
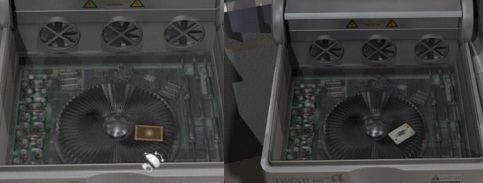
Close the scanner cover and press the blue button again to scan the other side of the card. When the scanning is finished, open the flap again and left click on the card to put the card back in your inventory. View, in inventory, the 2 empty evidence bags in the close-up screen. Then take the Card (on the gloves) from inventory and click it, in the close-up screen, on the plastic bags to put the card back in a plastic bag.
Close the close-up screen and close the scanner lid. Then step away from the scanner. Zoom in again on the left part of the work table, so to the left of Wang, and put the plastic bag with the playing card back on the work table. Step away from the work table again. Now zoom in on the "Database user screen", the monitor that hangs on the right of the server cabinet.
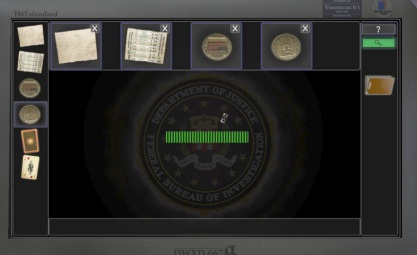
Database screen: Search for similarities::
Nicole reports that the monitor is directly connected to the database and that you log in with your fingerprint.
Click in the screen and ... Nicole's fingerprint will be scanned and compared.
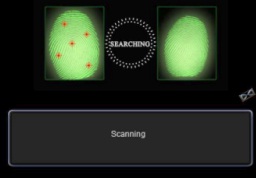
Then click the ENTER key on your own keyboard to confirm the result.

At the top left you see the 2 scanned sides of the playing card. Pick up the 2 cards and drag them to the top bar and click them there. A green question mark button and a magnifying glass button now appear at the top right. Click on one of the two cards (for example the play side) and you will get an enlarged image in the middle of the screen. Then click on the green question mark button and the device will analyze that side of the card.
When the analysis is finished, 5 green circles appear on the card. Right click on one of the circles to hear Nicole's explanation. So you now have to select 3 green circles to let the computer search the database for similar objects. At the top right, the magnifying glass button is now green and that is the search button.
On the play side of the card left click on the green circle at the top left and on the circle on the head, to select these 2 items. Now left click, in the top bar, on the back of the playing card to put it on the large screen. Also on the back of the card are now 4 green circles. Left click on the circle that is a bit left in the middle of the map.
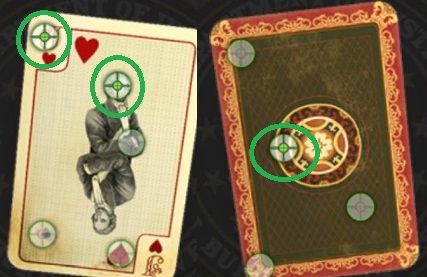
You have now selected 3 circles, so click on the Search button and ..... the computer will search the database and report that 5 results have been found, in which these playing cards were found in a murder case. The list with the 5 results will then appear on the screen.

So click on Match 1 to Match 5 and the documentation about the murder case will appear. Use the arrow at the bottom right to scroll to the next page.
|
Match 1: The murder of Melanie Jensen, aged 57 Murdered April 4, 2004 in Norwitch. Melanie was tied to a chair in her own house, next to an oven with an open gas tap. So Melanie has been gassed. A device was found to cause everything to explode when the door was opened. The device did not work. The detective who investigated the case was Dick Parr Match 2 Steven Ashton, 37 years old Steven was murdered in Chigago on May 16, 2006. Steven worked in a newly opened amusement park. Steven was found in a hole in the foundation when liquid cement was thrown into it. The detective who investigated the case was Austin Davis Match 3: Thomas Dawkins, 45 years old. Murdered March 21, 2006 in Chigago. Thomas owned and cooked in a restaurant. A particular dish, "Chef's Duck" was always prepared by Thomas himself. The dish was ordered and Thomas was electrocuted while preparing it. The detective who investigated the case was Detective Mathew Hernandez Match 4: Madison Colby, age 35. Killed on October 9, 2008 in Boston. Madison was a pharmacist and was squashed by a garbage truck. Madison was the young woman in the beginning cutscene of the game. The detective was Stanford Garcia. Match 5 Edward Carter, 52 years old: Edward was murdered on October 19, 2009 in New York. Edward was the CEO of the DotInspire Corporation. Edward is the man who couldn't escape his car and was grabbed by the train, at the end of Chapter 1. The investigative detective is Nicole Bonnet |
When you have read all 5 cases, there is a documents folder in the right bar where the files are stored. Zoom out of the screen. Well ... it looks like a serial killer is at work. Talk to Wang for a little longer and then use the "Card Analysis" option to notify Wang of your findings. Then exit the lab and go back to Ruth's office.
NB: If you forgot to close the scanner lid, Wang will ask you to do this now. You can only leave the lab when the scanner is closed again.
Nicole's boss Jeff Kurtz:
Ask Ruth if the boss has arrived by now. That turns out to be the case and Nicole can now talk to the boss.
So go through the glass door to Boss Jeff Kurtz's office and talk to him about any topics you get.
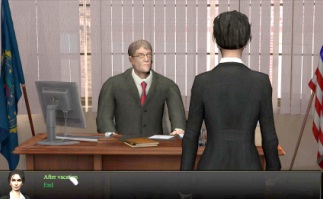
After Nicole explains what she has discovered, she is assigned the case for further investigation. But not with Nick as a partner. Dick Parry will be Nicole's new partner. Kurtz says the FBI needs to pay more attention to its image these days and they even employ PR people for it. There is even a chance that the really big boss of the FBI wants Nicole to do PR services.
Since Nick was too negative in the news in France, he is no longer welcome. Nicole has temporarily escaped beeing fired because she is a woman, but Kurtz does want results from her in the short term. Nicole can ask the IT man for a new computer now that the hard drive of her old one has been taken for examination. Kurtz also says that Nicole is not yet allowed to leave the building. Apparently there's also a new package been delivered for Nicole.
When you have discussed everything with the boss, go back down to the reception hall. Kruntz has told Nicole to go to the IT department for a new computer. The IT department is in the corner of the hall where the shooting range is also. So go back to the corner of the hall and ...... There's a note on the IT door.
Click on the door to have Nicole read the note. The IT man is not present and if Nicole has urgent questions she must call FBI headquarters. Walk back to the left and then go through the double exit doors, at the desk, outside and ...... Outside the explosives disposal service (Sapper) is busy with the suspicious package for Nicole. A robot grabs the package and takes it to the secure bunker
Sapper room:
Nicole is then in the control room of the explosives disposal service, the Sapper Room. Talk to the Sapper man, who was just at the control panel and has now taken a few steps back. De Sapper says that the package contains a metal box and that the box has a combination lock. So we don't know yet if there is a bomb in the box. The packaging has been sent to the laboratory for further investigation.
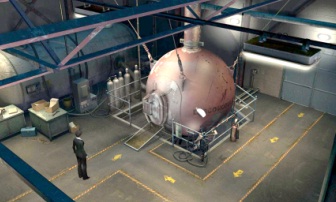
Through the window you can see the orange bomb bunker, which now contains the box. The door, to the right of the window, gives access to the bunker, but Nicole doesn't wants to go there now. She first wants to know more about the packaging material. So exit the Sapper room, through the bottom left corner and then go back up the stairs in the main reception hall to the:
Laboratory:
Talk to Wang again and ask him if you can view the wrapping material. Wang then hands Nicole the packaging material, which of course is put in an evidence bag. View this packaging material in the close-up screen, so right click on it in inventory. There are scribbles on the packaging and Nicole says she should make a photocopy of it. So, in the close-up screen, click on the bag with the gloves to take the paper out of the bag. Close the close-up screen and go to the office of:
Ruth:
Behind Ruth's desk is the photocopier to the left. However, talk to Ruth first and use all topics again and Nicole asks Ruth to look up all the documentation on the 5 murders and she will be allowed to use the photocopier. After this conversation, take the Gloves with the Packaging Material from your inventory and click it on the copier to make a copy of the material. After copying, store the gloves with the real material again. In inventory you then have a copy of the packaging material (wrapping copy) and Nicole can continue to work with this. However, put the original packaging back in an evidence bag, so right-click on the bags and then click on the bags with the original packaging (in the close-up screen) to put the original packaging back in a bag.
Fold the package copy:
Dive back into the inventory and now right click on the copy of the packaging. In the close-up screen, Nicole will also see red characters at the edges.
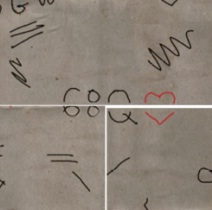
Nicole thinks she should fold the paper to see if she can make sense of the signs. You can see that the paper can be folded into 12 squares. If you put the cursor in a square at the 4 edges, you will get a short white arrow. You get a left arrow, a right arrow, an up arrow and a down arrow. By clicking with these arrows you can fold the paper at those places. Click with the Up arrow in the top right square to turn the entire paper over first. You have turned the paper over now, because you saw it upside down first. Now you will see the following at the bottom left: 53G XX 89.
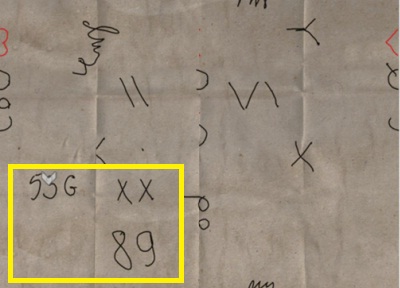
Now click with the right arrow in square 1, or 4 or 9, to fold the entire left flap inwards.
Then fold the right flap inwards by clicking with the left arrow in square 4, 8 or 12.
You have then folded the left flap and the right flap inwards and Nicole now sees a black Q and a red Heart. Nicole concludes that this must stand in front of the Queen of hearts because that's the next card in the card game. This should be the symbol for the next victim. Now unfold the left flap again by clicking with the left arrow on the left flap. Leave the right flap alone.
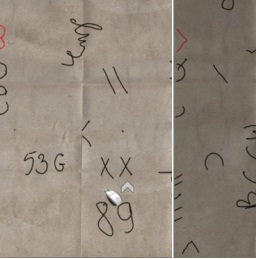
Now fold the bottom up, by clicking with the up arrow in 1 of the bottom boxes.

Then fold the left flap back in with the right arrow and .... Now Nicole sees: 6 8 Q and the red Heart.
Click on the thick X at the bottom right to close the screen.
Leave Ruth's office and go back to the reception hall and then through the Sapper door, to the left of the green soda machine, back to the:
Talk to the Sapper man again and ask him about the Combination.
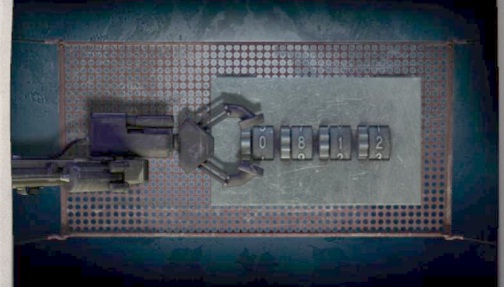
Nicole says she does not understand the combination of 6 8 Q Hart. The Sapper says that the combination lock of the metal box consists of 4 numbers. The man also explains to Nicole that in some card games the Queen of Hearts has a value of 12. So Nicole and the Sapper conclude that the combination could well be 6 8 1 2. The Sapper man gives Nicole permission to try to open the box.
Open the box
Click with your magnifying cursor on the monitor screen, which is on the desk in front of the window. You are then in the close-up of the Robot Controls. On the monitor you now see the combination lock of the metal box and the grab arm of the robot. Below the monitor is the robot's joystick.
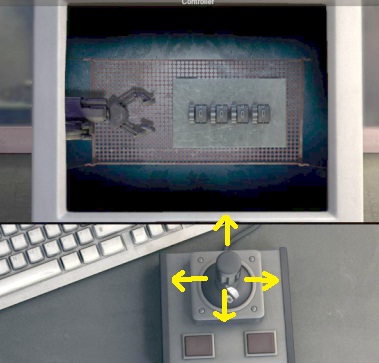
With the joystick you can move the grab arm of the robot. Below the joystick are 2 red buttons. With the left button you squeeze the grab arm of the robot. You can move the Joystick to the left and to the right and up and down, the robot will go left and to the right and the grab arm up or down. You move the joystick to the left, right, up or down by clicking the joystick and then holding down your left mouse button. Then pull the joystick to the right, left, up or down.
So you have to place the grab arm of the robot exactly on each of the 4 tumblers of the box, so that the tumbler is exactly in the grab arm. Then click on the left button to close the grab arm. When the grapple arm is closed and is just right, you can move the joystick up and down to turn the arm to the correct number. The grab arm of the robot is open.
Click on the joystick and then hold down your left mouse button. Pull the joystick to the right until the joystick grapple arm is just at the first tumbler.
Then click on the left button to close the grab arm.
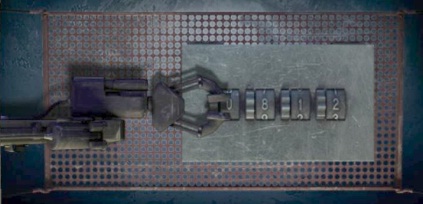
Now drag the joystick up and keep doing that until you have the 6 on the first tumbler.
In the same way, move the 8, 1 and 2 on the other 3 tumblers and ...
If you have done all this correctly you have set the combination 6-8-1-2 on the tumblers and the box is open.
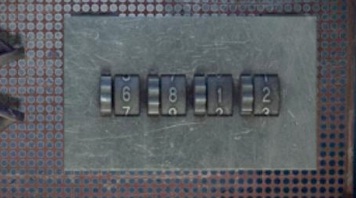
You go out of the close-up automaticly. Talk to the Sapperman again when you open the chest.
There is no bomb in the box but only a piece of paper and a coin and Nicole can go and get it.
So now go through the door to the right of the window to the bomb hangar.
Zoom in on the door of the orange bombunker (Detonation chamber). Click on the door to open it.
In the bunker the chest is on a grid. Zoom in on the chest. There is a Coin (Token) and a Piece of Highway ticket in the chest.
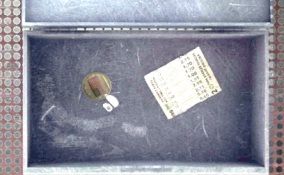
Take the gloves from your inventory and take the toll ticket from the chest with the help of the gloves. Then put the plastic evidence bags back in the close-up screen of your inventory and put the Toll ticket in the plastic bag. Close the close-up screen. With the gloves, take the Coin from the chest and step back twice. Nicole has no more evidence bags, so she cannot put the coin in a bag now. Nicole has to pick up new bags. So exit the bomb hanger, through the bottom left and then the sapper room and go back to the:
Laboratory:
Zoom in again on the left part of Wang's work table and then grab a few new Evidence bags from the small gray box. In inventory, in the close-up screen, put the coin in an evidence bag, as you have already done a few times before. Nicole thinks it's a coin from an amusement park. Step away from the work table. Nicole now has to scan the coin and look it up in the database. So zoom in on the Scanner again.
Scan the Coin and the toll card:
Open the scanner cover again. Put the bag with the coin in inventory in the close-up screen and then take the coin from the bag with the gloves. Then put the coin in the scanner. Close the scanner lid and click the blue button. The coin is now scanned on 1 side. Open the cover again and then right click on the coin to flip it over. Close the cover and click the blue button again to scan the other side of the coin, then open the cover again and take the coin from the scanner. Put another evidence bag in the close-up screen and then put the coin back in.
Now scan the Toll ticket in the same way, also on both sides. Put the toll ticket back in an evidence bag after scanning. Close the lid of the scanner and step away from the scanner and zoom in again on the Database User Screen, the monitor that hangs to the right of the large server cabinet.
Database screen :
Click in the screen again to scan Nicole's fingerprint and then press your own ENTER key again to access it. The scanned sides of the coin and the toll ticket are in the left column. Drag both coins and both toll tickets to the top bar. Then click on the green question mark button to analyze the 4 objects.
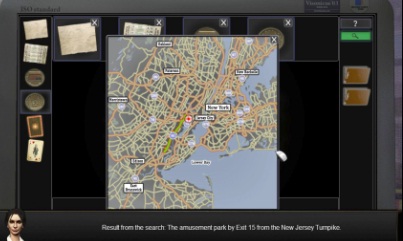
When the analysis is finished, click on 1 of the 4 objects in the top bar. You get that object enlarged in the big screen. Do this with each of the 2 toll ticket sides and the 2 coin sides. Nothing can be seen on the blank back of the toll ticket. However, you now see green circles on the front side of the toll ticket. Click on the circle on the 0.70 cent strip to select this circle.
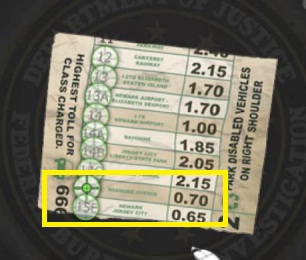
Then click on the green magnifyer button and ..... the computer finds a Match and you see the map of New York and surroundings.
Exit 15 at New Jersey will be marked on the map, because that's where the Amusement Park, you found the coin of in the box, is.
You no longer need to have both coins analyzed because if you do that, you will be presented with the same map with exit 15 selected. So zoom out and talk to Wang again and use all subjects again. Wang is happy that Nicole wants to go to the amusement park immediately, but he doesn't want to go. He's too busy. Then Nick Parry, Nicole's new partner, enters. Continue to talk to Parry using all topics.
Parry doesn't want to go to the amusement park right away. Parry thinks Nicole is a bit hasty and wants to study some more evidence first. Moreover, he suspects that the killer will wait until Nicole is on the scene as a witness. Nicole disagrees and wants to try to save the life of the prospective victim as soon as possible.
Close the conversation via "end" and .....
Nicole has thus pushed her way and in a large-scale action, supported by helicopters, the FBI raid the amusement park.
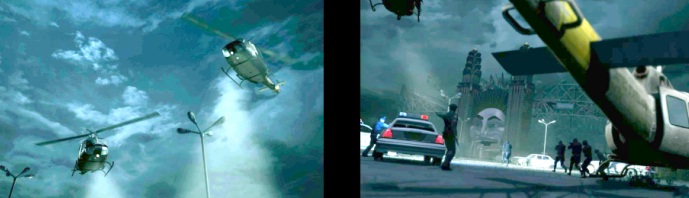
Chapter 3: October 20, 2009: New Jersey
amusement park.
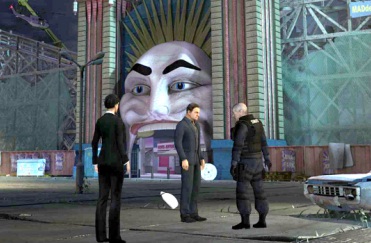
Nicole, her new partner Dick Parry and the commander of the SWAT Team are at the entrance of the amusement park. Try to talk to Dick Parry, but Nicole does not want to talk to her new partner at this point. Talk to the SWAT commander. Several Swat agents are now searching the amusement park for the killer but nothing special has been found yet. Nicole wants to investigate the amusement park herself. The entrance to the amusement park is the huge gaping mouth of the clown's head. After the conversation with the SWAT commander, enter the amusement park (Alley) through the gaping clown mouth. Nicole ends up in the main street of the amusement park. A SWAT agent is on duty.
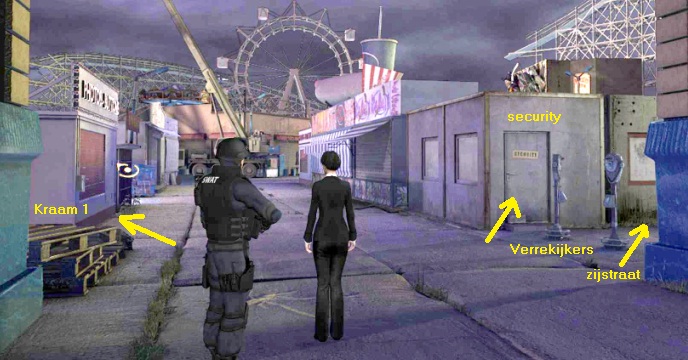
Talk to the oSAWAT agent for a moment. The agent found nothing and saw nothing special. Beyond the cop, on the left side, there is a closed shack with the shutter down. On the corner of that shack is the box with the handle to open the shutter. Further on, also on the left, is the Shooting Gallery. On the right is a side street with 2 Binoculars and on the corner is the Security Office. First walk to that closed shack, past the SWAT agent on the left. You will then enter the close-up of the handle box where the handle for the roller shutter of the stall is. Take the lever out of the box and step out of the close-up again.
Now click with your magnifying cursor on the left Binoculars, which is in the entrance of the side street.
In the close-up you then click with your magnifying cursor on the 2 viewing lenses of the binoculars and ...
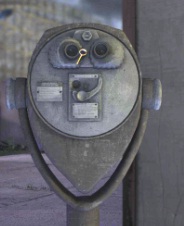
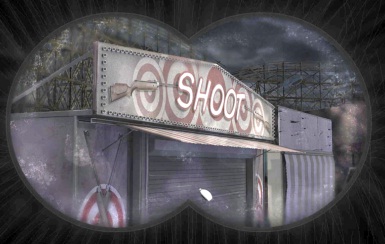
..... Nicole looks through the binoculars and sees ... the shooting gallery.
So these left binoculars are focused on the shooting gallery and Nicole wonders if this is a hint for her.
Step back twice and zoom in on the right binoculars. Try to look through the right binoculars ... But Nicole reports that this is not possible. A coin must be put in the binoculars. Get out of the close-up. Place your cursor to the right of the right-hand binoculars. Your cursor then becomes the forward arrow to enter the side Alley.
So walk into the side slley and .... The alley is blocked by a huge pile of colored barrels.
You can zoom in on the stack of barrels, but you can't do anything with it yet. A few meters in front of the barrels, on the right, there is an oil can on the ground.
Look at the Oil Can...it is quite rusty. Take the Oil Can and view it in inventory.
Nicole reports that there is still a little machine oil in the can. Walk back to the main street, via the bottom of the screen.
Security Office:

Now click with your forward arrow on the door of the Security Office. There is a wooden block against the door.
Nicole cannot open the door because of the wooden block. Take the wooden block and enter through the door.
There is a desk on the left wall and a refrigerator in the left corner. On the right wall is a sofa and above the sofa is a key cabinet. Zoom in on the desk. You are then in the close-up of the 2 drawers of the desk. Open the top drawer. Take from the drawer the Energy saving lamp (Bulb), the Coins (Tokens), the round metal Can (Box) and the Key.
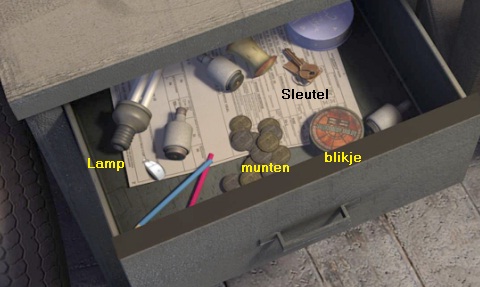
Step back. View the Key in inventory. The key is attached to a small wooden board that should have a number on it. But Nicole reports that this key has no number. If you turn the key in the close-up screen, you will also see that there is no number on the shelf. Also take a look at the round metal can that you just took from the desk drawer. The can is full of small airgun pellets. Zoom in on the refrigerator. The refrigerator is closed with a combination lock. Zoom in on the padlock. A 4-digit code is required to open the lock. Zoom out. Nicole hopes she can find the code for this lock somewhere. Zoom out of the refrigerator.
Zoom in on the key box, which hangs on the wall above the sofa. The key box is also locked with a padlock. You can see that there are 22 keys in the cabinet and each of the keys is attached to a number shelf. We'll leave this key box alone for now, but we'll be back here soon. So get out of the close-up and exit the security office again via the bottom of the screen. Nicole is then outside again at the left -hand binoculars. Go down one more screen via the bottom of the screen. Nicole is then back on the main street, where the SWAT agent is waiting. The 2nd booth on the left is the shooting gallery....go there
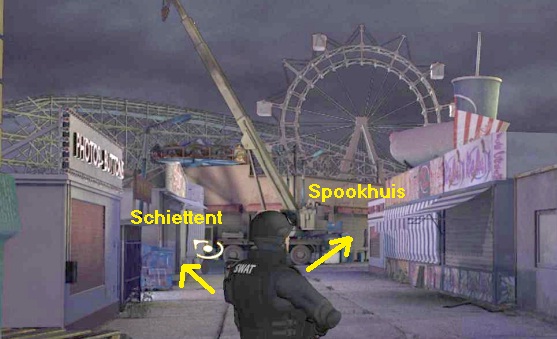
Shooting Gallery .
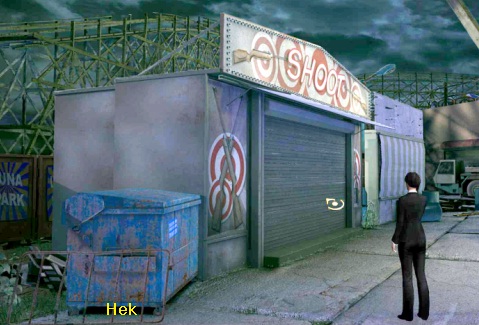
Nicole is standing in front of the shooting gallery. To the left of the shooting gallery is a blue waste container. A piece of metal fence leans against the blue waste container. Take the fence. The shutter of the shooting gallery is also closed. Click with your forward arrow on the shooting gallery to get to the close-up of it. Click on the closed roller shutter. Nicole tries to manually raise the roller shutter. Nicole will of course not succeed. On the right the lever box (Roller shutter crank) hangs from the roller shutter. A pipe goes up from the lever box to the orange Roller shutter mechanism.
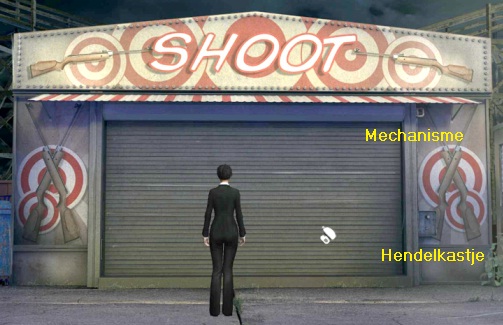
Zoom in on the lever box. The crank has disappeared, so take the Crank, which you took from the locker of the closed stall, from inventory and place the crank in the crank hole. Place the Key you took from the desk drawer of the Security office in the keyhole.

Then left click on the key to turn it and then left click on the turning handle and ..... Nicole reports that the mechanism is blocking somewhere. Step 1 step back. At the top right, so above the turning handle box, is the roller shutter mechanism. Click with your magnifying cursor on the Roller shutter mechanism. Nicole, however, reports that the mechanism is too high.
Take the Fence (Metal railing) from inventory and click it on the far right edge of the shooting gallery (Metal railing + Shooting gallery) and .... Nicole puts the fence against the shooting stand. However, the fence is cross. Left click on the piece of fence so that Nicole now puts the gate upright and .... Nicole can now climb up the gate to the Roller Shutter Mechanism.
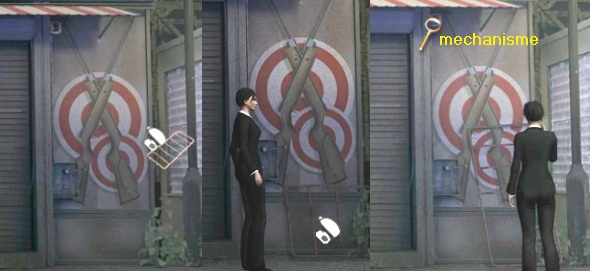
So click again with your magnifying cursor on the roller shutter Mechanism and .... Nicole climbs up through the fence and looks at the mechanism in close-up, which could use a little oil. You can try if Nicole wants to empty the can of machine oil into the mechanism, but Nicole doesn't want to do that like this. Step back 3 times, via the bottom of the screen. You then look all the way through the main street again. You can have Nicole go back to the SWAT agent and ask that agent for help to open the shutter of the shooting gallery. But the agent cannot do this either and the agent also thinks that the mechanism must be oiled.
So you are now looking again, from the SWAT agent, down the main street and Nicole is at the shooting gallery. Beyond the shooting gallery is a large construction crane and there the street curves to the right to the Haunted House (Chamber of Horrers). Place your forward arrow at the back of the large construction crane and then double click and .... Nicole runs further than around the corner and ends up at the:
Haunted House
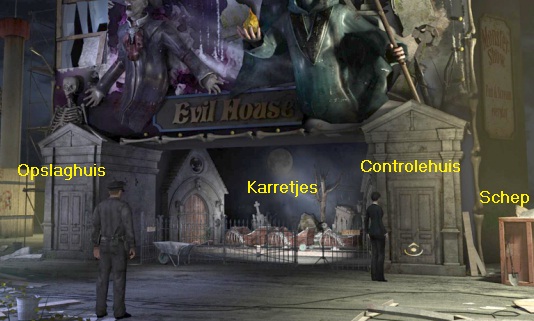
A police officer is guarding the haunted house. Talk to the officer for a minute. The officer reports that nothing of interest has been found in the haunted house. Behind the fence are the carts (Ghost train) with which visitors can take a ride through the haunted house. To the left and right is a house. The right-hand house is the control room of the haunted house train and the left-hand house is a storage / work space.
Right-hand house: The Control Room:
To the right of the Control Room is a reddish brown box. There is a shovel against the box. Walk to that box and then take the shovel (spade). Click with the forward arrow to the right-hand house. Then click on the doorknob of the doors. Nicole then opens the doors and looks into the control room.
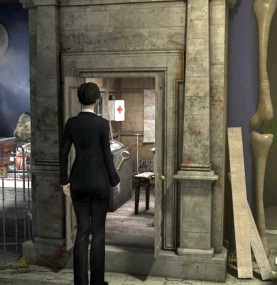
Click with your magnifying cursor in the control room and ..... You are then in the close-up of the control panel of the ghost train.
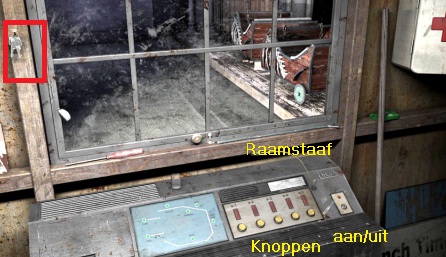
On the left, blue, screen you see a diagram of the various stops of the ghost train. In addition to the blue screen, you see 5 yellow buttons with red lights above them. With the 5 yellow buttons the carts are operated with which you can drive through the haunted house. On the far right is a keyhole where the key has to go in to activate the yellow buttons.
The control panel is under the window. On the bottom edge of the window frame is a screwdriver and a window rod that serves to keep the window open (Prop). On the left pillar of the window, 2 keys are hanging on a nail. Take the keys and also take the window rod. Try to fit the keys in the keyhole of the control panel. However, they are not the correct keys. Step back 2 times to exit the control room. Nicole is back on the overview screen. Now click with your magnifying cursor on the door of the left-hand house and .... Nicole will walk towards it
Left house: Storage room:
Click on the doorknob on the door. The door is locked. Take the 2 keys, which you took from the control room, from your inventory and click on the door handle (Keys + Keyhole) and then click on the door handle again. The doors are now opening. There is a blue bicycle in the room and a hammer on the floor. You can't take the hammer yet. There is also a workbench in the room. A lamp fitting hangs from the ceiling, without a lamp.
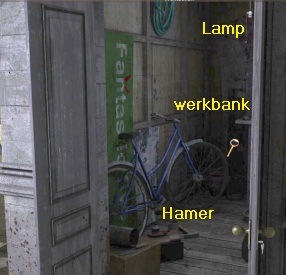
Click with your magnifying cursor on the lamp fitting to see the fitting in close-up.
Take the CFL (Bulb), which you found in the desk drawer in the Security office, from your inventory.
Click the CFL into the fitting and then click on the string to turn on the lamp.
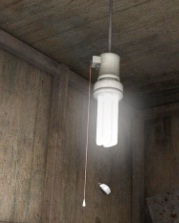
Get out of the close-up and now take the hammer from the floor. Click with your magnifying cursor on the workbench and now zoom in on it. There is a vise stuck on the workbench. Next to the vice is a piece of plastic and above it is the wheel of a train trolley. On the left is an oil can. A red piece of rope hangs on the wall near the suitcase.
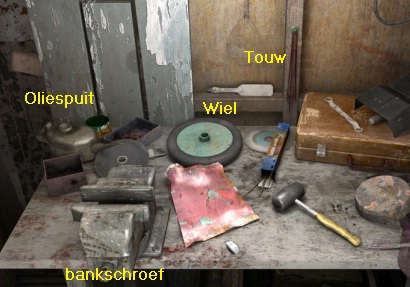
Take the wheel and the oil sprayer and also take the rope. Step back twice to return to the overview screen.
Then go, via the bottom of the screen, back to the main street and again to the:
Shooting gallery:
Go back into the close-up of the shooting gallery, so make sure you see the entire front of the shooting gallery again. In inventory, combine the Oil Can (Can) with the Oil Sprayer to pour the oil from the can into the sprayer. Zoom in again on the Roller shutter mechanism. Nicole climbs back up through the gate and you are again in the close-up of the mechanism. Take the Oil Sprayer from inventory and click it on the gear you see in the mechanism and .... The mechanism is now nicely lubricated with the oil.
Zoom out of the close-up and zoom in again on the Turning handle box. Click again on the key to turn it again and then left click on the turning handle again and .... because now the mechanism is lubricated with oil, the roller shutter now turns up. When Nicole has screamed in ecstasy "I Finaly Did It", then step back and see .... the Shooting Gallery is now open.
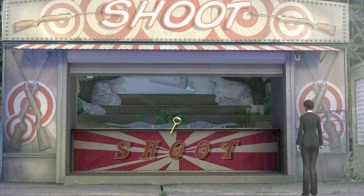
Click with your magnifying cursor in the now opened shooting gallery. You get into the close-up. The air rifle is on the counter.
To the right of the air rifle is a coin lock where you have to put in a coin and the red button you have to click to start the shooting game.
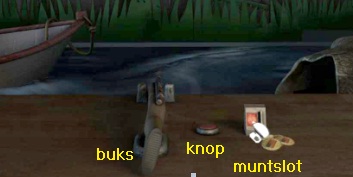
Take the Tokens from your inventory and click on the coin slot to put a coin in it.
Then click on the red button. The light in the shooting gallery will now turn on. Pick up the air rifle and ..... 7 Ducklings will now appear.
The 7 Ducklings do not move and therefore remain still. Use the air rifle to knock over all 7 Ducklings. It's really not difficult.
Move the rifle to a duck and then shoot the duck over with your left mouse button. When all ducks have been shot, rabbits appear.
The rabbits will move through your screen. The bottom rabbits move from left to right and the top ones move from right to left. You have to shoot 9 rabbits. If you have shot all ducks and 9 rabbits, you are ready and your prize will appear. Your prize is a Witch Doll that falls on a string. There is also a piece of yellow plastic at the red button.
Grab the Witch and then view the Witch in the close-up screen of your inventory.
In the close-up screen, turn the witch over using the arrows on the left and right of the screen.
The woodenTag of Key 9 is attached to the back of the witch.
Click on the wooden key tag. The tag turns around and you now see that it has a red arrow on it. Nicole reports that this tag belongs to a key in the key box of the Security office. Close the close-up screen. There is now also a piece of yellow plastic (plastic tile) at the red button. Take the piece of Plastic and then step back 2 times and then, via the bottom right, away from the shooting gallery. Go back to the Security office (Guardhouse) and enter again.
Security Office:
Zoom in again on the key box. The cabinet is therefore locked with a padlock and you do not have the key for that.
On the top right side is the hinge of the door.
View the hinge in close-up. There is a nail in the hinge. Click on the nail to remove it from the hinge and step back again.
Then click on the right side edge of the cupboard, where the hinge is attached, and ... the door opens. There are 22 keys in the key box. Each key is on a shelf with the key number on it. However, the keys are not in the correct number sequence. Now take all the keys from the cupboard. View the keys in inventory and turn them over in the close-up screen so that you see that each key has a number
You now have to put the keys back in the cupboard in the right order. Number the pins in the cabinet, from top left to bottom right, 1 to 24. Then, one by one, take the keys from inventory again and click them back on the correct pin in the cabinet. So key 1 on pin 1, key 2 on pin 2, key 3 on pin 3 and so on .... It may be done in any order. If you cannot see the number of the key, turn the key briefly in the close-up screen to see the number. Also hang the key tag of the witch doll, number 9, on pin 9. If you have all the keys plus tag 9 correctly, then Nicole will report this.
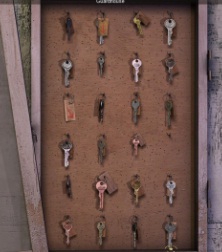
So you are missing key 16, but that doesn't matter .. You now see that key tagf 2 and key tag 9 have a red arrow and these 2 red arrows now point to key 14. Key 2, 9 and 14 and thus they make out the code for the padlock with which the refrigerator is locked. And this code is therefore: 2, 9, 1, 4. Step out of the close-up and click again with your magnifying glass on the refrigerator. Then click with your magnifying glass on the padlock to go in the close-up of the padlock.
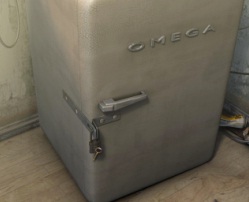
The lock has 4 turntables that you must turn to the correct number. So the code is 2, 9, 1, 4 and you have to set this from bottom to top on the padlock. Click on the turntables and then drag them to the left or to the right until the correct number is visible. So you turn the bottom disk on 2, the 2nd disk on 9, the 3rd disk on 1 and the top disk on 4.
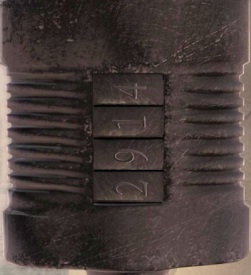
"That's It" Nicole shouts and the lock goes open.
Get out of the close-up and then click on the padlock to remove it and then click on the refrigerator door to open the refrigerator.
In the refrigerator, on the top glass plate, is a key ring with 2 keys. Get the keys.
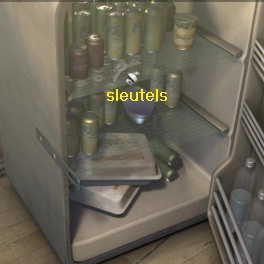
Close the refrigerator door again and step back and .... Nicole automatically locks the refrigerator again with the padlock.
Exit the Security office and go back to the:
Haunted House:
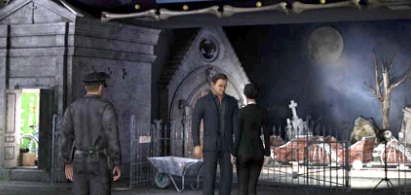
Back at the haunted house, Nicole now finds her partner Dick Parry. Talk to Parry and use all options.
Parry is fed up with this useless messing around here at the amusement park. Parry believes that Nicole is a hysterical woman who exaggerates things a bit and that there is nothing to be found here. Parry thinks they should concentrate again on examining the package. Nicole strongly disagrees, but Parry pulls all the agents back and leaves. Nicole is left alone in the amusement park.
Nicole is now all alone in the amusement park. Dumb as Dick Parry is gone and has also withdrawn all the agents.
Go through the gate to the carts of the ghost train. An iron bar leans against the open gate. Take the iron bar (Railing bar).
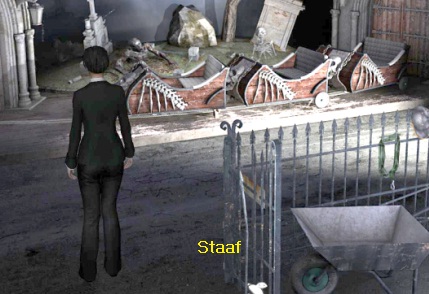
There are 3 carts on the rails. Zoom in with your magnifying glass on the front cart. In the close-up you can see that the front cart is missing the left rear wheel.
You can zoom in on the Car axle but also on the middle of the cart to look under the cart.
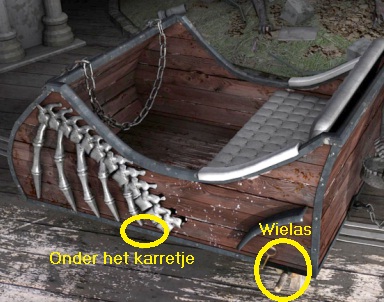
Zoom in on the Car axle. Take the Wheel that you took from the storage house from your inventory and click the wheel on the wheel axle.
Nicole reports that she must also block the wheel with a pin, otherwise it will run off the axle while driving.
Take the nail that you have taken from the hinge of the key box from inventory and try to click this nail into the hole of the wheel axle. Unfortunately ..... Nicole reports that the nail is too short. Nicole needs a longer nail. Put the nail back (right click) and step out of the close-up. Zoom in on the bottom center of the cart (Car underbody). You then look under the cart and see the 2 metal wheels that go over the rails and that ensure that the cart receives power from the rail. You can't do anything with this right now, but you will soon.
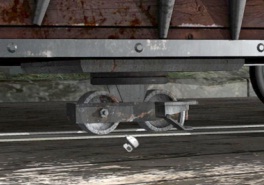
Control room:
Step back 3 times and then enter the control room again. In the left pillar of the window is still the nail on which the keys hung.
Take the iron bar (Railing bar) from inventory and click it on the nail to pry the nail out of the woodwork.
View the nail in inventory and you will see that the nail is bent. Step back to exit the control room. Now go back to the left house, the storage room
Storage room:
Zoom in again on the workbench. The vise is open but is missing the handle to open or close the vise. Take the window rod (prop) from inventory and insert the rod into the hole of the vice. Then click once on the bar to almost close the vise. Take the bent Nail from inventory and now click the nail between the almost closed "claws" of the vise.
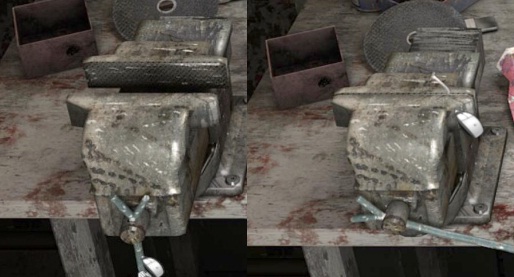
Click once again on the metal bar to close the vice completely and .... the nail will now become a completely straight nail. Click once again on the bar to open the vice slightly again and then take the Nail back out of the vice. Step back 2 times and go back to the train carts. Zoom in again on the front cart and then further on the rear wheel. Take the large nail from inventory and then place it in the hole of the wheel axle. This nail is big enough but Nicole says that she has to bend the nail again. So take the Hammer from inventory and ram it on the nail in the wheel axle to bend the nail.
The wheel is now firmly attached. Go back to the control room in the house on the right
Control room:
Zoom in again on the train's control panel. Take the key from the refrigerator of the Security office, from your inventory and click the key in the keyhole of the control panel. When the keys are in the keyhole, click on it to turn the key and .... the red light above the key will now light up. View the schedule and the yellow buttons. The green dots in the diagram correspond to the s-1, s-2, s-3, s-4 and s-4 red lights above the 5 yellow buttons. The intention is to turn on all 5 red lights at the same time. gets. Click on the yellow buttons and see what happens. If you click on the 5 yellow buttons in any order, you will notice that you never get all 5 red lights on. You also notice that the s-4 yellow button is broken.
Make sure none of the 5 red lights are on. You do this by removing the key from the ignition and then reinserting it. Then click on the key again to turn the console back on. All red lights are now off again. Now only click on the s-2 and the s-3 yellow button and ... all 5 red lights now light up at the same time and the train drives away into the haunted house, but unfortunately without Nicole.
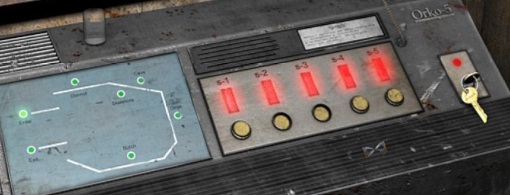
On the schedule you can follow the route of the train and a little later the train will reappear. Nicole has to find a way to make the carts wait until she is in it before they drive away. Exit the control room and go back to the carts. Zoom in again on the front cart and then zoom in on the bottom center of the cart so that you can look under the cart again. You will again see the 2 metal power wheels under the cart. These metal wheels ensure that the power flows from the rails to the drive of the cart. You should be able to prevent this temporarily, so that Nicole has a chance to sit in the front cart before the carts leave.
Storage room:
Zoom out completely and go back to the vice on the workbench in the storage house. The vice is still slightly open. Take the piece of yellow plastic from inventory and click it into the vice. Then fully tighten the vise by clicking the rod / handle again. Take the small Nail from inventory and click it on the piece of plastic in the vice to poke a hole in the plastic.
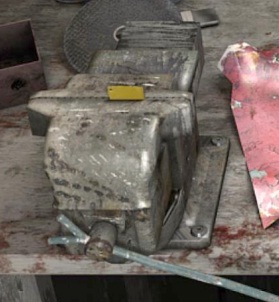
Click twice on the bar again to open the vise slightly again and then take the plastic back from the vise. Right-click in inventory on the piece of yellow plastic to view it in close-up. There is now a nice round hole in the plastic. Take the red string from inventory and put it through the hole in the plastic.
Pak het stukje geel plastiek uit inventory en klik ermee op de wieltjes en....
Close the close-up screen and go back to the carts.
Zoom in again on the front cart and again further in on the metal flow wheels under the cart.
Take the piece of yellow plastic from inventory and click on the wheels and ....
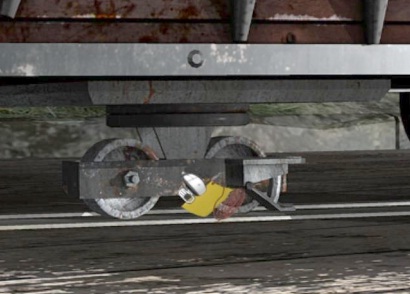
Nicole blocks the power wheels with the plastic and puts the other end of the rope in the cart. Go back to the Control room. Zoom in again on the control panel. Take the key out of the ignition again. Immediately put the key back in the ignition and click the key again to turn the panel back on. When you have not clicked the yellow buttons anymore, Nicole tells you that the train is ready for departure.
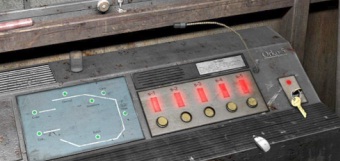
The Queen of Hearts Card:
So go back to the carts like a rocket and zoom in on the front cart again. The red string hangs over the front of the cart.
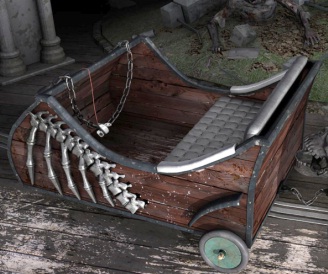
Click on the string to pull out the piece of yellow plastic from under the cart and ....
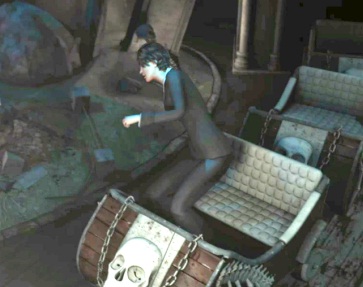
enjoy Nicole's ride through the Haunted House where Nicole then finds the Queen of Hearts card
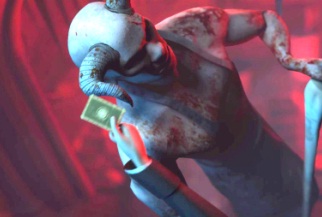
After the ride, Nicole automatically calls her so-called partner Dick Parry.
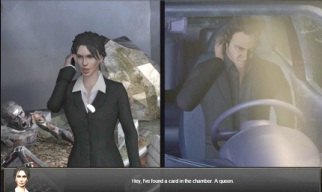
However, Parry is only willing to send a patrol car. He thinks no more is necessary, because there isn't a body and he thinks there will be no murder. You have control over Nicole again. Now go all the way back to the entrance of the amusement park, via the bottom of the screen twice. Nicole then walks back down the main street. When Nicole is almost back at the Security office, a motorcyclist arrives.
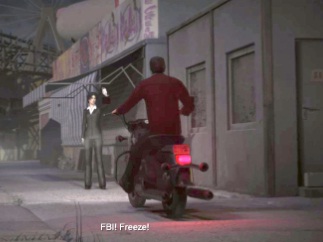
Nicole stops the man and searches him. Nicole and the motorcyclist are then in front of the Security office. Talk to the man and use all conversation options.
The biker's name is Archie Benson and he's a paroled delinquent. Archie works for the demolition company, which has the assignment to demolish the amusement park, as a guard of the site. Archie was out to get some beer, because his boss keeps the beer and the keys to the haunted house under lock and key. Nicole receives a few coins from Archie for the binoculars (tokens), in exchange for the combination of the fridge padlock.
When you've finished talking with Archie, zoom in on the right binoculars again. Take the coins (Binoculars tokens) obtained from Archie from inventory and click on the coin slide of the binoculars and then click on the curved lever to make the coin disappear into the binoculars.
Then click with your magnifying cursor on the viewing lenses of the binoculars to look through the binoculars and ...... To her surprise Nicole notices that someone has mounted a night vision goggles on the binoculars and thus she sees through the binoculars the metal barrels that are stacked on top of each other at the end of the side street.
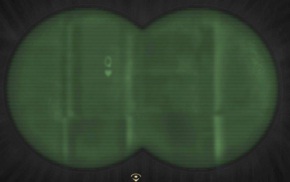
Nicole can still vaguely distinguish a Q and a Heart on one of the barrels. This is a sign of the murderer.
Step back 2 times and then go back into the side street.
Now zoom in on the stack of colored barrels that are at the back of the side street and completely block the further passage.

The barrels are on a concrete slab and there is a crack in the slab. Take the Wooden Block from your inventory and place the block on the concrete slab. Then take the Shovel from inventory and click with the shovel on the blue barrel where the wooden block now stands and .....
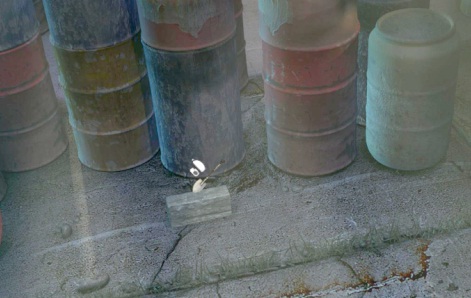
Nicole uses the shovel as a lever to knock over the stack of barrels.
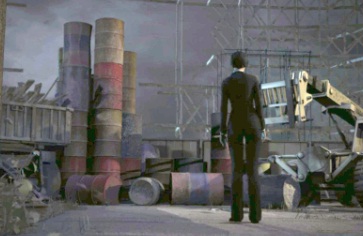
Step back and then walk back to the binoculars via the bottom of the screen.
Look through the right binoculars again and .... Nicole now sees an old factory building through the binoculars.
Zoom out of the binoculars and enter the Security Office again and talk to Archie again and ask him about that Power plant you just saw through the binoculars
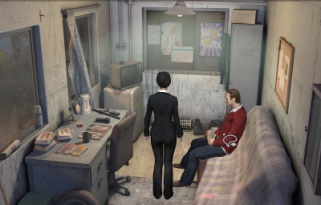
Archie says that the building is an abandoned Power Plant and that it will be demolished soon and.........
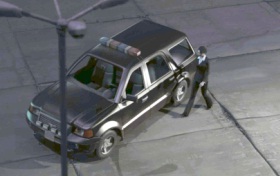
........ Nicole immediately leaves the amusement park and drives her car to;
Chapter 4: 20 Oktober 2009:
Power Plant:
Nicole is at the old factory building. According to Archie, this used to be a power plant, but the building is now on the nomination for demolition.
Nicole's pockets, so your Inventory, is empty again except for Nicole's FBI magnetic card.
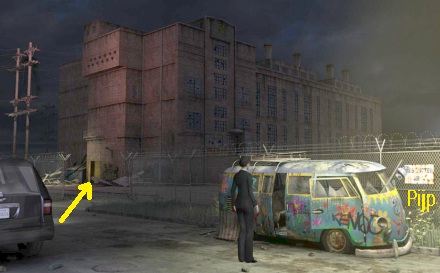
Right click on the building and listen to Nicole's commentary. Nicole thinks the building is abandoned and that it is a hideout where a serial killer will happily hide. At the gate is the wreck of a colorful VW bus. An iron pipe protrudes through the windshield of the VW bus. Right click on the VW bus. Nicole walks to the VW bus (Minibus) and has some comments about it.
Get the hand cursor on the iron pipe that protrudes through the windshield of the VW bus. Then left click on the iron Pipe to take the Pipe and store it in your inventory. Now walk through the opening in the fence to the front (Building front) of the building. You can see Nicole from a top view in front of the entrance of the building. Nicole is starting to get a bit scary now and wonders where the killer is.
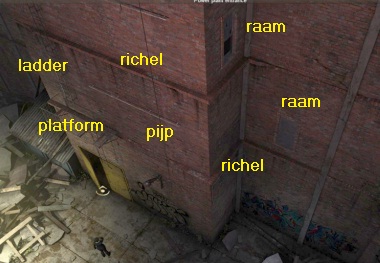
Before you enter through the yellow door, look up at the facade. You will see 2 windows, 2 ledges, a pipe, an iron platform and a fire ladder. Remember all this because you will soon have to move Nicole from the bottom window, through the ledges, pipe, platform and ladder to the top window. But that will come later. Now enter the building through the open yellow door. Nicole walks in and ...
As soon as Nicole enters the building, a kind of detector blows on and you see a very large red gear drop down above an enormous generator.
A number of red lasers are also activated. Nicole ended up on the:
Ground floor:
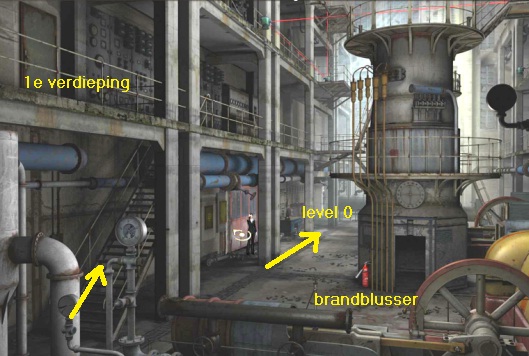
Nicole has ended up in the large factory hall and she is standing in front of the orange Exit doors. In the middle of the hall is the enormous generator, above which the large gear wheel hangs. This is the 1st generator. Behind this 1st generator is a 2nd generator. At the bottom there is an opening in the 1st generator and 5 yellow pipes go up along the generator. The yellow pipes have a bright red fire extinguisher (CO2 extinguisher).
Nicole is on the ground floor (level 0) of the hall. If you put the cursor between Nicole and the huge generator you get the forward arrow behind the 2nd generator (Level 0). To the left is the stairs to the landing of the 1st floor (Level 1). The orange doors, where Nicole now stands, is the exit to the outside (Building front).
View the red fire extinguisher. Nicole then walks over to the fire extinguisher and reports that the thing is still new. Take the red fire extinguisher and look at it again in the inventory close-up screen. Nicole then reports that the CO2 foam in the fire extinguisher is ice cold. Now go, via the forward arrow, to the left of the generator, to behind the 2nd generator (Level 0).
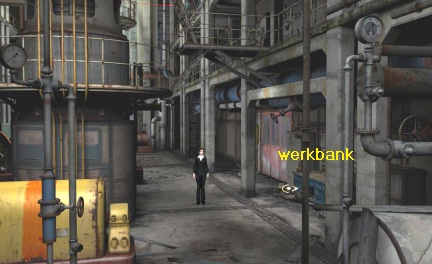
You will see Nicole standing next to the 2nd generator and you will see the orange Exit doors again. Near the orange doors is a cupboard and a blue metal workbench. On the blue workbench you get the forward arrow to the Workbench. Right click on the 2nd generator and Nicole tells that she might be able to get on top of this 2nd generator. Now walk to the blue Workbench
Workbench:

Zoom in further on the workbench. There are 5 drawers in the workbench. Open the left top drawer and the right top drawer.
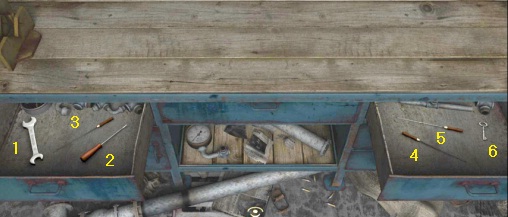
From the left drawer, take a Screwdriver, a Flat file and a Wrench. From the right drawer, take the round file, the triangular file and the key. Step away from the workbench twice, via the bottom of the screen, and then walk back to the 1st (ie the front) generator. When Nicole is next to the 1st generator again, click on the stairs to go up the stairs to the first floor (Level 1).
Landing 1st floor:
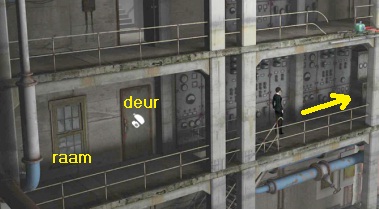
Nicole is on the landing of the 1st floor. Behind Nicole you can see the green door to the 2nd floor. To the left of the green door is a window. That window is the bottom window that you saw when Nicole was outside at the entrance of the factory. Click on the green door to see if Nicole can open the door. However, Nicole cannot open the door because the door is blocked from the other side. Continue over the landing to the right and .... On the next screen you will see a ladder to get on top of the 2nd generator. Continue to the ladder and then climb up the ladder and ....
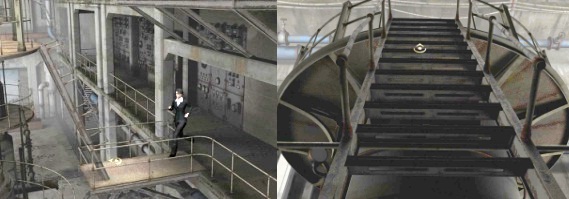
Nicole lands on top of the 2nd generator and ...... discovers that there is a woman on top of the 1st generator. Nicole cannot see if the woman is still alive. Above the woman hangs the huge gear wheel that now drops a little further down. The gear wheel hangs from a crane. The crane is on top of a gray bar (Gantry). In the crane the killer has hidden a BOMB. The red laser beams also come from the crane, which form a closed circuit via a number of green boxes. Every few seconds, the gear drops a little further and the woman threatens to be crushed by the gear. Nicole calls Dick Parry and he promises to fly back immediately with the SWAT team and a doctor.
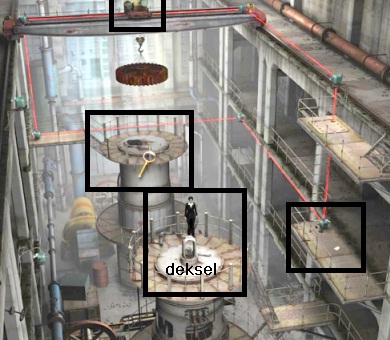
Nicole cannot go to the woman because the woman is under the lower laser beam. View, so right click, the tap, which is on top of the gray bar. Nicole says that the laser emitter, where the lasers come from, is attached to the crane. Nicole cannot go to the crane because the laser beams run over the ladders and stairs. From now on you will notice that the red gear continues to drop a little further.
Nicole is therefore on top of the 2nd generator. In the middle is the turbine cover (top cover). On the lid is a kind of "tower". If you look to the right you will see the "balcony" in the landing of the 2nd floor and the "balcony" of the 3rd floor. On the second floor "balcony" is a white paper and there is a box where the horizontal and vertical laser beams meet. From the 2nd floor balcony, a ladder goes up to the hatch in the floor of the 3rd floor balcony. Unfortunately, a laser beam also goes up through the closed hatch. Nicole now has to reach the 2nd floor balcony to pick up that white paper. But Nicole must first have a tool. Zoom in, with your magnifying cursor, on the turbine cover. To the right behind the "turret" of the turbine cover is a blue Wire cutters on the ground. Take the Wire cutters
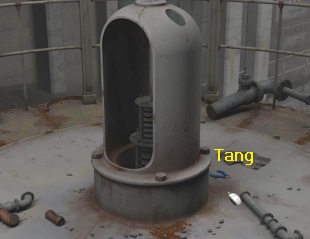
Step back and then descend back down the ladder to the 1st floor landing. The large gear wheel drops a little further down.
Walk back across the landing to the green door. So there is a window to the left of the green door.
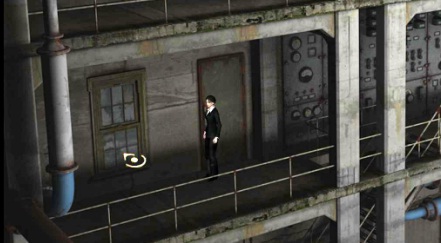
Get to Window 2:
Click with the forward arrow to the window and .... Nicole crawls out through the window and then stands on a ledge on the outside wall.
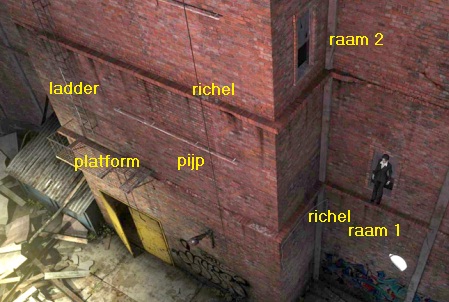
Above Nicole you see Window 2, the window of the 2nd floor. Nicole has to go to Window 2 to re-enter through Window 2. The ledge where Nicole is on, is the bottom ledge and goes to the metal platform that hangs above the yellow entrance doors. From that platform, a ladder goes up to the top ledge. Above the bottom ledge there is also a pipe hanging from the facade.
Move Nicole over the ledge to the left, clicking on the ledge. While Nicole shuffles to the left over the ledge, the window closes again. Nicole can no longer enter through the window. Move Nicole over the ledge to the left until she stops. Nicole is then under the pipe. Right click on the pipe. Nicole hopes the pipe can support her weight. Left click on the pipe and .... Nicole hangs on the pipe.
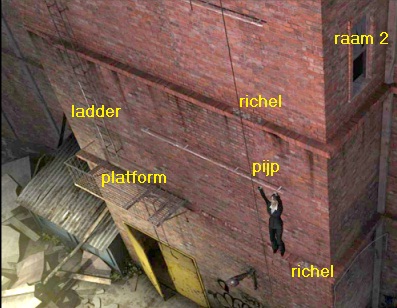
A metal platform hangs on the left corner. Left click on the metal platform and ........
.... Nicole then slides all by herself on the pipe to the left and then drops onto the metal platform.
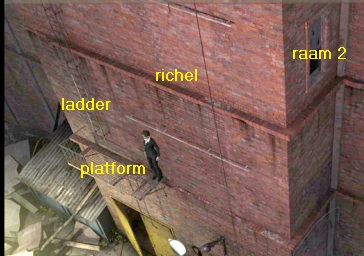
A ladder goes up from the metal platform. Click with the forward arrow to the ladder and .... Nicole climbs further up the ladder and ends up on the top ledge. The top ledge turns right around the corner, to Window 2. Click with the forward arrow to the Window and .... Nicole shuffles over the ledge to the right, around the corner and climbs in through the window and ends up on the landing of the :
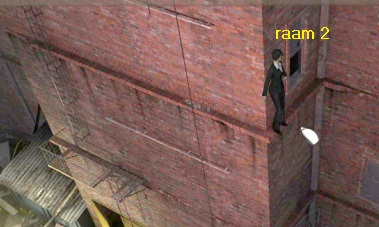
Landing 2e floor:
Follow the landing to the right and on the next screen you continue to the protruding "balcony".
So on the "balcony" there is a white paper and a laser box that emits a horizontal and a vertical laser beam.
Pick up the Sheet of paper. View the paper in the close-up screen of your inventory. Then turn the paper over to view both sides.
On one side of the paper you see the schematic of the lasers and on the other side the schematic of a BOMB. Right-click on both sides of the paper
The upper part of the laser diagram shows how the laser beams are currently set. The bottom part of the diagram shows how to change the course of the laser beams to make them go through the first floor. But unfortunately the "turret" of the lid on top of the 2nd generator is in the way. Close the close-up screen.
Back at Nicole, take a moment to look around to see if what you saw on the laser beam chart is also correct. At Nicole, who is on the "balcony" of the 2nd floor, is a green laser box. A laser beam goes up from the laser box to the 3rd floor. The laser beams form a closed circuit and are connected to the BOMB that is attached to the crane above the red gear wheel. The laser beam goes up from the laser box through the hatch of the 3rd floor. At the laser box is a ladder to go up to the hatch. But because of the laser beam, Nicole can now not go to the 3rd floor to go to the tap. However, you have seen on the diagram that it is possible to divert the laser beams via the 1st floor and that is exactly what Nicole has to do now.
WARNING: As soon as you start messing with the lasers the TIMER starts because disarming the Lasers and BOMB is a TIMED PUZZLE and you don't get that much time to do it. You have to do a lot in a short time, so be fast and accurate. It comes in 3 parts and your game will be AUTOMATICALLY saved. We start with:
A: Divert the Laser Beams:
Nicole is still standing on the 2nd floor "balcony" where she found the paper with the schematic of the lasers and the bomb. So here is also a green laser box from which a laser beam goes up to the 3rd floor. Click with your magnifying cursor on the green laser box to view the box in close-up.
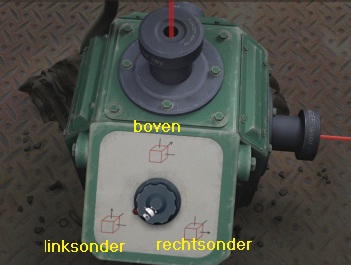
Nicole says that she must now be very careful. If the laser beam is interrupted, the BOMB, on the crane, will explode and Nicole and the woman are then doomed. Your game will now be AUTOMATICALLY SAVED and with good reason because from now on the clock will start running.
The green box has a rotary knob that you can turn in three positions. The button is now in the lower left position and this will send the laser beam up to the 3rd floor. If you were to set the button to the top position or the bottom right position, the laser beam will no longer go up. But there is 1 small problem ..... the laser beam will then be interrupted by the "turret", on top of the 2nd generator, and this will cause the bomb to explode. Do you want to see what happens if you turn the dial to the top position? Your game is auto-saved, so you can reload the auto save afterwards.
Do it WRONG:
Left click on the dial and then hold down your mouse and then drag the button up so that the red arrow goes to the top position.
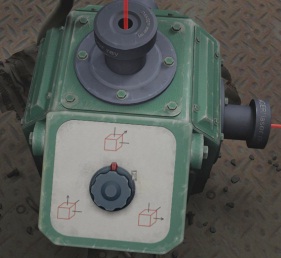
You see what happens. The laser beam no longer goes up to the 3rd floor but from the box to the top of the 2nd generator.
Unfortunately the laser beam is blocked by the turbine cover and ... the bomb detonates and the whole factory explodes.
Nicole and the woman do not survive.
Well .... this was not good. Open the load screen and click on the picture of the green box to load the Auto save to start over.
Now Do It Right
So Nicole has to somehow get that turbine cover out of the way. So keep your hands away from the dial, so leave the dial at the bottom left position. Step away from the close-up of the green laser box. Follow the 2nd floor landing back to the back. You will then arrive at the open door of the stairwell. Go through the door and Nicole will be back on the 1st floor.
Nicole now leaves the 1st floor door open here.
Follow the 1st floor landing to the right again and then climb up the ladder to the top of the 2nd generator again.
Zoom in again on the turbine cover. The "turret" on the lid is secured with 3 bolts.
Take the wrench from inventory and click it on each of the 3 bolts to loosen them.
There is a hole at the top of the "turret". Take the pipe from inventory and insert the pipe into the hole.
Then click on the pipe to turn the "turret" 90 degrees.
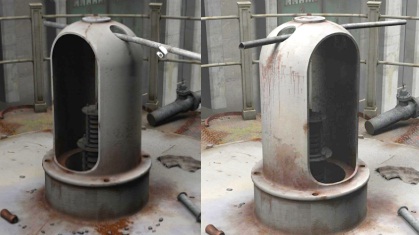
The "turret" is open, so if you now set the knob of the green laser box to the top position, the laser beam should be able to go through the "turret". Step back and go back down the ladder to the 1st floor. Follow the landing back and go back through the door to the 2nd floor. Follow the 2nd floor landing to the right again, to the "balcony" where you found the paper and where the green laser box is. Zoom in again on the green laser box. Left click on the button again and then keep your mouse pressed again and turn the knob back to the top position and .....
the laser beams now no longer go up on the right side and over the 3rd floor but now go to the left and through the "turret" on top of the 2nd generator and this does not interrupt the laser circuit.
Nicole can now safely go to the 3rd floor because the laser beam no longer goes through the hatch above her head. Get out of the close-up of the green box. Above Nicole is the hatch in the balcony of the 3rd floor. To the left of the green box is the ladder to climb up to the hatch. Click with your forward cursor on the ladder and then, at the top of the ladder, click on the turning wheel of the hatch to open the hatch.
Nicole climbs up the ladder and ends up on the landing of the 3rd floor.
B: Disable the Lasers and Defuse the Bomb:
Follow the 3rd floor landing to the back (Level 3).
On the next screen you will see the gray bar (Gantry) on the left where the bomb is attached and where the huge red gear is hanging.
Walk up the gray bar and then click with your magnifying cursor on the Crane.
Nicole walks very carefully over the beam to the crane and you are then zoomed in on the BOMB.
Your Game will now be saved automatically again.
You are zoomed in on the lid of the Laser Emitter, which is mounted on top of the tap.
A green square light flashes on the bottom of the lid. At the top of the lid is a Mercury sensor.
The lid is screwed on the 4 corners with 4 screws. The Mercury sensor must be cooled down. Take the Fire extinguisher from your inventory and click it on the mercury sensor to cool the sensor with the ice-cold CO2 foam. As long as the mercury sensor is frozen, the bomb will not explode and Nicole can touch the lid. The Mercury sensor stays frozen for a short time and keeps getting warm. As soon as you see that the sensor has become warm again, you must freeze the sensor again with the CO2 foam from the fire extinguisher
|
Right click on 1 of the 4 screws. Nicole reports that they are special screws that require a special screwdriver to loosen them. Right-click in inventory on the Screwdriver to view it in the close-up screen. The screwdriver is a regular screwdriver but now needs to be converted into a special screwdriver. You have 3 files in your inventory. Click with each of the 3 files in the close-up screen on the flat head of the screwdriver. When you have clicked on the screwdriver with all 3 files, you have auctioned a half moon-shaped head in the flat head of the screwdriver.
Close the close-up screen. In the meantime, the Mercury sensor will have become hot again. So take the fire extinguisher from inventory again and click it again on the mercury sensor to freeze the thing again. Then quickly take the screwdriver from your inventory and click it on each of the 4 screws to loosen them. However, the Mercury sensor only remains frozen for a short time. So if, while loosening the 4 screws, the Mercury sensor gets hot again, you have to keep freezing that sensor with the fire extinguisher. When you have removed all 4 screws, you can quickly freeze the mercury sensor again with the fire extinguisher.
Your Game will now be saved automatically again. |
The lid has been removed and you can now see the inside of the control box. You can still see the green flashing lamp and the mercury sensor. You no longer have to keep freezing the mercury sensor. At the top right you see the clock that causes the large red gear to drop a bit further down regularly. A small gear wheel moves to the left of the clock. At the bottom left you see the box that controls the laser beams. And you also see a lot of blue cables. You have to cut one of the blue cables to switch off the lasers. But which blue cable can you safely cut?
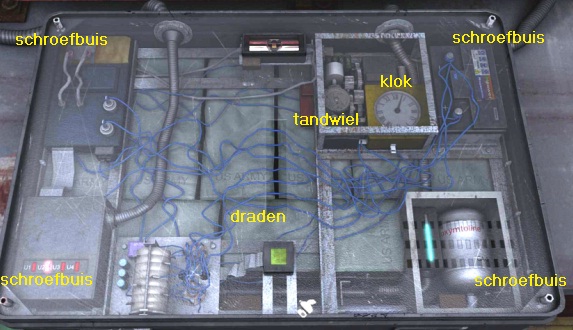
Do you remember the piece of paper with the Bomb's schedule? You saw a red arrow from the + button, right, pointing to a button in the top left. So find the blue cable that is attached to both buttons and then cut that blue cable with the wire cutter. It is the bottom blue cable, in the tangle of wires that you see in the middle above the green light. So take the Wire Cutters from your inventory and click it on the bottom blue cable, right above the green flashing button, and ...
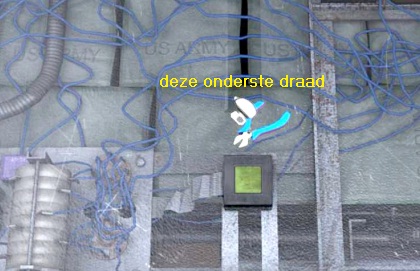
..... the laser beams disappear forever. But you're not done yet. You have now turned off the laser, but the clock that lowers the gear is still doing its job. And of course you cannot just access it because there is a glass plate over the inside of the control box. At the 4 corners you see the metal pipes where the screws of the lid were in, the 4 screw tubes. Take the key, which you took from the right drawer of the blue workbench, from your inventory and use it on each of the 4 screw tubes to unscrew these 4 tubes.
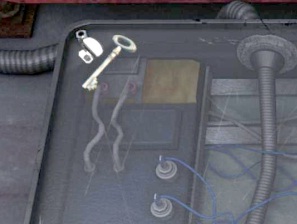
You have to do this one by one and therefore take the key from inventory each time to click on the next tube. When you have removed all 4 metal screw tubes, click in the middle of the glass plate to remove the glass plate. You can now get to the clock, top right. To the left of the clock you see a rotating cogwheel. Take the screwdriver from inventory again and ram the screwdriver into the small gear to block it and ...
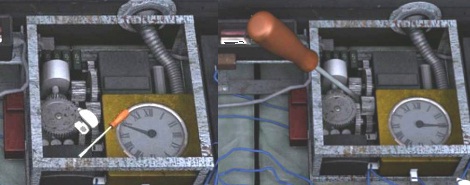
The Bomb is now switched off and the lowering of the large gear has now also stopped. Watch the FINAL MOVIE of this 4th chapter:
Nicole looks down at the large gear and the woman on top of the 1st generator. Nicole climbs down the gear wheel to the motionless woman.
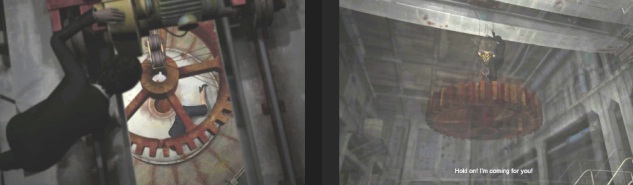
The woman seems to still be alive, because she is moving a little. Then Nicole sees a man go through the door. Is this the killer?
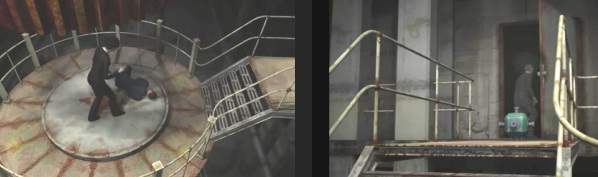
Nicole oes after the killer but then she sinks through the wooden floor of the walkway.
Nicole threatens to fall to the floor, deep below her, but with an utmost effort she manages to climb back onto the walkway.
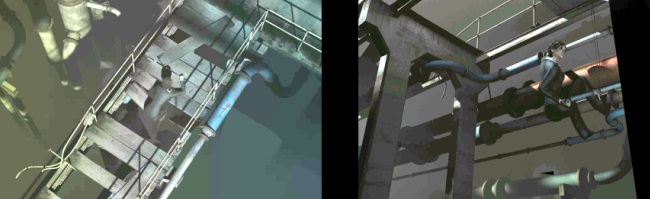
Nicole zet de achtervolging verder weer in, maar de man blijkt gevlogen te zijn en we belanden in:
Nicole continues the chase, but the man appears to have flown and we end up in:
Chapter 5: 21 Oktober 2009:
New York: Bronx.
FBI Building
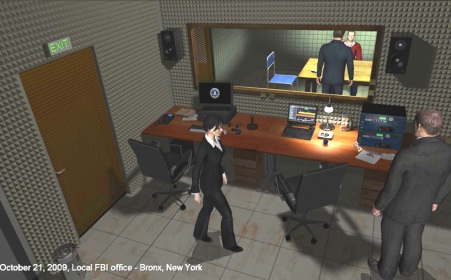
It is the next day, after Nicole's adventures at the amusement park and the old Power Plant. Nicole is in the monitor room of the FBI building and gets screwed up by her boss Jeff Kurtz for acting all by herself the night before. Boss does not want to believe that Dick Parry has abandoned Nicole of his own accord. The woman who rescued Nicole from the power plant has died, she turned out to be dead when the doctor came to her. Nicole tries to convince her boss that the woman was still alive and that''s why she acted the way she acted. So Nicole believes the woman has gone into cardiac arrest. Unfortunately, the boss does not believe Nicole.
Dick Parry is interrogating Archie Benson, the theme park guard. Nicole asks her boss if she can also interview Archie. Nicole doesn't believe Archie is the serial killer because he doesn't seem smart enough to her. But Nicole does think Archie knows more than he has said
Nicole then leaves the Monitor room and is in the large reception hall. Partner Dick Parry stands in front of the green soda machine and Nicole wonders whether Parry has anything to do with the case. Talk to Dick Parry and use any topic of conversation in the conversation.
Parry says the suspect, Archie Benson, only wants to talk to his attorney. Nicole suggests confronting him with pictures of the victims. Dick is a bit surprised about that, but thinks it's a good idea. He has requested Benson's data, he says. Dick says he has to go away to talk to the prosecutor about another case. In the meantime, Nicole will pick up the photos in her room.
When the conversation with Dick Parry is over, walk up the stairs to the landing (Mezzanine) and then go to Nicole's office (My room).
Nicole's office:
Zoom in again on Nicole's desk (My desk). Click on the (Files) folder, located on the left of the desk, for the broken computer.
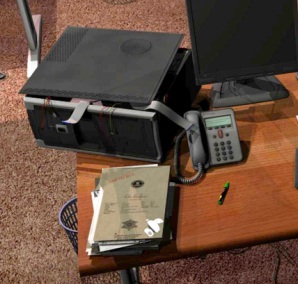
Nicole takes the five pictures of the victims (victim's pictures) from the folder. You then have the 5 photos in inventory.

View the 5 photos in the close-up screen of the inventory (So right click on each photo). The victims are: Edward Carter, who was thus run over by the train in his car in Chapter 1. Jane Harington, the woman from the power plant. Thomas Dawkins, who was electrocuted in his kitchen. Madison Colby, the woman squashed in the garbage truck in the game's intro. Melanie Jensen who has been gassed in her own home. Exit Nicole's office and go back down the stairs to the reception hall. Then go downstairs through the door of the Interigation room, the first door to the right of the green soft drink machine.
Interrogation room:
Archie Benson's Interrogation:
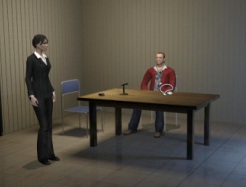
Talk to Archie Benson and use all the call options again.
Archie has a criminal record. Archie once stood trial for assaulting a girl and also for murder. Nicole shows Archie the photos of the 5 victims. It takes a while, but eventually Archie admits that he knew Jane Harrington, the woman in the power plant. Jan Harington was a jury member at his trial. The other 4 victims were also on that jury.
When Archie's interrogation is over, Nicole automatically returns to the hall, where she meets Dick Parry again. In this conversation with Parry, use all the options you get.
Parry is annoyed green and yellow because Nicole has not asked which trial Jane Harington was on the jury. Nicole explains that Benson only had two trials with a jury, one for murder and one for rape. Parry assumes that Benson is seeking revenge on the rape jurors. Nicole says she's going to ask Ruth's file for Benson. Parry disappears into the interrogation room to question Archie further.
Go up the stairs again and ...... Nicole runs into secretary Ruth. Ruth gives Benson's file to Nicole and says the boss wants to talk to Nicole.
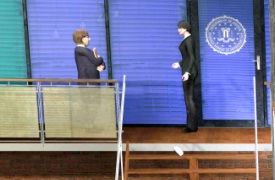
Continue to talk to Ruth through all conversation options and the conversation will come to an end automatically.
Nicole then walks away and enters Ruth's office. In Ruth's office, go through the glass door to Nicole's boss's office
Boss Jeff Kurtz:
Talk to Kurtz and use all conversation options again.
Kurtz says they released Benson. Benson turns out to have an alibi for the mishap in the power plant, because he was in a supermarket at the time and can be seen on the surveillance video of the supermarket. Kurtz has more news about Archie Benson because Archie turns out to be the son of an influential politician. Benson was previously charged with the murder of Carol Austen, a card reader. The deck of cards disappeared from the scene of the murder and was later found by Archie Benson, who was romantically involved with Carol. The deck of cards was then mysteriously lost, so it was not used as evidence and Benson was acquitted. All 5 of the killer's victims are jurors from that trial. Kurtz orders to protect anyone who had anything to do with that process.
Exit Kurtz's office and then Ruth's office and go to the:
Laboratory and Monitor Room:
Here you will find techie Wang again. Talk to Wang. Use all possible options.
You won't be able to use them all because halfway through the conversation, Dick Parry comes in to take Nicole along.
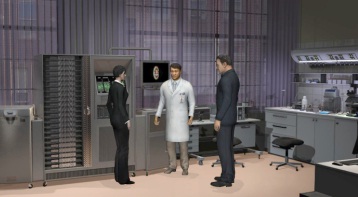
Wang says he found a partial fingerprint on the car of Edward Carter, the man who was run over by the train in Chapter. Then Dick Parry enters the lab. The killer has called and only wants to talk to Nicole. Nicole, Dick and Wang go to the monitor room, where Nicole talks to the killer on the phone.

The killer wants to be called Paul and tells how he got Carter, the man in the train accident, and Jane Harington, the wife of the power plant, to the scene of the murder. Carter sought help in murdering his wife, and Harington sought evidence to compromise someone at work.
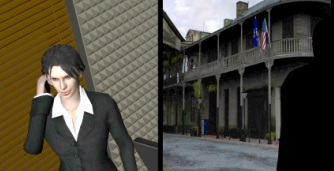
Paul says both victims more or less deserved to be killed. Then he hangs up, when Nicole asks when Paul will kill the King.
After the conversation with murderer Paul you ask Wang about the phone call.
Wang says the conversation was just too short to locate the location from which Paul was calling. Wang can only say that Paul called from another state. Wang can analyze the conversation further, but he doesn't have time for that now. Wang thinks Nicole can analyze the conversation herself.
Nicole then leaves the monitor room and has another meeting with boss Jeff Kruntz in the hall. Kruntz says that another package has arrived for Nicole. The sapper from the explosives disposal service has taken the package to the explosives room. Nicole enters the Sapperkamer and sees that the package explodes in the bunker. Nicole talks to the Sapper, who says the package exploded by itself when the robot put it in the bunker. The packaging of the package has been saved and the sapper gives the packaging (Wrappings) to Nicole.
Exit the Sapper room and go back to the:
Laboratory:
Wang is now at his desk. Talk to Wang again and this time ask him about the packaging (Piece of paper). Wang is going to examine the packaging material under his microscope. While Wang is doing this, you also ask him about the recording of the telephone conversation with murderer Paul. Wang has already isolated Paul's voice, so Nicole can analyze it more easily via the computer. Further ask Wang if he found anything on the packaging material (TRACES), and he says that there are fragments of seed on the packaging. Wang then gives Nicole the Seeds and then leaves the lab.
Analyze the Seed Fragments:
When Wang has disappeared, click again with the magnifying cursor on the left part of the work table to go into the close-up. To the left of the work table, near the magnifying glass, is now a pair of tweezers. Take the tweezers and also take plastic Gloves from the big box.
Step back to get out of the close-up. On the right side of the work table is the microscope.
Click with the magnifying cursor on the microscope to get a close-up of it.
In the close-up screen of the inventory, view the bag with seeds. Take the Tweezers from inventory and then click, in the close-up screen, on the bag to remove the seeds from the bag. The seeds are attached to the tweezers. Close the close-up screen.
To the right of the microscope is a blue box containing the glass slides to be use with the microscope. Take a glass slide from the blue box and then view the glass slide in the close-up screen of the inventory. Take the tweezers and click on the glass slide to place the seeds on the glass slide. Close the close-up screen.
At the bottom of the microscope you see a gray drawer (Stage). Click on the gray drawer to slide it open. Then take the glass slide from inventory and click the glass slide in the drawer of the microscope. Close the drawer. The red on / off button is located in the white base of the microscope. Click on the red on / off button to turn on the microscope now. The light in the microscope will now light up. Click with the magnifying cursor on the eyepiece to look through the microscope and ....
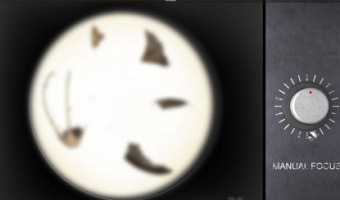
Nicole looks at the seeds on the glass slide through a microscope. However, the lens is out of focus, so you have to focus the lens using the dial. The red dot of the rotary knob is now at the top. Click on the dial and then keep your mouse pressed and then turn the dial to the left, until the red dot is on line 8. Then release your mouse. You can now see the 5 seed fragments clearly and you now have to puzzle them together into 1 whole seed.
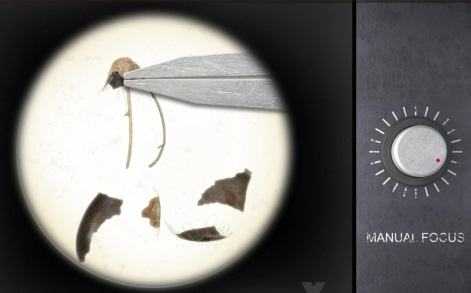
Move your mouse to the left and ... the tweezers will now appear in the circle. Your cursor is now the tweezers. If you click on the left you close the tweezers. Pick up the seed fragments with a left click and then hold down the mouse again to drag the fragments across the screen. If you put the tweezers on a seed fragment and then right-click, you turn the fragment around one turn. If you DOUBLE CLICK on a seed fragment, you put the fragment on the other side.

So puzzle the 5 seed fragments together into 1 whole seed, and this is not at all easy ..... so good luck with it.
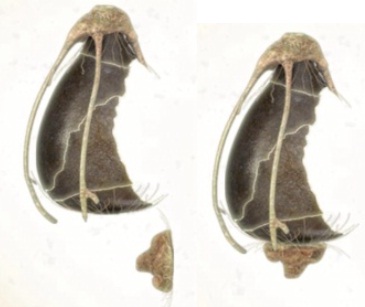
Nicole indicates whether you have done it correctly because then she tells that see need to look up the seed in the database. When you have correctly assembled the seed, click on the gray X to get out of the close-up. A photo camera is mounted on top of the microscope with a red on / off button. Click on the red on / off button to take a picture of the puzzle seeded together. The photo is electronically sent to the database, so you will not get a photo in your inventory. Click the on / off button of the microscope again to turn off the light in the microscope and step back.
Scan the wrapping paper:
The Scanner is located to the left of the large server cabinet. Click with your magnifying cursor on the scanner and then click on top of the scanner again in the close-up to open the lid. Dive into the inventory and right click on the evidence bag containing the packaging (Secured box wrapping). Take the gloves from inventory and click on the evidence bag to remove the packaging material.
The sheet of packaging paper then "sticks" to the white glove. Turn the paper over using the turn arrows to view the other side as well. On one side of the paper you see orange stripes and on the other side you see watermarks. Close the close-up screen.
|
Take the glove with the packaging paper from inventory and click it in the scanner. Nicole puts the paper in the scanner with the side with the orange lines facing up. Close the lid and click the blue button to scan the side with the orange stripes. When the scanning is finished, open the lid again and then right-click on the wrapping paper to turn it over. The side with the watermarks is then facing up.
Close the lid again and click the blue button again to also scan this 2nd side of the paper. Nicole tells you that she has now scanned both sides of the wrapping paper. Open the lid again and left click on the wrapping paper to remove it from the scanner. Close the scanner lid and exit the close-up. Open the inventory and right click on the empty evidence bags to put them in the close-up screen. Then take the glove with the packaging paper from inventory and click it on the bags to put the paper back in an evidence bag. Close the close-up. |
The Database User Screen hangs on the right side of the Server. Click with your magnifying glass on the database User Screen and then left click in the screen to have Nicole's fingerprint scanned again. When scanning is over, press the ENTER key on your own keyboard to open the database.
On the left is the photo of the seed and the 2 scans of the wrapping paper. On the right you have the question mark button, the magnifying glass button and the 2 folders in which the results of your previous scans and analysis are stored. Now drag the photo of the seed and the 2 scans from the wrapping paper to the top bar. This will activate the Analyze button (The question mark).
The seed is now also in the big screen. Click on the green question mark button and ....The database will search and give 6 pictures of 6 whole seeds.
You have to find the seed of which your seed is half. It is the top right Seed.
Your pieced together seed is therefore the left half of the top right seed. Drag your half seed to the top right photo.
Then click your seed exactly on the left half of the top right seed.

The computer will scan again and then announce that there is a "Match" and you get the name of the seed, which is Eleocharis rufilata.
You know itch seed it is seed is now. Now find out where this seed comes from. In the top bar, click on the scan of the watermarks. You will notice that there is already a watermark "marked" with a green circle. The "Search" button is now green, so click the green magnifying glass button and ..... The watermark and seed will now be compared and the database will show you a map of the state of Louisiana.
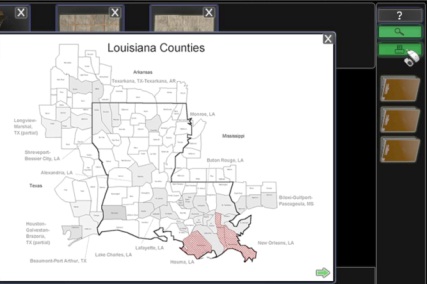
On the map, 2 areas are shaded in red and these are the areas where the Elecococharis rufilata seed grows and is found. At the top right, the print button has now appeared. Click on the Print button to print the map. You see a green arrow at the bottom right of the map. Click on the green arrow and .... The map has changed to show you the areas in Louisiana where the "Louisiana Navigation Co" has its offices.
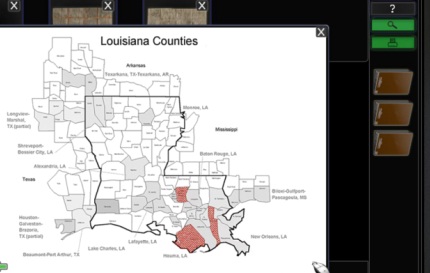
This Louisiana Navigation Co is a steamboat company and the seed carrier. Nicole mentions where in Louisiana the offices of the steamboat company are located. The Louisiana Navigation Co offices are located in Gretna in Jefferson Parish, Detalion in Terrebone and Baton Rouge in East Baton Rouge. Click on the print button again to also print this 2nd floor plan. You are done with the database. So step back to get out of the database screen. On the far left of the lab, to the left of the scanner, is the large Printer.
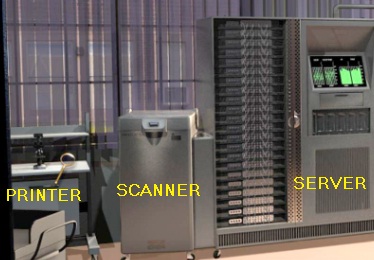
Click with your magnifying cursor on the printer to zoom in on it. The 2 prints of the 2 Louisiana maps hang in the printer. So take the 2 prints of the 2 Louisiana maps from the printer. So there are 2 papers that you have to take one by one (Printout with company offices locations and the Printout with plant occurrence areas). Get out of the close-up and exit the lab.
NB: If Nicole does not want to leave the lab now because she says she is not ready yet, this means that you forgot to do something, during the scanning and / or analysis in the database. However, if you have followed my explanation properly and carefully then you will have no problem.
Nicole is back on the landing, in front of the lab. Go back down the stairs to the reception hall.
Then go downstairs through the door of the Monitoring Room (the second door to the right of the green soft drink machine).
Monitoring Chamber:
Analyze the tape of the conversation with murderer Paul:
Under the window, through which you can look into the interrogation room from the monitoring room, are devices on the long table. That window is in fact a one-way mirror. You can look into the interrogation room but you cannot look into the monitoring room from the interrogation room. Click with your magnifying cursor on the window to get in the close-up.
To the left of the window is the Graphic Equalizer (Main panel). Zoom in on the Graphic Equalizer. It is a device with which you can analyze and / or filter sound recording. You will now see a graphical representation on your screen of the recording of the telephone conversation that Nicole had with murderer Paul. Nicole says she heard a radio in the background when she spoke to Paul. Nicole now wants to filter the sound to find out which radio station she heard.
|
Study the screen. On the left you see a green arrow with which you can slide the green selection line across the screen. At the bottom of the screen you will see the stop button, the play button, the pause button, the analysis button, the filter button, the back button and the reset button. Click the play button and ... Nicole says Wang has already filtered Paul's voice out of the recording. The green line will now move from left to right through the sound graph. Allow the recording to end completely and pay close attention. Below the graph screen you will see a ruler that runs from 0: 05.0 to 1.50.0. When the green line reaches certain points, you will hear the sound of the radio. You will hear the radio at points 0.55.0., 1.25.0 and between 1.35.0 and 1.40.0. Nicole then reports that she hears music. You now have to cut out all the noise from the graph so that you only have the part with the sound of the radio music. In the meantime, the recording has ended and the green line is all the way to the left again, so you can start filtering out all the noise parts. Click on the ANALYZE BUTTON and ..... the software will now analyze the file and then several yellow-outlined parts will appear on the graph. You can click in the yellow parts to select such a yellow-outlined part. That part will then turn red The yellow-outlined parts are numbered 1 to 7. You can see those numbers at the top of the yellow-outlined parts. Watch out ... because some yellow pieces overlap Left click in yellow part 1. Part 1 turns red.
Click on the FILTER button and .... noise part 1 will be filtered out. Click on the ANALYZE button again to get new yellow parts, which are now numbered 1 to 6. The yellow parts 2, 3 and 4 partly overlap each other. Click in yellow part 2 to make it red. Be careful that you only made Part 2 red.
Click the FILTER button to filter out noise part 2 Click on the ANALYZE button again. You will get new yellow-lined noise boxes. These are now subjects 1 to 5. Parts 2 and 3 overlap. Click in part 3 to make it red. Make sure that only part 3 is red and not part 2 as well
Then click the FILTER button again to filter out noise 3 Nicole now reported that you did it right because she says: "It couldn't be better" and that she now has to play the recording again.
|
Sleep de groene lijn naar het begin van de overgebleven grafiek, op punt 0.40.0 en klik dan op de Afspeelknop en.....Je hoort nu alleen het radiostation en Nicole meld dat dit een radiostation uit Lafayette in de staat Louisiana is. Ok....Nicole weet dus nu dat moordenaar Paul haar heeft opgebeld uit Lafayette in de staat Louisiana. Stap achteruit en verlaat de Monitoring kamer en ga, via de trap, terug naar boven en Nicole's kantoor binnen.
Nicole's kantoor:
Hufter Dick Parry zit achter het 2e bureau, het bureau dat vroeger Nick's bureau was.
Praat met Parry en vertel hem wat het resultaat is van al je analyses. Dus gebruik gewoon weer alle gespreksopties
Parry vindt Nicole's argumentatie en bevindingen niet voldoende om een exacte locatie van de moordenaar te ontdekken. Als Nicole ook nog vertelt dat ze de radiozender gelokaliseerd heeft, krijgt ze van Parry het advies om een cirkel van 60 mijl rond de locatie op de kaart te markeren. Dat is de radius die de zender maximaal kan uitzenden.
Zoom weer in op Nicole's bureau. Er ligt nu een groene markeerstift (Marker) op Nicole's bureau.
Pak de groene Markeerstift en stap weer achteruit.
Drag the green line to the beginning of the remaining graph, at point 0.40.0 and then click on the Play button and ..... You now only hear the radio station and Nicole reports that this is a radio station from Lafayette, Louisiana. Ok ... Nicole now knows that killer Paul called her from Lafayette, Louisiana. Step back and exit the Monitoring room and go back upstairs and into Nicole's office.
Nicole's office:
Dick Parry sits behind the 2nd desk, the desk that used to be Nick's desk. Talk to Parry and tell him the result of all your analysis. So just use all call options again
Parry does not think Nicole's arguments and findings are sufficient to discover the exact location of the murderer. When Nicole also tells that she has located the radio station, Parry advises her to mark a circle of 60 miles around the location on the map. That is the maximum radius that the transmitter can transmit.
Zoom in again on Nicole's desk. There is now a green highlighter (Marker) on Nicole's desk. Take the green Highlighter and step back again.
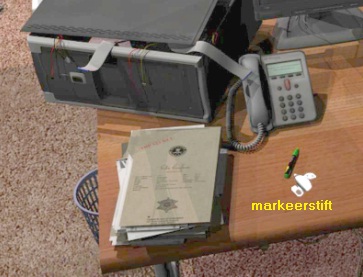
On the right wall, behind Nicole's desk, is a map of North and Central America.
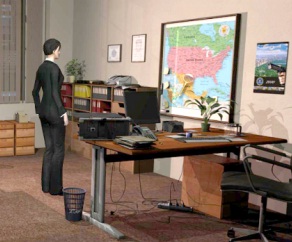
Click on the map with the magnifying cursor to view the map in close-up.
On the left you see a panel with 4 buttons. Click on that panel and the light in the map goes on.

Now click with the magnifying cursor on Louisiana, just above MEXICO. You are then in the close-up of the state of Louisiana. Grab, one by one, the prints of the map of Louisiana from your inventory and stick them both on the card. Nicole groans that nothing is happening. Take the Marker from inventory and click it on the map and ....
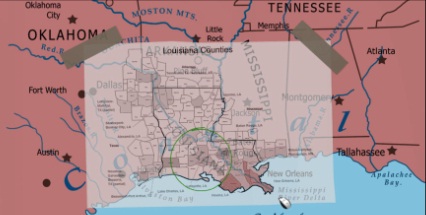
Nicole now draws a green circle on the map and discovers that the town of Detalion falls within the shaded area. So the killer called from Detalion. Step back a few times and talk to Dick Parry again and use the "Leaving" option. Parry thinks Nicole should go to Detalion to continue the investigation there. Parry is even willing to come along. We then end up in:
Chapter 6: 22 Oktober 2009
Detalion, Louisiana
Sheriff's Office:
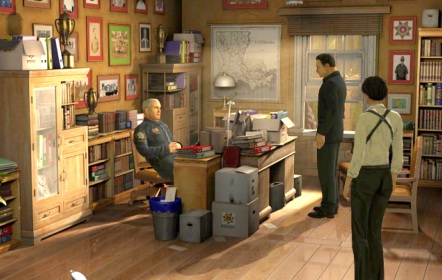
Nicole and Dick Parry arrived in Detalion, a town in Louisiana, and went straight to the Sheriff's office.Talk to the Sheriff and use all conversation options.
The Sheriff claims not to have known about their arrival and he certainly knows nothing about the murder case. The Sheriff also says that no strangers have been spotted recently, since the town was hit by Tropical Storm Katrina. Nicole and Parry can use the sheriff's office as a base and he will find shelter for them too, because there is no hotel in the town. Nicole decides to take a look at the town herself.
Nicole and Parry leave the Sheriff's office and are outside the yellow Sheriff's building. Talk to Dick Parry. Parry then disappears to get the laptop out of the car. Nicole wants to look around the town. The deal is to meet again here at the Sheriff's building. The Sheriff's car is in front of the Sheriff's building. In the street is a shop (Store) on the left and a house on the right. View the car, store, and house with your eye cursor. The only important thing you experience is that the store is closed. Walk down one screen via the bottom of the screen. Nicole ends up at:
Wharf:
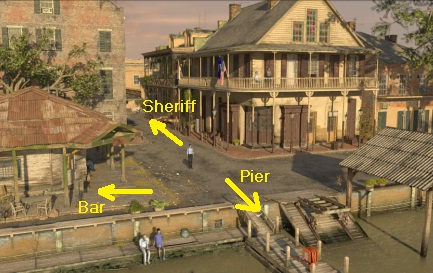
On the left is a bar, in the middle you can go to the wooden pier. To the left of the pier are a man and a boy fishing (Anglers). An American flag hangs on the balcony of the large corner house and there are 2 men on that balcony. Check out the corner house. The steamboat company used to be located in the corner house. Walk one screen to the left, to the "Lucky Mo-Jo Bar".
Lucky Mo- Jo Bar:
A bum is sitting on the bench in front of the bar.nAbove the door the rusty nameplate of the bar, which you glance at with your eye cursor, is crazy.
Talk to the bum and use all options.
The bum talks about a hunting lodge and a steamboat that he sails through the swamp to pay tribute to his dead friends. The bum has to keep the ghosts happy, but he cannot do that anymore because he can no longer go by boat himself. The sheriff has taken the bum's bag and the bag is in his mojo. Without his mojo, the bum no longer dares to enter the swamp.
You can try to see if Nicole can enter the bar, but the door is locked so that won't work. Go back to the Wharf via the bottom of the screen and then go to the:
Pier:
An airboat is moored at the pier and a woman is standing on the pier. There is also an orange pump on the pier. View the Pump and the airboat. The pump is used to fill the boat with fuel. The boat can not only sail on the water but also on dry land. Such an airboat is typical of this region, where there are many swamps. Talk to the woman and use all options again.
This is Momma Morton and it's her boat moored here at the pier. Momma Morton goes on to say that half an hour ago she took a stranger by boat to the Hunting Cabinet in the swamp, not far from the steamer. After the conversation with Momma morton you walk back up and then back down the street to the:
Sheriff's office:
Enter the Sheriff's office again and talk to the Sheriff again using all options again.
Nicole asks the Sheriff to take her and Parry to the old steamer and the hunting lodge. The Sheriff clearly doesn't feel like it and makes all kinds of excuses to avoid having to go. You do experience that the bum is called Aaron. No matter how Nicole insists, Sheriff clearly doesn't feel like bringing Nicole and Parry into the swamp. The Sheriff then disappears.
With the Sheriff gone, Nicole can take a leisurely look around the office. Click with the magnifying cursor on the desk to get to the close-up of the desk. There is a postcard in front of the desk. To the left behind the postcard is a Scissors and in front of the letter stand is a roll of Adhesive tape.
Take the scissors and take the postcard. Also take the tape. View the Postcard in the close-up screen of the inventory. The postcard shows the yard with the office of the steamboat company. Close the close-up screen and step back to leave the close-up of the desk. To the left of the window is a map of Louisiana. View the map. Nicole reports that if she goes into the swamp, she needs a map.
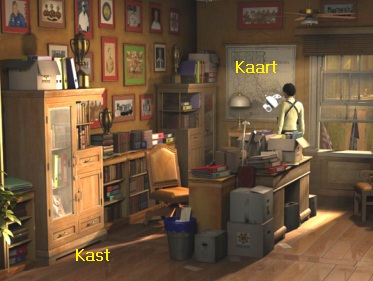
So left click on the card to take the card. View the Map of Louisiana in the close-up screen of the inventory. The sheriff has marked the route from Detalion to the hunting lodge in the swamp on the map. So the Sheriff does have an interest in that hunting lodge. Close the close-up screen and go back outside via the bottom of the screen. Walk down the street to the wharf again and walk back up the Pier.
Pier:
Talk to Momma Morton again and ask her if you can rent her boat (Renting the boat) and then use all of the following options.
Momma Morton doesn't want to rent out her boat to Nicole, even though Nicole says she's from the FBI. Momma claims her boat's rudder is malfunctioning. Nicole has since noticed that the residents of this town are not exactly willing to help the FBI. Walk back down the pier to the Werf. Nicole is then called by Parry. Parry reports that he is leaving town for a while because he left the killer's file in a roadside restaurant on the way. Nicole tells Parry about the hunting lodge and the stranger and says she wants to go there. She asks Dick to come after her in the sheriff's car when he gets back. Go back to the:
Lucky Mo-Jo Bar:
Talk to bum Aaron again, who is still on the bench. Use all conversation options again: Momma Morton is Aron's sister. Aaron wants to say a good word for Nicole to his sister when Nicole brings him back his mojo. That mojo is in a leather pouch and that pouch is in the Indian bag that the Sheriff took. After this conversation with Aaron, go back to:
Sheriff's office:
The Sheriff's not back yet. Behind the desk is a cupboard with a glass door. View that closet in close-up. Aaron's Indian bag is in the closet. If you click on the glass door, Nicole reports that the door is locked. A bent nail sticks in the right glazing bead.
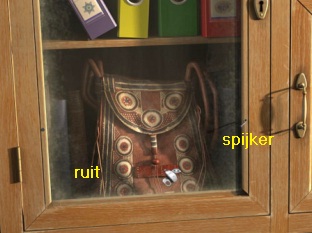
Left click on the curved Spijker (Nail) to remove the nail and the glazing bead. Take the Scissors from inventory and click on the glass pane to remove the pane from the door. Put the scissors back (right click). On the Indian bag lies a spiral copper tube. Left click on the bag and Nicole takes the Copper tube.Then left click on the bag again and now Nicole takes the small leather pouch (Mojo bag) that was also attached to the bag. Step back to exit the close-up of the closet. Nicole has put the glass plate of the cupboard door to the left of the cupboard.Left click on the glass plate to put the glass plate back in the door. Exit the office and go back to the:
Lucky Mo-Jo Bar:
Talk to Aaron again and use all options again:
Aaron explains, rather elaborately, that the spiral copper tube is used in an illegal beverage distillery. Apparently, Aaron illegally makes spirits. Nicole gives Aaron his Mojo Pouch back and he is naturally very happy with it. Aaron gives Nicole a wrapped chicken, which she has to offer to the spirits in his name.
Aaron suddenly gets very upset and Momma Morton comes to calm him down.Talk to Momma Morton and use all the options again:
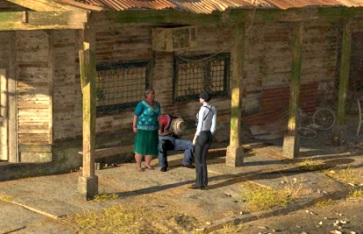
Momma will take Aaron home. Nicole is now allowed to use her boat to retrieve the stranger from the hunting cabin in the swamp.
Momma explains to Nicole how to sail. Momma and Aaron disappear.
Pier:
Click with the magnifying cursor on Momma's airboat and ....
Nicole goes on board and tells her to check the rudder first.You are in the close-up of the boat seat.
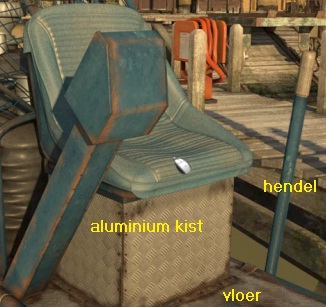
To the right of the chair is a long Rudder lever. Left click on the rudder lever and .....
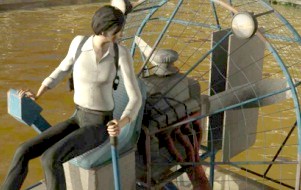
Nicole tries to sail away but the boat refuses to move. The rudder blades are not set correctly. You automatically end up in the close-up of the chair. Click with magnifying cursor on the floor in front of the chair. You then zoom in on a Toolbox. Open the chest. In the box is a funnel and a can of brake fluid.
Take the funnel and then get the can of brake fluid. Step back again.The chair is mounted on an aluminum box. Click with the magnifying cursor on the aluminum box to zoom in on it. Nicole has removed the valve herself and you now see the battery and the motor and a red hose that is attached to the motor. Left click on the red hose to pull the hose out of the engine.
In inventory, combine the Scissors with the Adhesive Tape to cut a piece of adhesive tape from the roll. Take the cut piece of adhesive tape from inventory and click it on the right end of the red hose to tape the hose. Note:The piece of cut tape is difficult to see. So take inventory on all items until you read "piece of adhesive tape" at the top of the screen. You have found the piece of tape.
Now take the funnel from inventory and also click with the funnel on the right end of the hose. Nicole tries to insert the funnel into the hose, but the funnel is too thick. Store the funnel again and then left click in inventory on the postcard. Nicole rolls the postcard into a paper funnel. Then take this funnel (Rolled postcard) from inventory and click it on the right end of the red snake and .... this homemade funnel will fit in the snake. Now take the can of Brake Fluid from inventory and empty the can into the postcard funnel.
Nicole reports that there is enough brake fluid in the steering mechanism. Put the can back away and remove the funnel from the hose. Then left click on the right end of the hose again to put the hose back into the engine. Step back to exit the close-up. Click again on the long Rudder lever and .... Nicole is now sailing away with the boat into the swamp and eventually ends up at the Hunting Lodge
Swamp
Hunting Lodge
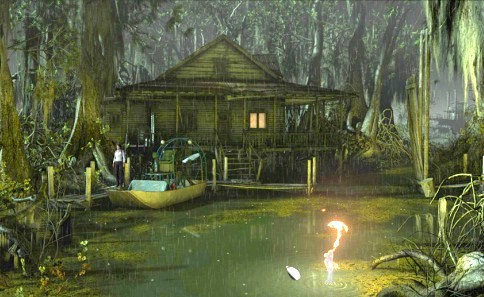
The airboat's fuel is running low, so Nicole doesn't know how to get back to Detalion. Nicole is on the dock in front of the hunting lodge The airboat has docked at the dock. In the distance you can see the wreckage of the old steamboat, to the right behind the lodge. Every now and then you will see flames rising from the water here and there. Click on the boat with the arrow cursor to see the boat and the dock in close-up.
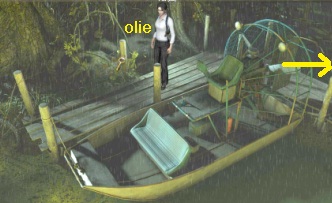
In the close-up, click to the left of the jetty and Nicole (Pier left) with the magnifying cursor on the filthy swamp water. You will then see a thick layer of Petroleum floating on the water. You also see 2 scaffolding posts. A piece of copper wire is twisted to the right scaffolding post.
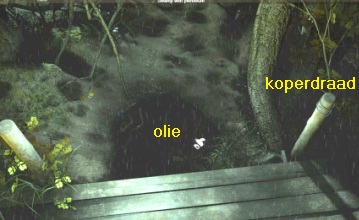
Look at the oil spot on the water and also look at the copper wire. Try if Nicole wants to take the Copper wire. Nicole doesn't need the copper wire at this point though, so she's not going to grab it now. Step back to get out of this close-up and then click with the arrow cursor on the right edge of the screen to get out of the close-up of the boat again. Nicole is then in front of, or near, the stairs that go up to the door of the hunting cabin. Click with the arrow cursor on the stairs (Cabin) and you will see Nicole standing in front of the stairs from a top view.
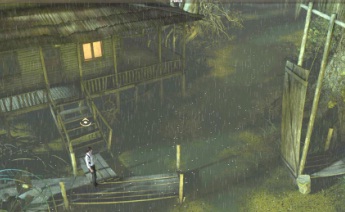
You will now also see that the scaffolding contains a drawbridge and that the drawbridge is raised. Nicole cannot go further to the right, so the only option is to enter the hunting lodge now. There is a light in the cabin, so someone is probably there. So go up the stairs to the front door of the Hunting Lodge (Porch) and .....
Nicole carefully opens the door and peeks in and sees ... a man sitting at the desk.
Nicole storms in and overpowers the man and ties him to a porch post with handcuffs. Nicole shows the man her FBI card.
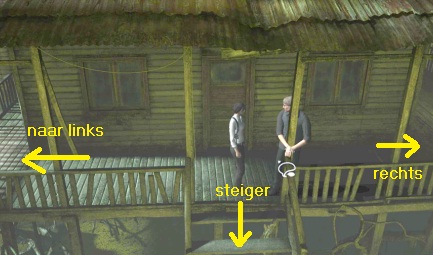
Well ... that was another example of FBI tactics. Talk to the man and use all options.
This is the stranger brought to the hunting lodge by Momma Morton and his name is Arthur Blake and he claims to be a writer. Blake says that the hunting lodge is for sale and that he wants to buy the hunting lodge, swamp and steamer from the New Orleans firm of Prescott, Crosby and Moreau, so that he can write here quietly. One of the firm's employees named Turner was to meet him here and take him back to town. Arthur goes on to say that he spoke with the sheriff that same morning and that his papers are in the car, which is at the sheriff's office.
When you have asked Blake everything, Nicole will close automatically.
Walk back down the stairs, through the bottom of the screen and then go to the left, back to the boat. Nicole then receives a call from Dick Parry.
Parry is not happy that Nicole is alone in the swamp with a suspected murderer. Nicole asks if Parry wants to check that Arthur Blake and Parry wants to do that. Nicole asks Parry and the Sheriff to come and collect her. Parry doesn't trust the sheriff and he warns Nicole. Then Nicole calls Ruth to ask her to take a close look at Prescott, Crosby and Moreau and their husband Turner.
After these 2 phone calls you walk up the stairs again to the veranda of the hunting cabin and .....
Nicole receives a text message from Ruth saying that there is no firm Prescott, Crosby and Mareau in all of Louisiana. Immediately afterwards, Parry calls again, who says that Arthur Blake is probably who he says he is. Although Blake is not on the list of jurors, Parry still suspects that it is a trap of the murderer. They found an abandoned rental car from the airport outside of town. Parry wants to contact the car rental company to find out the name of the renter. The sheriff has since admitted to meeting Blake and knows about the hunting lodge in the swamp. It's also true that Blake's car is parked here. Parry says he will come to the hunting lodge as soon as possible.
Walk up the stairs to the veranda and talk to Arthur Blake again and use all the conversation options again.
Nicole frees Blake from his handcuffs during the conversation. Blake has been fantasizing about how to use the situation in his new book. When Nicole tells him it's more serious than he thinks and that there's a real killer in the swamp, he doesn't quite believe it. After all, Turner was a neat lawyer who met him in front of the firm's office and from whom he received letters with the firm's logo. Blake says it was Turner who contacted him and told him about this hunting lodge and the steamer. Nicole suggests waiting in the hunting lodge for Dick Parry and the sheriff to arrive. She will have to provide lighting, because according to Blake the light is not working.
Click on the front door of the hunting cabin, Nicole goes inside for a moment, but it is indeed dark inside so Nicole immediately steps outside again. Now walk one screen to the left, across the veranda. Nicole lands on the left end of the veranda and here are a Deckchair , a Battery and a large thick glass Bottle . On the wall hangs a long boat hook stick. From a pipe come a blue and a red wire, but the red wire doesn't reach the battery
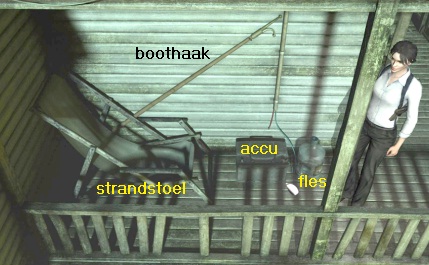
View the Bottle with your eye cursor. There is drinking water in the bottle. View the Battery in close-up with your magnifying cursor. You can see in close-up that the red wire that comes out of the wall pipe has been cut and therefore the battery does not supply any power. Step back again to exit the close-up. Grab the Beach Chair. Nicole stores the beach chair in inventory and now you can take the boat hook from the wall. So also take the Boat Hook.
Nicole needs a piece of wire around the cut red wire. Hey .... isn't there a piece of copper wire wrapped around one of the jetty posts, by the boat? Walk back to the right, to Arthur Blake, and then descend the stairs in front of the cabin to the dock. Then walk to the left and go back to the boat. You can see the boat and the jetty in close-up again. Click again with the magnifying cursor on the water, to the left of the jetty and Nicole. You are then again in the close-up of the oil spot and see the 2 scaffolding posts again. Now take the copper wire twisted around the right scaffolding post. Step back and go back to the Battery, on the porch of the cabin.
Zoom in on the battery again. Left click in inventory on the Copper wire to straighten the copper wire. Then take the copper wire from inventory and click it on the left connection point of the battery. The copper wire now connects the red wire to the battery, but you still have to connect the wire. In inventory, use the scissors to cut another piece of adhesive tape from the roll of adhesive tape and then stick the cut piece of adhesive tape on the slice where the copper wire is now attached to the red wire and ... The power is restored and you can see it lights up in the cabin.
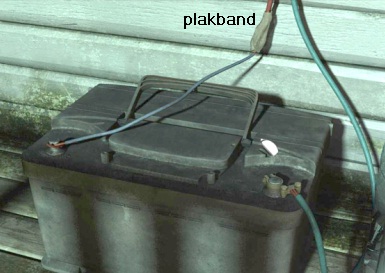
Get out of the close-up and walk back to Arthur Blake and Nicole and Arthur will now automatically enter.
In and around the Lodge
Arthur has got it cold and wants a hot tea. Look around. There is a desk by the window and a kerosene lamp on the desk. To the right of the desk is the stove. To the left of the desk is the white refrigerator in the corner. There is a Old wall calendar on the refrigerator. At the back left is the kitchen and there is a kitchen cupboard Cupboard. There is a thick chair and a small table in front of the kitchen. In the foreground is a suitcase and a green bag.
Look at the Calendar that is stuck on the refrigerator. The calendar is out-of-date. Take the Calendar and view it in the close-up screen of the inventory. The calendar is for the year 2004. Look at the Kerosene Lamp on the desk. Then take the Kerosene lamp and view it in close-up in inventory. The lamp is intact but there is no kerosene in it anymore. View the suitcase and the green bag (Luggage). Check out the small table by the chair. Blake's camera is on the table. Click with the magnifying cursor on the kitchen cupboard. There are 2 cups on the kitchen cupboard and a plate of cakes. Take the 2 cups. Open the top left cupboard and take the tea tin.
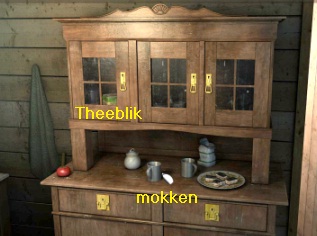
Step back again. Talk to Arthur about the Camera. Blake took pictures of the cabin and the surrounding area, but says he didn't take a picture of that Turner guy. Nicole herself ends the conversation. Zoom in, with the magnifying cursor, on the stove and then open the door of the stove.
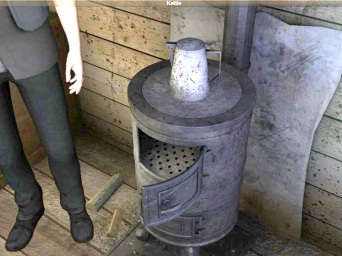
There is no fuel in the stove. There is a coffee pot / teapot on the stove. Take the Coffee Pot Step back again and then leave the Hunting Lodge via the arrow cursor at the bottom right. Outside on the veranda, Nicole receives another phone call from Dick Parry.
Parry got stuck in the mud with the car and cannot come back to the Hut tonight. Nicole says there is no other way for her and Arthur to stay in the Cabin to spend the night. Parry also says that he has no information about who rented the car. But Parry has learned that the swamp area with the cabin and the boat is Aaron's property.
After the phone call from Parry, walk to the left again, to the battery and the thick bottle of drinking water. Take the Coffee Pot from inventory and click it on the thick glass bottle to fill the coffee pot with drinking water from the bottle. Walk back to the right, to the front door of the cabin. Do not go back in yet, but now click with the walking cursor on the right corner (Porch right) of the porch and .... Nicole runs right around the corner and you are in the close-up of the right end of the porch .
So you are here on the right side of the hut. There is a bucket here, a chopping block, an axe, a tin bowl and an empty can. Behind the chopping block (Stump) is an axe. On the chopping block is a half wooden crate. Get the Bucket. Get the axe. Take the empty can. Take the bowl. Take the Axe from inventory and click it on the half wooden crate, which is on the chopping block. Nicole uses the axe to further ram the half crate into pieces. Then take the crate residues from the chopping block.
Get out of the close-up to the left and then enter the hunting lodge through the front door. Zoom in again on the stove. The stove door is still open. Take the coffee pot filled with water from inventory and place the coffee pot back on top of the stove. Also place the two cups on the stove. Take the tea tin from inventory and click it on both cups to put a tea bag in both cups. Take the pieces of wood from inventory and put the wood in the stove. Then put the Calendar in the stove as well. Nicole says she only needs fire now.
Step away from the stove and talk to Arthur again and ask him for a lighter and he gives Nicole his lighter. Zoom in on the stove again and light the stove with the lighter. So take the Lighter from inventory and click it on the wood and the calendar that you just clicked in the stove.
Put the lighter back away and step away from the stove. The water in the coffee pot has to boil and that takes a while. In the meantime, talk to Arthur again and use all conversation options. When you are almost done with this conversation, you will hear a telephone, just as the water in the coffee pot also starts to boil. Leave the cabin and .... Nicole reports that it was a text message, but it wasn't her phone that started ringing. Go back inside and Arthur report that the tea is ready. Arthur has already taken a cup of tea. So zoom in on the stove again and take the remaining cup with tea and .......
Nicole drinks her tea but it turns out to be "bad" tea. Nicole becomes intoxicated and stumbles out and falls unconscious on the porch. After a while, Nicole wakes up and walks back into the cabin to find that Arthur Blake has disappeared. Go right back outside and .... Nicole calls for Blake but of course she gets no answer. Go down the stairs to the jetty and .... Nicole sees that the drawbridge is now half open. Apparently Blake has crossed the drawbridge. Nicole finds Blake's cell phone with a text message from Turner on it from 2 hours ago.
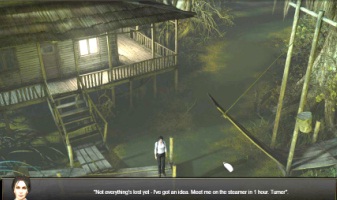
Nicole reads the text message and learns that Turner and Blake want to meet on the steamer. Nicole calls partner Parry to tell him Blake is headed for the steamer. Parry says he's on the road with a special force and Nicole has to do stupid things in the meantime.
Nicole is really not going to sit idle here and wait for the murderer to kill Arthur Blake. But the swamp is dark, so a lantern will be useful. You have already taken the kerosene lamp from the desk, but the lamp does not contain kerosene. You also took the bucket, the bowl and the can from the right side of the veranda. Walk to the left and back to the airboat. Zoom in again on the oil slick, which floats on the water behind the jetty to the left. Take the bucket from inventory and click it on the dark oil pool to fill the bucket with petroleum. Nicole thinks she can refine the petroleum into kerosene for the lamp. Go back to the Hunting Lodge and enter again.
There is now 1 empty cup and the coffee pot on the stove. Zoom in on the stove again and take the Cup. Immediately remove the cup from inventory and click it on the stove to put the cup back on the stove. Nicole now puts the cup in front of the spout of the coffee pot. Take the Spiral Tube (Copper tube) from inventory and click it on the coffee pot. Nicole puts the tube in the spout of the coffee pot and the other end of the spiral is now hanging in the cup.
Left click in inventory on the beach chair and Nicole rips a piece of canvas (Old deckchair canvas) from the frame of the chair. Combine this piece of canvas with the funnel and you have a funnel with canvas. Click with the funnel (Funnel with canvas) on the teapot, but Nicole reports that the canvas is too big and can therefore catch fire. Right click to put the funnel back in inventory. Right-click in inventory on the Funnel with Canvas to view this entirely in the close-up screen. Then take the Scissors from inventory and click with the scissors, in the close-up screen, on the Canvas and ....
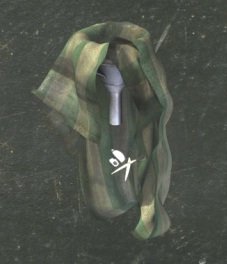
Nicole cuts quite a bit off the canvas. So the funnel should now be good. Close the close-up screen and then take the canvas funnel from inventory again and click it again on the coffee pot and now Nicole places the funnel in the coffee pot. The Canvas therefore serves as a filter. Take the Bucket with the Petroleum from inventory and click it on the funnel (Bucket with petroleum + Funnel) to filter the petroleum and put it in the coffee pot.

Left click on the Canvas to remove the funnel from the coffee pot. This will close the lid of the coffee pot and the petroleum in the pot immediately starts to boil, but the steam escapes through the spout of the pot. In inventory, cut another piece of adhesive tape from the roll of adhesive tape with the scissors. Immediately take the piece of cut tape from inventory and click it on the pouring spout of the coffee pot to seal the spout and .... Your screen will go black for a moment and then you see that refined petroleum is dripping from the coffee pot into the coffee cup. The coffee cup now contains Kerosene.
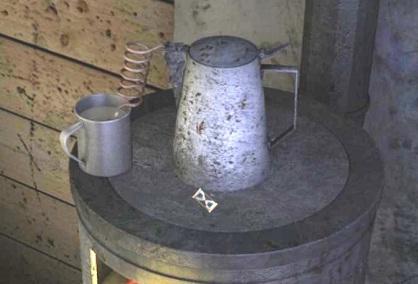
Take the cup with kerosene and combine the cup in inventory with the kerosene lamp to fill the lamp with the kerosene.
Then click with the Lighter on the lamp to light the lamp. Step away from the oven and exit the cabin and go to the:
Drawbridge
Place Nicole at the end of the jetty, in front of the drawbridge. The drawbridge is half open. Take the Boat Hook from inventory and click it on the Drawbridge and ...... With the boat hook Nicole brings the bridge all the way down and she can now continue walking over the jetty.
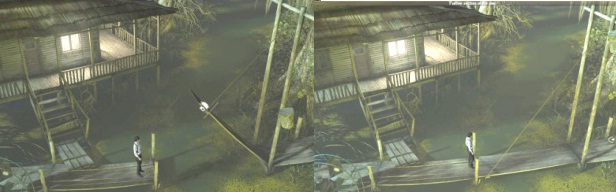
So continue one screen to the right and ...... A very adult crocodile stops Nicole. Right click on the crocodile. Nicole reports that the crocodile is one of the swamp ghosts Aaron talked about. Aaron also said that such a ghost expects you to offer him something and he gave Nicole a wrapped chicken to do so. Left click in inventory on the rapped chicken to remove the chicken from the packaging. Then take the Chicken from inventory and click it on the crocodile and .... the animal disappears after it has eaten the chicken with taste.
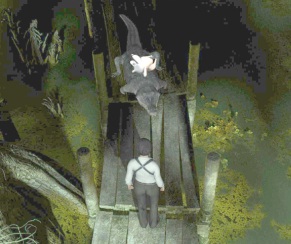
Well ... the coast is clear, so walk up one screen and ...... Nicole reaches a screen where quite a bit has disappeared from the jetty.
Only the jetty posts are still there. Nicole moans that she needs light and your game is now automatically saved.
|
Jump from pole to pole to the other side PART 1 Nicole is at the bottom left and she has to go through the posts to the continuation of the jetty, top right. But first she needs light. Take the tin bowl (Basin) from inventory and click it in the water, in front of the piece of scaffolding where Nicole is now. Nicole places the bowl on the water.
Take the Can from inventory and place the can on the scale. Now take the kerosene lamp from inventory (which you have already lit) and place the burning lamp on the scale and .....
The bowl with the lamp now sails to the other side and floats at the 2 rear poles. So there is now enough light to see the posts. Now you have to take Nicole to the other side via the poles. Nicole has to jump from pole to pole. The posts are rotten and Nicole struggles to keep her balance on the posts. The posts also drop quickly when Nicole lands on a post. If you wait too long to jump to the next pole, Nicole will end up in the dirty water and be eaten by a crocodile. It is therefore important to always jump quickly to the next pole. To jump to a pole, click with the white arrow cursor on the pole you want to jump to Nicole is at the bottom left. You will see 3 posts on the right and 6 posts on the left. Number the first 3 posts to the left 1, 2 and 3 and the post to the right of post 3 you number as post 4. Post 5 is not there. The next pole is pole 6, and then poles 7, 8 and 9. The piece of scaffolding is 9 and when Nicole reaches 9 she is safe again.
Jump to Pole 1
Jump from Pole 1 quickly to Pole 2, Pole 3 and then to Pole 4.
As soon as Nicole has reached pole 4, pole 5 emerges from the water. So jump from Pole 4 quickly to Pole 5 and then quickly to Pole 6.
From pole 6 you jump to the left, to pole 7 and then on to pole 8. From pole 8 you jump to the safe jetty
Then walk further up one screen and .... the piece of jetty that Nicole has reached safely is only a short distance and .... again a good part of the jetty is gone and you see a lot of posts. You see a plank between some posts.
SAVE YOUR GAME HERE. |
Nicole reports that she has to get the lamp here. To the right of Nicole is a long stick (Stick). Take the stick and walk, via the top left, one screen back to the left and then on to the left end of the piece of scaffolding. Take the Stick from inventory and click it on the Bowl / Lamp, which floats in front of Pole 6.
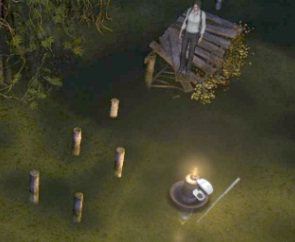
With the Stick, Nicole brings the Lamp back to her. Also put the stick away again and walk up again to the 2nd series of posts.
Take the Bowl / Lamp from inventory again and place this combo on the water for Nicole again and ....
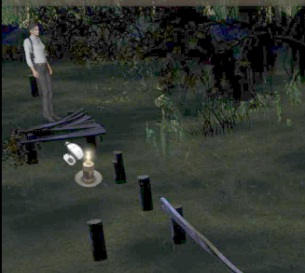
The bowl / lamp now goes all the way to the other side. You are then back with Nicole
|
Jumping Poles Part 2: Nicole is standing on the small piece of jetty 9. In the water you see 4 poles behind each other to the right. These are posts 10, 11, 12 and 16. Between posts 12 and 16 is a plank. To the left of Paal 12 is Paal 13. You have to jump quickly again because all these posts will drop down quickly when Nicole lands on them. If Nicole falls into the water, she will be eaten by the croco. Jump to Pole 10. When Nicole is on Pole 10, quickly remove the Stick from inventory. Quickly click with the stick on the plank, which is between posts 12 and 14 and .....
Nicole slides the plank towards her and the plank is then attached to posts 10, 11 and 12. Nicole is standing safely on the plank. Click on Post 13 and......
... Nicole walks across the plank to Pole 12 and then jumps over to Pole 13.
Pole 13 sinks quickly, but fortunately Pole 14 rises. So jump to Pole 14.
Pole 14 also sinks quickly, but Pole 15 rises. So jump to Pole 15. From Pole 15 you quickly jump to Pole 16.
Nicole is now on the shelf that is attached to posts 16 and 17 and here she is safe again. It might be a good idea to SAVE your game now, because there are a series of jumps waiting for you. To the right of post 16 you see posts 17, 18, 19, 20 and 21. Hop, from Paal 16, via piles 17, 18, 19 and 20 to Paal 21.
When Nicole has reached Pole 21, she will appear in front of her Pole 22. Jump over to Pole 22 and Pole 23 will appear. So jump quickly to Pole 23.
In front of Pole 23 you will see Pole 24. Jump from Pole 23 to Pole 24 and ..... You will now see Nicole again from a top view and you will now see the 3rd Part of this 2nd series of Pole Jumping.
Nicole is on Pole 24 and you see the poles 25, 26, 27, 28, 29 and 30. In front of Pole 28 is the Lamp. Now jump from Pole 24, to Pole 25 and straight on to Pole 26.
When Nicole lands on Pole 26, a new pole will rise next to Pole 27. Post 27 is now a double post. Jump to Pole 27 and then on to Pole 28.
Nicole is safe on Pole 28, so maybe it's a good idea to SAVE your game here again first For Nicole, the Bowl with the Lamp floats. Pick up the Lamp and then place the Lamp behind Nicole on Pole 27.
When you have placed the lamp on Pole 27, you also take the Can from the bowl and finally take the Bowl itself out of the water. To the right of Pole 28 you can see the top of Pole 29 in the water. However, pole 29 is almost completely underwater and Nicole cannot jump to it. Take the Scale from inventory again and place the scale on Pole 29. Then place the Tin back on the Scale and you have made Pole 29 into a Pole that Nicole dares to jump to.
So jump to Pole 29 and then on to Pole 30 and then on to jetty 31 and .... Phew .... you made it. The pole hopping is over.
Continue to the right and ..... Nicole ends up at the Steamer: |
Steamer:
On top of the boat there is a light in the wheelhouse and at the back you can see the large paddle wheel turning. The steamer has 4 decks. Someone is getting the steamer up and running. Continue to the boat. Nicole then walks over the gangway onto the boat and then stands on the lower deck. To the left is the stairs to deck 2. Go up the stairs to the 2nd deck on the left. At the top right is the stairs to the 3rd deck, so click on the top right of the stairs and Nicole ends up on the 3rd deck and is just below the wheelhouse, which is on deck 4. Go up the stairs to deck 4.
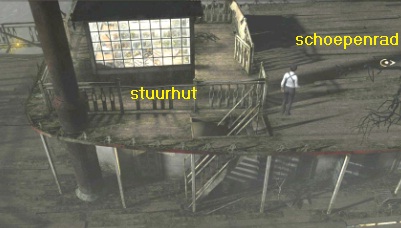
On deck 4 you do not go straight into the wheelhouse yet, but you walk through a screen to the right, to the large paddle wheel and ..
.......Oops ...... Arthur Blake is tied to the spinning paddle wheel.
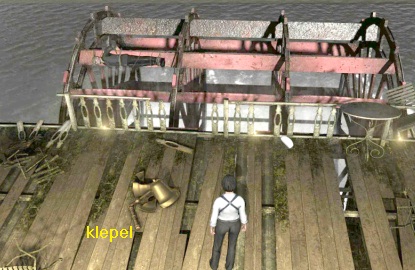
To the left of Nicole is the broken bronze ship's bell. The Clapper is also located between the 2 bells. Take the Clapper and walk back down to the:
Wheelhouse:
Continue to the wheelhouse. The glass doors of the wheelhouse are closed and there is no way to open the doors.
Take the Clapper from inventory and ram it on the windows of the left door and ....
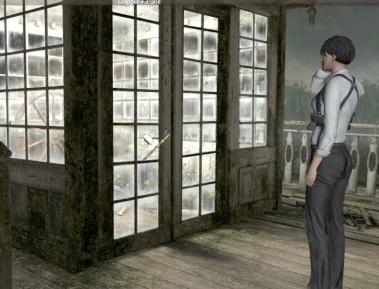
Nicole smashes 1 of the squares with the clapper. Nicole can now put her hand through the broken window to reach the door handle on the inside. So left click on the broken window (Handle) and .... Nicole opens the doors. Go inside. Nicole is then standing in front of the large steering wheel in the wheelhouse. To the left of the steering wheel is the Telegraph, with which the captain passes on his orders to the engine room. A captain's cap hangs on the telegraph.
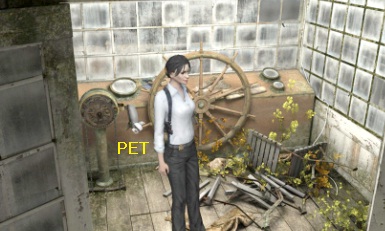
NB: If you cannot see the captain's cap because Nicole is in front of it, you have to take Nicole a step back.
Take the Captain's hat and ........ The Captain's hat also contained a playing card. View the Captain's cap in close-up in inventory. It's Aaron's hat. Also view the Playing card in close-up. The playing card is the King of Hearts. Close the close-up screen. The captain's cap hung on the telegraph's arrow handle. Click on the arrow handle of the telegraph and ...... Nicole has stopped the rotating paddle wheel. Go out of the wheelhouse via the bottom of the screen and then on the deck again via the bottom of the screen. Then walk another screen to the right, to the paddle wheel and ..... The ending movie of this chapter starts.
Unfortunately ...... Nicole is too late ...... Arthur Blake did not make it and died of drowning. Parry arrives with the Sheriff and investigates the steamer and the surrounding area. A man with a photo camera is arrested. It's Jack Rowlings, the journalist who tried to hit up Patti in Chapter 1 at the Gentle Bob bar. We end up in:
Chapter 7: 23 Oktober 2009: New York
The Bronx: FBI Kantoor:
Nicole questioned Jack Rowlings in the interrogation room of the FBI office. Use all call options.
Rowlings doesn't really want to cooperate at first. But then Parry comes in with a newspaper describing the power plant murder with photos taken by Rowlings. Rowlings is still unwilling to cooperate, so Parry is now making it an official FBI questioning. After much insistence, Rowlings then tells that for the first murder at the train, he received an email with the tip that he should go to the bar and stay near the woman if he wanted a scoop. Jack then accidentally stayed with Patty instead of Nicole. Before the murder at the power plant, he got a call with the address. Rowlings got there and snapped a photo when Nicole was just on the cog with Jane Carrington. So Rowlings was the one who then saw Nicole running away.
Parry wants Rowling's cell phone, but Rowlings refuses to part with it. Rowlings also refuses to have his fingerprints taken. Parry and Nicole then threaten to issue a court order to force Rowlings to give up his cell phone and fingerprints. Rowlings then asks if he can get a Coke. Nicole walks into the hall and receives a phone call from Wang at the green soda machine who reports that he has found a partial fingerprint on the device that was in the car of the train accident. Wang put that fingerprint in the database. Dick Parry comes out of the interrogation room and joins Nicole.
Talk to Dick Parry and again use all the conversation options.
Parry thinks Rowlings is the murderer and he wants to officially arrest him so they can get permission to search his apartment and confiscate his camera. Nicole, however, thinks Rowlings is playing a game and is only after journalistic fame. According to Nicole, Rowlings doesn't fit the killer profile that the FBI has drawn up for the killer. Parry then suggests giving Rowlings his can of Coke and then examining the fingerprints on the can.
Nicole already is standing in front of the green soda machine, so click on the green machine and Nicole buys a green can of City Cola. Re-enter the interrogation room to the right of the soda machine and talk to Rowlings again. Nicole gives the Coke to Rowlings and a moment later gets the empty can back, with Rowlings' fingerprints on it. Exit the interview room and go to:
Laboratory:
Talk to Wang and Nicole hands the Coke can to Wang. Wang promises to take the can's fingerprints and then upload them to the database. Nicole then receives a call from Ruth who says that Niciole's father has been trying to reach her. Leave the lab and Nicole will automatically call her father. Dad reports that Nicole's mother has been hospitalized. Nicole's mother is in a diabetes coma. Nicole cannot go to the hospital now, but she agrees with her father that she will visit tomorrow.
Go back into the lab and talk to Wang again. Wang has now put Rowling's fingerprints in the database and Nicole gets his permission to use the database again. So click again with the magnifying cursor on the database monitor, which hangs to the right of the large server cabinet. When you are zoomed in, click in the screen again to have Nicole's fingerprint scanned again. When scanning is finished, press your own ENTER key again.
At the top left you now see 2 fingerprints. The top print is the partial print, found in the car wreck, and the other is Rowlings' fingerprint. Drag the print from Rowlings to the top bar. The printout also appears in a separate screen and the "Search" button is now activated. Click the Search button but no Match is found. Now also drag the partial print to the top bar. The partial print will also be displayed on the large screen. Drag the partial print onto Rowlings printout and then snap the print onto Rowlings printout and ....
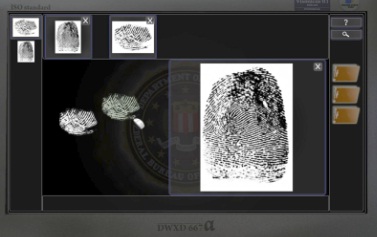
The database will then compare the partial printout with Rowlings's printout but no match is found. In the big screen, click on the cross on Rowlings's print to remove Rowlings's print from the big screen. Then click, in the top bar, on the partial printout (not on the cross) and then click on the "Search" button again and ..... the database will find a Match in the UAFD07 database, but Nicole has no permission to to browse this database.

Step back to exit the screen and talk to Wang again and use all the options here again. Wang tells Nicole to compare the partial printout with the military database UAFD07. Nicole has just tried that, but she cannot access it. Wang advises her to talk to her boss about this. Exit the lab and go to Ruth's office. Talk to Ruth and use all conversation options. The boss is in his office and Ruth gives Nicole permission to talk to the boss. So go into the boss's office and talk to Jeff Kurtz, the boss. Jeff Kurtz arranges for Nicole to be allowed to search the UAFD07 military database. So go back to it:
Laboratory:
Log back in at the database screen. Drag the partial fingerprint back to the top bar and then click the "Search" button again and ..... The UAFD07 database will then display 10 possible fingerprints in a separate screen. Click on 1 of those 10 fingerprints to get it large in the screen. Then drag the partial fingerprint to the large print and click the partial print on the large print, where you think it corresponds to the partial print. The scanner then scans whether the two prints are the same. You must do this with each of the 10 fingerprints. 1 of the 10 prints is then the Match with the partial print.
I'll make it easy for you. Number the 10 fingerprints, 1 to 10. Then click on print 4. Print 4 will appear large on the screen. Now drag the partial print to print 4 and move the partial print over print 4, until you have found the spot on print 4 that is exactly the same as the partial print. It's the spot at the bottom left. Then click the partial print exactly on that spot on print 4 and ....
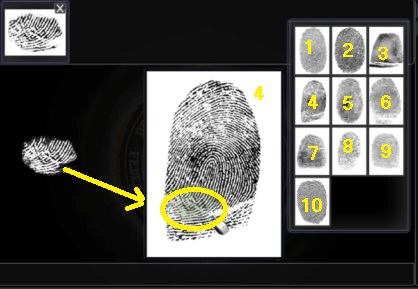
The database will scan and now find a match and report that it is the fingerprint of one Captain Paul Reed.
Paul Reed worked on a military project called "Queen of Hearts".

Nicole has left the database by herself. Talk to Wang about your findings and then leave the lab.
On the landing, Nicole meets boss Jeff Kruntz. Talk to the boss and use all options.
Nicole says journalist Jack Rowlings has been released and has the name of the murderer: Paul Reed, who worked in a military lab in Maine on a project called the Queen of Hearts. Kruntz knows the name of the project, but does not want to say anything about it because it is top secret. Kruntz regrets that Arthur Blake is dead. Kruntz's daughter read his books. Kruntz explains that Arthur Blake is a writer's alias and that he was a member of the jury under his real name. The other judges would be safe, but Nicole should ask Ruth that.
Nicole will automatically walk back into Ruth's office. So talk to Ruth again and he will tell you that:
The remaining jurors are safe, but the judge who heard the trial is not. Judge Wolsey has left his home in the state of Maine but never arrived at the destination.
The police are looking for a judge. Go to:
Nicole's office.
Praat met Dick Parry over alle onderwerpen:
Nicole wil meteen naar Maine, om die Paul Reed op te zoeken.
Parry wil echter liever op kantoor nog wat papierwerk doen, maar uiteindelijk gaat hij akkoord om met Nicole mee te gaan naar Maine.
We belanden dan in
Talk to Dick Parry on all topics: Nicole immediately wants to go to Maine to see this Paul Reed.
Parry prefers to do some paperwork in the office, but eventually agrees to go with Nicole to Maine.We then end up in
Chapter 8: 24 Oktober 2009:
Maine: Norwicht: Farm of Paul Reed
In and around the yard: Conveyor Belt:
Nicole and Parry have arrived at Paul Reed's farm after a hellish drive through the snow.
There will of course be a conversation between Nicole and Parry in which you simply follow all the options.
The farm seems to be abandoned and Nicole wants to investigate the barn. But Parry wants to have an official search warrant first. Parry thinks that Nicole is too energetic and thus plays into the hands of the murderer. After all, it seems that the killer is using Nicole as a witness for his actions. Parry then receives a phone call asking about a lens. If you let Nicole ask about the call, Parry won't say anything about it. Parry then leaves for the nearby town and Nicole stays here alone at the farm.
The house is on the left and Nicole is at the huge barn. There is a blue tractor at the shed. In the foreground, at the gate, is a yellow letterbox. Behind the letterbox a blue air mattress (mattress) hangs over the fence. Nicole's car is on the right at the gate. View the yellow letterbox with your eye cursor (Right click). Nicole reports that the letterbox is full, but you cannot open the letterbox. Take the blue air mattress. Aim the forward cursor at the front doors of the Barn and go there.
To the left of the barn door is an old ramshackle stove. Via the arrow cursor on the right edge of the screen you can go to the rear of the barn (Behind the barn). Click with the magnifying cursor on the ramshackle stove to get into the close-up. On top of the stove is a bicycle pump. There are a few items in the stove, behind the crooked door. Left click on the crooked door to open it.
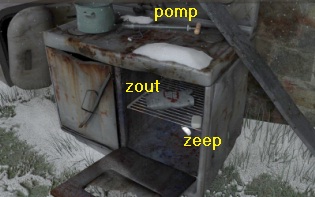
Then take the bag of Salt and the piece of Soap from the stove. Also take the Bicycle Pump, which is on top of the stove. Step back and now click on the shed doors to see if Nicole can open the shed. Unfortunately ... the doors are locked with a padlock. Now go to the right side of the shed via the forward cursor on the right edge of the screen.
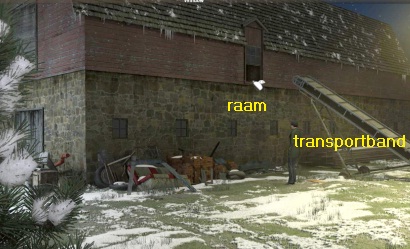
Nicole shouts that a window is open, in fact ... on the right side of the barn is a window open. There is a conveyor belt in front of the open window. Check out the open window. Nicole then continues to the conveyor belt to view the window. Goods are transported into the shed through the open window via the conveyor belt. The conveyor belt is mobile and is now not against the window. Zoom in on the conveyor belt with your magnifying cursor. You will then see that the left wheel of the conveyor belt is stuck in a hole with ice. On the left is a plank.
If you click on the bar where the 2 wheels are attached, Nicole reports that she cannot push the conveyor belt to the shed because the left wheel is stuck in the ice hole. But we can help Nicole with that. Take the bag of Salt from inventory and click with the salt on the Ice for the left wheel (Bag + Ice) and .... Nicole spreads the salt over the ice and this melts the ice away.
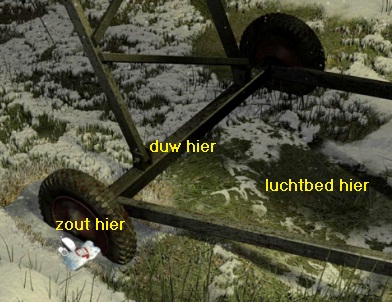
However, the left wheel is still stuck in the hole. Take the Air Mattress from inventory and click it on the ground between the metal frame (Matrass + hard ground). Pick up the Plank and place the Plank on the air mattress. The Plank is therefore partly under the bar to which the two wheels are attached.
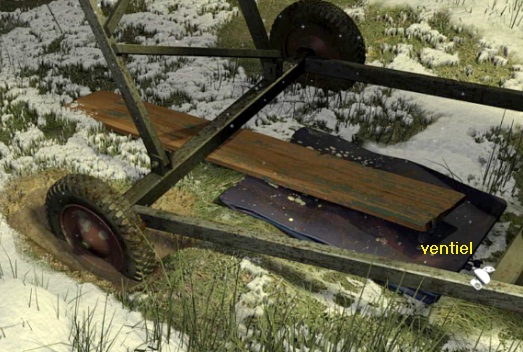
The Mattress valve is located on the right side of the air mattress. Right click on the valve. Nicole wonders if the air mattress is not leaking. Take the Bicycle Pump from inventory and click it on the valve of the air mattress (Pump + mattress valve) and ... Nicole pumps up the air mattress and this causes the shelf to lift the wheels of the conveyor belt. Unfortunately, the conveyor does not slide off the shelf by itself. Take the piece of soap from inventory and click it on the shelf to make the shelf smooth.

Now click again on the bar (Bottom structure) where the wheels are attached to and now Nicole pushes the conveyor belt off the shelf and against the shed.

Click with the forward cursor in the open window and ..... Nicole climbs up the conveyor belt and up to the window.
In the Barn:
The elevator:
Nicole looks through the window into the shed. Down in the shed, Nicole sees a work table with drawers.
On the table are all kinds of stuff that Nicole looks uncomfortably familiar.
Click with the forward cursor to the table and ... Nicole jumps down into the shed.
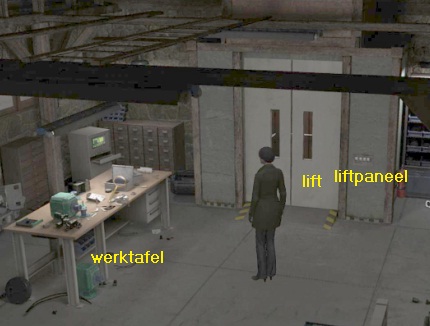
Nicole is at the doors of an elevator and in front of the work table. Take a closer look at the work table. View, (so right click) one by one the various objects that are on the work table, such as the projector parts and the laser part, the printed circuit board and the metal box. With some objects Nicole gets a flashback about the way in which the object was used by the killer to kill his victims. When you have looked at all the objects, step back to leave the close-up.
Check out the elevator doors. Nicole reports that the elevator is ready behind the closed elevator doors. Try to open the elevator doors by clicking on the doors. Well .... if only it really is that simple. There is a control panel in the wall to the right of the elevator doors. Zoom in on that control panel. You end up in:
The Elevator Puzzle:
This is a random puzzle. The appearance of this puzzle, and also the solution of the puzzle, is always different. Even if you zoom out and zoom in again you will always see new symbols. You see four tumblers in the panel. You see a symbol on each tumbler. Those symbols are arranged in a certain order, from left to right. You see a cogwheel button on the right and a long gray OK push button at the bottom left. Next to that long gray button are 3 lights.
The symbol on the right rocker arm differs from the other 3 symbols. The right symbol does not conform to the logical order in which the other symbols are rotated, relative to each other. With the cogwheel knob you can make the right rocker arm turn, so that the symbol on the right rocker arm changes.
So you have to turn the right tumbler until you get a symbol on that tumbler that you think is the right one to complete the logical sequence. Then press the long gray button. If you have chosen the correct symbol, the first of the 3 green lights will light up. So you have to do this 3 times in a row. If you choose wrong, you have to start all over again. If you have done it correctly 3 times in a row, the 3 green lights will illuminate and the elevator doors will open.
To turn the right rocker arm Left click on the gear knob and then pull the gear knob down or push it up. It is very possible that you will get very different symbols than I do. If you leave the puzzle and then activate it again, you also get a different sequence of symbols. This puzzle is therefore random and I cannot therefore give you a ready-made solution for it. If you did the first turn correctly, but you make a mistake on the second turn, you have to start all over again from turn 1.
Here's what I got and so this shows my solution. However, there are a lot of symbol sets that you can specify in the game and it is not possible for me to show all solutions for this. But I assume that, based on these 3 images, you understand what the intention is.
 |
 |
 |
Here are a few more options that are good.
When you have solved the symbols puzzle correctly, you will automatically exit the puzzle and the elevator doors are open.

So get in the elevator and .... Nicole ends up upstairs in Paul Reed's office:
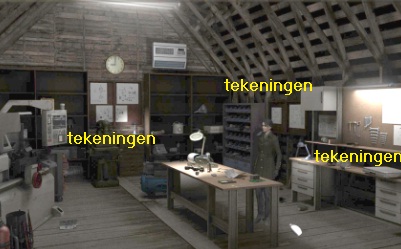
There is not much Nicole can do here. There are only a few construction drawings (Diagram) that you can view. Those construction drawings hang on the wall to the right, which also has some tools. There are also construction drawings on the dark brown plates, under the clock and next to the cabinet with screw trays. View (so right click) all those construction drawings. Once you have looked at the construction drawings, you go back down with the elevator via the bottom of the screen and Nicole meets Paul Reed and his sister Fan Reed. Sister takes Nicole at gunpoint with a rifle. Sister Reed thinks Nicole is a burglar. Paul Reed is apparently handicapped because he is in a wheelchair.
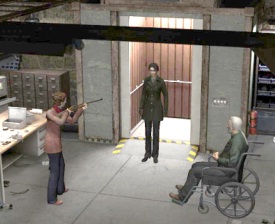
Nicole explains that she is not a burglar, but an FBI agent investigating a murder case. Paul Reed explains that he received a number of assignments by e-mail for making the chip with which you can stop a car. In total Paul received 8 orders to make 8 devices. Paul does not know the client and the payments always come from a different city. Paul Reed is in a wheelchair because of an accident while working on a military project 10 years ago. That project was the "Queen of Hearts" project. Reed's colleague Peter Douglas was thrown in prison for it. On their way home, the Reeds passed Dick Parry's car. Reed's sister Fan felt like she recognized Dick Parry. Parry reminded her of a town policeman at the time of Finney's murder. Finney was a local who drank too much, assaulted his wife and was killed using the church clock mechanism, which slowly strangled him. Finney's wife is the pastor's daughter.
When the conversation is over Nicole will automatically be outside in the yard. Click on Nicole's car and ..... Nicole calls Dick Parry first and says she is going to church to question the pastor about Finney. Finney's murder was pretty special and bizarre, so it seems to be off to Nicole. Parry is hungry and says he's going to eat something in town first. Nicole then drives her car to the:
Church:
Outside:
Walk through the gate to the church and .... Nicole is lucky because she just meets the pastor, who is about to close the church for today. Apparently the church is also being renovated because it has scaffolding. Talk to Pastor Aandreef Simon and use all conversation options again. Also note that the pastor has a flashlight in his hand.
Pastor Andrew Simon says that Finney only started drinking too much after he had been a juror in a murder case. The alleged murderer in that case was the son of an influential politician and was acquitted. It turns out to be the Benson case, the case where all the victims of the current series of murders were also the jurors. Andrew Simon goes on to say that Finney had a nail in his hands when he was found dead. The pastor suspects that he wanted to saw through the rope on which he was hanging.
When the conversation with pastor Andrew Simon is over, go one screen to the left via the left edge of the screen and Nicole ends up in the Cemetery. Nicole is then at the beginning of the path that runs through the cemetery. A bit in the middle of the screen you get the arrow cursor on an upright tombstone (Grave). Go to that upright gravestone.
When Nicole is standing in front of the tombstone stone, click with the magnifying cursor on the stone to view the stone in close-up.
It turns out to be the headstone of Derek Finney's grave. On the bottom of the tombstone a 2 of hearts card is engraved.
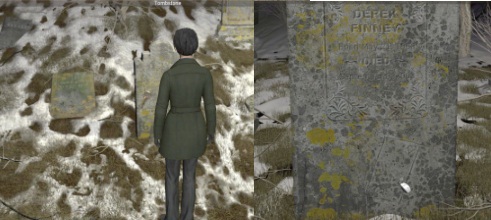
Step back 2 times, out of the close-up, then go back to the front of the church, to Pastor Andrew Simon. Talk to the pastor again and ask him about Finney's grave and all further follow-up options. The pastor says that the engraving of the Hartentwee card suddenly appeared on the tombstone a year after the murder. The pastor has no idea what the meaning of the two Hearts engraving is. Now enter the church through the front doors.
Inside the church:
In the hall of the church, Nicole receives a call from Paul, the Card Killer. Paultje informs Nicole that he is preparing a new card, so a new murder. Paul also reports that Nicole can find enough clues here to find out who the next victim is and where the murder will take place. Nicole is therefore in the front hall of the church. The large gate to the church hall is locked. To the left is the door of the Bell Tower. In the right corner is a stepladder and in front of the stepladder is a prayer chair. There is a brush on that prayer chair. Take the Paintbrush.
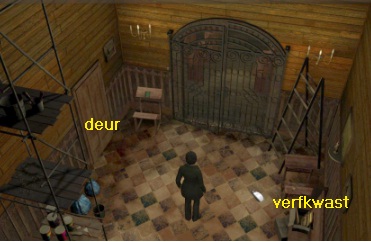
Try to open the bell tower door. But unfortunately ... the door is locked. Go back outside and talk to the pastor again. Now ask the pastor for the key to the bell tower door. The pastor then gives Nicole the key. Enter the church again and open the bell tower door with the key you just received and then go through the door and Nicole ends up at the top of the:
Bell tower:
It is dark here and there is nowhere to find a light switch. So go straight again, via the stairs, back to the front hall and then outside again. Talk to the pastor again and ask him about lighting the tower and the pastor will then give Nicole his flashlights. So go back into the church and back up the tower. Nicole naturally turns on the torch in the tower. There is a cupboard in front of the round window. To the left of the cupboard is a dark corner.

Click with the magnifying cursor in that dark corner and .... Nicole kneels in the dark corner and you see a power cord lying on the floor. Move the flashlight's beam to the right until you can see the extension cord's outlet. Then left click on the plug and .... Nicole puts the plug in the socket and the lamp lights now.
Now you can explore this small narrow space. In the foreground see the thick wooden support beam.
To the right of the support beam hangs a metal lever. Take the lever.
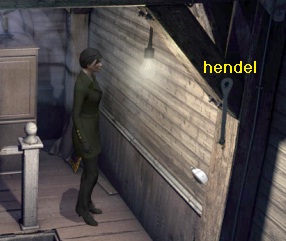
Click with the magnifying cursor on the case. Nicole opens the closet and you are in the close-up. The mechanism of the clock tower is in the cabinet. Right click on the mechanism and then listen to Nicole's commentary. The killer had the rope, which Finney is hung from, attached to one of the axles / gears. So when the mechanism kicked in, Finney was pulled up and hanged. You don't have to do anything with the mechanism, so step back again to leave the close-up. Nicole is right in front of the cupboard. Use your cursor to examine the floor to the left of Nicole. If you look closely, you will see a long plank in the floor where you can see 2 nails. You will get the magnifying cursor on that shelf, so zoom in on that floorboard.
In the close-up you can see that there are two nails sticking half up from the plank.
Take the lever from inventory and then click with the lever, one by one, on both nails to pop the two nails out of the shelf.
When the two nails are removed, click the lever on the plank again to remove the plank. Underneath the plank is the old floor, as it was at the time of the Finney murder. So you see 3 pieces of the old floorboards. Look at the old floorboards and Nicole reports that there is a thick layer of dust on it. Right click to store the lever again and now take the Paintbrush (Brush) from inventory and click it on the front of the 3 old floor parts and ... Nicole dusts the dust away with the brush and 2 letters become visible, which a nail are scratched into the wood. The letters are a D and a P.
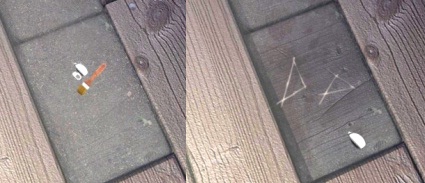
Step back to get out of the close-up and now go back down the stairs. Back downstairs in the front hall, Nicole wonders whether those 2 letters DP are Dick Parry's initials. Get out of the church and talk to Pastor Andrew Simon again using all the options for conversation.
The pastor says, albeit with some hesitation, that the policeman who previously tried to protect his daughter from her husband's violence was also the one who found Finney in the clock tower. It was rumored that Finney was alive when he was found, but that the officer let him die. The name of that policeman is .... Dick Parry ....... Nicole herself, if you do not skip an option, returns the flashlight and that ends the conversation, and your time here at the church too. come.
Walk back to Nicole's car via the bottom of the screen (Church door) and then left click on the car to let Nicole get in.
But before Nicole can get in, she gets a call from Ruth.
Ruth asks Nicole if she hasn't received the fax and is then very surprised that Parry hasn't told Nicole about the fax. Ruth then talks about that fax. At the office another package has arrived for Nicole and our boss Jeff Kruntz has ordered not to wait for Nicole but to open the package immediately. The package exploded and Wang found millions of shards of glass in it. It turns out to be the shards of a lens. A lens like the one used in a lighthouse. Ruth confirms that Dick Parry used to work as a police officer in Maine and that the fax was sent to the local courthouse. Nicole immediately sets off and arrives a little later at the:
Courthouse.
Continue to the entrance of the courthouse. Unfortunately ... the court building is not open and so the glass front door is locked. Nicole cannot enter. So step back again. There is a red car to the right of the building. Check out the red car. It's Dick Parry's car, so Parry is somewhere around here too. At the bottom of the screen is a trash can and a shovel protrudes from the trash can. Go get that shovel from the trash can.
Place your cursor slightly above Parry's red car. You will then get the diagonal left arrow to go to the back of the courthouse (Courthouse rear). So now go to the back of the courthouse. Arriving at the rear, Nicole notices that a light is burning behind the lower right window. Check out the middle window. The middle window is slightly open.
On the curb is an advertising board that has fallen over. The billboard is attached to the lamppost with a chain. Zoom in on the chain. In the close-up you can see that the chain is around the lamp post and then secured with a padlock. Take the Shovel from inventory and click with the Shovel on the padlock and .....
Nicole breaks the chain with the shovel. Step back and now take the Billboard. Place the Billboard under the middle window and then climb in through the middle window.
Nicole ends up in a hallway in the courthouse. On the left is a door open to the corner room where the light is on. Nicole discovers shards of glass (Traces) on the tiled floor of the hallway. Nicole thinks there is a burglar inside. Move the cursor over the tile floor until you get the eye cursor on the glass shards (Traces). Then view the shards of glass and then enter the Archives through the half-opened door.

There are documents on the floor. Someone is clearly looking for certain documents and Nicole reports that someone else is in here. There is a stepladder near the middle shelf unit. Walk, via the forward cursor, to the back of the stepladder and ..... Nicole catches her partner Dick Parry, who is busy reading some documents. Talk with Parry about everything
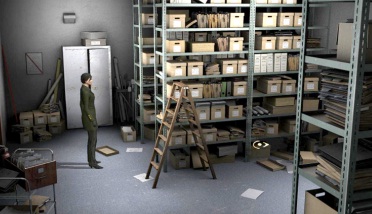
Parry says he is looking for information about Peter Douglas, the man who caused the accident that left Reed in the wheelchair. Parry goes on to say that Douglas was in a cell with Benson. According to Parry, Douglas was Reed's client for the devices used to commit the murders. Douglas was released in 2002 and the first murder was committed in 2003. Nicole confronts Dick that the first murder was committed here in Maine and that he was involved. Nicole accuses Dick of keeping everything out of the file and calling in neither her nor the agency's help. Nicole doesn't believe Parry when he says he's trying to save the missing judge Wolsey. How did the killer get inside information? Nicole then accuses Parry of complicity in at least six murders and burglary at the courthouse. Nikki then wants to arrest Parry and handcuff him, but Parry escapes. A furious chase now ensues in which Parry eventually plunges into the depths with his car.
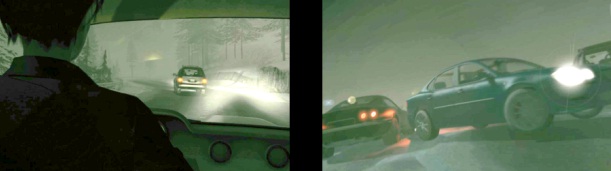
Parry dies but before he takes his last breath he tells Nicole that he was blackmailed by Douglas and that Nicole can find Douglas at the lighthouse.
....and we end up at the......
Lighthouse
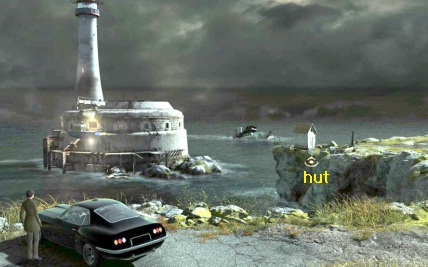
The lighthouse is built into the sea on the foundations of an old ford from the 19th century. Nicole can not just reach the lighthouse. There is a small cabin on the cliff. A cable car leads from the hut to the lighthouse. The wreck of a fishing boat floats in the sea to the right of the lighthouse. Walk to the:
Hut:
Repair the cable car machine:
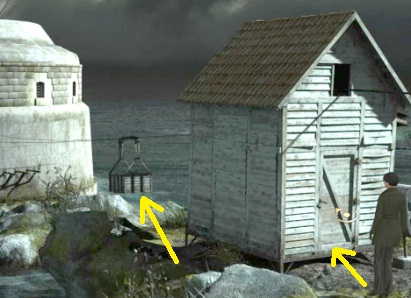
Behind the hut is the seat of the cable car. The cable car mechanism is inside the hut, so enter the hut. In the hut, Nicole is standing in front of the cable car machine. To the left of the wall hangs a blue work coat and there is also a Metal cover on the floor. To the right of the machine you see a crack (Floor crack) in the floor. In the corner, at the back right, is a bucket and behind the bucket is a Spool (Reel). To the right behind the machine is a large Flywheel and to the right is a rickety bench on the wall
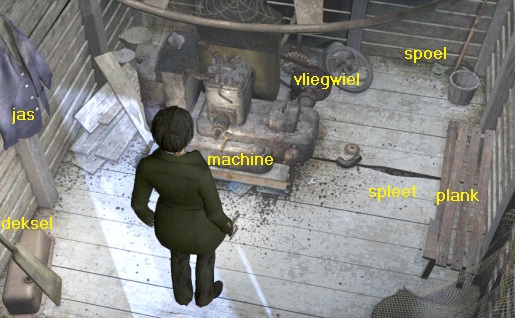
|
Zoom in on the blue work jacket that hangs on the left wall. Take the jacket. There is also a Belt (Belt) behind the jacket. Also take the Belt and then also take the Hook where the jacket and the belt hung.
Then view the jacket in the close-up screen of the inventory. The jacket has 2 pockets. Click on the right jacket pocket. You take a pack of filter cigarettes from the right jacket pocket. Close the close-up screen and then look at the jacket in close-up again. Then click on the left pocket and you will take out a box of matches. Take the Metal Cover, which is on the left side of the floor. It is the cover of the cable car machine. Take the flywheel Also take the Reel that is behind the bucket on the floor. It is a spool of a casting rod. View the Coil in close-up in inventory. The spool contains another fishing line.
In the close-up screen, click on the spool to remove the fishing line. You will lose the spool because you only have the fishing line. |
Move your cursor over the wrecked wooden bench. You can tear off the front shelf of the bench. So click on the front shelf of the bench to take that shelf
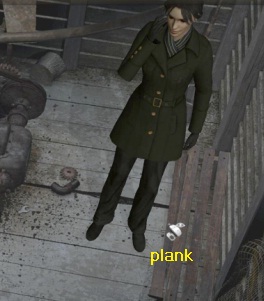
Zoom in on the crack in the floor, to the right of the machine. There is a socket wrench in the crack and it may come in handy. But if you try to get the socket wrench, Nicole screams that the wrench is too deep. Then combine in inventory the Plank (Board) that you have torn from the bench with the Hook to turn the hook in the shelf. Then take the Shelf / Hook combo from inventory and click it on the socket wrench and Nicole then takes the socket wrench.
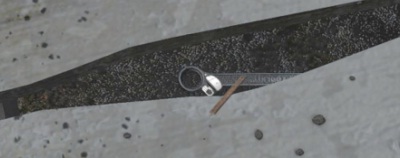
Step back and zoom in on the machine. The machine is quite rusty and does not work. Nicole has to get the machine running in order to get to the lighthouse with the tray of the cable car. At the bottom left is a Wing Nut on the machine. Take the wing nut.
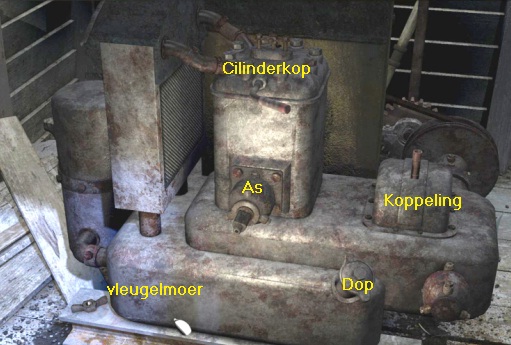
Move your cursor over the machine to find the various parts. On top of the machine you will find the Cylinderhead. A bent rod protrudes from the cylinder head. Under the cylinder head you see an axle on the right a pipe is sticking up (clutch) and in that pipe there should be a lever. On the front right you see the cap of the fuel tank. Take the Flywheel from inventory and click the Flywheel on the Axle. Then take the Wing Nut from inventory and click it also on the Axle. Then take the Belt from inventory and click it on the Axis to rotate the belt around the axis. Now zoom in on the fuel tank cap. Try to unscrew the cap, but Nicole can't do that with her bare hands.
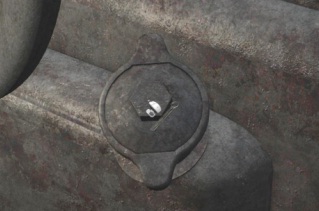
Take the Socket Wrench from inventory and click it on the Cap and you will see that the cap rotates a little bit. You lost the socket wrench right away. Click on the cap again and now Nicole unscrews the cap and it disappears to the inventory. However, there is no fuel in the tank, so step back three times to exit all close-ups and exit the hut.
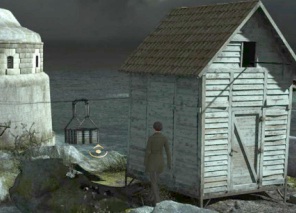
Weer buiten mik je de vooruitpijl naar het bakje van de kabelbaan, dat achter de hut aan de kabel bungelt.
Loop dan door naar achter de hut. Je ziet dan, links naast de hut de brandstoftank (Container) staan.
Outside again, aim the forward arrow to the tray of the cable car, which dangles from the cable behind the hut.
Then walk to the back of the hut. You will then see the fuel tank (Container) to the left of the cabin.
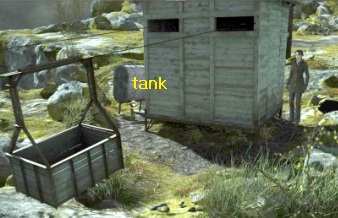
Continue to the fuel tank. There may be some fuel left in the tank. There is a tap at the bottom of the tank. A lever leans against the right front leg of the tank. View the Metal Cover in the close-up screen in inventory. The lid looks like a bathtub and there is a hole in the bottom. Turn the lid over so you have the bottom up. Then take the Fuel filler cap from inventory and click the Cap in the hole to close the hole.
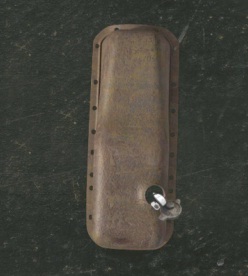
Close the close-up screen and then take the lid from inventory.
Then place the Lid on the ground, under the tap of the large fuel tank (Cover with fuel filler cap + Ground).
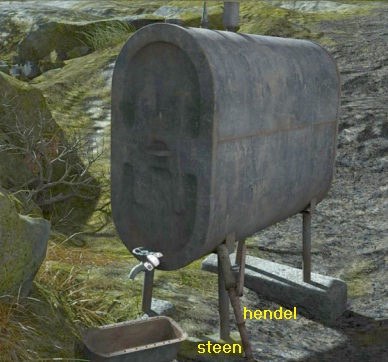
Then click on the tap and ... nothing comes out of the tank. Take the lever leaning against the front leg. Take the lever. The right front leg stands on a yellow stone (Rock) so that the tank is level. Left click on the stone to remove the stone and ... The tank will tilt and this will cause some drops of fuel to drip from the tank. Click on the tap again and now the last bit of kerosene flows out of the tank and into the bathtub lid.
Pick up the bathtub lid and go back to the front of the cabin and re-enter the cabin. Zoom in again on the machine and the petrol tank. Take the bathtub lid from inventory and click it on the inlet of the gas tank to pour the gasoline into the tank. Look at the bathtub lid again in the close-up screen and then take the gas cap off again. Then take the Cap from inventory and place the Cap back on the gas tank. Step back and zoom in on the cylinder head, above the flywheel.
Take the curved Bar (Shank) and view this curved bar in the close-up screen. The rod is hollow and has a thread on the outside. Nicole says that the rod is used to heat the cylinder head. Close the close-up screen. View the pack of cigarettes in the close-up screen and then click on the filters of the cigarettes to remove 1 cigarette from the pack. Keep the cigarette in close-up and take the matches from inventory. Light the cigarette with the matches by clicking on the cigarette with the matches at the front. Close this close-up screen and put the curved rod back in the close-up screen. Take the burning cigarette from inventory and then insert the cigarette into the threaded end of the rod.

Close the screen again and take the rod from inventory again and place the rod, with the burning cigarette in it, back in the cylinder head. Step back and now zoom in on the Clutch pipe. The Clutch is the clutch and you can see the pipe in close-up at the bottom of the screen. Obviously something has disappeared. Take the lever, which you took outside the large petroleum tank, from inventory and insert this lever into the pipe.
Step back and you look at the flywheel again. You have tied the Belt around the axis of the flywheel. Click on the Buckle of the belt and ..... The belt starts the flywheel and the machine starts, but ....... If you now click on the Clutch lever then the cable car will leave without Nicole in it. Zoom in again on the Clutch lever. Take the fishing line from inventory and click the fishing line to the handle.
Zoom out and leave the hut and walk back to the back of the hut. You can now see the fishing line hanging from the left window. Now step into the cable car compartment and ........ Nicole pulls on the fishing line to release the clutch and ... in the tray, Nicole makes her way to the lighthouse. But just when she is a little over halfway, the bowl blocks and Nicole dips into the water.
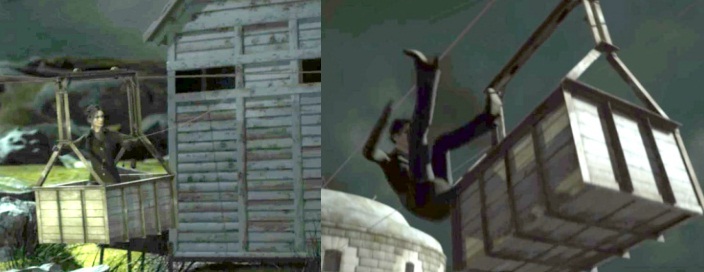
Nicole swims further to the lighthouse and she is standing at the bottom of the rocks of the old fort, taking off her soaking wet coat.
The Old Fortress
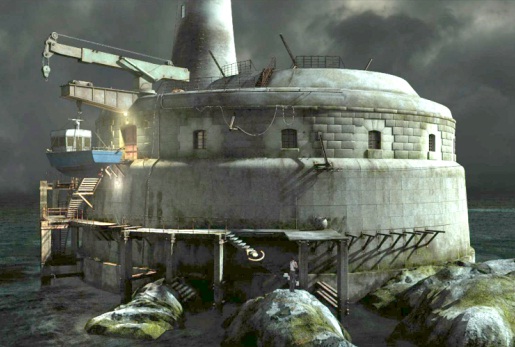
Nicole is standing on a rock at the bottom of the old round fort. Now you can also clearly see that the lighthouse is built on top of the fort. On the left, 2 cranes are hanging from the fort and one of those cranes hangs a boat. Well ... it shows little humanity if we leave Nicole here in the cold in her shirt, so walk up the platform, which is built around the fort, via the stairs. Nicole are then on the platform and you can now see that the platform is not quite whole anymore. On the left part of the platform is missing and on the right there is no platform at all. Behind Nicole is a World War II mine on the platform and in front of Nicole is a metal ladder. Right above Nicole hangs a beam (Pulley) over which a steel wire rope hangs.
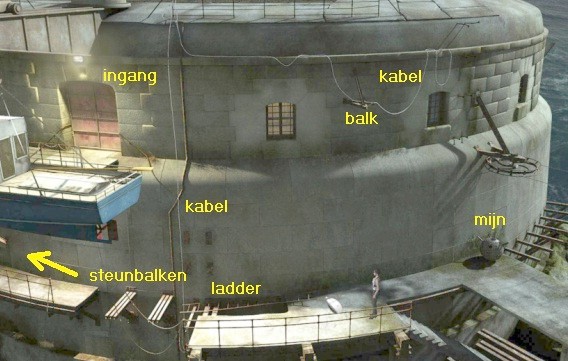
One end of the steel cable is hanging at the ladder and you can see the 2 support beams of the missing piece of platform hanging on the wall. Above, by the boat, is the entrance to the fort and Nicole has to go there. View the Ladder. The ladder is too heavy for Nicole. Look at the beam, high at the top of the facade where the cable hangs over. Click with the magnifying cursor on the metal Ladder to view the ladder in close-up. At the ladder, the end of the cable that also runs over the beam hangs and there is a hook on the cable. Nicole needs the ladder to get to the roof of the fort. Click on the hook to hook the hook, and thus the cable, to the ladder.
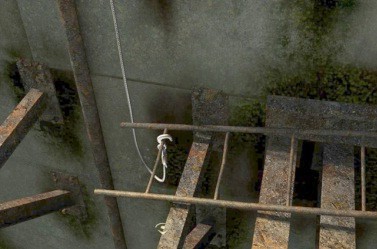
Step back to exit close-up. A part of the platform has disappeared near the ladder, but the 2 support beams are still on the facade.
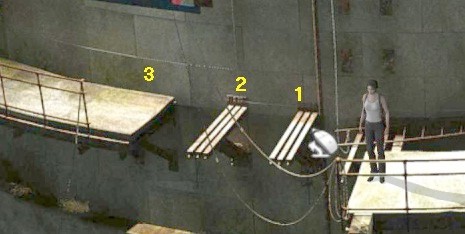
Click with the Jump cursor on the front support bar and Nicole will jump to the front support bar.
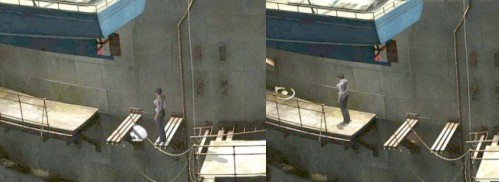
Then jump to support beam 2 and then to platform 3, under the blue boat.
Then continue to the left and Nicole comes to the stairs that go up to the steel entrance of the fort.
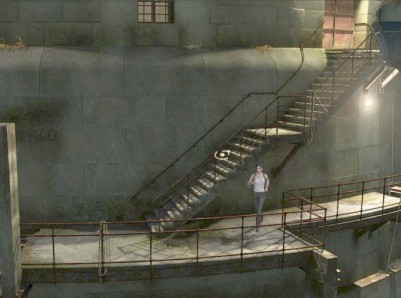
So go up the stairs. At the top of the stairs, Nicole is standing in front of the steel entrance door of the fort. Click on the steel door but unfortunately ..... Of course the door is locked. The blue boat hangs from the crane in front of the entrance. There is a long Oar on the deck of the boat. Get the Oar.
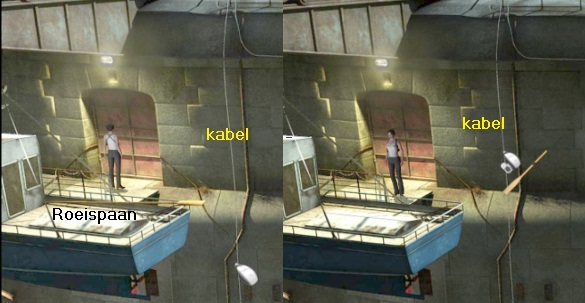
To Nicole's right you see the cable that you attached to the ladder with the hook. Take the Oar from inventory and click it on the cable (Oar + Steel rope) and .... The other end of the cable falls down and is then at the mine on the lower platform. Go back down the stairs (arrow above left of the boat) and walk back to the right and jump back to the starting platform via the 2 support beams and continue to the mine. Now zoom in on the large round mine. In the close-up you can see the cable in front of the mine.
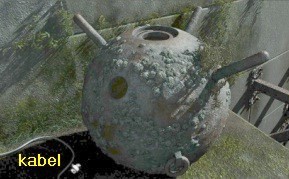
Click on the cable and .... Nicole ties the cable to the mine and she also immediately pulls a small metal beam from the beam where the cable hangs over.
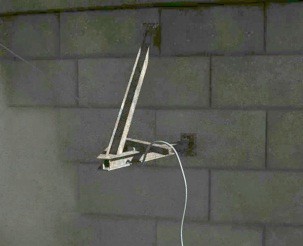
That bar falls down. Get out of the close-up and .... The bar that you saw falling down is on the platform.
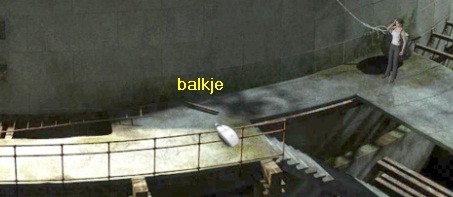
Go grab that metal bar and zoom in on the mine again.
Take the just picked metal bar from inventory and click with it on the mine and .... Nicole puts the bar under the mine.
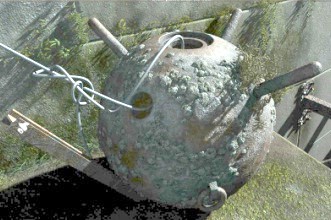
Click on the bar and ...... using the bar as leverage, Nicole pushes the heavy mine off the platform, and the weight of the mine now lifts the ladder up to the platform in front of the entrance of the fort. Get out of the close-up and see ..... the ladder is now hanging above the entrance. So hop back via the 2 support beams to the left and up the stairs again. When you reach the top, click with the forward arrow on the ladder and ....

Nicole climbs up the roof of the fort via the ladder
On the Roof of the Fortress
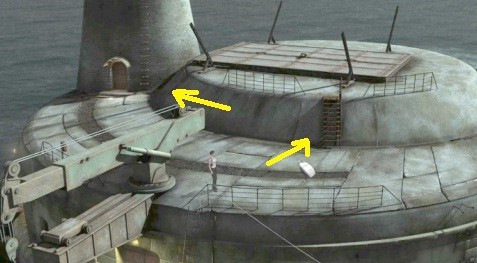
Nicole is standing on the roof to the right of the crane. Behind the crane you see the entrance to the lighthouse. The roof has an even higher roof that can be reached via a ladder. In that higher day is a very large metal hatch. Click on the ladder with the forward arrow. Nicole runs to the ladder and climbs up and you are in the close-up of the large hatch. Nicole reports that the tap must be used to open the large hatch. So step back again to descend the ladder again. Now place the arrow cursor on the tap and then click to run to the left and past the tap. Nicole is then to the left of the tap.
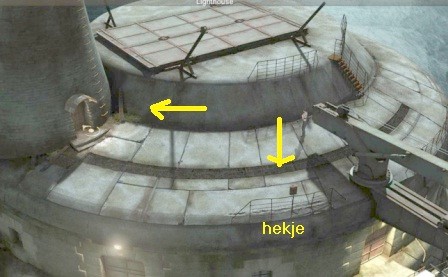
You can now continue to the entrance of the lighthouse, but you can now also go down to the gate and the crane.
The box with which the tap is operated is located on that gate. However, first proceed to the entrance of the lighthouse.
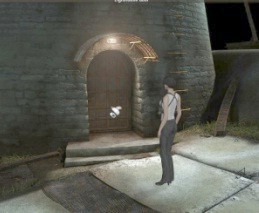
Click on the lighthouse door, hoping that the door is unlocked. But unfortunately .... the door is locked and Nicole will never get into the lighthouse through this door. To the right of the door are metal ladder rungs on the facade of the lighthouse. Maybe Nicole can climb all the way up the ladder rungs to the lighthouse lamp house. Check out those ladder rungs. Nicole reports that the sports are almost completely rusted through, so ...Nicole doesn't want to risk it. Go back one screen to the right and then go to the gate (Crane) that is on the edge of the roof just in front of the crane. The control box of the crane hangs from the gate. Zoom in on the tap box.
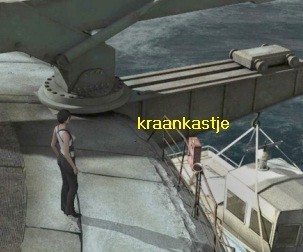
Operate the crane and open the large hatch with the crane:
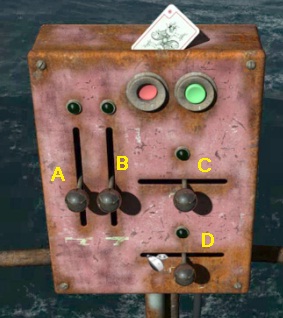
There is a playing card in the cupboard. It's the Joker card. Take the joker card. View the Joker card in close-up and then close the close-up screen. Now you can operate the tap with the levers in the box. There are 4 levers that you can click up, down, left or right in the slots. Above each lever is a small light that are now all off. There are 2 horizontal levers and 2 vertical levers. Above the handles is a red Off button and a green On button. Number the two vertical levers A and B and the 2 horizontal levers C and D. With A and B you can move the crane up and down. Use C and D to move the tap to the left or to the right.
|
Click on the green button. The lights of A and C will now light up bright green and the lights of B and D will flicker faintly. Push lever A up. You see the tap go up. Lever A is back in the middle. Click Lever C to the right. The crane swings to the left. Lever c is back in the middle. Click Lever C to the right again. The crane continues to turn and is now more or less above the hatch.
Lever C is back in the middle. The lights of A and B are off and the lights of C and D are bright green Click Lever D to the left. The crane arm extends and the hook of the crane is now exactly above the hatch. The lights of B and D are now on. Click Lever B down. The hook of the crane comes down a little. Click Lever B down again and the Hook of the crane will hang exactly above the eye of the hatch. Step back and walk under the tap to the right. Nicole is then again to the right of the crane. Climb back to the hatch via the ladder. The Hook of the crane is at the Eye of the hatch.
Click on the Hook to hook the hook to the eye. Step back and run back to the tap box. Zoom in again on the tap box and click on the green button again. Then click Lever B up and ..... You see how the tap opens the hatch. Step away from the tap box and ...... the hatch opens further.
So go back to the hatch and ....Nicole jumps down through the open hatch and .....Nicole is "welcomed" by Archie Benson. Benson points a gun at Nicole
|
There is a long conversation in which Benson confesses that he did murder the fortune teller. However, Benson's father bribed the jurors so he got off with a prison sentence. Archie didn't have the courage to confess in court and he hates his father for being so dependent on him. Benson says his prison buddy Peter Douglas is also here at the fort. Benson tries to shoot Nicole, but his gun jams. This gives Nicole a chance to draw her own gun and shoot Archie.
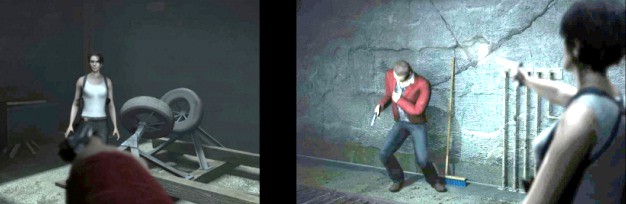
Inside the Fortress
Well ... Nicole had no choice. It was she or he and he lost. Nicole does have a problem though ....
because where is the exit from this room and how to deal with Peter Douglas, who, according to Benson, must also be here somewhere.
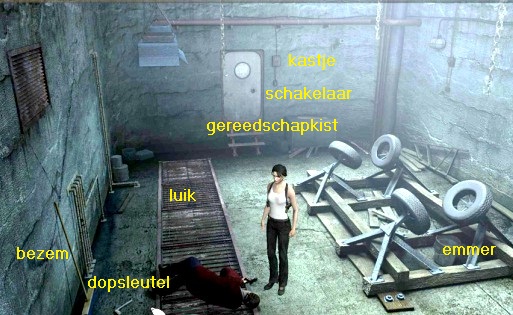
In the back is a steel door. In the door is a round window (Porthole). There is a blue toolbox on the floor to the right of the door. Also to the right of the door is an electrical box on the wall and under that box is a switch. Behind the dead Benson is a Broom against the wall. There's a socket wrench on the floor between Benson and the broom. Benson is on a long roster. There is a hatch in that long grid. Behind Nicole is a wooden construction with tires that is used to hoist boats in and out of the fort. There is a bucket between the 2 front tires.
Walk to the door and .... Nicole tries to open the door. However, the door is firmly locked and we see how Peter Douglas keeps an eye on Nicole via a camera and a monitor. Click with your magnifying cursor on the round window in the door and Nicole looks through the window and sees a steel spiral staircase that leads to the top of the front tower.
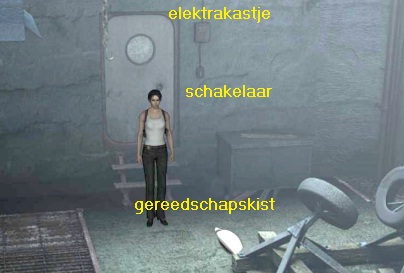
Step back and zoom in on the Toolbox, which is on the floor to the right of the door. Click on the lock of the tool box to open the box.
Then take the medium wrench and the broken blade from the chest and step back again.
Take the broom and take the big wrench on the floor in front of the broom.
Click with your magnifying cursor on the Bucket (Between the supports) to zoom in on it and then take the Bucket.
Under the bucket is the Small wrench. So take this little socket wrench and step back again.
Click with the magnifying cursor on the grid where Benson is lying on to get to the close-up of the hatch. There is a tunnel under the grid, but the tunnel is full of water. Nicole cannot open the grate hatch with her bare hands. Take 1 of the 3 socket wrenches from inventory (it doesn't matter which socket wrench) and click it on the hatch handle to open the hatch.

Nicole reports that she has to pump the water out of the tunnel and she wonders if there is a pump mechanism here somewhere to get this done. Step back to leave the close-up and ..... Through the camera Nicole yells at Douglas and he tells that Judge Wolsley is at the top of the lighthouse. Zoom in the switch, which is located under the electrical box to the right of the door.
Then click on the switch and ... you will see the tunnel again while Nicole reports that there is no power because the wires are not connected. Zoom out of the switch and zoom in on the box above the switch. The lid of the box is secured with 2 screws. Take the broken saw blade from inventory and then click with the saw blade on the top screw and ... the lid comes off and then dangles from the bottom screw.
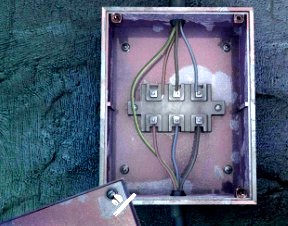
Also click with the saw blade on the bottom screw to place the lid in inventory. In the box you can see the power wires. However, the top 3 wires are not connected to the contacts. View the lid of the cabinet in the inventory close-up screen. Then turn the lid over. On the inside of the lid you can see how to attach the wires to the contact points.
Close the screen and you are back in the power box. The bottom wires are already attached, so you still need to clip the top 3 wires onto the top contact points.
Click on a wire and then click on the contact point to which you want to attach the wire.
Connect the blue wire to the left terminal. Connect the red wire to the center contact point. Connect the black wire to the right terminal.
Step back and you are back at the switch. Click on the switch again and ..... if you have connected the wires correctly, the water will now be pumped out of the tunnel. You see this happening and Nicole tells you too. Step back and zoom in again on the tunnel hole in the long grid and then jump through the hole down into the tunnel.
The Fan Puzzle:
In the tunnel Nicole is standing in front of a large fan that blocks Nicole's further passage. The fan is off but the blades of the fan are blocking the passage. The fan hangs a semicircular grid (Impeller) and in the middle is the As (Impeller axle). Look at the grid (Impeller) and you will learn that the fan is in fact 3 propellers mounted behind each other. View the Axle (Impeller axle). Nicole says that the shaft consists of 3 different nuts, each of different diameter. Fortunately, you have 3 socket wrenches of different sizes.

You have to turn the nuts with the three socket wrenches and then turn the propellers out of the way.
If you put a socket wrench on the nut (Axle), you can click the wrench left or right to turn the propeller blades out of the way.
So there are 3 propellers that are mounted on the shaft one after the other and each propeller has 3 propeller blades.
What you need to do is to turn each of the propellers out of the way so that there is an opening for Nicole to crawl under the propellers further down the tube.
NB: The solution to this puzzle is always different, so I cannot guarantee that my solution will be the solution for you exactly.
You can place the three socket wrenches on the Nut of the Axle, but you cannot place multiple keys on the nut at the same time.
You can then click a key to the left or right and to turn the propellers. With each key you can always turn 2 propellers, but which propellers they are is different every time.
So try the 3 keys and click them left or right, until you have created a passage and Nicole says she can crawl under the propeller blades.
Small Op key to the left = turns the front and middle propeller counterclockwise.
Small Socket Wrench to the right = Turns the front and rear propellers clockwise.
Middle Socket wrench to the left = Turns the center and rear propeller counterclockwise.
Middle Socket wrench to the right = Rotates the front and rear propeller clockwise.
Large Socket to the left = turns the rear propeller counterclockwise.
Large Socket to the right = Rotates the center and rear propeller clockwise.
Again ..... this is always different and my solution does not have to be the case with you. So I cannot provide a ready-made solution for this puzzle. You will have to try and figure it out yourself and keep trying until you have all 3 propellers in one direction and Nicole says that she can then crawl further through the tunnel.
When you have solved the puzzle, Nicole reports that she can crawl under the propellers.
So click with the forward arrow under the propellers and ... Nicole crawls through the round propeller tube and ends up on a grid platform.
Above Nicole hooft is a grate hatch. Click with your magnifying glass on the grid, above Nicole. The grate is too high, so Nicole cannot reach it.
View the Broom in the close-up screen of the inventory. Then click on the handle of the broom in the close-up screen to remove the handle from the brush.
Nicole reports that there is a hole at the end of the broomstick. Close the screen and put the Bucket in the close-up screen. In the close-up screen, click on the Bucket Handle to remove the metal handle from the bucket. Then click on the handle to bend it into a loop. Close the screen and return the broomstick to the close-up screen. Grab the loop-shaped bucket handle and then click the lust through the hole in the broom handle. Close the screen.
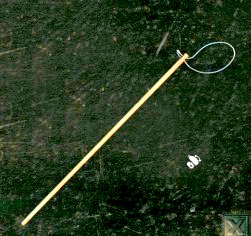
Take the bucket from inventory and place the bucket on the platform where Nicole is standing on. When Nicole has placed the bucket next to her, click again on the grid above Nicole's head and Nicole stands on the bucket and then looks through the top grid and sees the handle of the metal door of the room where Benson's body is located. Now take the broom handle and click with the broom handle on the door handle and ... Nicole attaches the broom handle, with the loop, to the door handle.
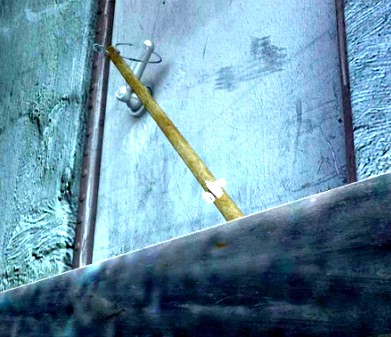
Click on the broom handle to pull down the door handle. Then click again on the broomstick and .... Nicole cheers that the door is now open. The broomstick has now disappeared and the door handle is up, but the door is now locked. Click at the bottom of the screen to get out of this close-up and then dive back into the round propeller tube to crawl back under the propellers to the other side. Back on the other side, step back to crawl out of the tunnel. Nicole is back with Benson's body. Walk to the metal door again and Nicole now goes through the door and is then at the bottom of the metal spiral staircase.
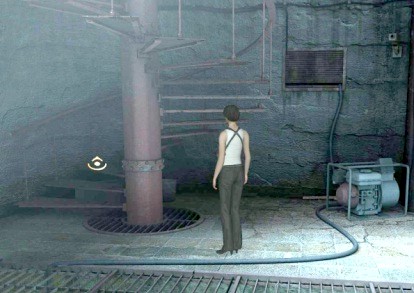
Click with the forward cursor on the spiral staircase and Nicole climbs up to the lamp house of the lighthouse where she finally meets killer Peter Douglas.
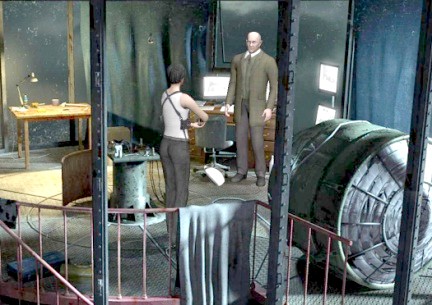
Talk to Douglas and use all conversation options.
Douglas explains everything and tells that Nicole is the JOKER. Benson's gun had no bullets because Douglas had taken it out.
Douglas saddles Nicole with a gigantic feeling of guilt and it will soon turn out that Nicole cannot really live with that.
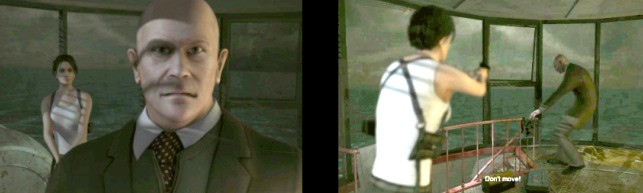
Douglas tries to escape but Nicole shoots him and Douglas crashes and crashes to the rocks.
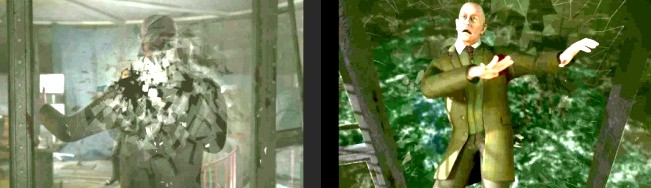
Nicole is picked up by 2 helicopters and decides to leave the FBI. She accepts Nick's offer to join him as a private investigator.
![]()
Is this the end of the Art of Murder series? Or will we see Nicole Bonnet as a private detective in an Art of Murder 4?
NB: 2020: After Art of Murder 3 Cards of Destiny they didn't go on with the series. There are other Art Of Murder games released but they are not point and click adventure games such as the first 3, but Hidden Object / Casual games and I have never played them. I do not like Hidden Object / Casual games
2020: Walkthrough by: Louis Koot