
Atlantis 3: The New World:
2023: Walkthrough door: Louis Koot
If you found this walkthrough through Google search or through another site, you probably haven't visited my site.
Many more highly detailed game walkthroughs can be found on my site and here is the url of my site: www.pcgameswalkthroughs.nl
Part 3
Chapter 5: Siberia: Prehistory
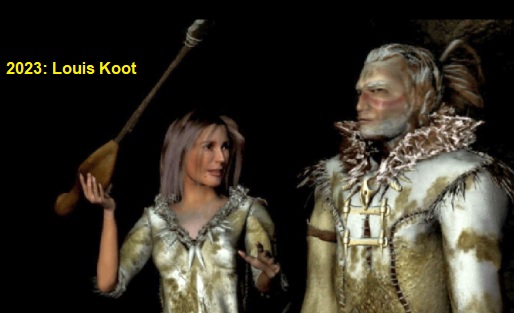
cut scene: Our Heroine is now in the harsh winter of Siberia and apparently in the Stone Age.
She is a hunter's companion and we hunt a Mammoth but the Mammoth dosn't like to be hunted and the hunter gets hunted.
The Caves
Main Cave
You have landed in a cave. Click 2x forward through the tunnel and .......

Our Heroine crashes down and falls for dead on the floor of a large cave. But you continue as her ghost.

There are 3 exits in the cave, 1 of which takes you back to the original cave and the 2 others each in a different cave.
Click, to the left of our "Sleeping Beauty" 1x forward and you will be standing in front of a rocky bridge over the river.

Sheep Cave
Click forward to go over the bridge and then through the corridor and you will enter another cave.
Turn slightly to the left here and you will see a stone tablet with a drawing on it. Click forward. A horde of running sheep appears on the rock wall.

Turn to the left until you see the Spear on the floor. Pick up the spear. The spear now appears as a weapon in your hand.

Click to hurl the spear into the rock wall and then pick up the spear again and then right click to store the spear in your inventory now
Then turn to the right until you see the exit and click forward and follow the tunnel back to the main cave, where your body is on the plate

Click 3x forward and turn around so that you see our sleeping beauty again right in front of you.
Then click forward, to the right of your body, then turn slightly to the left and click 2x forward and you will enter the next cave.

Wolves Cave
Here is an extinguished fire on the floor. Click forward and look down at the extinguished fire.
Take the Stick from your inventory and click it on the fire pit to stoke up the fire again.

The shadows of 5 Wolves will then appear on the rock wall, 2 on the left and 3 on the right. The last wolf, on the right, is the White Wolf

What you have to do is keep these wolves fighting each other so that in the end the White Wolf remains the victor.
Click on the front wolf on the left, then turn to the right and then also click on the front wolf.
Both wolves are going to fight and the left wolf wins.

Then click on the next wolf on the right, that is the Brown Wolf, and it will now fight with the left wolf.
The right wolf now wins. Then click on the last wolf on the left and it will win the 3rd round.
Now click on the White Wolf and........the white wolf wins and comes to life

The White wolf now really appears in the cave but disappears right through the rock wall.
Well......... you are a Ghost and ghosts can also go through walls, so find this spot in the wall and click forward and.........

....... after some hesitation you walk through the rock wall and........

Our heroine ends up in a large lake and........

....... she pulls herself onto dry land on an island and sees a beautiful balloon in the sky above a rocky island.

Well this hot air balloon is your ultimate goal here ..... you will then end up on the front island
The islands:
Turn right and go 1 step forward on the path and then turn left .......

.........pick up the tree stump and put it in your inventory

Turn right and continue across the island to the back point.
You run into a dead tree there. In the grass just in front of this tree you will find a click spot. Place the tree stump here.

Then click forward towards the tree and .........

........ you climb the tree and the branch gives way under your weight and you fall onto the next island.

Before you continue straight ahead......look down and turn slightly to the left and then pick up the little Stone.

Then go ahead. A dangerous-looking Sabertooth Tiger blocks your way and you can't avoid it left or right because then you'll drown in the quicksand. The Tiger walks in circles around that big stone. Take the little Stone from your inventory and hold it. Wait until the Tiger turns left and is behind the stone and then about in front of the Tree, then quickly throw your stone at the tiger.

The tiger doesn't really like this of you and jumps at you but ....... ends up in the quicksand and drowns.

NB: If you failed to drown the tiger, you must try again, but you have lost the stone. You then start again at the place where you picked up the stone, so pick up the stone again and then walk on to the saber-toothed tiger and try your luck again. You must repeat this until you have managed to drown the tiger in the quicksand.
Stand there for a moment, look down and turn slightly to the right and then pick up the broken branch.

Now go left around the big stone and then forward again and you will end up on the back point of this 2nd island.

A big stone in front of you. Use the branch you just found as leverage on this stone and .........

....... via the stone you end up on the next island.

On this 3rd island you first go forward 1x. A split. On the right you see the White Wolf.

Go to the left here and via 2x forward you will reach a small beach.

Straight ahead you see a brown Bear. Behind you, you hear a huge grunt. Turn around and ...... Black Wolf blocks your way back.

Behind the wolf lies a long stick and you need that stick, but the wolf is in the way. You have to get rid of blacky. Looking at Blacky, turn slightly to the left and click forward to go under the Rock Arch. Black wolf follows you, as you can hear from the grunting. Continue forward, then turn to the left and then click 2x forward towards White Wolf.

Cut scene: White Wolf "eats up" Black Wolf.

Then turn around and click 2x forward to the beginning of the island.
Turn around again and go down to the left again to the beach with brown Bear right in front of you.

Turn around again and now pick up the Long Stick that lies on the spot where Blacky used to be.
Then turn all the way to the left until you see the grass ramp and click Forward to get to this ramp.

Then look at the grass at your feet and slowly turn to the left.
At the edge you will now find a click spot in the grass. Take the Long Stick from your inventory and click it on the click spot in the grass.

Cut scene: You now pole to the other side and end up behind brown bear.

Walk across the island to the other side and then click forward to the tree trunk that is on the beach and .....

you roll the tree trunk in the water and "sail" it to the next rock island that is under the Balloon.

Go all the way up ......... that is 6x forward where you always have to make adjustments.

When you reach the top, look up and click forward to the hot air balloon and you will be sucked into the hot air balloon.

You will see a niche in the back of the balloon in which you can already see the Crystal Skull.
So click forward, to the left of the round floor hatch, then turn right and click forward again,

........ then turn left and you are in the niche. First, pick up the small "knife" to the right of the skull and put it in your inventory.

The "blade" then turns out to be a small javelin, put in your inventory.
Then click on the skull and you will disappear for the 3rd time in the "Brain Maze".
Crystal Skull 3:
Find the Dolphin again and click on the animal again and listen to what it says and note it down

Then turn to the left and look a little up and then click on the Air bubble and .........

......... you are back in the Balloon.

Click 2x forward and you will fall out of the balloon through the round hole.
Turn to the left and keep turning until you get the forward arrow. Then click forward and you are in front of the rocky path that goes down.

Click 4x forward (always turn around) and after the 4th Forward turn to the right. You see the big chunk of rock you came off of.
You will see a picture of a Wolf on it. Click forward towards this image and........

Caves part 2
You end up back in the fire cave / wolf cave. Leave this cave and go back to your own body.

You have to go back to the sheep cave.
Stand in front of your body so that you can go back to the left of it, over the stone bridge, to the other cave where those sheep run over the wall.
When you're in there, click forward again over the tablet on the floor and the 4 sheep start running around again.
Now take your big spear from your inventory. You must now hit each of these 4 sheep with the spear.

It is a matter of taking a good look at the height at which a sheep runs and then throwing the spear in time so that you hit the sheep right in the heart. You know you've hit the sheep because it then disappears. You get his heart in your inventory. So you have to hit all 4 sheep so that they disappear and then you have 4 Hearts.

These hearts are named after the 4 nature elements: Fire Heart, Air Heart, Water Heart and Earth Heart. Leave the cave and return to your own body and now stand there so that you look at your body while the head is on the right. Your body lies on a large stone slab. On the 4 corners of this stone slab you see an image. These images are schematic representations of the 4 natural elements: Fire, Air, Water and Earth.

So you have to place the correct heart on the correct image. You start by placing the Earth Heart at your feet. Then walk right around the plate and to the next corner place the Fire Heart. On one side of your head place the Air Heart and on the other side of your head the Water Heart.

You come back to life. Then click forward, turn right and click forward to cross the bridge.

Then click forward through the tunnel and you will return to the cave with the hunter.
Cut scene: You give the hunter the Throw Spies and show the hunter what he can do with it
Now the hunter kills the Mammoth and you return to the Crystal Skull Chamber and you are our friendly Archaeologist again.
You have a conversation with the villain and you try to tell him what the Dolphin has told you.
Villain can't remember this very well and he wants you to go into the skull again.
Open your inventory and click on the Crystal Skull. This will appear on your screen.

Then just click again with your left mouse button and you will return to the "Brain".
Look for the 3 "Air bubbles" in which you see the 12-door corridor and then click on it to get into the 12-door corridor.

12 door corridor:

Stand still. Now first list all the instructions of the Dolphin and in the correct order.
What did he say to you again?
| First go through the 1st door on the left and then through the 3rd door on the right.
Finally through the 1st door on the right and then through the 6th door on the left. Go through the 4th door on the left and then through the 3rd door on the left So if you put these in the right order then you need to go through these doors NOW in the following way: 1st door on the left, 3rd door on the right, 4th door on the left, 3rd door on the left, 1st door on the right, 6th door on the left. |
Pond
You arrive in a landscape with a pond and you are welcomed by an old woman and an old man.

Go forward to the Old Woman,

then turn left and click the old woman and choose the 2nd option from the conversation options, so the picture with the old man and old woman.

When the woman has finished, the old man calls you. Now do not click on the old man, but turn slightly to the left and then click 1x forward, turn to the right and you will see the old man again. Click the old man to get to him. The old man now tells you that the secret of the skull is waiting for you. Now you can talk to him but you have to choose the right options. Select the following conversation options successively: Click successively: Option 5 the Skull; Option 6 Yourself; Option 3 Earth.

After this, the old woman will speak to you again. Do not click the old woman, but turn slightly to the right and click forward towards the pond. Then turn to the left and you will be right in front of the old woman again. Now click on her and ask her about: Option 4 the sphere with all arrows and then Option 1 the Omega Staff.
So the treasure is at the bottom of the pond. After the old man has spoken last, turn slightly to the left and click forward towards the grass.

Then turn to the left and continue until you see the pond on the left of your screen. Then click forward along the pond.
You end up in the grass. Then turn to the left and click forward again along the pond

Turn left and now walk into the pond and ........

Cut scene: You enter the pond and dive underwater and swim to the bottom and.....

....... you pick up the Omega Staff. FLASH and …...

...... you're back in the Crystal Skull room and you're staring right down the barrel of the villian's gun.

Rogue Man takes the Crystal Skull from you. Open your inventory and click on the Omega Staff.

You will enter the "Brain Maze" again. Find the Dolphin and click on it and ask him all the questions.

Then turn to the right in this screen and you will see 2 "Air bubbles". Click on the bottom bubble and .....

...... you now end up back in the tent camp.
Chapter 6: Final
Tent camp:
Turn left or right and turn all the way. So you turn around. There is a guard in front of the tents and he is armed.
Turn to the left so that you see the back of the left tent. There is a flashlight on the left tent. Take the flashlight

Hold the flashlight, turn back to the right and then click the flashlight on the guard standing in front of the tents.
Cutscene: You knock the guard unconscious with the flashlight.
Turn around and face the now unconscious guard sprawled on the floor.

There is something on the ground just in front of his left hand. Pick this up. It's a Knife. Put the knife in the inventory Then, on the back of the corpse, click on the belt and you will get a Key. Store the key in your inventory. Then look up a little and move your cursor on the top of the pole next to the left tent. There is a leash hanging from this pole. Click on that and you take a 2nd Key. store the key in your inventories

Then turn to the left and look. Targui is handcuffed and asleep in the entrance of the tent. Click on Targui to wake him up.
Then open your inventory, take out the Knife and click it on Targui to cut through his bonds.

Then click on Targui again to talk to him again and use all options.

Now to flee safely. Turn to the left and you will see a closed Jeep.
You should NOT use this jeep, you can try clicking on it, but save your game first.
Turn further to the left, past the tree. Behind this tree is Jeep 2, an Open Jeep.

Click forward to get to this Jeep. Open your inventory and take one of the 2 keys and click it on the front seat of the jeep.

If this is the wrong key, our archaeologist will report it. Then take the other key and click it on the jeep. If she says she doesn't want to run without Targui then you haven't used all options in the conversation with Targui. Then go back to Targui and talk to him again and make sure you talk to him about the Jeep .. Then back to the open Jeep and click again with 1 of the keys on the jeep and ........
Final cut scenes: ...... you and Targui manage to escape.

Watch the, disappointingly short, ending at the Campfire.

THE END
2023: Walkthrough by: Louis Koot