
Aura: Fate of the Ages.
2020:Walkthrough by: Louis Koot
If you have found this walkthrough via google search or via another site then you have probably not visited my site.
A lot more very detailed game walkthroughs can be found on my site at: www.pcgameswalkthroughs.nl
The screenshots that are in this walkthrough are made when I played the game in 2012 and wrote the Dutch walkthrough, so the text on all screenshots is in Dutch. I do not have the game anymore so I can't make new screenshots with English text on it. I'm sorry for this but it can't be helped
Chapter 2: Dragast: Part 1:
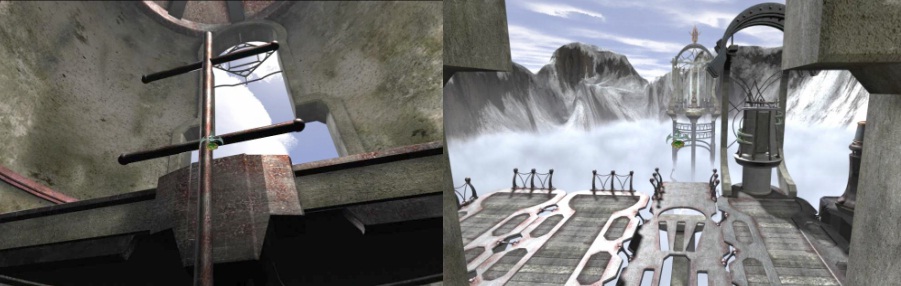
The Journey Ship has delivered you to Dragast. Dragast is the snowy mountain world and here you are between the high and snowy mountain tops. The mountains are connected by walkways and swing bridges. The Journey Ship has "docked" on a tower.
Turn around. You see a tower. Go forward 1 time, turn right and go 1 time forward again over the path, then turn slightly left and go 1 time forward again onto the next path. You are now on the right-hand side of the tower on which the Journey Ship is docked. However, you cannot move forward any further, so turn to the left and click on the brown door of the tower.

You go inside. In the tower room a man is sitting at a table jigsaw puzzle. Click on the man to talk to him.

The man says that you first have to look for Armagast in his office. Armagast is the creator of this Dragast world and he must give you full access to this world. A "Tram" will take you to the Armagast office.
After this conversation, turn back to the open door. Exit the tower again and then continue forward to the end of the path. At the end you take a look to the left and to the right. Both left and right you see a continuation of the path, but you cannot reach these paths. There is no connecting bridge. Turn around so that you look back at the tower and then look down. On the right side of the platform you will see a Control panel. Zoom in on the Control Panel.

It is the control panel for the swing bridge. The swing bridge is the front part of the "path" that now goes to the tower and you are now on the "swing platform" of the bridge. Take a look at the panel. The panel has 3 screens, a purple joystick lever, 4 purple buttons and a light under each button. A blue / gray handle protrudes from the bottom of the panel. Just click on those 4 purple buttons and see what happens. The lights under the 4 purple buttons change color when you click on the buttons.
The 4 lights start as ocher yellow but change to red, blue, green and again to ocher yellow when you click on the purple buttons. Make sure again that all 4 squares are again ocher if you have clicked enough. Then zoom out again because you do not have enough information to solve this puzzle now. Go back to the tower and enter again. Inside you click on the puzzle man again to ask him for advice.
The man now tells you to close the door. You will then be a diagram on the inside of the door where you will see symbols. These symbols tell you how to turn the bridge. For this you have to take good note of the colors of those symbols.
So turn around again to the open door and click on the door knob to close the door. Indeed you now see a diagram on the inside of the door. Your Journal book will flash for a moment to show that this diagram is now also in your journal, so you can always view it again in your Journal.

You see 3 line symbols on the door. They all have a different color. Left = Red, Middle = Blue and Right = Green. Remember this. Turn around again to the man and click on him again. The man asks you if you want to find the missing jigsaw puzzle pieces for him and bring them back to him. Turn around again to the door and click on the door knob again to open the door. Go outside and back to the Bridge Control Panel.
Turn the Bridge to the Right:
Zoom in again on the Control Panel. The intention is that you now let the bridge turn to the right so that the bridge connects to the path to the mountain on the right. The diagram on the inside of the door indicated that the Green Symbol makes the bridge go to the right. So you have to get this Green Sign on the right-hand screen.
Number the 4 purple buttons, from left to right, 1, 2, 3, 4. Then click on each of the 4 purple buttons until each light under the buttons is dark green. Then click on the Sliding Lever that protrudes from the bottom of the panel. The sliding lever then enters the panel and "locks" the 4 squares so that they do not change color again when you click on the 4 purple buttons again. So you have to do that now. Click on the 4 purple buttons again but this time in the following order: 1, 3, 2, 4. The Green Symbol will appear in the right-hand screen.

Click on the right -hand screen and ...... the bridge turns to the right and connects to the right path.
Armagast

You can now cross over to the right-hand rock. So now go forward over the bridge and then turn right and then go forward 3 more times and you will then continue automatically up the long spiral staircase, which circles up the mountain. At the top of the spiral staircase you stand on a wide mountain ledge. Go forward 1 click and then look right and left. To your right there is a round metal door in the rock. To the left is a bridge to the left that connects the mountain you are now on to the Temple Mount, but you do not have access to the Temple yet. Look again straight forward over the wide ledge and then follow the ledge further to the end.

The wide ledge going around the mountain becomes a narrower path that ends at the "Tram".

The "Tram" is a cable car seat. So sit in the "chair" and ..... the chair will take you across the street.
Once you reach the other side, look down and to the left. Go down the stairs, turn right and click on the door.

You end up in the office of Armagast
You now meet Armagast and a conversation follows. Armagast now gives you full access to Dragast and he says that you can only come back to him if you have found what you are looking for. You will automatically be outside again and you will see your Journal flashing. Take a look in your Journal. Scroll through it. 5 new drawings have been added to your journal. So now you have 11 drawings in your journal book and the 5 new ones are drawings 7, 8, 9, 10 and 11. Take a look at them and then close the book.
Turn left and go back up the stairs, turn right and go back with the cable car to the other side

Back across the street, follow the path around the mountain back to the bridge and walk across the bridge to the Temple Mount

You are now at the door of the temple. Click on the door and you go inside.
Temple:

You are in a short hall. There are 2 large statues on the left and right. Through the hall you look into a square room. In the middle of the floor of the room is a large round hole that contains some machine. At the back of the room you see a huge statue. The 10th drawing in your Journal shows you this giant statue and also shows you what the intention is.
Go forward 2 times. You stand on the edge of the pit. You see a large metal plate resting on gears.
Do not zoom in further. Turn left so that you look at the left wall. On the left wall you see a white panel.

Go forward 2 times and then turn left and zoom in on the white wall panel. On this panel you see a yellow circular drawing.
Look carefully at the drawing, you will have to imitate it on the large metal plate

The Circle puzzle part 1:
Zoom out and turn to the right so that you see that huge statue behind the pit.
To the left in front of the statue you see a Lever. Go forward 1 time and turn left. You are now in front of the lever

Click on the lever. The lever goes down and then up again, but nothing else happens.
Now go back to the front of the pit and then turn back to the pit. Now zoom in on the metal plate resting on the gears above the pit.

|
The Metal Plate is divided into 5 Circles and you also see a Yellow Drawing on it. Each Circle contains a piece of the drawing. You can click on the 5 circles to rotate them or to make the part of the yellow drawing on the circle black. By doing this you must now use these circles to copy the drawing that you saw on the white panel. First try it out yourself. If it does not work, load your SAVE so that you can start again with the original starting position of the circles. Then follow the following solution: Number the circles as follows:
Click the Circles in this order: 1, 3, 5, 3, 3, 2, 3, 1, 3 |
You see that lever, near the giant statue, then go up and down. That lever is now activated. So go back to that lever and click on it again and .... The Giant statue now turns around and a round well becomes visible in which a ladder goes down.

Turn right, 1 time forward, turn left and click in the round well and you will end up in a cave tunnel. At the back of the tunnel you see, on the right, a grating fence. Go forward 2 times and you will meet the man who is locked up in the prison cell

Prison Cell:
|
The man wants to get out, but the cell door won't open. You say you want to try if you can open the cell door. So zoom in on the cell door.
You zoom in on the complicated lock of the cell door. You see 3 bars: an Upper Bar, a Middle Bar and a Lower Bar. There are 6 buttons on each bar. The buttons in the Upper Bar and in the Lower Bar are correct. You can't do anything with it. In the middle of the Upper Bar you see a Golden Button. The middle bar has a triangle shape in the middle. The 6 buttons in the middle bar are each in a hole. 4 holes are empty. However, those 6 buttons in the Middle Bar are all in the wrong hole and you now have to get them in the right hole. Number the holes (buttons) of the Center Bar, from left to right, 1, 2, 3, 4, 5, 6, 7, 8, 9, 10. Whereupon the top hole in the triangle is hole 5 and the bottom one hole in the triangle hole is 6. Number the Golden Button as 11. From now on I am no longer talking about holes and buttons but about the numbers 1 to 10
If you click on the buttons in holes 2, 3, 4, 7, 8, 9, then they will turn golden. The button is then activated. If you click on the empty hole next to that button, the activated button will move to that empty hole. You can always push a button 1 hole. There are several possible solutions for this puzzle, but here is how I solved it:
The entire right-hand side is now free.
Now click on the Golden Button 11 and ..... the cell door will open and the prisoner will leave the cell.
You have a conversation with the prisoner. His name is Arkampus. Armagast may not know that he is here and to prevent you from reporting this to Armagast, he wants to make a deal with you. In exchange for your silence, he will give you the code for a Secret Passage. Arkampus takes you upstairs and shows you a new yellow circle drawing on the white wall panel and you see the 5 circles of the metal plate rotating. Arkampus disappears. |
So you are again in front of the white wall panel. You now have an "Unknown Amulet" in your inventory. That Arkampus must have secretly put it in your pocket. Zoom in again on the white wall panel and take in the new drawing again. Zoom out, turn left and go back to the front of the pit. Zoom in again on the iron plate:
The Circle Puzzle part 2:
Well, actually this one is very simple. You have to turn the circles again so that the panel drawing becomes visible again. It is the same solution as the first time. So number the circles exactly as you did the first time. Then click again on circles 1, 3, 5, 3, 3, 2, 3, 1, 3, and ..........

.......you see the lever at the giant statue moving up and down again. So go to that lever again and click on it again. The giant statue turns around again and closes the round well. Click on the lever again and the giant statue will now fall diagonally backwards. The head of the statue is now in the entrance above the statue.
On the roof of the Temple part 1:
Turn right and go forward 1 time, turn left, look up and click on the head of the giant statue and........

.... you climb up through the statue and you end up in a cave above the statue. You see a ladder. Look straight ahead and then go forward to the ladder. Look up and click with your forward at he top of the ladder to climb up.

Look down. You look into an illuminated tunnel. At the back of the tunnel you see another ladder.

Go forward 2 clicks through the tunnel. Left and right you will see a niche. Go forward one more time and then turn left so that you look at the left niche.

In the left niche is a mirror and a small table. Zoom in on the table. There is a thick book on the table. Click on the thick book.
The book folds away and 2 Jigsaw puzzle pieces appear. Take the two Jigsaw Puzzle Pieces.

Zoom out and turn around to the other niche, which contains 2 mirrors. Go forward and then take the left mirror. The mirror ends up in your inventory.

Turn to the left and go forward to the ladder at the back of the tunnel. Look up and click the forward arrow on the top of the ladder.

You end up on the Roof of the Temple and look into the blue sky. Look straight ahead and stand still.
On the right-hand side of the roof is a "tulip-shaped" device and on the left in front is a Round Pillar.

The round pillar has 5 round stones that are above each other and on each of those 5 round stones you see a symbol. You can now see the front of that pillar, but also on the sides and on the back are those symbols on the stones. This is your next puzzle, but you don't have enough information to solve it now. It is best to first give those two Jigsaw puzzle pieces to the puzzle man in the tower.
Back to Puzzle man:
So turn around, look down and click with your forward arrow in the round ladder opening to end up in the illuminated tunnel again.

Go back 4 times forward through the tunnel, then look down and click on the top of the ladder and you will return to the cave.

Look up a little and then click twice in the dark hole in the wall and you will be in the temple room again.
Go through the hall to the front door and outside.

Cross the bridge again and then turn right and go forward until the spiral staircase.
Look down and click on the spiral staircase and you will descend e now off again.

At the bottom of the spiral staircase, go forward 1 time and then turn left onto the swing bridge.
Go over the swing bridge and you are back on the platform that is the pivot point of the swing bridge.

Turn around to the Bridge Control Panel and zoom in again:
Turn the bridge back to the center:
So you have to go back into the tower and for that you have to turn the bridge back to the middle. According to the diagram on the inside of the tower door, Blue is the color for the middle. Click on the 4 purple buttons until all 4 squares are blue. Then click on the large blue handle again to "lock" the squares and then click on the 4 purple buttons again in the order: 3, 4, 1, 2

The blue symbol appears in the middle screen. Click on the middle screen and the bridge turns back to the middle. So go over the bridge and to the door of the tower. Click on the tower door and you will enter it again. Take the two Jigsaw puzzle pieces from your inventory and give them to Mr Puzzle Man.

Your Journal Book will flicker again.
Puzzle man is grateful to you and says that it "will help you". So look in your Journal. The last drawing in your journal now shows you the Jigsaw puzzle that the puzzle man is still busy with. You see 5 symbols on this drawing. It is the symbols that you must set on that round pillar that stands on the roof of the Temple.

Close your journal, turn around and go outside again and to the Bridge control panel. Zoom in again on the Bridge Control Panel and simply click on the right-hand screen to turn the bridge to the right again. When that happens you go over the swing bridge and up the mountain via the spiral staircase. Go over the bridge to the Temple and enter the temple again. Climb up again via the giant statue and then up the illuminated tunnel via the ladder in the cave and up to the roof via the ladder in the back of the tunnel.
On the roof of the Temple part 2:
All right, puzzle time ..... Take a look at the drawing of the Jigsaw puzzle in your journal. You see 5 symbols on it. The order in which you now have to set these 5 symbols on the pillar is from top to bottom. But you have to set these 5 symbols on the BACK of the round pillar. So not on the front side. Unfortunately you cannot see the back of the pillar. Thank goodness you have a mirror with you. Go forward to that "tulip-shaped" case that is on the right rear of the roof. Then turn to the left so that you can see the round pillar again. You look behind the pillar and you see, on the floor, an iron clip standing between the two curved bars.

Now take the Mirror from your inventory and click it between the two curved bars so that the mirror clicks into the clip and stands upright.

Then zoom in again on the Round Pillar. You are then zoomed in on the top two turning stones of the pillar and in the mirror you can see the BACK of these two stones. By clicking on the Symbol on the tiles you turn the tiles one turn. So you have to make sure that you get the correct symbol on the BACK of each stone and you see this in the mirror. For me was as in the next screenshots and I assume that you have never clicked on the stones of the pillar before

Click 3 times on the top brick. Click twice on the second brick. It then looks like this

You now see the 2 good symbols Zoom out in the mirror. You are then zoomed in on the bottom three stones.

In the mirror you can see that the symbols on tiles 3 and 4 are already good. So don't click on tiles 3 and 4. However, click 4 times on tile 5 and .........
The "Tulip" opens and the two clamps at the bottom of the "Tulip" come loose and you see the lever at the giant statue go up and down again.
You are automatically zoomed out of the pillar. Turn around again and click in the round ladder hole again. Follow the route back to the Temple room and go back to the Lever. Click on the lever again. The giant statue stands up again. Click on the lever again. The giant statue now rises and a lattice door becomes visible underneath the statue. Turn to the right, 1 time forward, turn to the left and zoom in on the lattice door below the statue. Click on the lattice door.

The lattice door drops down and you end up at a ladder. Look up and click the forward arrow at the top of the ladder.
You climb up and look at the blue sky again.
Look straight ahead and go outside 1 time ahead. You stand on a "balcony" and straight ahead you see a "gazebo" sticking out of the fog. You cannot reach that "gazebo" because the bridge is not there. The bridge is hanging deep below you. So you have to let the bridge rise. On the right you see a round pillar with a rotary wheel on top. Zoom in on that round pillar.

The Tetrahedron of Dragast.
Raise the Bridge:

An inner tube starts rotating in the pillar and you see a column with 4 circles below each other. There are red ARROWS in each of the circles, but they are rather strange arrows. On top is a rotary wheel on the pillar. If you click on the left-hand side or on the right-hand side of the rotary wheel, you will see another column with 4 circles in which you also see 4 red arrows. In total there are 4 of these circle columns in the pillar. You can rotate each circle in each of the 4 columns by clicking on it, but you cannot rotate the top circle of the 1st column. To raise the bridge you must ensure that, in each of the 4 circle columns, each subsequent circle is the MIRROR IMAGE of the previous circle.
However, the upper circle of the next column must be the same as the lower circle of the previous column. I really can't explain this better. You just have to do it. Make sure you have the 1st circle column back on screen. That is the column in which you CAN'T TURN THE UPPER CIRCLE. Then set all circles in all 4 columns as you can see in the image below. If you have set the 4 circles of a column correctly, click on the left-hand side on the rotary wheel to go to the next column.
In the end it should look like this in the 4 columns:

If you have done this well, you will see the bridge sections rise.
NB: There is an annoying bug here in this puzzle. This bug MAY cause one or two circles in a previous column to end up standing wrong while you have been moved to the next column. So it may happen that you have finished setting all the circles and think that they are all correct but that you will not see the bridge parts coming up. If this happens then scroll back through all 4 columns through the right-hand side of the rotary wheel and CHECK all circles to check they are still as shown in the image above. Chances are that 1 or 2 circles are wrong. Then put it correctly and you will see the bridge rise.
Go over the bridge to the gazebo. A Prism floats in a basket in the gazebo

That Prism is the "Tetrahedron of Dragast". Click on the Prism and the thing will disappear into your inventory.
Turn around and go back over the bridge and go inside again and descend into the well via the ladder.

Click in the "tunnel" and you'll end up under the giant statue. Go through the hall to the front door of the temple and outside.

Go back over the bridge and then left and follow the ledge and then the narrow path to the cable car again. Sit back in the chair and you glide across again. Turn left, look down and go down the stairs, turn right and go through the door and you are back at Armagast:
2012: Original Dutch Walkthrough by: Louis Koot
January 2020: English translation by: Louis Koot


