
2023: Walkthrough by: Louis Koot
If you have found this walkthrough via google search or via another site then you have probably not visited my site.
A lot more very detailed game walkthroughs can be found on my site at: www.pcgameswalkthroughs.nl
Chapter 5: True Confessions:
Nightmare and then Bates comes knocking on Samuel's door. The nurse at the sanitarium called. Strange things happen there and Samuel travels to the:
Ashbury Sanatorium:
Samuel is standing in front of the gate of the sanitarium again. So click on the doorbell again and the nurse will open. Samue end up in the hall again.
The nurse tells that Robert is dead. His body was found at the old door and James was there too. James is locked in his cell again, here in the sanatorium. Use the "Visit James" topic. The nurse takes Samuel to James' cell. Nurse is frightened and runs off to fetch a doctor. Samuel looks through the door window into James' cell and........James has hanged himself in his cell.
Enter James' cell.

Click on the hanging corpses ofJames. Then right click on James. Samuel grabs Robert's bunch of keys from the dangling corpse. Samuel's name is written in blood on the wall. Click on Samuel's bloody name. On the wall, above the table, that hole has now been plastered shut again. Click on the hole. Then take your black tower knife from your inventory and click it on the hole again. Samuel scratches the hole open again, but the blade breaks off. Click on the hole to talk to Ralph.

Ask Ralph about James.... Ralph says that James is not the killer, but that James knew who it is. Ralph doesn't know the name.
Dr. Smith then walks into the cell and throws Samuel out.

Samuel now automatically goes to the:
Old Lighthouse:
Move your cursor to the left in the large hole in the narrow facade. On the dark left side of the big hole you get your red arrow. Click on this Hole in masonry. However, the corner is too dark and Samuel sees nothing. So take your burning lighter from your inventory and click it again in the dark corner.

You enter the close-up of the wall and you see another red Symbol on it. Click on the symbol.
Take Williams Diary from your inventory and click it on the symbol again.

Samuel redraws the symbol in the diary. You can check this again by right-clicking on the diary and then scrolling to the last page.
Close the close-ups and right-click on the map in your inventory. You will now automatically travel to:
The House of Dr. Hermann:
Ring the doorbell. Hey ....... Hermann does not answer. Samuel rings the doorbell again, but Hermann doesn't seem to be home. Click your exit cursor in the door. The door is ajar and Samuel enters. Continue to the cellar. On the dissecting table is a package under a Sheet. There is a bucket in front of the cutting table. Trembling with fear, you click on the Sheet and .......

Hermann's decapitated body lies under the sheet. Samuel almost gets a heart attack and kicks over the bucket. Cheerful Hermann's head rolls out of the bucket. Do you understand why Samuel is going to throw up? Click on Hermann's body. Who, what and why are the 3 questions that come to mind by Samuel. Close close up. Look at the right sink. You will see another red symbol on it. Click on the Symbol and you will enter the close-up. Click on the symbol. Take out William's diary again and click it on the Symbol again to draw this Symbol in the diary as well.

Cutscene: We see an altar rising.
Close close up. Click again on Herman's corpse on the dissecting table. In the close-up, click on Hermann's clenched Hand.

There is something in the hand, but you cannot open the hand because of the rigidity that has already set in. Close close up. For fun, click on Hermann's Head that is rolling on the floor.Close close up. Hermann's desk is against the back wall, behind the dissecting table. On the left part of the desk with the drawers stand a lamp. Click on the Lamp. Samuel walks over and turns on the lamp. The desk corner is now illuminated. Click on the top drawer of the desk.

You enter the close-up of the desk and the top drawer is open. In the drawer, on the right, is a book. Click on this book. The book slides back revealing a few Plastic bags that were under the book. Click on the Plastic bags and they will disappear to your inventory. On the right side of the desktop lies a Medical Forceps. Click on the medical forceps and it will also disappear into your pockets. Close close up.

Click on Hermann's corpse again. In the close-up, take the forceps from your inventory and click on Hermann's clenched Hand. You break open the fist. Hermann has a few Hairs in hand. Click on the Hairs. This must be the killer's hair. Take the Plastic Bags from your inventory and click on the Hairs.

Samuel puts the hairs in the bag. Now to get a hair from James so that Samuel can compare the two hairs. Close close up.
The doorbell rings and Samuel quickly goes upstairs and bumps into Inspector Collier at the top of the hall.

Samuel reports that Hermann is dead and decapitated. According to Collier, James is the killer. James is gek, so an obvious candidate.
The news that James has committed suicide only strengthens Collier's opinion. Samuel automatically travels back to the:
Sanatorium:
Ring the doorbell again and you will end up in the hall again. Samuel talks to the nurse. Talk to her about "The Body of James". James' body has been taken to the Old Chapel in the cemetery. Go outside, walk to the left and go to the back of the building. The Stoker is outside shoveling coal. Click on the stoker but he won't talk to Samuel. Go, via the bottom left, to the graveyard:
Chapel
get the key to the chapel:
The building on the left is the Chapel. Click on the Chapel door. Of course the door is locked.

Go back to the stoker and talk to him again. Now he wants to talk to Samuel. Talk to him about the "Restorage" (chapel). Stoker has the key but he damned it to open the chapel. Samuel has to get hold of that key. Use the "Bribe" topic. Well, Stoker wants to be bribed, but he is too afraid of the nurse and .no, he doesn't dare. Go back to the front of the building and click with your exit cursor on the sewer pit that is in the middle at the bottom of the screen . Samuel ends up in James' Cell through the sewer.

Go into the hallway through the open cell door and then click at the back of the hallway. You will reach the table where Smith should always be on guard.

Go, via the exit at the bottom left, to the:
Boiler cellar:
Go to the Front area. On the right are the two lockers.
Click on the left locker to open it. There's a pair of rubber boots in the locker
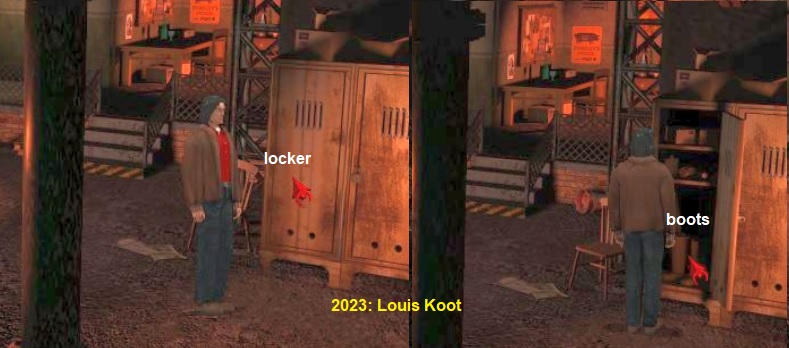
Even though Samuel says he doesn't want them, take the rubber boots Samuel puts them in his inventory.
At the bottom left of your screen is still that heap of coal and in front of it is a fence. A rag hangs over this fence. Take the rag

Look at the burning boiler. Above the door of the boiler is a Valve. Click that valve to open up the top hatch of the boiler
Take the rag from your inventory and click it on the door of the boiler.

But the boiler is to hot, so you have to wet the rag first. Put the rag back in your inventory via a right click and go back to the back via the stairs and then back into the cell corridor through the door. Go down the hallway to James' Cell and re-enter the cell. To the left of the door, under the light switch, is a faucet. Take your rag from your inventory again and click on the faucet

Samuel is now soaking the rag. So back to the boiler cellar and to the boiler. Take the now soaking wet rag from your inventory and click it again on the boiler door, and nowSamuel opens the door. Take the Rubber Boots from your inventory and click them into the boiler to throw them into the boiler

Go back to James' Cell and click with your exit cursor on the bed and Samuel will go back out through the sewer. So he emerges again through the sewer pit at the front. Go to the back of the building. Oily smoke is now pouring out of the basement. The cellar door is half open and the Keys of the stoker are in the door. Click on the Keyring and you have the Chapel Key.

Go back, via the bottom left, to the graveyard
Chapel:
Take the key of the chapel from your inventory and click it on the door of the chapel. Samuel enters by himself.

James's body is on the wagon. Click on "James". Samuel needs something sharp to cut some hairs off James' head. As you know your knife is broken. There is a table on the right. In front of the table are some Shards on the floor. Click on the Shards. Samuel picks up a sharp piece of glass. Take the Shard from your inventory and click it on James again.

Samuel cuts off some hair and puts it in a plastic bag. You will now automatically return to the:
Hermann's mortuary cellar:
On the desk, behind the dissecting table, is also a Microscope. Click on the microscope. Samuel walks over and fiddles with it and then says the microscope is ready to use. Take the Hairs of the Murderer from your inventory and click it on the microscope. Then take the Hair of James from your inventory and click this on the microscope.

Samuel examines the two hairs in the microscope and comes to the conclusion that the hairs do not come from one and the same person. S
o James is not the killer. But Morris, the slathand, also has black hair, doesn't he? Travel via the map to:
the Castle:
A hair from Morris:
Go straight out the front door and go to the stable. Enter the stable. Morris isn't here.
A letter sticks in the vise of the work table. Click on the letter. The letter is from Morris and is read aloud.

Can you still find the light switch? The switch is located to the left of the front horse box. Click on the switch.
The light in the second, open, box turns on. Under the rope hangs a cap. It's Morris' cap. Take the Cap.

The cap disappears to your inventory. Dive into your inventory and right click on the cap. There is a hair in the cap. A hair from Morris. Pick up the Plastic Bags and click them on the cap to put the hair in a bag. Travel back to Hermann's House. Go inside and back to the cellar. Take the Hair of Morris from your inventory and click it on the microscope. So Morris can't be the killer either. Travel back to the:
Castle:
Go to the kitchen and talk to Bates about "Robert" again. Bates still knows nothing and Samuel tells him that Robert is dead. Bates fears Victoria will not survive this news. Samuel insists not to break the news of Robert's death to Victoria just yet. Bates has his doubts about this. Give Bates a "Positive" answer when your masks appear. Bates then agrees not to break the news of Robert's death to Victoria just yet. Go through the dining room, the great hall and the gallery to Robert's study:
Robert's study:
Robert's door is obviously locked. Fortunately, you stole Robert's key from James' corpse.
So take Robert's Keys from your inventory and click it on Robert's door and you enter

There are several click spots, but you don't have to click on everything.

There are 3 bookcases on the right wall. Above each bookcase is a year, in Roman numerals. There is a lamp next to each bookcase. In the left corner, so left of the door, hangs a portrait painting. Below this drawing is a small chest of drawers, in my game this cabinet is called a "Little Table". Against the left wall stand a couch. To the right of the door hangs a Diploma on the wall and in the right corner is a large grandfather's clock. At the bottom of your screen is Robert's desk and on it is a pile of books and an open book. Click on the portrait painting . In the close-up, see that this guy has one of the Sacred Keys hanging around his neck. Samuel doesn't know who this is.

Close close up. Click on the small chest of drawers. You come into a close-up again. On it stand a Cacao Can, a Rac" with test tubes, a bottle of pills and an anatomy book. You can click on any of these items. The two drawers are locked. Click on the Cocoa Can. The can opens. Click in the open can. Samuel takes a little key from the can.

Take this little key from your inventory and click with it on both drawers to unlock both drawers. Click on the lower drawer to open it. There is a photo in the drawer. Click on the potho. It is a photoof Sophia, Robert's wife who left Robert a long time ago. Close the drawer. Click on the top drawer to also open it up". There is a paper in this drawer. Take that paper. It is a Collateral paper and it disappears in your inventory. Close close up.

In your inventory, right-click on this Collateral Paper. In the close-up you can see that there is nothing written on this paper at all. You do see a kind of code in the bottom border. Close close up. You can click on the Diploma, the couch and also on the books that are on the desk. DO NOT click on the Clock YET. Click on each of the three lamps, hanging next to each of the bookcases. These lamps emit a greenish light. Take that Collateral paper from your inventory and click it on one of these 3 lamps. It doesn't matter which bulb. You will be in a close-up again and the greenish light of the lamp see a number appear on the paper. Write down this Number: 63081.

Close close up. Click on one of the bookcases. As a result, you can no longer click on the bookcases afterwards. Above the middle bookcase is a year in Roman numerals, it is MCXX, so the year is 1120. Click on this. Samuel tells you that the year 1120 is exactly 1 year earlier than the year in which the first foundations of the castle were laid.
The Clock Puzzle
Now click on the Clock. You have to click on the clock face at the top of the clock. You come into the close-up. The clock strikes once but the hands are at 12 o'clock. That's strange. Above the large dial you see a Needle. You can click on the hands or on the little red circle to which the hands are attached. You can then turn the hands. Turn the big hand counterclockwise down to the 4 and then click. You have then set the clock to 11:20.

Then click on the Needle. The clock strikes again and the needle turns all the way around and........
...... the middle bookcase slides into the wall and Robert's secret Wall Safe appears there.
The Wall safe puzzle
Click on the safe. You come into the close-up.

So you see the safe door and it has a large, gold, knob. Under the knob you see 5 boxes.You have to set the correct code in the 5 boxes. That code is the number you saw on the Collateral paper when you held that paper up to the light. The code is therefore: 6.3.0.8.1. Number those 5 boxes, from left to right, as A, B, C, D, E.

Click in Box A. A number appears in box A, but it is not the 6.
Click on the large button knob and keep clicking it until you have the 6 in box A.

Click in Box B. A number appears in box B. If it's not the 3 then click on the button again until you have the 3 in box B.
Click in Box C and set the number 0 in it with the rotary knob button.
Click in Box D and set the number 8 to it.
Click in Box 5 and make sure that the number 1 is in it.
You automatically exit the close-up and the safe is now open.
Click on the safe again and you will enter the close-up of the now open safe.

In the top compartment lies a Diary and are some Test Tubes. Click the Diary. It is Robert's diary and Samuel takes it.

The diary is read aloud by Robert. Listen and shiver. Learn about Robert's experiments on his patients and learn about his plans for James.
In the bottom box you will find a ring, a piece of parchment, bullets, and vials. Take the ring. Samuel stows the ring in his pockets. Now you can click on the letter that the ring was on. It is a letter from William to Samuel. Samuel never received this letter because Robert intercepted the letter. William tells in this letter about the Ring you just picked up. Close up close-up of the letter. Click on the Parchment. This is William's Will and Testament.

This will was also "nicked" by Robert. In the will, Samuel inherits the castle and Robert is disinherited.
Close all close-ups and exit Robert's study. In the hallway, click on Victoria's door. Victoria opens.

Talk with Victoria about the painting and the other topic. Victoria is displeased that you snooped into Robert's study just like that. Your masks appear. Do we now give Victoria a "Positive" or a "Negative" answer? Remember, Victoria doesn't know Robert is dead yet and Samuel doesn't want to tell her yet. So now give Victoria a POSITIVE answer. Samuel then talks his way out of this plight without telling Victoria that Robert is dead.
Victoria then tells that the guy in that painting is Lothar Gordon. Lothar lived 200 years ago and is in fact the founder of the Ashburry Sanatorium. Continue asking about Lothar Gordon until you run out of this topic. Lothar has gone insane himself and when he died he was completely "crazy". His body is buried in the graveyard of the sanatorium in an unknown grave. Then ask Victoria about "Ashburry". Before it became a sanatorium it was a cholera hospital. Victoria now retreats to her room.
Open your inventory and right click on your map and travel back to the:
Ashbury Sanatorium:
Looking for Lothar Gordon:
Ring the doorbell again. The gate opens again and Samuel goes through. You do not enter the hall now, but you are outside at the front. Go, via the Exit on the left, to the back of the sanatorium and then, via the exit at the bottom left, to the graveyard On the first graveyard screen, click on all the graves you get the red arrow cursor on and Samuel will tell you who's grave it is .

Samuel won't finf the grave he's looking for at the chapel, so goo, via the bottom right, to the "Rear part of the cemetery".
On the back part, to the left of the left building, you will find a Grave behind "dried Shrubs".

Click on that grave. It's an Unnamed Tomb. Right-clickt on this grave. The Gordon family crest is on it. This is the tomb that Samuel is looking for. Click on the dried Shrubs and do this several times. Samuel will say that the bushes are full of thorns and he cannot remove them with his bare hands. Go back to the Chapel and enter the chapel . To the left of the entrance stand a box on the floor. Click on this box

Samuel takes out a Garden shears, but the garden shears are broken. Look at the garden shears in your inventory to see that the screw that holds the two blades together is gone. Go outside and return to the back of the sanitarium. Click again on the small window, to the left of the door of the boiler room. You will return to the close-up of this barred window. On the left in the close-up you can just see a piece of the rain pipe that is next to this window on the facade. The drainpipe is attached to the wall with a bracket and in this bracket there is a screw. Click on the screw and it will disappear to your inventory.

So dive into your inventory and then click this Screw on the Garden Shears. The garden shears are whole again. Close the close-up and return to the Tomb at the back of the graveyard. Take the repaired Garden Shears from your inventory and click on the Dried Shrub. Samuel cuts the bushes. Click on the Grave again but unfortunately, the lid is too heavy and Samuel cannot open the tomb.

Go back to the back of the sanitarium. Remember that shed? Right on the corner. Under that roof you now get a Dark Corner.
Right click the dark corner and Samuel grabs a metal rod from under the roof.

So go back to that grave in the back part of the cemetery. Take the metal rod from your inventory and click it on the grave again.
Samuel opens the grave but ....... Lothar is not in it .... Is Lothar taking a walk? So where is the 4th Sacred Key?

Close the close-up and go to the front of the sanitarium and enter. So you will return to the Hall. Talk to the nurse about the "Tomb of an Ancestor". The nurse tells you that Lothar lay here in that grave for many years, but that some years ago his remains were transferred to the church in Warmhill. So travel via your map to the:
Warmhill Vicarage:
Enter the church through the side door. Inside you click the Exit "To the Altar".

You come to the altar and Father Frederick is standing in front of it. Talk to Father Frederick about the "Tomb of an Ancestor".

Father Frederick will look this up in the Church Chronicles but says this could take a while.
So some time must pass and you must come back at least once to ask Father Frederick if he has found the answer yet. Leave the church and walk to the front of the church. Then, via the exit on the left next to the church, go to the cemetery and then on to the "Tomb of William". You are then at the large Gordon Family Crypt. Do nothing but immediately go back to the church via 2 times below on the right. Enter the church again through the side door and continue to the altar. Now click on Father Frederick again and ask him again about the "Grave of an ancestor", however, he does not have an answer for you yet. So go out of the church again and now go to "William's Tomb" in the back of the cemetery and immediately return to the church. Enter the church again and to the altar and click on Father Frederick again. Ask him again about the : grave of an ancestor". Father Frederick now has the answer for you.

The remains of Lothar Gordon lie in the Gordon Family Crypt in the graveyard behind the church.
The 4th Sacred Key
So return to the graveyard, left behind the church, and then to the "Tomb of William" screen. The door of the Gordon family crypt is now open. The gravedigger is apparently inside the crypt. To the left of the door is his "toolbox". Click in the doorway. Samuel shouts if anyone is inside and the gravedigger appears. He asks what Samuel is doing here. Give the digger a "Positive" answer. Samuel says he wants to go in, but the gravedigger won't let Samuel go in. You now get the "Urn" topic. Use this.

Samuel suggests that the gravedigger go and get Lothar's Urn from the crypt. The gravedigger agrees and he goes back inside. There's nothing you can do right now but wait. After a few moments, the gravedigger returns and hands the Urn over to Samuel. Right-click the urn in your inventory you take the "4th Sacred Key" from the urn.
The 5th Sacred Key:
Now click on the Toolbox, Samuel takes a flashlight from the toolbox.

To the right of the large crypt, in the corner between the two smaller crypts, is the "Tomb of William", ckick there. but Samuel says the ground is still to soft. Return to the church. Do you remember where the gravedigger was digging a grave? Right next to the church. So continue to the right. Walk a little further to the right and you will see the large pile of earth on the far right of the screen. Click on the pile of erath, but it is too dark.

So take the flashlight from your inventory and then click with it again on the grave with the cross.
Samuel illuminates the cross. However, there is nothing on it. Then click with the flashlight on the pile of earth

Samuel finds a shovel so take it

Go back to the "Tomb of William". Take the shovel from your inventory and click it on the "Grave of William".

However, Samuel does not want to dig because he is afraid that the gravedigger can see this. Look at the open door of the large crypt. At the bottom left of the door is a peg. Behind the open door you see a fence. There is a steel cable going from the door to that fence. Take the peg under the door. Click on the steel cable and...... The door slams shut and Samuel now automatically blocks the door with the peg. The gravedigger is now locked in the crypt. Take the shovel from your inventory again and click it on the "Grave of William" again and....... ........Cutscene: Samuel digs and digs and digs and eventually exposes William. In the close up you can see the "5th Sacred Key" hanging around William's neck.

Take the key you now have all 5 Sacred Keys. Close the close-up and return to the church.
Who is The murderer:
Back at the front of the church, the rest of this chapter is self-explanatory. The carriage of the castle is now in front of the church. Is Victoria in the Church?. Samuel enters the church and he sees Bates dive into the confessional. Father Frederick arrives to hear Bates' confession. However, Samuel deviously prevents this and he dives into the confessional himself. Bates "Confess" his secret. ...Bates tells who has killed Henry, Vick, Hermann, Robert and James
...........the killer is.........Samuel himself!!! Samuel gets a vision and we end up in:
Chapter 6: Look through the Mirror:
2023: Walkthrough by: Louis Koot