2019: Walkthrough by: Louis Koot
If you have found this walkthrough via google search or via another site then you have probably not visited my site.
A lot more very detailed game walkthroughs can be found on my site at: www.pcgameswalkthroughs.nl
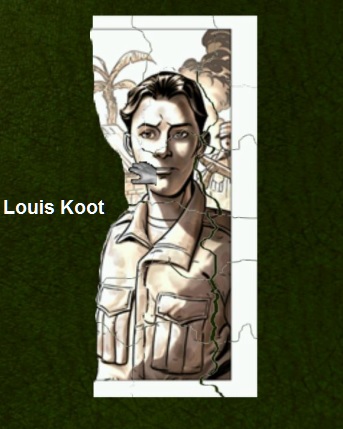
This Director's Cut edition of Broken Sword 1 The Shadow of the Templars is a bit different then the original game. The Director's Cut edition begins with a new chapter feathering Nicole Collard and further more there are a few new puzzles to be solved and the interface is a bit different. The game starts with a Intro with Nicole (Nico) Collard,
Intro
Paris, city of love, romance and dreams. But for Nicole no more, since the day of the murder.

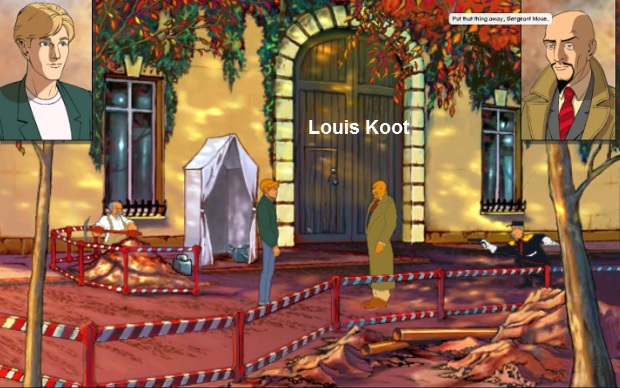
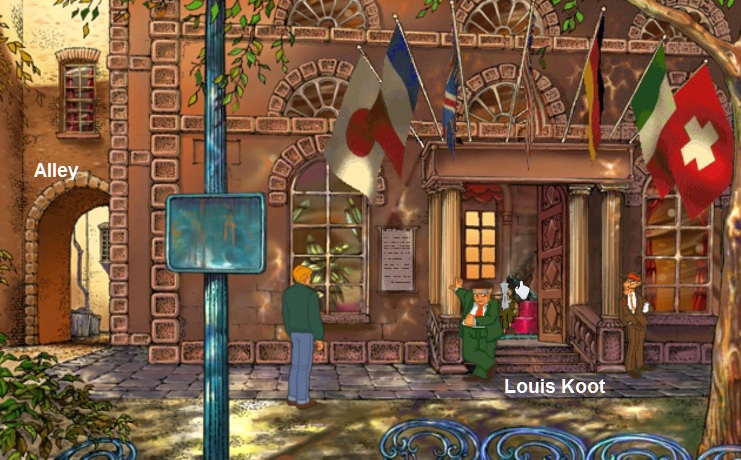
Nicole Collard, a newspaper journalist, gets a call from her boss telling her that she should go straight to the Palais Royale, to do an interview with Pierre Carchon, media king and perhaps the future president of France. Carchon has specifically asked for Nicole to do the interview. Nicole walks to the palace where Carchon and his wife live. At the entrance Nicole has an encounter with a street artist, a mime player.
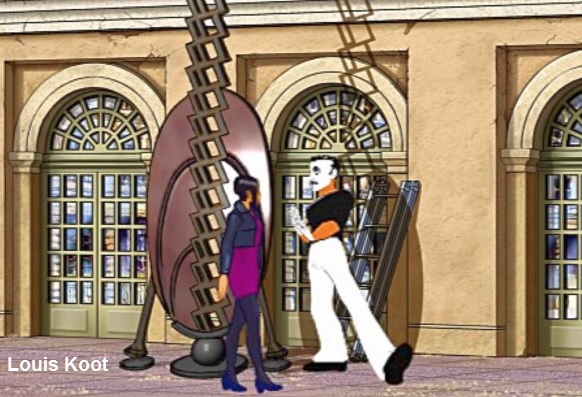
From experience Nicole knows that you if you want to pass a mime player you better play along with his game.
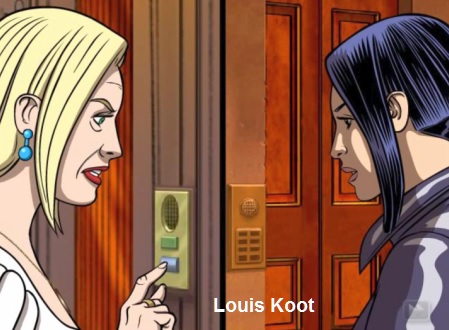
Nicole calls and is brought to Carchon's wife Imelda, also known as the ice queen.
Pierre Carchon joins them and tells that he was a friend of Nicole's father.
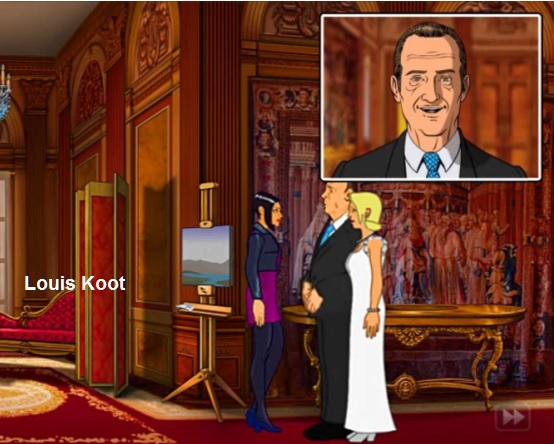
But before they can start the interview, they hear a sound in Carchon's office. The mime artist has penetrated through the window and intentionally has dropped a vase. Carchon thinks it's the cat and he goes to have a look. Then Nicole and the "ice queen" hear a shot. Nicole rushes into the office and is promptly knocked down by the mime player.
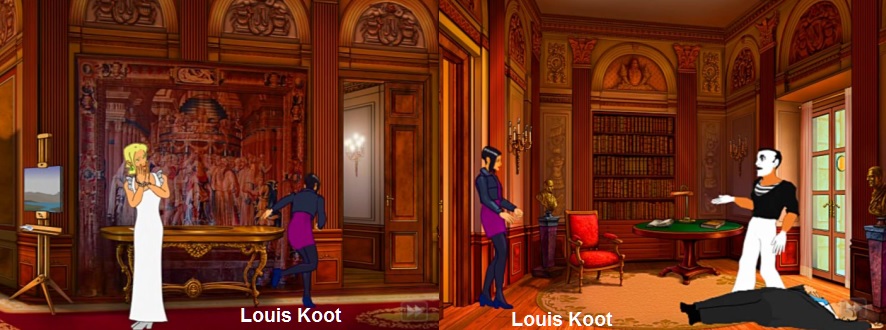
When Nico comes around Imelda tells her that her husband Pierre Carchon is dead....he's been murdered by the mime
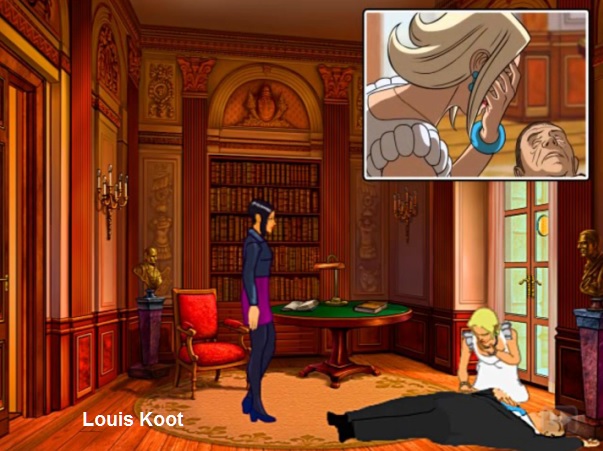
This is not the first murder of an influential person lately. The murderer reminds Nicole of an earlier "costume" murder. Nicole decides to do research before the police arrive.
You now get control over Nicole
Chapter 1: Paris, France: Nicole Collard:
A: Palais Royal
Carchon's office
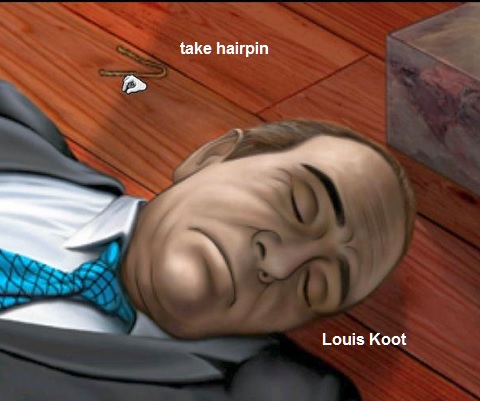
On the jacket of the corpse you see a small blue circle flashing. Move your cursor to it and it will change into a magnifying glass on that spot.
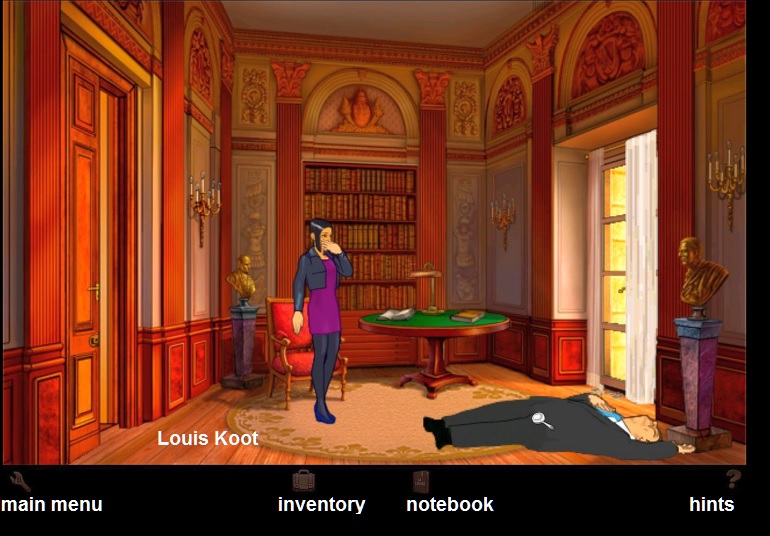
Click to view the corpse in close-up view.
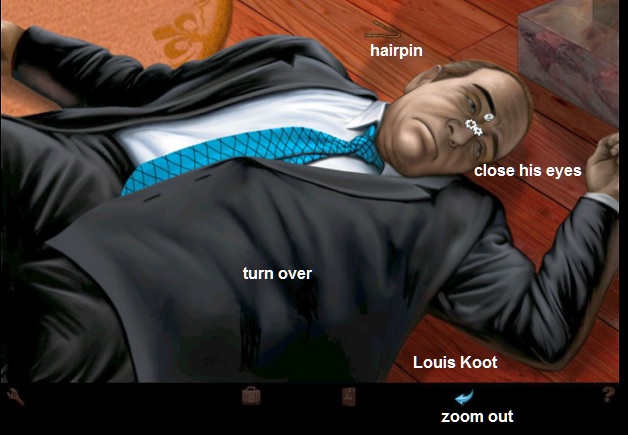
Close the eyes of the dead Carchon. Left of the corpse's head lies a hairpin. Pick up that hairpin, it is from Nicole.
Click on the jacket of Carchon to turn it open and you see a blood stain and a yellow ticket
Look at the blood stain with your eye. Take that yellow ticket from the inside of the jacket.......
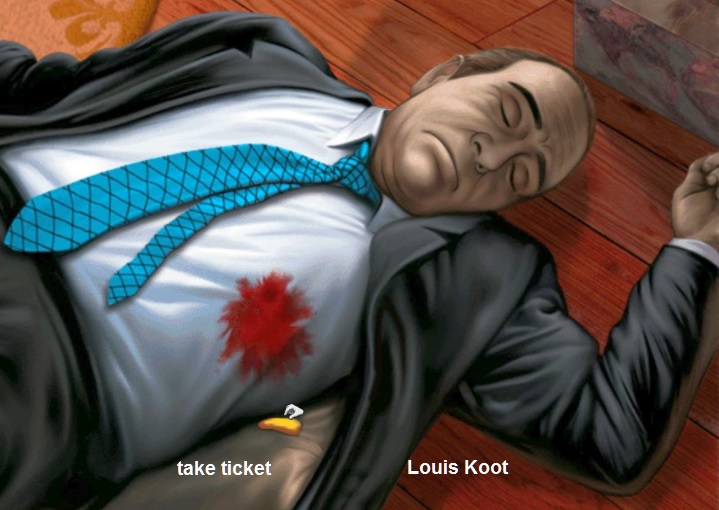
Nicole tells you it's a ticket of the Bateau de la Conciergerie.
Leave the close-up by clicking the green arrow. Look around the room. You can view the bookcase and the two busts.
Look at the curtain and then slide it aside and then look at the hole in the window.
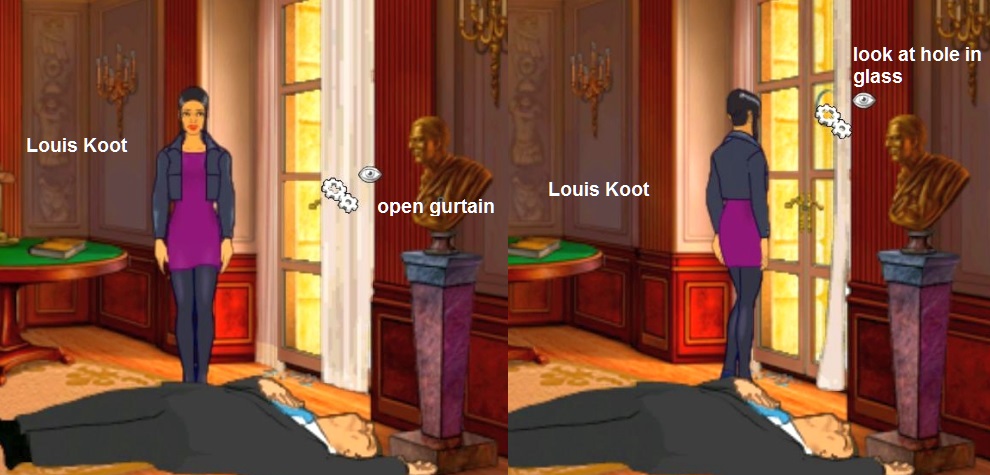
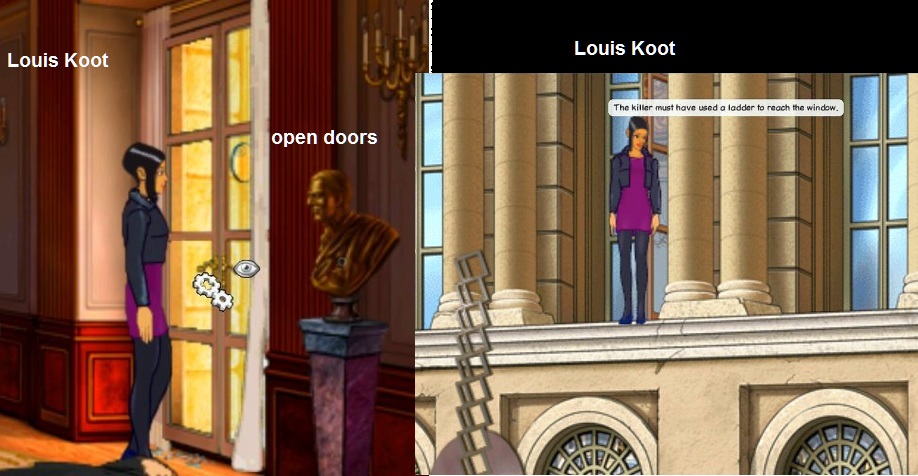
Then open the balcony door and....Nicole steps outside and you see here standing on the outside ledge.....The mime must have climbed up a ladder.
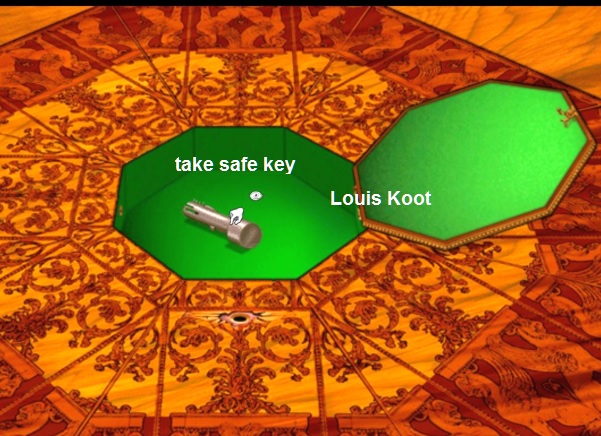
Nicole goes back inside. Leave Carchon's office back to the hall. You can look at the tapestry, hanging on the wall next to the door. There's an embroidered cloth on the table and next of the table stand a painters easel. On the easel lies a tube of paint. Click with your magnifying glass cursor on the embroidered cloth that's on the table.
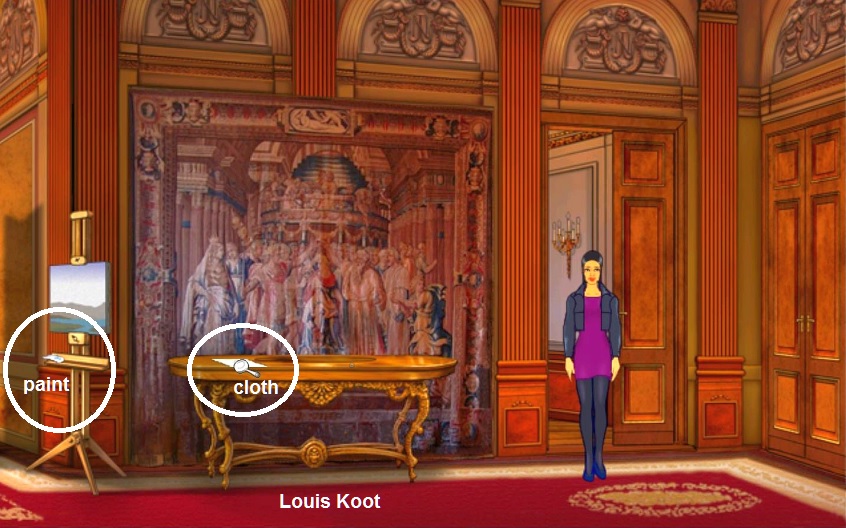
The embroidered cloth has a big cross. Take the Cloth
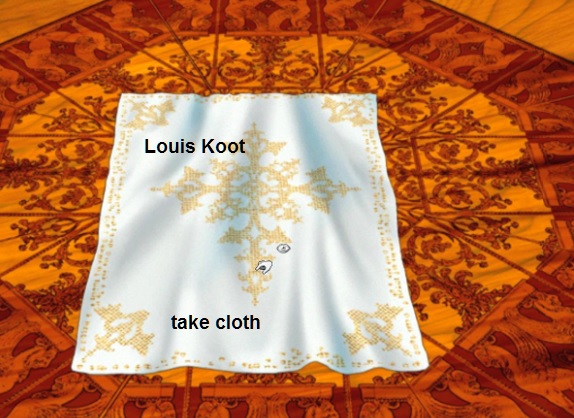
When you have taken the cloth you'll see a little hole in the table
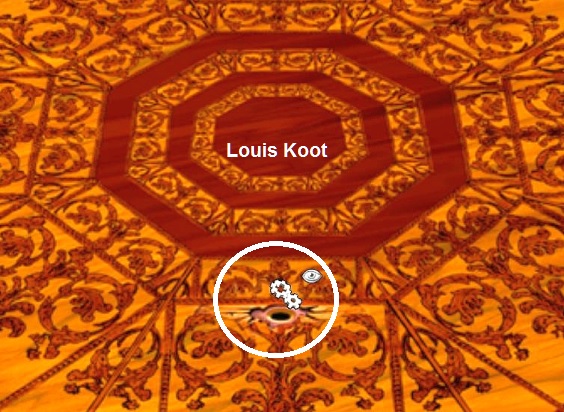
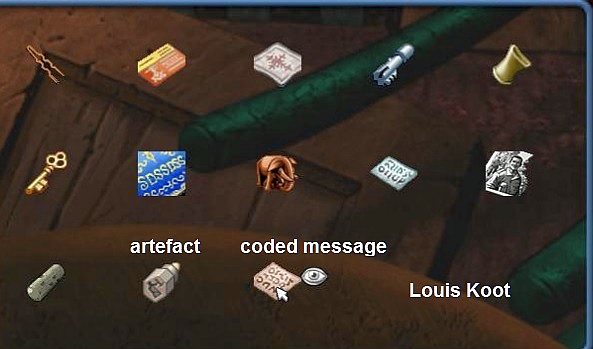
Click on your inventory bag to open it .......An inventory screen with the items you have in your inventory opens up.
Click on the hairpin and then drag it out of the inventory to the hole in the table and then let go and.......
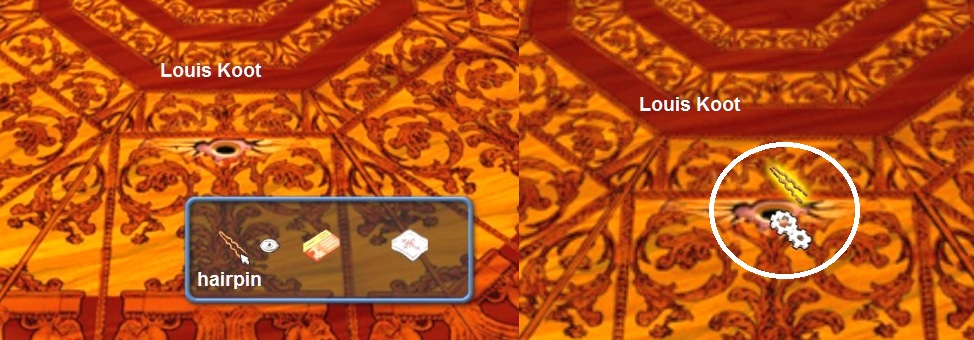
Nico sticks the hairpin into the hole and.......a secret compartment will open up in the table and in this compartment you'll find the Safe Key.......Take the Safe key
Leave this close-up. Take the tube of blue paint, that is on the ledge, underneath the painting, on the easel
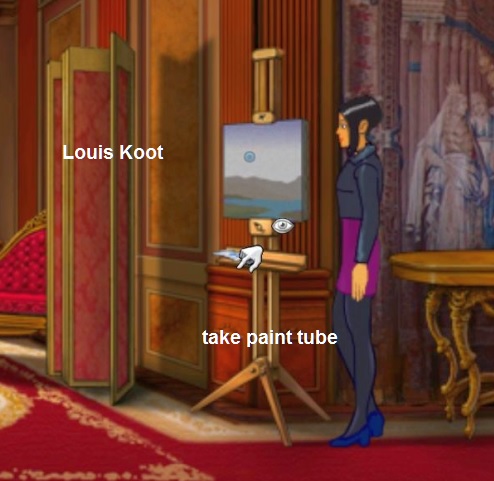
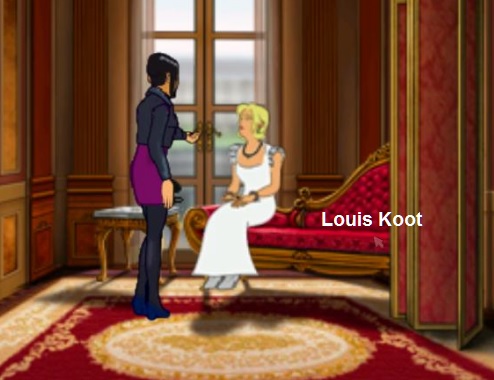
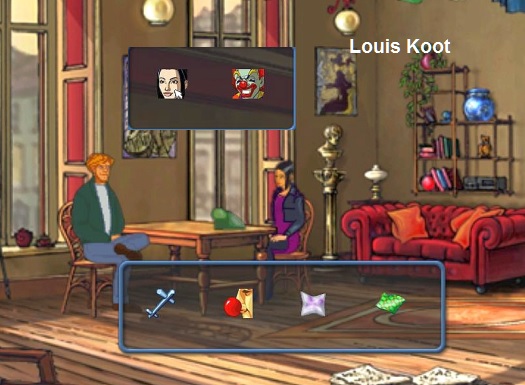
Nicole is then caught by Imelda, but she may keep the tube of paint. Now go to Imelda and talk to her by clicking on her with your talk cursor.
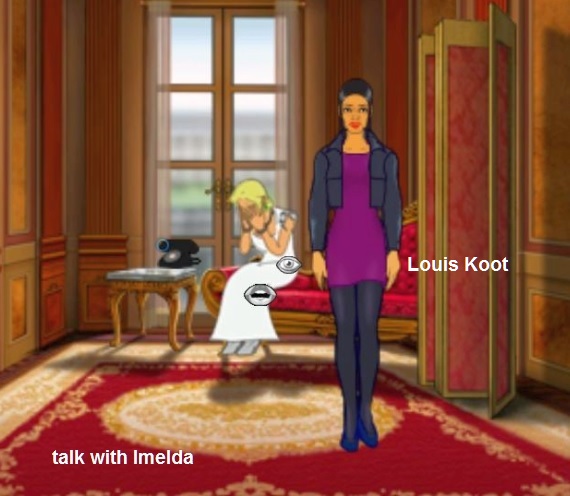
The conversation topics appear as icons at the top of your screen. Click those conversation icons to talk about them and make sure you use them until there's nothing more to be said about a topic. You can also ask Imelda about the items in your inventory by clicking on those items
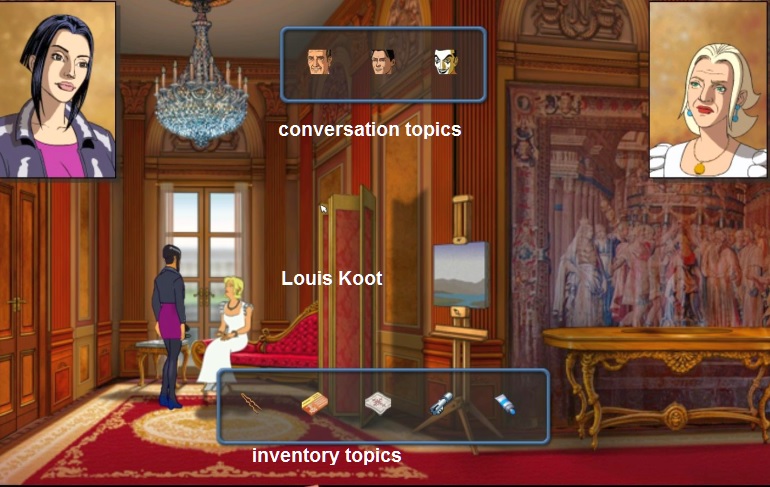
Imelda does not know why her husband asked Nicole to come. Carchon knew Nicole's father, but Imelda didn't. Imelda suspects that the mime was a jealous husband. Her husband had a lot of affairs with other married women. Imelda thinks that Nicole will immediately write a nice article.
You will now see two "Nicole icons" at the top of your screen, one with a golden crown and one with two red horns on the head.
The golden crown Nico means " you can trust me" but the red horns Nico means "you can't trust me".......
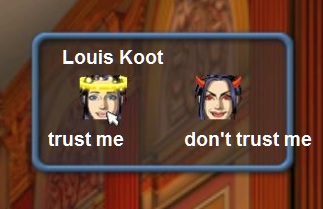
As an answer to Imelda's remark about Nico, click on the golden crown Nico.
Nicole continues to be nice in her answers and Imelda will trust her. Nicole thinks that Carchon is threatened and that's why he wanted that Nicole came, because Nicole had already written an article about the costumed murderer. Nicole gets Imelda to let her do the investigation into the death of Carchon and Imelda gives her the key to Carchon's salon at the end of the hall.
Carchon's salon
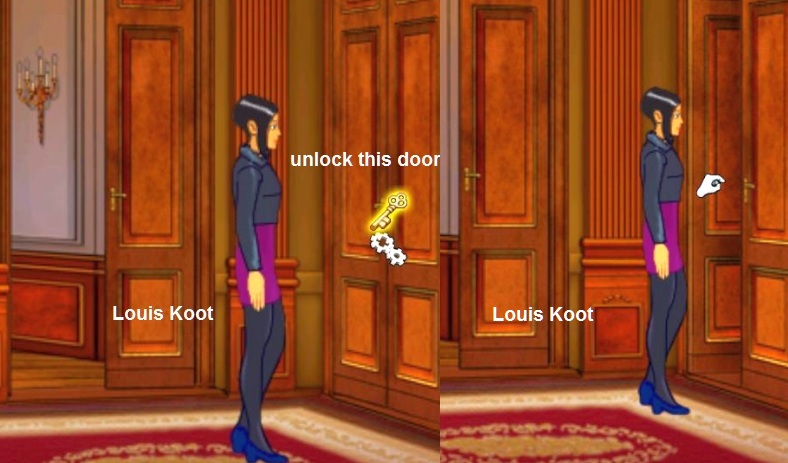
Walk all the way to the right, to the door at the end of the corridor. The door is locked, so open the door with the key Nico got from Imelda and then go inside.
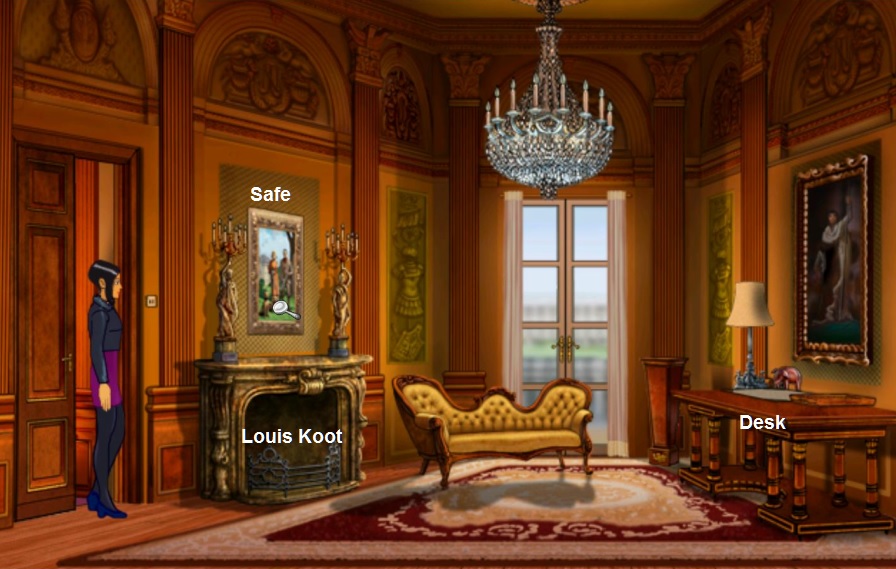
A painting hangs on the wall above the fireplace. At the right wall stands a desk.
First go to the desk and look at it in close-up
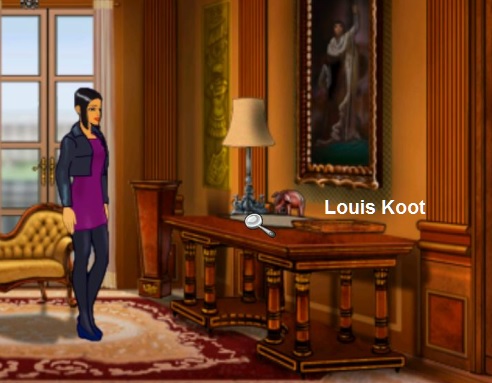
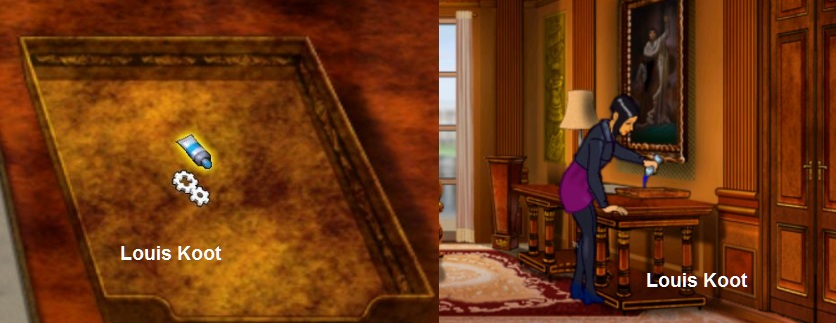
On the desk you find a paper tray and a writing pad. There's also a wooden Elephant standing on the desk. Look at the paper tray, the writing pad and the wooden elephant.
Nico recognizes the wooden elephant........ It is made by her father and she has the same copy. So Carchon did indeed know her father. Take the wooden Elephant.

Nico can't do anything with the in-tray and the writing pad now, so go out the close-up. Now go to the fire place and click with your cursor on the painting that hangs above the fireplace. On the left part of the painting is a button. Push that button and.......Nico hears a click sound and you leave the close-up. Click again on the painting and....
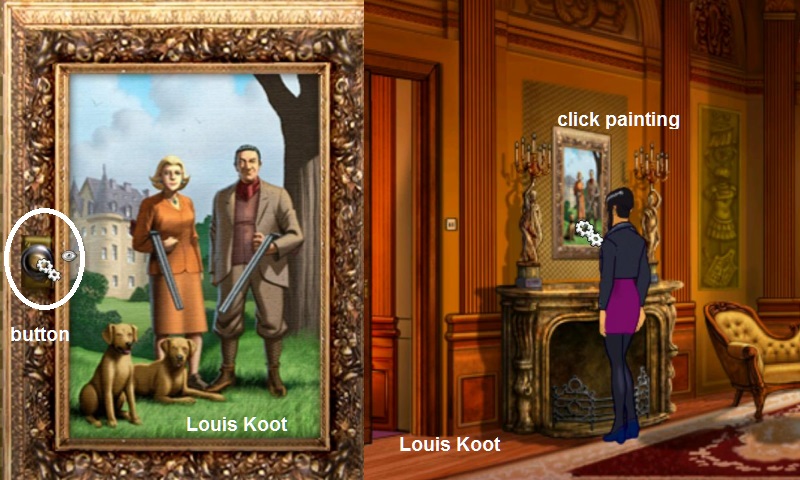
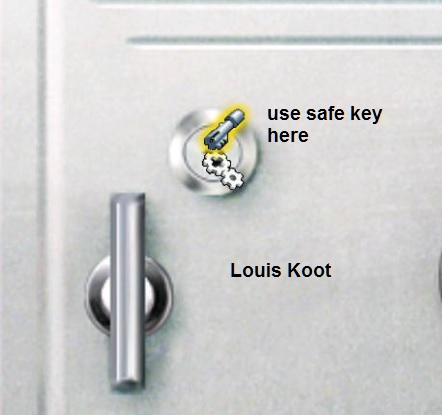
Nico opens the painting as a door and behind it she find a Safe. Zoom in on the safe and use the Safe Key in the keyhole to open up the safe
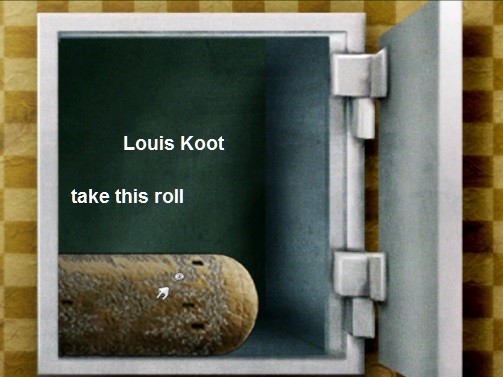
In the safe is a stone roll with strange symbols....take the stone roll
|
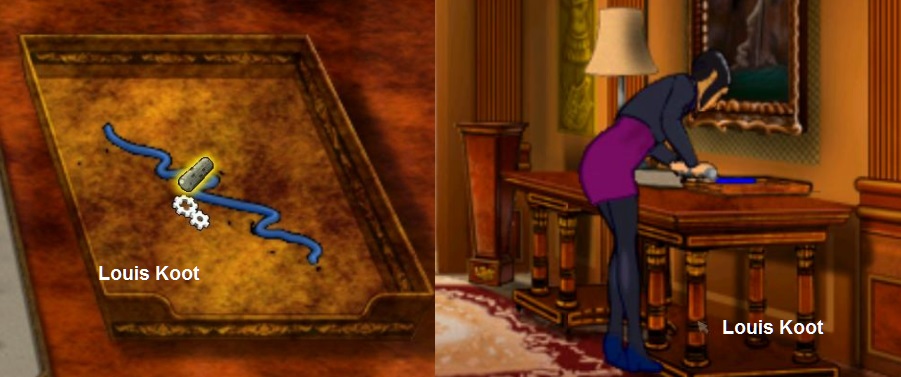
Make a print of the stone roll symbols: Nicole wants to find a way to print out the symbols on the stone roll. Go back to the right side of the room and zoom in on the desk again. There are two methods to make a print of the symbols on the stone roll. Method 1:
Method 2:
I use method 1, so use the tube of paint on the paper tray
Then use the stone roll on the paint in the paper tray
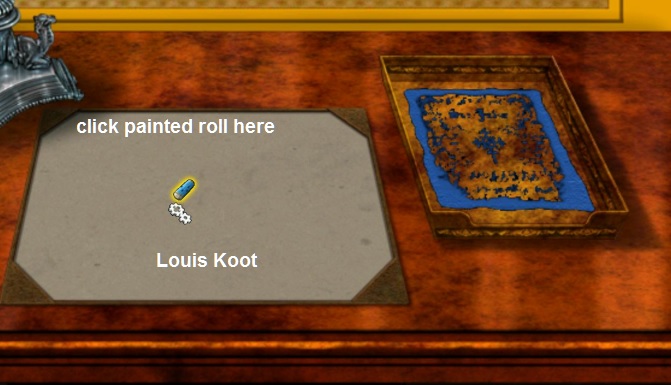
Then use the painted stone roll on the writing pad and......
.....then take the print of the coded message from the writing pad
|
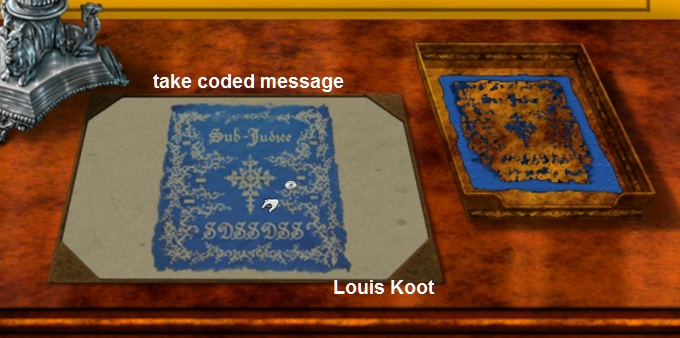
In inventory look at (right click on) this Coded Message.

At the top "Sub-Judice" is written, a legal term that means "under the right". At the bottom are a number of letters: "SDSSDSS". Nicole has no idea what those letters mean, but she suddenly realizes that the ticket, that she found in the inner pocket of the murdered Carchon, is important. The ticket is from Bateau de la Conciergerie, on the Île de la Cité, an that used to be the court. So "under the right" could literally mean under that old Court building!
Leave the room to the hall and go back to Imelda. Talk to Imelda again to say goodbye
Nicole shows Imelda the little elephant, but Imelda has nothing sensible to say about it. Nico then leaves the house and ends up on the Ile de La Cité
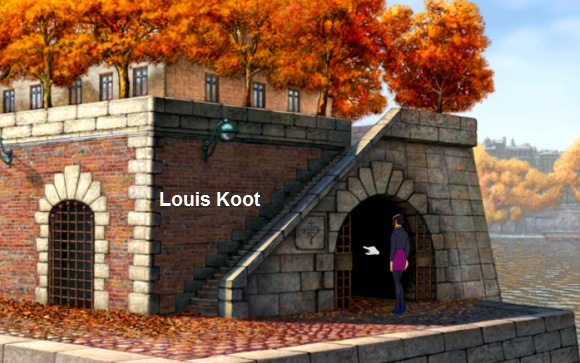
B: Quayside
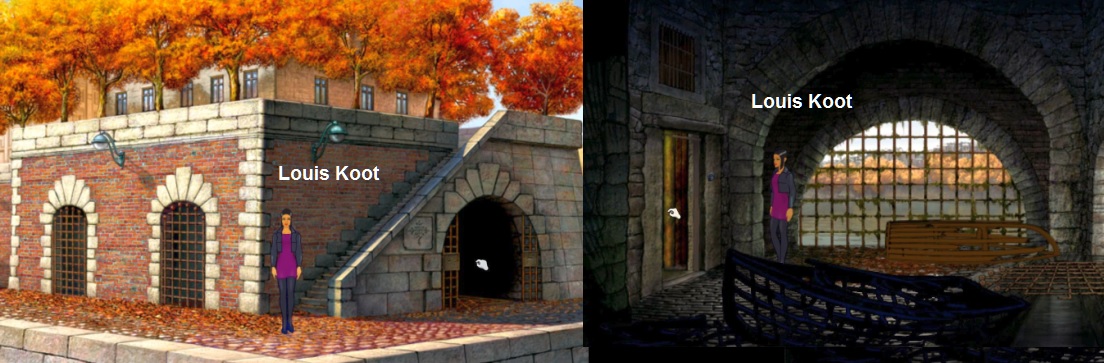
An hour later Nico arrives at the Île de la Cité, an island in the middle of the Seine in Paris. Nico is standing on the quay near the river, beneath the Conciergerie building. You see two large arched passageways with a fence in front of it. You can not open them. Walk further to the right around the corner. Here you see a large passage with a fence.
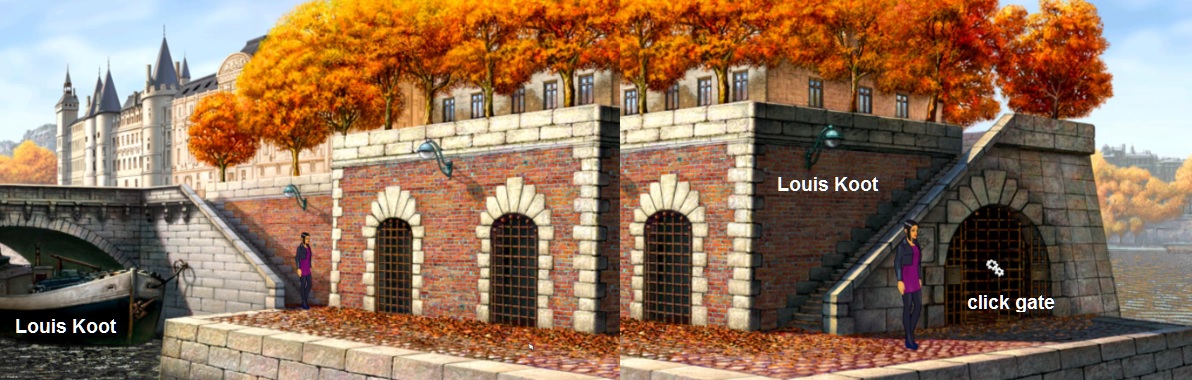
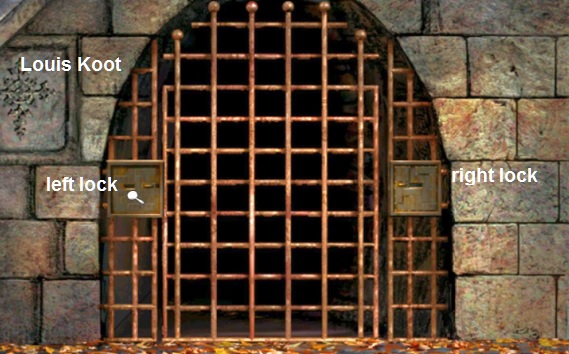
Look at the plaque, hanging on the wall to the left of the gate. Nicole says that the same cross is depicted here as is on the embroidered Cloth. She's on the right track! Try to open the fence. That does not work. Nicole looks at the fence up close and sees that there are two special locks on it.
The Sliding Lock Puzzle:
Click on the left lock to see that one up close. It is a sliding puzzle
The intention is that you move the blocks in the puzzle so that the block with the handle can be slid out through the slot to the left.
Left click/hold on a block and then you can slide it down or up or to the left or to the right.
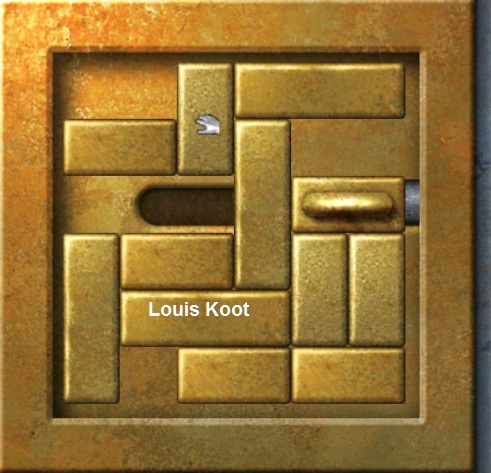
I could give you a hole series of screenshots to show you a step by step solution but I'm not going to do that.......This is a simple sliding puzzle so you can figure it out for yourself....eventually you will get it right and if not then you must ask yourself why you're playing computer games if you can not solve this kind of simple sliding puzzles by yourself

The gate is then unlocked on this left side and you're back in the close-up of the whole fence.....Now click on the right-hand lock to solve this one too.
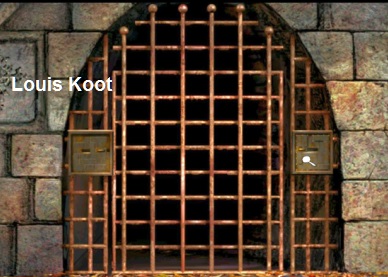
On the right-hand lock you have to make room so that you can eventually push the block with the handle all the way to the right.
This sliding puzzle is a bit more difficult but you'll get it right eventually
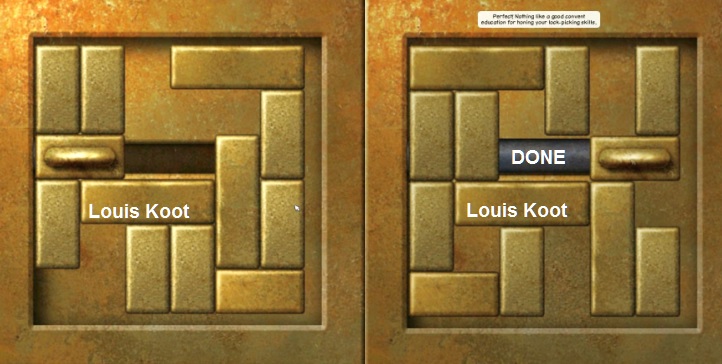
When you're done the fence will fall out and Nicole will be able to go inside, so walk inside
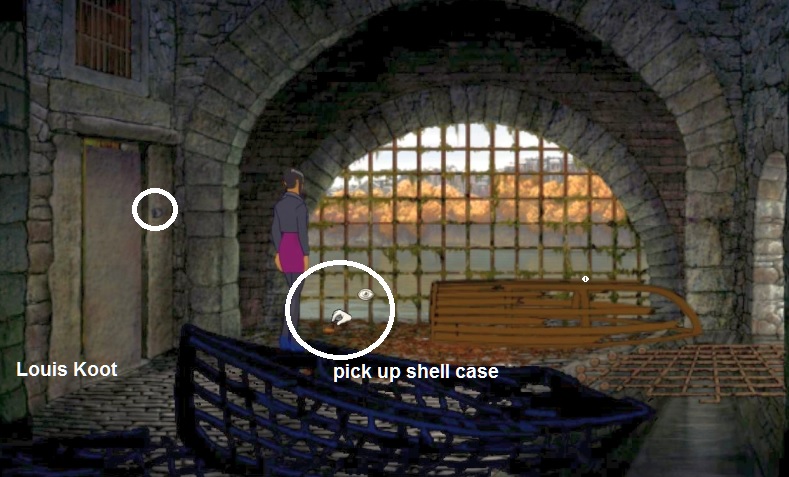
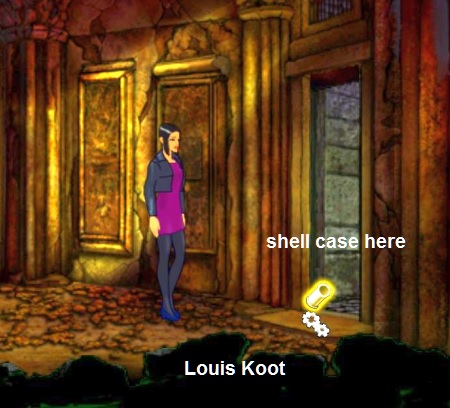
Inside Nicole sees that the fence has fallen over a canal like a bridge. On the other side a broken rowboat stand against a fence. Push that rowboat over.
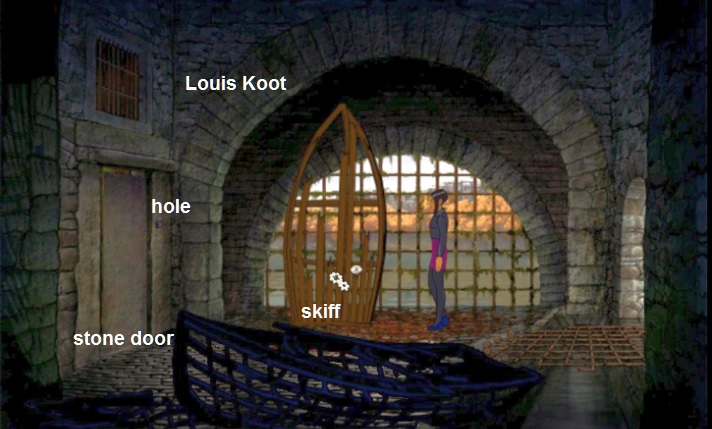
Underneath the rowboat you will find an old copper Shell Case on the floor...pick it up because Nico will need it
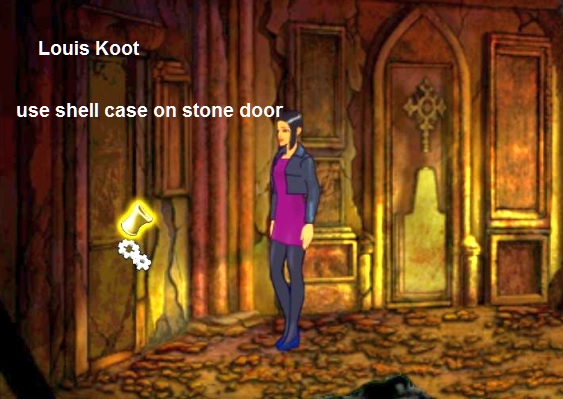
The stone door on the left is closed. There is no latch on the door, but on the right side of the door you can see a little hole. Look at that little hole in close-up. Around the hole are dashes and there are two words: sinister and dexter. That is Latin for left and right. Above the hole you see two buttons. Leave the close-up....... Remember the print of the stone roll, which had a code on it: SDSSDSS. Take the stone Roll from your inventory and place it in the hole.
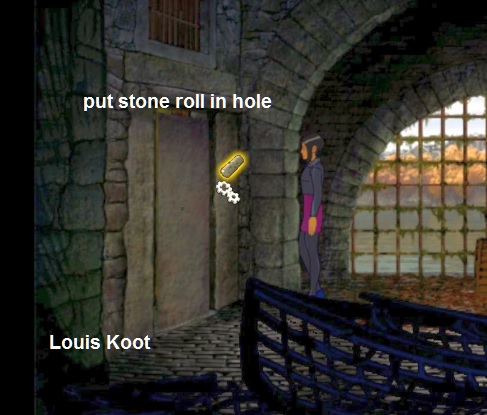
It fits exactly and you go into the close-up again
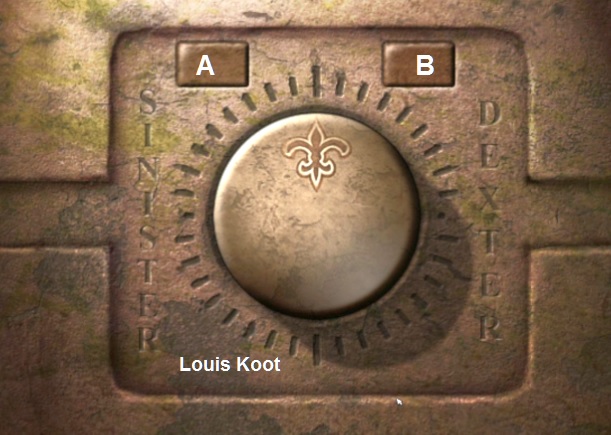
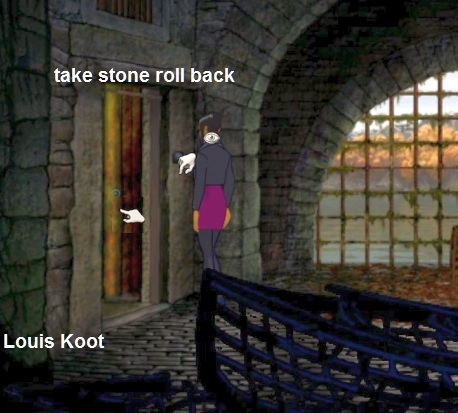
Now press the buttons A and B in the order indicated on the stone roll, SDSSDSS... S for left (A) and D for right (B). So click in this order on the two buttons: A, B, A, A, B, A. A and........ The door opens and Nicole can continue to the next room. But first take the stone roll back from the hole and then walk through the now open doorway into the next room.
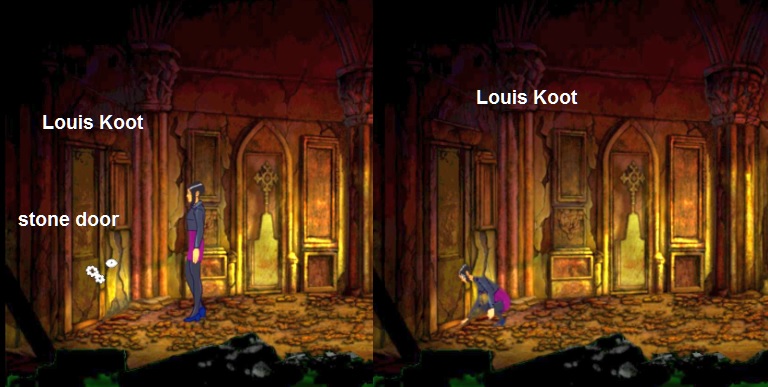
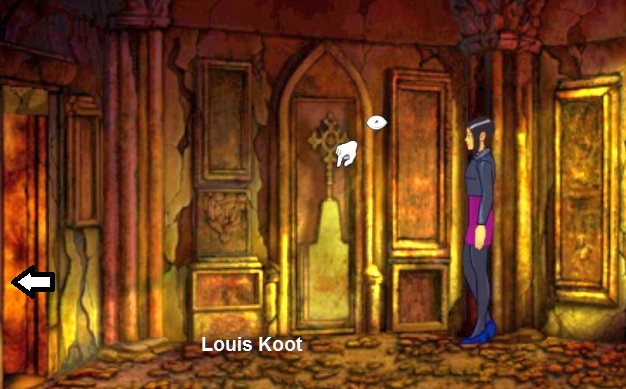
Cross Room:
When you are over the threshold, turn around and see the text engraved on the stone threshold in the doorway: "Ut lex vel ut nex summito". This is Latin and it means something like "Submitting to the law or death". Walk to the carved stone cross in the wall. Look at the cross (right click) and then left click the cross.
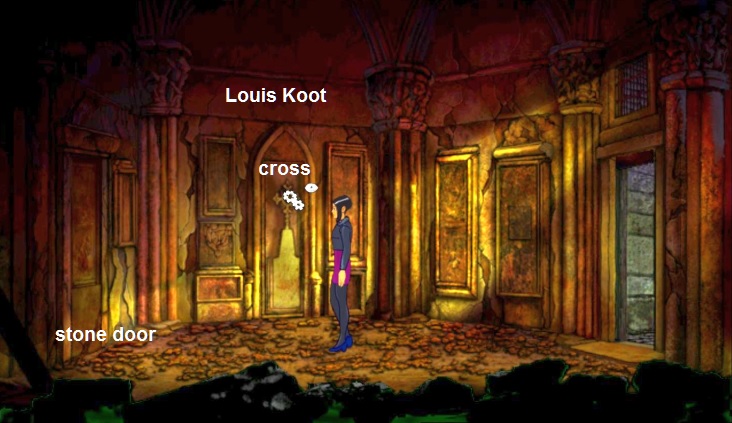
Nico lift the cross but she keeps holding on to it.....The entrance door closes and a stone panel slides open next to the entrance door.
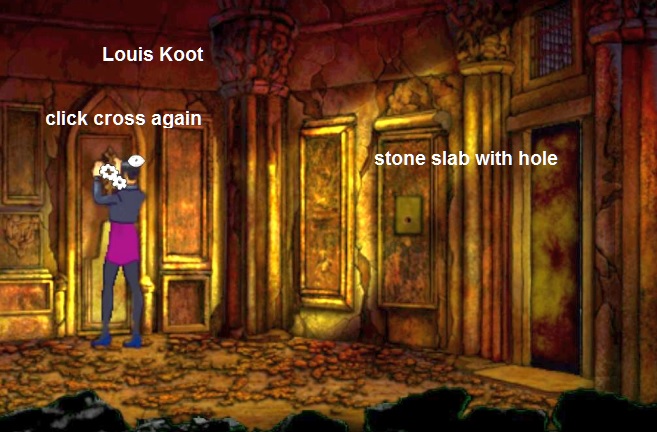
The cross does not stay up, when Nicole releases it, the door opens again and the panel closes. Left click again on the cross to let go of the cross. The entrance door goes open again and that stone panel is gone. Go to the entrance door. Take the Shell Case out inventory and place it on the threshold of the doorway........
Now use the Cross again to close the door..........
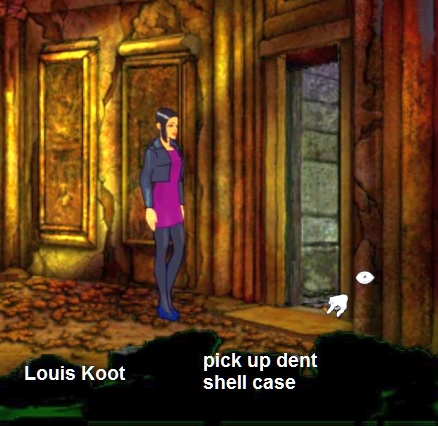
The door will bent the Shell Case. Let go of the Cross to open up the door again and go pick up the now bent Shell Case
Grab hold of the Cross again and when Nico has taken hold of the Cross again then use the bent Shell Case on the Cross
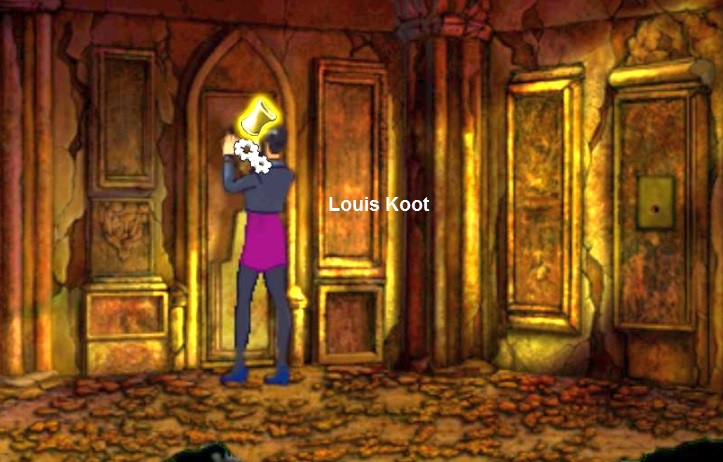
Nico puts the shell case under the cross so that the cross will stay up. Let go of the cross.
Because of the shell case the Cross will stay up now so the stone panel will be there. Go to the panel that is now open.
There is little hole in the stone panel and the wall. Put your stone Roll in that hole and.......

Nicole hears how a mechanism comes into play and a moment later it crashes.
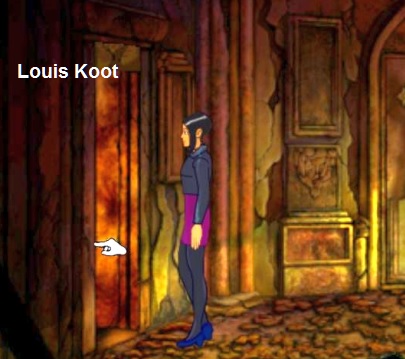
On the left side of the room another stone door has come up a little bit. Go to that door and look at the crack at the bottom.
But the crack is to narrow for Nico's fingers. She needs something thinner to pry the door open. Take the Shell Case back from the Cross

Use the flattened Shell Case on the crack at the bottom of the left door.
Nico manages to open the door and she can walk on into the next room
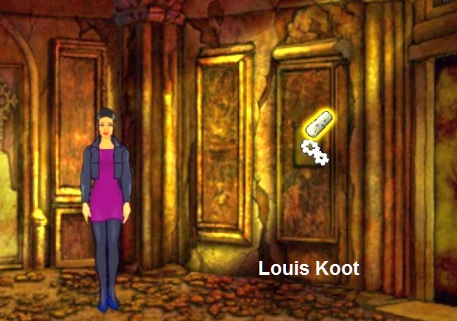
Nicole enters a dark room and she walks all the way in. Go back to the right, to the door. To the left of the illuminated doorway stand a generator.....
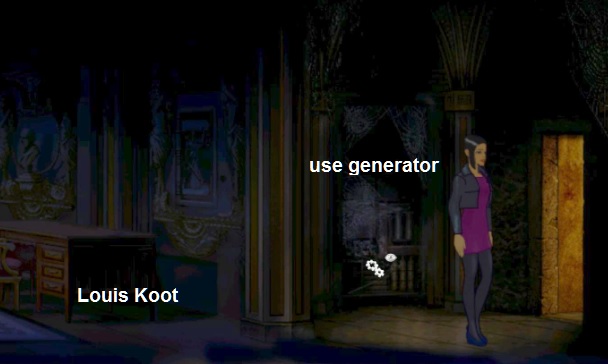
Use that generator and...we have light. Go back to the left into the room
There is a desk around the corner. It is dusty and has not been used for years. A painting hangs on the wall to the right of the desk. Look at that painting. Nicole says that it's a door of a safe and that she needs to find something that fits in the lock. Walk to the left of the room. Here too you see a desk, but that is not so dusty. Go in close-up of this desk
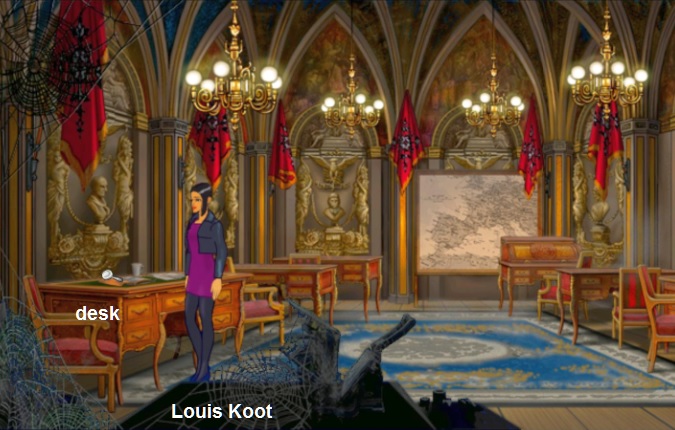
To her surprise Nico finds a file about herself on the desk and also the newspaper articles she wrote about the costumed murderer, who had murdered businessmen in Italy and in Japan. The businessmen were known as benefactors and Nicole had proved that they were the opposite.
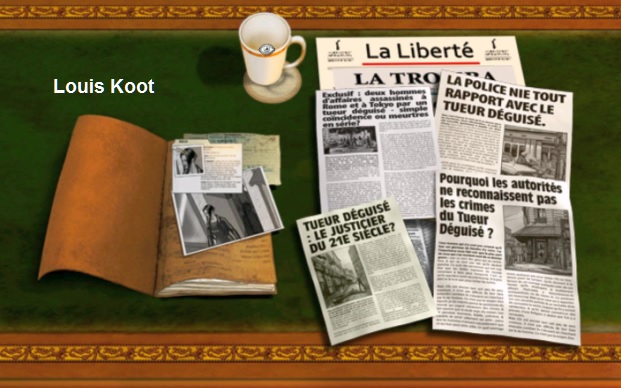
Click with the eye cursor on the photos, the articles and also the coffee cup. You must do this to be able to leave this close-up.
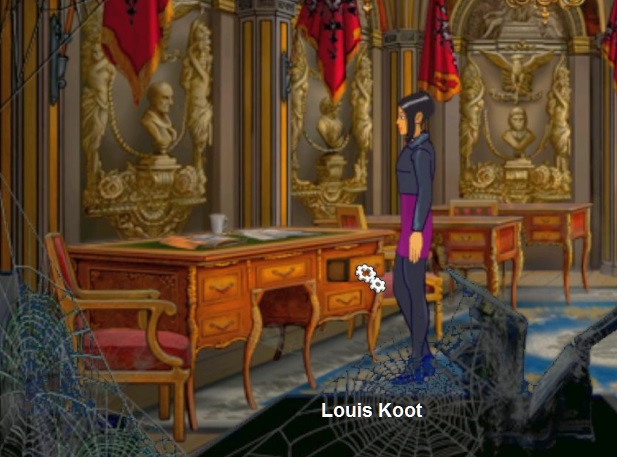
Leave the close-up and now open up the top right drawer of this desk

Nicole finds a Coded message in the drawer
Try closing the drawer again...but instead of closing the drawer Nico pulls it out completely
Look in the box where the drawer was and.........
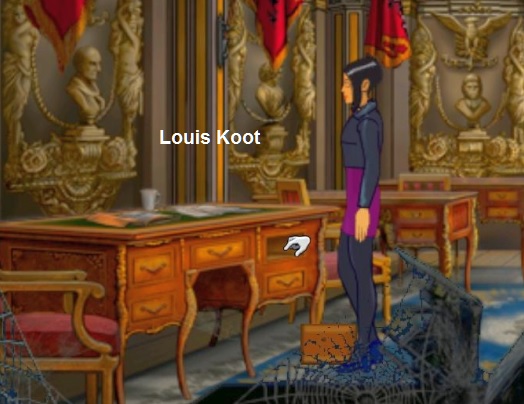
....... Nico finds half of a photo.
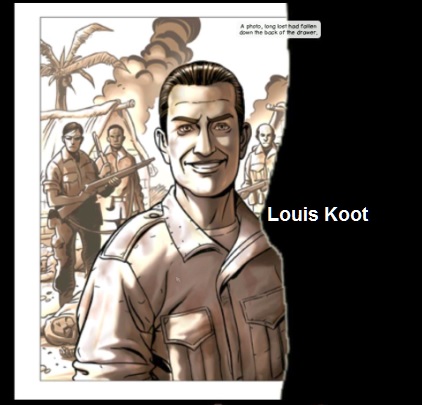
On the photo we see a smiling Carchon. Behind him are soldiers and a corpse. Who would have been on the other half of the photo?
Decode the Coded Message
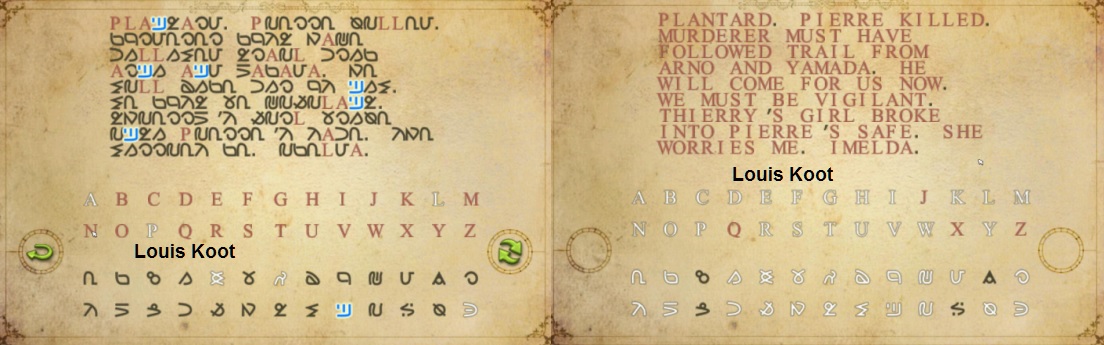
Right click in your inventory on the Coded Message to see it up close. Each symbol represents a letter. Equal symbols are the same letters. Click on a symbol at the bottom of the text. The symbol then lights up in the text. Then click on a letter. The illuminated symbol is then replaced by the letter.
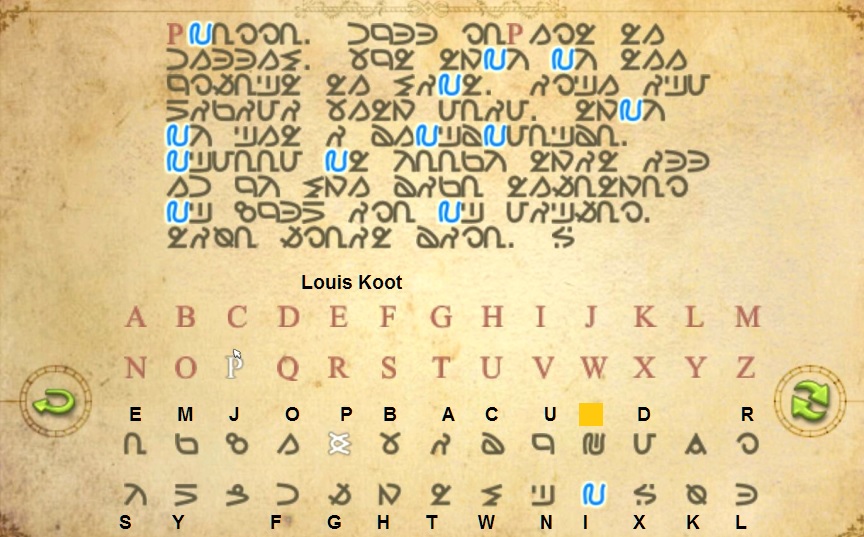
Decipher the whole message in this way......When correctly done you read......
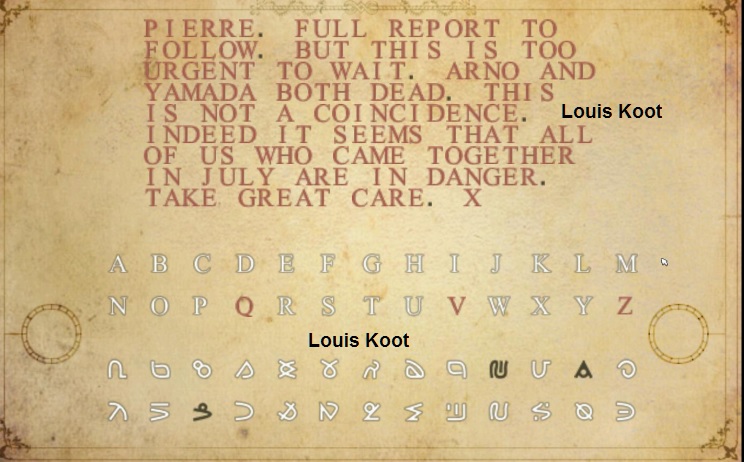
Nicole now has enough material to write a good piece for the newspaper and to tear Carchon's reputation to pieces. She leaves for home.
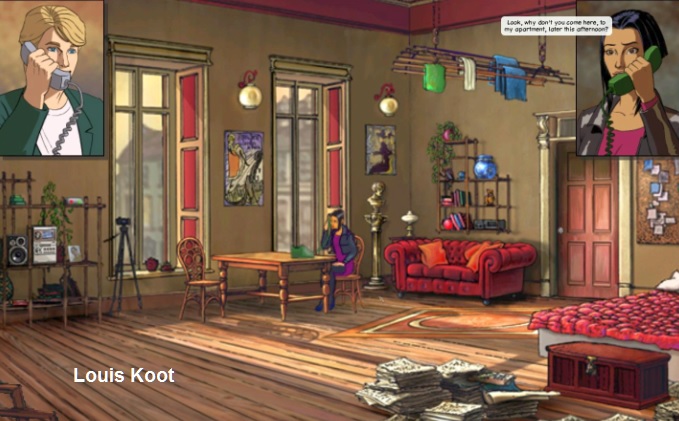
Nico's apartment that night.
The phone rings. It is Ronnie, the chief editor of the newspaper and Nico's boss
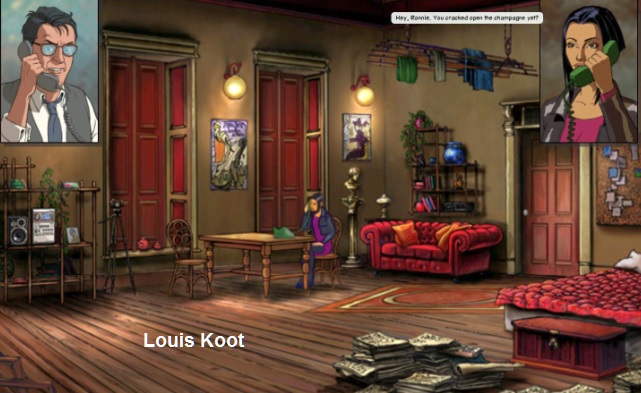
Ronnie does not want to print Nicole's article. It is suicide, he says, to write a national hero like Pierre Carchon to pieces. Nicole does not trust it because two hours ago, when she delivered her article, Ronnie was enthusiastic about it and now he does not want to print and publish it????. Someone must have put Ronnie under pressure! Carchon has powerful friends. Nicole is desperate. This should have been her breakthrough.
Then Nico receive another phone call .
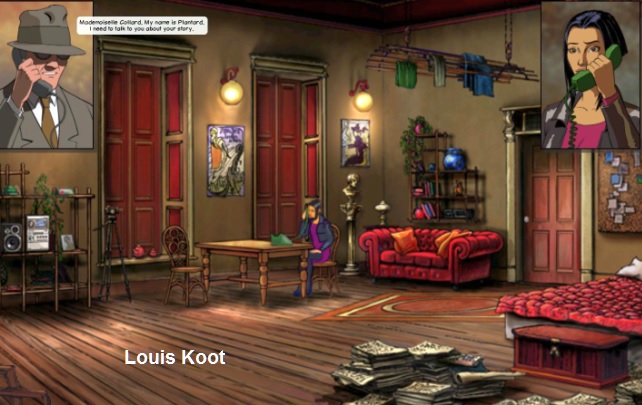
A certain Plantard wants to make an appointment with Nicole to talk about her Carchon story. Plantard says that he has information about the costumed murderer. Plantard wants to meet Nico the next morning at eight o'clock in the Café de la Chandelle Verte. Nicole can recognize him in his gray coat and she can not talk to anyone about it.
Chapter 2: Paris; France;
George Stobbard:
Café de la Chandelle Verte
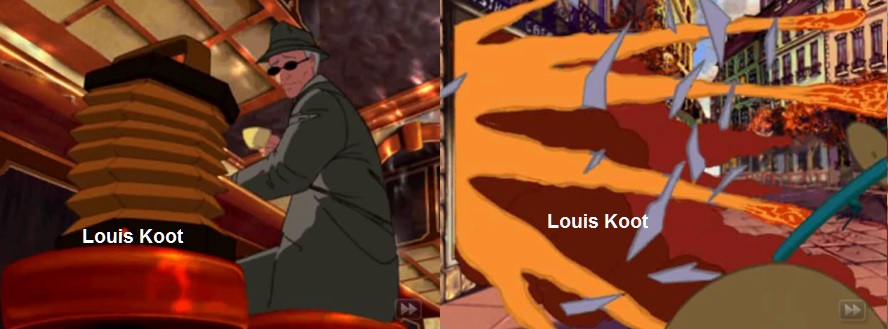
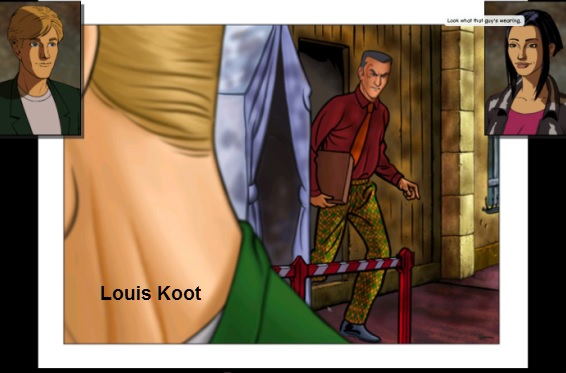
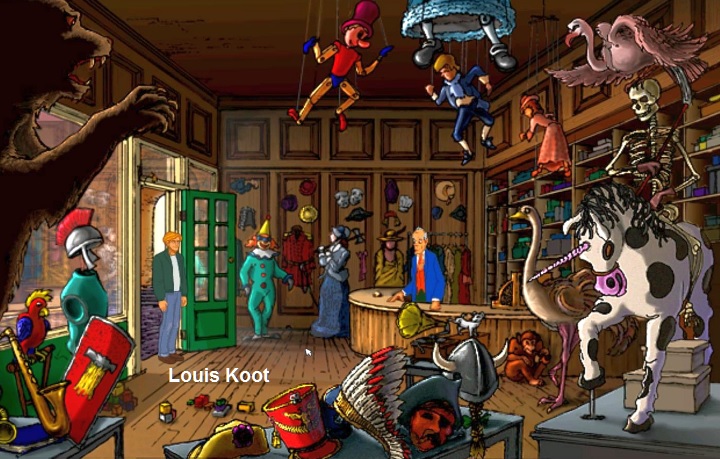
George Stobbard, a young man from California USA, is traveling around the world before he starts his life seriously and currently he is in the French capital Paris. George is sitting on the terrace of Bistro / Café de la Chandelle Verte to enjoy a cup of coffee. George is somewhat disappointed in the haughty attitude of the Parisians towards a smooth young American man. George is especially disappointed in the Parisian girls and he decides to try his charms on the handsome waitress of the Café.
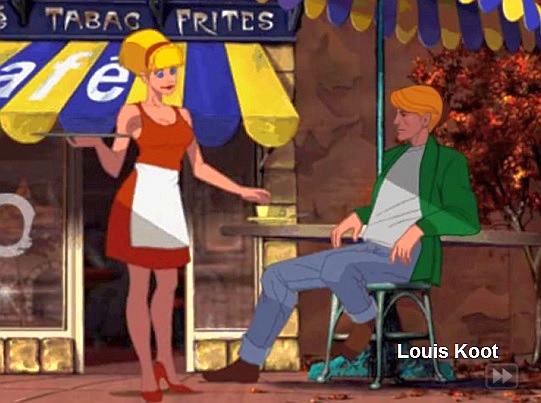
The pretty waitress smiles friendly at George, but then turns her attention to an older man who asks her something.
Note that this older man has a briefcase with him.
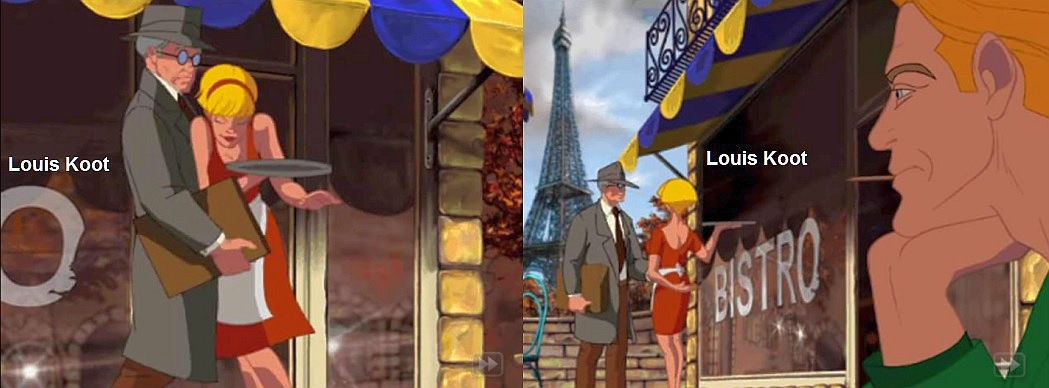
The waitress and the older man enter the Café where the man takes a seat at the bar and orders a cup of coffee. The man places his briefcase next to him on a bar stool. George is then harassed by a Clown. George punctures one of the Clown's balloons and the Clown disappears into the Café also.

We then see that the Clown picks up the old man's briefcase and puts his harmonica on the bar stool.

The Clown then runs out of the Café, with the briefcase, and disappears into an alley, on the other side of the street.
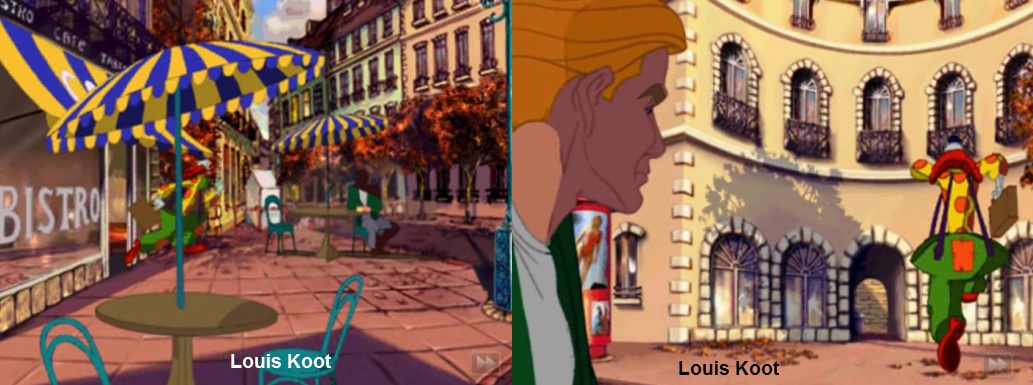
Back in the Café we see that a light is starting to burn on the harmonica. The older man looks surprised at the harmonica and then we see that harmonica is filled with explosives .... it's a BOMB and the thing explodes. The entire façade of the Café is blown away and George is blown away too and has landed under a parasol.
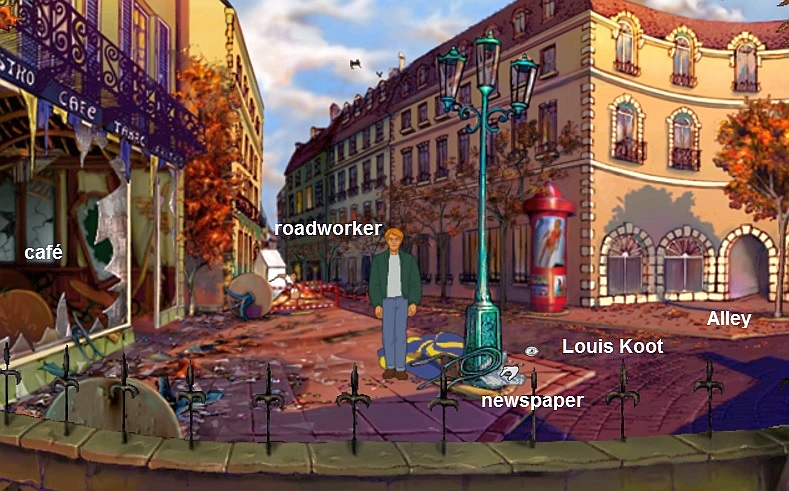
George has survived the explosion and is back on his feet. There is a blown up patio chair by the lamp post. There's a newspaper under that chair.
Grab the newspaper. You'll see the newspaper in close-up. Click with your eye on all the articles.......
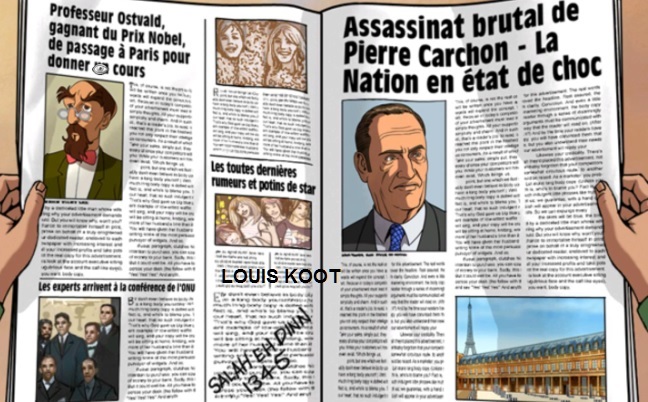
George reads an article in the newspaper about a Nobel Prize winner, from an Eastern European country and with a name that George can not pronounce. However, somebody, has written something on the newspaper .... "Salah-eh Dinn, thirteen forty-five", has been written on the newspaper with pencil. Look at this with your eye......
NB: In the original game you would now first go into the alley and then enter the café to look at the dead body and to talk to the waitress. You do not need to this now. You can do it if you like but it isn't really necessarily. The waitress has nothing to say to George and you will end up with a unconscious waitress because she will drink a whole bottle of brandy
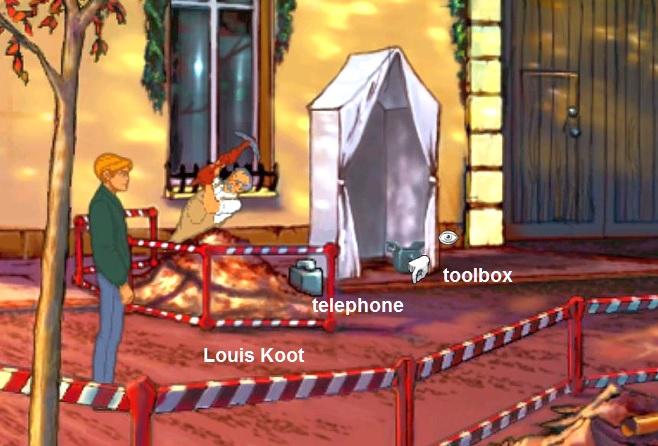
Behind George, a road worker is digging a hole in the street. Go to the Road worker and.........
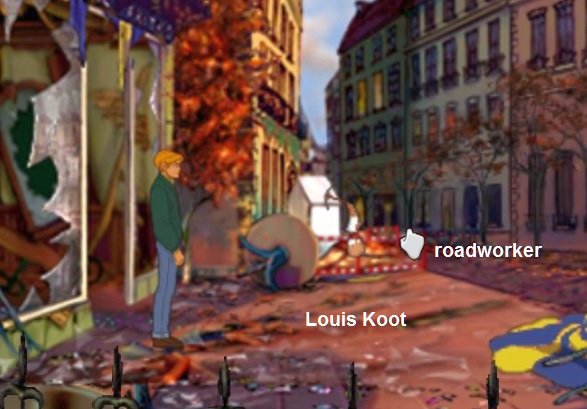
George ends up at the Road Worker and ..... We now meet gendarme Moue and inspector Rosso.
Of course we all end up back in the Café. Moue bends over the corpse of the old man and finds that it is indeed a dead corpse. Gendarme Moue is not one of the most intelligent gendarme of the Parisian police force. Rosso and Moue talk to each other for a moment and then Rosso starts questioning George.
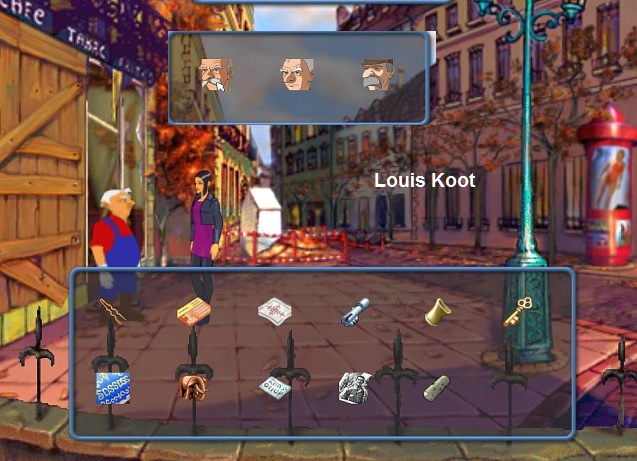
Rosso asks whether George has seen the old man enter the cafe. Say yes by clicking the Thumb Up icon.
Rosso then asks if George has seen someone else enter the cafe. You get the Thumb Down and the Clown icon as possible answers. Now click the Clown icon. Rosso is satisfied with the answers George has given. George is allowed to go and Rosso gives his calling card to George. George then automatically leaves the Café. Outside again we then see that Nicole Collard has enter the crime scene and she is shooting photos of the crime scene. Agent Moue is now on guard at the door of the cafe.
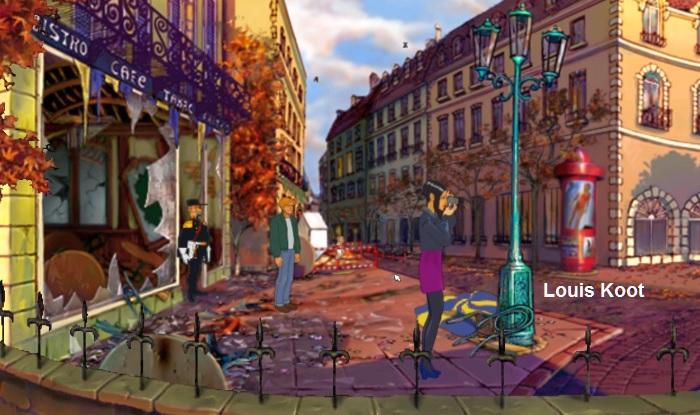
When Nico is standing still for a moment then quickly click with your talk cursor on her to talk with her.
Nico immediately hear that George is an American and asks whether George has seen an older man with a hat and a briefcase. George tells about the Clown and the explosion and Nico says something like "Oh ... there he is again", and with this she meant that clown. Your conversation topics appear. Talk extensively with Nico. Use all conversation topics multiple times until they are all gone, and do so with any follow-up topics you get.
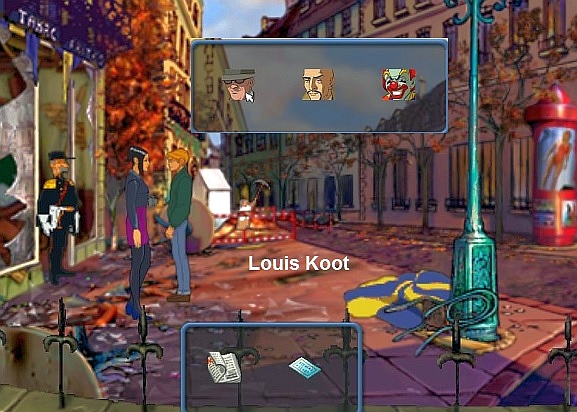
Nico tells that the old man called her and asked her to meet him here at the cafe. The old man's name is Plantard and he had important information that he wanted to tell Nico. Nico also knows something about the clown, but she does not want to talk about this here and now. Nico gives George her phone number. Once Nico has given George her phone number, she disappears.
Talk to Agent Moue and ask him about the briefcase, the clown, Plantard and Inspector Rosso. Moue can not explain why he and Rosso were on the scene so soon after the explosion. Moue thinks that Rosso has demonic powers. When you have asked Moue everything you close the conversation again via the green curling arrow.
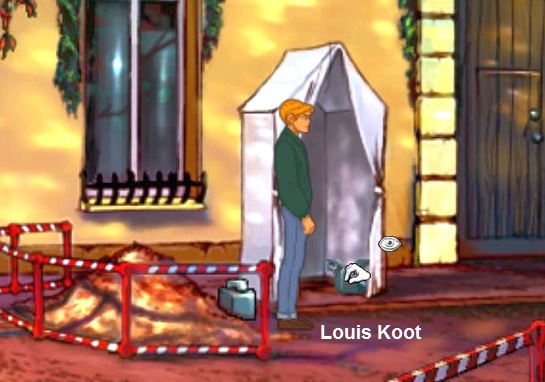
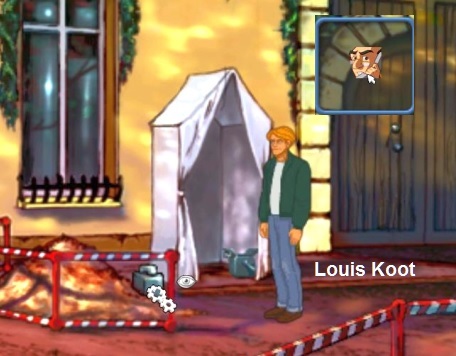
The Road Worker:
Walk again to the road worker The toolbox of the road worker is standing in the tent. Between the tent and the dig hole stand the road worker's telephone
Click with your Gears icon on the toolbox.
George bends to look at the contents of the toolbox but the road worker doesn't want this
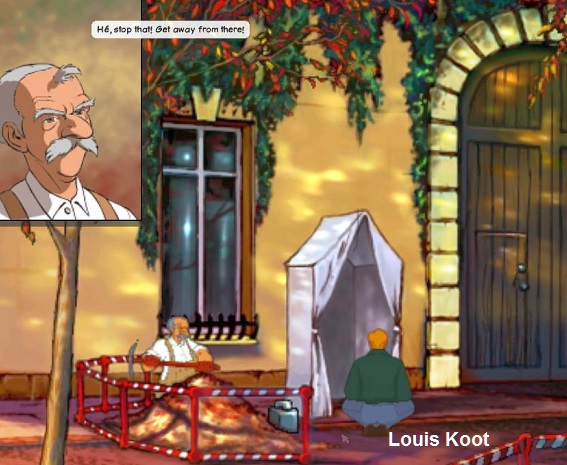
Go talk to the road worker and exhaust all topics completely, until they are all gone.
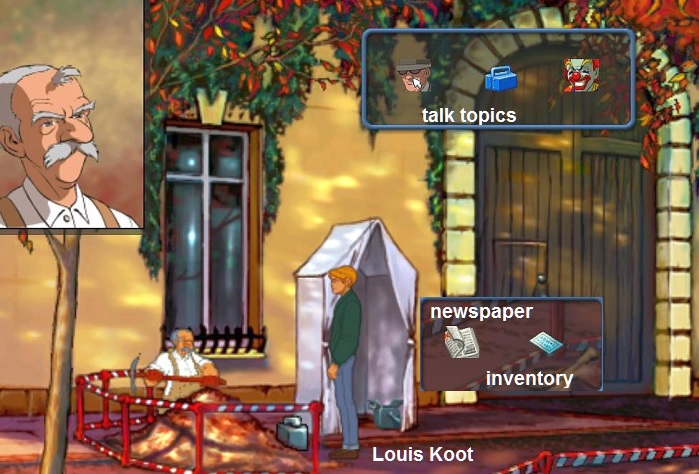
George finds out that road worker has a rod in his toolbox with which he can lift the sewer lid, but he doesn't want to give that rod to George. When you have asked the road worker about his toolbox, the clown and Plantard then click on the Newspaper that's in the inventory...... Newspaper that's in the inventory......After some nagging, the road worker takes a break to read the newspaper and he reads in the newspaper about "Salah Eh Dinn" and that turns out to be a horse that participate in a horse races. The road worker now leaves his pit to go to the betting office to place a bet on "Salah Eh Dinn".
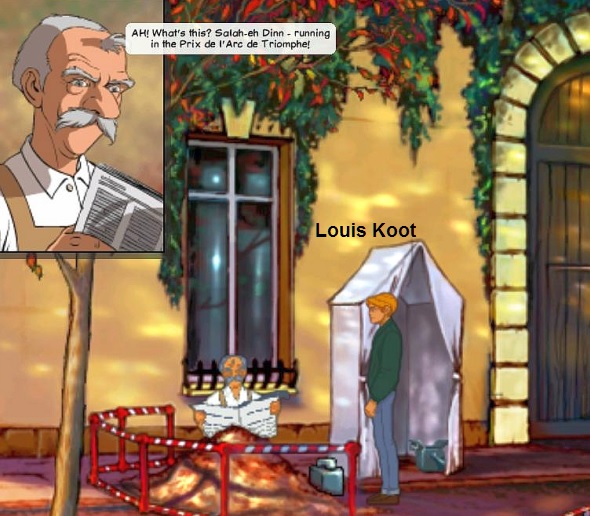
Now that the road worker has disappeared, click again with your Gears on the toolbox and now George will take out a T-shaped metal rod.
Go back to the cafe via the left edge of the screen and then go into the alley, across the street.
Alley
It's a dead end alley. You can look at everything here in the alley but only one thing is important and that is the manhole cover in the middle of the alley. You can try whether George can lift the manhole cover with his bare hands, but that doesn't work. So use the T-shape rod on the manhole cover to lift it and to open up the way into the sewers. Then go down into the sewer
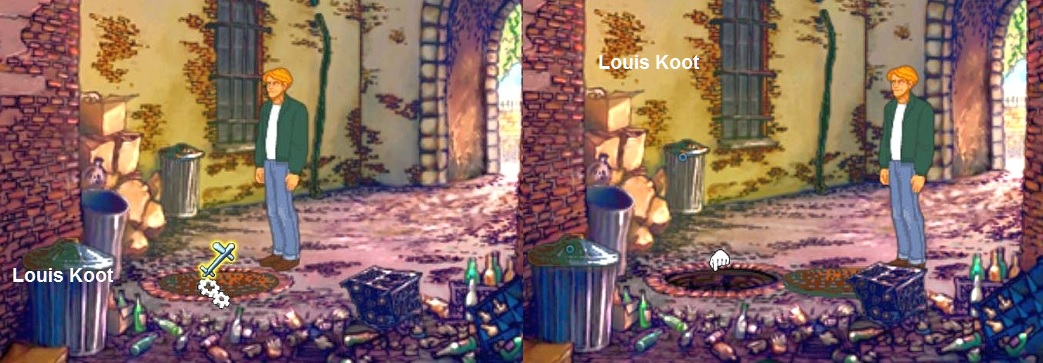
Sewer:
George has ended up in the stinking sewer. You can see something lying in the corner...it's a red clowns nose...go pick it up
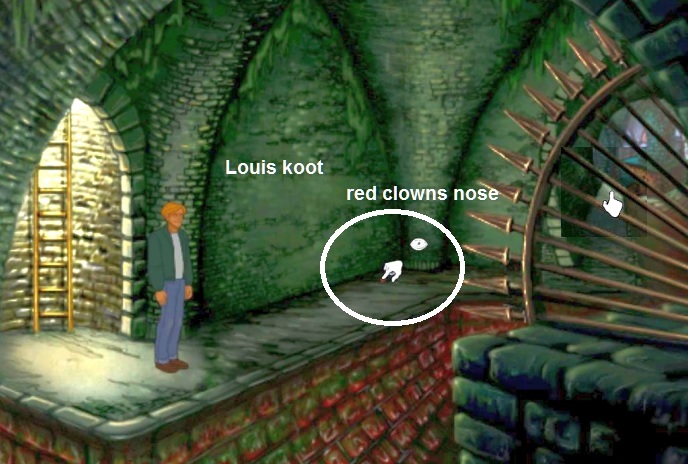
Apparently the clown has lost his nose here. Open your inventory and then right-click on the red Clown nose..... George sees that something is written inside the red clown's nose.....La Risée Du Monde, Paris, is written on the inside of the clown's nose. Perhaps the store that sold the clown's nose?

Now walk further into the sewer, through your pointing hand on the fence. George ends up in one of the main channels of the sewer. You see another ladder. In front of the ladder there is a paper tissue on the floor and on the fence, near the ladder, a piece of cloth is stuck.
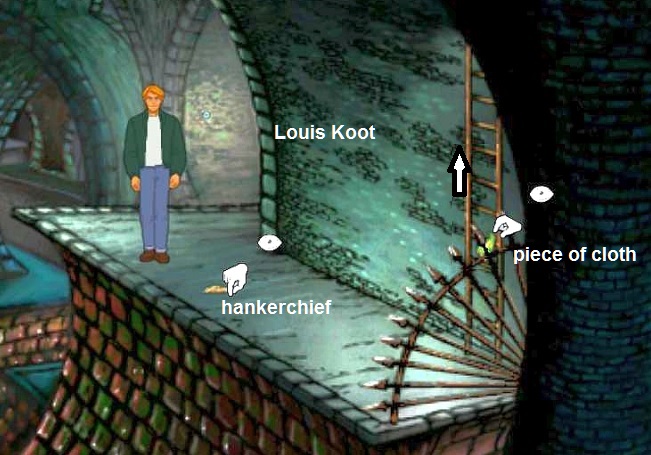
Look at The paper tissue......It's soaked with some kind of spread. Pick up the Paper tissue. Look at the piece of fabric / cloth that is attached to the fence. Then take the piece of Fabric / Cloth. Then go up the ladder. George climbs out of the sewer and ends up in a courtyard and here he meets a guy with a big mustache.
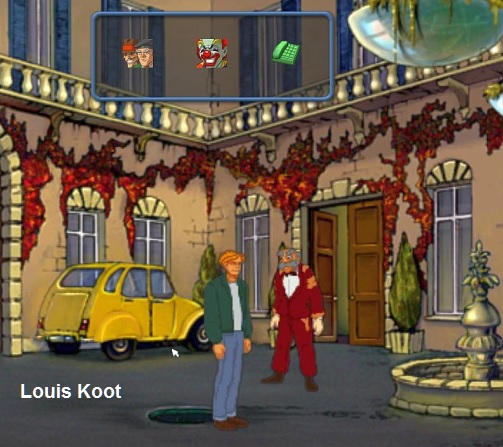
A fat guy dressed in red clothes and adorned with a thick mustache "welcomes" George when he comes out of the sewer.
Talk to the guy, but he doesn't really want to talk with George because he doesn't trust George. In inventory click on Rosso's calling card and........
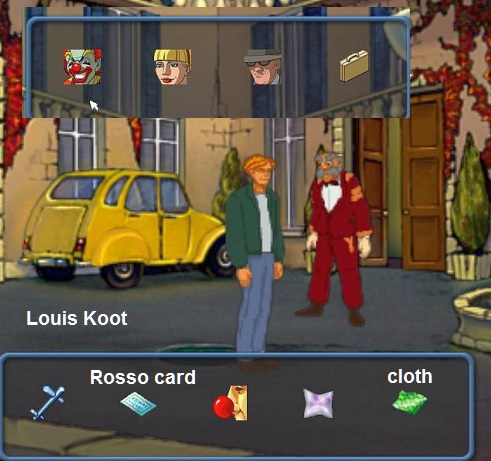
George pretend to be inspector Rosso and now the mustache guy wants to talk with George. First use all the conversation option until the are all gone
Mustache guy has served in the army and he has a big eye on the waitress of the cafe. Mustache has seen Plantard and he also grabbed the clown for a moment when he, like George, came out the sewer here in this courtyard. The clown had Plantard's briefcase with him.
When you have exhausted all conversation options then do not click the "leave arrow" but click in the inventory on the piece of green fabric that you have found in the sewer. George shows the piece of fabric to mustache who then says that the piece of cloth comes from the clown's coat. Now ask mustache about the clowns coat and do this several times
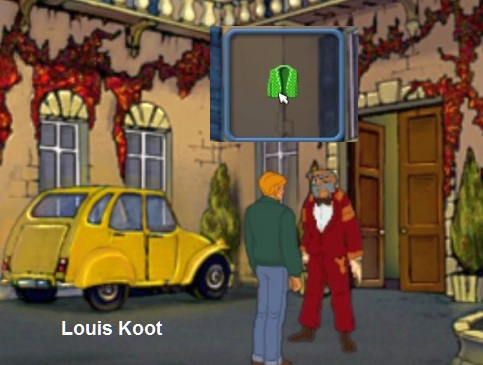
Because one of the sleeves of the clowns jacket was torn, mustache has given away the coat.
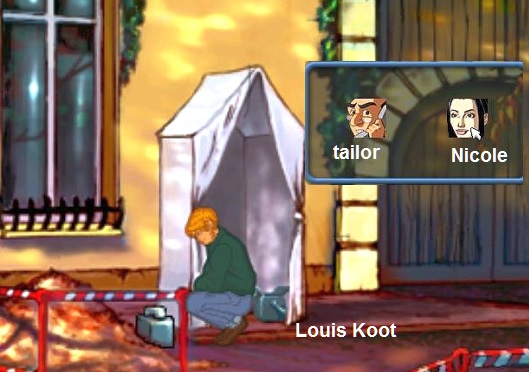
However, mustache tells that on the label of the coat was the name and the phone number of the tailor: B. Todryk 74-98-08-59 ........
When there's nothing more to talk about with Mustache then click on the curl green arrow to say goodbye and.....George ends up at the road workers tent again.
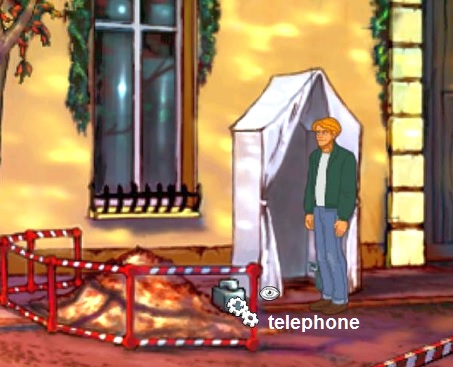
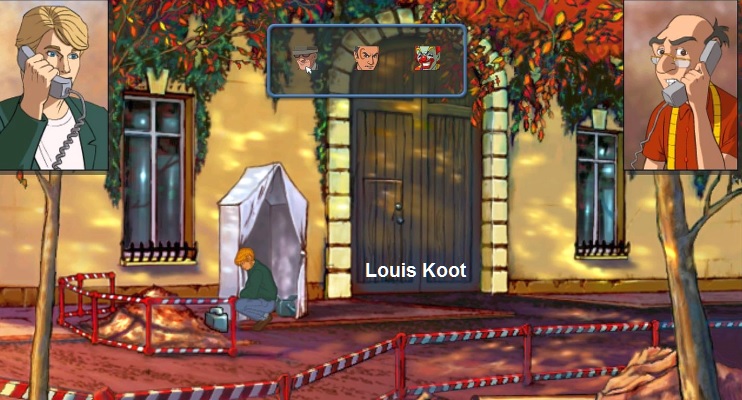
The road worker hasn't return to his dig. Now click on the Telephone and call up Nicole Collard
George calls Nicole and is invited to come to her apartment in Rue Jarry 36.
We then go on with Nico in the next chapter......
Chapter 3: Paris; France, Nicole Collard:
Café and Quayside revisited
Rue Jarry: Nicole's apartment
Nicole has agreed with George that he will visit her this afternoon. Before that time Nico has some things to do because she has a lot of questions and is looking for answers. Look around in the apartment. Next to the window is a rack with the stereo system. You can turn on the radio. There is also the very first photo that Nicole ever made. There is also an answering machine on this rack but no messages have been left on it. Nicole's first teddy bear is on the wall rack above the sofa.
At the foot of the bed stand large wooden chest. Open that chest
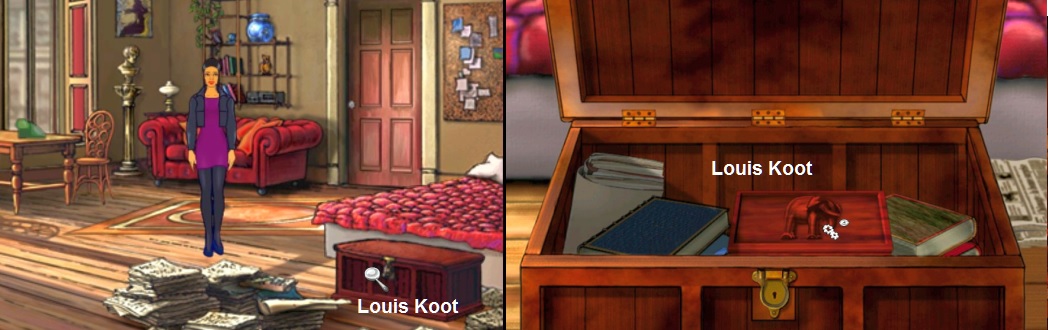
In the chest is a small wooden box with a carved elephant on it. Nicole inherited the box from her father, who made it.
Click on the elephant box to see it up close
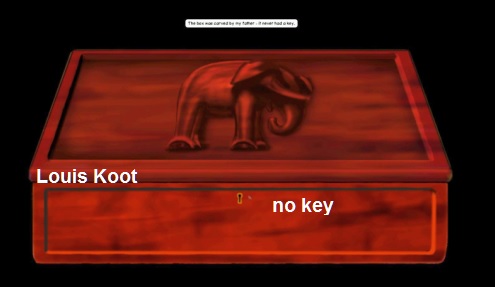
There is no key, so Nico can not open the box. Leave the apartment.
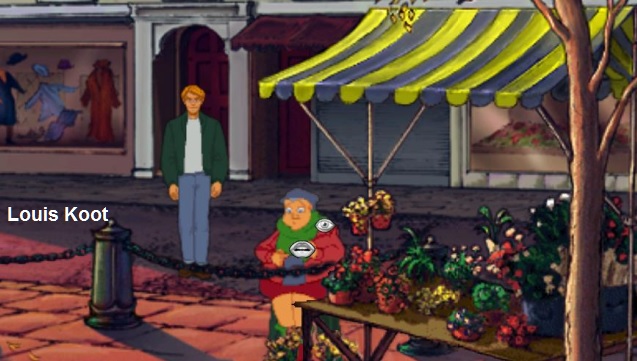
The Flower woman in front of Nicole's apartment
Speak with the flower woman, who is also a fortune teller.
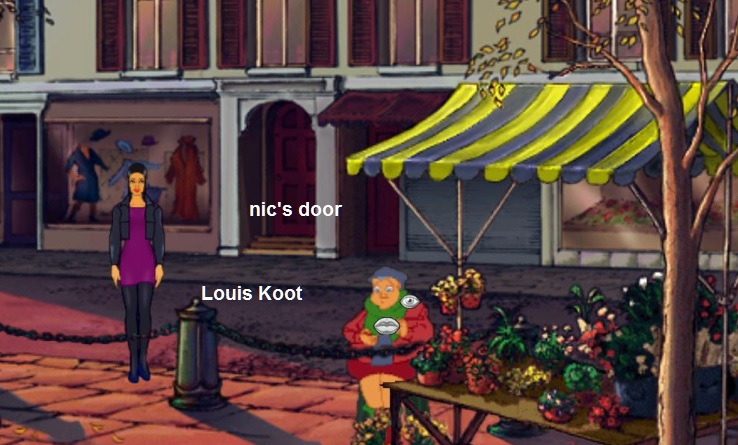
The flower woman tells Nicole that her niece has been waiting for her in Nicole's apartment yesterday. And that "niece" had a key to Nico's apartment.
But Nicole has no niece at all! Would someone have installed eavesdropping equipment in her apartment?
Walk to the left and you will get the map of Paris in your screen. You can quickly travel to the various location on the map.

Now click the Café de la Chandelle Verte location to go there
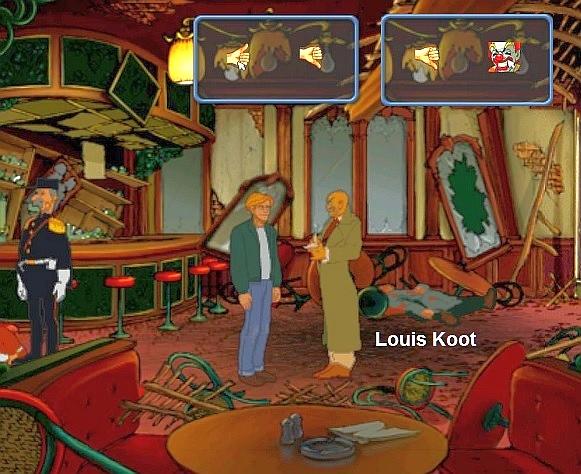
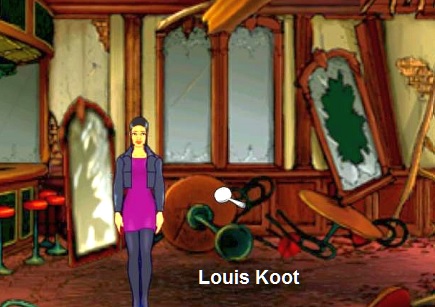
Café de la Chandelle
Nicole arrives at the tent of the road worker, who isn't back yet. Walk to the left, to the exploded café. At the café a man is just busy fixing the windows.
If you try to enter the café then the window man will stop Nico, so talk to the man.
The window man doesn't have anything useful to say, all he does is complaining about his "friend" the road worker and that no one ever write about the "true heroes" such as himself. Nicole offers to take a photo of him and to write an article about him. The man then rubs his hair in the right direction and now Nicole can enter the café. So....enter the Café
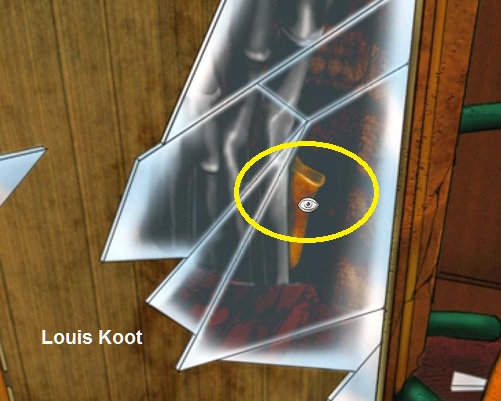
Click with your gear cursor on the broken mirror that stands against the bar. Nico puts the mirror straight.
Then click with your magnifying glass on the mirror to look up close in the mirror
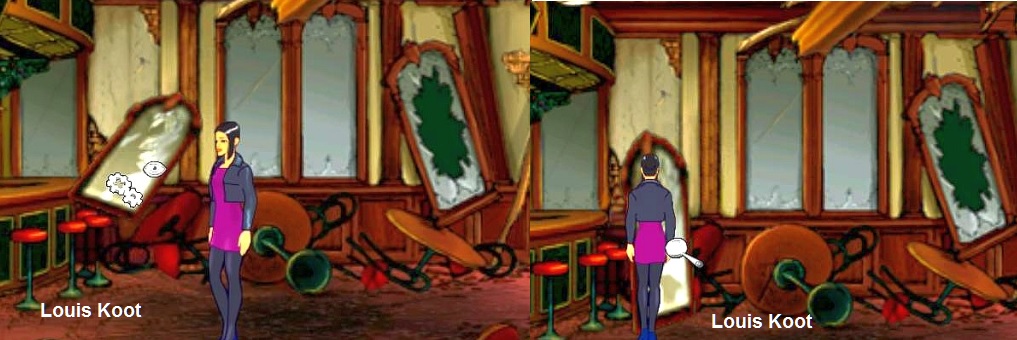
In the mirror Nico sees something sitting between pipes behind a broken panel.
Leave the close-up and now look behind the fallen table to the pipes.
Behind the two right-hand pipes you can take a kind of leather pouch.
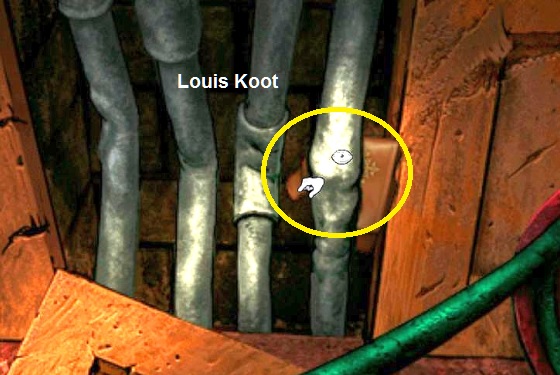
Nicole sees that the cross of Carchon's organization is on the pouch. Plantard must have hidden this here before he died. Open the pouch in your inventory and Nicole finds a metal artefact and a coded letter. On the metal artefact Nicole sees a sword, a scale and Lady Justice. The code in the letter is the same as on that other letter, so Plantard had connections with Carchon.
Right click in inventory on the coded letter to see it in close-up.
Decipher the letter in the same way as you did with the first coded message in Chapter 1 and you can read the message
Nicole thinks that Imelda is not as innocent as she appeared to be. Apparently Plantard was working for Imelda and Carchon. But why did he want to meet Nicole? Was it a trap, or did he just want Nicole to reveal his story? It was at least a story that was worth a murder.
Leave the cafe, the window man now wants his photo taken but Nico says that she has forgotten her camera.
Walk back to the road worker's tent and then further to the right and......Nicole automatically goes back to the
Île de la Cité
When Nico has arrive at the quay, you go in and to the room with the cross.
In the room withy the cross you repeat the procedure to close the right door and keep the left door open.
So take again hold of the cross and then block the cross again with the bend Shell Case
Then put the Stone Roll in the hole of the stone tablet to open up the left stone door
Take the Shell Case back from the cross and walk through the left stone door into the last chamber
The lights are still on.. At the first desk on the right-hand wall you examine the painting of Lady Justice......
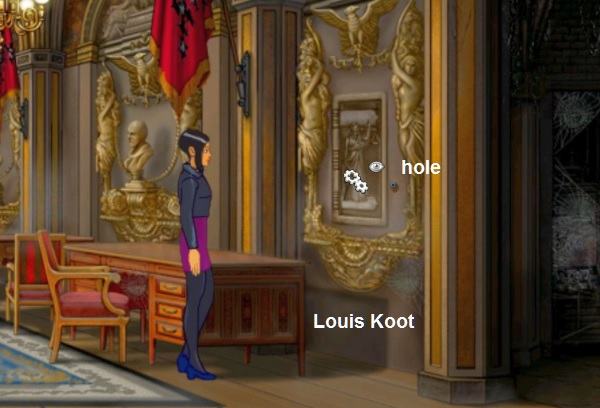
Lady Justice has a sword and a scale. On the right side of the painting Nico notice a little hole in the wall.
Put the metal Artefact in that hole and......
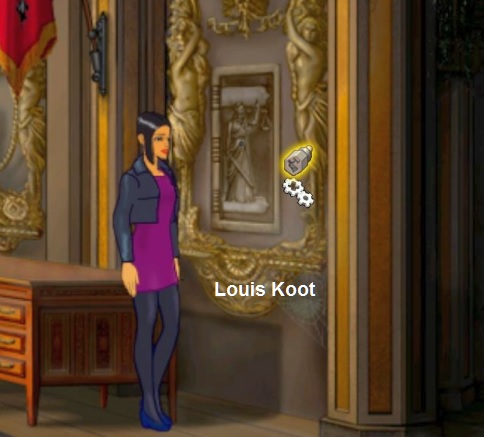
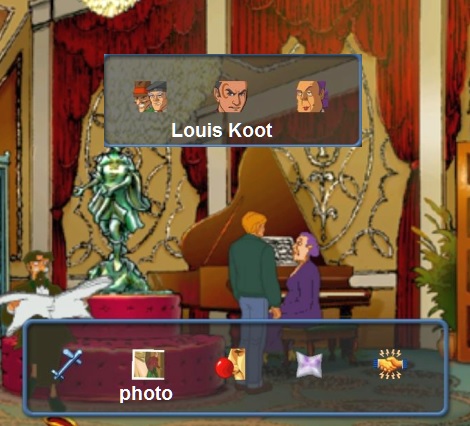
The safe opens as expected. Zoom in on the stuff that's inside the safe and take the Photo Pieces, that are lying under the red folder
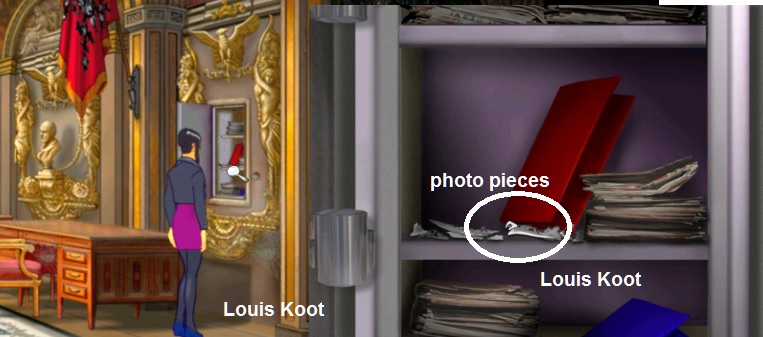
Nicole puts the photo pieces on the desk and you must now puzzle them together.
It's not difficult......in fact it's rather easy...So put the pieces together and......
Nicole will see that it is her father in the picture. It is the torn off piece of that other photo with Carchon! What was her father involved in?
Nicole is rather upset about all of this and she goes back to her apartment and we switch to:
Chapter 4: Paris; France; George Stobbard
George Stobbard: Hotel Ubu and Crune Museum
Rue Jarry: Apartment of Nicole Collard:
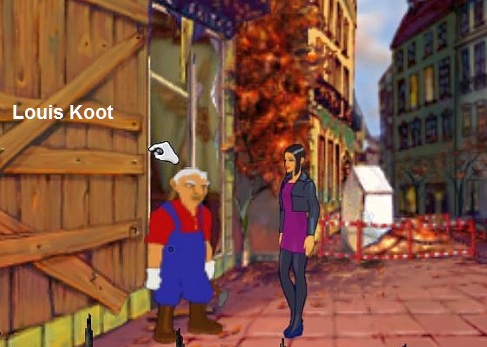
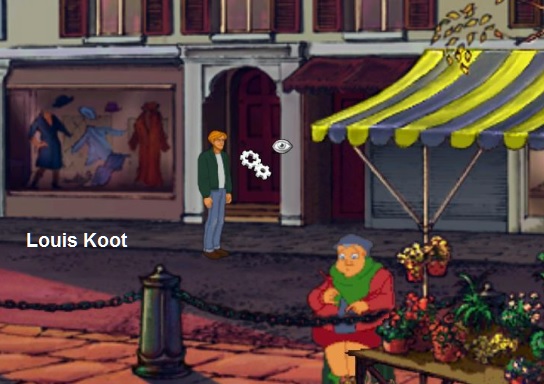
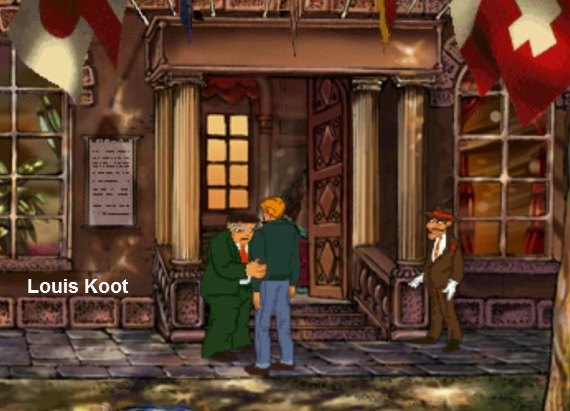
George has ended up in the Rue Jarry. A clothing store is located on the corner. The brown door is the door of Nico's apartment. Click with your Gears on Nico's door. George tries to push the door open, but the door won't go open. Cross the street to the flower woman and talk to her.
You get a number of talk options again, so use them again and exhaust them completely. The old woman tells that Nico's door is not locked but is jammed because of moisture. However, a firm push against the door will be enough to open the door. When you have gone through all the conversation topics and there is no more left, you close the conversation with the green arrow.
Walk back to Nico's front door and click on the door again with your Gears and ....
......Now George gives a firm push to the door, the door opens and George enters Nico's apartment. Nico is pleased to see George and a conversation follows. Nico wants to continue her research on the clown even though the publisher of her newspaper refuses to publish her photo and article. Nico's boss even advised her to end her investigation into the clown and Plantard. According to Nico, everyone seems to want to ignore this case and to keep silent about it.
Your conversation topics appear and also your inventory is opened again. First talk to Nico about Nico, Plantard, and the clown.
Nico says that Plantard had her name from her newspaper because she had written an article about the link between two murders in Italy and Japan, both committed to rich business people. The person in Italy was murdered by a murderer dressed as snowman and the man in Japan by a murderer dressed as a penguin. And now we have a clown as a killer.
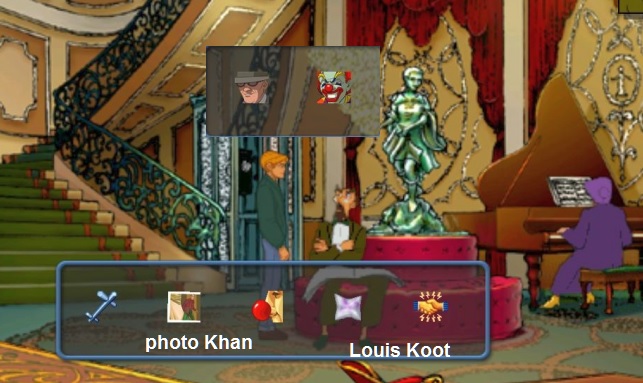
Click on the clowns nose in your inventory and George shows Nico the clown's nose and points her to the La Risée Du Monde, Paris, which is written in the clown's nose. Nico tells George that La Risée Du Monde, Paris, is a shop for party supplies and this location is now also available on the map. Then click on the piece of green fabric / cloth in your inventory. George then shows Nico the piece of green cloth and...... Nico then gives a photo to George.
It is a picture of a man. On the photo, the man wears a checkered pants made of the same green fabric as the piece of fabric that George found in the sewer. According to Nico, the man is not difficult to recognize because on his left cheek the guy has a scar in the shape of a horseshoe / crescent moon.
You can also show Nico the soaked tissue, but Nico will find this disgusting and will not tell you anything about it. After you have received the photo from Nico you can leave Nico's apartment by clicking the green arrow. You will not use Nico's phone in the Director's Cut edition. Back on the street you walk to the left to get the Map of Paris in your screen. Go, via the Map, back to the Café de la Chandelle Verte. George ends up at the Road Workers tent again. Use the Telephone again to now call tailor B. Todryk
Click on the B.Todryk number to call the man now.
Tailor Todryk reacts rather nervously when George asks him if he can come by. Use all options again in this phone call. The main subject of conversation here is the photo that George has just received from Nico. George asks Todryk if he have made a suit for "a man with a scar in the shape of a horseshoe"......However, Todryk needs the name of the customer, Todryk can not give any details without a name. . If there is nothing left to talk about, close this phone call
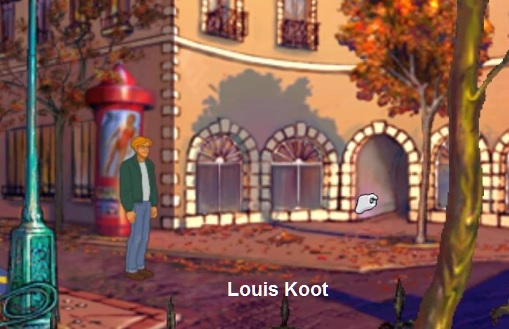
Walk back to the right until you have the Map back in your screen and now go, via the map, to the party shop:
La Risée Du Monde Party Shop:
Talk to the owner of this party supplies store. Ask the man about the Clown and about Plantard.
The shop owner never heard of Plantard and he can not tell George who has rented a clown costume from him. When you have eliminated all talk options, click on the photo of the man with the horseshoe scar in the inventory, so click on the photo that George has gotten from Nico. George asks the shop owner if he recognizes the man in the photo. The shop owner now tells that the man from the photo was in his shop this morning to buy some theater smink. Click on the photo again to ask the shop owner if he is sure that this is the guy who bought the theater smink. Then click on the soaked tissue.
The shop owner smells at the tissue and tells that the tissue is soaked with a certain type of theater smink and that he recently sold two cans of this smink. Click again on the photo of the man with the scar. Now the owner tells that the scar guy bought 2 cans of smink and also rented a clown suit and a green elf costume. The man called himself Monsieur Khan.
When you've all this information from the shop owner, click on the green curl arrow to say goodbye.
The shop owner then does a "practical joke" with George. He shakes George's hand but does so while he has a "buzzer" in his own hand.
George experiences an electric shock and gets a bit angry. George may keep that "buzzer" and that thing is now in your inventory. Leave the store through the door and you will return to the Paris map. George now knows the name of the scarface man, so travel back to the Café and use the telephone of the road worker again to call up tailor B. Todryk again. Use the Khan topic and.......Todryk now tells that Khan has a room at the Hotel Ubu, but Todryk doesn't know the room number
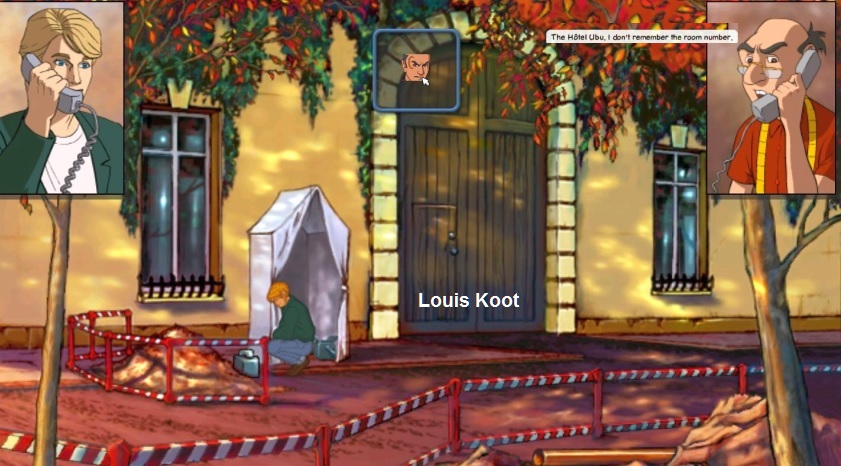
Go to the Map and....Hotel Ubu is now a location that you can go to, so travel to:
Hotel Ubu:
Lobby:
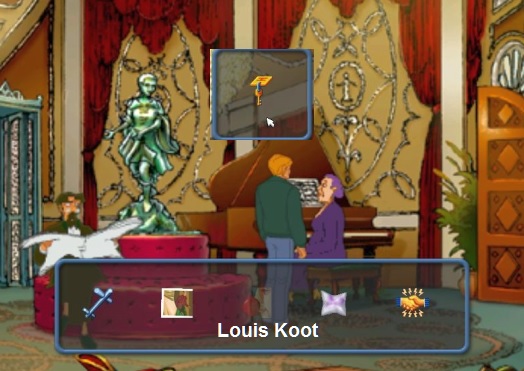
At the entrance of the hotel there are two, rather shabby, "gentlemen". These two are Flap and Guido and they are gangsters. To the left of the hotel is a gate that gives access to the alley next to the hotel. Enter the hotel. George ends up in the lobby. An elderly lady is playing the piano and on the red round couch a man with a beard is reading the newspaper. Behind the red couch you see a telephone box and the stairs to the floors. First talk to the piano playing lady.
This lady is Lady Piermond. Ask Lady Piermond extensively about the two gangsters, about Lady Piermond and about Khan You will hear hat Lady Piermond has almost been seduced by one of the hotel guests last night. Almost ... because the guy named Moerlin has deceived Lady Piermond.
When you have completely exhausted all conversation topics then click on the photo of Khan in the inventory.
Lady Piermond recognizes Khan as being that Moerlin, the man who deceived her last night. You get the Khan topic again, so ask Lady Piermond further about Khan / Moerlin. Lady Piermond then tells that Moerlin / Khan gave some papers an hour ago at the desk clerk of the hotel. The papers are stored in the hotel safe. Moerlin has left the hotel and has not yet returned.
Close the conversation with Lady Piermond if there is nothing more to talk about. Then go and talk to the bearded newspaper reading guy on the red couch.
This is the Nobel Price winner that George has read about in the newspaper he found on the terrace of the Café after the explosion. Ask the man all questions about the Clown and Plantard. Click in this conversation also on the Khan photo in your inventory.
The Nobel Prize winner recognizes Khan and asks why George has a picture of Khan with him. So ask the man about Khan.
The Nobel price winner recognizes Khan as an enemy of his country and he knows that Khan is a killer.
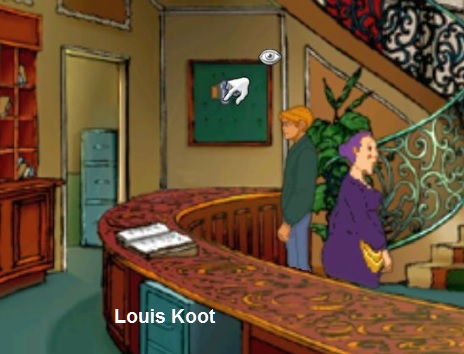
Close this conversation when there is nothing more to talk about. Then walk to the left. George then arrives at the reception desk of the hotel. Behind the counter is the nifty reception clerk. There is a guest book on the desk. Behind the receptionist you see the mailboxes of the hotel rooms. On the short wall, under the stairs, a blue key hangs on the key board.
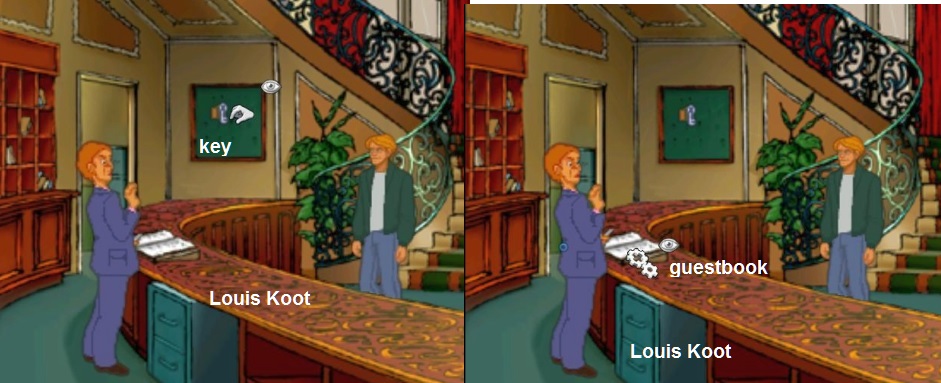
Try to grab that blue key while the receptionist is polishing his finger nails.........nice try but George can not take the key while the receptionist is watching. Look the guest book (right click). There is no one named Khan in the hotel but one Moerlin has room 22. Talk to the nifty receptionist now. Before you talk to the receptionist via the conversation topics, first click on the photo of Khan in the inventory.
The receptionist recognizes Khan as one of the hotel guests but he does not want to tell George his name. Then use all the conversation topics again and exhaust them completely. You learn that the blue key is the Room 21 key. Room 21 is empty but now reserved for a guest who will arrive later. To get something out of the hotel safe, George first has to identify himself as a hotel guest.
Close the conversation with the receptionist again when you have asked the nifty everything and have shown him the picture of Khan.
Then walk back to Lady Piermond. Talk to Lady Piermond again and use the Key topic.
George asks if Lady Piermond wants to keep the receptionist busy for a moment so that he can steal the key for Room 21 from the board. George and the Lady then walk to the counter. Lady Piermond asks the receptionist to put her suitcase in the safe. The receptionist disappears and the Lady goes back to the piano.
As soon as the receptionist has disappeared, you quickly steal the blue key from the board
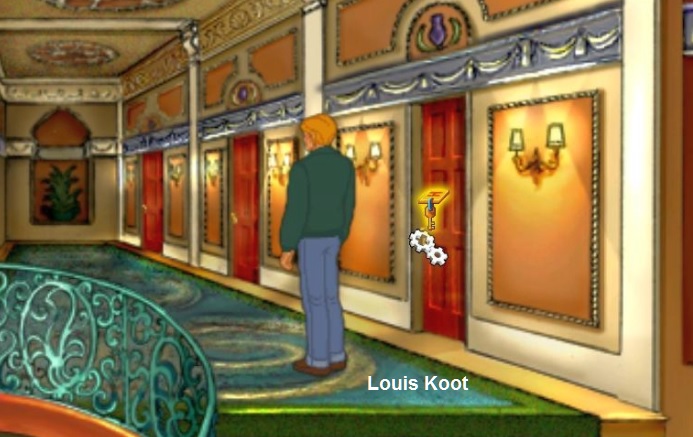
Then go up the stairs to the 1st floor. George is then in the corridor of the 1st floor. From tailor Todryk you know that Khan's room is the second door on the right and that is Room 22. George, however, has the key of Room 21, and that is the 1st door on the right. Take the Roo 21 Hotel Key from your inventory and then click with it on the first door on the right.
George enters into Room 21. Of course there is nothing to do here. George somehow needs to get into into Room 22.
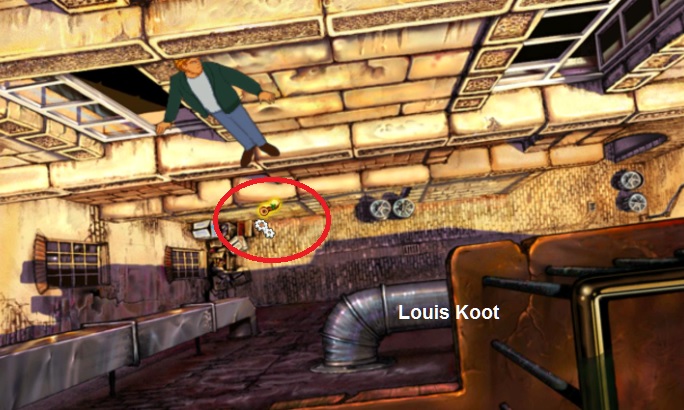
Click with your gears on the window, right next to the bed. George opens the window, so go out the window
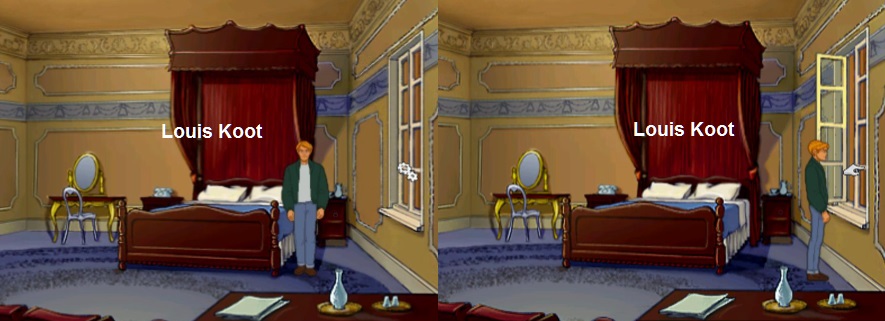
George climbs out of the window and ends up on a ledge. Beneath George is the alley that is located to the left of the hotel.
The window on the right is the window of Khan's room, so click with your index finger in that window and ....
Khan's Room:
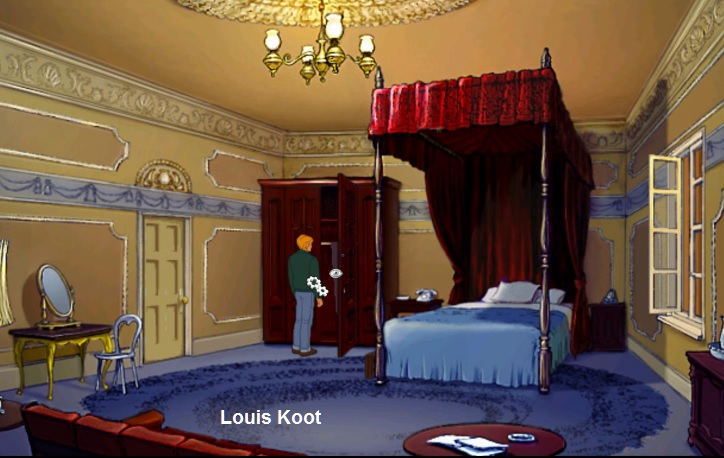
George climbs into Room 22 through the window. To the left of the bed stand a large double door closet. Examine the bed. George finds nothing.
Open the large closet. There is a pair of pants in the closet but George can't do anything with it
Close the closet again. Well .... this was not a success.
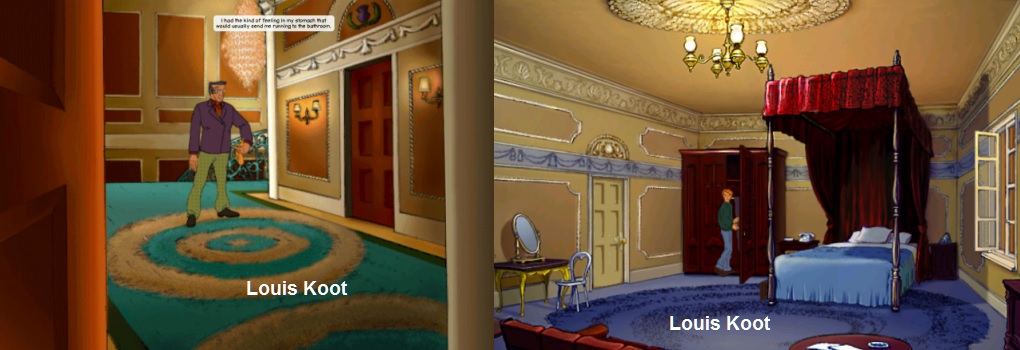
There is really nothing to be found in the room, so click with your index finger on the room door to leave the room through the door.
George sees Khan / Moerlin coming into the hallway and he hides himself quickly in the big closet.
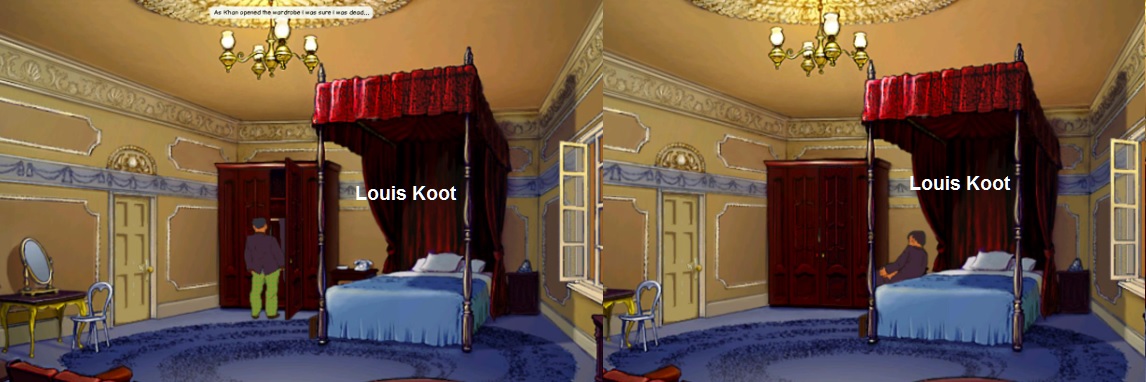
Khan / Moerlin then enters the room and opens the closet.
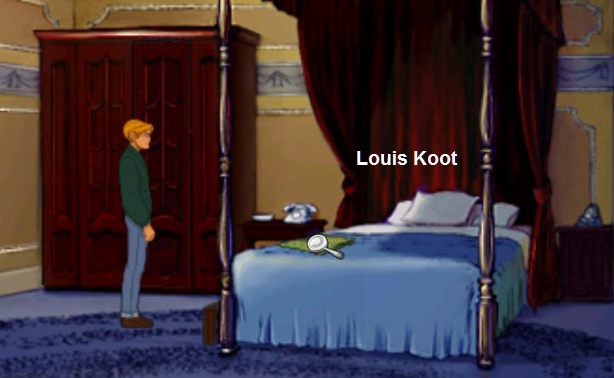
George thinks that he will be caught but Khan takes the pants out of the closet and starts changing clothes. Khan disappears again.
The green clown pants now lie on the bed. Click with your magnifying glass cursor on the green clown pants to see it in close-up.
You see the front side of the pants. Search both pockets......
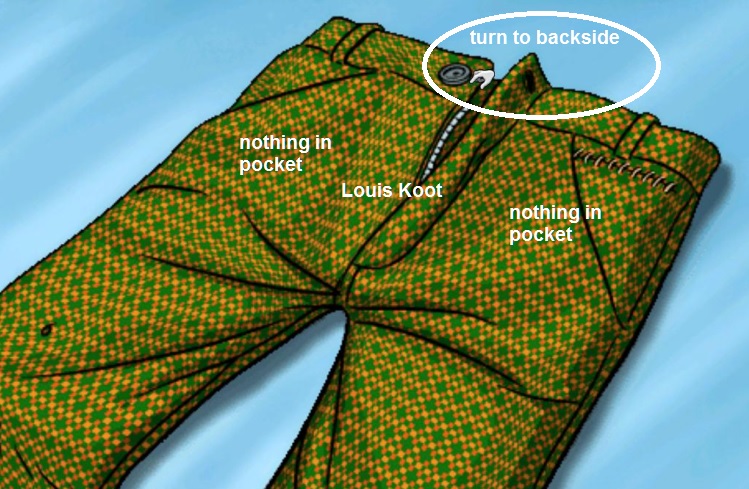
Both pockets are empty, so click on top of the zipper to turn the pants to see the backside. Click both backside pockets......
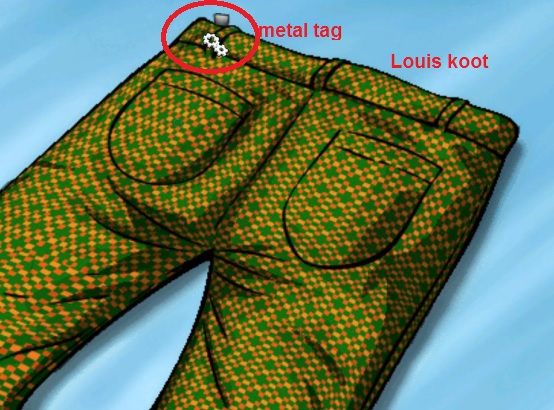
From the left pocket (right pocket on the screenshot) Georges takes out a book of matches
When you click the right pocket (left pocket on the screenshot) then a metal label appears on the top left of the pants. Click that label and.....
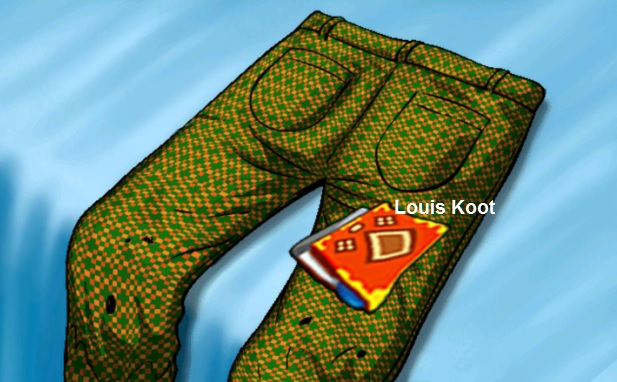
....By clicking that label George has unzipped a secret pocket at the front side of the pants, so turn over the pants to see the front side again and.....
........ then click on that secret pocket (right pocket on the screenshot) and.....George steals the ID-Card from Khan
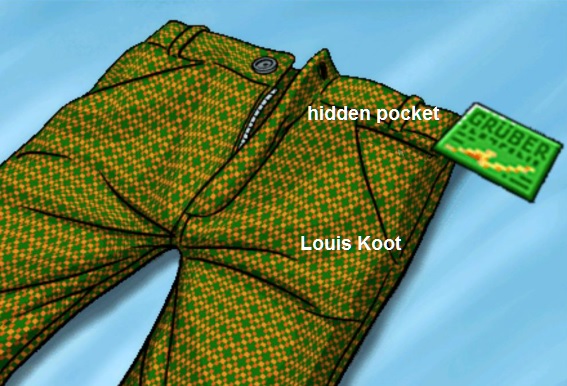
The match book is from "Club Alamut" and The ID pass is from "Thomas Moerlin, Grüber Electronics Corporation". Is Moerlin an electrician?
Leave the room via the door and return, via the stairs, to the lobby. Back in the lobby you walk to the reception desk. If the receptionist is not behind the desk, click in the doorway next to the mailbox box to call the receptionist. Talk to the receptionist again and click on the ID card in your inventory.
The receptionist recognizes the ID pass as Moerlin's pass and therefore refuses to take the papers of Moerlin out of the safe for George.
Exit and walk back to Lady Piermond. Now leave the hotel through the open front doors and ...... outside George is stopped by Flap and Guido and Flap will search George. Go back into the hotel and talk to Lady Piermond again. Show the Lady the ID-card of Moerlin and.......George asks Lady Piermond for help to convince the receptionist that he must give Moerlin's papers to George.

George and the Lady go back together to the receptionist who is yhrn convinced by Lady Piermond to bring Moerlin's papers to George now. It turns out to be a Manuscript.
George does not want to view the rolled up manuscript until he returns at Nico. Okay ... you know what will happen if George leaves the hotel through the front door with the manuscript. The manuscript will then be taken away by that Flap and Guido. That can not happen. Go back to the 1e floor. Go back into Room 21 again and climb out of the window in room 21 again. George is outside on the ledge again. Beneath George George is the alley. Open the inventory and click on the rolled up manuscript and then throw the manuscript down, into the alley
Crawl back into room 21 again. Leave the room again through the door and walk down the stairs to the lobby again.
Leave the hotel again through the front doors. Outside George is again searched by Flap and Guido, but of course they do not find the manuscript.
Then go through the gate into the alley and pick up the manuscript

George automatically return to Nico in her apartment.
Back in Nico's flat:
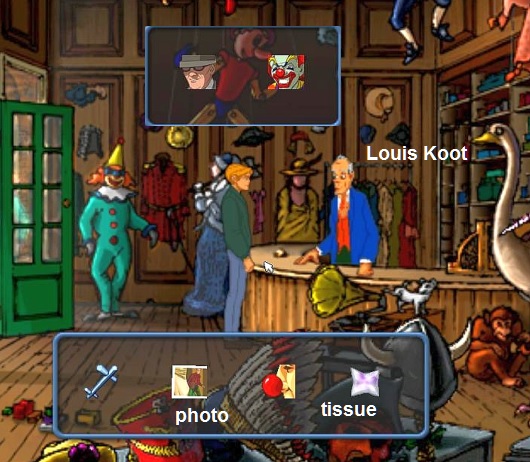
Talk with Nico about the clown and about Nico. Then click on the Manuscript in inventory to talk about it with Nico.

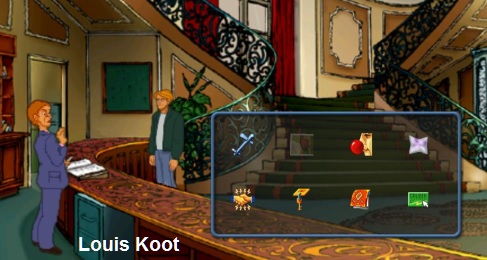
Nico and George look at the manuscript and this is now going to be big on your screen.
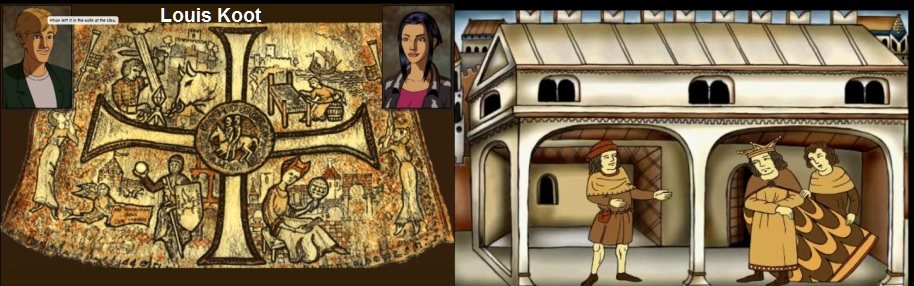
In the middle of the Manuscript they see an image of two knights sitting together on one horse.
Nico will now first tells the legend of the Knights Templars and their treasure that is still not found after 600 years.
George thinks the manuscript is the "key" to that treasure. You then only have one talk topic left and that is the manuscript.
Nico says they need the help of an expert and she also knows an expert. Nico has a friend, André Lobineau, who is expert in the field of the Middle Ages.
André Lobineau works at the Crune Museum and this becomes a location on the map now
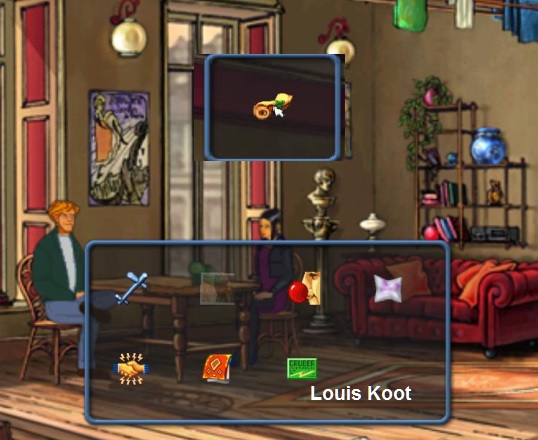
The Manuscript is again in your screen. The Manuscript is divided into 5 parts, A, B, C, D, E .
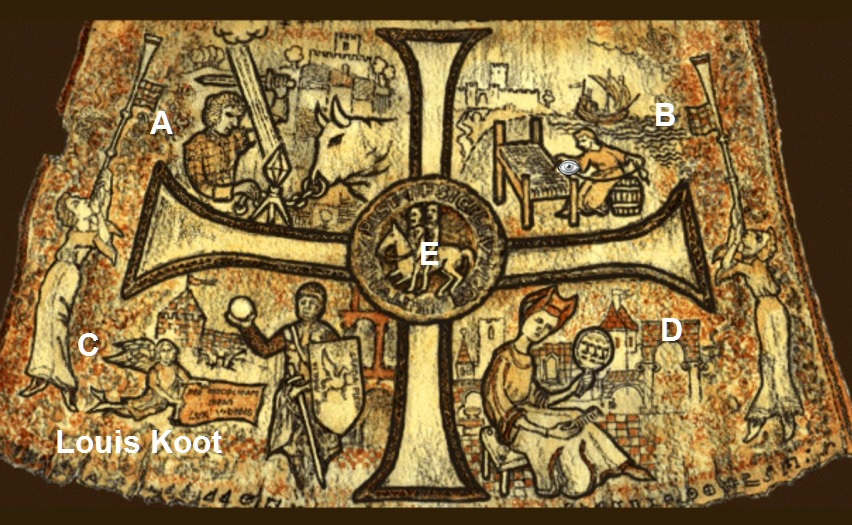
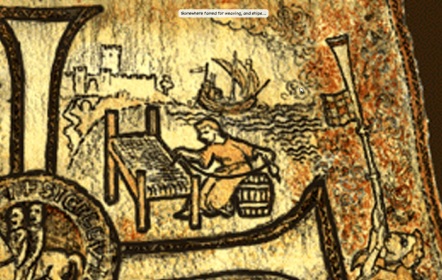
Each part shows a specific image and if you click on a part with your eye then you'll see it in close-up and George, or Nico, will tell what you see
When you have looked at all of this and there's nothing more to talk about then you exit out of the conversation and.........George says goodbye and leaves Nico's apartment . Walk all the way to the left and then go, via the map, to the: |
Crune Museum
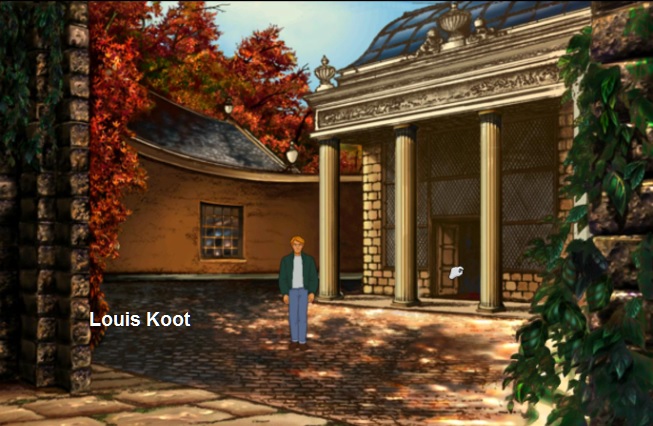
Click in the entrance of the museum to go inside. There is a guard walking around in the museum and that guard will always intervene when George touch an exhibit.
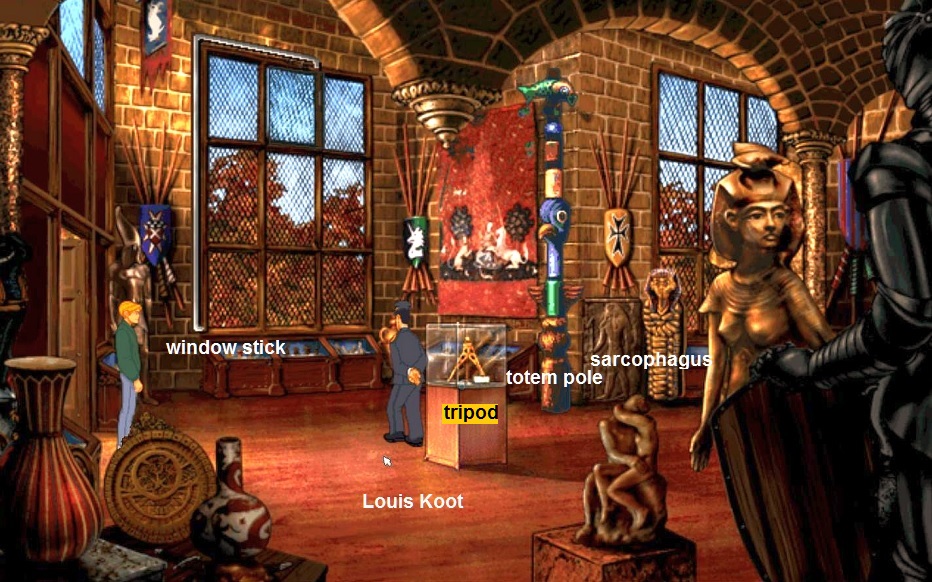
The museum has only one room and the most important item is the Tripod which stands in the glass display in the middle of the room. But you can view almost all things in the room and you have to do that too. First look at the Tripod in the glass case by right-clicking on it. It is the same tripod as you have seen on the manuscript and ....George reads on the sign that this tripod was found in Lochmarne; Ireland, at the remains of a Knight Templar.
Under the left window there are 3 showcases and on the left side of the window there is a swivel pole to open the skylight in the window. When the guard does not look at George and the left window, click with your Gears on that swivel pole to open the center skylight in the large left window. When you have opened up the skylight then you walk away at the window and ........ the guard will close the opened skylight again. Apparently the guard does not like fresh air.
In front of the right window stand an Egyptian sarcophagus that you can click on with your gears. Left click on the Sarcophagus and ...... George opens the sarcophagus but the guard does not think this is a good idea and he says that George should close the sarcophagus again.
Next to the large red tapestry stand a large colorful Totem pole. Click once on that totem pole and see what happens ... George pushes the totem pole and the guard almost gets an heart attack Remember that with the swivel pole you can open the skylight in the left window and that you can open the Sarcophagus. And also remember that you can push the totem pole down. You will need all this later in Chapter 6. Now go talk to the guard.
George asks the man if he is Lobineau. That is not the case and the guard says that Lobineau is absent. You now get a lot of conversation topics. Use them all and exhaust them completely. The guard pretends to know everything about the exhibits, but George quickly finds out that he doesn't know anything. However, ask the guard especially everything about the Tripod. George then learn from the guard how the alarm of the museum works.
If you have asked the guard everything then leave the museum. Outside go back to the map via the left edge of the screen and travel back to Nico via the map
Rue Jarry: Nico
George takes a seat at Nico's table and tells Nico what he has discovered in the museum.
Nico gives George a folder in which he then reads an article about Professor Peagram.
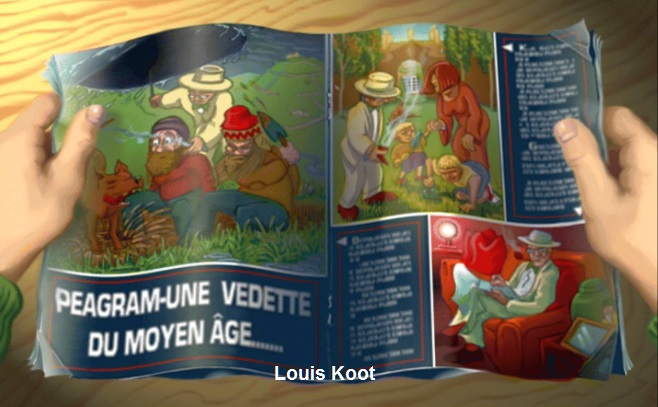
Peagram is working on excavations in Lochmarne, Ireland.
Nico advises George to go to Ireland. Nico, however, will not go along. Talk to Nico about that Professor Peagram. Do not use the Manuscript topic now because then George and Nico will look at the manuscript again, and that is not necessary. Say goodbye to Nico and outside you go back to the map via the left edge of the screen. On the map you now click the red arrow and ... the map of Europe appears.......Click on Ireland and........
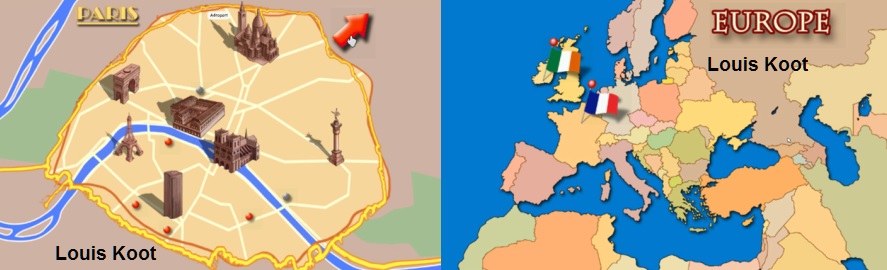
.......George end up in:
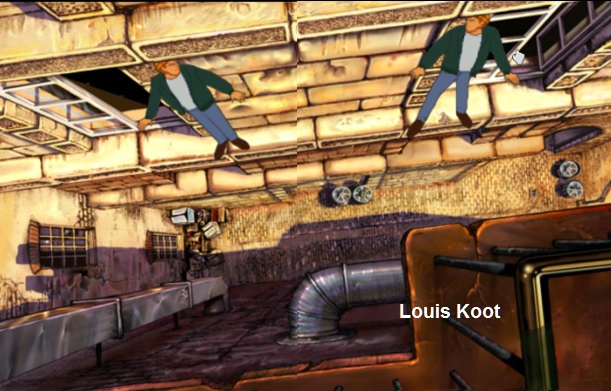
Chapter 5 : Lochmarne; Ireland; George Stobbard
2019: Walkthrough by: Louis Koot