
2021: Walkthrough by: Louis Koot
If you have found this walkthrough via google search or via another site then you have probably not visited my site.
A lot more very detailed game walkthroughs can be found on my site at: www.pcgameswalkthroughs.nl
Chapter 4: Quite a Show
Follow the path up the mountain until Norah reach the crossroad at the top. Turn right and follow the right path

Halfway this path you see a fresco painted on the wall. Stand close at the fresco and look at it with your eye to hear Norah's comment

Follow the path further. The stairs goes up to the amphitheatre that's on top of the mountain...we go there in a minute.
Follow the path to the end where Pillar A has fallen down on some tents

You can look at a photo that lies at the first tent that has survived the collapse. Zoom in on the panel that's on the fallen down pillar A. The panel has a fresco and 4 gray buttons that you can click but don't do that now. On the fresco you see a diamond symbol with a quarter circle in the left corner.....It's a representation of the 4 buttons. Click the fresco with your eye to record it in the journal

Turn around and follow the path back to the stairs and now climb up the stairs to the amphitheatre on top of the mountain

On top are the pillars B, C and D and they all have 4 buttons and a fresco, Go to Pillar B and look at the fresco to record it in the journal. The fresco also has a diamond symbol of the 4 buttons

Go down into the amphitheatre via the planks. Then turn around to see the 4 white symbols on the floor of the basin beside the planks....
Click those symbols with your eye to record them in the journal.

These symbols are also on the fresco's of the pillars A, B, C, D and they tell you witch of the buttons you must push in on the 4 Pillars. Go up again via the planks. Go to the microphone. Beside the microphone stand a tape recorder on a crate. Switch on the tape recorder to hear the recorded message. Above the tape recorder is an electrical switch with a lever but because there's no power the switch doesn't work

Turn around....You see the microphone, that doesn't work, and you see Pillars C and D.
There are several very big loudspeakers here and they all are connected with the microphone and they all are pointing at the big steel door of the temple

Go to the Pillars C and D and look at the fresco's to record those fresco's also in the journal. Both fresco's has a symbol of the 4 buttons

When you have looked at everything here and then the 4 fresco's of the pillars A, B, C, D and the 4 white symbols on the floor of the amphitheatre will be recorded in the journal

Go down via the stairs next of Pillar C and then turn left....You see the radio tower and a tent in front of it

On top of the radio tower is a switch and also in the tent is a switch but they don't work now because there's no power.
In the tent you can look at some photo's, but it is dark in the tent so you maybe it's best to first restore power.

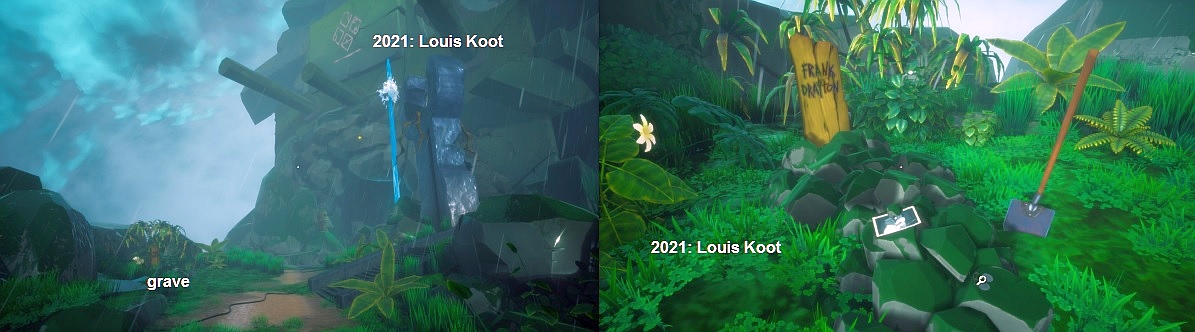
Standing in front of the tower and the tent turn right.......In the far corner you see a grave. Go to the grave and look at the photo.....
The Waterwheel Generator
Then turn around.....You now see the Water Wheel Generator behind the waterfall. Go to the Water wheel Generator

The water wheel isn't turning because the water of the waterfall isn't falling on the wheel. Also the generator, to witch the water wheel is connected, isn't running because there's now power. The generator and it has 3 levers, 1, 2, 3. If you click the levers then they won't go down

At the end is a tent and inside the tent stand the power cabinet with two levers. Both levers are up and you can't flip them down because the generator isn't working

Go to the back side of the generator. You see the 3 levers of the generator from the other side. all 3 levers are connected via a bar with a round wheel. In the 3 wheels is a hole.

The bar of the 3 levers must fit in the holes of the 3 wheels. But the waterfall isn't giving enough water to get the waterwheel running. So we must get more waterpower first and to get more water power we need to push the correct buttons on the pillars A, B, C, D. Via the 4 white symbols on the floor of the amphitheatre and the symbols on the 4 fresco's you can figure out witch of the 4 buttons you must click on the pillars A, B, C, D
Go back to Pillar A, the fallen down pillar at the end of the path. Zoom in on the fresco and the 4 buttons of the pillar and push button 1 to make it black

Go to Pillar B, zoom in on the 4 buttons and push button 4 to make it black

Go to Pillar C and make button 3 black

Go to Pillar D and make button 1 black and......

More waterfalls are now coming down from the mountain......Go back to the waterwheel generator and see.....the waterwheel is now turning

But the waterwheel isn't powering up the generator yet because the 3 levers are not down yet. You must get those 3 levers down now.. Go to the other side of the generator and make sure you can click the green button. Each of the 3 wheels has a hole and you see the 3 levers from the back side now. You must connect the iron bar of lever 3 with the hole in wheel 3, lever 2 with the hole in wheel 2 and lever 1 with the hole in wheel 1. To connect the levers with the wheels the hole of the wheels must be down

Click the button as often as it is necessary to get the hole of wheel 3 down. Then go to the other site and click lever 3 down....Lever 3 will stay down now.

Back to the other side and click the button again to get the hole in wheel 2 down. Back to the levers and click lever 2 down. Lever 2 will stay down.

Back to the other site and click the button again to get the hole in wheel 1 down. Back to the levers to click lever 1 down...lever 1 will stay down.

All 3 levers are now down and at the front of the generator , a panel with round buttons is activated. Zoom min on that round panel. The panel has 7 buttons......one button is white now but the other 6 buttons are gray. You must make all 7 buttons white. Each button toggles itself on or off and the buttons on the left and right of that button, so each button changes the status of three buttons.
It's a fairly simple puzzle. If you haven't push buttons yet yourself then only click the buttons at 11 hour and at 5 hour to make all buttons white.
But if this doesn't work for you then keep clicking buttons until you have all buttons white.

The water wheel is now powering up the generator. Now go to the cabinet in the tent and flip both levers and.....

......The lights go on now.

.....Now go back to the tent at the radio tower. There's light in the tent now. Go inside the tent and flip the lever of the switch to sent power to the switch on top of the radio tower.

Look at all the photo's here and then leave the tent and now climb to the top of the radio tower and on top flip the lever of the switch to sent power to the switch at the microphone but....

........Norah pulls the lever down but she gets an electrical shock and she falls down from the tower and is unconscious for a while....after the loading you're in Norah's nightmare;
Dried Ocean and the Everhard House
Norah's dreams that she's in a dried ocean

Open the journal....The journal shows 2 pages with images and names of the people who have worked on this game...this is one of the hidden things that gives you a achievement.

Put the journal away and go forwards to the big skull and go through the bone tunnel of the skull and ...Norah will get a flash back and the she sees her bed

From the bed go further forwards to reach a stone path. Follow the stone path over the hill and you'll see a house in the distance

Follow the stone path further to the house, witch is the Everhard house, and enter the house

In the downstairs room you can look at two photo's

Go upstairs and into the room at the back. Go through the room and look at all the photo's

On the chair that stand at the fireplace stand the musical box of Norah's mother. Open the musical box to end Norah's dream

Back at the Amphitheatre
Norah has woken up from her fall from the radio tower. The switch on top of the tower now sent power to the switch at the microphone.
Go up to the amphitheatre via one of the stairs

Go to the switch at the tape recorder and flip the lever down and......

......The microphone now also has power. Now use the Microphone and watch what happens.......

.......Norah sings a song through the microphone and......The door of the temple goes open. Go down and enter the Temple

Temple
Follow the cave tunnel to the end chamber and.....

......while you walk through the cave look at all the fresco's that are on the wall....you enter the end chamber of the temple cave

The round platform with the pedestal is the lift. On the two crates are some notes that you can look at. Then go to the pedestal and press the diamond button and.....

.......You go up to the upper chamber of the temple cave. Look around. There are 4 fresco's on the walls an beneath each fresco is a round slab with symbols, an arrow and a button. There's also a stone door with the numbers 1, 2, 3, 4 and there are symbols on the walls.

One of the symbols is circled white and is translated as Water Animal. On 2 crates is a note and also in the tent are several notes that you must look at and read.

First go look at and read everything here. So go to each of the 4 wall fresco's and click them withy your eye. Also click that Water Animal symbol with your eye and look at the 1, 2, 3, 4 circle on the stone door. Look at and read every note on the 2 crates and in the tent. When you have looked at all these things then it is all recorded in the journal and you can figure out how to get that stone door open

Beneath each of the big wall fresco's is a round slab with symbols, an arrow and a button.. From left to right I have marked the 4 slabs as A, B, C. D. To open up the stone door you must turn the arrow on each of the 4 slabs to a certain position and that can be up, right, down or left. You can figure this out if with the information in the journal

So go to each of the 4 slabs and press the button in the middle of the slab to put the white diamond shape arrow on each slap to the correct position.
In this screenshot you see ho it must be on each slab

When you have done this correctly the stone door goes open and you can go through the passage to the last cave of the temple
It's a huge and deep cave ant it is the actual temple cave. Go up the stairs to the 3 Drums.

......On the crate are 2 notes that you can view and read

The Drum puzzle: Follow the Leader
Go stand at the 3 drums and zoom in on them. Do not hit a drum yet....let me explain this puzzle first....

Each of the 3 drums gives a different sound....The left drum produces the lightest sound, the middle drum gives a dull sound, and the right drum sound the dullest.
You start with hitting the middle drum (2) and then you see purple symbols appear on the wall of the cave.....

You then hear a sequence of drum sound and you must repeat that sequence on by hitting the correct drums. It start with 2 drums, then 3 drums, again 3 drums, then 4 drums and then 5 drums...every time you must repeat the sound that you here by hitting the correct drums of that sequence......It's hard if you don't have good hearing and I do not know if the sequences are randomly generated but here is how it was for me......
You start the puzzle by hitting Drum 2, so the middle drum
For me the sequences that I had to repeat on the drums were
Sequence one: 1 + 3
Sequence two: 2 + 3 +1
Sequence three: 1 + 2 + 1
Sequence four: 3 + 3 + 1 + 2
Sequence five: 1 + 3 + 3 + 2 + 2
Again.....I do not know for sure if the sequences are not randomly generator in each game, so it may well be that it is different in your game...
When you have solved this Drum puzzle a pedestal will be created on the on the edge beyond the drums....

Go to the pedestal and place your hand on it and.........

Norah puts of here gloves and puts her hand on the pedestal and......The cave fills with water and......Loading and.....you are in:
2021: Walkthrough by: Louis Koot