2019: walkthrough by: Louis Koot
If you have found this walkthrough via google search or via another site then you have probably not visited my site.
A lot more very detailed game walkthroughs can be found on my site at: www.pcgameswalkthroughs.nl
Cold Case Summer is Mikael Nygvist's 9th Carol Reed game, with the voice of Sara Louise Williams as Carol Reed. I assume that you have played a Carol Reed game before and therefore know what type of games these are. You will undoubtedly know how to move Carol through the game, with your computer mouse. Compared to the last 2 Carol Reed games 7 and 8, nothing much is changed in terms of the interface.
Cold Case Summer is based on the murder of Swedish Prime Minister Olof Palme.

Cold Case Summer is Mikael Nygvist theory about the motive of this murder.
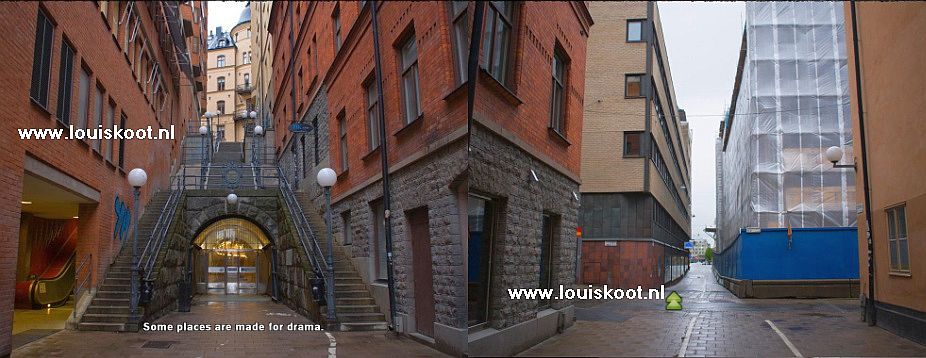
The game starts again with a Tutorial, which you can play or skip. If you have done a Carol Reed game before, the Tutorial is a piece of cake for you, so I skip it. If not, play the Tutorial and follow the instructions that appear on the screen. Whether you play the Tutorial or not, the game starts, as usual, with a musing Carol while you are presented with a number of photos of Norrköpping and then we are in Carol's bedroom.
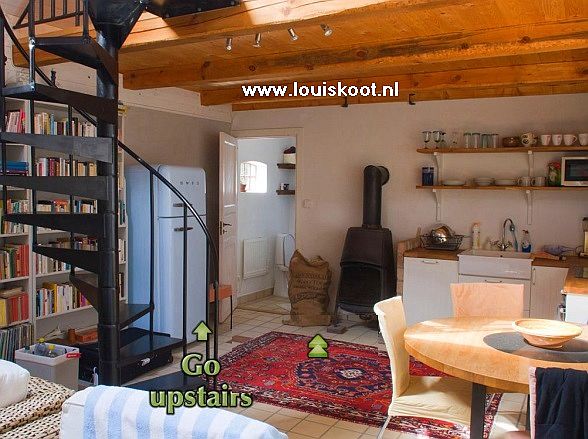
Carol's flat:
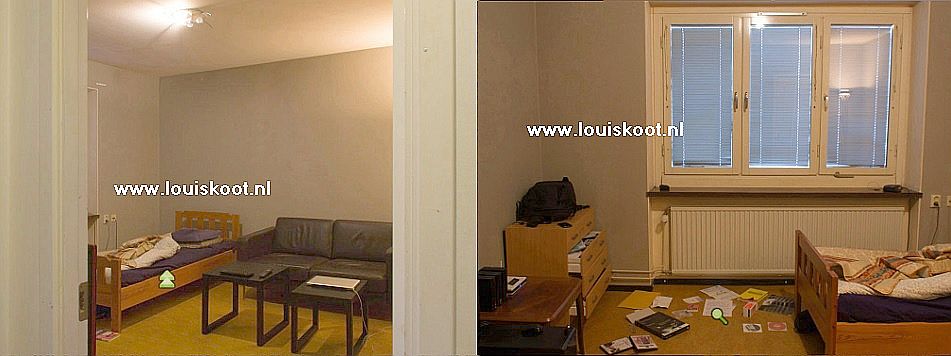
It is still early in the morning and Carol has just woken up and is lying in bed staring at the ceiling. The game tells you to click the up arrow to jump out of bed. So click the up arrow and ..... Hupsadaisy..... Carol jumps cheerfully out of bed and we stare at the double doors that lead to Carol's living room. Take a look around the bedroom. Wow ... not even a minute out of bed and Carol is already fully dressed and made the bed nice and tightly ..... my housekeeper, with whom I am married, really does take much longer.
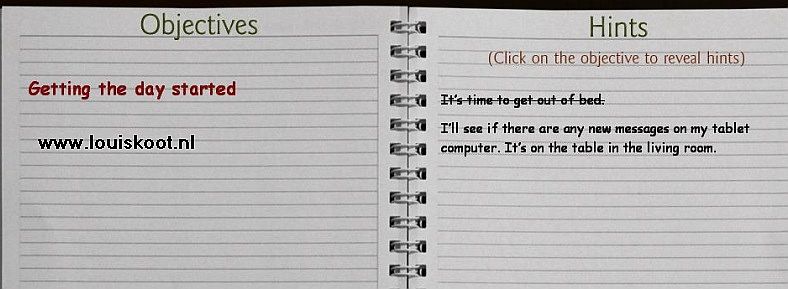
A clown doll lies on the bed. When you click on the doll, Carol tells you that she called him Len, which personally I think is a rather lame name. If you move the cursor upwards, the Inventory bar will pop up above the play screen. In the Inventory Carol keeps all the items she picks up in the game.
At the moment you will only find Carol's notebook in the inventory. Carol's notebook is the Hint system in the game. In the notebook Carol notes, naturally, on the left page the tasks (Objectives) that she has to do. If you click on a task, hints will appear on the right-hand page about what you must do next to complete that task. This even goes so far that the Hints also gives you the complete solution of the puzzles, if you click through often enough.
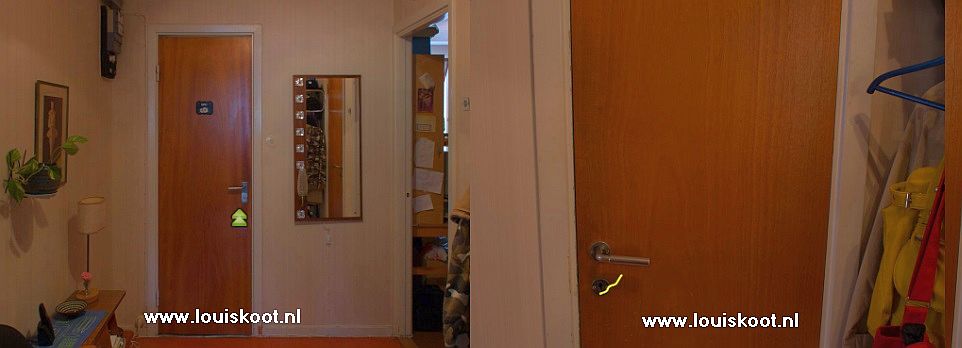
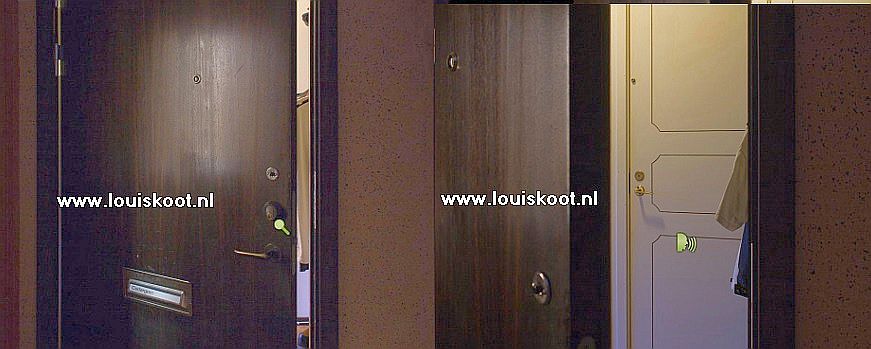
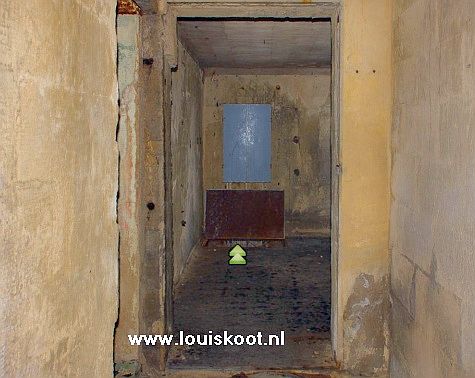
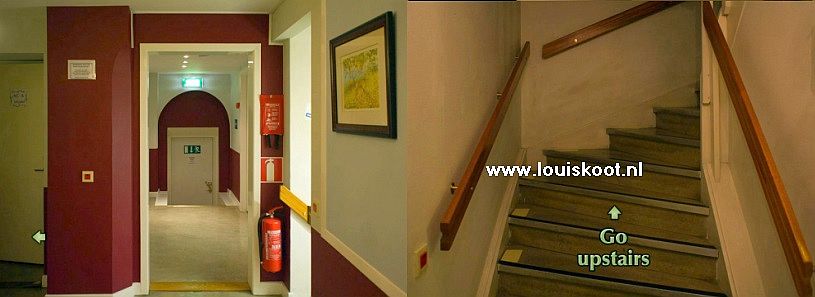
Close the notebook and turn right and then leave the bedroom through the single door with the round window in it. Carol end up in her hallway.
The game treats you with the message that you open the menu screen by pressing your ESCAPE key. You can save, load and leave the game on the menu screen. The Game always makes an autosave when you close of, but you can always save yourself at any time.
Carol is now in her hallway at her front door. Turn left 1 time and then enter the kitchen. Turn left immediately in the kitchen.
Carol's sewing machine is on the kitchen table and there is scissors and a round box with pins.
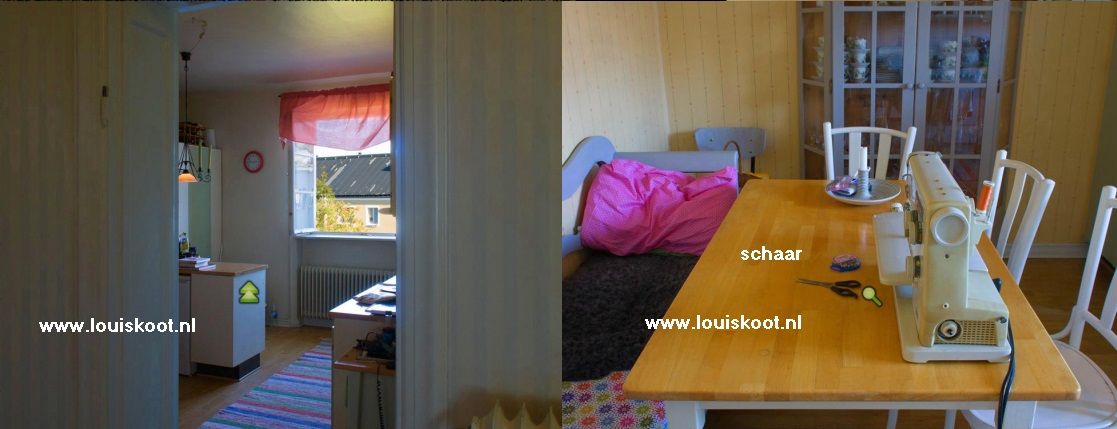
Zoom in on the scissors and then grab the scissors and click the scissors to the inventory.
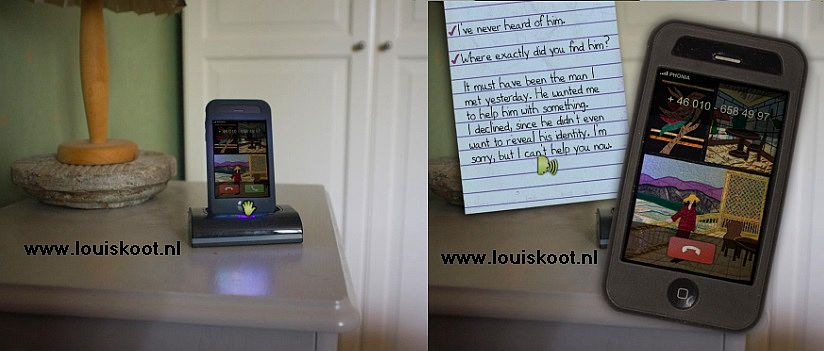
Turn left and enter the hall again and then go straight to the living room. Walk through 1 step and then turn left again and walk through to the double doors of Carol's study. However, do not go into the study yet but turn left again and ..... The game tells you that you can use the Space bar to see all the "hot spots" in the screen. Click the message away and ..... Carol is standing in front of her large pine wooden table. Carol's Tablet is on the table ..... Yes yes .... we keep up with the modern times. Zoom in on the Tablet and then click on it with the hand to make it look big on your screen. Click on the On / Off button in the right edge of the Tablet to turn on the thing
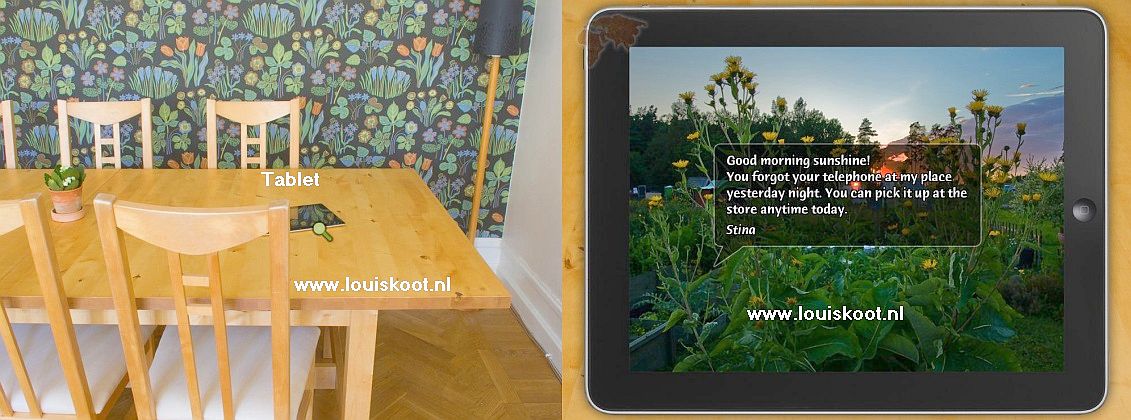
A text message from Stina, Carol's best friend, appears on the screen. Stina reports that Carol has left her cell phone with Stina. Carol can come and pick up her cell phone at Stina's store. The logo of your map flashes at the top left of your screen. A new location has been added to the map, namely Stina's store. The game also gives you a message about this. Left click to continue and then turn off the Tablet by clicking the on / off button again. Then click twice the turning arrow, at the bottom of the screen, to throw the tablet back on the table and to go out of the close-up. Carol doesn't take her tablet with her but she leaves it here on the table
Turn right and now go through the double white doors to Carol's study. Carol has placed her enormous Ikea, or Lundia, bookcase on the long wall, but at the moment there is nothing to do in the bookcase. Turn clockwise to Carol's desk, where her computer is. You get the magnifying cursor between the mouse pad and the keyboard, so zoom in on that spot.
In the close-up you see the left speaker, 2 flacons and a black device that looks a lot like a photo lens.
Grab the black device and then click on it with your magnifier and .....
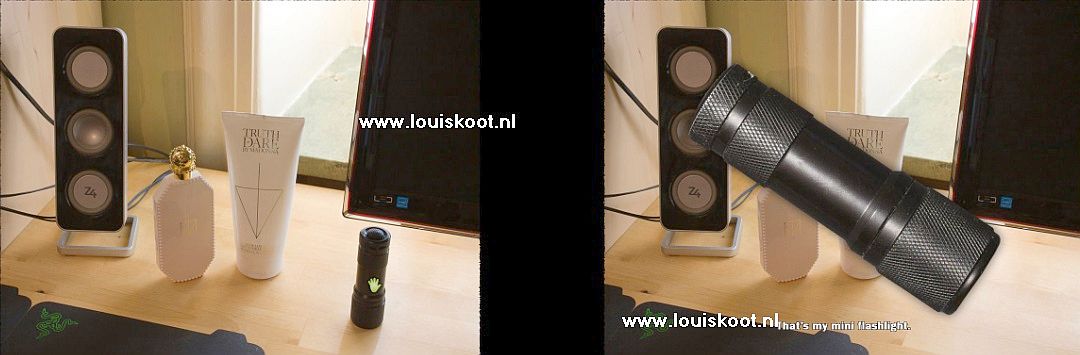
Carol reports that the thing is a mini flashlight. Click the flashlight to the inventory.
Turn right and return through the white doors to the sitting room and then back to the hall. Stand in the hall against the front door again and then turn twice counter clockwise and ..... Carol "must", so open the toilet door to enter the bathroom. Carol's bathroom is currently being renovated because the drain system is completely rotten. You look at the floor. Turn left. At the white plinth there is a blue pencil on the floor.
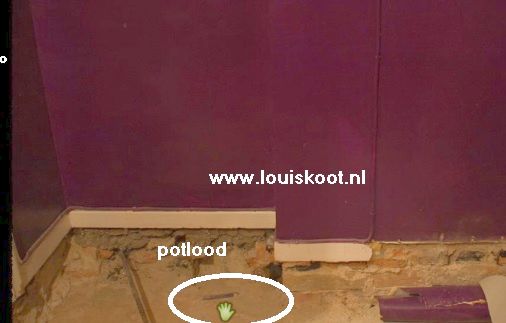
Pick up the pencil. There is a long number on the pencil. Click the pencil to the inventory.
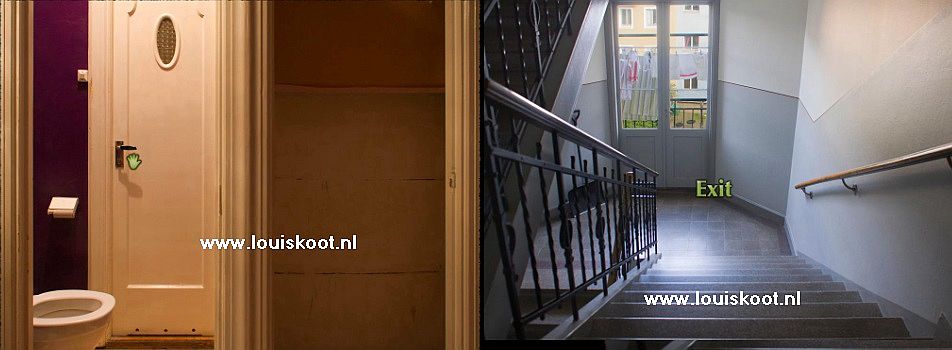
Turn left and ... Carol looks at her toilet. Click on the door handle of the toilet door to return to the hall. Then turn left again and we are again at the front door. Click on the door handle on the front door to leave Carol's apartment. You end up in the stairwell.
Click EXIT and ..... you end up on the map. Carol travels quickly and comfortably to the various locations via the map. Those locations must first become available. At the moment there are 2 locations available "Home" and "Stina's Store". Home is Carol's flat so go to the Stina store now.
Stina:
Stina has once again started a new store .... she now runs a snack bar. Talk to Stina through all the options in the notebook.
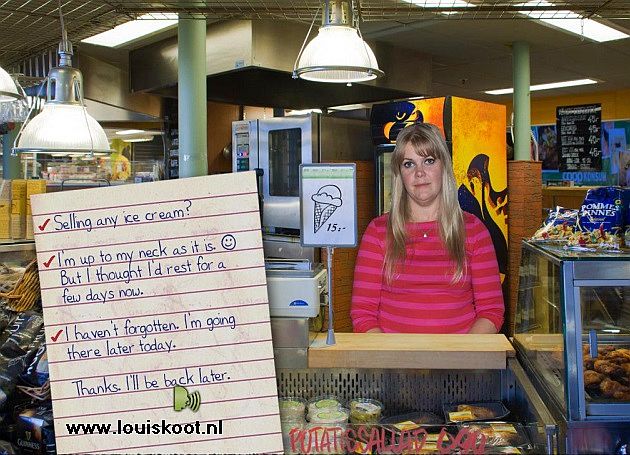
Stina asks whether Carol has already had time to pick asparagus pods for her. Carol's Allotment is now placed on the map. Stina gives Carol her cell phone back, but you have to click on the cell phone to grab the thing and put it in your inventory. Say goodbye and then travel via the map to Carol's Allotment, to pick some asparagus pods for nag Stina.
Carol's allotment:

Upon arrival you look at Carol's shed. Walk 1 step ahead and then turn left. You look into Carol's garden. Walk 2 steps further ahead and then turn left again and .... you are now standing in front of Carol's box with asparagus pods. Zoom in on the asparagus pods and pick a handful of the pods and then click this delicious vegetable to the inventory.

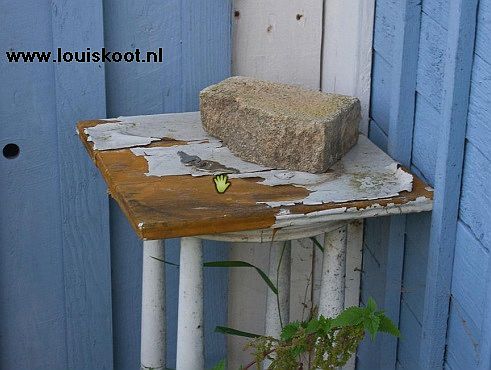
Turn around and then left and aim the forward arrow to the passage, right next to the Carol's blue barn. Then go 2 steps forward. You are then standing at the wooden bench that stands against Carol's shed. Turn left and walk on to the high round table with a stone on it.
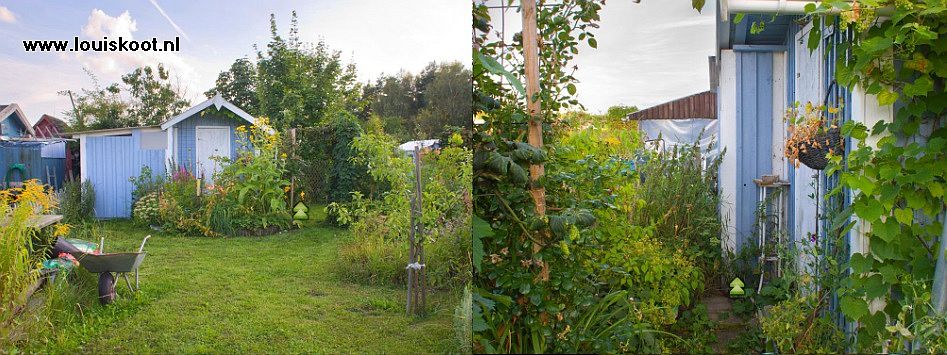
Carol of course keeps her shed locked when she is not here. Zoom in on the stone and then lift the stone and then take the scouring keys that are under the stone.
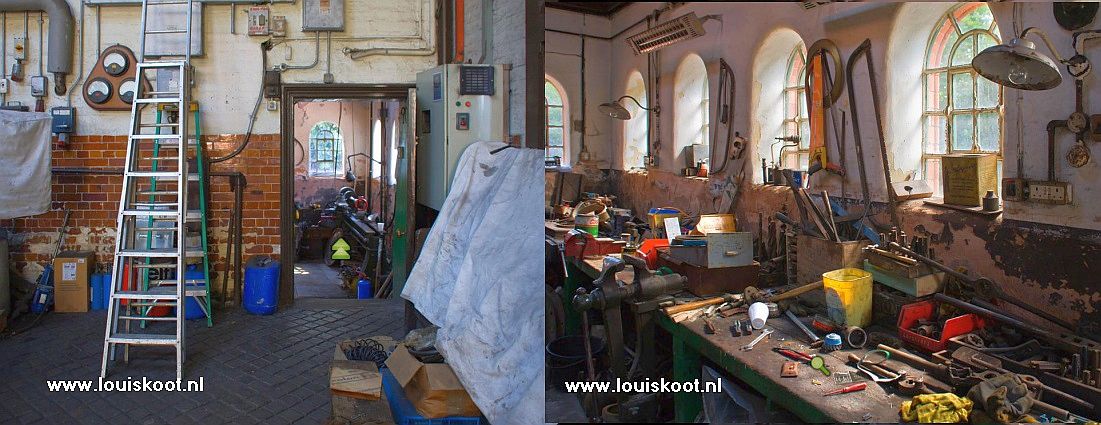
Step backwards via the turning arrow and then turn clockwise to the white barn door. The door is locked with a padlock so take the just found Keys from inventory and click on the padlock and .... Carol enters her shed. Look around the shed. There is a bed and a shoe table and on the right side Carol has a workboard with a chest of drawers underneath.
Turn to the workboard and then open the top drawer. Carol does not need anything from the drawer yet but opening the drawer is now the "trigger" for the phone call that Carol will receive when she leaves the shed. So close the drawer again and turn right and leave the shed and ......... Carol gets a phone call and Carol's cell phone appears in your screen. Click the green button to answer and then talk to the guy through the conversation options that appear.
The man who calls Carol wants to meet her as soon as possible at the "Graffiti Heap", but he does not say who he is or why he wants to talk to Carol. The man says he wants to meet Carol now and he breaks the connection. The "Graffiti Heap" is now on the map. Turn left and go out of the shed in 2 steps, then turn left and click EXIT and then travel through the Map to the:
Graffiti Heap:
The Graffiti Heap is a "junk yard" on the industrial site of Norrköpping and Carol has landed on the road. Continue one step further and then turn right.
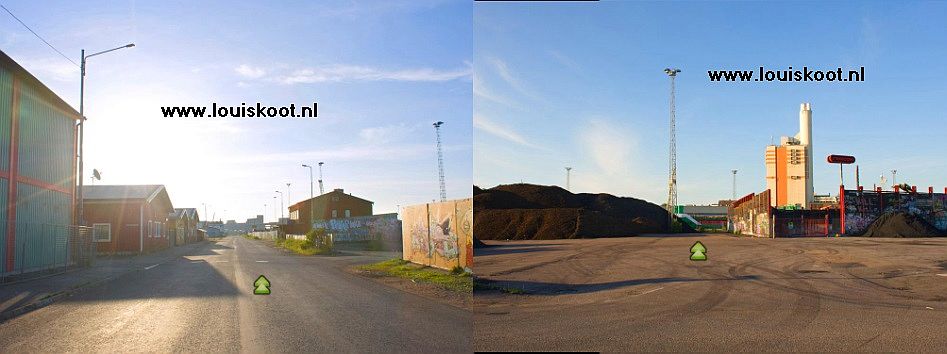
Go 2 steps forward and then turn left. You are now looking at the junk yard.
Go 3 steps forward again and then turn left again. You now see 2 blue waste containers

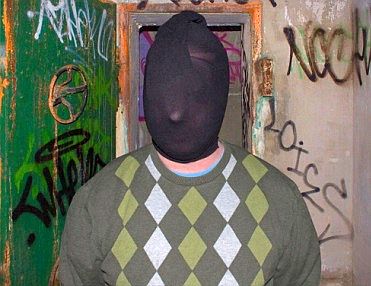
Continue to the blue waste containers and then turn left and then take another step forward and .... Carol is greeted by the guy you were on the phone with, but you don't get to see the guy.... Click the forward arrow but the man screams that Carol should stand still ..... the man does not want to be seen. Talk to the voice through the conversation options that now appear .......

The man calls himself X and he says he has a case for Carol that will make her world famous. However, Carol does not like the sneaky voice, so she refuses to cooperate. X will call again in a few days to see if Carol has change her mind. The number of X is now in Carol's telephone.
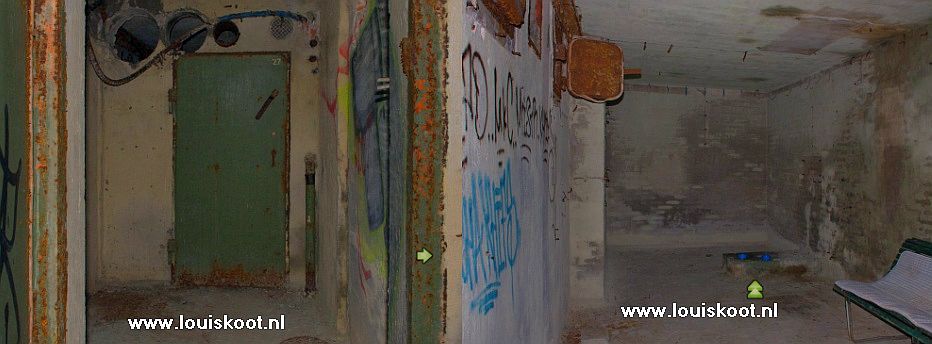
Carol now wants to go back to her flat, so turn 2 times to the left or 2 times to the right. Then 1 step forward, right, 1 step forward, right, 3 steps forward, right, 2 steps forward, left and another 1 step forward and then click EXIT and we will be back in the apartment building where Carol's flat is, but not in the flat but in the cellars.
Carol's flat:
Cellar:
Because Carol's bathroom is being renovated, she has had a temporary shower in the basement.
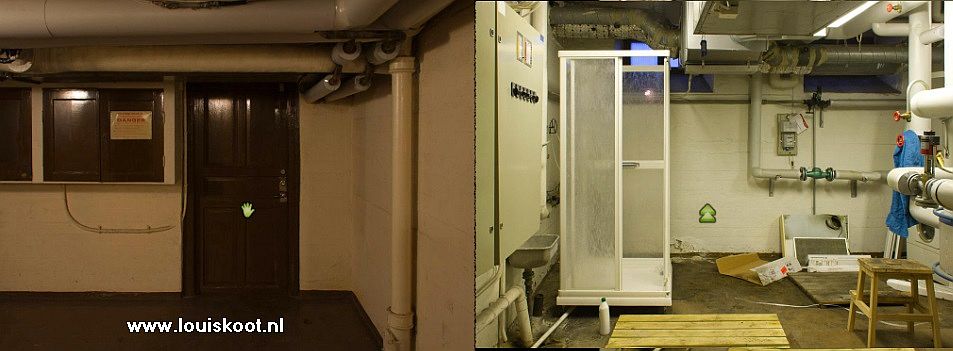
Click on the brown door to enter and then walk 1 step to the white shower cubicle but do not enter the cubicle yet. Turn to the right and .....
on the thick white pipe hangs a blue bath towel and on the pipe is a blue and a white bottle.
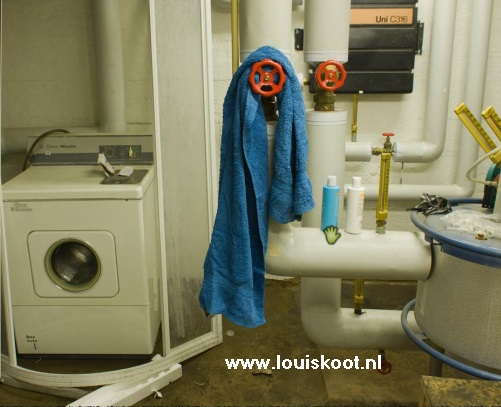
Take the blue bottle with shower gel and click it to the inventory. Turn left again and now enter the shower and ..........
Your screen goes black for a while Carol takes a shower and after the shower Carol returns to her flat.
Bedroom:
It is now late in the evening and Carol has completely put Mister X out of her mind again. It's time to sleep so Carol walks into her bedroom. Turn right and then click with your magnifying cursor on Carol's bed and then click with your hand on clown Lenny to push the doll aside and then click on the blanket to flip it over and then click SLEEP and .....

Carol dives into the bed and ...... Early the next morning Carol is woken up by her phone and she stares at the ceiling lamp.
Turn left and then take Carol's cell phone out of the holder and press the green button ....
It is one Samuel Rickman from the Norrköpping police who calls Carol awake. Rickman would like to know if Carol knows a Harri Michelsen or has heard of him. Give Richardson the answers and you will find that Harri Michelsen was found dead and that Carol was the last person with whom Michelsen has called. Michelsen is strangled and they have fished his corpse from the Flat Iron river, at the Wire Lookout. This location is now added to the map. Carol tells about her meeting with X and that this was probably Michelsen and that he asked her for help but that she refused. Rickman reports that they may want to interrogate Carol even further later on, and then the conversation ends.
Turn right and then click the up arrow to climb out of bed and then, via the double white doors, go to Carol's:
Living room:
Walk through to the white doors of the study and then turn left and take Carol's Tablet from the table again. Turn the Tablet back on again by pressing the on / off button and ..... Well ..... the tablet has information about that Harri Michelsen, searched on the internet. So read the info about Michelsen, who we know as Mister X.
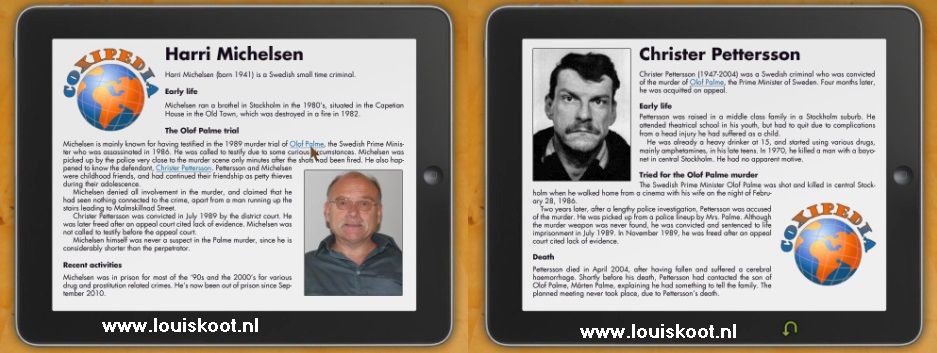
Harri Michelsen was a petty thief who ran a brothel in Stockholm and traded in drugs. Click with a close eye in the article and ...... Carol notes that she knows someone who is familiar with the world of prostitution and because of this a new location is added to the map and that is the address of Amber, the whore from the previous game "Amber's Blood". Also click on the hyperlinks in the article to read the information about Olof Palme and Christer Pattersson
Michelsen was arrested by the police a few minutes after the murder of Olof Palme, near the crime scene, but he denied having anything to do with the case. Michelsen stated that he did see a man running away, up the stairs to Malmskillnad street. Michelsen was never a serious suspect for the police, because he was not big enough. This as a result of research into the direction from which Olof Palme was shot and the height of the shot wound. Michelsen was a childhood friend of one Christer Pettersson. Pettersson is the man who was convicted for the murder, but was acquitted again on appeal for lack of evidence.
The article about Christer Pettersson tells you that this is the man who was convicted for the murder of Olof Palme but that he was acquitted on appeal for lack of evidence. The article about Olof Palme gives you some information about the murdered prime minister such as a brief summary of his origins and political career. Olof Palme and his wife were shot from very close by but Mrs. Palme survived the attack.
When you have read the 3 articles and you have made sure that Amber's address is placed on the map, you put the Tablet back on the table by turning around using the turn arrow. Then leave the flat, through the front door and the EXIT in the stairwell, and then travel now to the:
Wire Lookout:
So here is Harri Michelsen's corpse fished out of the river.
The lookout is a round tower that stands under a tree on the banks of the river. Continue one step further.

If you want to enjoy the view, you can climb up the globe. Then climb back down again and take a good look around the tower. Walk further behind the tower and then turn left and ......... Carol reports that she is close to the "Graffiti Heap", where she spoke to Harry as Mister X. Walk down the stone steps and turn around then to the stairs and .......
there is a wire brush on one of the stone steps. Zoom in on the wire brush and then take the thing and click it to the inventory.
Walk up the stairs again, then turn right and go 3 steps forward to the street, and then turn left or right and click the EXIT. Travel via the map to the:
Graffiti Heap:
Well .... you remember the route to the 2 blue containers, so follow this route to the 2 blue containers again and turn left again and then take another step forward to the red building. Now zoom in on the alley between the red building and the large generator. You then look through the alley and see a few stacks of pallets. There is a white piece of paper near the rear pallets on the floor.
Zoom in on the white piece of paper and then pick it up ..... there is a code of dashes and dots on the note .... is this a Morse code?
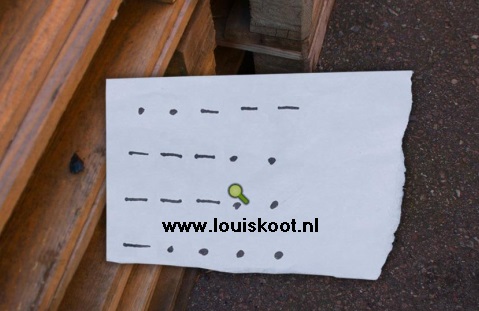
Click with your loupe on the paper ..... Carol wonders if Harri has lost this paper here. Click the paper to the inventory.
Turn around and follow the route back to the EXIT and then travel to the home of the old whore Amber:
Amber:
Ask Amber everything you can ask her

Amber says that she used to work for Harri in Stockholm. Amber knows that Harri recently moved to Norrköpping, probably to avoid the people to whom he owed money. Amber spoke to Harri the day before yesterday and gave him Carol's phone number. Harri was rather secretive about his address, so Amber met him in cafes and so she doesn't know exactly where he lived. Amber does know that Harri worked as a part-time guide at the Pamplestone gas station and this location will be added to your map.
Say goodbye to Amber and now travel to that:
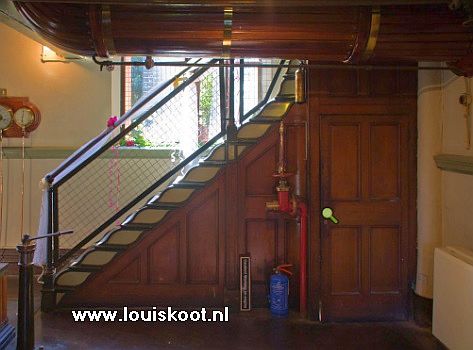
Pamplestone Pumping Station:
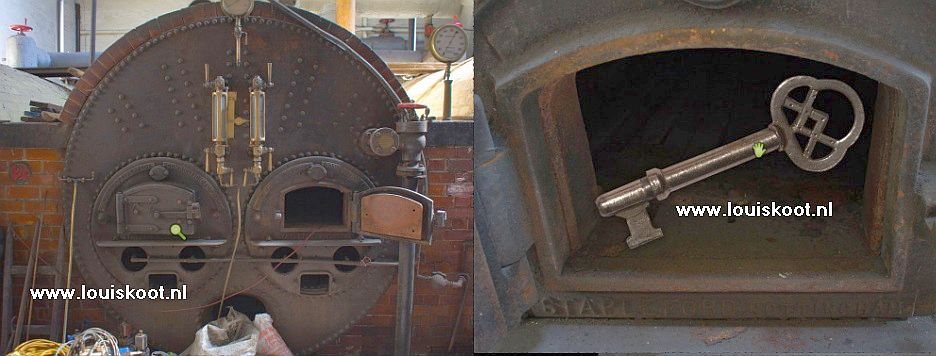
The pumping station is located in a beautiful old building, so go inside.
The front room is a kind of museum. In the rear rooms are the large boilers of the pumping station. When Carol is inside she is standing on the "bridge".
Walk one step further between the pillars. To the left of the boiler room door is a tool table with a large hammer on it. You can now pick up the hammer but if Carol leaves this building then she will, of course, put the hammer back on the table because she is of course not a thief. So don't grab the hammer yet but wait until Carol really needs the hammer here. Turn left and .... you see the stairs and a cupboard door under the stairs.
Zoom in on the door and then try to open the cupboard door by clicking on the door..... Unfortunately .... the door is locked. Get out of the close-up and then turn left or right twice. You then look at a desk that is on the other side of the hall, at the windows. There is an open book on the desk that you can view in close-up, but it really doesn't matter. Turn left again and enter the boiler room through the door. Walk between the stone kettles to the next doorway. Carol cannot go outside through the back door. Turn left and walk to the wall and turn right again and .....
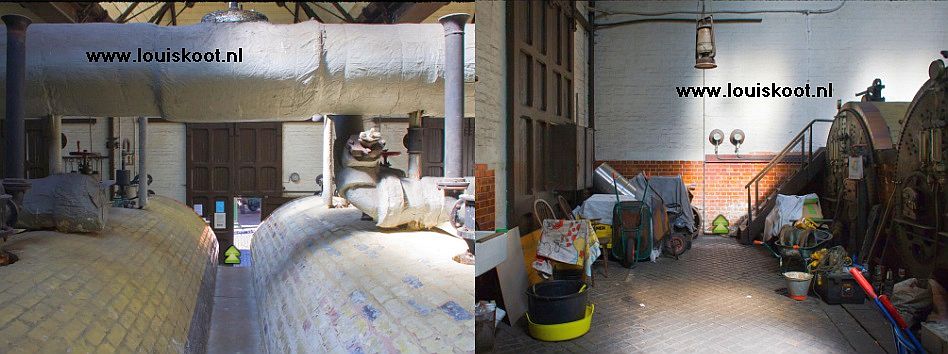
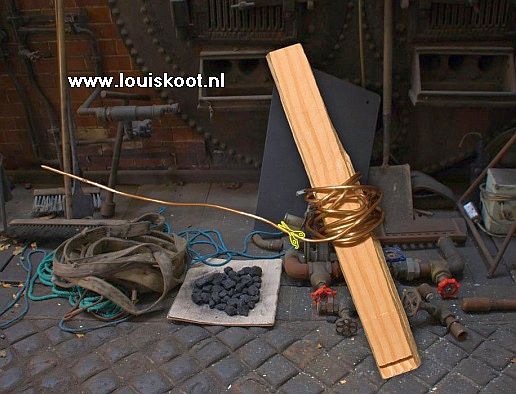
Carol is now at the rear of the left furnace. The right hatch is open and the left hatch is closed. Click twice with your magnifying glass on the left hatch and ...... Carol reports that she can't open the hatch. Zoom out and turn right. Just past the back door you now see a pile of wood on the floor. Take 2 steps forward and then turn left and .....
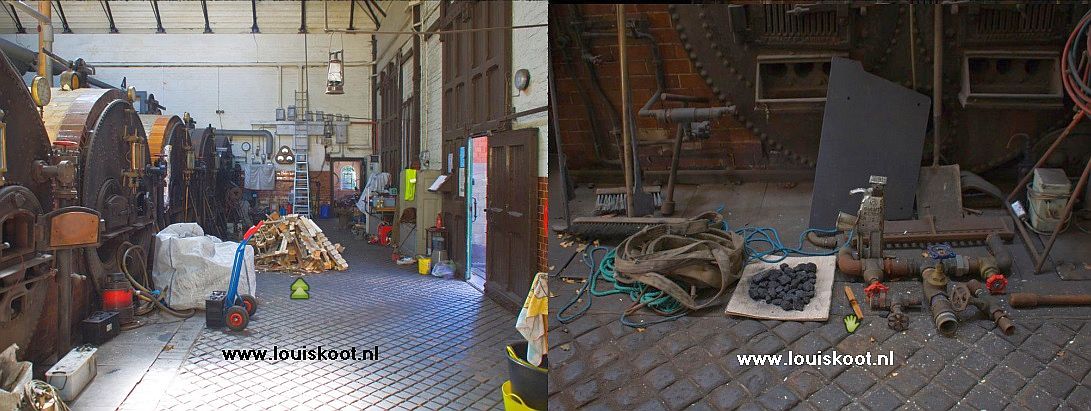
On the floor is a handful of coal on an old newspaper. To the right of the coal newspaper is a wooden plank with copper wire wrapped around it. Pick up the plank and ..... The plank with the copper wire comes large in your screen and Carol reports that she can use a piece of the copper wire. So take the scissors from inventory and then use the scissors to cut the protruding part of the copper wire and then click the cut piece of copper wire to the inventory.
Get out of the close-up via the turning arrow .... Carol puts the plank back on the floor.
Turn right again and now enter the workshop through the doorway. Turn left in the workshop and then zoom in on the front workbench.
Between all the junk is a double photo of an arbor building. Pick up the photo and then turn it over via the curve arrow.
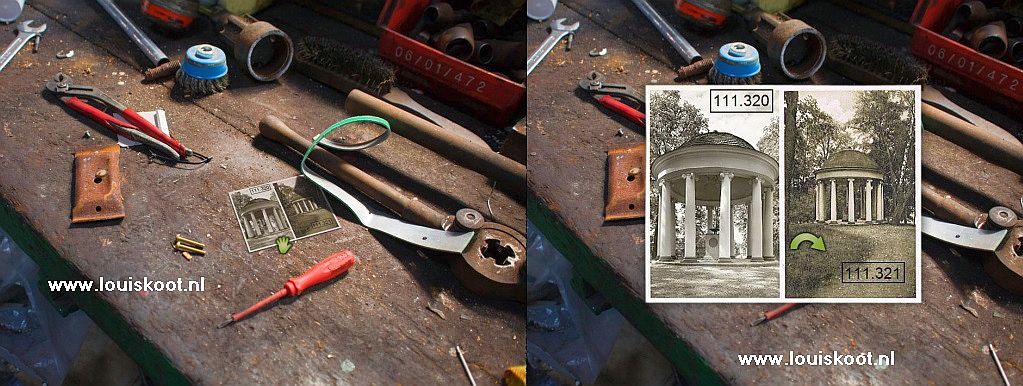
On the back of the photo you read a message from one Rita to Harri. According to that Rita, the monument in the photo is the building with the ceiling painting that Harri has asked for. Click the photo to the inventory. Turn left and walk out of the workshop and then one step ahead. Turn right and walk up the stairs, between the ovens, and then continue straight ahead out of the building. Once outside, turn left or right and click EXIT and then travel via the map back to:
Stina:
Give Stina her asparagus pods via the conversation options and then continue to talk to her about the photo, that you just have found. Stina thinks that the arbor monument is one of the "Aurora Monuments" on the hill, north of Stenhagen. This Aurora Temple location is now available on the map. Say goodbye and travel to the:
Aurora Monument:
Carol ends up in the forest. Walk 1 step forward ...... you will see the road and you cannot move forward, turn right and ...... you will see an iron arbor.

Walk 2 steps through the arbor. Carol is then on the other side of the arbor and cannot continue straight on.
Turn right and ...... There is a tourist information sign in the grass. The sign provides information about the "Iron Temple". the iron arbor that you just went through
The arbor was commissioned by Countess Aurora Rosvall for the garden of her house in Finspong. A year after the death of the countess, the "Aurora Temple" was built on Hageby Hill, which should be close by. The Hageby location is now placed on the map.
Get out of the close-up, turn right and walk back through the arbor to the road. Carol then stands in front of the bunch of purple flowers.
Turn left and take 1 step forward and turn left again and click the EXIT. Now travel via the map to the:
Aurora Temple:

The Aurora Temple is therefore the monumental round building that is on the photo of that Rita. Walk up the hill and go stand in the center of the building. In the center of the building is a bronze bowl / scale on the square pillar. Below the scale is a photo lens. First look up at the ceiling to admire the ceiling painting with little angels. Then look down again and then zoom in on the Photo Lens, which is to the left under the Bronze Scale. Take the Photo Lens. Turn the lens via the curve arrow. A telephone number sticker is stuck on the lens. Click with your hand on the lens and ....... a hint will appear in the screen .....

Carol has stored the phone number in her cell phone and she wants to call that number now, so left click to continue. In inventory, right-click on Carol's cell phone and then click on the telephone number and ..... Carol gets that Rita on the line ....... Talk to Rita via the options. Rita does not want her lens back because the thing is broken. Rita is relieved when Carol says that she is not Harri's wife and she tells Carol Harri's address, which is now available on the map. Say hello, turn around and walk back down the hill until you can't go straight ahead. Then turn left or right and click EXIT and then travel to:
Harri's apartment:
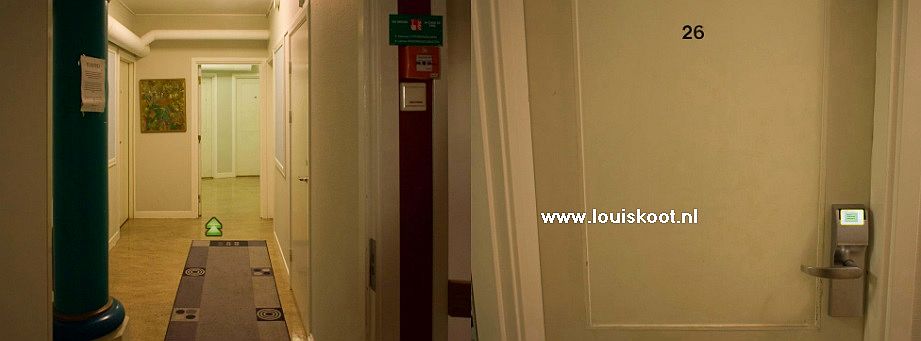
Go in through front door 51 .... Carol then enters the hallway and stand at the door of Harri's flat. Read the name on the mailbox .... Harri Michelsen, so you are at the right door. Click on the door handle but ..... Well ... the door is locked and we have no key. Turn around and go outside through the door and turn right. Harri's flat is a ground floor flat in the apartment building and therefore it has a small garden. Walk forward to the corner of the apartment building and then turn right and go forward again 1 click, along the side wall. Turn right again and........Carol is at the back of the apartment building.
To the right, behind the lamppost, you can see the green garden gate of Harri's garden. Take 1 step forwards and then turn right and ....
Carol then stands directly in front of Harri's green garden gate. Open the garden gate and step into the garden.
Open the gate of the porch and climb up the porch and then click on the door handle of the white back door ..... unfortunately .... also Harri's back door is locked. Turn around and climb of the porch again and then turn right and take a step forward and turn right again and ...... We are standing in front of a window and the window is slightly open.
A garden table and garden chairs are standing very hospitably under the window. Zoom in on the window and then click on the left window and ....
Carol climbs in through the round garden table and ends up in Harri's study:
Study
Turn left twice. In front of the other window is Harri's desk with his computer and his piano keyboard.
There is a white piece of paper in front of the piano where something has been cut out.

Zoom in on the white paper and then pick it up. A photo of a building has been cut out of the paper, but unfortunately the address of that building has also been cut out. Step 2 times out of the close-up and turn left. At the bottom of the bookcase is a rolled up sheet of paper.
Zoom in and take the rolled up paper from the bookcase. The explanation of the Morse codes is on the paper.
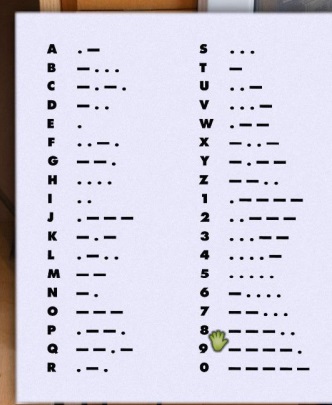
Click the paper to the inventory. You can now, with the help of this explanation paper, translate the Morse code letter that you have found on Graffiti Heap. If you do that then it turns out to be numbers and these are: 2 8 8 6 also a code ?. Turn left again and walk into the hall
In the low cupboard there are telephone books and between the telephone books is a brochure about the Pamplestone Pumping Station. Take the brochure and read the information ..... The Pamplestone station was built between 1882 and 1884 and was in use until 1954. Since 1974 it has been a museum and every Sunday the pumps are put into operation for the public. Put the brochure back and turn left and then walk into the kitchen. At the back right of the kitchen is a low Lundia cupboard and on the cupboard is a black piggy bank. A large mushroom poster is stuck on the wall.

You can pick up the piggy bank and then turn it upside down and back again, but otherwise Carol doesn't want to do anything with the piggy bank so put the thing back on the Lundia cupboard. Go back to the hall. You will then see the toilet door. You can take a look in the toilet, but there is really nothing to experience or you must really need to relief yourself. Turn left and enter the living room / bedroom.
Living room / bedroom:
To the left of the sofa is a magazine table where you can find a letter from Harri. So zoom in on the table and take the letter out.
Harri has noted down some tasks on the note and one of the tasks was to show Amber a manuscript. Click on the note and ....... Carol is surprised that Amber didn't tell her about a manuscript. Get out of the close-ups and turn counter clockwise to the bedroom door. There is a writing desk with a flap in the corner.
Zoom in on the writing desk ..... however, the lid of the desk is closed and Carol does not have the key. Get out of the close-up and then go through the door into the bedroom and look around. To the left of the TV is a door with a mushroom poster on it. View the poster in close-up ...... Apparently, Harri was fond of mushrooms. Go back into the living room and continue to the white back door.

The keys are in the lock of the back door. Open the door and Carol lands outside on the porch. Turn around and step back into the flat through the back door. From now on the back door is unlocked and Carol no longer has to climb in through the window. Turn clockwise. Behind the white table stand a white cabinet at the wall. The cabinet has drawers. Zoom in on the left drawer and then open the drawer.
There is a sheet of lined paper in the drawer. Pick up the paper. On the sheet Carol reads the titles of the chapters of the manuscript Harri was writing.1 of the chapters is entitled "Meeting with Siggi and Crille". Get out of all close-ups and .....Carol now receives a text message from her off and on boy friend Jonas

Jonas has bought a new car and he has sent a photo of it....what is it with men and there cars.......I can't even drive a car, so I do not have one. Click the phone away and go back to the hall and out through the front door. Carol ends up in the stairwell through the front door, but Carol can now also enter Harri's flat via his front door Exit the apartment building and find the EXIT and go back to:
Amber:
Ask Amber now about Harri's manuscript and also ask her about the "Dead City" ........
Amber now shows Carol two pages of Harri's memoirs that you read.
Click with the turning arrow to read the 2nd sheet. A photo is stuck on the second sheet.
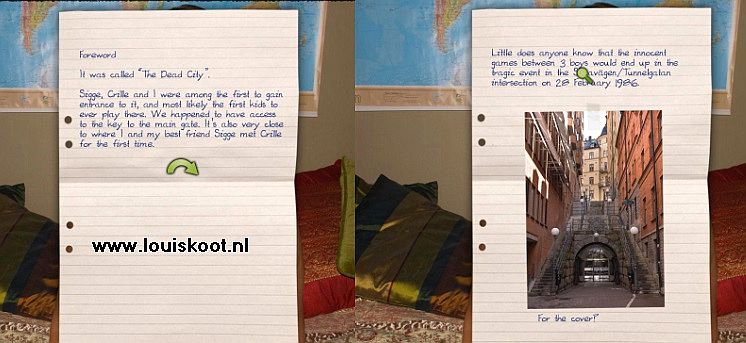
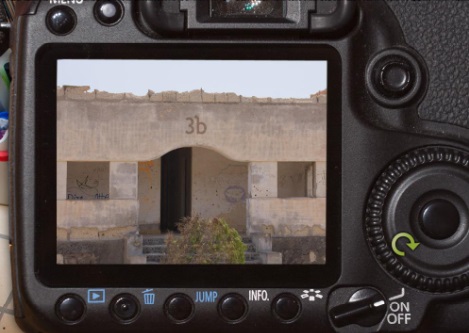
The photo shows the location where Olof Palme was murdered. Click on the text above the photo to put this Sveavägen / Tunnelgatin location on the map. You can enlarge the photo by clicking on it. You read that Harri, Sigge and Crille played as children in a place they called "The Dead City". Amber has no idea where the "Dead City" is, but she does know who Sigge is. Sigge used to be the owner of a casino and a drug dealer. Now that Sigge has a hostel in the center of Stockholm. The name Crille means nothing to Amber.
Say goodbye and on the map you now click on the "Olof Palme Murder Scene" ...... But Carol says it is too far away to go on foot .... and that makes sense because Olof Palme was murdered in Stockholm and that is a long way from Norrköpping. Carol needs a car and who has just bought a new car ...... yes.....Jonas ..... Open the inventory and right click on Carol's phone and then call Jonas and ask him if you can borrow his new car and he makes an appointment with Carol in the "Pyramid Elm Park", which immediately appears on the map. So travel to it:
Pyramid Elm Park:

Jonas has a new job again. Talk to him and ask him about the keys to his old car. Jonas reports that his old car is parked in the Steiner Parking lot and he gives Carol the key. Click on the key to store it in inventory and the parking location will be placed on the map. Say goodbye and travel to the:
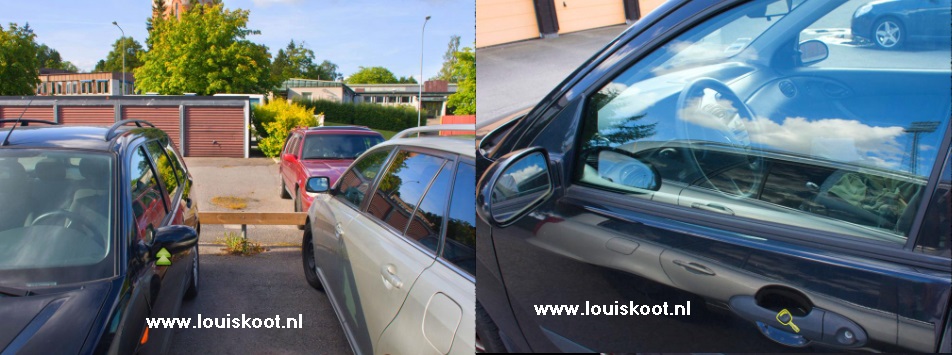
Steiner Parking:
The blue Volvo is Jonas's car. Walk through 1 step, turn left and open the door with the car key.
Carol takes a seat behind the wheel. Take the car key from inventory again and put the key in the ignition and ...... The car will not start. Take the key from the ignition switch, turn left and get out again. Turn right and walk 1 step forward, towards the garage boxes, do not click EXIT but turn right and click on the blue Volvo's bonnet to open the bonnet. Look for the hand cursor on the engine, which you get on the Spark Plug.
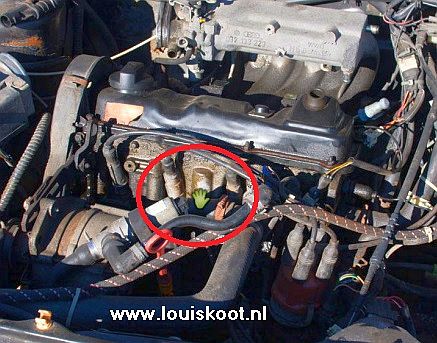
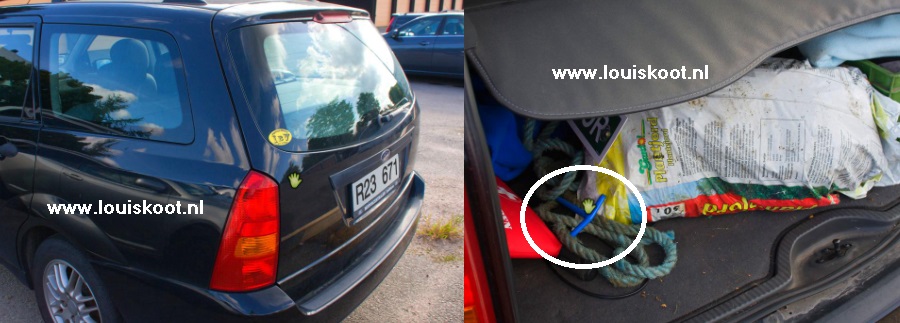
Click on the spark plug to unplug the spark plug cable. However, Carol needs a spark plug key to pull the spark plug out of the engine, so step back, turn right and walk, between both cars, 2 steps forward and then turn left. Open the Volvo tailgate. Underneath all the junk lies a blue spark plug key in the boot of the Volvo. Take the spark plug key and click the thing into the inventory.
Step back, turn left and walk back to the front and open the Volvo's bonnet again. Take the spark plug key from inventory and screw the spark plug out of the engine block. Then click on the spark plug and ..... Carol reports that the spark plug is rather rusted and therefore needs to be cleaned. Fortunately we found a Wire Brush earlier, so take the Wire Brush from inventory and clean the Spark Plug with it.

Then get out of the close-up twice. Of course Carol puts the spark plug back and closes the bonnet again.
Well ..... dive into the Volvo again, put the car key back in the ignition and ........ we end up on the map, so now drive to:
The Olof Palme Murder Scene:
So Carol drove to Stockholm and has ended up where Olof Palme was murdered. We look into a narrow street. The building on the left is under renovation, but Palme was murdered behind the thick pillar of the right building. Take 1 step forward and then turn right and ...... Behind the thick pillar lies a bunch of flowers on the ground. View the bunch of flowers in close-up.

There is a white card attached to the yellow flower. Click on the flowers ...... "Still missing you" is written on the card ..... Click on the card to release it from the yellow flower. A long iron wire sticks to the yellow flower. Click with your magnifier on the stalk of the yellow flower and then click with your hand on the iron wire to click the iron wire to the inventory.

Step back 2 times, turn left and now continue 2 steps through the narrow street. Carol is on the other side of the narrow street and straight ahead she sees the stairs that she also saw in the photo she got from Amber. Take another step forward. There is a pedestrian tunnel under the stairs. If you want you can take a look in the pedestrian tunnel but there is nothing to do. You can also climb up the stairs, but this is not really necessary, except that there is a memorial plate halfway up the stairs about the murder of Palme ..... you read on that memorial plate that the murderer has fled via these stairs
Standing in front of the stairs and the pedestrian tunnel, turn around. Carol then looks again at the narrow street and she now also sees a side street. Take 1 step forward, then turn right and walk into the right street. You will then receive the EXIT. If you turn a little to the right you will see that Carol is now in front of a youth hostel, the "Best Hostel City", where you can click on the door .... Carol then asks if the hostels in Sweden are just as filthy as in England . Turn right again, click EXIT and travel back to:
Harri's Apartment:
If during your first visit you had left the apartment through the front door, you can now also enter through the front door. If not then you have to take the back route again. Enter through front door 51 and then click on the door handle of Harri's apartment and we will now enter without difficulty. Carol is in the hall again and looks into the living room. Turn to the front door. Hello .... an envelope now sticks from the letterbox.

Grab the envelope and take a ticket from the Railways from it. It appears that Harri has rented a locker at the Central Station of Norrköpping and that the rent for the locker has been paid until 30 September 2012. The Central Station location is now being put on the map, but it makes no sense to go there already because Carol doesn't know the code for that locker yet. Get out of the close-up, turn left and take 1 step towards the toilet door and then turn 2 times to the right and .....
You are standing in front of a hall closet door and it is locked. Take the copper wire, that you cut from the wooden plank in the pump station, from inventory and click it on the keyhole of the closet door and ....... Carol tries to force the lock with the thin copper wire but she says that she first has to do it with a thicker thread. So take the thicker and yellow iron wire, from the yellow flower, from inventory and click with it on the keyhole and then click again with the thin copper wire on the keyhole and ....... the closet door will open. It is a deep closet, full of junk and coats. A thick woolen coat hangs from the jacket rail, among other things, and has a zippered pocket.
Click twice with your hand on the zipper and ...... Carol picks a note from the jacket pocket.
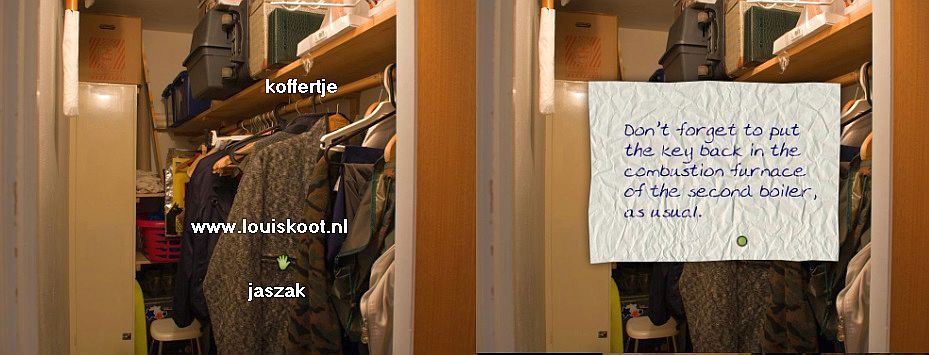
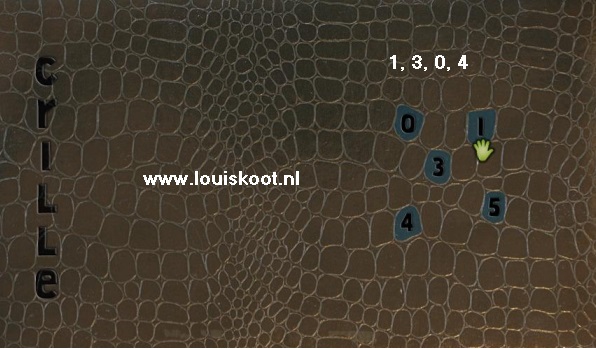
On the note we read "Don't forget to put the key back in the combustion furnace or the second boiler, as usual" ...... Haha ..... so there is a key hidden in that boiler in the Pamplestone pumping station. Step back 1 time, to put the note back in the jacket pocket. Above the woolen coat is a black suitcase on the shelf. Take the suitcase from the shelf ..... The suitcase will "float" large in your screen and ..... in the lid you can read the name "Crille" and the numbers 0, 1, 3, 4, 5 .......You have to click these numbers in the correct order to open the suitcase but unfortunately Carol doesn't know the code yet. Step back 2 times, turn right and walk 1 step into the kitchen and then turn left and leave the apartment through the front door and through the stairwell door. Turn left outside and click EXIT and travel back to
Pamplestone Pumping Station:
Enter the building again and walk through another 1 step, between the pillars.
Now zoom in on the tool table and now take the large hammer from the table.
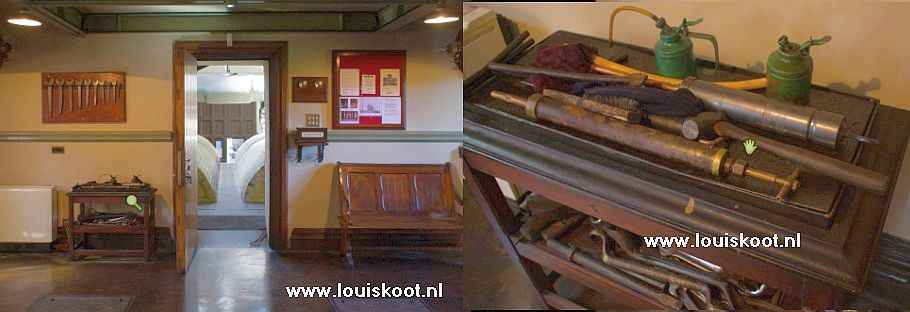
Get out of the close-up and enter the boiler room again and continue to the back door. Turn right, walk on and turn right and ..... Carol is again in front of the leftmost furnace. The right hatch of the oven is open but the left hatch is firmly closed and when you were here the first time Carol could not get it open. Zoom in on the left hatch and then ram on it with the newly packed hammer and ..... the hatch opens. Zoom in further and then take the "Pamplestone Key" from the oven and click the thing into the inventory.
Close the hatch again, step out of the close-up and go back to the front hall. Turn right again in the front hall and zoom in again on the cupboard door, under the stairs, and now open this cupboard door with the just found key and ...... Carol is then in the bare cupboard. In the right wall you see a niche in which 4 pieces of hollow tube are crammed and one of them holds a paper.
Take that paper from the tube ..... there is a telephone number of the maintenance service but you can also vaguely see another text on the paper. Grab the pencil, which you found in the very beginning of Carol's bare bathroom, and click with it on the paper to make the writing visible. However, the text is upside down, so turn the paper over via the turning arrow and then click on the text to make it more readable ...
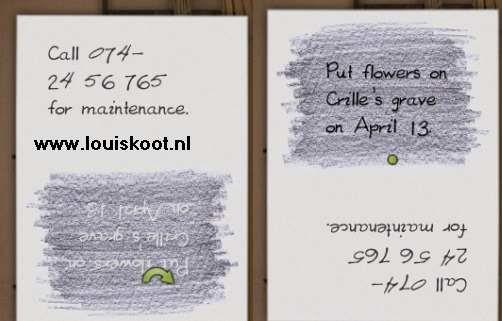
you read "Put flowers on Crille's grave on April 13" ...... Harri's friend Crille is deceased. Step back a few times and leave the building and ..... Oops ..... Carol must first put the hammer back so you end up in the close-up of the tool table. So put the Hammer back on the table and then leave the building and EXIT to the map. Travel back to:
Harri's flat:
You enter again through front door 51 and the front door of Harri's flat. Carol is then back in the hall. Walk through again to the bathroom door and then turn right twice more and open the door of the deep hall closet again by clicking on the door handle. Then take the "Crille" suitcase from the shelf again. To open the briefcase Carol has to press the number buttons in the correct order ... So it is a code that Carol has to press, but what is that code? Well ..... Harri wanted to lay flowers on Crille's grave on April 13, probably because April 4 was an important day for Crille. April is month 4 so click in the following order on the numbers: 1, 3, 0, 4 and ..... the case will open.
There is a newspaper article in the briefcase. Take the newspaper article ....
The newspaper article reports that Christer Petterson has died in the Stockholm hospital. Christer Petterson has received substantial compensation from the government for his unjustified arrest and detention in the Olof Palme case. Petterson was known to friends as Crille.
Click with your magnifying glass and then with your hand on the newspaper article to click it away. Then take the white envelope from the briefcase, then click on the envelope again and then click the letter out. The letter is an official letter from the notary who handled Criile's legacy. You read that Harri is the only heir to and that he has received a black piggy bank, a key and an Allen key.
Click this letter away again and ...... On the sheet of paper that is now visible in the suitcase, you read "meeting Christer (draft)". Also take this sheet of paper out of the suitcase and ...... It appears to be a to be a page of Harri's memoirs in which Harri talks about the "Dead City" and describes his first meeting with Crille. Turn the sheet with the turning arrow to read the rest ..... here is a short summary:
The "Dead City" was an abandoned building site where Sigge's father was the site manager and he also had the keys and that is how Sigge and Harri arrived on the site. After hanging around there, they went to the beach, where they first met Christer Petterson. Petterson was a few years younger than the two friends, but they still got along well. The year after their first meeting, Petterson fell from a balcony, causing chronic brain damage. Petterson was in the hospital all summer. Sigge's father kept the boys busy with stories about a treasure he had hidden in the "Dead City", but he told the boys he no longer knew where he had hidden the treasure. Sigge and Harri searched and searched, but could not find anything. Sigge's father died shortly thereafter and could therefore no longer tell whether the story was true. Crille never became the same after the fall. His later psychological problems were attributed to brain damage. Finally, Harri reports that he could never have imagined that he would return to the "Dead City" 50 years later to finally try to solve the secret behind the murder of Palme.
Click this sheet of paper away again and then grab a letter from Christen Petterson from the suitcase he wrote to Harri when it was in jail Crille writes that it is a shame that they cannot meet each other more often. However, former prisoners are not allowed during visiting time. Crille further writes that he sleeps on a mattress in the building of the Aviation Administration, or the Swedish Civil Aviation Service. Carol finds this strange. Click on the note to put the Aviation Administration on the map. Click the letter away and see .... all papers have now been removed from the suitcase and Carol will now find that Key and the Allen key that Harri has inherited.
Grab both keys to store them in Carol's deep pockets. Step back 3 times to leave the closet and leave the flat again and travel to that:
Aviation Administration:
Carol has landed on the square in front of the aviation service building. Walk through and then zoom in on the yellow entrance doors and try to enter .....

Unfortunately .... the aviation service is closed today. Step back and turn left. Walk 2 steps and then turn right and .....
We are standing in front of a park that is partly built up on a hill.

Walk into the park and climb up the hill via the two stone steps. Carol is then on the wide path that goes through the park.
Turn left .... you will see a bench with a trash can. There is a path to the right past the bench.
Walk 1 click further and then turn right and continue up and then right again and ......

follow the path 1 step further and ...... Carol can go forward so turn left and ...... a narrow forest path and a stairs.

Well .... climb further up via 2 clicks ..... You can then continue up to the mast, but don't do this ....
turn right and then zoom in on the red tourist information pole and read the information about the "Air Force Bunker".
You read that an air force bunker is hidden in these "Odelberg Hills", which was dug into the hills in 1949. The bunker was taken out of operation in 1971. You also read that there is a helicopter landing place on top of the hill and that the Civil Aviation Authority is now responsible for the bunker. However, the entrance to the bunker is closed off on this side to prevent graffiti sprayers from entering. The main entrance to the bunker is on the south side of the hill.
Get out of the close-up and ..... Carol reports that it is better to look up the south side of the hill. So you can walk all the way to the top of the hill, but you will only find the mast here and the view is not pretty either. So, from the info pole, turn right and descend back to the paved path. Turn right and forward 2 times, turn left and forward to the wide path
Turn left and follow the wide path 3 clicks and you will get the EXIT ...... DO NOT click the Exit but turn left and .....
you will now see the, heavily neglected, main entrance to the Bunker:
Air Force Bunker:
Walk through to the bunker entrance and zoom in on it. The bunker is closed with a padlock but you open it with the key from Crille's suitcase and ....... Carol enters into the tunnels. So Crille had found a place to sleep here in the bunker. Continue to the wall and then turn right and ....... Through the doorway Carol looks into a dark room.
Click with your magnifying glass in the dark room to step in .... You will then get the gear cursor ....... It is too dark to search the bunker just like that, so take the mini flashlight, that you have taken from Carol's study, from inventory and click it on the dark wall and .... we have light. Turn left ..... Hey ... a green closed door with a turning wheel. Turn the wheel with the turning arrow to open the door and........
..... a small hallway and then a long corridor with rooms. Walk 2 steps further .....Carol is in the long corridor ....
Left and right are rooms and you get the magnifying cursor in the corridor.
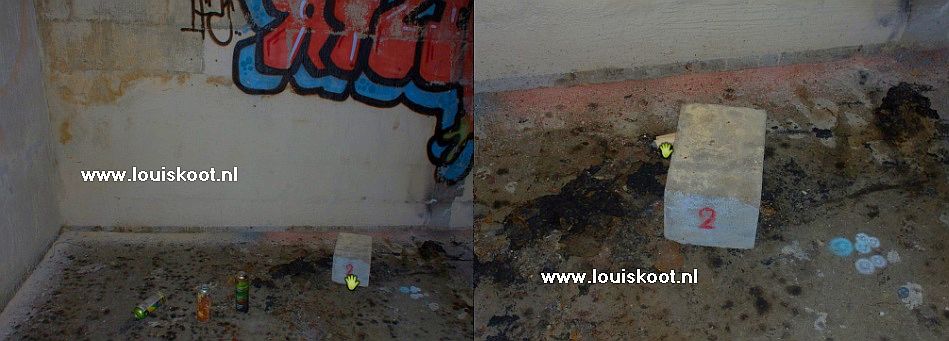
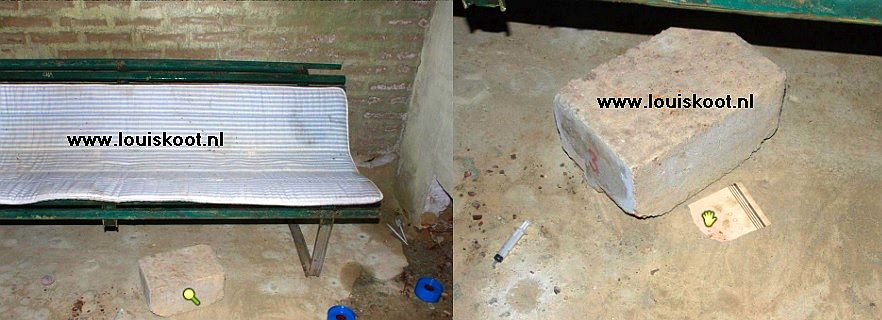
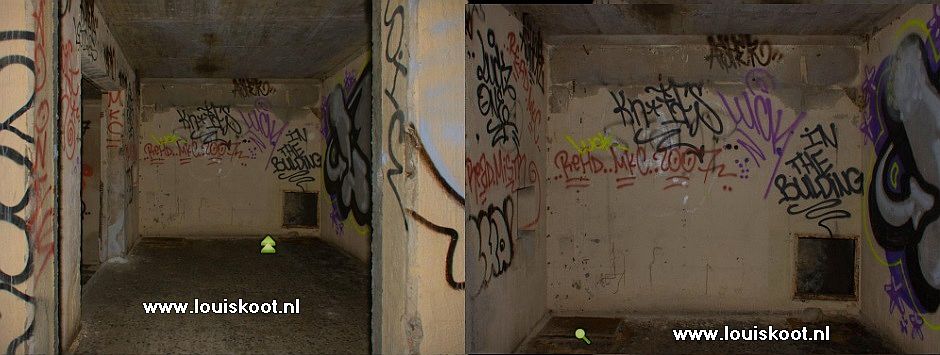
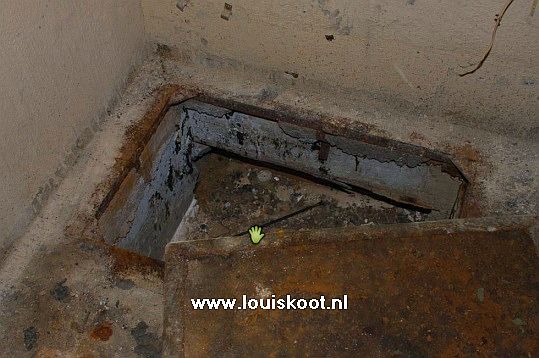
Immediately enter the 1st room on the left and turn in the room to the left ....... there are a few paint sprayers on the floor and there is a square gray brick with the number 2 on it. Click on the brick and ..... under the stone is a rolled up paper ...Take the paper from under the stone and ......
the paper appears to be the blue print of these bunker tunnels .......
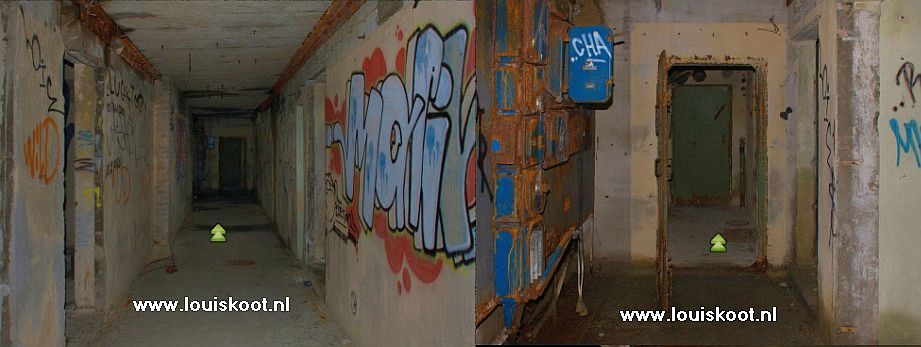
From now on you can see on this map where Carol is in the bunker. To put the map back on your screen, right click on it in the inventory..... You will see a blinking red dot that indicates Carol's position in the tunnels. Click the map to the inventory, turn left and step back into the long corridor and turn left. You look through the long corridor again and you now get the forward arrow again. Walk 3 steps further and ...... Left there are electrical boxes with 1 door open ... that door is blue and "CHA" is sprayed on it. The corridor ends further on in a hall with a green door
Continue one step further ...... until you reach the passage, and then turn right and enter the back right room ..
.In this room is a green park bench with a thin mattress. Stand in front of the bank. There is a brick halfway under the bench, but leave the stone alone for a moment. Zoom in on the bottom right of the thin mattress. Then click with your hand on the mattress tip to fold it over and ....
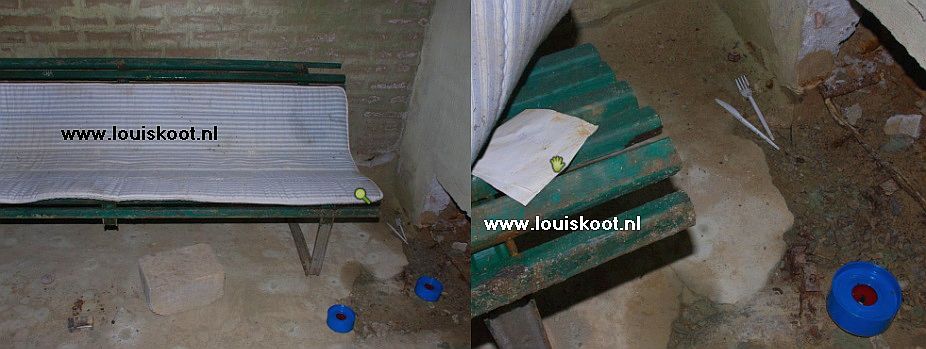
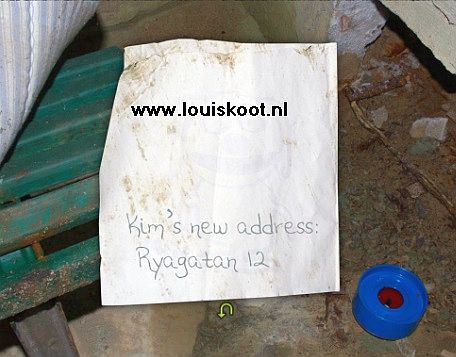
Take the paper that's under the mattress .... Unfold the paper and ..... it appears to be a child's drawing of a dog ....
The drawing was made by a certain Kim .... Click on the dog to close the drawing again and ..... We read Kim's address and this location is put on the map.
Step 2 times out of all close-ups .... Carol is standing in front of the bench again.
Now zoom in on the brick and move the brick to the side and .....Pick up the piece of paper that appears ...
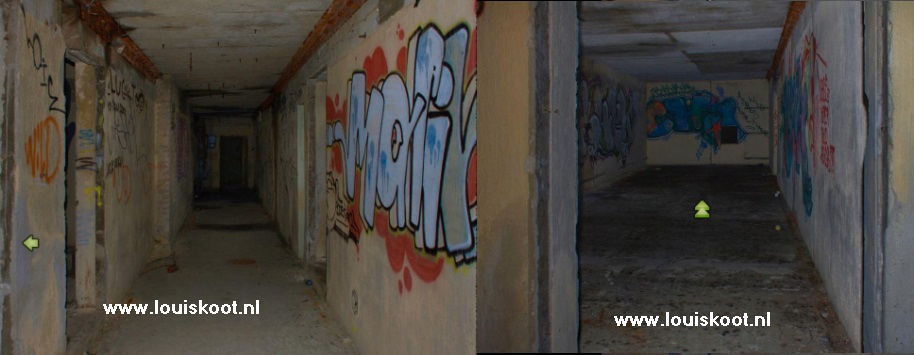
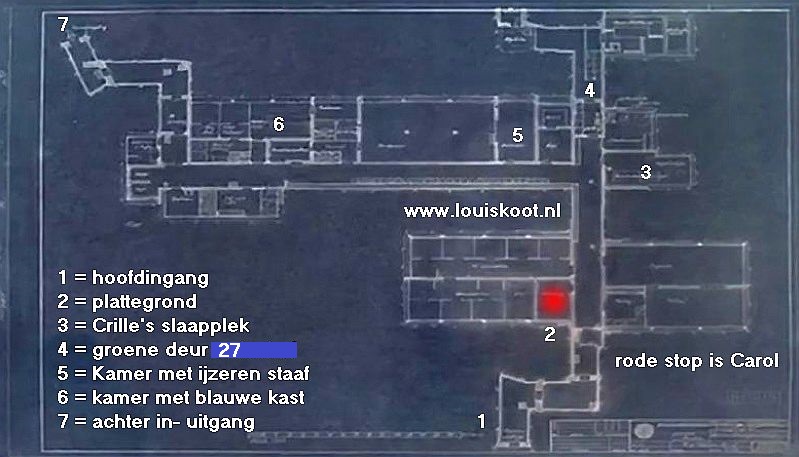
On the piece of paper are 5 Hexagons, drawn in a certain order ..... 3 above and 2 below ... Click this paper also to the inventory and get out of the close-up. Turn right and step back into the corridor and turn right again. Now walk to the closed green door, where the number 27 is written on .....Try to open the door by clicking on the rusty door handle .... that does not work .....
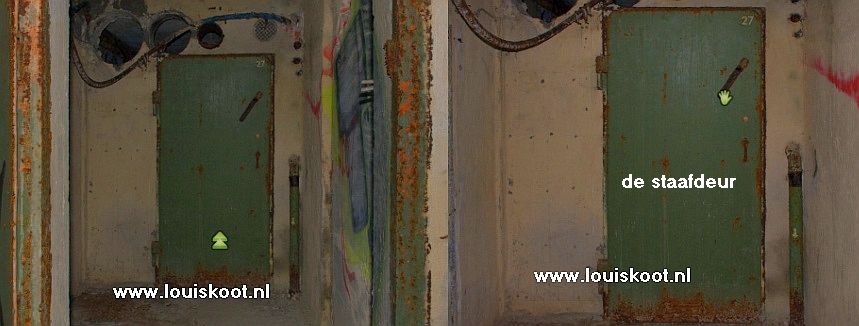
Above the door handle is a rusty iron bar on the door .... that bar is now tilted to the left and it is a bolt ...... Click on the rusty bar but ..... Carol reports that the bar is stuck to the door ...... Look up on the bunker map where Carol is now and then remember this position .... so this is Door 27.......it's number 4 on the map
Click the map back into the inventory and turn all the way around.
Now walk 2 steps back through the long corridor and then turn right and ...... We look into a transverse corridor with rooms on the right.
Walk 1 step into this corridor and then turn right again and ... You look into a room and in the back wall of this room you see a metal hatch.
Walk in and ..... in the left corner you will see a metal plate on the floor ..... Zoom in on the metal plate and then slide the plate to the side and ...
in the hole under the plate lies a metal bar ..... Take the metal bar and click it to the inventory ....
Slide the plate back over the hole and step out of the close-up. Turn left twice and step back into the corridor and turn right. Follow the corridor for 3 more clicks and then turn right ...... You now look into the second last room on the right and see a blue cupboard doors in the wall. A floor hatch is open under the doors.
Go inside and zoom in on the blue cupboard doors ...... You cannot open the doors now ..... The doors are fastened in the middle and lower center with a screw for which you need the Allen key, but because of the open floor hatch Carol cannot stand close enough at the doors. Turn twice and step back into the corridor and then turn right again and continue to the end of this corridor. Then turn right and continue through the 2 open metal doors ......
.......turn left at the gray wall and step through the doorway into the gray corridor and turn right and .......
We are at the back entrance of the bunker ..... the entrance is closed of with a gate door ..... zoom in and click on the door handle but ...... Carol does not dare to leave the bunker on this side because she not knows where she will end up. So get out of the close-up. Take a look at the bunker map to see where Carol is now on the map. For now Carol has had enough of the bunker ..... she first has to find something to get the iron bar from door 27 moving, so we have to go back to the main entrance (1 on the map) to leave the bunker.
Standing in front of the back door gate (number 7 on the map), turn right and then follow this route back to the main entrance:
Forward, right, forward 2 times, left, forward 5 clicks, right, forward 5 clicks, right, forward 1 click and then left and ...... You are back at the main entrance .....
Leave the bunker and walk through the tall grass to the road, turn left and now click the EXIT and travel to:

Kim's Apartment:
Talk to Kim, who has drawn that child's drawing for Christer when she was a young girl, through all the conversation options you get:
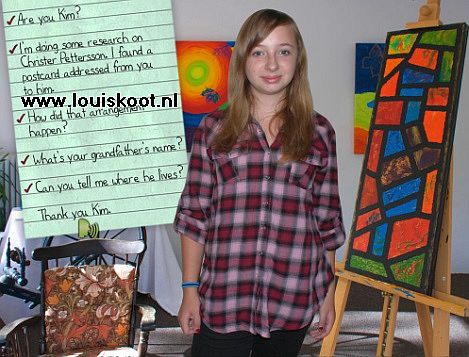
Kim says that Crille was her regular babysitter and that he was employed by her grandfather, Sigvard, who was called Sigge by everyone.
The address of Sigge is put on the map. Say goodbye and travel to:
Sigge's Apartment
Carol ends up in the stairwell of the apartment building where Sigge has an apartment. Turn left or right twice. We are at the door of an apartment and the door is slightly open. On the letter box we read the name "Cedergen". Click with the magnifying cursor on the door to open the door a little further and then click with the talking cursor to ask if anyone is at home ....
However, there is no answer, so step inside now. Carol is in the hall and is standing in front of the bathroom door. Turn left and enter the bedroom. Turn left in the bedroom and ...... oops ... it looks like the apartment has been broken into. The room is clearly searched because the drawers of the cupboard are open and the floor is strewn with things
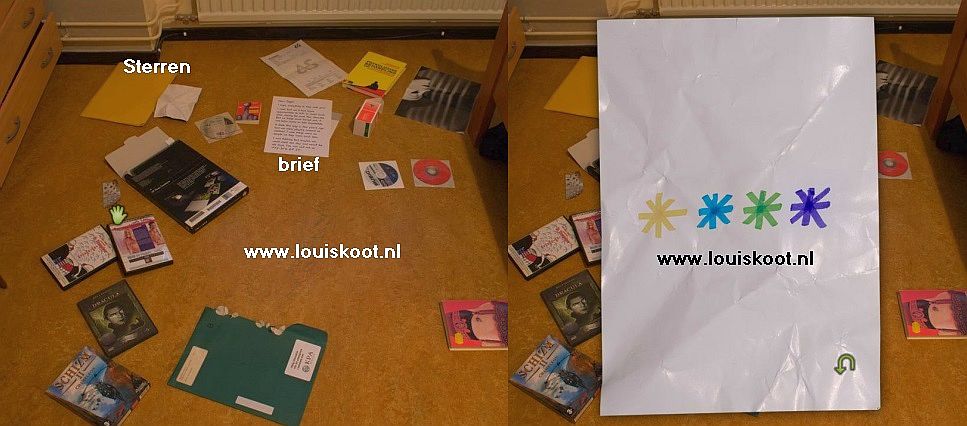
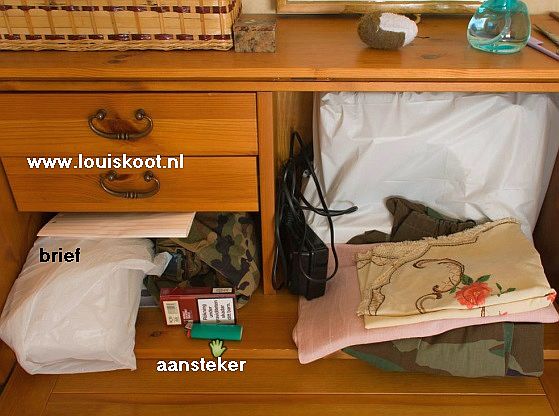
Zoom in on the things on the floor. You can pick up a few items to have a closer look, but Carol doesn't take anything with you. To the left of the DVD box is a paracetamol strip that you can pick up but the strip is empty. There is a crumpled white paper on the brown envelope. Pick up that paper and then turn it around because on the other side of the paper are 4 colored stars drawn in the colors yellow, blue, green, purple ...... remember this color sequence, so write it down somewhere because you can do not take the paper
There is also a handwritten letter from Harri. To the left of Harri's letter is a dictionary with English abusive words and to the right of the letter is a box of nicotine pills. Read Harry's letter. Harry writes Sigge that he has moved and states his telephone number. When you've seen all the stuff on the floor, step out of the close-up and walk to the window. On the windowsill there is a case that you can pick up and then open the zippers. There is an electronic cigarette in the case but you cannot take it with you.
Turn counterclockwise to the chest of drawers. The top drawer is still closed. In the front of the drawer you see 5 neutral colored stars. On the cupboard is an MP3 player that you can pick up and watch, but cannot take with you. In the 2nd drawer there is a child's drawing that you can see more closely. The drawing also shows 1 blue asterisk.
Click with your hand on the top drawer ..... well .... the top one is locked and that is why it is still closed. Now zoom in on the top drawer. There are 5 stars in the front of the drawer. If you click on a star, 1 of the other stars will get a color. Number the stars, from left to right, 1, 2, 3, 4, 5. If you click on star 1, star 5 turns blue. If you click on star 2, star 4 will turn red. If you click on star 3, star 1 will turn purple. Click on star 4 that becomes star 3 green. When you click on star 5, star 3 turns yellow.
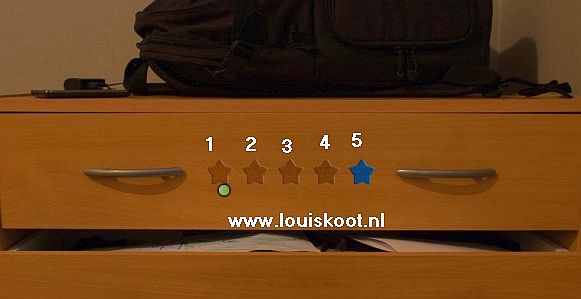
Star 1 is therefore the purple star. Star 2 is the yellow star. Star 3 is the green star, Star 4 is the red star and star 5 is the blue star.
On the crumpled paper you saw 4 stars and the order was Yellow, Blue, Green, Purple. Click on the drawer on the stars 2, 5, 3, 1 and ..... the drawer slides open. There are books and a letter and a newspaper article in the drawer. You can take the Nympho book but you cannot read it. Take the letter from the drawer .... you have also picked up the newspaper article.
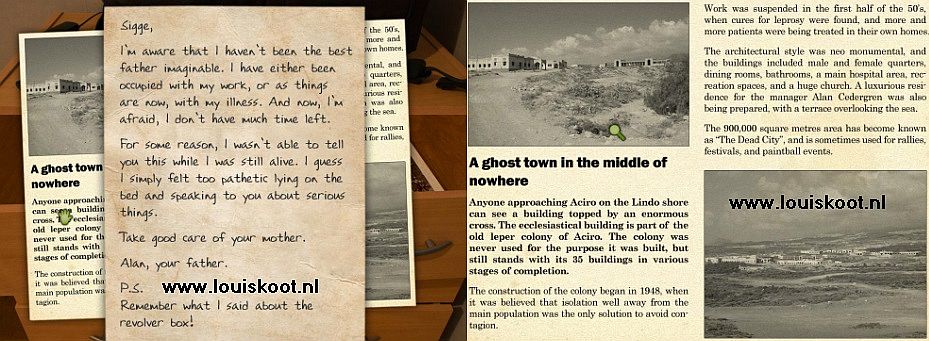
The short note is from Sigge's father Alan. Sigge received this note after the death of his father. In the P.s you can read about a gun box .. Click on the newspaper article to highlight this and ..... The article is about "Aciro", the "Dead City". The "Dead City" was meant for Leprosy patients. This location is now added on the map. You can enlarge the two photos in the article to view them more clearly. The "Dead City" can be found on the Lindo coast and is now sometimes used for rallies, festivals or paintball events.
Go out all close-up and turn around and go back to the hall and leave the house through the front door. Carol reports that she will return later when Sigge is home. In the stairwell, turn 1 time clockwise and click EXIT on the elevator door and the travel via the map to:
The Dead City:

Crawl under the barrier and then walk another 3 steps to the houses .After 3 steps turn right and ......
Carol is now in front of the "Pro Populo" house ..... the "People's house".

Go inside and then into the back room. The rear room is a kind of church hall of the "house". Turn right. There is a pot on the floor ....
Pick up the Pot .... it turns out to be a pot of solvent. Click the pot away to the inventory, turn right and walk back out .......
Turn left on the street and walk back to the barrier and crawl under it again. Click EXIT and ..... you now end up on the map of the "Dead City".
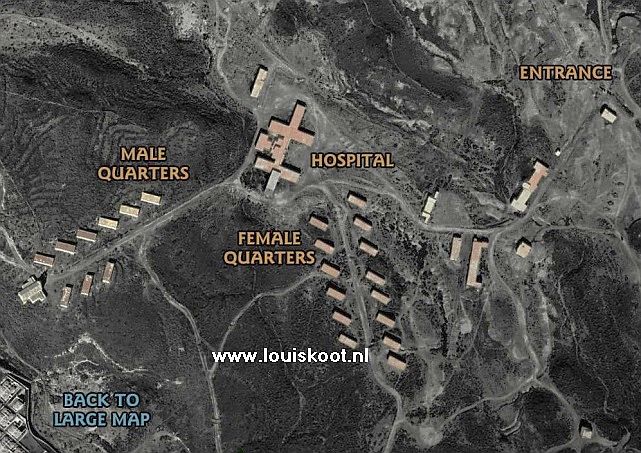
The "Dead City" is therefore larger than you would have thought ..... it has a Hospital, a Men's Quarter and a Women's Quarter.
Via "Back To Large Map" you open the normal map but you don't want that yet. Now click on the Hospital to go there now.
Hospital:
We can't enter the Hospital, so turn around ...... Carol has the feeling that snakes are crawling around here, so she doesn't want to stay here ..... She just wants to get out of here as quickly as possible. So find the EXIT and Exit back to the Dead City map and then go to the men's quarter:
Men's Quarters:
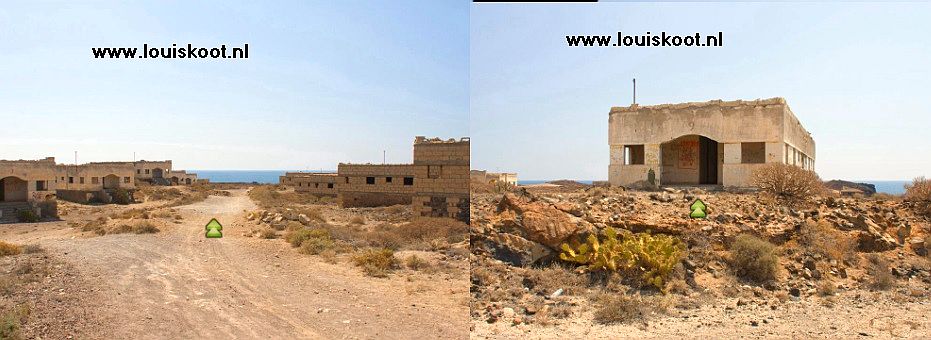
Well ..... we land on a dirt road ..... In the distance you see the neighborhood ....
the center of the neighborhood is the church, the building with the cross. So walk on and enter the church.

In the church you turn left to the left wall. You can see gray cement on a large part of the wall. Click with your magnifying glass on the cement spot .......... Carol thinks it's a boring affair. Turn around and leave the church and keep walking straight back until you get the EXIT and click on the map yourself to the map again. Now go to the
Female Quarters:
Follow the path 3 clicks ahead. The path then becomes narrower but do not go any farther but turn left and ..... Carol now sees
Walk to the house and dive into the corridor and continue to the back of the corridor.
Carol then looks through the window and in the distance we see a lonely house.
Click with your magnifying glass and ...... Carol says that lonely house must be the manager's house and that house is now being placed on the Dead city map. Get out of the close-up, turn around and go back outside. Back on the path, turn right and walk back to the EXIT and then travel through the Dead city map to the manager's house:
The Manager's Residence:
Well ..... it was once a very nice house, but as is the case with the entire Dead City ....everything is in ruins.
Walk through and then enter through the right opening. In the room you turn left and ....... yes .... the stairs is collapsed.
Click on the "staircase" with the small slanting arrow to end up on the 2nd floor and then climb further up to the 3rd floor and then step outside onto the roof terrace. On the roof terrace you turn left and ...... the tiles look rather shabby, but there are some tiles of different colors ...Zoom in on the tiles and then click on it again with the magnifier ......

Carol then announces that some tiles have a different color and she is surprised about it. You can't do anything with these tiles right now, but remember them ... you'll come back here later. Get out of the close-up, turn left and click twice with the slanting arrow in the stairwell, to descend back to the 2nd floor.
On the 2nd floor you can also go outside, but that makes no sense, so turn right and climb via the "stairs" further down and then leave the house and walk straight to the EXIT and open the Dead City map. Now click on "Back To Large Map" to open the Norrköpping map and travel back to:
Sigge's Apartment:
Hey ..... Sigge is at home now, so we talk to Sigge and we use all options. During the interview, Sigge gives Carol a photo of Christer Petersen's summer house.
Turn the photo over and then click it to the inventory.
Sigge says that Harri Michelsen visited him just before his death. Harri wanted to talk about what Sigge's father had hidden in the Dead City, a leper colony. Sigge gave Harri some notes and a map of the colony. Sigge thinks Harri was killed by creditors. When Carol asks about Christer Petterson, Sigge says that Crille was his bodyguard for years, when he himself owned the casino. Sigge gave Crille drugs and in return got his unconditional loyalty. Harri told Sigge about the summer house he had bought and he asked Sigge if he would rent it for a few weeks. Sigge suspects that Harri needed money. Harri gave him a photo of the summer house and Carol can have the photo of the summer house. Say goodbye and go back to:
Harri's Apartment:
Enter through the front doors and then go back into Harri's office, to the right of the toilet.
Turn left again in the office, to Harri's desk, and zoom in again on the white paper with a frame cut out. Then pick up the paper.
The paper floats in your screen .... Take the photo of Harri's summer house from inventory and place it in the cutout frame and ......
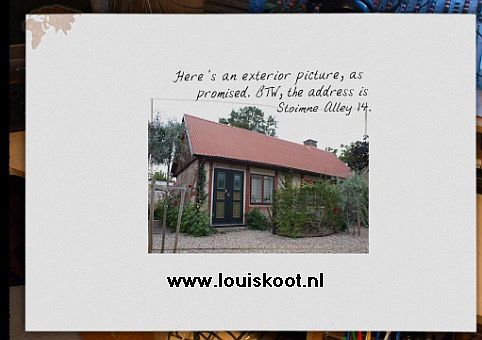
The photo fits and Carol now reads the address of the summer house and this location is now also available on the map.
Leave all close-ups and leave the flat again and exit to the map. So now travel to:
Harri's Summerhouse:
View the front door in close-up ..... the front door has a numeric code lock ..... what is the code? On the "Graffiti Heap" you have found, on your 2nd visit, a Morse code note. In Harri's flat you found a paper with the translation of the morse code and with the help of that paper you could "convert" the morse code paper to the number 2886. Well ..... would this be the code for the summer house? Just try ...... so press buttons 2, 8, 8, 6 and ....... Click ........ Now open the front door and ....... Yippeee .... Carol gets in.
Against the left wall is a large cupboard with mirror. Don't walk on yet but immediately turn left. To the left of the cupboard there are 2 posters on the wall of which the right-hand poster is a poster about a coal mine where there was an anniversary on 5-15 July 1951.
Click with your loupe on the coal mine poster, so that Carol says something about it. Turn right again and then walk forward to the window and then turn left. Carol is now standing in front of the wooden closet. The closet has 3 doors, the middle of which is a mirror door. Unfortunately all 3 doors are locked and we do not have a key.
Turn right again 2 times. You now see the rest of the room. On the long left wall is a large bookcase. You also see the iron spiral staircase to the 2nd floor and you see the kitchen, the refrigerator and the bathroom. Behind the stairs are a cool box and a black suitcase. Take 1 step forward to the cool box and the suitcase. Carol hits her nose against the stairs
Turn counterclockwise to the bookcase. In this segment of the bookcase is a radio and, to the left of the radio, a stack of trays. On top of the trays is a yellow / black screwdriver. Take the screwdriver and click it to the inventory. Turn around and walk to the TV, which is on the right long wall, and then turn left. If you now place the cursor on the iron stairs you will have the opportunity to climb the stairs to the bedroom on the floor. Don't do this yet.
Beyond the stairs is the refrigerator and the kitchen and bathroom. To the left of the kitchen is a wood burning stove and a burlap sack containing paper and firewood. Continue to the wood stove. Zoom in on the burlap sack and extract wood and a piece of newspaper from it and click it to the inventory. If you then try to put the firewood and the newspaper in the wood stove, Carol does not want to do this because she thinks it is warm enough here. But try this anyway because otherwise you will get problems later.
Get out of the close-ups and turn clockwise to the kitchen unit. On the counter is, among other things, a bread bin.
Zoom in on the bread bin and then open the lid and then click with your magnifier in the bread bin and ...take the key that is in the bread bin.
Store the key in inventory and close the bin again. Get out of the close-up, turn to the right and walk back to the posters hanging next to the large closet. Then turn right again and walk to the window again and turn left again and ..... Carol is standing again in front of the large closet. Take the just found key from inventory and open the left closet door with it.

There is a Memory card on one of the shelves ..... Take the Memory card .... it is a memory card for a digital camera. Store the card in inventory and step out of the close-up. Open the mirror door of the closet with the key. Behind the mirror door are a few shirts. Click on the shirts and ..... Carol finds a key.
Click the key away to the inventory and step out of the close-up. Then try to open the right closet door, with the key from the bread bin but ...the key doesn't fit and also the key from the shirts does not fit. Turn left, walk to the front door, turn left and walk back to the wood stove. At the wood stove you now turn to the fridge. To the left of the fridge is the black suitcase. Zoom in on the suitcase. Click on the left zipper to unzip the suitcase.
The Harri digital camera is in the case. Take the camera from the case. Click on the on / off button to turn on the camera ..... However, the camera reports that it does not have a memory card. Click on the right side of the camera to open the cover and then insert the just found memory card.
Close the cover and turn the camera on again with the on / off button and then view all photos.
To go to the next To go to the photo, turn the rotary knob with the rotary arrow.
Carol first sees pictures of the houses 3b and 5, in the Dead City. Then she sees a picture of the backrest of a sofa .... there are 2 antique jewels hanging over the backrest. It is the sofa that stands here in the summer house. There are no more photos, so get out of the close-up and ...... Carol puts the camera back in the suitcase. Click on the suitcase lid to close the suitcase again.
Step back and turn right and walk back to the 2 posters. The right-hand poster is a poster of a coal mine and it says that in 1951 there was an anniversary in the mine. Click again with your magnifier on the mine poster and ..... now you get into the close-up of the poster and you can slide the poster away, so click with your hand on the poster and ...... well .... surprise .... a wall safe appears behind the mine poster.
The safe naturally needs a number code to be opened. Zoom in on the code panel and then enter the year 1951, the year of the anniversary of the coal mine, and ...... the safe opens. in the safe are the 2 antique jewels, which you saw in the photo in the camera. At the bottom is a white envelope that has already been opened. You can pick up the left jewel but you cannot take it with you. Take the envelope and click on it again in close-up ..... Carol takes a blank white paper from the envelope on which "Next drop-off" is written.
Click the paper to the inventory and step out of all close-ups and hang the poster back on the wall. Go back to the iron spiral staircase and now climb up the stairs to the bedroom on the 2nd floor. You are then in front of the bed ..... turn right. In the corner is a white armchair and a kitchen chair. There is a book on the kitchen chair and white paper under the book. Take the paper from under the book.

A schematic map of the women's quarter in the Dead City is drawn on this paper. You see that the houses 3b and 5 are in the women's quarter and you also see that they are in the right row and that it is the 3rd and the 4th house in the row. Some of the other houses have a different color. Also click this paper to the inventory. Turn right and click on the stairs to walk back down. Well ..... Carol will have to come back again to open the right closet door, but she can't do that now. Leave the summer house and outside find the EXIT and pop up the map and travel back to:
Harri's flat:
Walk into Harri's living room and immediately turn left, to the writing desk with the locked lid. Zoom in on the writing desk and open the lid with the key that Carol has stolen from the shirts in Harri's summer house. There's a lot of things in the desk, but the only 2 items you can get are the green lighter and a letter. Take the green lighter and click it to the inventory. Then take the letter and click on it with your magnifying glass.
The letter is another page of Harri's memoirs. You read that Harri has given Crille money to steal Sigge's revolver box. Crille was convinced that Sigge knew he had stolen the gun box, but Sigge left it blue because he knew his gun was used to kill Olof Palme. Crille would leave the country the day after the murder and already had a ticket for the ferry to Finland. Crille threw the weapon into the sea between Finland and Sweden, but returned to Sweden and was arrested. Carol currently finds the subject too sensitive to talk to Sigge about it. Carol wants to do more research first.
Leave all close-ups and leave Harri's apartment again and travel, via the map, back to the:
Air Force Bunker:
This time Carol end up right in front of the bunker entrance, number 1 on the map. So go inside by clicking on the padlock and follow the corridor and the side corridor to the room with the blue cupboard doors (number 6 on the map) So from the entrance: forward, right, forward, left and then 5 times forward, turn left into the transverse corridor and then 4 times forward and right. Enter the blue closet room again.
Zoom in on the blue doors. The hatch is open under the blue doors and that hatch prevents Carol from getting closer to the doors. In inventory, combine the Screwdriver with the Iron Bar and then take this combo from inventory and click with it on the top screw hole in the doors and ...... the doors open. It appears to be an electrical cabinet. There is a diagram on the inside of the right door. A piece of paper sticks out above the diagram. Take that paper. Stripes are drawn on the paper in different positions.
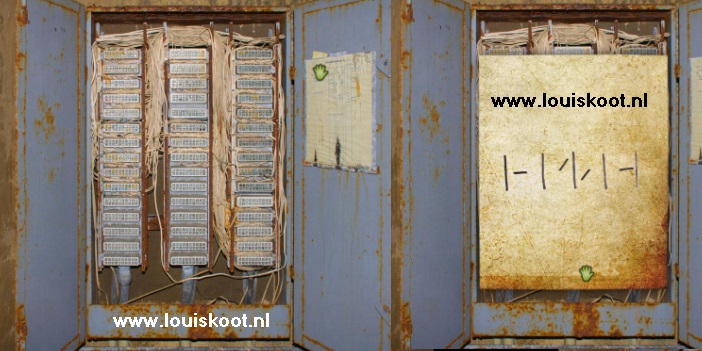
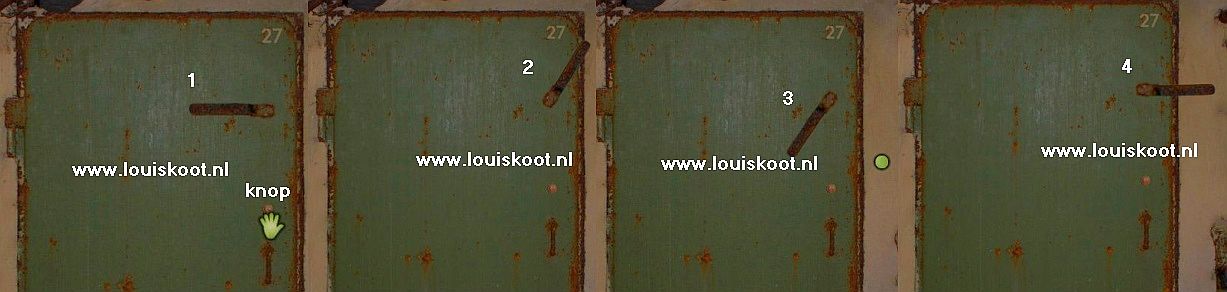
Draw the lines over because you need it to open door 27. Click the paper to the inventory and get out of the close-ups. Leave this room and go back down the corridor and now go to green door 27. On door 27 the rusty bolt sticks. The door handle is located under the bolt. There is a red knob between the door handle and the bolt. However, the rusty bolt is stuck. Combine in Inventory the wire brush with pot of solvent and then click on the bolt with the wire brush.

Carol can now turn the bolt, with the turn arrow cursor that you now get on the bolt. But you have to turn that in a certain order and that order is on the stripes of paper that you have just found in the electrical cabinet. There are vertical stripes on that paper, but they are not important. It is about the slashes and the horizontal ones. Those stripes indicate the positions in which you must click the latch/ bolt

So you have to turn the bolt successively in the positions as you see it on the paper.
After each correct position, click on the red button to confirm the position of the bolt. If you do this correctly, the door will open.
Carol is then in the bunker section behind door 27 and she can walk further, along the stairs on the left
.At the bottom of the stairs, the corridor is flooded, but still walk down the stairs.
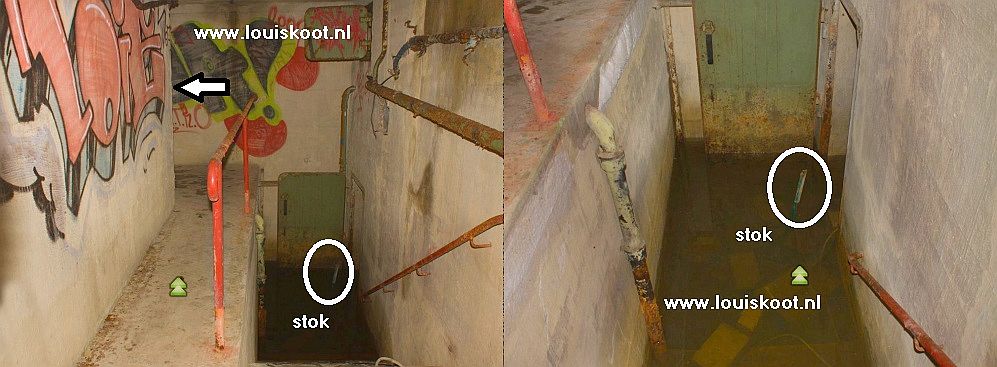
A green wooden stick sticks out of the water. Walk through 1 more click and then take the Stick out of the water and click it to the inventory. Carol cannot stay here, so turn around and climb back up the stairs and then turn around again and walk along the stairs further ahead and then left around the corner and .......... a incinerator and an iron ladder that stands against the wall. There is a niche above the ladder. Climb the ladder.
In the niche a green door is open ..... Look in the niche ...... In the niche is a white footstool .....
Take the green Stick from inventory and click it on the footstool to draw it closer with the help of the stick. You then see the top of the footstool. 2 hexagonal screws are placed in the top plate of the bench, which you have to turn with the Allen key. You have to turn the 2 screws in a certain order and this order is on the piece of paper that you found under Crille's mattress, here in the bunker.
On that piece of paper you see a hexagonal screw 5 times ..... 3 at the top and 2 at the bottom. The 3 upper ones are the upper screw and the 2 lower ones are the lower screw .... so if you go from left to right you have to turn the 2 screws in this order: Lower, upper, upper, lower, upper .... .Click the note away again and then take the Allen key from inventory.
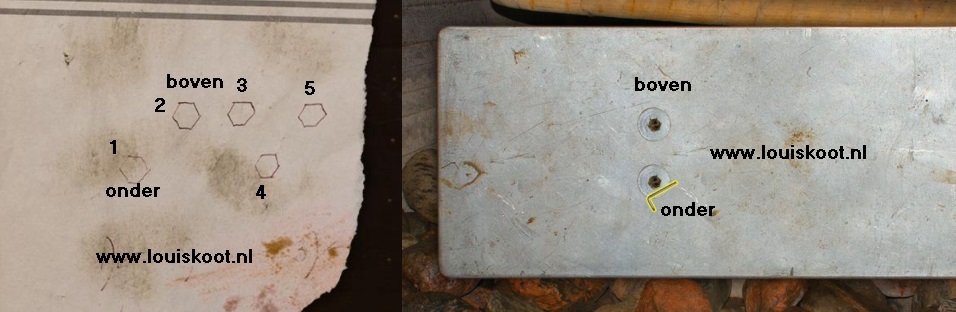
Then use the Allen key to click in this order on the 2 screws in the bench: Lower screw, Upper screw, Upper screw, Lower screw, Upper screw and ........ the upper plate of the stool opens. The footstool is full of tablets. On the right is a package of strips wrapped with elastic and it says Roy. Take that right package ..... they were apparently intended for that Roy. You can turn the tablets around but you can't take them with you,
Step back 4 times, then turn around and, via 2 clicks forward and then right, climb down the ladder.
Go back through the corridors to the main entrance and ..... Carol gets knocked unconscious by a guy who has put a stocking over his head ........
After a while Carol comes back to her senses and she has a bursting headache. Carol is lying on the floor .... at the top of the screen you get the small slanted arrow, so find the slanted arrow and then click to lift Carol up again. Go through the open green door and then turn left and walk to the main entrance of the bunker. Click on the lock of the gate door ..... Unfortunately .... the gate door will not open now.
Well ..... luckily the bunker also has a back exit and Carol knows where it is, because you already showed Carol that back exit during your first visit here. Just look at the map of the bunker for the route to the back exit, or search for the route in the walkthrough. Back at the back exit you zoom in again on the lock of the gate. Take the Bunker key (Key from Crille's box) and open the gate door with it and ...... Carol ends up outside and in the park, near a playground. Carol says she should take it easy for a while. Turn left and follow the park path to the EXIT and travel home, so to:
Carol's Flat:
Carol does not immediately end up in her apartment but in front of her door in the stairwell .... Click on the door handle and ...... Shit ..... Carol has lost her house keys ..... Click again on the door handle and .... Help ... a bearded monkey opens the door and asks what's wrong.

Give Bearded Monkey the answer and ....... He slams the door shut. So click on the door handle again and .....
Bearded monkey opens again. Continue to talk to Bearded Monkey, whose name is Bigge.
Carol threatens to call the police, but Bigge says he is working in the bathroom. Carol says she lives here and Biggie now recognizes her from the photos in Carol's drawers. Bigge thought Carol was already home because he heard someone in the flat while he was working. Bigge can't remember if the front door was closed all this time, but he's done working for today and will be back in a few days. The toilet has also been demolished, but Bigge has put a temporary solution for Carol in the living room.
Bigge disappears and Carol is inside. Enter the living room and continue to Carol's blue sofa. Then turn left and see ..... at the office door is Biggi's "temporary solution" for Carol's toilet problem. Go through the doors to Carol's office and ...... Oops ..... somebody has hung clown Lenny on an electrical cord ...... Click on Lenny and then turn Lenny through the turning arrow.

On the back of Lenny is a post-it note with Carol's keys stuck. Grab Carol's keys and then click with your magnifying glass to hear Carol scream that they are her keys. Then click the keys to the inventory and then take the post-it note and turn it around ..... there is a threat to Amber on the post-it note.

Click the exit arrow and click on pop Lenny again to put the poor clown in the inventory and then click on the elk cord to remove it from the screen. Walk into the study, turn around and head back into the sitting room and then to Carol's bedroom. Put Lenny back on Carol's bed, where he belongs. Now go to the bathroom ...... Biggie has stuck a warning on the bathroom door. The bathroom is now completely bare. Turn clockwise in the bathroom. In the wall niche, where the toilet is supposed to be, lies a chisel from Piglet ......Take the chisel and click the thing into the inventory.

Turn right again and leave the bathroom and leave Carol's flat and now go to:
Amber:
Ask Amber if she is threatened and then ask her if she knows a certain Roy. Amber has not received any threats, but Carol advises her to be careful anyway. About Roy tells Amber that it is a boy who used to hang out with Siggi and Harri. Amber suspects that Roy is a junkie and she says that he used to work at the Airline Service in Stockholm. Say goodbye and travel back to the:
Aviation Administration:
Walk through again to the yellow entrance doors and zoom in again and click on the chrome door handle again and ...... Well .... the aviation service is now open and Carol is received by the counter man. Ask the man about Roy. Roy Stenson works here in the archive and Carol can visit him and we end up in the archive and with Roy. Talk to Roy and ask him anything you can ask:
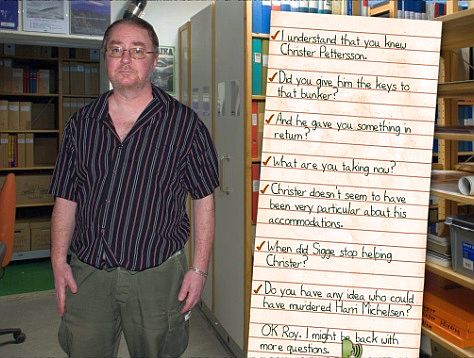
Roy has known Crille (Christer Peterson) since the 1980s and has given Crille the keys to the bunker in exchange for amphetamines. Crille was previously given shelter by Sigge, but he dropped him before Crille was arrested. And since then he has also not supplied him with drugs. Roy suspects that Harri was killed by the people to whom he owed money. Although he finds it a bit exaggerated to kill him for that because now they can whistle for their money. Roy knows that Harri used to borrow money from Sigge.
Say goodbye and say that you may come back again with more questions. Back outside you look up the EXIT and then go via the map to:
Sigge:
Ask Sigge again all the questions you get.
Sigge says that he hadn't lent Harri money for a very long time and he also said that he fired Crille because he stole something from him and was never sober. Sigge knows Roy Stenson and says that Roy had problems with his landlord. Roy is now staying at Sigge's hostel in Stockholm. Stenson helped Sigge with some paperwork. Suddenly Sigge remembers that Harri asked something about "Substrata" when he came to visit. "Substrata" is the name of a painting that used to be at Sigge's house, but Stigge does not know where the painting is now.
Say goodbye to everything you've discussed with Stiggie. Carol says she wants to talk to Roy about his accommodation. so travel back to the:
Aviation administration:
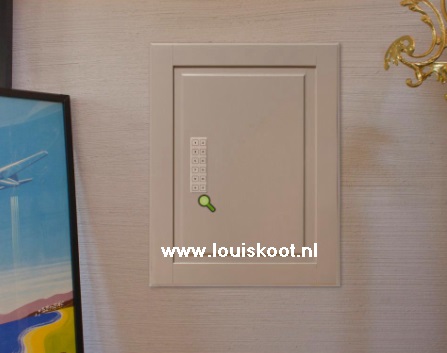
Enter the building again through the yellow doors. Carol now ends up in the archive where Roy works, but he is not present now. Do not walk on, but turn to the right and ..... Carol is standing in front of a table that stands against one of the many archive cabinets. In the cabinet compartment, where the table stands, is a scale and a letter box. You can take a closer look at the scale, but you can't do anything else with it. Zoom in on the letterbox .... in the lower section of the box is a magnetic card. Take the magnetic card and then turn the thing over .....
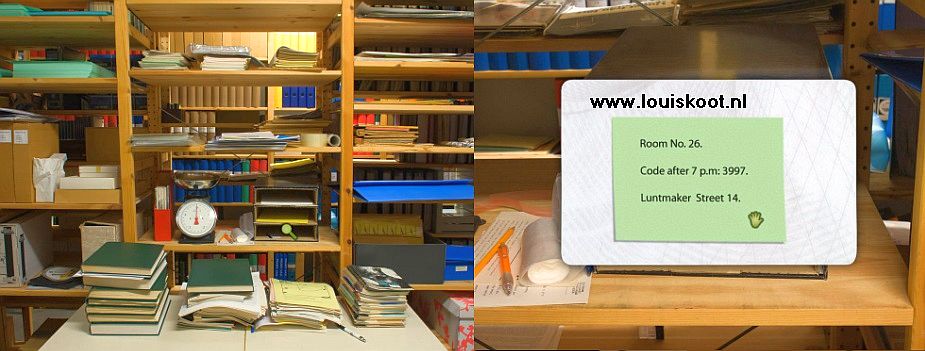
The magnetic card is the key card of Roy's room in the hostel of Sigge ..... room 26. It also contains the code that must be keyed in after 7 pm in the evening at the front door to enter the Hostel ...... 3997. Click on the card to click it to the inventory. The "Sigge Hostel" location is now also available on the map. Turn right again and click with your hand on the gray door and .... Carol is outside again. Search the EXIT and travel now to:
Sigge's Hostel:
So Carol drove back to Stockholm at a racing pace and she is standing in front of Sigge's "Best Hostel City", on the side street where she was before. Zoom in on the door and try if you can go in ...you can't. To the right is the white letter box and above the letter box is an intercom and a numeric code box.
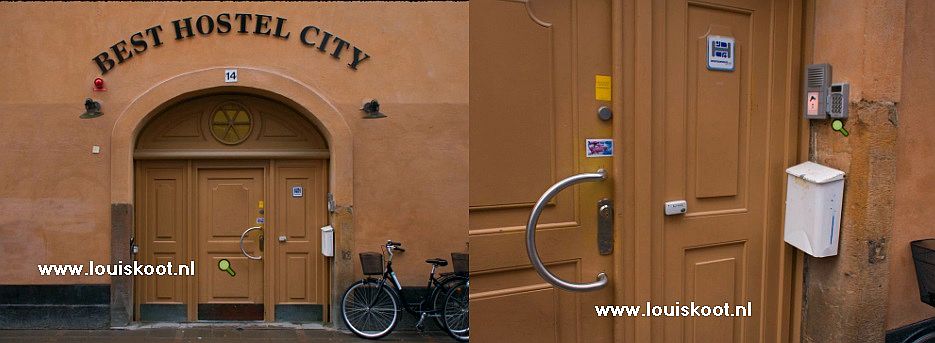
Zoom in on that number code box and then key in the code that is on the magnetic card ....... so 3997 .... Carol will be at the door again, so click on the door again and .... we end up in the hall on the ground floor. Walk one step to the left of the green pillar and then continue forward 4 times down the corridor. Then turn left and click on the stairs and ......
Carol is on the 2nd floor. Walk 1 step into the corridor and then turn right and .... yes ..... door 26 .... Roy's room.
Take Roy's key card and put the thing in the door lock and then click the door handle and ....... Carol goes in
Room 26: Roy's room:
Turn right. Between the 2 beds is a bedside table and on the right bed is a travel case. Continue to the bedside table. On the bedside table are headphones and pills. Click with your magnifying glass on the pills and Carol tells you that they are the same pills that she has found in the bunker, in the footstool. Open the drawer of the bedside table and take the printed e-mail and read it ....
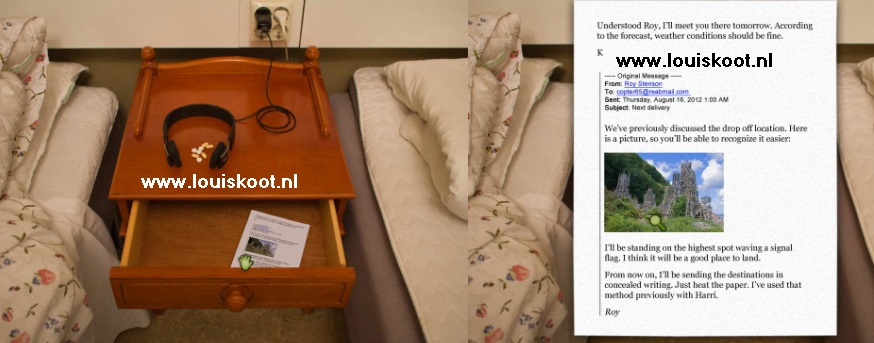
The e-mail is the answer from one K to an e-mail from Roy. In the email you see a photo of the "drop of" location and you read that Roy will give signals with a red flag there. Roy also says that in the future he will send the new locations in a hidden way K only has to heat the paper to make the location visible. Roy has also used this method at Harri ....... Ha ha ha ..... so that sheet of paper that you found in the Safe of Harri's summer house and that had "Next drop off" on it, has hidden information ........ On the photo you see a number of wooden towers .... Click, if you want, with your magnifying glass on the photo to enlarge it.
Step out of the close-up and close the drawer. Turn clockwise to the right bed. If you want you can take a look in the suitcase .... Unzip the suitcase by clicking on the right zip with your hand ...... you can't take anything out of the suitcase. Turn around to the white table and the chair .... a pull-over hangs over the chair .... hela ... isn't that the same pull-over that the stocking guy in the bunker also wore? Leave the room. Back in the corridor, turn left, 1 step forward, left and climb, via the slanting arrow on the stairs, back to the lower floor and then walk down the lower corridor back to the front door. Leave the hotel, turn right and click the EXIT in the street and go back to:
Harri's Summerhouse:
Go back inside and walk to the wood stove. If you have already taken wood and a newspaper from the burlap bag then you already have that in inventory, if not then you now take it from the burlap bag. Then click with your hand in the wood stove to get into its close-up. Then put the wood with the newspaper into the stove and light it up with the green lighter. Take the "Nex drop of" paper from inventory and click on the fire and ......
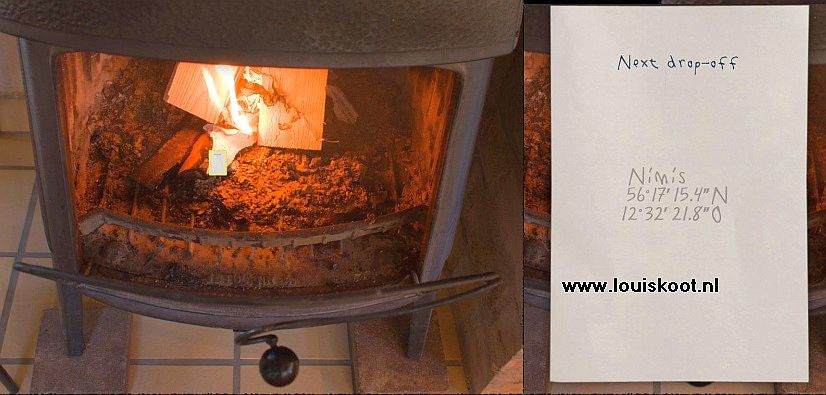
because of the heat the secret message now becomes visible on the paper ....... The "drop off" place is "Nimis", the place that you saw in the photo in the email. This location is now placed on the map. Get out of all close-ups and leave the summer house again. Find the EXIT and click on the map at the Nimis location but ....... Carol screams that she first wants to bring Roy's key card back. So first go back to the:
Aviation Administration:
Enter again through the yellow doors. Carol immediately ends up in the archive and that Roy is still not there. If you try to put Roy's key card back in the letter box, Carol says she wants to return the card to Roy in person. Walk one step and then turn right. Behind the racks is a chest of drawers against the wall and on it is Roy's smart phone.
Click with your magnifying glass on the smart phone to get there and ..... the smart phone receives a message so pick up the smart phone and read the text message .... the sender of the text message complains about the landing place, which is full of boulders, and he wants to arrange a new date and a different landing place. Get out of the close-up and ...... We hear that the toilet is flushed and ...Roy turns up, who is done with his big "message". Give Roy his key card back, via the talk options and continue through the options and ..... Carol leaves the building. Find the Exit and then travel to:
Nimis:
Nimis is the place you saw in the photo in the email to Roy. It is a beach location and there are various structures made of wood. Carol arrives above the beach and at the "entrance". This "entrance" is a wooden "tunnel" through which you have to go down to the rocky beach. First walk 1 step forward and then turn left. At the boulders, to the left of the entrance, is a sledgehammer. Take the hammer and click it into the inventory.

Turn right again and now dive into the wooden "tunnel". Continue to descend straight until Carol is all the way down and on the rocky edge at the sea ....

Carol cannot move forward .... turn right .... you see a pointed wooden structure .... Walk 2 steps forward .....
Carol is then 1 step beyond that structure and she can go even further but do not do that ..... Turn right and ........

..... a structure has collapsed and in front of the rubble you see something red / white between the rocks ..... Zoom in and ...
... it appears to be a signal flag. Grab the flag ...... In close-up you see a rolled up piece of paper in the flag ....
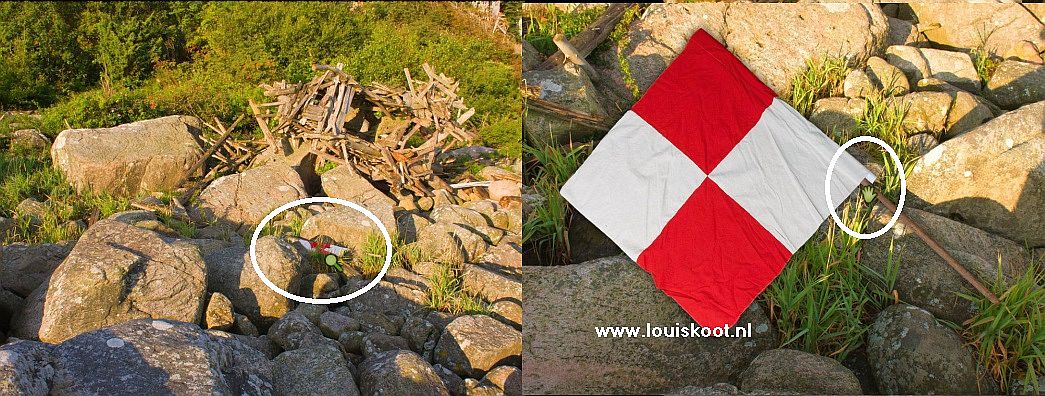
Take that piece of paper from the flag and roll it out and then click, with the loupe, on the 2 lines of text ..........The pill smugglers have smuggled in a cargo with a helicopter and they want to deliver it to the Old City tomorrow, before noon. Carol says the Old Town is the place where Sigge had his casino. Get out of the close-ups ..... Carol doesn't take the flag. Turn right. On the left you see a tower and on the right the pointed structure. Take 1 step forward and turn right ....

Carol is now standing in front of the pointed structure ..... it is a lookout tower. 2 clicks ahead and ..... Carol has climbed a bit up in the tower .....
Look for the Up arrow and click and then climb further up and then enjoy the view over the sea .....

Turn around and ......
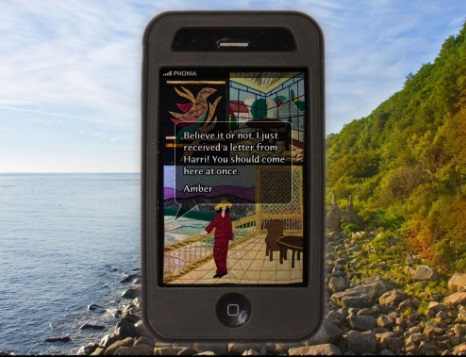
Carol receives a text message from Amber who reports that she has received a letter from Harri and asks if Carol wants to come immediately.
Click the phone away and then click the down arrow and then the oblique arrow twice in the tower and .....

Carol is downstairs again. Walk one step forward, turn right, 1 step forward, turn left and .......
walk to the "entrance" tower and climb through the "tunnel" back up ......

Again you walk 1 click further into the forest and then you click the EXIT ..... go to:
Amber:
Ask Ambertje for Harri's letter and Amber shows the letter.
The letter arrived so long after Harri's death because he had put Amber's wrong address on the envelope. In the letter, Harri tells Amber the code for the right door of the cupboard in his summer cottage. Harri also tells us that there is a primitive map with colored rectangles on the top floor. That map shows part of the Dead City. Harri is convinced that something important is hidden in the city. He has hidden all the clues he collected in the cupboard. The key is in the bread box and Amber has to lift the right door of the cupboard a little to the right when she turns the key. The old gun box is in the cupboard. Harri suspects that the colors on the card have to do with that box.
Well ..... Carol already knows all this info, so step out of the close-up to give the letter back to Amber and then ask her about Sigge's casino. Amber reports that Sigge has sold his casino and that it is now an antique shop, but it seems that drugs are still being sold. The location of the antique shop is put on the map. Say goodbye and go back to:
Harri's summer house:
Go inside and walk to the window. Turn left and .... we are again in front of the large closet with the 3 doors. Take the key that you found here in the bread bin from inventory and click it on the right closet door and ....... Carol now uses the key correctly and .... the door opens. In the closet is the revolver box ..... There is a round lens on the box .... On the top shelf is a notebook and a pair of Harri's memoirs
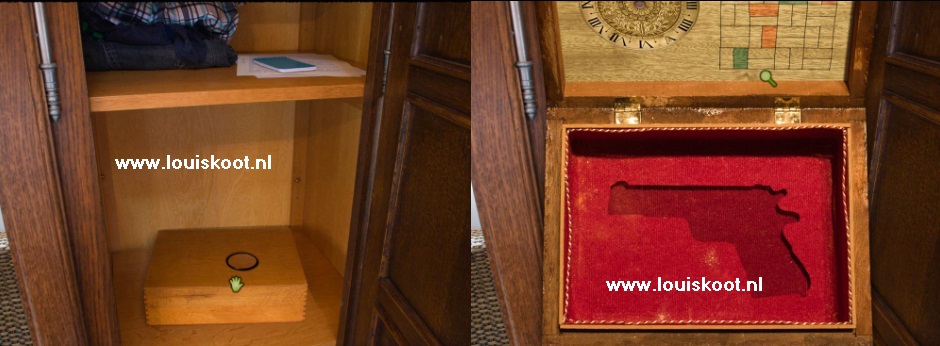
Pick up the lens and click the thing to the inventory. Take the box and click it open ..... there is no more revolver in the box but on the inside of the lid a diagram of colored blocks is drawn. Zoom in on that diagram. To the left of the diagram is a timepiece with "Substrata" in it. The timepiece has the Roman numerals 1 to 12. You can turn the timepiece but Carol has no idea what the correct code is, so get out of the close-ups ...... Carol puts the box back. On the top shelf is a notebook and letters. Pick up everything and open the notebook ..... it contains a To Do list, so read it
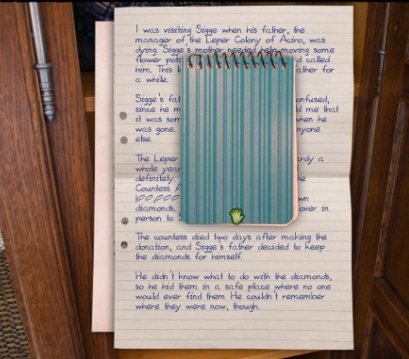
Click away the notebook and start reading the letters. Always click on the letters to read the following. Finally you also read the "What to tell Carol Reed" letter.
Harri writes that he was visiting Sigge when his father was dying. Harri was then alone with the dying man, who confused him with his son. Sigge's father said the leper colony was discredited a year before closure. A donation of one hundred thousand Swedish crowns and diamonds had been made by Countess Aurora Rosvall.
The countess personally handed over the diamonds to Sigge's father. Two days after the donation, the countess died suddenly and Sigge's father decided to keep the diamonds. Because he didn't know what to do with the diamonds afterwards, he hid them in a secret place. Unfortunately, Sigge's father himself no longer knew where he had hidden the diamonds. But he had left some clues for Sigge here and there. The most important clue was in his gun box. Ah. So that is why Harri had Crille steal the gun case
On the Carol Reed note you can read that Harri wanted to tell that he wanted to help his old friend Roy. He thought Roy smuggled cheap drinks across the border. Later Harri found out that Roy also smuggled heroin and Harri wanted nothing to do with it anymore. Harri told Roy that he had to look for another courier. Roy would probably think he wanted to go to the police and that is why Harri feared for his life. On Amber's advice, he contacted Carol. He wanted to give her important information in exchange for help.
Well ...... Carol's help came too late. And probably Harri was killed by Roy. But did Roy know about the diamonds, or are they still where Sigge's father hid them? Carol can only find this out by finishing Harri's list herself. Leave the summer house and click on the map on the "Dead City" and then go via the Dead City map to the "Female Quarters".
Dead City: Female Quarter:
Through the sketch of the Female Quarter and Harri's memoirs we learned that Harri thought that the colors of the houses are important.
If you look at that sketch again, you will see that there are 4 houses that have a color. The houses with numbers 3b and 5 are between black and green.
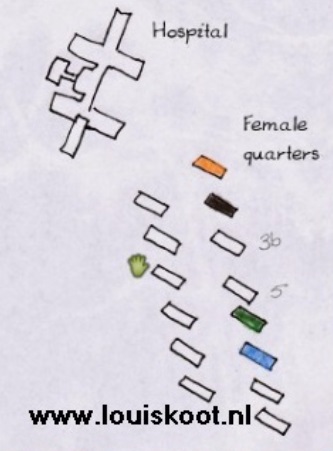
You must now note the house numbers of the 4 colored houses. You have to look at the houses on the left side of the road and note their house number with the color on the sketch. So you start at the beginning of the road. Turn left immediately and .... You are in front of the house number 1 and this is the orange house in the sketch. The black house is the 2nd house and it has number 3. Then house 3b and then house 5. Beyond house 5 is the green house and that has number 7 and .... at the end of the road is the blue house that has number 9. House number 9 is the house where you have previously looked through the rear window at the manager's house.
So note on your sketch that Orange is 1, that Black is 3, that Green is 7 and that Blue is 9.
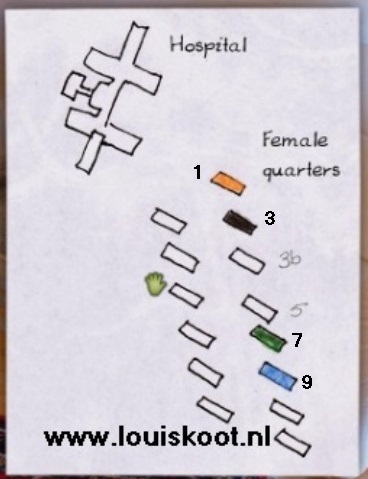
Find the EXIT and go to the large map and travel to:
The Old Town:
Carol is looking for the former Sigge casino here, which now houses an antique dealer, and she has landed in a narrow street. Walk forward 6 clicks.
To the left is a small square and the street goes straight ahead and down .... There is a "crossing children" sign on the corner of the street.

Then turn right ........ a narrow stair lane that runs down. Go 3 clicks down the alley .....
Carol is downstairs and halfway through the alley .... turn left ..... We are standing in front of the brown door of the antique shop .....
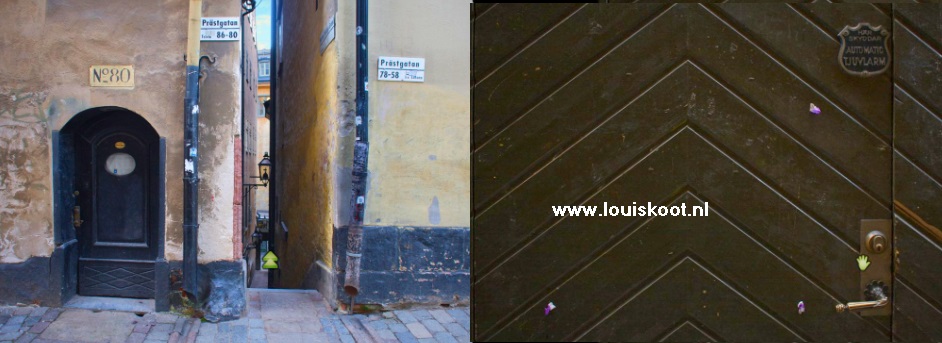
Click with your hand on the door handle and ........... Phil, the antique dealer opens and Carol enters.
Horny Phil thinks Carol is the hooker he ordered from an escort service.
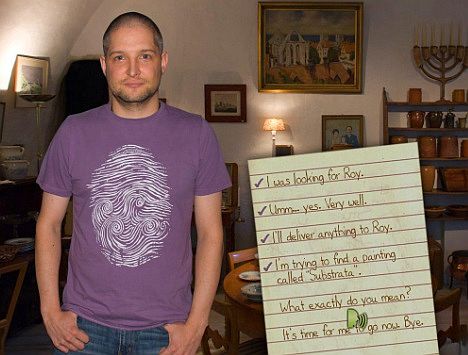
Phil says that he would meet Roy today, but that Roy is late with his delivery and he is a little surprised to hear that Carol knows Roy well. Philly boy asks if Carol can convey a message for Roy. Roy then gives Carol a note with a new flight plan and the message that Roy needs a new helper. Take the note to click it to the inventory. Phil is the one who runs the drug business together with Roy. Tell Phil that you are looking for a painting with the title "Substrata". Phil says that he recently got a reproduction of that painting for someone who is now deceased .......... Harri? .....
Phil is willing to talk further about it, but only after Carol gave him his "pleasure". Carol might already get undressed and lie down on the bed while Phil will put on his sexy underwear. Phil disappears to first jerk himself off, so that he will be ready for his supposed fuck with Carol. Carol can now sniff around here, but you have to be quick because horny Flippie will be back soon, with a stiff cock
To the left of the bed is a round table with a candlestick on it. Zoom in on the table .... Next to the candlestick is a Label .......
Click on the label to slide it away and then take the Key, which is under the label. Click the key to the inventory.

Get out of the close-up and turn left and use the key on the double brown door to open the door and ......
Carol is then in a small stock room and she sees, in the middle, a painting with a black, a blue and orange stripe.
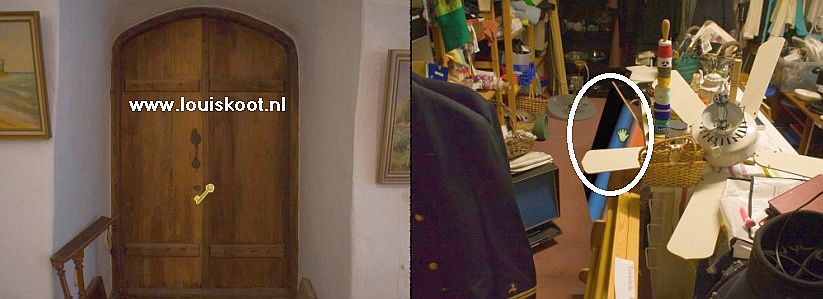
Grab that painting .... it is the "reproduction of" Substrata "..... click the thing into the inventory and step out of the room .... Then turn left and click on the front doors the leave this horny antique shop, in intact condition. If you were too slow, I hope for Carol that Flippie uses a condom ..........

Back in the alley you can climb back up, but that's not really handy.
Turn around and walk all the way out of the alley and turn right in the street and click the EXIT and travel back to:
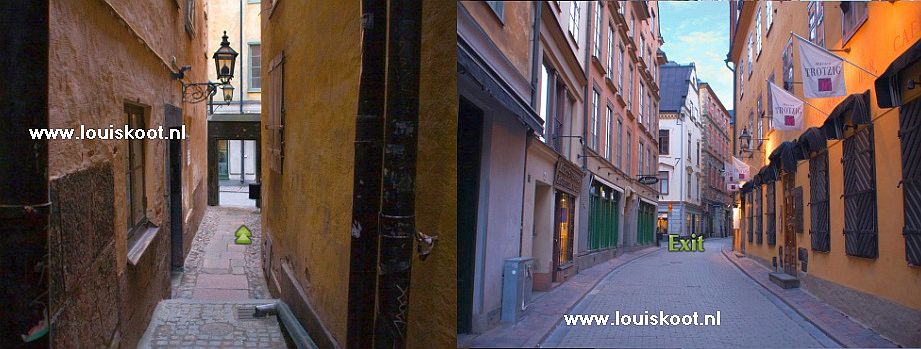
Harri's summer house:
Gun box: Go inside and open the right closet door by clicking on the door with your hand. Pick up the gun box again, open the box and zoom in again on the timepiece and the block diagram on the inside of the lid.
The timepiece is rotable via the turning arrow. There is a push button in the middle of the timepiece. The numerals of the timepiece are in Roman numerals and are the numerals 1 to 12. The code in which you have to turn the timepiece consists of the 4 house numbers, of the colored houses on the sketch of the women's neighborhood ...... but in which order should you put those 4 house numbers? Right-click in inventory on the "Substrata" painting to take a closer look at this thing ..... the colors in the painting are, from left to right, Black, Blue, Orange, Green ......well ..... According to the house numbers and the sketch: Black = 3, Blue = 9, Orange = 1 and green = 7 ...... So the code becomes: 3, 9, 1, 7. Click the painting away. You now have to turn the timepiece to put every digit of the code in the top center and then click on the push button. It doesn't matter if you turn left or right. You can run click by click.
In the block diagram, 1 of the orange blocks becomes darker and Carol wants to take a picture of it with her smart phone. So click on the right button of the smart phone to take the photo. The block diagram is a diagram of the tiles that you have seen on the roof of the manager's house, in the Dead city, and Carol now knows which tile it is. Get out of all close-ups. Make sure that Carol has the round Lens in inventory ..... you know ..... the round Lens that was on the box here ...... The round Lens is of vital importance to Carol right away . Leave the summer house and open, via EXIT and the regular map, the Dead City map and travel back to the: |
The Manager's Residence
Go back inside and via the 2 stairs to the roof terrace. On the roof terrace you zoom in again on the tiles. You now get the gear cursor on the top orange tile. View the picture of the block diagram and you will see that the dark tile on the photo corresponds to the orange tile on which you now get the gear cursor. Take the Chisel that you have picked up in Carol's bathroom from inventory and click it on the orange tile and ...Carol will flip the tile off the floor. Turn the tile with the turning arrow and........
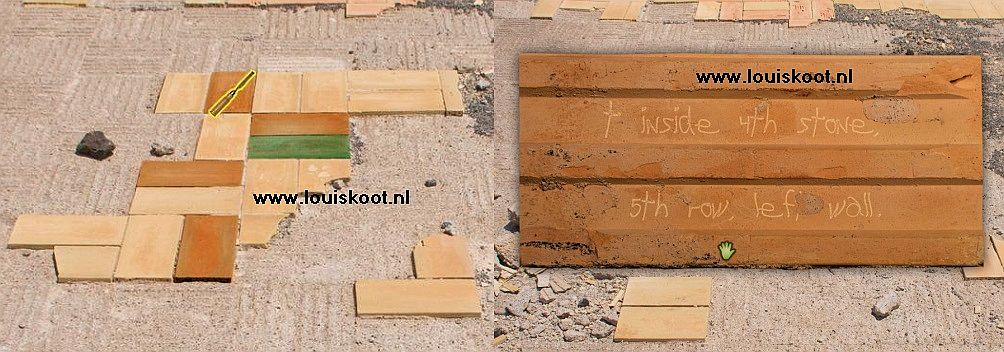
..... On the back of the tile is where Sigge's father hid the loot because you read: Inside a Cross ...... the 4th stone ..... in 5th row, left wall "......... Hela ....." within a cross? "...... a Church? ...." Left wall ".... didn't you saw in the church, in the men's quarter, a large gray cements spot on the left wall? .... So back to the Church. Click the orange tile in the inventory and descend back and run to the EXIT and travel via the Dead City card, now to the:
Male Quarters:
Walk on to the church ...... If Carol has arrived just before the church, she says that today the sun is shining very sharply ..... Remember this because the sun will soon be of vital importance to Carol. Enter the church. In the church hall you turn left to the left wall.
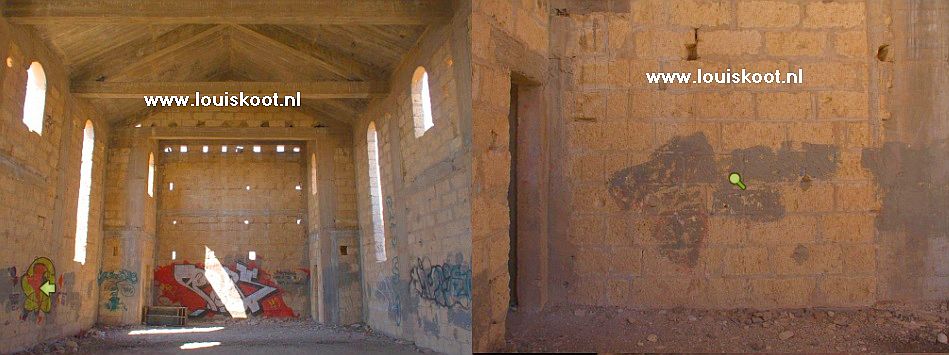
On the left wall we see the dark gray cement again .... Zoom in on the cement spot. In the close-up you get a close look at 1 of the wall stones ..... Click with your close eye on that stone ..... It is the 4th stone in the 5th row (counted from below). Ram a hole in the stone with the hammer .....
Then click with your Hand in the hole and ........ Carol exposes a linen bag .....
Take the linen bag and click on the drawstring to open the bag and then click on the edge of the bag to remove the Diamonds.
Click the diamonds to the inventory.
Get out of all close-ups and turn left and ....... If Carol does not have the round Lens now then it will soon be "GAME OVER " for Carol .... But of course Carol has that round Lens with because I told you that you had to put that Lens in inventory. Get out of the church and ...... Roy appears and threatens Carol with the Revolver from Sigge's father ..... Talk to Roy until there's nothing left to talk
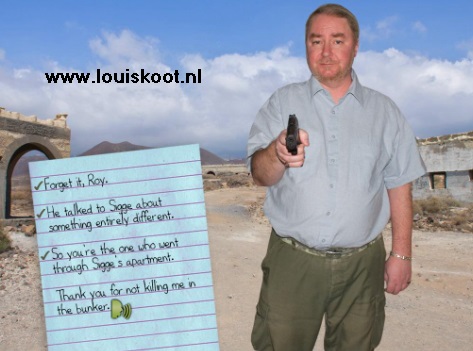
Roy thinks Harri went to Sigge to tell him about Roy's drug deal. Carol says it was for a very different reason, but Roy does not believe that, as Harri feared. Roy is the one who messed up Sigge's apartment and admits to having killed Harri. Roy wants to kill Carol too, but first he wants her to explain what the little card means he is showing her now.

When Roy shows Carol the mushroom card, grab the card from his hand and quickly click it away to the inventory ..... Roy is going to chat but you have to act now ..... Remember that Carol said the sun shines very brightly? Take the round Lens from inventory and click with the lens on Roy's eyes and .........

Roy is blinded by the sun and protects his eyes .... Quick....... turn right and ......

Carol runs away and manages to escape and she calls agent Rickman to tell him that Roy is Harri's killer and that he can be found at the hostel.
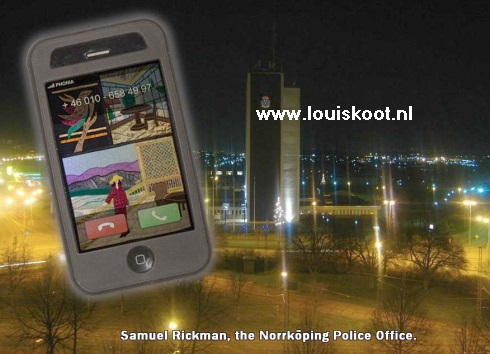
The Norrköpping map appears now ..... There is 1 more location where we have not been yet and that is the Central Station, where Harri had rented a locker. But ......... Harri's murder has now been solved and the diamonds that have been hidden for so long are found. But Carol still is troubled with the evidence for the murder of Olof Palme. It was on Harri's list that Harri wanted to give Amber the code for his locker. So go via the map to 'Amber's apartment'.
Amber:
Ask Amber if she has received the code from locker 14 from Harri. Amber unfortunately knows nothing, so say goodbye and go back to:
Harri's Apartment:
Go inside and then through the sitting room to the bedroom. Turn left in the bedroom to the door where the mushroom poster hangs.

In inventory Carol has Roy's mushroom card .... Now look at that card in close-up .... there is a morse code on the card ...... "Translate" the morse code on the card using the morse code explanation paper, You get the number 1970 again. Roy's card shows 4 mushrooms ...... print these 4 mushrooms in your memory and zoom in on the door poster and you see that, on Roy's card the mushrooms: 5, 6 8, 9 are shown.
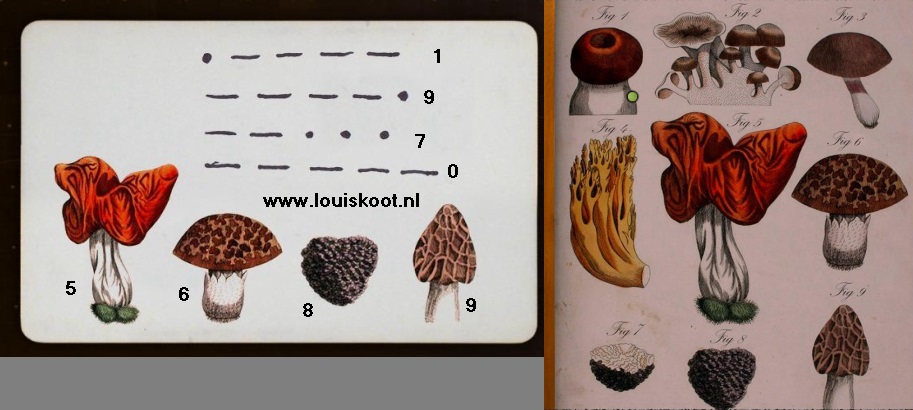
Leave the flat and then travel to the:
Central Station:
In the station hall you turn to the right and .... Carol is standing in front of the lockers. We know from Harri's notebook (that is in the right case in the summer house) that he has rented locker 14. Locker 14 is the top right locker, but you can't just open it. In the middle of the lockers is the code screen on which you must enter the code. So zoom in on that code screen and enter the code 1970 and .....

Locker 14 opens. So now zoom in on locker 14 and unpack the green metal box. There are number boxes on the box .......
you have to click the right code to open the box and that code is the mushroom code and that is 5, 6, 8, 9 .....
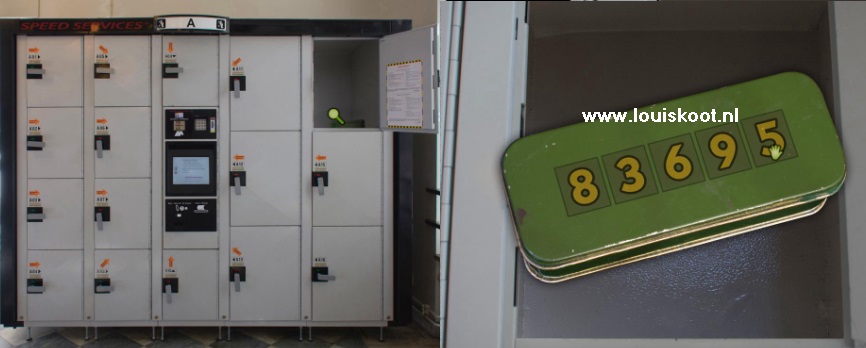
So click on the boxes: 5, 6, 8, 9 and ..... the box will open ......
Take Harri's memoirs from the box and Carol will read what Harri tells about the night that Olof Palme was murdered..
Well ..... it is one of the many theories about the murder of Olof Palme ...... probably we never know the real truth ..... As Carol says at the end.
But luckily her bathroom is finally back in order ......
Turn right and click the EXIT to end the game
2013:Original Dutch Walkthrough by: Louis Koot
2019: English translation by: Louis Koot