
2020 walkthrough by: Louis Koot
If you have found this walkthrough via google search or via another site then you have probably not visited my site.
A lot more very detailed game walkthroughs can be found on my site at: www.pcgameswalkthroughs.nl
Page 2 of the walkthrough
The Blueberry Loop: second time
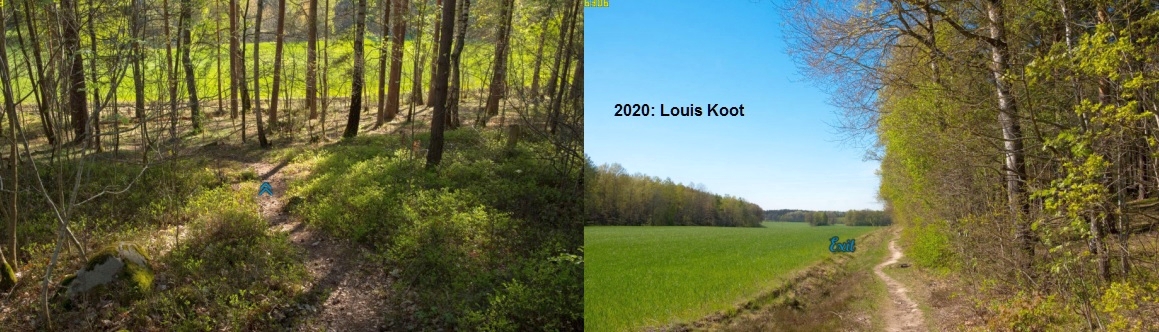
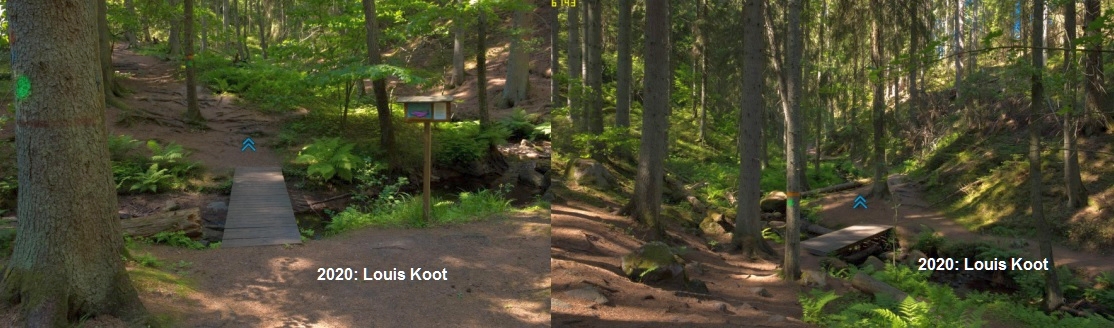
Follow the path again to the junction. In front of you is a tree with 2 red stripes and a tree with one yellow stripe. Turn left at the 2 red stripes tree to be at the new path.
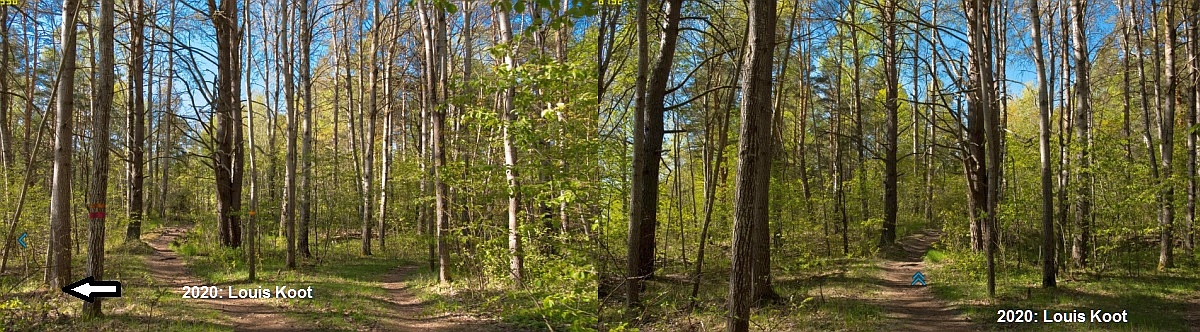
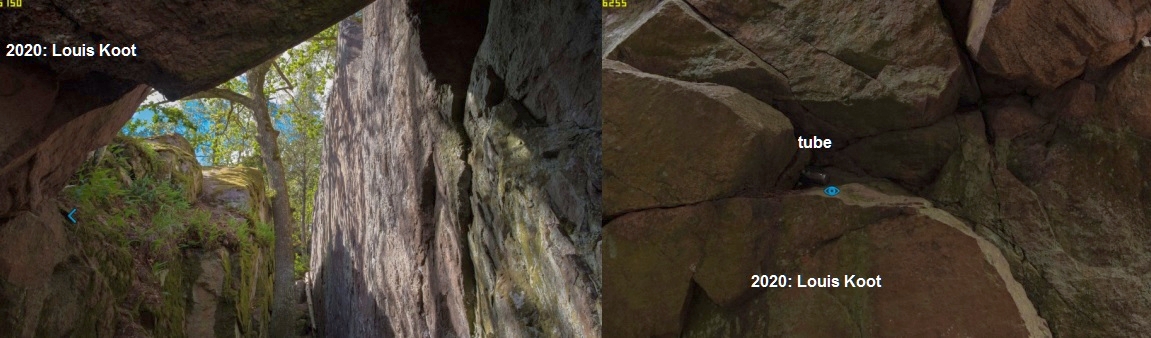
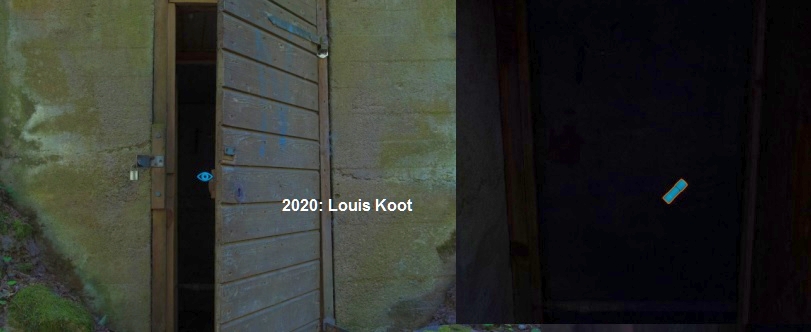
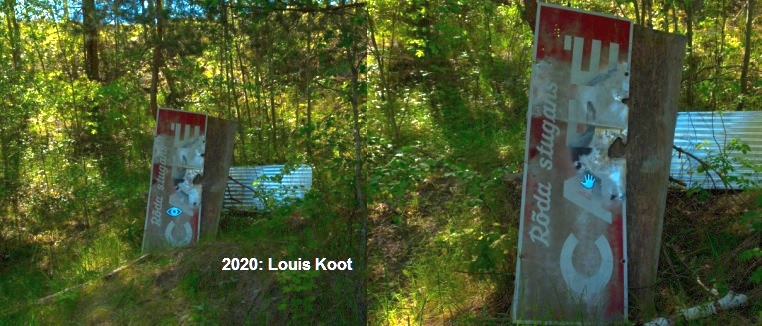
Follow this path 4 clicks forwards to EXIT. At this EXIT turn right and go forwards 2 steps to a stone shelter
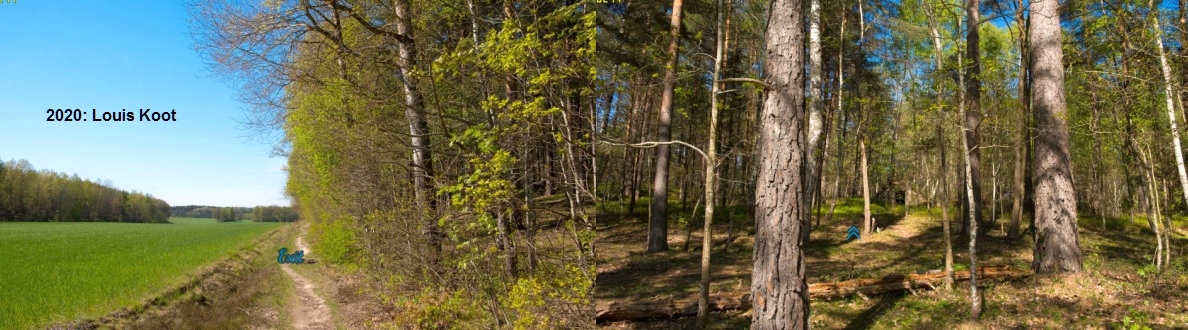
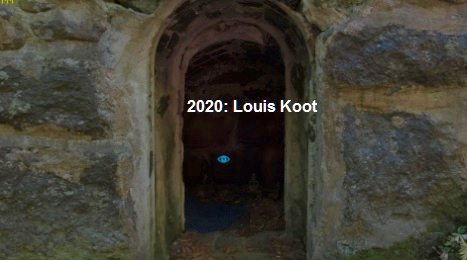
Look inside the stone shelter.
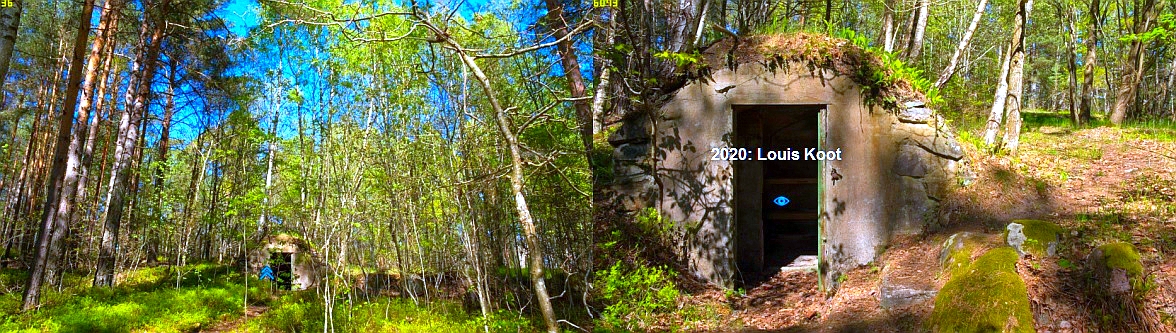
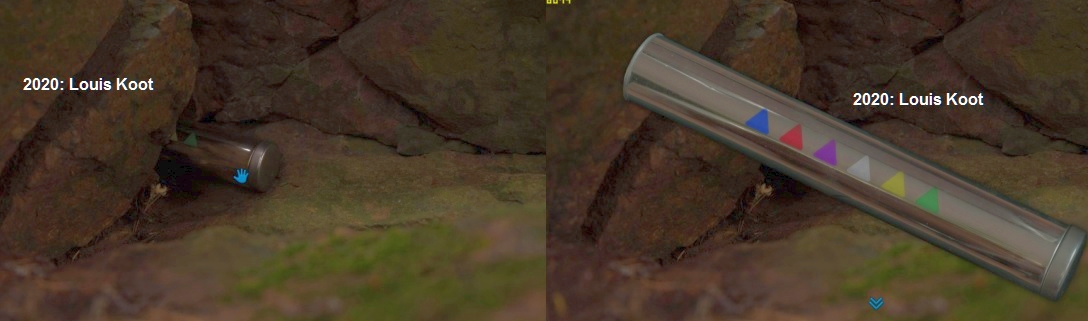
Push a piece of cloth aside and take the tube.
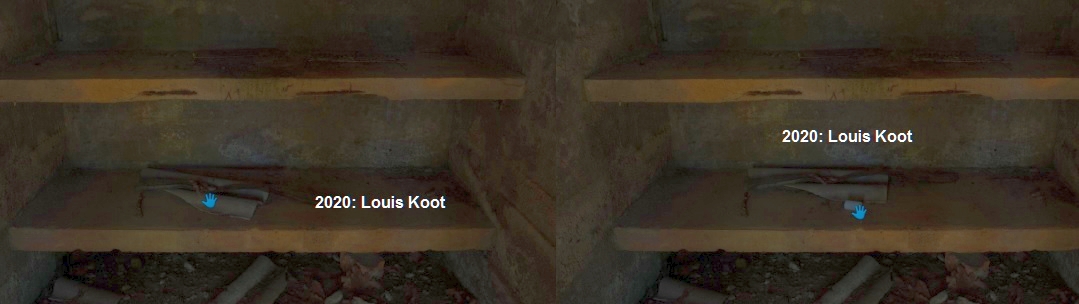
Open the tube, take the note out and read the clue about 'under the rusty iron statue'.

Carol must go back to the pet cemetery. Step back, turn around and go back to the path in 2 clicks. Turn right and EXIT to the city map.
The Pet Cemetery: second time
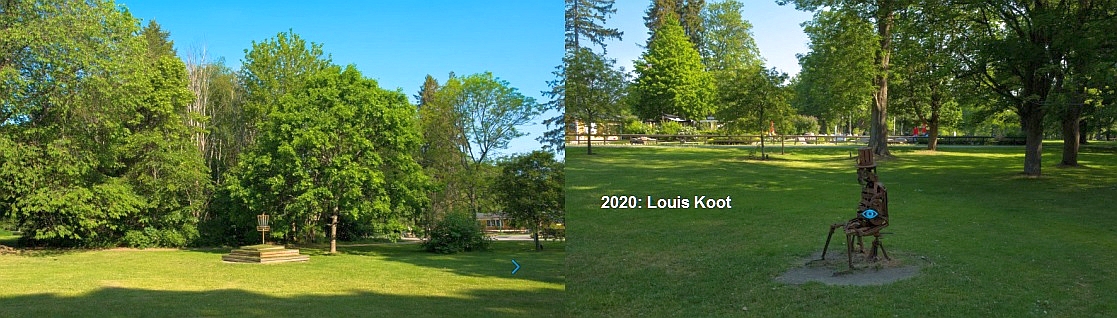
Walk forward 2 clicks, turn right, forward 2 clicks, turn left, and forward 3 clicks to be back at hole 1.
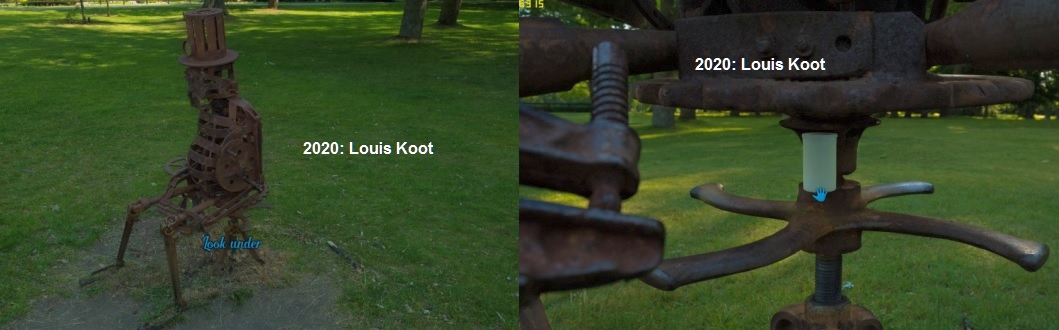
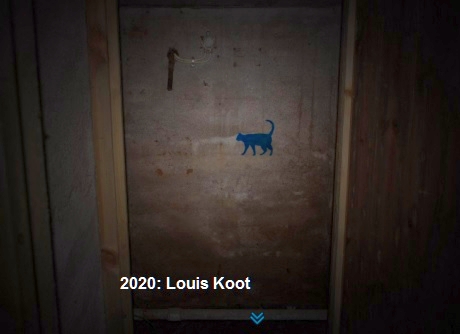
Turn right and take one step forwards in the direction of hole 2. Then turn right to see the rusty iron statue.
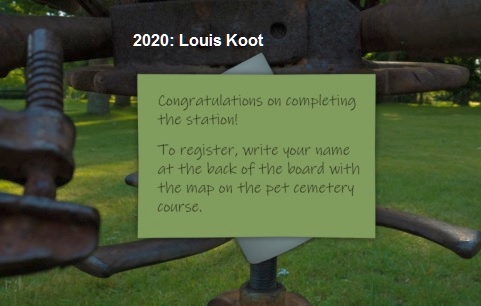
Look at the rusty statue and then look under the statue. Take the tube, open it and read the note.
'congratulations on completing the stations' the note says.
You do not have to register so let's get out of here. Step back 3 times, turn right and Carol will get a text message from Jonas who has the bentonite for Carol.
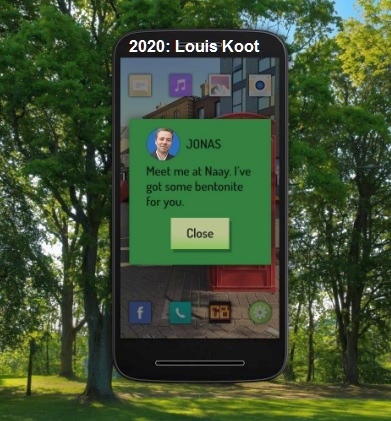
Put the phone away and go back to hole 1 and then find Carol's bike again to EXIT to the city map. Now travel to Jonas.
Jonas
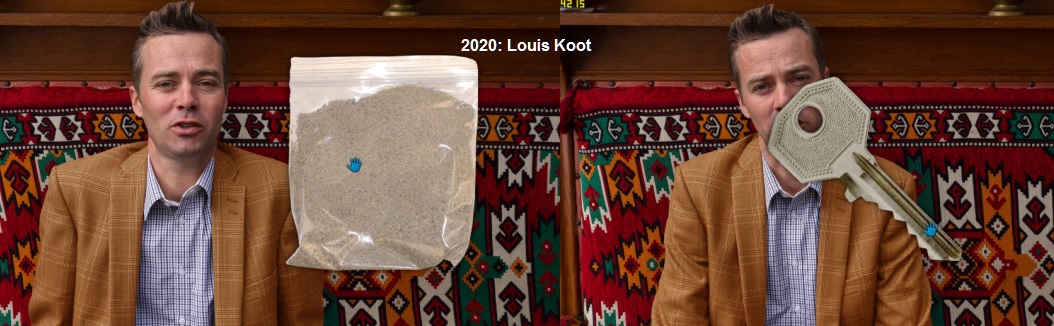
Talk to Jonas and get and take the bentonite. Ask Jonas about the faulty computer card and he will help Carol with it, but asks if Carol can do something for him in return. Some valuable items were stolen from the excavations and Jonas suspects a colleague. Jonas gives the house key of that colleague's house and this location is put on the city map
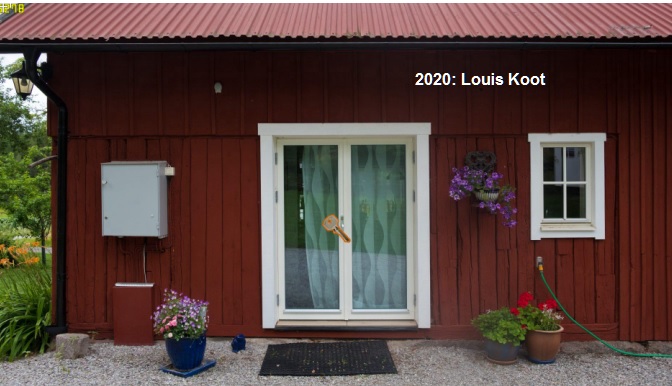
That colleague is on vacation, so he's not at home, so Carol can search his room in the house. So let's go there now
Jonas' colleague's room
Use the Key that you got from Jonas on the glass doors to enter the house.
At the window stand a little round table and at the right side of that table stand a trash can. Look at the trash can and open it by clicking the foot pedal of the can,
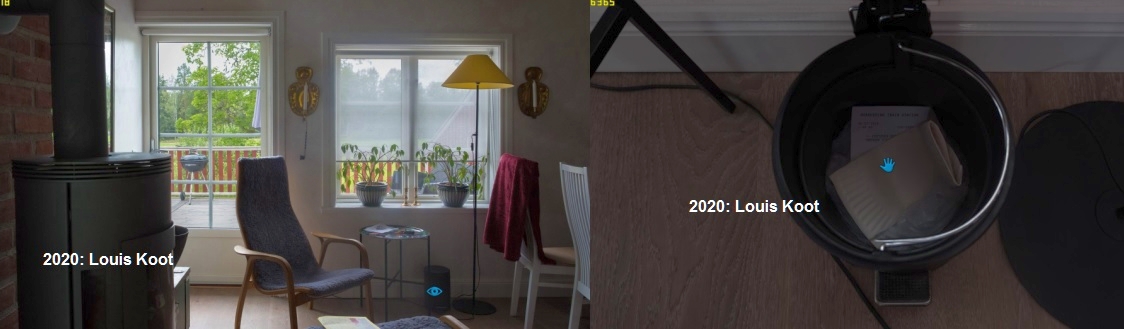
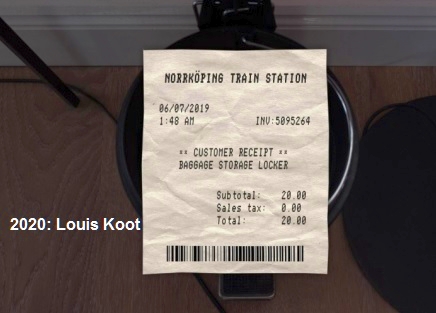
Take a receipt from the left-luggage office at the train station out this trash can. The Norrköping train station is put on the city map.
Step back a few times, turn right and Carol gets a new text message from Jonas, saying that the left room is the room of his colleague
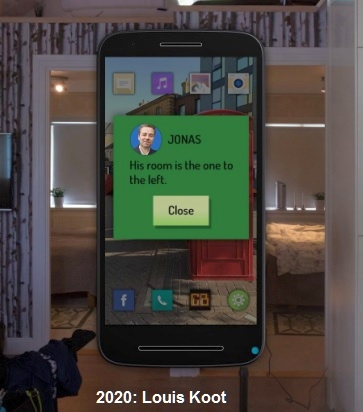
Put the phone away and then go into the left bedroom.
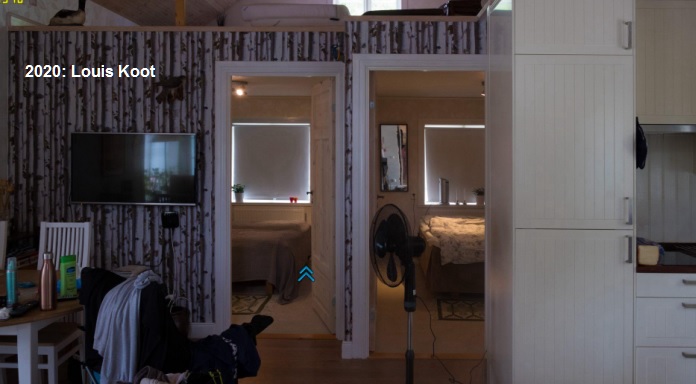
Turn left and examine the suitcase on the floor. There's clothing in the suitcase and on top of all the clothing is a package of socks.
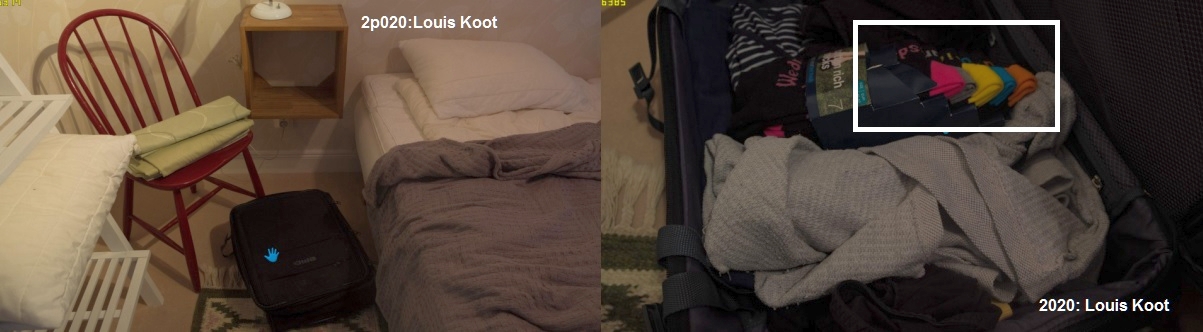
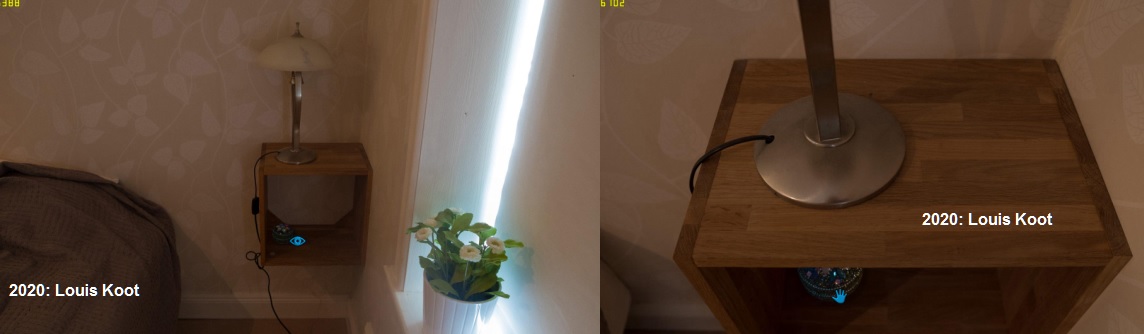
Those socks have different colors.....Write down the color sequence of the socks, from left to right. Those colors are: pink, gray, yellow, blue and orange. Step back, turn right, go forward to the window and turn left. Look at the round box that's in the wooden nightstand.
Pick up the round box to see it in close-up. There are colored decorative stones on the lid.
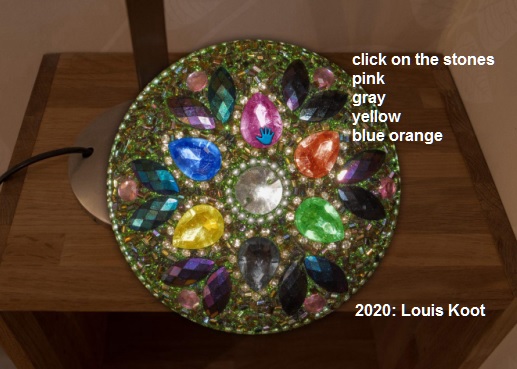
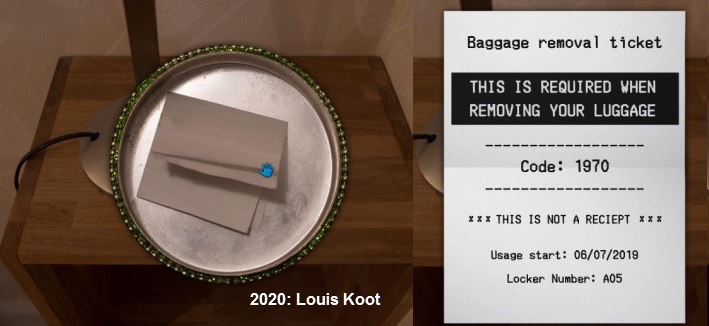
Press the color stones in the same order as the colored socks: pink, gray, yellow, blue, orange. The box goes open. Take the paper out of the box......
......... it's a ticket from a baggage locker at the train station. Write down the code: 1970.
Step back a few times, turn left, step back into the living room, forwards, turn left and click de glass doors to be back outside. Turn right and EXIT to the city map and travel to the
Train station
Inside the station hall turn right to the storage lockers.
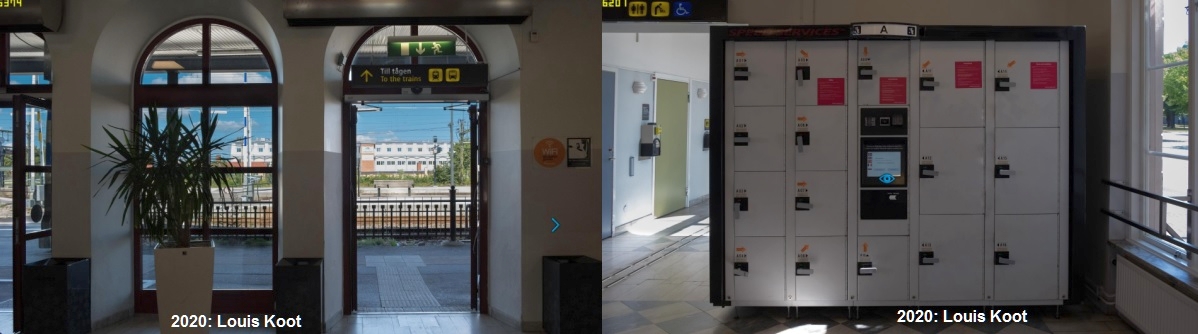
A computer screen is in the middle of all the lockers. Zoom in on the computer screen and the zoom in on the number keypad that's on top right above the screen.
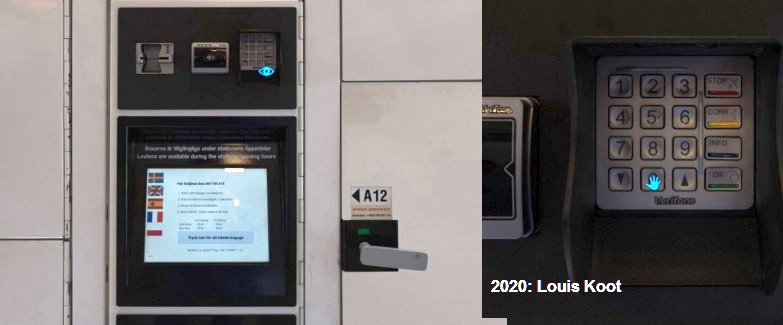
Use the number keys of this keypad to put in the code 1970, that you saw on the baggage ticket and Locker A05 will be unlocked. Open up locker A05 and take out the bag.
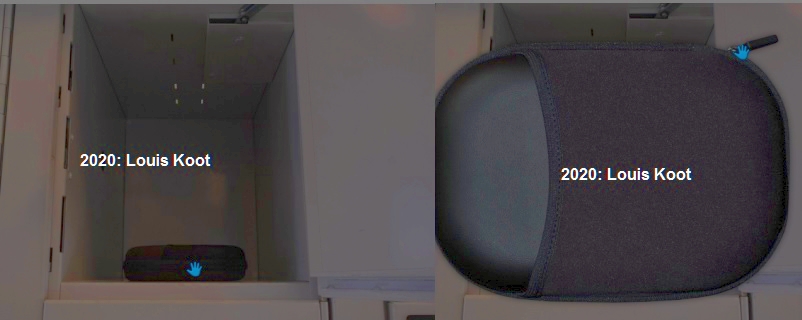
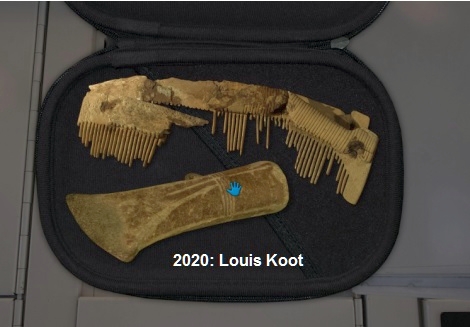
Unzip the bag and take out the stolen things from Jonas's excavation site. These are an iron comb and an iron pestle from the iron age.
Step back a few times and then turn right and leave the train station and the travel back to Jonas via the City Map
Jonas

Use all talk option. Carol will give the comb and pestle to Jonas and in return she get the repaired computer card from Jonas. So return to:
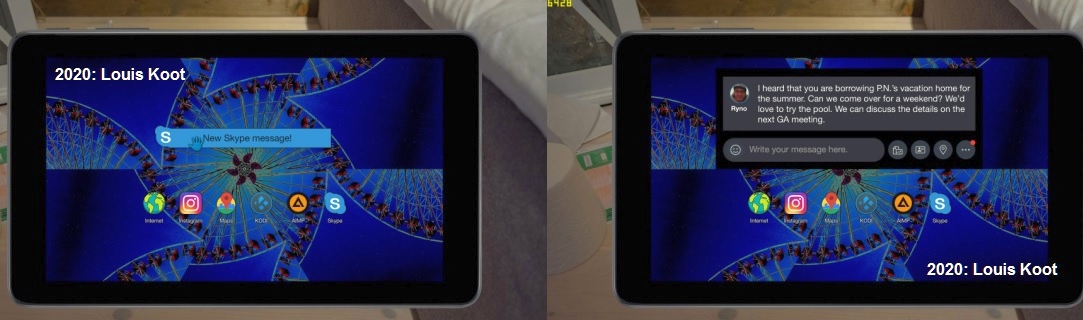
Kevo's apartment
You don't have to use the key anymore so enter and go to the kitchen. Take the laptop from the kitchen table again. Open the laptop and then click on it with your eye again to see the slot on the left side again. Put the now repaired computer card into the slot and the laptop will be up and running. Look at the screen, click on the blinking balloon icon and read the message.
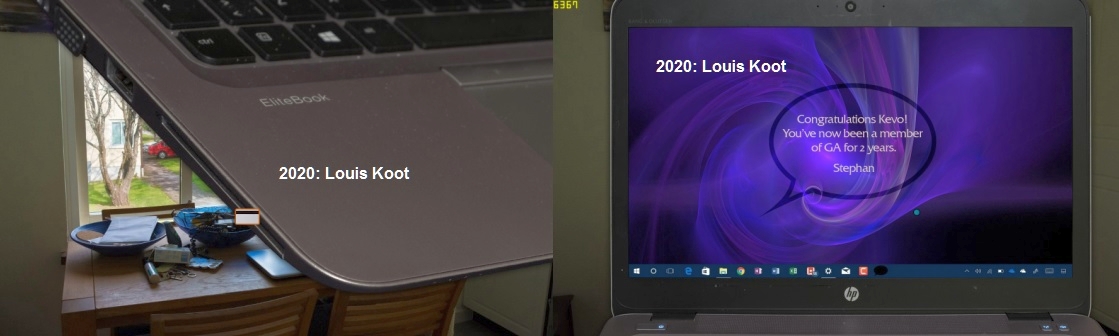
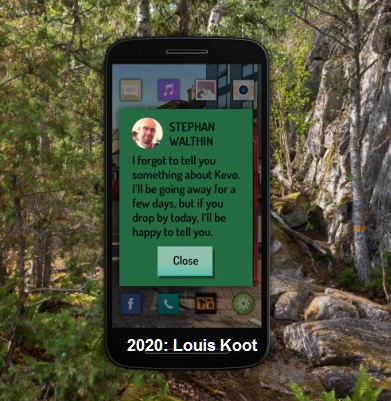
Stephan congratulates Kevo on being a member of GA for 2 years. Is this all you get for your trouble......I'm afraid it is. Leave the house and go back to:
Stephan, Kevo's brother
Talk with Stephan about everything. Stephan says GA means "Gamblers Anonymous" and this location is put on the city map.
Leave Stephan and go to the anonymous gamblers on the city map.
Gamblers Anonymous
Gamblers Anonymous is a group of men and women who share their experience, strength and hope to work on solving their problem and help others recover from their gambling problem. Talk to the GA employee about everything. He talks about Kevo's hiding place and now the Dragon Cap will be put on the city map. Take your leave and go to the Dragon Gap on the city map.
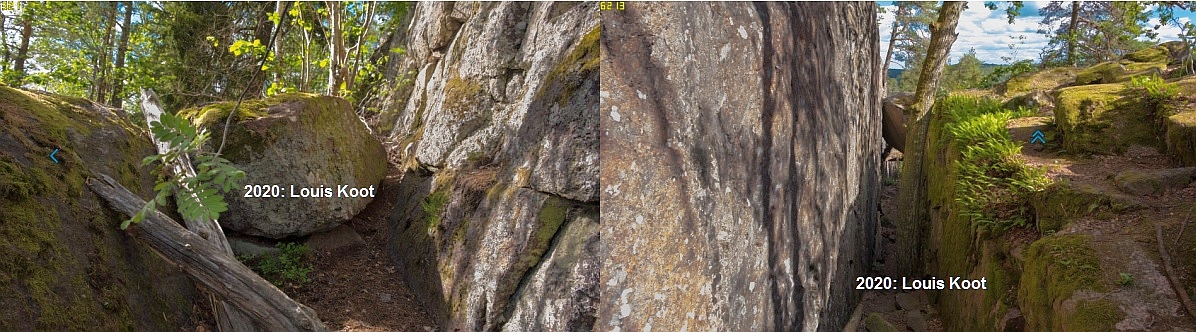
The Dragon Gap
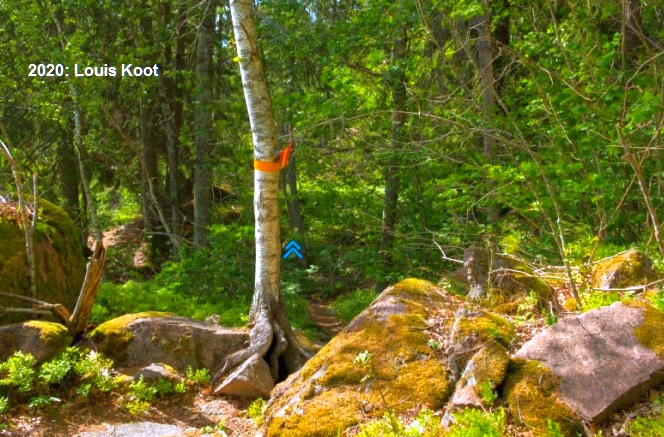
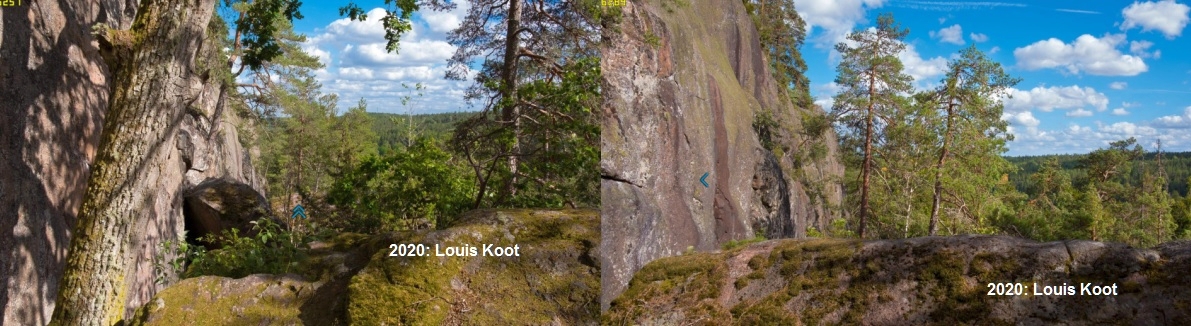
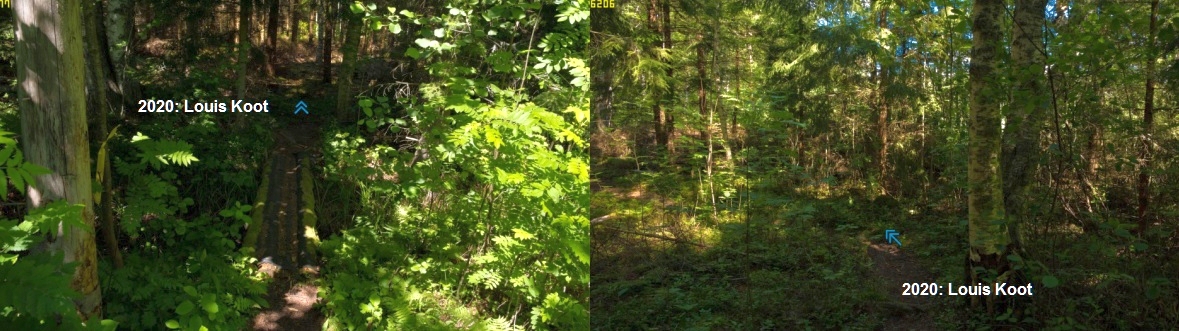
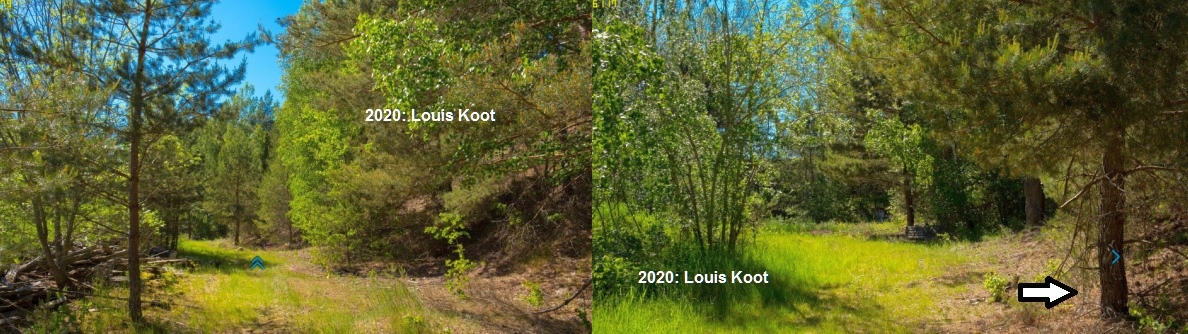
Carol arrives here at a tree with an orange stripe. Behind the tree is the beginning of the path through this Dragon Cap gorge. Go forward 8 times through the gorge.
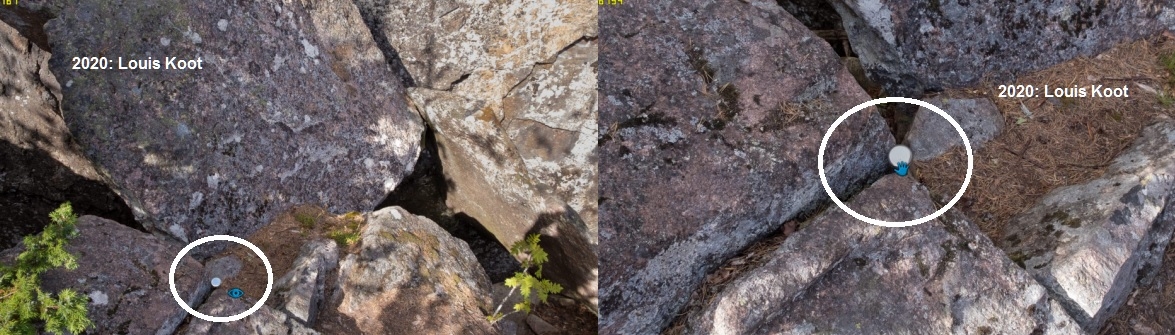
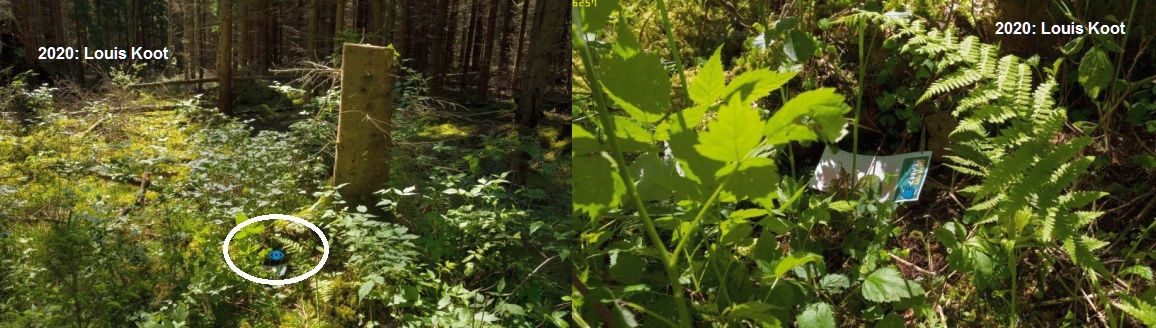
After 8 clicks you can go further ahead but don't do this now. Instead turn left to see the hiding place with the tube between the rocks.
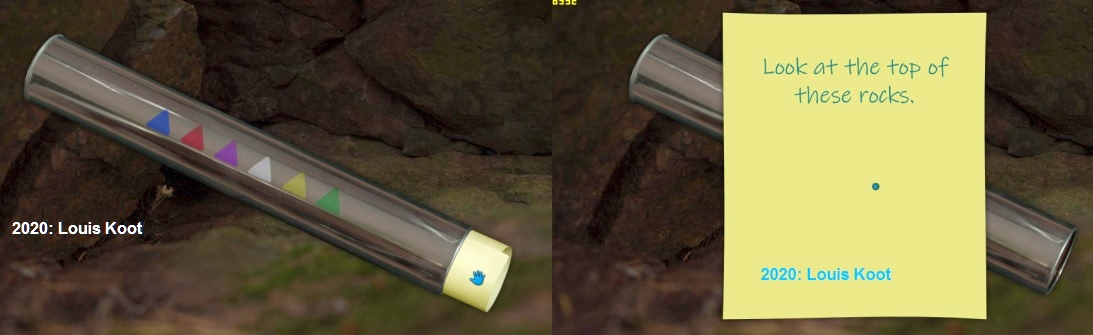
Look at the tube and take it out.........The tube has 6 colored triangles, all in a different color.
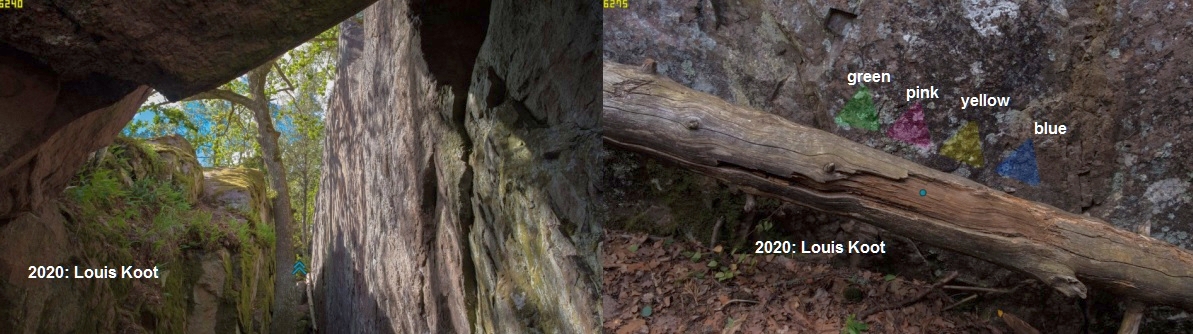
You must press the triangles in the correct order to open this tube. But you don't know the code yet, so we need to look further for a clue. Step back to put the tube back into its hiding place. Turn right and now go 2 clicks further forwards and then turn right and..........Above the broken off tree branch you see 4 colored triangles painted on the rock wall. Note down the colors of these 4 triangles......green, pink, yellow, blue.
Turn right and go 2 clicks back and turn right again to be back at the tube in the hiding place. Take the tube again and now press the correct 4 color triangles: green, pink, yellow, blue. Take the note out the tube and read the next clue.....So Carol must go all the way to the top here.
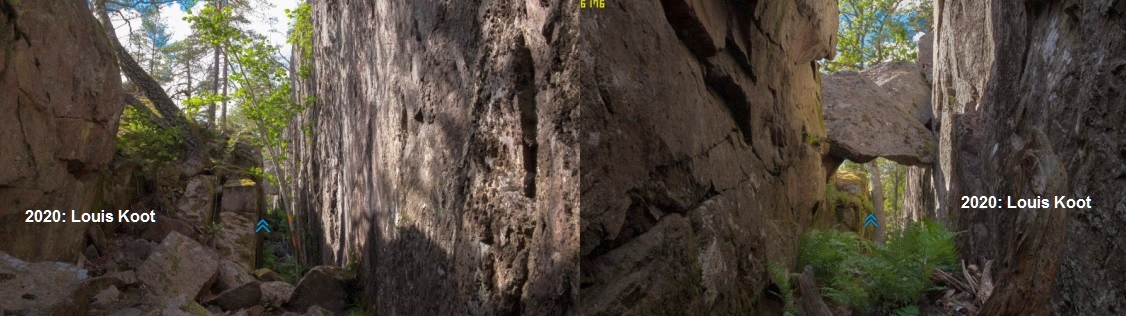
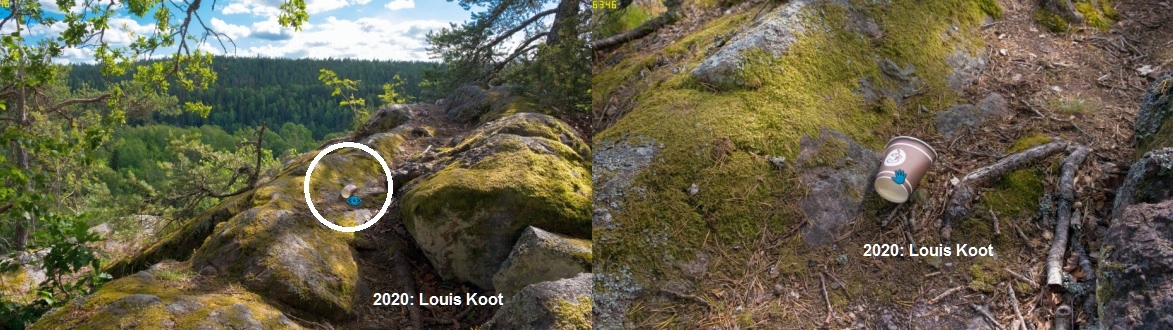
Step back, turn right and now go forward 3 times through the gorge to the end. You can't go any further so turn around and then climb up to the right of the gorge.
Turn right......You see a paper cup lying on the rocks. Zoom in on the paper cup and then click you're eye on it to here some comments from Carol about polluting the environment. The take the paper cup and click to the inventory
Turn left, 1 step forwards and turn left again and...
............the next tube sticks at Carol's feet between the rocks.
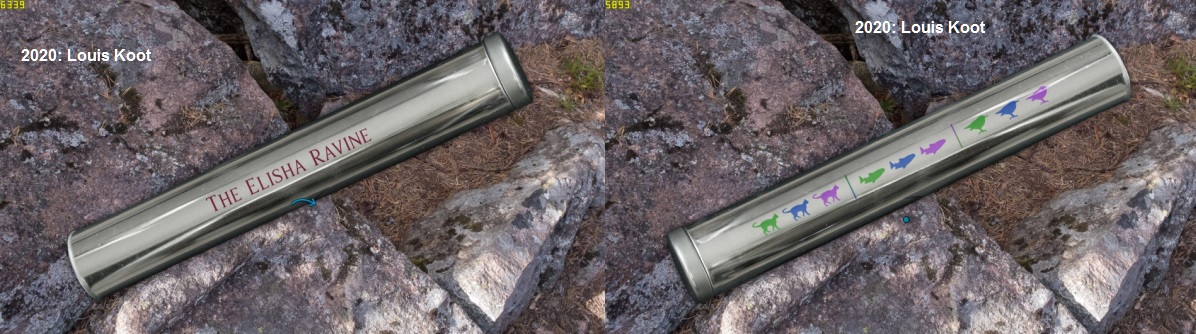
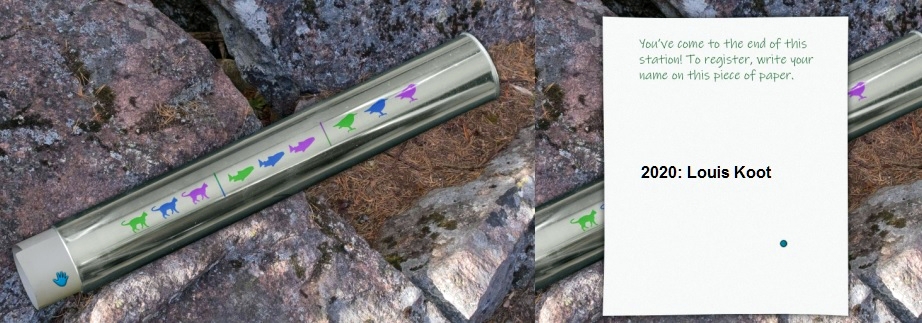
Zoom in and take the tube out and.......The Elisha Ravine is written on the tube and this location gets put on the city map. Turn the tube to see a number of green, blue, pink cats, fish and birds on the tube. Again a color code so we must find the clue for this and I presume we will find it at the Elisha Ravine
Step back to put the tube back between the rocks. Turn left and go back to the gorge in 2 clicks. Then turn around and go all the way back through the gorge to the EXIT at the beginning and that is 11 clicks. Exit to the City Map and go to
The Elisha Ravine
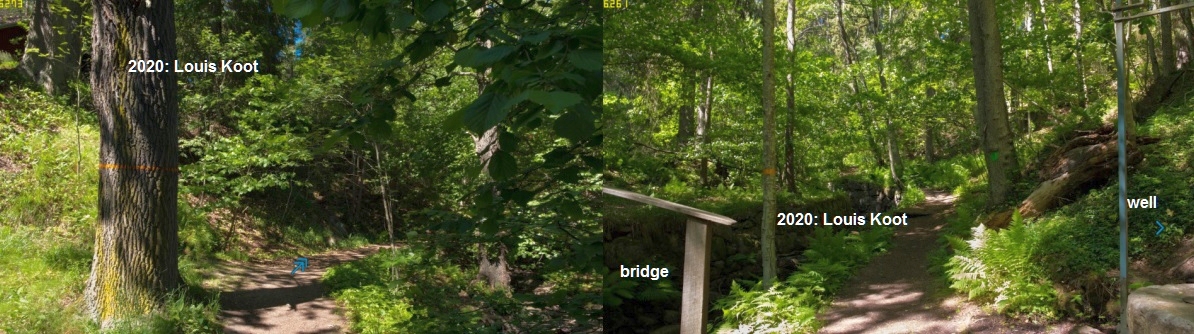
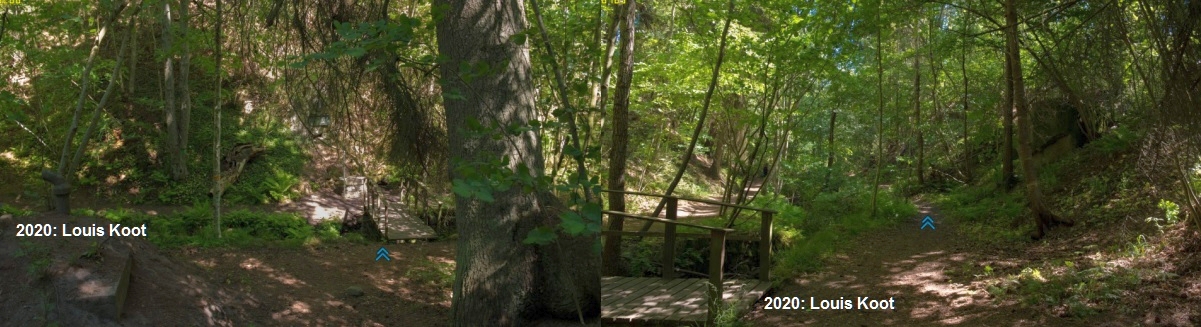
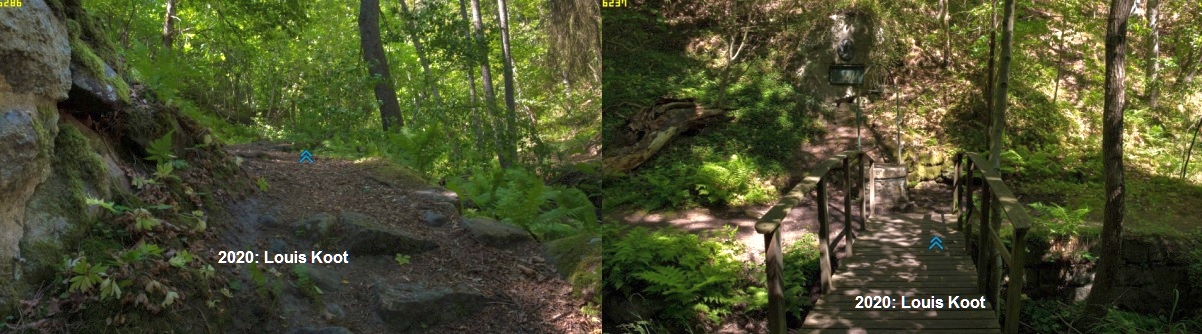
Go forward 6 times via the arrows. You go over a wooden bridge and walk along side a stream. After 6 clicks you stop. Left is a bridge an right is a well.
You can open the lid of the well to look inside it but there's nothing for Carol in this well. Turn left, or right, twice to be at the wooden bridge and cross over it to the other side
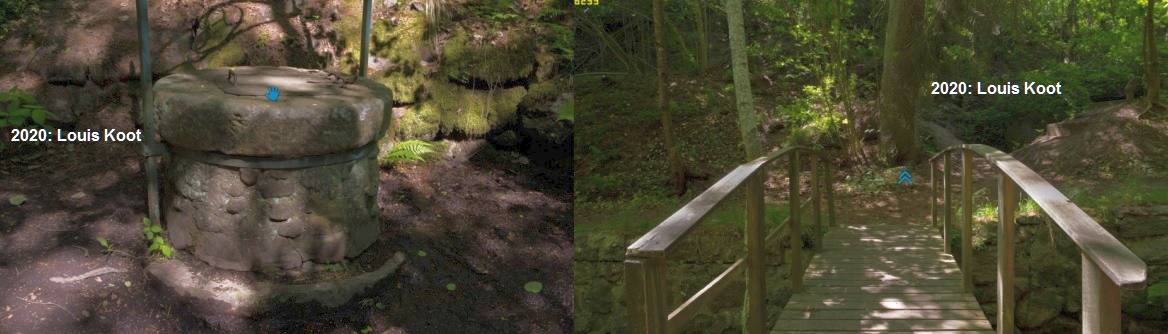
Turn right, forward, turn left and go forward to the door of the dynamite bunker.
Look inside and use your mini flashlight in the dark room to have some light.
You see the first animal of the animal code, it's a blue cat.
Step back, turn around, forward to the bridge,
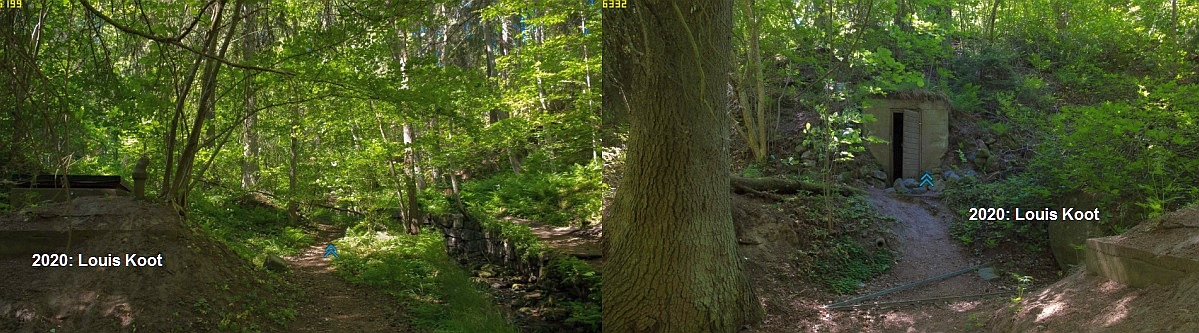
Don't cross the bridge yet but turn right and follow the path on this side 3 clicks forward and then click the Go Down arrow into the dry ditch.
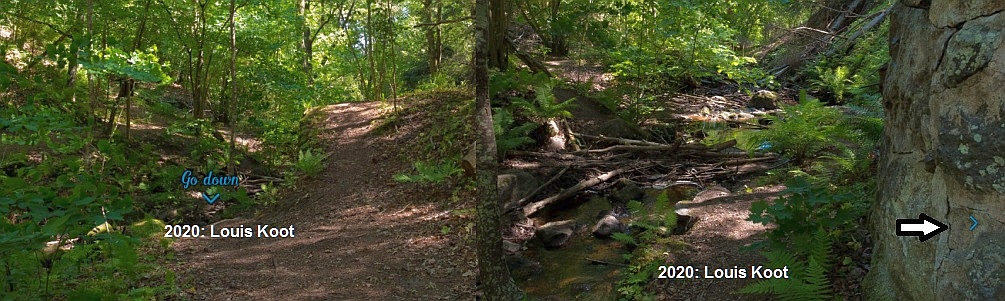
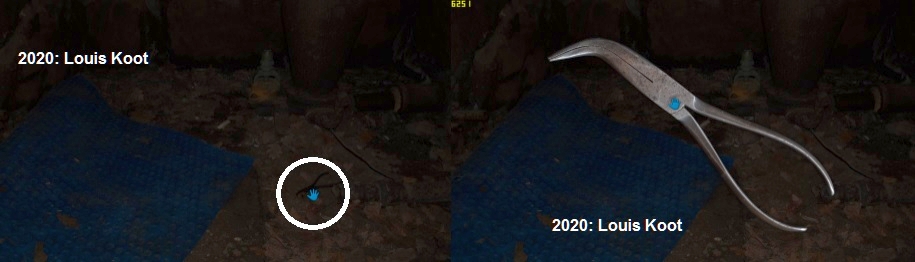
Turn right and look into the dark entrance.
Inside there's a bent nose Pliers on the floor. Take the Pliers and put it in the inventory.
Step back, turn right and go back up to the path and then forward to the bridge (2 clicks). Turn right and cross back over the bridge to the well.
Go back to the bridge and over the bridge to the well. At the well turn left and now follow the path on this side 7 clicks forward to a slatted bridge
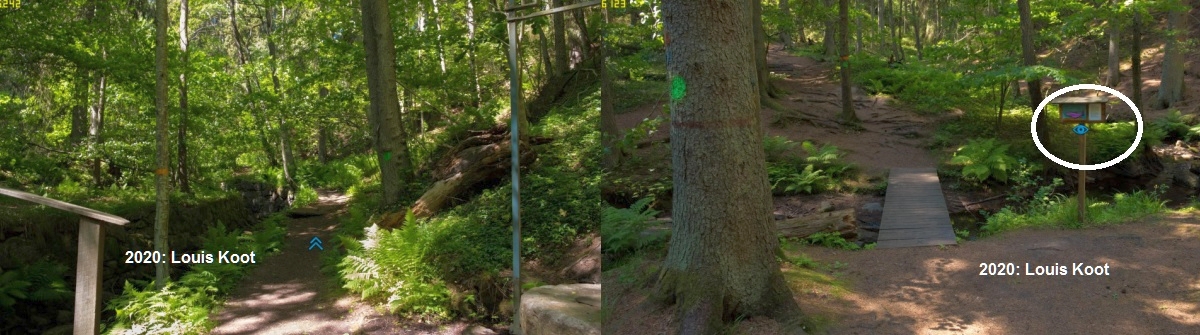
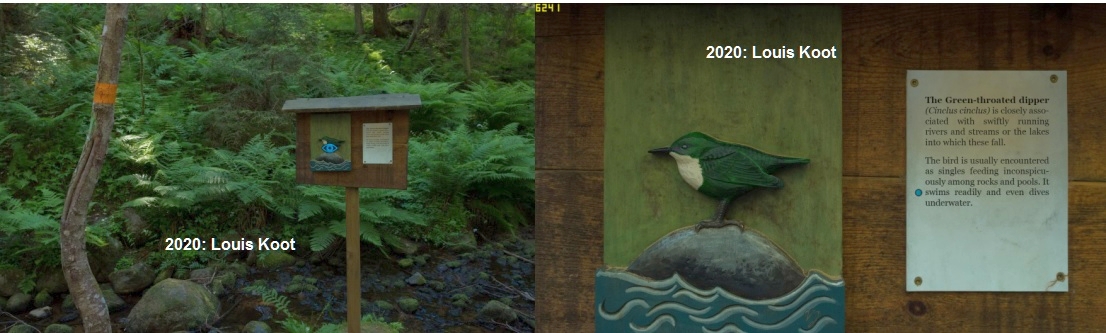
Zoom in on the information sign that stand on the right side of this slatted bridge......It gives you the second animal of the animal code....the pink fish.

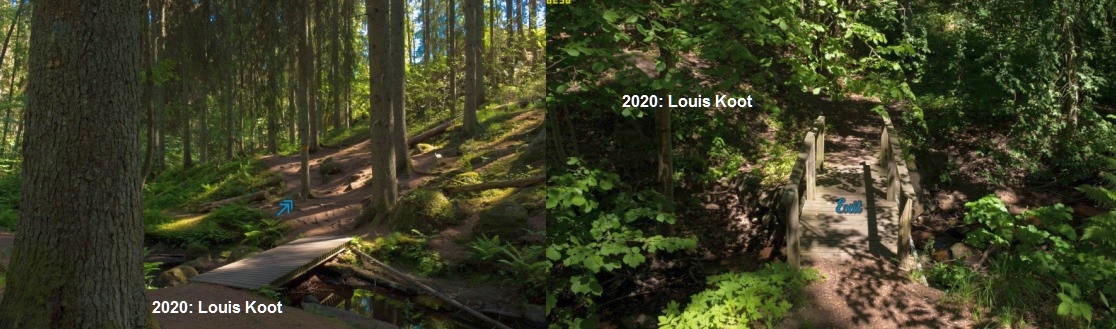
Step back and now cross over the slatted bridge and go forward over the next slatted bridge.
You have crossed that bridge and can't go further ahead, so turn left and see the bird clue an the information sign....it's a green bird
Step back, turn left and go all the way back to the EXIT in 15 clicks. Then turn left and click EXIT on the bridge to get on the city map. Travel back to the:
The Dragon Gap revisited
Go through the forest and gorge to the end (11x forward). Turn around, climb the rocks, forward and turn left.
Take the tube again, turn it over and enter the code: so click the: blue cat, pink fish, green bird. Take the note out the tube. Carol has reached the end of this station.
Go back to and through the gorge and Carol will get a text message from Stephan.
He has remembered something important about Kevo. So go all the way back to the EXIT and travel back to:
Stephan, Kevo's brother
Kevo lived in a friend's holiday house for a while.
Stephan shows you a piece of paper with the address of the holiday house and this location gets put on the city map, so let's go there now.
The holiday house
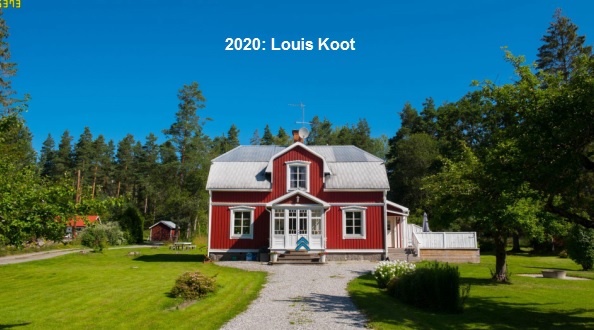
Go forward to the house. The double glass door is locked, so turn right and go to the left side of the house via the left slanted arrows in the garden.
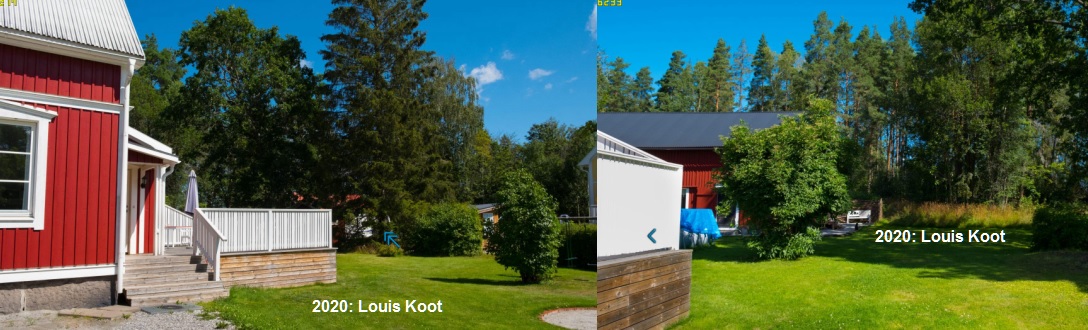
The turn left to be at an old water pump that stand at the side of the house. Zoom in on the water pump and take the house key out of it.
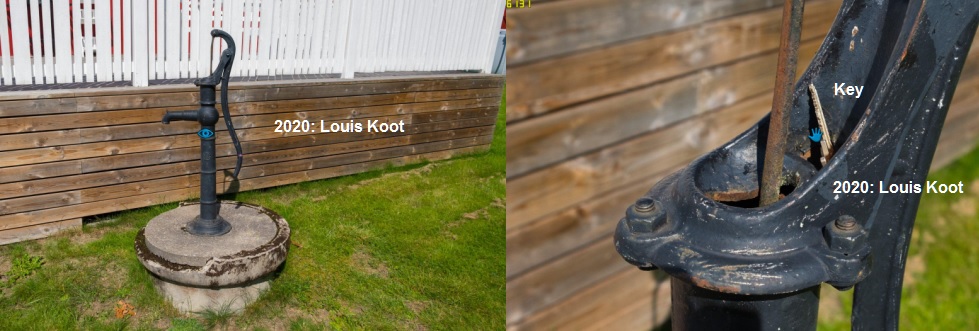
Put the key away in inventory and step back. Turn left, forward, turn around to the house. You're back at the front side of the house. The key you have just found isn't for the double doors, so turn right again and go to the side door via the left slanted arrows. Click the door handle and then use the house key you found in the water pump on the door to enter the house.
Go straight up the stairs to the upper floor.
Look at the closed right door and see a black piece of iron that's screwed on the door in the upper right corner of the door frame. Carol needs a screwdriver to unscrew this black piece of iron from this door. Step back twice and then go into the bed room, left of the closed door. Turn right and look at the box that's on the left nightstand. Click the box to see the lid of it in close-up. On the lid are 4 squares that you can color in the colors green and pink.
You do not know witch square you must give green or pink. So step back twice, turn right and leave this bed room to the stairs and go down to the down floor.
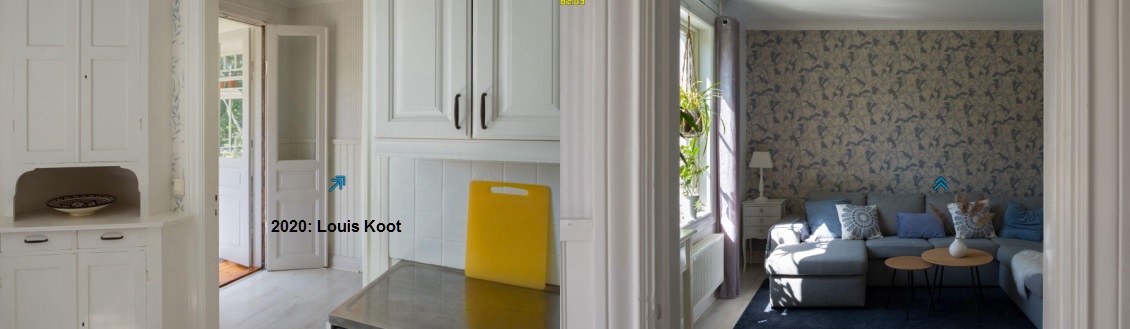
Go on to the front door and turn right and enter the kitchen
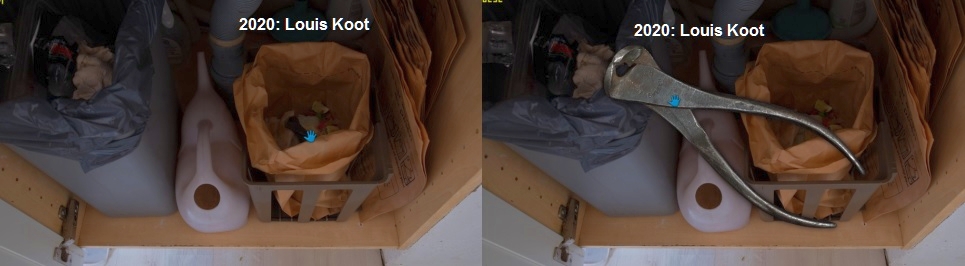
Open the closet door under the sink.

There are two waste bins in the closet. Click in the right-hand bin to take out an End Cutter pliers and click it to the inventory
Step back and turn left and then click the slanted arrow and then step into the living room.
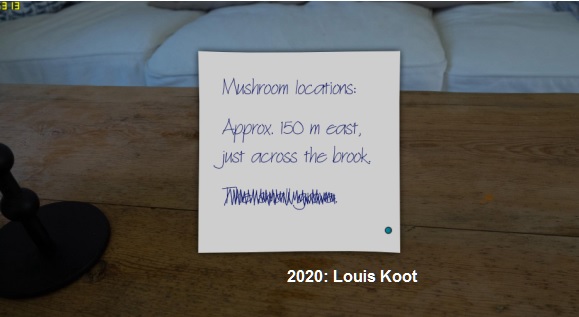
Turn right and go forward to the next room. Turn right to the coffee table. There's a note on the coffee table.
Zoom in and read the note about the mushroom location. This location will now be added to the map.
Leave the house and search outside the EXIT and then travel via the map to
The mushroom location
Forest paths again. Walk over the tree trunk bridge, then turn right and then follow the path for 5 clicks.
After 5 clicks, turn left. You are standing on a tree stump. To the left of the stump is a coupon between the tall grass.
Zoom in on the coupon and pick it up ... it's a Grand Slam 75 coupon. Turn the coupon over ...
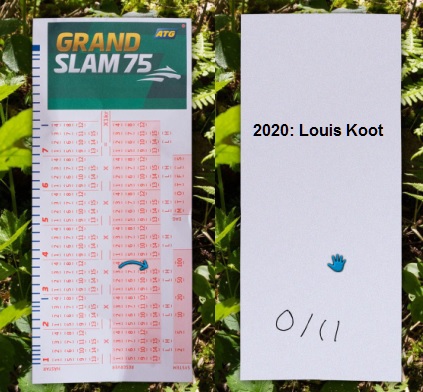
.. at the bottom of the back you see the solution of the code for the tablet that is in the attic of the guest house. Click the coupon to the inventory.
Step back, turn left and follow the path back to the EXIT and then travel back to:
Stephan, Kevo's brother house
Enter the house through the front door and then go through the rooms to the veranda. Step through the veranda doors into the rear garden and go to the door of the guest house. Open the door and step inside and climb up the stairs to the attic. Pick up the tablet in the attic. Click in the screen of the tablet and then click the symbols according to the clue on the back of the coupon .
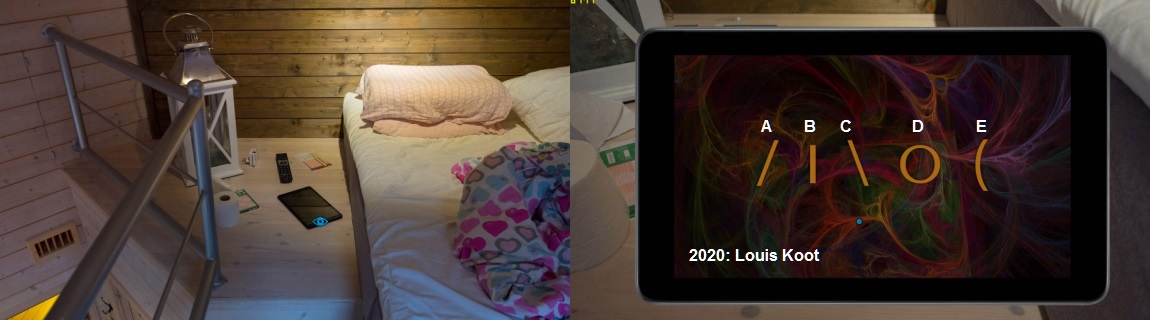
Number the 5 figures, left to right, A, B, C, D, E. Then click on D, A, E, B. You then read on the tablet that there is a new Skype message so click on it to view the message.
The message is from Reyo in which he reports that Kevo has rented the summer house from someone with the initials P.N. Step back, climb back down. Leave the guest house. Go back into the main house through the porch and walk through the rooms to the front door and exit the house. Via the City Map you return to the:
Gamblers Anonymous
Talk to Reyo about that mysterious P.N. P. N first name is Pierre but Reyo is not allowed to tell more. So leave and go to
Stina
Talk to Stina about everything. Stina finds that The summer house belongs to politician Pierre Nyman.
This location gets put on the City map now, so leave Stina and go to Nyman via the city map.
Pierre Nyman
Talk to Pierre.
Kevo was interested in environmental issues and did something in the swampy area in Toadville. The Toadville Marsh location will be put on the city map.
Pierre also confirms that Kevo rented his summer home. Leave and on the City Map now go to the
Toadville Marsh
Well.....a forest again......I'm getting hay fever from all that wandering around through the forests of Norrköping. Go forward 5 times and then turn right.
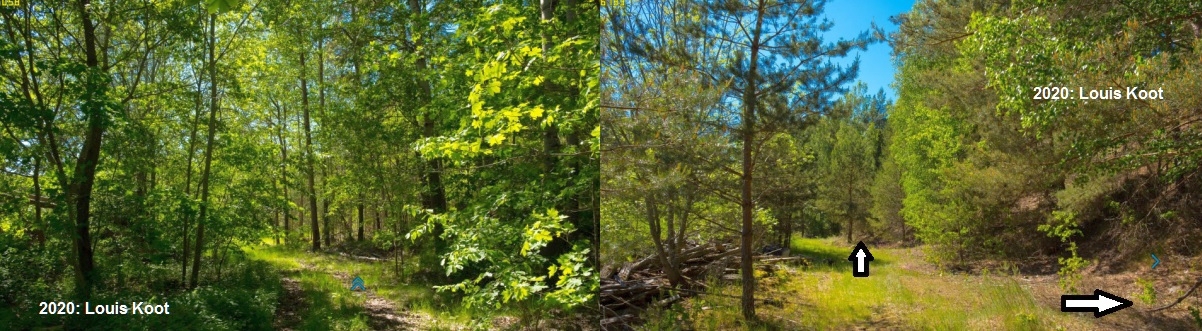
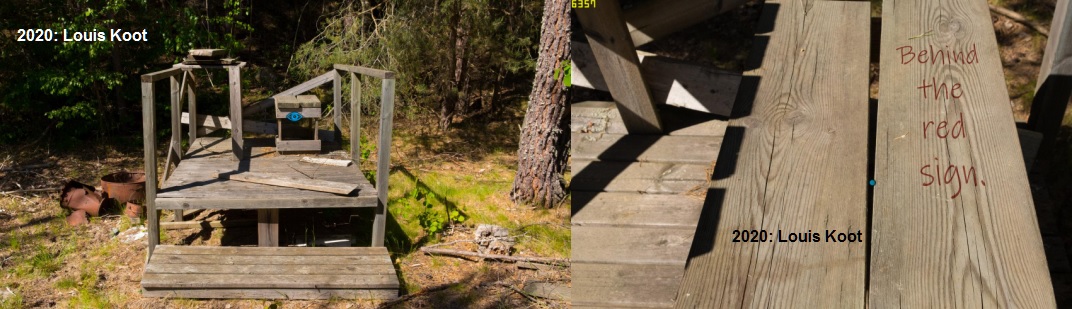
Carol is standing at a derelict wooden platform. There's a little wooden bench on the platform.
Look at the little wooden bench and read the clue that's written on it....'Behind the red Sign' you read.
Step back, turn left and go 2 clicks further over the grassy forest path.
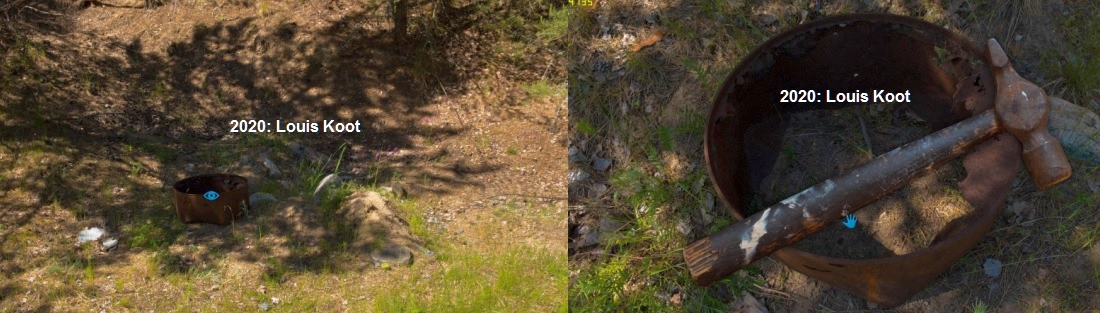
Turn right again and look into the rusty barrel. Take the hammer that's in this rusty barrel and put it in inventory.
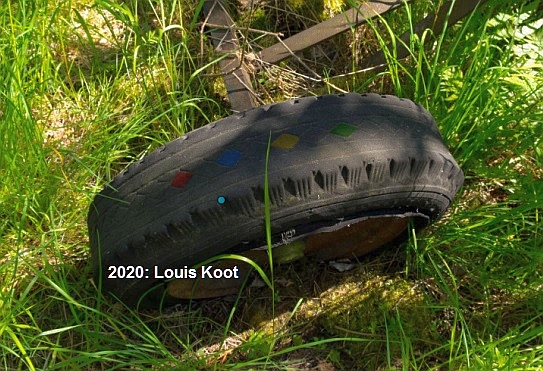
Step back and turn around by clicking 2 times left or right. You see a car tire sticking out of the grass.
Look at the car tire in close-up and note down the colors of the 4 colored diamonds that you see on this tire....red, blue, yellow, green.
Step back, turn right and follow the path further 4 times till the end. A board is in front of you. Zoom in on the board and then move it aside and......
....... pick up the little red pyramided that's leaning behind the board.
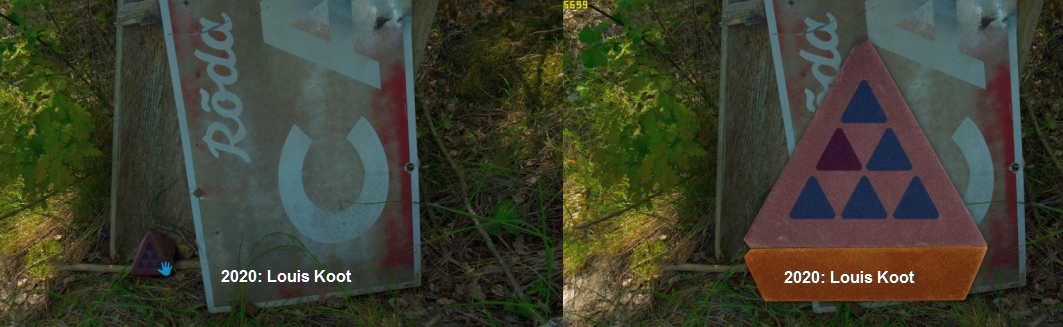
There are 6 triangles on the pyramid. If you click the triangles from top to bottom then the bottom bar will color green, orange, red, blue, yellow, purple. Number the triangles from top to bottom right as, A, B, C, D, E, F. A = green, B = orange, C = red, D = blue, E = yellow, F = purple. Only click the triangles tot give the colors that you saw on the car tire, so click the triangles: C, D, E, A and.......the pyramid opens up and inside is a nail.
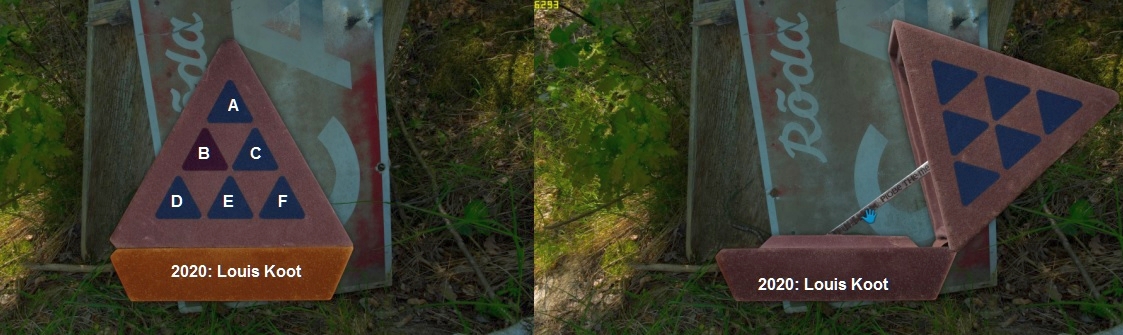
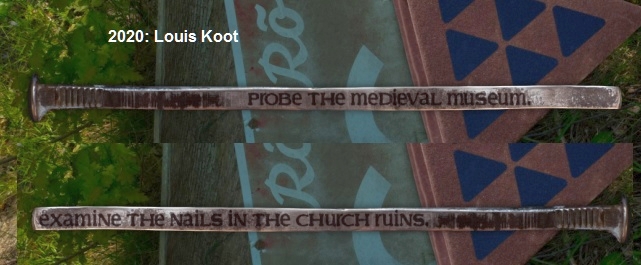
Take the Nail. On the nail you reed about the Medieval Museum and this location is put on the map.
Turn the nail over and you read that Carol must examine the nails in the church ruins, but what church?
Step back a few times. Carol doesn't take the nail but puts it back into the pyramid.
Turn around and g all the way back o to the exit (11 times forward) and EXIT and on the City Map go to the Medieval museum
But we do this on the NEXT PAGE of this walkthrough:
2020 walkthrough by: Louis Koot