
2020: Walkthrough by: Louis Koot
If you have found this walkthrough via google search or via another site then you have probably not visited my site.
A lot more very detailed game walkthroughs can be found on my site at: www.pcgameswalkthroughs.nl
You can buy this nice old LucasArts game at gog.com
There are several alternative ways to play this game. This Walkthrough tells you HOW I have played the game and this is definitely NOT the ONLY way to play through the game. It's not even the BEST Way to play the game, but the BEST Way is way too difficult and almost impossible to do. This Walkthrough gives you the EASY WAY witch means that it will avoid almost all combat actions.
Chapter 1: New York City 1938.
Barnett College
Professor Doctor Indiana (Indy) Jones, archaeologist and adventurer by profession, has burst into Barnett College. Indy's clothes are quite a wet
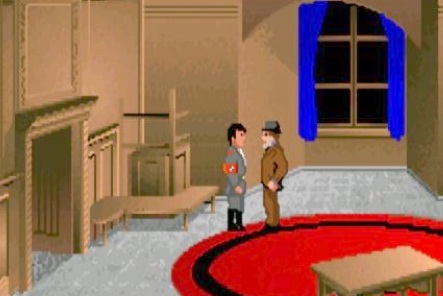
In the hallway, Indy meets the director of Barnett College, and fellow teacher, Marcus Brody.
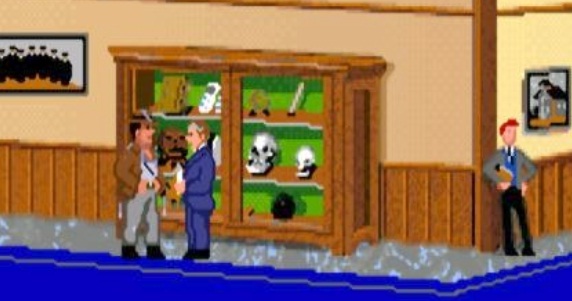
Indy reports to Marcus that he has finally found the Coronado Cross.
Indy then goes to the locker room of the boxing room to put on a dry suit and returns to the boxing room
You now have control over Indy. Below the game screen you will see all the actions you can let Indy perform. For example, you click on "Look" and then you click twice on the item you want to look at. It is exactly the same with all other actions. I will not give any more explanation, because I assume that you are smart enough to find out how you control this old game. Oh ... one more thing then ..... To open the Menu screen, press your F5 key. In the Menu screen you can then "Save", "Load" and "Quit" and view the "Help" section. Be sure to check out the Help because it contains explanations of all the shortcuts you can use.

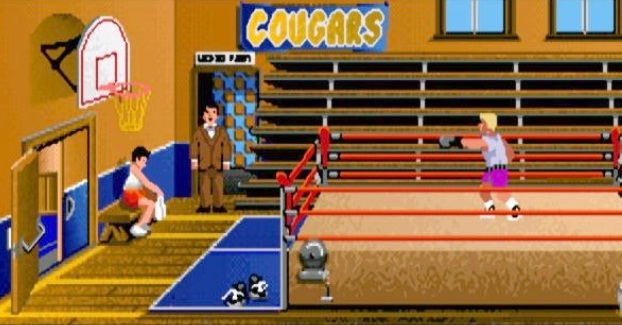
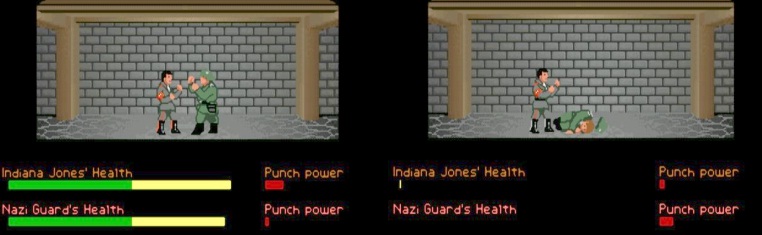
Boxing
A student is exercising his boxing skills in the boxing ring. If you want you can have Indy box against that student. It is not necessary, but it is a good practice to master boxing for later in the game. If you do not want to box, go back through the left door to the hall and immediately find Marcus Brody again.
If you do want to practice boxing for a while, make sure that Indy walks into the dressing room again. Indy will come out again but has then changed into his boxing outfit and he automatically climbs into the boxing ring. The student then asks if Indy wants to spar with him. You will then receive a number of possible answers that Indy can give. If you really want to box, give 1 of the top 3 answers, if you don't want to box, say "I think I'll pass for now. Maybe another time".
If you are going to box, use the number keys of your "numeric key pad" to make Indy hit. The "Numeric number pad" is the block of number keys on the right side of your keyboard. You can then open the Help via the F5 key. In the Help, you can read which number keys on the Numpad you should use to make Indy fight.
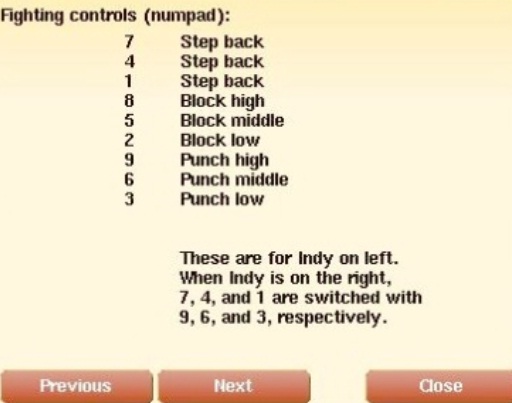
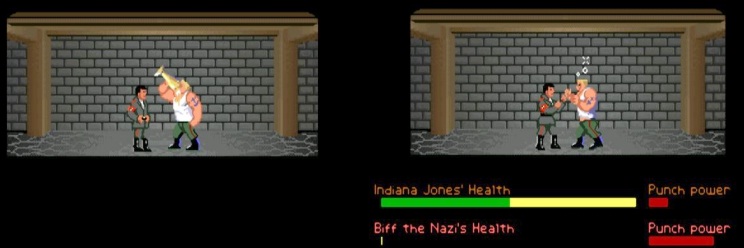
I am not going to explain this further so find this out for yourself. Indy wins if his opponent's Health meter is empty faster then his own Health meter.
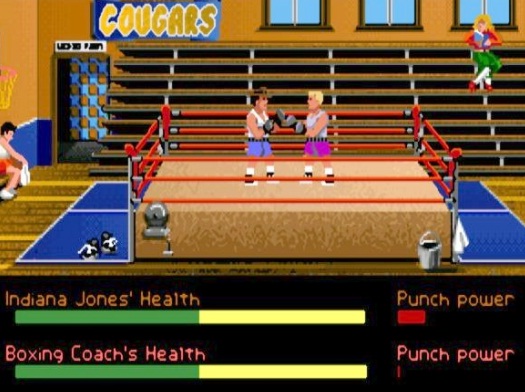
Whether Indy wins or loses does not matter ...... if you have had enough of this boxing then say the sentence: "I think I'll pass for now. Maybe another time". Indy will change into his clothes. Whether or not you've been banging a while against that student's stupid head, go back to the hall, so click in the doorway under the basketball basket. Back n the corridor walk to the right and ..... Marcus Brody is still at the showcase, or comes running in. Talk to Marcus, so click "Talk" on Marcus.
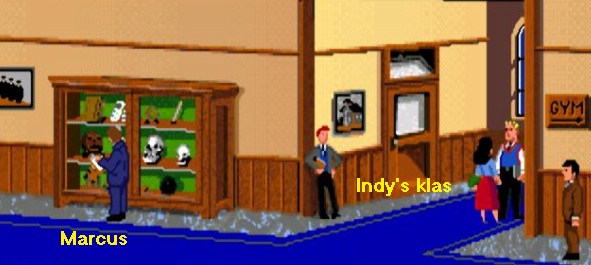
If Marcus walks away before you can click "Talk" on him, then walk to the left and then back to the right and Marcus will come back and stand at the display cabinet again. You have to give Marcus 2 or 3 correct answers in this conversation. Marcus and Indy briefly talk about a fake Mexican vase, which Indy apparently broke. Marcus reports that the College has hired a new geologist, who is also somewhat of an amateur archaeologist and his name is John Reid. Choose as answers: "What do you mean, considering his situation?" and then "After my job, eh?" and then possibly "Who is this expert?". When the conversation is over, Marcus disappears.
Then walk to the right. You will then see the door to Indy's classroom. Click "Open" twice on the classroom door and then step inside.
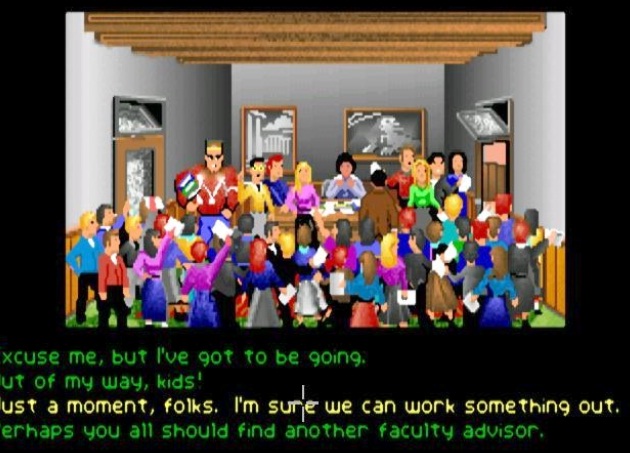
Indy's class is packed with disgruntled students, all of whom are waiting for Indy. Indy's secretary, Irene, is desperate and relieved to see Indy. Irene wants Indy to speak to the furious students to calm them down. So click twice with "Talk" on the students (Talk to students) and then choose from the options: "Just a moment, folks. I'm sure we can work something out" and then "Please relax. I have a solution that is fair for everyone" and then "Irene, take down names and I will see everyone in order". Indy then quickly flees the class to the college's storage room.
There is a large desk in the left window. On that desk is a large pile of letters, junk mail and newspapers.
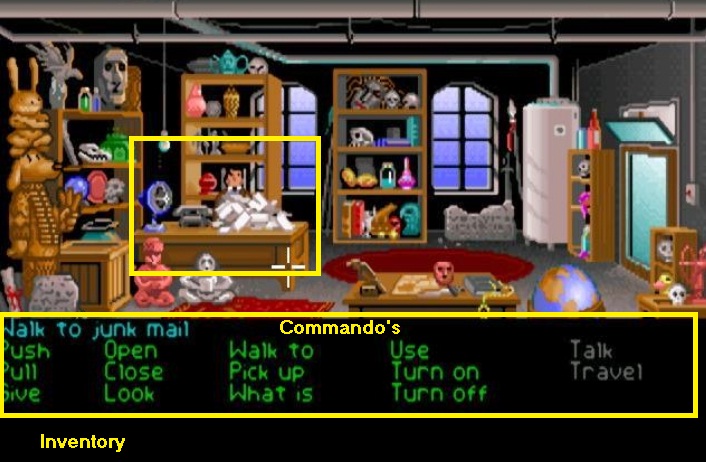
Click on the desk and ..... Indy takes a seat behind the desk. Then click "Pick Up" several times on the huge pile of junk mail, letters and newspapers to remove that whole pile from the desk. A red package remains. At the bottom of the screen you can read that the Junk mail, letters and newspapers are now in Indy's inventory.
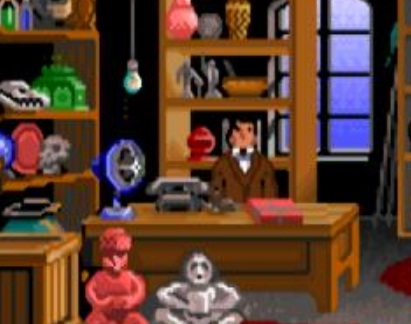
Click twice with "Look" on the red package. Indy reports that the package is from his father. Then click twice with "Pick up" on the red package (Pick up package) and ..... Indy takes the red package and puts the whole stack of letters, newspapers and junk mail back on the desk. So below the game screen are all commands, such as Push, Pull, Give, Open etc ....., that you can let Indy perform. Those commands are in green letters. Among all those commands is also the Inventory. Inventory items are shown in purple letters.
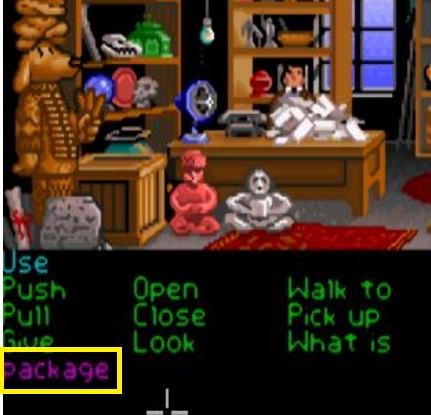
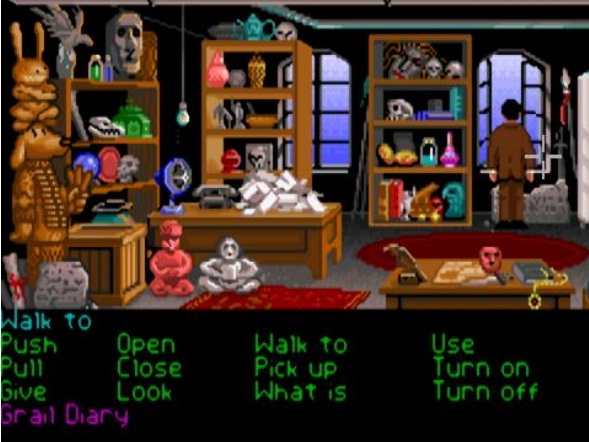
At this moment Indy has 1 item in inventory and that is the red package that he just picked up. Now click twice with the command "Open" on "Package" and ..... Indy opens the package and then takes out his father's Grail Diary. Now you also know what the inventory is and how it works. You do not see the inventory items as Items but as words and those words are purple. To do something with an inventory item, first click on one of the green commands and then on the purple inventory item.
Indy doesn't want to go out the door. Click twice with "Open" on the right window. Indy then opens the right window.
Click in the open window and Indy climbs out the window and.....The game goes on automatic for a while
Walter Donovan:
Outside Barnet College Indy is met by two men who take him to Walter Donovan. We then end up in Walter Donovan's house. This Walter Donovan has a clay tablet, on which something is written about the Holy Grail. Indy tells Donovan that the clay tablet is not complete. Indy then translates the clay tablet for Donovan
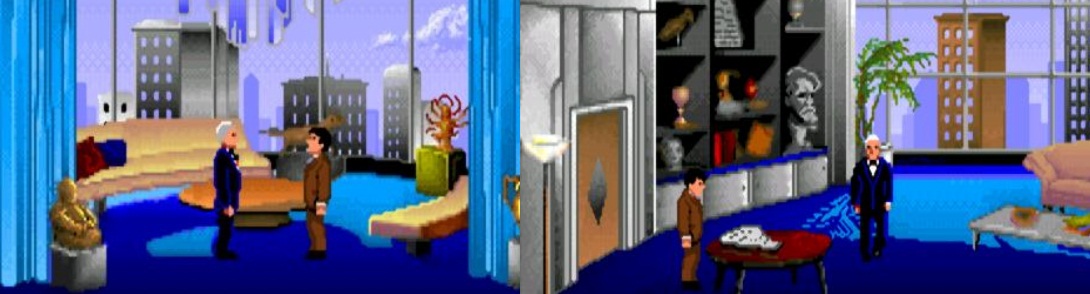
Walter Donovan is a rich man and he is looking for the Holy Grail. Donovan says he has hired Indy's father, Henry Jones, to find the Holy Grail for him. Henry Jones has been searching for this Holy Grail all his life ... finding the Holy Grail is Henry's great obsession. Henry's last quest took him to Venice, where Henry has now disappeared. Donovan asks Indy if he wants to take his father's place now.
NB: In the old floppy version of this game you would now come across the copy protection here. This Copy protection was that Indy had to translate the old text on the clay tablet for Donovan. This was then your first puzzle in the game and you had three chances to get it right. However, you could only translate that text well if you also had the official game booklet, because it contained the translations of all those hieroglyphics. Without that booklet you could not make that translation and you could not continue playing. It was a very effective way to prevent copying. In the ScummVM version of the game, this translation puzzle is no longer included because Indy now automatically translates the clay tablet .
The conversation with Donovan is over and Indy is returned to Barnett College. You will see that the option "travel" is now active green. Click on "Travel".

You can now travel to Indy's father's house or to the airport to catch a plane to Venice
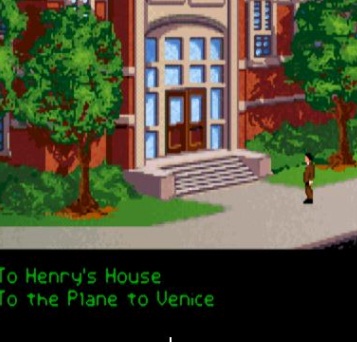
Click "To Henry's House" to go there now.
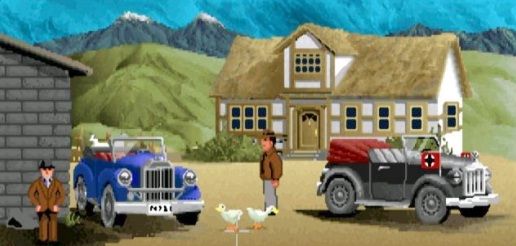
Henry's house
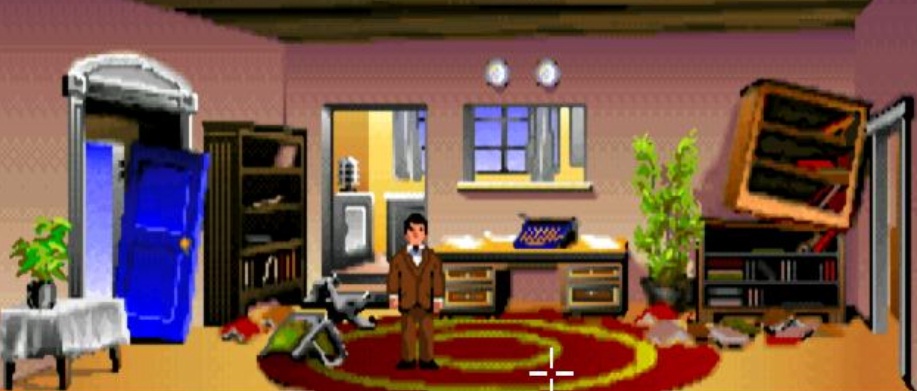
Arriving at his father's house, Indy notices that the house has been broken into. Indy wonders if the burglars were looking for his father's Grail Diary.
The blue front door has been ripped out of the frame. At the blue front door there is a table with a plant on it. A white table cloth is placed over the table. Click "Pick up" twice on the plant and Indy picks up the plant and places the plant on the ground next to the table. Then click "Pick up" twice on the white table cloth to also rip the table cloth from the table.
The table then turns out to be a large chest. Click "Open chest", but unfortunately the chest is locked.
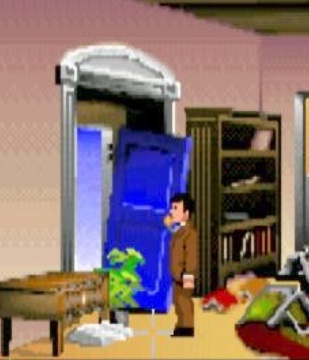
So Indy has to find the key to the chest. At the far right is a crooked bookcase on the wall. Walk to that crooked bookcase.
Click "Pull bookcase" twice and Indy tears the bookcase off the wall.
Indy will then stands in the way a bit, so walk a little to the left so that you can see the back of the bookcase completely.
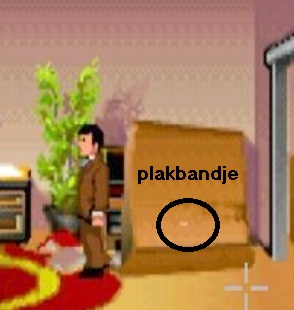
There is a piece of white tape on the back of the bookcase. Click "Pick up" twice on that piece of adhesive tape . Indy does not report it but the key for the chest sticks to the piece of adhesive tape, but there is no way to rip that key off the adhesive tape. Walk back to the right and then click in the front door to leave the house. Indy automatically returns to:
Barnett College:
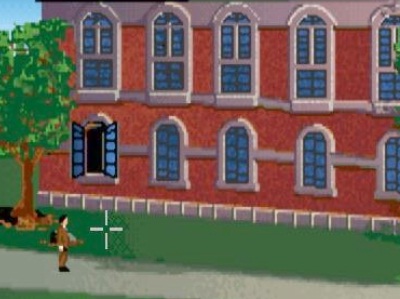
Indy is back at the side wall of Barnett College and at the open storage room window. Click on the open window and Indy climbs back in through the window. There is a shelving cabinet between the two windows. The cabinet has 4 shelves. If you count up from below, you will see a glass jar with a bluish liquid on the 2nd shelf.

Click "Look" twice on that glass jar. Indy reports that there is solvent in the jar, which he uses to clean things with it. In inventory, click "Use" on "Sticky tape" and then click twice on the glass jar (Use sticky tape in jar) and ...... Indy puts the adhesive tape in the glass jar and the solvent dissolves the tape. in inventory you then have a Small Key. Climb out through the open window and then click "Travel" and travel back to Indy's father's house, so click "To Henry's House" again.
Henry's house:
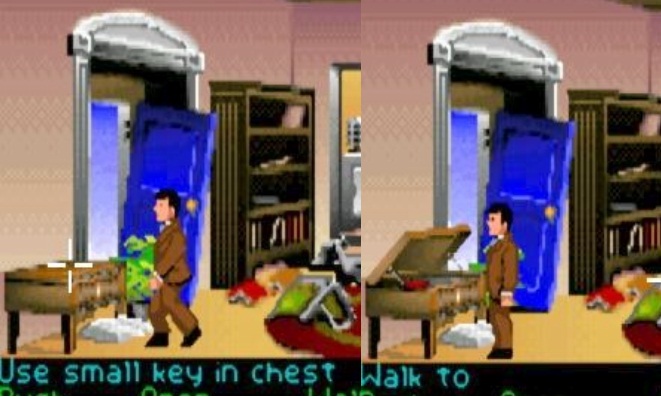
Back in the living room of daddy Jones click in inventory "Use" on the "Small key" and then click twice on the chest (Use small key in chest) to open the chest with the key. In the chest is, among other things, a red book. Click twice with "Look old book" on the red book and .....
Indy reports that this red book is his own diary, which he kept as a little boy. Indy also reports that this diary looks exactly like his father's Grail diary. Click "Pick up" twice on the red book (Pick up old book) to get Indy's diary from the chest. In inventory you now have the "Grail Diary" and the "Old Book" and the "Small key". Walk to the right and then enter the bedroom. The bedroom has 2 windows. To the left of the left window is a small painting that is crooked.
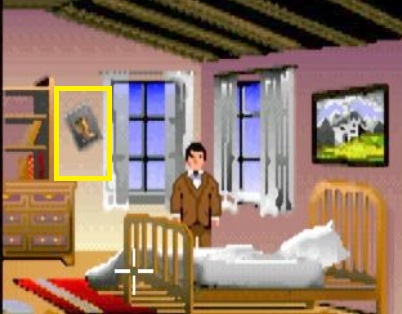
Click twice with "Look painting" on that small and crooked painting. Indy reports that it depicts a cup his father once won. Indy painted this painting when he was little. Click "Pick up" twice on the painting to remove it from the wall and store it in inventory. Indy is now ready to travel to Venice. Walk back to the left and exit the house through the front door. Indy automatically returns to Barnett College. Click on "Travel" again and then on "To the plane to Venice" and ...... Indy and Marcus take the plane and end up in:
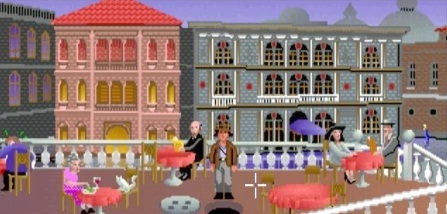
Chapter 2: Venice:
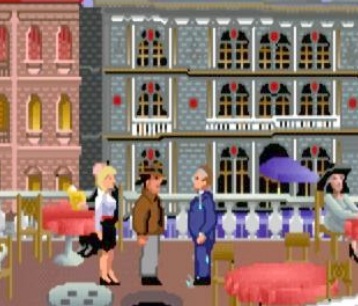
Indy and Marcus arrive on a terrace in Venice and here they will meet their contact Dr. Schneider. Indy has of course brought his famous Whip. Indy wonders how he must recognize Dr. Schneider. Then a lady, who introduces herself as Dr. Elsa Schneider, turns up. Marcus suggests that Elsa and Indy go to the library in advance. Marcus himself has to deal with some other matters first.
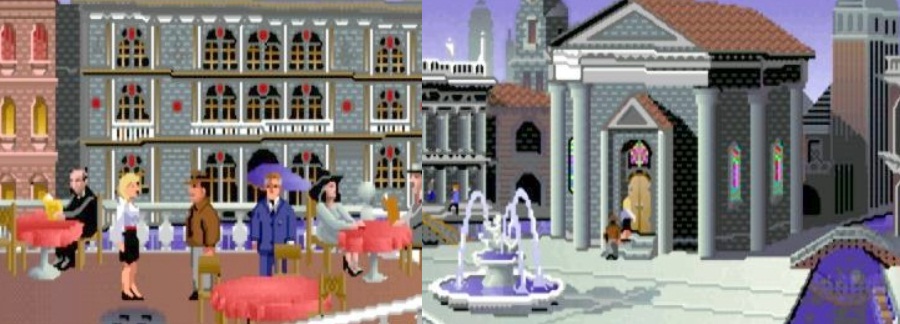
Elsa then takes Indy to the library and she tells that this building used to be a church. Indy's father has also been here. Just before his disappearance he murmured something about Roman Numerals. A clerk is sitting at the table, stamping books and Elsa tries, in vain, to tell that man to get out. However, Indy thinks he won't be bothered by the clerk, so he tells Elsa to leave the clerck alone.
Library
Indy stands in front of the library entrance. Elsa has disappeared between the bookcases on the right side.

Here in the library Indy has to find 3 books. Those books are: "How to fly a biplane", "Hitler's Mein Kampf" and "Secrets of Roman catacombs".
NB: It is very possible that you find the 3 books in different bookcases than I did. For example, you may have to find the 3 books in your game in the back bookshelves. The game determines "Randomly" where and in which bookcase those books are. So I can only tell you in witch bookcases I found those 3 books
Elsa has disappeared to the right, but we now keep moving left. Now click with your running cursor between the middle and front left bookcases and ...
.. Indy will be placed between those 2 bookcases and you will see the entire middle bookcase.
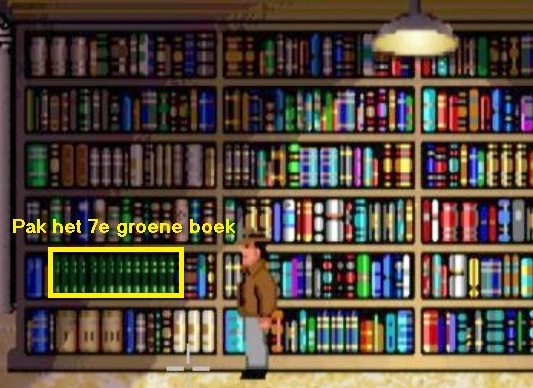
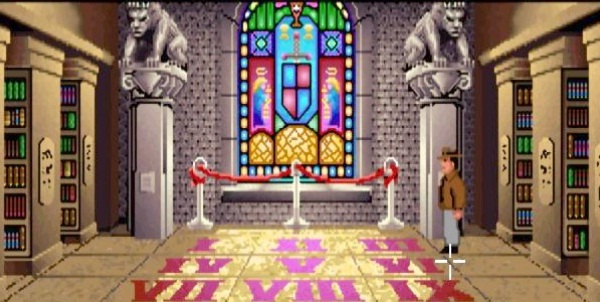
In the left box you see a row of green books, on the 2nd shelf from below. Check out that row of green books. Indy reports that they are all "How to do ......" books, so instructions for use. They are 14 green books. Take the 7th green book (Pick up) from the row ..... This is the "How to fly a bioplane" book (Manuel). Later in the game Indy has to fly an airplane, so this manuel will come in handy, but you can also see it now if you click "Manuel" with "Look". When you get the right green book from this bookcase you walk to the left and .... Indy ends up in an intermediate hall with a large stained glass window and with red Roman numerals on the floor.
Walk further to the left and get Indy back between the middle and the front bookcases.
In the rightmost part of the cupboard you see, on the middle shelf, a slanted brown book
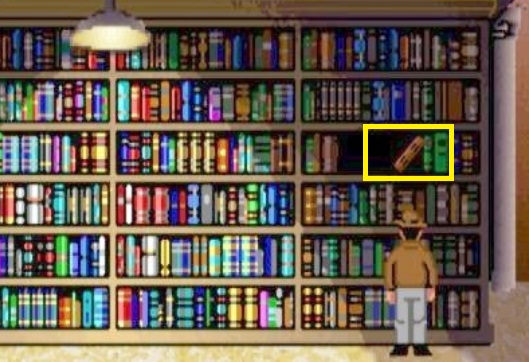
Grab that slanted book because this is the "Hitler's Mein Kampf" book.
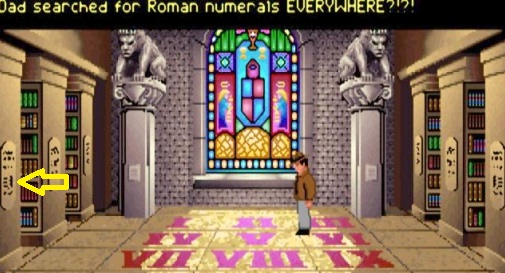
Your inventory now becomes fuller and therefore a blue arrow appears in the inventory. By clicking on that blue arrow you scroll further down through the inventory items. Walk further one screen to the left. Again Indy ends up in an intermediate hall with Roman numerals on the floor and a large stained glass window. Again, go left, between the middle and front bookcases. You will see the middle bookcase again.
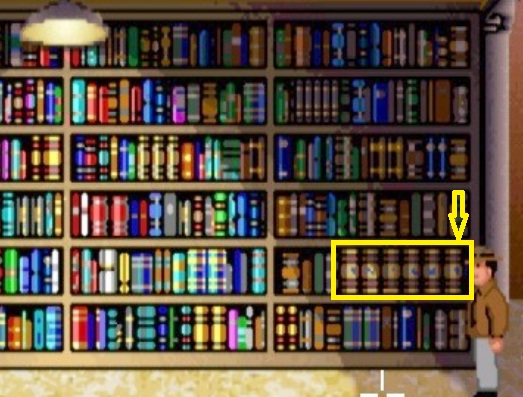
On the 2nd shelf from the bottom, in the rightmost compartment, there are 7 thick red books with blue letters. Grab the right-most red book because it is the "Secrets of the Roman Catacombs" book. In your inventory, this is the "Book of Maps" and it contains maps of the catacombs, which lie deep below Venice and an entrance of which must be found here in the library.
When you have found and taken the 3 books, you keep walking through screens to the left, until Indy has reached a stained glass window with a barrier.
The barrier consists of 3 metal posts with a red cord. Here too, red Roman numerals are on the floor. Take (Pick up) the red cord (Pick up cordon barrier) and also take the middle metal post. Now use the blue scroll arrows in the inventory to scroll up through the inventory, to the Grail Diary. Then click "Open" on the "Grail Diary" to open it and view the book now.
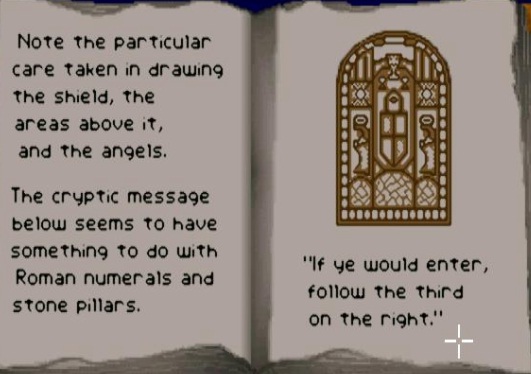
On the right page of the Grail book you see a stained glass window. Read the text below the stained glass window.
NB: The picture of the window and the text below the picture is different in every game.
It is therefore very possible that you see a drawing of another window in the Grail book and that the text below the window is also slightly different.
The text that I got is, "If you would enter, follow the third on the right". Take a good look at the drawing of the stained glass The window ..... you now have to find the intermediate hall where this stained glass window is. Click on the book to put it away again. You now have to look for the stained glass window that looks exactly like the drawing of the window in the Grail Book. So go to all in between halls and click with "Look" on the stained glass window. When Indy says "It looks very similar to the picture in the diary" then you are in the wrong window.

But when Indy says: "It looks JUST similar to the picture in the diary" then you are in front of the right window and in the right between hall.
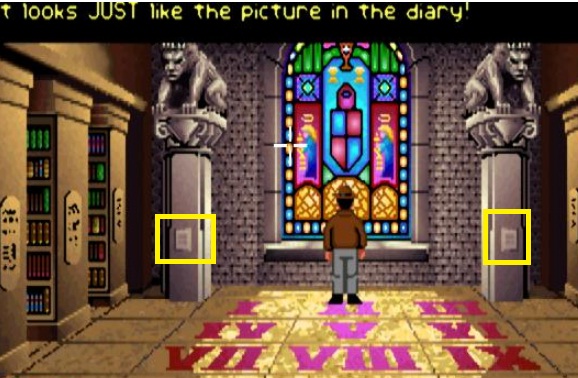
When you are at the right stained glass window you see that here too the floor has 9 floor tiles with Roman numerals. To the left and right of the window is a statue column. There is a plaque on both columns. Look at the plaque of the left column. Indy reports that it has the Roman Numbers on it and it with they are the Roman numbers VI (6), II (2) and IV (4). Also look at the plaque of the right column. Also on the right plaque are the Roman numerals and for me they where VII (7), VI (6) and IV (4).
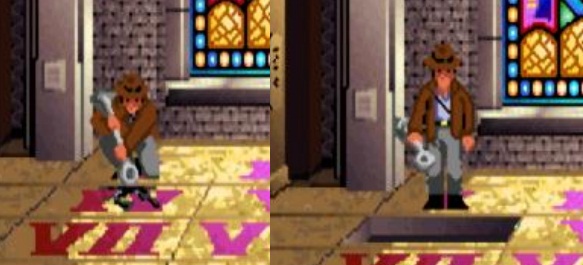
Below the drawing of the window in the Grail Diary I got the clue, "If you would enter, follow the third on the right". This means that I have to have the 3rd Roman number of the right plaque and for me that's IV. So I must have the floor tile with the Roman Numeral IV on it, but it is quite possible that you have been given another clue in the Grail Book. If you are in the right hallway and you know which floor tile you should have, click "Use" on the metal post in inventory and then click on the floor tile that has the for your correct Roman Numeral on it.
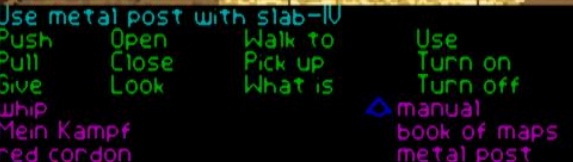
In my case that is the floor tile with the IV on it (Use metal post with slap-IV).
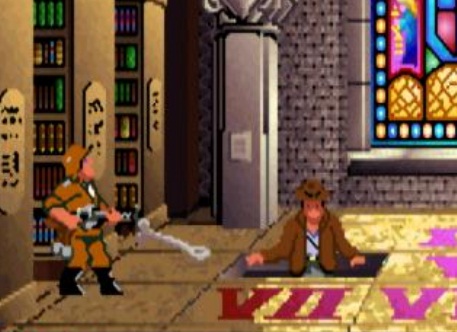
Indy then smashes that floor tile with the metal pole and opens the entrance to the underground tunnels and caves.
A Nazi soldier appears and ...... Indy jumps down through the hole and ends up in the underground Catacombs:
Catacombs: Upper layer:
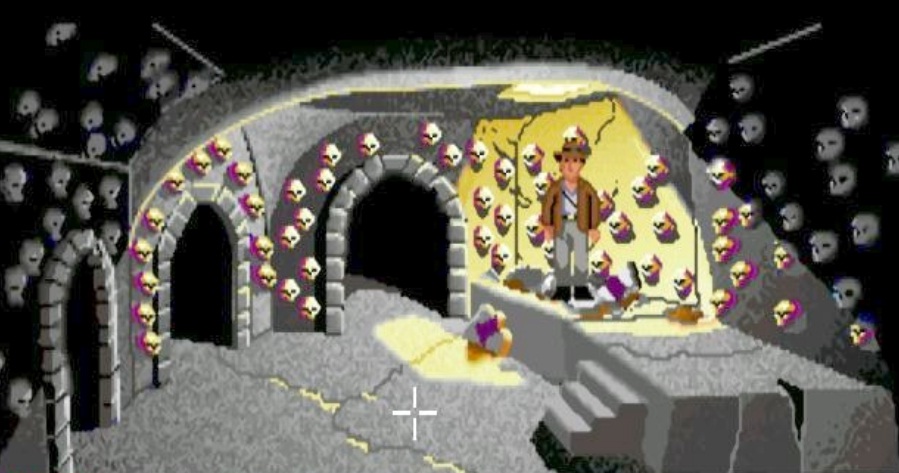
Cave 1
NB: If you have demolished the wrong floor tile, Indy will not end up in the Catacombs but in a deep hole. Then get Indy out of the hole again. The soldier then throws Indy out of the library. Then go back into the library and try to find the right floor tile.
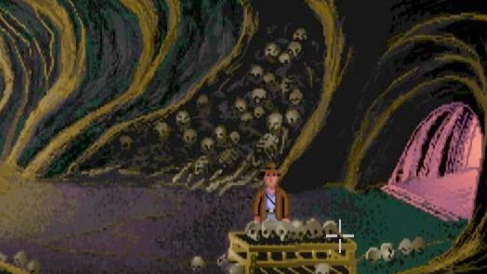
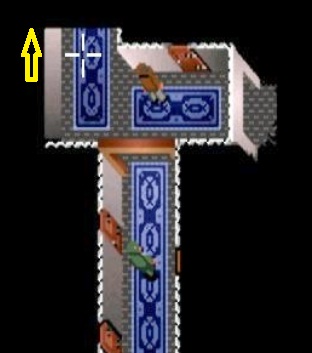
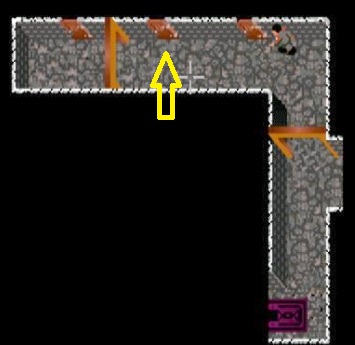
Indy has now entered a large cave. The walls are covered with skulls. From the cave you can enter the "underworld" through 3 exits. This is the beginning of the cave / tunnel maze and you must lead Indy through this maze through the correct route. In inventory you have the "book of Maps". Click "open" on the "Book of Maps" to open that book. You will see the 1st page of the book and you will see 2 maps of this catacomb system. The top floor plan shows the layout of the 1st part of the catacombs, and Indy is now in the top left cave, which is Cave 1.
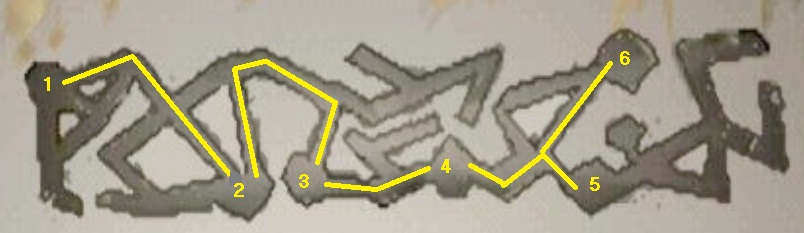
So Indy is now in 1 and he has to go to 6. Click the book away again.
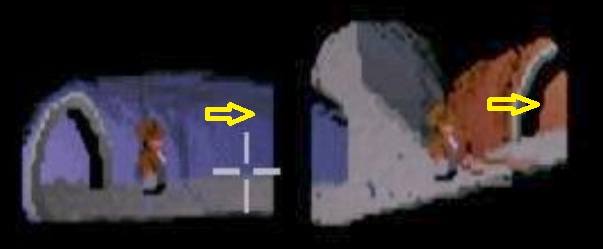
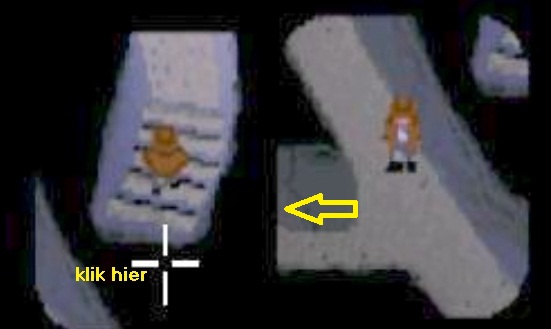
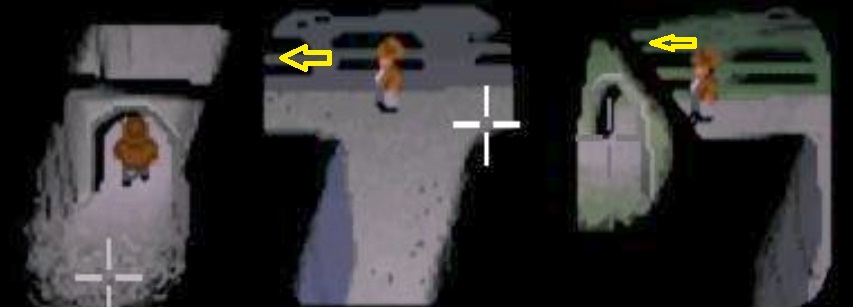
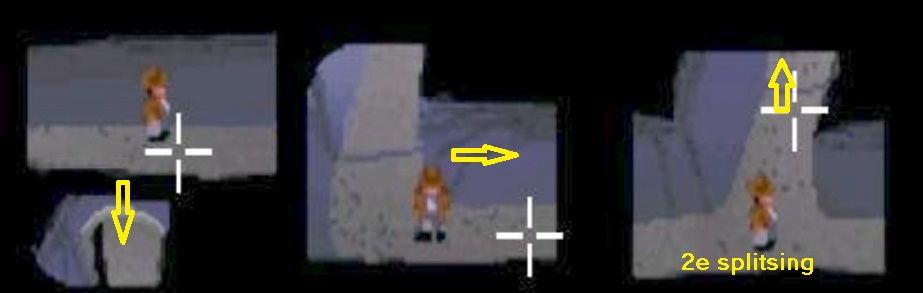
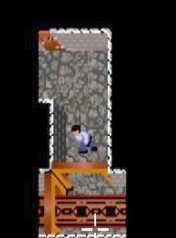
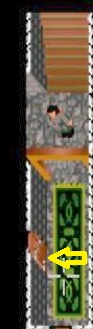
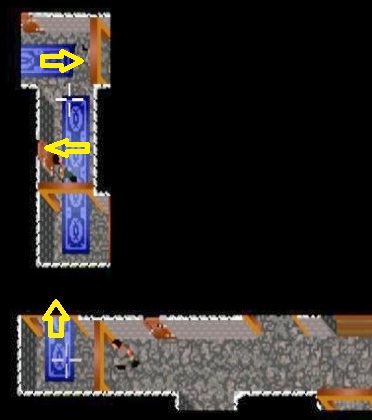
From Cave 1 you can enter the system of tunnels and caves through 3 exits. Now leave Cave 1 through the left exit. You will see Indy in the top left of the top tunnel. But a very small piece of the screen is now lit. In the illuminated part of the screen, click in front of Indy to move Indy forward. So follow the red tunnel further to the right. Indy then arrives at a fork and the red tunnel becomes a blue tunnel
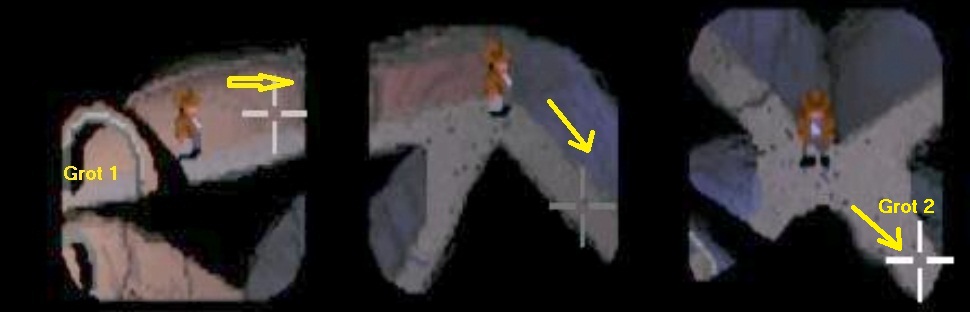
Follow the blue tunnel down and Indy will arrive at a 4-way fork. Follow the right down tunnel and ..... Indy will end up in:
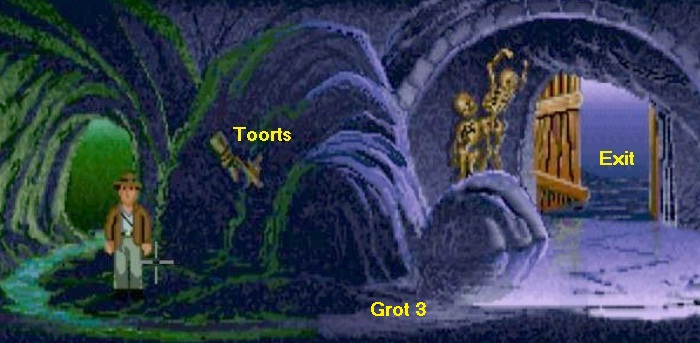
Cave 2:
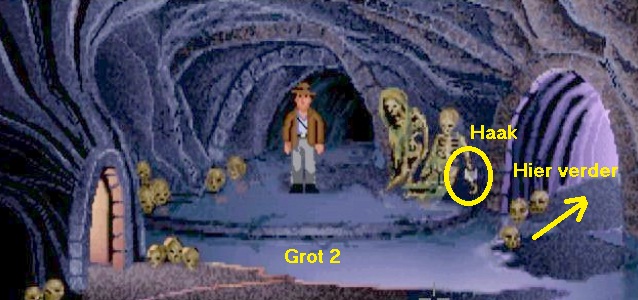
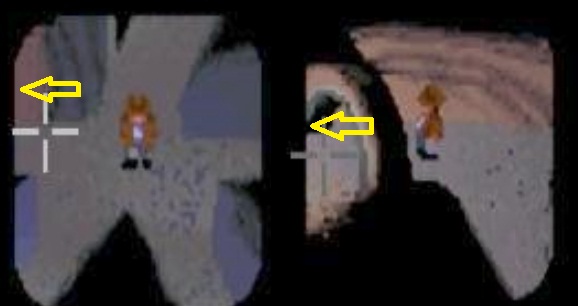
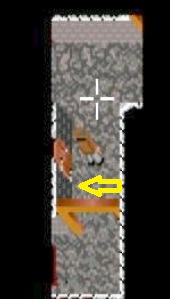
Two skeletons lean against the wall. The right skeleton has a hook instead of a hand on the right arm. To the right is a purple-lit tunnel and to the left an orange-lit tunnel. Take the Hook (Pick up arm) from the arm of the right skeleton. In inventory you then have a "Hook. Leave Cave 2 through the purple-lit tunnel. Then follow the blue tunnel up until Indy cannot go further up. Indy is then at a T-junction and can turn left or right. Follow the tunnel to the right, until the next T-junction.
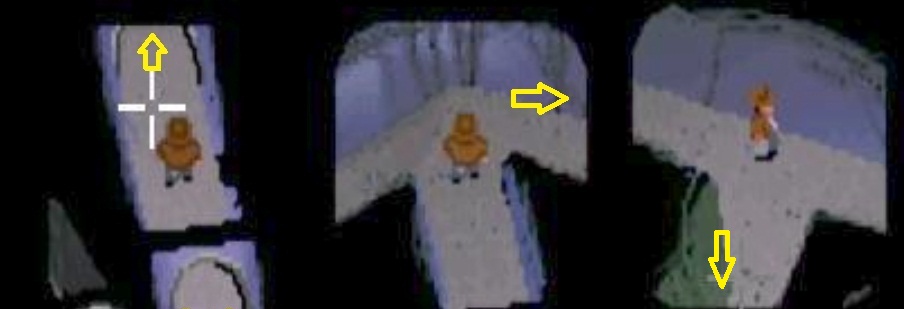
At the T-junction go into the green down tunnel and follow it down and Indy ends up in:
Cave 3:
There is a torch on the wall and on the right you see an open wooden door. At the wooden door there are 2 skeletons. Try to get the torch, but it doesn't work. Indy reports that the torch is stuck in dried mud. The 2 skeletons here are of no importance, so exit this cave through the open wooden door. Indy is then in a blue tunnel.
Follow this blue tunnel to the right. Indy soon reaches another junction where you continue to follow the red tunnel to the right and Indy then reaches:
Cave 4:
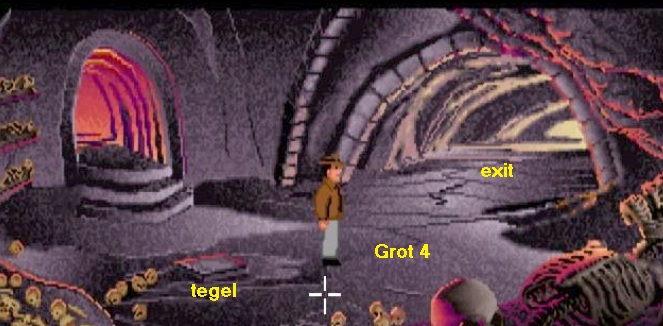
Cave 4 is the "red" cave. On the left are skulls and there are also whole skeletons here. Just in front of the entrance (the red corridor) there is a square tile (slab) in the ground. Indy doesn't want to do anything here in the cave now, so dive into the big tunnel and follow the tunnel (blue) to the next fork.
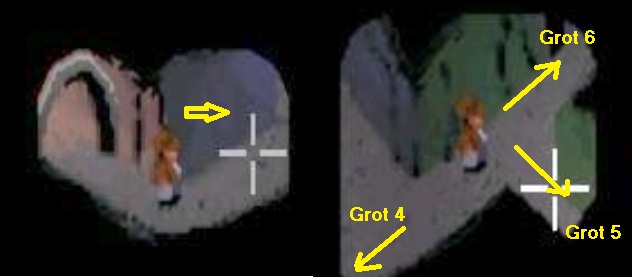
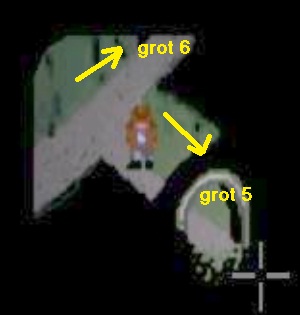
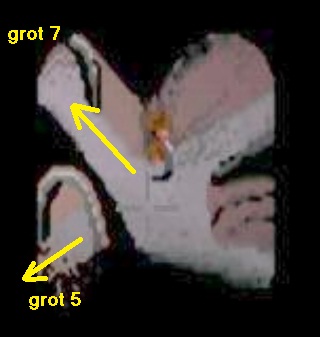
The blue tunnel goes up, the green tunnel goes to the right and then down. First follow the green tunnel to:
Cave 5:
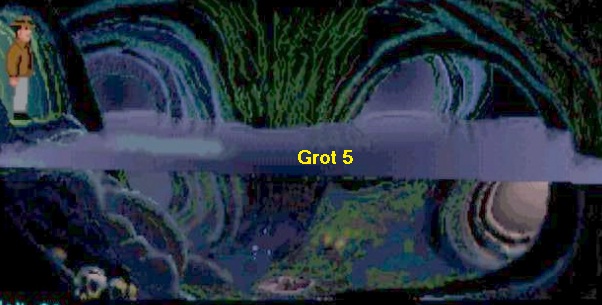
Cave 5 is completely underwater and Indy refuses to dive into the water. So go back to the fork and follow the blue tunnel further to the right.

The tunnel opens into a green tunnel. Follow the green tunnel to the right and ..... Indy ends up in:
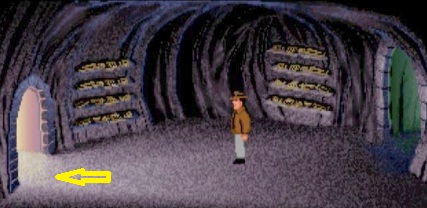
Cave 6:
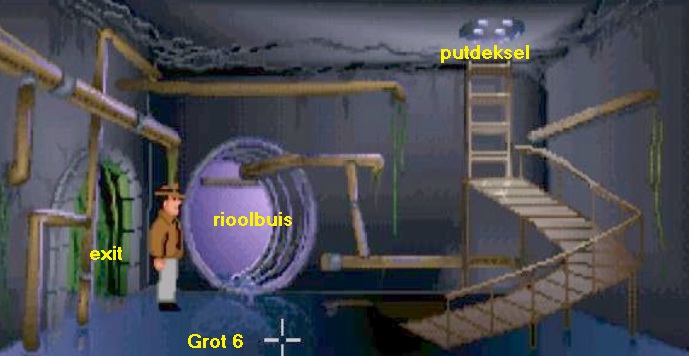
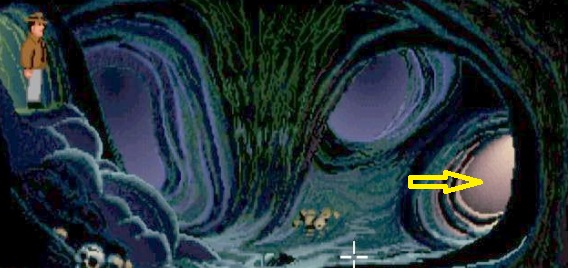
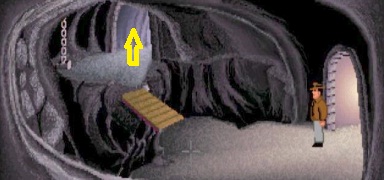
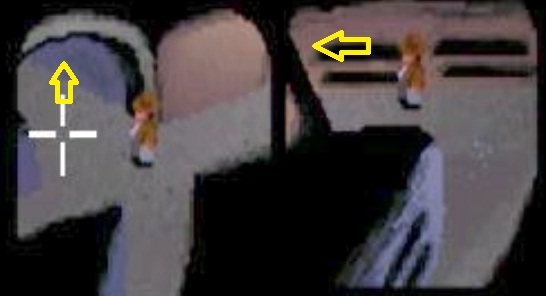
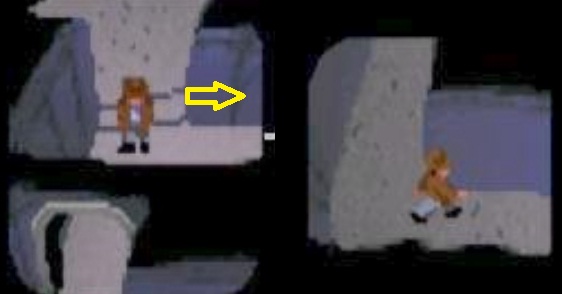
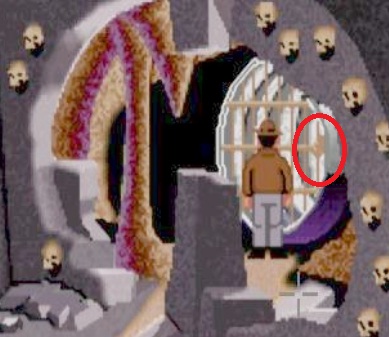
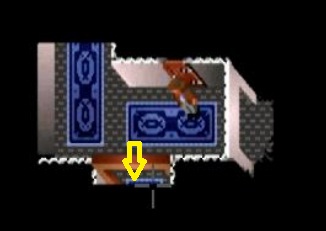
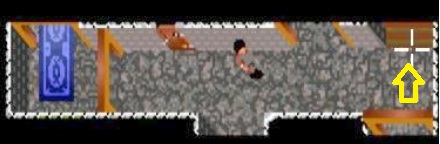
Cave 6 has pipes on the wall and a thick sewer pipe. Cave 6 also has a wooden platform that leads to a ladder. At the top of the ladder there is a manhole cover in the ceiling. Walk into the thick sewer pipe. The sewer pipe is closed with a fence and from the pipe Indy looks into the Burial Chamber.
Indy has to get into the burial chamber, but that is not possible now via the sewer pipe. Click behind Indy to return to Cave 6. Then walk over the wooden platform to the ladder. When Indy is standing in front of the ladder, click "Open" on the manhole cover (Open manhole cover) and .... Indy slides the cover away.
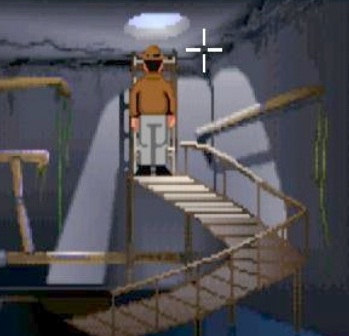
Click in the round hole and Indy climbs out of the catacombs and ends up on the terrace, where he previously met Marcus who met Elsa Schneider.
Terrace:
Walk to the left. Under the red awning a couple in love sits at the table. The couple drinks wine and the wine bottle is on the table.
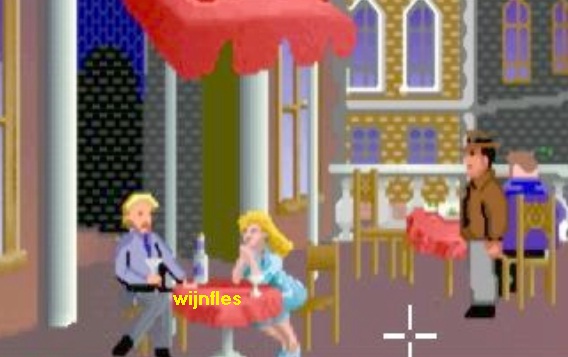
Try to pick up the wine bottle (Pick up wine bottle). But the boy in love obviously doesn't allow this. Now look at the wine bottle (Look wine bottle) ..... Indy then says aloud "mmmmm. 1924, a very bad year". Then try to get the wine bottle again and now Indy can take the wine bottle. Walk back to the right and then further to the right, down the terrace and then continue to the Fountain, which is spraying water on the square in front of the library.

Use wine bottle with fountain to fill the bottle with water.
Walk back onto the terrace and then dive back through the round sewer manhole to end up in Cave 6 again. Indy now must go back to Cave 3 to pick up that torch. In Cave 6 go into the green tunnel and then follow the route through the tunnels back to Cave 3 ...it is not that complicated, just the follow route from Cave 6 back to Cave 5, Cave 4 and Cave 3.
Cave 3:
Back in Cave 3, use the Wine Bottle on the Torch to "soften" the dried mud. Then take the torch, so "pick up torch" and ...
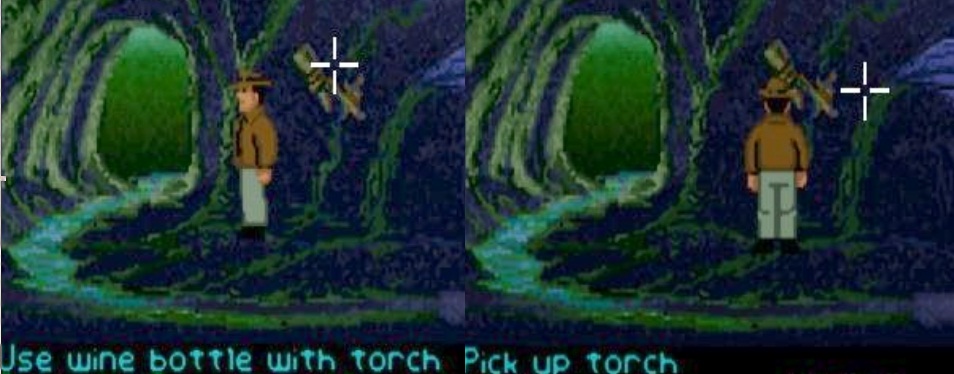
Oops ..... the torch turns out to be a lever and Indy now pulls it down and ..... below Indy's feet a hatch opens and ...
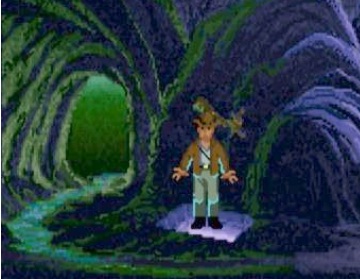
Indy rumbles down and lands even deeper underground. Indy is now in the lower part of the catacombs and in a blue tunnel.
Catacombs: Bottom layer:

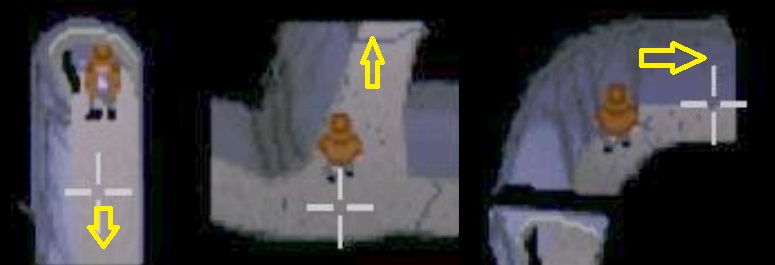
Follow the blue tunnel up and at the fork further to the right.
The blue tunnel now goes a bit to the right and then bends down and then Indy comes back to an intersection.
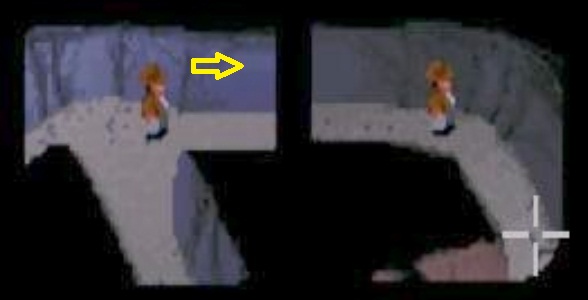
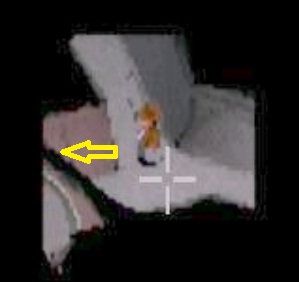
Follow the tunnel to the right / down and ..... Indy ends up at a narrow stone bridge.
Water drips from a closed hole in the ceiling. Across the bridge, you can see the red entrance to a small cave.
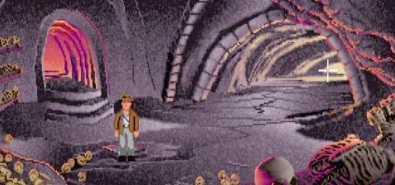
Click in that red entrance and ..... Indy cross over the bridge and then end up in a small cave.
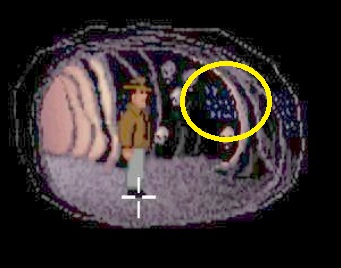
There are 5 skulls and 2 inscriptions on the walls. Those inscriptions are the blue "spots" that you see on the wall. Click with "Look" on the inscriptions to read them. Indy then reads the inscriptions and he reads a name and the title of an article. Make a note of the name and also the title of the article, as this is different every time.
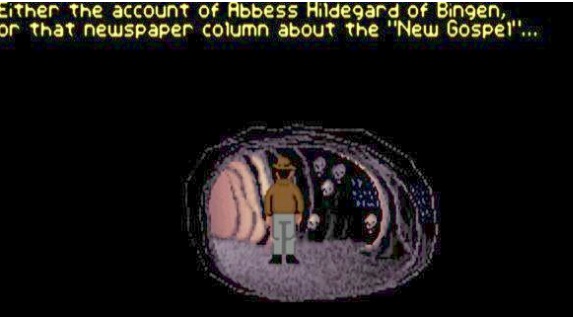
For me, Indy reads the following on the wall:
'Enter the account of Abbess Hildegard of Bingen, or that newspaper column about the New Gospel, is the correct account for the Grail'.
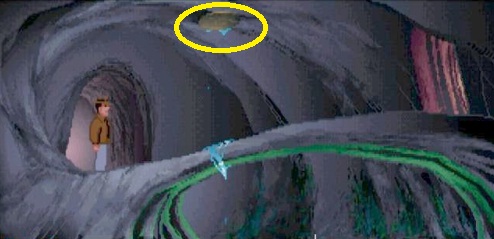
But it is very possible that you will get a different name and a different article than New Gospel, for example: Cable of Codiroli and Journal of Byzantine. There is a whole list of names that the game can present to you. So write down the name and also the article that Indy is reading on the wall in your game right now. Then walk back to the Stone Bridge. Stand under the plugged hole in the ceiling. The water that drips from the hole comes from Cave 5, the cave that is completely flooded. Use the Hook on the Wooden Plug to close the hole and .... Indy inserts the hook into the plug.............
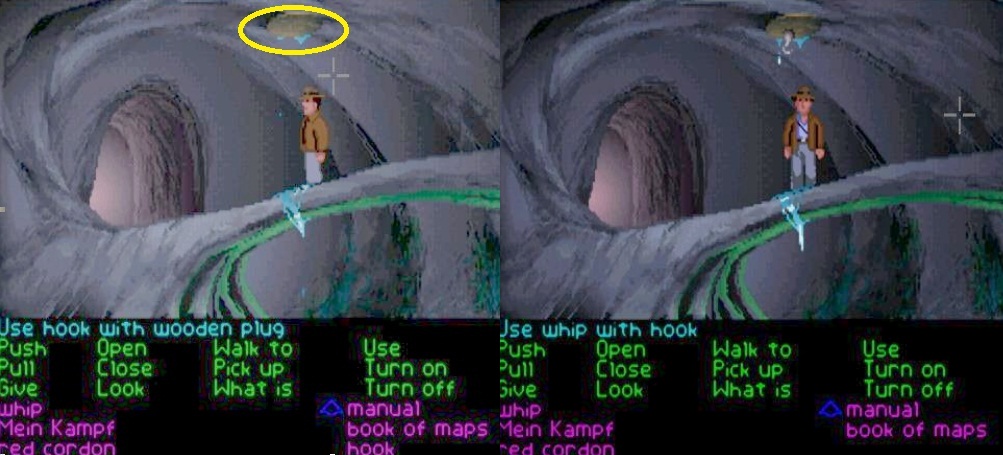
Now use the Whip with hook and........
Indy pulls the plug out of the hole with the whip and the water from cave 5 thunders down and punches a hole in the bridge

Walk back to the left, into the red tunnel, and then follow the tunnel slightly back to the fork.
Now go left at the fork and ... Indy ends up in a cave with a ladder.

Climb up the ladder, so click on the top rung of the ladder and ..... Indy climbs back up to the top tunnels and ends up in Cave 4.
Catacombs: Top layer:
The square tile in the ground is therefore a hatch. Now follow the route from Cave 4 back to Cave 5
Cave 5:
Cave 5 is now completely empty ..... all the water has flowed down through the hole in the ground. Indy is at the top left and you will see 2 dark blue openings and, at the bottom right, a bright red tunnel. Click in the bright red tunnel and ..... Indy slides down and then goes out of the cave via the red tunnel. Indy is again at a crossing of tunnels.
Follow the left tunnel up here and ..... Indy ends up in:
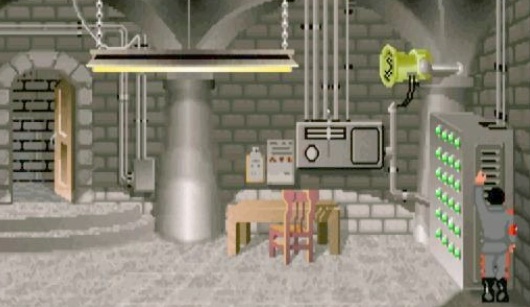
Cave 7: The Engine Room:
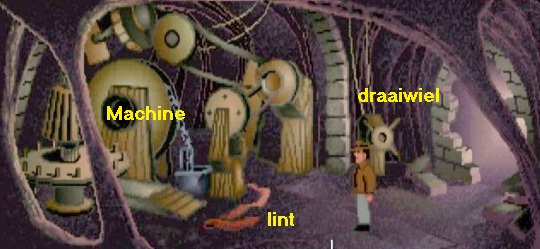
There is a machine here that consists of various turning wheels, a flywheel and cogwheels. This machine is the mechanism of a drawbridge that can be found in another cave. The machine is broken. That drawbridge is now open and Indy must now get the machine working to lower the drawbridge. A red ribbon is lying on the floor in front of the machine. At the entrance of the cave there is a wooden turning wheel that looks like the steering wheel of a ship. The red ribbon lying on the floor was an important part of the machine. Indy also has a red cordon (from the library) in inventory. Click in inventory with "Use" on the red cordon and then click on the machine (Use red cordon with machine) and ...
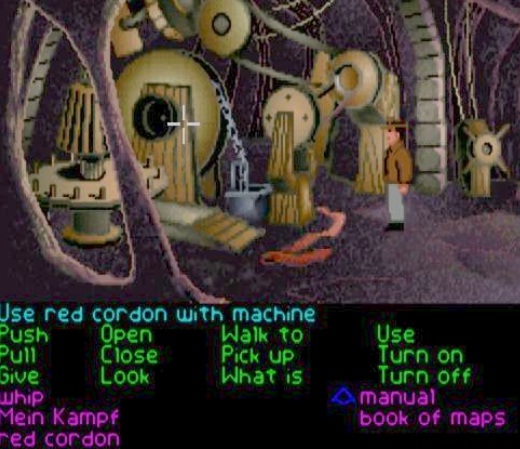
Indy places the red cordon on the machine .........
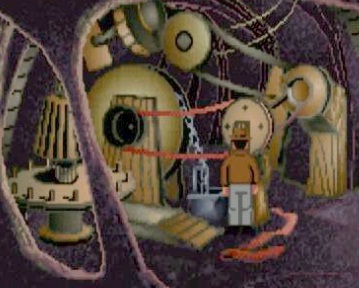
Now click with "Pull" on the wooden wheel (Pull wheel) and ...... the machine turns on and does its job. That drawbridge has now been lowered.
Leave the cave and walk back to the 4-way fork. Now follow the top right tunnel to the next 4-way fork.
The tunnels are now blue again. Follow the up tunnel, which then turns right and turns red again, taking Indy to Cave 8.
Cave 8: Statues Cave:
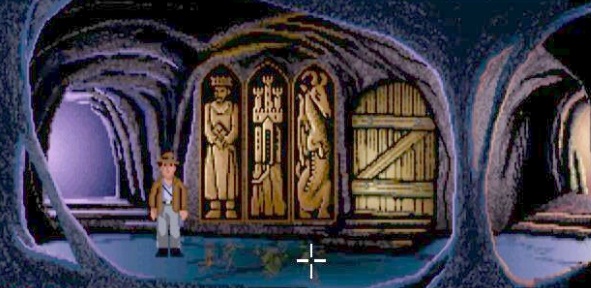
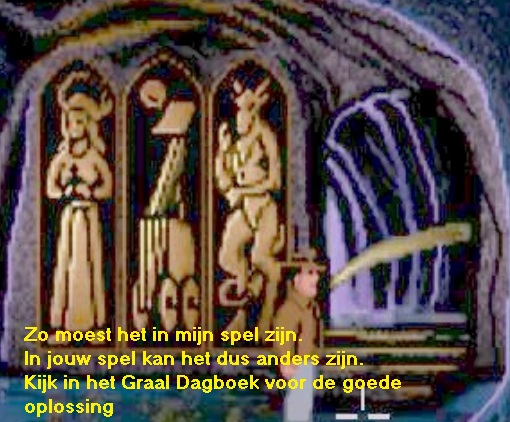
In Cave 8 there are 3 statues in 3 niches and in the 4th niche there is a wooden door. Try to see if Indy can open that wooden door, but it doesn't work that way. To the left of the wooden door are 3 statues. You can push any statue and a different statue will appear in that nice. Look in the Grail Book, so open the Grail Diary. In the Grail Diary you will now see 2 pages on which you also see 3 statues. Below the 3 statues on the left page it says "This configuration is labeled correct" The 3 statues on the right page mean "Sure Death".
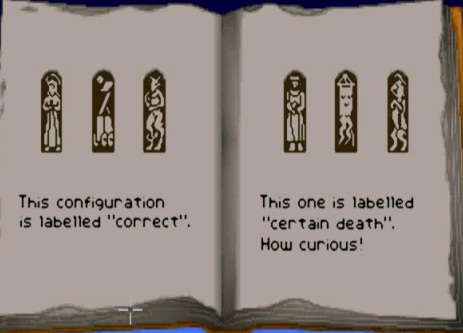
What must you do now ...... You have to push the 3 statues, in the niches, until you have the same 3 statues as on the left page of the Grail Book, in the 3 niches. Of course this is another "Random" puzzle which means that you will probably get 3 different statues than I did in the Grail Book.
The 3 statues in the niches influence each other. If you push against the statue in the right niche, then the statue in the left niche also changes. If you push the statue in the left niche then the statue in middle niche also changes. The middle statue does not affect the other 2 statues. So first make sure you get the right statue in the right-hand niche, then put the right statue in the left-hand niche and then in the middle niche . If you have the correct 3 statues in the niches, the wooden door opens. For me it was like this...
So walk into the tunnel behind the now open wooden door and Indy will then be at the top of a staircase in a blue tunnel. Click behind Indy to allow Indy to continue walking through the tunnel (if you click in front of Indy, he will walk back into Cave 8). Indy then automatically continues through the tunnel and ends up again at a T-junction.
Turn left to the next 4-way fork and then continue into the left red tunnel and follow all the way to the left and ........
We end up in:
Cave 9: Drawbridge Cave:
Because Indy has used the machine in Cave 7, the drawbridge is now down and Indy can continue.
So walk over the bridge and then into the next tunnel. Then click above Indy again to move him further through the tunnel.
Then follow the tunnel around the bend and then always to the left, so ignore all down tunnels. The tunnel then turns green and brings Indy to:
Cave 9: The Skull Cave:
Well ... there is nothing you can do here, so dive into the left red tunnel and continue to the 4-way fork.
From the fork, follow the blue up tunnel. The tunnel then turns red again. Follow the red tunnel to the left, to:
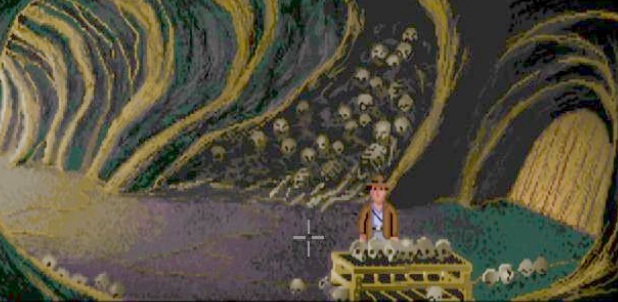
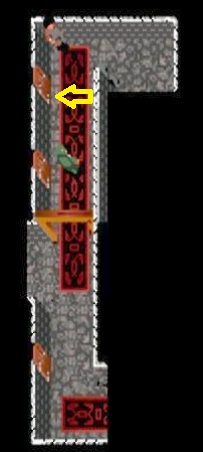
Cave 10: The Skull Organ cave:
|
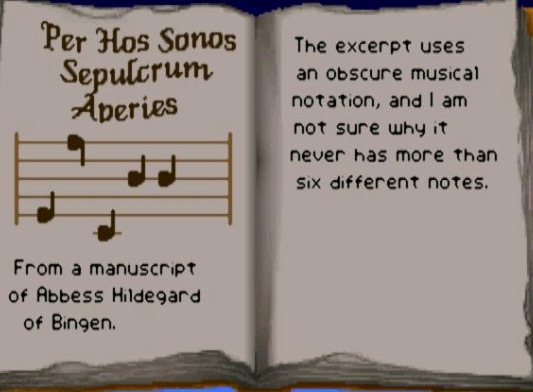
The exit from this cave is closed. In front of the exit is a wooden rack with 6 Skulls. Open the Grail Diary again. In the Grail Diary you will now see a Musical Note Bar.
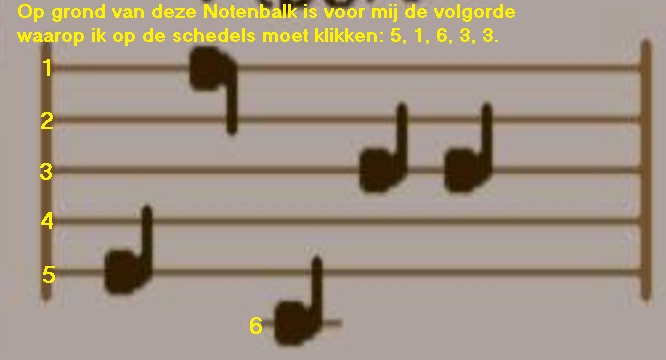
This Note Bar is also different every game because it depends on the name you got when Indy read the inscription in the small cave, beyond the Stone Bridge. There are 5 musical notes in the note bar. The bar has 6 lines and each line has a musical note. The Skulls on the wooden rack form an organ. Each of those skulls makes a musical note when you click on it. So now you need the 5 Music Notes, that you see in the Grail Diary, reenact by clicking on the skulls in the correct order. Number the 6 lines of the staff, from top to bottom, 1 to 6. For me, the 1st note is on line 1, 2 notes are on line 3, 1 note is on line 4, 1 note is on line 5 and 1 note is on line 6. You read the notes from left to right. So with me the order of the musical notes is then: 5, 1, 6, 3, 3. Because the leftmost note is for me on me on line 5, then on line 1, then on line 6 and then on line 3. So I have to click, with "Push" on the 6 Skulls in this order: 5, 1, 6, 3, 3
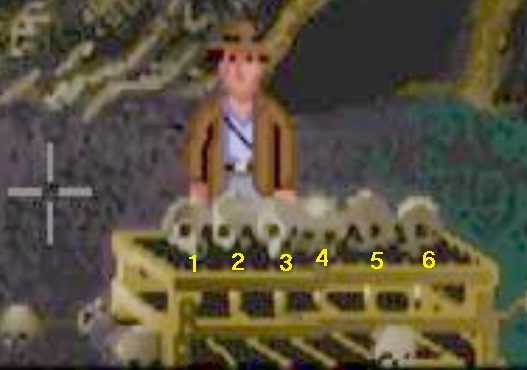
So look in the Grail Diary to see the Musical Note Bar that apply to you and note which lines have the 5 notes on them. Read those notes from left to right and note down the order. Then close the diary. Number the 6 Skulls on the rack, from left to right, 1 to 6, and then click "Push" on the skulls in the order that applies to you.
The order in which you have to click on the skulls is therefore determined by the Note Bar that you see in the Grail Book. If you do this correctly, the wooden door in the Exit gate will slide open.
|
Then exit this cave through the now opened gate. Indy ends up in a blue tunnel again. Follow the tunnel down.
The tunnel then takes a bend to the right and we arrive again at a 3-way fork.
From the 3-way fork up, go all the way up. The tunnel then turns right again. Keep following the blue tunnel to the right until you come to a down tunnel.
Then follow the down tunnel all the way down and then further to the right, until the 2nd junction. At the 2nd split you go up again, until again at the 2nd split.
Turn right and follow the tunnel to another 4-way intersection then take the down tunnel and continue to follow this tunnel to the:
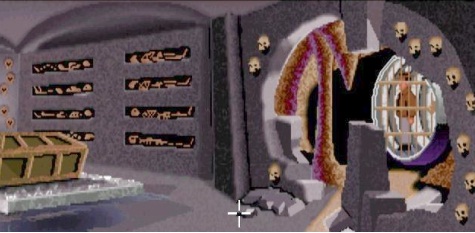
Burial chamber:
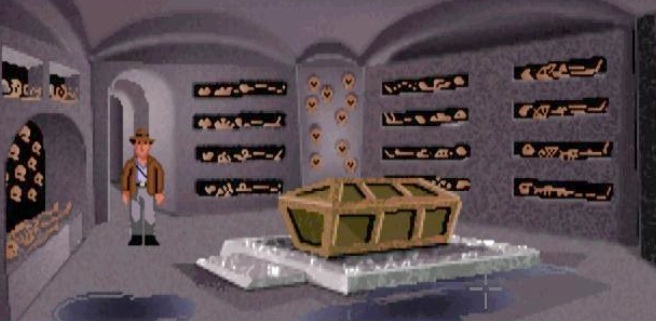
This is the room / cave that you already saw when you let Indy walk into the sewer pipe in Cave 6. In the center of the room is a coffin .
Open the coffin with "Open" and then look in the opened coffin and ...... Inside the coffin is a knight's skeleton.
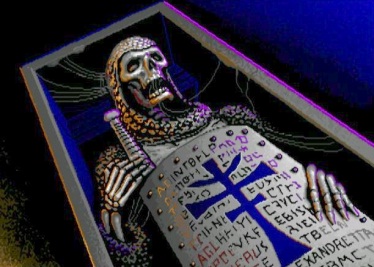
The Knight has a Shield and a Sword. The Shield has a text that Indy reads ......
NB: The text Indy now reads is different in every game and the name Indy mentions is an indication of the very last puzzle, getting the right cup, in the game.
In my game Indy reads : "The shield is the second marker Donovan spoke of. It mention the ancient city of Alexandretta. Today the city of Iskenderun is built on its ruins. We'll find the Grail near there!". What may be different for you is the name Donovan. Write down the name you are presented with. When you have watched the Knight and have written down what Indy has read, you continue to the right, to the large sewer pipe. The gate with which the sewer pipe is closed has a rusty lock.
Click "Open" on the lock of the gate and the gate will open. So walk through the sewer pipe back into Cave 6 and then climb out of the Catacombs again to the Terrace through the ladder and the round opening. Watch the ending scene of this chapter ........
Elsa Schneider and a dripping Marcus come to Indy. Marcus says he has discovered that Indy's father is being held captive at Brunwald Castle, on the Austrian-German border. Indy sends Marcus to Iskenderun while he and Elsa go to Germany, to Brunwald Castle.
Chapter 3: Germany:
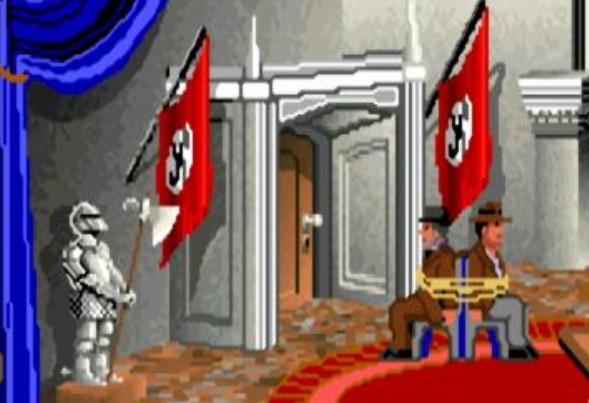
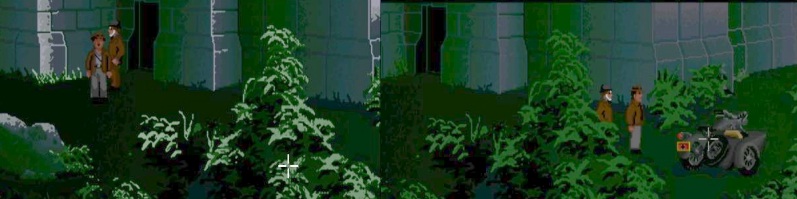
Brunwald Castle:
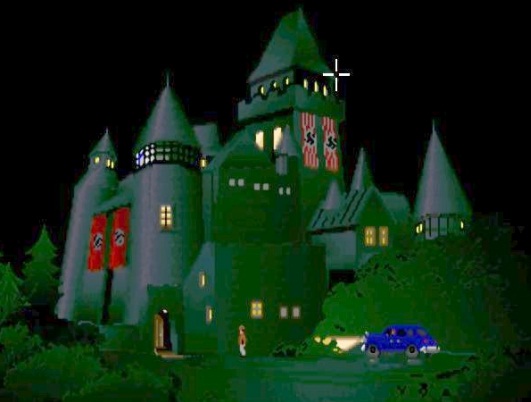
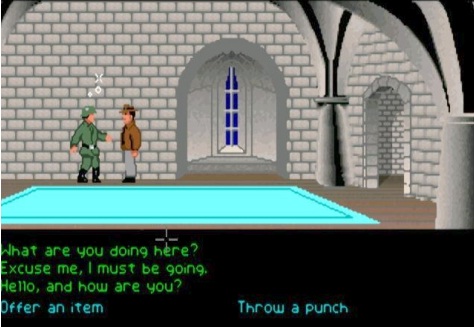
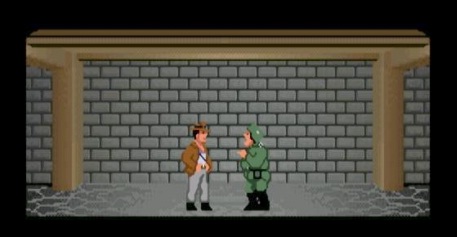
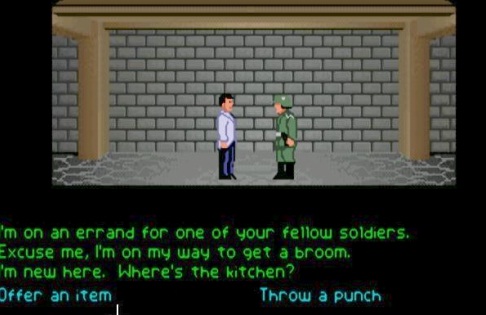
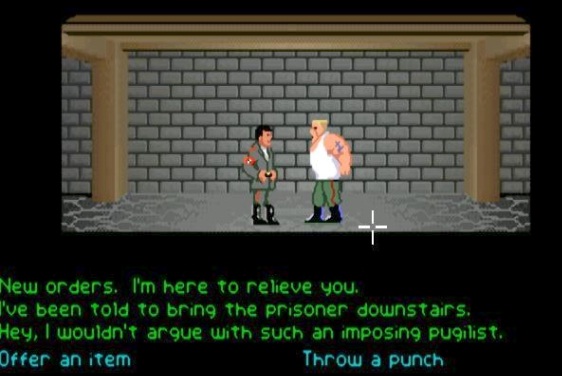
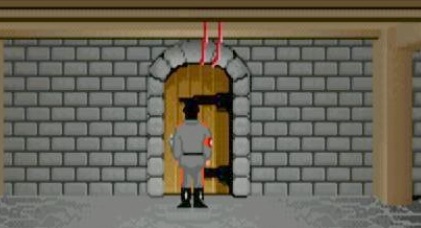
It is night when Indy and Elsa arrive at Brunwald Castle. Elsa stays in the car while Indy investigates. Indy walks towards the castle and then stops at the green facade. You see a door. There are 2 huge red flags on the side of the castle. Click with your running cursor on the left edge of the screen and ..... Indy ends up on the left side of the castle and at a fallen motorcycle. At the top left you see a dark spot, on the stone wall of the facade. View both the motorcycle and that dark spot on the wall. In both cases Indy says he sees nothing special. Walk back to the front of the castle and click on the front door and the castle butler lets Indy in and asks who he is. There are 3 possible answers you can give and you get the possibility to knock the Butler unconscious through the option "Throw a punch". So let me explain this first ....
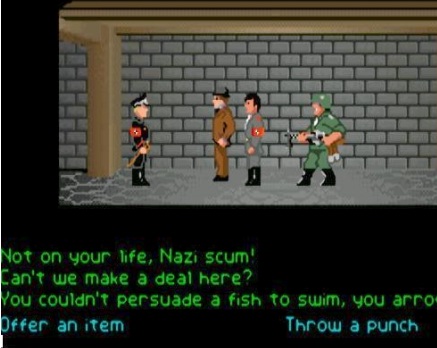
Fighting or not Fighting
This castle is infested with Nazi soldiers and Indy may encounter those soldiers. You usually get the choice to save yourself from the situation with talking / bluffing your way out of the situation or you will fight. If you choose to fight with a soldier, you are going to box with the soldier you do this the way you practiced in the boxing ring at Barnett College. You have to take into account that every subsequent soldier is a bit harder to defeat. Soldiers will also automatically start fighting if Indy is not always properly disguised. If I were you I would also save a lot in this part of the game, because if Indy is knocked out it's Game Over and the game doesn't give you the opportunity to try again. In this Walkthrough I try to avoid fighting as much as possible.
So we start with the Butler. You can smash the butler unconscious, using the "Throw a punch" option, but it's better to bluff yourself out of this situation by giving the right answers.
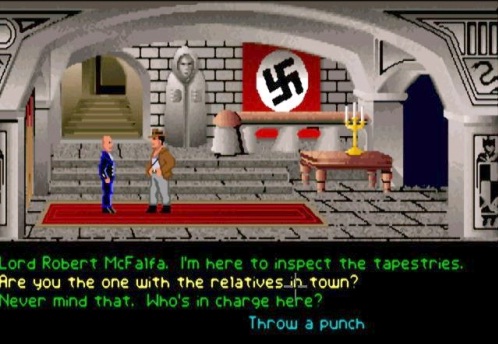
Start by saying, "Are you the one with relatives in town?". Butler says that he has a nephew living in the city and asks if there is something wrong with his nephew. Now say, "No, he's fine, but you must go to him immediately." Butler wants to see proof that Indy really knows his cousin Otto. So respond with "I can prove that I know Otto". Indy then tells the butler that he knows the nephew's name is Otto and where his uncle works. The butler disappears and .........
Meanwhile ....

Colonel Vogel, the commander of the castle, orders a soldier to pack and guard a newly acquired painting. It is a painting with a cup on it and Hitler himself is interested in it.
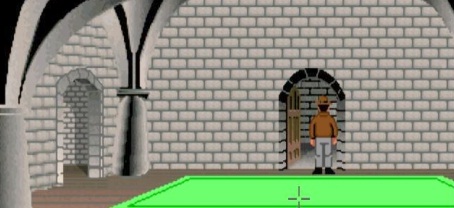
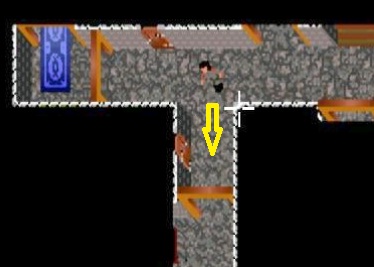
We then return to Indy in the hall. Walk up the stairs and Indy is then a corridor. This works exactly like in the catacomb tunnels. You always see Indy standing in a small part of the hallway, so you have to lead Indy through the corridors to the right rooms.

Walk down and then follow the corridor to the right, under the arch. The corridor brings Indy into a new corridor with 5 doors.
Go right through door 2 and ..... Indy ends up in a room and with a drunken soldier.
Say "Hello, and how are you" and then continue with "May I get you another drink?". The drunken soldier then gives his beer mug (Stein) to Indy. If you decided to fight with this drunk soldier, don't forget to grab his beer mug when you have won the fight. Exit the room and back into the hallway, then go through door 3 to the Kitchen:
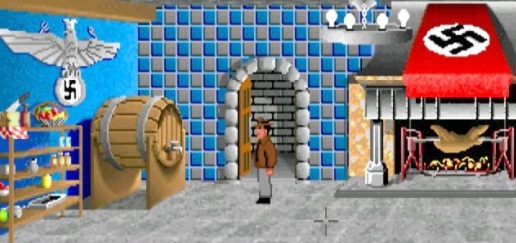
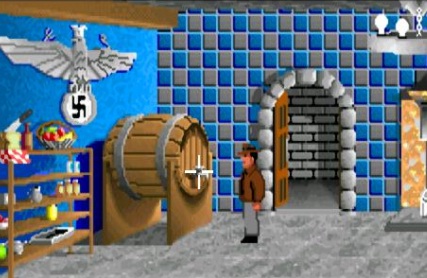
On the left wall is a huge beer barrel. A pig turns on a spit in the fireplace. There is a tap (spigot) in the beer barrel. Use the beer mug (Stein) on the tap (spigot) of the beer barrel. Indy fills the beer mug with beer. The fire in the fireplace are hot coals. Use the Use the filled stein with the hot coals, Then wait until the hot steam has disappeared and the fire has gone out.
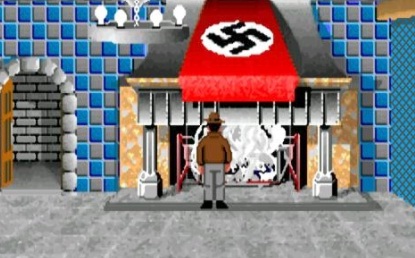
Then take the now roasted pig from the spit. Leave the kitchen through the door near the keg.
Now follow the corridor back down and then left and up, back to the entrance hall. Back in the entrance hall you now go to the right. Indy ends up in a room with a green carpet on the floor. There is a door above the green carpet. Open the door and then enter the hallway.
Indy is then in a "blue" hallway. Go down through the gate.
A soldier walks in the corridor and he stops Indy.
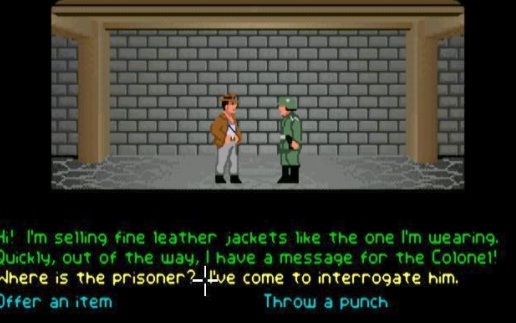
Say, "Where is the prisoner? I've come to interrogate him". The soldier says the prisoner is locked up on the top floor, but he also wants to know who you are. Now say, "Gestapo. Special investigations. I'm Dietrich's succession". The soldier doesn't believe Indy, so now try to bluff him by saying:" How do you know about that? Are you leaking information? ". The soldier has to swallow this but then decides to leave Indy alone.

On the left there are 2 doors and on the right 1 door. Go through the right door. Indy ends up in a dressing room. On the right is a rack with various uniforms hanging on it. On top of the rack is a Slot that prevents anyone from swiping the uniforms from the rack.
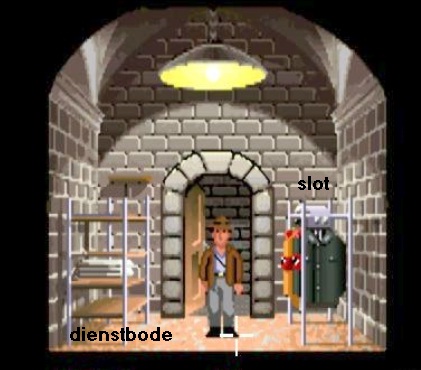
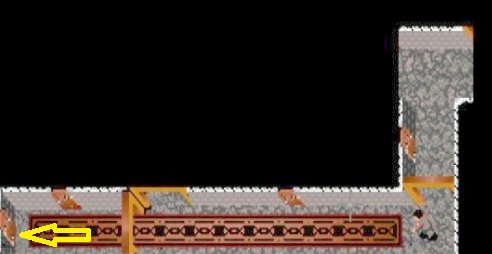
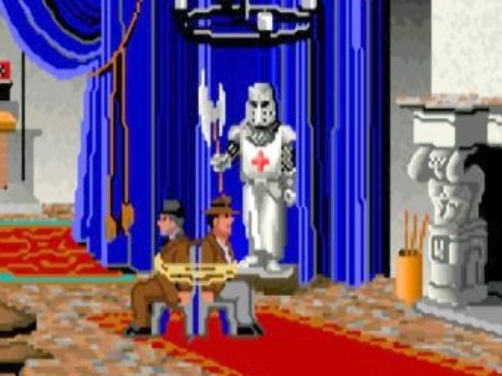
On the left is a shelving unit containing a servants uniform. Take the Servants uniform from the shelving unit, but do not put the uniform on yet. Go back to the corridor and go through the top door in the left wall. Indy ends up in a large conference room. Walk to the right to the fireplace. To the left of the fireplace is a harness in front of a blue curtain. The harness has a halberd
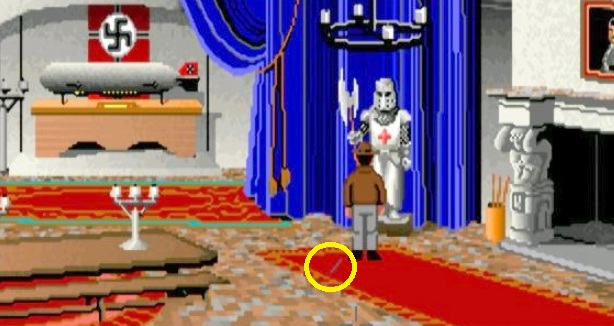
Push against the harness (Push suit or armor) and ..... the halberd of the harness then falls to the ground. Indy quickly picks up the halberd and puts it back in the armor hand. However, the Halberd has left a mark on the red carpet. Walk back to the left and then leave this conference room. Back in the corridor you now walk up, through the gate, and then follow the corridor to the left and then up and.......
..... again Indy is stopped by a soldier.
Say the following sentences: "Hi, I'm selling fine leather jackets like the one I'm wearing" and then "I've got authorization. How else would I get here?" and then "15 Marks. Just the thing for guard duty on cold nights?". The soldier, Corporal Kruger, then orders a jacket from Indy and also gives him 15 marks and Indy is allowed to continue walking. So follow the corridor, left around the corner and then go up the stairs to the 1st floor.

When you reach the top of the stairs, follow the hallway, around the corner to the right and go through the door you see. Indy enters a bare room.
There is a chest on the right wall. Open the chest and then look in the opened chest and .....
Indy takes 50 Mark from the chest. Now is the time to put on the servants uniform, so click" Use" on "servant uniform" in inventory and Indy puts on the uniform.
NB: Now that Indy is in disguise you shouldn't go back down because those soldiers who walk downstairs will recognize Indy and will find it strange to see Indy in a servant uniform. You will then really have to fight them, so don't go back down as a servant. If you have to go down again, you first have to change Indy in his own Indiana Jones outfit.
Go back to the hallway through the same door through which you came and follow the hallway further down and ......
Again Indy is stopped by a soldier. Since Indy is now dressed as a servant, it makes no sense to talk to the soldier.
You better offer the soldier something via the "Offer an item" option.
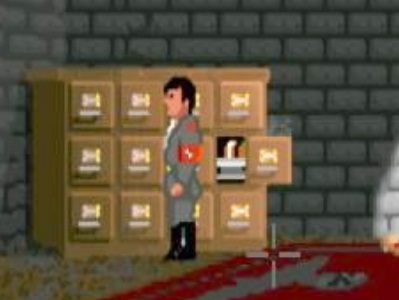
So click on "Offer an item" and then scroll through your inventory items to the painting that you brought from Indy's father's bedroom.

So click on "Painting" to give this painting to this soldier. Indy can continue and the soldier will take the painting to Colonel Vogel.
Vogel puts the painting in the safe and shows the safe code to the soldier, who has to remember it.
Vogel then stores the piece of paper with that code in one of the drawers of the chest of drawers.
We then return to Indy in the hallway. There are 3 doors in this corridor.

Enter 1 of the 3 doors into a room. All those 3 rooms are "safe" rooms, so it doesn't matter which door you enter. In the room you change Indy into his own Indiana Jones outfit, so click with "Use" on "IndyWear by Lucasfilm" to change Indy again. Then go back to the corridor and follow the corridor further to the right and then around the corner.
Then go straight through the 1st door you see. Another bare room with a chest. Open the chest and then look inside and ......
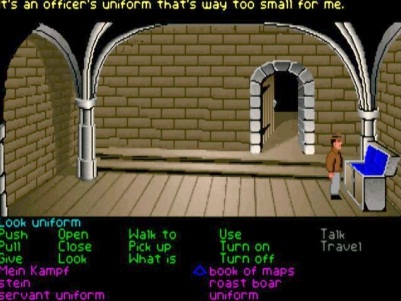
Indy takes a Uniform from this chest. "Look" at this Uniform in inventory. Indy reports that it is an officer uniform and he finds a Copper Key in the uniform. Indy throws the uniform back in the chest because is too large for Indy. Go back to the corridor and follow the corridor back down, around the corner to the left and then back up through the gate and down the stairs to the ground floor corridor. Back down you follow the corridors back to the dressing room, in the hallway where Indy was stopped by the 1st soldier. Enter the dressing room again
Use the Copper Key on the lock of the rack where the uniforms hang to open the lock. Then click Pick up gray uniform to pick up that uniform. In inventory you then have a gray uniform. Do not put on this uniform yet first go back to the 1st floor and to the bare room where the chest is where you found the copper key and then put on the gray uniform in that room. Indy disguised himself as a German SS officer.
SAVE YOUR GAME NOW and then go back g to the corridor and walk further up and then to the right and Indy is again stopped by a soldier.
it does not matter with this soldier whether you are going to talk to him or not ....... it always turns out to be fighting because this soldier is not to be talked about. You can try to talk your way out of it, but in the end you will have to fight with this soldier to knock him unconscious. So forget the talking and choose to fight through "Throw a Punch" and knock this soldier unconscious
When you're done you walk further to the right and then down and then enter the first room you encounter.
Another bare room, but here a first aid kit hangs on the wall.
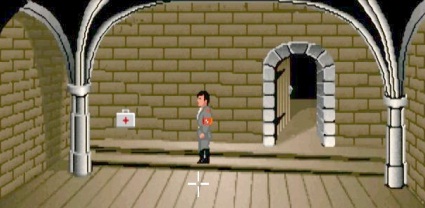
Take the first aid kit because you can restore Indy's health if he has received too much damage in a fight. Then click "Use" on this "First aid kit". Do this right now because Indy has just suffered quite some damage. Leave this room again and walk back up and follow the hallway back to the left and up at the end. The corridor now has blue carpet again.
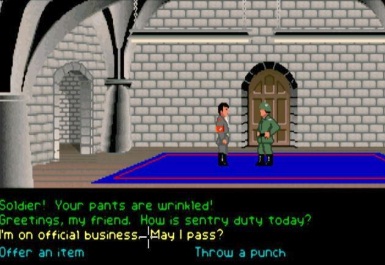
Enter the room on the left and tell the soldier, who's standing on a blue carpet, "I'm on official business. May I pass?" and this soldier will leave Indy alone.
Leave this room through the left gate, so back to the blue corridor. Follow the corridor further up and then to the right and enter the last room.
In this room, a soldier stands on a black carpet guarding a door. Please provide the following answers:
"I'm on official business. May I pass", "No, I was transferred here today. New orders", "Certainly! You do have top secret clearance?"

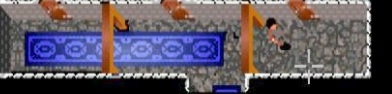
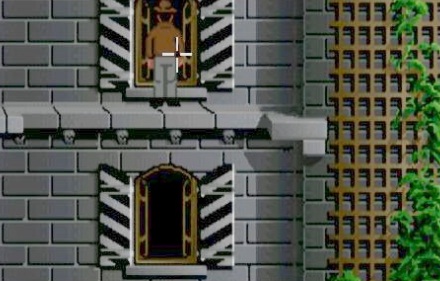
The soldier is overwhelmed and does not insist further. Open the door behind the soldier and then enter that room. Indy then stands on a gray carpet. On the right you see a window. Walk to the window and open the window. Then click in the opened window and ...... Indy climbs out the window and ends up on a ledge of the outer facade. Indy automatically changes clothes in his Indy outfit.
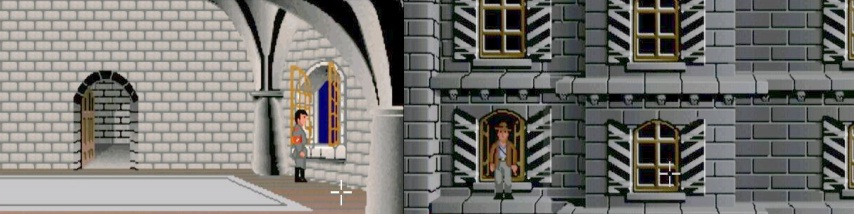
You see 3 windows and Indy is in front of the left window. Walk over the ledge to the right until the 3rd window.
Open the 3rd window and then climb back inside and we are in a room with a red carpet and you see 2 pillars.

On the left pillar, near the window, there is a loose stone. "Push" against the stone that is on the left pillar and the pillar turns a turn.
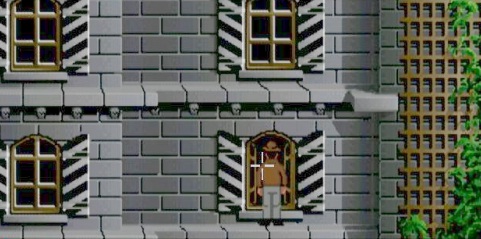
Climb back out the window. On the right you can now see, under the ledge above Indy, the stone. Use the Whip on that gray stone and ......
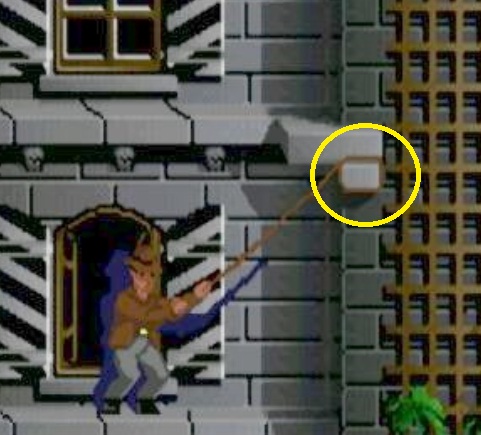
Indy swings to the climbing frame and climbs up through that frame and lands on the ledge of the 2nd floor. Open the window and climb inside.
Indy is now in a room with a round red carpet on the floor. In the corner, near the door, there is a closet. Open the closet and ..... Indy steals 75 Mark from the closet.
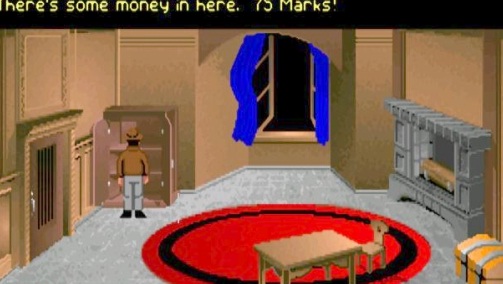
Take a look at inventory ... Indy should now have 140 marks. Climb back out the window. When Indy is back on the ledge of the 2nd floor, click on the open window of the 1st floor, so the window directly below Indy, and ..... Indy then walks to the left and then jumps down at the middle window and lands back on the 1st floor ledge. Climb back through the right window. Indy is back in the room where he pushed against the loose stone. Now put on the gray officer uniform again, so click "Use" again on "gray uniform". Then walk to the left, open the door and leave this room. Back in the blue corridor, enter the Guard Room through the far left door.
Inside, Indy is once again addressed by a soldier. Do not talk to the soldier but click on "Offer an item" and then give the "Mein Kampf" book to this soldier and the soldier is delighted and leaves to read the book. On the right wall is a large gray cabinet with a lot of green lights that flashes. It is the control box of the alarm system. There is a grid in the side of the cabinet. Use the filled Beer Mug on that grid (Use stein with grating). Indy throws the beer into the cupboard and causes a short circuit in the cupboard. The green lights will then stop flashing.
Leave the room and follow the hallway to the right and then down and right again. On the right you will see the stairs that goes up to the 2nd floor.
So climb up the stairs and then left and ..... Up in the red corridor Indy meets another soldier.
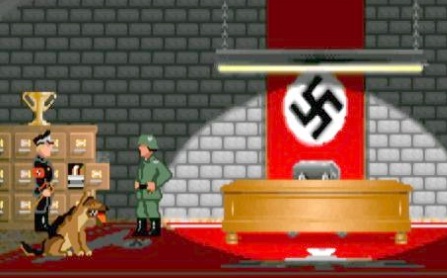
Say the following sentences: "Soldier! Your pants are wrinkled" and then "And no time to remove the stain on your jacket?" and then "Sauce? You buffoon! You waste my time, stand aside!" and Indy can walk on. Enter the red corridor right through the first door and ... Indy is then in Colonel Vogel's office.
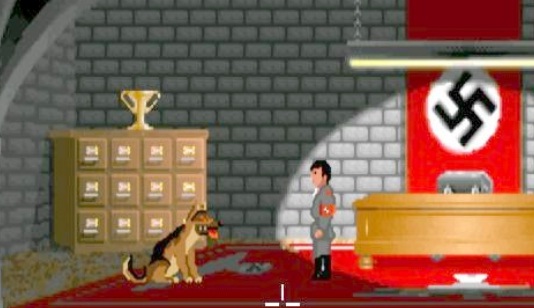
Walk to the left and ... oops ..... sweet dog. Give the roasted pig to the dog and the dog enters his cage. Back at indy you see the chest of drawers where Vogel has stored the piece of paper with the code on it. On top of the drawers stand a large cup. Take the Cup and then open the middle drawer in the right row and then look in the drawer and Indy finds a pass with the code.
Pick up the pass. Close the drawer with "Close" and leave the office. Go back down, so right and then down the stairs again.
Follow the corridor back to the left and then down and left. You are back in the red corridor of the 1st floor ..
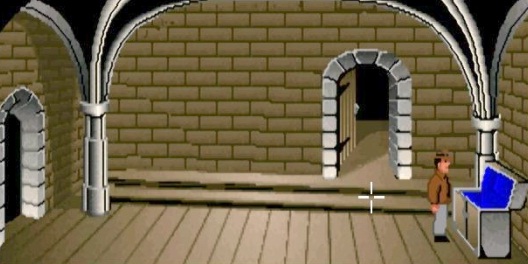
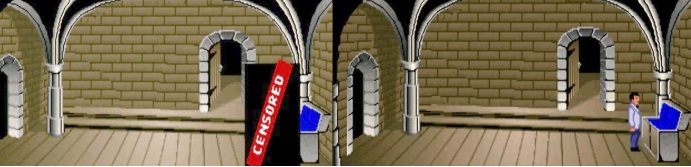
Walk all the way to the left and then go through the door at the end of this corridor. Indy ends up in the painting storage room.
Walk down the stairs and then walk all the way to the left.
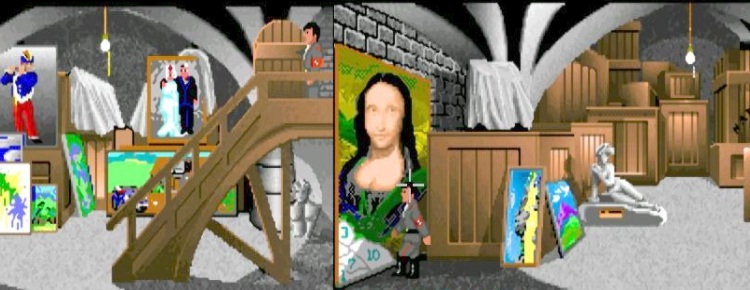
A large "Mona Liza" painting hangs on the wall. Click with "push" on the "Mona Liza" painting and.....The painting slides away and Indy has found the Safe.
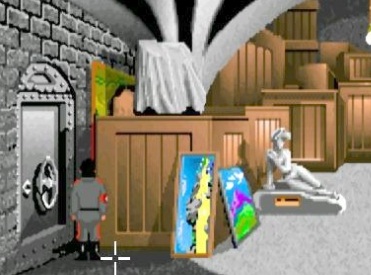
Click "open" on the safe door and ....... Because Indy has the combination pass he can now open the safe door. So walk into the safe.
In the corner, is Henry's cup painting and on the wall is a large painting of a guy holding a goblet. Check out that large painting and Indy will report that it is a Grail painting. Look closely at the Grail Cup in the painting. Try to determine if that Grail Cup is shiny or not and then remember this fact.
Now change Indy back in his Indy outfit and leave the safe. Walk back to the right, up the stairs and disappear through the door to the hallway. Walk a little to the right and then up and follow that corridor to the stairs and descend through the stairs back to the ground floor corridors. Follow the ground floor hallways back to the Entrance Hall and then turn left again into the hallway and follow the hallway to the Kitchen. In the kitchen, fill the Colonel's Cup (Trophy) with beer from the large keg.
Then follow the route back to the entrance hall. Back in the entrance hall, at the Hitler flag, go right out of the hall and follow the hallway back to the stairs and to the 1st floor. On the 1st floor, enter the first chest room again and put on the gray uniform again. Follow the corridors to the 2nd floor. Walk down the red corridor to the fork. To the left of the hall is a sturdy German in a white shirt and green pants.
Walk to the German. This German is guarding the prison corridor and Indy cannot go any further.
Do not talk to the man and do not (yet) fight with him. Click on "Offer an item" and then give him the beer filled Trophy and ...... the guy drinks the beer, and that takes a while, and then he stands rather shaky on his feet fight Indy anyway ..... you have to fight with this German now but because he is drunk now, 1 well-aimed punch is enough to knock the guy out
You then see Indy standing in the hallway again. Follow the left corridor down and then left around the corner, into the purple corridor and Indy is again stopped by a soldier.
Don't fight but say "I'm on official business. May I pass" and then "No, I was transferred here today. New orders" and then "Certainly! Do you have top secret clearance?" and ....
after some bullshit Indy can continue. Follow the purple corridor further to the left and then up and go through the last door

Indy is then in a room with a blue table and a blue sofa. There is a candlestick on the table.
A Silver Key hangs on the left candle stand of the candlestick. Take the Silver Key.
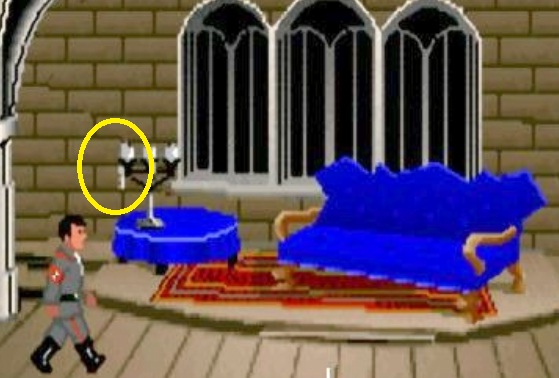
Leave this room again. Follow the purple corridor back to the right and then around the corner and then walk all the way up and then left around the corner.
Indy is now in the hallway with 3 doors all 3 locked.
Indy's father Henry is locked behind one of those 3 doors. Click on the middle door. Indy is then at the door. Above the door you see 2 red bars.
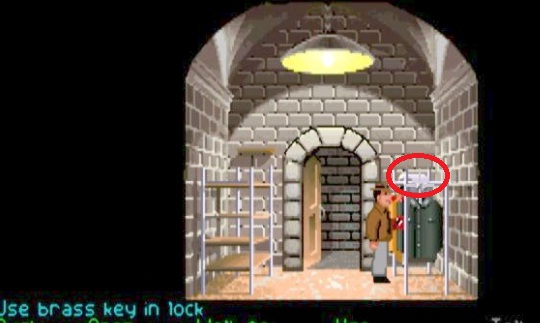
Use the Silver Key on the door to open the door and then enter and ... Indy found his father. So Henry will follow Indy from now on.
Indy and Henry have to go back to the room where Indy pushed the armor. That room is on the ground floor. Leave the room. Indy locks the door again. Click right or left and you'll see Indy and Henry back in the hallway. Follow the corridor: right, down, right, up and Indy and Henry are stopped by the soldier who shoots in the air. An SS officer appears who wants the Grail Book.
So click on "Offer an item" and then give the Grail Diary to the officer and ......
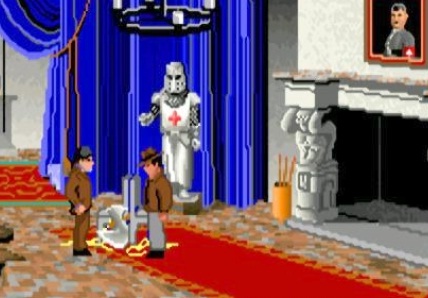
Indy and Henry are captured and they are then strapped to a chair in the room where Indy previously pushed the armor over.
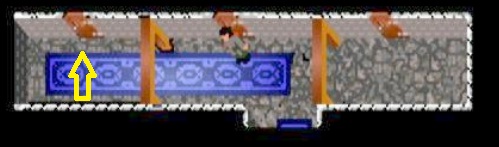
Indy and Henry have to slide all the way to the right. click with "Pull" on Indy and the 2 will slide a little to the right. Keep pressing Pull on Indy until the 2 have moved all the way to the right through the room and to the right armor. It's a long way so you have to click a lot of times. On the red carpet you can still see the marker that the halberd of the harness made it into it. Make sure the center of the two chairs is exactly on that mark, then click "Push" on the harness and .....
Indy kicks the harness and this causes the halberd to fold down again and that halberd breaks the ropes.
Indy and Henry are free again but now have to get out of the castle unseen. Walk to the fireplace. The fireplace has 2 statues as pillars.
Click "push" on the left pillar and ..... the back wall in the fireplace opens.
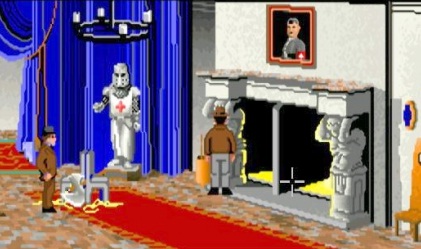
go out through that secret door and then walk right to the motorcycle.
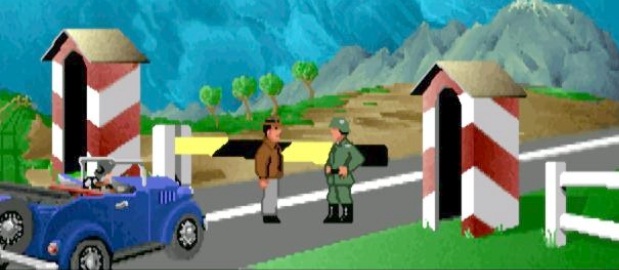
Click "Use" on the motorcycle and Indy and Henry leave for Berlin but are stopped by the border guard.
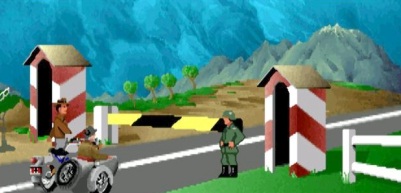
|
Use these sentences here: "That's out of the question. " Indy and Henry can now go on and we end up in: |
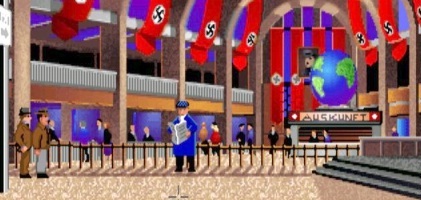
Berlin:
Hitler has just delivered one of his famous speeches, accompanied by Elsa Schneider.

Indy enters the stage and receives the Grail Diary from Elsa. A soldier then takes Indy to Hitler.

Click on "Offer item" and then on the "Pass" and Hitler signs the Pass and disappears.
With the pass signed by Hitler, Indy now has a safe conduct at all roadblocks. Henry appears and we arrive in the arrival hall of Tempelhof airport.
Tempelhof airport:
EXPLANATION
Indy and Henry now have to leave Germany as soon as possible and this can be done in 2 ways ...by Zeppelin or per Fighter Plane. The Zeppelin requires a Ticket, but the Fighter plane does not require a Ticket. A Ticket for the Zeppelin costs 175 Marks but Indy only has 145 Marks. So Indy cannot buy a Ticket for the Zeppelin. There is a way to steal a Ticket but I am not going to deal with the whole Zeppelin thing because it is extremely difficult and complicated. I limit myself to the other possibility leave Germany in the Fighter Plane. If you also want to do the Zeppelin part you will have to find another walkthrough. But I warn you again ....... That thing in the Zeppelin is terribly difficult and almost impossible to do.
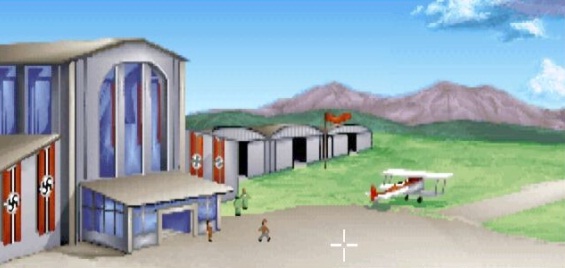
Fighter Plane:
So Indy and his father are in the arrival hall of the airport. Walk to the left right away to go out again.
You can see the plane outside. The plane is in front of the hangars and there are also 2 soldiers at the hangars.
Do not click on the plane yet, but first open the Manuel book in inventory, which you stole from one of the bookcases in the library in Venice.
The Manuel shows you how to start and take off the plane. So study the instructions
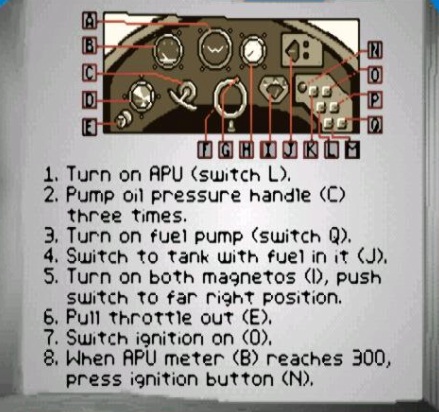
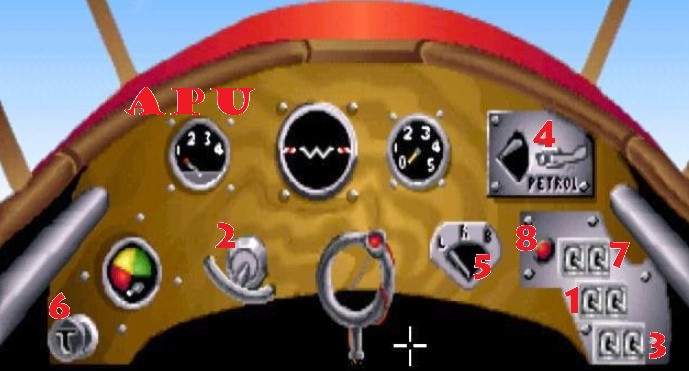
Then click on the plane and ..... Indy and Henry end up in the cockpit and you see the control / start console.
|
You have to act fast to start and take off the plane. If you take too long, the soldiers come and then Indy and Henry decide to run to the Zeppelin anyway and that is not the intention. Do the following and do it quickly, using the picture above as a guide. In the picture is:
Ok .... here we go:
We take off and then we fly. |
The control of the plane is again through the numerical number keys.
You can also look this up in the Manuel book and I am not going to explain this further because it is actually completely nonsense
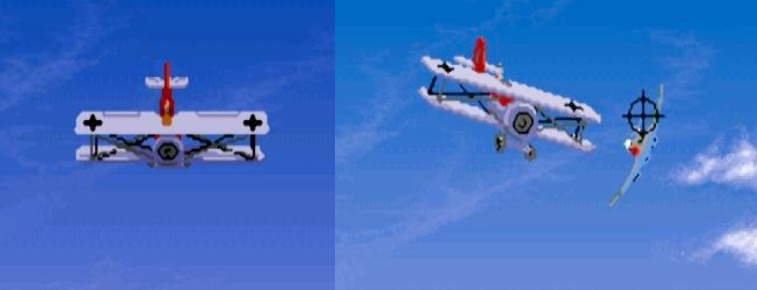
Naturally, Indy and Henry cannot leave German airspace on detected . German fighter planes keep appearing in the sky and those fighters will attack your plane. You should try to shoot those fighters down . You have a Crosshair that you need to quickly aim at a fighter and then you fire with your left mouse button. The longer you last, so the more fighters you shoot down, the further you get on your plane. But In the end your plane will be shot and you will crash.
NB: flying and shooting with the plane is not easy either. Actually it is almost impossible. However, it is not a problem if you don't manage it because you will eventually be shot down by the German fighters and if this happens immediately it is not that bad at all. It just means that you have to pass many more checkpoints in the car. So if you can't master the flying of the plane and also can't shoot a few German Fighters then you just let it happen by doing NOTHING .....
As I mentioned ... Indy and Henry are shot out of the sky and the plane crashes at a farm. Indy survived.
Walk to the right and ..... Ha ... Henry also survived the crash.
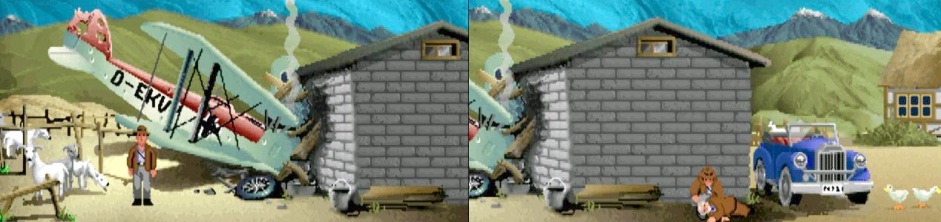
Henry also wakes up and turns out to have nothing. Walk a little to the right. There are 2 cars, but the right car has no petrol.
So click "Use" on the blue car and ... Indy and Henry drive away to go through Germany to the border with Austria.
On the way you have to show the Pass a few times at the checkpoints.
How often you have to pass a checkpoint depends on how far you have managed to fly with the plane before it was shot down. If you immediately crashed by plane, you will have to pass about 6 checkpoints. At each checkpoint you click on "Offer an Item" and then on the "Pass" and you can drive on. Eventually, Indy and Henry reach the border and continue through Austria and Yugoslavia to Iskederun.
Chapter 4 Iskederun:
The Grail Temple
Henry and Indy have arrived in Iskenderun and here Marcus joins them again. On the right is a sign nailed to the rock. Check out that sign. Indy reads on the sign that this is your last chance to SAVE your game because once in the Temple you can no longer SAVE the game
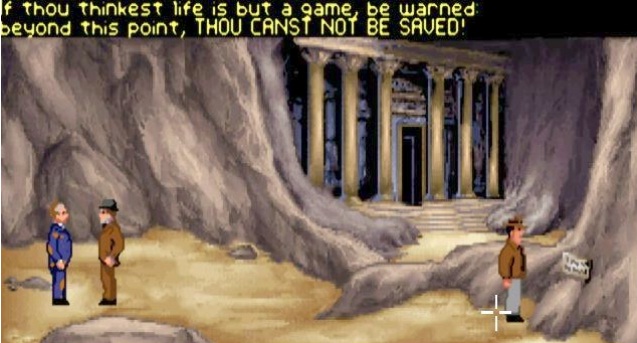
NB: If you play the SCUMMVM version then you can SAVE your game in the temple. The statement that you can no longer save only applies to the old floppy version of the game.
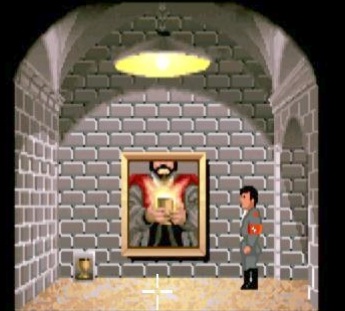
Enter the Grail Temple through the gate. When Indy, Henry and Marcus enter the temple, a fresh, chopped head rolls to them.
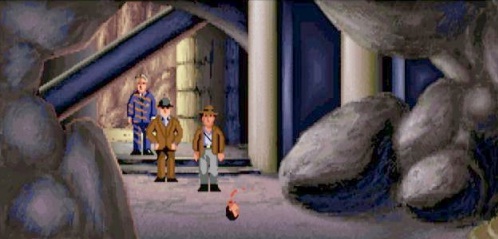
Walk to the right and ....... We are stopped by Walter Donovan and Elsa Schneider. Donovan shoots Henry to convince Indy to look for the Grail Cup.
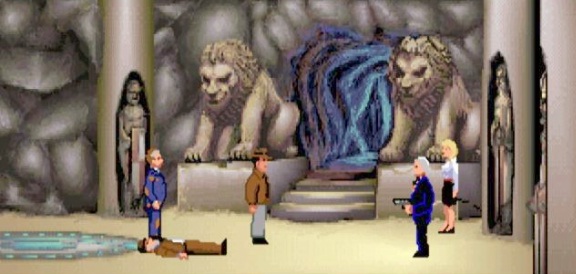
Henry is badly injured and to save Henry, Indy must find the Grail Cup. The grail cup has healing powers. Henry tells Indy to remember his Grail Diary and then Indy sets off.
The 3 Trails:
Indy must now pass 3 TRAILS. If you play the SCUMMVM version you can still save at all times
Trail 1:
Indy then enters the next cave, at a Stone Lion and steps
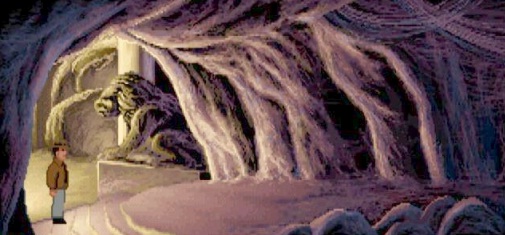
Walk, carefully, a little to the right and Indy stops in front of a muddy puddle and thinks of the words of his father: "Only the penitent man will pass".
If you walk Indy further to the right now then it will be GAME OVER so SAVE your game first now

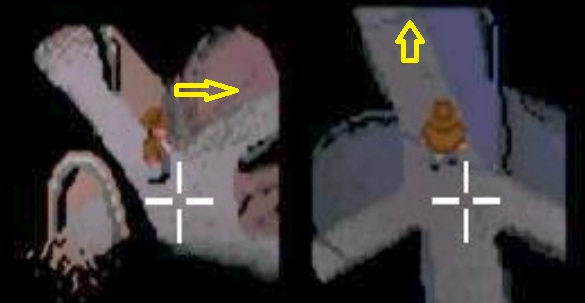
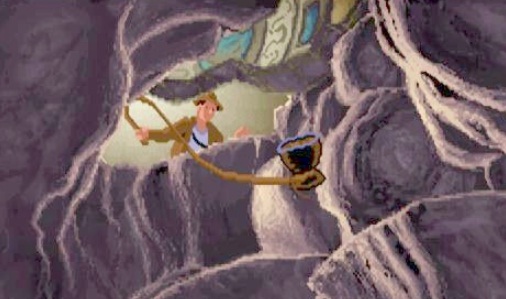
In the middle of the mud pool you see a tiny lighter spot. Click on that little lighter spot and ......
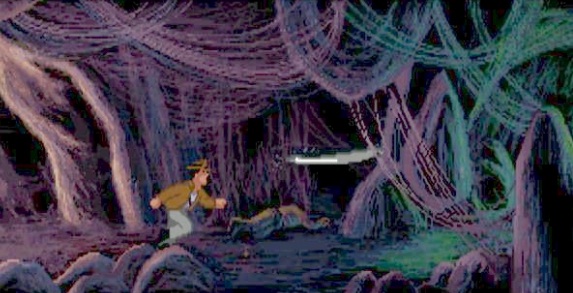
Indy jumps over and bends over, like a repentant man, and avoids the rotating chopping axes that appear twice and ends up safely at:
Trail 2:
Save game here and do that every time that Indy has progressed through a few safe tiles.
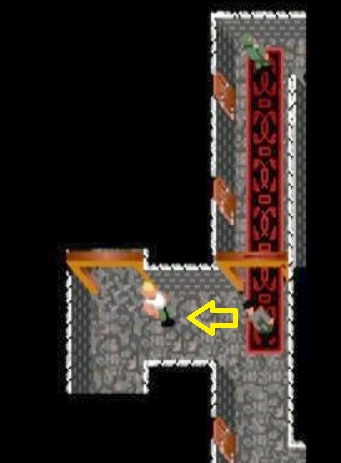
Trail 2 is a tile floor maze. Letters are on the tiles. Indy must go to the right via the correct tile route. So Indy has to jump from tile to tile and he cannot jump over a tile. Indy tells me that "In Tuskin, Jehovah is spelled JEHOBA". But you may very well be given a different word than JEHOBA, for example JEHUVA. So you should only place Indy on the tiles that have the letters of JEHOBA or, of JEHUVA if you have received JEHUVA as a word. So you click on the tile you want to bring Indy to and you cannot jump over a tile. Below you can see my route based on the letters of JEHOBA. So I have to take the correct route across the tile floor through the tiles with the letters J, E, H, O, B, A on them.
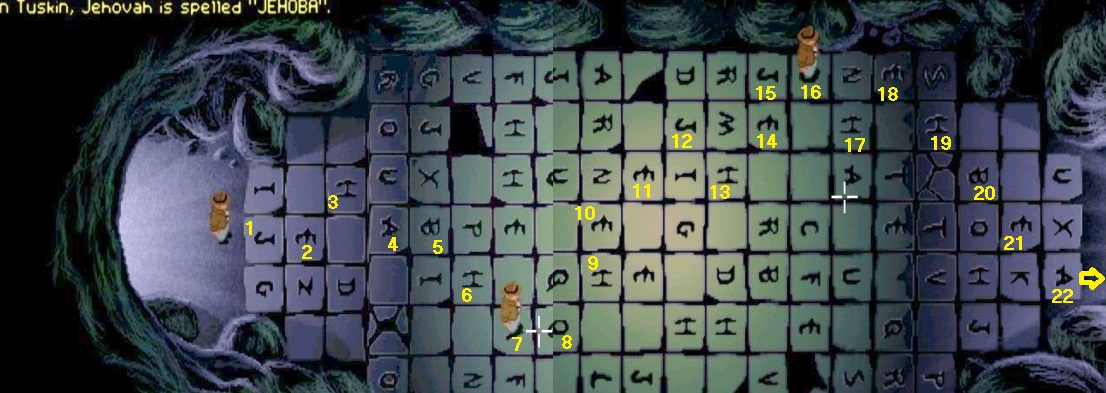
If you land on the wrong tile, Indy will die and you will have to start all over again from Trial 1, or from your last Save Game. You can Save your Game on every safe tile, so I suggest you do so. If you have reached the other side, walk to the right and Indy will end up at:
Trail 3:
SAVE your game first
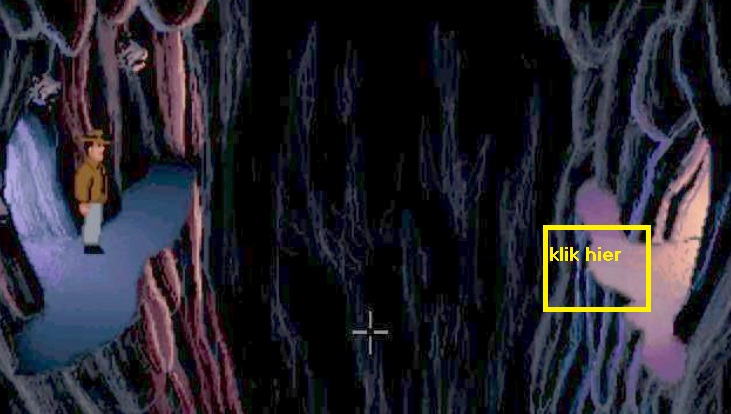
Trail 3 is the test of confidence. Indy stands at a gap with an invisible bridge. The path on the other side is "waved". Under the wavy edge of the path, the rock is blue. Click on the edge of the small wave, under the large middle wave edge and ..... If all goes well, Indy will walk safely across the invisible bridge to the other side.

The Holy Grail Cave:
Choose the RIGHT CUP:

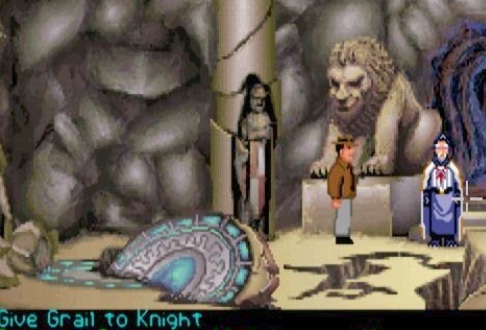
If Indy also has survives Trail 3, he has ended up in the last cave, the HOLY GRAIL cave. You will see a baptism bowl containing Holy Water. Continue to the left and Indy meets the last of the 4 Knights who were the Guardians of the Holy Grail. So this Knight has been alive for 700 years.
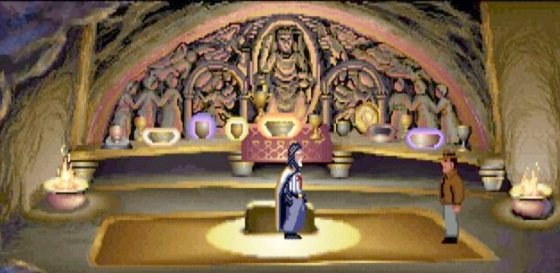
Indy says he needs the Grail Cup to heal his father. The Knight judges that "Indy is pure in heart" and so Indy may take the Holy Grail.
But Indy has to find out for himself which of all the cups is the only true Holy Grail cup.
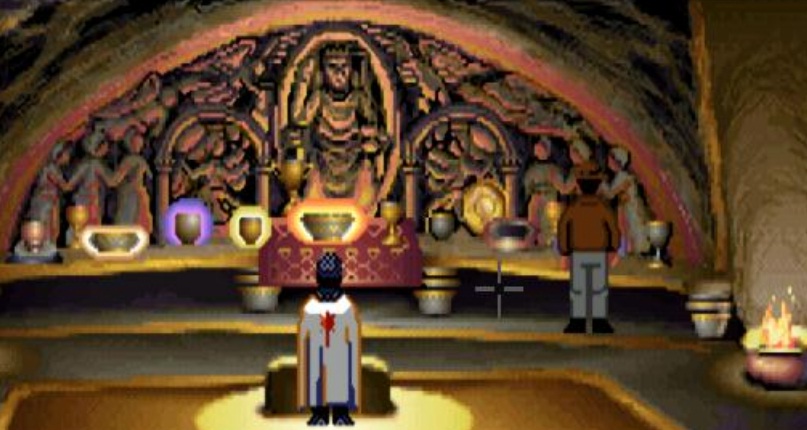
SAVE GAME HERE AGAIN
The crescent-shaped Niche contains a lot of Cups, in different shapes and sizes. One of those cups is the real Holy Grail cup. It's up to you to find the real Holy Grail cup. Think of the hints you got about the Grail in the Catacombs of Venice and also the cup in the painting in the castle's vault. Use these hints to determine which of all the cups is the real Holy Grail Click "Look" on all cups and then write down what Indy tells about it. Usually the good cup is the "Plain Metal Cup", but this time it was not so with me. This time the "Plain, Shallow Bronze Vessel" was the right cup for me
If you think you know which of all those cups is the right one, you take that cup. Then walk back to the baptismal evening and use the Cup at the baptism Bowl to fill it with Holy Water. Indy then fills the cup with Holy Water and then drinks the water, If it was the right cup, Indy will live. De Knight then says "You have chosen wisely".
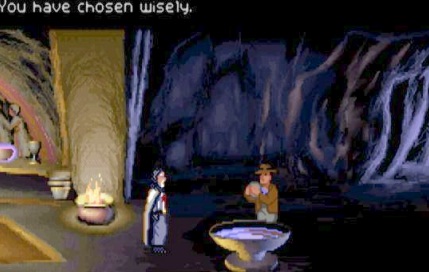
If it was the wrong cup, you can see how Indy ends miserably. Then load your last Save and try again.
If you have found the only good Holy Grail, Indy will walk back to the beginning and let Henry drink the Holy Water so that Henry heals immediately
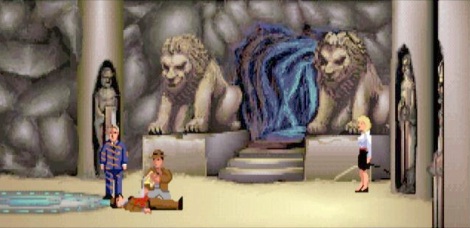
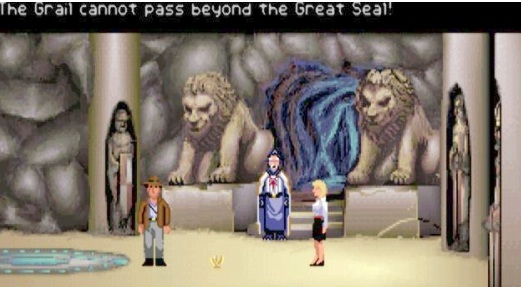
Henry then thinks that Indy should decide what to do with the Holy Grail and he places the Holy Grail cup on the floor and he and Marcus walk away. Indy and Elsa are alone and the Holy Grail on the ground between them. The Knight appears and says that the Grail cannot go beyond the Great Seal.
Elsa doesn't believe the Knight and she grabs the Grail and walks with it over the big round Seal, which is in the floor, and .......
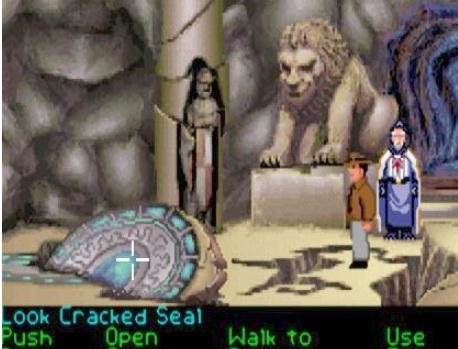
Oops ...... Elsa had better listen to Indy and the Knight. The Seal comes up and Elsa plunges into the depths ...

Elsa and the Grail have disappeared into the depths. Click "Look" on the Large Broken Seal, which is now sticking out of the floor
Indy then looks into the canyon and he sees the Holy Grail, which is on a ledge.
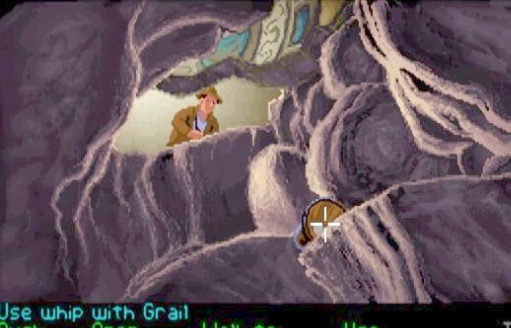
So use Indy's Whip on the Grail to fish the Grail out of the canyon with the Whip.
Finally give the Holy Grail back to the Knight and .......
...... Look at the END and see your final Score.........

2020: Walkthrough by: Louis Koot
Based on my original Dutch walkthrough from 2011 when I played the SCUMMVM version of this game
You can buy this nice old LucasArts game at gog.com