2018: Walkthrough by: Louis Koot
If you have found this walkthrough via google search or via another site then you have probably not visited my site.
A lot more very detailed game walkthroughs can be found on my site at: www.pcgameswalkthroughs.nl
This game is about how alcohol addiction destroys lives.
About the game
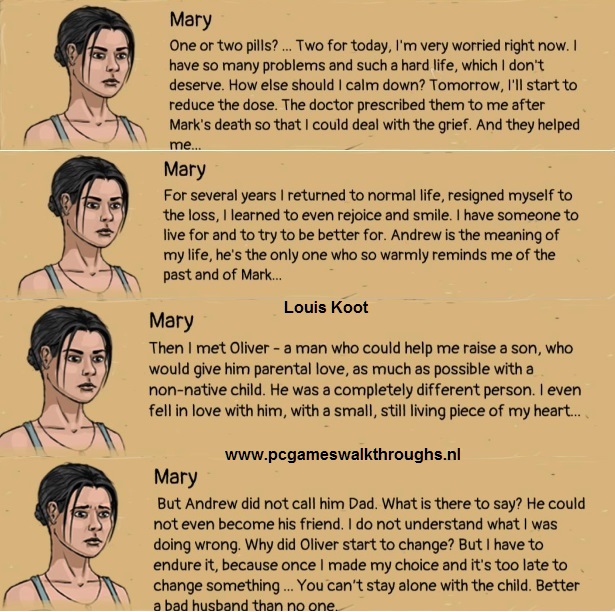
You're Mary and you are a young mother with a son named Andrew of about 10 years old now. Andrew's father was Mark, your husband, and you all where very happy.
But then fate came into your lives.....Mark died as a result of a car crash
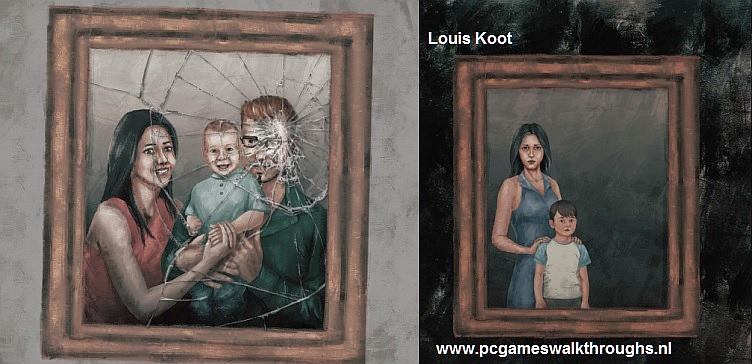
So after Mark's death you couldn't cope being a widow and raising Andrew on your own. A year later you met an other man, Oliver, and you thought he could be Andrew's new father
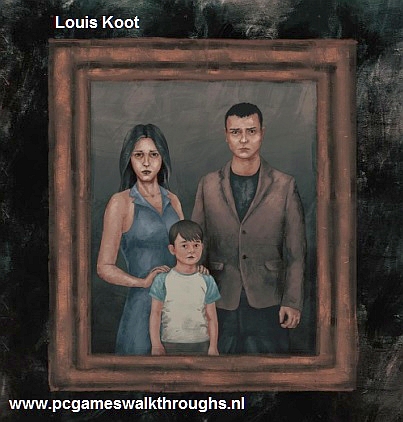
So you married again with Oliver......but Andrew will not accept him as his new father and Oliver turns out to be an alcoholic...
...you can't cope with this an you turn to pills to get you through the day and here is where the game begins......

On the main menu screen you will find the buttons for "Play", "Load" and "Quit". On the menu screen you can adjust the volume of the music and the sound effects separately under "Options". At "language" you can choose to enable subtitles in English, Russian, Ukrainian and Dutch. The spoken language in the game is English
The game has an autosave at fixed save points. So you can't save yourself and you always play from the last save point.
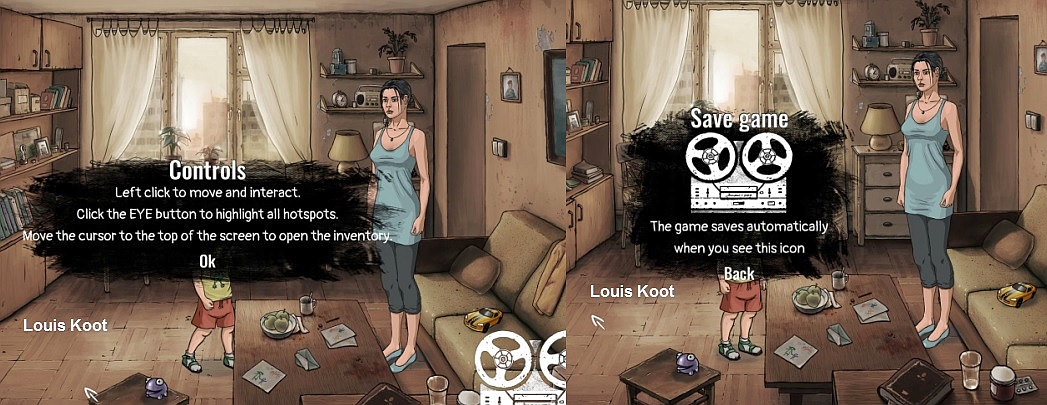
The game is "point and click" so you play the game entirely with your left mouse button. Your main play cursor is a little arrow that will turn red on a hotspot. with the red arrow you look at things, pick up things up and open up doors etcetera. When you move the cursor to the top of the screen the inventory bar will appear
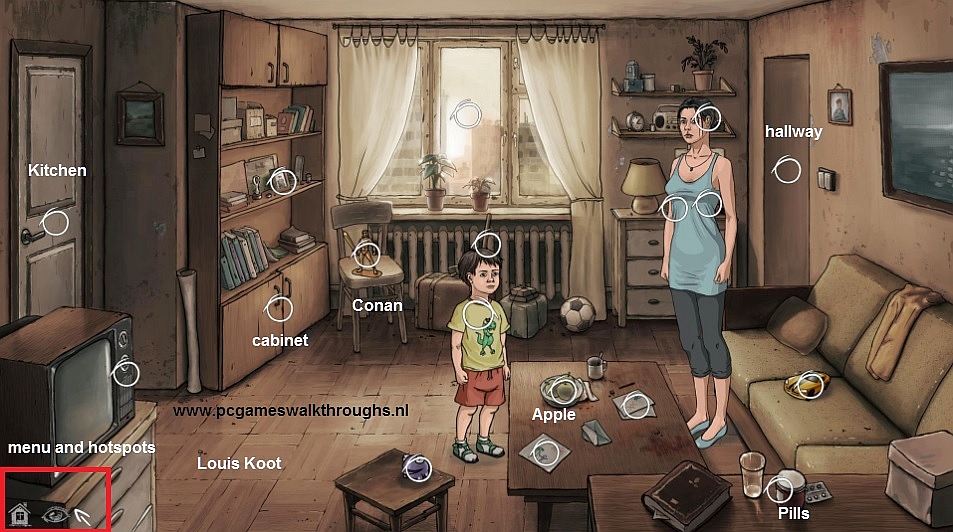
In the bottom left corner of the screen you'll see a house icon and a eye icon.
By clicking the little house icon you'll open up a small menu where you can leave the game. Clicking the little Eye icon will make all hotspots visible for a moment.
The game starts with
A: Mary:
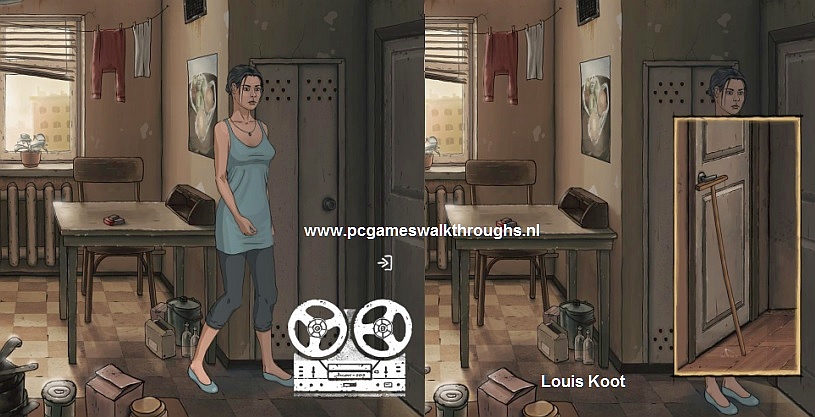
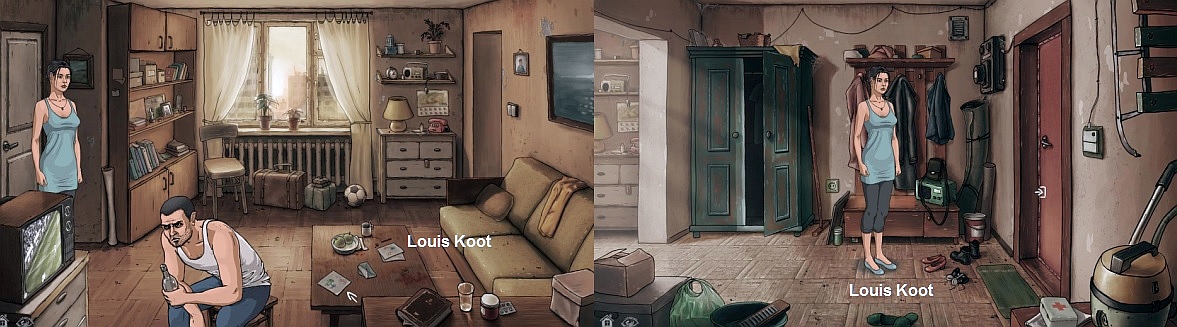
Apartment: Living Room:
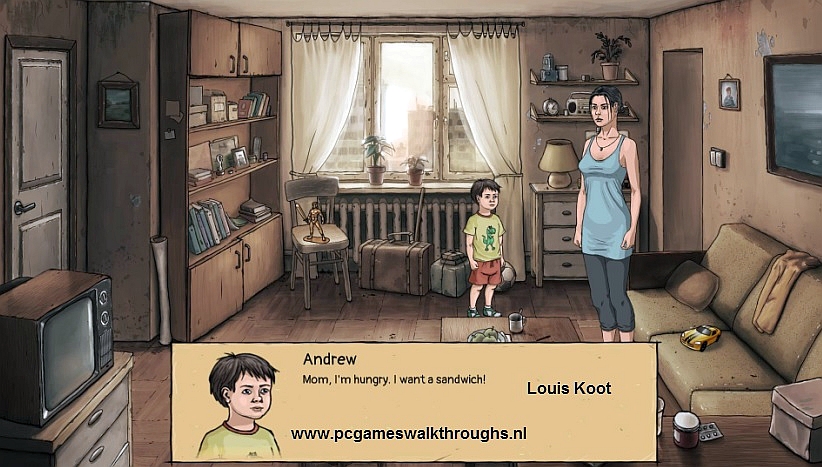
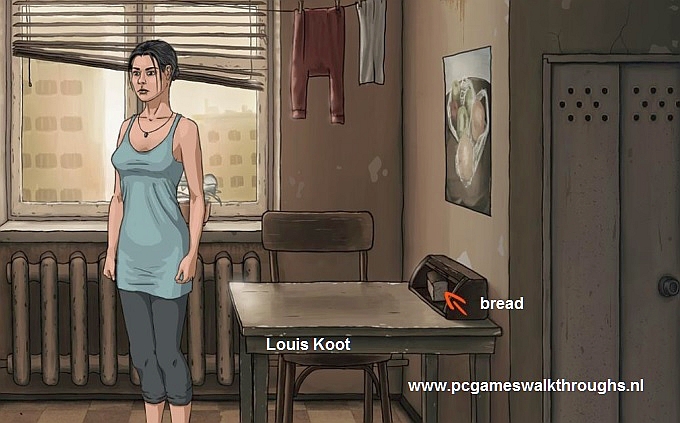
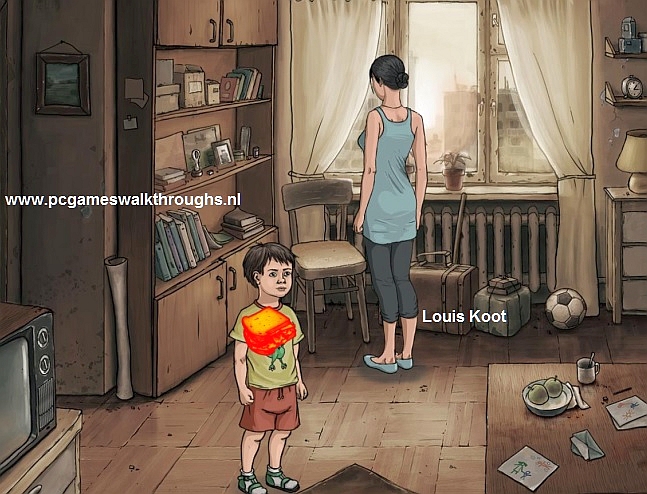
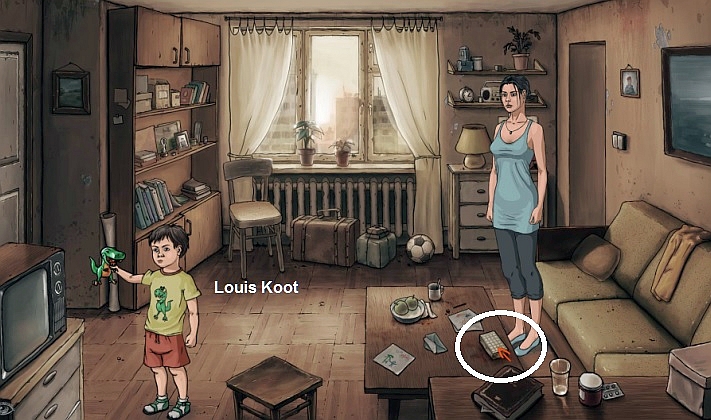
The story begins with Mary and Andrew in the living room. Andrew wants a sandwich.
Information about the game operation appears on the screen. Click OK to get rid of this.
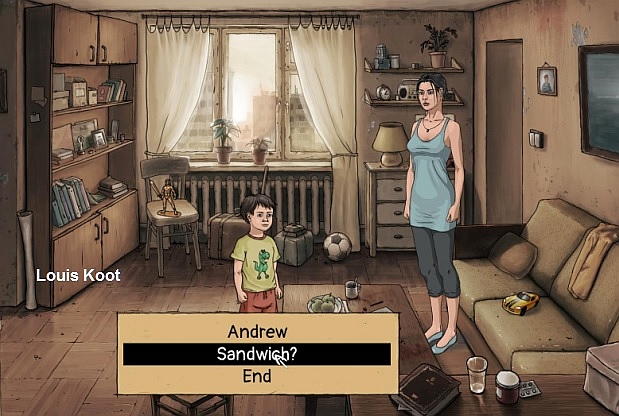
Click on Andrew with the talk cursor to talk to him and then use all topics...
Andrew will says what he wants on his sandwich: Salad, tomatoes, bacon and cheese.
Use the Eye icon to see all the hotspots in the room where you can click on......
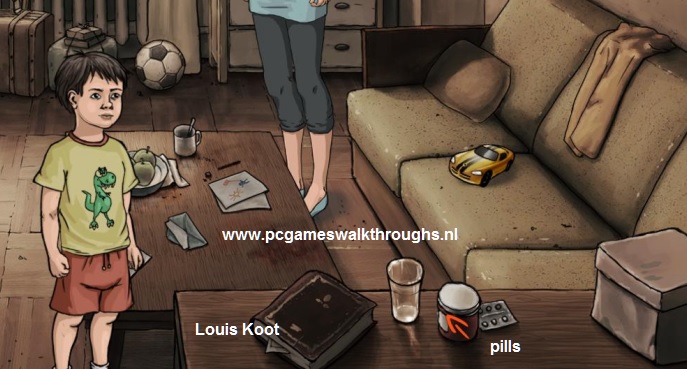
Go click on all those hotspot items......Start with the pills that are on the low cabinet, in the lower right corner.
You now get some information about Mary's background.....read it all....you must click to get Mary to continue her live story
When Mary is done telling you can examine all the other stuff here in her living room. At the window stands a chair and a closet. On the chair stands Andrew's hero Conan. The closet has two doors. Open the doors of the closet and then click in that compartment......There are a few empty bottles of alcohol in it..

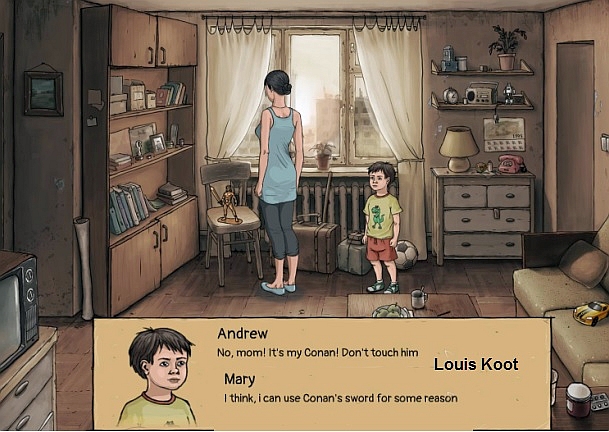
Click on the Conan toy, that's on the chair. Andrew doesn't like this but Mary thinks she must use Conan's sword, but Andrew don't want his mother to take it
A bowl with apples is standing on the table. Grab an apple, ...the Apple goes into the inventory.
Move your cursor to the top of the screen top open up the inventory. Take the Apple out inventory and click with it on Andrew but.......
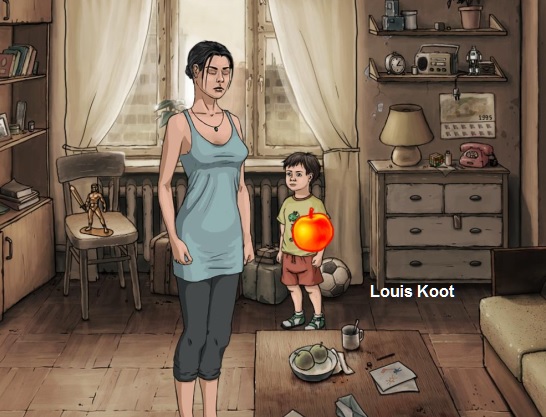
........Andrew does not want a apple...he want's a sandwich....so you better go make him one before he goes screaming the whole neighborhood together.
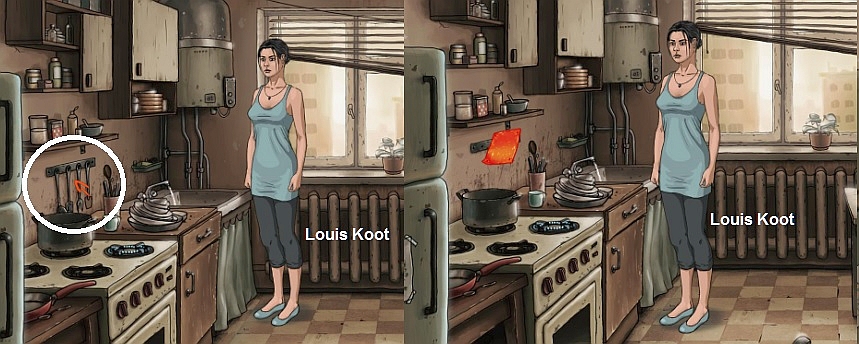
Kitchen
Go through the door to the left, into the kitchen. Look around and find all the hotspots
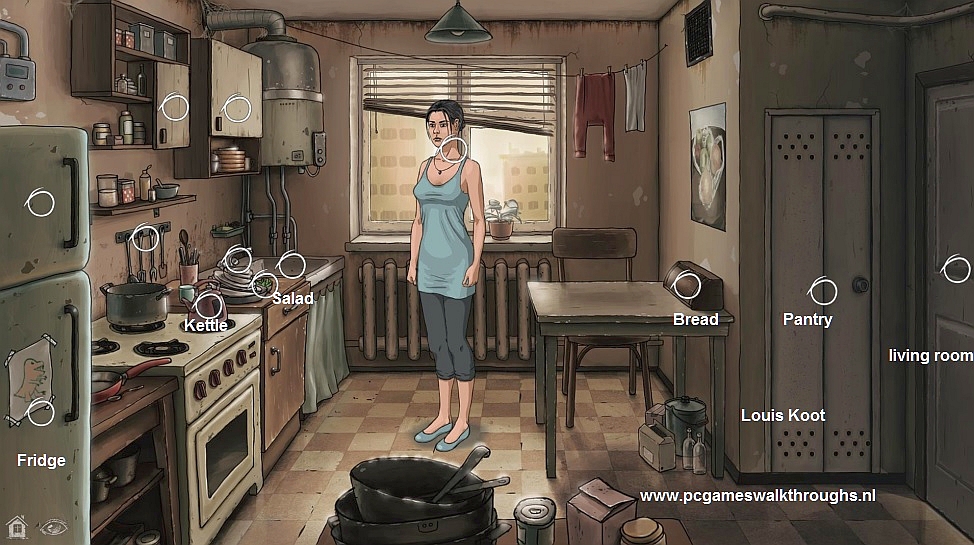
On the kitchen table stand a bread bin. Open the bread bin and take the bread that's in the bread bin
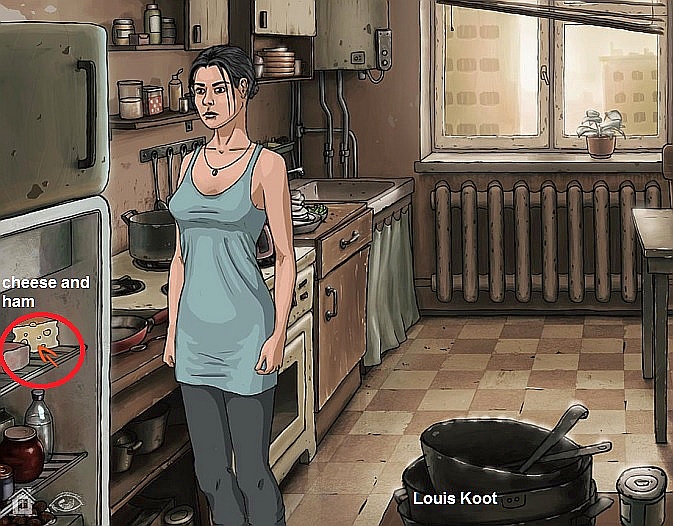
Open the refrigerator and take the cheese and bacon that are on the top shelf
On the stove stand a tea kettle and on the cupboard, between the stove and the sink, lies some salad. Take the Salad and take the Tea Kettle

Mary needs a knife to make the sandwich, but she can't find a knife. Go back into the living room and talk to Andrew again and ask all questions.

Andrew did not take the knife. Mary needs the sword from Conan to make the sandwich. But Andrew doesn't want to give Conan to his mother. Mary must give Andrew an other toy that he wants to play with, to replace Conan. There are a couple of toys in the living room: a purple Frog creature on the stool in front, a Robot toy stand on the second shelf above the telephone and a Car toy stand on the couch. Between the telephone and the lamp stands a Rubik's cube
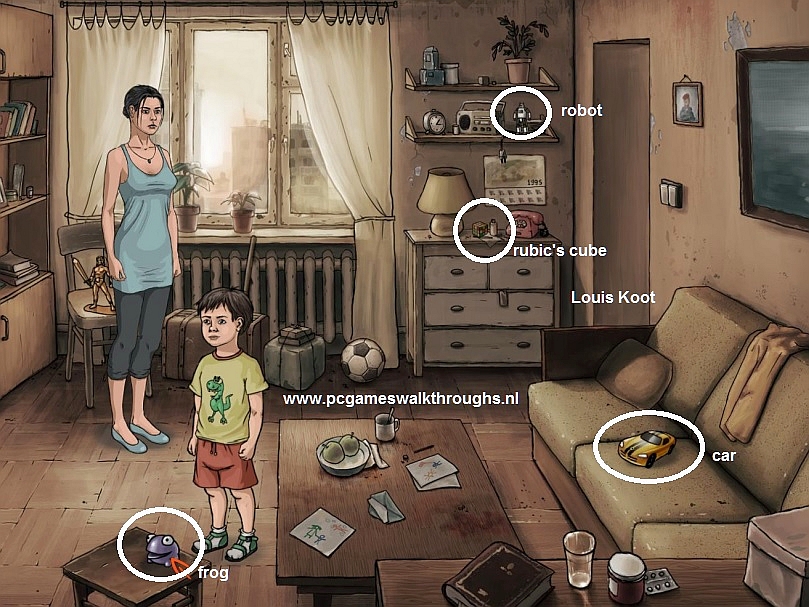
One by one pick the purple Frog, the Car and the Robot and try to give them up and to Andrew.
Andrew does not want any of those toys Take the Rubik's cube, next to the phone, and try to give it to Andrew, but Andrew does not want to play with the Rubik Cube either.
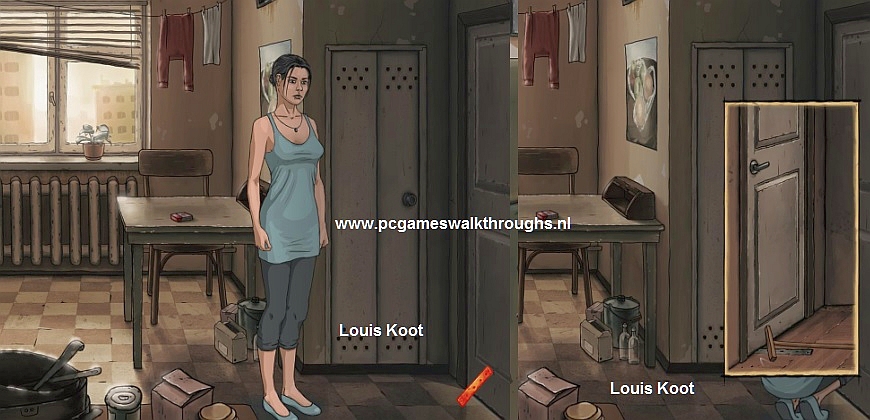
Hallway:
Go through the door on the right into the hallway. Look around.......
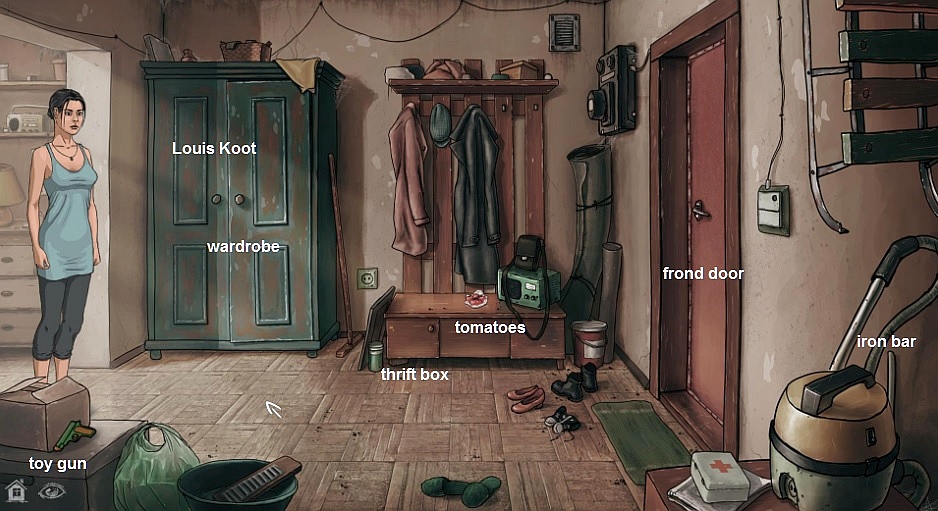
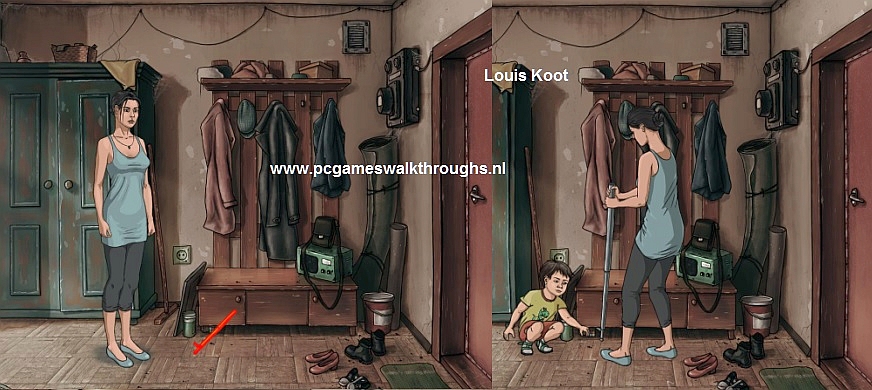
Take the toy gun, next to the box in the lower left corner. On the low cupboard, that stand under the coat rack, lies a few tomatoes. Take the tomatoes.
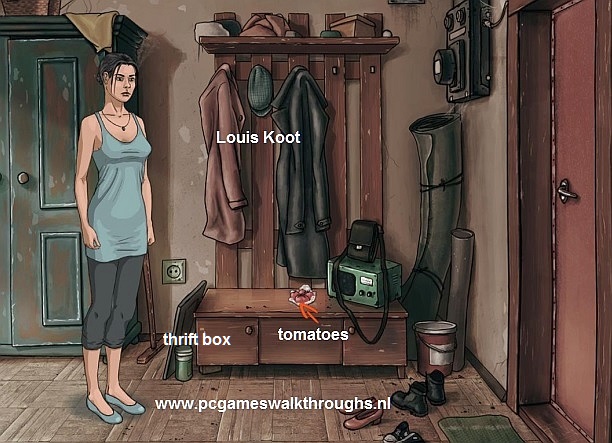
Against the left side of the low cupboard stand Mary's piggy bank, her Thrift Box with her savings in it....Click on the Thrift box, so that Mary knows that it is there. Mary can't take the Thrift Box.
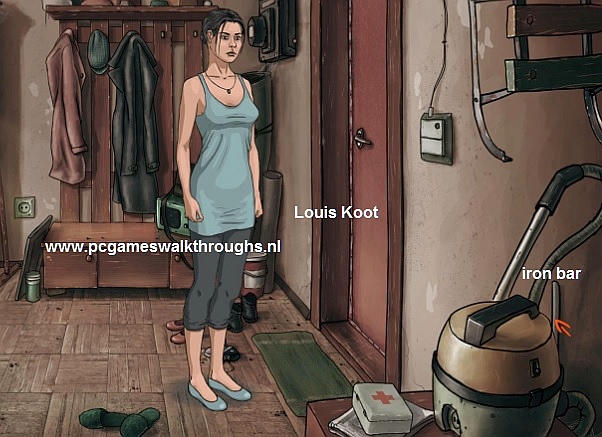
In the lower right corner stand Mary's vacuum cleaner and behind the vacuum cleaner stand an iron bar. Take that Iron bar
Take the iron bar out of inventory and click with it on the Thrift Box.......
.....But Mary doesn't want to take here savings now because she don't need it yet....but at least you know where to find it now.
Open the wardrobe and......... a piece of paper falls out. Click on that paper........... It is a picture on which we see Mary with her husband Mark and son Andrew.

Go back to the living room and try to give the Toy Gun to Andrew.....but the boy doesn't want it. So go back into the kitchen and now open up the pantry closet and.....solve the
Box Puzzle
When you click the question mark you can read an explanation about this puzzle
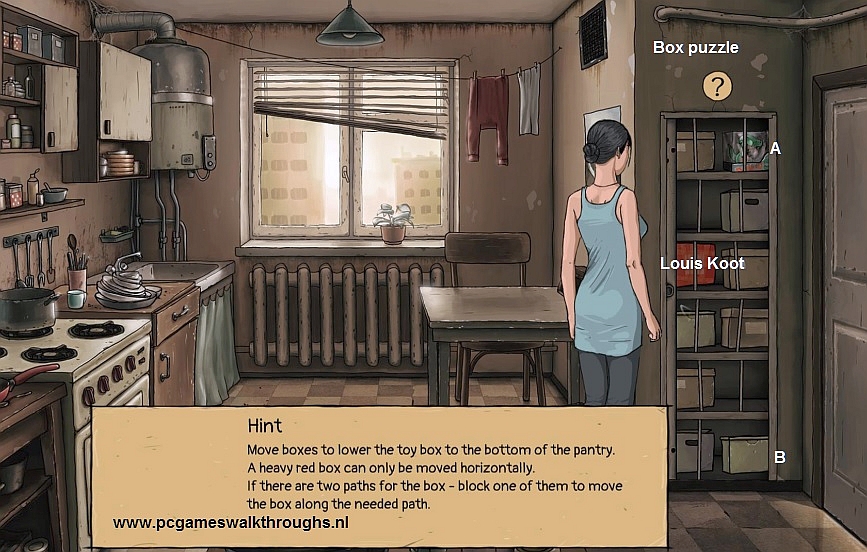
There are a number of boxes on the shelves and you have to lower box A, on the top shelf, to position B on the bottom shelf.
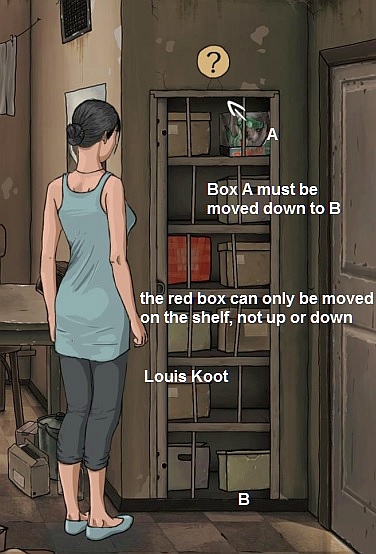
Click on the boxes to move then up or down. The red box can't go up or down, only left or right. It's not a difficult puzzle
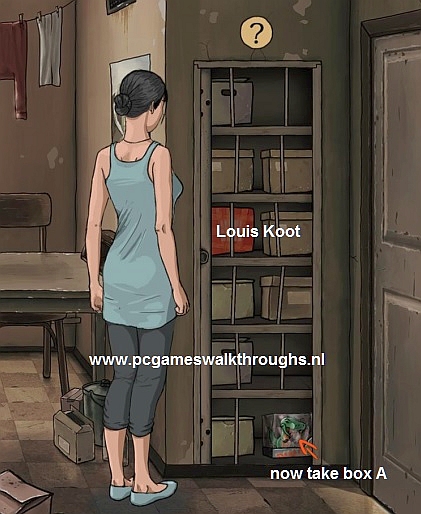
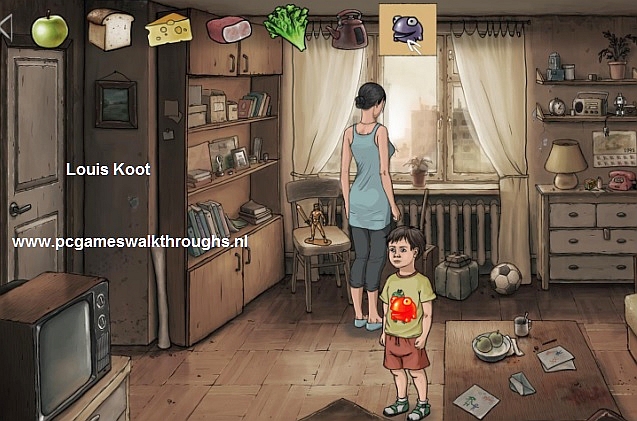
When you have Box A down then click on it and........Mary takes a toy Dinosaur out of the box. Go back into the living room and give the dinosaur to Andrew.

Andrew is happy with the dino and Mary may take Conan now, so take Conan, the sword goes off.
Make the Sandwich
In inventory combine the sword with the bread to slice the bread. Put the salad on one of the slices of bread. Then cut the tomatoes, the bacon and the cheese with the sword. Then put the tomatoes on the bread with the salad and then put the bacon and the cheese on it. Cover this slice with the other slice of bread and you have made a sandwich. Give the Sandwich to Andrew and......
The door bell rings, so go into the hallway and open up the front door and...
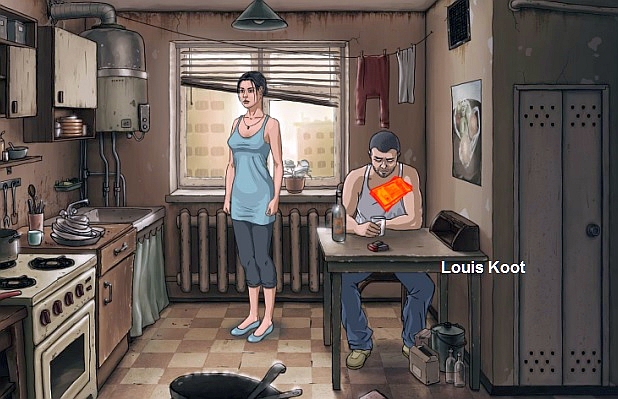
....your drunken husband Oliver enters the apartment, with a bottle of liquor in his hand
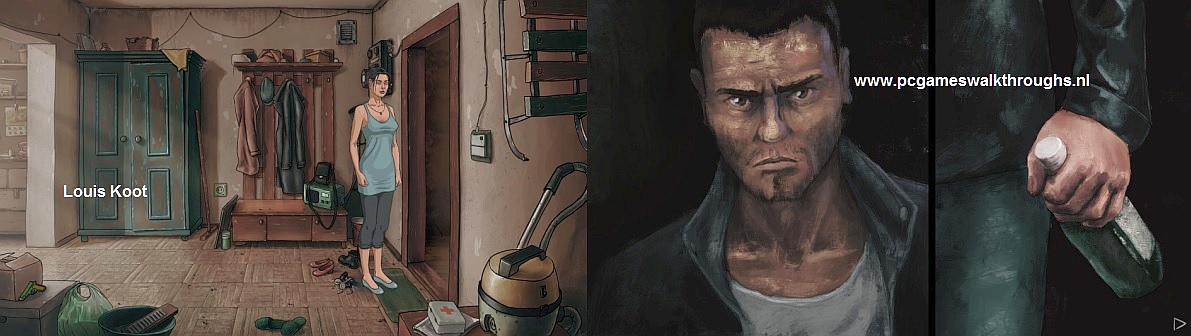
B: Broken Promises
Talk with Oliver in the hall
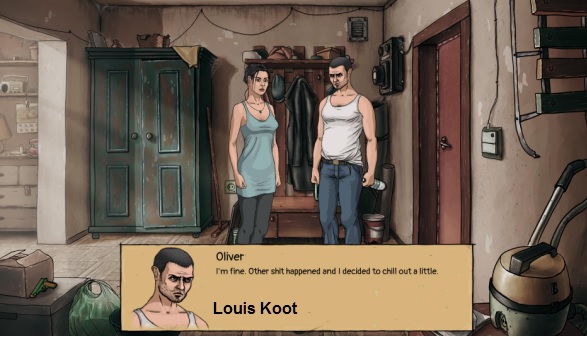
Oliver then goes to the kitchen, so follow him to the kitchen and talk to Oliver.

Nice guy Oliver, isn't he?......NO!!......But Mary still wants to give this drunken good for nothing son of a bitch her money to help him pay off his debts.
Get the Thrift Box
So Mary now needs here savings from her thrift-box. So go back to the hall and then try to take the Thrift-Box by clicking with the Iron Bar on it again........But....the Iron Bar is to short
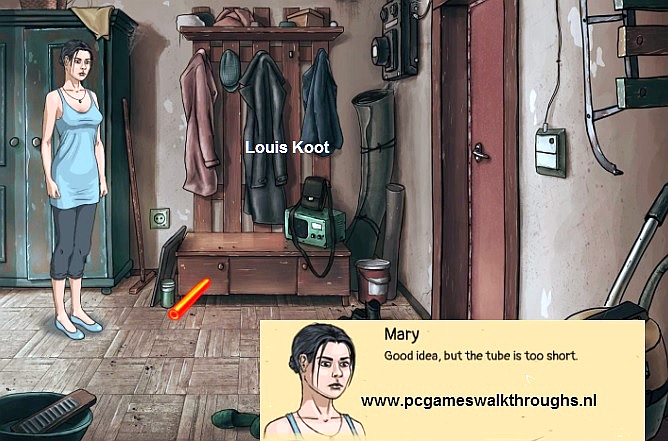
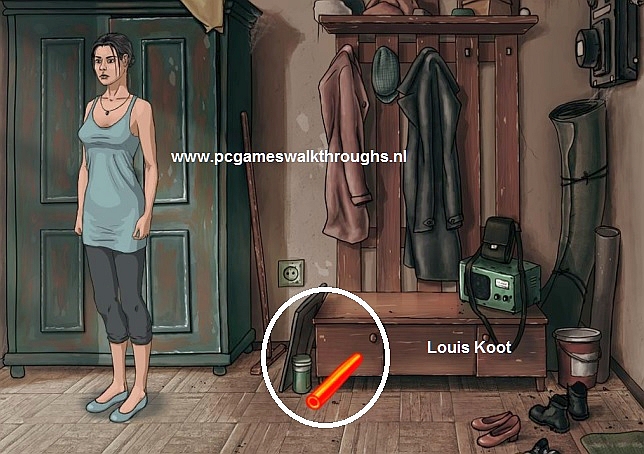
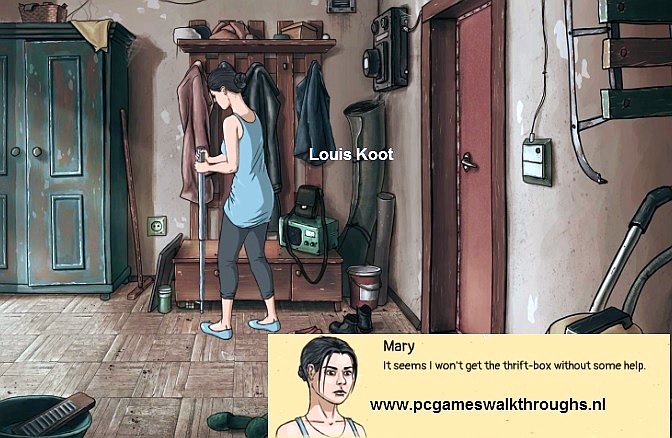
Go back into the living room. Beneath the window stand another Iron bar against the radiator. Take the Iron Bar. In inventory combine the two iron bars together to make a long iron bar. Go back to the hall and now try to take the Thrift Box with the Long Iron Bar.....but Mary still can't take the box...she needs a hook
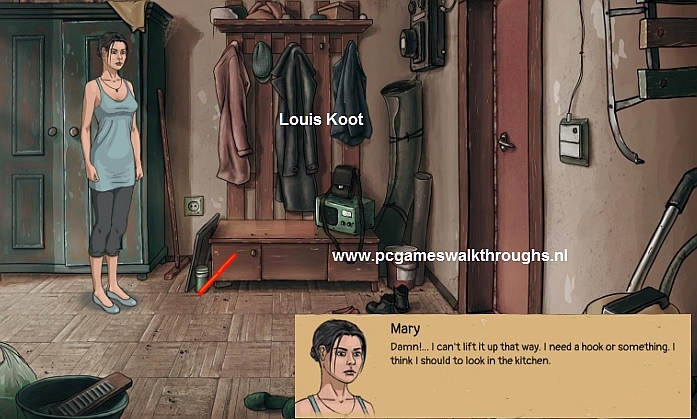
Mary thinks that she can find a hook in the kitchen, so skate back to the kitchen and open up the cupboard above the sink.
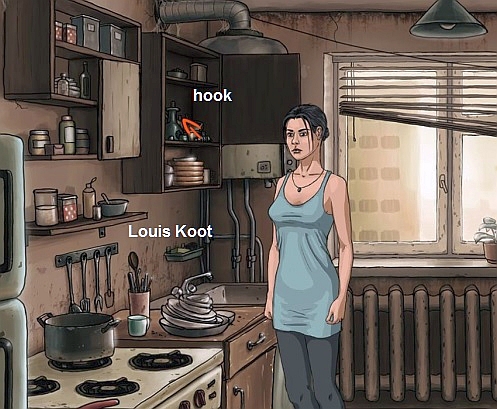
Then click in that cupboard and.....Mary finds and takes a curved Pipe Piece out the cupboard.
The curved pipe piece can serve as a hook, so combine it with the Long Iron Bar. Go back to the hall and click again with the Iron Bar on the Thrift Box and.....
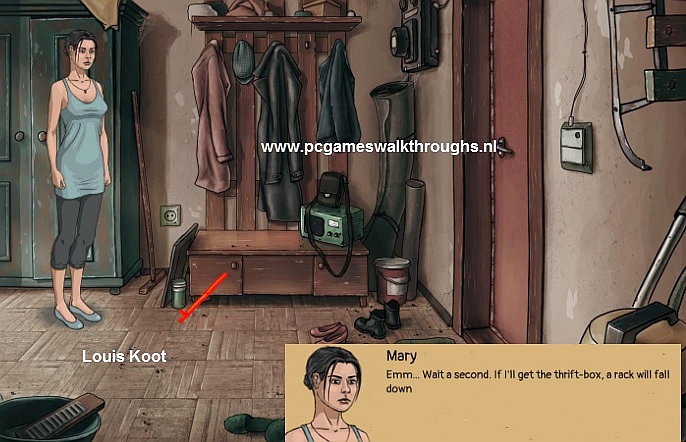
But Mary is afraid that the rack would fall, so she doesn't take box now.....the cupboards needs support. Put the Rubik's Cube under the cupboard to support it

Then use the Iron Bars again to take the box......but Mary needs help to take the box
Go back into the living room and talk with Andrew and Mary ask her son to help her
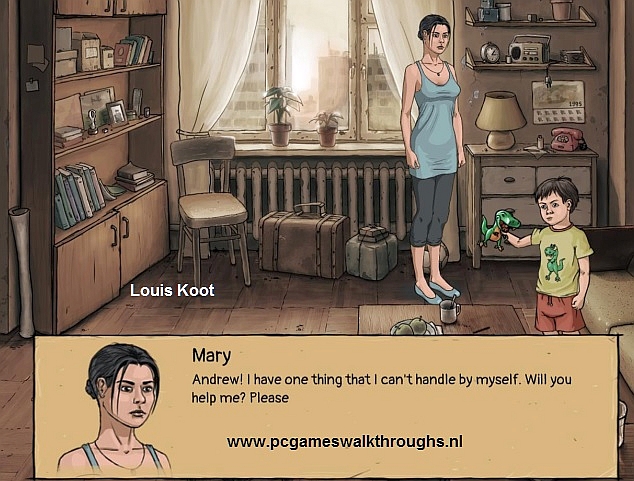
Right.....back to the hall and use the Long Iron bar again on the Thrift Box and........Andrew helps Mary and finally we have that stubborn Thrift Box
Were back in the living room and the Thrift Box stand on the table
Open the Thrift Box
Click on the Thrift Box...... Mary has to solve a puzzle to open up the box
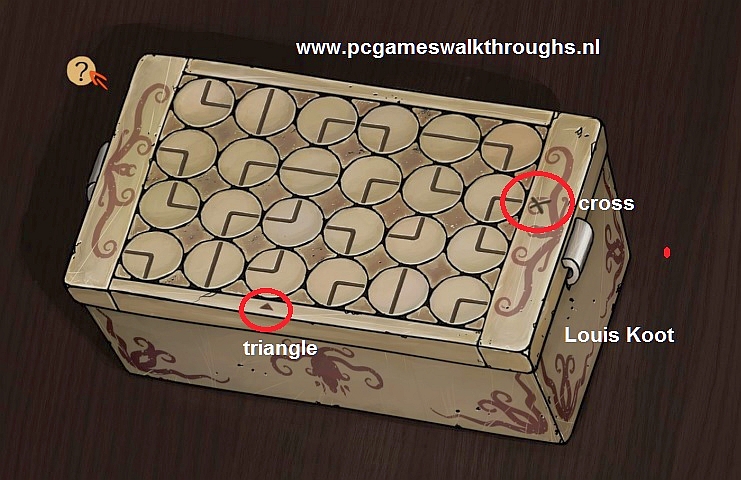
When you click the question mark you can read what you must do. . There are 24 round "buttons" with a line on it, on the lid.
You can turn "buttons" by clicking them. You have to make a connection between the Triangle and the Cross, on the lid of the box. So do so and then take the money out of the box
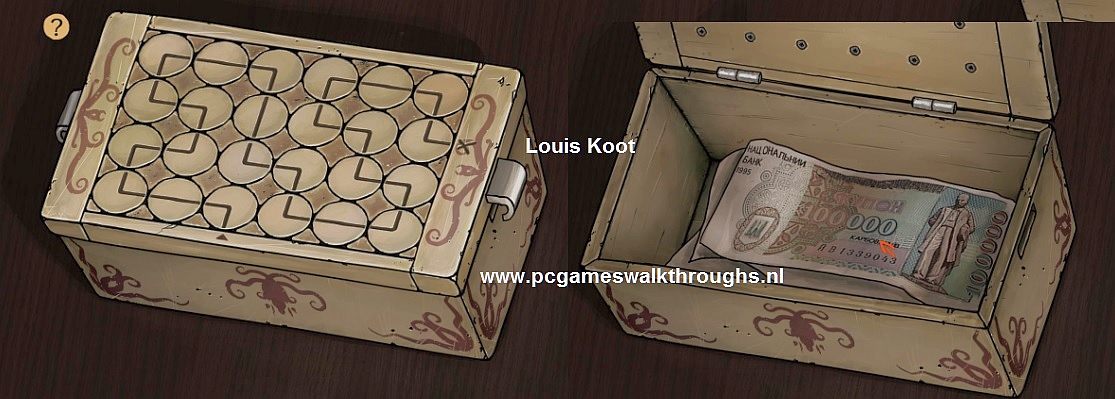
Go back into the kitchen and give the money to your "loving" husband Oliver,
In stead of using the money to pay of his debts, the lousy drunk wants to buy liquor and cigarettes for it.....Mary doesn't want to take it any longer:
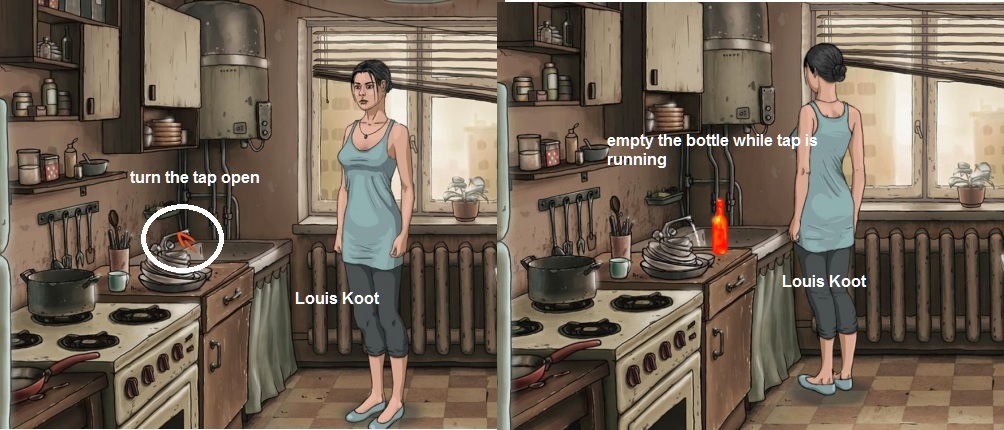
take the bottle of liquor, that stands on the table....
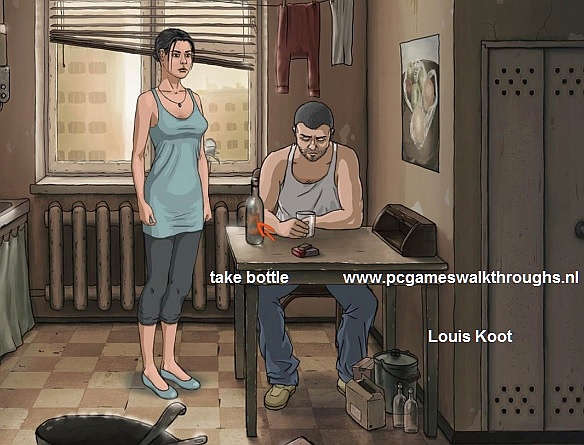
Turn the water tap open and then empty the bottle in the sink.
Oliver isn't happy with Mary's action and so he beats her up and we see that little Andrew, from behind the curtain with his hand on his ears, is a witness of this abuse
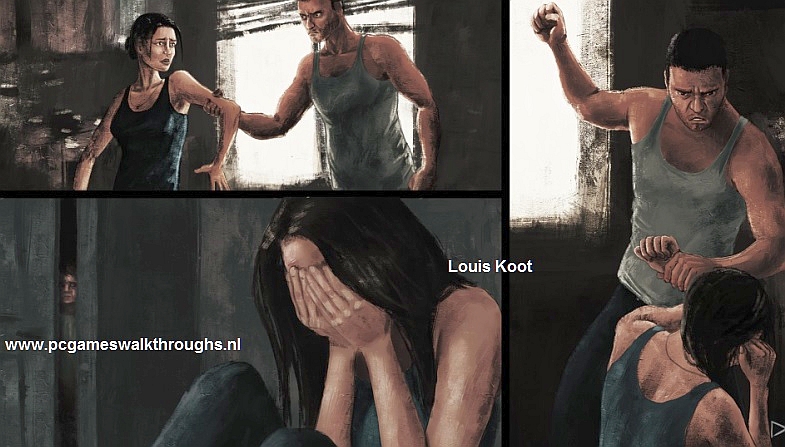
The game switches to Andrew, who lays behind his curtain with his hands on his ears.
C: Dad:
Andrew:
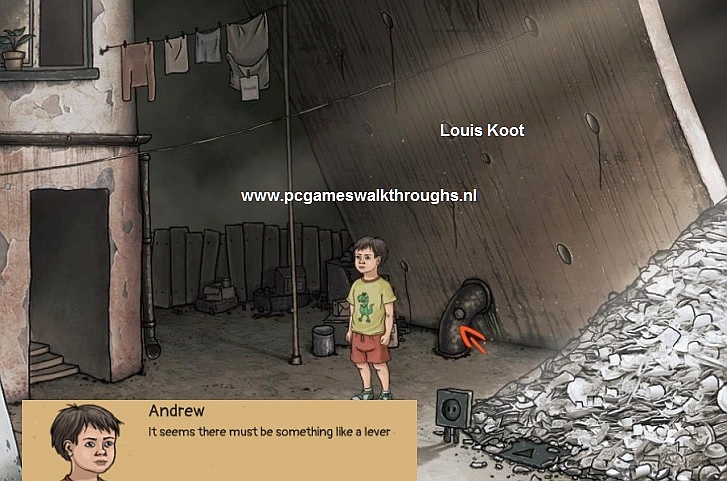
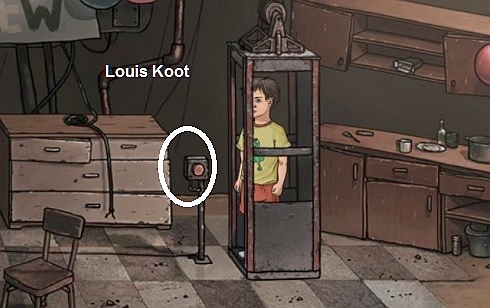
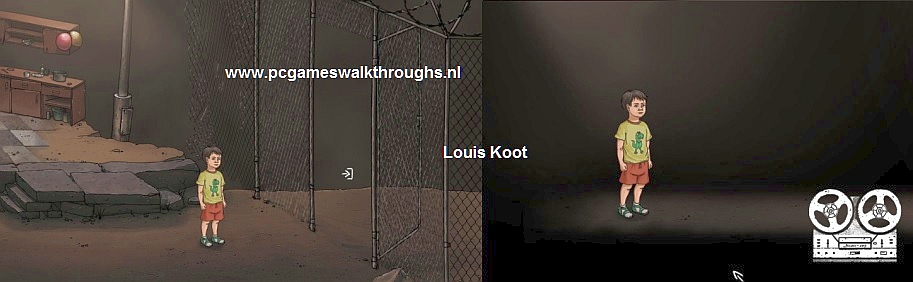
You are little Andrew now and you imagines that your real father is looking for you. You're dreaming and it's dark....
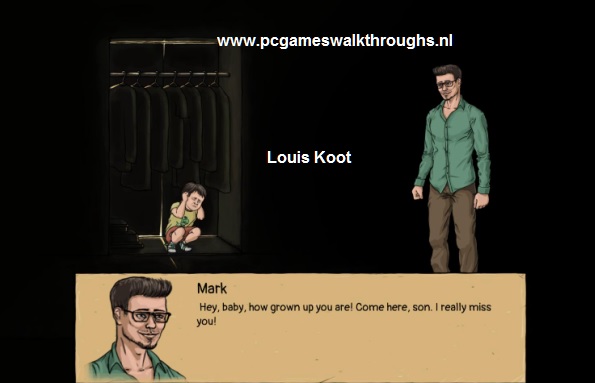
Click on the eye icon, at the bottom left of your screen, to see the only hotspots.
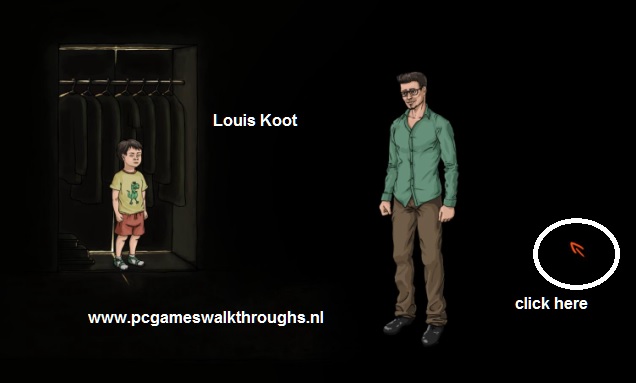
Then click that hotspot, right in the corner, with your red arrow and......Andrew walks on and the lights goes on......
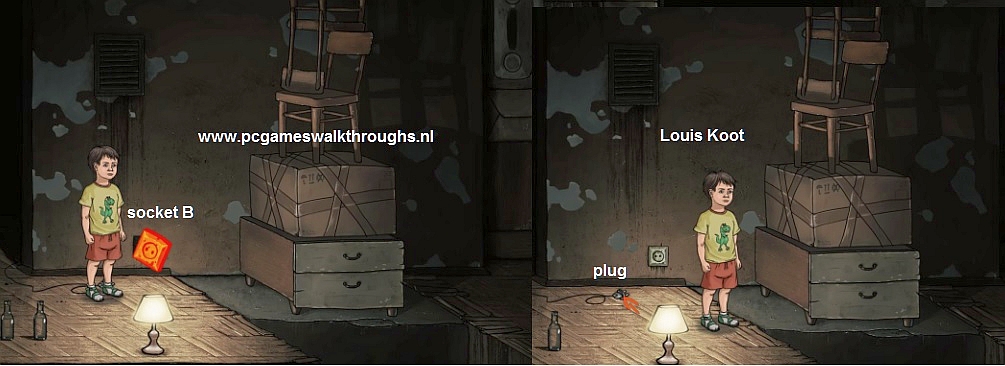
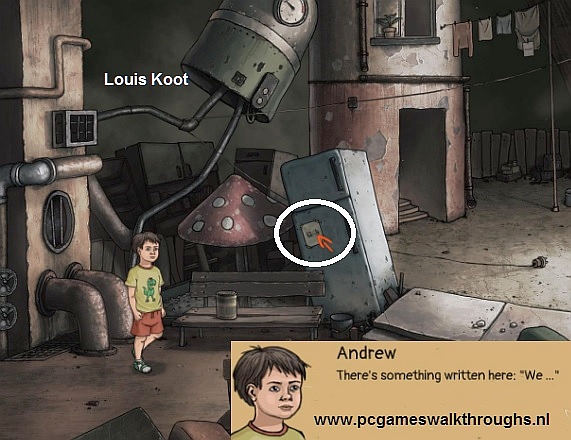
Click on socket A, behind the chair, and Andrew takes the lid of and puts the lid in his inventory.
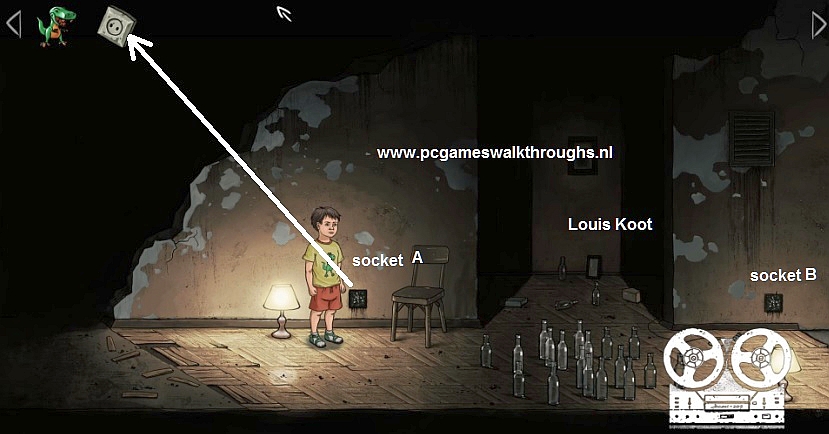
Walk to the right where there is an uncovered socket B in the wall and a plug on the floor.
Andrew can't go further to the right because of the pile of furniture that is standing on the remaining piece of floor. That pile of furniture has got to go
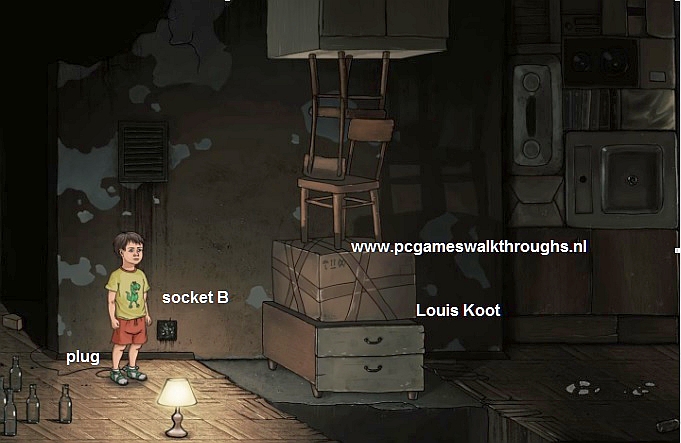
Take the lid from socket A out inventory and click it on socket B. Then click on the plug to put the plug in socket B and.......
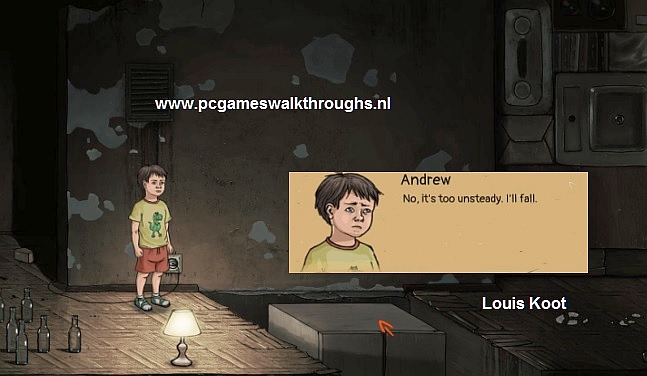
The piece of floor with the pile of furniture goes down but Andrew can't still not walk to the right, because the cupboard, that's now the "floor", wobbles to much
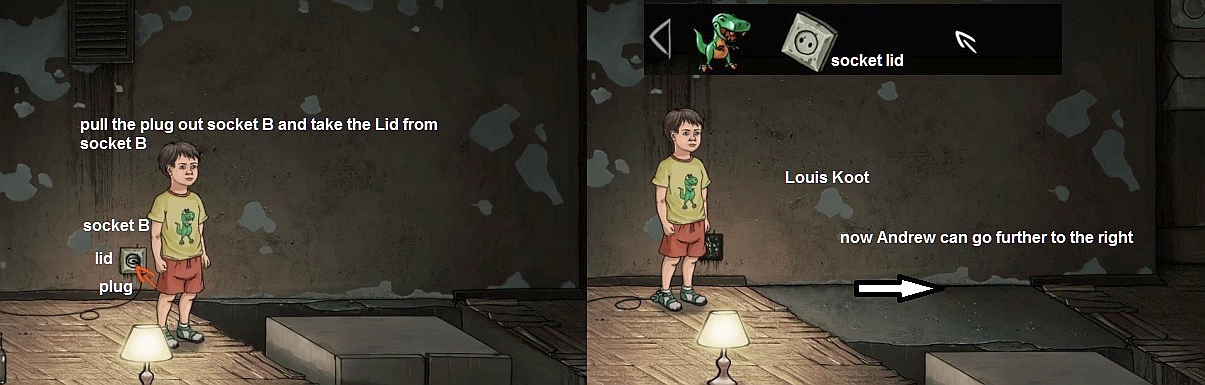
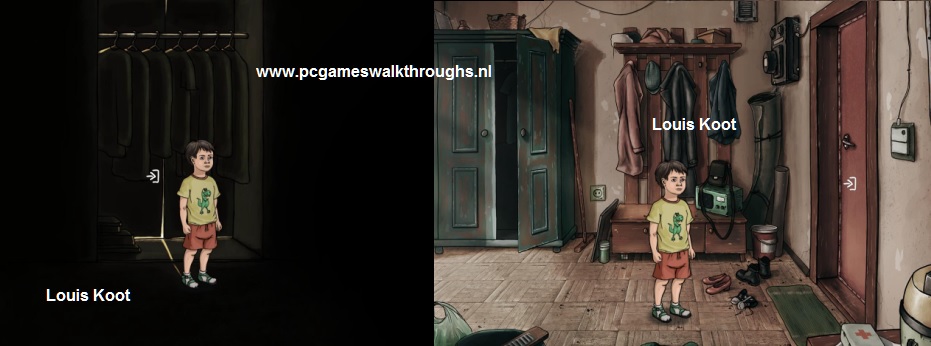
Pull the plug out of socket B and....... a solid piece of stone will slide out the wall and Andrew can walk over it to the right. But first take the Lid back of socket B....Andrew will need the lid for socket C.
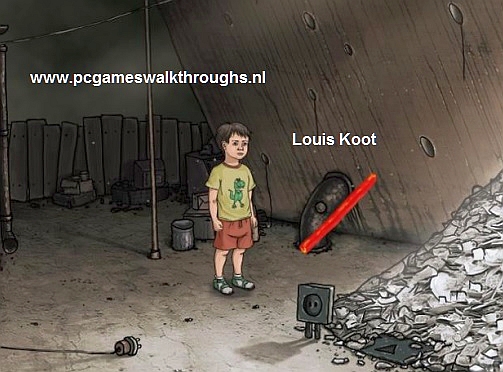
Walk to the right.......Andrew has reach the end.......In the wall you see a cupboard with two doors.. Open the left cupboard door and then take the screwdriver.
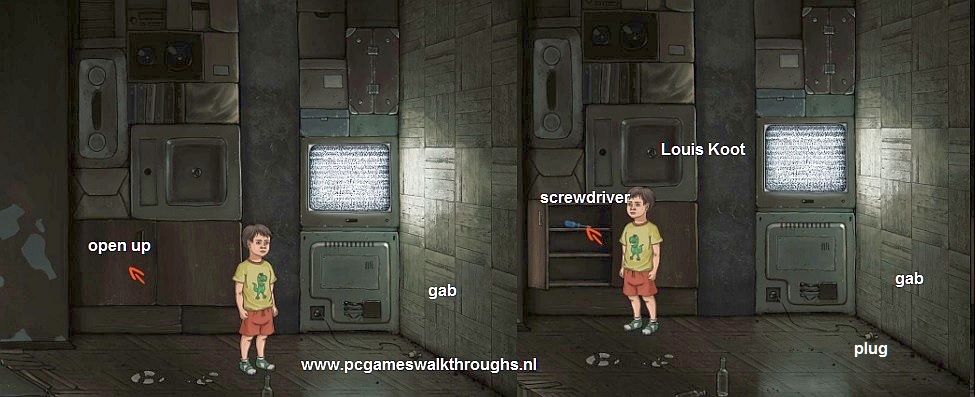
A plug is on the floor....Find the hotspot in the wall near the plug and then click that hotspot...... There is a little gap in that wall
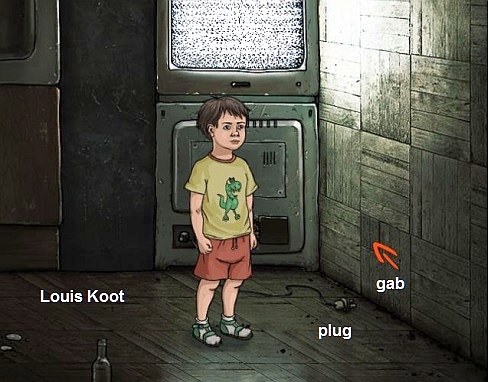
Take the screwdriver out inventory and use it 2x on the gab to make it wider
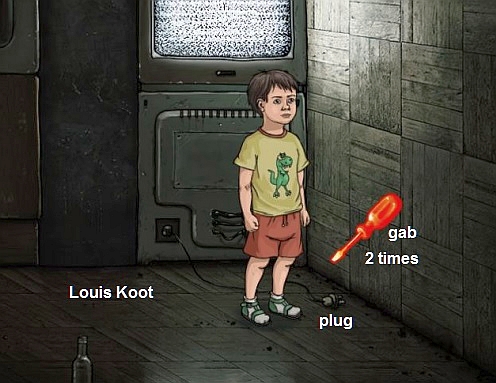
Andrew has discovered socket C. Put the lid, from socket B, on socket C and.......
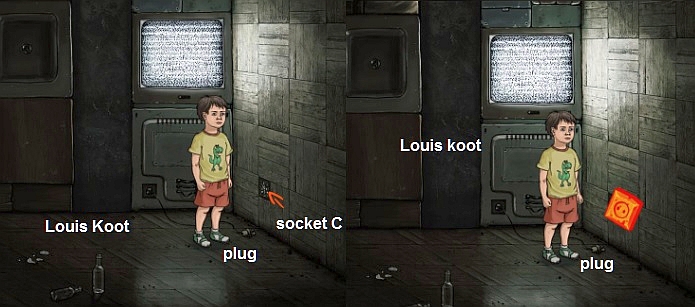
....then put the plug in socket C and..........A passage will open up in the wall.....
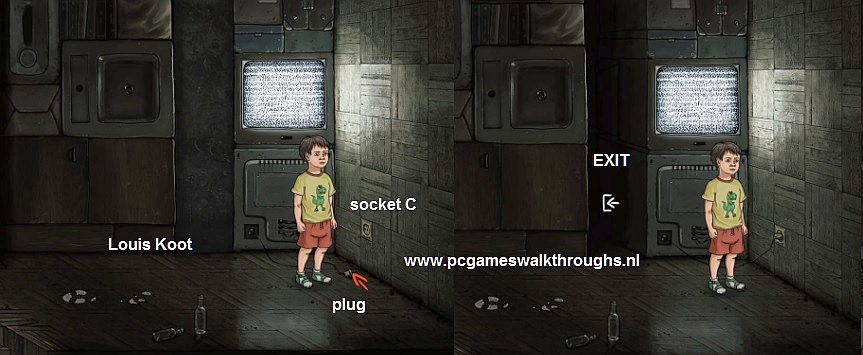
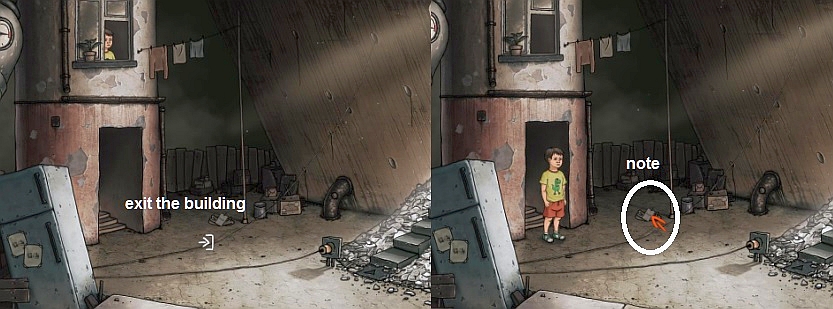
Exit through the passage to the next area......Andrew sees a glimpse of his mother Mary at the sink
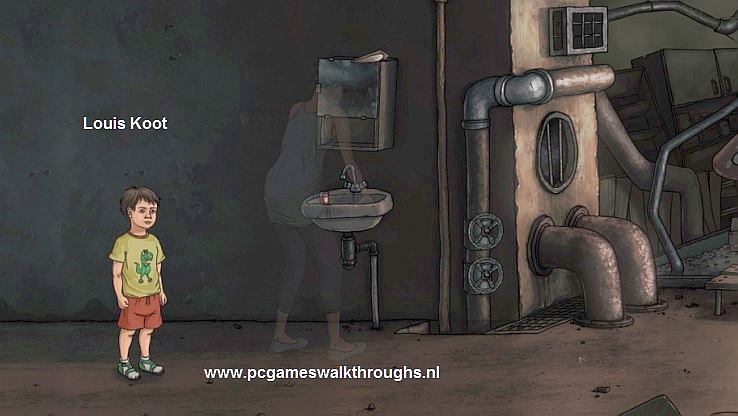
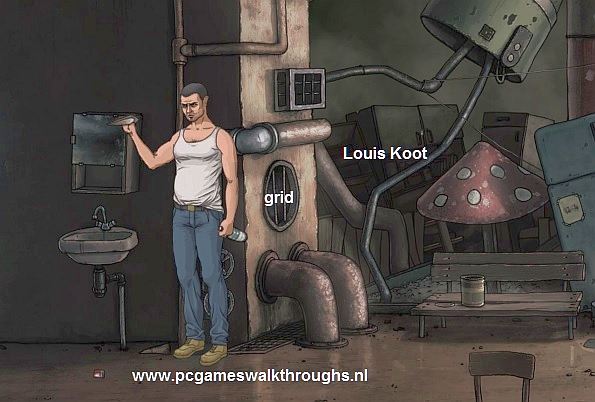
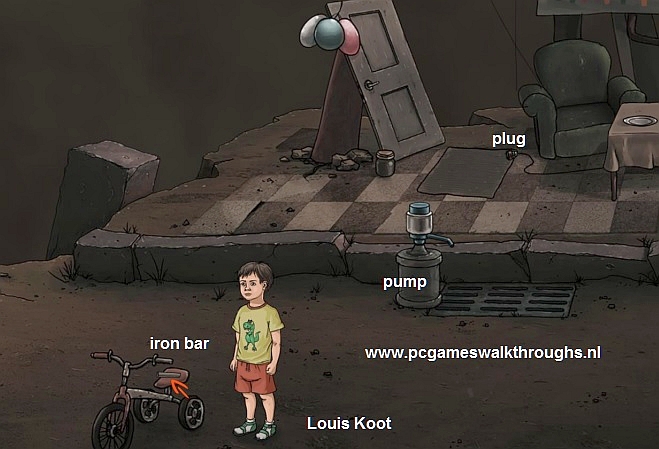
Mary disappears but she has dropt here pills. Click the Eye to see all the hotspots on this screen
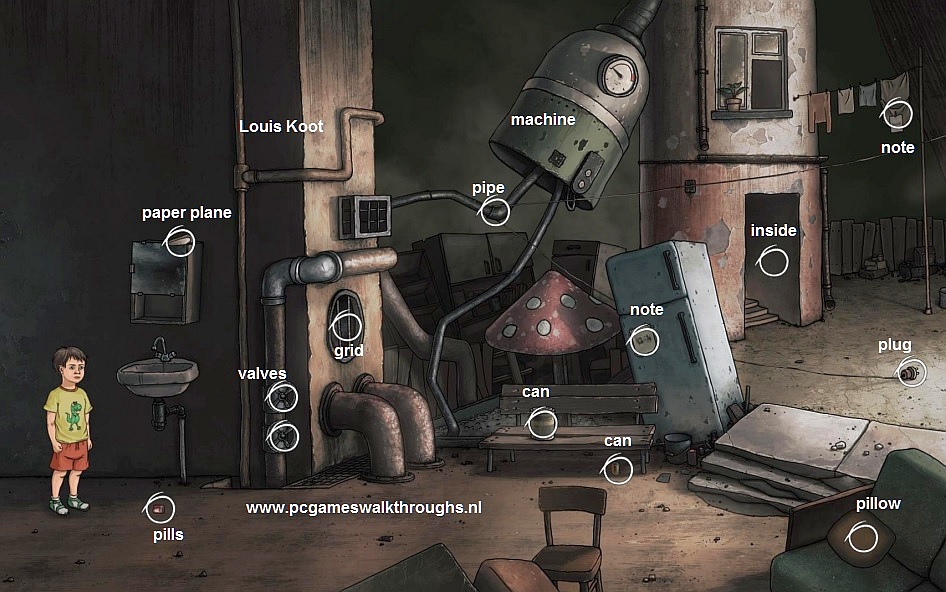
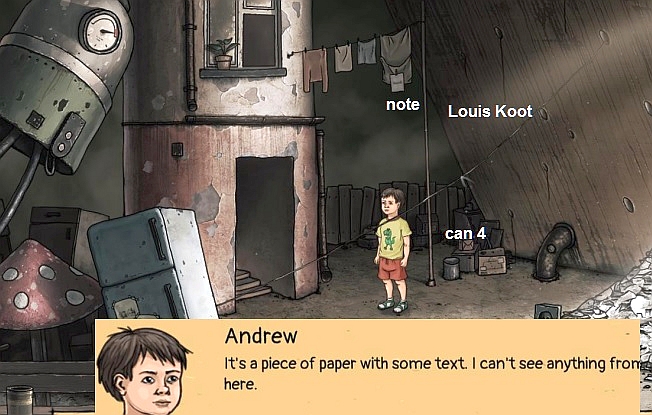
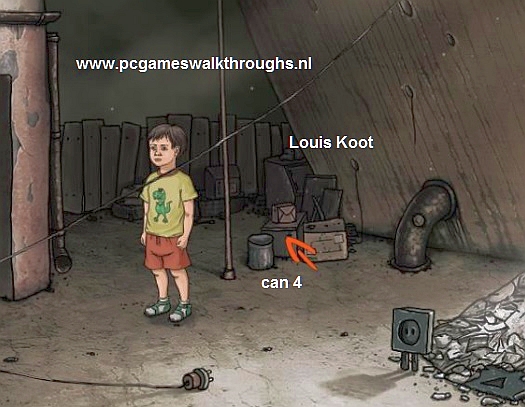
The pills of Mary are under the sink on the floor. A paper plane is lying on the cupboard above the sink. To the right of the sink is a thick pipe with two valves on it. Around the corner a round hole with a grid is in the wall. A strange machine is hanging above the wooden bench. That strange machine has two pipes sticking out and one of those pipes has a cord attached to it. If you follow that cord then you'll end up at the plug, that's on the other end of the cord an is lying on the ground, behind the refrigerator. There's a note on the refrigerator. A large Can stand on the wooden bench and a little can is under the bench. In the lower right corner stand a couch with a pillow on it.
Click the pills tube Mary dropped.....Andrew wonders why his mother hiding those candies.

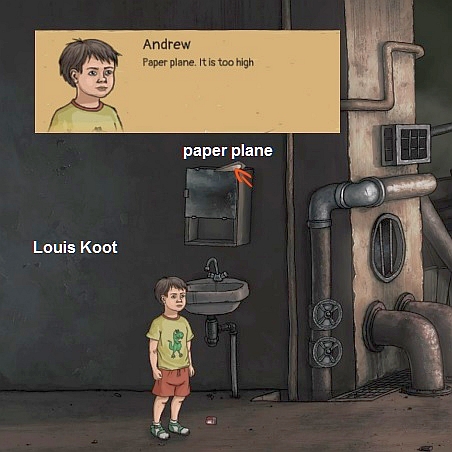
There is a paper plane on the cupboard above the sink but when you try to take it Andrew says that it's to high for him to reach
Look at the machine that's hanging high, to the right of the sink. A cord is attached to one of the pipes...
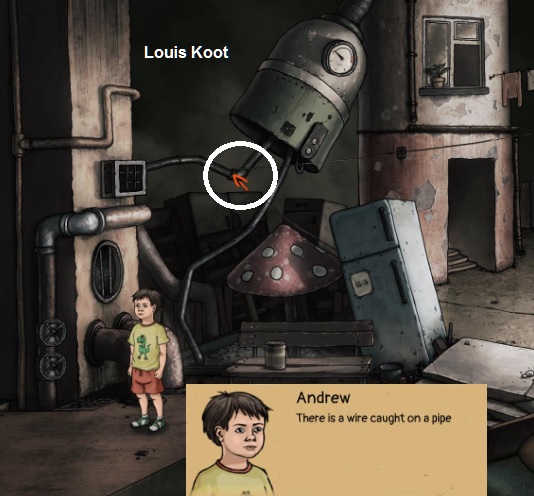
The end of that cord is lying on the floor and it has a plug, but Andrew can not plug that plug into a socket, because the cord is stuck at the pipe
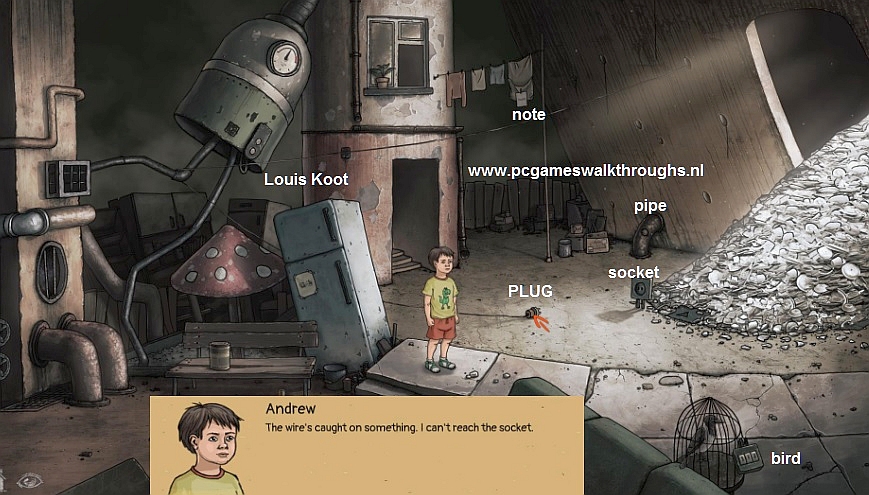
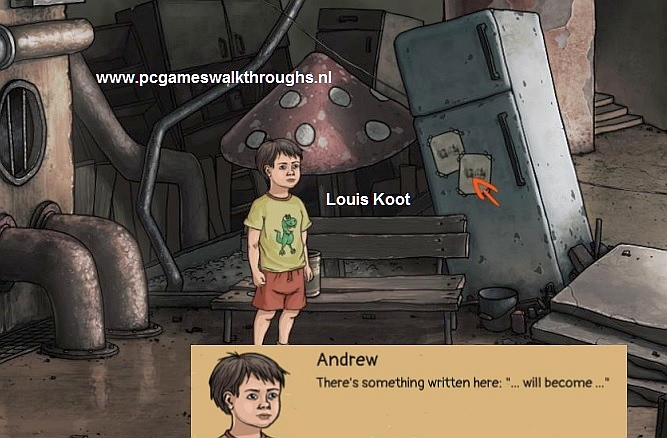
Click the Note that's on the fridge to read it....."We....." is written on the note
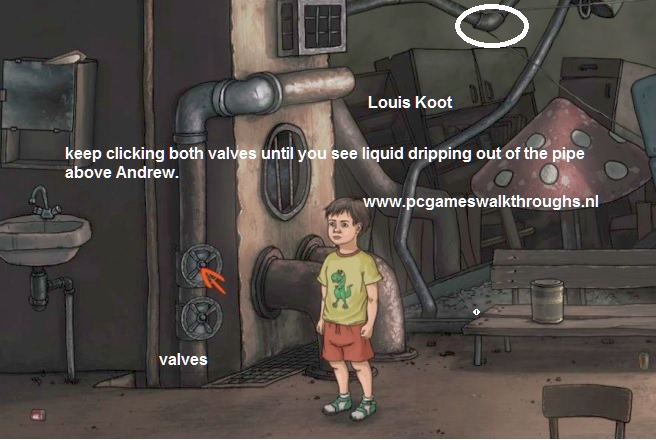
Click the 2 Valves...you must do this one by one, first the upper valve and then the lower valve..........
each time you click the valves the machine moves a bit but it will not break down.....
Keep clicking the two valves until you made a small leak in the pipe under the machine and you see some liquid dripping down from the pipe.
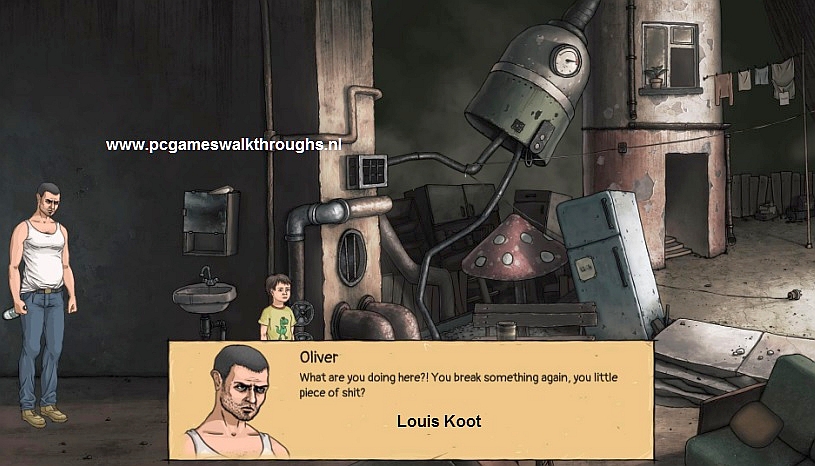
The cord is still stuck on the pipe and........Oliver appears and he's clearly drunk. Andrew does not want anything to do with him.
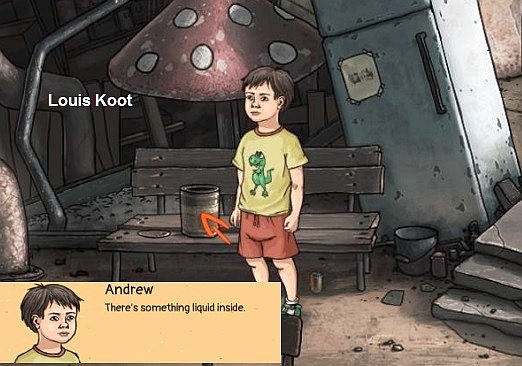
Go to the Can that's on the wooden bench. Andrew can't take the can but he can open it with the screwdriver.....So open up the can with the screwdriver.
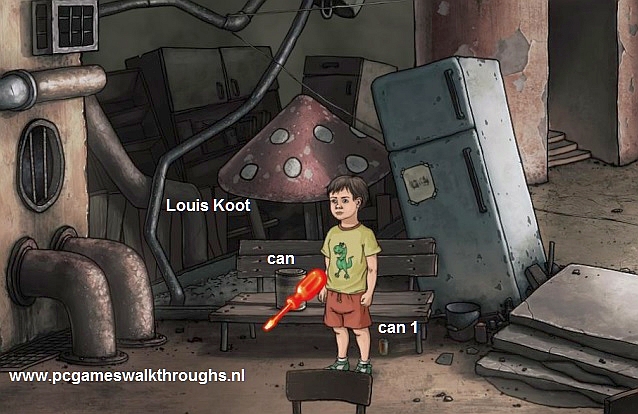
Then click on the now open can to look into it...There is some kind of sticky liquid in it.
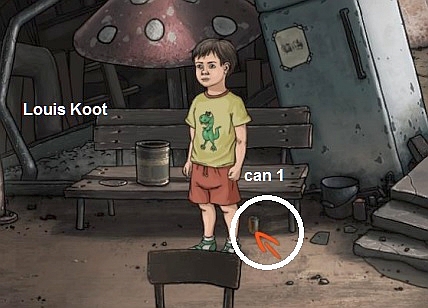
Under the bench stand a little tin can....Take that can....It's can 1
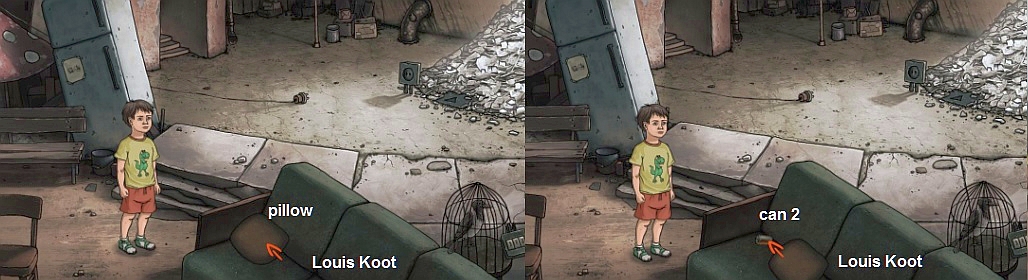
On the couch, in the lower right corner, is a pillow. Click the pillow to move it to the right and the take can 2
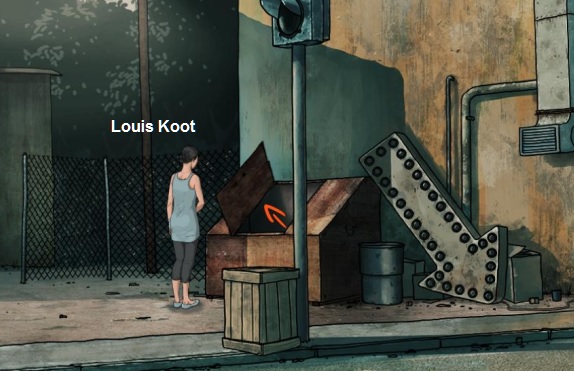
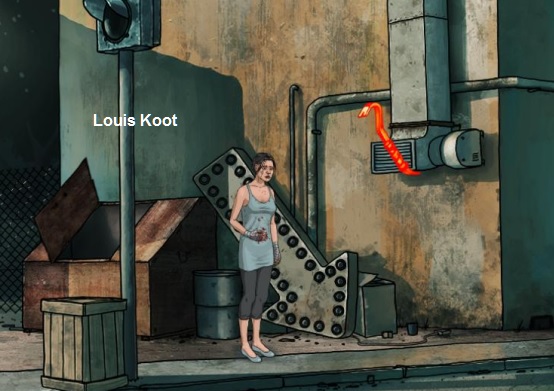
Walk to the right. Oliver gets closer to Andrew. Go to the right side of the big mountain of crockery and use the Eye icon to see all the hotspots here
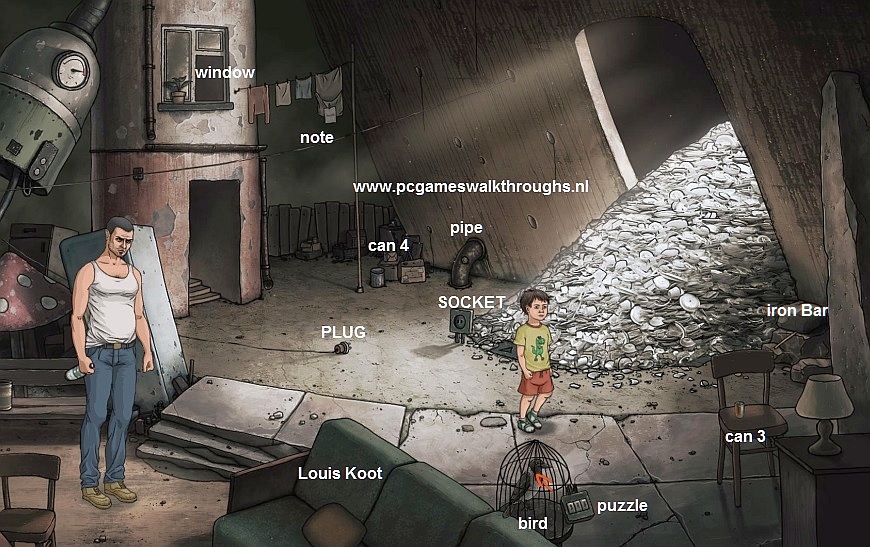
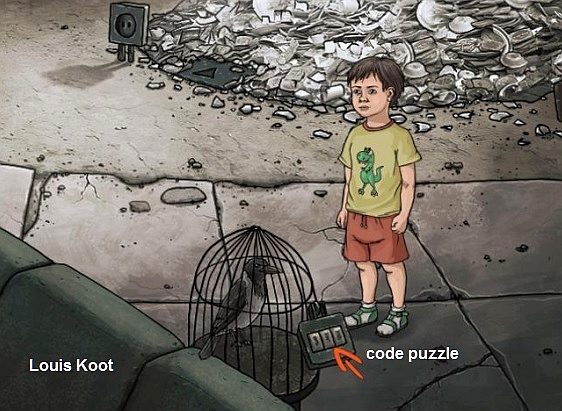
At the wall, in the right corner of the pile of crockery, an Iron Bar sticks between the stones. On the chair stand Can 3. At the couch stand a birdcage with a bird in it...the birdcage has a code slot. Behind Andrew lies the plug, that's on the end of the cord, on the floor and you see the socket where that plug has to go in. Behind the plug and the socket is a building with a window.....On the washing line there are clothes hanging and on one of those clothes a note is sticking. In the corner you see a bent pipe coming out the wall and before that pipe are some crates and Can 4 on the floor.
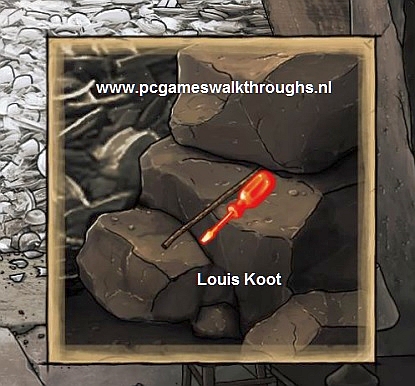
Click on the Iron Bar.....you come in a close-up screen....
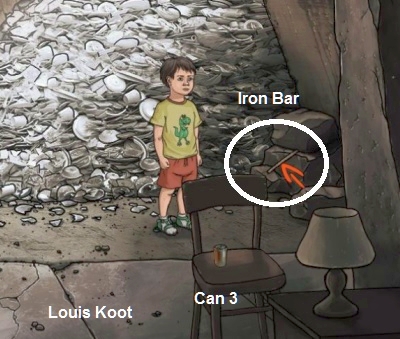
The Iron Bar is sticking between the stones and Andrew can't get it when you just click on it. So Use the screwdriver on the Iron Bar to get it.
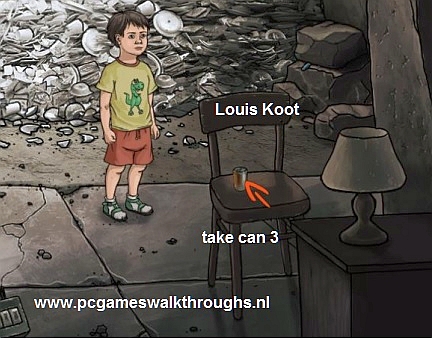
The screwdriver stays here so I thing you don't need it anymore. Take Can 3 from the chair
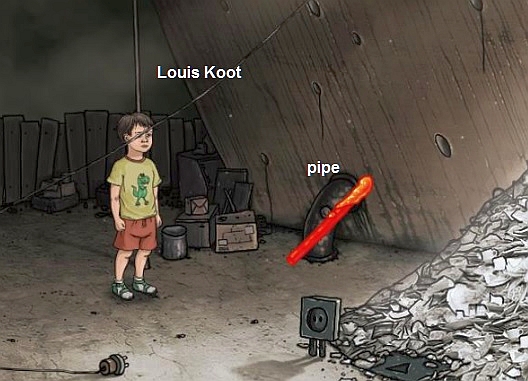
Go the bent pipe in the corner, behind the crockery mountain.....Click on that pipe..... there must be a lever on the pipe but it's gone
Take the Iron Bar out inventory and click it on the pipe and..........
.....see what's happens......The rod automatically moves and the pressure in the pipe of the machine becomes so high that a lot of water flows out. This drives Oliver mad and he goes away...
But Oliver takes the paper plane and throws it away. The paper plane ends up behind the grid above the thick pipes. The cord is still not loose.
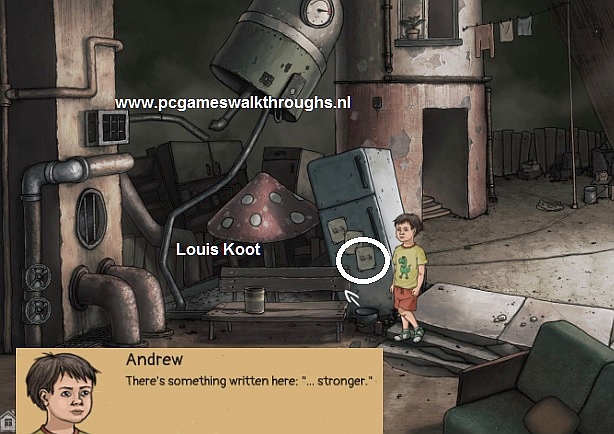
Go back to the wooden bench. Use the Iron Bar on the open can with the sticky liquid. The Iron Bar has now sticky stuff on it.
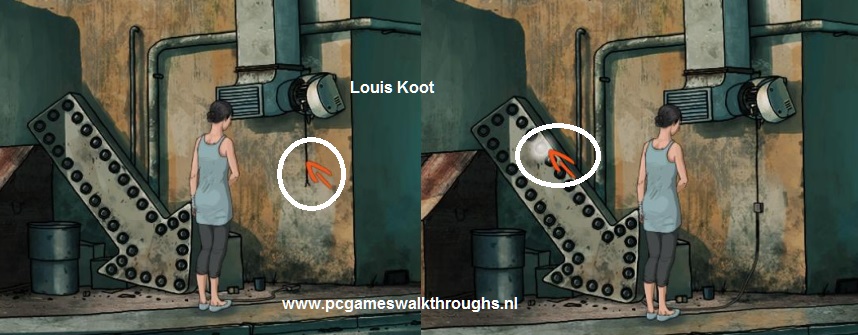
Use the Iron Bar in the Grid Hole or click with the red arrow in the grid hole

In the close-up use the Iron Bar on the Paper Plane to get it out the pipe

The paper planes doesn't go to inventory but on the fridge as a second note......Click on the note to read it...."...will become...." is written on it.
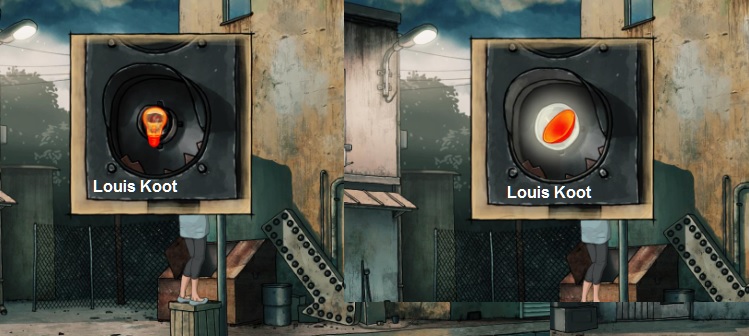
Go back to the birdcage.......There's a crow in the cage and Andrew wants to free him, but has to find a code. Click the code slot that's on the cage.
You'll be in the close-up of the code slot.
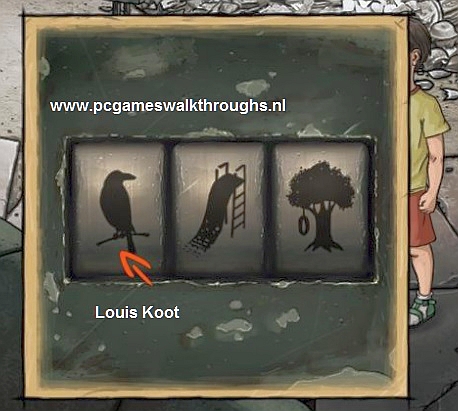
It has 3 windows and you must put the right images into the 3 windows by clicking them until you have the right image in a window.
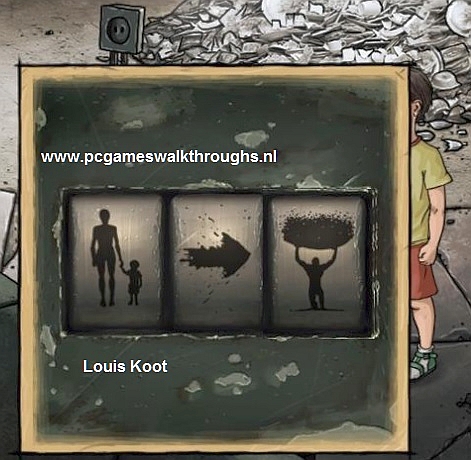
I've not found any clues for this puzzle so I solved it by "Trial and Error".... From left to right these images are: Mother with Child, Right pointed Arrow, Man carrying a Heavy Load
The crow is free and it lands on the pipe on witch the cord with the plug is attached to......That pipe breaks and the cord is loose.
Go back to the washing Line and now click on the note that is sticking on the piece of cloches...It hangs to high so Andrew can't read that note from the ground
Click on the stuff that's on the ground behind Andrew and.......Andrew picks up Can 4.
Click with the Iron Bar again on the bent Pipe and........
the Iron Bar goes back to inventory but appears to be a bit longer now. Click on the Plug and.....Andrew will put the plug into the socket now and.......
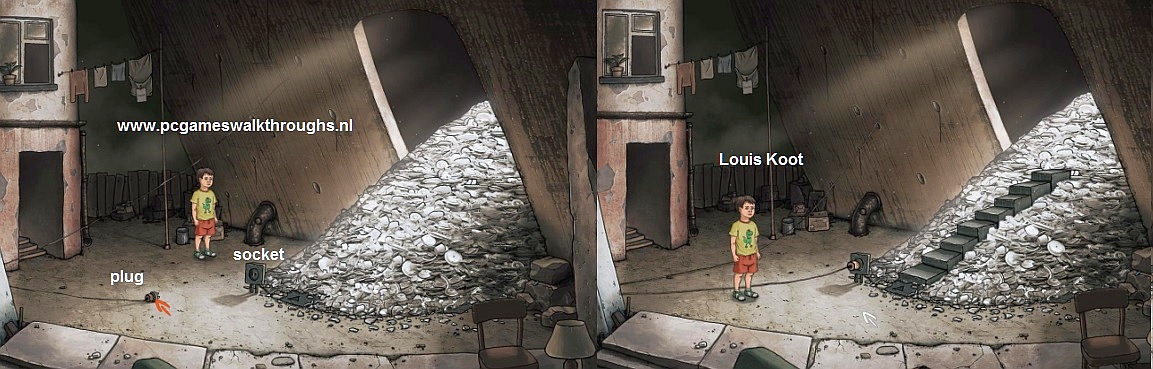
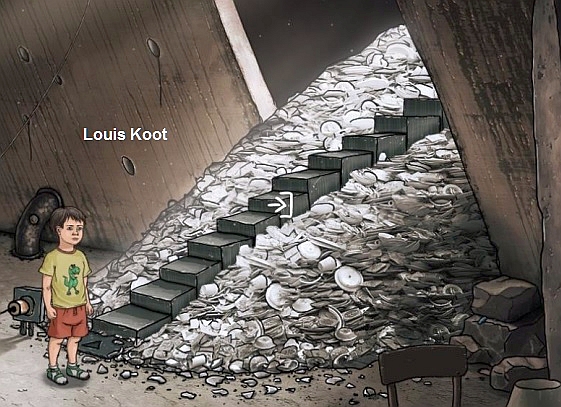
..........There is now a staircase over the mountain crockery.
Enter the building with the window.........Andrew looks out the windows......
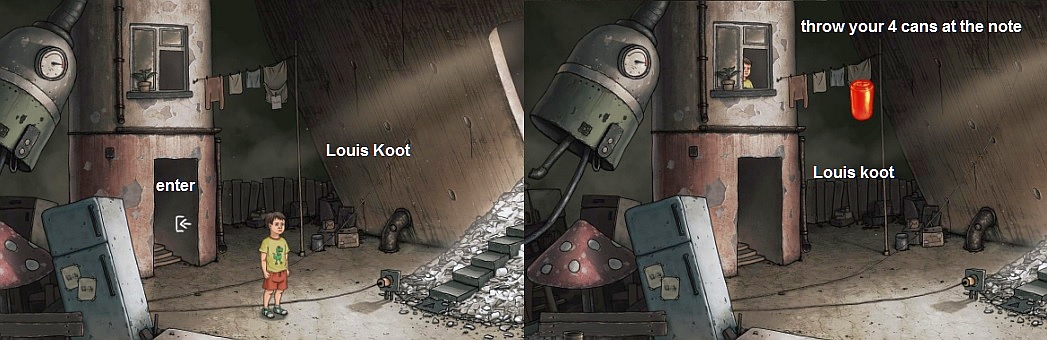
Take, one by one, your 4 Cans out of inventory and throw them, one by one, at the laundry on which the note is sticking. That piece of cloth will fall on to the ground
Exit the building and then click that note and........
The note ends up on the fridge, so go back to the fridge and click the 3rd note to read it.........
Together with the other two notes the whole sentence reads: "We will become stronger". Go back to the crockery mountain and now click the Exit on the stairs to go to the next area.
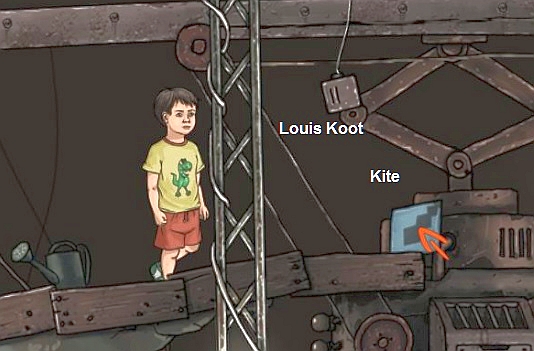
D: Dad 2
The Kite
Elevator:
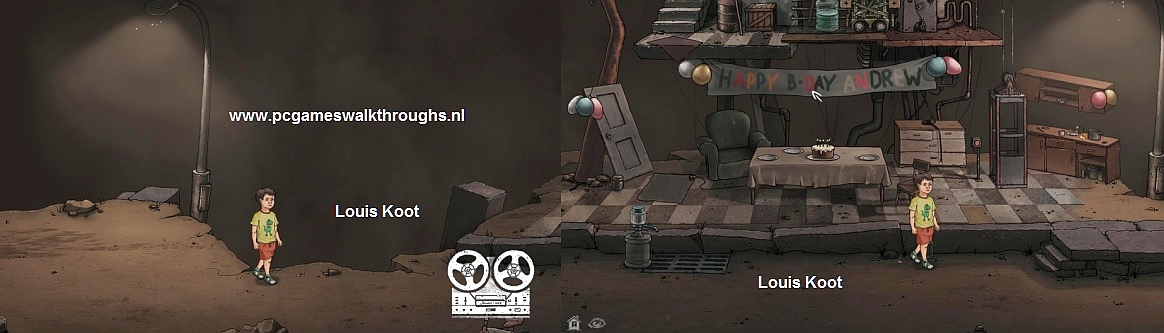
Andrew ends up in a situation that reminds him of his birthday. Andrew's father stand behind a close fence. Use the Eye to see all hotspots.
Walk back to the left, to the tricycle. There's an Iron bar on the seat of the tricycle....Take the Iron Bar
A water / soap pump stands behind Andrew. Click on the pump....the pomp gives water or soap. Go back to the fence and now go talk with daddy Mark and use all options
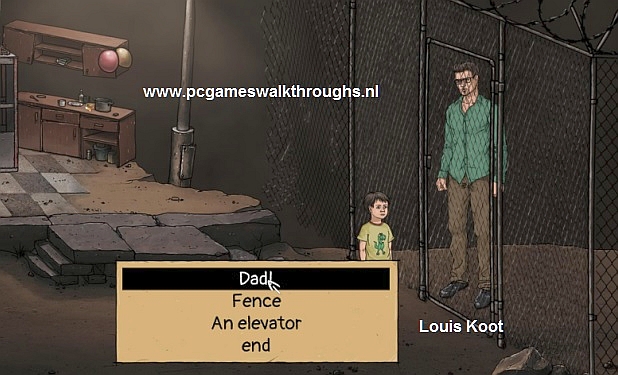
Mark tells his son to go find his kite and play with it outside the house. Mark also gives Andrew the tip to find a socket for a lift and then to go up with the lift.
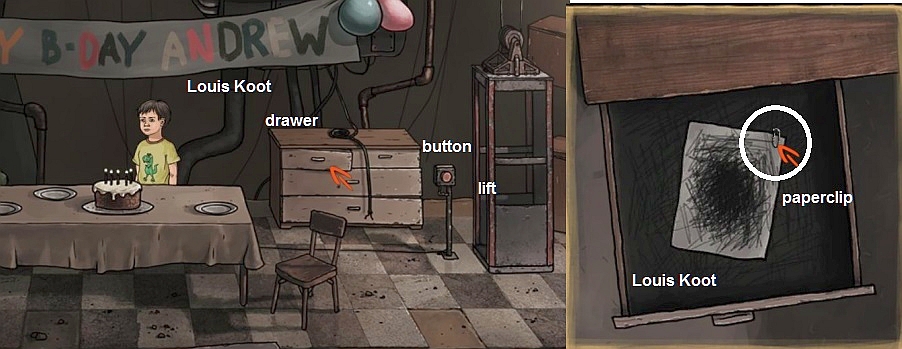
When you're done talking with daddy then go up the stone steps. The lift isn't working because the lift button has no power right now. Walk to the left of the birthday cake table. At the door lies a mat on the ground. On the upper right corner of the mat lies a plug on a cord. It's the plug of the lift button....When you click the plug Andrew tells that he can't see a socket to plug in the plug. Click on the bottom left corner of the mat and......the upper right corner curls around to expose the socket that's underneath the mat
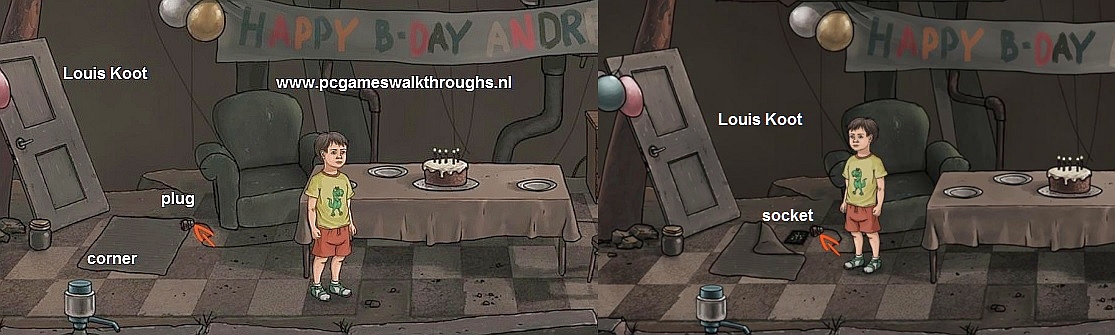
Click the socket to view it in close-up.....The socket has no cover so Andrew can't put the plug in the socket
Notice the pattern of the grooves of the socket...Go out the close-up. Walk back to the right. At the lift stand a cupboard with drawers. The top left drawer is a bit open. Click the top left drawer to open it all the way. A drawing is in the drawer. On the top right corner of the drawing sticks a paper click....Take the Paper Clip
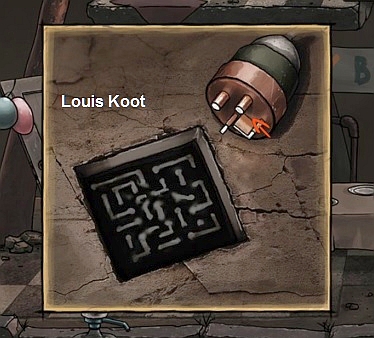
Behind the lift stand another cupboard. Open the right door of that cupboard. There are six covers for socket outlets, each with a different pattern...
.....You must take the right cover for the socket under the mat. Take the brown cover at bottom left..
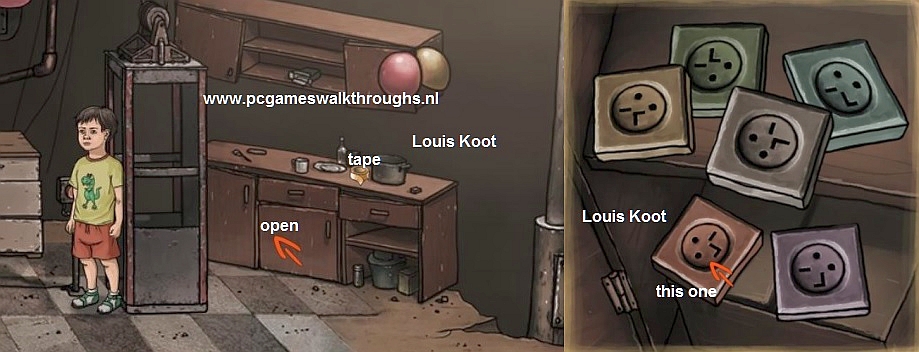
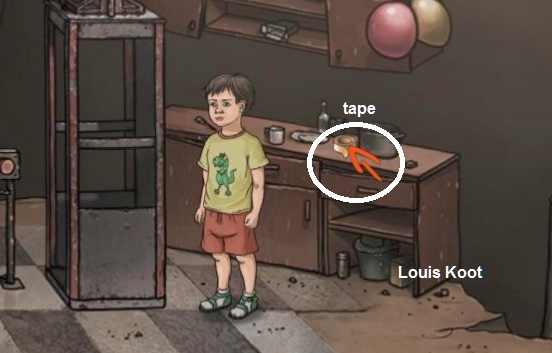
On the cupboard lies a roll of adhesive tape....Take the Tape
Go back to the mat and go again in the close-up of the socket. Put the cover onto the socket and then click the plug, to plug it into the, no covert, socket
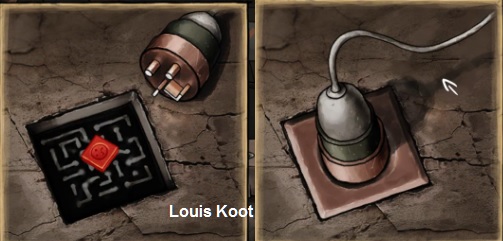
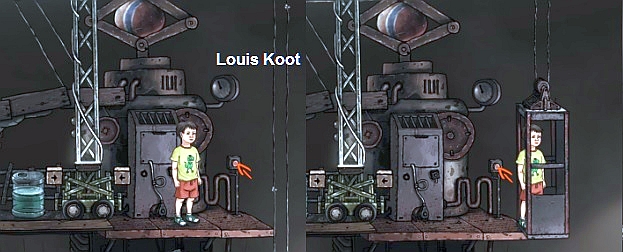
The lift will have power now, so go back and put Andrew in the lift cabin and then press the button, next to the elevator and......
Andrew goes up one floor with the lift.
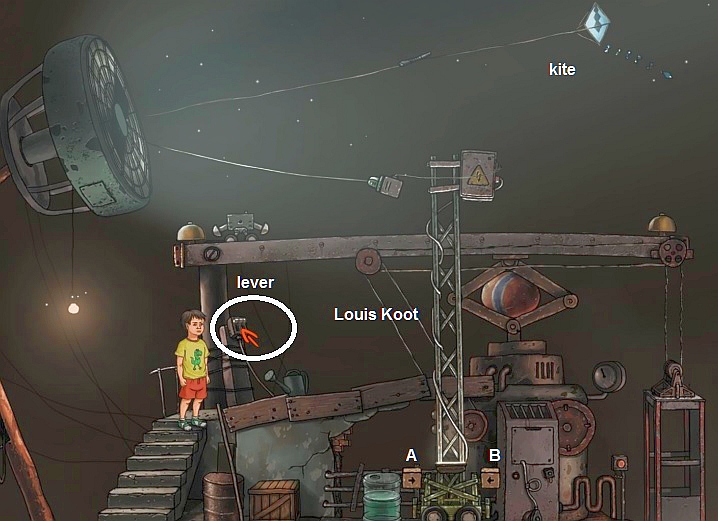
Crane:
Use the Eye icon again to see all the hotspots
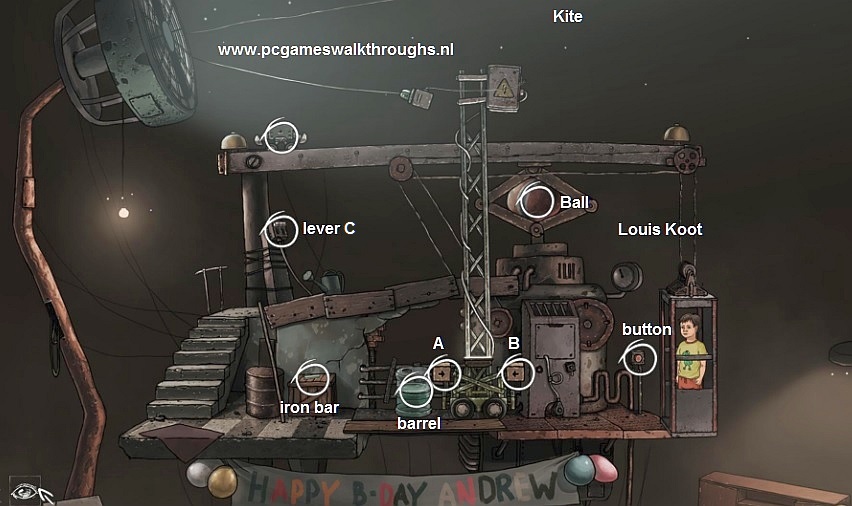
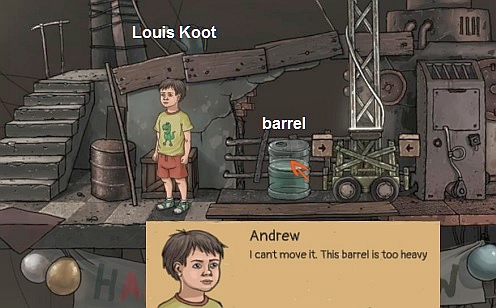
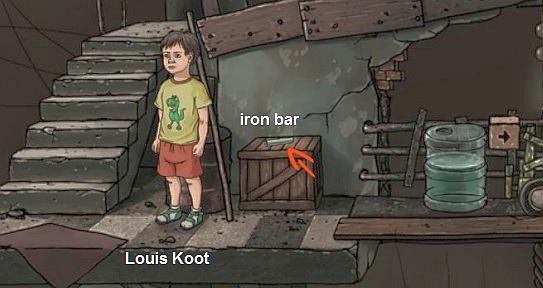
You see the crane that moves the lift up and down. Andrews ball is stuck in the crane. Andrew can get to his ball by climbing up the stairs.. The crane stand in the middle and you see 2 arrow buttons, A and B, on the crane. To the left of the crane stands a barrel with water and a wooden crate. On top of the wooden crate lies a second Iron Bar. On the pillar of the crane, on top of the stairs, is Lever C. Step out the lift and walk to the barrel. When you click the arrow buttons A and B then you move the crane to the left or to the right....But Andrew can't do this now because the water barrel stand in the way and also the ball prevent the crane to move. But when you click that water barrel Andrew tells you that he can't move it because it's to heavy.
Go to the wooden crate and click it and.....Andrew picks up the second Iron bar that's on top of the crate.
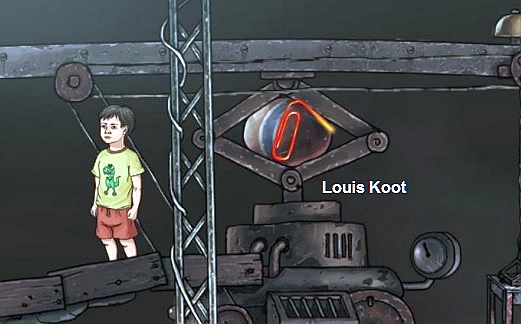
Go up the stairs to the top level and then click Lever C and see what happens. You now also see the Kite in the air
The Kite's rope is stuck in the wind machine....Andrew has to get \his Kite down to be able to pick up the kite. To get the Kite down Andrew has to cut the rope of the Kite and he must do this by moving the crane back and forth and up and down. On top of the crane stand the weight of the crane and you have seen that when you click Lever C that the weight goes back and forth, moving the crane, and the lift, down. The lift is down now, because you have pulled Lever C down.
Go back down the stairs and to the lift....The lift hangs down now, so press the lift button to get the lift up. Than step into the lift and click the lift button again to go all the way down.
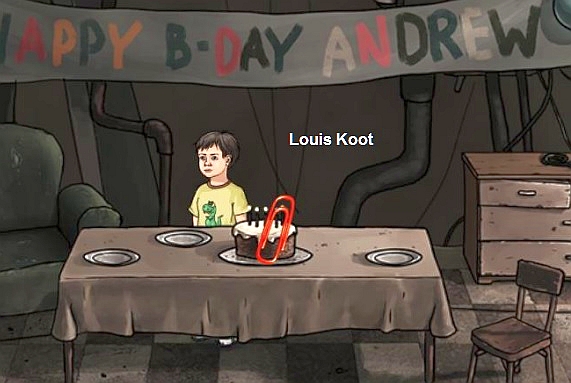
Go stand behind the birthday table and then use the Paper Clip on the birthday cake, to bent the Paper Clip via the candles of the cake
Go down the steps and then go to the Pump. Now take the blue Cap of the pump.....
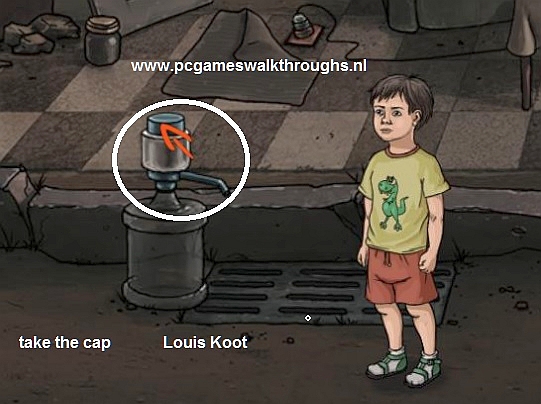
NB: You can only take the cap of the pump when you first have taken the second Iron Bar of the wooden crate and the first Iron Bar from the tricycle. Combine in inventory both Iron Bars with the pump cap and then bind it all together with the Adhesive Tape. Get in the lift again and press the lift button to go up again. Go to the water barrel and place the Cap with Bars onto it
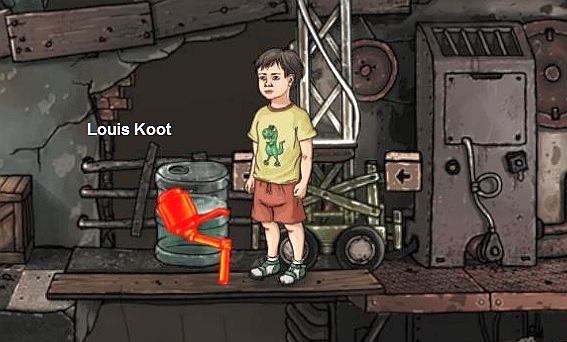
Then click the pump cap to drain the barrel empty.
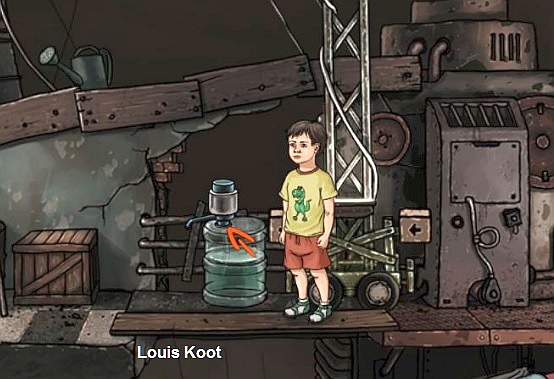
When the barrel is empty click it again a few times to push it to the left, against the wooden crate
Go up the stairs to the Ball and use the Paper Clip on the ball to prick it....The Ball is gone now
Right.....Now Andrew can move the crane back and forth....Go back down the stairs and go stand at the arrow buttons A and B....With Arrow A you move the crane left and with Arrow B the crane go right. With Lever C you can lower the Crane. You must use Arrows A, B and Lever C a couple of times to move the crane so that the weight, on top of the crane, will cut the rope of the Kite.
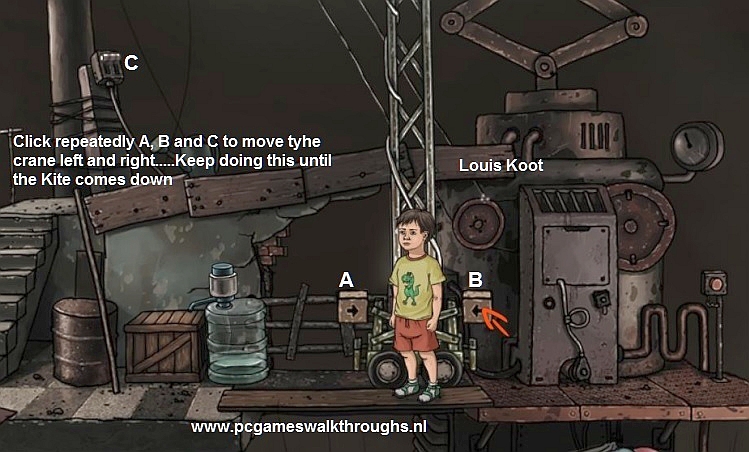
There's no sequence to follow....just click repeatedly the arrows A and B and Lever C......it means that Andrew will have to climb up the stairs a couple of times to pull lever C down a couple of time. So move the crane, with the arrows A and B, left and right and also use Lever C....Keep doing this until you see that the weight of the crane cuts the rope of the Kite....The Kite will fall down on the top level. Then go back up via the stairs and grab the Kite.
Fly the Kite:
Now that Andrew has his Kite back, go down the stairs and then further down with the lift. Down the steps and to the fence.....Dad's gone but the fence is open now.
So go through the fence and then go screens to the right and Andrew will come to his father again, who's sitting on a chair. Talk with daddy
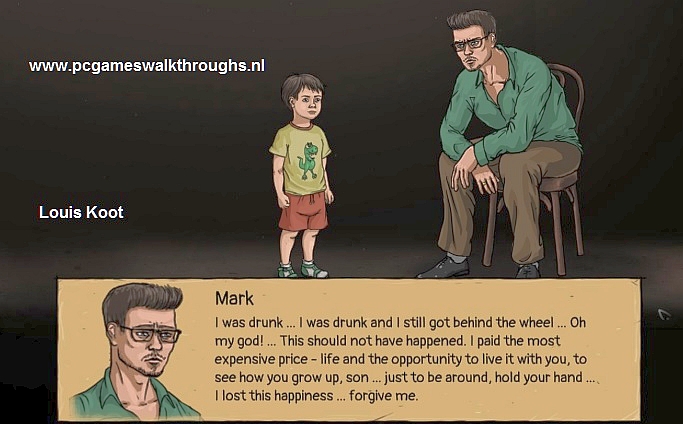
When Mark is gone then go further right and then through the closet into the hall. Leave the apartment through the front door.....
Andrew goes kiting with his Kite and the game switch over to Mary in the kitchen

Mary:
Leave the apartment
Mary is in the kitchen.....Try to leave the kitchen......
Mary can not leave the kitchen because Oliver has jammed the kitchen door, in the living room, with a broom. Somehow Mary has to push that broom out of the way.
Open the freezer compartment of the fridge and.... you will see a frozen plate on the right inside of the compartment.
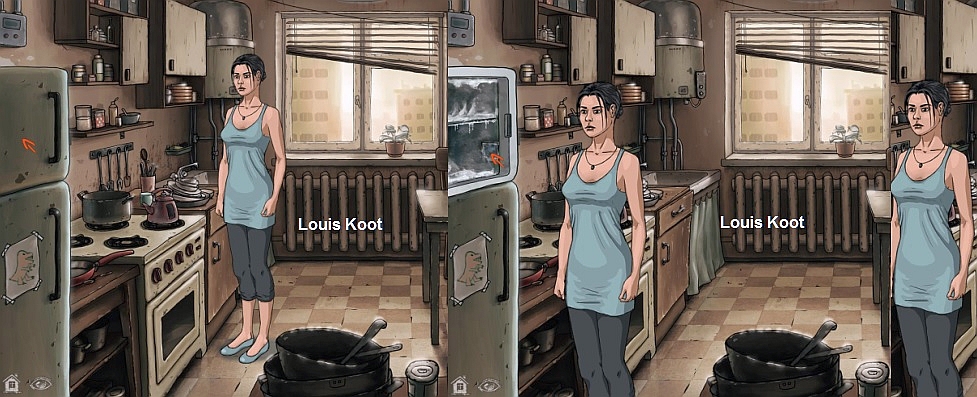
On the kitchen table lies a box of matches and on the stove stand Mary's water kettle. Take the Kettle and take the Matches

Turn on the water tap of the sink, so that water is coming out of the tap. Then fill the kettle with water. Use the matches on one of gas pits of the stove and then put the kettle on it
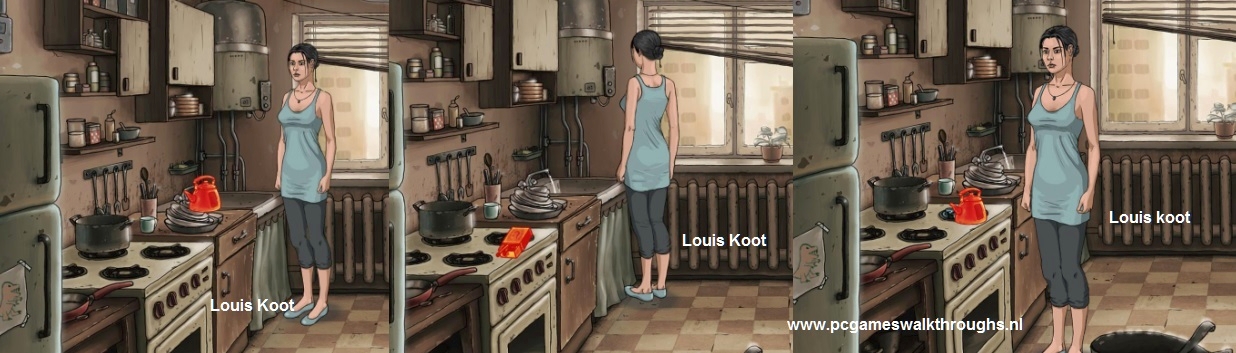
When the kettle is boiling take the kettle. Open up the freezer compartment of the fridge again and hold the hot kettle against the frozen plate in the freezer.
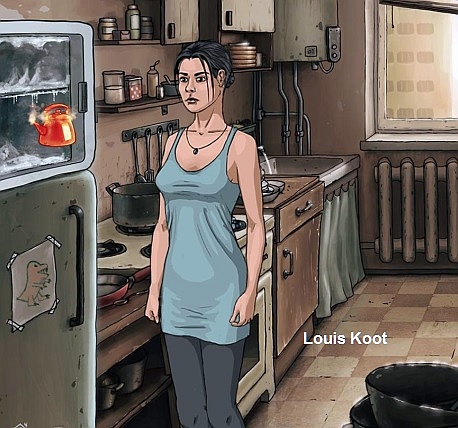
The ice around the plate has now been defrosted and Mary takes the plate and it now is in the inventory.
Click on the spoon rack, that's on the wall at the sink. Mary removes all the spoons....The rack is screwed on the wall.....Use the metal Plate from the freezer on the rack to unscrew it
Mary has put the spoon rack in her inventory. Go to the door and take the spoon rack out inventory and put it under the door..... and Mary gets rid of the broom
Now leave the kitchen into the living room and talk to Oliver....But he is only interested in watching TV, so Mary just has to look for Andrew on her own.
Go into the hall and then leave the apartment through the front door
E: Little Kite:
Mary:
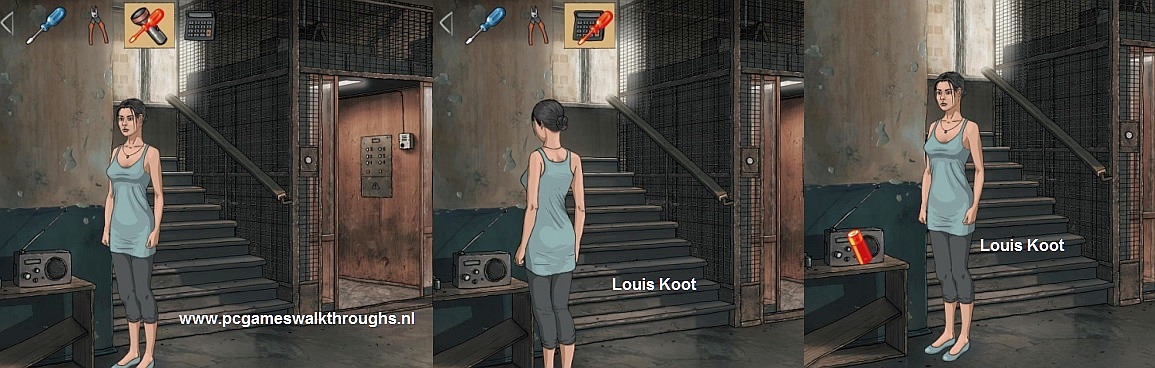
1: Fix the Elevator
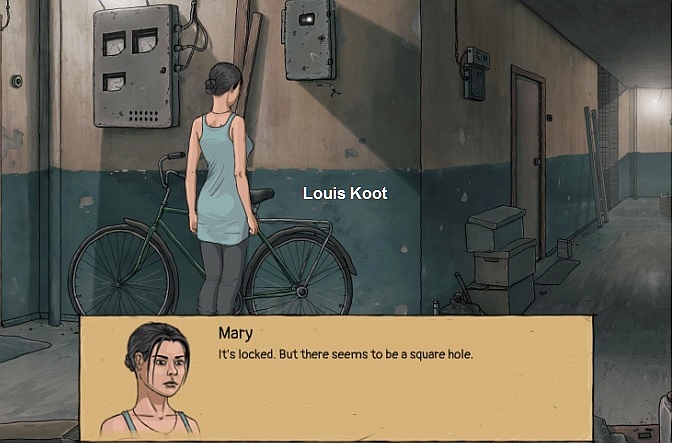
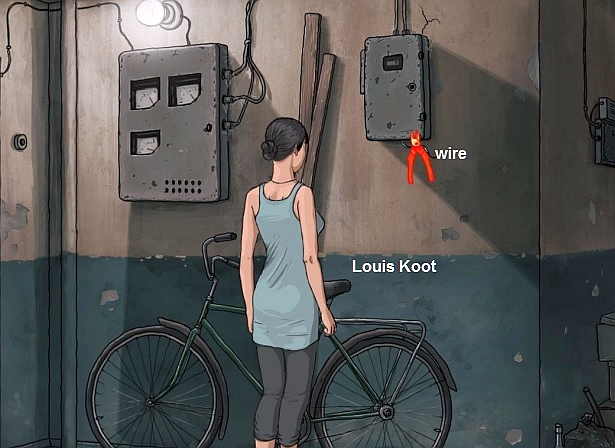
Mary is outside her apartment on the 5th floor of the building. A bicycle stand against the wall. Above the bicycle are two electrical cabinets on the wall. A piece of electrical wire is sticking out from the smallest right cabinet. Some stuff is standing in lower right corner of the hall are some stuff and of those thinks that stands there is a piece of pipe.
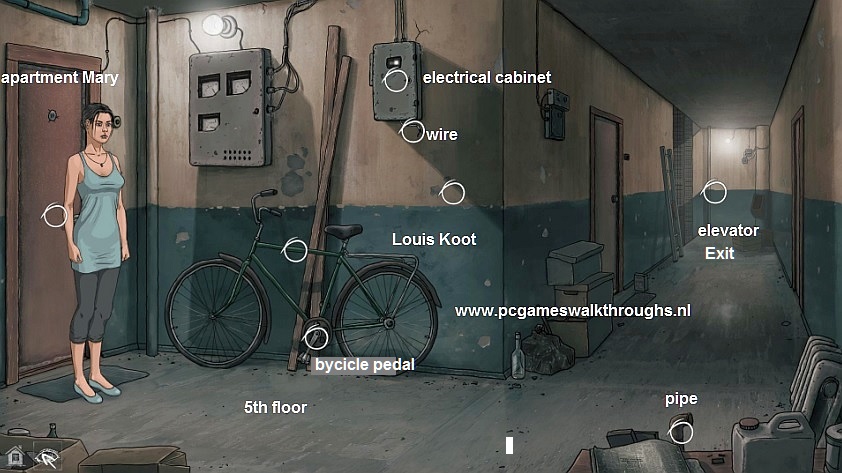
Click on the smallest of the two electrical cabinets and also click that piece of wire that's sticking out that cabinet. The cabinet is locked but there's a square hole in the cover of the cabinet.
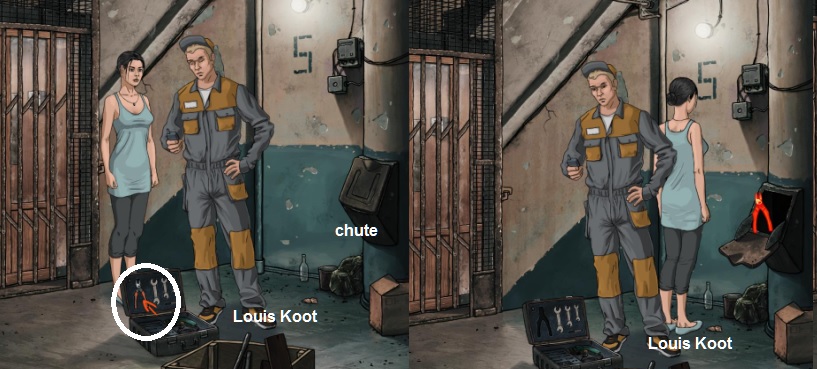
Mary can't take that piece of wire....she needs a cutting tool to cut the wire. Look at the bicycle pedal.......Maybe the pedal of the bicycle will fit into the square hole of the small electrical cabinet, but Mary needs a tool to get the pedal of the bicycle. Take the piece of pipe, that stands in the lower right corner. Now click at the end of the hall and Mary comes at the staircase and the elevator. Apparently the elevator is out of order, hence the elevator mechanic who's here
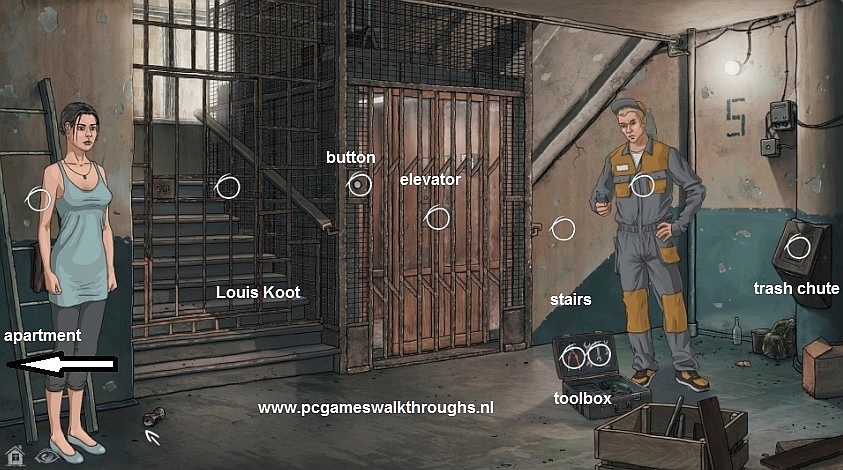
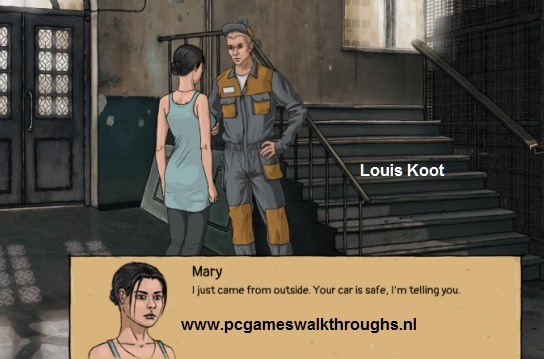
Talk to the mechanic and ask all questions.
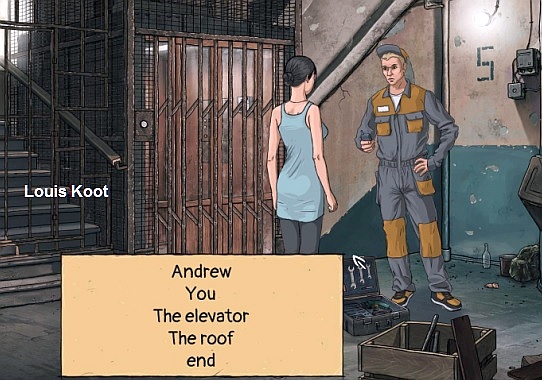
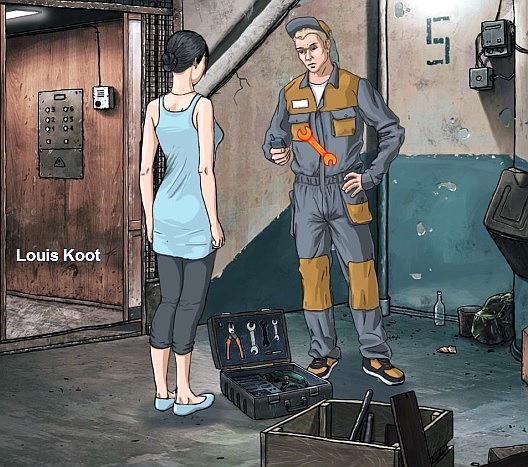
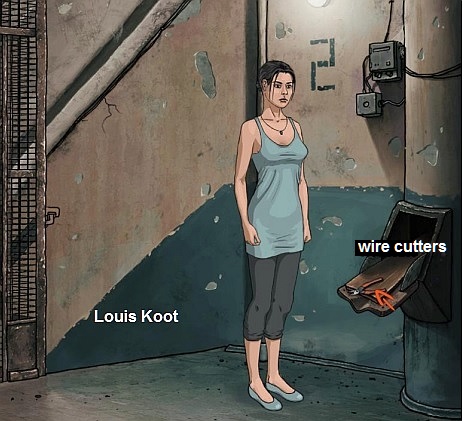
End this conversation when Mary has asked the mechanic everything. The toolbox of the mechanic stand between him and Mary.
In the toolbox are a couple of wrenches and a wire cutter. Click on the wrenches and also click on the wire cutter.....
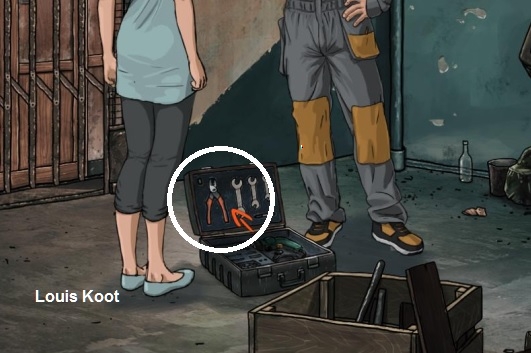
Mary will ask the mechanic whether she may borrow the wire cutter (nipper) and the wrench.
f Mary don't ask this automatically then click the mechanic to talk to him again and then ask him for the wrench and the wire cutter
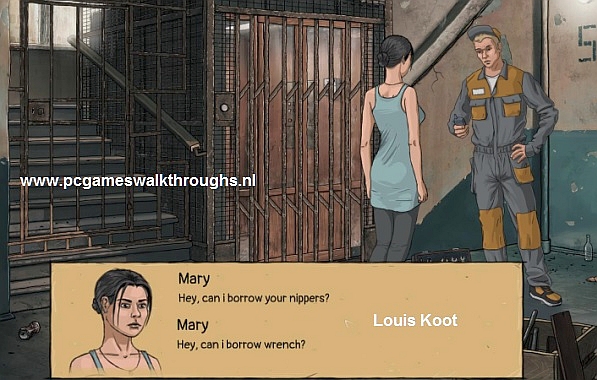
Mary can borrow the tools if she promise to bring them back and does not go too far away. So take the wire cutter and take the wrench from the tool box.
Go to the left, back to Mary's front door. Use the wrench on the pedal of the bicycle to take it of the bicycle

Take the pedal out of inventory and click with it on the small electrical cabinet to open it with the pedal

There's a lever in the cabinet.....Click the lever and.....Mary shut down the electricity and the cabinet closes. Cut with the wire cutter the piece of wire that sticks out from the cabinet now
Mary now has one piece of electrical wire. Go back to the mechanic at the elevator. Give the wire cutter and the wrench to the mechanic.
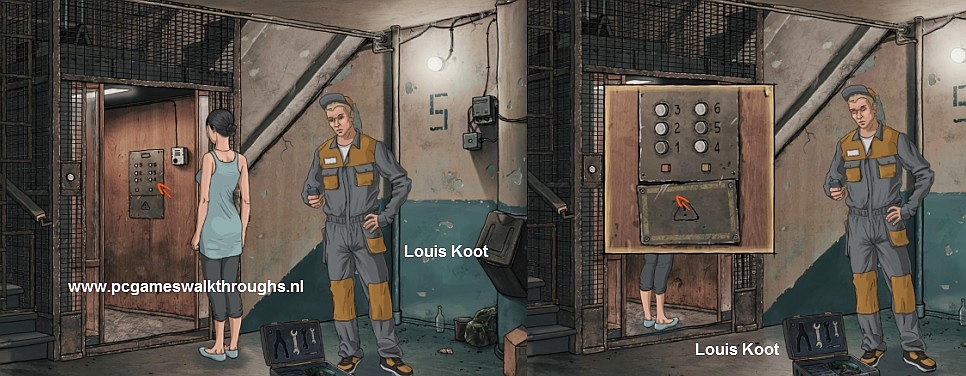
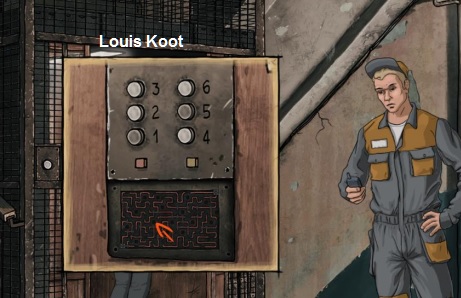
Go into the elevator and look at the control panel. The cover, under the buttons, is screwed tight with screws.
Go down one floor via the stairs, right next to the elevator. Mary will be on the 4th floor. Mary can not reach the cupboard on the wall because the two men do not want to move sideways.
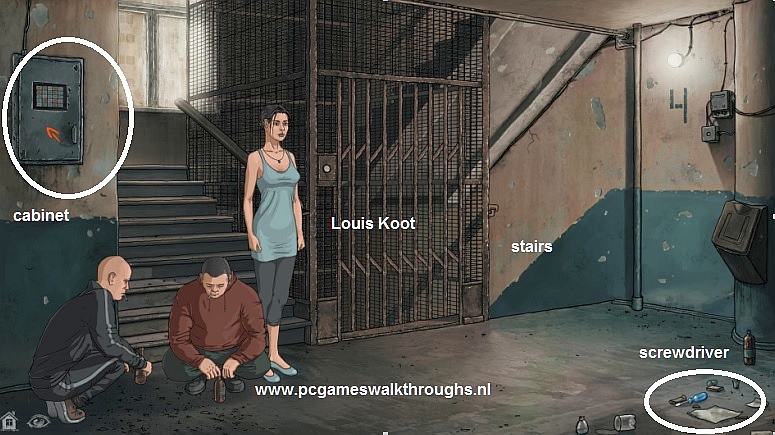
At bottom right lies a screwdriver on the floor.....Take the screwdriver at the bottom right. Go down to the 3rd floor
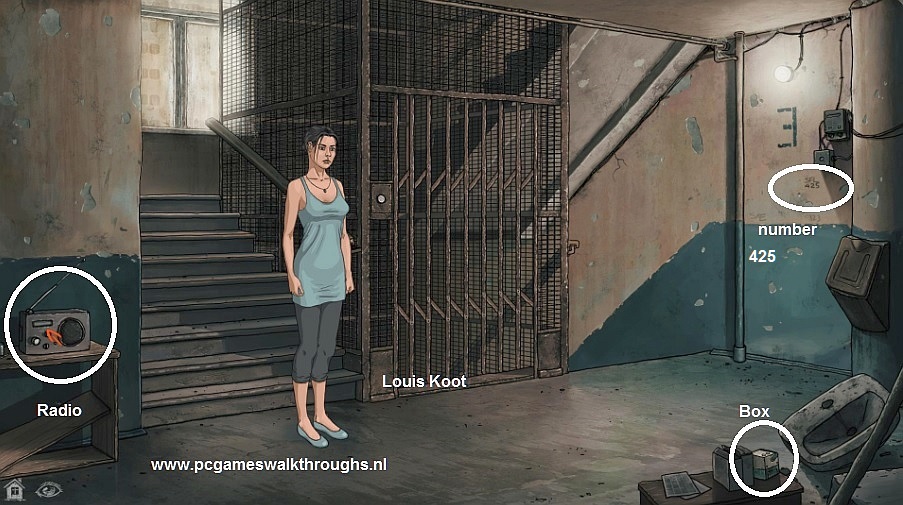
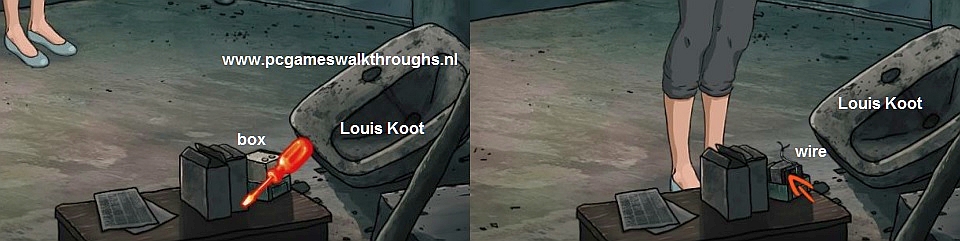
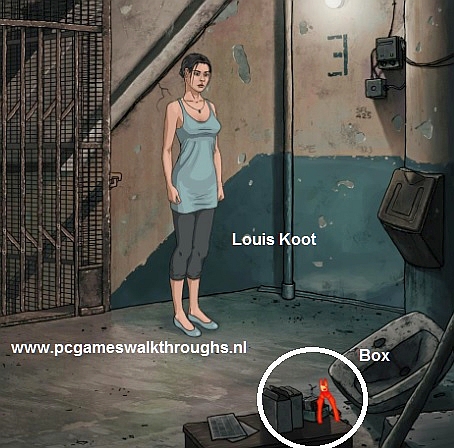
Check the radio, there are no batteries in the radio. On the right wall, underneath the electrical boxes, you can see a number.....It's the number 425.....it's not a hotspot you can click but note down this number because Mary has to use it later. Bottom right stand a little box on a crate.....Open the little box with the screwdriver and you will see a wire sticking out.
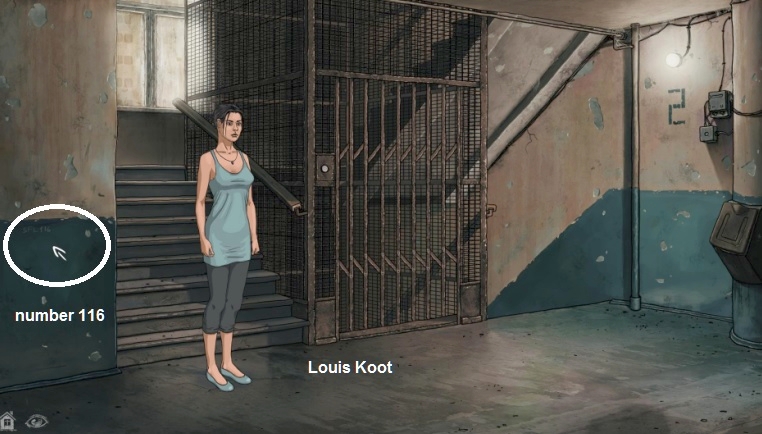
Go down to the second floor. There is also a small number to see there, left on the wall at the top of the green part....... its the number 116.....note it down
Go down to the first floor (ground floor). On the wall are the letterboxes. The letter boxes are being supported by a plank. If you click that plank then the letter boxes will fall.
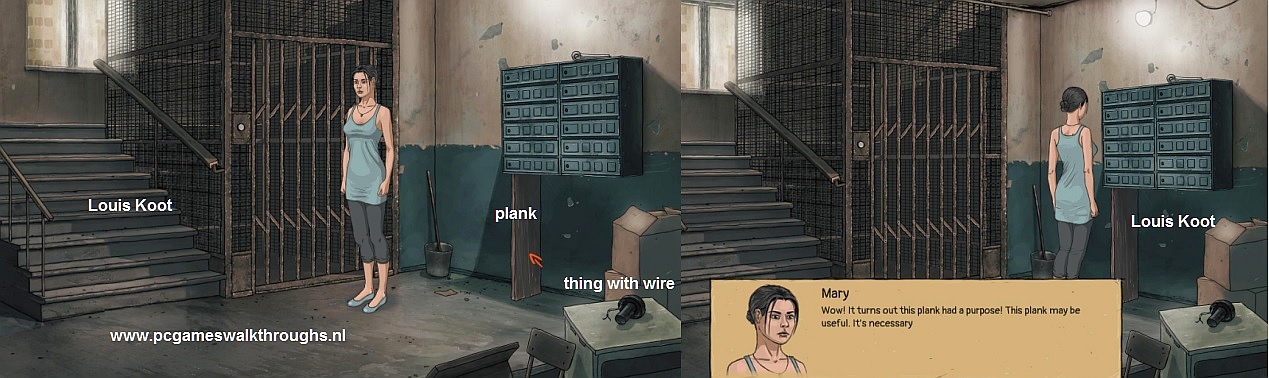
Mary needs that plank but she must replace it with something else that can support the letter boxes. Take the Pipe out inventory and click with it on the plank and......
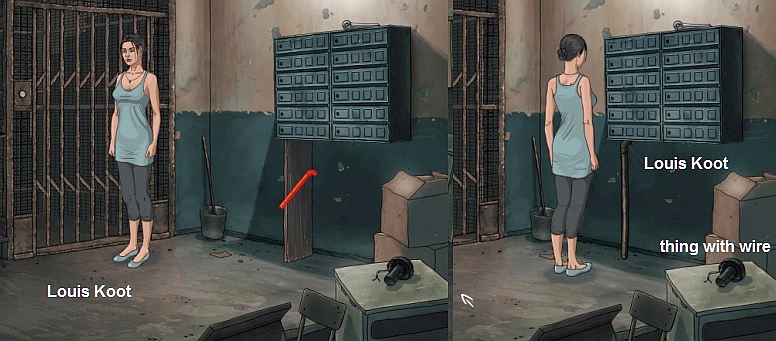
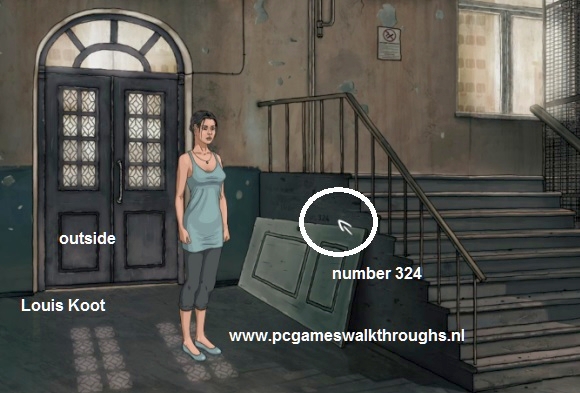
Mary switch the plank with the pipe and she puts the plank in inventory. Look at the object that is lying on the table.....a wire is sticking out that object.. Walk to the left and......You see the front door of the building. On the wall of the stairs is a number, above the door that's leaning against the wall......it's the number 324...note it down.
Mary doesn't have a reason to leave the building yet, so go up the stairs to the second floor. You probably have notice that on al floors there's a garbage chute in the corner. On the second floor open up the garbage chute and then put the plank into the chute, to block the chute

Now go back up to the 5th floor and take the wire cutters again from the tool box of the mechanic.
Mary may borrow the wire cutters again but she can't take it of this floor. So open up the garbage chute here and throw the wire cutters in the chute.
Go back to the 1st floor......The wire cutters has landed on the plank in the chute here, so take the wire cutters.
Go down to the first floor and use the wire cutters on the object on the table to take the piece of wire.
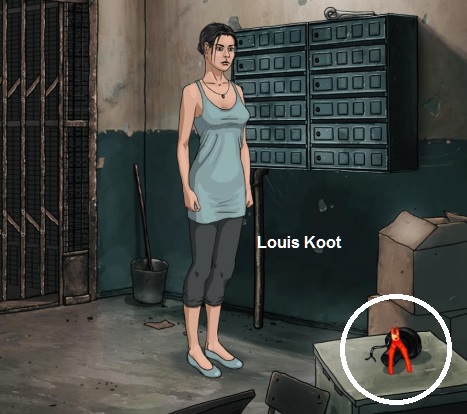
Go up to the 3rd floor, where the radio is , and use the wire cutters on the little box on the crate, to cut off the wire.
Mary now has 3 bits of electrical wire. Go back up to the 5th floor. Open the elevator and then click the button panel, inside the elevator. Use the screwdriver on the cover to unscrew the cover.
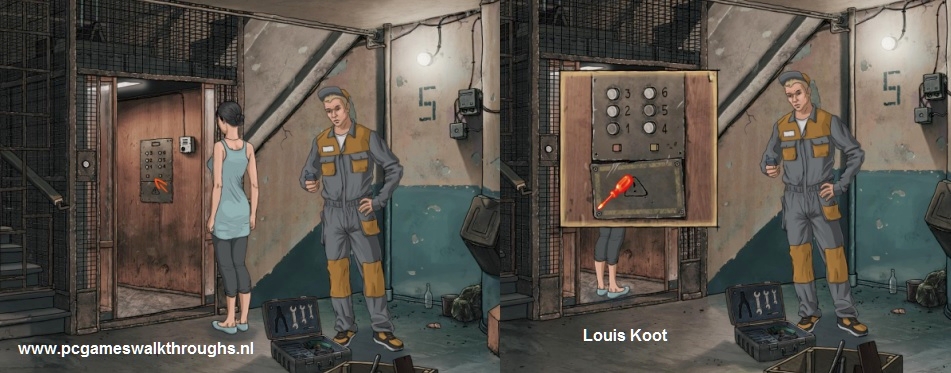
Click in the now open panel and........
Mary now has to do a puzzle.....with her three bits of wire she must restore the electricity circuit of the elevator
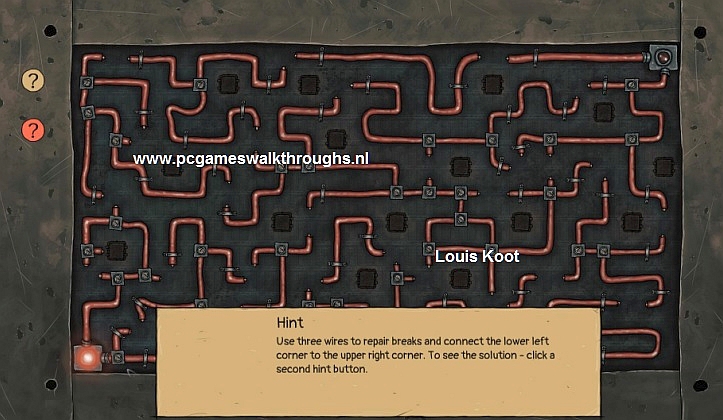
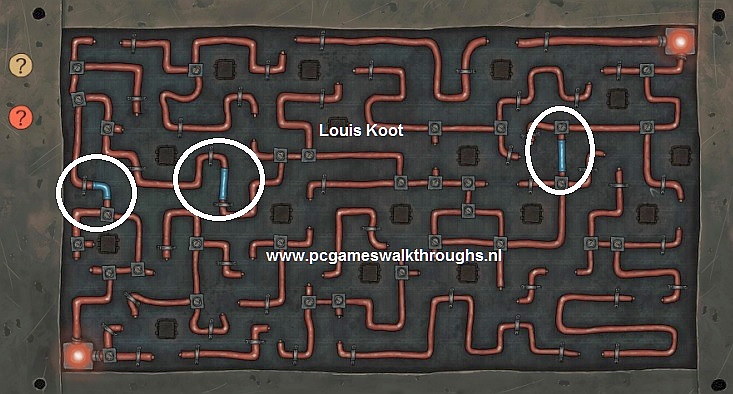
If you can not solve this on your own than you can click the bottom question mark to see the solution.....You will see the 3 places where you must click the 3 wires.
The elevator has power now, so go up with the elevator to the 6th floor
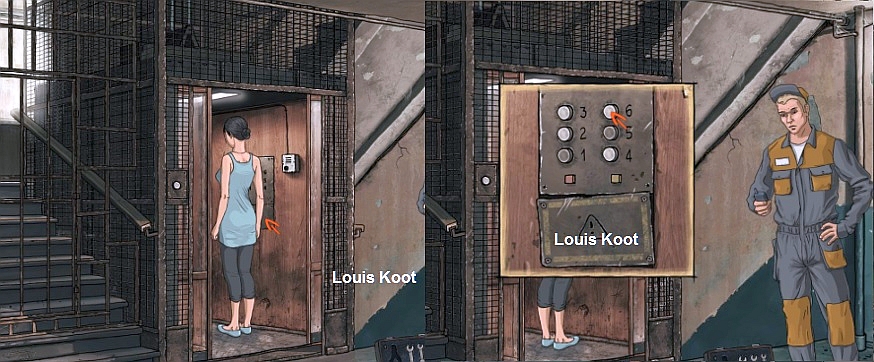
You see the number 614 on the outside wall of the elevator...note that number down. Above the ladder is the hatch to the roof, but it is locked....Mary needs the key for that hatch. . To the left / behind of the ladder there's also a hatch in the wall but it has a code lock. In the lower left corner stand a table with paint stuff on it but there's also a calculator on that table.
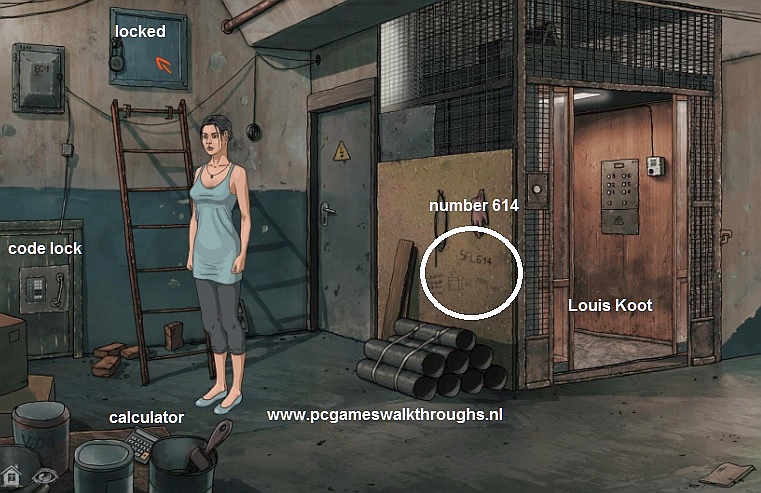
First take the Calculator. Then zoom in on the code lock of the hatch that's behind d the ladder. You have to enter a number of numbers behind the numbers 1,2,3 and 6
Think of the numbers you saw on the floors. There were no numbers on the fourth and fifth floors, so they are empty.
Fill in: Behind 1: 324, behind 2: 116, behind 3: 425, behind 6: 614
Mary finds a flashlight in the now open cabinet. Take the flashlight
Go back with the elevator to the floor 3, where the radio is. The radio has no batteries but the flashlight and the calculator do have a battery. So combine in inventory the screwdriver with the flashlight and with the calculator, to take the batteries out. The put the two batteries into the radio and.......
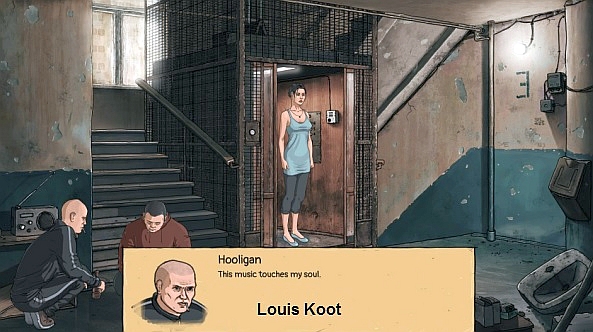
The radio works again and the two hooligans, from the 4th floor, come down to listen to the music.
Go back up to the fourth floor. Now Mary can access the wall cabinet here, so click on it now
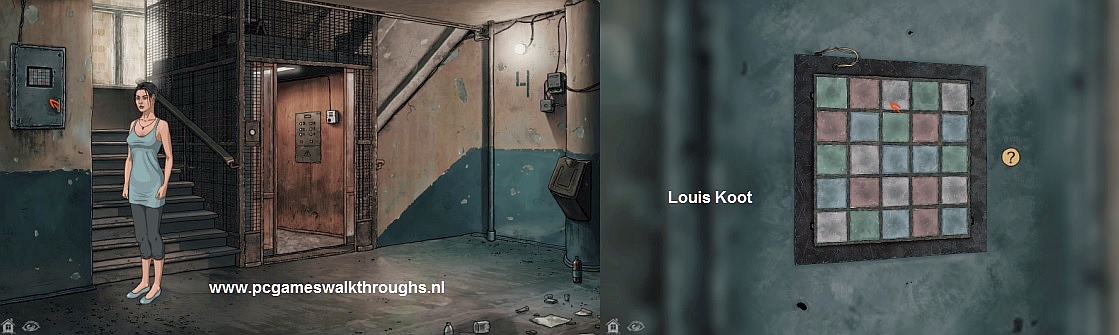
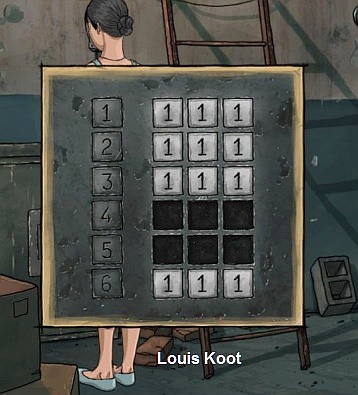
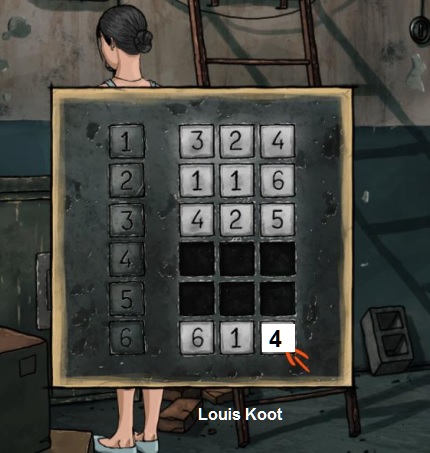
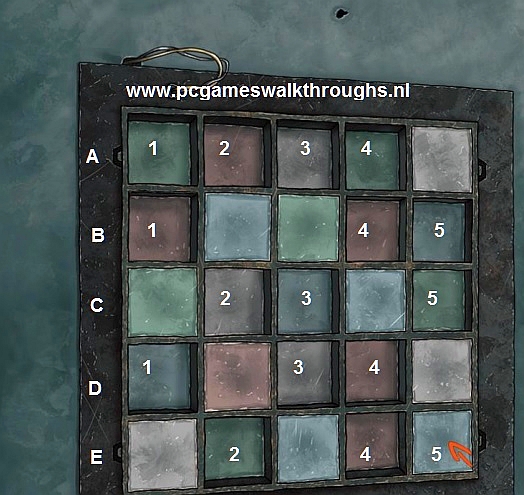
You're in the close-up of the panel that's on the cabinet. Click the question mark to now what you must do to solve this puzzle. The panel has 5 rows with each 5 squares. You can press each square. The rows are A, B, C, D, E. In each row you must press the right squares. I didn't found any clues for solving this puzzle, so this one was "trial and error".
In row A press the squares 1, 2, 3, 4. In row B press the squares 1, 4, 5. In row C press the squares 2, 3, 5.
In row D press the squares 1, 3, 4. In Row E press the squares 2, 4, 5
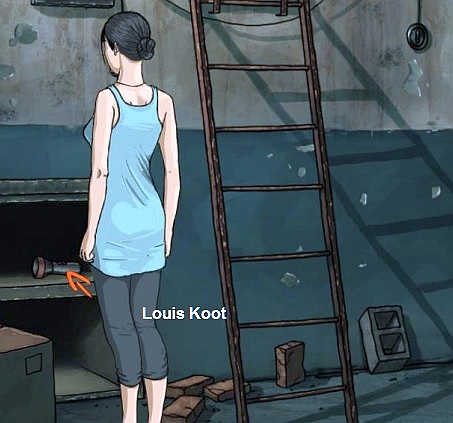
The cabinet opens....take the Key that hangs in it...It is the key for the roof hatch.
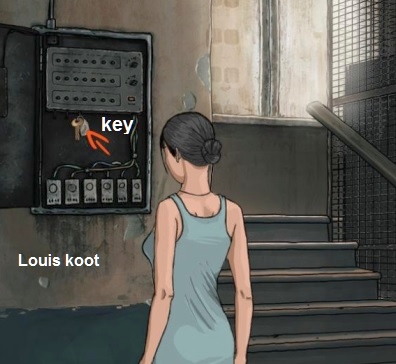
Go back up to the fifth floor and give the mechanic his wire cutter back. Then go with the elevator back up to the sixth floor and open the hatch above the ladder with the key.

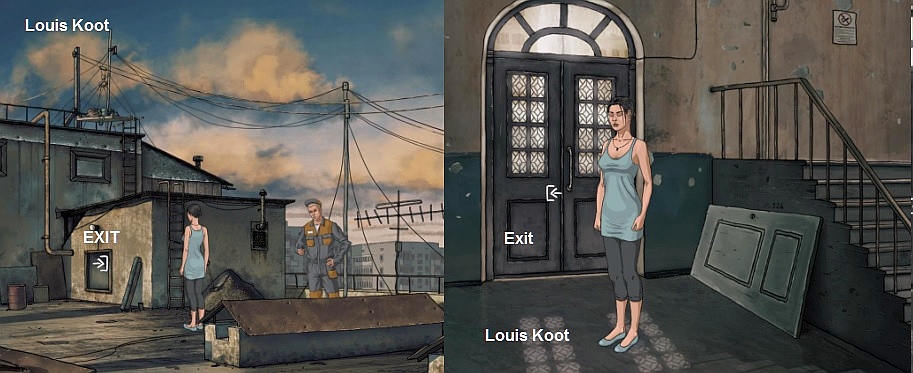
Click in the then open hatch and.....The mechanic will join Mary on the roof :
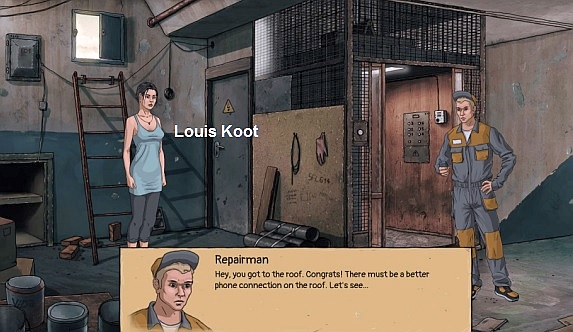
2: Roof: How to get rid of the mechanic
Talk to the mechanic. He does not want to call his boss
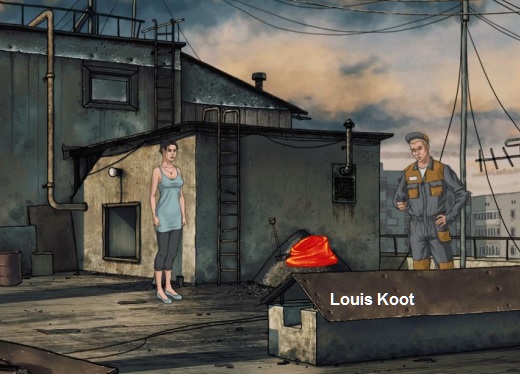
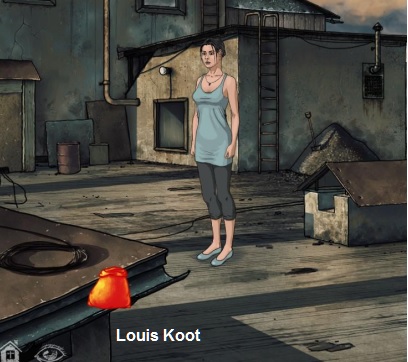
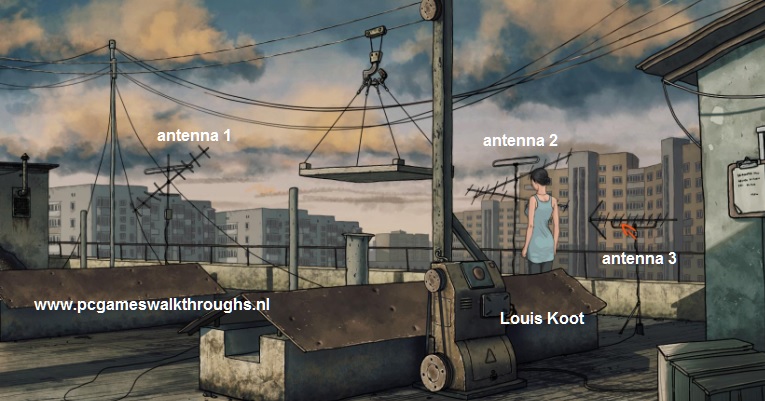
Look at the heap of gravel, that is against the wall of the building with the ladder. Above that building hangs a plank....it's a kind of lift with some stuff standing on it.....look at that lift plank. There are 3 television antennas standing on the roof. Mary wants to twist the antennas but the mechanic will not like it. So Mary must get rid of the mechanic. Walk to the right, to the machine that stands on the roof
When Mary is at the machine she notice a Note that's on the roof building. Read that note......It says that there's a key on the cart...that card is the lift plank
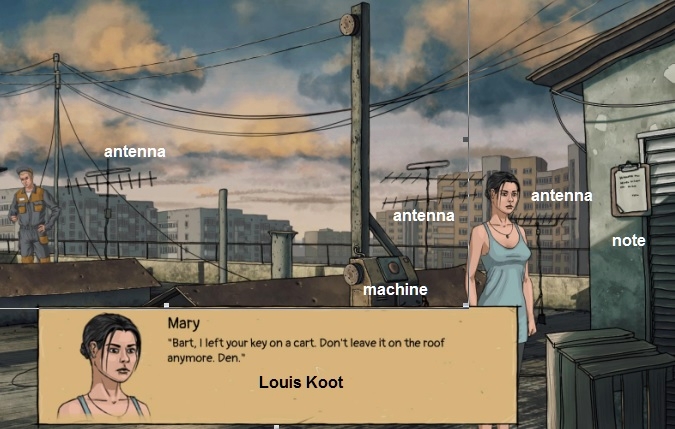
The machine is for operating that plank, but the machine doesn't work because a belt is missing on the machine.
Go back to the mechanic and then go inside the building via the hatch. Go with the elevator down to the first floor and leave the building through the front door.
Outside:
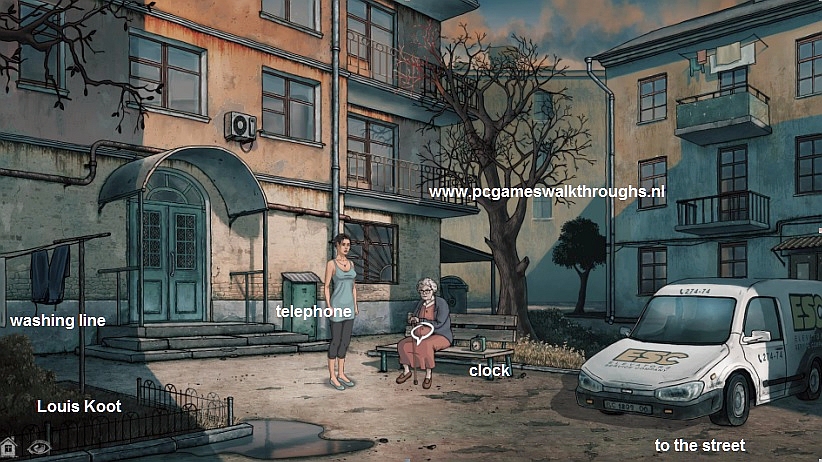
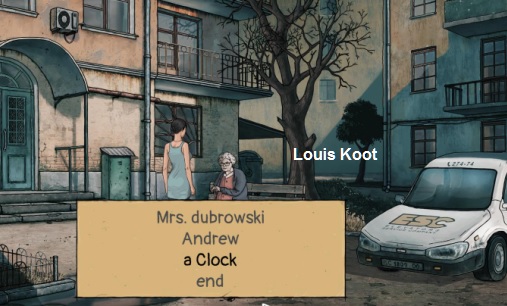
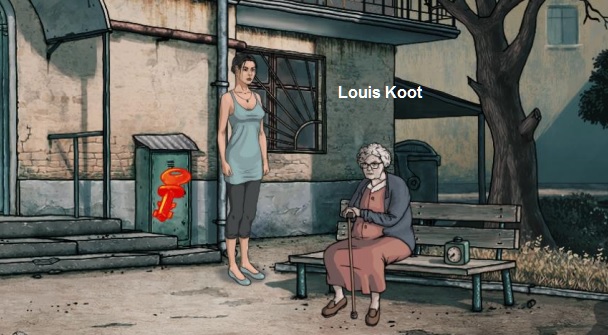
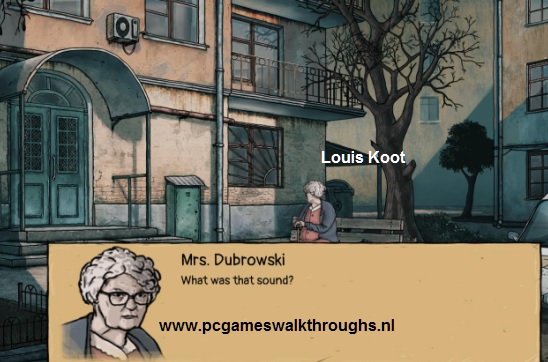
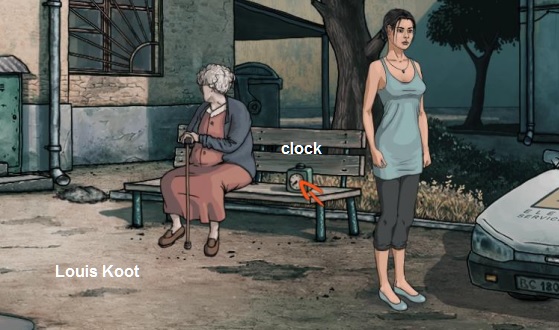
Mrs. Dubrowsky is sitting on the bench. Next to Mrs. Dubrowsky stand her clock on the bench.. The car of the mechanic is parked here.
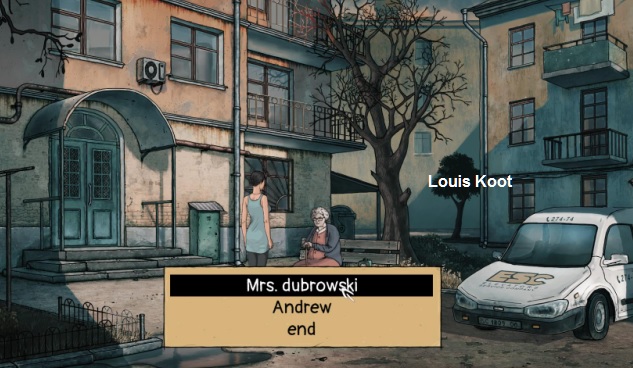
On the left a pear of trousers is hanging on a washing line. Against the a building stand a little closet. Talk to Mrs. Dubrowsky
When the conversation has ended then click on the clock
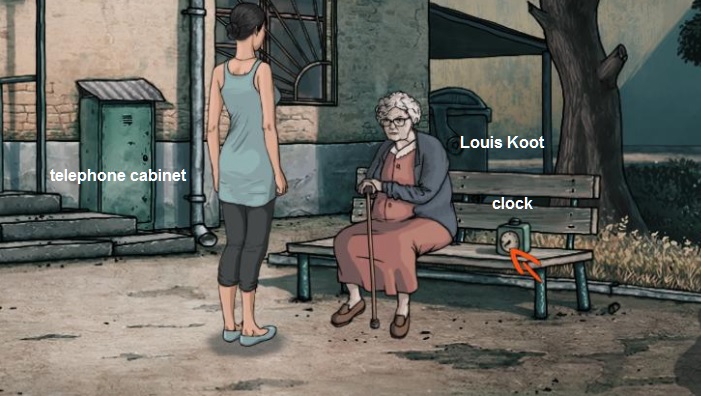
Then talk to Mrs. Dubrowsky again and ask her about her clock.......
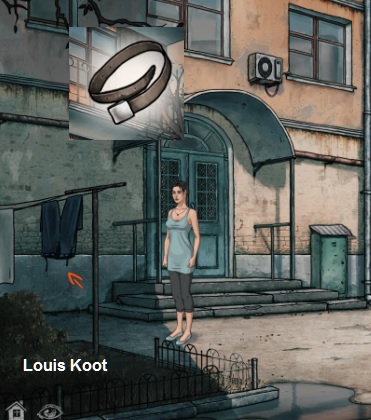
Click on the trousers that hangs on the washing line and......Mary takes the Belt from the trousers and put it in her inventory
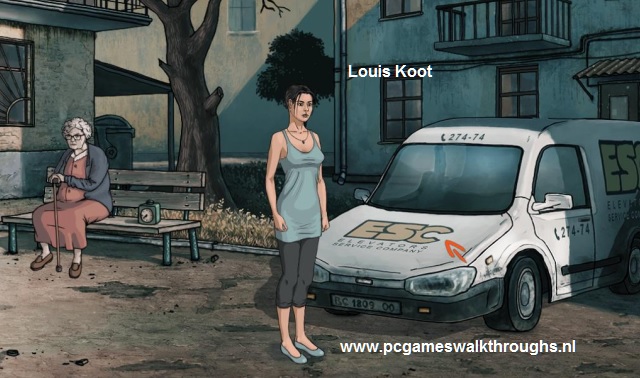
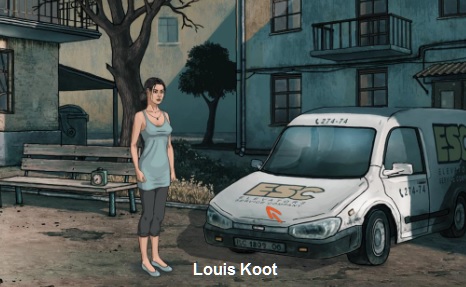
Click on the mechanic's car and....Mary reads the company's phone number 27474 that's on the car.
Click on that telephone cabinet.........it is locked. Mary needs a key....maybe it is the key that's on that plank on the roof.
So go back into the building an with the elevator to the 6th floor and than to the roof. Walk to the cart machine and use the Belt on the wheel that is on the side of the machine

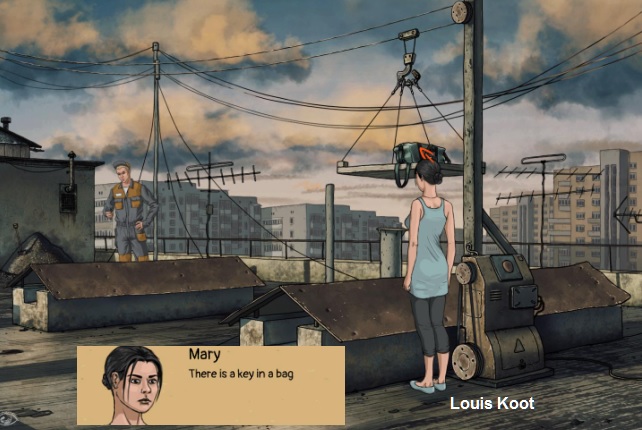
Mary put the belt on the machine. Click the button and......The plank comes to Mary now
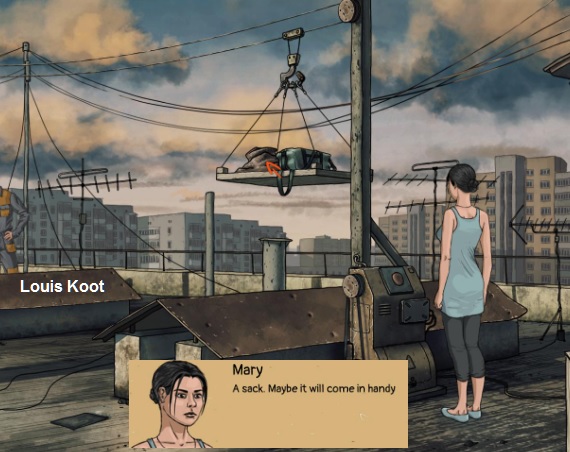
There's a sack and a bag on the plank. First take the Sack. Then click the bag and.....Mary takes a key out the bag
Go back into the building and down to the first floor. Go outside and use the newly found key on the telephone cabinet to open it now
You have to move the sliders in such a way that the colors within the sliders are the same in each row.
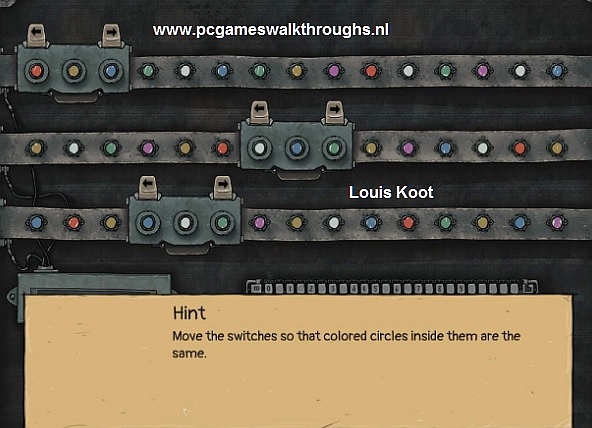
You move the sliders to the left or right by clicking the arrow buttons that are on the sliders. Move all 3 sliders on white- green- purple.
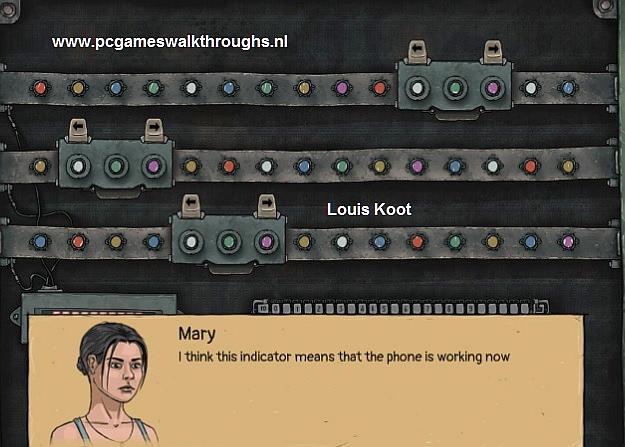
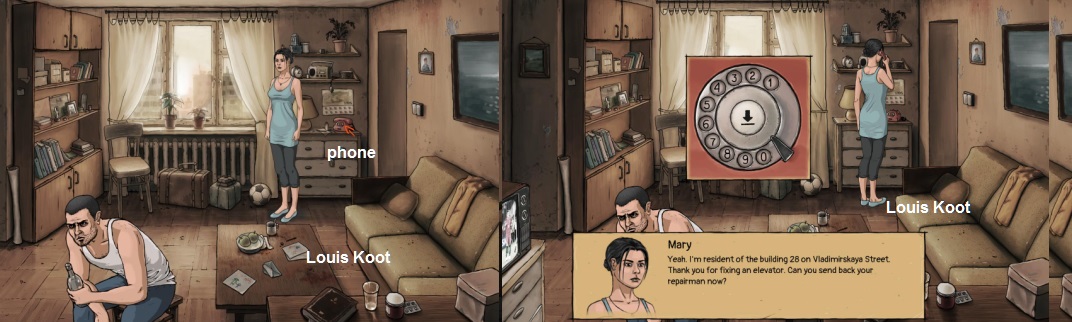
The phone in Mary's apartment will work now again. So go with the elevator to the 5th floor and then a screen left and into Mary's apartment. Click the phone and then dial 27474, the number of the mechanic's boss....Mary ask if the boss can call his mechanic to call him back because the problem with the elevator has been solved
Go back to the 6th floor with the elevator and then through the hatch onto the roof and talk to the mechanic.
His boss has called him but the mechanic didn't picked up the call because he's playing a game on his cell phone
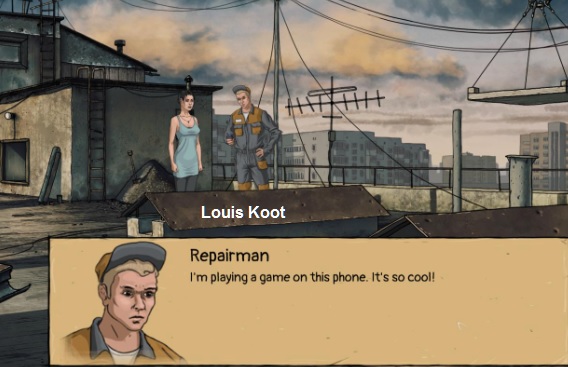
Mary must think of something else to get the mechanic from the roof. Go back to the first floor and then outside again.
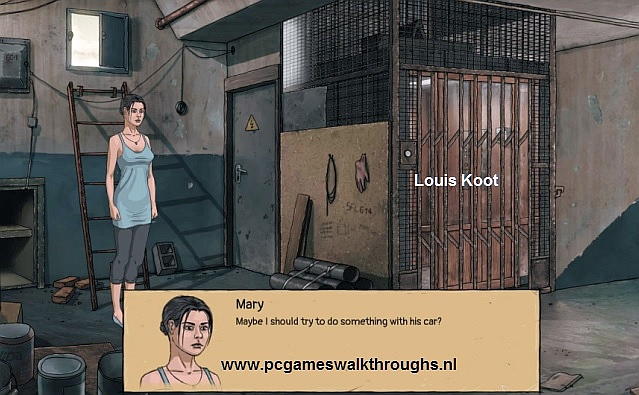
Walk to the mechanic's car and click it again.....
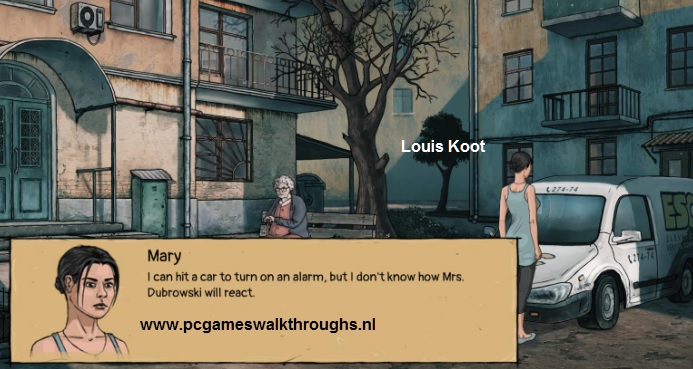
Mary comes up with the idea to activate the car's alarm, but she does not know how Mrs. Dubrowsky will react to that. Mary thinks that she can get Mrs. Dubrowsky away by moving her clock's time. But Mary has to distract Ms. Dubrowsky somehow to be able to fiddle with the clock
Go back to the roof and stand at the heap of gravel. Take the Bag out inventory and click with on the gravel heap......
Mary fills the bag with gravel
In the lower left corner you see a gutter. Go stand at that gutter and put to bag with gravel in that gutter and.......
......The gravel from the bag goes through the rain pipe and Mrs. Dubrowsky gets distracted by the noise, but only for a short time.
This wasn't enough distraction. Go back to the gravel heap. Fill the bag with gravel again.
In inventory combine the screwdriver with the bag, to make a hole in the bag. Then put the bag back in the gutter and
Now the gravel will come out the back slowly to give Mary more time. Go down to the first floor and then go outside.
Mrs. Dubrowsky is now still distracted by the gravel coming out of the rain pipe.
Click on the clock and........... as soon as the alarm goes Mrs. Dubrowsky goes inside. When Mrs. Dubrowsky has taken her leave Click the mechanic's car and....
The car's alarm goes off. Go into the building and......Mary meets the mechanic at the elevator......Talk to the mechanic and he will leave.
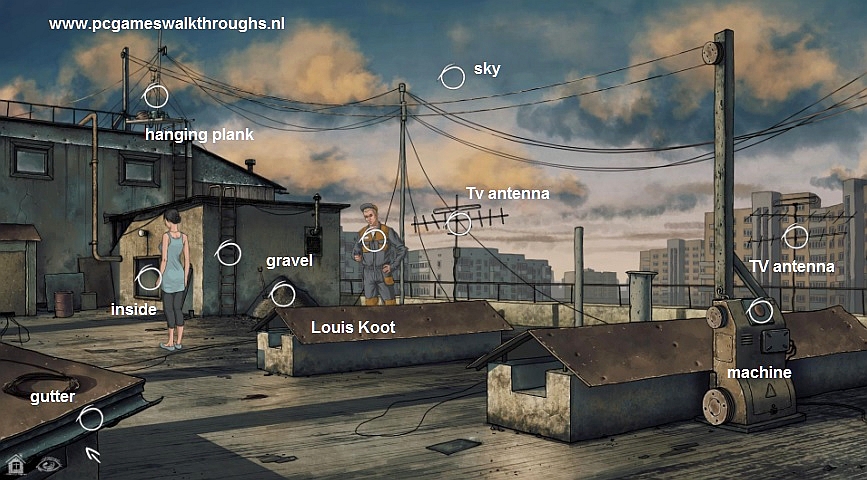
Go back to the roof. Look at the sky
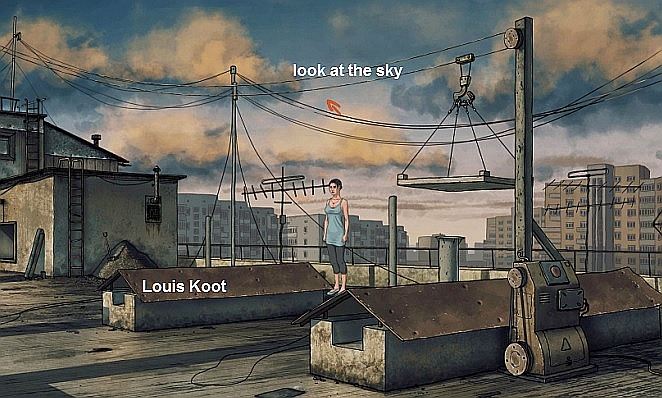
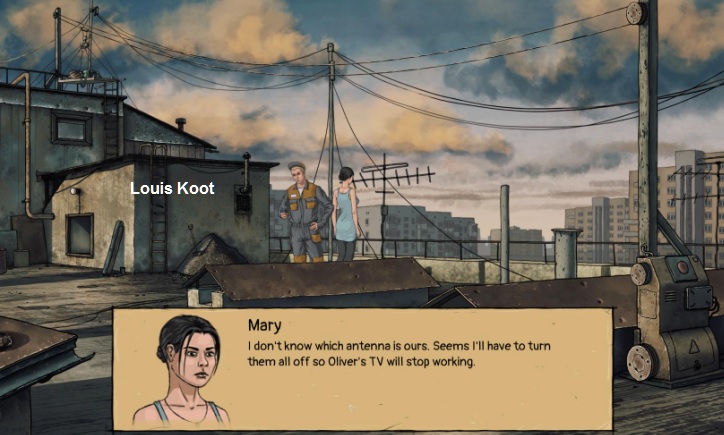
There are 3 TV antennas on the roof......Click all 3 antennas to turn them and........
......Mary sees a kite in the air and then........Oliver gets up on the roof and he's very angry. .........Mary says that if she finds Andrew she will leave Oliver.
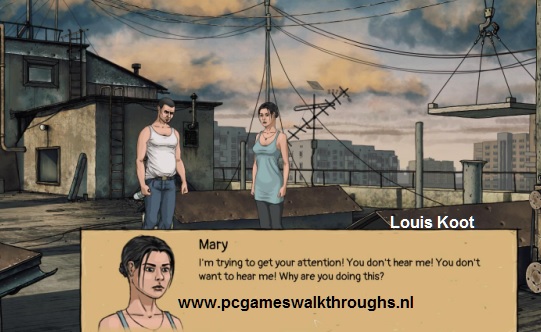
Oliver beats up Mary but she defends herself with a brick.
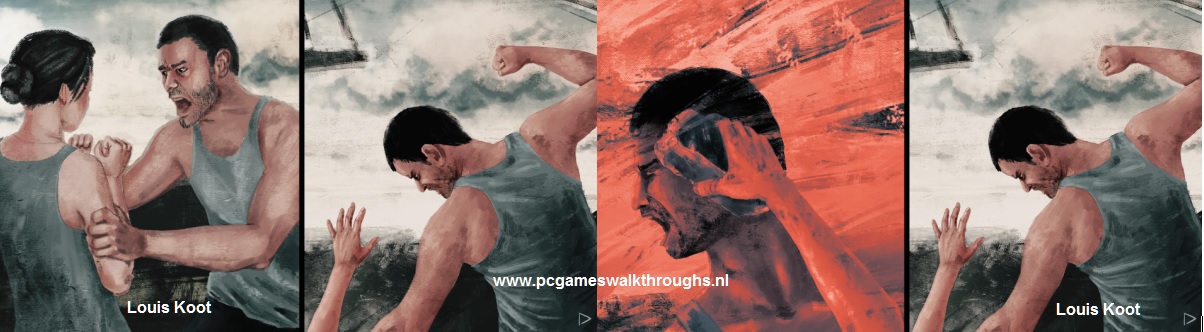
Oliver lies motionless on the roof.
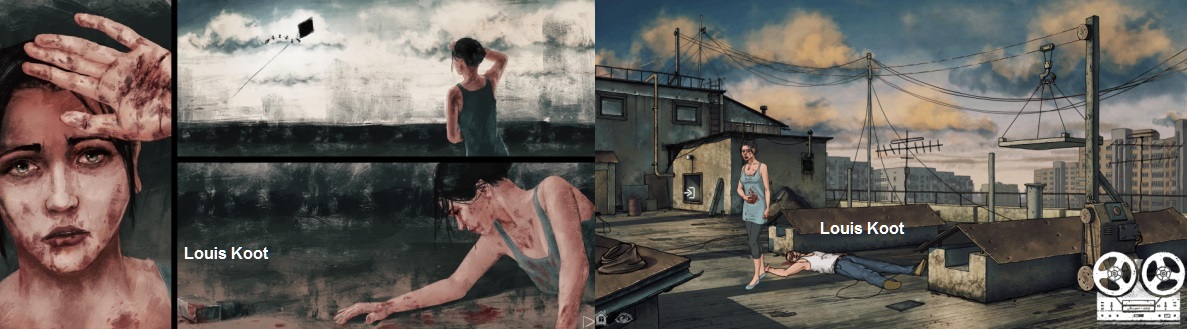
F: Invisible Tears:
Go inside and into the elevator. Mary will be automatically on the fifth floor. Go into Mary's apartment and use the first aid kit in the hall.
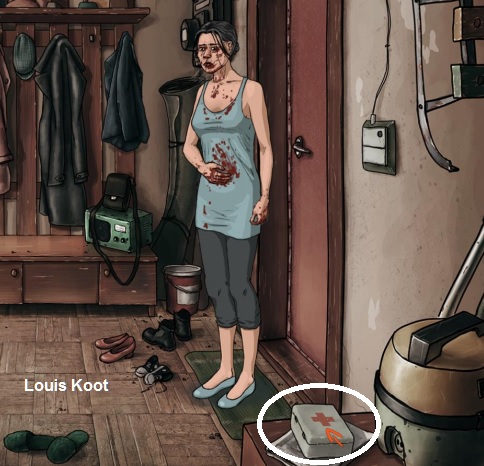
Mary goes into the kitchen to take care of her hand.
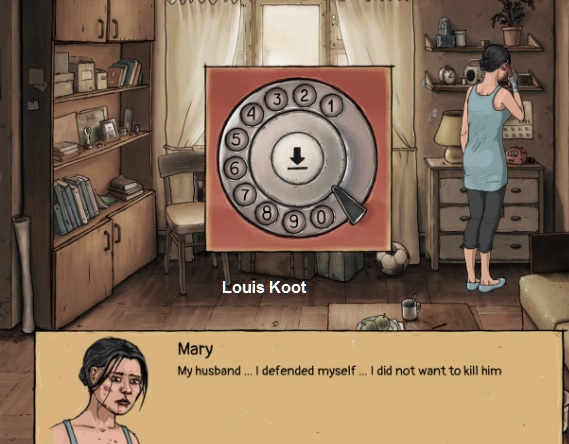
Go into the living room and use the telephone to call the police, so dial 911.
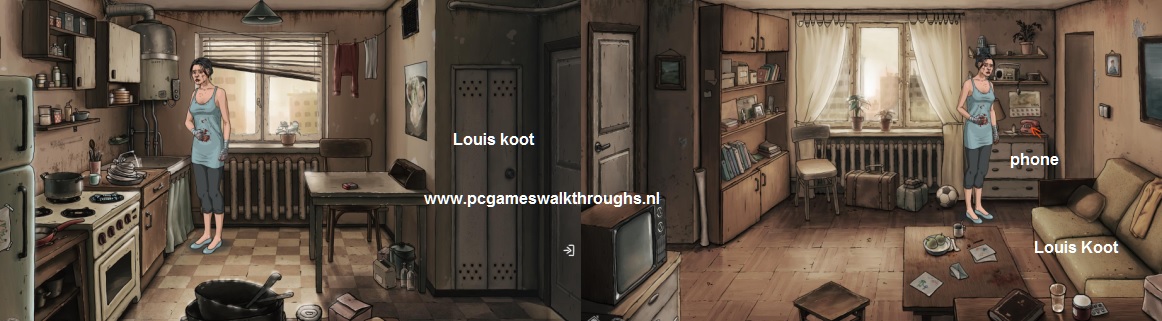
Mary tells what has happens but she also tells that she will leave the apartment to look for her son
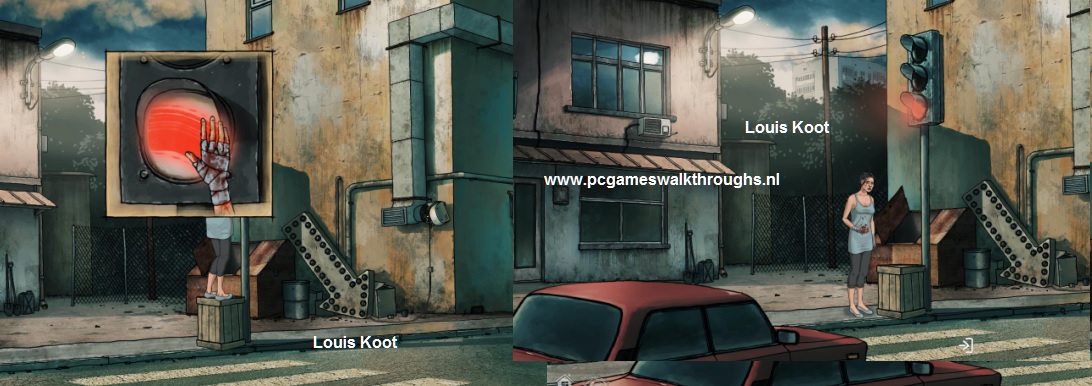
The Traffic Light:
Leave the apartment and go with the elevator to the first floor and then go outside. Walk to the right and then click the exit to go to the street
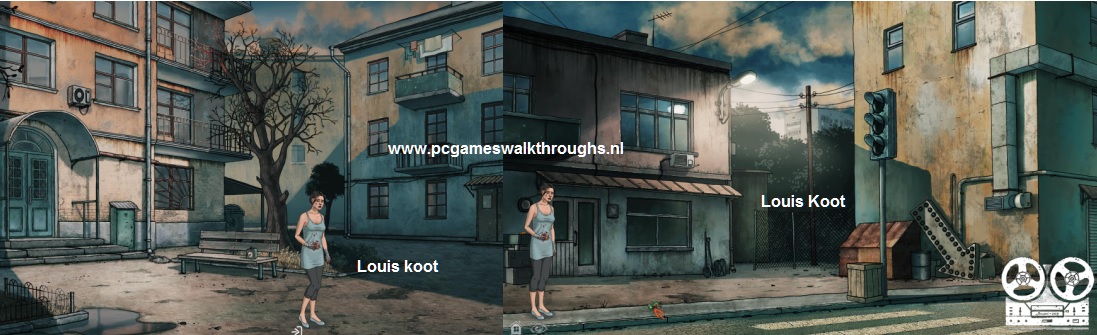
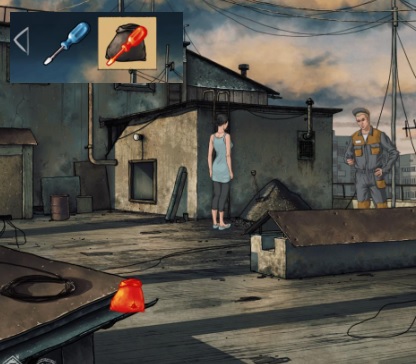
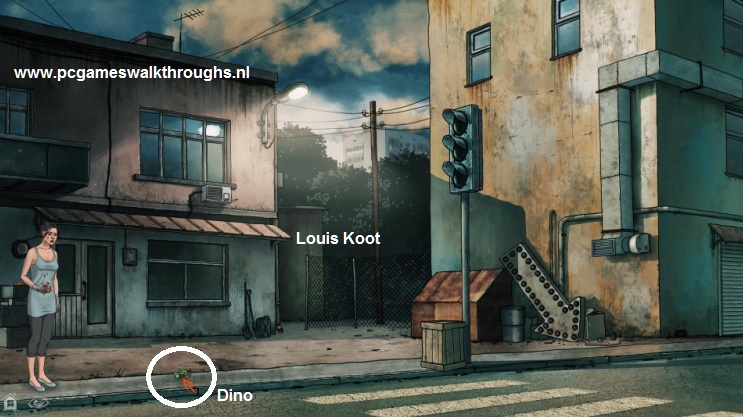
It's a busy street with cars riding by all the time. At the zebra crossing stand a traffic light. On the side walk, between Mary and the traffic light, lies Andrew's dinosaur. Pick it up
Mary wants to cross over the zebra crossing to the other side of the street, but to be able to do that the traffic light must have a red light, so that the cars will stop at the crossing. At the building, behind Mary, are some crates and there's a round lamp on that building, left of the door. Move Mary to that building.
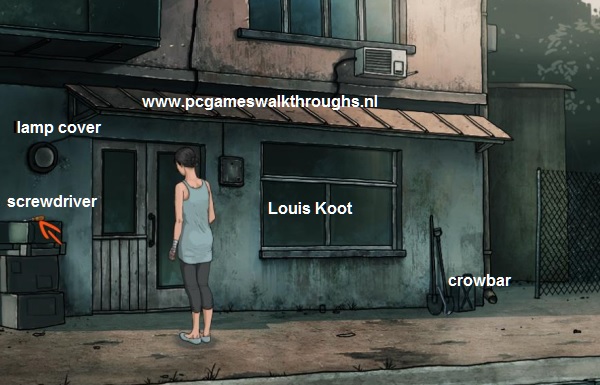
On the crates / boxes lies a screwdriver....Take the screwdriver. Above the crates / boxes hangs a wall lamp. Take off the cover of the wall lamp and Mary sees that there is no light bulb here. But she puts the lamp cover in inventory. On the right of the window stands a crowbar.....Take the Crowbar
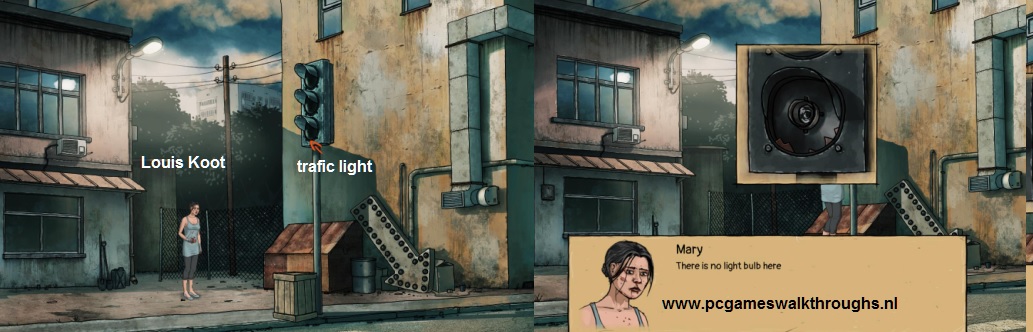
Now go to the traffic light. Against the building, behind the traffic light, stands a garbage container and a big arrow with lamps on it. There's also a ventilation shaft on the building with an electrical device. Click on that big Arrow with the lamps....Mary takes one of the lamps from the arrow
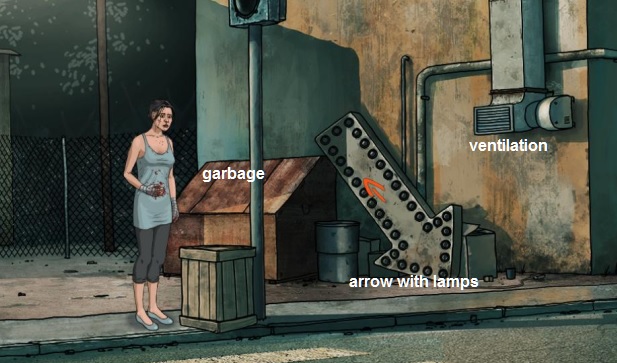
click the traffic light .....Mary climbs on the crate and she sees that there's no red lamp in the traffic light.
Put the lamp from the arrow into the traffic light....But it turns out that it is a broken lamp
Mary can not cross the zebra crossing, because the cars do not stop, so she must put a red lamp into the traffic light.
Click on the grill of the ventilation shaft....listen to what Mary tells about it
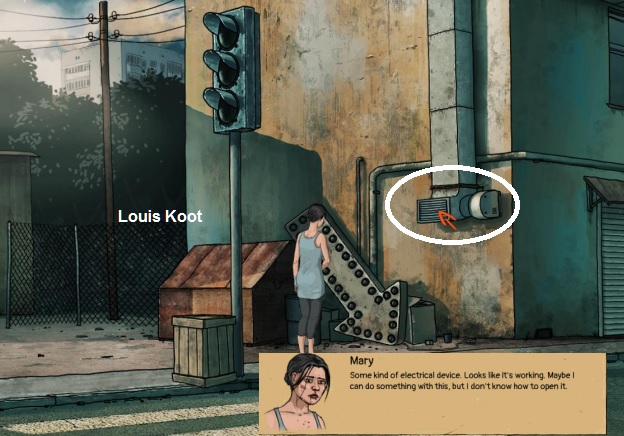
Mary must find out if there's still a good lamp in the arrow and she thinks that the engine of the ventilation shaft can help her with this. Click with the Crowbar on the grid of the ventilation shaft......But the crowbar isn't isolated and Mary is afraid to be electrocuted if she uses the crowbar now
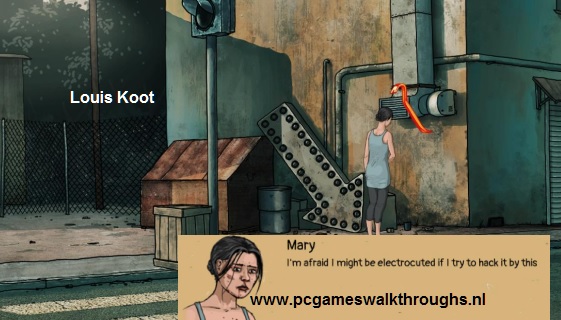
Look at the sky, between the two buildings. Then open up the garbage container and then click in it. Mary finds an old tire.
In inventory use the screwdriver with the old tire, to punch it. Then use the tire on the crowbar...the crowbar is then isolated.
Use the isolated crowbar on the grid of the ventilation shaft and....
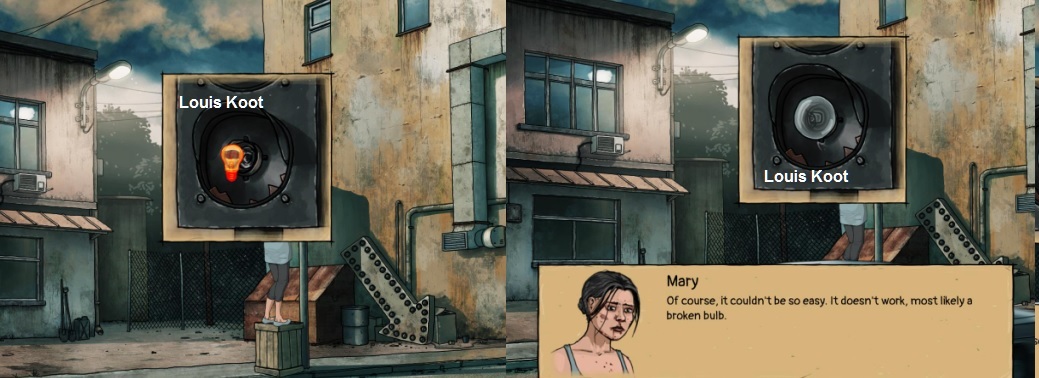
....the engine cover of the shaft goes open and a wire sticks out....Click that piece of wire and.....one lamp on the arrow lights up...Take that burning lamp from the arrow
Click again the traffic light and put the lamp in. Then put the lamp cover on the lamp and.....
......with here blood Mary makes the cover red....the traffic light now has a red light so the cars now stops at the crossing.
Cross the zebra crossing and.......see the ENDING of the game
Mary sees an ambulance. An accident has happened. Walk to the right. Mary is afraid that the victim will be Andrew, but no...it isn't Andrew.......
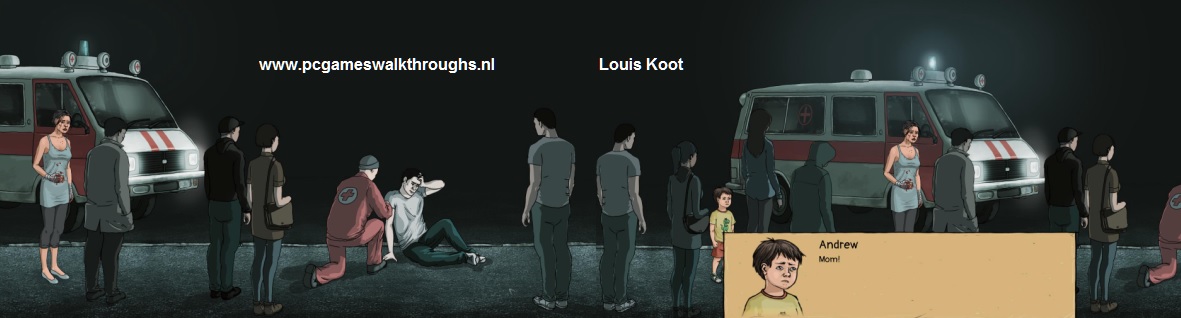
Finally Andrew can fly his Kite......
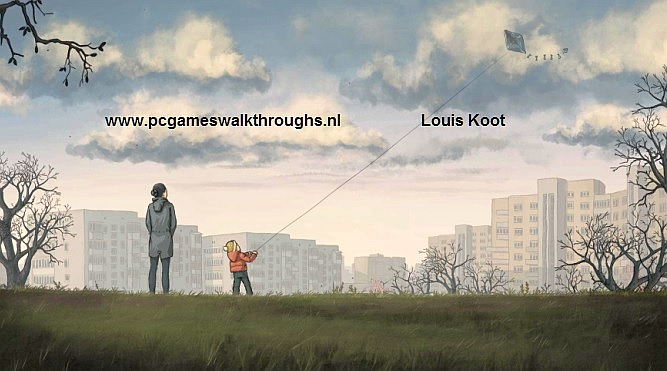
THE END
But now in 2018 there's a sequel on Little Kite and that sequel is: Repentant
So if you want to no how the story of Mary, Andrew and Oliver realy ends then go get this sequel game for Little Kite
2018: Walkthrough by: Louis Koot