Magnus Failure
If you have found this walkthrough via google search or via another site then you have probably not visited my site.
A lot more very detailed game walkthroughs can be found on my site at: www.pcgameswalkthroughs.nl
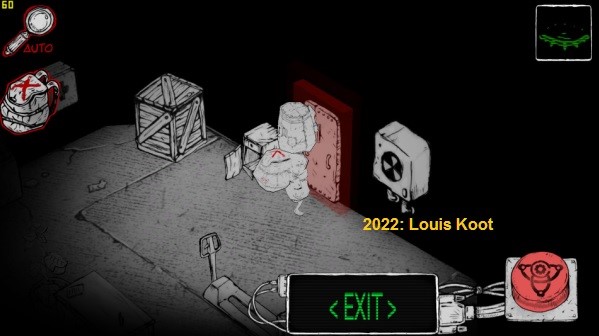
2022: Walkthrough by Dick Leeuw and Louis Koot
Text by Dick Leeuw and screenshots by Louis Koot
Magnus Failure is an isometric exploration and adventure game with logical elements.The protagonist of the game is a person who, for unknown reasons, finds himself in the isolation of other people and scans the radio in search of a signal. The appearance of a seemingly incomprehensible message makes you want to find the sender. So you set off on a journey through the unique world of Magnus Failure! Solve puzzles using the right combination of items, find them in the surrounding world and solve mini-logic games. The world is full of mechanisms that open up new locations for the player

Choose New
Game and you will see a drawing, click on the red arrow to go to the next
drawing.

After 9
drawings you will see a red round button, click on that button and you will see
the explanation about the controls in this game.

Click on I
Get It and then click on the eye at top right to open the options menu. The options speak for themselves.
Only option
3, the camera mode, can sometimes help you see things differently.

Home
Click on
Resume and you are in the house, there is a radio on the table and when you are
close to that radio it turns red.
At the
bottom of the screen you will see a red button and you will read LOOK.

If you click
on the confirm button and he radio will play in close-up.

Click the red close / leave button to leave the close-up. There are
more possible instructions that you can get at items.

Go to the
next room, the tape recorder will turn red when you are close to it.
You see the
red confirm button again and next to it is now USE. Click on the red confirm button.

You now see
your inventory use screen. You see that you must use 2 items from inventory on the tape recorder, but you
have nothing in your inventory yet.

Click the red close button to leave this close-up
You now need
to find your inventory. Exit the room and go to the right.

The backpack
turns red so click on the red confirm button to grab the backpack.
The backpack is now on the left of the screen. Click the bagpack to view the inventory items discription screen.
Here you can view the objects and read what
it is.

Now you can
start looking for objects. Objects of interest will turn red.
Walk to the
bed in this room, to the left of the bed is a music box with a doll.
Click the
red button and the music box will play, I don't know if you'll need this in the
later parts but you don't need it here.

Go back to
the first room where there is also a book on the table.
Click on the backpack and then click on the book to read about it in the swcreen.

You will
find all kinds of items throughout the game, but you won't need them all in
this part, maybe in the following parts.

Click on the red button and you will get a few keys, put these in your inventory as well.
Firs click the keys to make that screen blue and then click the red arrow button to move the keys to the inventory on the left side

Go to the right, there is a hanging cupboard. Open that cupboard and you take a seed from the cupboard.
Click the bagpack to open the inventory and then put the seed in your inventory

Go to the
next room and then right into the next room.

There is a
roll of insulating tape in the drawer, so open the drawer to take the tape en put the tape in your inventory.

You now have some items in inventory so go and view the
items in your inventory to read what they are.

Go back to
the other room, you can have a look in the bathroom but you won't find anything
there.

In the
middle cabinet you will find a diving helmet and fishing hooks, put them both
in your inventory.

Go back to
the hallway and then outside through the exit door.

Outside
I made a map
of the site with the buildings.

Outside, go
to the right and then......

....... up the path between the bushes to the tree stump.

When you are close to the tree stump, the hole in the stump turns red, click the red button.
You will
then get a piece of paper with numbers and symbols, click it to your inventory.

Click on
your backpack to view this paper, you can then zoom in even further. You will
need this later on in the game.

Walk further
to the wall, there seems to be a large door here.
Turn around
and walk back to the house.

Turn to the
left and continue on the path to the well.
From the
well, a stone path leads to beehives and a hut, as well as a stone path to the
other buildings on the property.

Go to the well. The well
will turn red when you are close to it.
There is a
package on the floor, take the package and click it to your inventory.

Check this
in your inventory, you'll see it's a: 2321 THEOPHILOS-God's Friend.
Go back to
the ladder and click on the red button to go back up.

At the top
you take the left path, behind the truck, you come to a hut with 5 beehives in
front of it.

Go to the
fourth hive, wen you count from the right, and click on the red button, you then have a honey frame, put it in
your inventory.
Turn around
and go to the door of the hut.

Click on the
red button to go inside, there is a drawing on the wall.

Go to the cupboard to the left of the drawing, click on the red button.

Go outside
and go back to the well and then go to the right, you will come to a truck.
Go to the
side of the truck and click on the red button, behind the red hatch you will
find a data-cassette tape.

Click the data-casette tape to your inventory and view it in your inventory

Go to the
hood of the truck and click on the red button to take copper cables from the truck. click them and view them in your inventory.

Go back to
the stone path.
Go to the
right and follow the path, you will see a building to the right of the path,
but you can't enter there yet so follow the path further.

The power
house is on the left.

Go through
the stairs to the door, click on the red button to enter.

The engine
is located on the right in the building, it is not working now.

You now get tosee
the interaction screen, to fix the engine you need 2 objects.
First select
the roll of insulating tape and then click on the bottom red arrow.

The engine
is running again and there is power again.

To the left
of the motor is a cupboard, open that cupboard and you take a screwdriver from it.

Put the screwdriver in the inventory and view it in the discription screen

Go to the
large closet and open it to take a bottle of water from it.

Go outside
again and follow the stone path further.

You come to
the bunker 2222, to the left of the door of the bunker is a number panel

Enter code
2222 and it is wrong.

You can also
try the code 2321, that's on the Theopilos stick which you found earlier, but it is also wrong.

Turn around
and then follow the power cables, you will also see a large door in the wall,
but you can't do anything with it.

Follow the
wall and you will come to a large door with a hole in the middle, there are
also 2 columns in front of the door.
Something
has to go on top of those columns.

Walk back to
Home via the stone paths.

Enter your home and inside walk
down the hall and enter the room on the right.
The cassette
recorder near the computer will now turn red.

Click on the
red button and you will enter the interaction screen, you will see that you
need 2 objects here.
Select the data-cassette
and click it to the right, then select the screwdriver and click it to the
right as well.

You will
then see a computer screen and the cassette recorder with the screwdriver.

You now have to move the screwdriver left and right until you have the correct position.
You move the screwdriver left or right by clicking left or right of the screwdriver
The position
is different every time, the first time for me it was left and the second time it was
right. You have to find this out yourself.

You will
find the code for the bunker there: 0407.

Go outside
and walk through the stone paths to the bunker 2222 and new enter the code 0407 on the
number panel and click Enter.

Enter the
bunker.

Go to the
desk. The drawer on the right, in the desk, will turn red, click the red button to open the drawer.
You take a
sheet of papyrus with numbers and symbols from the drawer. Click this to your inventory.
Click on
your backpack and select this papyrus, in the screen you will see a red eye and
with that you can zoom in further.

You will
then see which symbols belong to 2222, so note those symbols.

Then walk to
the computer and click on the red button, but you get an error.

In the
corner there is a drawing on the wall, view the drawing.

Turn around,
left of the desk is a round pot.

Your inventory goes open. Here you
have to select the seed and the bottle of water to put them in the pot.

Moments
later, a plant grows in the pot.

Turn and
walk to the cupboard that is against the wall to the right of the desk.

Downstairs
you turn around and walk to the table in the middle, click on the red button
and you will see 3 tumblers with symbols.

Click on
your backpack and look at the papyrus, you can see which symbols you have to
fill in on the tumblers. They are the 2222 symbols.

Place the
correct symbols on the tumblers and the lamp turns green, you will see
that a hatch, on the left behind the tumblers, is now open.

Go to the cupboard to the right of the 2 computers, in this cupboard you will
find an awl.

Go to the
computers and see what you can read on them


Go to the
hatch and go down.

Go to the
chest next to the phone, open the chest and you will find a human heart.
Click the
heart to your inventory and view it.

To the right
of the phone is a telegram. Click on the red button and the telegram is in your
inventory.
Click on
your backpack and read the telegram.

Go back up
via the ladder and there you go further up via the elevator.

Go outside.
Then go past
the power building to the building (room with safe) that you couldn't enter
before.

Go to the
door and click on the red button, you will see a keyhole. Select the awl and
click it to the right.
Now you have
to look through the eye, at top right, to see in the options menu if you have the right camera setting, you need
normal mode otherwise see it in reverse.
You now have
to set the red pawls at the correct height.

Pawls A to
E must be as shown in the screenshot, pawl F must still be set at the correct
height.

I can't make
a screenshot of that, as soon as you have set all pawls to the correct height you will
automatically be at the door again.
Go to the
door and now you can enter.

Inside is a
computer, click on the red button.

You see that
you need 2 items, the honey frame and the B-rocessor, so put them in the 2 screens at the computer

Click on the
red button and you will now see a pattern on the screen with symbols that you
have seen before.

Go to your
inventory and zoom in on the pattern of symbols.

Go back to
the computer and you will see your start-pattern on the screen again.

You have to
put the symbols in the right place with the buttons above and the buttons on
the left

I can't give
you an exact solution because your starting position will be different from mine.
This is how
it should be.

If this is
successful, the safe will open, in the safe you will find an old book.

View the
book in your inventory.

Go out again
and go back to the power house, go to the right along the stone path until you
get to the hole in the big door.
There are 2
columns in front of the door.

Select the rod with the number 2321 and click it to the right, the rod is now in this
column.

Go to the
left column and click on the red button, now select the old book that you found
in the safe.
Click the
book to the right.

The book is
now on the left column, go to the Eye hole in the door and click on the red button.
Select the
heart and click it to the right.

The door
slides back, go inside.

This the End of this first part of the Magnus game.

You can go on with the second part in this Magnus serie and that is Magnus Imago that you also can get on STEAM
Text by Dick Leeuw and screenshots by Louis Koot