2018: Walkthrough by: Louis Koot
If you have found this walkthrough via google search or via another site then you have probably not visited my site.
A lot more very detailed game walkthroughs can be found on my site at: www.pcgameswalkthroughs.nl
Various editions of the original Myst game have been released. There is the original version which was released on Cd-rom. One year after the release of the original version, the Myst Masterpiece Edition was released which has better graphics quality than the original version. For the rest Myst and Myst Masterpiece are exactly the same game. However, a third version of the game has been released under the title REAL MYST. REAL MYST is the latest version of the game and contains some extra puzzles and an extra Age that do not appear in both other versions. REAL MYST also contains a hint function.
This walkthrough is made for the Myst Masterpiece Edition
Saving and Loading in Myst:
Myst is completely Mouse-controlled and your cursor appears as a hand. Myst is an old game and was made for Windows 95. That's why you play Myst in a so-called Windows screen. In order to save and load or to go to the Options menu you have to move the cursor upwards in your screen. The gray and the blue Windows bar, at the top of the screen, will then appear. In the gray bar you get the following options: "File", "Options" and "Help".

To save and / or load a saved game, go to "File" and then choose the relevant option in the drop-down menu. There are 2 ways to save in Myst: "Save Game" and "Save As ..." . Myst saves your save game in the "Saved Games" folder in the Myst directory. With "Save As ..." you can give a name to your save game and also specify where you want to save the save. With "Restore Game" you load a save game back into the game.
You have to take into account the following: If you load a Save Game back into the game, you will ALWAYS end up in the Library.
You will first receive a link book in which you see the ceiling of the library in the screen. Click in the window and you will end up in the library of Myst Island.
You then stare at the ceiling. Click the downwards hand to look down and you can continue playing. A Save Game does NOT bring you back to the place in the game where you made the save. A Save Game will ALWAYS take you back to the library on the main island. From the library you have to follow the route back to where you were last in the game. No problem because all the puzzles you have already solved are solved, so you do not have to repeat them again.
How to play Myst
Playing Myst means that you have to travel to 4 different Ages. In each Age you'll need to solve puzzles to collect a Blue and a Red Book page. You must bring those blue and red pages back to the Myst island. You can go to those ages and collect the Blue and Red pages in any order that you want. But be ware that this walkthroughs is made in the order that I have played the game and that order is
First I do the Selenetic Age.
Second I do the Stone Ship Age,
Third I do the Mechanical Age
Fourth I do the Channel wood Age.
We shall end the game with the END GAME on Myst island
Intro
The game starts with a short intro movie. You see a sky gap and you hear the voice of Atrus. A man and a book are falling down.
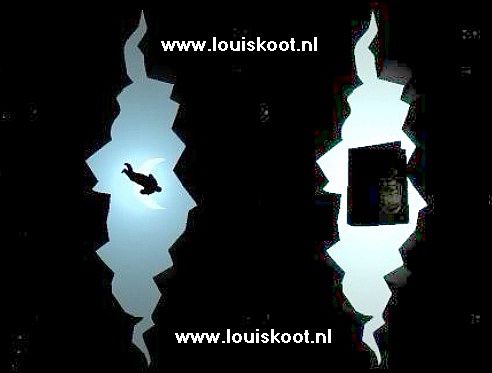
The man we no longer see but the book is in your screen. Click on the book. The book will then appear large on your screen.

It is the MYST book. Click on the cover of the Myst book and ..... The Myst book opens up. On the right page of the Myst book a short film will start, in the window
You get a bird's-eye impression of the Myst Island. Wait patiently until the movie in the window has ended and then place your hand in the window. Hmmmmm ..... weird book, you think by yourself. You can click in the window, but you have doubts. You do not dare to click in the window..... You do not know what will happen next. Shall I do it?...you ask yourself. Ah, what the hell......what does it matter. You have led a very boring and petty bourgeois life so far with a woman, two children, a good job and a home that is heavily mortgaged and you think it has become time for some more adventure in your life. So ..... click with your hand in the book window and ...... YOU WILL DISAPPEAR and ...... You have arrived at the Myst Island and in Chapter 1 of this walkthrough
Chapter 1: Myst Island:
Open up the Selenitic Age
A: The Marker Switches:
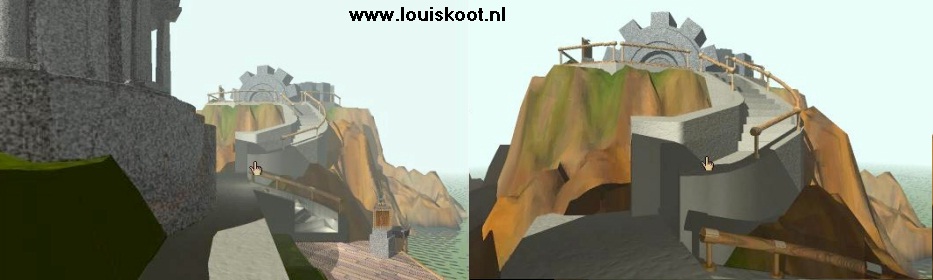
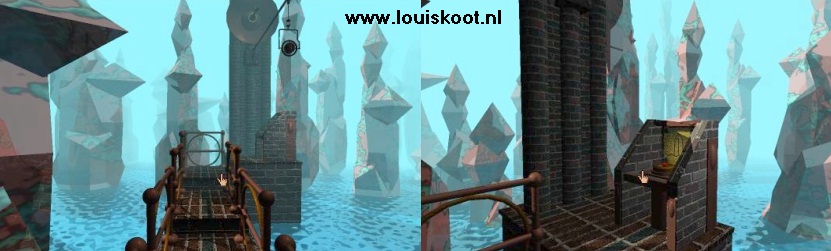
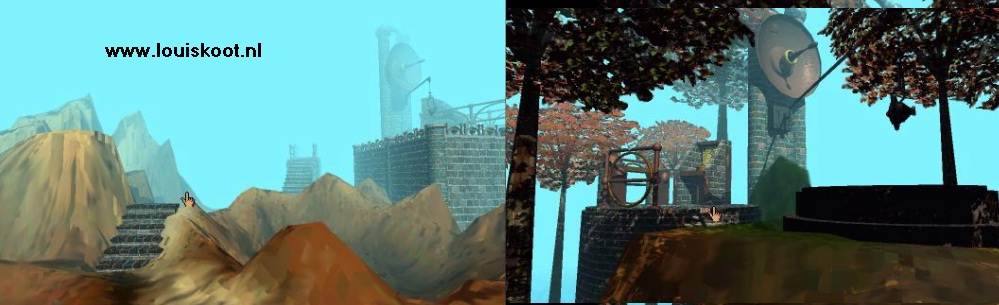
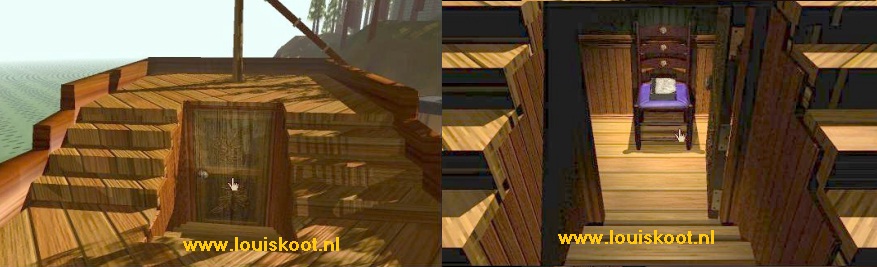
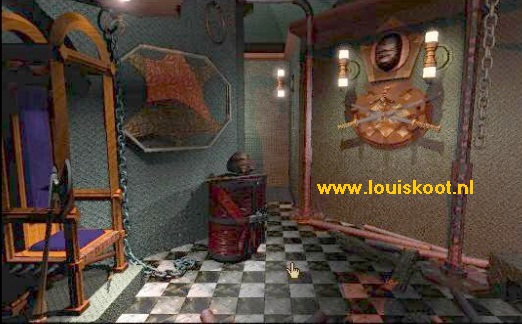
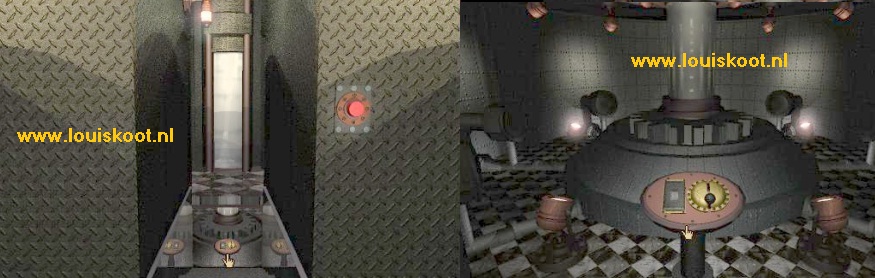
You have ended up on an island ..... You have no idea how you got here and where you are and what kind of an island this is
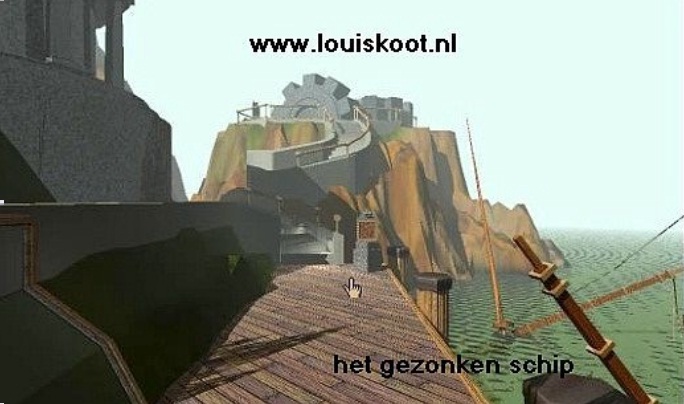
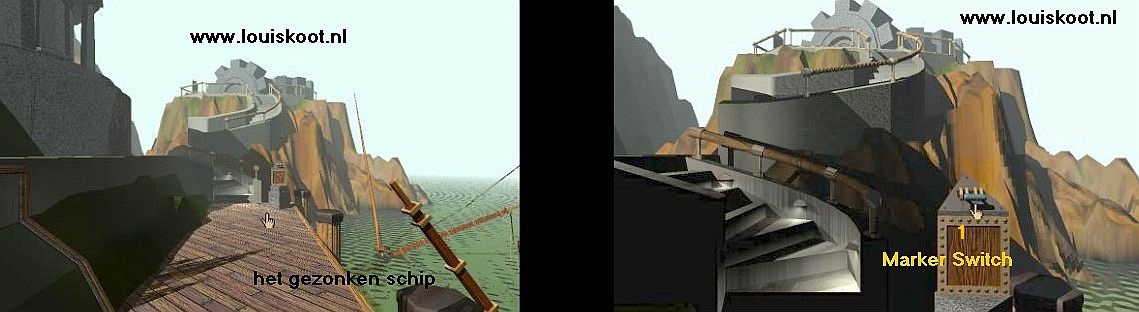
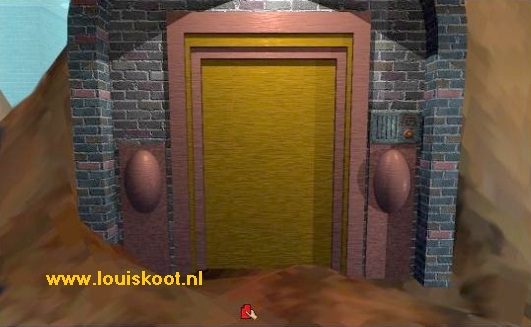
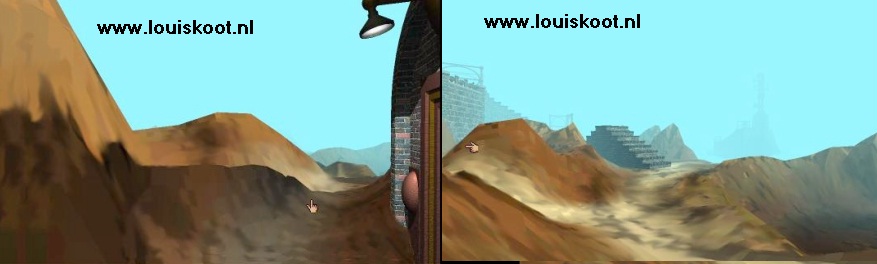
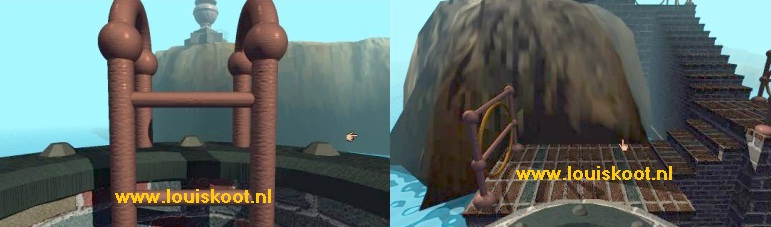
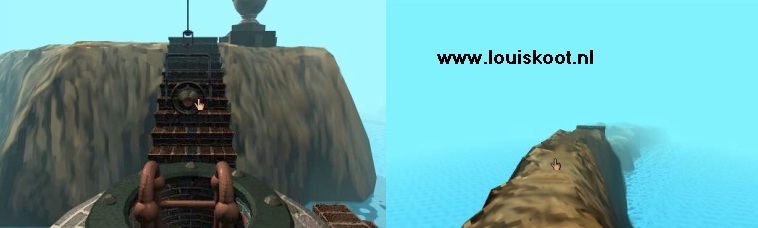
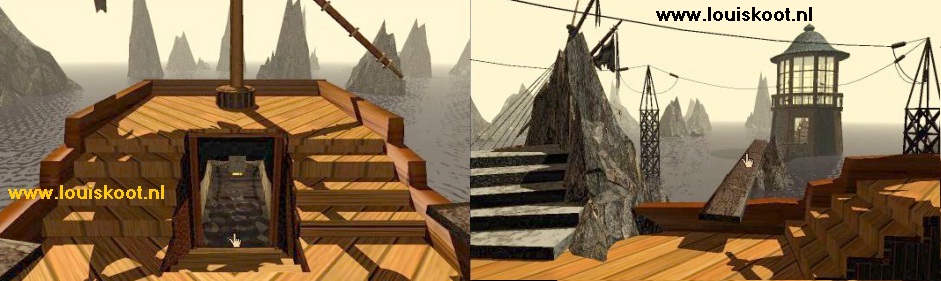
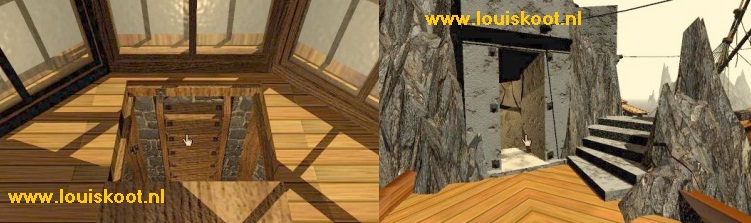
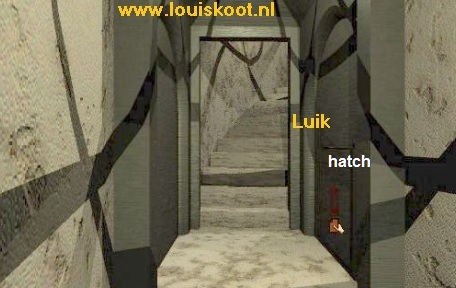
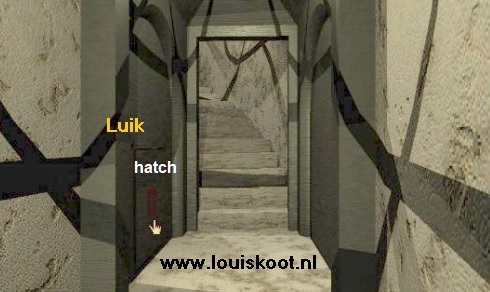
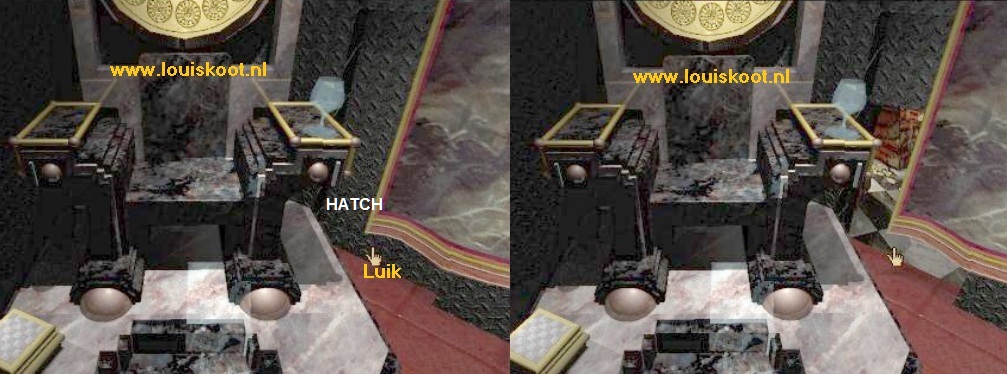
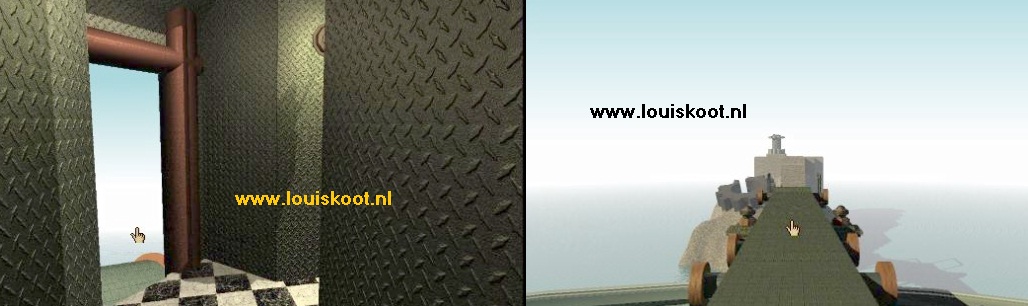
You are standing on a quay. Straight ahead you see a hill and on top of the hill you see a large stone cogwheel. The sea is right next to you. Turn clockwise. Apparently there's a sunken ship in the water. Only the crow's nest of the ship still protrudes above the water. Turn clockwise twice. You stand with your back to the sea and look at a green dike. There is a steel plate in the dike. Click with your finger on the steel plate and it slides open and so you have opened the entrance to a tunnel.
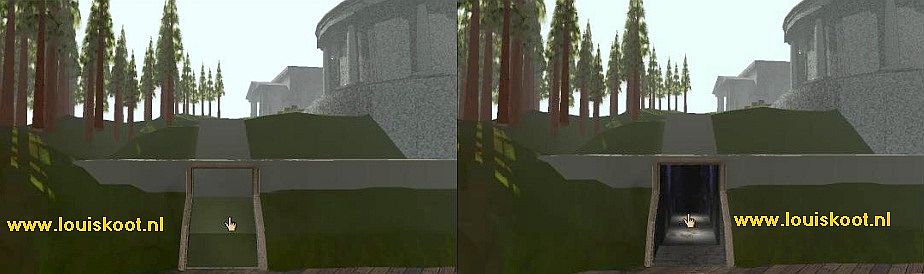
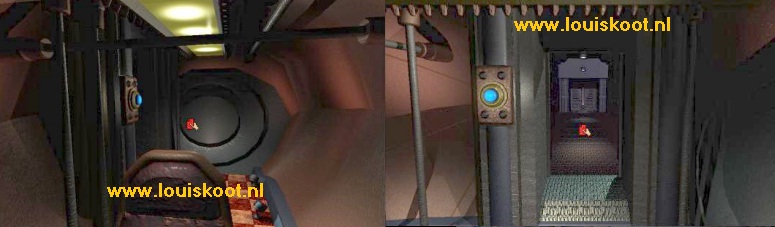
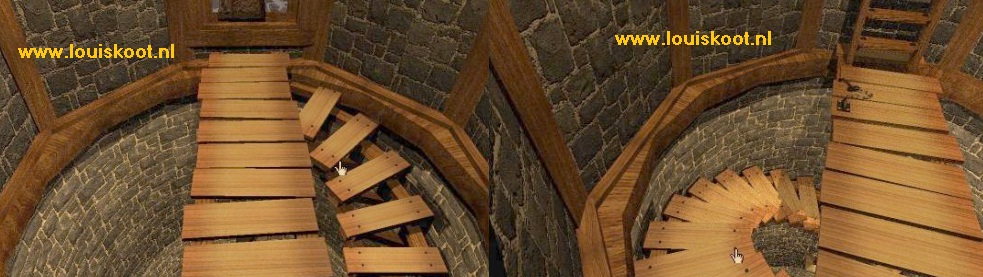
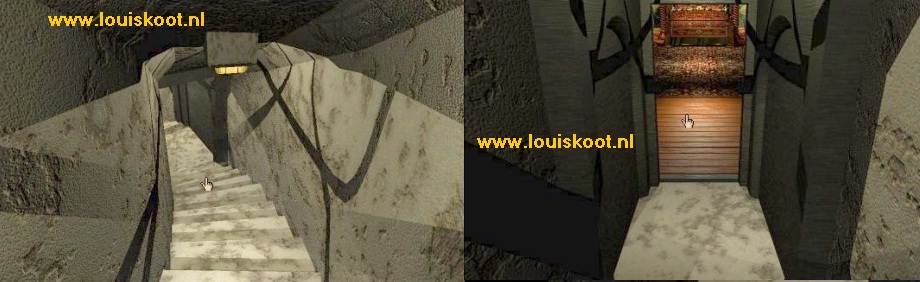
Click 1 time to get to the tunnel and then click 4 times forward to get to a round cave through a small ladder and a nice long staircase.
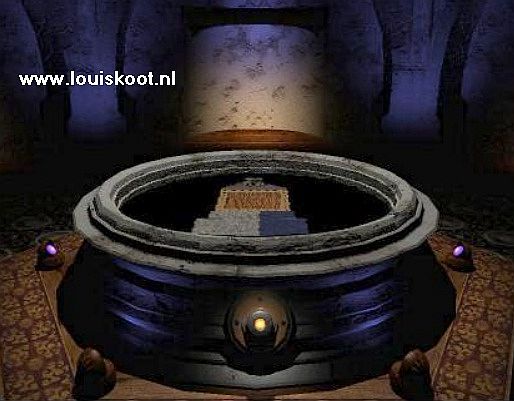
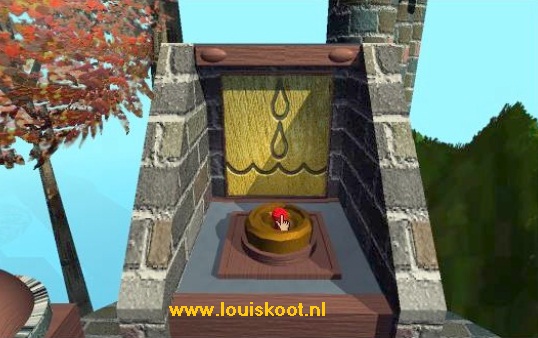
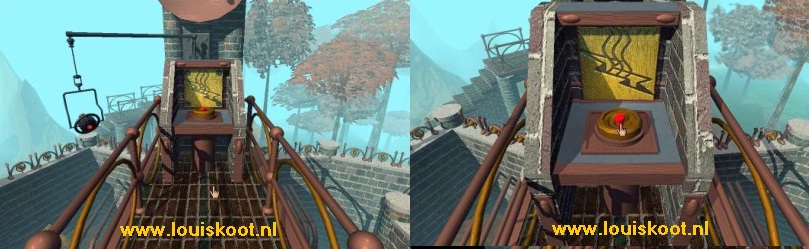
There is a round well in the middle of the cave. There is a button on it. Click with your finger on the well to get closer. I call this zooming.
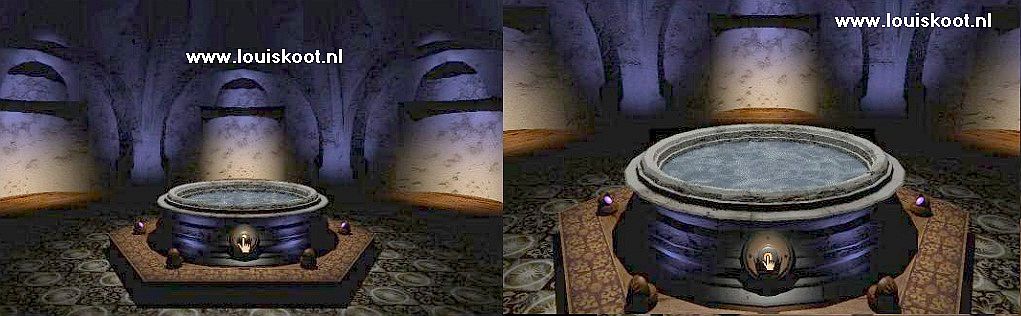
In the well you can see the water lapping gently. Click on the button and ......... the water disappears and the well is dry. You now see a kind of light box in the well. Click on the button again and ..... the water is back again. It is not real water that you see in this well. It is a holographic projection of water. An illusion. Turn counterclockwise 2 times. You see the staircase and to the left of the stairs you see a metal plate on the wall.
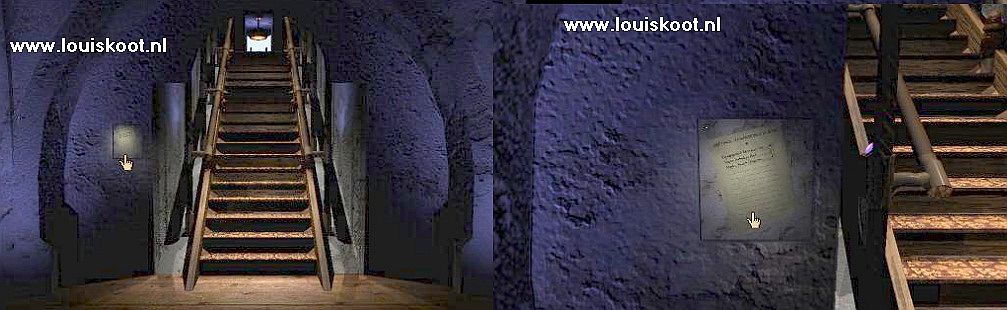
Click on that metal plate to zoom in on it. There is a note on the plate and top left you see a small square button. Zoom in on that note.
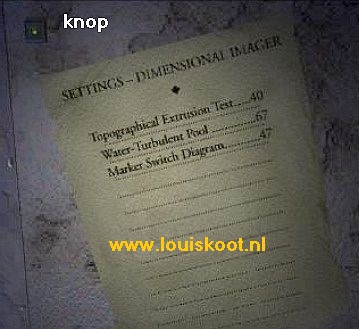
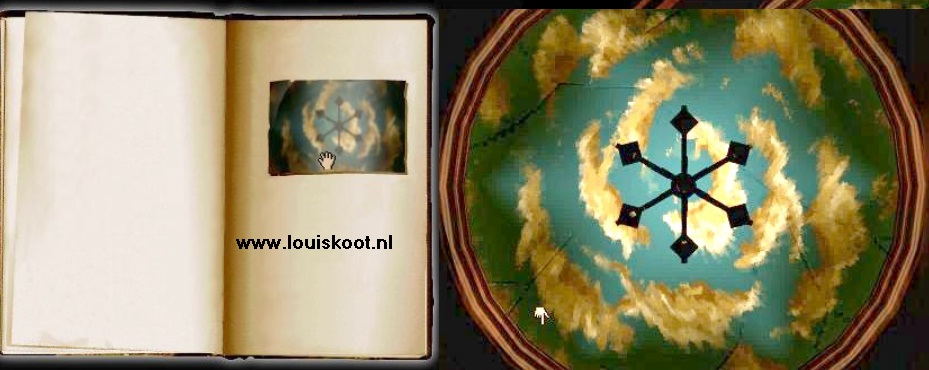
This note gives you the "Settings" for the "Dimensional Imager" and that is the round water well here in the cave.
You read that the code for the: "Topographical Extrusion Test" is 40, the code for the "Water Turbulent Pool" is 67. For the "Marker Switch Diagram" the code is 47. Click on the small square button that you see on the top left of the metal plate. The metal plate slides open and you see a number display that has now entered the number 67. Below the numbers you see arrow buttons. Well, 67 is the code for the water in the well and that is correct. Change the code now, by clicking on the arrows, in 40 and then click on the red button.
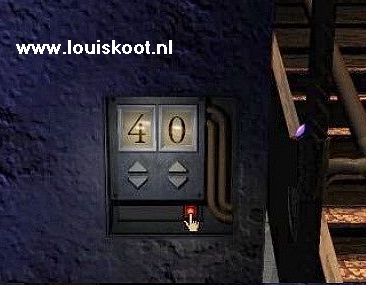
The plate closes again. Turn back to the well and zoom in again. The water is gone again. Press the button again and ...... in the pit you will now see a topographic projection of the Myst Island.

Turn again 2 times and click again on the metal plate, left of the stairs. Click again on the small square button to open the plate again and now set the code 47 on the number display and click on the red button again. Turn back to the well and zoom in again and click the button again. Now a three-dimensional projection of a box with a handle appears.
This is a so-called "Marker Switch". Print this thing right in your memory because you have to go look for these "Marker Switches" on the island to activate them.
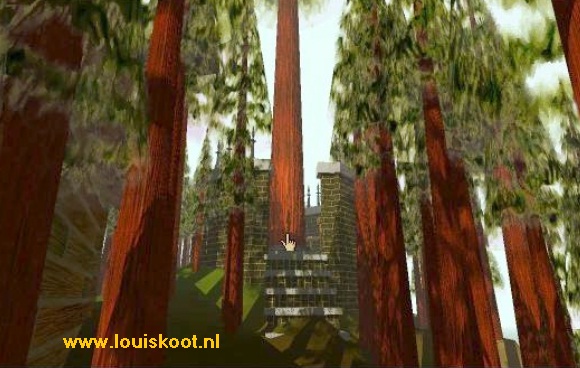
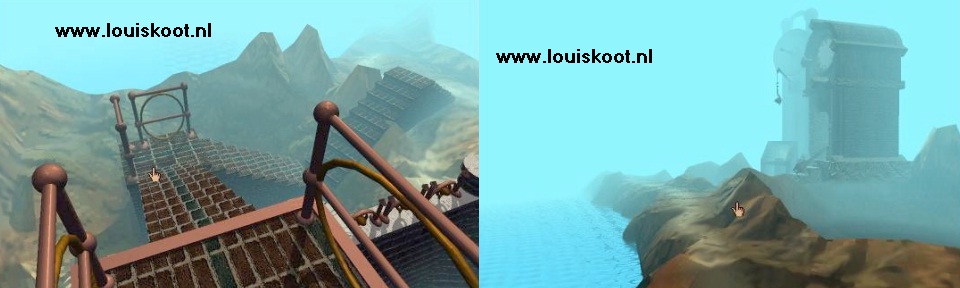
Turn again to the stairs and then go back up the stairs 6 times and ...........you are outside again on the quay and look at the sunken ship. Turn counter clockwise and go 1 step forwards.......stop.... The stairs goes up the hill but in front of the stairs is your 1st "Marker Switch" box.
A lever is located on top of the box. The lever is lowered. Click on the lever to raise the lever. This "Marker Switch is now activated."
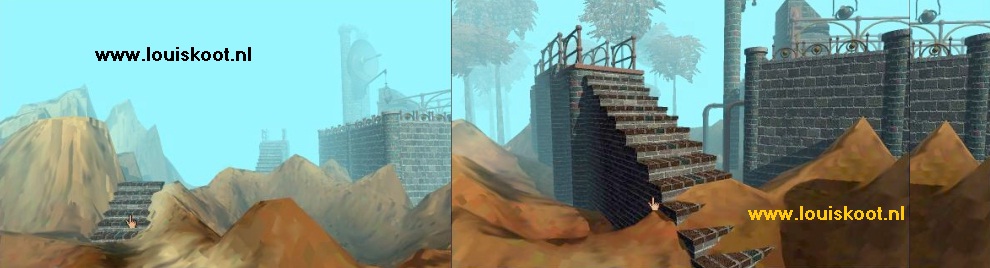
Go up the stairs 1 time. At the top of the stairs you can go to the right, further up the hill to the cogwheel, and to the left and then to the buildings. First we go to the left. So click left and go forward to the next stone stairs. Turn right to stand straight in front of the stairs. You are now standing above the entrance of that well cave. Go up the stone steps.
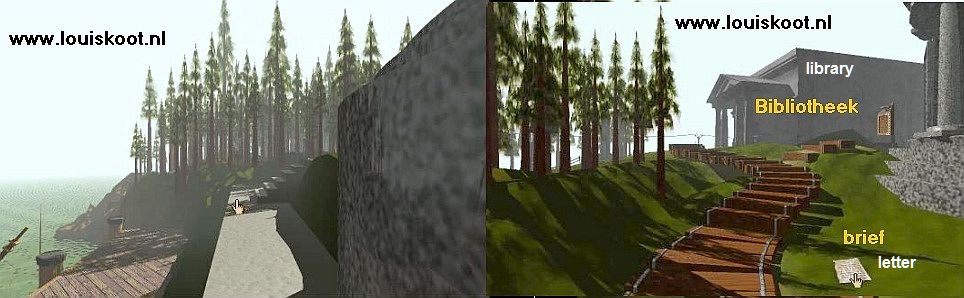
You are now standing on a wooden path leading to the two buildings. Take 1 step forwards and.... next to the path is a letter in the grass.
Click on the letter The letter will appear in your screen Read the letter. The letter is from someone called Atrus and is addressed to a Catherine
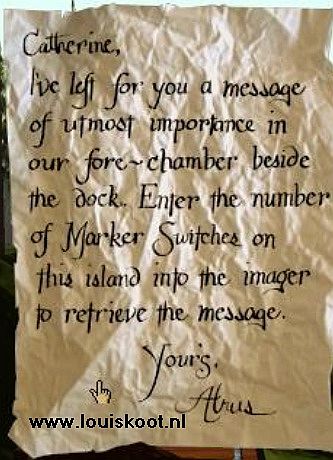
Well, that is clear. The" Fore-Chamber", that Atrus mention, is the well cave and the Imager is that holo projector.
So you have to count how many of those "Marker Switches" are on this island and then enter that number in the number display, behind the metal plate, in the cave
Click next to the letter to put it back in the grass. Go one step ahead on the wooden path. You're on a crossroad then.
To the right is the Observatory building and there stand your 2nd "Marker Switch". Go to "Marker Switch 2" and click the lever to raise it.
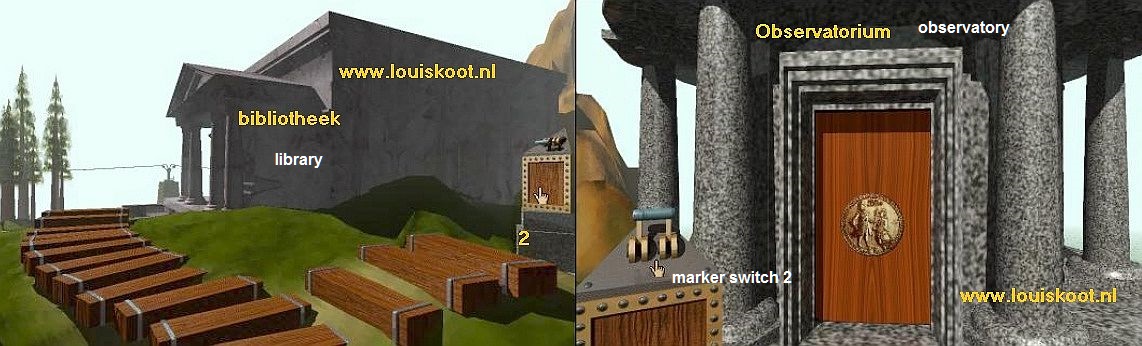
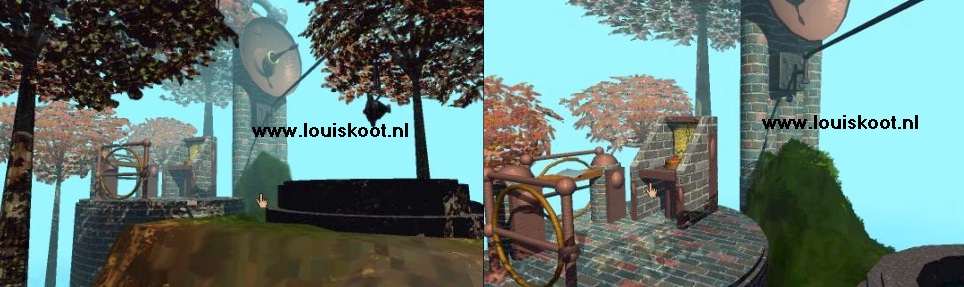
Turn around and click with your finger on the wooden path that goes to the right and you will end up there again. Go forward 1 time and then turn right. You are now in front of the entrance of the main building of this island and this is the Library. Do not go in there now. Turn left and continue forward one time to the round platform. You'll see a large Spaceship, standing behind the library. The 3rd "Marker Switch" stand in front of the spaceship.
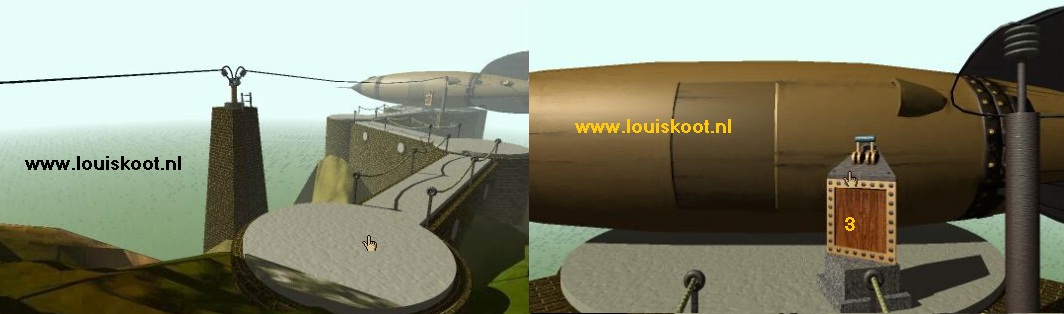
Proceed to the Spaceship and raise the lever of the "3rd Marker Switch". Click on the door of the spaceship. The door does not open. The spaceship has no power.. Turn around and go back to the front of the Library and then turn right. You are now standing with your back to the entrance of the library and you're looking out over the island.
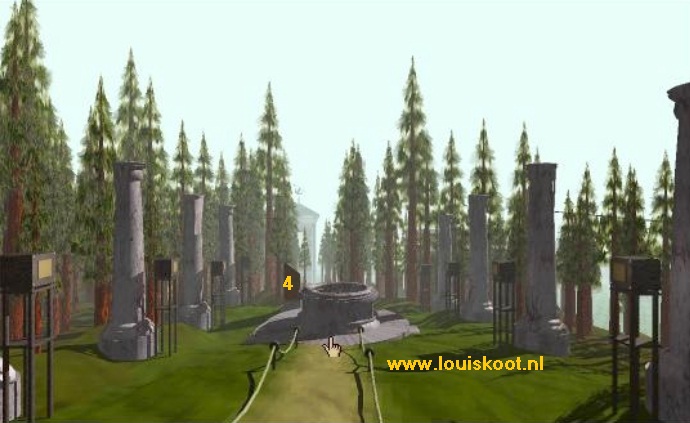
You'll see a round well again and in the distance you will see a Clock Tower. To the left and right you see a number of stone pillars and before each pillar there stand a kind of box on legs. Behind the well you see the 4th "Marker Switch". Go forward one time to the well and then click in the well to look into the well.
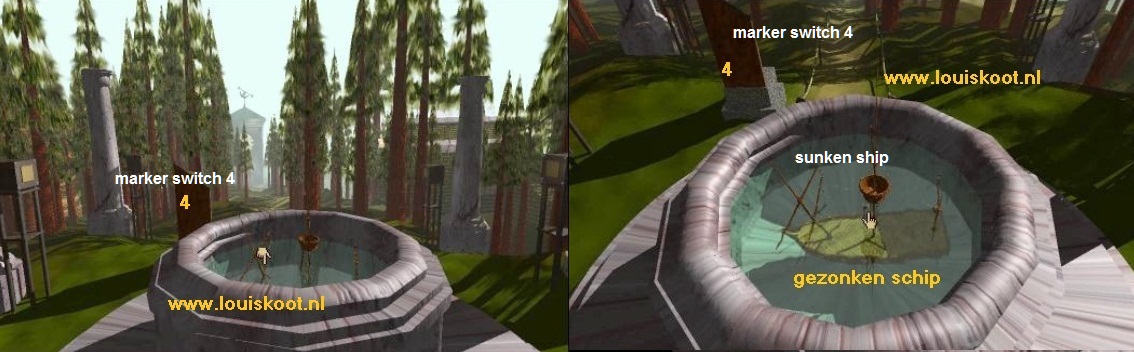
In the well floats a sunken ship. Only the masts still protrude above the water. Would this ship be a miniature version of the large ship that is sunk at the quay?
Click on the right side of the well to zoom out and then advance 1 time. You are now past the well and on your left side is the 4th "Marker Switch". Put the lever on this thing up again.
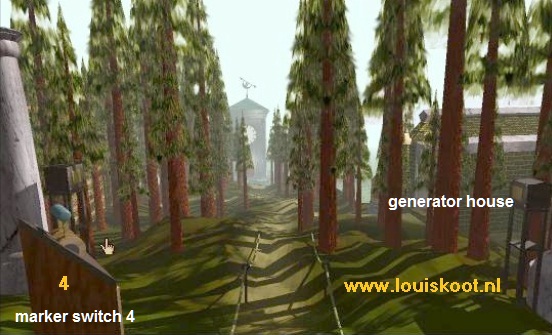
Continue 3 times ahead and then turn right. You're standing in front of a stone building and the 5th "Marker Switch". Put the lever on the box up again.
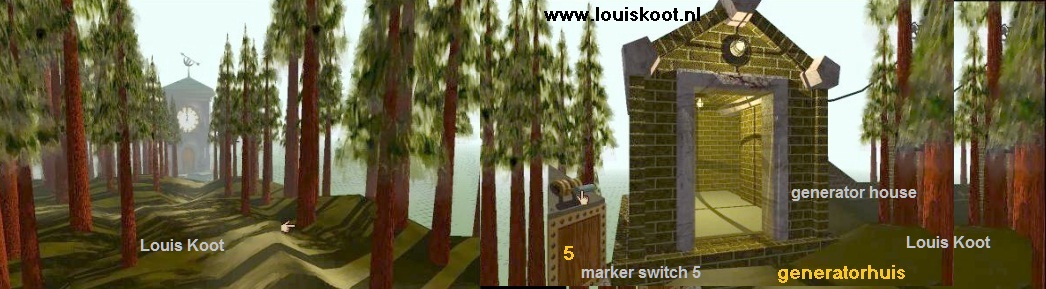
This building is the Generator building. Do not go inside now. You have no idea what to do inside, so don't go messing about with things you do not understand right now.
Turn counter clockwise and then go forward 2 times. You are at the "end" of the island and you are right in front of the Clock Tower.
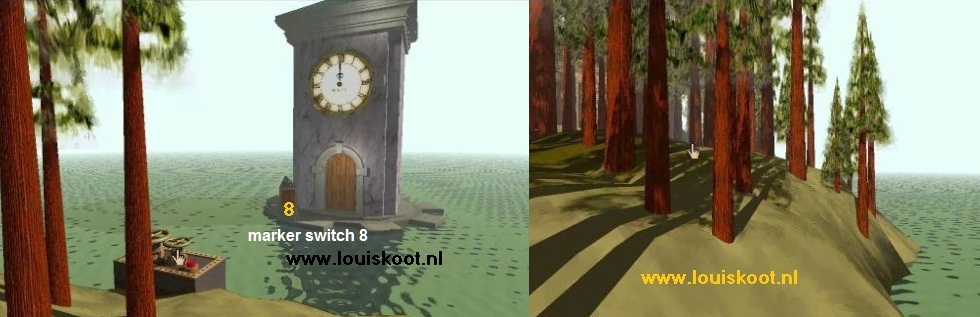
"Marker Switch" 8 stand at the left corner of the clock tower, but you can not get there......Where is the bridge? You see a column in the water on which you see two rotating wheels and a red button. Click on those two rotating wheels to get there. You can look down at the wheels for a moment, but you have no idea what to do with it, so just click with your finger on the left side of your screen to turn left.
You look through the pine tree forest and you'll see wooden hut. Go through the pine forest, 2 times forward and you are at the hut and at "Marker Switch" 6. Put the lever on the box up again.
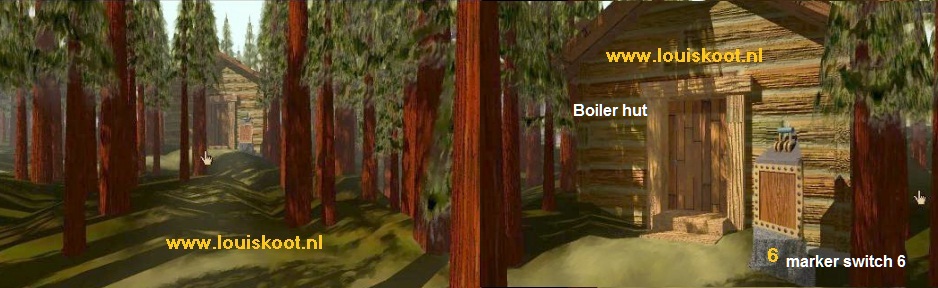
This wooden hut is the Boiler Hut......Do not go in now. This will also come soon.
Click with your forward finger, right next of "Marker Switch 6", to get to the right side of the hut. Behind the hut you see a round stone "stage" with a very tall tree.
That tall tree on the stage is actually an elevator with which you can go down to the Cave where the Channel wood Age Linking Book is located.
There is no point in going there at this moment because this will come later as well. Turn around and return to the front side of the boiler hut.

Back at the front of the hut click your forward finger on the left side of the screen. You are then stand between the red pine trees. Go 6 times ahead and you are back in front of the entrance of the library.
Turn right before the library and follow the wooden path 4 times back, to the path above the quay.
Turn on the path to the left. You'll see the Cogwheel Hill again. Go all the way up to the top of the hill, to the large stone cogwheel.
"Marker Switch 7" is placed on top of the hill. Move the lever on the Marker Switch upwards.
You have now found all "Marker Switches" .... So there are 8 of those "Marker Switches" and of 7 of those things you have now raised the lever. Only the lever of "Marker Switch" 8, near the Clock Tower, you could not raise yet. The letter from Atrus reported that you have to enter the number of "Marker Switches" on the numerical box of the Holo imager, in the cave near the quay.
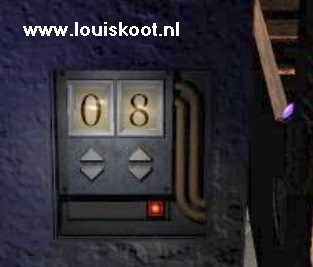
Now we go back to the well in the cave, so turn around, descend the stairs and go down to the quay. You probably need to open the entrance to the cave first Go down the tunnel again. In the cave zoom again in on the well and then turn 2 times to the left. Click again on the metal plate, left of the stairs, and click on the small square button again to open the plate. In the display use the arrows to set the number 08 and then click on the red button again.
Then turn back and zoom in on the well and click on the button and .... A holo-projection of Atrus will now appear in the well.
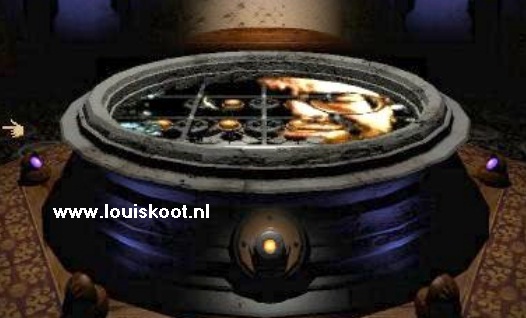
Listen to the holo-message of Atrus, which was actually meant for Catherine. Atrus tells something about his books, that are kept in the library. Those books are apparently all burned. Atrus suspects his sons, and in particular his son Achenar of having burnt the books. Atrus tells that he went to investigate and that he stored the books that survived the fire in safe places. Atrus also says that Catherine should think of the "Tower Rotation".
All right, turn 2x to the left, so that you can see the stairs again, and then go up the stairs again to the quay. You turn left again on the quay. Now follow the route back to the entrance of the library and enter it now:
B: The Library:
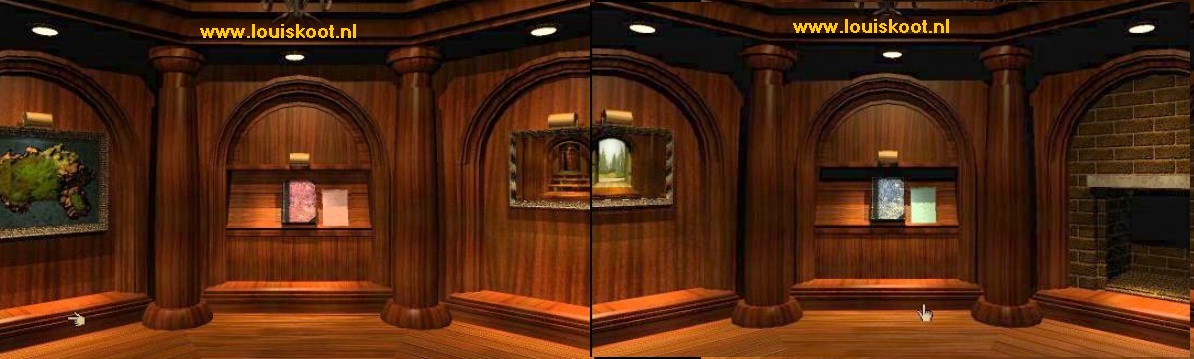
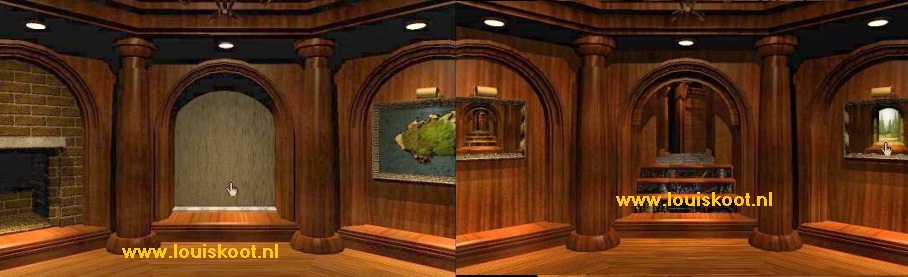
The library is a more or less a round room with niches. Stand in the middle of the room, so that you can turn in all directions.
Make sure you are standing in front of the bookcase. The middle of the 3 niches is the bookcase niche.
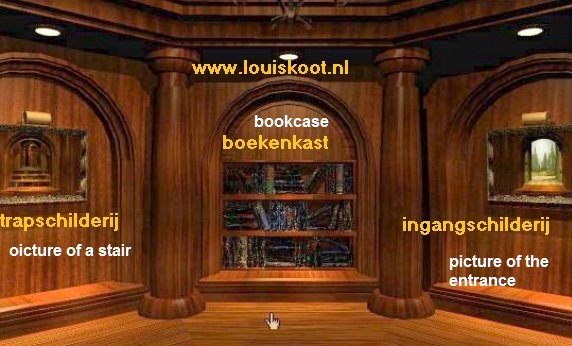
In the niches, left and right of the bookcase, you see a painting in the niche.
The left painting shows you a staircase that seems to come out of the bookcase niche. The right-hand painting shows you the entrance to the library.
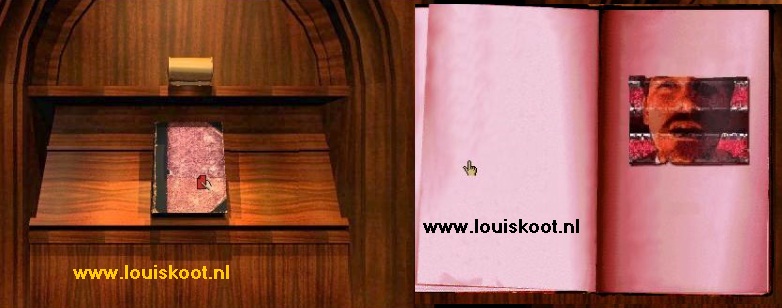
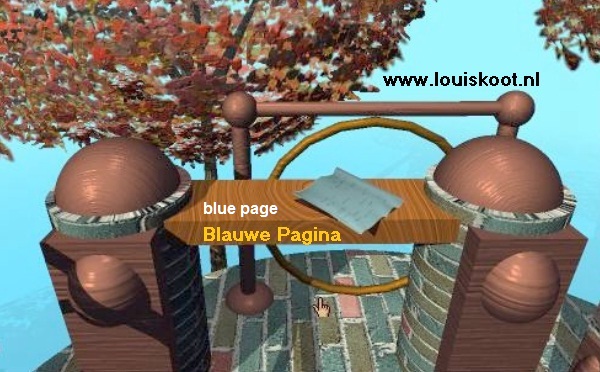
Turn left once. Again you see 2 niches and part of the stairs painting niche. In the middle niche is a Red Book with a separate page next to it. In the left niche is a map of this Myst island. Turn right again twice. You see a niche where a Blue Book is located with a separate page next to it and you see the fireplace.
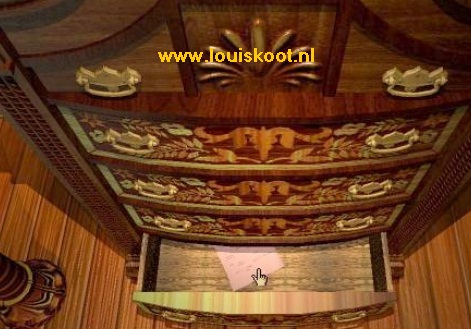
The bookcase:
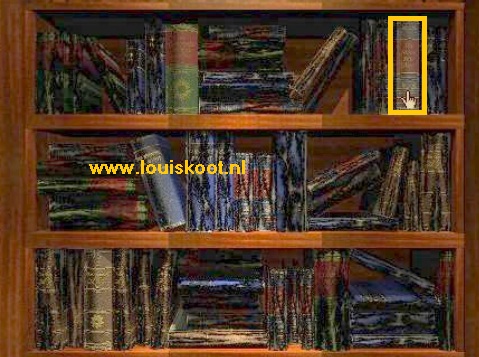
now you know where all the niches are located. Turn back to the Bookcase niche and then go forward 2 times. You are then zoomed in on the 3 shelves that are full of books. You can click on any book and then the book will appear in your screen. Then click on it again to open the book. If you do this with each book, you will find that most of the books are BURNED. However, there are 5 books that have not been burned completely and you have to read these 5 books because they contain important clues.
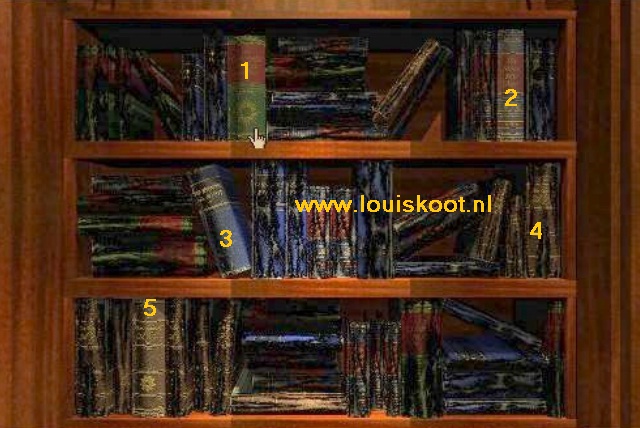
|
4 of these 5 books are Journals, written by Atrus, and they tell you something about the 4 Ages you have to go to in this game. The journals also give you important instructions on how to travel to those Ages. The 5th book is a Code book that you really need at the end of this game. Well, these 5 books are:
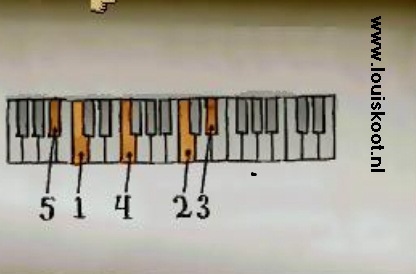
So take the books 1, 2, 3, 4 and 5 out of the bookcase and browse through these 5 books. In the Stone ship book, which is book 2, you will see a star chart on the last few pages with an image below. You will need these images later to go to the Stone ship Age, but you do not have to draw them yet. You can do that later. In the Selenitic Age Book, that is book 3, you see on the second to last page a drawing of a piano keyboard. 5 of the keys are numbered 1, 2, 3, 4, 5. Make a drawing of this because you can't take anything with you
The Selenitic Age is the first Age that I go to in this walkthrough and you need this drawing. The Code Book, which is book 4, contains 300 pages and on each page there's a diagram of black and white boxes. The Mechanical Age book, which is book 5, also contains interesting information about this Age, so read this book carefully. If you have read all the 5 books and drawn the drawing of the piano, then click twice with your finger on the screen to do 2 steps backwards so that you are back in the middle of the room. |
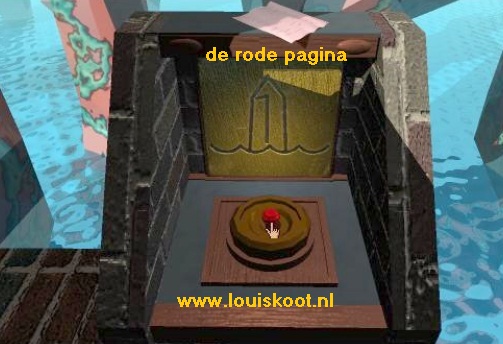
The Red Book
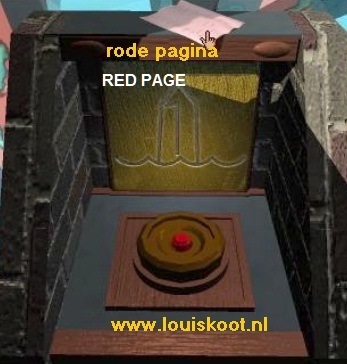
Now go to the niche with the Red Book. Click on the Red Book to get it in your screen. Open the book by clicking on it again.
There is a window in the right-hand page of the Red Book. You see a lot of STATIC in the window and you hear a lot of squeaking and creaking.
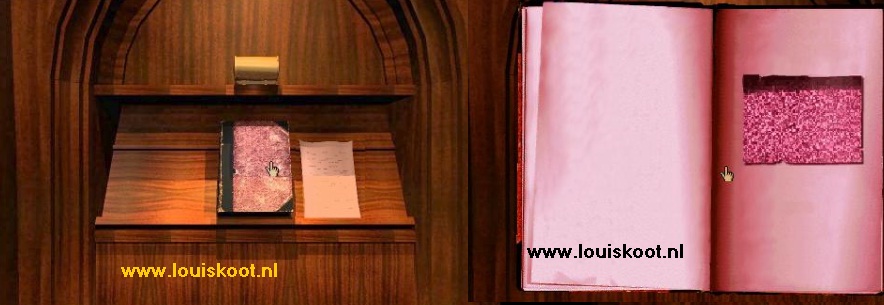
Click next to the book to put it back on the shelf again. Then click on the separate page, that lies next to the book. You take the page in your hand and see that it is a Red Page. Click with the page on the Red Book. You hear a very specific sound and you have pasted the page in the Red book and the book is back in your screen. Open the book again and ........ The face of a guy appears in the window now
The guy in the book can see you too and he starts to talk to you, but because of the disturbance you can only hear a few fragments of what he says. This guy is Sirrus, the youngest son of Atrus and Catherine. Sirrus can not see you well either, and at first he thinks that you are Achenar, his elder brother. Listen to Sirrus, he only wants Red pages.
Click next to the book to put it back on the shelf and then click with your finger twice in the screen to take 2 steps backwards.
Now go to the niche with the Blue Book and repeat what you have just done with the Red Book:
The Blue Book:
So stop the Blue Page, which is next to the book, in the book and open the book. In the window appears Achenar, the eldest son of Atrus and Catherine and brother of Sirrus.
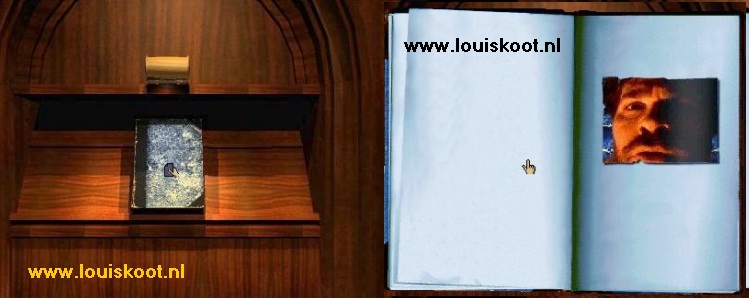
Here too there is a lot of interference and so you can also hear Achenar very fragmentary.
But it becomes clear to you that he is particularly interested in the Blue Pages. You catch the words: "Who are you", "Blue Pages" and "Must have the blue pages"
When the window is black again in this book, then click again next to the book to put it back on the shelf. Then step back 2 steps.
Well, this is your assignment in this game TO FIND THE RED AND THE BLUE PAGES and stick them in the Red and the Blue Book. o in each of the 4 Ages, that you have to go to, you will find a Red Page and a Blue Page. But you can only take one page with you each time. So if you want to get both the Red Page and the Blue Page from each Age you will have to go to all the Ages 2 times. You can however choose to only get 1 page and leave the other page. So for example you can only go for all Blue Pages or only for all Red Pages. If you do that you can just play the game and finish it, but you will miss part of the story.
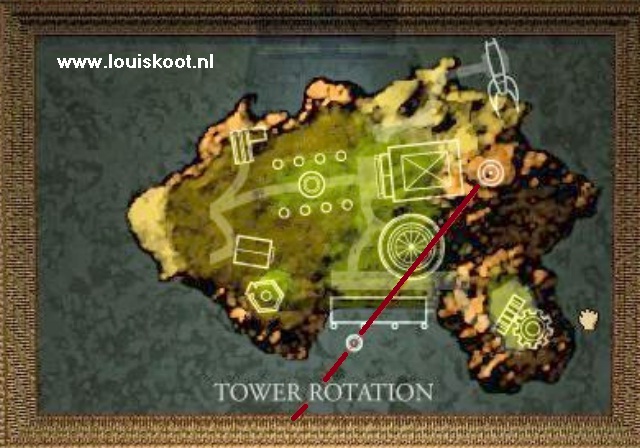
The Tower Rotation Map:
Turn back to the niche with the red book. The map of the island is to the left of this niche. Click 2x on that island map and you are zoomed in on it. White-marked spots now appear on the map. These white spots are all 7 places where the 7 Marker Switches are located and of which you have put the levers up. Because you have put those 7 levers up, this card is now activated. You don't see the Clock Tower now appear on the map because you weren't able to activate "Marker Switch 8", witch stand at the base of the Clock Tower.
On the map you see now: The Cogwheel on the hill, the Sunken Ship at the quay, the round Observatory, the Library with the Water well in front of it, the Boiler Hut with the Tree elevator, the stone Generator building and the Spaceship. Behind the library you see a white circle. That white circle is the ROTATION TOWER. Place your hand on the Tower and then click your left mouse button.
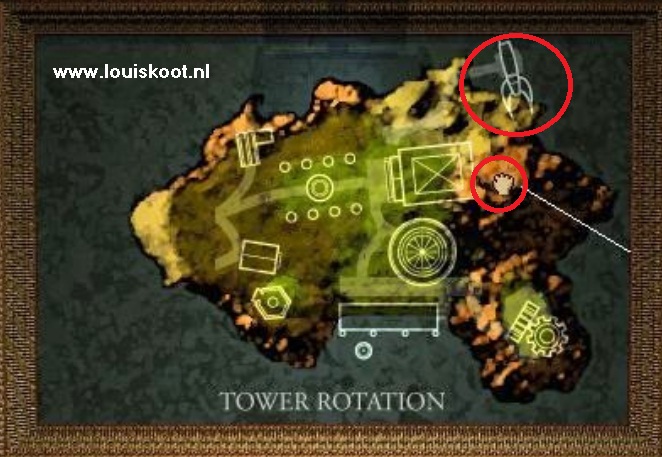
"TOWER ROTATION" you read on the map and a white line appears from the Tower. Now hold down your mouse button on the Rotation Tower and ........... the white line will turn over the map. When the white line reaches over the Cogwheel, the Sunken Ship, the water well and the Space Ship, then the white line becomes a RED line. Now make sure that the Red Line is exactly on the Spaceship and then is a smooth line. Make sure this red line stays on the Spaceship
You now have the Rotation Tower turned at the Spaceship.
The Rotation Tower:
Click twice with your finger next to the map to zoom out and to take 2 steps backwards. Then turn right once and .....
you are right in front of the niche where the Staircase painting is hanging. Click twice on this painting and .... the painting is completely distorted and you hear a bang and you zoom out automatically.
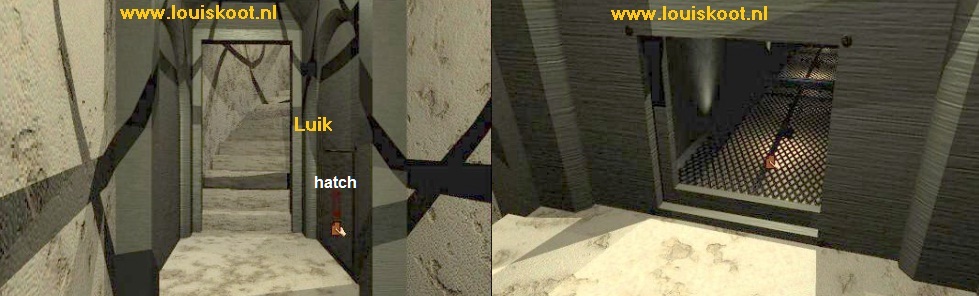
The bookcase shelves now roll out and it's now a staircase and the entrance to the library is now closed. Click with your finger on the now unfolded bookcase steps.
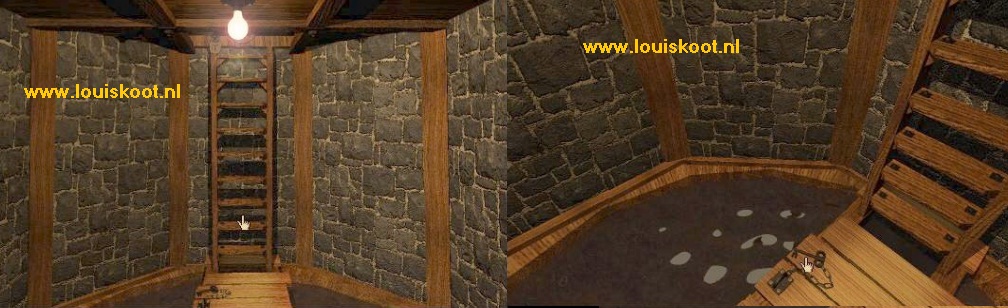
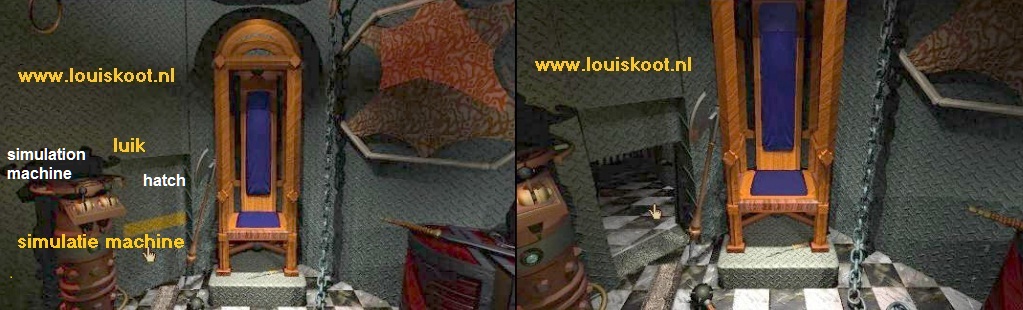
You are standing right in front of the bookcase but ...... the back of the bookcase niche is now open and you see the entrance of a tunnel. Go through the tunnel and .....You get to an elevator.
Click on the elevator door and enter the elevator. Click on the blue button and the elevator will bring you up.
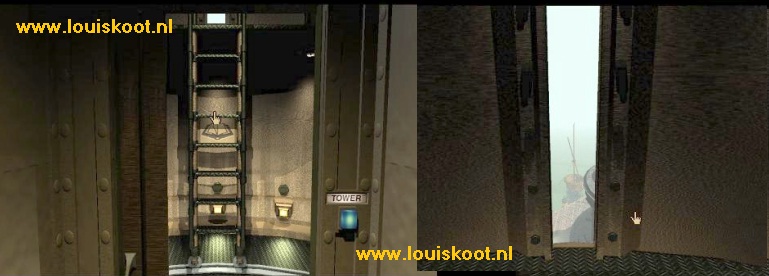
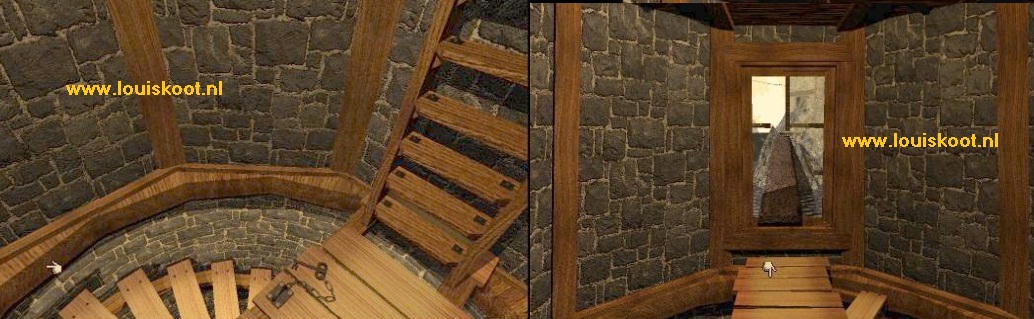
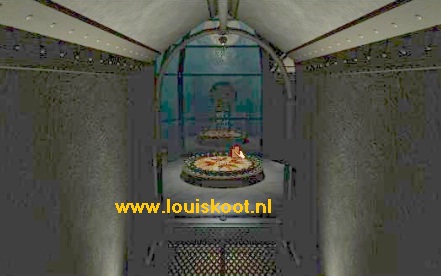
You are now up in the Rotation Tower. Exit the elevator. You are standing in front of the "Book ladder".

Click on the ladder, at the top of the screen, and then climb all the way up. Through the slit you now see the Spaceship, so the tower is now indeed aimed at the spaceship.
Turn all the way around and then click with your down index finger and then climb back down the book ladder. You are then standing in front of the elevator door again.
Turn left or right and then go 2 times forward to the "Key ladder", which is behind the elevator.
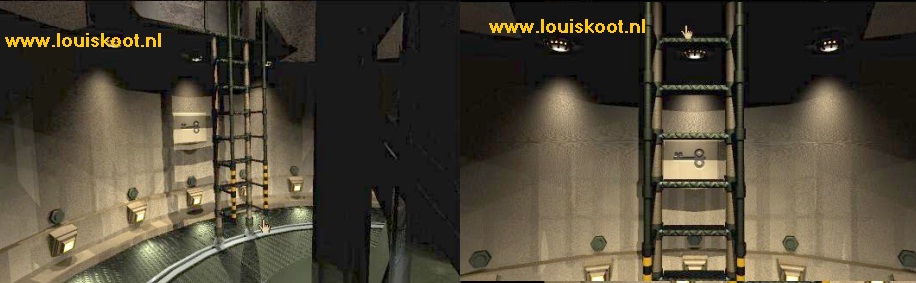
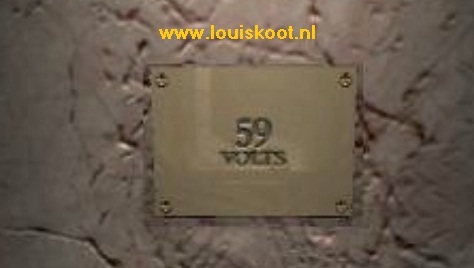
Climb this "Key" ladder all the way up and above you see a Metal Plate on the wall. Zoom all the way in on the metal plate. 59 VOLTS you read on the plate.
So this is an indication of how to start the spaceship. Well, climb back the key ladder and go back to the front of the elevator.
Enter the elevator again and press the blue button again to go back down. Walk back through the tunnel to the library room.
Turn around to the niche with the entrance painting, right next to the bookcase niche, and click twice on this painting. The staircase becomes the bookcase again and the entrance opens again.

Turn on the Generators:
Go outside and go back to the stone Generator building.
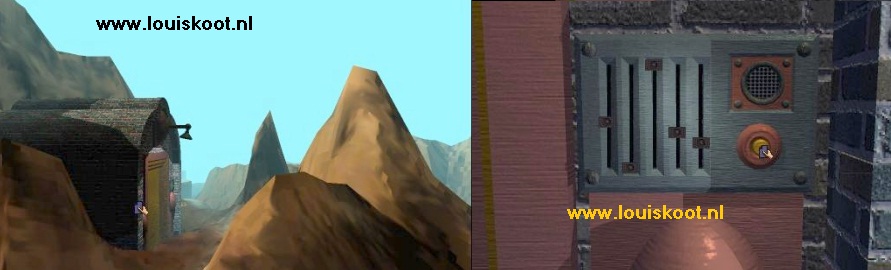
Go inside and then forwards, through a stone staircase and a tunnel. You end up at a gray door. Open the door by clicking on the button, right next to the door.
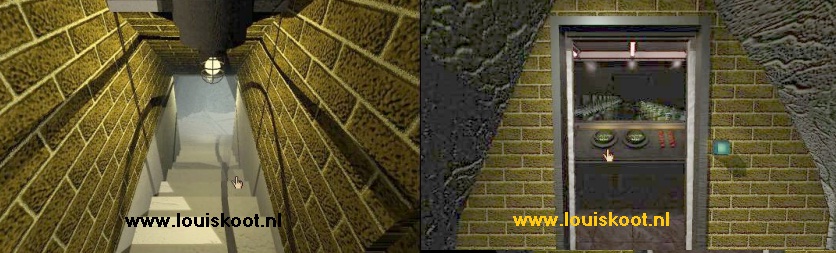
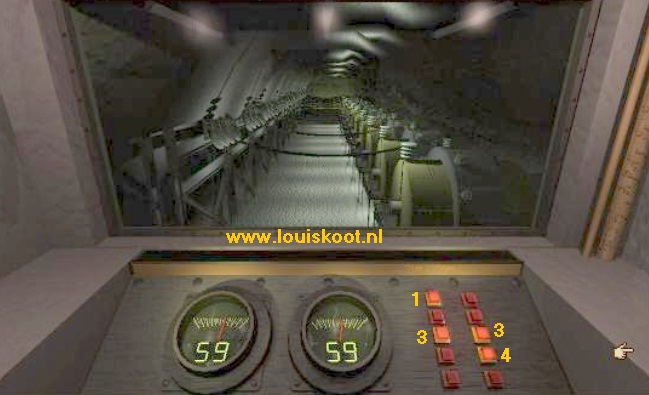
When the lights are on you go forward. Through the window you can see the generators and in front of the window you see 2 round gauges that are now both at 00. To the right of the 2 gauges you see 10 red buttons, in two rows of 5 buttons each. Number the buttons, in each row and from top to bottom, as 1, 2, 3, 4 and 5. Turn around. A paper hangs next to the entrance. Zoom in and you will see the layout of the 2 meters and the 10 buttons. You read that one gauge is for the general power supply and the other gauge is specific for the spaceship. Turn back to the gauges and the 10 red buttons. Well, the indication in the Rotation Tower was 59 Volts, so you have to set both meters to 59. You notice, however, that you can not just click randomly on those red buttons because you then never get to 59. Here is the solution:
In the Left Row click on buttons 1 and 3 and in the Right Row you click on button 3 and 4 and ..... both meters are at 59.
Let's go To the Selenitic Age now:
The Spaceship
Turn around and go back through the tunnel to get outside again. Now go back to the Spaceship, behind the library
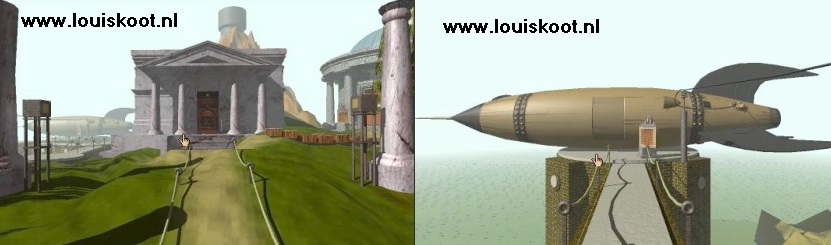
Click again on the door of the Spaceship and now the door will open. Go inside.
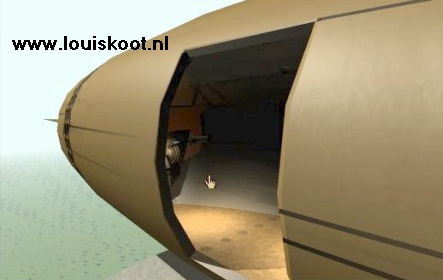
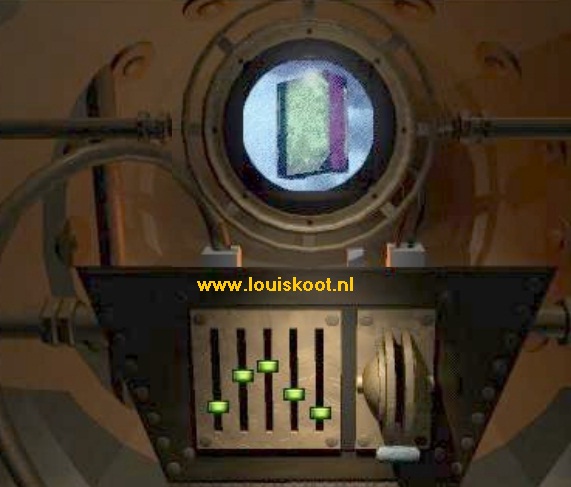
In the "nose" of the spaceship you will find the start-up mechanism. It consists of a Round Screen and underneath there are 5 slots where you can push a button up and down.

If you push the buttons through the slots, you will hear different tones. The tones go from very low to very high. A blue lever is placed on the right of the panel.
Turn around. There is an ORGAN in the back of the spaceship. Go to it and zoom in completely at the keyboard.
Do you remember the keyboard drawing you saw in the Selenitic Age book. Have you done that drawing? Then grab this drawing.
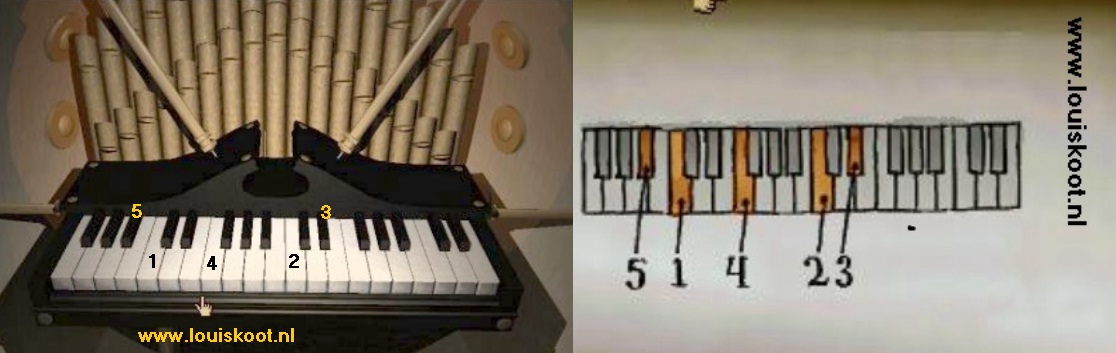
The 5 keys, numbered on the drawing with 1, 2, 3, 4, 5, correspond to the 5 slots under the round screen. The left slot is then for Key 1 and then so on to the right. You have to click on each of those 5 keys on the Organ and then REMEMBER the MUSICAL TONE you hear. Then you turn over to the start console and with the buttons in the slot set this TONE correctly. You must do this very precise and you must do this with all 5 sliders. So you back between the organ and the console to hear the tones and then set that slider to the exact right position. When you think that you have all 5 slider at the exact right position then click the Blue Handle and.......If it goes well then the Selenitic Linking Book appears in the round screen.
NB: This Organ/Slider puzzle is a very frustrating puzzle. You have to slide each slider in the exact right position and this is very tricky. Not many people are able to solve it, but I did. If you see the book in the round screen, I advise you to SAVE IMMEDIATELY. If you want to play this game again then you have at least one Save Game for this rotten puzzle
Well, what are you waiting for ?? Click on the book. In the screen you will see the link movie to the Selenitic Age. Click in the screen. The video then becomes screen filling.
Enjoy your scenic flight over the Selenitic Age and if you have enough of it, just click on the screen.
You then hear the specific Linking Sound and then you are back in the spaceship ..... You have landed in:
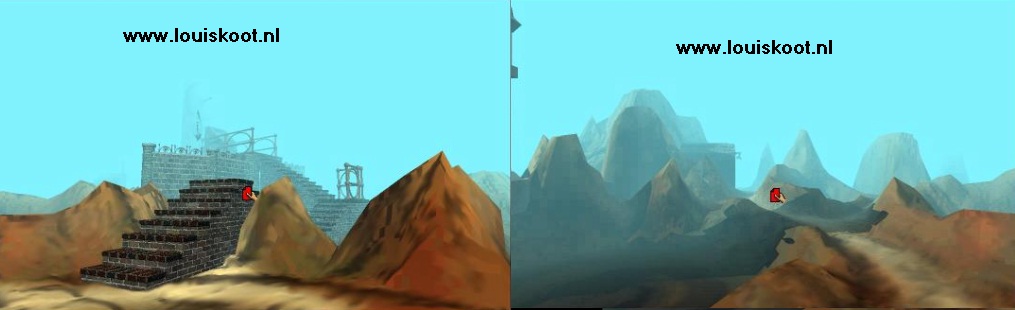
Chapter 2: The Selenitic Age
You are still in the Spaceship ....... It seems that you have not left the main island. Turn around and leave the spaceship and see ......

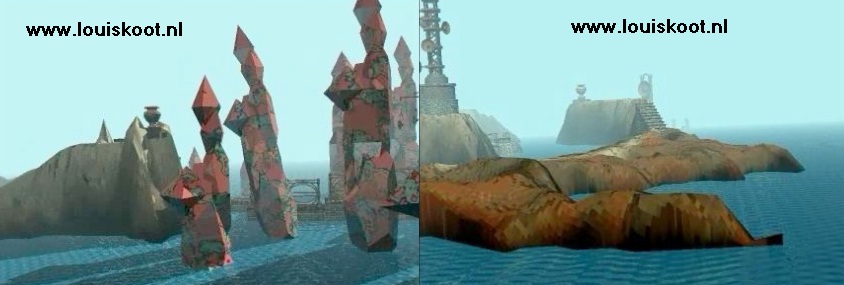
You have arrived in a new world and are standing on the stone Pier. Straight ahead you see a high rock formation. Follow the path ahead.
You come at a Stone House that stands against the rocks. Turn clockwise so that you are right in front of the house.
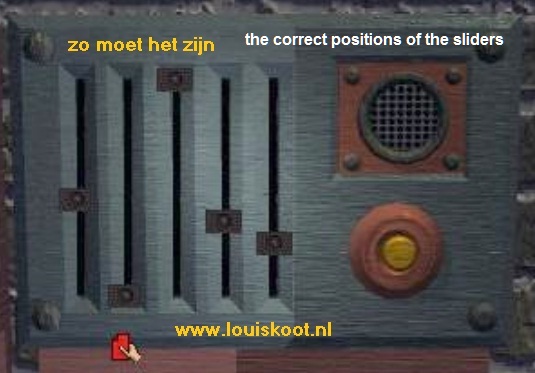
You'll see a big brown door. The door is closed. Right next to the door is a panel with 5 sliders, a speaker and a button. Zoom in on that panel
This stone house is the entrance to the Submarine maze. At the end of this maze you'll find the Linking Book that can bring you back to the Myst Island. But first you must figure out how to open this door. In each of the 5 sliders you can slide the button up and down. Currently, each of the 5 buttons is at the very top of the slots. If you click on those 5 buttons and then hold down your mouse button you will hear a sound. If you slide the buttons down through the slider, you will hear a different sound every time. In total you will hear 10 different sounds. The 5 buttons must each be set to the correct sound in their slot. If you then click on the button then the door will open. But which 5 sounds are the right ones? you do not know this at this moment.
Turn on the 5 sound Antenna's:
A: The Water Antenna
Zoom out the panel and then turn counter clockwise. Continue forward 1 time. You are then at a junction.
You can continue further to the stone "pyramid" stairs or you first turn left.
Turn left. You see another stone staircase and behind it you see yet another stone staircase. In the right part of your screen you'll see an antennal dish
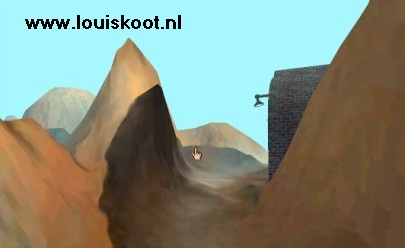
Go forward, via the 2 stone steps. You are then in a piece of forest. Straight ahead you see a hill. Continue forward one time to that hill.
You will now hear the sound of Running Water and you will see the Water Antenna standing on top of the hill. Climb all the way up the hill and go to the Stone Cabinet where you see a Red Button.
You are at the Water Antenna. You can see this by the water symbol above the Red Button
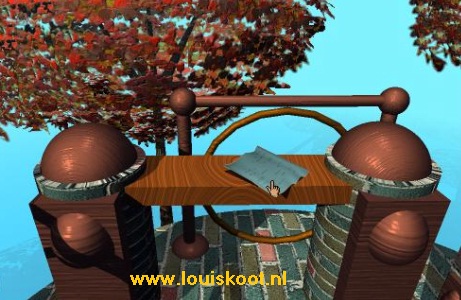
Click the red Button to turn the antenna ON. Then turn left. On the bench lies the BLUE PAGE.
You can now take the blue page with you, but I advise you to leave the page just now. We'll pick it up later. Remember that the blue page is here.
So ...don't pick up the blue page now. Turn left and go back 10 times, to the crossroad before the Stone House. You'll see that stone "pyramid" staircase again
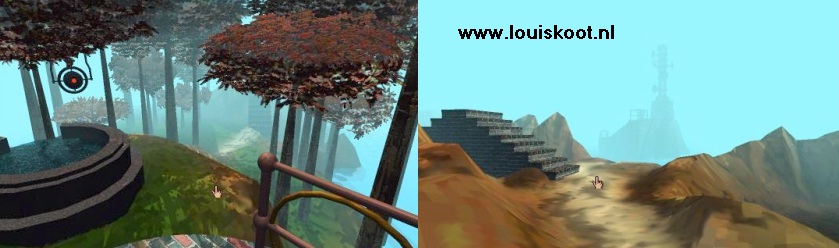
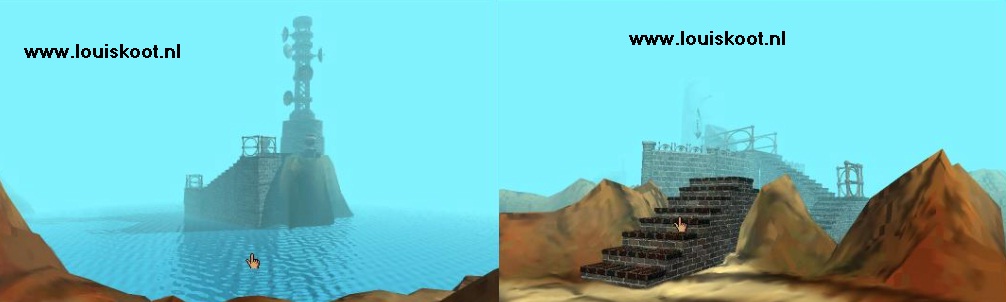
Now go 2 times ahead and ........ you are standing at the edge of the island near the water and in front of you you see the Reception / Radio mast standing on a small island.
Turn left to the "pyramid" staircase. That staircase goes to the next antenna
B: the Volcano Antenna:
Go 6 times forward to reach the Volcano Antenna via the "pyramid" stairs and the next steps.
You know this is the Volcano antenna because you hear the sound of burning fire and because of the fire symbol, above the red button. Click on the Red Button to also turn this antenna on.
Turn clockwise 2 times and then go back down the stairs three times. Right in front of you, you'll see the Big Clock:
C: the Clock Antenna:
Go forward 2 times, you hear the sound of a Clock. Turn right. You are at the red button of the Clock antenna.
Press the Red Button to also switch on this antenna. Turn anti-clockwise and continue 2 times further to the next fork in the path.
Turn clockwise and go 2 times forward. You are now starting to hear "Flute tones".
D: the Flute Tones Antenna:
Continue 6 times forward and you are at this antenna.
Above the red button of this antenna you'll find the RED PAGE.
Leave the red page for no as well. Press the Red Button to switch this antenna on also.
Turn clockwise and go back 8 times. You see that transmission / reception mast again. Turn right and follow the path 3 times ahead.
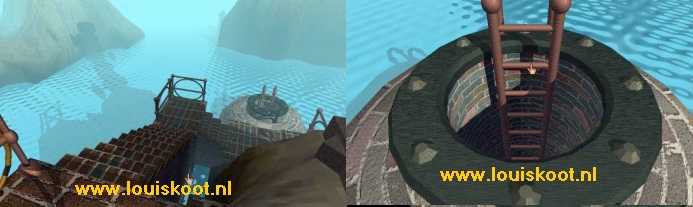
You are standing in front of a Stone Staircase again. Continue 4 times ahead, you hear the sound of the whistling wind, and you are now at the:
E: the Wind Antenna:
The red button of this antenna is above the round ladder hole. So click on the Red Button to zoom in on it and then click on it again to switch the antenna on.
Turn around and click with your finger on the top of the ladder that goes down into the round hole. You are on the ladder.
Click down 3 times via your down index finger and you are at the bottom of the ladder. On the left you see a green handle. Click on the lever to turn on the light.
Turn left or right and then go forward 5 times through the tunnel. You are then at the 2nd ladder.
Climb 3 times, then turn right and then go 4 times forward and you are now at the:
F: The Send and Receive Mast:
So you are now on that little island and you are standing in front of the round bottom of the Send and Receiving Mast.
Click on the 2 metal door. These blows open and you see the Control Panel. Zoom in on it.
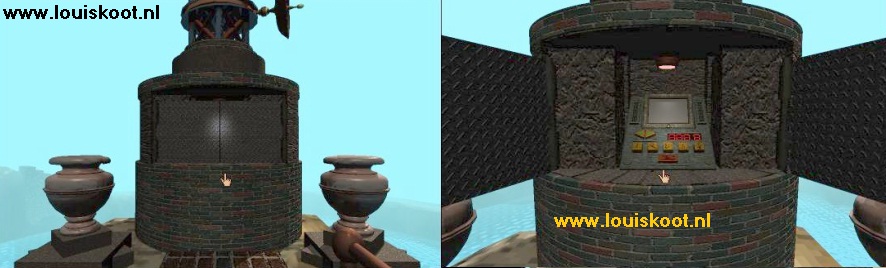
You see a screen, 2 arrow buttons, a digit display, 5 yellow buttons on which you can see the symbols of the 5 antennas and a big Red E button.
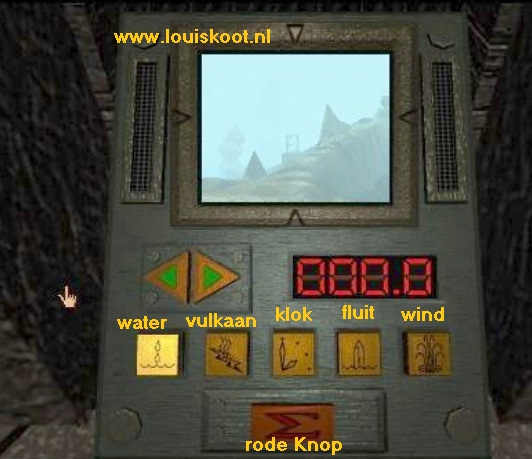
You now must aim the Send en Receive Mast at each of the 5 Antennas, that you have to turn on. You do that by clicking on the Arrow buttons. FREQUENCIES will then appear in the Digit display. If you hear the sound of the antenna through the loudspeakers WITHOUT STATIC, then you have the mast pointed exactly at the antenna. Then click on the RED E BUTTON. You must always click on the symbol button of the relevant antenna. Do not click too fast on the arrow buttons because then the numbers in the display will flash by too quickly.
|
The correct frequencies for all 5 antennas are:
Make sure that these frequencies are always on the display and always click on the Red E button. If you have correctly aligned all 5 antennas, click the Red Button again.
You then hear all 5 sounds in sequence in a certain order. Remember this order. The order is: Flute tone, Water, Wind, Volcano, Clock, |
G: The Red Page:
Click left or right, next to the panel. to zoom out and then turn right. Go 4 times ahead, to get back to the ladder pit, and climb down the ladder again.
Go back through the tunnel to the other ladder and climb up again in 4 times. Then turn left or right and go 2 times forward, the stairs behind the ladder pit.
Then turn left and follow the path 6 times back to the junction.
Turn left and go forward again to the Red Button of the Flute Tones Antenna.
Now grab the RED PAGE because we're going to bring this one back to the Myst Island now
The RED PAGE will now remain attached to your Hand cursor, but you can simply click with the cursor to move forward. You will not lose the page.
Turn around and follow the route back to the junction.
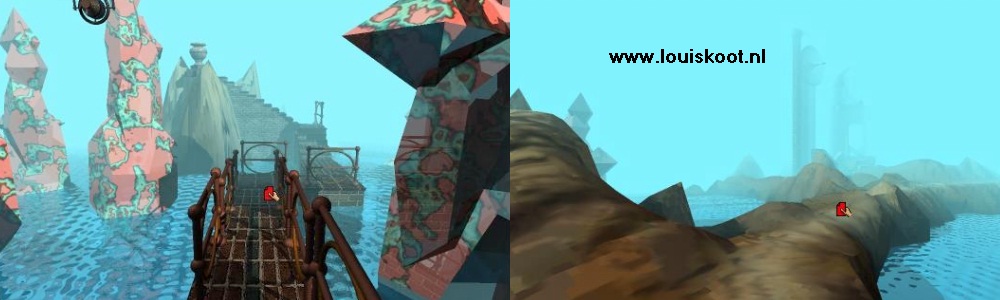
Turn left and follow the route back to the Stone House.
H: The Stone House

Zoom back on the sliding panel. Well, set each slider to the right sound, according to the order you heard at the Send and Receiving Mast.
So, from left to right: Flute tones, Water, Wind, Volcano, Clock, Then press the Knob and ..... You hear the 5 sounds and the door opens.
Go forward 2 times. You are standing in front of a long staircase that goes down.
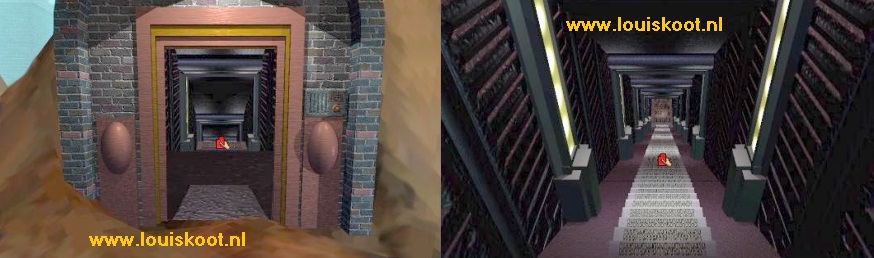
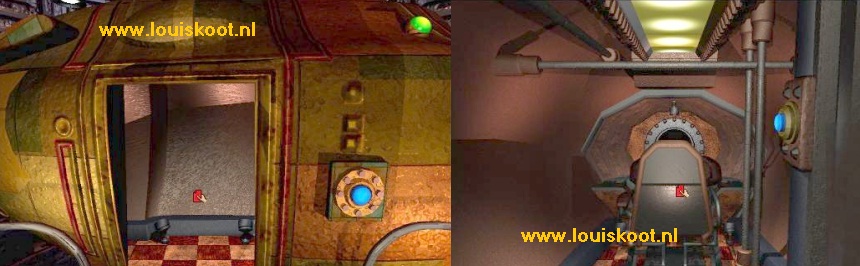
Go 8 times ahead to get into the SUBMARINE CAVE, via this staircase and the next tunnel. You see the Golden Submarine right in front of you.
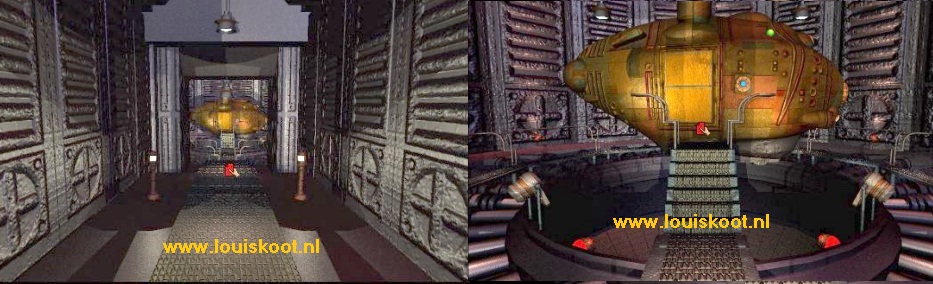
I: The Submarine: You're way back to the Myst Island
Go to the submarine and then click on the Blue Button to open the door. Go inside and then forward to the Chair.
Click on the seat to take place. You sit in the chair and look at the control panel.
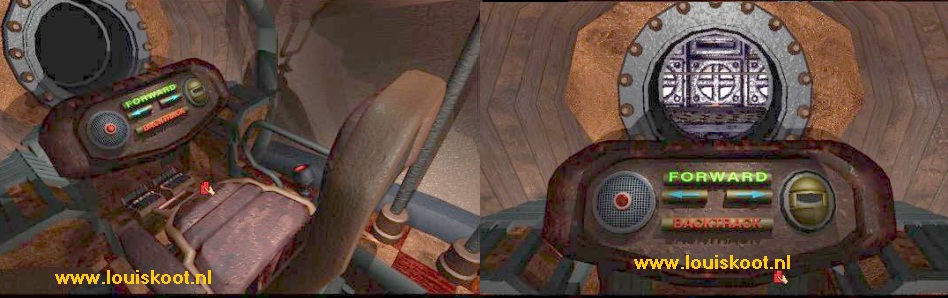
To start, click on the green "FORWARD" button and ........
The Submarine drops down under water and sinks further down and then comes to a stand still at the beginning of a Rail system. You are now in the:
Rail Maze:
You have the control panel of the submarine in front of you. In the middle you will see the "Forward" button and below it a Left Arrow and a Right Arrow button. On the left is a red button and on the right you see a small screen with the letter "N". N = North and you have heard a "Ping" sound. You can hear that sound again when you click on that red button. You now have to move the submarine through the maze via the Left arrow and the Right arrow buttons. Every time the submarine has moved forward and then comes to a stand still, you hear a SOUND. Those Sounds tell you which way you have to let the submarine go by using the left arrow or the right arrow.
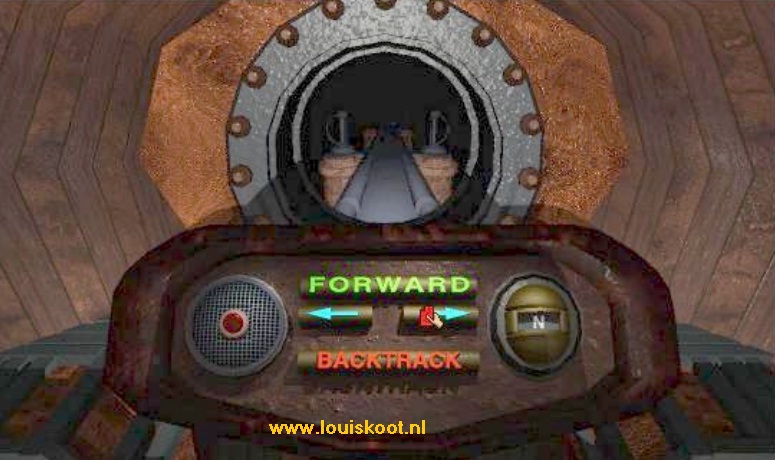
The sounds you'll hear are: PING = North (N). PRTT = West (W). PLOP = South (S). AIR BREAK sound = East (E).
Sometimes you will hear 2 sounds at the same time. This means that you have to go to Southeast (SE), Northwest (NW), Southwest (SW) or Northeast (NE).
|
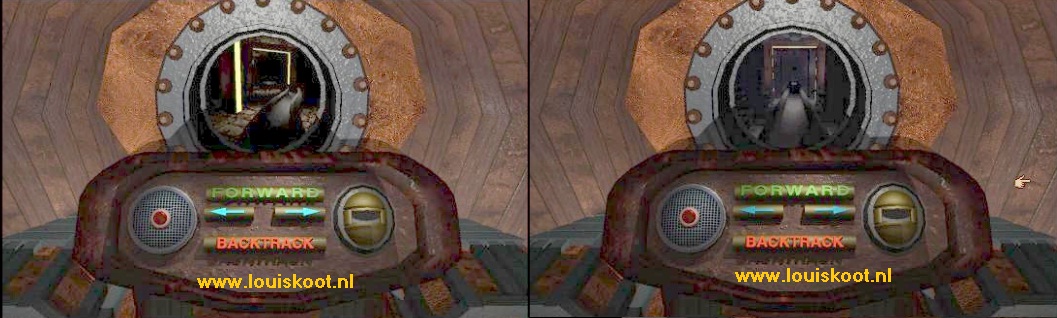
I will explain this the first few times but then you have to do it yourself. But first I will give the right route through this maze and that is: N (North), W (West), N (North), E (East), E (East), S (South), S (South), W (West), SW (Southwest), W (West), NW (Northwest), NE (Northeast), N (North), SE (Southeast). I will explain the first few steps for you, then you must know how it works and you can do the rest yourself.
Right.....this is how far I can help you here......The rest of the way you have to do on your own. You have now already done the first 5 steps (N, W, N, E, E) so you must do de next steps by yourself and they are: S (South), S (South), W (West), SW (Southwest), W (West), NW (Northwest), NE (Northeast), N (North), SE (Southeast). |
After the last step Southeast (SE) the submarine enters a long tunnel and then comes to a standstill.
You have reached the end. Click the right-hand finger to get out of the chair and then go forward to the door of the submarine.
Click on the Blue Button to open the door and then go 7 times ahead to the Myst Linking Book, that is lying in the cave on the pillar.
Click on the book to get it into your screen and then open the book. Click in the window of the right page and .........
............. you will return to the Library of the:
J: Myst Island:
You stare at the ceiling of the library.
Look down through the downward finger and then turn left and go to the Red Book. Paste the Red Page in the Red Book and then open the book.
In the window Sirrus appears again and he is now somewhat better to hear but the interference is far from gone.
Listen to Sirrus again but remember that you do not click in the window. Sirrus wants to have even more Red Pages. When Sirrus is gone again, you zoom out of the book.
Right.......you have a choose now......You can decide to not go get the Blue Page in the Selenitic Age, but that's no fun at all. So we'll go back to the Selenitic Age now to collect the Blue Page also.
Leave the library and go back to the Spaceship. Open the door and go inside and to the control panel.
Pull the Blue Handle down all the way and in the round window the book will reappear.
Click in the round screen and then again and you are back in the link movie. Just click on this screen again and you will return to the Spaceship in the:
Selenitic Age:
K: The Blue Page:
Exit the spaceship and follow the route back to the Water Antenna.
Grab the Blue Page and return to the Stone House.
Zoom in on the sliding panel again and click the button again and the door will open again.
Go back to the Submarine via the stairs and the tunnel and go back in and sit in the chair again and press FORWARD again and you will go down to the maze again. I'm sorry for you but you have to follow the same route through the maze again, so repeat what you did the first time. Here again is the correct route.
N, W, N, E, E, S, S, W, SW, W, NW, NE, N, SE.
At the end you go back out of the submarine and to the Myst Linking Book and through the book you end up in the library of the
Myst Island.
Go to the Blue Book and stick your Blue page in it and listen to what Achenar has to say.

You have done your First Blue and Red Page in both books and completed the Selenitic Age.
We continue with:
Chapter 3: Myst Island:
Open up the Stone ship Age:
In order to go to the Stone ship Age, the Sunken Ship must be "lifted" at the quay. In order to achieve this, the miniature ship, in the well in front of the library, must be brought up.
After you have done the Blue Page from the Selenitic Age in the blue book you are still in the:
Library:
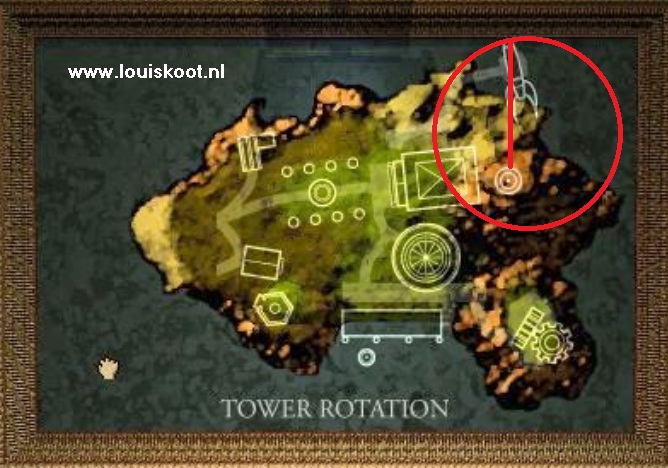
Go to the Tower Rotation Card. Zoom in again. Click on the tower circle, behind the library, and hold down your mouse button again.
You hear the tower turning again. When he white line hits the Sunken Ship at the Quay, the line will turn red again. Then release your mouse button.
You have now turned the tower onto the Sunken Ship at the quay. Zoom out twice and turn clockwise. Click twice on the "staircase painting" that hangs to the left of the bookcase, to open the tunnel to the tower elevator and to close the library door. Go through the tunnel to the elevator, get in and go up. At the top you climb again up the "Book ladder" and you will see through the crevice that the tower is now indeed facing the sunken ship at the quay.
Go down the "Book ladder" and go to the "Key ladder", behind the elevator. Climb the "Key ladder" and zoom in on the copper plate, which you now see above the ladder on the wall.
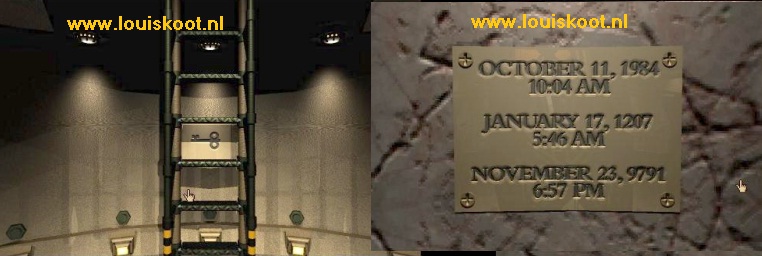
Write down the 3 dates you read because they are the instructions to "lift" the ship in the well.
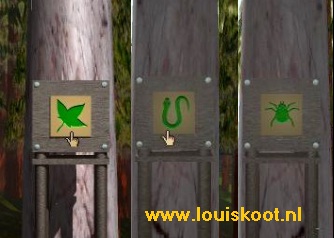
Go back down the ladder and go back down with the elevator and back through the tunnel to the library. Turn around to the "entrance painting", right next to the bookcase, and click twice again to close the tunnel and open up the door again. Exit the library. You stand on the "platform" in front of the library and straight ahead you see the well. Left and right to the well are four stone/metal pillars, standing on the grass. They look like chimneys. There is a box on each pillar and on each of those 8 boxes you see a Yellow Plane. Number those 8 boxes now, from the library to behind the well, as L1, L2, L3, L3 and R1, R2, R3, R4. L is Left side and R is Right side.
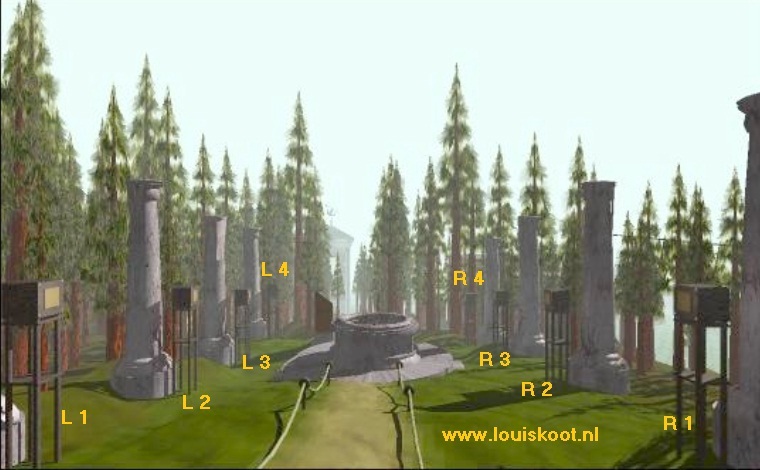
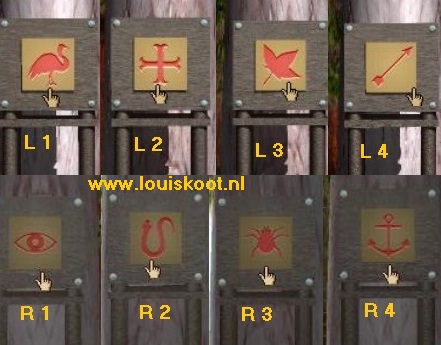
Now go to each of those boxes. Always fully zoom in on it. Each box has an image in the yellow area. If you touch the image with your finger, it will turn red. If you click on the red image, it will turn green. Now make sure that NONE of the 8 images is Green. These are the images you'll see in the boxes: L1 = Bird. L2 = Cross. L3 = Sheet. L4 = Arrow. R1 = Eye. R2 = Snake. R3 = Insect. R4 = Anchor
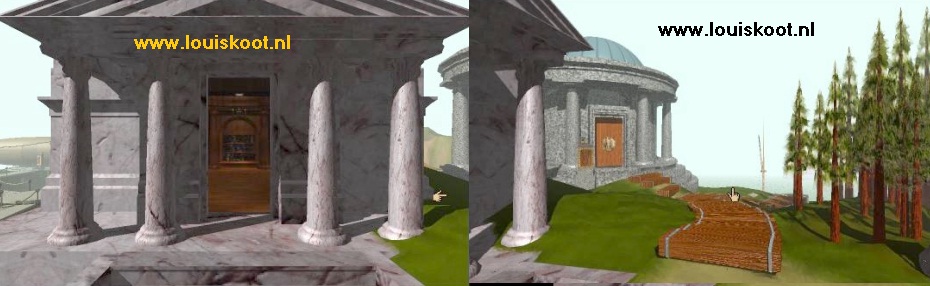
To the right of the Library is the round Planetarium building. Now go there and go inside.
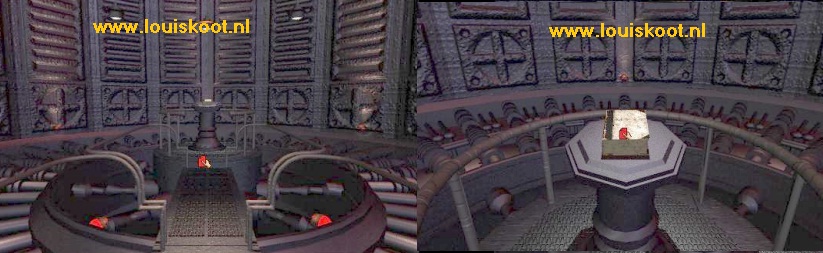
Planetarium:
The planetarium is a round chamber with in the middle a very comfortable chair. Well ..... in a planetarium you usually can look at the stars. And that is exactly what you are going to do here now. But to see the stars it must be dark here. So turn around to the entrance and then click on the blue button, to the right of the entrance, to turn off the light.
It's no dark in here. Turn back to the chair. Click twice on the chair and you lie in it and you look up at the large gray panel that hangs above the chair.

|
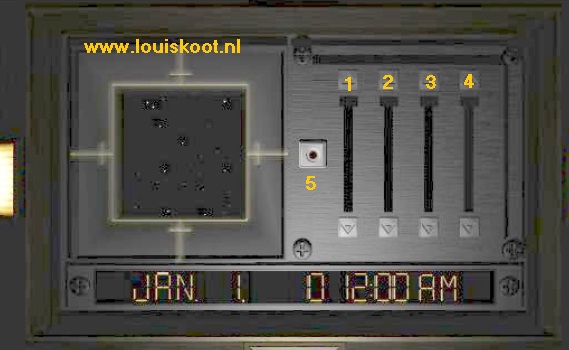
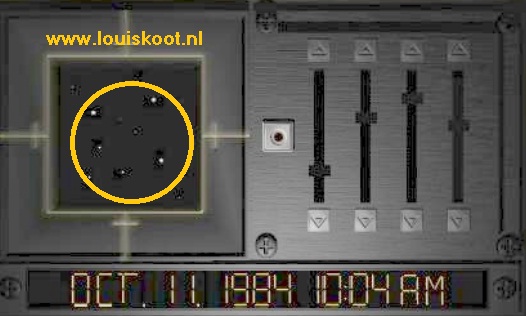
Click on the panel that is now hanging above your head. The panel lowers and then hangs full screen for your eyes. The panel has a screen, a small light next to the screen and four sliders that you can slide up and down through the 4 slots. Number the sliders 1, 2, 3, 4
In the screen you can now see the Constellation of January 1 year 0 at 12.00 In the tower you have seen 3 dates. Those were these dates:
October 11, 1984, 10:04 AM. Well ... these 3 dates you should now set with the 4 sliders. Each date shows you a certain star constellation. Draw these 3 sets of star constellations on a piece of paper.
It is best to first set the correct value with each slide and then use the arrows to get to the exact right value. So first set October 11, 1984, 10:04 AM. Then press the blinking light on the right of the screen. In the screen, all kinds of starry skies will pass and the screen will show you the stars that belong to this date. Make a drawing of this
Then do the same for the other 2 dates.
|
When you're done with this and you've set all 3 of the dates, you have a drawing of all 3 star constellations. Zoom out of the panel via the downward finger and then you go forward to the exit. Turn the light back on by clicking the blue button again and then go outside. Go back to the library and back in again.
Library:
Zoom back in completely on the bookcase. Grab the Stone ship Age book from the bookcase. That is the thick book with red label on the right of the top shelf.
Open the book and browse to the pages where all those star constellations are . On each of these star pages you can see one of the 8 images, of the 8 boxes that stand outside the well. Look up the three star constellations that you have made visible in the Planetarium and note which image belongs to it.
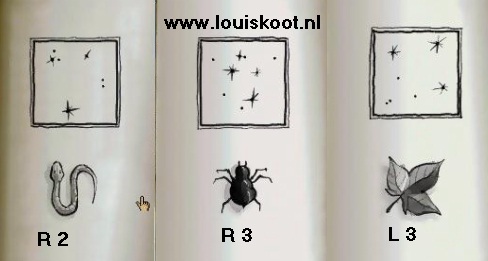
So these are: Leaf, Snake, Insect. Put the book back and go outside.
Water well:
Convince yourself that on each of the 8 boxes no image is green now. Then go to:
box L3 and make the Leaf green.
Go to box R2 and make the Snake green.
Go to box R3 and make the insect green.
You'll hear a noise. Look in the well and see ...... The miniature boat has now come up.
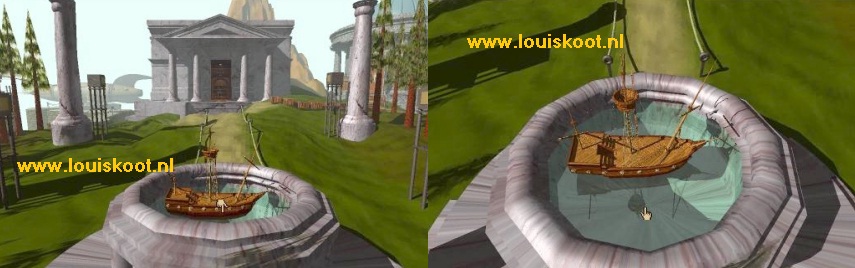
Now go back to the quay. On the way you can already see that the large ship has also risen.
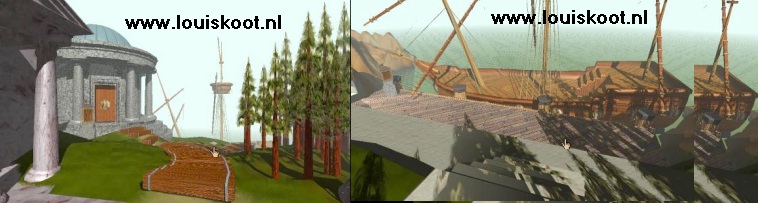
Go to the quay on go onto the now risen ship.
On the ship you turn immediately to the right. You see the door of the cabin. Click twice on the door.
The door opens and you see the Stone ship Linking Book lying on the chair.
Go inside and click on the book. Open the book. In the window you can see the movie of the Stone ship Age.
Click in the window to enlarge the video. Look at it at ease and if you have enough of it then you click in the movie and .........
....... you end up in ...........
Chapter 4: The Stone Ship Age
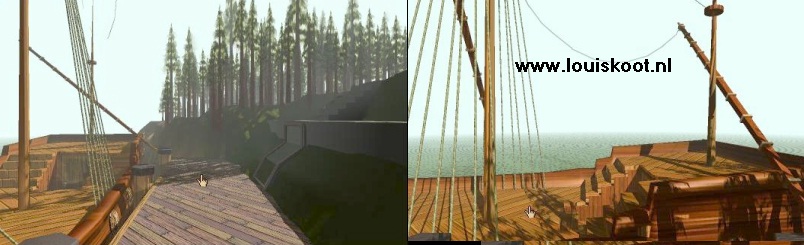
You have landed on the aft deck of a ship and look at the entrance of a tunnel that goes into the rock. You also see a stone staircase that goes to a 2nd ship. You are on the Left Ship. That other ship is the Right Ship. Turn left. You see a long gangway that goes to a small "island" with an "umbrella". I call that the "Crow's nest" island".
Turn left again. You look through the open door of the aft cabin of the ship. Vaguely you see a door down there but you can not get there because the cabin is full of water.
Turn counterclockwise again. You see the Lighthouse and the gangway that goes to it.
Turn counter clockwise again. You look back at the entrance of the tunnel and that stone staircase. Now go forward one time to the entrance of the tunnel. Then go into the tunnel 1 time and then try to go further through the tunnel. That is not possible because the tunnel is full of water and also because it is dark in the tunnel. Turn around and go forward 1 time back from the tunnel. Turn left. You stand in front of the stone stairs. Climb up and down again on the other side. You are standing on the aft deck of the Right Ship. A wooden plank path goes up along the rock. Turn left. Another tunnel. Enter this tunnel and you will notice that this tunnel is also underwater and dark. Go out again and turn left. Go to the wooden path and now follow it all the way up.
You are then on top of the rock and at a ..... Binoculars. Zoom in on the binoculars. You look through the binoculars.
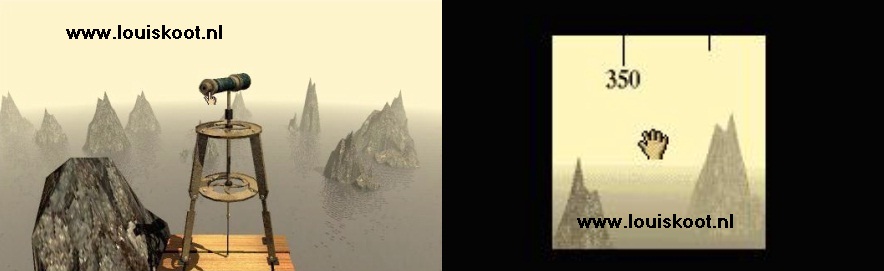
At the top of the binoculars screen you see scale. This scale goes from 0 to 360. It is therefore 360 degrees. By clicking with your hand on the screen and then holding down your mouse and then dragging your mouse to the left or to the right, you can rotate the binoculars 360 degrees left or right. Practice this for a while. You will have to do this later to see something specific through the binoculars. If you have enough of it, zoom out and turn around and follow the wooden path back down to the right ship.
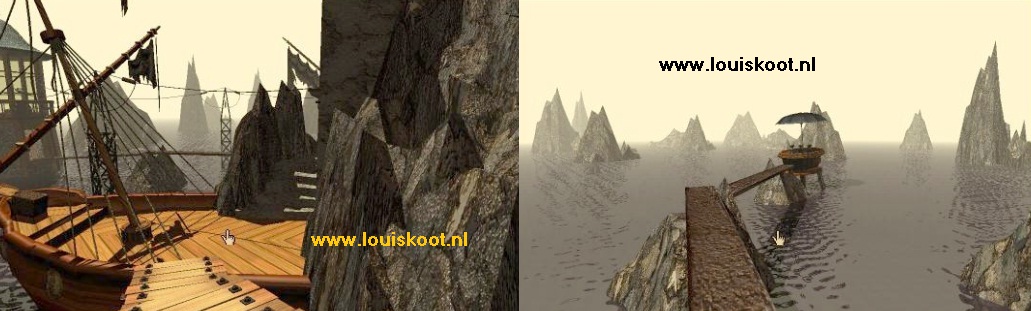
Go through the stone stairs to the left ship. It will be clear to you now that the front of both ships are buried deep into the rock and that these two tunnels are in fact the corridors to the two cabins of the ships. Go over the gangway to the " Crow's nest island". There are three pumps on the "Crow's Nest", but don't touch them right now
Turn back and go back to the deck of the left ship and then go via the gangway to the lighthouse.

You are at the bottom of the lighthouse on a plank. A ladder goes up to the hatch in the ceiling .Click on the ladder. You then look down and see a key lying on the shelf.
The key is attached to a bracket, in the plank with a chain. You also see that the "cellar" of the lighthouse is full of water. Click on the key. The key slides into the water and then back on the shelf. Click on the ladder. You look up and see that the hatch is closed with a padlock.
Well .... you now know that the two ships are with their front half burried deep into the rock and that those two tunnels are the corridors through which you have to reach the cabins of the ships. The Myst Linking book is also underwater and the basement of the lighthouse is under water. All that water must first be pumped away and light must be made in those 2 tunnels. Would you be able to pump the water away with those 3 pumps on the "Crow's nest"?
So go back to the "Crow's nest". Now click on the left pump and ..... the pump will go on. Now go and look in the aft cabin of the left ship, the two tunnels and in the lighthouse if there is some change now. You notice that only the water has been pumped out of the aft cabin, but not from the tunnels and not from the lighthouse either. The left pump thus pumps only the water from the aft cabin of the left vessel.
Go back to the "Crow's nest" and now click on the middle pump. This causes the left pump to switch off again, but the middle pump is now on. Go and see what is happening now. The water in the aft cabin is back again, the water in the lighthouse is still there but now both tunnels have been emptied. Go back to the "Crow's nest" and now click on the right pump to switch it on, the middle pomp is of again.
Now go back to the lighthouse.
Lighthouse:
Look down at the key again. Now the water is pumped out of the lighthouse and you can go down to the bottom via the wooden spiral staircase.
Well, what did you learn from all this pumping now? That you pump the water out of the aft cabin of the left ship with the left pump. With the middle pump you pump the two tunnels dry and with the right pump you pump the water from the basement of the lighthouse. You also know that you can only put one pump on at a time.
You are back in the lighthouse after you turn on the right pump. You look at the key. Turn left and then look down.
Go down the wooden spiral staircase to the bottom of the lighthouse.
There is a large chest downstairs. Zoom in on the chest.
The chest is locked with a lock and will not open. Say ... would the key that lies above fit? But then this chest must be brought up. On the left side you see a tap at the bottom of the chest. Click on that tap. The water that is in the chest now flows out of the chest via that tap. Wait until no more water comes out and then click on the tap again to close it. Click next to the chest to zoom out and climb back up via the spiral staircase. Go back to the "Crow's nest" and turn on the middle pump to pump the water out of the tunnels and back into the lighthouse,

go back into the lighthouse and ...... the chest now floats next to the plank. Click on the ladder to look down again and then click on the key

The key will slide in the lock of the chest. In the chest you find another key. Get that Key and click on the ladder again,
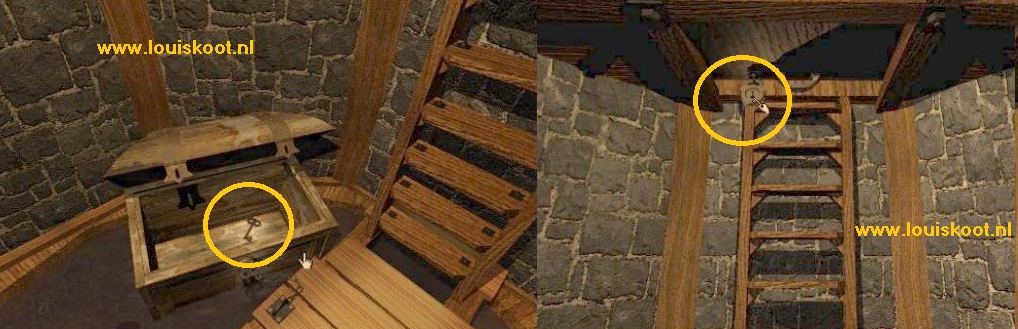
You look up at the hatch, click with the key from the chest on the padlock and.........the key slides into the padlock, opens it and the lock falls down.
Click on the hatch and this opens now. Climb up through the hatch and you are at the top of the lighthouse.
Turn left or right....... Through the windows you have a nice view of the rock and the 2 ships
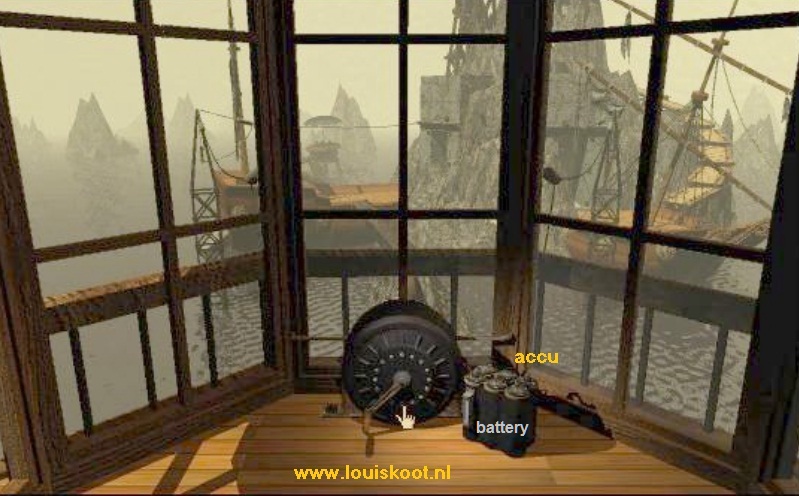
In front of the window stand the dynamo. The dynamo consists of a wheel with lever and a thick battery. Zoom in on the battery.
The battery is empty or it is only a quarter full. You have to fill up the battery.

Zoom out of the battery. Click on the turning lever of the round dynamo and then keep your mouse button pressed. The handle turns around. Keep this up for a minute or 2 to fully charge the battery. You can see if the battery is full when you zoom in on the battery again. The window must then be completely full and white and the light should be green. If the window is not completely full then you continue turning the lever. If the battery is fully charged then you will have electricity and light for about 10 minutes in the two tunnels and the two living areas.
Sirrus: The Red Page:
Zoom out, turn around and click on the hatch to go back down. Go to the left ship and enter the tunnel again.
If there is water in the tunnel again then you have forgotten to switch on the middle pump. The lights in the tunnel are now on.
Go all the way down and then click on the button of the cabin door. The door opens. Go inside.
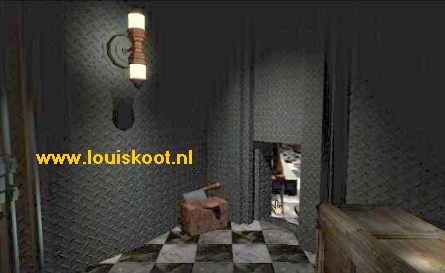
You are in Sirrus's bedroom and you stand in front of his bed. Turn clockwise. You see a small table.
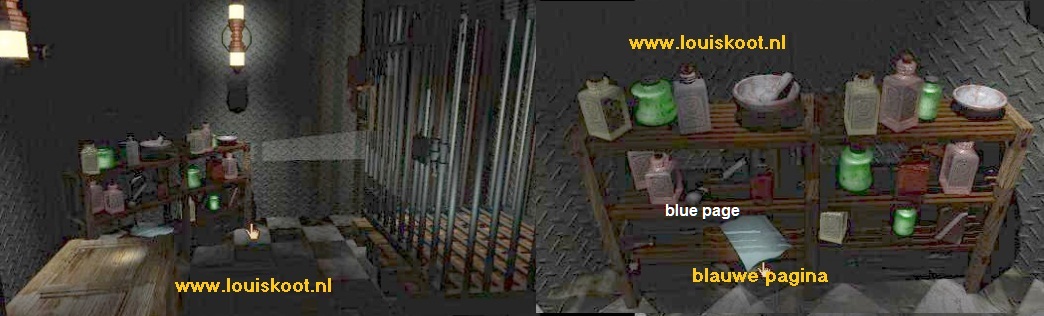
Go to the table and open the drawer of the table. Zoom in on the contents to view the syringe and bottles briefly in close-up. You can not do anything with it, so zoom out 3 times and then turn 2 times to the left. You now see a cupboard with drawers against the other wall. Go to the cupboard and open and close all the drawers. In the bottom drawer you'll find the RED PAGE. Leave it ... do not take the page with you yet.
Zoom out of the drawers, turn left and leave the cabin. Go back up the tunnel stairs 1 step and......... STOP. In the right-hand tunnel wall you now see a Panel with a Red Square on it.
That panel is a hatch and gives access to a metal crawl tunnel, but we'll go in it later when we've actually have the red page.
NB: If the light is still burning then you can now open that hatch and then crawl all the way through that crawl tunnel to see what is in there. If the light has already gone out, then you'll have to go back to the lighthouse to fully recharge the battery.
All right.....I presume that you still have light in the tunnels, but it is wise to recharge the battery now completely. Continue all the way up and out of the tunnel again. Return to the battery at the top of the lighthouse and recharge the battery completely. Go down again and make sure that the Middle Pump is still on.
Achenar: The Blue Page:
Go to the Right ship and enter the tunnel there and descend the stairs all the way down in the tunnel. Click on the button of the cabin door and this door will also open. Go inside and take a look around and then go to the bed. Oh ... yes ...this is Achenar's bedroom. The Blue Page is on the bed but don't take it now
Turn around and leave the cabin again and again go one step up. On the left side you can see a panel with a red square on it.
This is also a hatch that allows you to enter that metal crawl tunnel. Do not do this now but go up the stairs and then out of the tunnel again. Go to the "Crow's nest" and turn on the left pump again to pump the water out of the aft cabin of the left ship. Then go to the entrance of the aft cabin. At the bottom of the stairs you see a door. Go down and open the door via the doorknob in the middle of the door. The door opens. A wooden staircase goes down to the floor of the cabin. Follow the stairs 3 down and ....... Oops ..... it is far too dark here to continue.
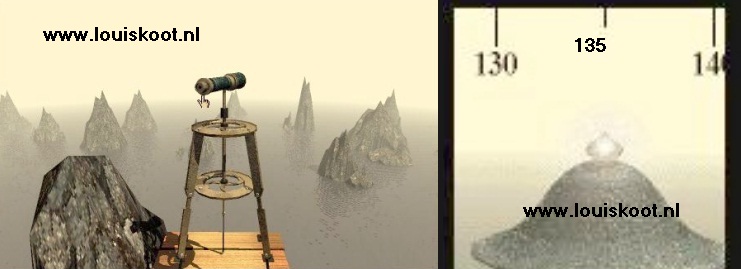
Turn to the left and climb up, back to the deck of the ship. Return to the "Crow's nest" and switch the middle pump on again to pump the water out of both tunnels again. Now go back up in the lighthouse and recharge the battery completely. Return to the Right Ship and then go up the wooden board path to the Binoculars. Look through the binoculars and now slide the binocular screen to the left until you see a flashing light. This light is flashing on top of the "Crow's nest". Read how many degrees this flashing light is on the scale. That is at 135 degrees.
Bring the Red Page to Myst:
Go back down and up again in the lighthouse and recharge the battery completely.
Then go back to the tunnel of the left ship, the Sirrus ship, and descend the tunnel stairs completely. Open the door again and now take the Red Page from the bottom drawer of the drawers.
Zoom out and leave the bedroom again and go 1 step up the stairs. Now, right click on that hatch panel in the wall. The panel opens.
Click in the hole and then crawl 3 times through the crawl tunnel. At the end look down.
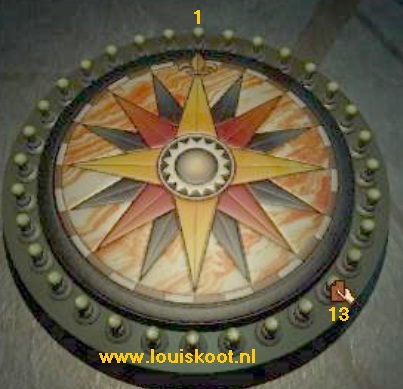
You see a large circle with a star figure in it. There are a bunch of push buttons around the circle. By clicking on one of these buttons all buttons are turned on and then you have also turned on the light in the aft cabin. But which button should you click?. If you click on the wrong button then all the lights go out and you have to go back to the battery to recharge it. Through the binoculars you saw that flashing light at 135 degrees. Well, the button you have to click on now is the button that is at 135 degrees around this circle. And that is the 13th button. So count from the middle, above, and click on button 13.
The lights around the circle go on. Quickly turn around and crawl back through the tunnel and then turn right into the stair tunnel and climb up and out. The access to the aft cabin is again full of water, so go to the "Crow's nest" and turn the left pump back on to pump the water out of the aft cabin again.
Go back to the left ship and then descend to the door of the aft cabin. Open the door again and completely descend the wooden stairs.
You can do this now because you have now switched on the light via the 13th button in the crawl tunnel. There is an empty table at the bottom of the cabin.
Go all the way to the table and zoom in on it. With your Red Page in your hand, click on the table and ....... The Myst Linking Book comes up out of the table.
Click on the book to put it in your screen and then click on it again. Open book and then click in the window and .... You will return to the Library on the Myst Island.
Myst Island:
Look down and go to the red book. Stick the Red Page in the Red Book. Open the Red Book and listen patiently to Sirrus again.
You here Sirrus a little better now but there's still some static. Sirrus wants even more red pages and he says that you should not trust his brother Achenar.
When Sirrus has finished zoom out of the book a few times. You have to go get the Blue Page from the Stone ship Age. So go back to the quay and get onto the Ship again and descend to the Stone ship Age linking book and link back to the Stone ship Age.
Stone ship Age;
Bring the Blue Page to Myst:
You know how it works here in the Stone ship Age now so I'm not going to spell it out for you all over again ..... You will undoubtedly have to recharge the battery a few times and of course you will have to drain the tunnels and also the aft cabin. You also have to click on the 13th button in the crawl tunnel to put the light in the aft cabin on again, when you have taken the blue page from the sleeping cabin of the Right Ship.
You know how to do all this, so go grab the Blue Page of Achenar's bed in the right ship.
In the tunnel, open the hatch panel and crawl through the tunnel to the round device with all those buttons.

Zoom again in on the round device and click on the 13th button again to put the light back in the aft cabin.
Crawl back through the tunnels and make sure that the water is pumped out of the aft cabin again.
Drop back down to the table in the aft cabin, click with the blue page on the table to bring the Myst book back out and link back to the Myst island
B
Back on Myst put the Blue page in the Blue Book and listen again to Achenar.
Same as with Sirrus. Then zoom out again and ..............We continue with:
Chapter 5: Myst Island:
Open up the Mechanical Age
After retrieving the Blue Page from the Stone ship Age and pasting it in the Blue Book, here in the library on the Myst Island, you are still in the:
Library:
We now want to go to the Mechanical Age and access to this Age is the big Gear, which is on the hill near the quay. You have to open up that big gear wheel.
Go back to the Tower Rotation card and zoom in again. Now make sure that the White / Red Line is placed on the big gear wheel, on top of the hill.
Zoom out completely. Open the bookcase again, via the "bookcase" painting, and go through the tunnel to the elevator. Open the elevator, get in and go up.
If you don't trust yourself then you can check, by climbing the "Book ladder", to see whether the tower is now really aimed at the big gear wheel
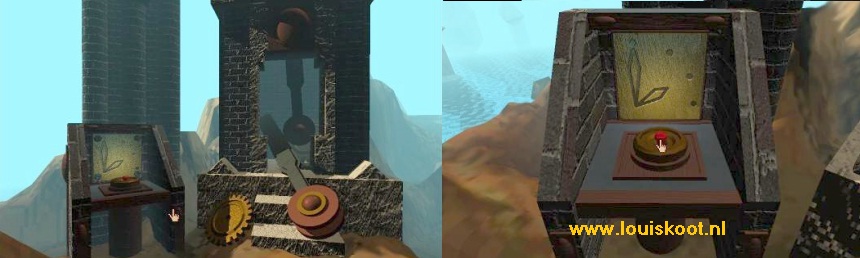
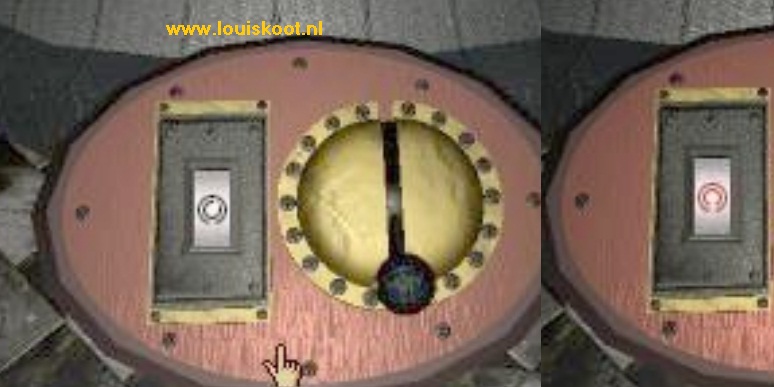
Climb the "Key ladder" again. At the top of the "Key ladder", there is now another copper plate on the wall and you read the following 2 instructions: 2:40 and 2-2-1.
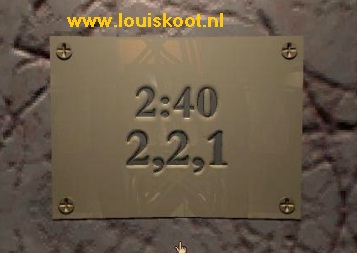
Write those numbers down and go back down again and with the elevator back down to the tunnel. Go back through the tunnel into the library .
Click twice on the "entrance" painting, to close the bookcase again and open the library. Exit the library
Clock Tower:
In the distance you can see the big Clock Tower on that little island. Hmmmmmmm........that first clue you just saw, 2:40 ... could this be 2 hours and 40 minutes?
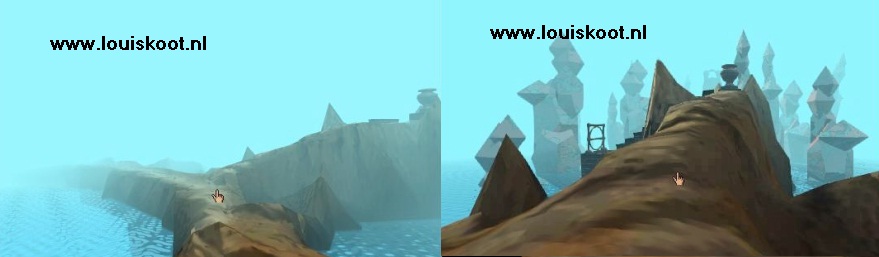
Go all the way across the island to the bank before the clock tower.
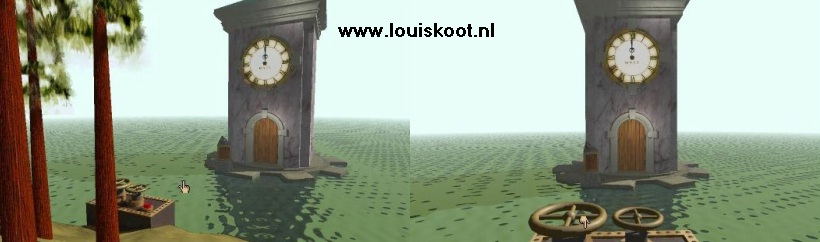
Look at the clock of the tower .... 12:00 am the clock points out .... but that clock is standing still.
Zoom in on the 2 turn wheels that are on the column in the water. Then look down at the 2 wheels.
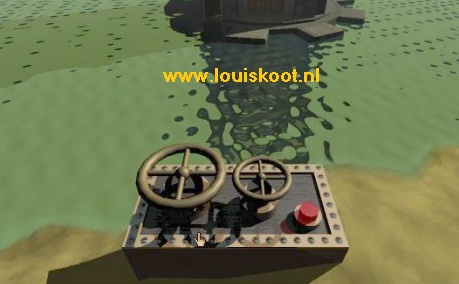
You see a large left wheel and a smaller right wheel. And you see a red button. By clicking on the wheels you turn them and that also moves the hands of the tower clock. The right wheel is for the HOURS and the left wheel is for the MINUTES. 1 click on the right wheel move the clock 1 hour and 1 click on the left wheel move the clock 5 minutes. You should have enough of this explanation to set the tower clock now at 2:40.
Need more help? ..... Assuming that the clock now stands at 12 o'clock how many clicks do you have to press the right wheel to get the hour hand at 2 o'clock? And how many times do you have to click on the left wheel to get the minute hand at 40 minutes? ......Still don't get it ???? Okay .... ok ay.... here the solution ......
Click the right wheel 2x. Zoom out and look at the clock. Is the clock now at 2 o'clock? Yes.
Look down at the wheels again and click on the left wheel 8x. Zoom out and ..... the clock is now at 2:40.
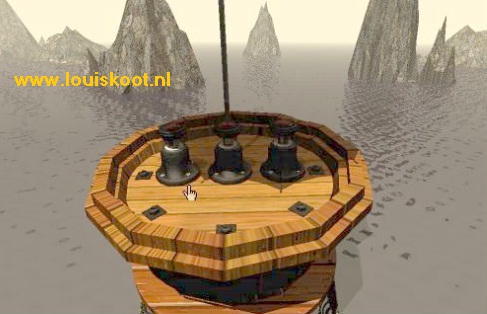
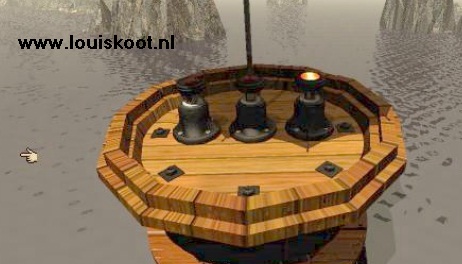
Look down again at the wheels and now click on the Red button and ......... a "gear bridge" now comes up out of the water.
Click on the bridge to zoom out and then go 2 times ahead to the door of the tower. On the left is the 8th "Marker Switch". Click on the "Marker Switch" lever to raise it now. All "Marker Switches" on the island are now activated. Click on the door and go inside and you are standing in front of the Tower Mechanism:
With this mechanism you now have to get that big gear on the hill open. At the bottom you see a miniature of the big gear on the hill. On the axis there are 3 gears on top of each other and on each gear you now see the number 3. On the left and right of the axis o there is a lever and in the right corner you see a big lever. The Weight is hanging in the upper left corner.

|
The intention is to get that weight down but with the RIGHT NUMBER CODE on the 3 gears. The thick lever is the Reset Lever that lets you put the puzzle back in the starting position if you go wrong. With the levers A and B you turn the 3 number cogwheels. First practice a bit to see what happens.
|
What was the second indication that you saw at the top of the "Key ladder"? Wasn't it 2-2-1. 2-2-1 must therefore be set on the 3 cogwheels from top to bottom. This is quite a bit tricky and requires a bit of "feeling". First make sure that on all 3 wheels the number 3 is visible again because that is your starting position, otherwise it will not work.
Then pull the right lever A towards you and release. You will then see 1-1-3 on the 3 gears
Pull the right lever A towards you again and release. You now see 2-2-3 on the gears. Don't touch lever A anymore
Pull the left lever B towards you and HOLD firmly until the middle wheel is 2 again and the bottom wheel has 1 it
The weight is then completely dropped and ..... the big Gear is open.
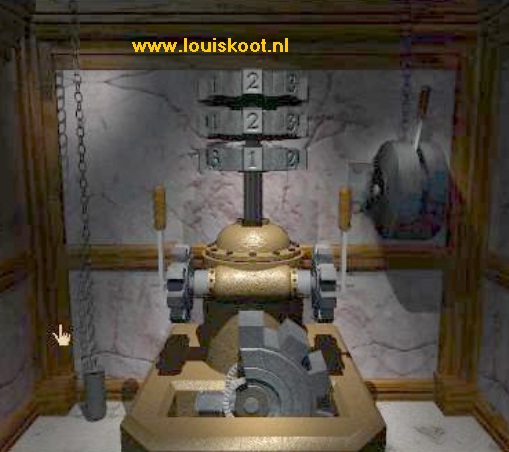
Didn't it work for you? Well........set the 3 gears back to 3, 3, 3 and try again. Can't give you more help with this
Big Gear on the hill:
Ok, if you succeeded then leave the Clock Tower. Cross the "bridge" and go over to the library but don't get in.
Turn right and follow the path to the hill and go all the way up the hill. You'll see that the large Gear Wheel is now also open.
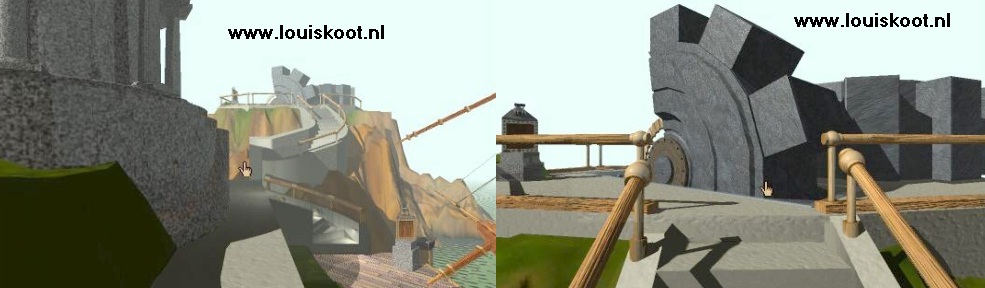
Walk to the "Marker Switch". Right next to the "Marker Switch" you click on the floor grid and you are right in front of the opened wheel. Go forward into the wheel and click on the linking book.
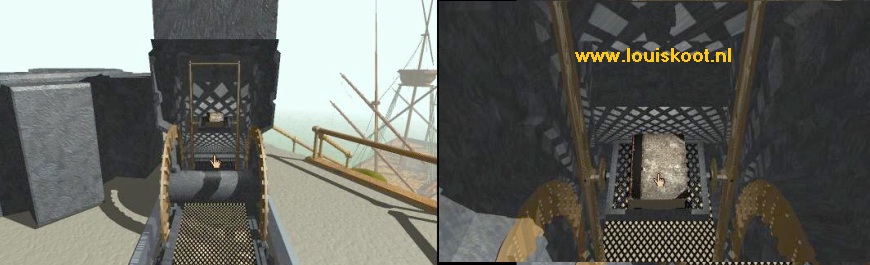
Open the book and click in the window. Watch the movie of the Mechanical Age to see how this Age looks like....
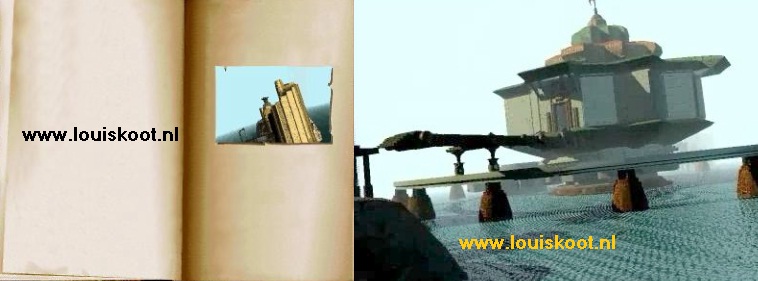
......It's A large island with 2 smaller islands. Click in the movie and you'll end up in:
Chapter 6: The Mechanical Age:
The Fortress:
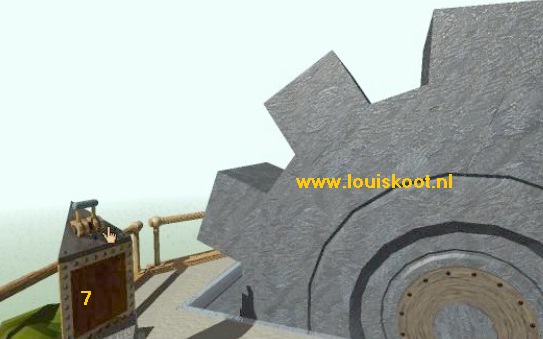
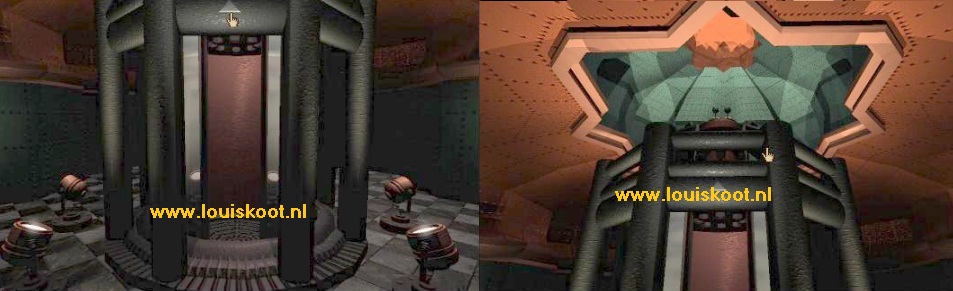
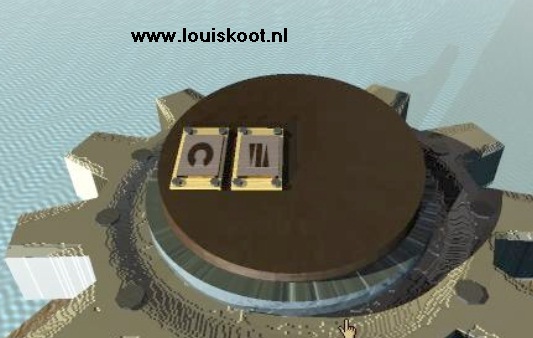
Upon arrival you are standing in front of a metal staircase. You have landed on a "Gear island". Click on the right of your screen to zoom out. On your right you see a small round pillar with two cogwheels. On top of the pillar are a big red button and 4 green "windows".
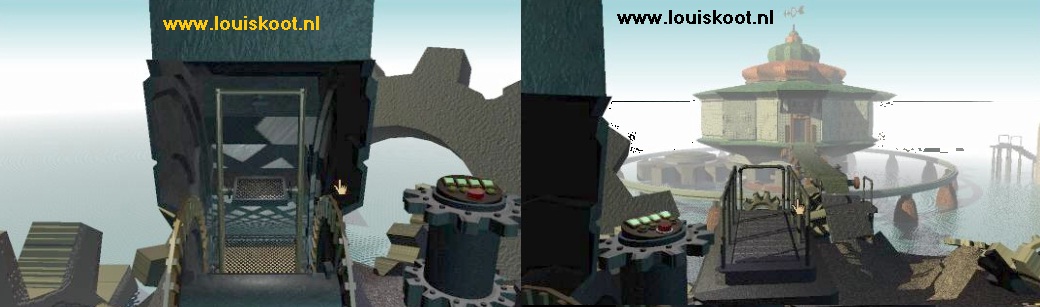
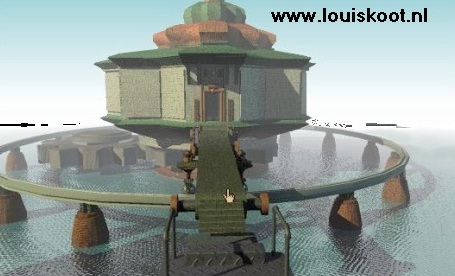
Turn to the right .... You will now see the main Island. The "main island" is a building within a rail that goes around the building like a circle. It's a fortress. You see the entrance of the Fortress and the "green bridge" that goes to it. The round pillar with the Red button is now left in your screen.
Go 1 step ahead and you are standing next to the round pillar and in front of a metal bridge with a gear at the back. The bridge where you now stand is the exit back to the Myst Linking Book. But to reach that Linking book, the "bridge" has to be brought down. Now click on the round pillar with the Red button and the 4 green windows. You'll zoom in on it. In the 4 "windows" you now see a green + sign
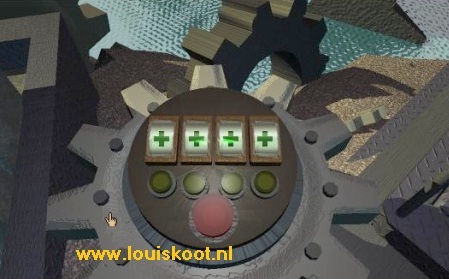
There is a button under each of the 4 windows. If you click on such a button, another symbol will appear in the window above. You can have 10 different symbols appear in each window. In these 4 windows you have to fill in the correct symbols Code to be able to return to the Myst Island. Click right on the screen to zoom out again. You are again standing in front of the metal "bridge". So in this Age you should not only look for the Red and Blue Pages, but also look for the "Return Code" that you have to fill in on the pillar to go back to the Myst Island.
Around the Fortress there are 3 smaller islands. To find the code you will have to go to the 2 other small islands and that means that the Fortress must be turned. But first let's go into the Fortress. Click Forward, right next to the "Bridge", to get to the beginning of the "green Bridge" that goes to the entrance of the Fortress
To the right of the Fortress you can see 1 of the other 2 sub islands. Go forward 5 times and you are in the corridor of the Fort. You are standing in a corner of the corridor. You can go straight through the corridor but you can also go to the right through the corridor. It does not really matter because this corridor is completely round. Lets go to the right through the corridor.
So click on the right side of the screen and then go forward 5 times through the corridor and you will enter
Achenar room:
The Blue Page:
Just stand still for a moment and look around. On the other side of the room you see that the corridor continues and there is a small brown cupboard on the left. Move forward 1 time towards that small brown cupboard and then turn counter clockwise. You're standing before Achenar's great Throne. Yes .... Achenar seems to suffer from megalomania. There is an ax against the throne and you see a Green Panel with a yellow stripe in the green wall. And you see a round machine with 2 round levers. That is a Simulation machine. Click with your finger on the Panel with yellow line. You bend over and "crawl" towards it. Click on the panel again and now it will open.
Click in the hole. You are then right in front of the hole. Click again in the hole and you crawl through it and then you are in Achenar's "torture chamber". On the right is a large iron cage and in front of the cage there is a low shelf cupboard against the wall. Go 2 times forward to the cabinet. You are then right in front of it. The Blue Page is on the bottom shelf.
Leave the Blue Page here for now. You now know where you can find the Blue Page, so later you will simply pick up the page here. Turn clockwise twice. You are right in front of the iron cage. On the left side of the cage is a lever. Just click with your finger on the lever and...... Oops ....... Au ..... you get an electric shock. It is an electric cage. Turn right. You see the crawl hatch again and a chopping block with an axe.
Both the chopping block and the ax are full of blood. You can open the large wooden chest, which is on the right, but you can not do anything with it. Crawl back to the room through the hatch. Turn counter clockwise again so that you look back at the Throne, the hatch and that round Simulation machine. Now click on that round machine.
Fortress Rotation Simulator machine
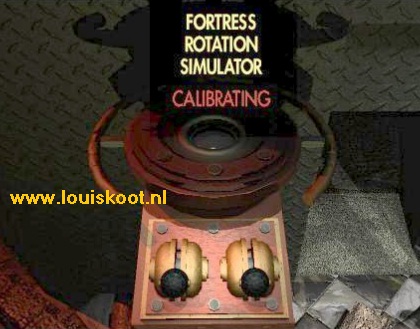
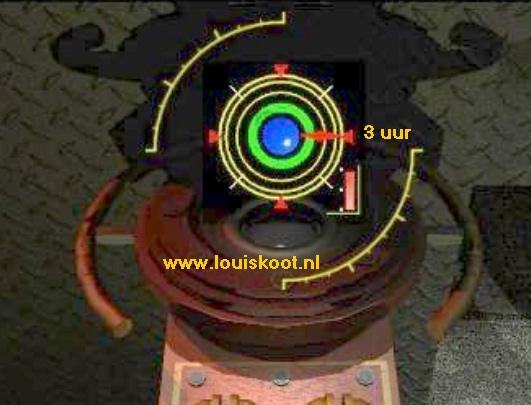
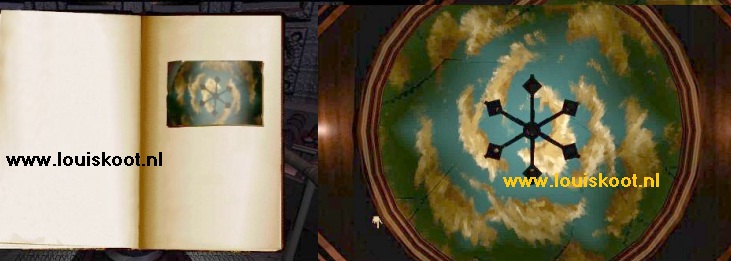
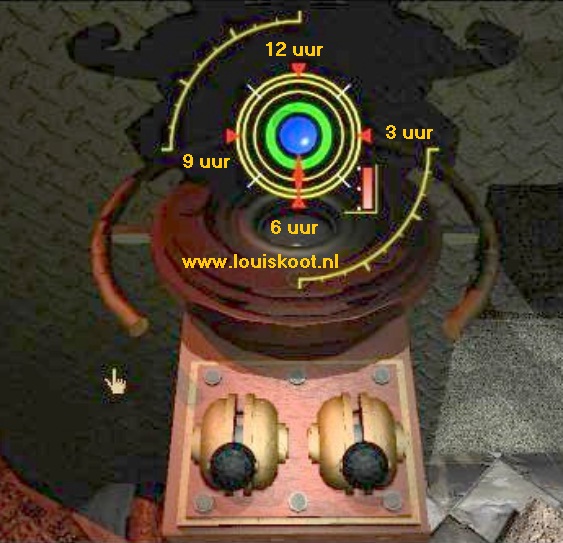
This machine is the "Fortress Rotation Simulator". It is a holographic projector and a holographic projection of the fort appears. The circles are the Fortress and around the fortress you see 4 Red Triangles. The Red Triangles are at "12 o'clock", at "3 o'clock", at "6 o'clock", and at "9 o'clock". The red arrow is the entrance to the fort and this is now on the "6 o'clock" triangle.
|
You also see 2 round levers. You can raise the left lever and then release it. The left lever will then stay up. You can also raise the right lever, but if you release the lever then it falls down again. Okay, you have to do a simulation now and then pay attention to the sounds that you hear. You must now turn the entrance of the fort to each of the 4 triangles. The entrance is now on the "6 o'clock" triangle.
Well .... what have you learned from this now?
|
Zoom out of this simulation machine by clicking twice right next to it. You can now take a look at the rest of Achenar's stuff here in the room. If you click twice on the throne then you sit on the throne and look from the throne into the room. Do that for a moment. When you are sitting on the throne go forward 1x and then click on the two swords that are hanging crosswise on the wall. You can not do anything with it.
Turn clockwise. You look into the hallway from where you entered into Achenar's room. On the right is that simulator machines and on the left are some torture tools. On the left is a small box on a shelf. Click on it to zoom in on it. The box has a crank on the right side. Click on the crank and ...... a Cobra hose floats out of the box......Nice guy, that Achenar. Turn counter clockwise 2 times and then move forward to the continuation of the corridor. Follow the corridor 2 times further. You turn left around the corner and in the long part of the corridor you see a red button, on the left wall. Ignore this button now but remember that it is here in the corridor
Continue to follow the corridor and you will enter
Sirrus's Room:
The Red Page:
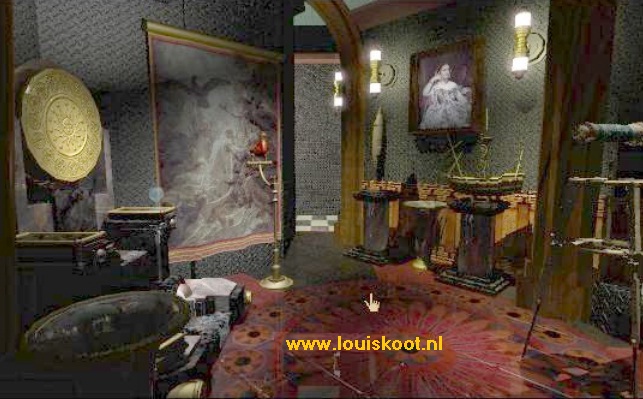
On the left wall hangs a large tapestry. In front of the tapestry is a tripod with a Red Bird on it. To the left of the tapestry stands the Marble Throne of Sirrus. Apparently Sirrus suffers also from megalomania. On the right is a Telescope. Go forward 1 time so that you are standing in the middle of the room and then turn left. You are now right in front of the Throne. Go forward. You are now standing just before the throne and you see, on the right side, the bottom left corner of the tapestry. To the left of the tapestry you see a piece of metal wall, between the throne and the tapestry. Click with your finger on it and ..... a hatch open up where you can crawl through.
So crawl through this crawl hatch into Sirrus's secret storage room. In the storage room there are some crates and a wine rack. Go forward to the crates on the back wall and then turn right. You are then right in front of the wine rack. A rolled letter in the wine rack is placed at the bottom right. Click on that letter to get it into your screen and read it:
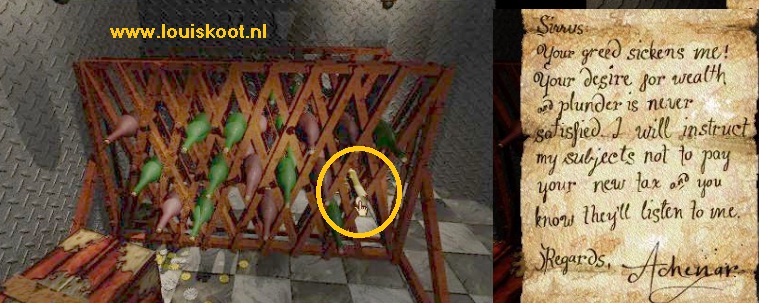
"Sirrus ... Your greed makes me sick." "Your appetite for wealth and looting is apparently unstoppable." I will instruct my subjects not to pay your new taxes and you know that they will listen to me, kind regards .... Achenar ".
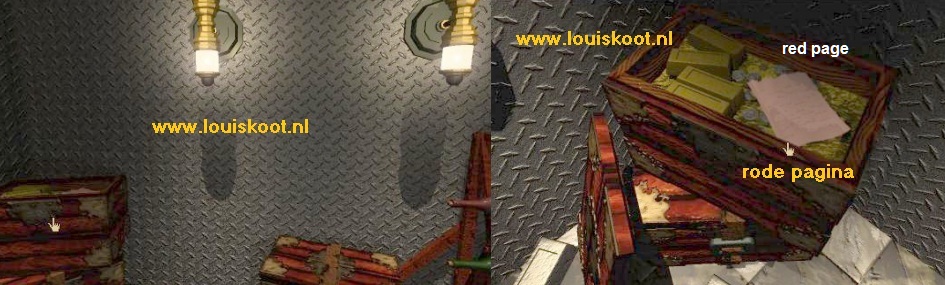
Click next to the letter to put it back in the wine rack. Turn to the left. In the corner you'll see an opened crate on top of a closed crate.
Click on that opened crate and you look in it and you'll see the Red Page in it.
Leave the Red Page here as well. You now know where you can find the Red Page, so you can pick it up later. First you still have to find that Symbol Code to be able to reach the Myst Linking Book. Crawl back through the crawl hatch into the room. You can take a look at all Sirrus's stuff. You can move the red bird by clicking on the handle on the tripod and then rotating the handle a couple of times. You can view a miniature of the space ship and of the Stone Age Ship and you can see through the telescope. You can also find 3 crystals on the low cupboard that you can light up when you go with your finger over it.
If you have seen all things in the room of Sirrus, then go stand straight in front of his marble throne and turn to the left. You then look at the corridor from which you came.
Go back into the corridor and walk around the corner and now go to the Red Button, which is now on the right side of the wall.
Walk to the Red Button and then turn right.
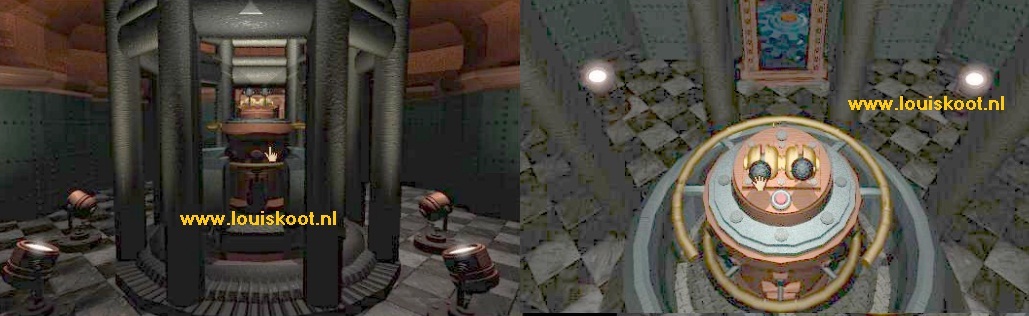
The Elevator:
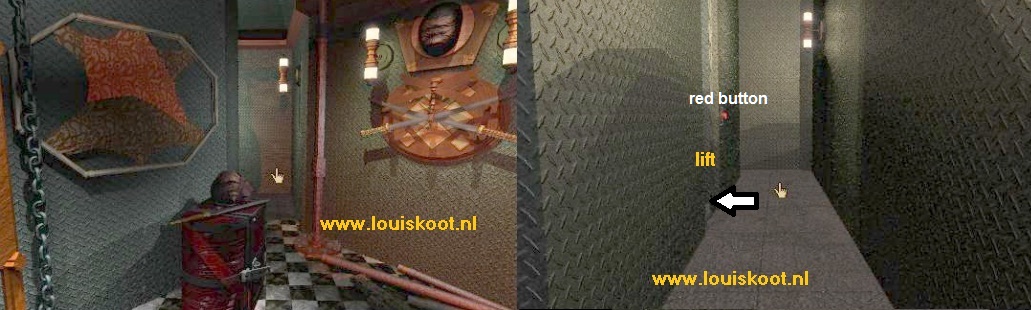
You're standing before a narrow and short corridor. This corridor goes to the round elevator but the elevator is "out of order". The entrance to the elevator is on the other side, but you can not walk around the elevator. Click the Red Button. You hear a lot of noise and then the floor of the hall lowers and is now a staircase that goes down to the space underneath the elevator.
Go down the stairs 2 and you will be under the elevator and in front of an oval console on which you see a window and a button lever. Click on the console to zoom in on it. In the window you can see 2 small circles. An outside circle and an inside circle. There is a little opening in both circles. The opening in the outer circle is set to "6 o'clock" and the opening in the inner circle is now about "12 o'clock". The inner circle is the elevator and the outer circle is the elevator room. You have to turn the elevator and you'll do that with the button lever.
If you raise the button lever and then hold it, you'll see and you hear that the elevator turns and in the window you'll see the inside circle. You must make sure that the opening in the inner circle is equal to the opening in the outside circle. Then you can go into the elevator. You can do this " click by click" by raising the button lever and then releasing it. Or you do this in one go by raising the button lever and then holding it until the inside circle is turned so far that the opening has almost reached the opening of the outside circle. Then release the button and if you have done it right then both openings will fall together at "6 o'clock" and both circles will turn red.
Then click right next to the console to zoom out and turn clockwise and go back up the stairs. Then turn left or right twice and see ........ you can now enter the elevator. So do that.
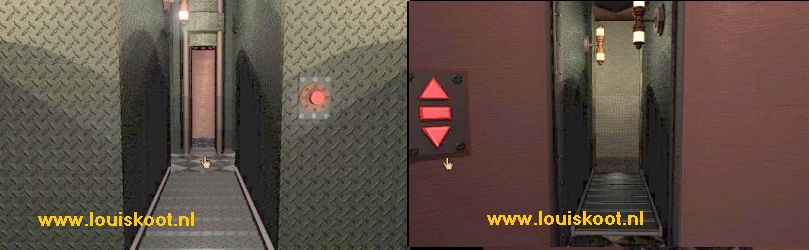
In the elevator you can see the 3 elevator buttons on the left. The Down Arrow Button is to go down, the Up Arrow Button is to go up and the Bar Button, between both arrows, is to lower the elevator just a little bit. Click the Up Arrow Button and the elevator will bring you up. When the elevator has gone up and stopped again, you will go out of the elevator and turn left or right. You then look back at the elevator. Above the entrance of the elevator you now see a Gray Triangle. Click on this triangle and ......
Turn the Fortress:
You look up and you see that there are 2 levers on the roof of the elevator. How to get to the top of the elevator? Look down again through the lowering finger and go back into the elevator. Now press the BAR Button, so press the button between the two Arrow Buttons. You hear "Ping" ... QUICKLY....... STEP IMMEDIATELY OUT OF THE ELEVATOR ..... After a few "Ping sounds " the lift drops a bit and the roof of the elevator is now at your height. If you were to slow in leaving the elevator after pressing the BAR BUTTON then you'll have to do this again. Go 2 times ahead and you are on top of the elevator at the 2 Handles:
You are now going to do for real what you have practiced in Achenar's room on that holographic simulation machine. You see 2 big levers and a red button and you see a "mirror" in which you see the gears under the fortress. The intention is that you now turn the fortress to one of the islands where you can find a part of the returning code. You know that the entrance of the fort is now facing the "Gear Island", and that is on the " 6 o'clock" position. You can check this by moving the left lever up and down. You'll hear the dull "Pong" sound. You must first turn the fortress now to the "Ping" island.
|
Go back in the elevator and press the Down Arrow Button. The elevator drops back down. Exit the elevator and follow the corridor all the way back through one of the two rooms to the Entrance / Exit of the Fortress. The Fortress is now turned and the "bridge" now connects the Fortress with a small rocky island. On top of this island there is such a round "gear" pillar.
So go all the way to that pillar on top of the rock. On the pillar you see the left half of the Return Code. Draw these 2 symbols on a piece of paper
Zoom out of the pillar by clicking left or right next to it and then turn left. Go back into the Fortress and back through the corridor and through one of the rooms to the elevator. Go up again with the elevator and when the lift is up again, press the middle BAR BUTTON again and get out of the elevator again. The elevator again will drop a bit without you. Go back onto the elevator to the 2 levers
|
|
Go down again with the elevator and back through the hallway to the Entrance / Exit of the Fortress.
The Fortress is now turned to another, slightly larger, rock island and on top of this rock island is also a gear pillar
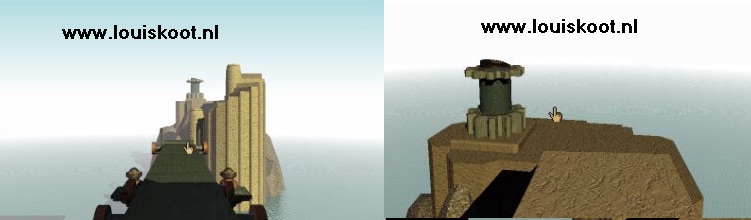
Go to the top of the rock island and zoom in on the pillar. You see the right part of the Return Code. Draw the 2 symbols on your piece of paper again.
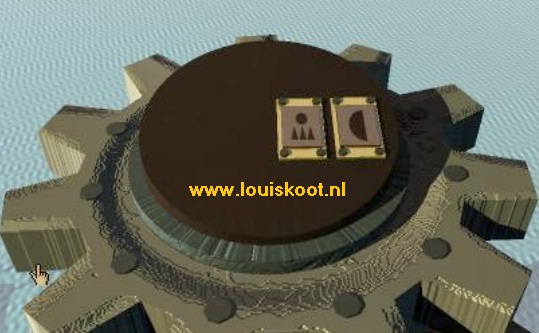
Click left or right next to the pillar and turn around and go back into the Fortress. The fortress must now be turned back to the "Gear Island", and that is the "Pong" island. So go back to the elevator and take it up again and click again on the middle BAR BUTTON and quickly get out of the elevator again. Go back onto the elevator to the 2 levers and make sure, with the levers, that you hear the dull "Pong" sound again. If so then click the red button again.
Bring the Red Page to Myst:
You can now either get the Red Page or the Blue Page from the room of Sirrus or from the room of Achenar. Go down again with the lift and then exit the elevator. You can now choose whether you go left to Sirrus's room or right to Achenar's room. In this walkthrough I always get the Red Page first, so go left through the corridor, to the room of Sirrus.
Stand again right in front of the marble throne and then crawl through the hatch into the storage room
Walk to the crates in the back corner and now take the Red Page from the opened box.
Crawl back through the hatch and go through the hallway to the Entrance / Exit of the Fortress. The Fortress is again connected to the "Gear Island".
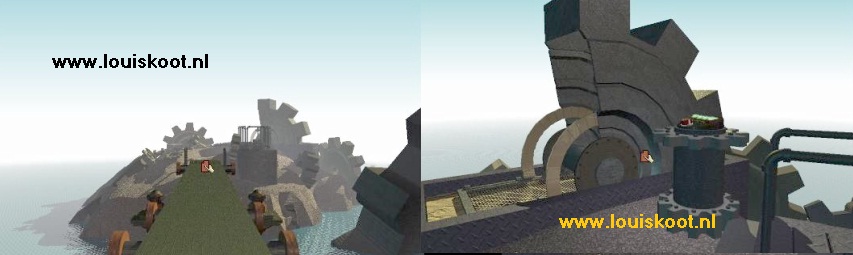
Go all the way over the bridge and then turn right, so that you look back at the fortress. The code pillar is then left of you ....

Zoom in on the code pillar and then set the found symbols on it, from left to right, and then you press the Red Button
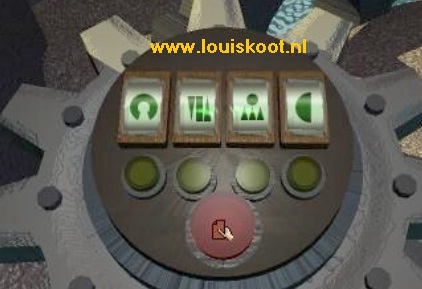
You automatically zoom out of the pillar and you see now the "bridge" drops down into the "cave".
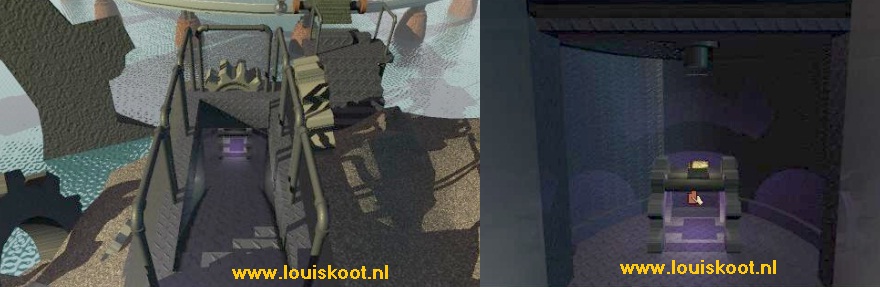
So go down 3 times and click on the Myst Linking Book. Open the Myst Linking Book and click in the window of the right page. You return to the:
Myst Island
You are back in the library and look at the ceiling. Look down through the down index finger and go paste the Red Page into the Red Book and then open the Red Book.

Listen patiently to the nagging of Sirrus. He needs 1 Red Page. Close the book.
Retrieving the Blue Page from the Mechanical Age:
Ok .... you have to decide for yourself whether you also want to get the Blue Page from the Fortress of the Mechanical Age. Of course I do. If you want to do that too then go out of the library and go back to the Linking Book in the big Gear Wheel upon the hill. Via the book, return to the "Gear Island" and go back into the Fortress and into Achenar's room.
Crawl through the hatch, right next to the Throne, into the "Torture chamber" and grab the Blue Page from the low rack cupboard
Leave the fortress to the "Gear Island". You do not have to enter the Return Code again on the pillar, but you do have to press the Red Button again to lower the "bridge".
Go down again to the Myst Linking Book and link back to the Library in Myst. Place the Blue Page in the Blue Book and listen to Achenar
Close the Blue Book and we continue with:
Chapter 7: Myst Island: Open the Channel wood Age:
Library
Go back to the Tower Rotation Card. Zoom in again. Place your hand on the Tower Circle again and make sure that the White / Red line is now placed on the log next to the wooden hut.
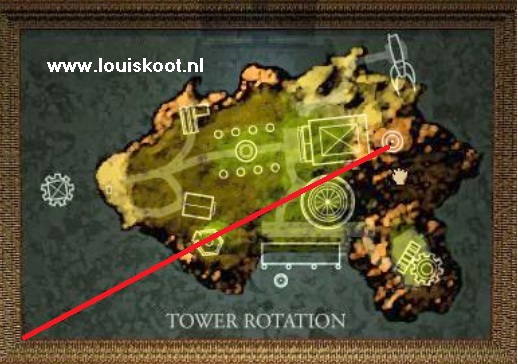
Then zoom out twice again and open the bookcase / staircase again by clicking twice on the "stairs painting".
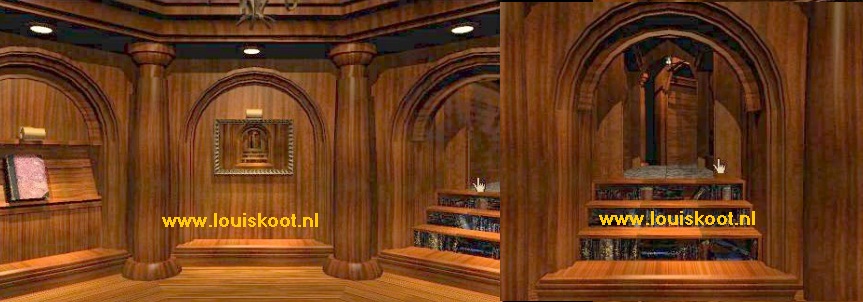
Go through the tunnel to the elevator, into the elevator and up to the elevator.
Via the "Book ladder" you can look through the crevice again to check that the Tower is now really oriented on the Tree, next to the wooden hut.
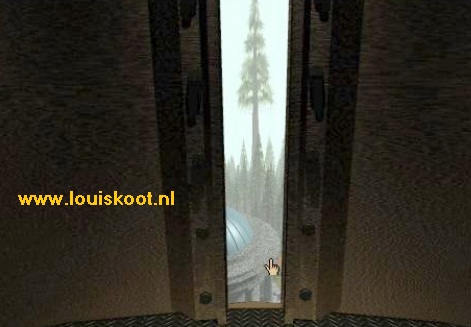
Go to the "Key ladder" and climb up again. On the new copper plate, at the top of the "Key ladder", you now see the indication for Channel wood.
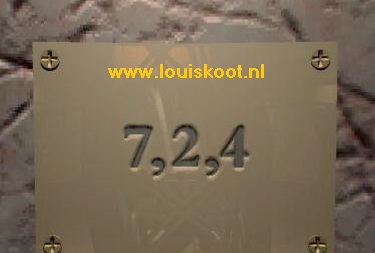
It is code ..... 7, 2, 4. Copy this code.
Climb back down and go back down with the elevator again. Walk through the tunnel back to the library and close the bookcase again by clicking twice on the "Entrance Painting". The library door is open again, so leave the library. Walk through to the well.
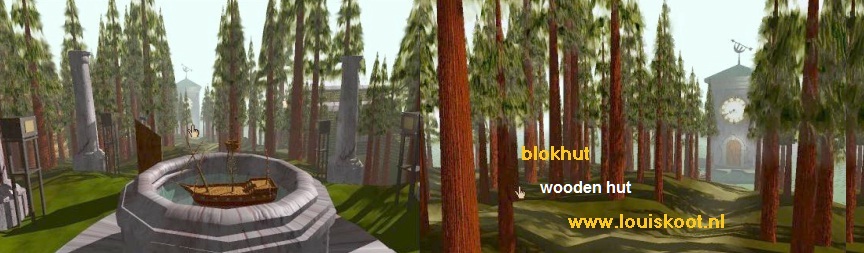
Then go a few more times and then enter the forest to the wooden hut
Wooden Hut:
Right next to the wooden hut is that very tall Tree on the round stone stage. You can not see this now, but there is an opening in that tall Tree. The tree not only goes high into the air but also deep into an underground cave. The opening in the tree is now under the ground. The wooden hut is the "Boiler Room". With the Boiler you have to "lift" the High Tree up and down. Click on the door of hut......the door opens, so get in.
The Boiler is located in the back of the log cabin. To the right of the Boiler you see a big red turning Wheel and to the left of the Boiler you see that big high tree. At the top of the boiler you see a round window with a red pointer in it. The pointer is now completely on the left. The round boiler stand on the "stove" and in the "stove" you see the "pilot flame hole." The stove isn't burning right now
Turn now to the left. You look back at the entrance and you now see a Safe in the corner. Click on the Safe to zoom in on it. You will see a 3-digit display with 3 buttons and a lever. Pull the lever down and release. The safe does not open. Well ... which code did you see in the Tower? ... So use the buttons to enter code 7, 2, 4 on the digit display and then pull the lever down again and release. The Safe opens.
There is a matchbox in the safe. Click on the matchbox. It opens. There are matches in the box. Click in the box. You take out 1 match.
Now use the match, from right to left, to iron over the side of the matchbox. The match will light up.
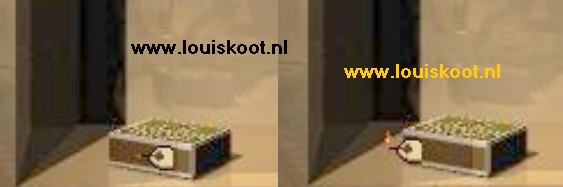
QUICKLY NOW........, turn left. You look at the Boiler again. Click on the Boiler to zoom in and then click with your burning match in the pilot light hole. The pilot light goes on
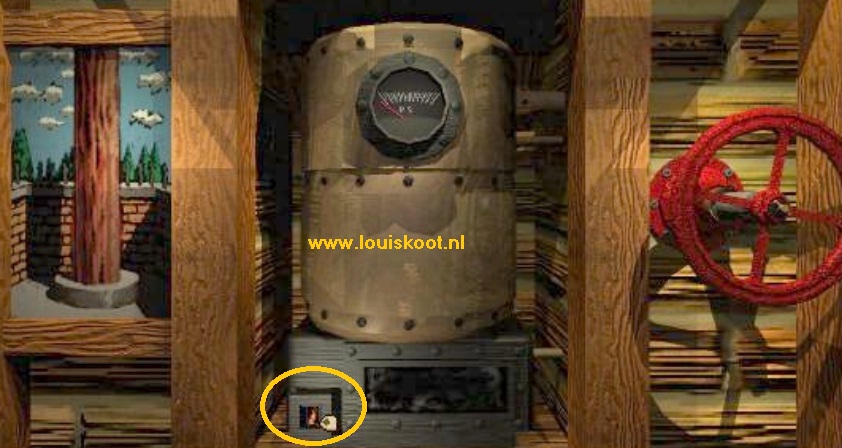
Now you have to increase the pressure in the Boiler. Place your hand on the right side of the big red turning wheel. You will then receive 2 Green Pivot Arrows:

Now click your left mouse button and keep it pressed. The wheel will turn and you will see that the heater is now on. Hold down your mouse button for about 26 seconds until the wheel stops rotating. Then release your mouse button and ....... The Red Pointer in the Boiler will go to the right and when it is on the right you will hear dull thumps, as if a pile is being slammed into the ground.
Turn clockwise quickly and go forward one time. Outside you immediately turn left so that you look at the front of the log cabin again. There are 2 red trees in the right side of your screen. Click with your finger between those 2 trees and you go forward to the big tree right next of the wooden hut
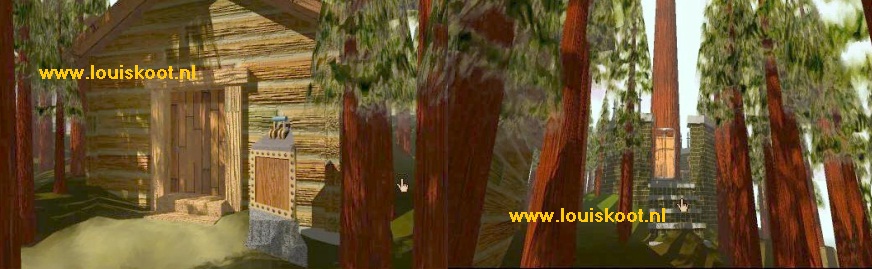
Walk all the way to the round stage. The Tree / Pile now rises further up and you see the Opening in the tree.
Do NOT enter the Tree now. Click at the top of the tree trunk to look up.
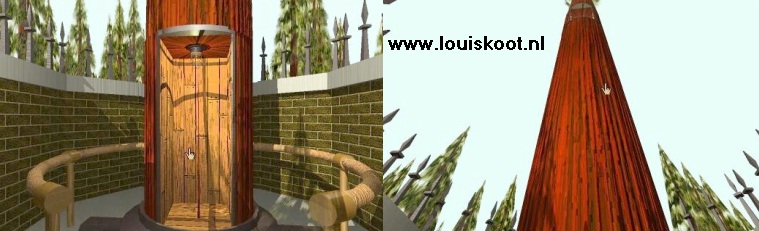
Keep looking up until you no longer hear dull thumps. The tree has then fully raised and the opening in the post is now completely above. The tree will not automatically sink back into the ground. Look down again via the down index finger and turn left or right. Go back to the front of the wooden hut, open the door again and go back inside. Click on the Boiler again and place your finger on the Left side of the Red Wheel. Now you get 2 Red Pivot Arrows.
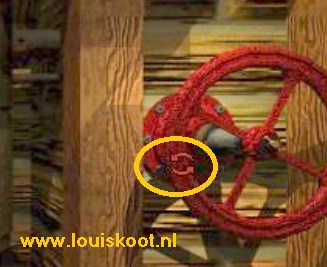
Well, click your left mouse button again and hold it down until the wheel stops rotating again. The fire in the stove is then off. Release the wheel. The pressure disappears from the boiler and you hear the dull thumps again. VERY QUICK NOW you go back outside and very quickly back to the Tree. Stand right in front of it. The Tree is already in the process of sinking back into the ground. Wait until the Opening, the elevator, has reached ground level and then quickly click in the opening.
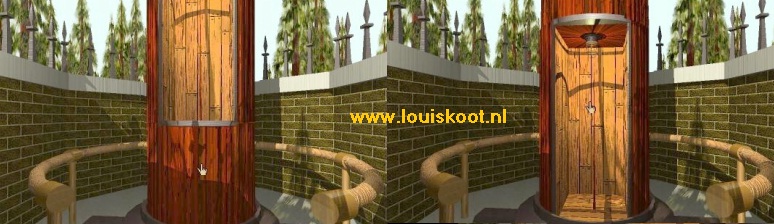
You are then standing in the tree and it sinks further into the ground, with you in it. Do NOT click the button on the left. Should you have unexpectedly stepped into the Boom the 1st time, you can use the button to go up again. The Tree will bring you into the underground cave and you will see the Channel wood Age Linking Book.

Go 2 times ahead and click on the Book. Open the book. In the window you can see the Link Movie again.
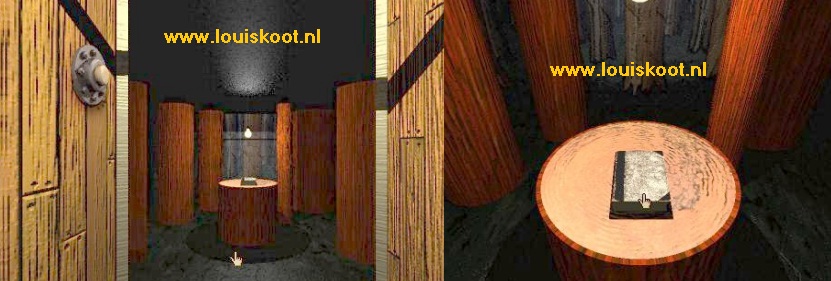
Click in the window and watch the movie in order to get acquainted with the Channel Wood Age.

Then click again in the video and you will arrive in:
Chapter 8: The Channel Wood Age:
In the video you saw an overview of the Age ..... Water, Trees, Tree Houses and a Windmill....Yes.....This Channel wood Age is a swamp. On top of the trees is the Tree House Village which consists of two floors. In this Age it is all about Water power.
You are standing on a wooden path in front of a tree. The first thing you have to do is to go to that windmill. Turn left or right.
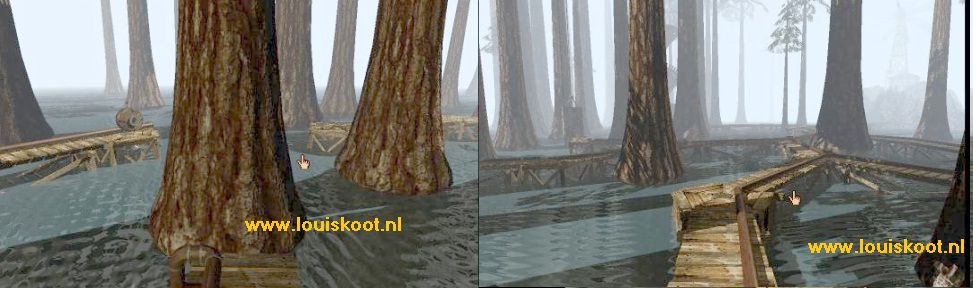
In the distance you can see the windmill. You also see all kinds of wooden paths that go in different directions. A water pipe runs across all those wooden paths. At the crossroads of the paths there is always a switch in the water pipe. All those switches have a lever that you can move to the left or to the right. This determines whether the water then goes left or right through the pipes. With the water power the engines for the elevators and the doors in this Age become active. But first the water flow through the pipes has to be turned on, and you have to do that in the windmill.
The windmill:
Go forward three times over the path. You are then at a fork and at a "switch". Ignore all the switches you now encounter.
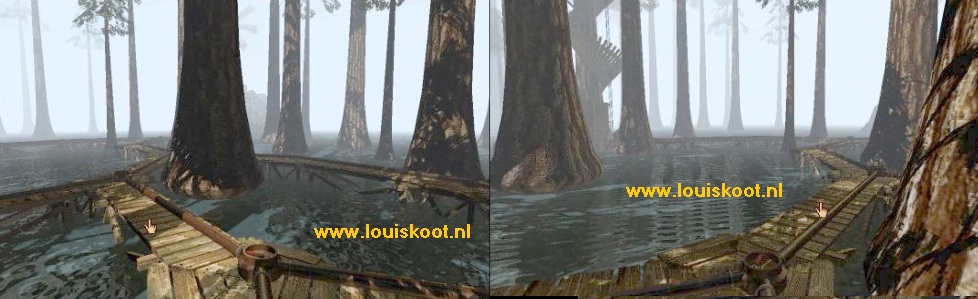
Continue 2 times ahead on the straight path. You are at the next junction.
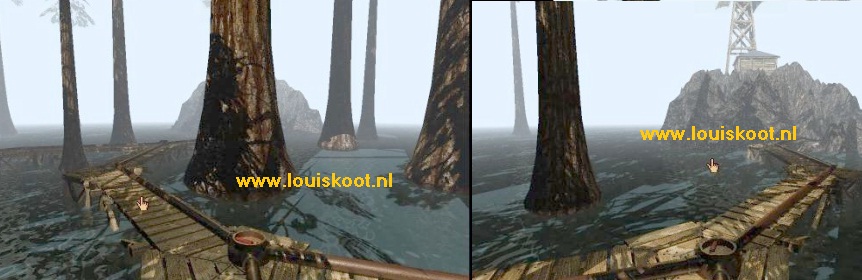
Follow the straight path 2 times further to the next fork and then 4 times ahead and you will see the windmill straight ahead.
Now follow the path to the rock where the windmill is on, and then on to the entrance of the rock.
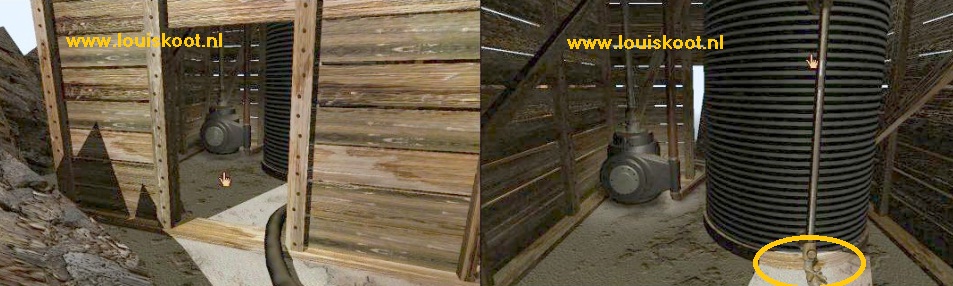
You hear water flowing. Go inside. The large round water reservoir is located in the windmill. A pipe runs over the reservoir from the top to the bottom and you can see a tap in the pipe on the ground. Click on the water reservoir. You look up and see that the reservoir is being filled by a pipe.
Look down again and click on the tap now. You zoom in on it. Now click about 10x,on the front lever of the tap. 10 times should be enough.
The tap is then completely open and the water now flows through the pipe from the water reservoir.
NB: If you do not hear water flowing, click on the pump on the left of the water reservoir. From the pump a pipe goes up into the reservoir. If it's ok, the pump is on and you see that pipe turning. If the pipe on the pump is not running, pull down the red lever on the pump. Then open the tap again in the pipe in front of the reservoir.
Zoom out of the tap by clicking next to it and turn around. Go back over the path and you will then be on junction 1 at switch 1.
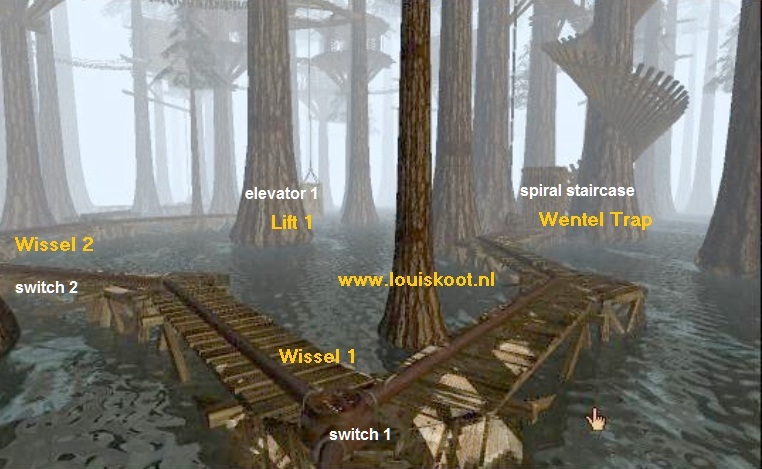
The path goes to the left and to the right. The right-hand path ends at the Spiral staircase Tree If you look in the distance, to the left of the spiral staircase, you will see the Tree Elevator 1.
Bring the Water to Elevator 1:
The door of the spiral staircase is locked on the inside. So there is no point in going there. The water must first be led to Elevator1. Click on Switch1.
You look down at Switch 1. If the lever of Switch 1is now on the left side then click on the lever click it to the right.
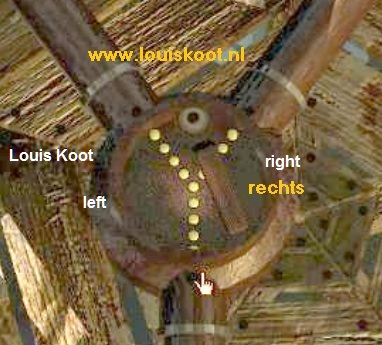
The water will then flow further to the left via the pipe. Zoom out of the
switch by clicking next to it and then click on the left path. Follow the path 3 times ahead to
junction 2 and Switch 2.
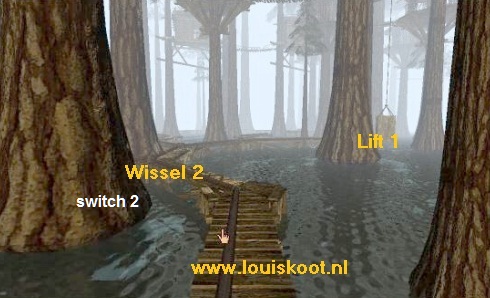
Further to the right you see Switch 3.

Zoom in on Switch 2 and move the lever to the left so that the water moves to the right, to
Switch 3.
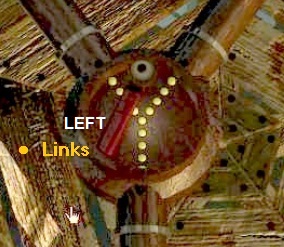
Zoom out and move forward on the right path.
You end up at junction 3 at Switch 3.
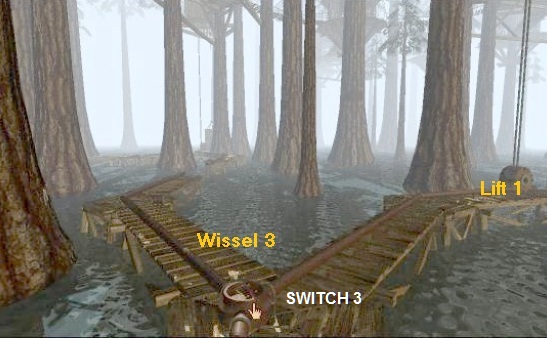
Zoom in on Switch 3 and turn the handle of this switch to the left so that the water will continue to the right, to the engine of Elevator 1.
Zoom out and click on the right path and walk over the right path to Elevator 1
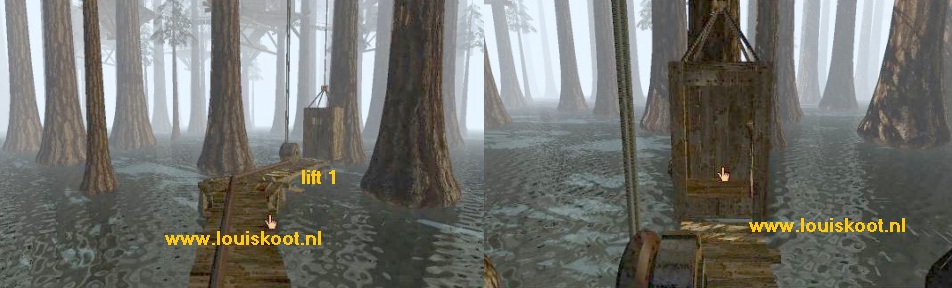
In front of Elevator 1 is the engine of this elevator. You hear that the engine is now on. Click on the door of the elevator and enter the elevator.
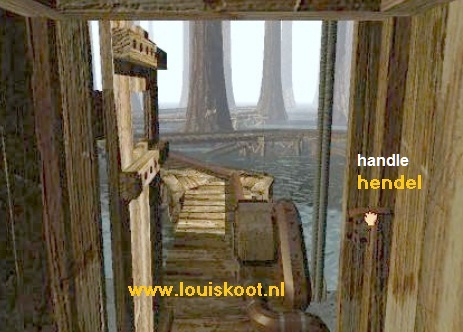
From within the elevator you look out over the path. On the right is a red handle. Close the door first and then pull the Red Handle down and release. The elevator goes up and then stops. Open the door and step 1 step forward from the elevator. You are now at Level 1 of the Tree House Village . The lower floor consists of rectangular huts and a number of large Round "Divide Huts".
Tree houses Level 1:
The huts are connected by rickety wooden bridges. A "Divide Hut" is in fact a crossroad, but there are also a few "End Divide Huts".
You should now look for a Red Handle in one of the round "Divide huts". And that lever is quite difficult to find.
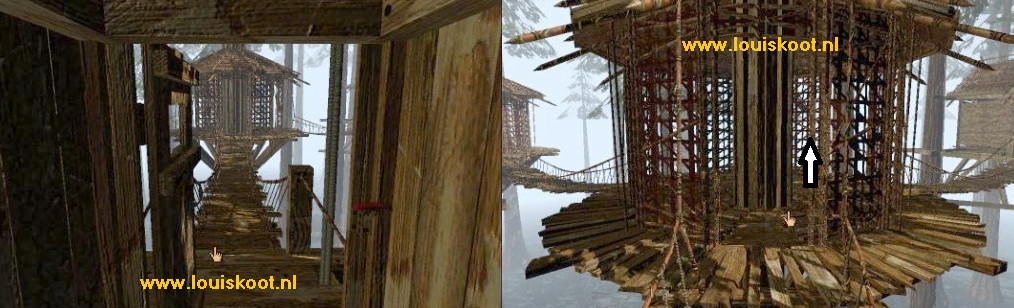
Now go forwards 1 time first. You are then standing just before the one round "divide hut". You have to go to the rectangular cottage that is to the right of this round hut. In the middle of a "Divide hut" is always a thick round pillar. So you can come into such a dividing hut on the left or right by clicking on the left or right of the round pillar. Now click right next to the pillar in the hut and you will stand on the right side of the pillar in the hut
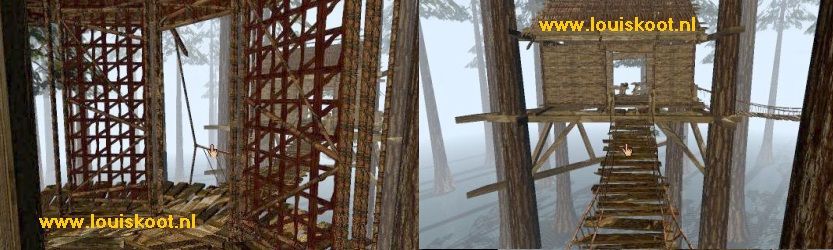
Click in the opening and then go 2x ahead and you are in the rectangular hut. Turn right and go 3x ahead to the next rectangular hut.

Turn right again and you will see a round Dividing Hut again.
Go forward and then click on the left side of the pillar in the distribution hut. Then go forward one time and you will see a Round Dividing Hut again.
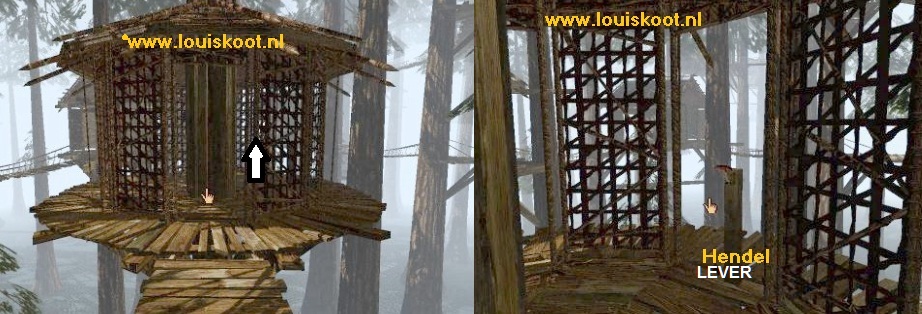
Click in this dividing hut again right next to the round pillar and you are standing in the hut and see, in the opening, a wooden pillar on which the Red Handle is located. Click on the post to zoom in on it. Through the opening you now see the spiral staircase again. Pull down the Red Handle and release.
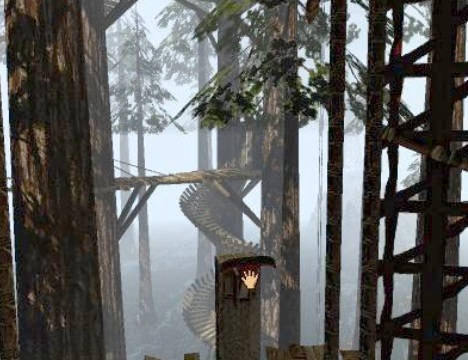
You see that there is now a door open at the spiral staircase. You have to get there now. Turn right and click in the opening of the "Divide Hut".
Then click at the right in the next "Divide Hut" and then back into the opening. Go ahead into the Rectangle Hut.
Turn right and then go 2 times forward to the next "Divide Hut".
Click on the left side in the "Divide Hut" and then click again in the opening. Go forward to the Rectangle Hut.
Turn right in the Rectangle Hut and you will continue to progress through 2 "Divide huts" until you are back in a Rectangle hut.
Then turn left and go forward to the next Rectangle Hut.
Turn right and you will see right in front of you the Spiral Staircase and elevator 2.
Go forward. You are at elevator 2 and the spiral staircase. Elevator2 does not work because you have led the water through the pipes to the Elevator 1 engine.
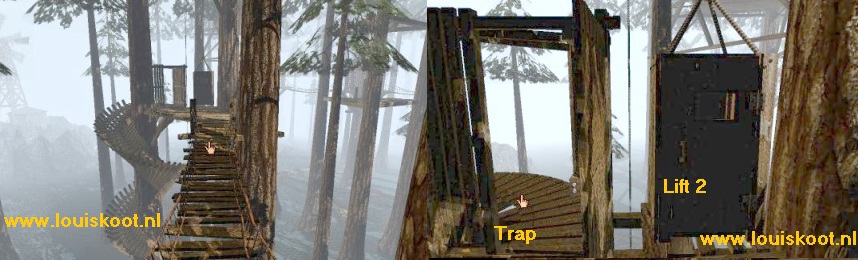
The water must now be led to the engine of Lift 2 and this engine is at the bottom of the spiral staircase.
So descend via the spiral staircase, then open the door and then go forward over the wooden path to Switch 1
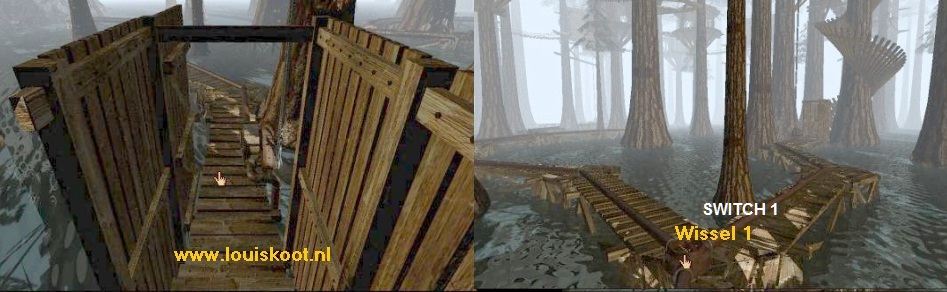
Zoom in on Switch 1 and move the lever to the left so that the water goes to the right, to the engine of Elevator2, which stands in front of the spiral staircase door.
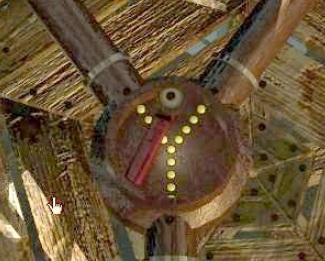
Zoom out and walk back to the spiral staircase. You should hear the engine now. Climb back up to the 1st level via the spiral staircase and then turn around. Open the door of Elevator 2 and get in it.
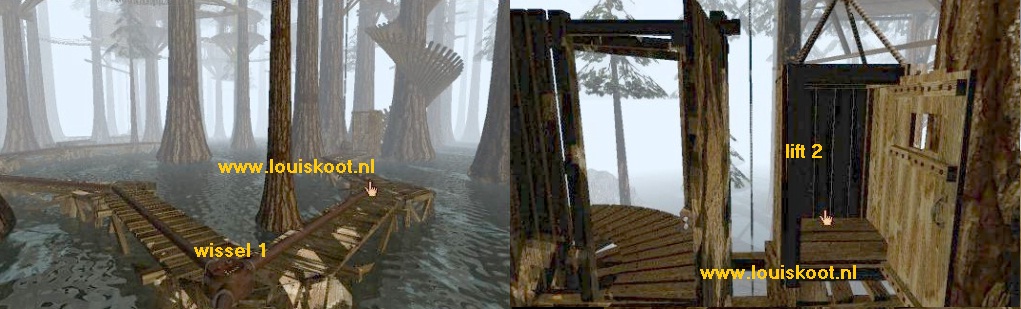
Close the lift door and pull down the Red Handle, which is on the right-hand side of the lift, and release.
Elevator 2 will take you up to Level 2 of the Tree House Village. Open the elevator door and get out of the elevator.
Tree Houses Level 2:
The Blue Page:
Follow the wacky wooden bridge path 5 times ahead. You are at the Hut of Achenar and stand in front of an open iron gate.
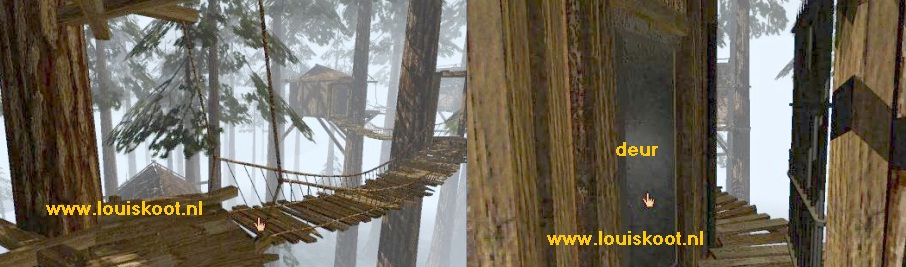
You can see a closed metal door. Click on that door and then open the door. You look into Achenar's "prayer room." Go inside. There are masks on the wall and there is a kind of "nail bed". A holographic projection of the ugly head of Achenar appears above the bed. You hear him uttering a number of incomprehensible cries.
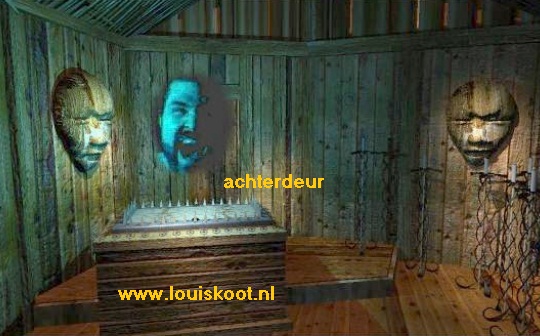
Wait until the projection disappears and then go 2 times ahead, on the right side of the "bed of nails", to the opened door behind the "bed of nails".
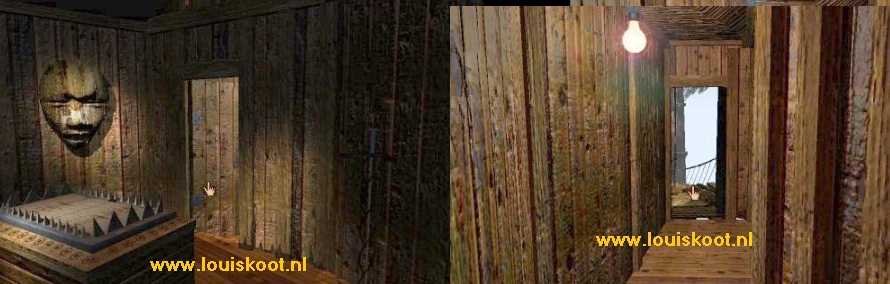
Step through the door and then go 2 times forward, through the hallway and you are outside again on the wacky "floating path". Achenar's hut is thus an "end cabin", but you can still see a "bridge" that goes to the left. Click on that "bridge" and you are right in front of a rickety Rectangle Hut.
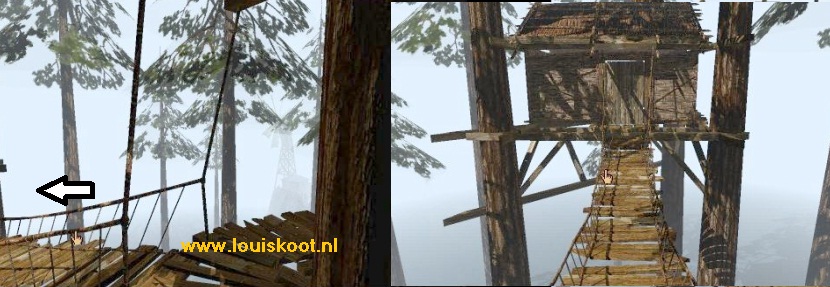
Go forward, open the door and step inside. There is a bare bed in the hut. Turn left. Left in the back corner is a round Holo machine and for the holo machine lies Achenar's BLUE PAGE.
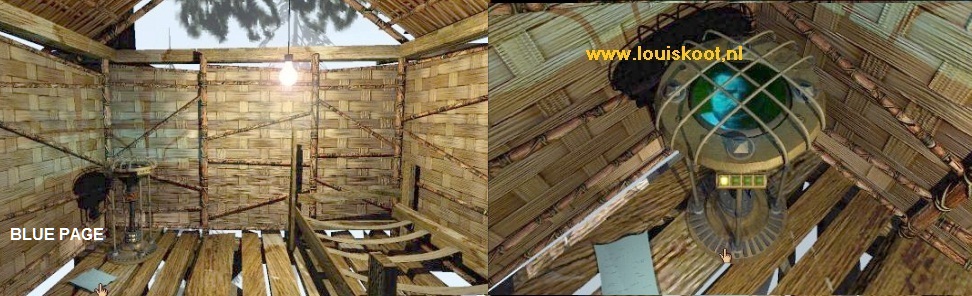
Zoom in on that Holo machine and press all 4 buttons. You'll see the ugly face of Achenar appear in the machine. If you have enough of this then grab the BLUE PAGE. In contrast to what I have done so far in the other Ages, we now take the BLUE PAGE with us. It will save you a lot of going back and forth. So grab the Blue Page. and zoom out on the right side of the holo machine. So now you have the Blue Page in your hand and that remains the same. Now we look for the:
Red Page:
With the Blue Page in your hand, turn left and leave the Hut 2 times ahead. You are standing in front of Achenar's "prayer room" hut again. Now click on the path that goes to the left.
Follow the path now 7 times ahead, back to Lift 2. You will see that the path continues past Lift 2.
Follow the path further 4 times ahead and you are standing in front of the Sirrus Hut. Open the door and head forward. Nice room.
You have to give it to him ... That Sirrus is not such a barbarian as his brother Achenar. Although ..... external display do not always say everything about someone's character. A bed, a table on the left and on the right Go to bed. There are 2 drawers in the bed. Click twice on the left drawer. There is a crooked dagger in the drawer. Zoom out and click twice on the right-hand drawer. There is a piece of a letter in it.
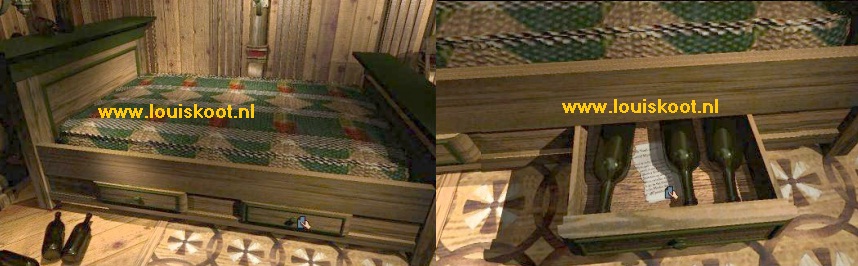
Click on the letter and read what you can.
It is a piece of a letter from Atrus and it is about his Safe. He tells about one of the Marker Switches on Myst Island and it is the Marker Switch 1 on the quay. This Marker Switch must be set to the "Off" position.
Zoom out and then click above the bed to get completely out of the bed. Turn to the left and go to the table in front of the window.
Open the drawer that is in this table and ...... in this drawer you'll find the RED PAGE.
Back to Myst:
You already have the BLUE PAGE in your hand, so you can not take the RED PAGE with you, but now you know where to find it. Zoom out, turn left and leave the Sirrus hut and walk back over the path 5 times and then turn around. You are back at Elevator 2. Open the elevator door and enter. Close the lift door and pull the red handle down and the lift will bring you back down to the 1st level. Get out of the elevator and turn around.
We have to search for the Myst Linking Book now and judging from what has happened in this Channel wood Age this will mean that you have to alter the water flow again to lead the water to another place through the pipes
Go down again 7 or 8 times via the spiral staircase and then continue in the direction of the Windmill until just past Switch 1. Then turn around to Switch 1 and turn the Lever of Switch 1 to the right again. Zoom out and go over the left path to Switch 2. Switch 2 is good, so leave it alone and go via the right-hand path to Switch 3. Stay in front of Switch 3.
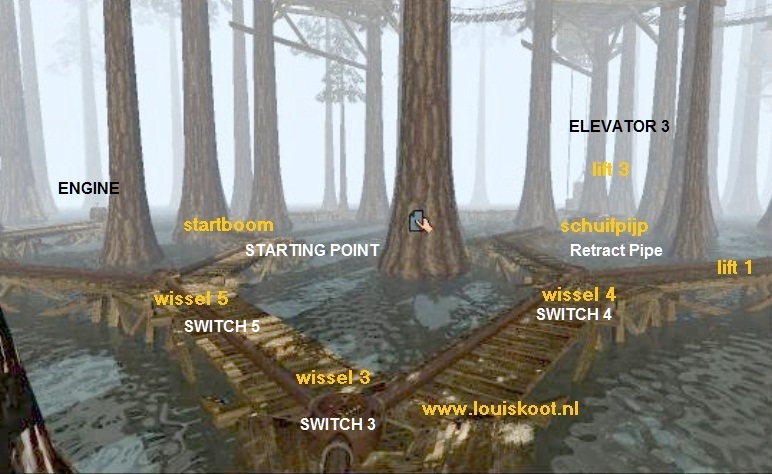
To the right it goes to Switch 4 and to the left to Switch 5. Beyond Switch 4 you see in the distance between the trees, Elevator 3. Just in front of Elevator 3 you see that there is a gap in the water tube that goes from Switch 4 to Elevator 3. If you look to the left, to Switch 5, then you see the path on which you first arrived at this Age. On the left behind that path you see another engine. Zoom in on Switch 3, before your feet, and now move the lever of Switch 3 to the right. Zoom out and go left over the path to Switch 5.
Probably the lever of Switch 5 is already on the right. If that's not the case then you have to do this yourself.
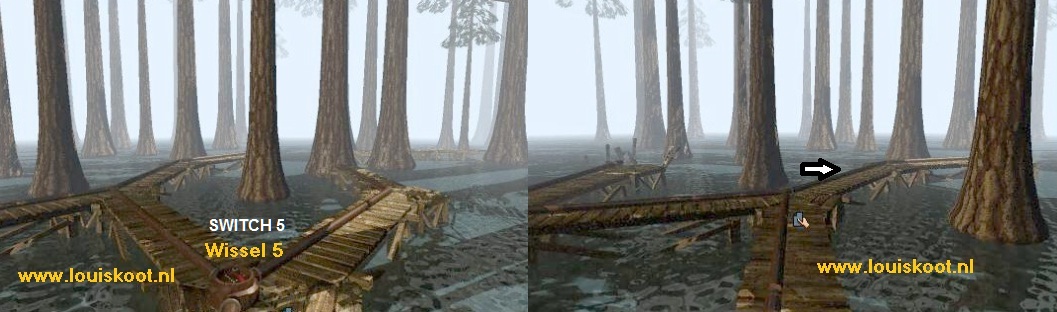
Then follow the path to the left and then further ahead to that engine at the end of the path.
The engine is now on. You can not go any further because the bridge is not there. There is a red lever on the motor. Pull the lever down and release and ...... the Bridge path will rise out of the water
You can now continue, so go 9 times ahead. On the left you see elevator 3 but the engine of this elevator is not on yet because the water is not going here. Turn right and walk to the end of the path.
You are now on the other side of the gap in the water pipe and at the end of the pipe there is a turning handle. Click on the turning handle and the pipe slides out and closes the gap.
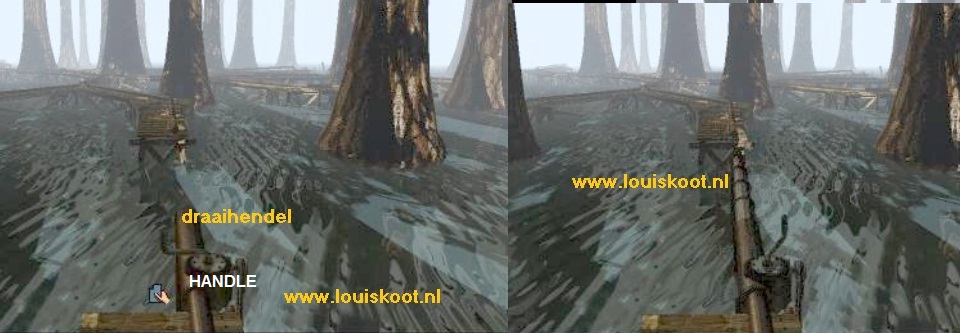
Now the water has to be brought through this pipe to Elevator 3. Turn around and walk back 3 times, then turn left and follow the path back to Switch 3 and put the handle of Switch 3 again to the left. Zoom out and walk to Switch 4 and move the handle from Switch 4 to the right. Zoom out, turn around, walk back to Switch 3 and then to Switch 5 and follow from Switch 5 the path to the left and then further ahead to Elevator 3.
The engine is working now, so open the elevator door and get on the elevator. Close the door and pull the red handle down and Elevator 3 will bring you up again.
Open the elevator door and you will see the Myst Linking Book in front of you on the floor of the hut.
Well, go ahead, click on the book, open the book and link back to the:
Myst Island:
You are back in the library. Look down and go to the right and to the Blue Book. Paste the Blue Page in the book, open the book and listen to Achenar again.
Achenar tells you that you should not "free" Sirrus from the Red Book. It is all the fault of Sirrus, says Achenar. He needs 1 blue page and that can be found on this Myst Island.
If Achenar is gone and the window is black then you zoom out 2 times again. Now you can choose whether or not you will pick up the Red Page from the Channel wood Age. I will do that because otherwise I will keep feeling that I only play half of this game. I assume that you too would like to do this. Leave the Library and go all the way back to the Wooden hut. Go inside and click on the Boiler again. The pilot flame is still burning but the pressure has dropped out of the boiler. With the green pivot arrows on the right side of the red wheel, turn the wheel completely open again to increase the pressure in the boiler.
Then go outside again and to the Tree and wait again until the opening in the Tree is completely high again and you do not hear any dull thumps anymore.
Then go back to the boiler in the Hut and turn the red wheel completely closed again with the red pivot arrows on the wheel.
Quickly go out again and to the big Tree and wait until the opening is at your height again and then click in the opening and you will go back down to the Channel wood Linking Book.
Go to the book, open it and link back to:
Channel wood Age:
The Red Page:
You will arrive at the same place as the first time. Turn around and follow the paths to Switch 1. Turn the lever of Switch 1 to the left again.
Zoom out and go to the spiral staircase and climb up to level 1 of the Tree houses. Then turn around and go up with elevator 2 to level 2.

Get out of the elevator and turn left and follow the path back to the Sirrus cabin. Go inside and grab the Red Page from the drawer of the left-hand table.
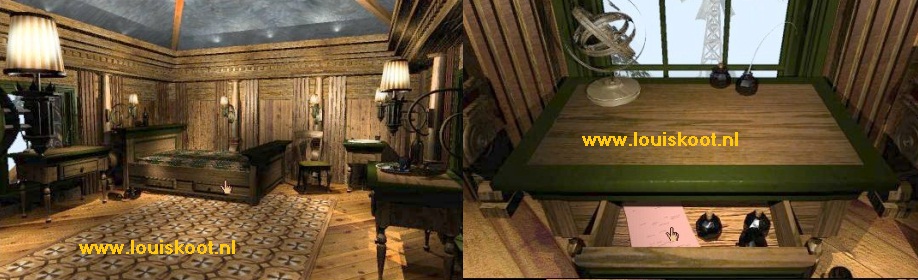
Go back to Elevator 2 and go down with it again and then via the spiral staircase further down and walk back to Switch 1.
Move the lever of Switch 1 to the right again.
Then follow the paths, via switch 3, switch 5 and the slide bridge, back to Elevator 3.
Go up with Elevator3 to the Myst Linking Book and link back to:
Myst Island:
Library:
Go to the Red Book and paste the Red Page in the book and now listen very carefully to Sirrus.

You can understand Sirrus is now very well and he tells that his father, Atrus, has imprisoned him and Achenar each in a different Age. Whether Sirrus or Achenar is the villain son, Atrus does not know.. Of course Sirrus says that he is innocent. Sirrus still needs 1 Red Page to be liberated and he tells you to go to a book in the bookcase and to view page 158 in that book. This page contains the instructions on where to find the last Red and Blue Pages. He also tells you about a Green Book and warns that you should not click on that Green Book. According to Sirrus that is a "Prison Book". Zoom out 2 times to start with
Chapter 9: Myst Island: End Game
Library:
Go to the bookcase and zoom in on it. Following what Sirrus has told you, you now grab the thick book that is on the right of the middle shelf from the bookcase.
Open the book. This is the book that has 300 pages with blocks of diagrams. Scroll through this book to page 158 and then draw the diagram that you see on page 158 on a piece of paper.
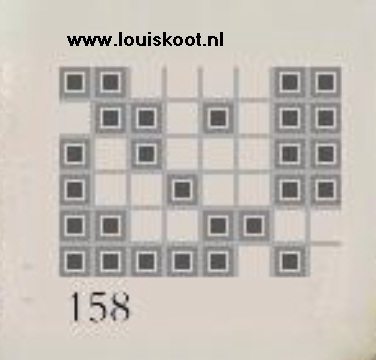
Close the book and take 2 steps backwards. Hmmm .... Sirrus and Achenar have told you about one last Red and Blue Page to be found here on Myst Island. Would there really be a place on this island that you have not seen yet? Maybe a place here in the library ?. Turn clockwise to see the Open Fireplace. Stand in front of the fireplace. Hmmmmmm ..... The OPEN FIRE ....... Click in the fireplace and ..... YOU ARE IN THE FIREPLACE....
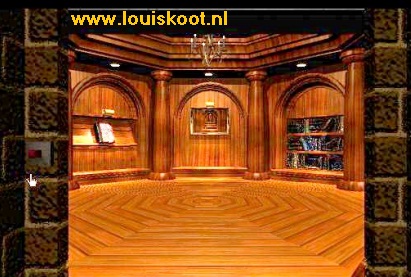
On the narrow wall, on the left, there is a red button. Click on that Red Button and ...... The Fence will close. The bottom half of the Fence is a Gray Panel. Click with your finger on the top left of the gray panel. Vandal that you are ..... Do you always destroy someone else's stuff? You have made a square dent in the gray panel. I hope for you that the inhabitants of this island do not get angry with you now.
All right, click in the gray panel 47 more times, so that you have made a total of 48 of these squares, in 6 rows of 8 squares each. Now grab your drawing from page 158.
You see black and white squares on it. A total of 48. Well, the Black Squares must remain but the White Squares you have to click away on the gray panel again. Number the 48 squares on the Gray Panel, from top left to bottom right, as 1 to 48 and then click the following squares: 3, 4, 5, 6, 9, 12, 14, 18, 20, 21, 22, 26, 27, 29, 30, 35, 36, 39, 40, 46, 48 ..... The panel then looks like this ....
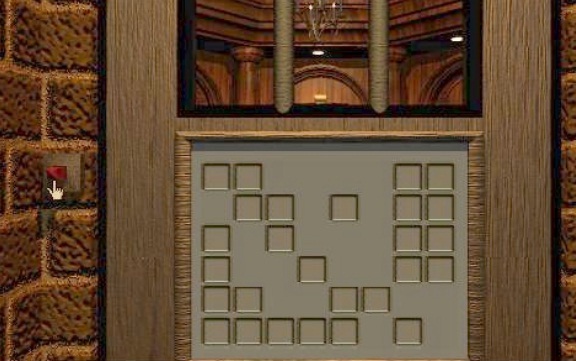
Now click again on the Red Button again and ..... You are now turning around 180 degrees with the Fireplace and then the gate opens again. You stand in front of a niche with 2 shelves. The last Red and Blue Pages are on the bottom shelf. A GREEN BOOK is on the top shelf. Click on the Green Book and then open it. You now "meet" Atrus, the father of Sirrus and Achenar and the writer of all Ages
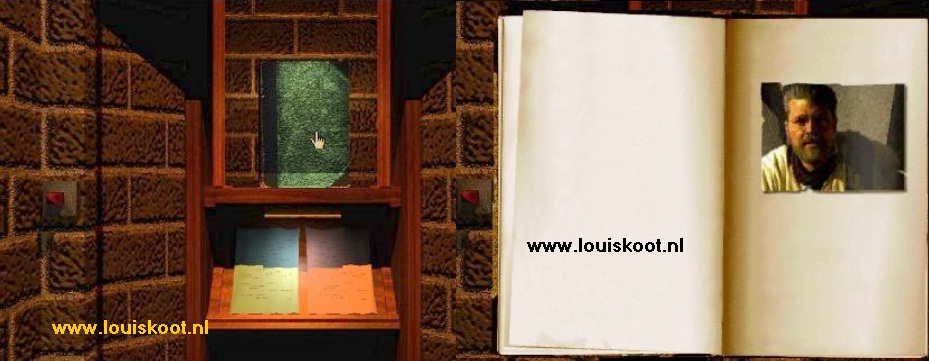
Listen to Atrus and do NOT click in the window.
Atrus asks who you are and then he says that you should NOT come to D'ini, at least not yet. Atrus will tell about his 2 sons, Sirrus and Achenar, about his library on Myst and about his books. He tells that he learned from his father, Ghen, the art of writing the Ages and that his 2 sons suddenly plundered all the Ages. In order to determine which of his 2 sons is the most guilty he has both of them locked up in a Prison Age that can only be reached via the Red and the Blue Book. Unfortunately, Atrus is now also stuck in D'ni. There is a page gone from his Myst Linking Book and he asks you to come to him when you have found that page.
When Atrus has finished then you do NOT click in the window of the green book, but instead click next to the book to close it. We now going to do both ENDINGS of the game
You have to make choices now. Who do you believe? Sirrus? or Achenar? Or do you believe Atrus ?. So there are 3 Endings possible but only 1 of them is the good ending. If you are only interested in the Good End, then you simply leave the Red and the Blue Page here. Do you also want to see the wrong endings then SAVE YOUR GAME NOW. Call this Save "The End" or something similar.
The Wrong End:
Now pick up the Red page or the Blue page to take it with you. I'll take the Red page now, but you can just as well take the Blue page. So, take the Red Page and click the Red Button again. The Fireplace turns back. Then click on the Red Button again to open the gate and enter the Library again and put the red page in the red book and.......
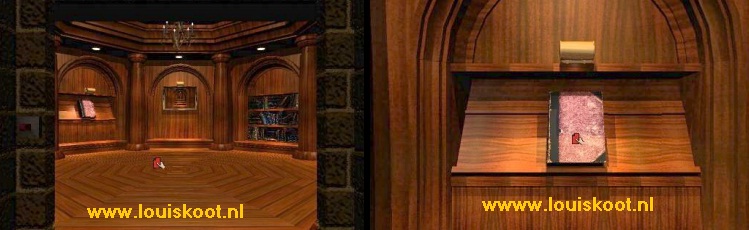
......STUPID IDIOT THAT YOU ARE.......How could you have thought that Sirrus can be trusted......

You have released Sirrus from his prison, but now HE looks from the library into the Red Book where YOU are now trapped in ... and you CAN NOT GO OUT.
Good ..... there is nothing else that you can do then loading your last Save.
You can also do this same joke with the Blue Page, which you have to pick up first by turning the Fireplace. You can do this yourself. I now go for the:
Right Ending:
After you have loaded your last Save Game "The End" you are back in the Library. Atrus needs a White Page for his Myst Book. What was it about that partial note that you read in the cabin of Sirius in Channel wood? Wasn't anything about that "Marker Switch" at the quay?
Leave the library and turn left and follow the path back to the base of the gear hill. Turn clockwise and descend the stairs to the quay. Then turn around and you are again in front of the very first Marker Switch. Put the lever of this thing down again and ..... the box opens and in the cabinet is a White Page:
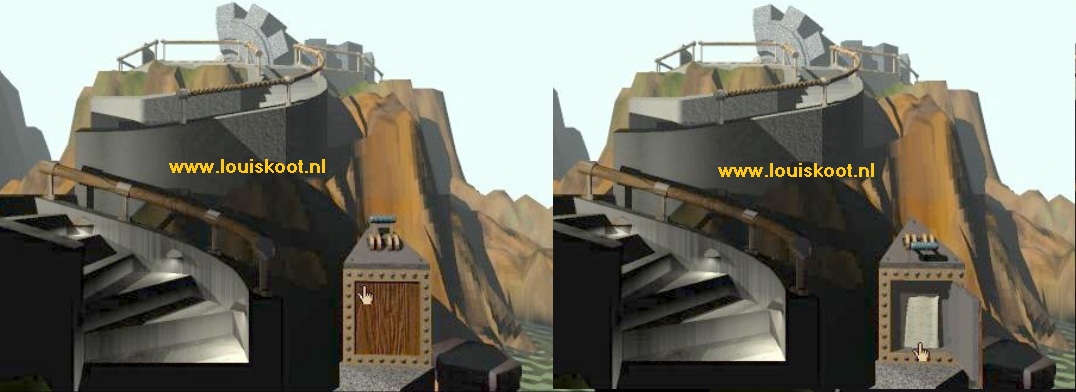
Grab the White Page out the box and go as thunder and lightning back to the Fireplace in the library.
Dive into the Fireplace again and press the Red button again and then fill in the correct squares on the Gray panel again.
Then press the Red Button again and the hearth turns back to the Green Book. Click twice on the Green Book.
Atrus asks if you have found the White Page and he sees that and he now invites you to come to him. Click on Atrus and you end up in:
D'ni: (pronounce it as Dunny)
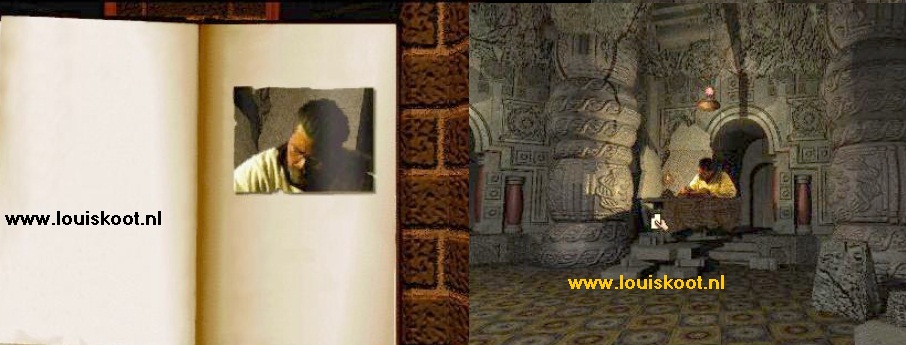
You are in a big cave. Turn counter clockwise. You see Atrus writing at a big table. Go 2 times ahead to Atrus. Atrus notices you and he asks for the White Page. Give him the White Page.
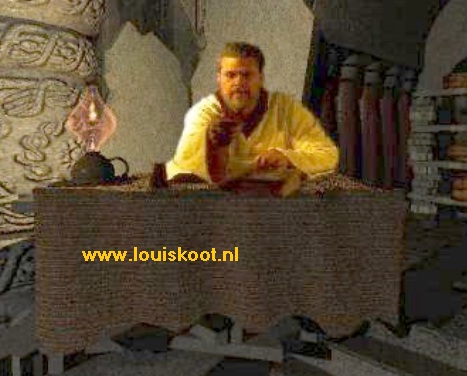
As Atrus talks to you, he grabs the Myst Linking Book and pastes the White page into it and he then links to Myst.
You can walk through the cave in anticipation of the return of Atrus. That does not take that long, so you can also just stand in front of the table.
Atrus then returns and tells about his wife, Catherine, who is imprisoned somewhere in an Age called Riven. Atrus can not send you back to your own world because he is too busy with WRITING. In frond of Atrus the Myst book is lying on the table. Click on it and link back to the Library.
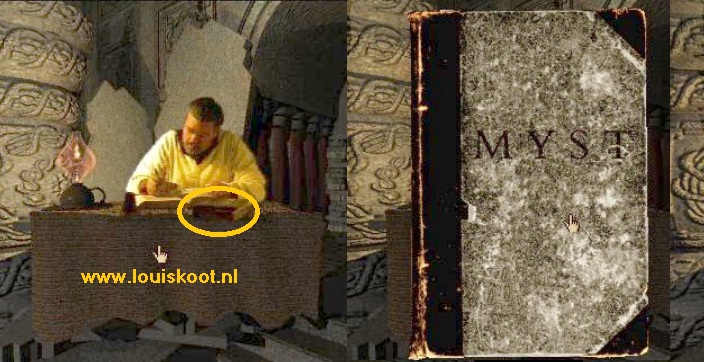
Take a look in the niches of the Red and the Blue Book and see ..... Atrus has burned both books and locked both his sons in their prison forever and ever.
Well ...... This is it END of Myst. There is no beautiful and flashy End movie. This is just it. You can now go back to all the Ages to wander around at ease and see the things you missed. If you really want to know how the story goes, you will have to play Myst 2 Riven.
2018: Walkthrough by: Louis Koot