
2018: Walkthrough by: Louis Koot
If you have found this walkthrough via google search or via another site then you have probably not visited my site.
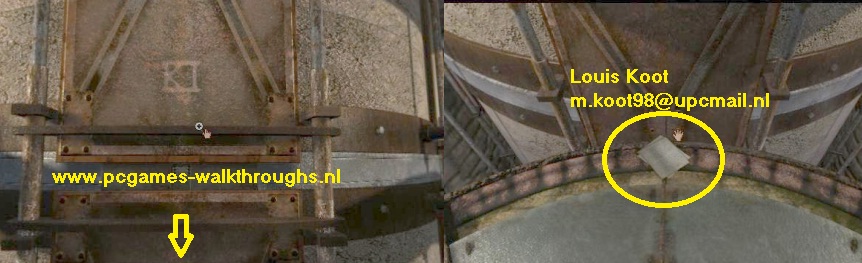
A lot more very detailed game walkthroughs can be found on my site at: www.pcgameswalkthroughs.nl
Chapter 2: The Voltaic Age:
The Voltaic Age is one of the 3 Elements Ages about which you can read in Atrus's Journal. The Voltaic Age is the Age of Energy. The other 2 Ages are: Edanna the Age of Nature and Amateria the Age of the Dynamic Forces. Read that part of Atrus Journal once again, because you'll need the knowledge that you gain from the journal later on.
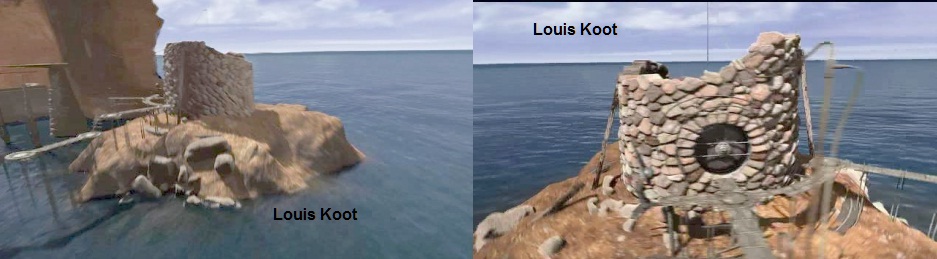
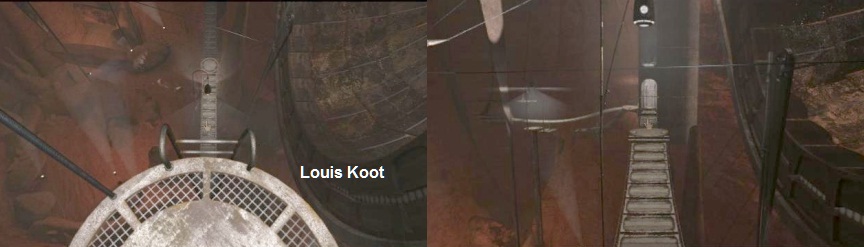
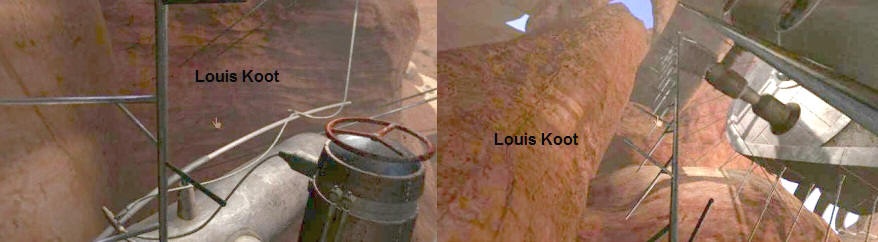
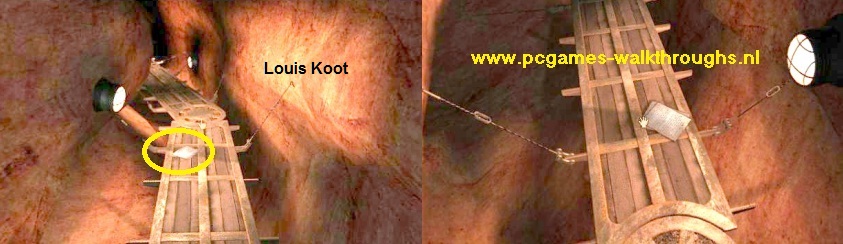
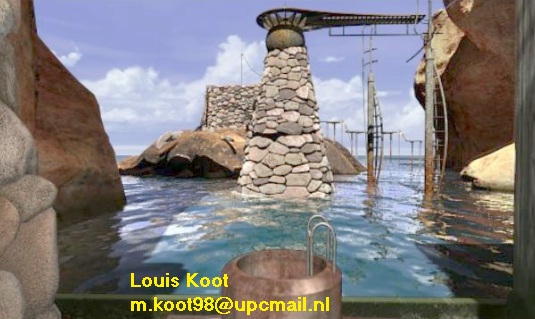
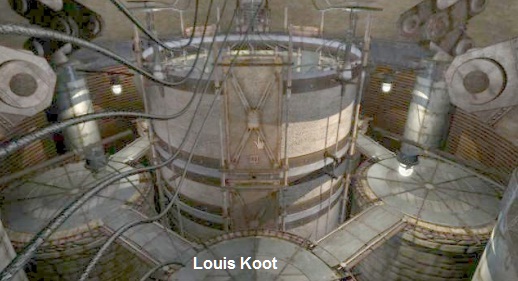
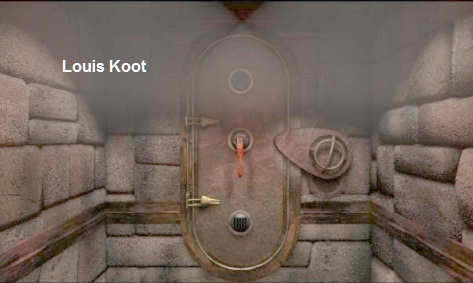
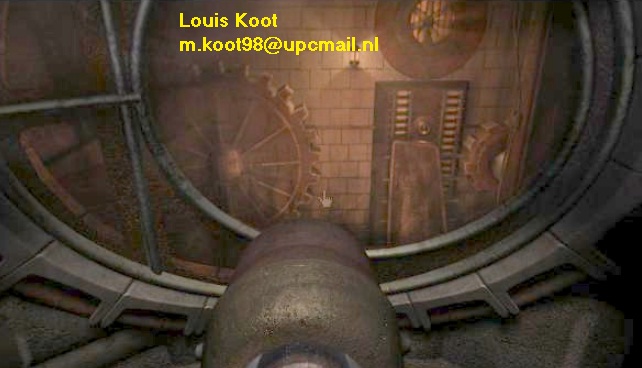
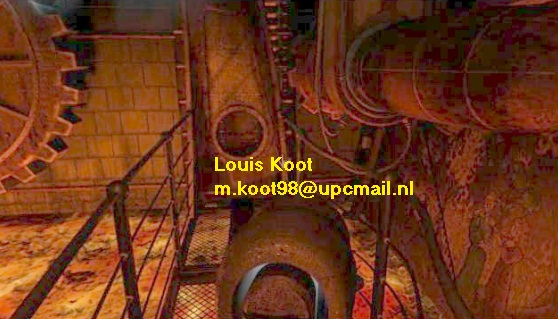
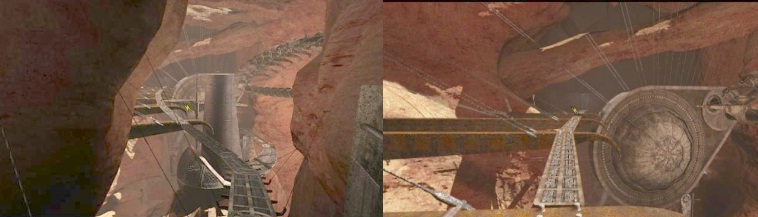
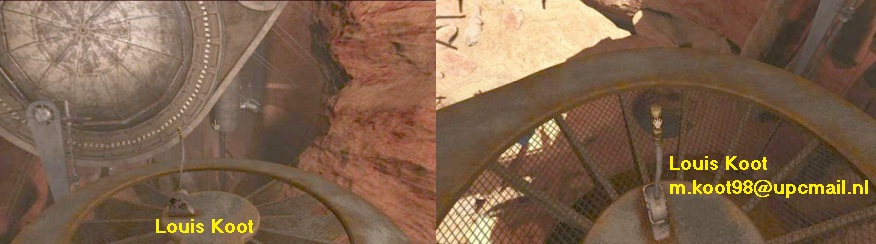
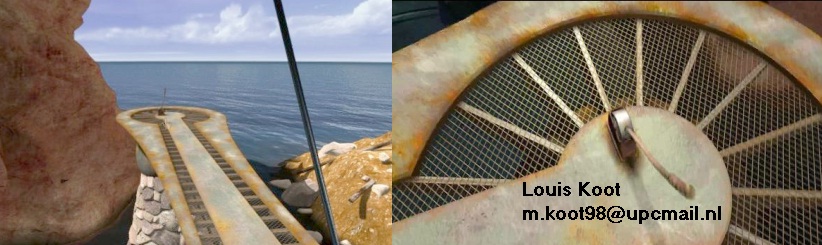
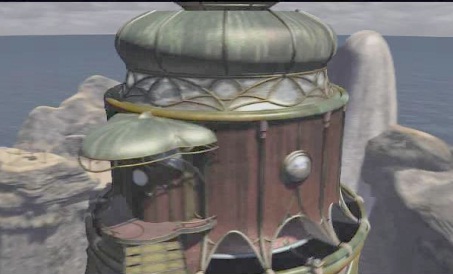
You are standing on a round, iron, platform that is part of an iron "scaffolding". This iron "scaffold" is the path that runs through this Age. In front of you is a round, rocky island and on it stands a thick" Tower", built from rough round rocks. To your right is the ocean and this ocean is also behind the island.
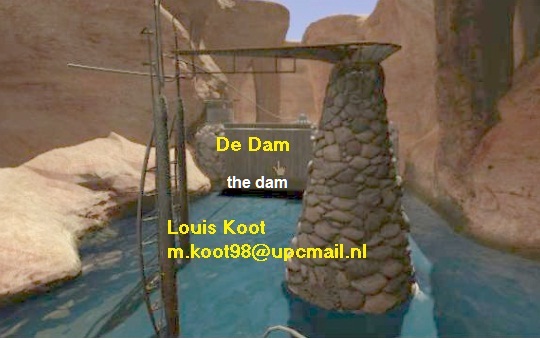
Take a look around. If you look behind you, you will see that the path you are on is going on to the main island through a gorge. If you look to the left of the "tower" island, you'll see that a dead end of the path ends at an bay of the ocean. In the water you see a high platform there, that goes to a Tapered pillar. Further back in this bay you see the rocks of the main island and you also see that there is a kind of a dam.

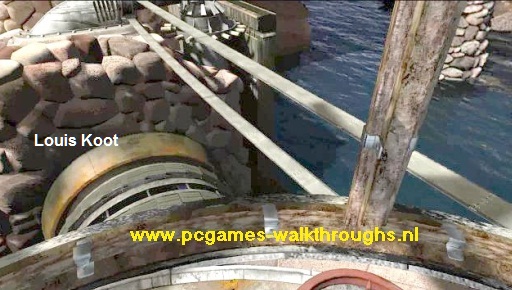
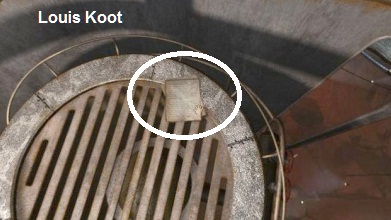
If you look closely you will see that there are cables running from the "roof" of the round "tower" to that platform on that tapered pillar in the bay. Well, nice to know, but what do you have to do with it. First let's go to that "Tower" island. So walk 2 times ahead, then turn left and walk 3 times ahead. You are now on the junction where, to the left, you have the dead-end branch to the bay and you see a "Wing-shaped" structure in front of you, at the end of the path. Turn to the right and you will see the large round hatch of the tower.
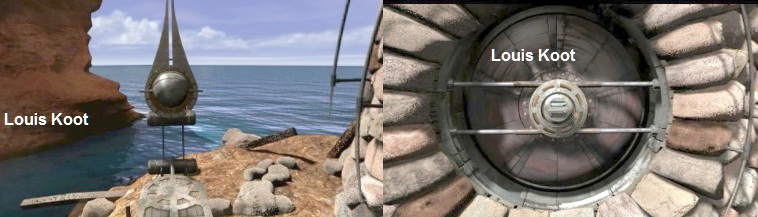
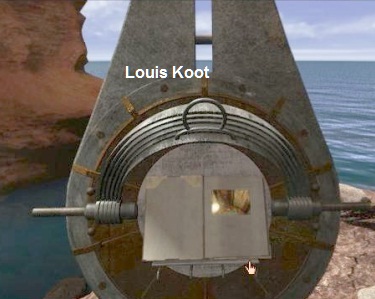
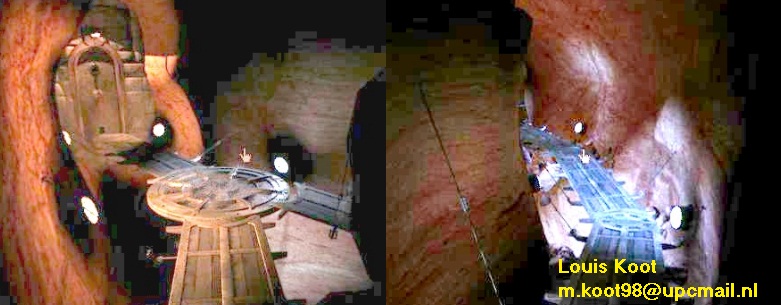
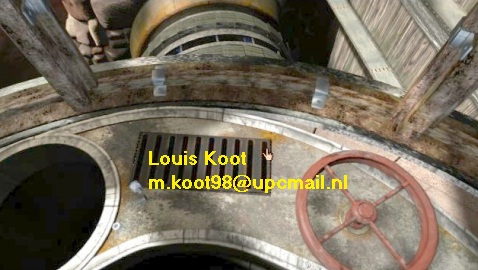
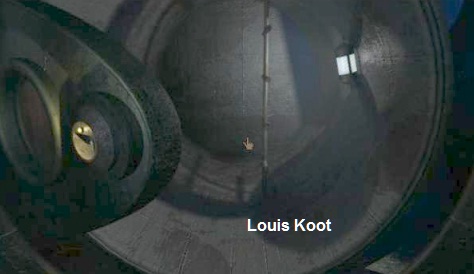
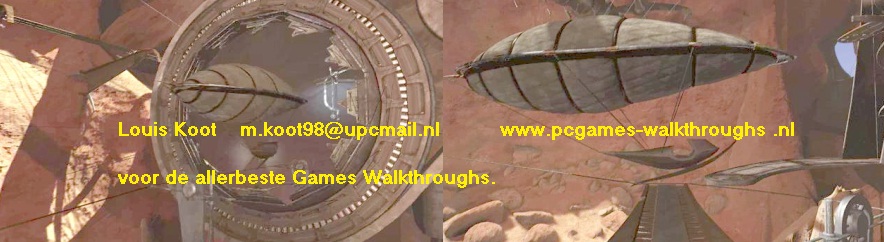
Step to the round hatch and then click on the lever ... but ......this round hatch does not open because there is no Power. Opening this round hatch is your main is your goal in this Age. Turn around and return to the junction, turn right and walk to that "Wing-shaped" device, that stands at the end of the path. Click on the globe to open it and look ........ There is a J'Nanin Linking Book in it . Click on it to open the book and see that the book is "active".
Do not click in the linking screen of the Linking Book because then you will be brought back to J'Nanin and you are just here. No, you have an important task to do here in the Voltaic Age and that is finding the Voltaic Energy Symbol and return to J'Nanin with it. You will never use this J'Nanin Linking Book .
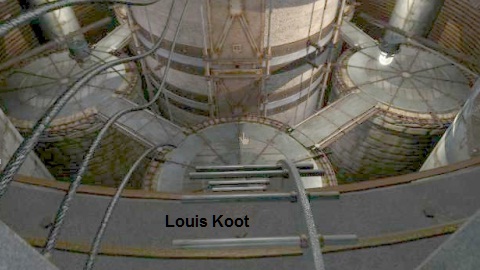
So close the book again and turn around and walk 1 time forward, back over the path. Turn right and walk to the end of this dead-end trail. Look, now you can see that tapered pillar in the water better. You now also see that there are more cables, coming from the island behind you, entering the water here and going to that platform on that tapered pillar.
You can't do anything else here so let's go to the main island. Turn around and walk back to the main path.
Turn right and click 3 times forwards, turn right again and continue 9 times ahead and .....

before you is now the entrance to the gorge on the main island. On your right you see the entrance of a tunnel in the rocks. Click 4 times forward and then turn right.
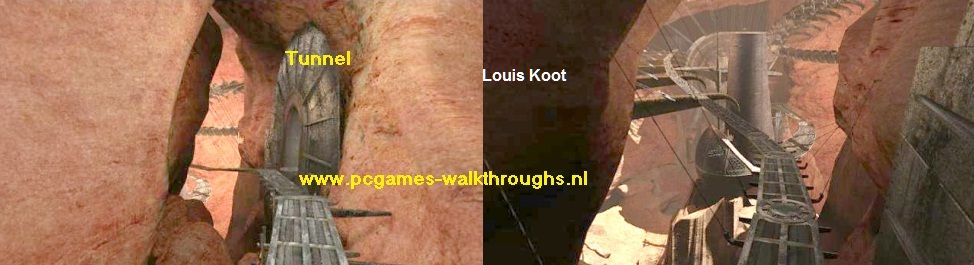
You are now in front of the tunnel entrance. Do not enter the tunnel now, I just show you this tunnel now so you now where it is. Turn left again and continue through the gorge. You see that the gorge suddenly becomes a lot wider. Continue 3 times ahead and then stop again. Now first take a good look around you, and also above and below you

You are now in the wider part of the central gorge that cuts through this island. This gorge actually continues to the right and then comes out in the bay at the "tower" island. You see a kind of "chimney" and below the "chimney" you can see an additional path.
Go 5 times further ahead and then stop again to look around you again.
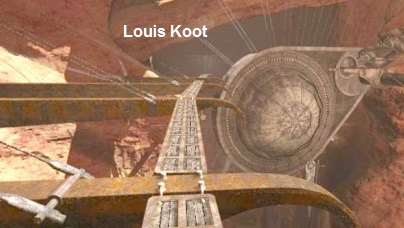
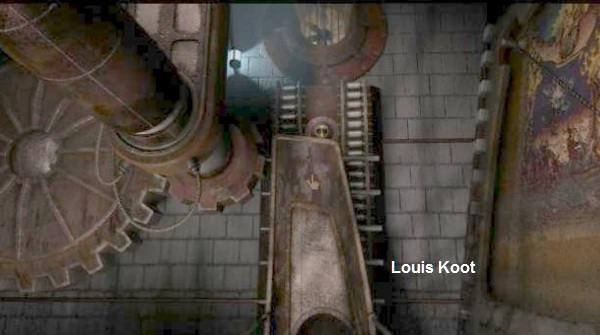
The path continues straight on but there is also a path to the right, that goes around the "chimney". You also see that in the big opening of a cave, a very large round DOOR is hanging in the air. The cave behind the large round door is the "Hangar" and that round door is the Hangar Door.
Now turn right and follow the path to the back of the "chimney" via 4 times forward.
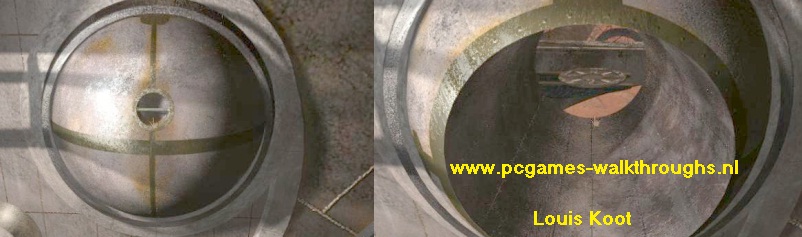
Turn right and you will see that this "chimney" is hollow and that there is a round platform with a lever in it
This "chimney" is not a chimney at all but it's an elevator. Enter the elevator, turn right and pull the lever for a moment to notice that the elevator is not working. There is no power.
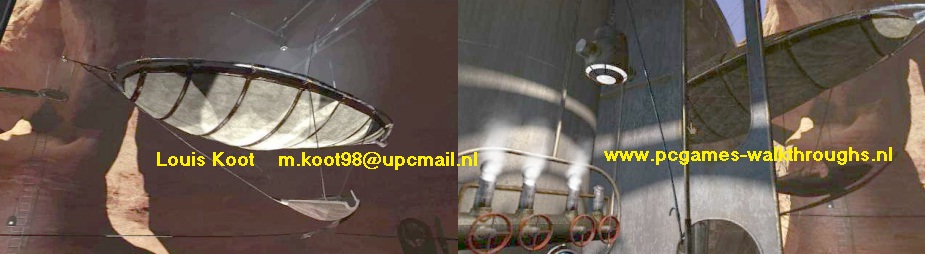
Turn around and walk back to the main path and follow the main path now all the way to the end. You are then standing on a round platform, left of the large hangar door. Turn right and........you are now looking into the Cave, so the "Hangar", and you see a strange thing hanging in this cave. That strange thing is the AIR SHIP and with it you will soon make a trip across this island.
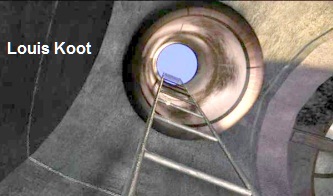
Look down and you see that you are at the top of a ladder. Deep below you'll see a path that goes to the back of the large Round Hangar Door. Go down the ladder to get to that bottom path.
Walk 6 times ahead on the path and you are at the end of it and are standing on a round elevator platform. Look down at the lever.
Grasp the lever and move the lever to the left and to the right and ......... Nothing happens ...... There is no Power.
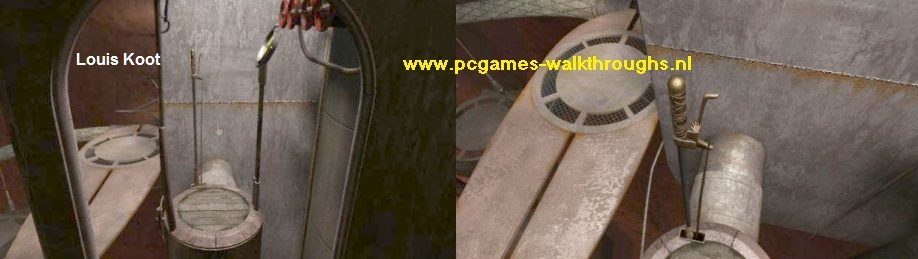
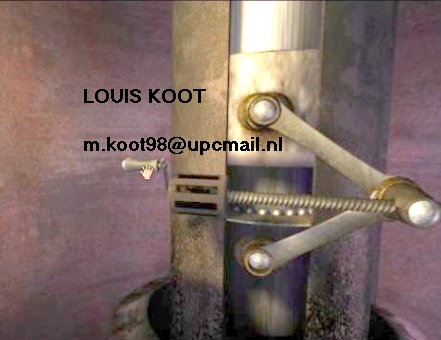
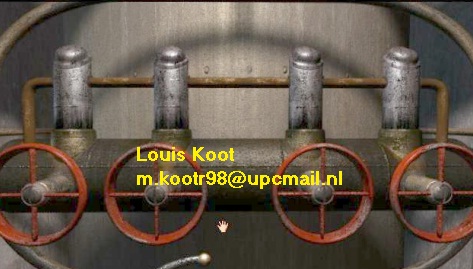
Turn to the right ........ you see 4 Red Turning Wheels. There is a valve above each wheel and a pressure gauge under the wheels.
These are the wheels with which you will soon have to fill the Airship with hot air. But there must first be Hot Air.
Turn around and click 1 time to get to the Surfboard-shaped platform and then turn right.
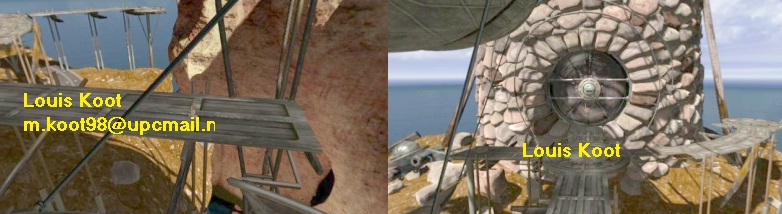
To the left there is a staircase that goes down to the next path but Saavredo has destroyed this path so you can not go any further. Click once to the end of this platform and then look at the black steel rod with the side bars on it. Follow this rod with your eyes upwards and you realize that this could be a LADDER.
Do not go up this ladder now. That will come later but REMEMBER that this ladder is here. Turn slightly to the right and you will see a thick pipe with another red turn wheel. You can turn the red wheel but nothing happens. You will have noticed that everything that could move here is as dead as it could be. Apparently in this Age of Energy the Energy bill is not paid because there is no Energy. We are going to take care of that now.
Continue to the right so that you see the round elevator platform and the 4 red turn wheels behind it. We will now go all the way back to the beginning of the gorge, where the entrance of the tunnel is. So click 1 time to get back to those 4 red wheels and then click 6 more times to get to the end of the path.
Climb the ladder back up again to the upper path. Back up you turn left and then you follow the path back in16 times to the tunnel entrance.
You can also use the so-called "Zip Mode function" to return instantly to a place where you were before.
Anyway ......Turn left and ..... you are standing in front of the tunnel entrance.
First follow the tunnel 4 times. After 3 steps you will see Saavredo Journal pages on the path. Walk a step further and turn around and take the pages of Saavredo Journal off the path.
Read these new pages in Saavredo's journal and then close the journal again. Turn around again and follow the red tunnel again........
..... you'll come to a left / right junction. To the left it goes to a door, but it is locked. Turn right and follow the "Blue" tunnel.
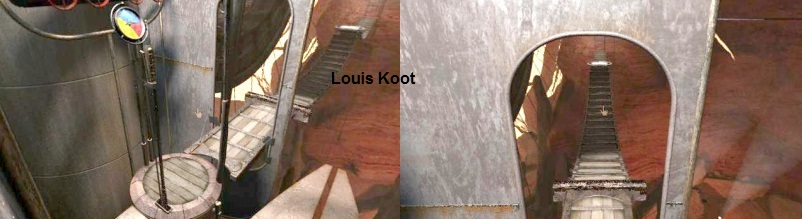
After 7 times you go down a small staircase and then you stand in a lower space. Right in front of you a same small staircase goes up to a metallic tunnel.
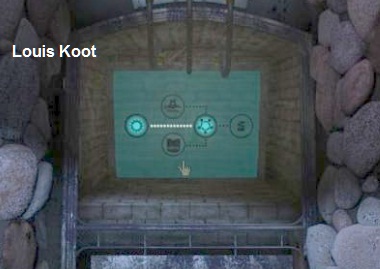
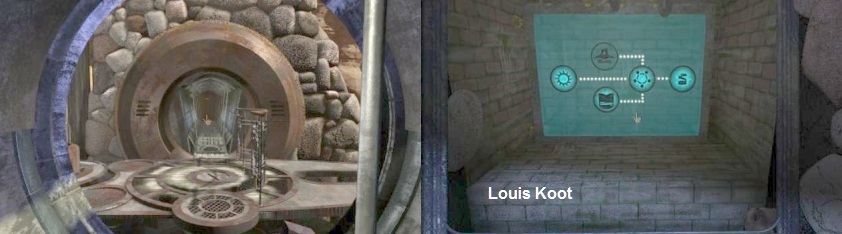
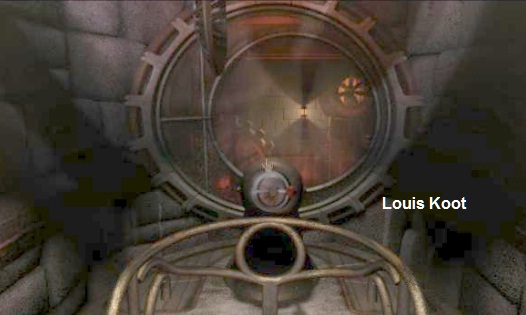
Turn left and you'll see a ladder pole going up. Turn around and you'll see a Diagram in a niche. Click once in order to view that diagram better.
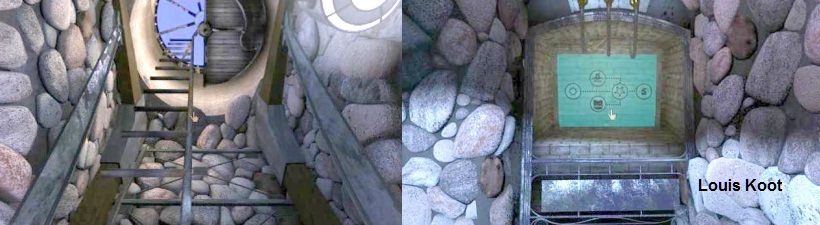
On the diagram you see 5 circles and each circle has a symbol in it. These circles represent the various places on this island. The circles are connected to each other via a dotted line. The upper circle represent the "Tower" Island and the three middle circles are from left to right: The Water Wheel, the Electromagnetic Chamber and the "Chimney" lift. The bottom circle is the Magnet. None of these places currently receive Power.
Turn around and click again 1 time towards the ladder and then turn right. Now move 6 times to go through the metal tunnel.
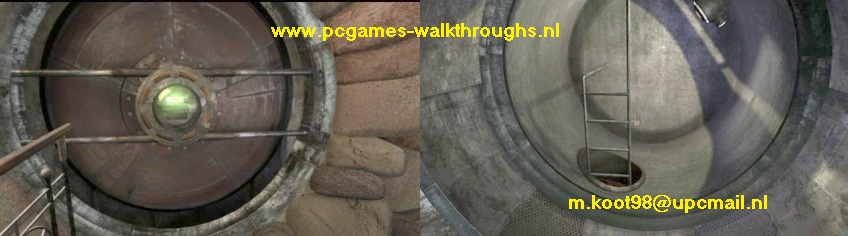
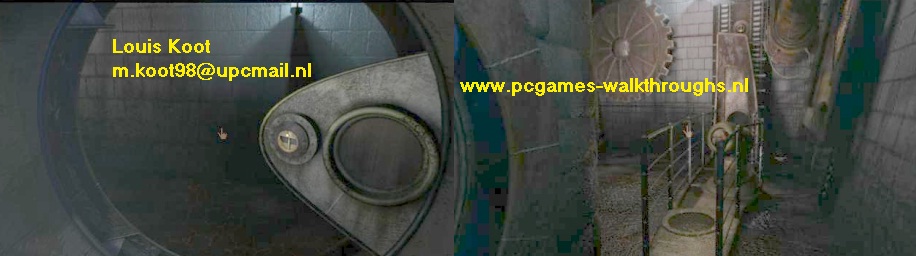
You come outside and you are standing on a sort of jetty. You hear the murmur of running water. Before you see you again such a large round metallic hatch. This hatch is locked also. Turn to the right and see.......you are now on the Dam / lock and you see the "Tower" island and the Tapered pillar in front of it.
You are now on the other side of the bay. You see a round manhole with a ladder. Click on the round manhole and then look down, to look into the manhole.

There is a ladder in this manhole but you can not go down because it's full of water. Yet that ladder suggests that it must be possible to enter this manhole. So, you have to get the water out of this manhole. If you look down, on the left or the right of this manhole, you'll notice that you are standing here above a kind of waterfall and that the water flows under your feet. You are in fact standing on a lock / sluice
The Waterwheel Puzzle:
Go back through the metal tunnel to the "room" with the circle diagram and the ladder pole. Now stand in front of the ladder and look up
Click 2 times up, to get to the top of the ladder. You are then in the control room of the large Waterwheel.
You see the large lock gate/ dam with the large Water Wheel in front of it. The Water Wheel is a large horizontal cylinder.
What has to happen is that the lock door opens so that the water can flow from the bay to the water wheel. Look down and you'll see that Saavredo has also been here and has caused some damage to the control panel. There should be 2 red turning wheels but Saavredo has removed the left turning wheel.
But the right wheel is still there, so click on the red turning wheel and ..... the lock gate moves away and water now flows from the bay to the water wheel.
Well done ...... Turn around and descend the ladder again.
Go again through the metal tunnel to the manhole. Now the lock gate is behind the manhole, so that the left water opening is now closed.
Go back to the manhole and look into it and you will see that the water is gone now.

Now descend the ladder in the manhole and when you're down turn right or left and then click on that big red round button.
A door slides open and you'll see a Large Cylinder containing a PISTON. This cylinder is in fact an axle that is mounted under a gear and this axel must be moved by the water wheel. Click once to get closer and then click on the rotary lever, that's on the left side of the cylinder.
The Piston in the Cylinder now goes up but otherwise nothing happens.
Saavredo has made sure that the Waterwheel can not run yet in the control room. As a result, the shaft can now also not turn and thus the generator, with which power can be generated, is not working.
Turn around again, go 1 step forward, turn right, look up and climb back up the ladder to crawl out of the manhole.
Go back to the metal tunnel. When you are back in the Metal Tunnel take 4 steps forwards and then you STOP.
You are now at the end of the metal tunnel. Turn right and zoom in on the round "window" in the tunnel wall.
You can now see the scoops of the Waterwheel through the round window. This is the manual way with which you can now put the waterwheel into operation, despite Saavredo's demolition work at the top of the control room. Click with your "hand" on the scoops and.......
..... the Waterwheel starts turning and you hear a huge noise while the tunnel starts to vibrate. ............
Leave the close-up and turn left and now go down the stairs and then turn left to the Diagram Chart in the niche.
You now see on this diagram that you have succeeded in generating power and that you are now also sending electricity to the Electromagnetic chamber, because both the circle representing the Water Wheel and the Electromagnetic chamber and the line between the two circles are now "lit up".
We're now going to find that electromagnetic chamber. Go back through the Metal Tunnel, all the way out to the big round hatch, on the jetty of the Water Wheel. The platform you are on is now turning around. Look again at the round hatch and click one more time to get close. You can see that the light of the hatch is now green. Click on the lever and ...... Yes ...... this time the hatch will open.
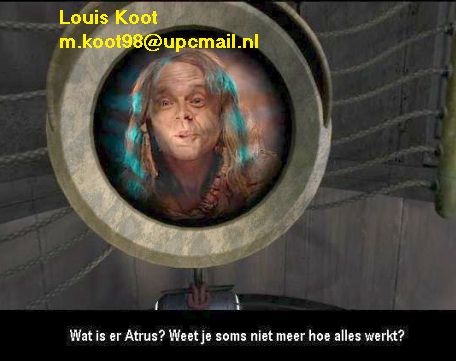
Go inside and then go down the ladder. When you're down turn right and go to the round viewing screen. Stand right in front of the round screen and then look down and click on the round button.

In the screen you see a cut scene in which Saavredo speaks to you again. Listen to Saavredo......
When Saavredo is finished, turn right and enter the tunnel, which has a walkway of round metal platforms. Follow the tunnel to the end.
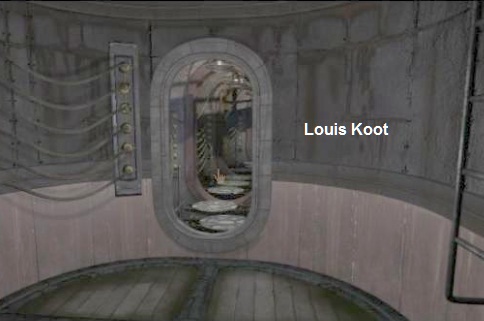
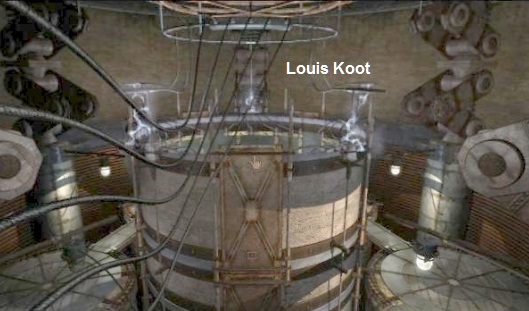
The tunnel brings you upstairs in a very large, high round room with some round machine in the middle.
The Electromagnetic Chamber puzzle
The round machine in the middle of the room is the Electromagnet but it does not provide power at this moment.
Look down and click 1 time forward to descend the stairs at your feet, to the floor of the Electromagnet room.
Look at the wall of the magnet in front of you. You see two brown doors with a horizontal slit in between. The upper door has the D'ni number 1 on it
Move your cursor to the horizontal gap between the 2 brown doors and you will see the + sign. Zoom in on the crack. You now see a panel with, left and right, 3 large round pushbuttons.

The panel itself consists of 3 parts, an upper, middle and lower part and on each part you can see copper-colored circuits. So it is an Electric Switch panel. Do not do anything with it now.
Get out of this close-up. Now walk to the right and all the way around this room and every time you stand on a round platform you turn left to see the Magnet again.
This way you will discover that this Magnet contains 5 of these brown door sets and therefore also 5 of these Electrical Switch Panels between the doors.
The upper doors always have a D'ni number, so the numbers 1 to 5, but that is not important. At door number 3 you'll find a few of Saavedro's Journal pages.
When you have returned to the ladder, turn around so that you can see the doors with the D'ni number 1 again.
Zoom again in on that electrical panel between the doors:
The Electrical Circuit Puzzle:
The circuits are interrupted and you must now restore this by connecting ALL circuits together. With the buttons, left and right, you shift a part to the left or right. It's not that difficult. Start by putting the upper and lower parts right. These must therefore connect to the two circuits that do not move when you press the buttons. When that happens, you move the middle part. The solution for this puzzle is always different because the starting position of the puzzle is always different. So I can not give a ready-made solution for this puzzle. On the this you can see how it was in my game:
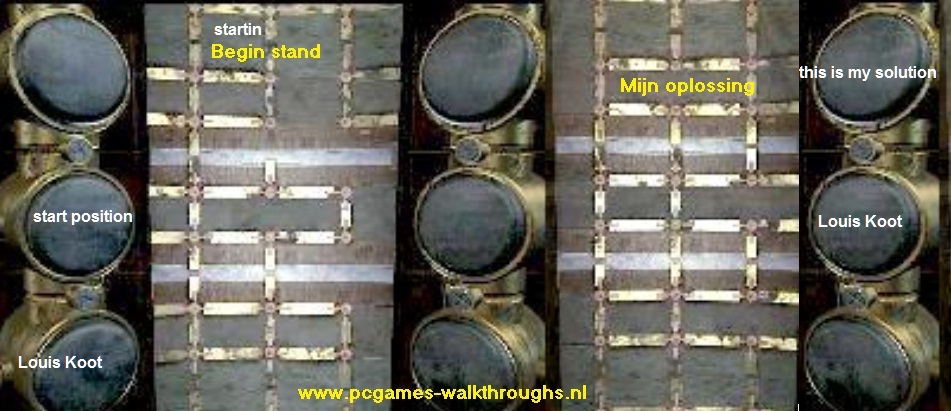
If you get it right then the two doors closes again. They then come against each other and then you automatically leave the close-up.
You only have to do this puzzle once. By solving this puzzle in Door 1 you have also solved all other doors of the magnet.
Turn around and go back up the ladder to the tunnel. Turn back a little at the top, to see that electrical current is indeed coming from above on the Magnet.
Problem solved. Now to make sure that we can fill the Air ship with Hot Steam. We must make Steam......
To the Lava Chamber
Turn around and walk back through the tunnel with the metal round platforms, 10 times forward, to the room with the viewing screen.
Go up the ladder again and then go out through the open round hatch again and cross the Water Wheel back to the Metal Tunnel.
Go back through the Metal Tunnel to the lower space with the Diagram chart. Turn left to view the Diagram again.
All circles, except the top ones, are now "illuminated" and also the line between the circles. Except for the upper circle of the "tower" island. Apparently that island still has no power.
Turn to the right and now go back through the "Blue" tunnel. After 7 times ahead you are back on the junction and you see again that door with the red handle that does not open.
Turn sharply to the left and then follow the "Red" tunnel all the way back out, until you are back on the walkway in the gorge. Follow the walkway all the way back through the gorge and into the Cave (Hangar) of the airship. Back in the Hangar cave go stand on the round elevator lift platform, at those 4 Red Turning Wheels, again. This elevator still does not work.
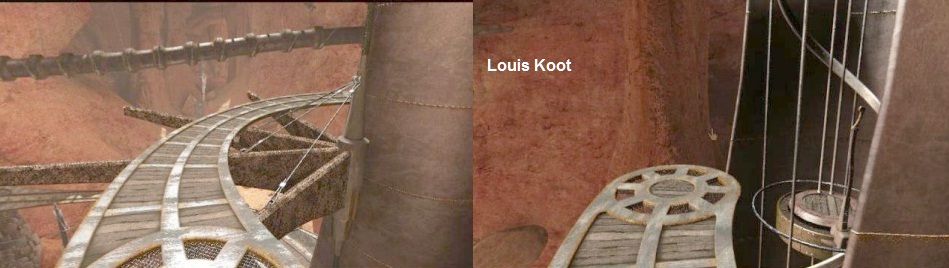
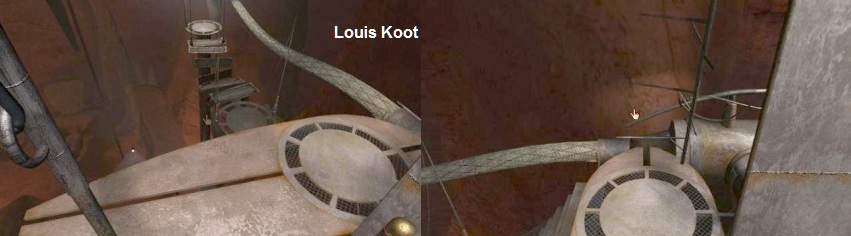
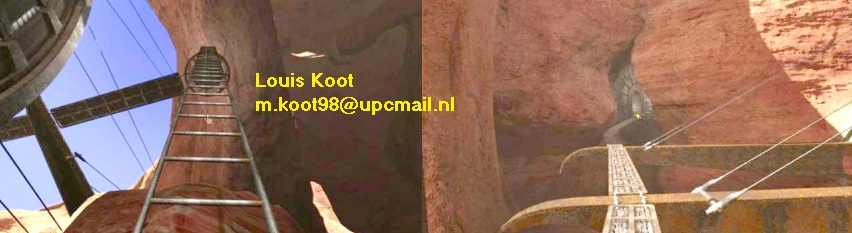
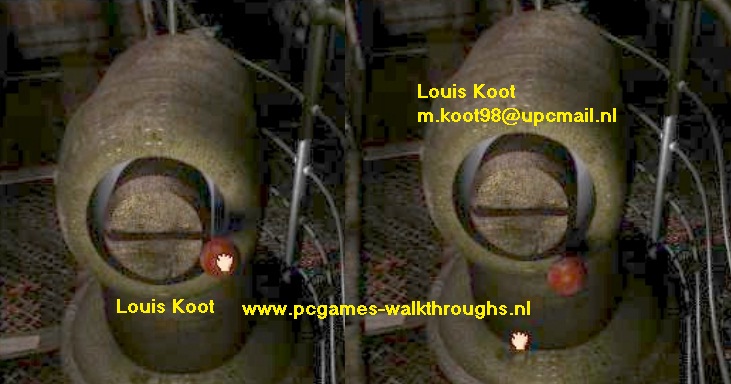
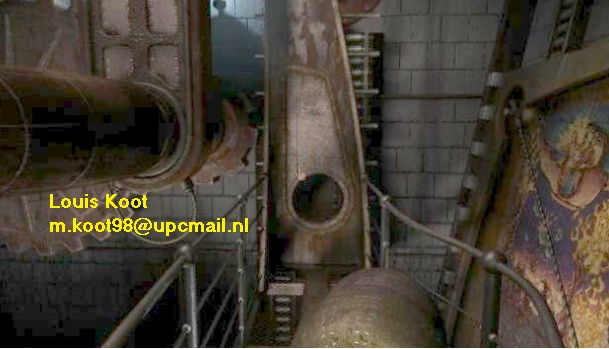
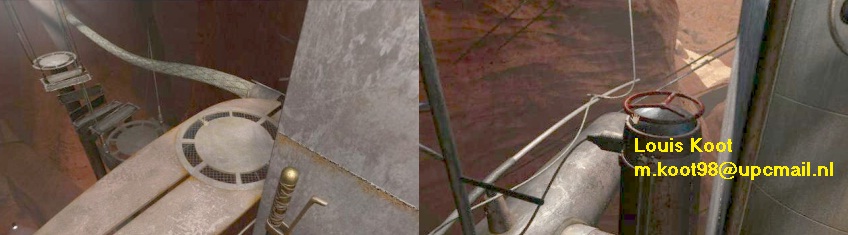
So click 1 time further, to get back on the Surfboard-shaped platform. You are then right in front of the black iron ladder pole that goes up. Look up again and now climb up this ladder. At the top of the ladder you end up on a pipe. Turn to the right and you'll see a round platform in a "bucket-shaped" construction.
Click 1 time to get to that "bucket" platform. On the platform you look down because there are a few Saavredo Journal Pages on this "bucket platform".
Grab the pages and read them and then close the journal again.
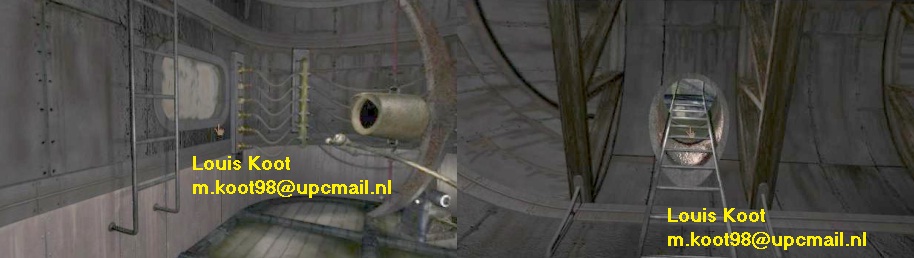
Turn left. You see a Spherical hatch sticking out of the rock. Click 1 time to get close and then click on the handle of the hatch and ...... the hatch opens.
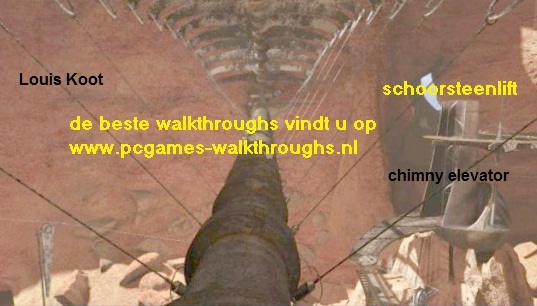
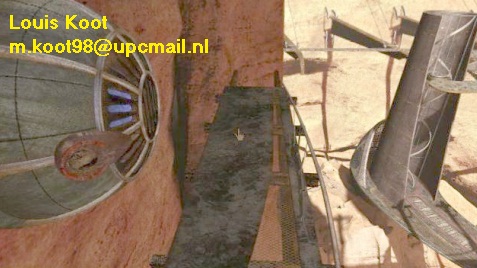
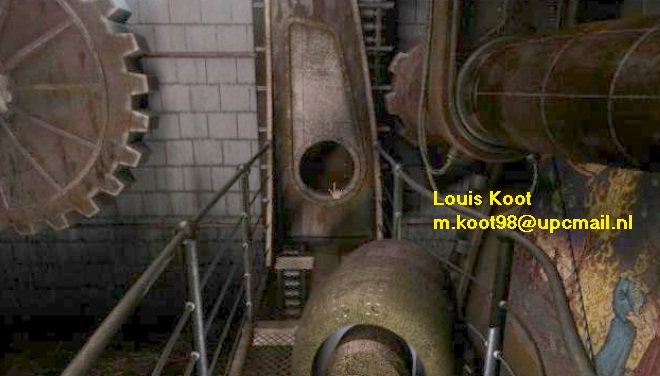
Crawl 3 times forward through this short round tube. You end up on a platform on the other side of the tube. You are now high above the gorge. The hangar door is now on your right. Look in front of you, you will see the "Chimney elevator" and you'll see that on your left side a pipe goes all the way across the gorge to the other side. Click one more time to get on that pipe.
Cross over this pipe to the other side. At the end turn to the right and ...... you see the end of a ventilation pipe, sticking out of the rock.
Click once to get on the platform. Then turn left, to stand right in front of the ventilation pipe. Click on the Red Dial and the pipe opens.
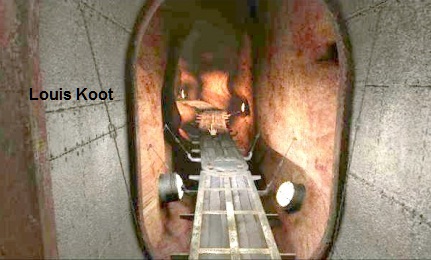
Click 1 time to get IN the pipe and then click continuously through the pipe until you can not go any further. That is 4 times ahead. At the end of the pipe it is really dark and you are standing by the ventilator.
Turn around...... In the floor of the pipe you see a LIGHT SPOT.
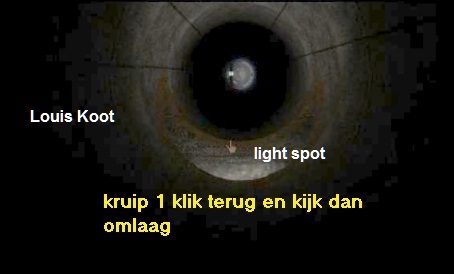
Click 1 time to get to that light spot and then look down. Turn around a little, so that you can click on the grid in the pipe with your Hand.
The grid will then open, so fall down through it. You end up in the:
Lava Room:
Stand upright and .. .....just in front of you is a manhole with a half-round fence in front of it. Behind it you see a door with a red handle.
Click once to get to this door. Click on the thick latch, that's on the right side of this door. The latch slides up. Then click on the red door handle and the door will open.........
.......do not step outside .. This is the door at the junction of the Red and Blue tunnels, which you could not open from inside the tunnel. Close this door again. Do not go outside into the tunnels. Turn around again and click forwards, to get behind the manhole at that big window
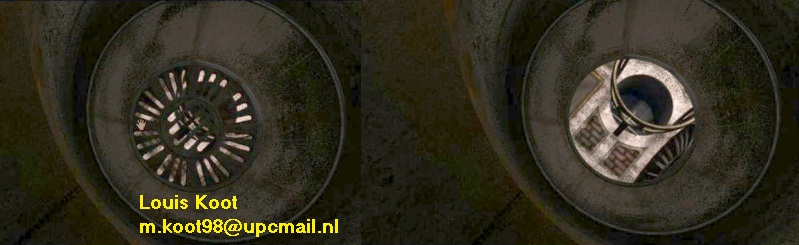
Look through the window. Behind the window is the LAVA CHAMBER and that is a fairly large and high room with devices in it. You see a large gear on the left and on the right you see a ventilator that does not work. There is also a kind of platform on the right. You do not see the floor of this room.
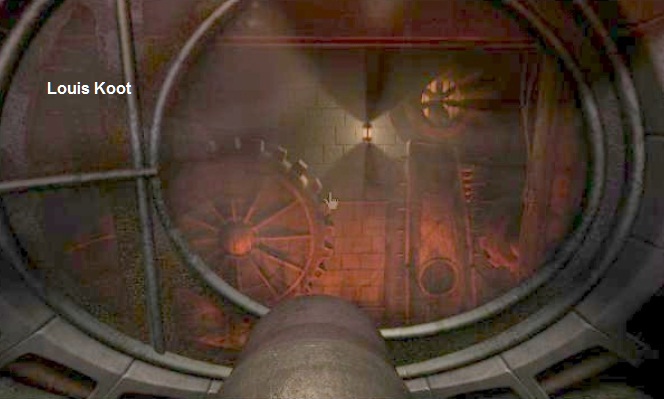
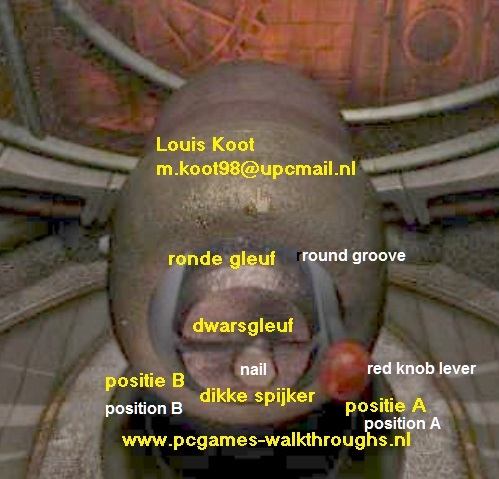
This LAVA CHAMBER is where the Hot Air for the Airs hip is to be produced. But it does not seem to work right now. It is hot inside but the ventilator does not seem to work. Look down. Below the window is a thick knob with a smaller red button in a groove in the thick knob. There is a round slot and a cross slot, but in the transverse slot Saavredo has rammed a thick nail to sabotage the button.
Turn around again and go back towards the door. Then turn around again and look down at the manhole.
Now click in the manhole 1 You descent down to the lower room. Turn to the right. You stand in front of a round door with a round window in it. Zoom in on the round window. Through the round door window you can now see the floor of the LAVA CHAMBER, that you already viewed through the large window. You'll see that the floor is covered with a thick layer of liquid, and very hot, lava,

Because of the hot lava you can not open the door to enter the lava chamber....... first you have to get rid of the lava.
Turn left and go back up via the ladder to the large window in the upper room.
We will now ensure that the hot steam from the Lava can flow through the ventilation duct to the distribution point in the cave at the airship. But to be able to do this we have to enter the LAVA CHAMBER to repair that ventilator. And for this you first have to pump the Lava away.
The Lava Puzzle:
Upper Room:
You are back in the upper room were Saavredo has sabotaged the red button. Fortunately, you still can pump the Lava out of the LAVA CHAMBER. Underneath the window is a thick knob with a smaller red button lever in a round groove. Saavredo has rammed a thick Nail into the horizontal groove, to sabotage the button.
Click on the Red Button lever and then hold down your mouse button. Then drag the red knob slightly upwards through the round groove, until it reaches the upper bend. Then release the red button and ..........
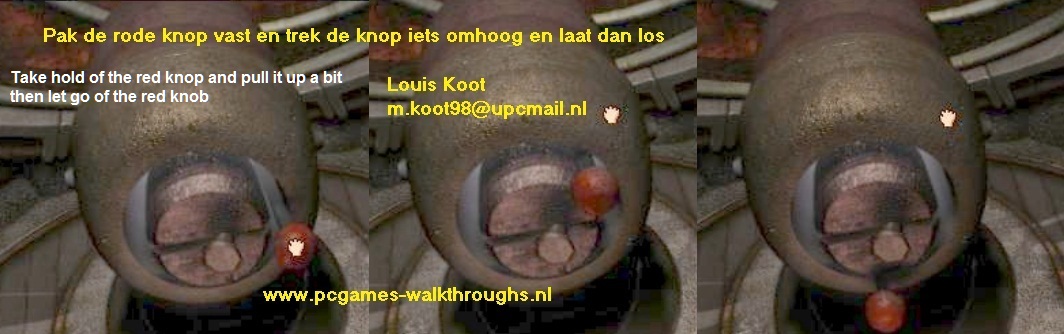
The red button lever now rotates all the way through the round slot to the left, and then goes back down to the bottom right again. Through the window you now see how the platform comes down and that means that now the lava has been pumped away out off the LAVA CHAMBER.
Turn around and go back down through the manhole, to that round door with the small round window in it. You can't look through this window now.
Click, on the left of the window, on the doorknob and the round door slide open. Click once to go through the door and then turn left.
Inside the LAVA CHAMBER:
You now see the sunken platform in front of you. Click 1 time to get to that platform and you see another Thick Button with a round red button lever. This Thick Button also has a round groove and also a horizontal groove. This button is not sabotaged by Saavredo and is therefore completely usable. Above your head, on the right, there is a big pipe.

What you must do now is this........ You can slide this red button lever through the round groove and through the horizontal groove in a few ways, to raise the platform your on to the very top. You must raise the platform, with you on it, to the top to reach the ventilator. Before you start messing with this thick knob, Save your Game first because thinks can get messed up here.
Now do the following in the this order:
Get hold of the red button lever and then pull it down and then pull it to the left into the round slot and then release the red button. ....
The red button then spins all the way through the round groove under horizontal groove slot and ends again at the bottom right. This means that platform, with you on it, goes up 1 time.
The platform has to go even higher, but the thick pipe, which hangs right above you, is in the way. So you have to bring that pipe to the left.
Look at the Red Button Lever again. Again.....take hold of the Red Button and now pull it slightly upwards and then pull it to the left, into the horizontal groove, and release the red button lever.......
The thick pipe now goes from the right, over your head, to the left. You can now see one of Saavedro's murals on the right wall.
The thick pipe now hangs left off you and the Red Button is now on the left side in the round groove of the Big Knob.
Take hold the red button lever again and now pull it down again and then to the right through round groove and then release the button.
The red Knob now goes counter clockwise through the round groove and above the horizontal groove and it ends again on the left side.
The Platform now rises further up and at the same time hot lava flows in again, via that pipe that is now on your left and has started to rotate, into the room below you.
The platform is now at the height of the ventilator.
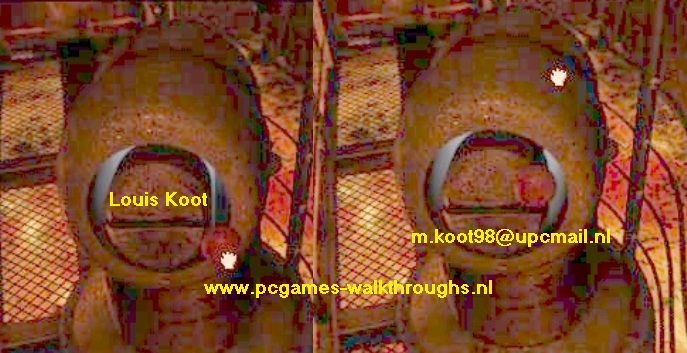
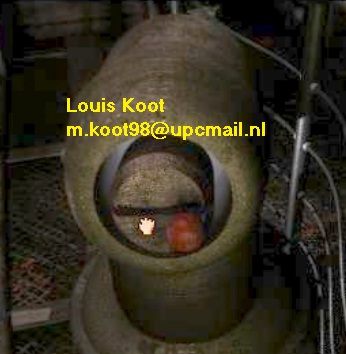
Now click once on the platform and you end up at the back of the platform. You are now standing in front of a round hole with a red glow in it.
Above that red glow you'll see a lever......Click on the lever to turn on the ventilator. You can hear the sound of the turning ventilator.
Turn around and click once again. You can now also see that the floor of the room is covered with hot lava again.
Turn around and you're in front of the red button again. Hold the Red Knob again and now pull it Up, through the round groove then and release the button.
The button goes back through the round slot and ends again on the left and ...... the platform drops once again.
The platform can not go down any further because that thick pipe hangs in the way again.
Now hold the red button again and pull the knob again into the horizontal slot ... and ......
The Red Button will move through the horizontal groove to the right again and this causes the thick pipe to go to the right again.
Hold the Red Knob again and pull the knob up again and ...
The Red Knob goes Up again through the round groove en it ends right again......... and the platform then descends to the floor while at the same time the Lava is pumped away again.
When the platform is completely below you pull the red button one more time to the left through the horizontal groove, to move the pipe to the left of the platform again
The red button and the thick pipe are now left again.
This is necessary because otherwise you can not pump lava into the LAVA CHAMBER and then all your hard work has been for nothing.
Turn around and click 1 time forwards, to go to the stone wall. Then turn right, open the round door by means of the doorknob on the right.
Then click once to go through the opened door. Turn right and climb back up the ladder to the control room.
Upper chamber:
Go back to the red button under the large round window and then pull it up, through the round groove and then release the button.
The red button goes through the round slot and ...... You see how in the LAVA CHAMBER the platform goes up again and how the thick pipe turns again. Lava flows into the room again but now the ventilator sucks the hot air through the canal to the cave of the airship.
To check whether there is really lava again in the LAVA CHAMBER,, go down again through the manhole and look through the small round window in the round door. If you do not see lava through that window now, then you have done something wrong and you will have to do this whole thing over and over again. But I assume that it is OK, so return through the manhole upwards.
You now have to go back to the round elevator platform and the surfboard platform, in the cave behind the large round door. You can take the route via the ventilation pipe, back to the "bucket platform", but of course you can also go through the tunnel. Let's just do that. So, in the upper chamber, go back to the door and open the door via the red handle.
Back to the Air Ship Hangar

Go forward 3 times and you are back at the junction in the tunnels. Turn slightly to the right and follow the "red" tunnel again, to the gorge.
Then go right through the gorge and all the way to the end and then descend again down the ladder to the bottom path.
Follow the path again to the elevator platform, at the 4 red rotating wheels, below the 4 steam valves.
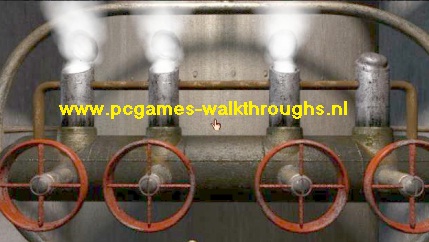
The Air ship steam valves puzzle:
You are back at the 4 red wheels and you're standing on the round elevator platform.
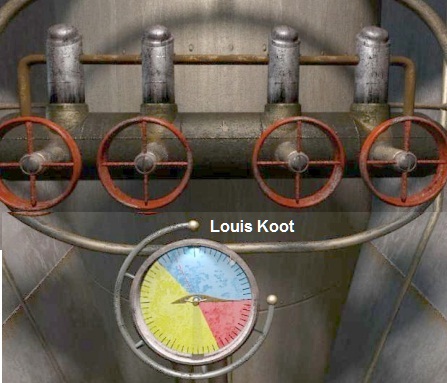
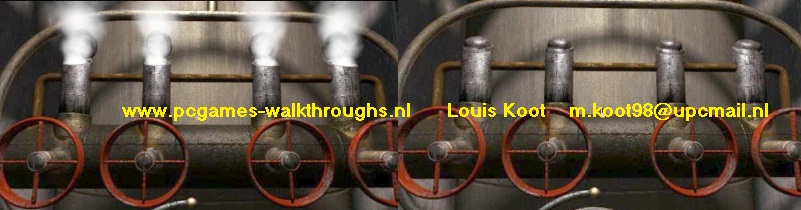
If you have done the Lava Puzzle well then steam will come out of 3 of the 4 steam valves now
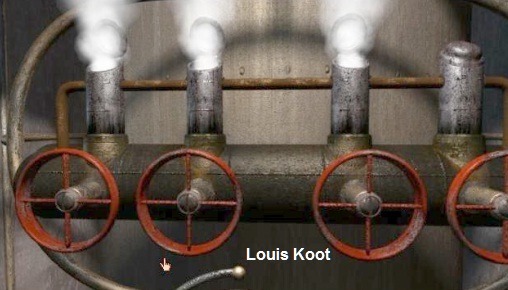
The intention now is to build up sufficient steam pressure, so that the airship will fill with steam. There are 3 levels, each with 4 of these red wheels and valves and a pressure gauge. You are now on the bottom level, so there are two levels above you that you can reach with this little elevator platform you're on now. But the elevator is not working now because the right valve is broken The intention is to turn off some valves and to switch other valves on again, to make sure that you build up enough pressure. But first you have to get the elevator moving. Do the following:
LOWER LEVEL:
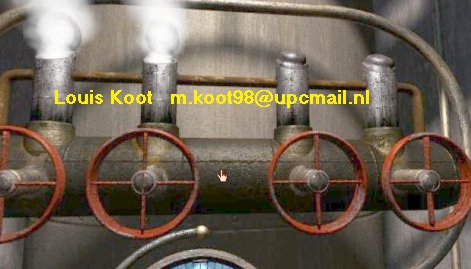
Close all 3 working valves by turning the 3 wheels under the valves. All 4 valves are then closed so no more steam will come out.
Turn left to look down and click on the elevator lever and pull it to the RIGHT and release and....
The lever returns to its starting position and the elevator now brings you up to the middle level.
MIDDLE LEVEL
Turn around to the 4 steam valves. Close all four valves by clicking on the turning wheels.
Look at the elevator lever again and now pull the lever backwards and release and.....You are now going to the Upper level.
UPPER LEVEL
Here you only shut off the Right Valve by clicking the right red wheel. The remaining 3 valves will continue to give off Steam.

Then pull the elevator handle to the LEFT and release and you will go back to the
MIDDLE LEVEL.
Now on the middle level you turn only the 2 left valves open again so that you can see steam coming out of them
Pull the elevator lever to the left and release and you go back to the Lower level.
LOWER LEVEL
Back on the lower level, you now open the 3 valves that you have closed before
Turn left and click 1 time to get back to the Surfboard platform. Then turn to the right and now click on that big Red Turning Wheel on top of the thick Cylinder pipe and .............
If you have done everything right now, you'll see how the airship is filled with hot air and then slowly moving forward and coming to a standstill against the Hangar door
Now go back over the path and climb back up the ladder. When you're back on the upper path follow it to the side path, that goes to the "chimney elevator".
Follow the side path to the "chimney" elevator.

Step into the "chimney" and click on the lever and .......
You now descend with the elevator in the "chimney" down. Get out of the elevator and follow the bottom path all the way to the end.
At the end of the path there is a lever on the round platform. Look down at the lever and then click on the lever and .........
See what is happening now ...............
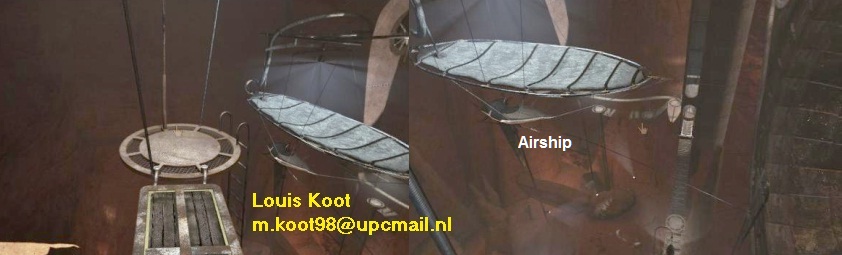
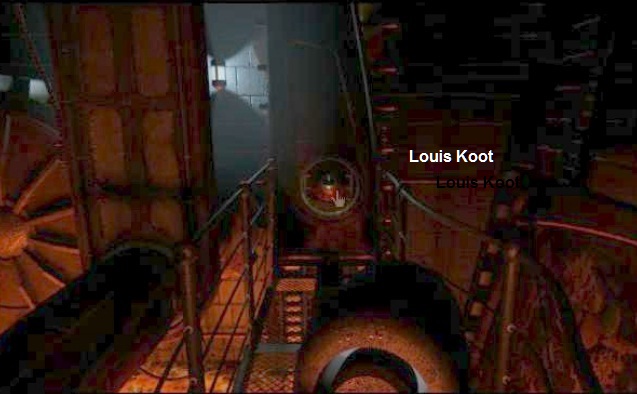
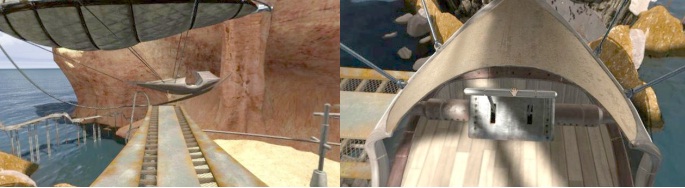
The Hangar door opens now and .. ....... t the AIR TRIP comes out and "sails" over the cable and comes to a stop behind you.
The Airship has slightly shifted the path to the lift. Click 4 times forward and ... you are in the gondola of the airship. Turn to the left and look down slightly and pull the lever and ........
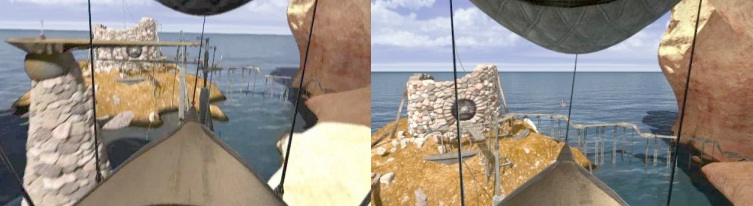
Now sit back to enjoy your "flight" through the narrow gorge, and over the dam and the water wheel........

....... and to the platform on that tapered pillar in the bay in front of the "tower" island.
The Voltaic Energy Symbol:
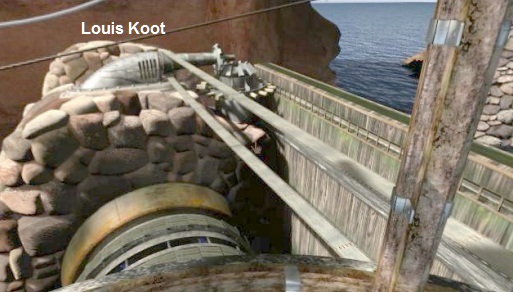
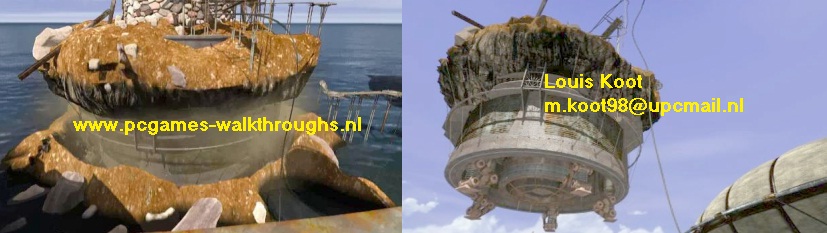
The airship has docked at the tapered platform. Turn Left and click 3 times forward to get to the round platform and then pull the lever and ........
look what's happening now .... You will not believe your eyes ........ The airship goes a bit further and takes a lever in the rails and .......
the entire upper part of Tower Island is now lifted up and it is then hanging high in the air.
Go back into the gondola of airship and pull the lever again and ............
the airship will rise now and docks against the raised part of the island.
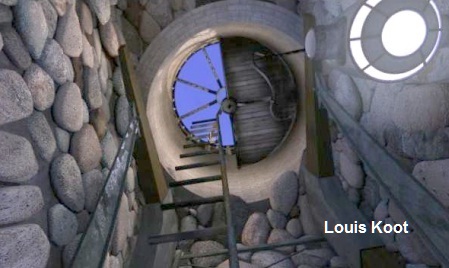
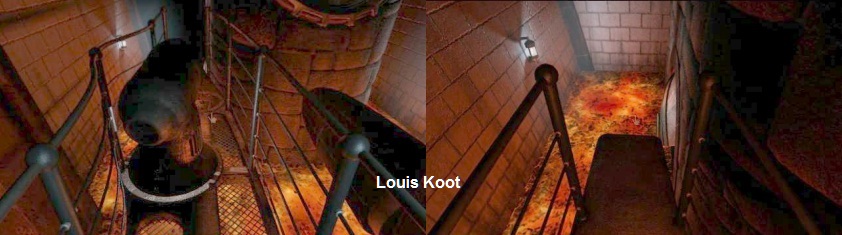
Turn right and click 1 time forward to get onto the jetty / scaffold [path. You are now high in the air. Turn left and walk to the large round hatch of the tower.
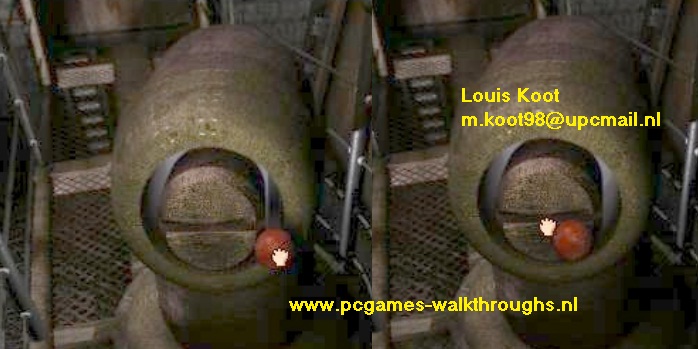
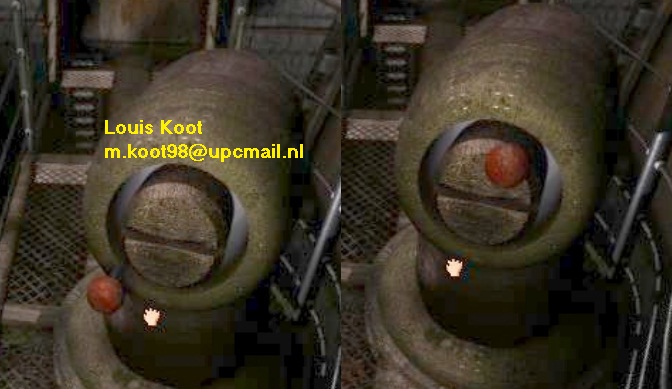
This round hatch now also has a green light, so open this hatch and then click twice in order to go inside.
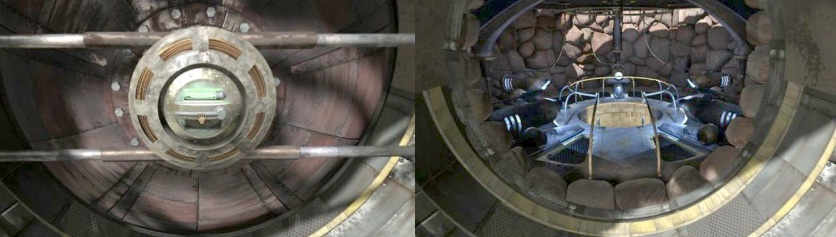
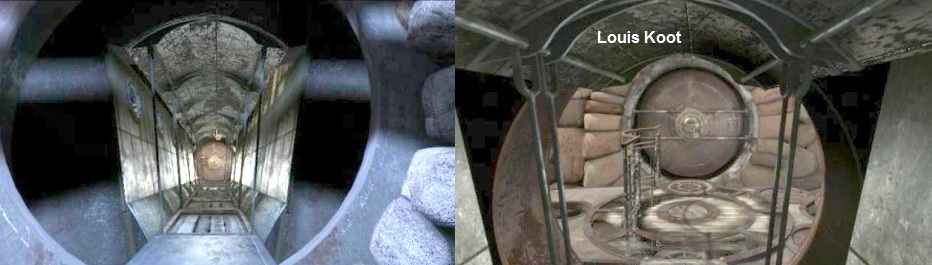
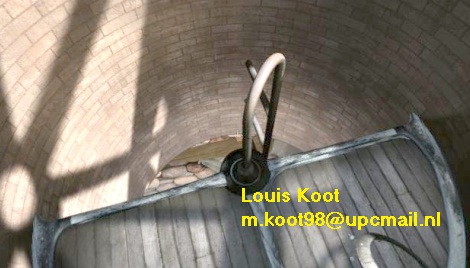
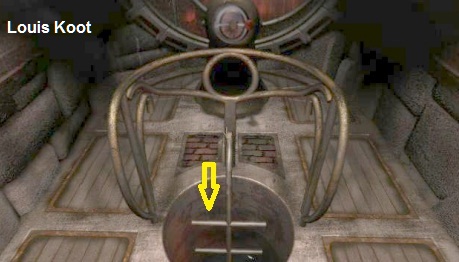
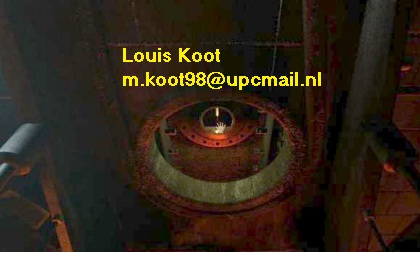
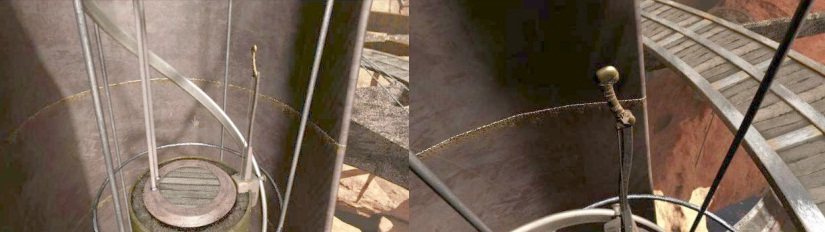
Look down through the wide round shaft. Click 5 times forward to get all the way down, at the bottom of the shaft.

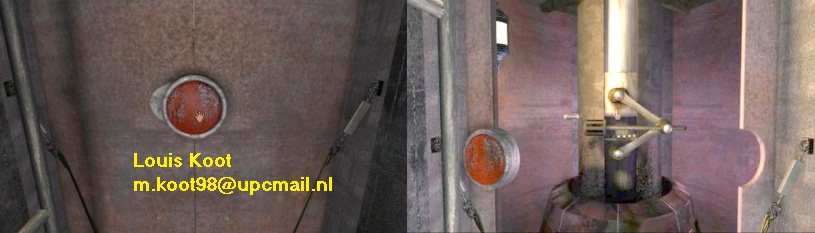
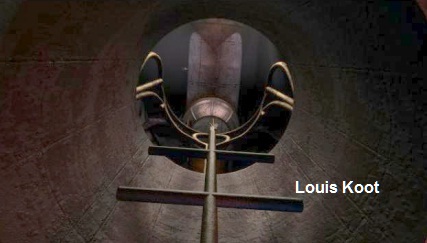
Then turn around a bit and then click on the turning wheel, which is on the bottom of the shaft and .......
The hatch opens up and you then look straight down into an Energy field. You'll see that the Voltaic Energy symbol is being formed by the dust particles that fall on this energy field
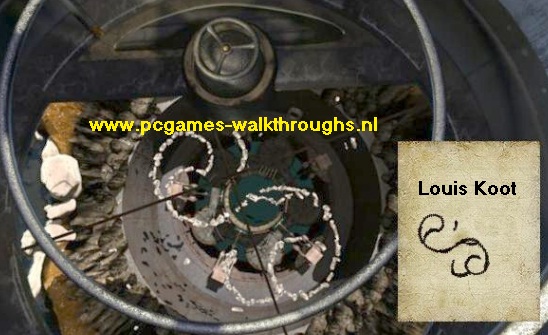
The Voltaic Energy symbol is now drawn for you and it is placed at the bottom of the screen, next to the 2 diaries.
You now have found the Voltaic Energy Symbol. You still have to find the Edanna and the Amateria Energy Symbol.
Look straight ahead again. In the wall of the shaft, just above the hatch, you'll see a gray panel. Open this panel and the J'Nanin Linking Book will be released.
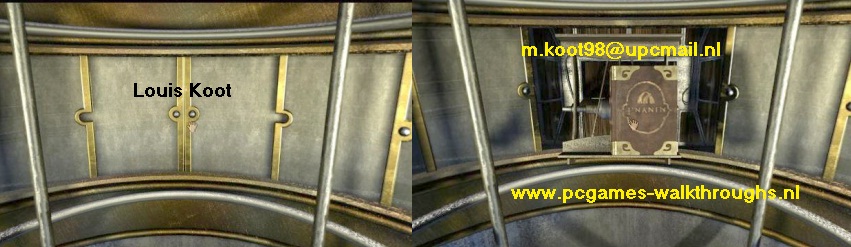
Click on the J'Nanin Linking book to open it and then click on the screen in the right page and ......
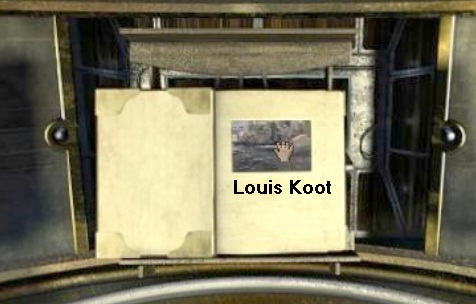
via the linking video you will now travel back to J'Nanin and arrive at the Observatory.
We continue here with:
Chapter 3: Back in J'Nanin: The Edanna Linking Book
Original Dutch Walkthrough from 2013 by: Louis Koot
2018 English translation, screenshots and lay-out by: Louis Koot