2018: Walkthrough by: Louis Koot
If you have found this walkthrough via google search or via another site then you have probably not visited my site.
A lot more very detailed game walkthroughs can be found on my site at: www.pcgameswalkthroughs.nl
Chapter 6: the Narayan Age
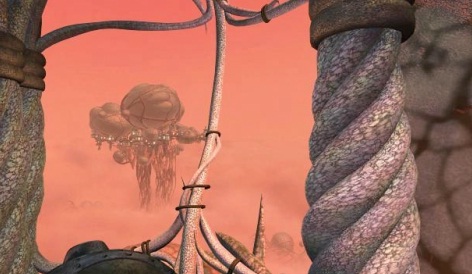
As you already saw in the linking movie, Narayan is an underwater world, "wrapped" in a huge bubble. Actually you are not really in Narayan and you will never come there. You arrive in the "Front Portal" of Narayan. It's pretty much the "machine room" of this world. Here you will solve your last puzzles and then decide for yourself which end Myst 3 Exile will have: The very wrong end; or the less wrong end; or the good end. Do not expect a dazzling finale of the game. Actually Myst 3 Exile ends (for me at least) in an anti-climax, especially if you compare the end (whichever end) with that spectacular roller coaster ride in Amateria.
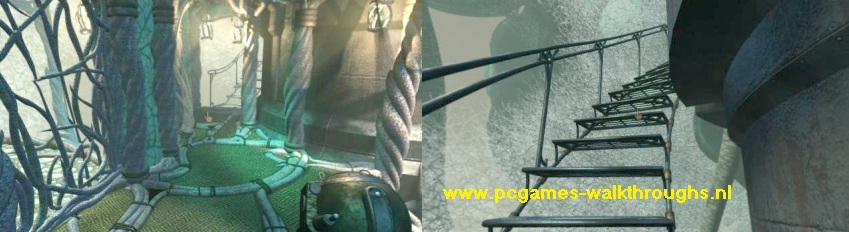
You have arrived and you are standing in front of a small staircase with green steps that goes up.
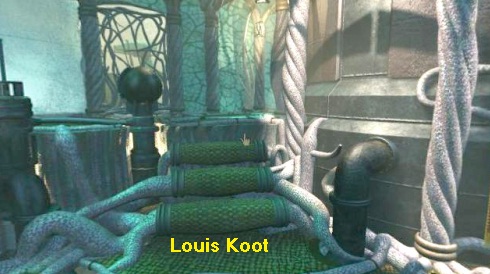
Before we go up the stairs, we first look at this downstairs room. Turn to the right and you'll see some red tapestries hanging on the wall.
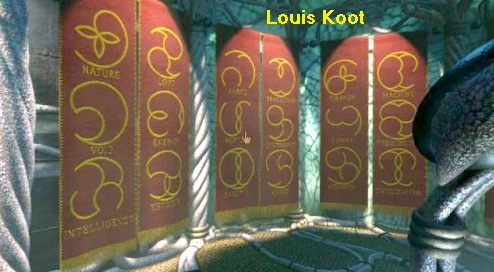
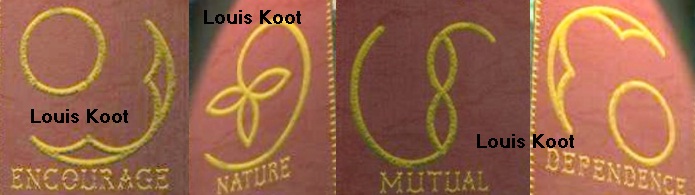
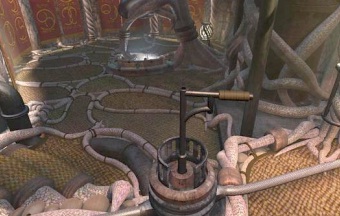
There are 10 tapestries hanging here and on each tapestry you see Symbols drawn. Under each symbol is a word that tells you what the symbol means. Take a look at the Symbols on the tapestries. Are some of these symbols not familiar to you? It should be, because at the bottom of your screen you have three of them........, the 3 Symbols you have collected in the Voltaic Age, the Edanna Age and the Amateria Ages. Later on we will continue to puzzle with the symbols on the tapestries. Take a look at the floor and you will see a maze of "Roots" running across the floor. In fact, those "roots" are pipes through which the current must flow. When you have looked at all this, return to that green staircase. If you look up the stairs you'll see an iron ball on the left and behind this iron ball you will see a fence that closes an alcove. To the left of this fence you see an arched passage with a blue / gray and more or less transparent "haze".
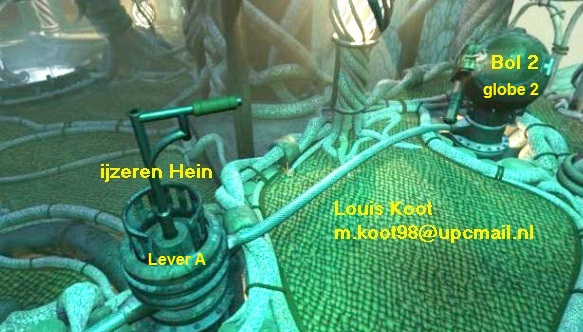
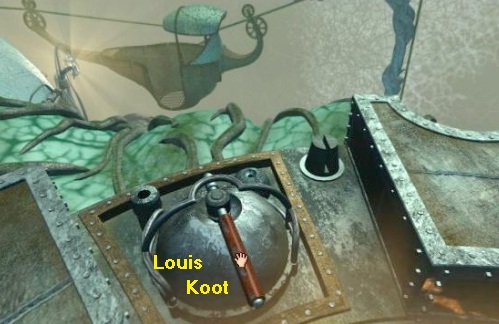
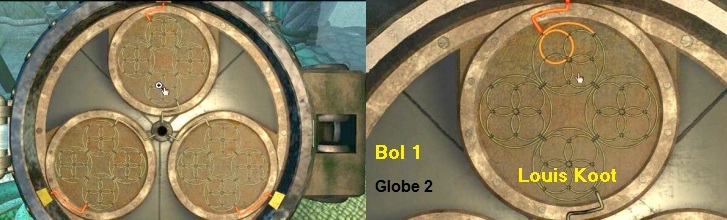
Go up the stairs and at the top you turn immediately to the left. You are standing in front of the Iron Globe and you will see that behind this globe there is an iron lever and further on a second Iron Globe.
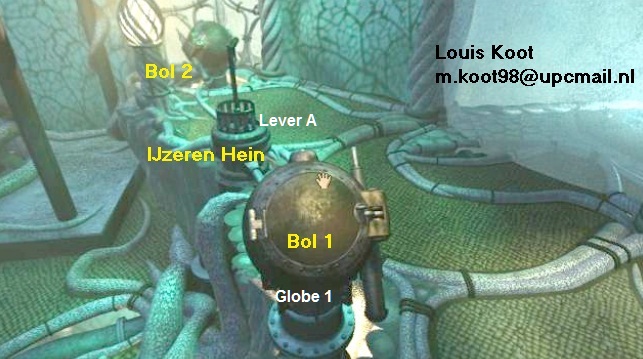
The front iron Globe is Globe 1 and the back iron Globe is Globe 2. This iron Lever is Lever A.
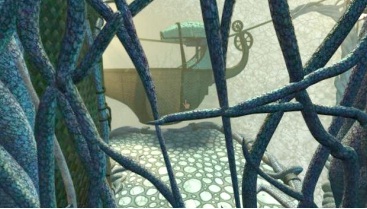
Click on the lid of Globe 1 and ........ Unfortunately .... the Lid does not open. Turn to the right and you look at that fence. Click 1 time forward to get to that fence.
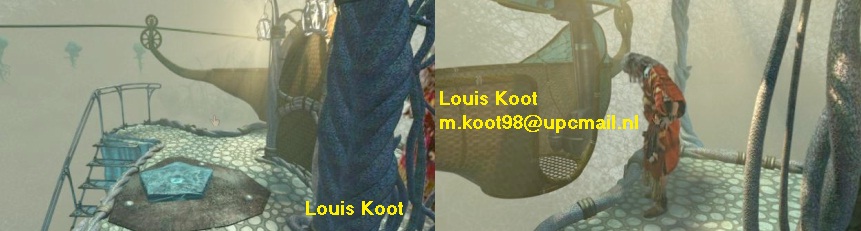
This fence does not open but you can see through it. You see the stern of a beautifully shaped Gondola hanging on a cable.
Turn to the left and ..... you can now see that blue / gray "haze" in the Arc-shaped Passage. You also see the iron lever A and the 2nd Globe
Click 1 time forward and then turn right and you are standing in front of the arch opening. Through the "haze" you see, vaguely, the prow of the Gondola, but you can not go through the "haze". The "haze" is in fact a force field. Turn now completely. You are then straight at iron Lever A. Turn slightly to the right and you will see the 2nd iron Globe again.
Lever A stands between Globe 1 and Globe 2. Lever A is now pointing to the right, so at Globe 2. Go to Globe 2 and try to open the lid of Globe 2 ... .....Unfortunately ....Globe 2 does not open either. Turn around and walk back to Lever A. Click Lever A now to turn it to the left. Lever A is then directed to Globe 1. Nothing else happens because there is still no power, but with Lever A you activate Globe 1 or Globe 2. Click Lever A back to the right again and turn to the left .
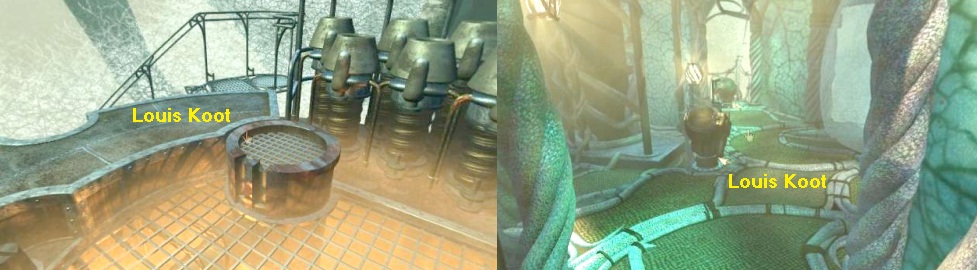
At the far left, at the back, you can now see a staircase going up. Click 3 times forward and you'll be at the bottom of that staircase.
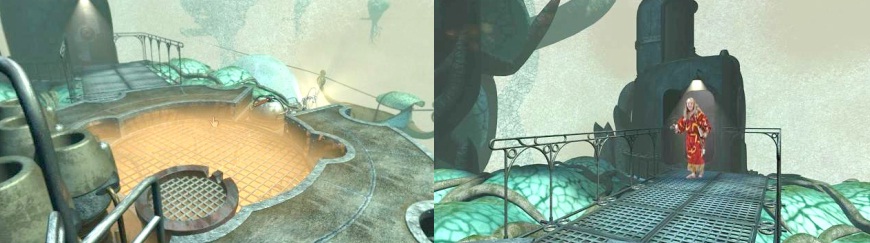
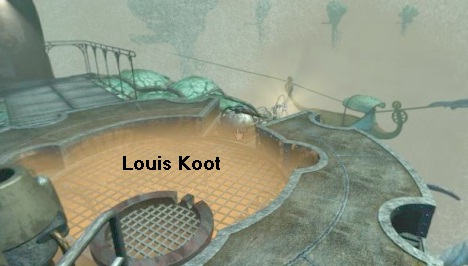
Look up and go up the stairs. When you're upstairs then turn sharply to the right and you then look through the "Upper Room" and this is the "Machine Room". Go forwards 1x and .....
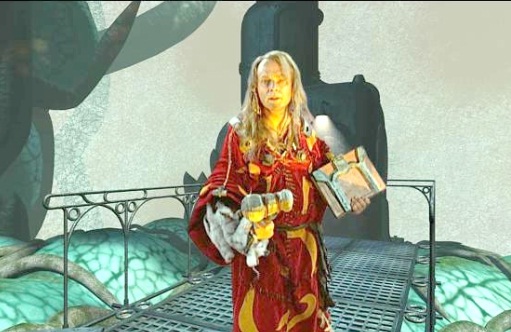
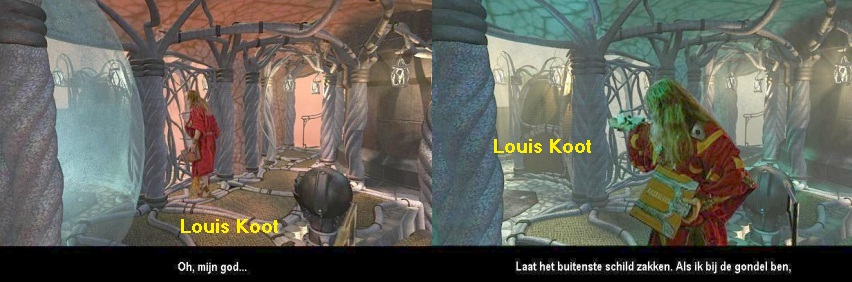
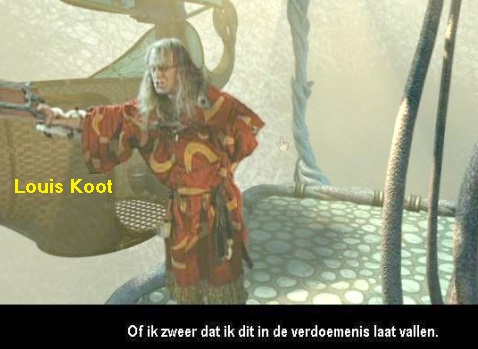
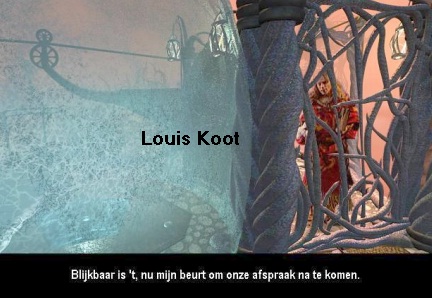
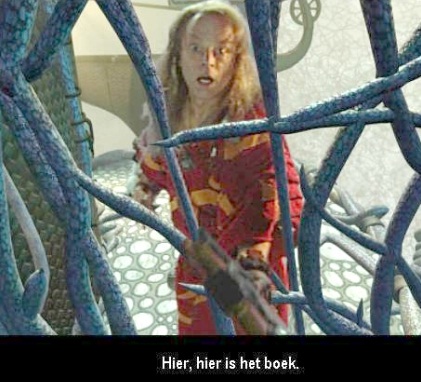
....... there is now a movie in which we now finally physically meet Saavredo in person who, in the back, steps out of a door.
Saavredo now sees that you are not the one he had expected. Of course he had expected Atrus, because he did all that effort. Saavredo has the Releeshan Book and a hammer and he gets angry and starts ranting and ranting against himself. Eventually he is addressing you.
Saavredo says that you can not go to Narayan, and neither can he, because he does not know how to turn off the force field. Saavredo also says that you can not go back to J'Nanin because he left the J'Nanin Linking Book there. According to him, both of you are now locked up in this Narayan portal for the rest of your life. Saavredo rages and rages a bit and challenges you then to find a way out, but he also warns you that "Doors that are open once remain open" or words with the same meaning ..
After this Saavredo disappears through the back door. You do not have to try whether you also can go through that door...you can't because Saavredo has locked it behind him.
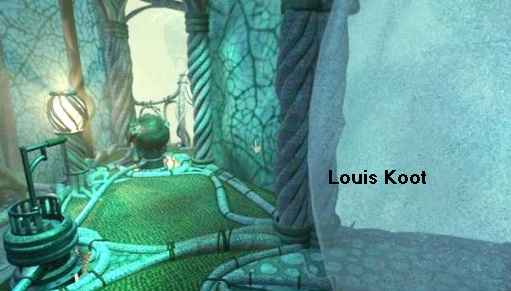
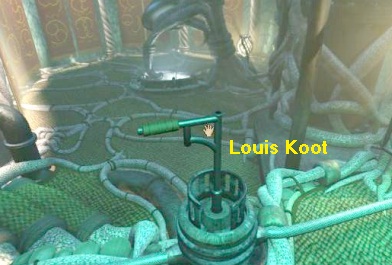
Turn to the right and you will see a kind of lid with a red Lever on the floor. We shall name this as Lever B
Behind Lever B you see the Gondola in all its glory, hanging on the cables. Click Lever B now and........ you have turned on the Power, as you can hear the buzz. Well, that went a lot easier than in the Voltaic Age, didn't? Nothing more to do here, for the time being. So turn around to the stairs and go back down.
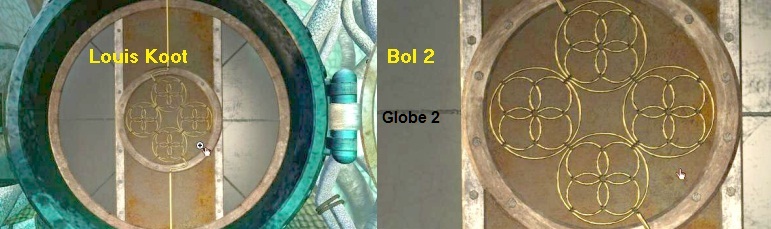
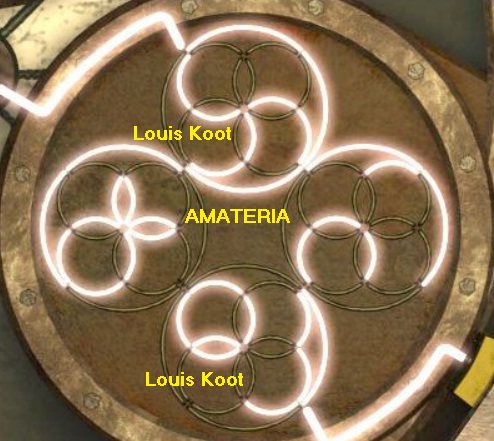
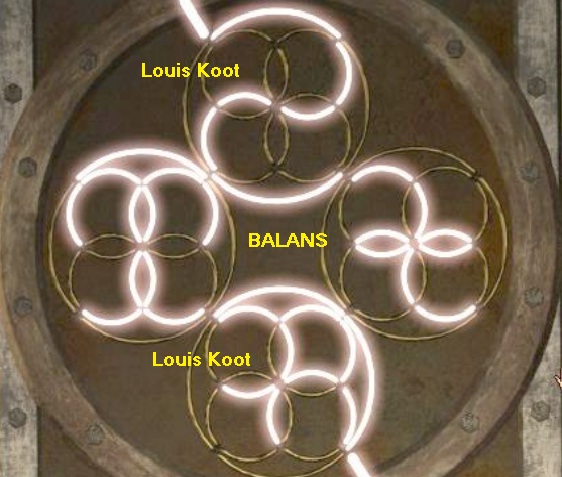
Go back to Globe 2 now and click again on the lid of the Globe. Because you have now supplied power and because you have put Lever A back to the right, Globe 2 now comes up. Click again on the lid and ...... the lid turns out to be a screen and you zoom in on it. Click in the close-up on the screen again and now you will see 4 large circles with 4 smaller circles in each of them. Zoom in on the circles to view them in close-up.
You can click with your finger on the edges of the various circles, but nothing happens.
Zoom out twice and g back to Lever A and now turn Lever A to the left to activate Globe 1. Globe 2 is turned off and sinks back down.
Go to Globe 1 and click on it again and Globe 1 comes up. Zoom in again 2 times and you see that Globe 1 shows 3 round circles with 4 smaller circles in each circle. You can zoom in on each of the Circles separately to get a close-up of them. Pick one out and zoom in on it. Now click again with your finger on a random edge of one of the circles. This edge will now become Orange. Just try this a bit
So you can make all white circles orange. What do you have to do with this now? Well ..... in these Circles you have to start drawing the 3 symbols of the 3 Ages. Each of these 3 Circles represents 1 Ages. I will explain it all to you, but if you have no patience, scroll down further to see the solution:
EXPLANATION
The 3 Symbols that you have found in the 3 Ages are: Voltaic Energy Symbol = Energy, Edanna Nature Symbol = Nature, Amateria Dynamic Forces Symbol = Dynamic Force. You'll find those symbols in your inventory, underneath your screen. But for your own convenience it would be very useful if you have these 3 drawings yourself on 3 separate sheets of paper so you can view them now.
If you have thoroughly read through Atrus's journal, then you will have noticed that he describes the 3 Ages in detail. Atrus especially describes his underlying philosophy concerning these 3 Ages. Atrus successively describes his philosophy concerning the Voltaic Age, the Edanna Age and the Amateria Age and the journal ends with a short indication about a fourth Ages. Atrus describes that fourth Age as an Ages that is perfectly in BALANCE, because it has all the characteristics from the other 3 Ages. In each of the 4 descriptions of the Ages you can read a Bold Printed Phrase and these phrases are:
Don't you recognize a few of these words ? You've probably seen them on the Red Tapestries, that you have watched on arrival. |
Now go back down the green stairs and go to those 10 tapestries.
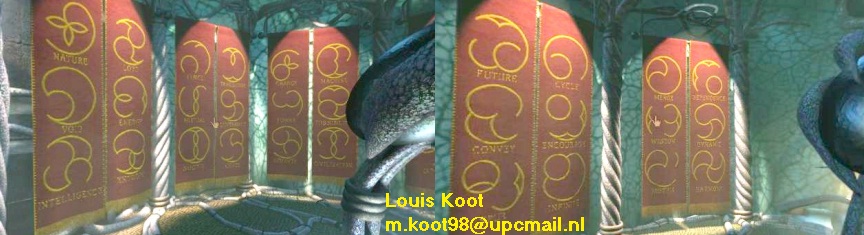
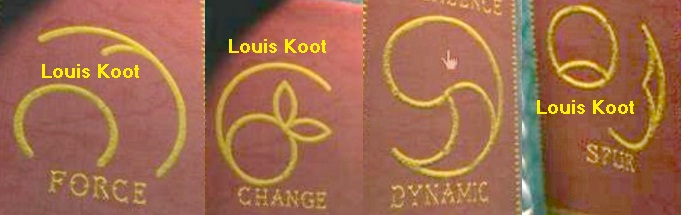
Now look at all the Symbols on those 10 tapestries more accurately and look for the symbols that are named as the words in the above 4 sentences. You notice that from 13 words in the above 4 sentences, you see the symbol on the tapestries. Mark those symbols. Then compare your 3 drawings of the Ages with the symbols on the tapestries and notice that each of your own 3 drawings is composed of 2 SYMBOLS. Apparently you have only found the HALF SYMBOL of every Age. So Saavredo has misled you, he has always hid the HALF of the LARGER Symbol of Ages in the 3 Ages.
|
The 3 drawings you have found are thus composed of: (so you already have these symbols)
But Atrus mentions in his diary per Age 4 Symbols, in the bold printed sentences. So you miss 2 Symbols per Age. And these are those Symbols you miss:
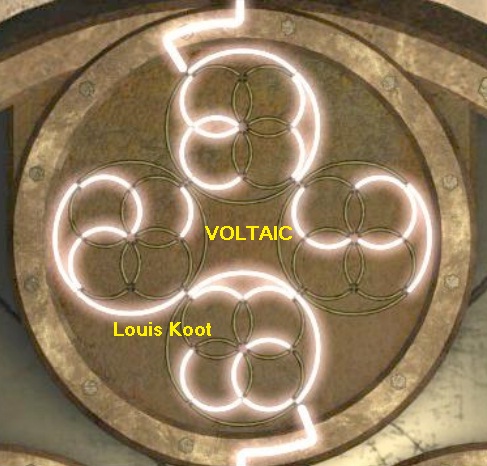
Now look for these Symbols on the Tapestries and mark them on the paper with the other symbols of that Age. You then have the Complete Symbol for each of the 3 Ages, which then consists of 4 Symbols. Here are the complete symbols: The Voltaic Energy Symbol consists of:
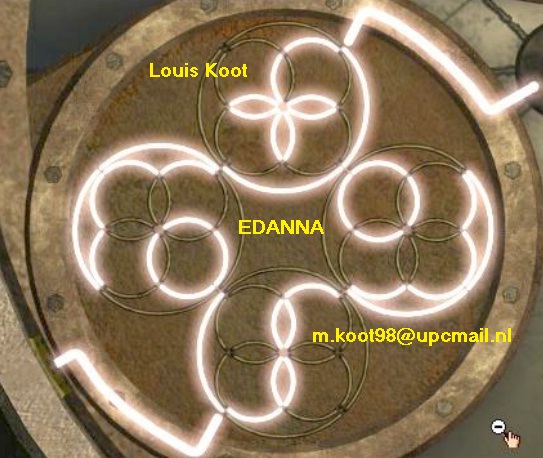
The Edanna Nature Symbol consists of:
The Amateria Movement Symbol consists of
All right.....Here ends my explanation.....You now must make the 3 Age symbols in Globe 1 |
The Age Symbols Puzzle
Lever A is still, pointing at Globe 1, so Globe 1 is activated. Go back to Globe 1 and click again on the lid to get Globe 1 up again. Zoom again in on the Circles.
You now have to make the 3 AGE Symbols in the 3 Circles with your finger. It does not matter which Age you draw in witch and it does not matter with witch circle you start. But within a circle you draw according to the sequence of the phrases from Atrus journal and place the Symbol of the first word of that sentence in the upper circle, the 2nd symbol in the right circle, the 3rd symbol in the bottom circle and the 4th symbol in the left circle.
Because I have visited the Ages in this walkthrough in the following order: Voltaic, Edanna and Amateria, I put Voltaic in the top circle, Edanna in the right circle and Amateria in the left circle. If you do it all well then all symbols will light up white and Globe 1 will close and you will be thrown out of the close-up and that energy shield in the Arc-shaped passage will be removed
Here is the solution:
The Balance Age Symbol Puzzle:
In Globe 2 you must also draw 4 Symbols, 1 per circle. But which symbols are they?. Think back of Atrus's journal and contemplate the last part of it, where he talks about the "Perfectly Balanced Age". There you will find that 4th Bold printed sentence and this sentence says: BALANCE SYSTEMS STIMULATE CIVILIZATION. 4 words, so again 4 symbols. But on the 10 tapestries you could only find one of them .....CIVILIZATION. Where should you look for those 3 other symbols? There is a part here where you have not been yet ....... the Gondola .......
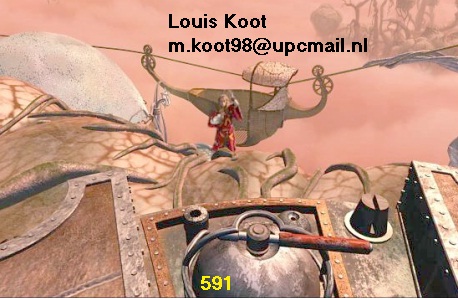
So you are still at Globe 1. Now go to the Arc-shaped Passage. You see the prow of the Gondola and ...... you see a staircase.
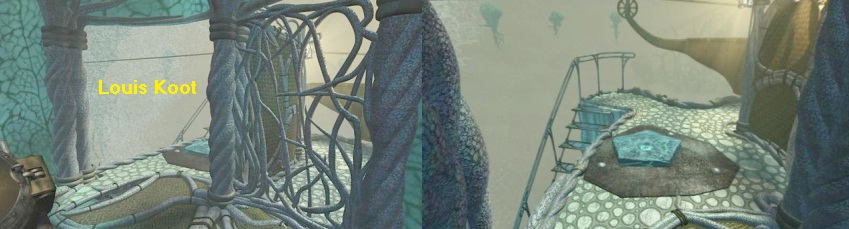
Walk to the Gondola and then turn left and descend the stairs. You are in the Lower Room and you can see that there are also red Tapestries on the wall here.
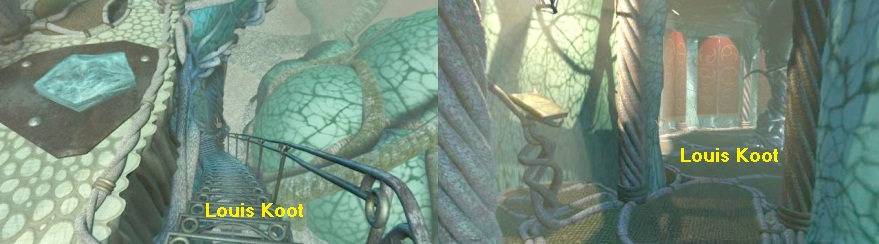
There is also a Linking Book on a book stand. Walk further and then turn left and ....... That Linking Book turns out to be a Tomahna Linking Book.

Grab the Linking Book so that it is placed in your Inventory.... it is your "escape route" from this underwater bubble.
Turn right and walk on to the ed Tapestries and look for the symbols on these tapestries
You have to find the these symbols here BALANCE; SYSTEMS; STIMULATE and make a drawing of them
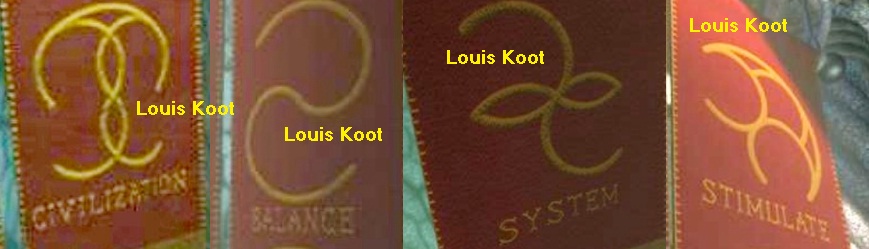
Then go back up, and if you had not already done so, go and take a look at the CIVILIZATION Symbol and make a drawing of it, on the tapestries.
Then click Lever A to the right again to activate Globe 2. As a result, the force field in the arch passage returns. Go to Globe 2, click 3 times on Globe 2 to get back into the close-up of the round screen with the 4 Circles. Zoom in on the 4 Circles and draw the 4 Balance symbols in it, according to the sequence of the bold sentence. Draw Balance in the top circle, System in the right circle, Stimulate in the lower circle and Civilization in the left circle.
The Complete Balance Symbol in Globe 2 looks like this:
As soon as you have made the complete Balance symbol, you go out of the close-up and see that, outside, a part of the Force field disappears.
A movie now starts:
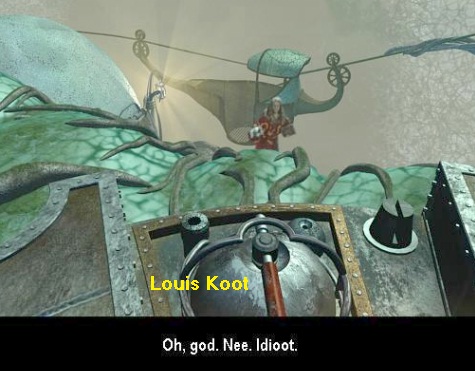
Saavredo comes in and he is amazed that you have managed to make the Blue Force field disappear.
Saavredo rattles a bit about "They are still alive" but he does not trust it all yet and just pulls Lever A a couple of times. After this he gives you the assignment to have the OUTSIDE BARRIER disappear, so he can go to Narayan with the Gondola. In return he promises you the Releeshan Book. Saavredo then puts Lever A to the right and he goes to the Gondola waiting for what YOU are going to do NOW.
All ENDINGS:
SAVE YOUR GAME NOW ......
You can now play the ENDING Myst 3 Exile, but the game has 4 endings and there is only 1 the good one.
So SAVE now first, so you can try out all the endings from this point in the game. Call this Save something like "the ENDINGS"
Wrong Ending 1:
You actually did what you came for, you restored the power in Narayan and you have the Tomahna Linking Book in your possession, so you can now just go back to Tomahna and Leave Saavredo here to his miserable fate ....however .....If you do this than you leave without the Releeshan book.
Freeze the screen and click, in the lower black bar, on the Tomahna Linking book to get it in your screen.
Open the Book and click on the Linking Screen and ......
You'll travel back to Tomahna. Upon arrival in Tomahna turn left and click 1 time forward towards the door of Atrus's Study and ......
Catherine storms outside and then comes Atrus also and ....... Well .... they are not exactly happy with you and then .... Saavredo appears and he kills you all ....

Ok ......That is what Saavredo meant when he told you: "Once opened doors do not close".
Load your "the ENDINGS" SAVE and now try:
Wrong Ending 2:
Because Saavredo has put Lever A to the left, the force field in the Arch Passage has disappeared.
Saavredo is waiting at the Gondola on what you are going to do. Go through the arch passage and walk on and then turn right and ..
.... DO NOT CONTINUE NOW........
Saavredo gets angry, he gets really mad and he threatens to let the Releeshan Book disappear into nothingness, if you do not let the outer force field disappear.
Don't do anything...... Just stay and ......After a few moments Saavredo takes Releeshan Book and then he beats you to death with his hammer.
Well.....you're not suppose to die, so re-load your "the ENDINGS" save and now try
Wrong Ending 3:
Go to Lever and click it back to the right.
The outer force field disappears and the arch passage is blocked again. But ... Saavredo now going to play a dirty game.
Saavredo knows that you can not come to him now and he throws the Releeshan Book away and disappears with the Gondola.
Fortunately, you have found the Tomahna Linking Book, so link through the Tomahna Linking Book back to Tomahna and walk to the doors of Atrus's study.
Catherine and Atrus storm out again to greet you but .....
well ... they are not happy with you because you have not managed to save the Releeshan Book.
Re-load your "the ENDINGS" save again and now end Myst 3 Exile via:
The only GOOD Ending
Now go back to the upper room. In the upper room you go straight to Lever B.
You had turn Lever B to the right to activate the power. Now switch Lever B back to the middle position, to switch off the power again.
You'll see how the Force Field is now activated again at the gondola.
The gondola can not leave now and Saavredo is trapped and lies crying at the gondola. Quickly go back down to the fence.
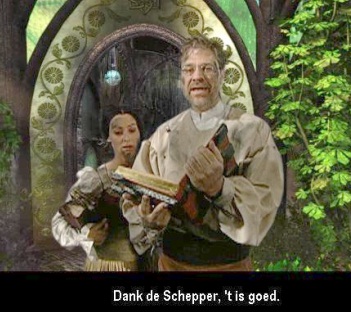
Turn to the Fence and ........ Saavredo starts begging now, and he finally gives you the Releeshan Book
Turn Lever A right again. Of course nothing happens now because you have turned off the power.
So go back to the upper room and turn Lever B also to the right again and ......
........ The outer force field at the Gondola disappears again ........
Saavredo waves at you and steps into the Gondola and leaves with it to Narayan and to his family whom he thought were dead.
You have succeeded, not only have you saved Releeshan, but you also have the Releeshan Book in your possession.
You saved Narayan and you saved Saavredo from ruin AND you own the Tomahna Linking Book. Open the Tomahna Book and travel back to
Tomahna:
Upon arrival turn left and click one time forward towards the door of the Study Room and .......
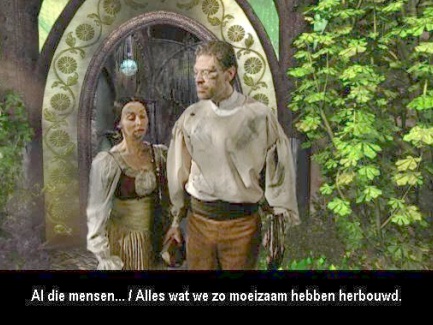
Catherine storms outside and then Atrus and the game now gets a HAPPY END ..........
Next look at the final video in which we have to listen to Atrus philosophical ramble and then the Credits starts.
...................THE END ......
..... But The END Has Not Yet Been Written .......
Original Dutch Walkthrough from 2013 by: Louis Koot
2018 English translation, screenshots and lay-out by: Louis Koot