Expansion Pack for Uru Ages Beyond Myst
2018: walkthrough by: Louis Koot
If you have found this walkthrough via google search or via another site then you have probably not visited my site.
A lot more very detailed game walkthroughs can be found on my site at: www.pcgameswalkthroughs.nl
You must have "Uru: Ages Beyond Myst" installed on your computer to install the Expansion Pack. Then install "The Path of the Shell" via the DVD or via the download you have purchased. The Installation of "The Path of the Shell" upgrades your installation from "Uru Ages Beyond Myst" to "The Path of the Shell". From now on you start the game with the DVD of "The Path of the Shell", but everything you did in "Uru Ages Beyond Myst" has been preserved, so you can continue playing. By installing "The Path of the Shell" you can also simply play "Uru Ages Beyond Myst" first, if you had not already done so.
Through "The Path of the Shell" you can play 2 expansions for "Uru Ages Beyond Myst" and they are "To" D'ni "and" The Path of the Shell ".
If you have installed the complete expansion via the DVD "The Path of the Shell" then you can play the original "Uru Ages Beyond Myst" and the 2 extensions "To D'ni" and "The Path of the Shell" as 1 game because these 3 games have in fact become 1 game. I did not do this ..... First I did "Uru Ages Beyond Myst", via the original DVD, and then installed the expansion package over it. It does not necessarily require that you have played "Uru: Ages Beyond Myst" completely to play the expansion. However, you should have a KI bracelet and it is useful if you have used all linking books and Linking Tablets in each of the 4 Ages, Teledahn, Gahreesen, Kadish Tolesa and Eder Gira. This means that in Relto you will have all links, except 1, to all Ages and Balconies already in the various Linking books and that will spare you a lot of going back and forth
When you start with a complete "clean" installation of "Uru: Ages Beyond Myst" and the Expansion Pack "The Path of the Shell", then it is useful that you first play the first "Uru Ages Beyond Myst". In any case, until you have done the prison in the Teledahn Ages and in Gahreesen until you have taken the KI-bracelet from the KI-Dispenser. See my very extensive and very clear walkthrough for "Uru: Ages Beyond Myst".
In the 2 expansions "To D'ni and The Path of the Shell" you will not encounter "Journey Cloths" in the new worlds that you have to activate. Your progress will be saved automatically and when you leave the game and then restart you always start in Relto again. From Relto you go back to the Age where you were when you left the game, to continue playing .... everything you had done before you left the game is saved and you can continue playing. You can NOT save yourself. As I have already said, you can play the 2 parts of "The Path of the Shell" as 1 game, but I played it as 2 separate games because otherwise it is not possible to make a good and understandable walkthrough for it.
Part 1: To D'ni.
Chapter 1: Provide all the links
A: Relto:
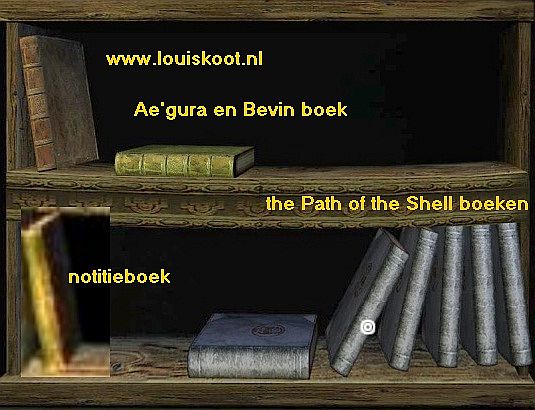
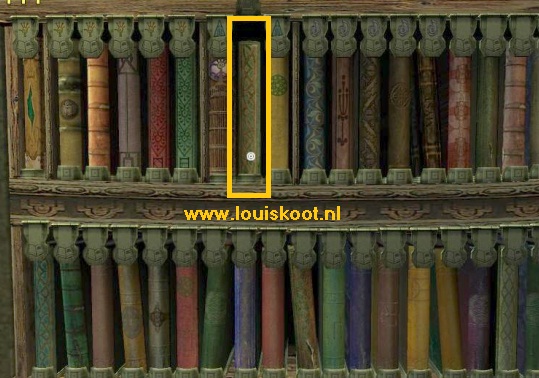
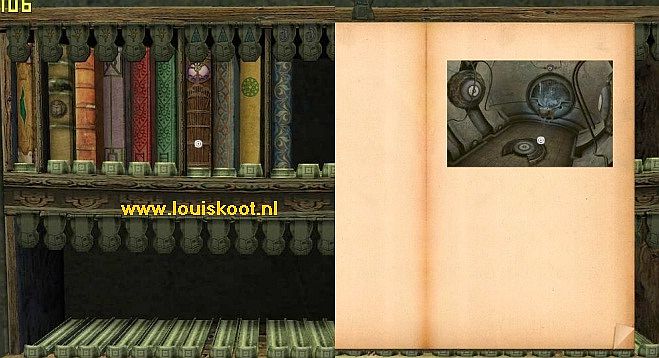
You start this game, of course, in your own private domain, Relto. Enter your Relto house and go to the right bookcase.
Originally there was only one book in the right bookcase. But now there is also a green book on the top shelf and on the bottom shelf there is a red book and 7 gray-blue books.
 \
\
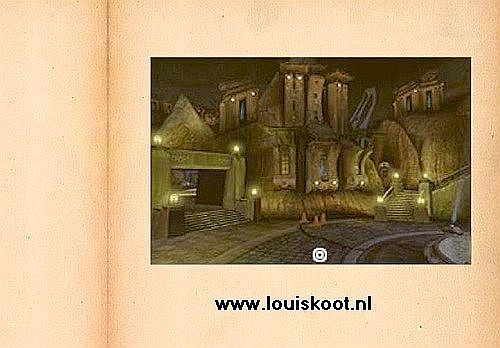
Pick up the green book and read it. The green book is written by Yeesha and in this she tells about Ae'gura and about Bevin.
The Red book, which leans on the bottom shelf, is your Notebook. If you click on the Notebook then it will be big on your screen.
In the Notebook you read the name you gave to your Avatar and you can type notes in the notepad, and that is a very useful tool because you will have to write a lot of hints and instructions. But ...... in this part of the expansion you do not really need the notebook ... but in part 2 "The Path of the Shell" you will absolutely need it. If you click away the Red Book again, it will disappear from the bookcase and you will always carry it with you. If you move the cursor down, to the bottom left corner of your screen, you will see the Relto Book, your KI Bracelet and .... the Notebook appear.
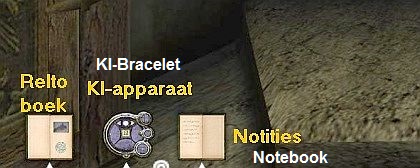
When you have to use the KI-bracelet and the notebook for the first time, I shall explain to you how you do that. The 7 gray-blue books, which are on the bottom shelf, do not have to be picked up and to be read just now, because they are for the second part of the extension "The Path of the Shell" and I do not pay any attention to that now.
|
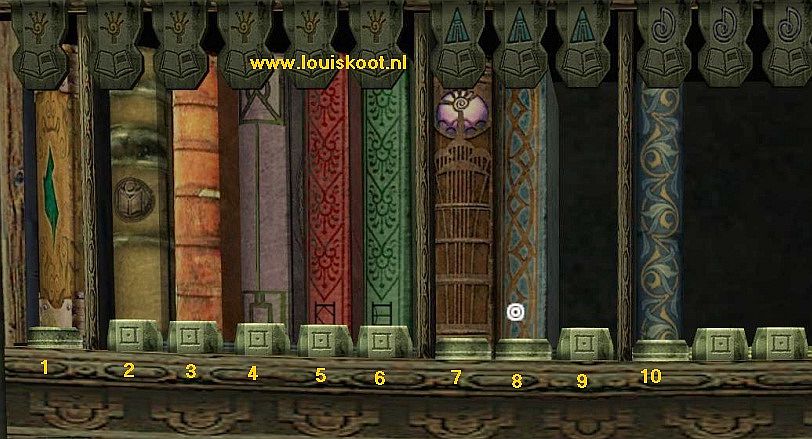
Turn around and walk to the other bookcase and zoom in on it. All linking books from "Uru Ages Beyond Myst" are here in the closet, plus 2 new books.
In slot 10 stand the "Watcher's Sanctuary Linking Book" and this is the book with which you can start part 2 of the expansion" The Path of the Shell ", and we are not doing that yet. |
We are now going to start with the Bevin Linking book, so pull that book out of slot 8 and then click on the Link photo on the first right page
and ..... you end up in:
B: the D'ni city of Bevin
Fountain Square (Square 1) and the "Water Garden":
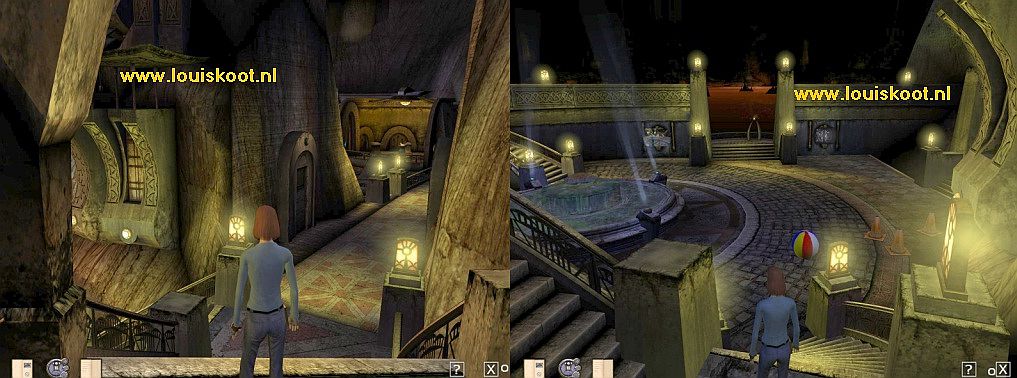
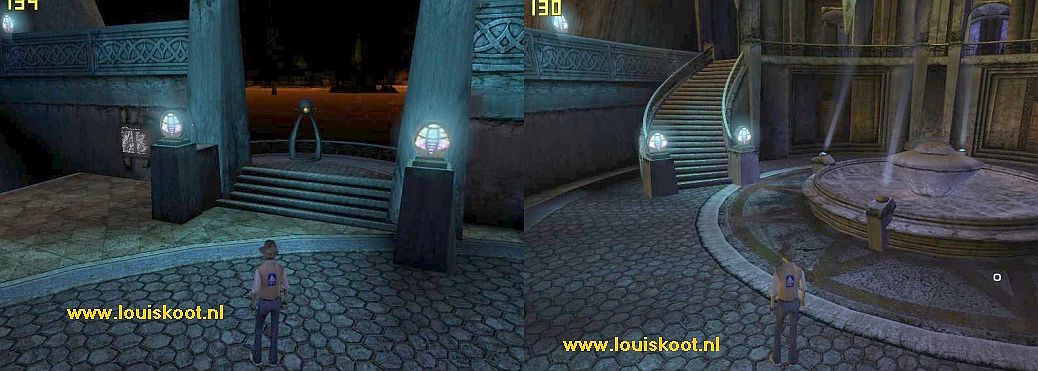
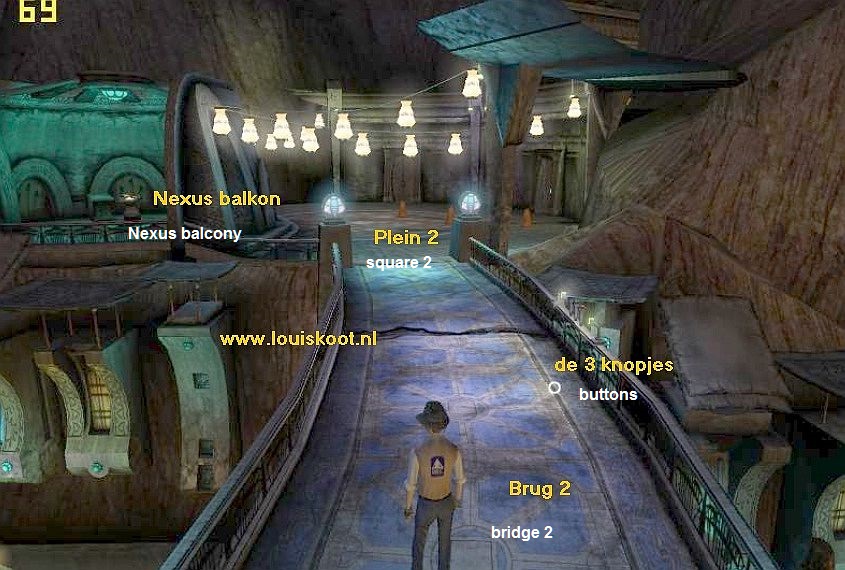
Welcome to Bevin. It's night. You arrive at a large round square with a fountain. This is Square 1.
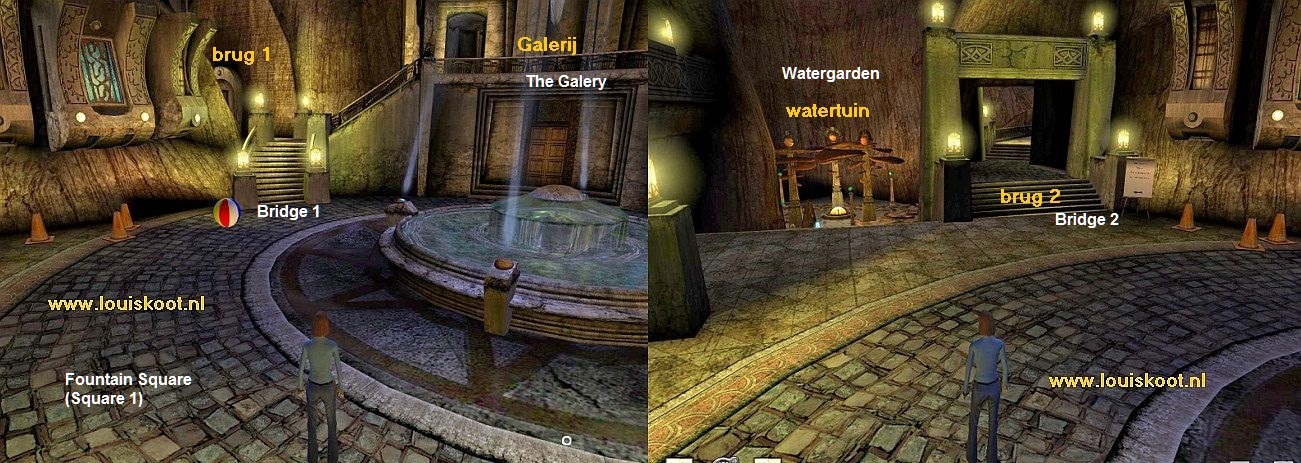
In the left of the corner you see a staircase going up. That staircase leads to Bridge 1 and further up to the Gallery. In front of the stairs is a nice beach ball on the ground and to the left of the beach ball you see a few orange pylons. Stay and turn around and look around you. Left of the orange pylons is a white sign at number of stone steps, which go up to a square gate. Links of the square gate is the staircase to the Water Garden.
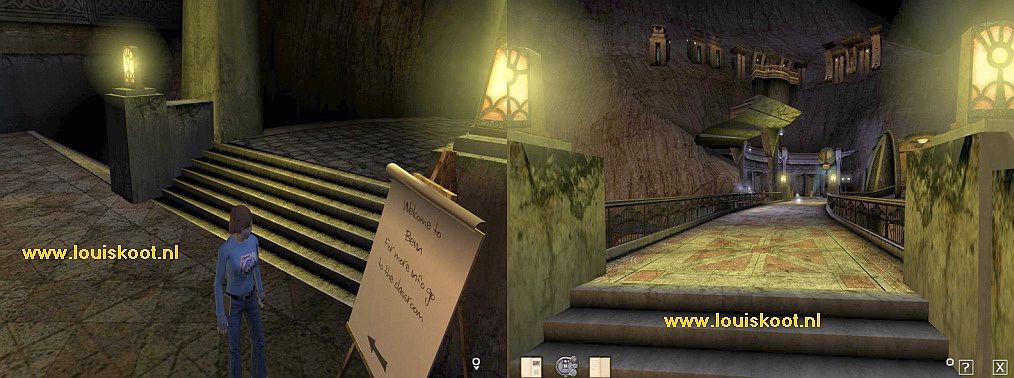
Go to that white sign. You zoom in on it yourself and you read "Welcome to Bevin, for more info go to the classroom".
The thick black arrow at the bottom of this text points to the square gate. So go up the stairs and then through the gate. You come to Bridge 2 and on the other side you see Square 2. But we are not yet completely cross over the bridge to Square 2. About halfway the bridge you see, on the left railing of Bridge 2, three colored buttons. The buttons are blue, green and orange. Bridge 2 goes over the Water Garden and that is not illuminated now. Go to the 3 color buttons, which sticks on the left railing.
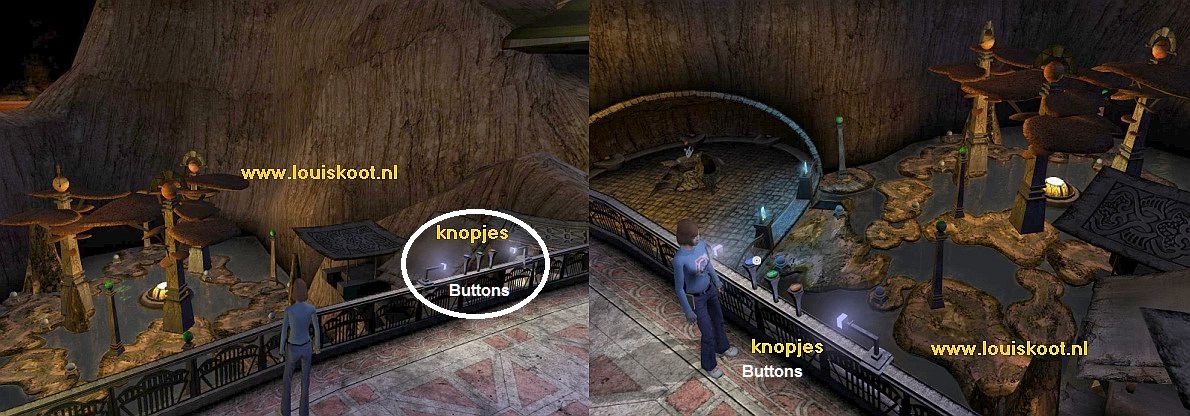
Click 1 by 1 on the 3 buttons to press all three of them once and ...... the "water garden" will be lit.
Turn left and walk back through the square gate to Square 1, the fountain square.
Turn to the right and walk forward to the staircase that goes down to the "water garden", left of the square gate. Go down the stairs.
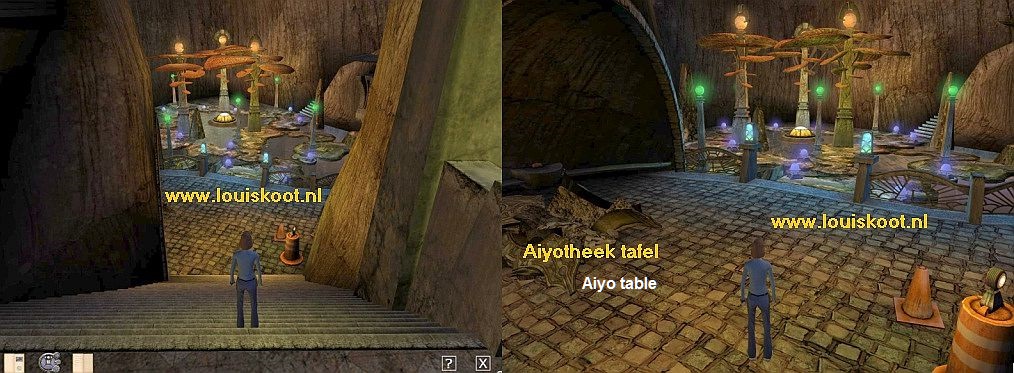
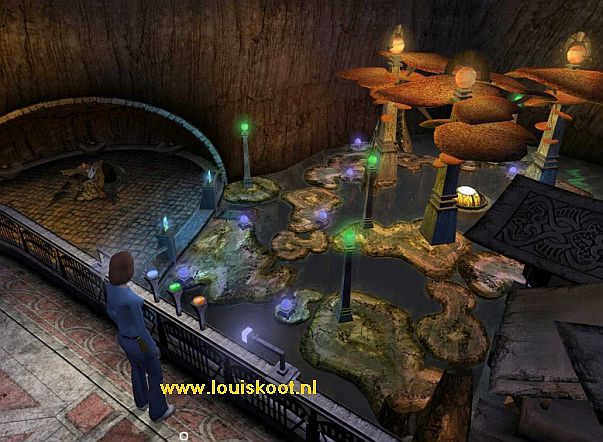
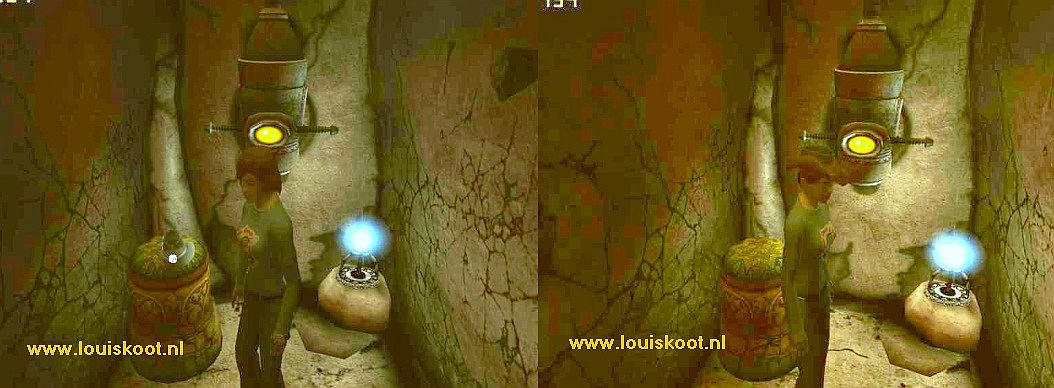
At the bottom of the stairs is, right in front of you, the entrance of the "Water Garden", between the two white lamps. To the right there are a few of those orange pylons. On your left, you see a Holographic device, just as there is one also in Yeesha's room in the Desert Cleft. This thing is also broken, but it flickers a bit. In D'ni language such a Holographic Table is called an "Aiyotheque Table".
Go into the "water garden" and then stand still on the first tile. You can now follow the tiled path to the left and to the right through the "water garden" On the other side you will see a staircase going up and to the right of this staircase (and then behind the pillar with a green ball lamp) you see 2 windows. Right in front of those two windows there is a small and low platform.
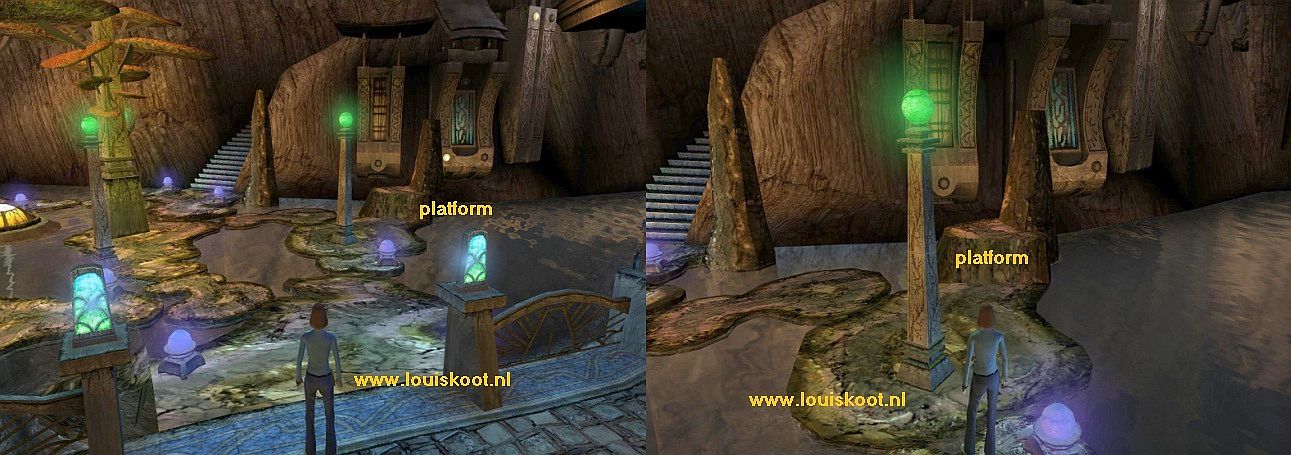
Follow the right tiles to that platform and jump on it, by taking a little run and then pressing the jump key at the right moment.
When you are standing on the platform you turn left and you will see a paper stuck to the side of the left window, which is a Relto page.
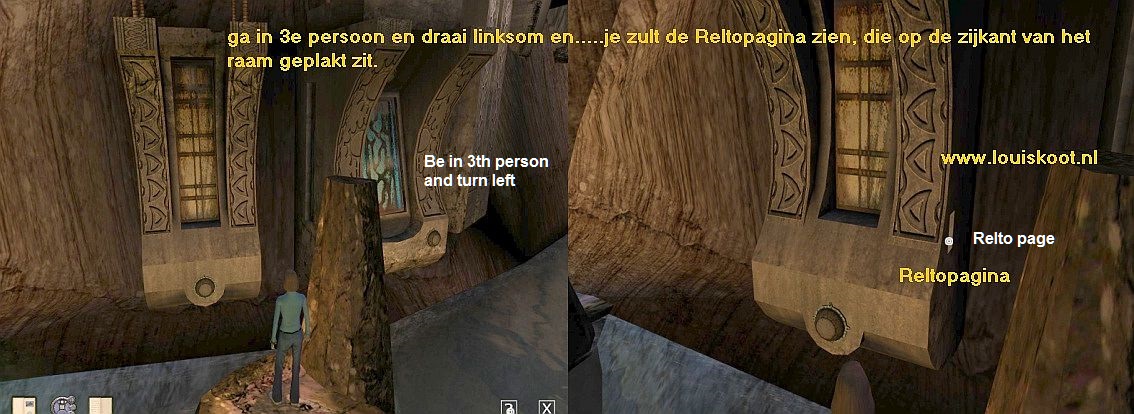
So click on that Relto Page and then click on the green image on this Relto page.
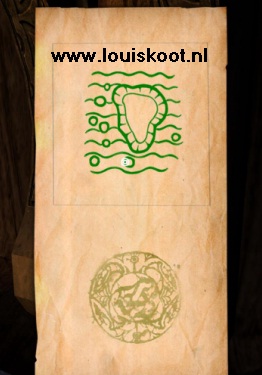
In your Relto book, this Relto page ensures that there are now small rock islands, in the sea around your Relto island.
Turn around, so that you can see the stone stairs again, jump off the platform and follow the tiles back to the entrance of the "Water Garden " and then go back up the stairs to the fountain square.
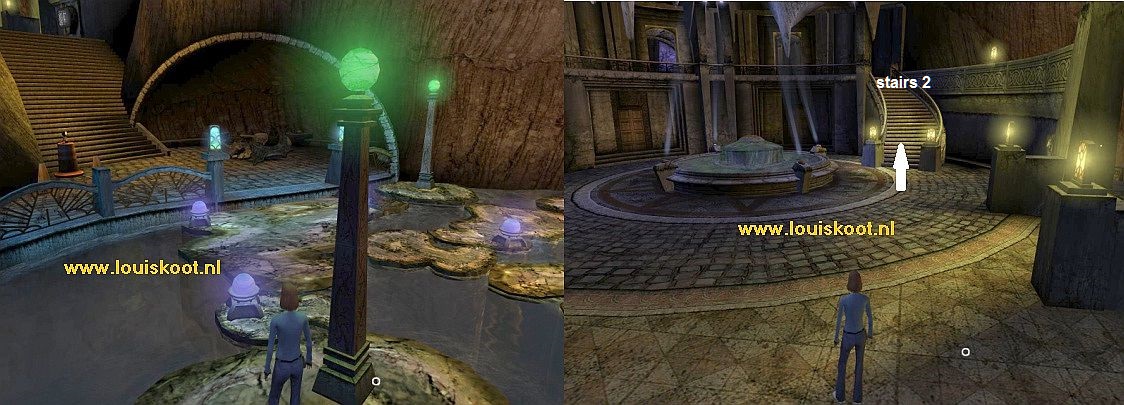
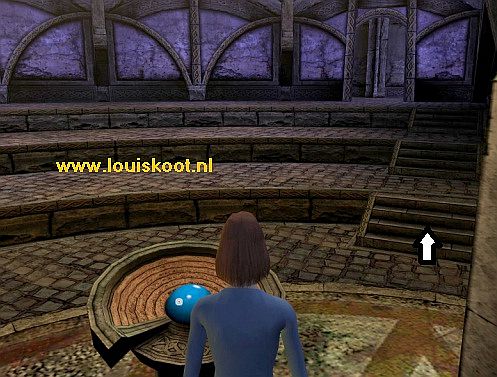
In the right back corner of the square, so right in front of you, you can see staircase 2 going up to the Gallery. Go up to the gallery via Stairs 2.
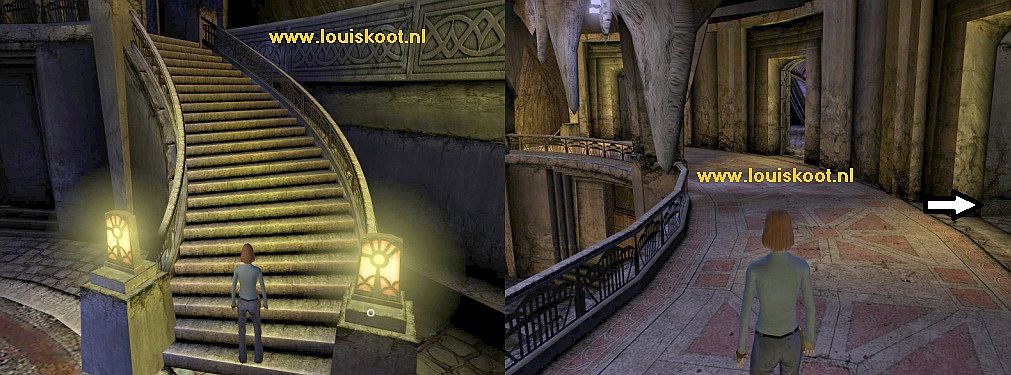
There are 3 rooms on the gallery. Go right through the first gate here. You end up in an intermediate corridor. Turn right and go through the gate in the corner ..... You end up in the:
Community Room:
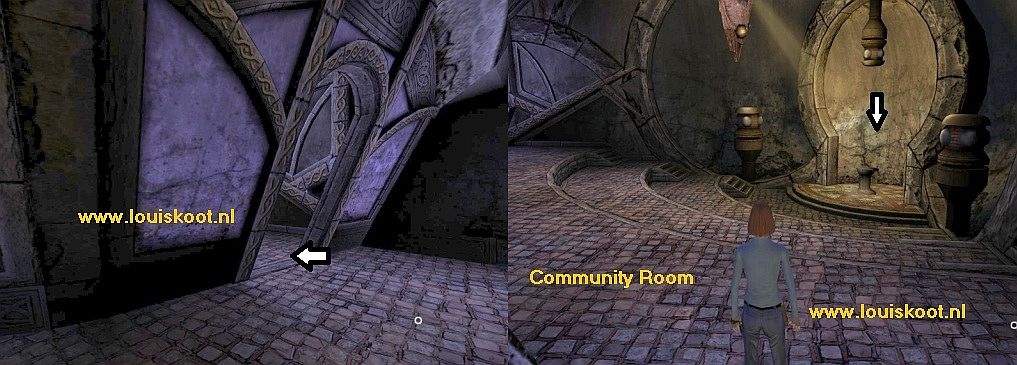
The Community Room is a kind of auditorium and in the back you see a big niche with a small pillar in it. Above that pillar is a device and left and right of the niche is also a device. Walk down and to the pillar in the niche and stand behind it. On top of the pillar is a thick blue button. Press the blue button.
You now hear a voice from those 3 devices. However, you can not understand the language. The voice speaks in the "D'ni" to you.....
Go out of the niche and then up the stairs on the right to the gate in the right corner. Go through the gate and then slightly to the left and then go through the next gate back to the gallery. Turn right and go down the stairs. Turn left and go down the bottom stairs, back to the Fountain.
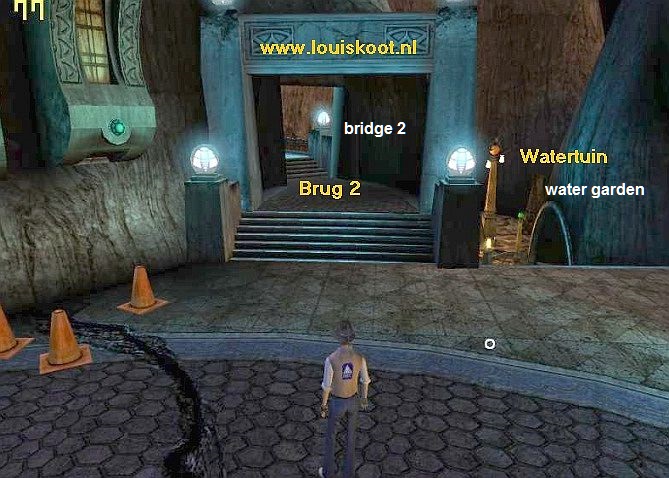
Walk past the beach ball and then turn right and go through the square gate to bridge 2. Now go over bridge 2 to square 2:
Square 2:
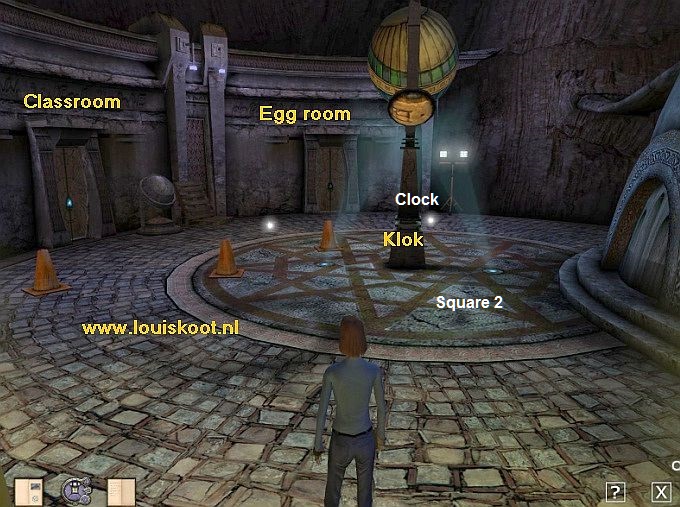
In the middle of square 2 stand a large D'ni clock. To the left of the clock are two Metal Doors. The left door has a blue doorknob, the right door does not. That left door, with the blue button, is the door of the Classroom and that right door is the door of the "Egg Room" and you can not open it yet. So go to the door of the Classroom and open this door by pressing the blue button.
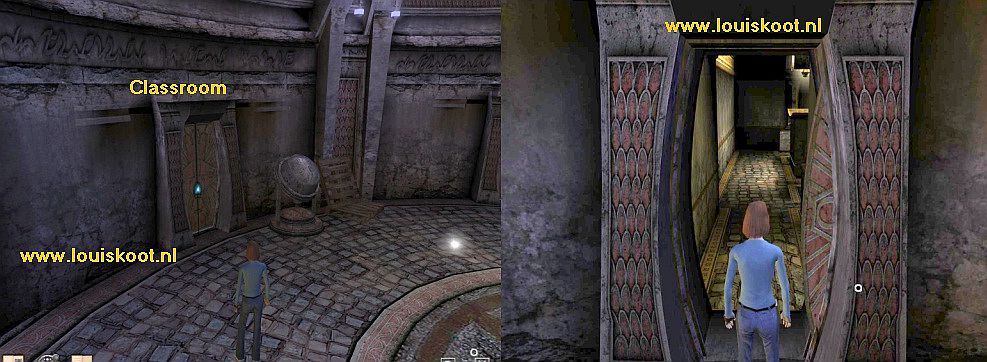
Go inside and take a few steps and then to the right and you are in the middle of the:
Classroom:
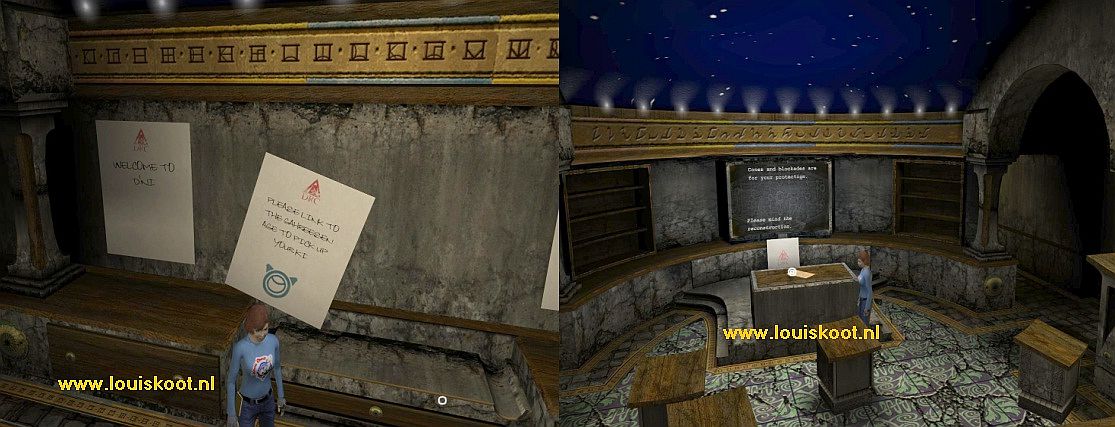
Turn left and view the DRC announcements, hanging on the back wall. Read especially what the second communication tells you: "Please link to the Age of your KI".
Note: This is important if you play this Expansion Pack without having played "Uru: Ages Beyond Myst" first. You must then first link, via Relto, to the Gahreesen Age to get your KI-bracelet from the KI-Dispenser. Without a KI bracelet you can not get any further in this Expansion Pack. Do you already have a KI-bracelet, then this is not important for you and you can go on.
Turn around and walk to the large desk, which stands in front of the "blackboard". There is a letter on this desk. Click on the letter. It will be big in your screen but you can not read it. It is written in a language that you can not read. Put the letter back on the desk. Take a look at the DRC announcements that automatically appear on the "blackboard" and then leave the Classroom through the same door as you entered.
The Nexus Room Linking Book Balcony:
You are then back on the 2nd square. On the other side you can go down a staircase, in the corner, and then walk under Bridge 1 to the Water Garden.
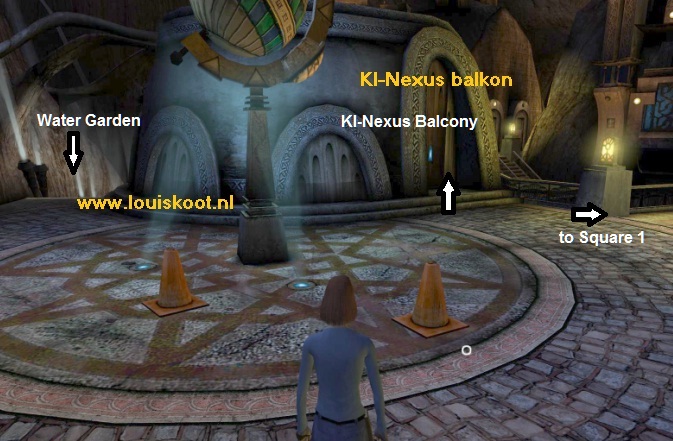
However....Look to the right, to bridge 2. In the corner, to the left of the bridge, you see a Wooden Door. This door also has a blue doorknob. Go to the Wooden door and press the blue door button. The door opens. Go through the door and ......... You are now on a kind of balcony. Right on the other side you see a blue button again, in the corner. Go to it and also open this door but do not go through it.

The door is the connection to Bridge 1 .... leave the door open but do not step outside. You are here in a semi-circular room, with a view over the Water Garden. In the middle of the room stands a small pillar. There are a few niches in the semicircular wall. In front of 3 niches is a Book Stand, where later a book will comes to lie on, but those books you must find first.
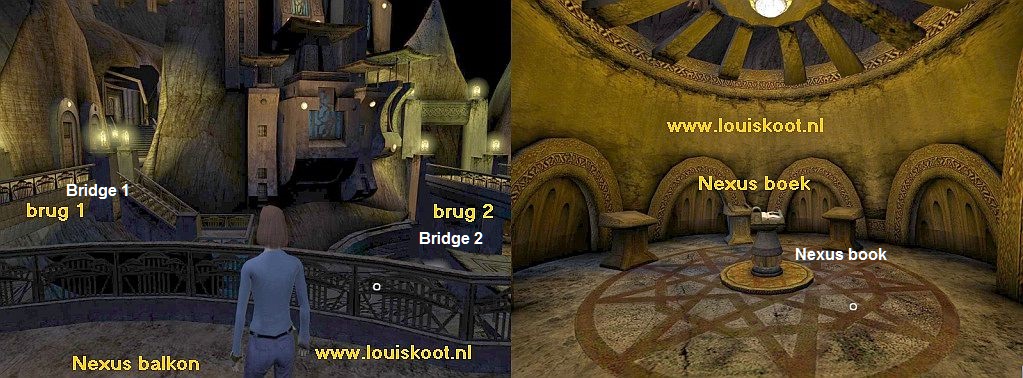
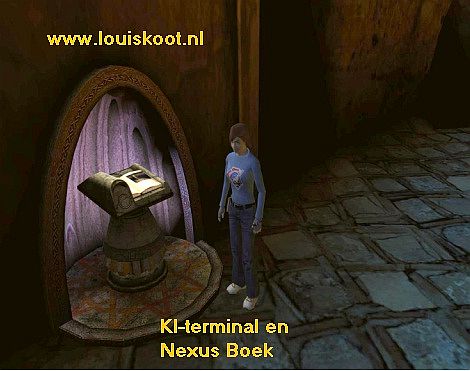
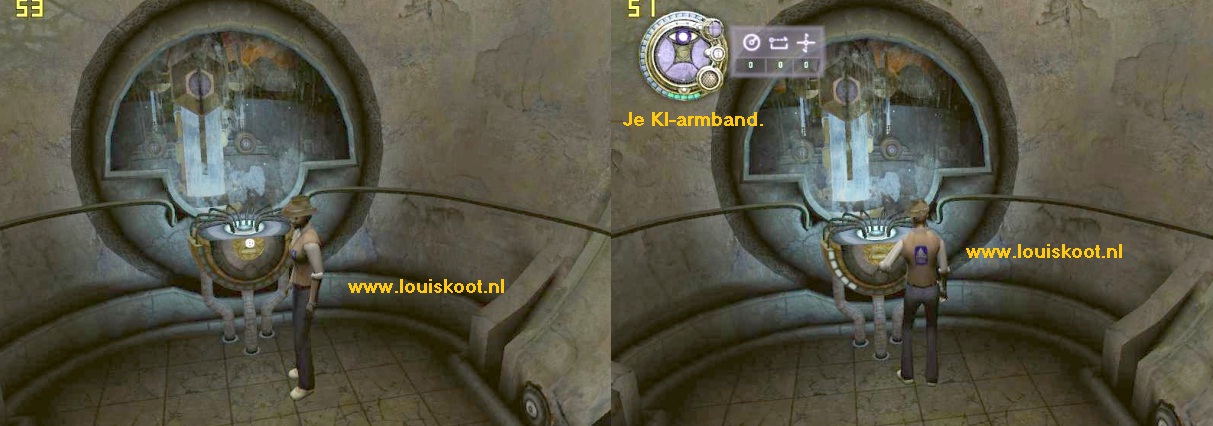
Walk to the pillar. On the pillar is the Nexus room Linking book. The left side of this pillar is a KI-Terminal.
Click on the KI-Terminal and ..... Your Avatar puts his / her hand in the terminal and your KI-bracelet is now activated.
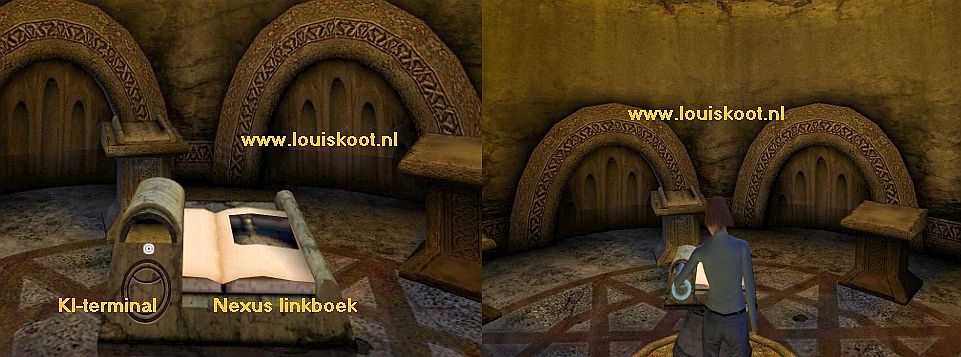
When you have activated the KI-bracelet you click on the Nexus Linking book and then on the link photo .......
......and you will end up in the:
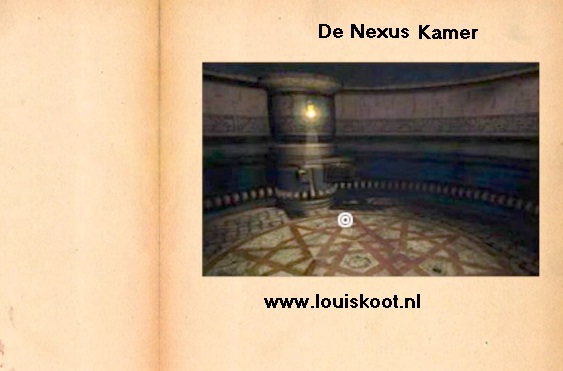
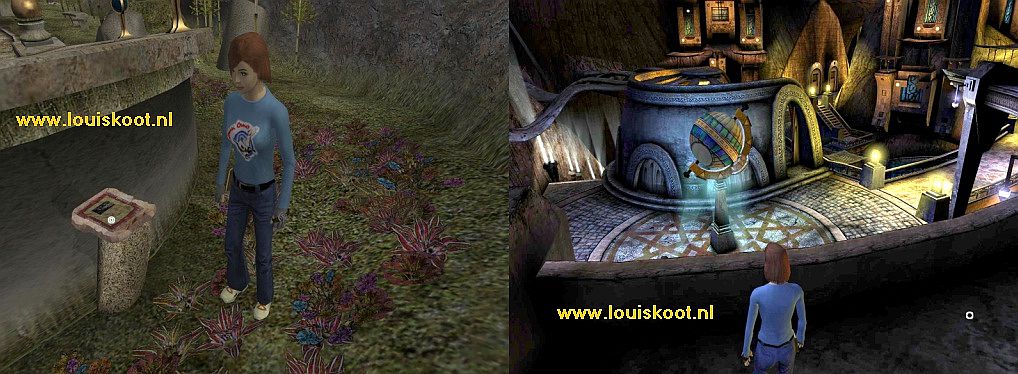
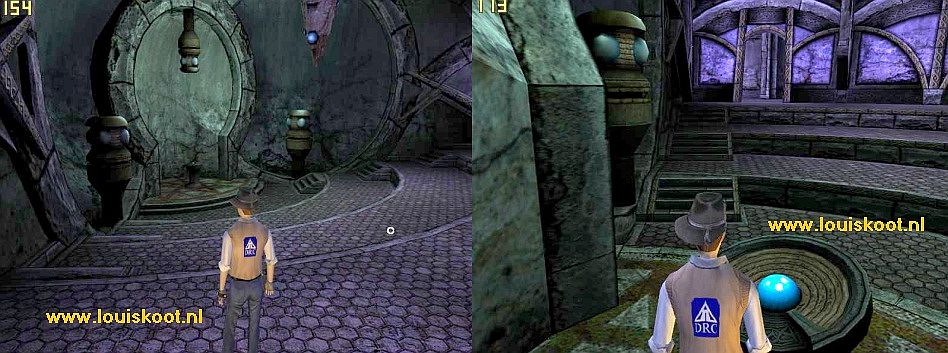
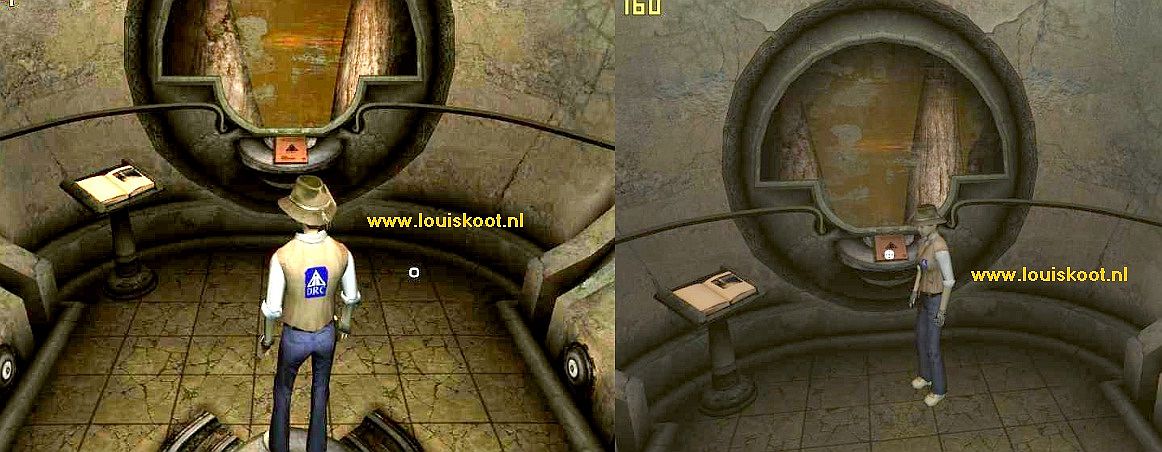
Nexus Room:
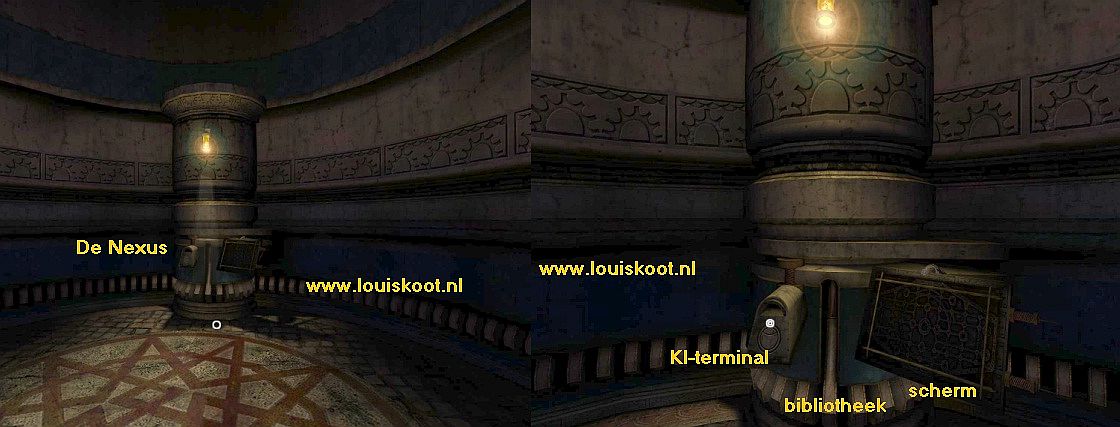
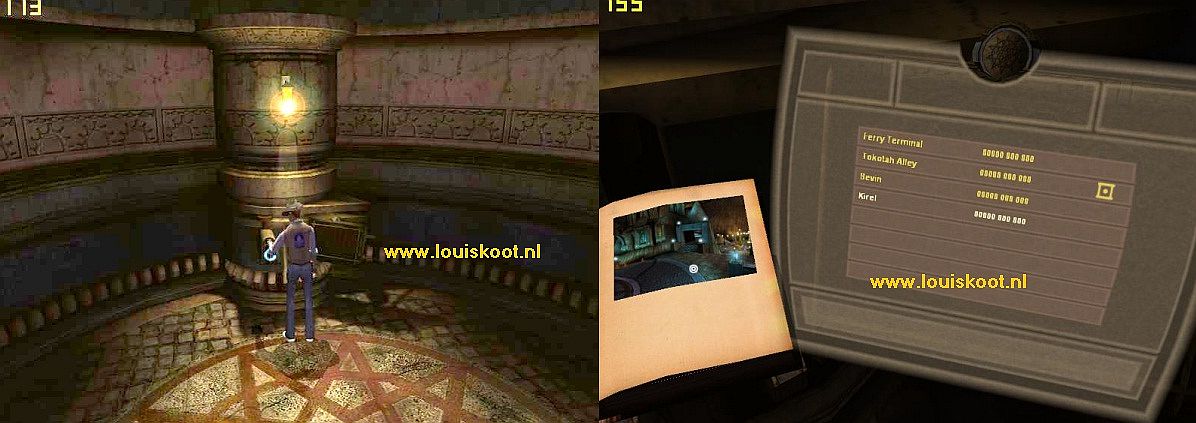
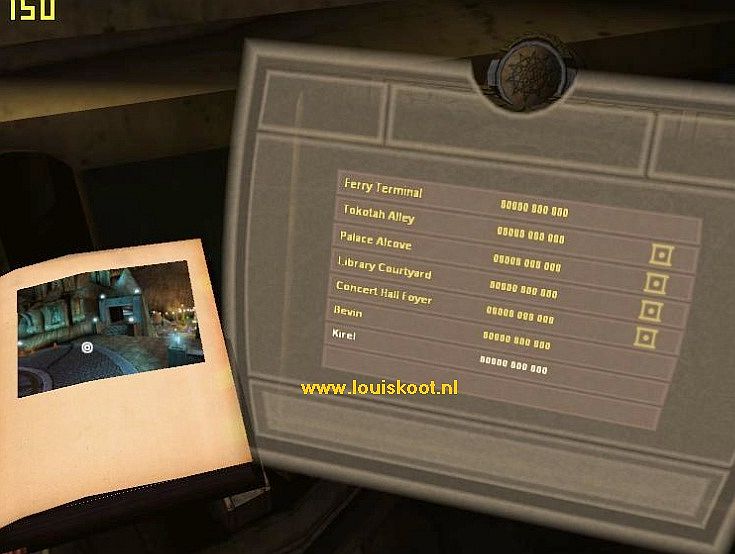
It is a bit dark here. Right in front of you you can see a yellow light burning on a round device. That round device is the Nexus. The Nexus is a library but it is also, just like Relto, a starting point. In the Nexus you will find all Linking Books to Ae'gura, the city, and also the link to the "Great Zero" and the two neighborhoods.
Walk straight to the yellow lamp. You are then standing in front of the Nexus. On the left is another KI-Terminal and on the right you see a Holoscreen that is not active now. So click on the KI-Terminal again and ..... Your Avatar will put the arm back into the KI-Terminal with the KI-Armband and ....... the Holo screen will be activated.
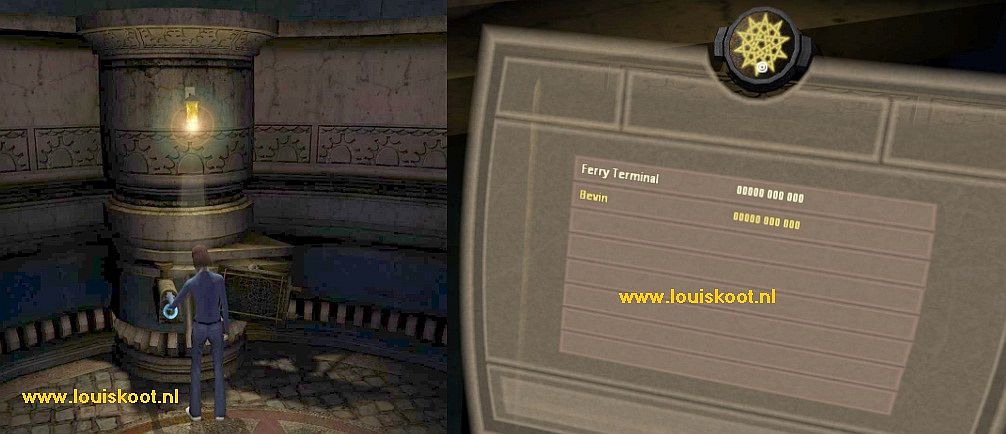
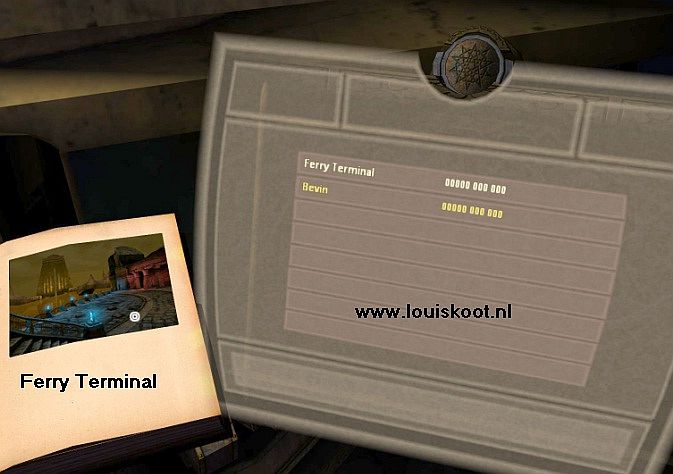
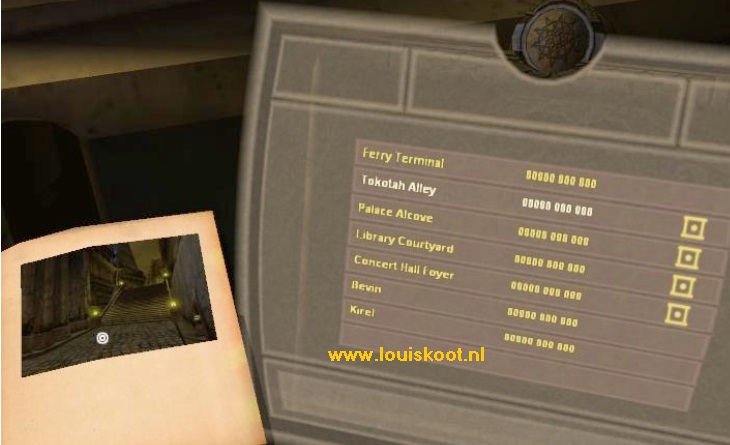
Two links now appear on the Holo screen, "Ferry Terminal" and "Bevin". Well, you are already in Bevin, so click on the "Ferry Terminal" link. The button above the screen appears and turns yellow. Click on the yellow button. The Nexus will now turn around and "spit out" a Book. This is the linking book of the link you clicked on and in this case this is the "Ferry Terminal" book.
Note: The Nexus Linking Book is now also in slot 9 of your bookcase in Relto. When you leave the game and start up again you always start in Relto again. If you want to continue with "To D'ni" then you pull the Nexus Book from slot 9 of the left bookcase to link back to this Nexus Room. From the Nexus you can then link to the new areas.
Click on the link photo in the book and you end up in:
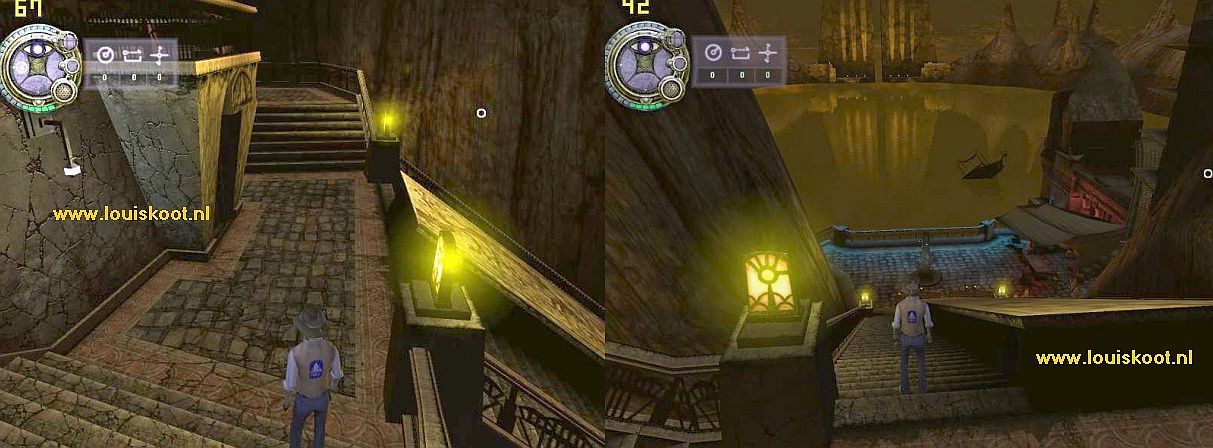
C: Ae'gura: Ferry Terminal:
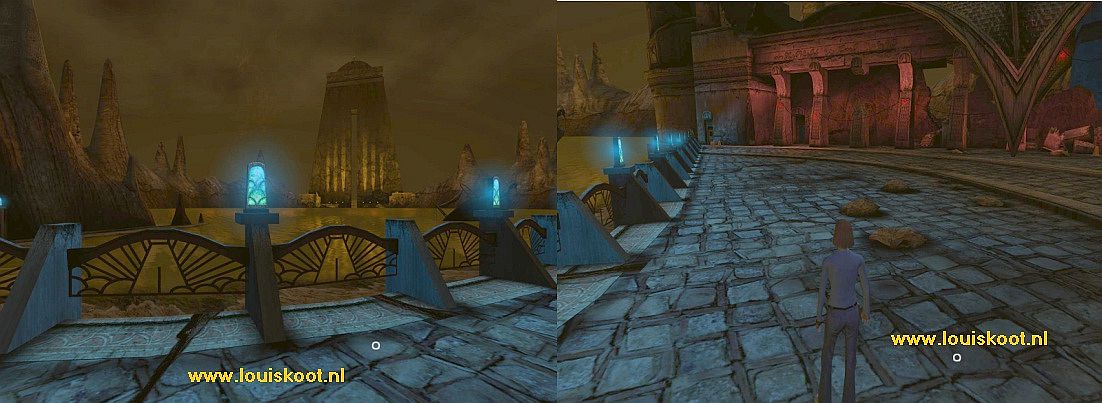
Welcome to Ae'gura......... You arrive at the pedestrian promenade ,at a large lake. It is still night Turn right and follow the promenade all the way back, until you can not go any further, you walk again against 3 of those orange pylons, behind these pylons there is a ledge that goes further along the wall, but is blocked by a "roadblock barrier"....... Turn to the right........ You see a gate in the wall... Go to and then through the gate and walk on to the "blue light."
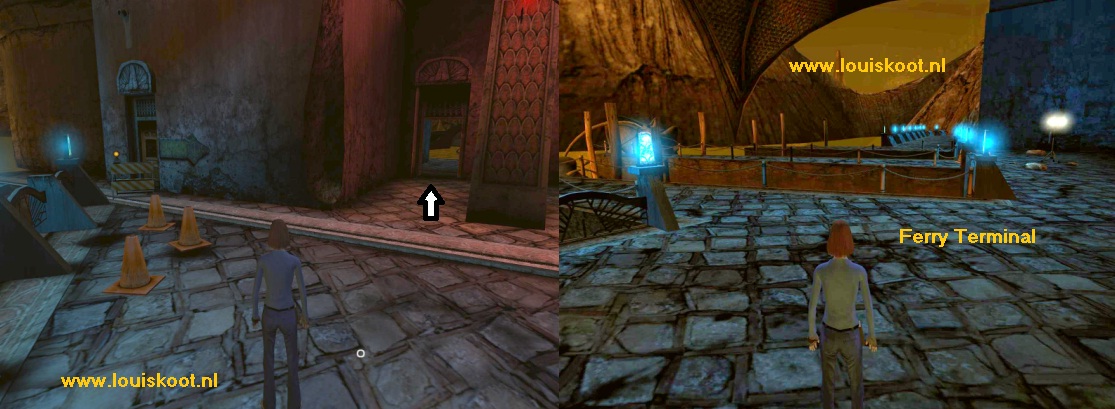
You are on the other side of the gate and in the area known as the "Ferry Terminal." So this is an inlet of the large lake, ........3 stone jetty's are sticking out of the water, you can take a look around here and you can walk onto each of the three jetty's. Shipwrecks float in the water......... there is little to do here now but take a good look around here...... When you are tired of this, go back through the gate to the promenade and follow it back to the right until the long staircase that goes up the mountain.
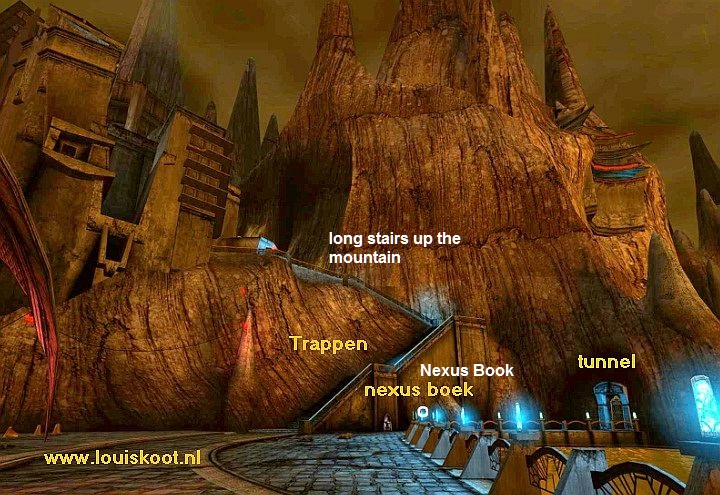
Go up the long stairs........you come on a plateau and here is a DRC tent.
On the left, a kind of "pyramid" staircase goes further up the mountain, but you can not go up that staircase because the DRC has put up a barrier.
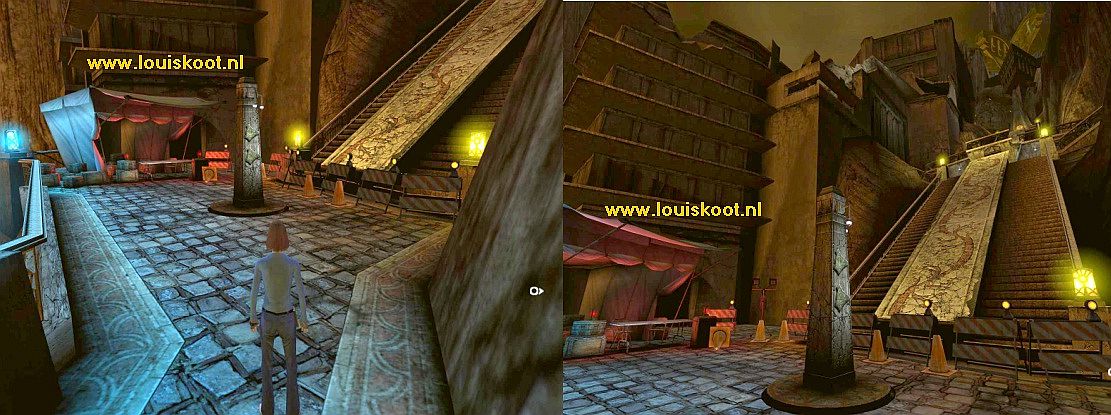
You can not enter the tent either and you can not get go behind the tent either. But from this plateau you have a beautiful view over the nightly lake, so enjoy it for a while. When you have enough of it then you descend back down the stairs to the promenade and follow the promenade further to the left.
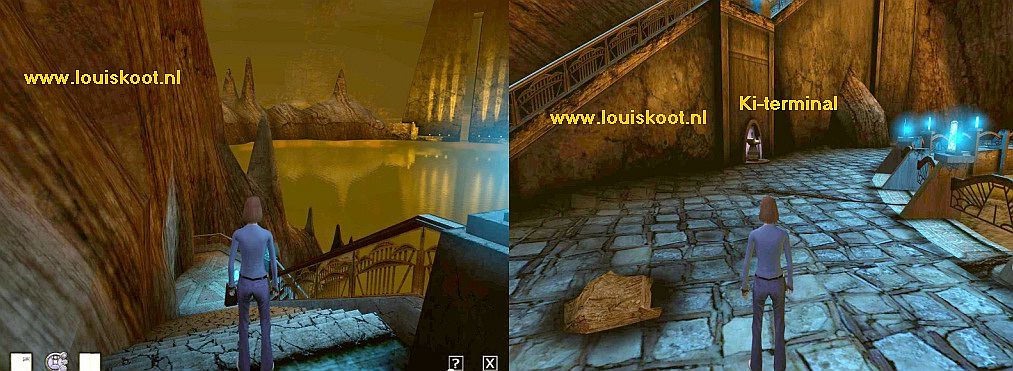
Beyond the mountain stairs there is a pillar with a KI-Terminal and a Nexus Room Linking book.
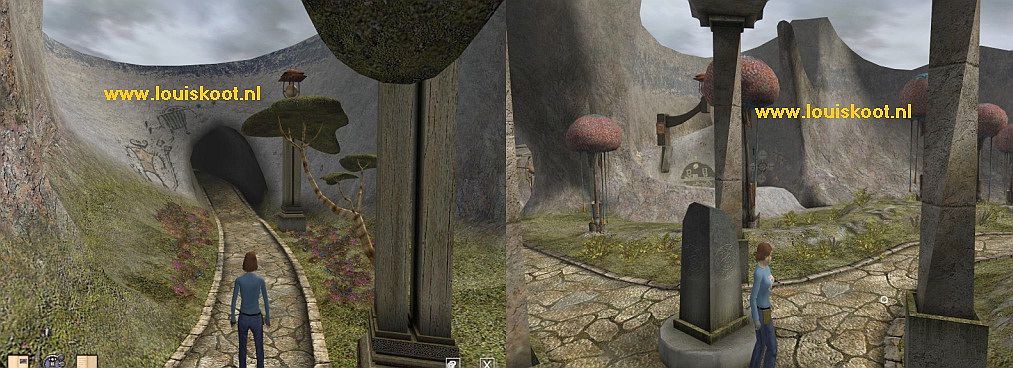
However, there is no need to use the KI-Terminal and this linking book now, so go walk further and you'll come to a tunnel. Enter the tunnel and walk to the back of it.
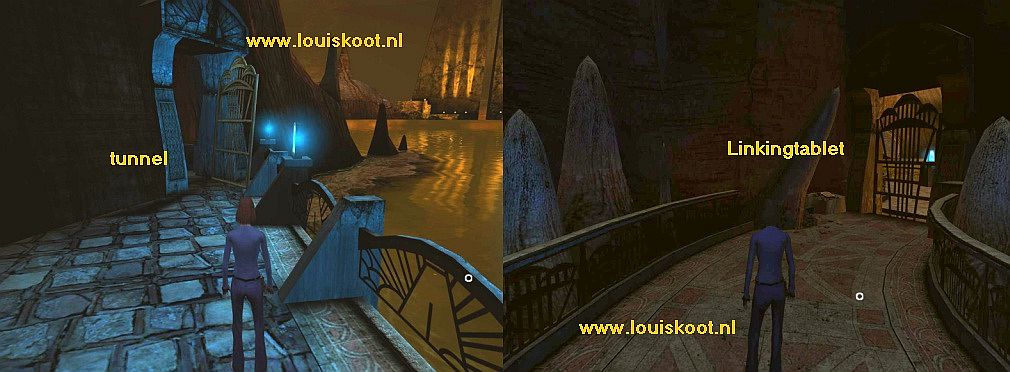
The other / entrance exit of the tunnel is closed by a gate and this gate is locked up. To the left of the gate is a Bahro Linking tablet on a stone.
Stand in front of the Bahro Linking tablet and then click on the Linking tablet and........
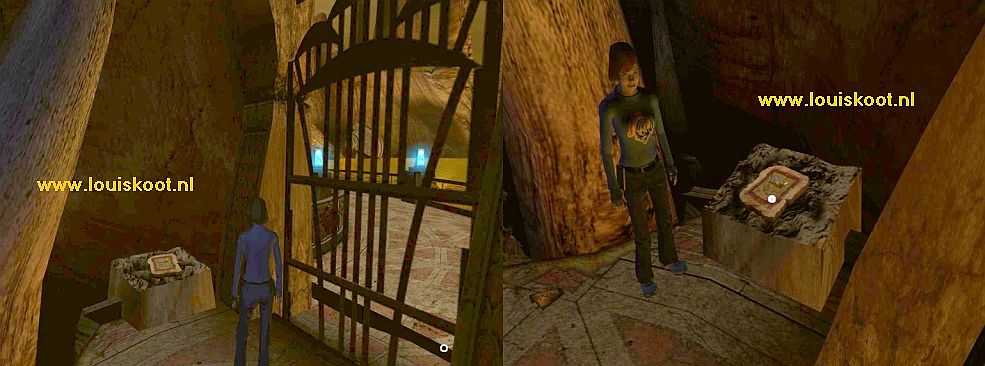
This Tablet links you to a place in the Teledahn Age. So click on the image and you will be taken to Teledahn.
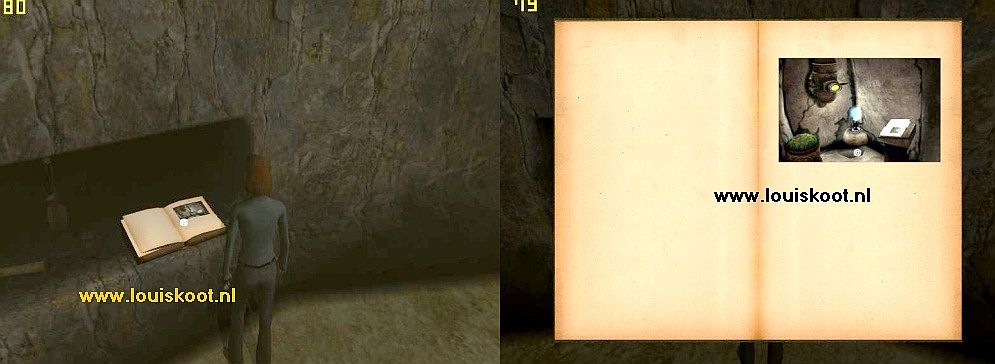
You end up on a wooden walkway in an unknown corner of the Teledahn Age.
At the end of the path lies a Relto Page .... Grab the Relto Page and click on the green drawing to add this page to your Relto Book. Then find this page in your Relto Book and click on the green drawing again. Now a wooden jetty has been added to your Relto island. Turn around. You see that this path is a Dead End. So open your Relto Linking Book and link back to Relto.
Relto:
You return to your house in Relto. Walk out. On the left side of your house is your new jetty and around the island a large number of small rocky islands are floating in the air / sea now.
You can jump to some of those rocky island. If you miss an island, you will automatically end up in your Relto House again.
Go back into your house and to the left bookcase. In Slot 9 you now have the yellow "Nexus Linking Book".

Through this yellow Nexus Linking Book you link directly back to the Nexus room, but we do not do that now. From "Uru Ages Beyond Myst" we still miss 1 link to a "Dead End" spot and we are going to look for that link now so that this link also ends up in the book that is in slot 7. We will now return to the Eder Gira Age. If you have played "Uru Ages Beyond Myst" according to my walkthroughs then you have activated the 3rd "Journey Cloth" of the Eder Kemo / Eder Gira Age as the last one. So pull the green Eder Gira Book out of the bookcase and scroll to the page with the "Journey Cloth" on it and click on it and.... ...... you will return to:
D: Eder Gira:
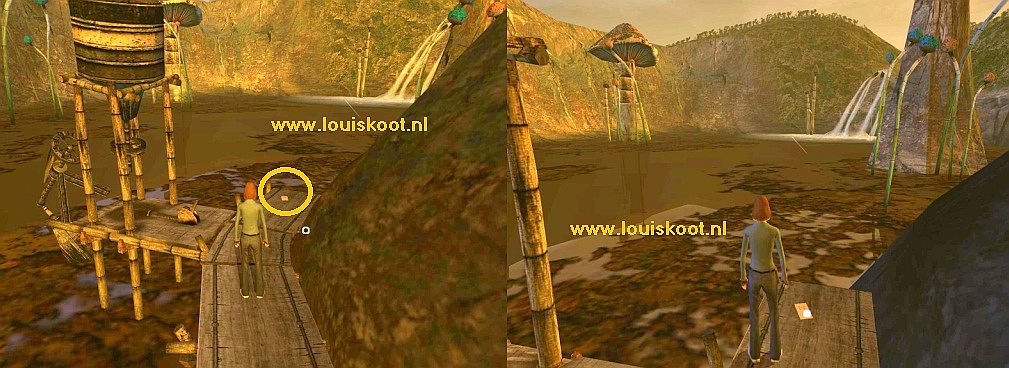
The Eder Gira " Journey Cloth", in the Eder Gira book, has brought you back to the 3rd "Journey Cloth" of the Eder Gira Age. in garden one at the big rock
Follow the path again to the junction and then continue through the 1st tunnel to the "Border Stone".
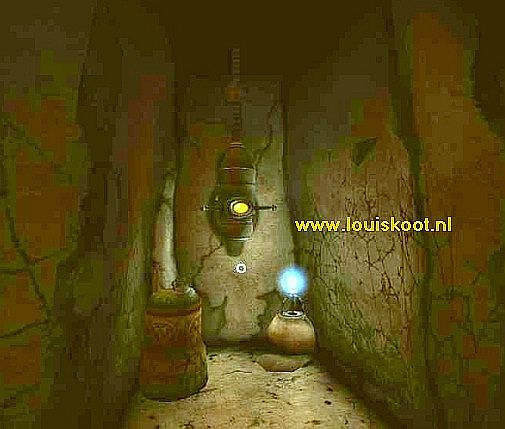
At the "Border Stone" you follow the path to right, to the "Floating and Revolving Obelisk".
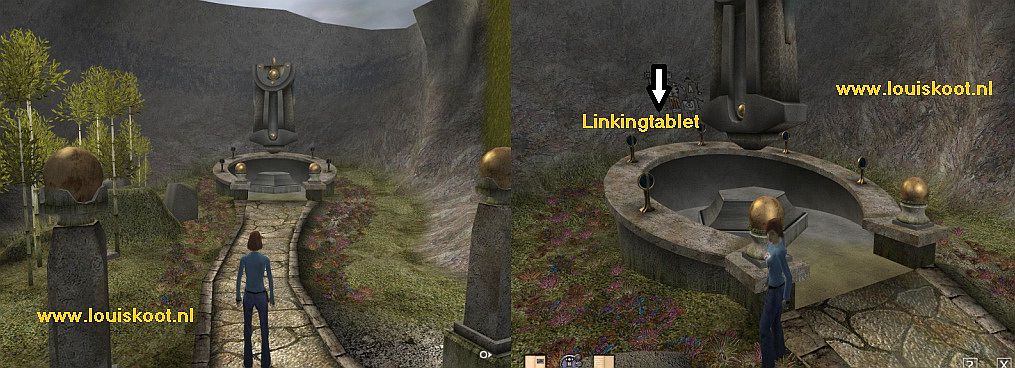
Walk, to the left or to the right, over the grass to the back of the Obelisk. .... In the round wall is there's now a stone and on the stone is a Linking Tablet.
Click on the Linking Tablet to grab it and then click on the Link Picture and ........ The Linking Tablet zaps you to a Balcony above Bevin Square 2.
Well ..... you can try to jump down from the balcony but that will not work. This balcony is therefore a "Dead End" but later it becomes important. The link to this balcony is now stored in the Bevin Linking Book in Relto. Move your cursor down to reveal the Relto book and link back to:
Relto:
Do you remember that you went to the "Douglas Sharper's Balcony room" in the Teledahn Age? You did that then via the Linking tablet that you found in the "Round Upper Room". That is the room with the aquarium. The link to the "Douglas Sharper's Balcony" was then saved in the Linking Book that is in Slot 7 of your bookcase. So pull Book 7 from the bookcase. The Link photo to the "Douglas Sharper's Balcony Room" is the first photo in this book.
Note: When you haven't "Uru Ages Beyond Myst ", or when you did but didn't go to the" Douglas Sharper's Balcony Room" then you do not have the link to it in Book 7. You will then have to link to the Teledahn Age and ensure that you end up in the Round Upper Room to use that Linking Tablet, which is located there, to end up in the "Douglas Sharper's Balcony Room". Read my "Teledahn Age section" in my "Uru Ages Beyond Myst" walkthrough to read how you should do that.
So click on the Link photo and ..... you end up in:
E: Teledahn Age: Douglas Sharper's Balcony Room
So you are in the front room where the 3 paintings hang on the wall and the Linking book to the Round Upper Room lies on the pillar.
The Round Upper Room is the room with the aquarium, above the control room of the Teledahn Age. Turn around and walk into the other room.
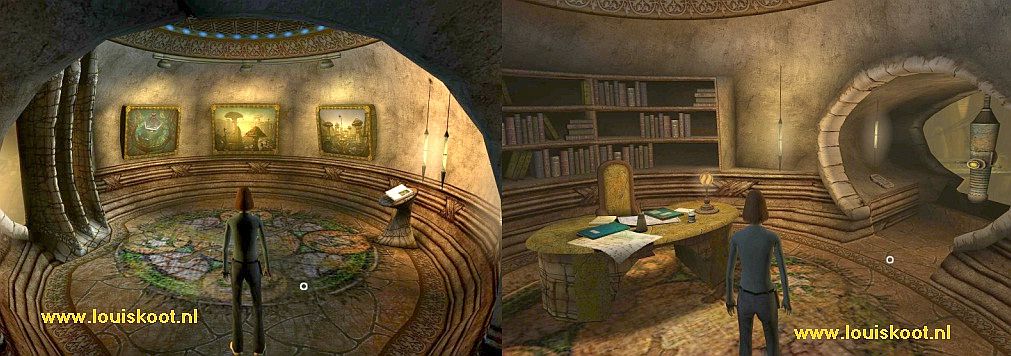
Go to and behind the desk and click on the desk top. Your Avatar takes place in the office chair and you are zoomed in on the desktop. Well, I'll repeat it again, if you've already played "Uru Ages Beyond Myst, then you've already been here before and have seen / read most of the papers on the desk. But now there is also a second green book on the desk, and there is a yellow Post-It note stuck to that book,
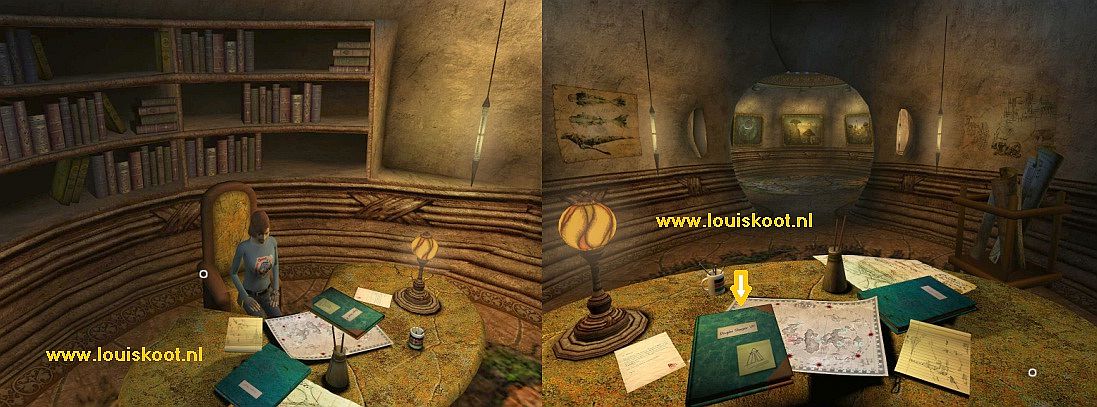
Click on that book and read it through, it is part 4 of Douglas Sharper's diary. Read the book carefully, there are not so many pages.
On page 3 you'll see a few numbers, 2175, 58, -81.....those numbers are on the bottom half of the page

Write down these numbers, they are KI-coordinates and you will need them later. You will also come across these coordinates on page 6. You also read something about a "Spy Room" and about the "Spy Room Linking Book" that is hidden in Teledahn and is accessible via the Prison Cave under the Hut of Teledahn
When you have read the book, you will return to the front room and to the Linking Book.
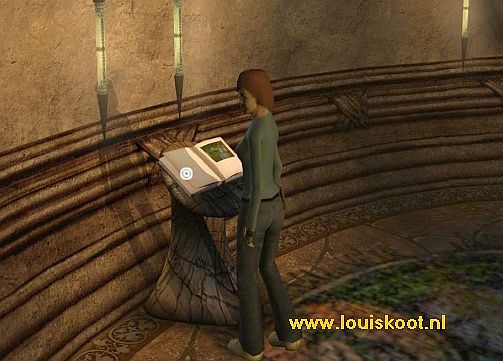
We have just read about a "Spy Room" and a "Spy Room Linking Book" and we find this very interesting, so we are going to look for that "Spy Room Linking Book" now.
Click, at the pillar, on the Linking Book and then on the image and you will end up in the Round Upper Room.
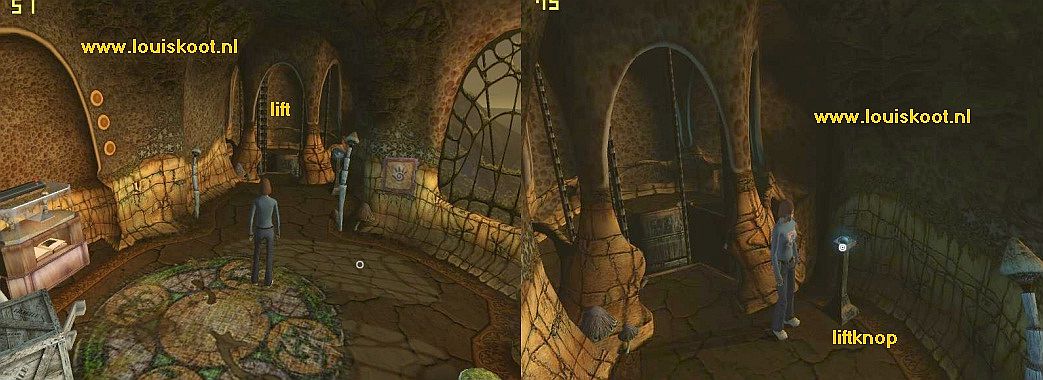
Go to the elevator. If the elevator is not there now, press the Blue Button and the elevator will come up. Go in the elevator and press the Green Button.
The elevator drops one floor down to the control room. Press the green button again and the lift drops further down to the Hut Cave.
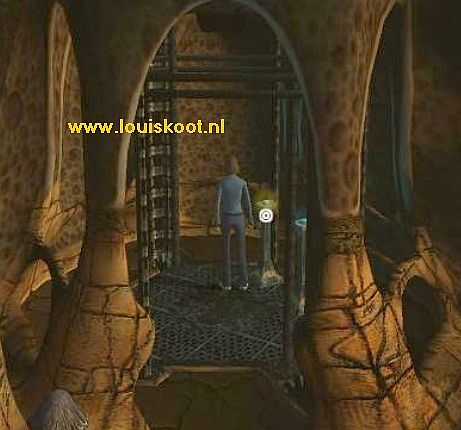
Get out of the elevator and into the hut and to the hatch in the floor.
Note: Again you are at a point where it is useful when you have done the entire Teledahn Age in "Uru Ages Beyond Myst". Then now the water in the water pipe, under this hut has disappeared and this floor hatch will now be open. However, if you did not do the Teledahn Ages before you started "To D'ni", you will now have to go back to the Control Room to pump the water out of the pipe. For this see my "Teledahn Age" section in my "Uru Ages Beyond Myst walkthrough
Go to the open floor hatch and make sure your Avatar stands on the ladder.
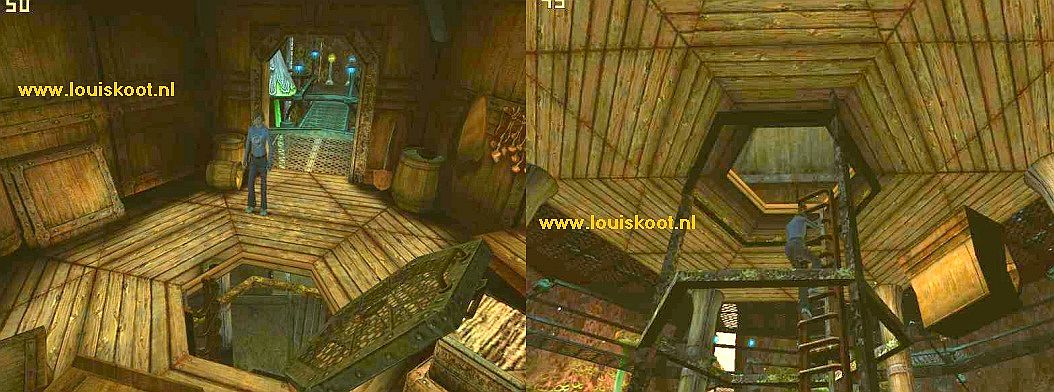
Go down the ladder and you're at the bottom of the cave. Walk to the entrance of the water pipe and descend via the ladder the to the bottom.
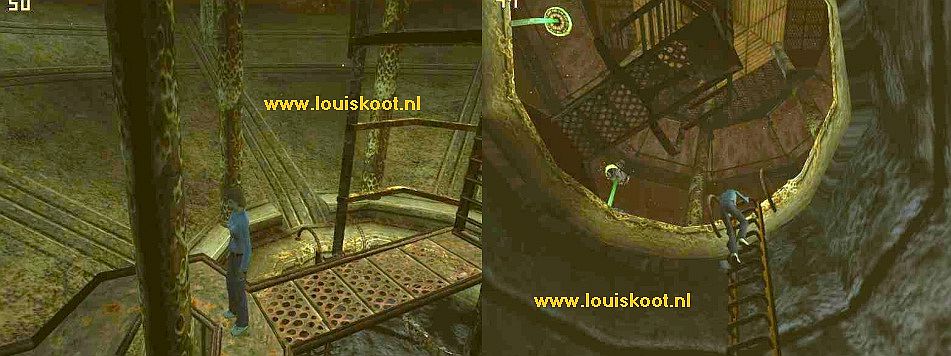
Follow the water pipe up to the light and then go through the hole out of the pipe again.
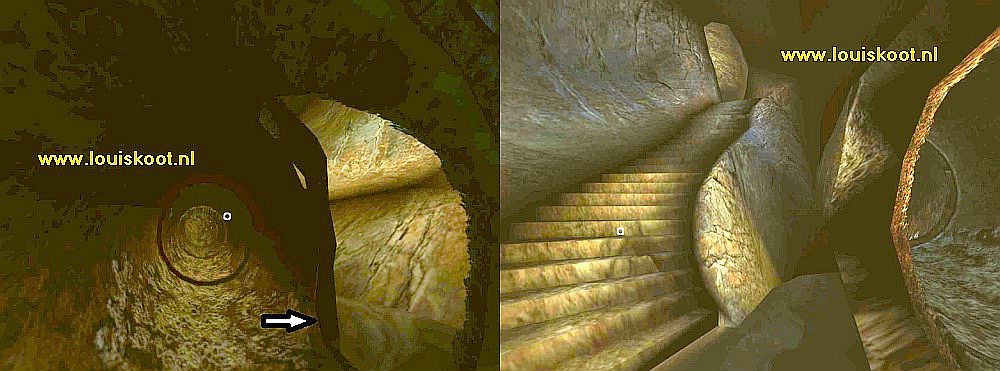
Go up the stone stairs and at the top of the stairs you go left into the Prison Cave:
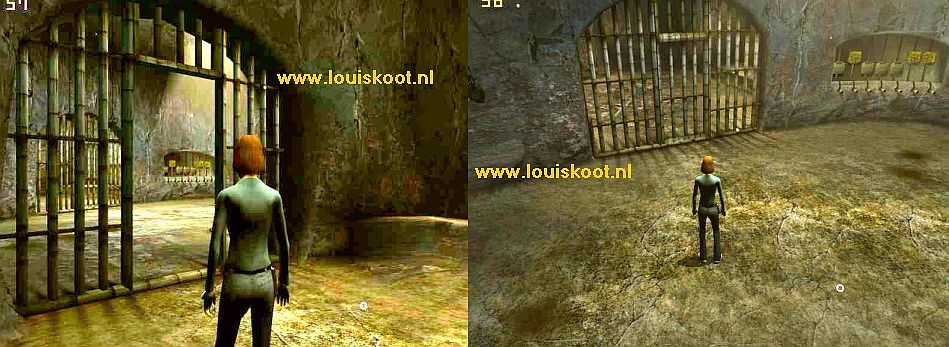
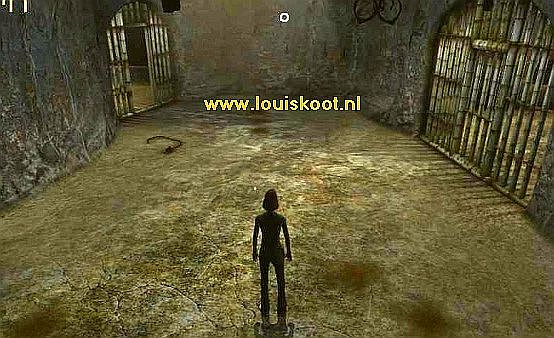
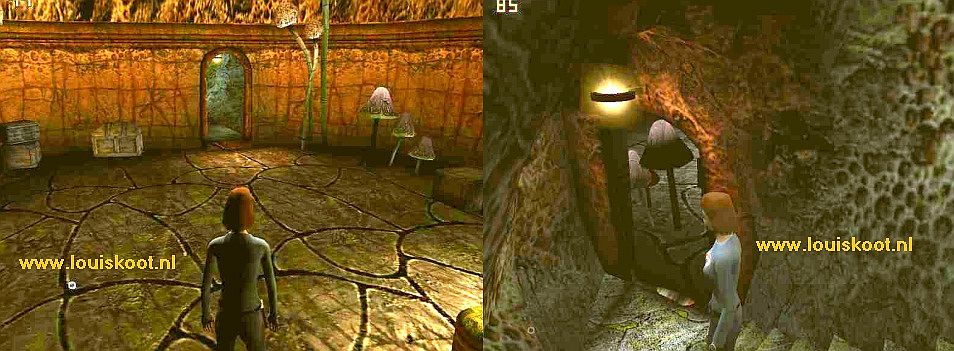
Prison:
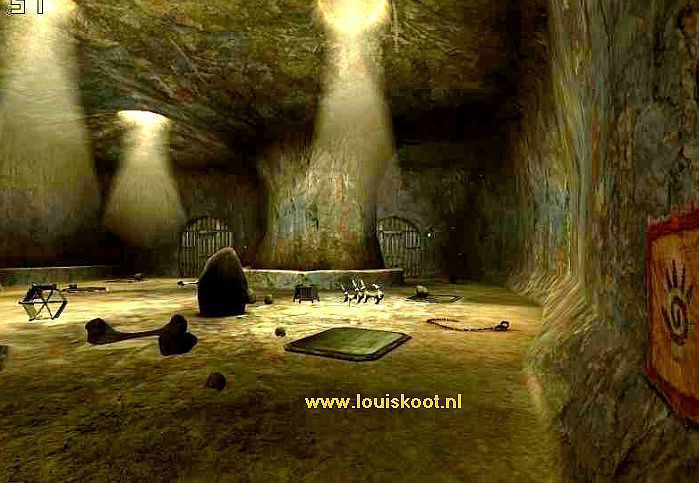
The 2 fence doors to the Cell are, of course, still closed and you have to open them again.
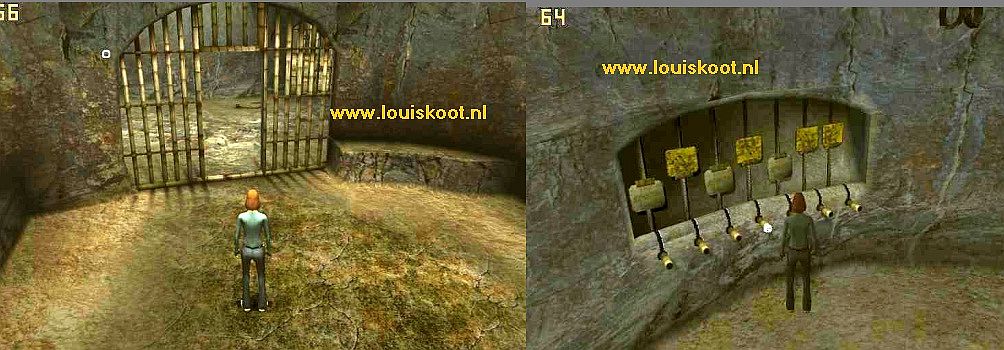
The back door of the cell is open. Walk to the right cell door. Go in 1st person and then look through the bars and look closely at the levers, in the niche of the back wall.
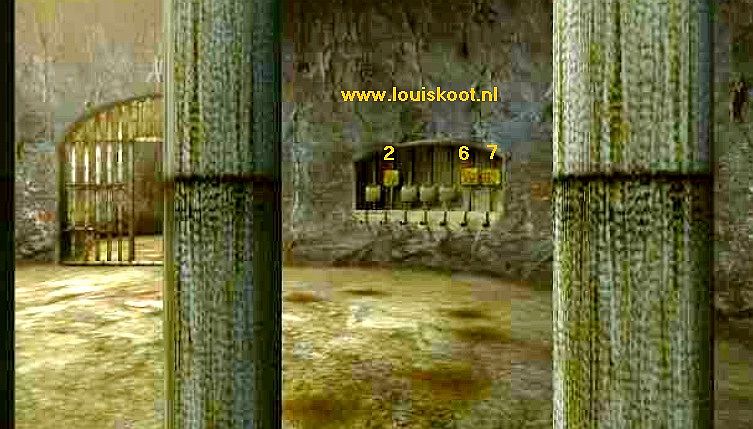
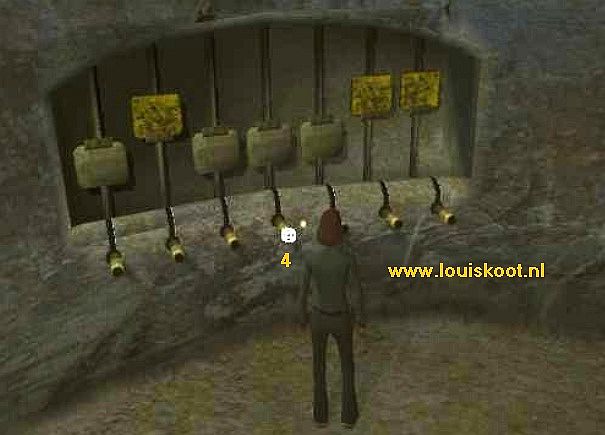
In the niche you see 7 levers and above each lever you see a square. Number those levers / squares, from left to right, 1 to 7. 4 squares are down and 3 squares are up. Note which 3 squares in your game are now up ..... in my game they are the squares 2, 6 and 7. In "Uru Ages Beyond Myst" you have laid a stone on 4 pressure plates here, to open up the 2 front doors of the cell open. I had to place a stone on the pressure plates 1, 7, 6 and 2, but for you it could have been other pressure plates. Well ...... the 3 squares that you see now UP are 3 of the 4 pressure plates on which you have placed a stone and you have to leave those stones on those 3 pressure plates, but you now have to take the stone from the 4th pressure plate and that is the pressure plate that corresponds to the square that is now NOT UP in the niche ...... for me this is Pressure Plate 1.
So go to the Pressure Plate, where you have previously put a stone on but from witch the square in the niche now is DOWN. Kick the Stone off that pressure plate ..... for me that is Printing Plate 1, but for you this can be a different printing plate because that depends on which 4 pressure plates you had to place a stone on in " Uru Ages Beyond Myst ".
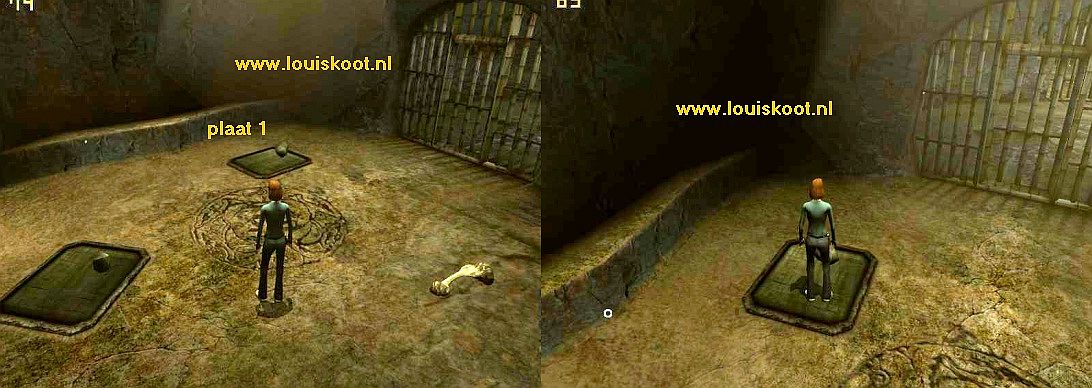
Once you have removed the stone from the right pressure plate, the 2 cell doors will go open, but the back gate closes.
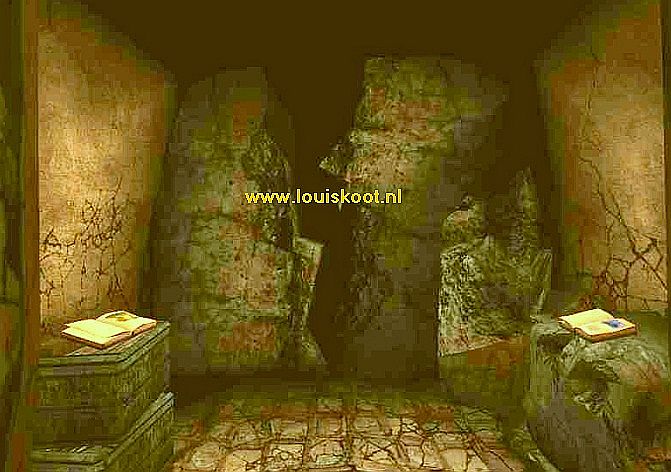
Enter the cell and walk to the closed back gate. Go back in 1st person and look between the bars into the rear cave and ....
......... In the left wall there is now a Niche open and in that niche there is a Linking Book.
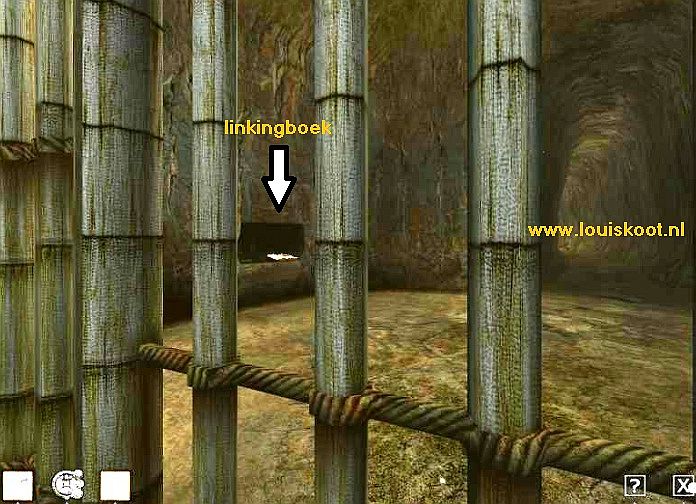
You have to open up the back gate to get at this Linking Book. Step backwards and go to the Niche with the levers in it. Make sure you stand well in front of the Levers. In "Uru Ages Beyond Myst" you have opened the back gate by clicking on one of the 7 levers. I have told you then that you had to remember which lever that was. Now click on that lever again. For me this is lever 4 and I am doing this again now and .......
The backdoor opens but both front doors close again. So go through the now opened back door and .......... Damn ...... that niche with the Linking Book is now gone ........
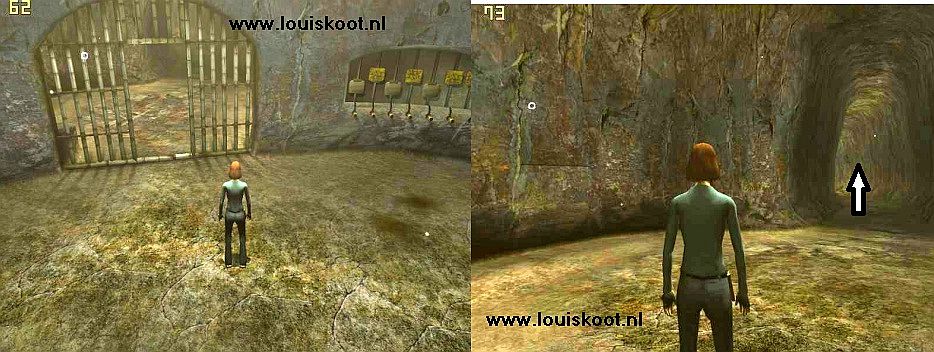
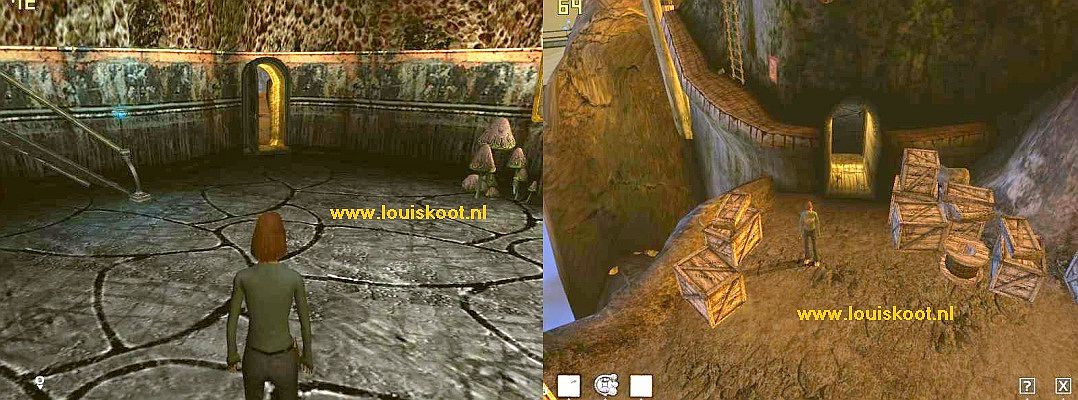
Ok ..... This is a shame ... but not a disaster ..... We must ensure that we can enter this cave while the back door of the cell is closed. Go out through the tunnel. You are then back in the gorge, behind the prison. Go down the wooden stairs and walk the wooden path to the Drawbridge
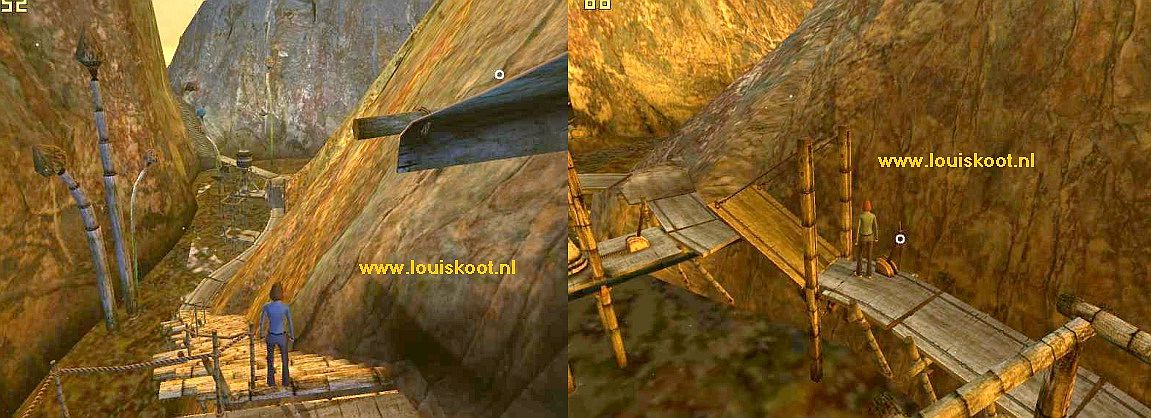
.In "Uru Ages Beyond Myst" you could only close this bridge half way and you even had to jump at it to get the bridge half down, because the Bridge lever did not work then . Now the Bridge lever works, so click on the bridge lever and ......... now the bridge goes all the way down. You have now made a connection from the Upper Dome Grotto to the back entrance / exit of the Prison.
Do not go over the Drawbridge now but turn around and follow the route back to the prison cell. You thus enter the prison via the back entrance / exit. The back door of the cell has to close again because then the Niche will appears with the Linking Book in the cave again. Go back to the 7 levers and click again on the lever that you have clicked on before, so for me it is Lever 4 and ........
The back gate closes again and the two front doors are open again. Now that niche is also open in the wall but of course you can not access it now.
Relto:
You now have to go back to the area behind the prison to get back here via the Drawbridge and the back entrance ........ If you have followed my "Teledahn" walkthrough then you have the 7th "Journey Cloth" activated in the Upper Dome Grotto. So take out your Relto Book and link back to Relto. In Relto you go to your left bookcase and you pull out the Teledahn Linking Book. So if you have done the Teledahn Age as I describe it in my Teledahn walkthrough then the "Journey Cloth" in this book will take you to the Upper Dome Cave. Click in the Teledahn Linking Book on the "Journey Cloth" and you will enter the Upper Dome cave.
Back in Teledahn:
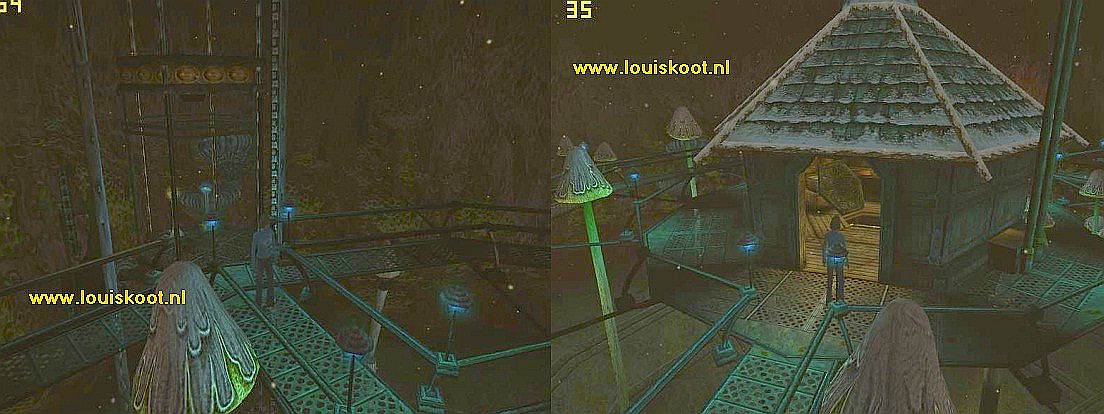
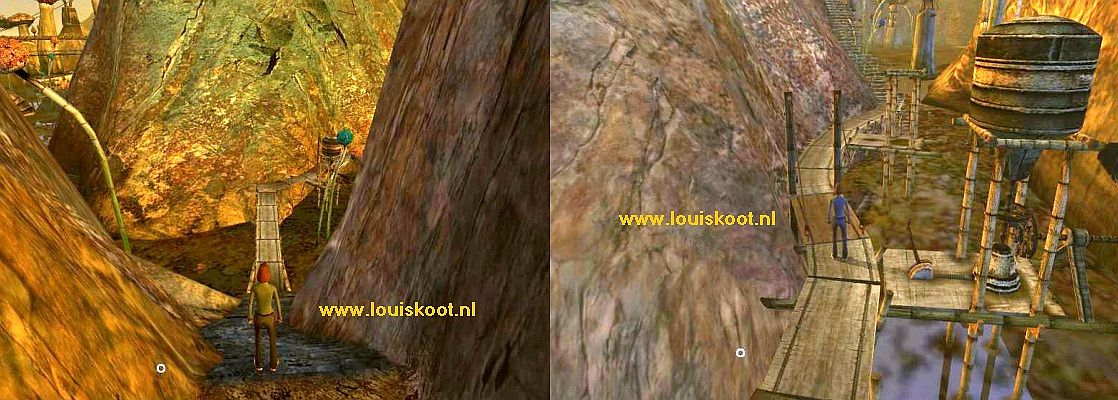
Turn around and leave the Upper Dome Grotto through the doorway and descend via the stairs down to the Lower Dome cave.
Leave the Lower Dome cave through the opened gate and you are back outside in the large open area by the ocean.
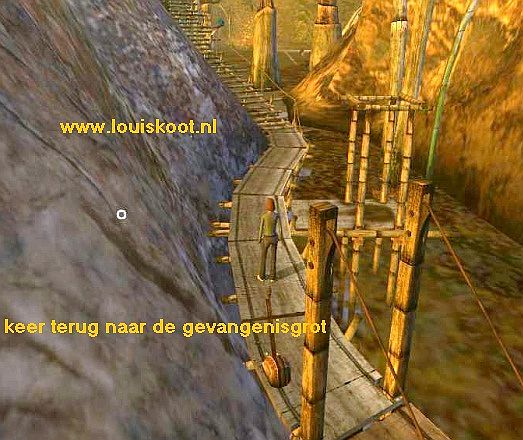
Walk to the right and follow the route back down to the Drawbridge and then continue along the wooden path.
Climb up again via the wooden stairs and then you walk through the tunnel back into the cave behind the Prison Cell.
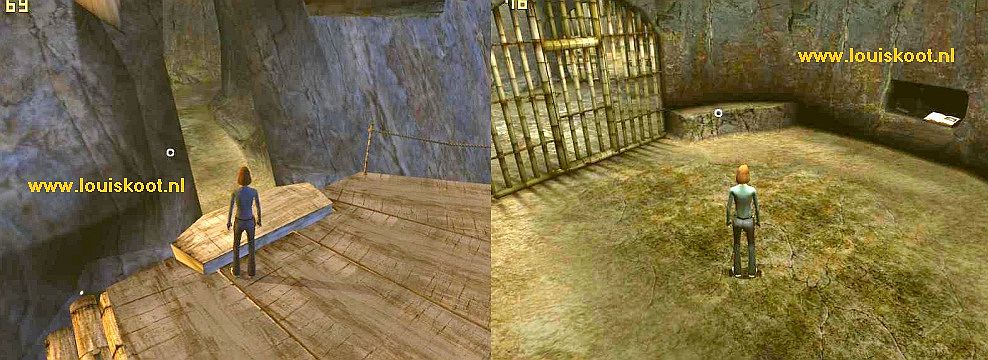
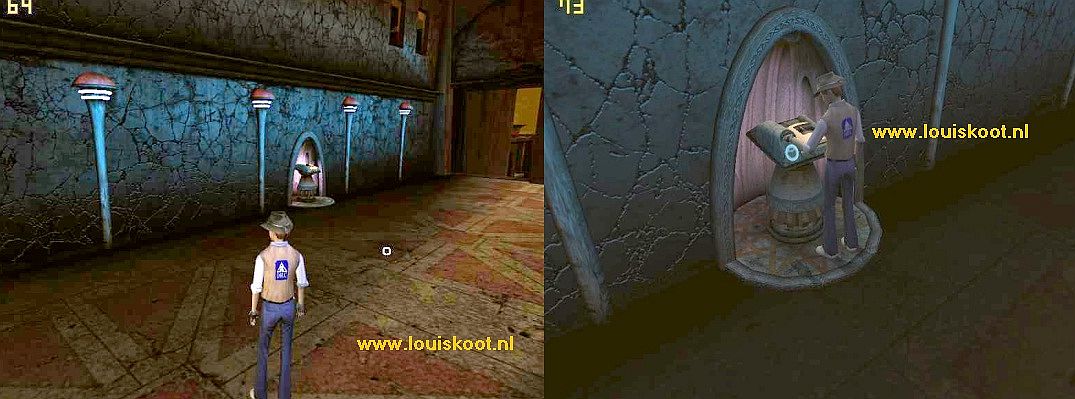
Well ..... because you have closed the back door of the cell, the niche is now open again. And in the niche is the Spy-room Linking Book.
So walk to the niche and click on the Linking book and then on the Link photo and ...... you will be in the:
Spy Room:
Here too it is a bit dark. You are at a periscope. Walk forward and then click on the yellow sight glass of the periscope.
You look into a room through the telescope. To the left in that room you see a large sign. On that board you read "Bob O'Goobo".
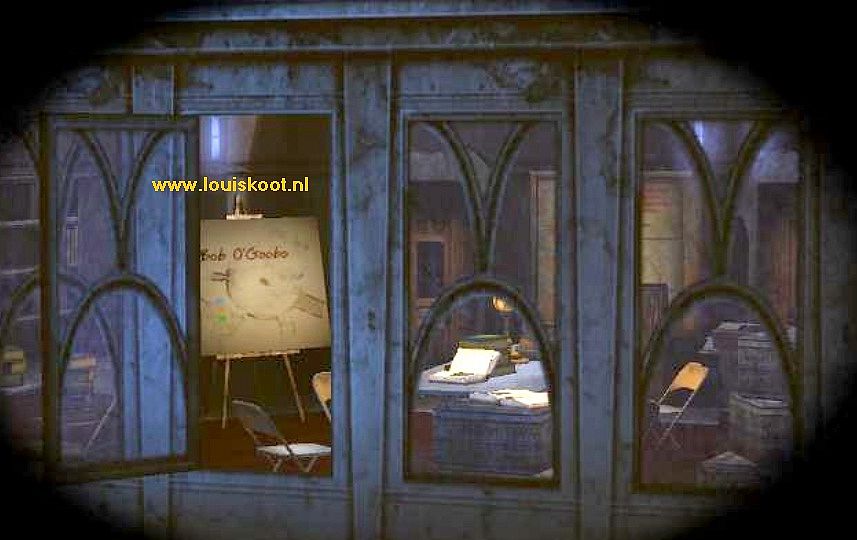
Write down "Bob O'Goobo" or remember it because you will need this soon. Zoom out of the periscope and turn around completely so that you have the telescope in your back. There is a Linking Book on the left and on the right. Go view both books but do not click on the photo in these books.
The left book brings you back to the Round Upper Room and the right book is a Relto Book. But this is not your Relto. It is Relto at night. Turn back to the periscope. On the left under the periscope, a Hat is on the barrel. It is the hat of Douglas Sharper. Take the hat.
Your Avatar puts the hat right on his / her head. Go back to the Relto At Night Linking Book and click on it again and then click on the Link photo and .......
you will end up in ..........
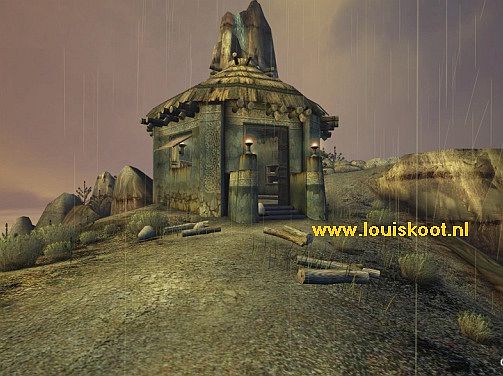
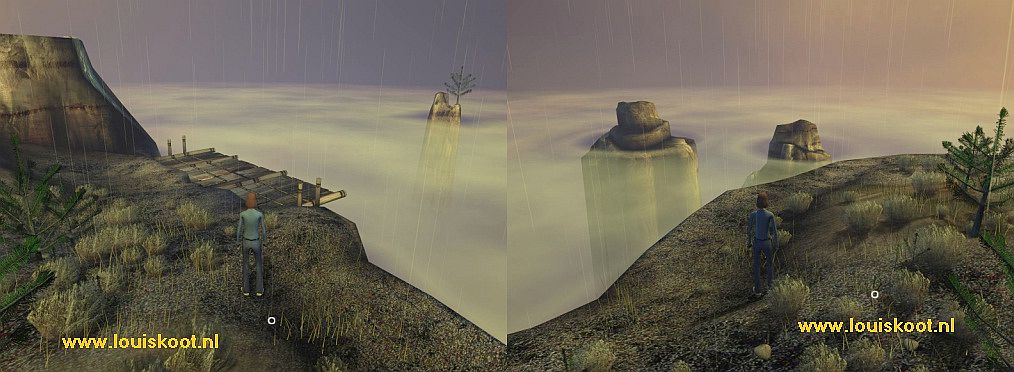
F: Relto At Night:
You have arrived in a Relto House and the shutters are closed and the lights are on. The left bookcase is packed with books.
You can open the shutters via the lever next to the door. It is night and it is raining outside.
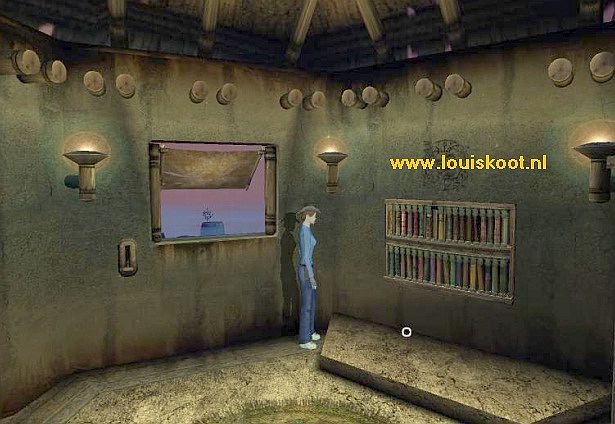
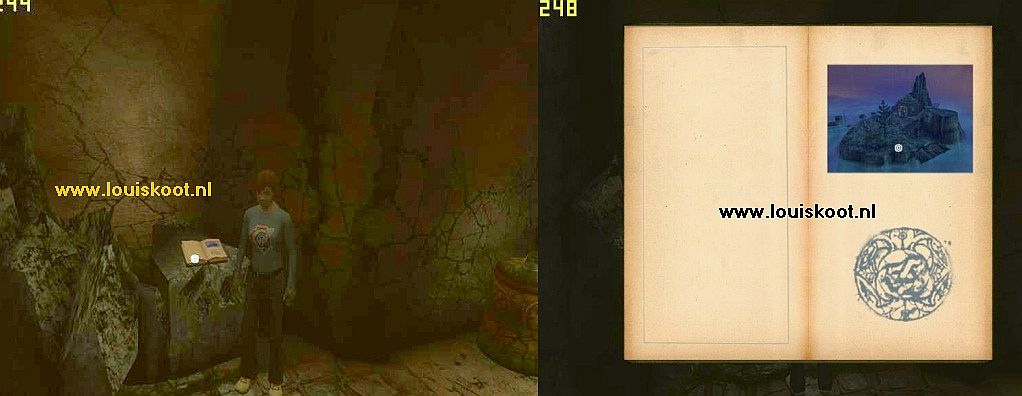
This is not your own personal Relto Age, but this is the Relto of Phil Henderson. If you want you can go outside through the door to let you Avatar get soaking wet by the rain. You can not open the wardrobe closet to change the look of your Avatar. You can only do that in your own Relto house. Go to the right bookcase. On the bottom shelf is a DRC vest and a brown book.
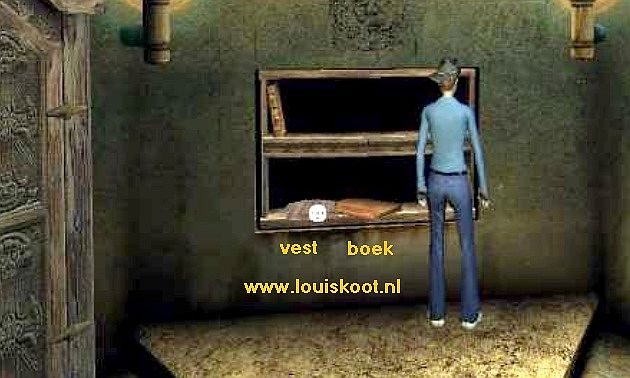
Grab the DRC vest. Your Avatar puts it on .Click on the brown book. It is Phil Henderson's diary. Open the diary and read it.
Then go to the left bookcase and zoom in on it. The bookcase is packed with linking books, 36 in total, but you can only take one book and that is the Neighborhood Linking Book.
It is the 8th book on the top shelf.
Take that book out of the bookcase and click on the link photo and your go to
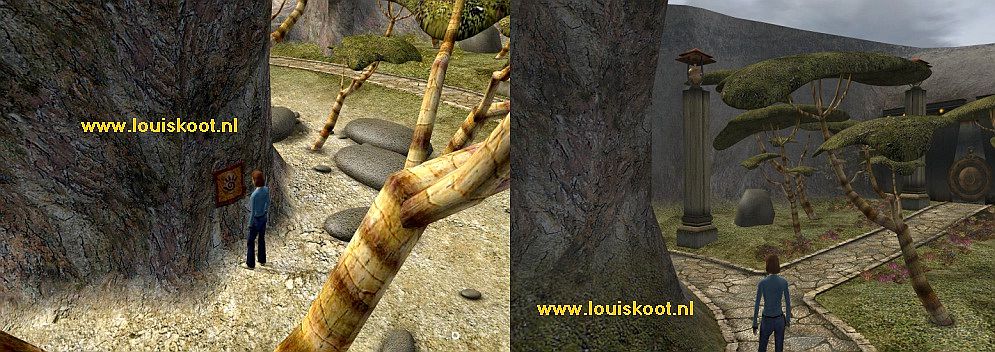
G: Neighborhood: Kirel:
It's night. Kirel is the exact mirror image of Bevin. It is the sister city of Bevin. Here too you have arrived on Square 1, near the Fountain, but here everything is exactly the opposite of Bevin. It is also clearly in decline here. From your point of entry, turn clockwise and walk to the ascending stairs. Go up the stairs and you are on the gallery. Walk through gangway and then go through the first gate on the left and then through the next gate and you are in the:
Community Room:
Well, here too everything is in decline. Walk down to the pillar in the niche. Stand behind the pillar and press the blue button.
From the 3 Audio devices comes the voice of Dr. Watson of the DRC. Listen carefully to Dr. Watson.
Watson tells about the progress of the restoration of D'ni by the DRC and during his story he suddenly mentions a place called the "Great Zero" and he also talks about the "Ferry Terminal". Watson also says something about all kinds of mysterious Bahro Linking tablets, Linking Books and "Journey Cloths" that are constantly appearing from scratch. Watson warns the employees of the DRC not to use these linking tablets and linking books.
When Watson has finished, you leave the Community Room, through the gate on the left, and you go back to the gallery.
You're on the left side of the gallery. Go down the stairs here, turn right and go down the next steps to the fountain square.
Bridge 2:
On this side is the Square Gate that goes to bridge 2 and square 2. Go through the gate and onto bridge 2.
You will see those 3 colored buttons on the bridge that you used to lit the lights of the "Water Garden" in Bevin. Only these buttons are now on the right handrail. Go to those 3 buttons. Again, they are blue, green and orange. Make sure that you are in 3rd person or 1st person well for the 3 colored buttons, so you can click on them.
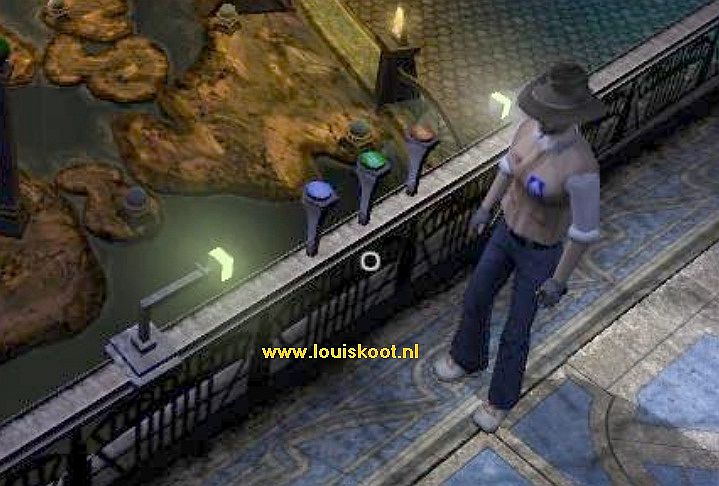
In the "Spy Room" you saw through the periscope a room with a board in it. On that board you read "Bob O'goobo". You probably thought this was a name, but no .... it's a code. The B stands for Blue, the O stands for Orange (Red) and the G stands for green. So press the 3 buttons in this order: Blue, Orange, Blue, Orange, Green, Orange, Orange, Blue, Orange. You have to see for yourself if you find this easily to do in 3rd person or in 1st person. You have unlocked the door of the "Egg Room".
Turn left and continue over the bridge to Square 2. In Bevin there is a D'ni clock on this square, but not here. Because in Kirel everything is exactly mirrored to Bevin, you will find the Wooden door to the Nexus Linking Book balcony now left and the Classroom and the "Egg Room" on the right side of the square. As you exit the bridge, turn left and go to the door of the semicircular balcony room, where the Nexus Linking Book is on the pillar. Open the door and go inside and walk to the pillar where the Nexus Book is located. Do not click on the Nexus Book but click on the KI-Terminal and ...........
........here also your Avatar puts her / his KI-bracelet in the Terminal to activate the bracelet. Now the link to Kirel is also included in your own Nexus and you can always link back to this Kiril town via your Nexus Room. Turn left and now also open the other door of this balcony, but do not step outside. Turn around and go back to Square 2 and go to the left door on the other side. So this is the "Egg Room" door. Press the blue doorknob and go inside.... Walk through the short hallway and
.............. you walk against a very thick pillar and stand for an alcove in this pillar.
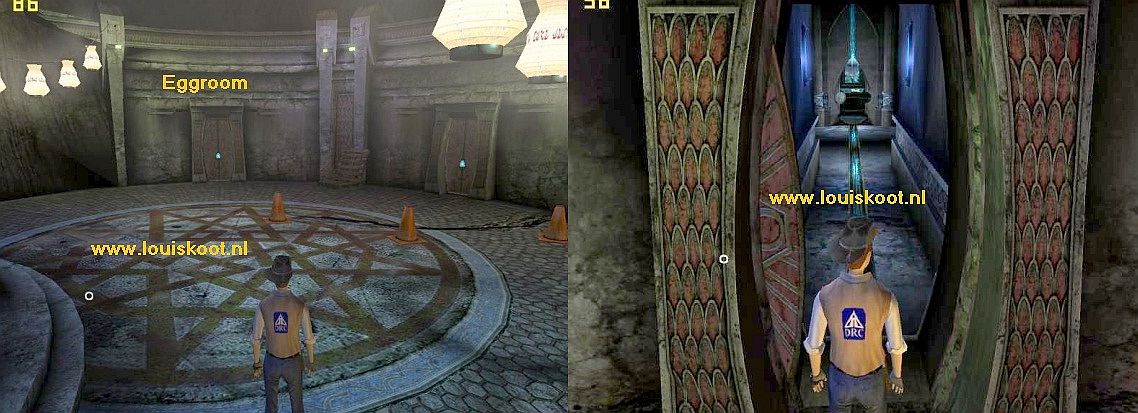
The Egg Room:
The Egg Room is a large round space with a very thick 6-angled pillar in the middle. There are 5 niches in the pillar.
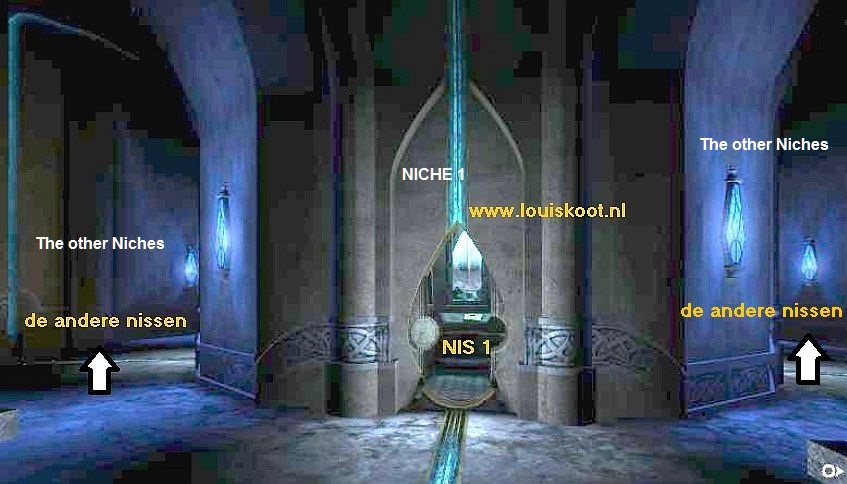
When you enter the Egg Room you stand in front of niche 1. Number the niches as Niche1, Niche 2, Niche 3, Niche 4, Nich3 5. Niche 1 is thus directly opposite the entrance door of the Egg room. Walk to the left, around the pillar, and you will automatically arrive at Niche 2, Niche 3, Niche 4 and Niche 5 and back at Niche 1.
In each of the 5 niches is a Bahro Linking tablet. Each of those 5 Tablets links you to another location in the Neighborhood. These 5 locations are: the "Great Zero", the "Library Courtyard", the "Concert Hall", the "Palace Alcove" and the "Tokotah Alley". You should travel to all these 5 locations via the Bahro Linking tablets in the niches, in order to place these links in your Nexus, in your Nexus Room. The order in which you are going to do this is not really important, but let's not mess about it now and put a bit of structure into it. So let's just do it in a sequence and so we start with
Niche 1: Tokotah Alley
Go into niche 1. Through the window in the niche you see the EGG.
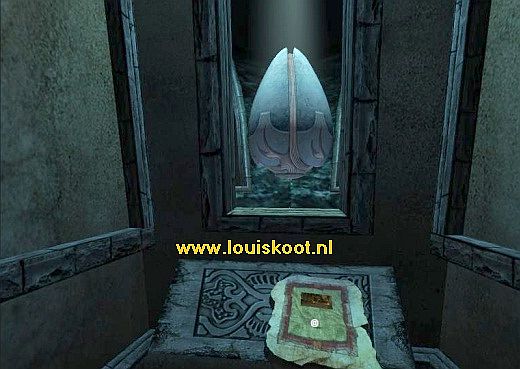
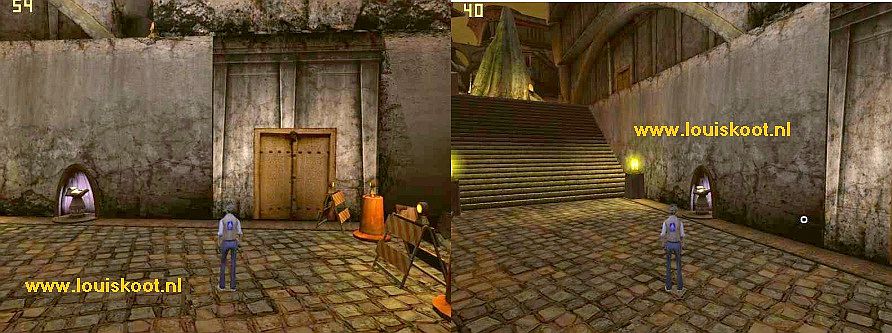
Pick up the Link tablet and click on the link photo and ...... You will end up in the Tokotah Alley.
You stand in front of a wide brown metal door in a wall. Turn to the left. You will then see the pillar with the KI-Terminal and the Nexus Linking book
Go to the pillar and click on the KI-Terminal to place the link in your Nexus.
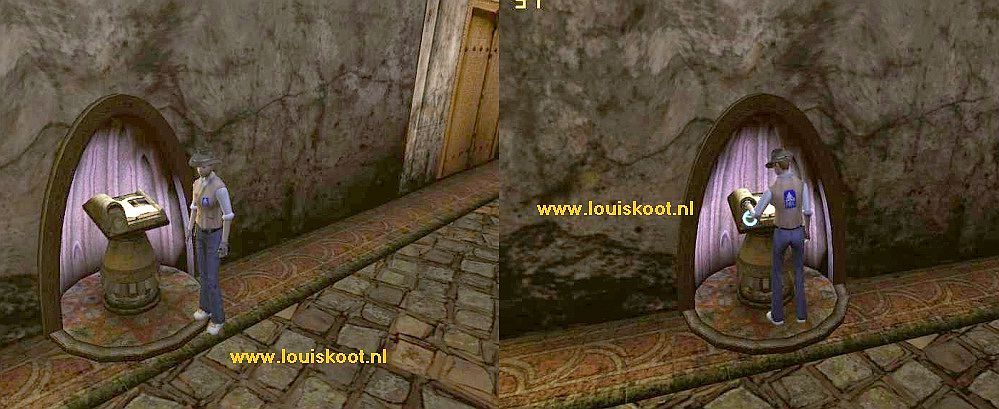
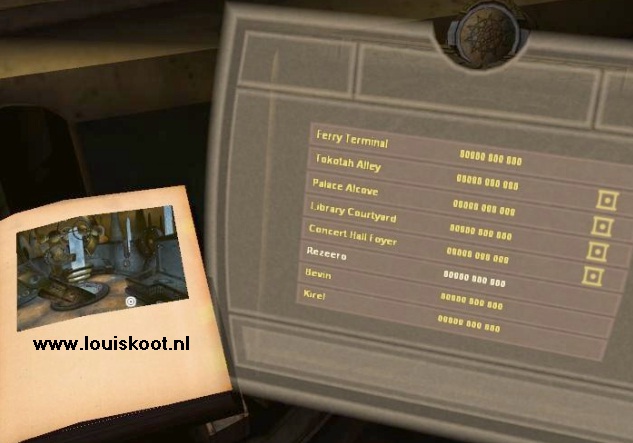
Then click on the Nexus Linking Book and then on the link photo and you will return to your own Nexus Room. Go to the Nexus and click on the KI-Terminal to activate the Holo screen again. On the screen now the Kirel link and the Tokotah Alley link have been added. Behind the Tokotah Alley you see a square with a dot.
Click on the Kirel Link and then on the yellow button and ... The Nexus spits out the Kirel book. Click on the picture and you'll return to:
Kirel:
You'll come back to the fountain at Square 1. Go back to Square 2 via the square gate and bridge 2 and enter the Egg Room again.
When you are in front of Niche 1 again you now turn right to the 1st niche on the right side .... This is:
Niche 5: Palace Alcove:
Use in Niche 5 the Linking tablet and you end up in the Palace Alcove. Turn right and you will see the KI-terminal / Nexus Book pillar
Go to the pillar and use the KI-Terminal to also add this link to your Nexus. Then link back to your Nexus Room via the Nexus book. Go back to the Nexus, use the KI-Terminal to activate the Holo screen again and click on the Kirel link again and then the yellow button to bring out the Kirel Book. Click on the book and you will return to Kirel.
Niche 4: Library Courtyard:
Go over Bridge 2 to Square 2 and then to the Egg Room. When you are in front of Niche1 you walk right again and pass Niche 5 to Niche 4. Go in Niche 4 and use the Linking Tablet to.....You end up in the Library Courtyard. Upon arrival you stand before a wall. Turn around completely so that you have this wall in your back. Straight ahead you see the KI-pillar, standing at a tent.
Go to the KI-pillar, use the KI-Terminal and link via the Nexus book back to the Nexus Room. Use the KI-Terminal here again and on the Holo screen you activate the Kirel Link again and click on the Yellow button again. Click on the Kirel Book to go back to Kirel. Enter the Egg Room again and now you go to Niche 2
Niche 2: Concert Hall Foyer
In Niche 2 use the Linking tablet and you end up in the Concert Hall Foyer. Turn around. At the top of the steps is the KI-pillar.
Well .... you must know the drill by now ..... Go to the pillar, put your hand in the KI-Terminal and link through the book back to your Nexus room. Use the KI-Terminal in your Nexus room again to activate the Holo screen. All 4 links, from the Niches in the Egg Room, are now added to your Nexus and 7 links are active on the screen.
The links :Tokotah Alley, Palace Alcove, Library Courtyard and Concert Hall Foyer all have a square with dot. However, there is still 1 link missing.
So link back to Kirel now. Back in Kirel you enter the Egg Room again and now you go to and into Niche 3. Use the Linking Tablet again in Niche 3 and you will now enter:
Chapter 2: Great Zero:
A: Great Zero Antechamber
All 5 locations that you now have made available via the 5 niches in the Egg Room are now also accessible via the thick brown book in your bookcase in Relto.
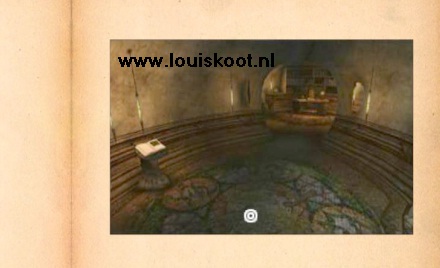
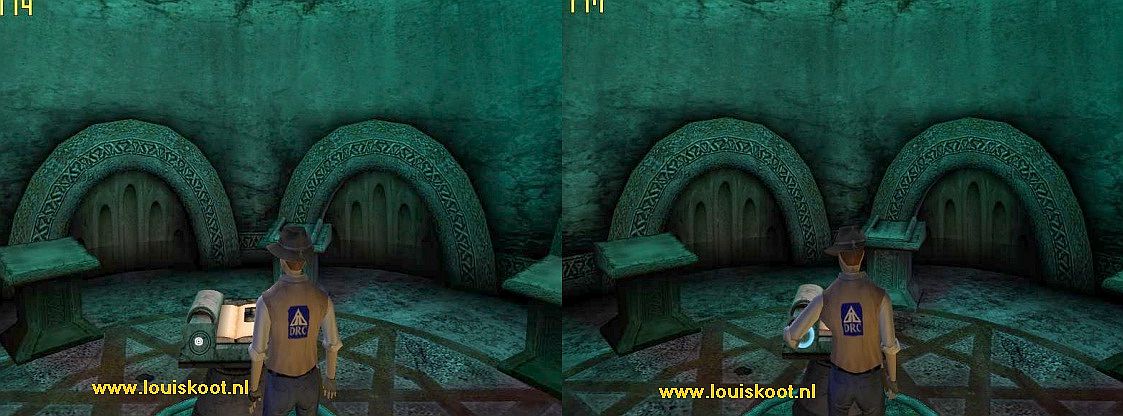
This is a small round and completely enclosed room with 2 round windows. Upon arrival you stand in front of one of the two round windows. In one off the windows is a Brown Book and to the left of this window is the Nexus Room Linking Book. Walk to the window and click on the Brown Book.
This is the "Great Zero DRC Data Notebook". Open the book and read it carefully. Just read the first 2 pages for now. These 2 pages teach you what you should do in the first place. The information you read on the first 2 pages of the "Great Zero Data Book",.....I shall give you a short summary in my own words now.....
1:
This small round room is the "Great Zero Antechamber" and from this room you can not go to the "Great Zero Courtyard" or the "Plaza".
To reach the Plaza you now first have to find 5 so-called "Great Zero Markers" and upload them in the "Great Zero
System" .I shall name these "Great Zero Markers" as "GZM"
from now on. When you have found all 5
GZM's and have uploaded them in the system, the link to the Plaza will be added to the
holo screen in your Nexus Room.
2:
Those GZM's are located in the various locations, of which you now have the links in your Nexus and in the book in Relto. However, the
GZM's can not be found with the "Bare Eye". You need your KI- bracelet to locate a GZM, but for this the KI bracelet must first be configured to a higher version. You can do this with the KI-Terminal that stands in front of the other window, here in the Antechamber. A number of vague green squares
then appear around your Avatar
3:
A properly configured KI-bracelet can then locate the GZM's for you as soon as you come close to such a GZM. The GZM indicator on your KI-bracelet will then flicker and the GZM will become visible. Then touch the GZM. The relevant green square on your
KI-bracelet will then turn bright green to indicate that this GZM has been located and has been inserted into your
KI-bracelet.
4:
When you have located all 5 GZM's and have touched them then you have 5 clear green
squares in your KI-bracelet and then you have to return to this Antechamber to put your KI-bracelet back in the KI-Terminal so that the 5
GZM's are registered in the Great Zero system. In your Nexus the link to the "Great Zero Courtyard" is added and from that moment on you can go there.
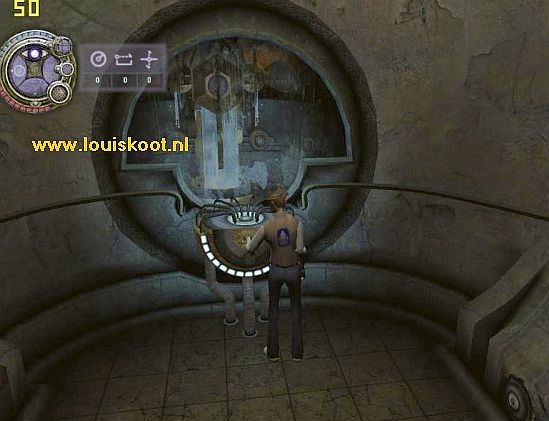
Okay, this is enough information for now. Let's get started. Turn around completely.
You then look at the second window and in front of this window is the KI Upgrade Terminal.
Walk towards it and click on the lock that is in front of the machine and ......
Your Avatar sticks his / her left hand with the KI-bracelet in the machine and your KI is now configured to locate GZM.
Your KI- bracelet now appear in the upper left corner of your screen.
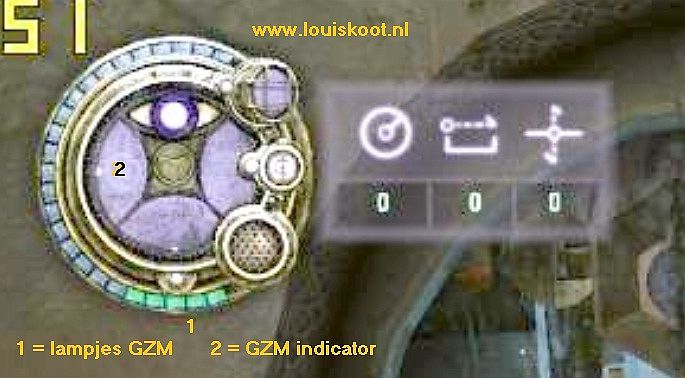
You will see small squares around the circle of your KI. 5 of these squares are now pale green. These are the indicators of the 5 GZM's that you have to find now and that is what we are going to do now. From now on, keep the KI bracelet at the top left of your screen. If your KI bracelet has disappeared from your screen, then press your F2 key to make the thing reappear.
Note: The KI bracelet always comes up at the top left of your screen, but you can pick up the thing to drag it to another spot in your screen. This can be useful if you think the thing is in the way at the upper left corner of your screen. Then you just drag the KI-bracelet to another place in your screen .... for example, top right, bottom right or bottom left .... as long as you keep the thing visible in your screen.
The Hunt for the 5 GZM's
A: Great Zero Antechamber: GZM 1:
Turn around and walk back to the 1st window where the Nexus Linking Book is next to and .......
In the indicator circle of your KI-bracelet a red circle starts to blink and in your screen a white circle appears in which a red circle and a red stripe pulsate.
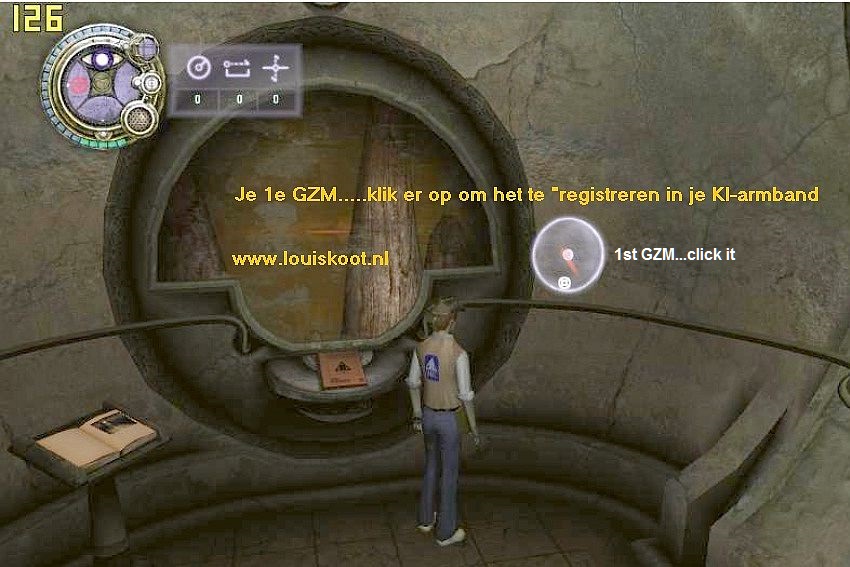
Your KI-bracelet has found the first of the 5 GZM's. Click on the white circle and ....... The white circle disappears and the first pale green square, in the edge of your KI-bracelet, will now turn bright green and will stay that way....Your KI-bracelet has registered the first GZM. Turn around and walk to Nexus Room Linking Book, which is located to the left of the window and link back to your:
Nexus Room:
Use the KI-Terminal to activate the Holo-screen. You must now return to the Tokotah Alley. This can be done by using Kirel and then the Linking tablet in Nice 1 of the Egg Room again. But why would you do that as you can also click here on the Holo screen on the Tokotah Alley link and then on the yellow button and then on the book that comes out the Nexus.
Either way, make sure you end up in the Tokotah Alley again.:
Tokotah Alley: GZM 2 and GZM 3:
Bring out your KI bracelet via your F2-key and keep your KI-bracelet in your screen . Go directly to the pillar with the KI-Terminal and the Nexus Linking Book.
Click on the KI-Terminal lock to register your newly configured KI-bracelet. The red circle will flash again in your KI.
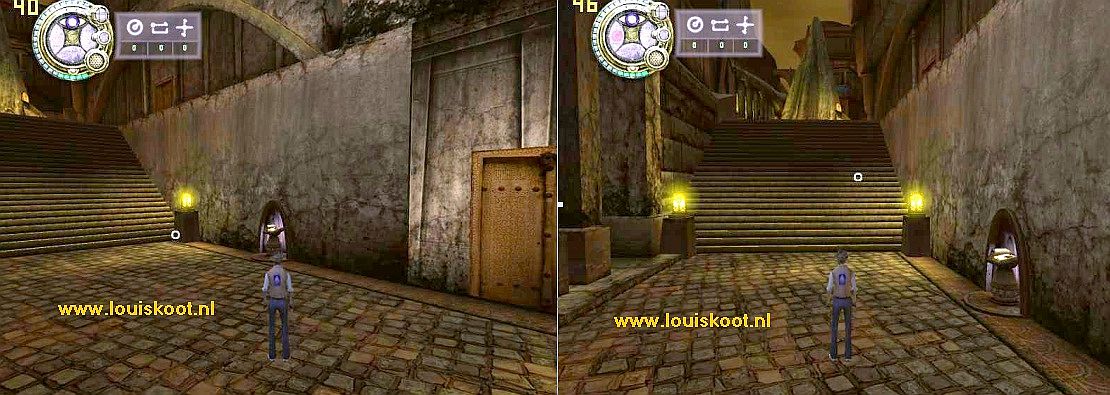
From the KI-pillar, turn left and walk to the wide stone staircase. Climb up the stairs.......Upstairs you are on a big square. In the middle of the square stand a large tree. Walk a short distance in the direction of the tree and turn left. Next to the staircase, which you came up, a tent is on the square and there is an illuminated sign in front of the tent.
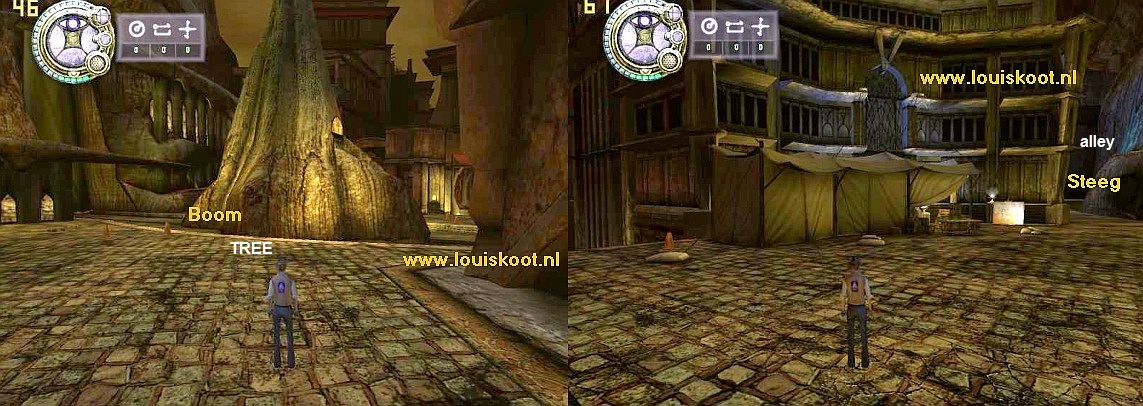
Behind the illuminated sign you see an alley. Walk past the tent and then, beyond the sign, enter the dead-end alley.
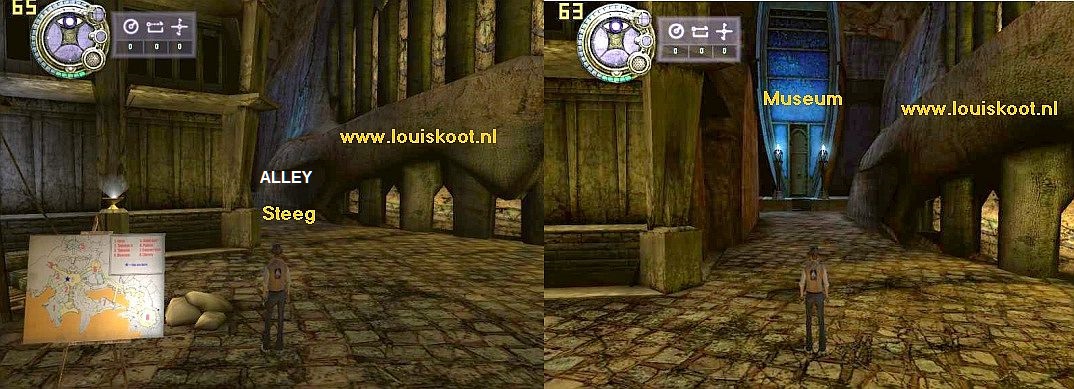
In the back of the alley you see the blue-lit front door of the Museum. Walk to the Museum door and stand straight before it. In your KI bracelet that red circle will flash again and the Museum door opens automatically. Do not go inside but turn left. You then look into the left rear corner of the alley.
Walk forward in the corner and ........ the 2nd GZM appears.
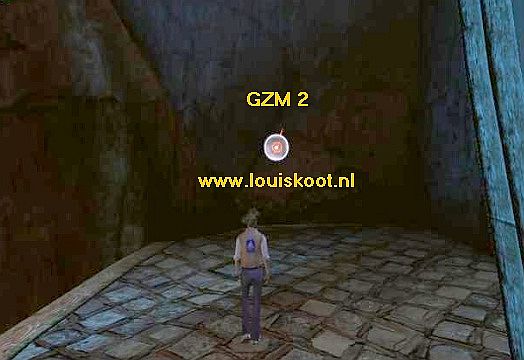
Click on the GZM to add it to your KI-bracelet and ....... the second green square in the edge of your KI-bracelet is now also clear green
Museum: GZM 3:
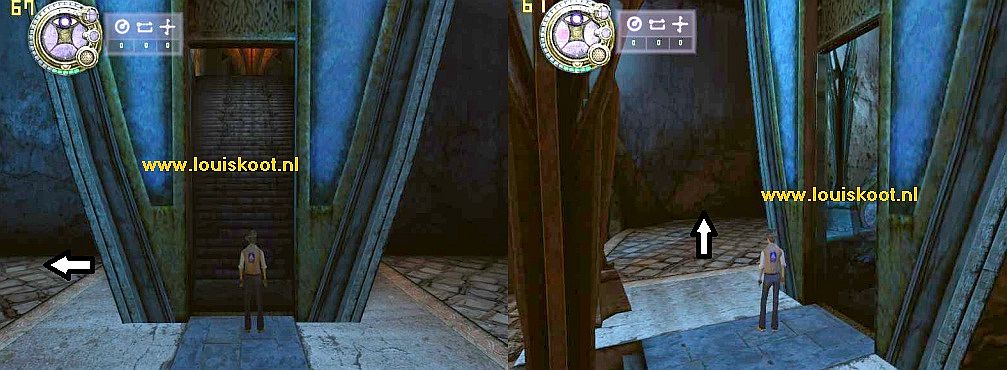
Turn around and walk back to the door of the museum. Turn left to the door. The door will open again automatically. Now go inside and walk up the stairs.
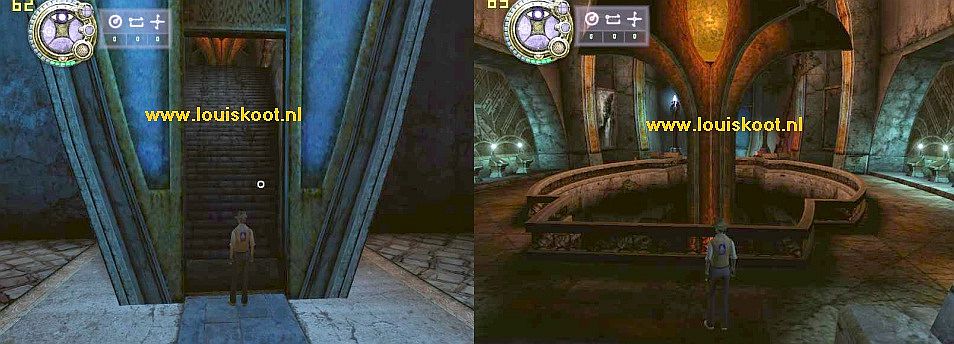
You come upstairs and you are on the round gallery. On the left and right you can see illuminated small stands on the walls.
First walk to those left stands. When you get closer to the stands you notice that there are 5 stands.
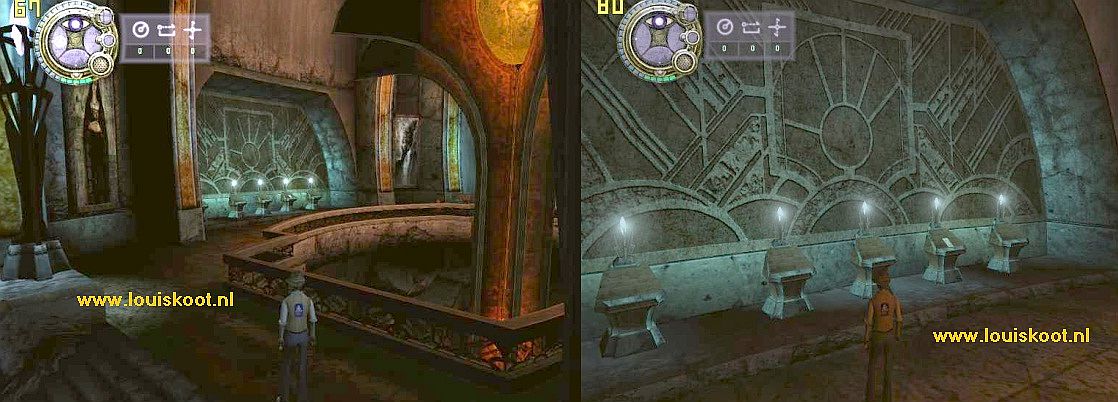
On the 4th stand is a Relto Page. Go get that Relto Page.
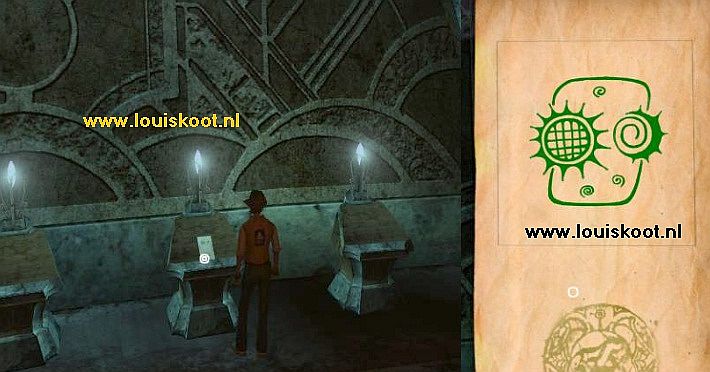
The green image shows the Sun and the Moon. Click on the image to add this page to your Relto Book.
The next time you return to Relto, the Sun and the Moon will shine over your Relto island at the same time.
Turn to the left and walk back to the stairs and now go to the right side of this gallery. In the corner, so right next of the stairs, is a table. On the table is a lamp and a paper.
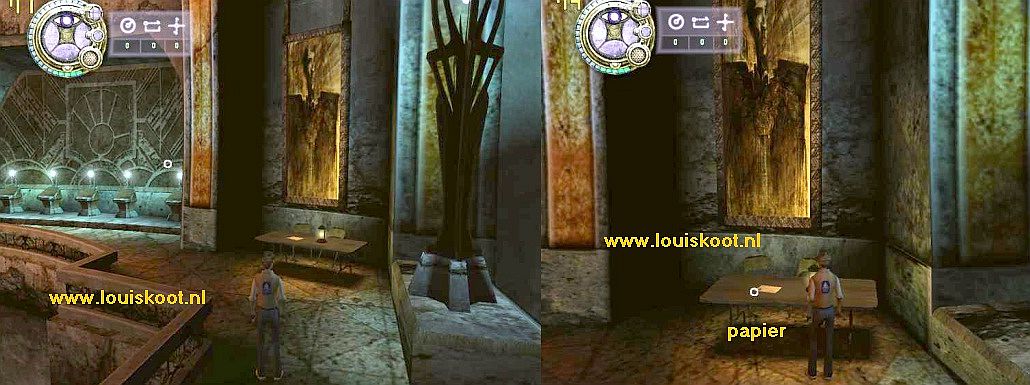
Click on the paper. There are images of animals on and of a human being. You notice from humans how huge those animals must be. Put the paper back on the table and then walk to the end of the right side of the gallery. You run into a "roadblock". Your red circle will flash in your KI- bracelet. Continue to the barrier and ...... the 3rd GZM appears.
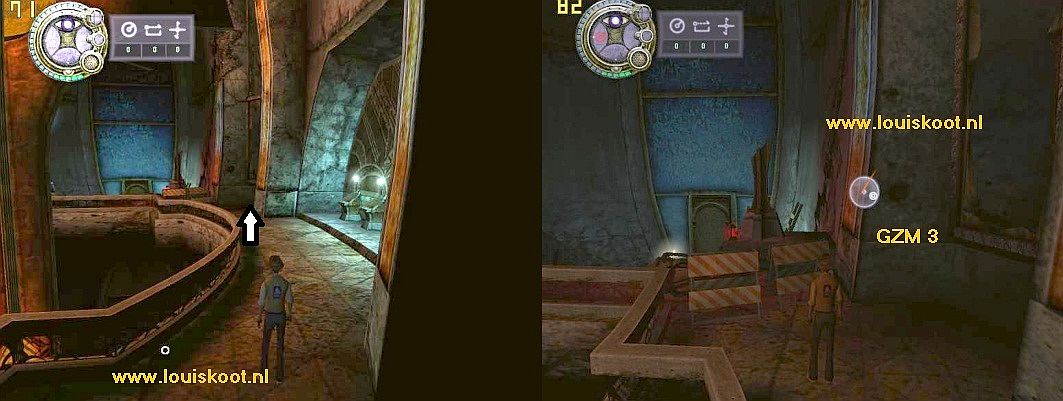
Click on the GZM again to add it to your KI bracelet.
Ferry Terminal: GZM 4 and GZM 5:
Walk back to the stairs and descend them again and go back into the alley via the automatically opening museum door.
Walk ahead to the square and then go right and back along the tent to the other side.
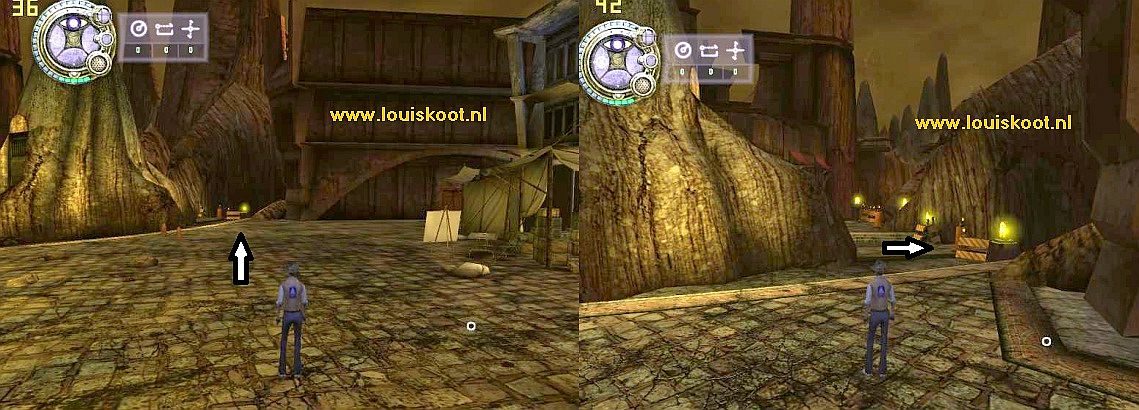
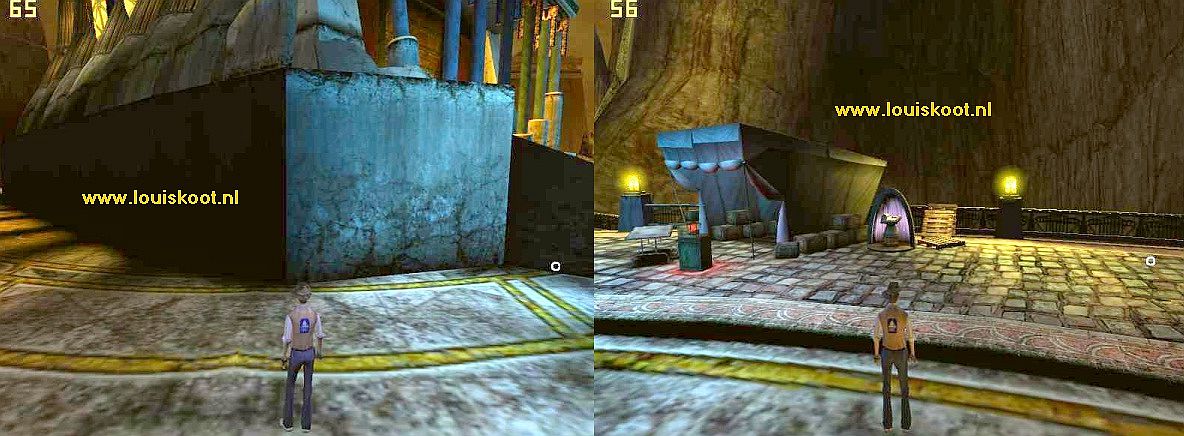
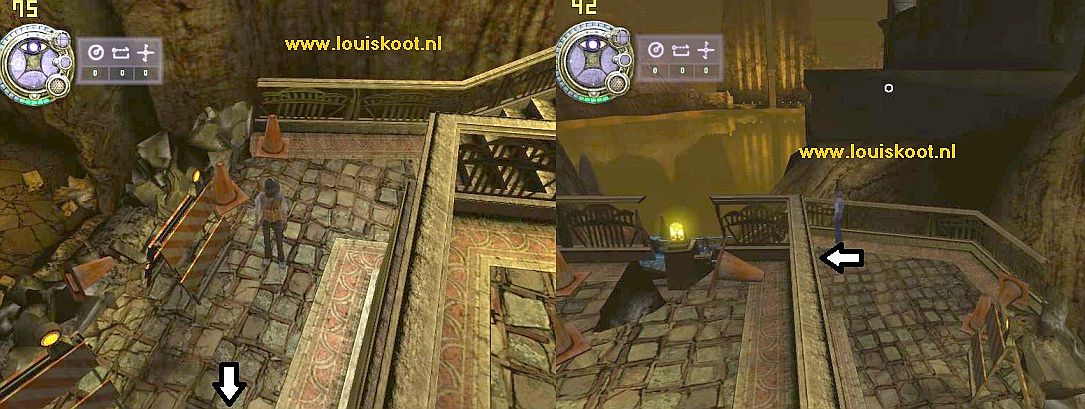
On the other side, turn left. You are now looking to the right side of the big tree and you see another "roadblock" there. Walk towards the barrier and turn right so that you look at this barrier. This barrier consists of 3 white / red fences and between fence 2 and 3 there is an orange pylon. The barrier closes off the "pyramid" stairs and that pylon stands on the wide ridge between both stairs. Now walk to the pylon and go to the left and look down.
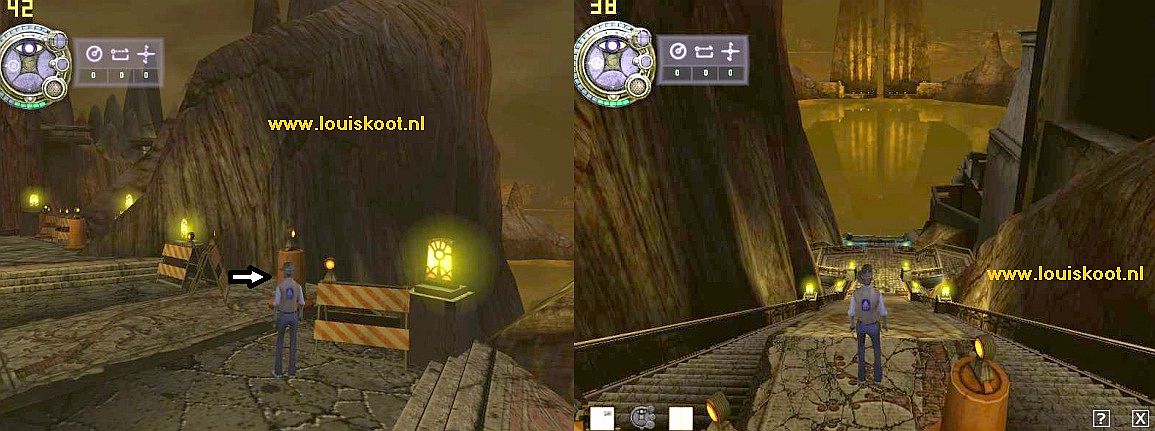
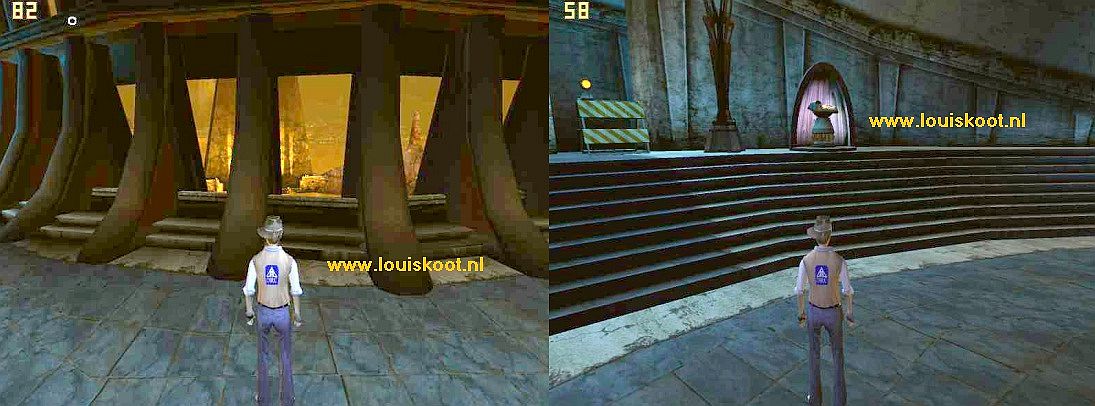
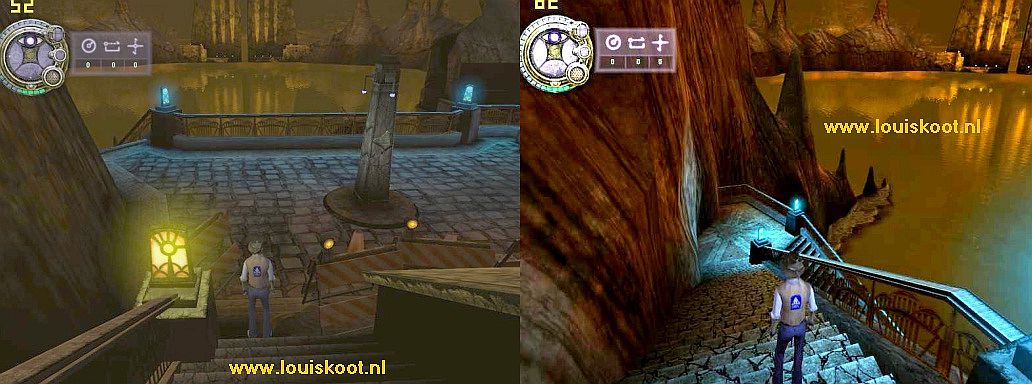
Deep beneath you you can see a balcony and even more deeper is the plateau with the tent above the "promenade" at the lake. You've been there before. Below you is the "Ferry Terminal" and you are now at the very top of that "pyramid" staircase. You can not take either of the two stairs, but you can go down through the wide ridge. So go down over the wide ridge, between the two stairs, to the balcony.
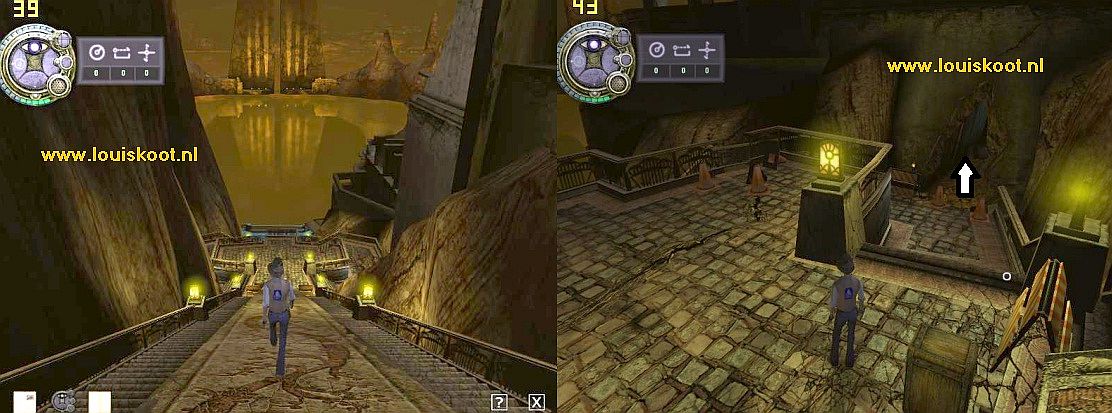
When you have reached the balcony, do not walk forward but turn to the right. There is another staircase that goes down to a lower floor. Go down this staircase.
You then walk against two orange pylons. These 2 pylons mark a big hole of a collapse. Stand between the two pylons and just walk straight down, over the rubble and through the hole, until you are back on a flat floor. It is a bit dark here, so pay attention. Follow the floor ahead until you can not go any further because a few large stones blocks the road.
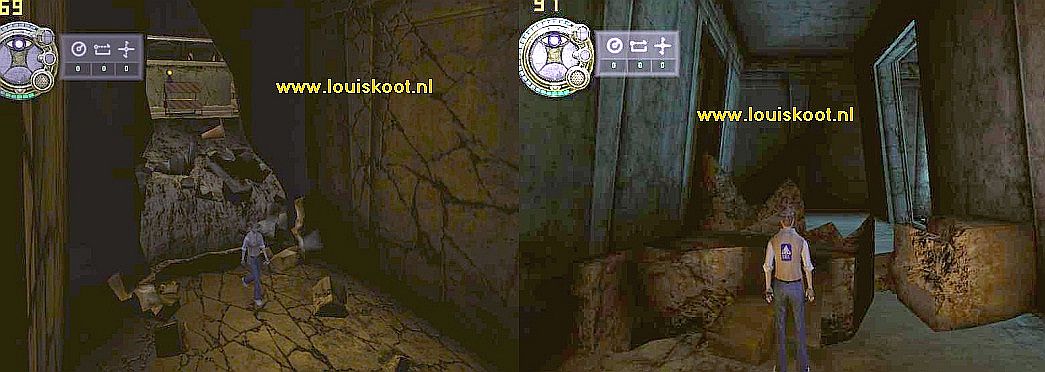
Behind the stones, in the right corner, there is a dimly lit gate. Walk backwards so you can take a good run and then run ahead to the stones and press, in your run and at the right time, your jump key to jump over the stones. Then go through that dimly lit gate and through the next one and just walk straight to the end room.
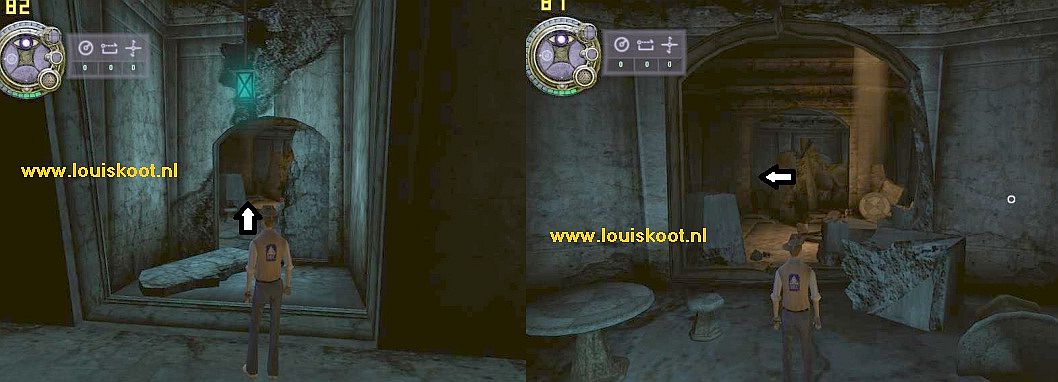
You are now in what used to be the bar room of the pub of Ae'gura. Here the red circle in your KI will flash again. Turn counter clockwise
In the back you can see, vaguely, a door. Walk towards that door and the 4th GZM will appear in the right corner.
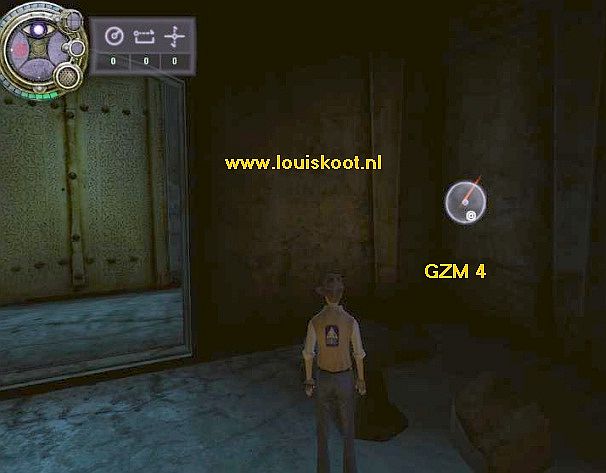
Click on the GZM again to add the thing to your KI bracelet.
Turn around and follow the whole route back, so you have to jump over the big stones again, until you are back up at the two orange pylons.
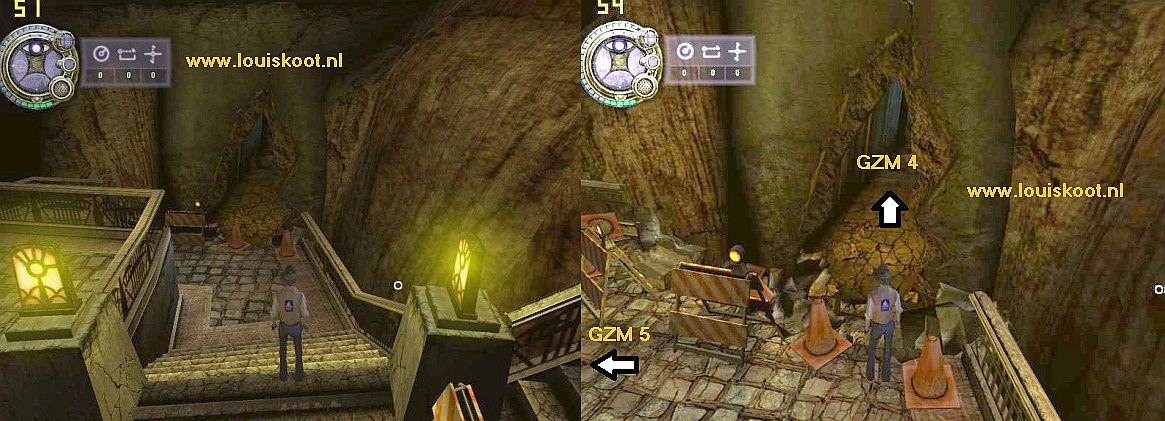
GZM 5:
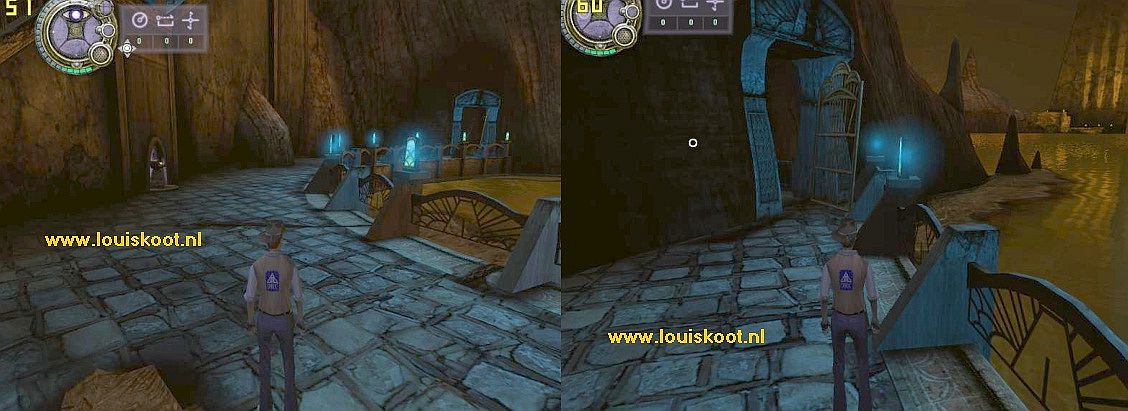
When you are under the balcony again, at the two orange pylons, then turn right and follow the path further into the corner and then left down the next staircase.
You are on the "intermediate balcony". Stand here in the middle and then turn right and walk to the stone ledge. Look down.
You can see that blue-lit balcony and the lake below you. You can not get on the ledge between the two stairs and the right stairs is closed below. But the left stairs is open below, so descend via the left stairs down to the blue-lit balcony. Down you go to the left and you descend the stairs further down to the promenade.
When you are down at the lake, turn left. You see the KI -Nexus book pillar again.
You have been here before and know that at the end of the promenade there is a tunnel from witch the back gate is closed.
Walk to the tunnel and enter the tunnel again and walk on to the back gate ............ Your KI will beep again and behind the back gate the 5th GZM will appear.
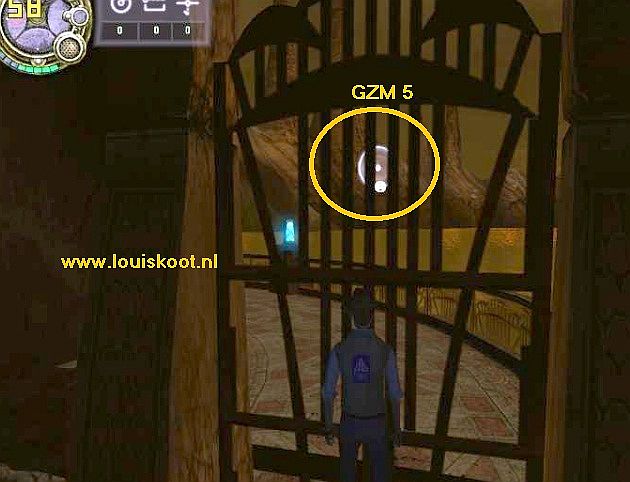
Well ...... Click, through the fence, on the GZM to also add this to your KI-bracelet ...................
Ok .. ...you have now found all off the 5 GZM's and the 5 green squares on your KI bracelet are now bright green. You now have to go back to the "Great Zero Antechamber" to put your KI-bracelet back in the KI-Terminal. You can do this in two ways and it's up to you which way you want to use
Way 1:
You can go back to the "Great Zero Antechamber" via the Nexus Room and then go to Kirel and the Egg Room. In the Egg Room you go, via the Linking tablet in
Niche 3, to the Antechamber. If you want to do this route, go back out of the tunnel to the
promenade and walk to the KI-Terminal pillar and use the yellow Nexus Room Linking
book to return to your Nexus Room . Then activate the Holo screen and use the Kirel link.
Way 2:
Do you also want to see what that Relto page, from the museum, has changed to your Relto Age? Then take your Relto
Book out and link back to Relto. You will arrive in your house. Walk out and take a walk around your island, so bathe in the sunlight and in the moonlight. Weird that you can see the sun and the moon at the same time. Then go back inside your
house and to the left bookcase. Pull the thick brown book out, which is in slot 7, and
scroll to the image of the "Great Zero Antechamber" ........
Click on the Link photo and ......... you also end up in the:
Great Zero Antechamber
You are back in the Antechamber, also called the "Observation room", of the Great Zero. Go to the KI Machine at the window and click on the lock.
Your Avatar puts his / her hand back with the KI bracelet in the machine and the 5 green GZM's are entered into the system. You notice that this is happening because you see 5 white lights appear at the bottom of the KI Machine. Your KI bracelet will appear in the top left corner of your screen and .... O Good Heaven .... now there are 15 Red Squares in the outer edge of your AI ....what the hell is going on......
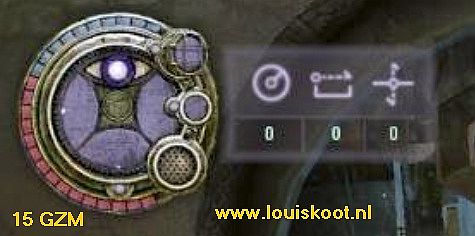
Well....those 15 red squares are your
New assignment:
You now you have to look for 15 "Red" GZM's and when you've found them all, put your KI-bracelet here again in the KI-Machine. These 15 "Red" GZMs can be found in all locations where you have been so far. In some of these locations new areas have now become accessible. It is true that some of the 15 GZM's can only be found AFTER you have found other GZM's. It is also true that there is one GZM that forces you, if you have caught it, to link back to Relto and then you can not go back to search for the other GZM's. So I advise you to keep this one GZM until you have found all 14 others.
Now first link back to the Nexus Room via the Nexus book at the other window.

Back in your Nexus room you activate the Holo screen again, by putting your arm back in the Nexus. A new link has now been put on the Holo screen. It is the "Rezeero" link. Rezeero is the "Great Zero Courtyard". Click on the "Rezeero" link and then on the yellow button. The Nexus spits out the "Great Zero Courtyard" book.
Click on the Link photo and you end up in:
2013: Original Dutch Walkthrough by: Louis Koot
2018: This English translation by: Louis Koot