Nancy Drew 6:
The Secret of the Scarlet Hand
2003: Original a Dutch Walkthrough by: Louis Koot
2024: This English translation also done by Louis Koot
If you have found this walkthrough via google search or via another site then you have probably not visited my site.
A lot more very detailed game walkthroughs can be found on my site at: www.pcgameswalkthroughs.nl
This walkthrough was written for a Senior Detective.
For the sake of clarity in the walkthrough, I have disabled the "Auto Move" function in the "Game Setup". This means that you do not automatically turn left or right when you place the cursor in the game on the left or right side of the screen. You then have to click with your mouse to rotate. I found that automatic turning difficult. So I will always mention how many times you have to click. When the walkthrough says, go left or go right, it means that you have to click the right or left arrow. By Zoom Out in the walkthrough I mean the Backwards Arrow that you get at the bottom of your screen when you are focused on something.
The time keeps running in the game. This may mean that certain people you need to talk to will not be there at certain times. In Nancy's hotel room you can "advance" the time in the game via the alarm clock. You'll actually have to do this a few times in the game. In the walkthrough I cover Nancy's hotel room at the moment when it is really necessary to go there for the first time.
You have to talk to several people in this game and often have different conversations with the same people, including by telephone. You will almost always receive several conversation options from which you can choose. Your choice often determines how the conversation goes and also whether the things that should happen happen afterwards. Although I explain in the walkthrough which sentences you should use in various conversations, it is better to always save before a conversation.
Part 1: The 5 Tasks
Start: Museum
The game begins with Nancy reading aloud a letter she wrote to her father. Nancy is currently "Between Cases" and therefore has nothing to do. Fortunately, her father's friend, Franklin Rose, got her the job of assistant curator at the Beech Hill museum in Washington DC. The museum is currently closed to the public as it is being prepared for an exhibition on Mayan Culture and the centerpiece of this exhibition will be an antique Monolith with a number of Glyphs on it.
When the game starts, Nancy meets her supervisor in the exhibition hall. This is Joanna Riggs and she is showing Nancy the jade carving of King Pakal. After this, the conversation continues in Joanna's office. Joanna explains some things to Nancy and then you get 2 conversation choices. Choose the second option: "If there's one thing I'v learned from my father…."
Joanna then tells Nancy that there is a To Do List waiting for Nancy in the lab. Then just follow all the possible topics of conversation and you will learn something about Taylor Sinclear, the art buyer for the museum, Hendrik van der Hune, the translator and Alejandro del Rio, the Mexican cultural attaché. Also ask about hieroglyphs and the Monolith.
So after this first conversation you look at Joanna's desk and Joanna is standing to the right of it. Hold your cursor against the right edge of the screen and your cursor will become a set of rotating arrows. Now click with your mouse 11 times to turn clockwise until you see a small table in the corner of the room, to the left of the large bookcase. Then go forward once to this table and zoom in on the magazines that are on it. The "Art in the Americas" magazine will then appear on your screen. Click on it to open it. It includes a long interview with Prudence Rutherford. Click on page 27 to continue browsing. Then click on page 28. Nancy will then comment: “Topeka Commission for the arts….How cultural”. Now you can read through the rest of the magazine. Once you have done that, click on the left pages to close the magazine again and then zoom out twice.
Rotunda
Then turn counterclockwise 6 times, to the door, and go forward 1 time and then open the door via the doorknob. Step forward once into the central hall. Right in front of you is the ticket sales desk, but first turn completely back to the door of Joanna's office. There is a nameplate on the wall to the left and right of the door. Zoom in on the name plate hanging to the right of the door. This lists the names of the donors to this museum. Zoom in on the bottom half of this plate Nancy reads and says: "Topeka commission for the arts-thats the organization Produnce Rutherford works for".
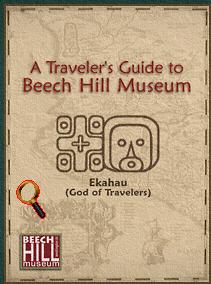
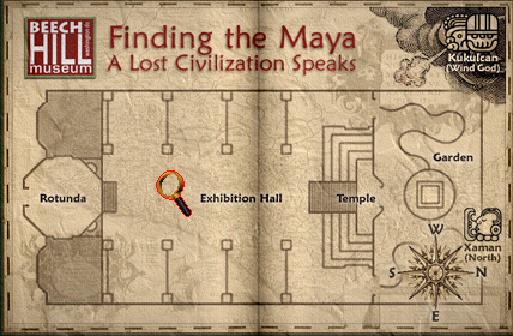
Zoom out twice and turn around again. Now go forward twice to the ticket sales desk and zoom in on the stack of maps on the left of the counter. On your screen you will now get a copy of the "a Travelers Guide to Beech Hill Museum". On it you see the symbol of the Mayan God Ekahau, which is the God of Travelers. Open the guide and the inside page reveals a map of the large exhibitionhall. Here you also see 2 images of Mayan Gods. At the top right is Kukulcan, the God of the Wind and at the bottom right is Xaman, the God of the North. On this map you can also see that you are currently in the Rotunda.
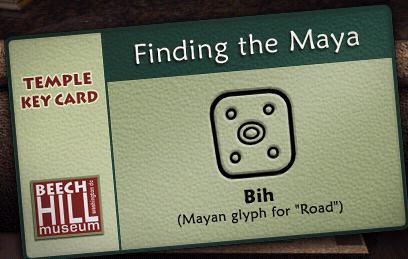
Close the map and zoom out twice. Now go forward twice, to the left of the counte,r and you will be behind the counter. On the left is a cabinet with a double glass door and it contains headphones that visitors can rent to receive spoken explanations during their tour through the museum. Zoom in on the glass doors of this cabinet. Click on the button of the left door. Hela...there's no button so you can't open the cabinet. Zoom out. To your right you will now see a drawer under the counter. Zoom in on this drawer and then open the drawer. Then click on the drawerbox in the drawer to lift it. There are 3 stacks of cards at the bottom of the drawer. Click on the front stack and such a card will now appear on your screen. It is a so-called Temple card. Notice the symbol of the God Bih, it is the God of the Way. Click on the card to place it in your inventory.
Close the drawer box and then the drawer and zoom out. Then turn around and go forward once and then left. You are now looking at the large double Golden Doors. That is the entrance and exit of the museum and if you go through these doors you enter the Metro station. But that comes later. To the left of these Golden Doors is an alcove containing a large red banner about the upcoming exhibition. Go forward once into this alcove. On the left here is a piece of paper on the floor that is folded like a paper airplane. Zoom in twice on this paper and then click on it to unfold it. Read through it, so click on the top half. It is a Loan Agreement between the Republic of Mexico and the Beech Hill Museum regarding the loan to the museum of the Monolith. Zoom out and you will see Joanna Riggs' signature on the contract, but you will also see that the Mexican Cultural Attaché's signature is not yet on the contract.
Zoom out and the contract will disappear into your inventory. Zoom out 2 more times and you will look at the Golden Doors again. It is high time to start working seriously now. Now turn left 8 times and then go forward 4 times down the stair corridor and you will be in the large exhibition hall. Here, on the left and right in niches, the Mayan Artifacs are exhibited. We'll have to look at them one by one later. At the very back of the room is the large Mayan Pyramid. Go forward 5 times until you are at the bottom of the pyramid and then turn right. You see a door in the wall.
Laboratory
Go forward to the door 3 times. You read "Employees only" on this door. Open the door by clicking on the door knob and then go forward once into the hall. There are 2 doors in this hall. The door on the left goes to the "shipping and receiving" area, the door on the right is the door off the laboratory. Zoom in on the laboratory door and then open it by clicking on the door button. Then go forward once into the laboratory. Stand still for a moment. There is one long work table along three walls of the lab with drawers and items on it. Turn to the left.
You see a young man sitting at a part of the workbench. He has a dust mask over his mouth and is working on an artifact. Click on this young man to have a quick chat with him. He introduces himself as Hendrik van der Hune and this is the Hendrik that Joanna was already talking about. From the 2 possible answers, now choose the second option: "That's right, I'm Nancy Drew……." And after this you just follow every possible conversation option and then you close the conversation.
Then turn left and you will see a desk to the right of the door. That's Hendrik's desk. Go there. To the right of the desk is a large radio on a table. Zoom in on that radio twice. It is a "Kremercom Morse HAM radio" with which Morse Code messages can be received and sent. If you click on the on/off button, Nancy will say that she better ask permission first. Zoom out twice and then zoom in on the row of books on Hendrik's desk. On the left in the row of books you can click on a book and the Manual of that Morse Radio will appear on your screen. Have a quick look through it. In addition to the usage instructions, you can also read the complete explanation of all Morse Code letters in this book.
Close the booklet and zoom out and then click on the card that's on the desktop. It is a card from the "Chaco Canyon Cultural Center" and you can read a name on it: "Sheila Schultz" and a telephone number: 1-505-555-1222. Well, you can't do anything else with this, so zoom out of the desk and turn further to the left and you will see another desk to the left of the entrance door. That's Nancy's desk. Go forward once to this desk. There are a number of things on the desk. There is a book on the left of the desk and the telephone on the right. To the left of the telephone is a clipboard with a paper on it and to the right of the telephone there is a yellowish paper stuck to the desktop. Zoom in once on the telephone and then zoom in twice on the clipboard. A purple note will then appear on the screen.
|
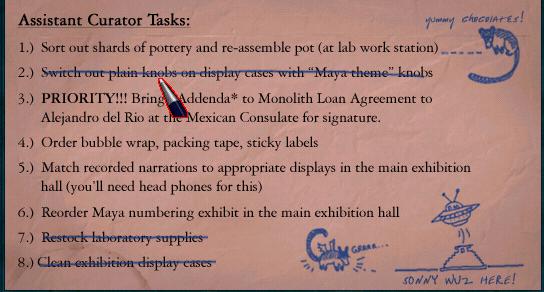
This is your To Do List. Joanna already told you that there would be such a list on your desk.
Take a look at the tasks. You see that there are still 5 tasks that have not been crossed out. These are the tasks you have to do, they are: Task 1 = You have to assemble an Earthenware pot/vase. So you have to make a complete vase from the shards again. Task 3 = This one has PRIORITY: You must get Alejandro Del Rio's signature on the loan contract. Task 4 = You have to order paper and stickers etc. from one of the suppliers. Task 5 = Apparently there is something wrong with the spoken stories accompanying the items on display in the exhibition hall. Some items tell the wrong story. You need to put this back in order. Task 6 = So in the exhibition hall you need to rearrange the numbered Mayan artifacts. On this TO DO list your cursor is a pen. When you have done one of the 5 tasks, you come back here and cross out this task here on the paper with the pen cursor. |
Task 4
Zoom out and then zoom in on the paper that is taped to the desktop. This appears to be a list of suppliers who provide items/services to the museum. The second name from the top is Silvio's and this is a supplier of paper products and stickers. Note the telephone number: 555-9963 and also note the account number "BH119K" and then zoom out twice. Well, let's just take care of TASK 4 right away. Zoom in on the phone again and then click on the receiver. You hear that you have no Voicemail messages and that you have to dial 9 for an outside line. So click on the 9 key and then enter 555-9963. Silvio reports. Provide the following answers:
|
Silvio now goes into a fit. He refuses to do business with the Beech Hill museum because the museum has not paid his bills for some time. Silvio says that he has the outstanding bills collected by a collection agency. Silvio then angrily cuts the connection. Well, that's nice then. How should you perform Task 4 now?
Zoom out 3 times and then zoom in on the thick book on the left of the desk. Then open the top drawer and take out the Doorknob and click it to your inventory. There's a candy wrapper in the drawer at the bottom. Click on the candy wrapper. It is a Kroko Kringle candy wrapper. Why would your predecessor, Sonny Joon, have kept this wrapper? It's probably important, so just copy the name "Kroko Kringle". Zoom out and the wrapper disappears back into the drawer. At the top of the drawer is Sonny Joon's diary. Click on this to get the diary on your screen.
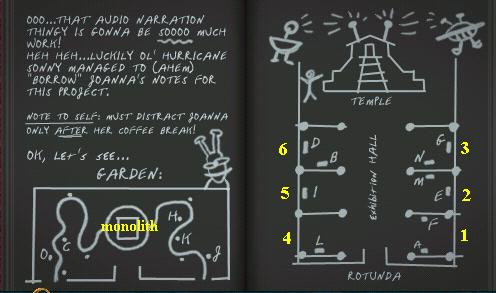
Open the diary and leaf through it. On pages 5 and 6 you will see Sonny's notes and drawings regarding your Tasks 5 and 6. Read it through and copy the two drawings exactly. They are a drawing of the museum garden and the large exhibition hall. Note the letters A to O in both drawings. These therefore correspond with the artefacts on display in the garden and the main exhibition hall. Close the diary and then close the drawer and then zoom out twice.
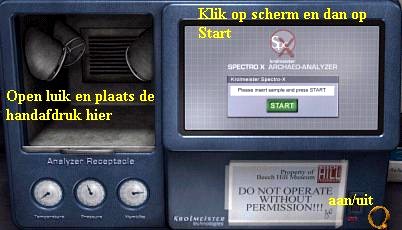
Turn counterclockwise 8 times and you will look at the long work table against the long back wall. You see a large device on it. The device reminds you of an old radio. Go forward once to this device. It is the "Spectro X Archeo-Analyzer" and you read that you are not allowed to use it without permission. At the bottom right is the on/off button and if you click on it, Nancy will say that she better ask permission first. Zoom out and turn left 4 times and talk to Hendrik again and do it in this order.....
|
"I'm suppost
to order more packing supplies, but the company says they
won't do business with us any more. Does Beech Hill have bills it can't pay?" "But Hendrik, how am I suppost to get this order taken care of?" "What is the Spectro X Archeo-Analyser?" " Did you now the deputy curator who was here before me?" " I'm not sure how to go about about rearranging those exhibit narations" Hendrik now gives you a rather complicated answer, which I will come back to when we do tasks 5 and 6. But it has to do with a "Convomatic Auto Narrator" that you can find in "Shipping and Receiving" and you also need a headset. End the conversation. |
Task 3
On your To-Do List, Task 3 has the highest priority, so let's do Task 3 now. For this you must go to the Mexican Consulate. Leave the laboratory and in the hall turn to the left and step through the door back into the exhibition hall. Go forward 3 times until you are in front of the pyramid and then turn left. Walk through the room to the exit and go up the stairs to the Rotunda. Go to the double golden doors and open them. You are now in:
Metro Station:
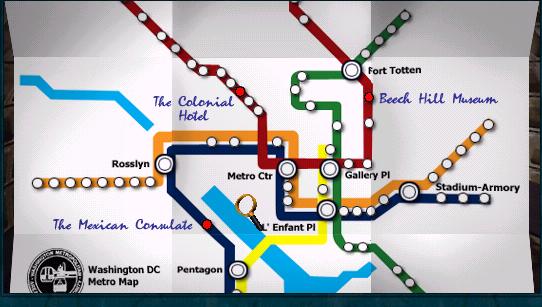
Nancy travels from location to location on the metro. Just click on the metro station you want to go to and the metro will drop you off there. The available locations are indicated on the map in italic blue letters. At this moment you want to go to the Mexican Consulate, so click on the red dot on the map next to the "Mexican Consulate". The metro will then deliver you there.
Mexican Consulate
Go forward once and you will be in front of the double front doors of the consulate. Open the door and step forward once inside and then go forward once more to the counter. Behind the counter sits a young man in a red vest. So this is Alejandro Del Rio, the cultural attaché. Click on him and he greets you. You can now choose to get straight to the point and hand him the loan contract, but then you will miss useful information. I propose to have this conversation like this:
|
"Hi, I'm
Nancy Drew, the new deputy curator over at Beech Hill".
"I beg your pardon, but how does a deputy curator becomes a pirate in your book?". "Do you blame Joanna and modern day art collectors for something dat happened long before they were born?" "But Joanna only wants to display this art work, to celebrate it, so the public will be able to enjoy it and learn about your peoples great talents and achievements". "What do you mean by questionable provenance?" "then the relics at Beech Hill must be legitimate, right?. "are you suggesting that Beech Hill is involved in these kinds of misdealings?" "and what iff these measures aren't taken?" "I admire your conviction, Alejandro. Lucky for me the Palenque Monolith is only here on a loan from Mexico". |
Now Alejandro would like to have the Loan Contract, so in your inventory click on this contract (you know, that's the paper that was folded on the floor in the niche of the rotundo like an airplane) and then click on the counter. Alejandro accepts the contract but does not sign it yet. He says that later that day he will meet with Joanna at the museum and then hand her the signed contract himself. Tell him: "actually, Alejandro, I think I'm suppost to take them back to Joanna myself". However, Alejandro tells you that you have completed your task, so you will not get the contract back. You have now completed Task 3. Turn around and go forward to the double doors, open them and take the Metro back to:
Beech Hill Museum:
Go forward once and Nancy opens the museum with the keys and you are back inside and back in the Rotunda. Put away your keys and first go behind the ticket counter. Zoom in on the glass doors of the cabinet with the headphones. Take the doorknob from your inventory and click it where the button should be on the left door. You place the button. Then click on it twice to open the doors. Then, from the middle row of headphones, take the right headphones. This disappears into your inventory. Close the doors and zoom out and turn around and now go back to:
Laboratory
Task 1:
Now let's get Task 1 out of the way first. Turn to the left so that you are looking at Hendrica. There is a white open container on the long work table along the wall, to the left of Hendrikus' workplace. In this white container you can see a number of pottery shards. Go forward once to this white container and then zoom in on the shards. Nancy then says that some shards are missing, so you cannot complete Task 1 yet. First you need to find the 2 missing shards. We're going to do that now. Zoom out 2 times.Talk to Hendrik and ask him if you can use the HAM radio.
That is not allowed. He also tells you that there is a problem with the radio tubes of this HAM radio. Then ask him what you have to do to put those pieces together. Hendrik then tells you what to do and also that your predecessor, Sonny, has probably stashed some shards somewhere else and that you have to find these missing shards first.
Turn left and leave the lab and then go straight through the door to the "Shipping and Receiving" department. So this is the goods receiving and shipping area and there are a few shelving units in it. There's a lot more in this area, but right now you're only interested in finding the missing shards. So go all the way forward to the large warehouse door on the right. There is a rack against the back wall. Go there. There is a large box in this position and it has "Sonny's Stuff" written on it. Zoom in on this box twice. You then look in the box.
Take out the floppy disc and put it in your inventory. The floppy also contains "Sonny's Stuff". Then take the pottery shard from the box. Then click on the edge of the box at the bottom of your screen to slide it back into the position and then zoom out. Turn around and walk back to the door and enter the hall. Turn right and go through the door into the large exhibition hall. Walk to the front of the pyramid, turn right and climb all the way up the pyramid and go inside. In the corner, to the right in front of you, is a silver-colored table and on it you see two silver-colored "Vases". Go forward once and then turn clockwise twice and then go forward once to this table. Zoom in on the largest "vase" and then take the pottery shard from it.
Of course there is a lot more to see up here in the pyramid, but your priority now is to get your Tasks done first, so leave the pyramid and descend to the floor and then go back to the Laboratory. Turn counterclockwise and again go to the white shards bin and zoom in on the shards again. The 2 shards you have found will automatically be placed with the other shards. Well, you have to piece these shards together into a vase.
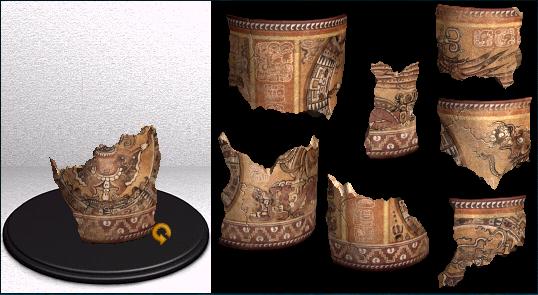
There is already a large shard on the turntable. You must click the shards against each other with the fracture lines and first complete the lower part and then the upper part. You can turn the turntable left or right if you keep your cursor on it. Your cursor will then become a left or right rotated arrow. It's a very simple puzzle, so put the pieces together. When you have finished this, zoom out twice and then talk to Hendrik again. He now asks if you know what that glyph on the vase means. Tell him: "No, I was hoping you could tell me". "You've got my undivided attention"."Why is it important"..........Hendrik explains why this excavation is important and he also says that he stays informed about this excavation via the HAM Morse radio. End the conversation. Now go to your own desk and zoom in on your Tasks List. Cross out tasks 1, 3 and 4 because you have now completed them. You still have to do Tasks 5 and 6 and these will be a bit more difficult to complete.
Task 5:
Hendrik told you the following about this task:

Do you understand anything about this? Not me! So first let's look for that "Convomatic Auto Narrator".
So go to the Shipping and Receiving warehouse and when you are inside, walk forward once towards the scaffolding.
Then turn left. You now see a large black/gray panel in the wall.
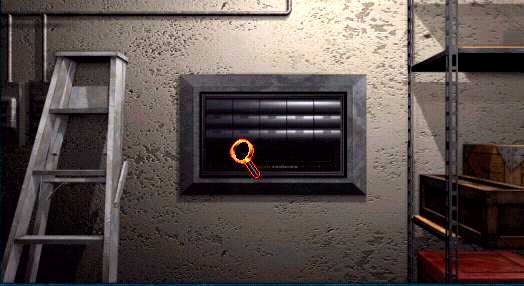
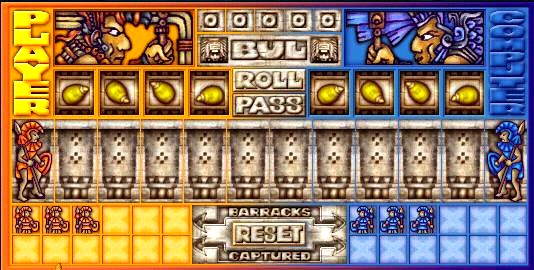
Zoom in on this panel. So this is the Comvomatic Auto Narrator and it contains the tapes with the stories that correspond to 15 of the exhibits. Visitors can then hear these stories through headphones as they follow a certain route through the exhibition. The device is divided into 15 "boxes". You can zoom in further on the left part, the middle part and the right part. Now zoom in on the left part. You will then see the first two "boxes" of each of the 3 rows. Click on the box at the top left. You will then see this screen:
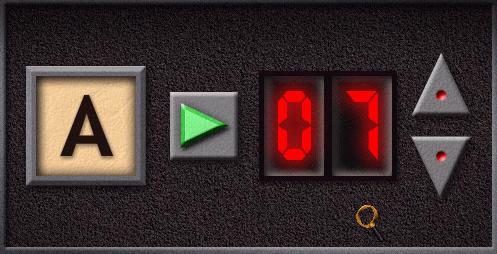
This box therefore belongs to exhibit A. You see a green arrow and a number display that now contains the number 07. You also see an Up and a Down arrow. Click on the green arrow and you will hear STORY 07. The number is therefore the number of the story that you hear when you click on the green arrow. So each of the 15 boxes has a LETTER and a Number story. Now click on each of the 15 "boxes" in turn. Always write down the LETTER and NUMBER of the story you hear when you click on the green arrow. Also try to write down at least the first sentence of the stories. Make a list of it.

|
You end up with this list:
If you have heard and written all of this down, you know the following: You now know that there are 15 pieces numbered A to O |
Your job is to find out which of the pieces A to O is playing the wrong story and then set the correct story number for those pieces here on the Convomatic Auto Narrator. But how do you know which of the pieces on display is piece A, piece B, piece C, etc.? Well, in the drawer of your desk you found Sonny's diary and in it, on pages 5 and 6, you saw drawings of the Garden and the Exhibition Hall. In these drawings you saw the letters A to O. I then explicitly told you that you had to copy these two drawings and also put the letters A to O in the right place. You certainly didn't do that then, it was certainly too much effort. That's a shame because on these drawings you can see where you can find piece A, piece B, piece C, etc. up to piece O. Luckily I took a screenshot of it. Still, I would just copy it, so you can keep the drawing next to your computer.
We will now follow the entire route through the museum, from A to O and listen to the story that you hear when you stand in front of section A to O. Then check these stories with the list you just made and mark which at which exhibit number you hear the wrong story and then immediately indicate what the correct number should be for this part number.
So leave the shipping and receiving warehouse and enter the exhibition hall. Continue until you reach the pyramid and then turn to the left so that you are looking through the hall towards the exit. According to Sonny's drawing, Exhibit A is located at the very front, to the right of the entrance to the hall, so now on your left. Go forward through the room 4 times (so straight to the entrance) and then turn left. You will then see Niche 1 (see Sonny's drawing). Go forward 3 times into this niche and then turn right.
Niche 1
Exhibit A:
You are now standing in front of the right display cabinet in this alcove. You will see, among other things, a radio in it.
Click on the nameplate in front of this radio in the display case. You read the following:
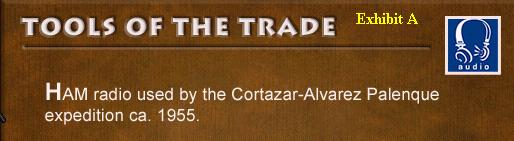
So that radio is a HAM Morse code radio and according to Sonny's drawing this is Exhibit A. Look at your list of stories. So you expect to hear the story 05 in this Exhibit A, but you don't. Stay zoomed in on this display board and click on your headphones. You hear Story 07. So that is wrong. Write done: A=07 = ERROR, should be A=05. Put your headphones back on and then zoom out 3 times. According to Sonny's drawing, you will also find Exhibit F in this niche. So turn left and you will look at the left display case and herein lies:
Exhibit F:
Zoom in on the large nameplate of this display case. You read:
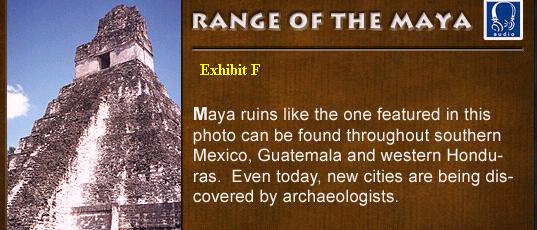
Here you expect to hear story 06. So click on your headphones and you will indeed hear story 06. So write down F = 06 = correct.
Click your headphones away again and zoom out twice, then turn around and go forward twice out of this niche.
Then turn right and go forward once and turn right again. You now face:
Niche 2
Go all the way to the back of this alcove and you will come across a narrow display cabinet, in which you will find:
Exhibit E.
Zoom in on the nameplate and you will read:
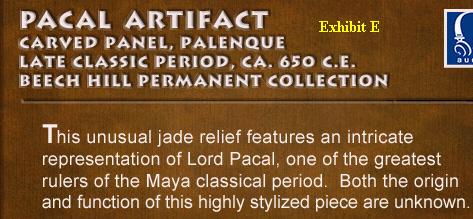
Here you expect to hear story 01. So click on your headphones and…yes, you hear story 01. So write down: E = 01 = Correct .
Put your headphones back and zoom out once and turn left. In this display case you see a head and in front of it is a nameplate.
Exhibit M.
Zoom in on the nameplate twice and you will read:
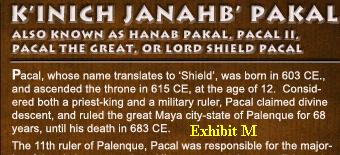
So you expect to hear story 02 here. Check this through your headphones and sure enough, you will hear story 02. So write down: M = 02 = Correct and M = Pakal's ascencion. Put your headphones back on and zoom out twice and turn around. Leave this niche by going forward twice, then turn right and go forward once, turn right and you are ahead
Niche 3.
Walk all the way to the back of this alcove and you will come across the display case that is against the wall here. Here you will find
Exihibit G.
Zoom in on the nameplate twice and you will read:
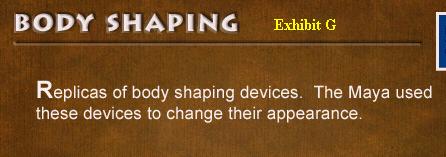
Look at your story list and you suspect to hear story 09 here. Is that also true? No, because you hear story 13.
So make a note: G = 13 = wrong = G = 09. Put your headphones back on and buzz off twice and turn right. In this display case you will find
Exhibit N.
Zoom in on the nameplate again and you will read:
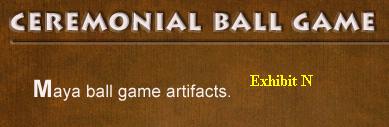
Well, you should hear story 10 here. So click on your headphones and... you hear story 10. So write down: N = 10 = correct.
Now we will examine the niches on the left, i.e. niches 4, 5 and 6.
Put your headphones back on and zoom out twice. Turn clockwise and go forward 5 times. You are then at the back:
Niche 6:
You are standing at the back, in front of a low display box. According to Sonny's drawing it has....
Exhibit D:
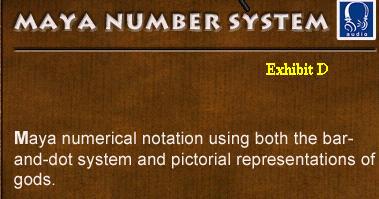
So you expect to hear Story 07 here. Check it with your earcups. However, you hear story 14. So write down: D=14=wrong, D=07.
Zoom out and turn left and zoom in on the display nameplate.
Exhibit B:
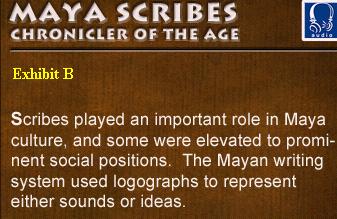
So Story 08 is appropriate here. Is that also true? Yes, so note down: B = 08 = correct.
Put away headphones and zoom out and turn counterclockwise.
Go forward 2 times out of this niche 6, then turn right, forward 1 time and turn right and you are standing in front of:
Niche 5
Go to the back of thisniche and zoom in on the display nameplate:
Exhibit I:
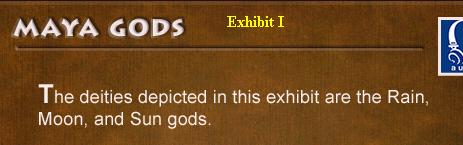
So story 03 should be heard here, and it is. So: I = 03 = correct.
Zoom out twice and turn around and go forward twice out of the alcove, turn right and go forward once, turn right again and you are faced with:
Niche 4:
Go forward twice into this alcove and then turn left and zoom twice on the nameplate on the left at the bottom of this display case:
Exhibit L:
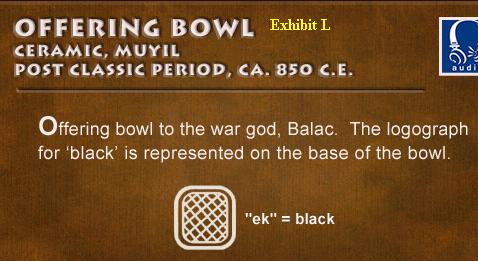
So this should include story 04 and that is true. So L= 04 = correct. Also draw over the Mayan symbol for Black on this nameplate.
Well, these were all 10 Exhibits here in the main exhibition hall. The other 5, plus the Monolith, can be found in the garden according to Sonny's drawing. Put away your headphones and zoom out twice, turn counterclockwise and go forward twice out of this niche and then turn counterclockwise again. You now look across the room at the pyramid again. To the left and right of the pyramid are the passages to the garden. Go forward 5 times to the pyramid and then turn left and then go forward 3 times to the blank wall, left of the pyramid and you are then right in front of the left passage to the garden. Go forward through this corridor 4 times and you will then be in:
Garden
The winding path follows a route through the garden and then takes you back to the exhibition hall via the right-hand passage. In the middle of the garden in a clearing with a "roundabout" on which the famous Monolith stands. That's a kind of Obelisk. Start by walking forward along the path twice and then zoom in on the stone column that is on the left of the path. This is:
Exhibit 0:
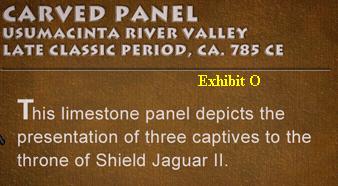
Here you expect to hear story 11 and you hear it. So: 0 = 11 = correct.
Zoom out twice and continue along the path twice. Then zoom in on the stone altar that is on the right of the path.
Exhibit C:
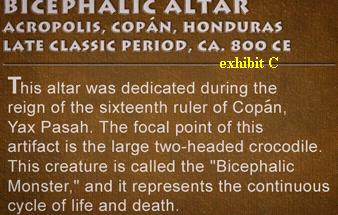
So story 14 is appropriate here, but you will hear story 05. So write down: C = 05 = wrong, C = 14.
Plug your ears out and zoom out twice and now follow the path forward twice, then turn right around the bend twice (you will see the Monolith in the distance) and then go forward again 4 times, round the bend twice to the left , forward once and you are in the open space in the middle of the garden. Go forward 2 more times and Nancy will run into the Monolith.
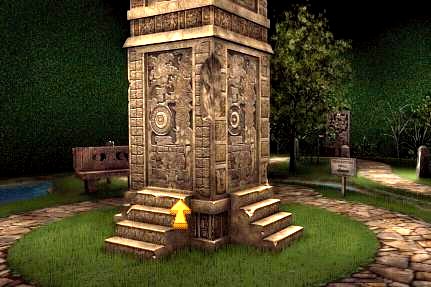
Nancy will say: "this side looked damaged" and you will hear footsteps. Zoom out and you will now meet:
Taylor Sinclair.
Just talk to Taylor Sinclair through any available conversation option. Sinclair gives a few hints suggesting that something is wrong with the Beech Hill Museum and this Mayan exhibit. However, he doesn't want to talk about it any further here in the garden and invites you to come visit him in his office later. So don't forget to ask him where his office is. So that is: 707 Bing Cherry Boulevard. Sinclair then walks away. Sinclair's address is now also listed as a stop on the Metro map
If Sinclair has run away, you are still standing in front of the Monolith. Now do not go forward to the right of the Monolith because then you will follow the same route back. So zoom out once and then turn around. Then go forward twice along the path and then once around the bend to the right, then forward again 3 times and once again to the right around the bend. Then go forward once and then zoom in on the stone that is on the right next to the path. This is:
Exhibit H:
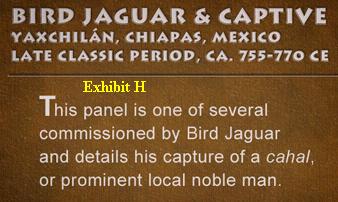
So here you expect to hear story 15. Check and indeed you now hear story 15. So write down: H = 15 = correct.
Zoom out twice and then continue forward twice along the path and then zoom in on the stone that is on the left of the path. This is:
Exhibit K:
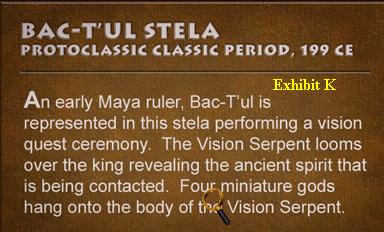
This includes story 12 and you will hear that too. So: K = 12 = correct.
Zoom out twice and go forward once and then zoom in on the stone that is right in front of you in the bend, on the left of the path. This is then:
Exhibit J:
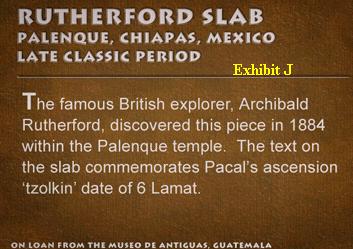
You expect to hear story 13, but you hear story 09. So write down: J = 09 = wrong, J = 13.
Zoom out twice, go straight around the bend once and then follow the path forward 6 times and you enter the exhibition hall via the tunnel and are then on the right of the pyramid. You have now had all 15 Exhibits and have heard all 15 stories and you now know at which Exhibit you have heard an incorrect story. You also know which story should be played with these exhibits. So go left and through the door into the hall and then left through the Shipping and Receiving door and then go back to the Comvomatic Auto Narrator. You can now adjust your list as follows:
| A = Tools of the Trade = 07 = wrong, must be corrected, A=05. F = Range of the Maya = 06 = correct. E = Pakal Artifact = 01 = correct M= K'inich Janahb Pakal = 02 = correct G = Body Shaping =13 = wrong, must be corrected, G = 09 N = Ceremonial Ball Gamrs = 10 = correct D = Maya Number System = 14 = wrong, must be, D = 07 B = Maya Scribes = 08 = correct I = Maya Gods = 03 = correct L = Offering Bowl = 04 = correct O = Carved Panel = 11 = correct C = Bicephalic Altar = 05 = wrong, must be, C = 14 H = Bird Jaguar = 15 = correct K = Bac T'ul Stela = 12 = correct J = Rutherford Slab = 09 = wrong, must be, J = 13. So you only have to change 5 tapes on the Comvomatic. So zoom in on the boxes: A: Change the number here to 05 So that the entire series of 15 tapes would look like this: A=05, B=08, C=14, D=07, E=01; F=06, G=09, H=15, I=03, J=13, K=12, L=04, M=02, N=10, O=11 |
If you have done this correctly, you will hear Nancy say: "There, that looks like it's in order" and you will no longer be able to zoom in on the "boxes" of the Comvomatic Auto Narrator. Go to your desk in the laboratory and zoom in on your Task List and cross out Task 5. One more task to do, Task 6: "Rearrange the numbered Mayan artifacts, in the exhibition hall".
Task 6
"Rearrange the numbered Mayan artifacts, in the exhibition hall"
So you have to rearrange the Mayan numbering system. Which of the Exhibits is again about the Mayan Numbering System? That's right, Exhibit D in Niche 6. So zoom out a few times and exit the laboratory and then enter the main exhibition hall. Go to the back of Niche 6. You will then be standing in front of that low display case of Exhibit D. The last time you were hereyou did not look in this display case. We'll do that now. Click on the keyhole on the right to open the display case and then click in it. a tile chart will now appear on your screen.
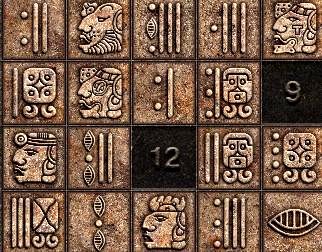
This diagram consists of 4 by 5 tiles, but you hear Nancy say that a few tiles are missing. And that is correct because there are no tiles on numbers 9 and 12. You will now have to look for these 2 tiles first. So zoom out and close the glass lid of the display case. Then zoom out again and turn around and leave Niche 6 and then enter the garden via the passage to the left of the pyramid. In the garden you walk to Exhibit C, the Bicephalic Altar. Zoom in on this altar once and then click on the tile on the right. On this tile you see 4 dots and 2 bars. Place the tile in your inventory.
Zoom out and turn around and walk back to the exhibition hall. Now go to the display case of Exhibit F, in niche 1. Open this display case by clicking on the keyhole. In this display case, at the front left, are 2 small tiles. Zoom in on these 2 tiles and then pick up the right tile. You see a God's head on it. Place the tile in your inventory and zoom out and then close the display case by clicking somewhere above the round board.
You have now found the two tiles, but you probably, like me, have no idea what the Mayan Symbols look like. For example, what is the Number 1 in Mayan? To find out you need Sonny's Floppy. You have found this floppy when you were looking for the shards for Task 1. You found the floppy in the box with Sonny's things in the rack in "Shipping and Receiving". But to "read" the floppy you obviously need a computer. For this you now have to go to Nancy's Hotel Room. Nancy rents a room in the Colonial Hotel, so leave Niche 1 and go through the double Golden Doors in the Rotunda to the Metro. Note that Taylor Sinclair now also has a stop on the metro map. Click on the red dot at the "Colonial Hotel" and the metro will take you there
Nancy's Hotel Room
Go forward to the hotel and you will automatically end up in Nancy's room. Walk forward twice through. The alarm clock is on the small table on the right. With this alarm clock you can, if necessary, "change" the time in the game. However, that is not necessary now, so don't set your alarm clock. The telephone and Nancy's laptop computer are on the large table. With the telephone you can call some of Nancy's friends and ask them for advice. This can only be done via this telephone in Nancy's room. Let's just do that. Zoom in on the phone and then click on the receiver and call up Bess. You have to key in the entire number. Because this is the first time you are calling Bess, this conversation runs completely by itself. Nancy just catches up with Bess. Afterwards, zoom out twice and then click on the laptop computer. Go into your inventory and click on Sonny's Floppy and then click with the floppy on the slot at the bottom right under the keyboard. Then click twice on the screen.
Sweet doggy... click on the laptop icon at the top right and read through Nancy's notes. Then close this screen by clicking on the cross at the top right. Then click on the Floppy icon. You have to enter a password…..Remember when I wondered why Sonny kept those Koko Kringle candy wrappers in his drawer? Try it and type: koko kringle and then press your Enter key. Yippee….you're in. So there are 4 categories on the flop, namely: "Stuff to do"; "Stuff to remember", Stuff to Forget", "Stuff to work on". Let's go through all 4, so click on:
Stuff to Do: Here you can read about Sonny's struggle with Task 5. He was really well on his way because as you can see he already got 10 correct. Well, you've already completed task 5 yourself, so this doesn't matter anymore. Close the document via the cross and then click on:
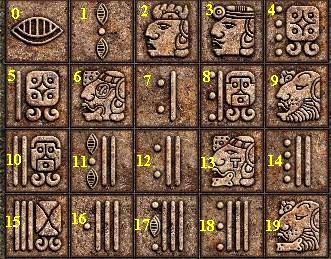
Stuff to remember: Yes…Sonny's notes on the MAYAN NUMBERING SYSTEM. Read this very carefully and take notes if necessary. You need all of this to complete Task 6 properly. What does Mr. Sonnyboy say here: He explains what, in Maya, our numbers 1 to 5 are and how you can use them to make all the numbers you want: you read that:
|
0 looks like a turtle's shell, but without the turtle.
1 dot = 1, so 2 dots = 2 etc. 1 bar = 5, so 2 bars = 2 X 5 = 10 Each dot is like an individual fingerprint and the bar represents the entire hand. A bar with 1 dot in front of it = 5 + 1 = 6 So 3 bars with 1 dot in front = 3 X 5 + 1 = 16. That bars are usually vertical. And the dots must be on the left in front of a bar. There is one big BUT with this system and that is that a dot or a bar must actually be recognizable as a dot or a bar if they want to count as a number. So you should just ignore anything that doesn't explicitly look like a dot or bar. Then he rambles on some more and then he suddenly says that the images of GODS also serve as NUMBERS. He then mentions this list:
This list give you which number belongs to which god and it also describes each God |
Well, you'll have to make do with this. Take a look at those 2 tiles in your inventory. So on one tile there are 2 bars with 4 dots on the left in front of them. According to Sonny's explanation, this is the Mayan number: 2 X 5 + 4 = 14. On the other tile you see a God's head. But which God? So what Number does this represent? I honestly can't figure it out. Close this document and then open:
Stuff to forget: Make a note of the two passwords you see at the top of this document: System login: sjoon and System password: spacebaby. Then read the piece of text about the Temple Quizzes. Apparently visitors to the exhibition can take a few quizzes for which they can find the answers to the questions at the Exhibits. But there seems to be a problem finding the answer to the "Matchmaker" question. Once you have read this, close the document and then open: Stuff to work on: I don't think this is really important. Just read it through and then close this document again. Then close the floppy screen via the cross and zoom out twice.
Well, you could have a quick phone call with Bess now. If you do that, just use all the possible options given to you and each time you use an option the conversation on that topic will continue to flow naturally. Don't forget to ask Bessfor a hint. She then advises you to go see Taylor Sinclair. But you were already planning to do that, but only after you have solved Task 6. Then say hello to Bess and zoom out. Leave the hotel and travel back to:
Beech Hill Museum:
It is now evening. Go straight to Exhibit D in Niche 6 and open the low display box again and then click in the box again. The Tiles table will appear on your screen again and the 2 tiles from your inventory will automatically appear in the 2 empty spaces. Well, you now know that these 20 tiles are each a Mayan number. So they are the numbers 0 to 19. However, they are not in the right place.
You have already seen that the boxes in which the tiles are placed each have a number. From top left to bottom right that is 0 to 19. You have to click the right tile in the right boxes. So the tile representing the Mayan number 0 should be in the first box at the top left and the tile with the Mayan number 19 should be at the bottom right, etc. etc. You can click and pick up each tile and then click them in a different place on the tablet. You then pick up the tile that is already placed in that spot. So make sure you get this number series from 0 to 19 in the correct order. Here is the correct solution:
If you do it right, you will hear Nancy say: "That looks right".
Zoom out completely and close the box and go to your desk in the laboratory and zoom in on your Task List and now also cross out Task 6.
Part 2: The Theft:
If you've been following my walkthrough so far, you've just completed Task 6 and crossed it off your Task List. Leave the laboratory and go, via the large exhibition hall, to the Rotunda and knock on the door of Joanna's office. Well, what did you expect? It's already evening, so Joanna has already gone home. Take the Metro to your hotel room. You have now completed all 5 tasks.
NB: It may well be that it is not yet evening in your game. It depends on how fast you were in solving the Tasks. If it is not yet evening in your game now Joanna is still in her office and you can talk to her and skip the "Turn the Time" part until you have to do so in your game. However, for my it was now evening, and that is of course because I have to write everything down while playing, so it takes me longer, but it makes no difference to the game at all. Louis Koot.
Changing the Time
In Nancy's room, walk to the small table with the alarm clock and zoom in on the alarm clock. Click on "Alarm" and then change the time, using the up arrow button, to 08:00 AM and press "Set". Your screen goes black for a moment and then...... Beep....Beep....Beep.... Good morning Nancy, hope you have slept well. It's the next morning. Take the metro to:
Beech Hill museum
Knock on Joanna's office door and then open the door and enter. Turn right and click on Joanna and just use all possible conversation options. You find out that Hendrik van Hune simply begged to be allowed to work for the Beech Hill museum and that he previously worked for the "Chaco Cultural Center" in New Mexico. End the conversation and leave the office and go through the Golden Doors to travel by Metro to Taylor Sinclair's office.
Taylor Sinclair' kantoor:
|
Upon arrival, go forward once and open the door of Sinclair's office and enter. Sinclair is sitting behind his desk. Click on him to start the conversation. "No thank you, you said that Beech Hill is in jeopardy. I need to know why"."Do you think there is a connection between the two thefts?" "Does Joanna share your concerns?" "With so much riding on this exhibit? How can that be?" " I understand your concern. But what can I do to help?" "I'll do my best". "Modest Mouse, most people call me Nosy Parker. But anyway, tell me something about the art business. Is that a contempory painting?" A (terribly ugly) painting now appears on your screen and Sinclair gives a meaningless answer. Continue with: "Good thing, you're not trying to make a living as a comedian. So, what about the painting?"" Is Popy Dada her real name?" Now just continue with the other questions and you will discover that he is not a friend of Alejandro Del Rio and that he takes 10 percent of every art sale he makes. Then end the conversation and leave his office and travel by subway to: |
Mexican Consulate:
Go in here and talk to Alejandro for a while. Just follow all the options and you will experience that Joanna, of all the museums that bid for the Monolith, had the highest amount. And that for such a small museum like Beech Hill. You also experience that Alejandro thinks very kindly about Henderik. Say bey bey to Alejandro and travel back to:
Beech Hill Museum:
The theft:
Proceed immediately to the laboratory. Notice that Hendrik is not there and immediately leave the lab and as soon as you are in the hall the alarm goes off. Turn to the left and Joanna enters the hall through the door and tells you that there has been a burglary and that the police are on their way. Your screen goes black for a moment and then you automatically find yourself in the large exhibition hall in Niche 2 . Exhibit E has been stolen and the police have taped the "crime scene".
However, you see a paper in the broken display case and you see a red handprint on that paper. Go forward once and click on that paper. But Nancy says she better talk to Joanna first before she gets her fingers in everything. So zoom out and turn around and go to Joanna who is now back in her office. Talk to Joanna. Just follow every possible conversation option and Joanna will grant you permission to do what you do best, which is snooping.
Go back to the scene of the crime, so back to Niche 2 in the exhibition hall. Zoom in on the "Red Hand" letter again, you will now see that there are a number of Glyphs above the Red Hand. Now place the Red Hand in your inventory. Go to the Laboratory. Hendrik isn't there, so you can't ask him what those glyphs on the Red Hand letter mean. Go to your own desk. There is now a white note on your desk, under the task list. Zoom in and read it. The note is from Hendrik. Hendrik is off somewhere, but through this note he gives you the task of going through the Temple Activities.
Zoom out and click on your phone and then on the receiver. You have a voicemail message, so press the "0" key and listen to Franklin Rose's message. He asks you if you want to investigate the theft and if you want to call him back. So press "9" and then dial Franklin Rose's number and talk to him. Just follow the options and then exit and buzz out of your desk .Return to Joanna in her office and talk to her again:
|
"Have you
seen Hendrik? I found a piece of paper inside the Pakal display case. It had some glyphs on it, and a print of a
red hand. I'm hoping he can give me a translation".
"Sorry Joanna. I thought I was supposed to go to Hendrik with all glyph questions". "I'm curious about the red hand print the thief left. Does it have any significance in Maya culture?" "I haven't seen Hendrik since the theft. Where do you think he could be?" Leave Joanna's office and rush back to: Laboratory When you enter, walk straight ahead and zoom in on it Spectro X Arche oanalyze device.
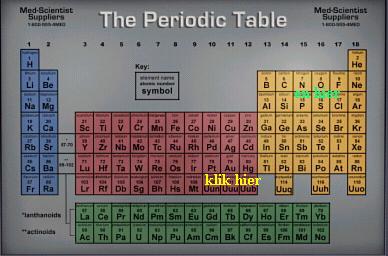
Click on the on/off button at the bottom right to turn the thing on. Then click on the roller shutter on the left to slide it down. The test section is now open. Click on the "Red Hand" letter in your inventory and place it in the test box. Close the box by clicking the roller shutter back up. Now click on the device screen and then click on the START button. The analysis starts and a graph appears on the screen. Click the "COMPARE" button. A second graph will appear on the screen. Click on the LEFT ARROW button. The two graphs are now superimposed on each other. Click on "MATCH" The letters "HgS" then appear in the "Chemical Compound" box and Nancy exclaims with joy: "That's it". Click on the "EXIT" button and zoom out once. Open the shutter and take back the Red Hand letter and click it back into your inventory. Turn the device off again via the on/off button and zoom out completely. Well, now you know that that "Red Hand" contains "HgS". But what the heck is “HgS”?. Turn clockwise 6 times so that you are looking at the wall to the left of your desk. You will see a large board hanging on the wall with all kinds of colored boxes on it. That's the "Periodic Table".
Go forward once to there. On this sign, in the PURPLE PART, click on "Hg" and Nancy says that this is Mercury. Zoom out once and then click on the "S" in the YELLOW part and Nancy says that this is Sulfate. Zoom out and Nancy tells you that the Red Hand print consists of a compound of Mercury and Sulphate. Zoom out and return to Joanna in her office to tell her your findings: |
Joanna
"I did the chemical analysis you suggested. That red hand was printed with a compound containing mercury and sulphur. Does that mean anything to you?" Joanna then tells you something about "Cinnabar". The Mayans used this to rub their carvings to give them more contrast. "Where would a person get a supply of Cinnabar?" Joanna then tells you that the museum has not had this stuff in stock for quite some time because the supplier could no longer deliver it. Hendrik always ordered it. Joanna does not mention the name of the supplier. End the conversation and return to your desk in the laboratory.
Laboratory
Zoom back in on that yellow list of suppliers that is stuck to your desktop. Scroll down and you will read the second to last name. Mack. Mack is apparently the supplier of the chemical stuff. Write down the phone number and zoom out and click on your phone and then on the receiver. Dial a 9 and then dial Mack's number: 555-6766. Follow this conversation like this:
|
"Hi, I'm the
new deputy curator over at Beech Hill. I wonder if you
could answer a couple of questions about our ordering
history".
"Do you know who has placed the order?" "You're sure it was last week?" "Was the package shipped to the museum?" "So there hasn't been a hold up at the distributor or anything like that?" "Can you remember anything about the person who picked up the package?" "Well, thanks for your help" "Problem? Not that I could hold you responsible for…… Mack then says that mercury sulfide is a very nasty substance that can make you completely mad. Give one of the two remaining answers. It doesn't matter because Mack will end this conversation anyway. Zoom out completely and leave the lab and in the hallway go through the door to the exhibition hall. |
Hendrik's tumble
Now enter the garden via one of the two passages next to the pyramid. It does not matter which exit you enter the garden through. Then walk 3 or 4 steps into the garden, then turn around and walk back into the museum and continue towards the front of the pyramid. You hear a loud scream and hear someone fall and then we see Hendrik lying on the floor in front of the pyramid. He fell from the top of the pyramid.
The ambulance takes Hendrik to the hospital where it is determined that he suffers from general memory loss due to the fall. Afterwards you are back in your hotel room and you now automatically have a telephone conversation with Bess and George. This conversation goes without saying and at the end of it they recommend that you talk to Joanna. Zoom all the way out and leave the hotel and return to:
Beech Hill Museum.
Go to Joanna in her office and talk to her. She's getting a little hysterical now. "take it easy, Joanna. I'm sure everything is going to be ok." However, Joanna, remains pissed off and asks if you want to contact the hospital where Hendrik is. "How can I help around here?". You can read Hendrik's mail and keep the lab tidy. yes, you think, just look at it. Exit and go to:
Laboratory
Go to your desk and zoom in on the phone and click on the receiver. So you have another voicemail message. So press the "0" key and listen to Nurse Bluefoot's message (she sounds like a guy, though). You learn the name of the hospital where they took Hendrik: "Eleanor Roosevelt Memorial Hospital" and Nurse Bluefoot's asks you to call her back immediately. So write down her phone number: 555-4000. Then press the '9" key and call back the Nurse.
|
"Nurse
Bluefoot? This is Nancy Drew. You left a message
regarding Hendrik van der Hune. How is he?"
"Can you explain the amnesia?" "Has he lost his memory for good?" "I see. So we need to help him find the trail of crumbs? Is that it?" "Where do I come in?" "I see. Well, I'll be happy to help in any way I can. When are the visiting hours?" "Great! Is there anything else?' "Well, the last thing we want is a meltdown. I'll go easy on him". |
The end of the conversation. Zoom all the way out of the desk and make sure you have the "Red Handshake" in your inventory and look at your watch to see if it is anywhere between 10:00 AM and 4:00 PM. if that is not the case, you should now go to Nancy's hotel room and then set the alarm for, for example, 10:00 am. You will then continue the next day. Then go via the exhibition hall and the Rotunda to and through the double Golden Doors and take the Metro to:
Eleanor Roosevelt Memorial Hospital:
|
Upon arrival, go forward and open the door of Hendrik's room. Hendrik is lying lazily in bed. Click on him. You look familiar to him, but he doesn't recognize you. "Hendrik! It's me, Nancy. You're looking very well. I'm here to help you with your memory exercices, so you can come back to Beech Hill as soon as possible"."Beech Hill is a museum here in Washington, DC. The curators name is Joanna Riggs. You were working there, and that's where your accident happened. Do you remember anything about the accident?" "What access code would that be?" "Actually, Nurse Bluefoot thinks with regular visits, I may be able to help you get your memory back more quickly". "Nurse Bluefoot says that visual aids often help to trigger memory". "Come on, Hendrik. You'll feel much better once things start coming back to you. I'v got o picture with me, if you'd like it to give it a try". The notice board will now appear on your screen. So take the "Red Hand" from your inventory and pin it to the right on the notice board and then continue with: "Great. These are Maya Glyps, like the ones you used to translate. Dont be upset if you don't know how to read them anymore. I can tell you what the mean"."I'm sure you have written them at one time or another in your career. So what do you think this is all about: 'the magician suffers yellow death'? " "The author? What are you talking about?" "Hendrik, this note was found at a crimescene. Are you telling me you left it there?" "I'm investigating the theft of the Pakal carving. Please, Hendrik try to remember something" Now Hendrik gets angry and tired and you are thrown out of the room by sister blue shark. Turn around and you're in the subway. Travel to: Taylor Sinclair's Office Go inside and talk to Sinclair: Sinclair gives the impression that he is very upset about the theft of the Pakal carving. "I see you have spoken with Joanna?""Have you spoken with the police?" "Did you hear? The thief left a glyph message with a red hand print on it" "What is the name of the museum in New Mexico?" "Do you know Prudence Rutherfort personaly?" "Why do you think, the thief is leaving this red hand print?" "I need a photo of the Pakal Carving. Do you have one?" Sinclair then holds a photo under your nose. Click on it to get this photo in your inventory. And this is also the end of this conversation. Leave Sinclair and travel to your: Hotel. In Nancy's room, go to the telephone and first call Franklin Rose: As follows: NOTE: As far as I can tell, this is the ONLY TIME in the game that you can have this conversation with Franklin Rose. It is very important that you have this conversation with Rose NOW, otherwise you will NOT be able to contact Prudence Rutherford, and then you will not be able to complete the game. "I need to contact a woman named Prudence Rutherford. I noticed she's on the board of the Topeka commission for the Arts, and that they've donated money to Beech Hill. Any idea how I might track her down?""Dad never told me you lived in Witchica" Rose then gives you Prudence Rutherford's phone number which is: 1-785-555-7279 and asks why you want to speak to her. "Mrs. Rutherford had a necklage with a Maya carving stolen out of her home. I'm trying to see if there's any connection between those two robberies""That would be great, Mr. Rose" Don't go calling Prudence Rutherford yourself right now. You should give Franklin Rose some time to call Rutherford first to prepare her for your call. Call the "Chaco Canyon Culture Center" in New Mexico. You saw and wrote down the telephone number on that card that is on Hendrik's desk in the museum's lab. Well, you must have forgotten to write it down, so here it is 1-505-555-1222. So dial this number "Heard the thief left a red hand print at the scene of the crime. Is that true""What typ of artifacs did the thief get away with?" " Do you have a list of the stolen pieces?" "I'm intersested in the Jade Carving. What did it look like?" "Could you sent me a photo of that Jade Carving, so I can take a look at the glyph?" Sheila would love to do this, but she can't. The only photo that was taken of that Jade piece is now with their insurance company. Thank Sheila and close. After this conversation, buzz off the phone and click on the alarm clock and set the alarm time to 10:00 AM, press SET and it will be the next day |
The Next Day
It's the next morning. Go forward once and then turn around and go to the telephone. Could you call Prudence Rutherford yet? Let's try it, so enter her phone number: 1-785-555-7279 and.......Unfortunately, you get her answering machine. Rutherford is not at home at this time. You will have to try again at a later time. Remember, you can only talk to Prudence Rutherford on the phone here in your hotel room. This is not possible via telephone in the Laboratory. Leave the hotel and travel to the Mexican Consulate. Go inside and chat with Alejandro. Just ask him all the questions you can and you will find out that.......
Alejandro was also in the museum at the time of the theft. He says he was there to return the Loan Contract to Joanna. Express your doubts about Joanna to him (this is important because of the anonymous tip to the police later in the game) and also ask him about Cinnabar. Say goodbye and leave the consulate and take the metro to:
Eleanor Roosevelt Memorial Hospital:
|
Enter Hendrik's room and then go forward once to the notice board. Zoom in on the notice board and then pin the photo on it that you received from slimeball Sinclair. Then zoom out twice and click on Hendrik. "Ready to do some memory work, Hendrik? I've brought you a picture"."Do you know his name?" "Think, Hendrik: Where's the carving now?" "Easy, Hendrik, the answers are in your head, you just need to find them". "Why would you break into the display case and steal the carving, only to leave it in the museum?" "What kind of plot?" "Do you know what lock it belong to?" "you can count on me, Hendrik". Now you get that key from Hendrik and it disappears into your inventory. "One of the pieces that was stolen from the Chase Canyon Cultural Centre was a jade carving with an unusual glyph on it. Do you remember translating it?""Do you know anything about the theft of Prudence Rutherford's necklace?" "Did you have anything against Joanna?" "Hendrik, I need to know where you put the Pakal carving" But he really can't remember, so he ends the conversation and leaves the hospital and travels to: |
Beech Hill Museum:
Enter and go straight to your desk in the Laboratory. There is now a yellow note on your desk, under the telephone. Click on this note and read it. It's from Joanna. Joanna is at the police station to be questioned about the theft of the Pakal. She also says that she has left her office open, so you can just go in there. Zoom out and click on the phone and then on the handset. You have another voicemail message, so press the "0" key to listen to it. It is Joanna who says, rather hysterically, that the police have given her the "third degree" and that she has been suspended by the museum's board of directors. She is no longer allowed into the museum. She asks you to call Franklin Rose.So press "9" and call Franklin Rose 555-1441. Just follow every possible conversation option.
Indeed, Joanna has been suspended and Rose wants Nancy to take over Joanna's duties. Despite your protests, he still holds that opinion. In fact, he wants Nancy to investigate the case and if it turns out that Joanna is innocent, her suspension will be lifted again. Of course you agree to this. End the conversation and zoom out completely.
Zoom out of the desk and now go to Hendrik's desk and zoom in on the left desk drawers. Open the top drawer with the key you received from Hendrik. In this drawer, next to the ruler, is a thick Zip disc. Pick up this disc and then put it in your inventory. Close the drawer and then open the bottom drawer, again with Hendrik's key. There are a lot of file folders in here. You can click in 3 places in this drawer. First click in the front of the drawer and you will take out Hendrik's "Translations Notes". The paper is full of notes and drawings about Maya Glyphs. Take a look at it and then zoom out and this paper will then appear in your inventory.
A little further in the drawer you will see a small booklet sticking out between the folders. Click on it and the booklet will appear on your screen. Open it and read through the pages. The first page contains "Number Stations" and the next two pages explain "Decoding the Numbers". The last right page is headed "Smuggler Stations"
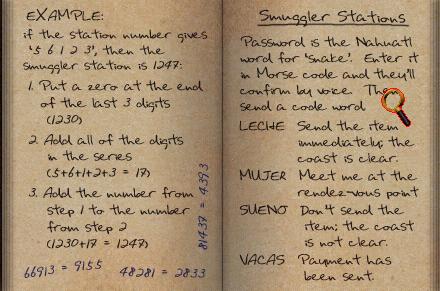
Read the top paragraph. You read that the "Password is the Nahuatl word for snake". Click on this paragraph and Nancy will say that she needs to find someone who speaks Nahuatl. Don't we know someone who comes from Central America? At the back of this drawer you can read another 4 note pages about an expedition by Hendrik with a certain Big Bunny. Read through them and then zoom completely out of the drawer, close the drawer and leave the lab and now take the Metro to:
Mexican Consulate:
|
Go inside and talk to Alejandro: "have you heard? The police received an anonymous tip and they're considering Joanna a prime suspect in the Pakal theft. They've taken her in for questioning""How did you know about museum finances?" "I need to know the Nahuatl word for snake. Can you help me?" "I'd rather not say. It's part of my investigation" "What are you talking about, Alejandro?" "First you tell me you are unconcerned about the theft of the Pakal carving, and then you have an urgent need to see the provenance document. Is it just me, or is this a little suspicious?" "Oke, Alejandro I'll see what I can do" Eleanor Rosevelt Memorial Hospital Enter Hendrik's room but he is sleeping. What a noise that guy makes while sleeping. Walk to the notice board and pin the "Translations Notes" from Hendrik's desk drawer on it. Zoom out, turn around and leave the hospital and travel to: |
Beech Hill Museum:
Enter Joanna's office and immediately turn right and go forward once (where Joanna always stands). Then turn left and click on Joanna's desk. Then click 3 times on the drawer that hangs under the middle of the desk. This drawer opens. There is a small key in the drawer, just in front of the scissors. Pick up this key and it will disappear into your inventory. Close the drawer and zoomout. Then click on that paper that is on the left on the desk. It's a letter of transmittal. It features items sent to Beech Hill by the Elmusea Cultural. Take special note of number 1113: "Diego de Lamba ornamental carving" a piece of Jade that was excavated in Cuba in the Jibacoa valley. Zoom out 4 times and then go forward to those filing cabinets. Then open the middle drawer in the middle cabinet. Click in the drawer and then click, middle right, on the folder: "Pakal Provenance"
This folder will now appear on your screen, so open it. There are 5 documents in the folder. Read all 5. The first document is therefore the actual Provenance, proof of authenticity, for the Pakal. The second document is dated May 4, 1940 and in it you can read that the Pakal was donated to the "Serpentine Gallery" by the then owner of the Pakal, one Rupert Star. The third document is a bill of sale. On August 31, 1955, the Pakal was sold by the Serpentine Gallery to a man named Felix Peterson for the sum of $800. The fourth document is a letter from a notary Vandalay to Taylor Sinclair, dated December 2, 1992. Vandalay informs Sinclair that the Petersons' estate will be publicly auctioned. The fifth document is the bill of sale recording the sale of the Pakal to Taylor Sinclair for the sum of $1,000. The note is signed by: Sinclair, Joanna and Vandalay. Once you have read these 5 documents, close the folder and zoom out. The Folder goes into your inventory
NB: The folder only goes to your inventory if you have asked Alejandro aboutthe Snake word. If you didn't asked Alejandro about the Snake word then you can view these 5 documents, but cannot take them with you. Then go back to Alejandro and ask him about the Snake word again.
Close the drawer. Leave Joanna's office and travel by subway to your:
Hotel room
Go to the phone and call Prudence Rhuterford again. This time you'll get her on the phone. Remember not to ask her questions that she might find insulting or this conversation will end prematurely. If this does happen, call her again IMMEDIATELY and then quickly apologize and resume the conversation.
|
"Hi, this is
Nancy Drew, calling from Washington, D.C. I'm trying to
reach Prudence Rhuterford, please".
"I'm sorry to hear about your loss. What can you tell me about the necklage?" "Was the necklage a gift?" "More? In what way?" "What does the jade piece look like?" It was a rare glyph whose meaning no one could exactly decipher, but it has something to do with the concepts: Snake, Green and South. "About the theft, where were you when it took place?""Was anything else taken beside the necklage?" "About the theft?" "What about evidence?" The thief also left a Red Handprint on her wall. "A red hand print was left at the scene of the crime at Beech Hill, too! Ms. Rutherford, I'm almost certain these robberies were committed by the same person" "Ms. Rutherford, it would be helpfull if I knew exactly what your carving looked like. Could you send me a picture that has it in detail?" "Oh, that would be wonderfull! How soon could you have it here?" "Thanks a million, Ms Rutherford, I won't let you down" |
Zoom out the phone and then click on Nancy's Laptop Computer. The external Zip Drive is located to the right of the laptop. Go into your inventory and click on the Zip disc that you took from the top drawer of Hendrik's desk. Then click this disc into the Zip drive and then click twice on the laptop screen. Click on the zip disc icon and…….well…did you really expect that no password is required to access the zip? Obviously you don't know the password, so you'll have to wait until you can visit Hendrik again. Close the screen and zoom out of the laptop. Just leave the Zip in the drive.
. It will now be too late to visit Hendrik or Alejandro. What you can do now is to call Bess and George. So pick up the phone and dial Bess's number and catch up with your friends. The first part just happens by itself and after that you just use all the conversation options that arise. After some options, the conversation will proceed naturally for a while. At the end, DON'T ask for hints. End the call and click on the alarm clock and set the time to 10:00 AM…
The Next Day
|
It's 10 o'clock in the morning. Nancy, woke up, get washed and dressed and have breakfast and then travel to: Mexican Consulate: Go inside and click on Alejandro: "Here's your file, as requested" and then "A deal is a deal"Alejandro now tells you the nahuatl word for Snake and that is C O A T L. Thank him and travel to: Eleanor Roosevelt Memorial Hospital: Enter Hendrik's room and click on Hendrik. Well, Hendrik is a lot happier now. Apparently his "Translation Notes" got him thinking after all: "you recongnize the riddle?" You will now see the notice board again. In addition to the "Translation Notes", Hendrik has printed a new piece of paper. Click on that and don't click on it again. Read what Hendrik has noted and take special note of the drawing and the word "STONE"
Copy it over if necessary. Then click on the paper again and you are back with Hendrik. "Who was this Whisperer of silent secrets?" "How did Pakal wish to be depicted?" "What happened to the scribe's writings?" "Hendrik, A prison of stone. We're not talking about the monolith, are we?" "Do you thing the monolith can be opened?" "Do you think there's anyone I can trust?" Ask him a few more times where he hid the Pakal and then close. Leave the hospital and go to your Hotel room |
Part 3: prelude to the Pyramid quizzes
Hotel Room
It's really time to take a look at Hendrik's Zip disc. You left this in the Zip drive, so zoom in on the Laptop and on the screen and click on the zip disc icon again. You will be asked for the password again. Could it be "Stone"? So type in stone and press your enter key and you are in. On the zip disk you will find 3 sections, namely: "translations", "Notes" and "Contacts". Click on each of these 3 sections and read every document. Take notes because you really need aal the information that's in these documents
|
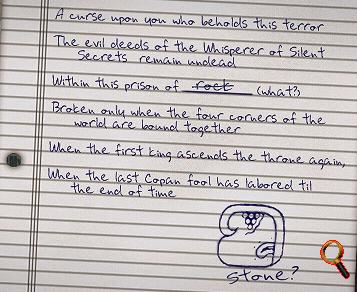
Translation: You will only find one document here. It contains the Whisperer's riddle. This riddle is of eminent importance. It simply contains the clue on how to open the Monolith. "A curse upon you who maintain this terror. The evil deeds of the Whisperer of Silent Secrets remain undead Within this prison of stone. Broken only when the four corners of the world are bound together. When the first king ascends the throne again. When the last Copan fool has labored the end of time" Close this document and click: Notes: There is a lot more in this file. Click on each of the titles in the left panel and then read each document very carefully. Again, take notes Bull: This is a ritual ball game and it has its origins around 3000 BC. Did the Mayans view the bull as a metaphor for warfare? Atanzahab: Matchmaker/marriage agent. Was hired by the parents of an eager groom to make an assessment of possible brides for their son to see whether it could result in a profitable marriage. The bride and groom often married without ever speaking a word to each other. I'll have to investigate whether we have an exhibit of this in the museum for the Temple Quiz. Greenstone: Jade. The Mayans considered Jade to be Divine and Jade was much more important to the Mayans than gold. Jade was often used to carve works of art and sacred objects. Are the SIX KEYS also cut from this? This is an extremely important clue. You must have read this to be able to ask Hendrik about these Six Keys later. Prison of Stone. This is the Monolith: The "prison"
hasa complicated lock. 6 seperate keys must be joined together to fit the lock.
Read the riddle Pakal probably spread them throughout the Mayan empire to prevent them from ever being combined into one key. What are these keys cut from? Must be Jade. It is likely that each of these 6 keys carries the same Glyph. Gotta find them before it's to late. Someone else is also aware of this. This is also an extremely important clue to the six keys Whisperer: Chronicler/writer, Amoxcali from the shaman legend. See also Traveler Notes from summer '72. The Monolith must have been the instrument with which she was punished. But because she was, most likely, of Royal Blood, Pakal could not arrange it in such a way that her soul remained banished from the realm of the dead forever So, inside the Prison of Stone (and that is the Monolith) there must be a Mechanism that made it possible for her Soul to take the road to the Realm of the Dead. But then there must also be a mechanism with which the Monolith can be opened from the outside: the six keys North: Artifacts have also been found in northern New Mexico. However, several pieces have been lost due to the recent break-in at the CCC. Does Hendrik mean the "Chaco Canyon Cultural Center" by CCC? Probably the North Key was also included, but I will check with the other museums in that area. Elmusea Cultural (AZ): NO: Institute for Mexican Antiquities (NM): NO Lila Higgins House (NM) NO We've seen that name, Elmuseo Cultural, before. At the top of that mailing list we found on Joanna's desk. That museum has loaned several pieces to Beech Hill. South: The Mayan culture extended through Western Honduras, Northern Salvador, Belize to......perhaps even into the Amazon region? See also the interview with Rutherford in the latest edition of "Art Appraizer". Hendrik means the interview with Prudence Rutherford in that magazine that is on the small table in Joanna's office. At the beginning of this game you looked through that magazine. If you haven't, it's impossible to ever get in touch with Prudence Rutherford. This is the indication that you should still leaf through that magazine in the way I mentioned at the beginning of this walkthrough. The Jade Glyph that Prudence has hanging on her necklace is the SOUTH key and you have to get your hands on it. East: Kantunlkin is in the far west of Mexico...but what about Cuba? The Mayans were great astrologers, so this allowed them to travel by sea. It seems likely that they were aware of the existence of the island (Cuba). Research: Documents show that a certain Bishop Diego de Landa, in 1652, found a strange looking Jade stone there. Could that be the East Key? Look at that: Diego de Landa. Isn't that item 1113 on that Elmuseo Cultural mailing list you found in Joanna's office? West: Revilla? Gigedo Island? Too far away? Research: 1898: A Jade stone with an unidentified Glyph on it is sold at auction in New York. According to the "Provenance" report, this stone was found in 1753 by a Commander in the Spanish army, one Juan d'Ascension Cortego, on Cocos Island, Costa Rica. Sold to whom?
The carving was sold to a shoe magnate from the American Midwest named: Make a note of this name and telephone number. You will have to contact the descendants of this Daddle later to find out where this West Key is now located. Coplan Fool: The reports from the excavation area sound favorable. Found is a piece of jade carving with a Rabbit Glyph. (RABBIT was the "TRICKSTER" in Mayan Folklore) +++ send a dispatch message via the radio+++++ So this is a hint that in order to get the Fool Key, you need to send a message via the HAM Radio in the Laboratory. Now click on the scroll arrow at the bottom of the left frame to continue. Pakal: Self-proclaimed 1st True King. The Pakal piece in Beech Hill must be the next item on the THIEF's list. Must prevent this, but how? I have to hide the Pakal in a safe place and can't trust anyone right now. Moral dilemma: can I say: "The end justifies the means"? And I must send a clear message to the PERPETRATOR who is trying to open the Monolith before I do. I sincerely hope that I can win this round. Indication that the Monolith is hollow and can be opened. Lamanai: Name of cities: means: "hidden Crocodile". Crocodile is depicted in many glyphs. Paal Kaka: A priest who gave many children their first name. NAMING: Prefixes: "Ah" for boys and "Ix" for girls. A prefix is usually followed by the name of a mammal, reptile or bird. For example: boy's name: Ah Balam, girl's name: Ix Cuat. After puberty, the kids take their father's surname. Contacts: Also in this file are several subfiles. You can read through them all. They are all traffic jams about Excavations. But the only really important information is in: Honduras: Region/Sites: Copan and Pulhapanzak. Excavation in Progress: Yes, Copan. Must keep an eye on this one. Contact via: HAMRADIO STATION 250. Comment: Password is the nahuatl word for Snake. And you know by now nd that's coatl So this tells you the location of the Fool Key and that you can obtain it by sending a Morse Code message via that HAM radio in the Beech Hill Lab. Don't panic, I'll explain that whole Morse thing later if we have to do that. You have now extracted all the important information from this zip disk. Now it's time to get your hands on all 6 of these Keys.
|
Close the zip disk and zoom out of the Laptop completely. Zoom in on the phone and first call : Daddle, Henry Albert IV 1-605-555-3195. You get the great grandson of Henry Albert Dadlde on the line and the first part of this conversation happens all by itself. Then you continue with: "I'm investigating a recent rash of thefts around the country involving simmilar Maya artifacts. Any information you could give me about the one your great-grandfather bought would be very helpfull". Daddle is willing to help you, but he tells you that he donated the Mayan piece to his daughter, Penelope, and he gives you her phone number: 555-3197. Thank him and then call his daughter at 1-605-555-3197. This conversation also happens completely automatically at first and it turns out that this Penelope is Poppy Dada. That's the painter of that painting you saw in Taylor Sinclair's office. Do this conversation in this way:
| "I don't run
into too many dead bodies luckily. But there's plenty of
ather creepy stuff"
"No No, You see, it's all a big coincidence. Your Dad's name came up in connection with a case I'm working on". "Actually, I called hoping your dad could help me solving this case" "Someone is stealing Maya antiquities -Jade carvings to be excact- and leaving a scaring red hand print at the scene of every crime" "It's printed with stuff called cinnabar. Nobody seems to know what it means. All I know is, the more I investigate, the more complicated it gets" "I got a tip that your great, great-grandfather bought a jade carving much like the ones that are being stolen. I'm hoping to have a look at it". "You're kidding. That's a one-af-a-kind Maya artifact, a piece of history. It's hundreds of years old. It's worth a lot of money". "I can't imagine your dad would be very pleased about this. Does he knows?" "Deadly Midnight Snack". I think I know the one you mean. But I'd rather not bring Taylor into this, if it's Ok with you. I'm just not sure wheter to trust him". "Why, are they poisonous?" "Thanks for the tip, Poppy, I can see you're going to be a detectives best friend" "But, would'n it ruin your painting?" "Something in it's place……Like what? An old shoe? A Metro token? A movie stub? "Ok, Poppy, if you say so" "It's a deal" "Thanks Poppy! Bey" |
After this conversation with Poppy, you will know where to find one of the keys and how to obtain it.
Call the Chao Canyon Cultural Center now. Phone number? Well, that's: 1-505-555-1222
It may be that it is now too late in the day and then you get the answering machine from the Center and that tells you that the Center is open between 10 am and 6 pm. If this happens to you now, go to the alarm clock and set the alarm time to 10 AM and after the beep beep beep you just go, but then it is the next day, call the: Chaco Canyon Cultural Center again.
This conversation happens all by itself. You get Sheila Schultz on the phone again and Nancy asks her if she can't help her with an image of the stolen North Key. Sheila says she will check with her employees and asks you to call back later. The connection is broken. Now just wait half a minute and then call the Chao Canyon Cultural Center again. You get Sheila Schultz on the phone again and now she tells you that the stolen Jade piece was wrapped in very soft foam and that it was tied quite tightly around it. However, the Jade piece has made a hair-fine IMPRINT in that foam and Sheila is willing to send that piece of foam to you. She knows the address of Beech Hill and she will send it there. Finish up and leave the hotel and travel to:
Taylor Sinclair
Enter and click on Sinclair and say: "Mind if I help myself to one of those scrumptious looking Oaxacon cookies?" Taylor is thrilled you asked that. Click on the lid of the glass jar and then on the jar and take a cookie from it. Zoom out and close the jar again by clicking on the lid and zoom out again. You're back in front of Taylor's desk. Now click on the paintings to the right of the desk and ask Taylor if you can look at Poppy's painting again. The painting appears on your screen and Taylor leaves the room. Click on the painting on the Mayan Stone, left in the middle.
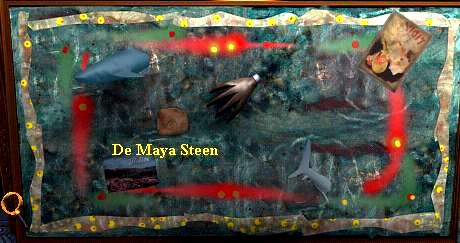
Then click on your cookie in your inventory and click with your cookie on the Mayan Stone. Click on the stone to place it in your Inventory. Well done Nancy, you now have the North Key. Zoom out a few times and turn around and leave Taylor's office and travel to the:
Eleanor Roosevelt Hospital
Enter Hendrik's room and click on Hendrik and say: "According to your notes, Pakal made a six-part key to the Whisperers's Tomb ans scattered the pieces around the world. Do you remember anything about this?" Hendrik now says: The four corners of the world are: North, South, East and West. Plus the 1st King, Pakal himself, and the Coplan Fool. Once these Six are put together, you can use them to open the Tomb. That's why I stole the Pakal, to prevent anyone else from putting the 6 keys together. Go on with: "Maybe I'd better tell Joanna what's going on?". Hendrik doesn't think that's a good idea now. Ask him again where he hid that Pakal. But he still doesn't know that. Exit, leave the hospital and travel to:
Beech Hill Museum:
If all goes well, there are now two Mayan stones on the way, those of Prudence Rutherford and those of the Chaco Canyon Cultural Center. Now let's see if we can get hold of that Mayan stone from Honduras. We will do this using the HAM Radio in the Laboratory. So go to the laboratory and there to Hendrik's desk and then click on the:
The Ham Radio
Zoom all the way in on this thing and then click the power button. Damn...short circuit. I should keep my hands away from electrical appliances. You don't wanna know how many times I've broken the washing machine. You blew up the Radio Tube and now it doesn't work anymore. Click on the power button again and then zoom out once. You now also see the side of the radio. Click on the hatch behind the microphone and then click on it again to open the hatch. Take out the broken radio tube (the yellow one). Close the hatch and zoom out 3 times.
Well, what now? You'll really have to find a new radio tube. Wait a minute... isn't there another HAM radio somewhere in the museum? Yes…..EXHIBIT A in niche 1 of the exhibition hall. Well, that is an older model than the one here in the lab, but that radio tube did not look too modern. So leave the laboratory and go to the EXHIBIT A display case in Niche 1. Open this display case using the small key you took from Joanna's desk drawer and then click on the Ham radio. Then click on the right side of the radio, at the bottom, and the radio will slide forward slightly. Open the hatch and then take out the rightmost radio tube. Close the hatch and click on the front of the radio to slide it back. Then click on the display glass to close the display case again and return to the HAM radio in the laboratory. Click once on the Ham and then again on the hatch in the side, open the hatch again and place the right radio tube, that is the white one, in the HAM radio. Close the hatch and zoom out 3 times.
Short lesson of morse code with the HAM radio
Well, if you know Morse code, go ahead. I can't Morse code so I'm going to study this first. Zoom in on the row of books on Hendrik's desk and then click on the leftmost book in the row. The Instruction book will appear on your screen again. Open it and read all pages carefully. On the second page you will read that you have to enter a 4-digit frequency and then press Connect. You can then listen to this frequency or send messages via the Morse Code Keyboard. In Morse Code, each letter consists of Dots and Dashes and the sentT key must be pressed after each letter. There will be some explanation as to what you should do if you make a mistake. On the last two pages you will find the entire Morse alphabet.
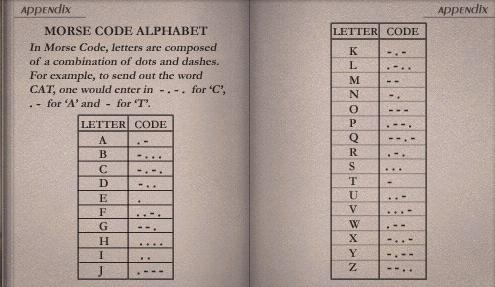
How to Contact the Smugglers in Honduras Now:
Take out the book twice and then zoom in on the drawers. Open the bottom drawer with Hendrik's key and then take the booklet that protrudes above the folders from this drawer. This booklet will also appear on your screen again. Now read it very carefully and take notes
|
Number Stations:
Decoding the Numbers:
EXAMPLE: Suppose you get the station number: 5, 6, 1, 2, 3. Then it is SMUGGLERS STATION: 1247. Why? Here's why: Smugglers Station:
Send the Message: Close the booklet and zoom out, close the drawer and zoom out. Zoom in again on the HAM radio twice. According to Hendrik's book you must first make contact with frequency 2050 to obtain a series of 5 numbers. Do the following:
So now you have to send the coatl word: Now enter the following series of codes with the Morse Code keyboard:
You have sent coatl and the Spanish lady now appears in your text screen again and says: mensaje entendido transmitelo ahoro So now you need to send LECHE:
The Spanish Lady appears again in your text screen, you read: Mensaje recihibo entregaremos a paquete lomas pronto possible. Cambio y fuero.The package will therefore be sent. Turn off the radio andzoom out all the way and travel back to your Hotel Room and set the alarm for 09:00 AM and the next morning you travel to the
|
Beech Hill museum
Shipping and Receiving warehouse
Walk straight to the hall near the laboratory and then enter the warehouse through the "Shipping and Receiving" area. Then walk forward twice until you are between the scaffolding and then turn around again and turn left. You are now looking at the corner with the Receiving/Sending door. Hela...there is now a crate waiting for you behind the rope fence. However, do not go forward to the crate yet, but first click on the stone packing table on the right wall. You zoom in on this table. There is a pink piece of paper hanging on the wall, to the right of the paper rolls. Zoom in on this pink paper and then click on it again. You hear Nancy say:"Diego de Landa…..I wonder if that's one of the key's"
So you can read on the paper that piece 1113 has been received. Piece 1113 is the Mayan stone found by Bishop Diego de Landa and sent to Beech Hill by the Elmuseo Cultural. So Beech Hill received it and so it should be in the racks here somewhere. We'll find out right away. First let's see what's in thatcrate. Zoom out twice and then turn left.
Click on the package behind the rope fence in front of the door. Click on the crate and then click on top of the crater to open it. There is a stone box in the crate. Click on this box and it will now come up. On the front you see 3 faces. Click on the front to enlarge the three faces on your screen. The three faces are therefore the lock mechanism of the stone box. To open the box, make sure all 6 eyes are closed. To achieve this, number the eyes from left to right as 1 to 6 and then click:
Eye 1; Eye 2; Eye 4; Eye 6 and you will see the entire box again.
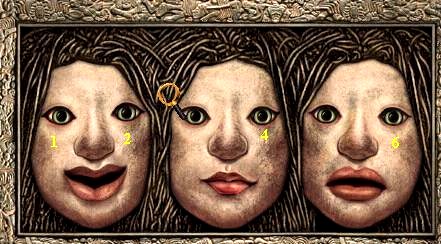
Click on top of the box to open it now. In the stone box is the Mayan stone from Honduras, which you "ordered" via the HAM radio. This is the Coplan FOOL key. Click on the Mayan stone and then again to place it in your inventory. Click on the lid of the box to close it again and then click on top of the box again and both the box and the crate will now disappear.
Zoom out twice and turn left. You look at the statements again. Go forward twice to the rear rack on the left, so not to the rack containing Sonny's box, but to the other rack that is against the back wall. You run into this rack. On the top shelf you will see a silver-gray box on the right. Click on this box and then click on it again. The box then turns around and you see BH 1113 on the label. This box could well contain the Mayan stone from the Elmuseo Cultural, the EAST Key. Unfortunately, the box has a number code lock. Click on this numerical code lock. However, you don't know the code you need to enter, so you can't open the lock now. Maybe you should ask Joanna about it?
So you now have 2 of the 6 Mayan stones (Keys) in your possession, namely the Fool key (from Honduras) and the West Key (from the Poppy Dada painting). You now also know that the East Key is located here in the rack, but for this you need to find out the numerical code for the lock. Underway are the South Key (Prudence Rutherford) and the North Key (Chaco Canyon Cultural Center) and you know that Hendrik has hidden the Kings Key (the Paka Keyl) somewhere in the museum.
Zoom out 3 times and turn around.
Go to and through the door back into the hall and walk through the museum to and through the double Golden doors and take the metro to:
Eleanor Roosevelt Hospital:
Go to Hendrik and speak with him and say:
"Hendrik, I received a package from your friends in Copan. I'v got the Copan Fool Key. I'll still need the Pakal though. How's your memory?"
Now Hendrik tells you that he has hidden the Pakal in the replica of the Pakal Tomb, at the bottom of the Temple Exhibit (so he means the Pyramid). He goes on to tell you that in order to reach the Pakal, you must solve the Temple Quiz. He also says that Sonny has put an impossible question in these Temple quizzes that is actually unanswerable. However, he does give you a clue to this...Coatimundi, an animal with a narrow snout and a long twisted tail. Write this down
Say goodbye to Hendrik and travel back to:
Beech Hill Museum:
Go straight to the Shipping/Receiving warehouse and turn to the Receiving/Shipping corner/door.............another package. Zoom in completely on the package. It comes from Prudence Rutherford. Open the box and remove the plastic. In the box is the replica of Prudence necklace with the Mayan stone on it. So this is the South Key. There is also a card in the box. Click on the card and read it through. It's from Prudence and it isn't important, so click it away again. Then click on the Mayan stone at the bottom of the necklace and then click the stone to your inventory. Now travel back to your hotel room. Set the alarm again at 09:00AM and after the beeps you travel back to:
Beech Hill Museum
de Noord Sleutel
Again go straight back to the Shipping/Receiving warehouse and then back to the Receiving/Sending corner. Look and behold, your third package has arrived. So this is from the Chaco Canyon Cultural Center. Zoom in twice on the package and then click on it to open it. Click inside the opened package to remove the Foam Mold. Click on the mold to open it. It shows a print of the Mayan Stone that was stolen from the Chaco Cultural Center. Close the mold again and then click it into your inventory.
Well, it's of no use to you in this condition. So you have to pour something into the mold so that a replica of the stone is created. Go to the laboratory and when you are inside, immediately turn to the right. You now look at the wall next to your desk and you see that Periodic Table hanging on the wall again. To the left of this you will see some device hanging. It looks a bit like a magnifying device they use for photos. Go forward to that device once and then place the Mold on the mat under the device. Then click twice on the spout of the device. You now fill the mold with some stuff.
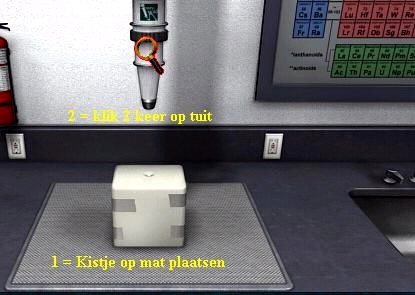
Click on the mold to open it and then take the Mayan Stone from the right part and place it in your inventory. So this is the North Key. Zoom out and turn clockwise and then leave the lab. In the hall you go left and then through the door into the exhibition hall. Walk forward twice and turn clockwise. You are now standing in the middle of the pyramid.
You now hold 4 of the 6 Mayan Keys, namely the South Key; the West Key; the North Key and the Fool Key. There are still 2 keys left to find. But before you can get the East Key, you know....that's piece 1113, you first have to know the Number Code for that lock. The only one who can tell you this code is Joanna. Unfortunately, Joanna is suspended, so you can't ask her. So you first have to find the Kings Key and that is the Pakal Carving that Hendrik has hidden in the Replica of the Pakal Tomb. Once you've recovered the Pakal, you can ask Franklin Rose to reinstate Joanna. Only then can you find out the numerical code to open piece 1113. However, in order to find the Pakal you must first go through the 3 Quizzes that Sonny has set up at the top of the pyramid for the visitors. That's what we're going to do now
Part 4: The Quizzes in the Pyramid
Level 1 of the Temple
After the end of part 3, you will be standing in the middle of the pyramid. Climb all the way to the top and at the top go forward once into the pyramid (temple). Straight in front of you you will see the Green Stone Tablet against the wall again, with the silver table on the right with the two vases on it where, in the distant past, you found the second shard piece for task 1. Go forward once to the Green Tablet and then turn 2 clicks left. You will see a computer screen in the corner. Go forward to that screen twice and then click on the screen twice.
Wait a moment and you will receive a text on this screen. Read it but do nothing else. Name this computer as Computer 1 and then zoom out twice. To the right of this computer there is a large wooden door in the corner. Go to that door to fin d out that it is locked. To the right of the door you will see a slot where a Key Card must be inserted. You do not have this Key Card, so turn around and look at Computer 1 again. Turn to the left and you will see another computer on the other side. Go there and click on the screen twice again. Read what it says again but do nothing at all. This is Computer 2. Zoom out 3 times and then turn 7 clicks counterclockwise so that you are standing right in front of the Green Stone Tablet again. So to the left of this tablet is Computer 1 and to the right of this tablet is Computer 2. Now go forward once to the:
Green Stone Tablet puzzle: The "Match-Up" game
Nancy tells you to insert your Temple Card into the slot you see in the wall to the right of the tablet. So take your Temple Card from your inventory and click it into the slot. You will now get the first Temple Puzzle on your screen. It is a simple Matching puzzle. You see 6 symbols and six words. Both the symbols and the words have a light. You have to match the right symbol to the right word. You've have come across all of these symbols and their meanings if you've wandered through this game so far, so if you've really taken notes on everything, you'll be able to solve this puzzle in no time. If you don't have that, you can look everything up. But there is an easier way to solve this puzzle, even if you don't know the answers.
Number the 6 symbols, from top left to bottom right, as: A, B, C, D, E, F. Number the words, from top to bottom, as 1, 2, 3, 4, 5, 6. Then try it out first. So for example, click on A and then on each of the 6 words. For one word, both the light of A and a word will remain on. Then that is the right combination. Write this down. Then click on B and again on all 6 words. Unfortunately, the combination of A goes out. So always write down the combinations of letters and numbers of which both lights remain on. Find out in this way which are the 6 correct combinations and then solve this puzzle one after the other without errors:
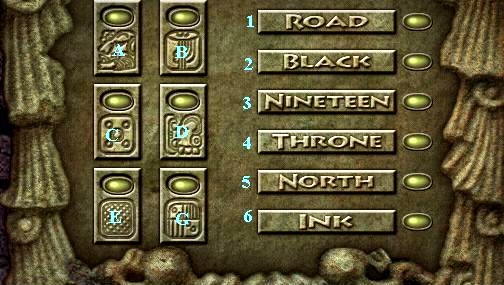
The correct solution is then: A with 3; B with 6; C with 1; D with 5; E with 2; F with 4
All lights are on and you hear a bell. Zoom out and you will automatically get your Temple Card back. This has now been upgraded to 1 level. Okay, so you've got this "Match-Up" game. Now go to Computer 1, in the left corner and insert your Temple Card into the Slot that you see in the wall on the right under the keyboard and then click on the screen:
Computer 1
You can choose from: "Activity Instructions", Quizz" and "View your Progress". When you click on "View your Progress" you will see that you have successfully completed the "Match-Up" Game. Return to the "Main Menu" and click on "Activity Instruction" and simply read the instructions carefully about the various games you have to do. Then click "Main Menu" again and then on "Quiz"
Level 1 Quiz:
You always get a question on the screen and you have to simply type the correct answer into the screen via your OWN Keyboard and then press your ENTER key to comfirm your answer. You will receive a total of 5 questions. All 5 questions are about the Exhibits that are in the display cases of the Exhibition Hall and in the garden. So, if you've looked at all of those Exhibits so far and made notes, then you won't have any problems with this quiz. You can of course also look up the answers in the display cases. Here I give you the questions with the answers and at which exhibit you can find this answer:
|
Question 1: Pakal ruled over witch ancient city? = Exibit E. = Palenque Question 2: Who's Pakal's mother? = Exhibit M = Zac Kuk Question 3: What is the 260-day Calender Called? = Exhibit I = tzolkin Question 4: Who is the "Supreme God"? = Exhibit M = Itzamna Question 5: What is a modern lanquage? = Exhibit D = quiche |
After 5 correct answers you will hear the bell and see the following message on your screen:"Congratulations! You have successfully solved the Temple Level 1 Quiz. If you have completed all the remaining activities of Level 1, you can now use your Temple Card to descend to the next level." Well, you haven't done that yet, so press "Main Menu" and then click "View Your Progress" and you'll see that you still have to do the "Bull" game. Press "Main Menu" and then zoom out. You get your Temple Card back. This has now been slightly further upgraded. Zoom out twice and turn around and go to:
Computer 2:
Insert your Temple Card into the slot again and click on the screen
|
Bull Game
You play this board game against your own computer. You are Orange and the computer is Blue. The aim is to capture all 4 of your opponent's Blue Warriors by landing on the space with a Blue Warrior on it. However, the Computer tries to do the same, i.e. conquer your Orange warriors. You always get two turns in a row and you always have to take the first turn. But after each first turn you can PASS. You can also determine whether the computer will PASS You must also always click on ROLL and PASS for the Computer. This gives you an advantage because YOU decide when to have the computer fitted. You just have to play this game and then see what happens. You roll the dice by clicking ROLL and you skip a turn by clicking PASS. If you lose the game, press the RESET button to start over. If you have won the game, the "HOORAY" screen will appear. DO NOT click on RESET here, but simply zoom out. You will then receive your Temple card back and it has now been upgraded enough to open the wooden door in the corner near Computer 1. You can first check on Computer 1 via "View Your Progress" whether you have indeed played all the games of this first level. So go to that wooden door in the corner near Computer 1 and insert your upgraded Temple Card into the slot to the right of this door, and... the door will now open. Go forward once through the now opened door and then forward twice down the wooden stairs. Then turn right and go forward once and you are at: |
2e Level of the Temple:
Here too you have to play 3 games to upgrade your Temple Card so that you can go through the next door to Level 3. Go forward one more time towards that computer screen that you see on the wall in front of you on the left. Then stand still and keep turning counterclockwise so that as you turn you can see everything that is in this room. So there's that computer screen, call it Computer 2, and then turn 2 clicks counterclockwise. You will see a Large Wooden Door. That is the entrance to Level 3.
To the left of this door you will see another computer screen. Call this Computer 1 and now turn 5 clicks further counterclockwise. You see the wooden stairs you went down. Turn further 7 clicks counterclockwise and you will see a large video screen with a button. You can click the button to watch a short video. Turn another 2 clicks further to the left and you will see a cupboard against the long wall. That's the Ball Game. Just turn further to the left until you see that wooden door again and then go forward to:
Computer 1
This is the computer that is to the left of the wooden door. Zoom in on the Card Slot and insert your Temple Card and then click on the screen. You can read the instructions again first and that is especially useful for the Ball Game and you can view your Progress, but you have not played any of the 3 games here yet. So click QUIZ
Level 2 Quiz
|
Again you are presented with 5 questions and again you simply type in the correct answers and press your Enter key after each answer.You can also look up the answers to these 5 questions anywhere in the museum. 1. What was the name of one of Shield Jaquar's wives? = Can be found in the niche where Exibit O is also located = Lady Xoc2. Witch Maya "monster" represents the "contuinuous cycle of life and Death? = You can find the answer at Exhibit C = Bicephalic 3. What did the Maya call a decorative woven blouse? = You will find the answer in the alcove of Exhibit H = huipil4. What is a "cahal"? = Answer is Exhibit H = Noble Man 5. Who was a Mayan Matchmaker? = Answer is on Hendrik's ZIP DISC = atanzahabThe congratulations screen appears after these 5 correct answers. Zoom out and receive your Temple Card back. Zoom out a few more times and then go to the right and to: |
Computer 2
This is the computer that is against the long wall, to the right of the large door.
Insert your Temple Card back into the slot and then click on the screen again.
Maze Game:
You have to enter a Login name and a password. You found both on Sonny's Floppy.
I told you to write down these names. So type in:
Loginname = sjoon and Password = spacebaby. Press ENTER.
You are in a maze. Well, it's not difficult. You have to find the exit. You navigate through the maze with your Arrow Keys. If you press the "M" key on your keyboard, a map of the maze will appear in the text box, so you can plot the correct route and always see where you are. You start at the top left and have to go to the white square at the bottom right. The orange dots on the map are the open passages. So navigate your way to the exit and remember thatlLeft on the map for you is right and right on the map is left for you. It's not really difficult. When you reach the exit you will automatically get your Temple Card back. Then zoom out a few times and turn clockwise until you see that box against the wall and then go there. Zoom in on the slot and insert your Temple Card and then play:
The Ball Game
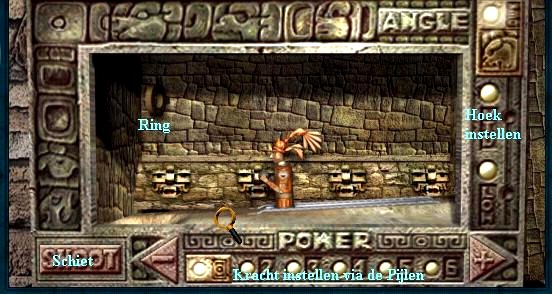
You need to have the figure throw a ball through the ring 4 times. After each successful attempt, the figure moves back 1 position and the distance to the ring increases, so the figure will have to throw the ball with more force to reach the ring. The angle at which the ball must be thrown also changes. So you always have to set the right FORCE and the right ANGLE for every turn. You set the power with the Minus and Plus Arrows at the bottom of the screen and the angle with High, Middle and Low at the top right. Then press SHOOT
Turn 1 at Position 1: Set POWER to 4 and ANGLE to HIGH, then press SHOOT. The figure throws the ball and it goes through the ring. And the figure slides 1 position backwards.
Turn 2 at Position 2: Set POWER to 3 and ANGLE to MIDDLE and press SHOOT. The figure throws the ball through the ring again and slides back to position 3.
Turn 3 at Position 3: Set POWER to 5 and ANGLE to MIDDLE and press SHOOT. The figure again throws the ball through the ring and then moves on to position 4.
Turn 4 at Position 4: Set POWER to 6 and ANGLE to LOW and press SHOOT. And for the fourth time the Mayan Warrior throws his ball through the ring and you are also done with this game.
Zoom out and receive your Temple Card back. If you've had all 3 games on this level, go to the Wooden Door and zoom right in on it. Insert your upgraded Temple Card into the slot and the door will open. Go forward once through the now opened door and then go forward 4 times down the stairs. You are in:
The 3e Level of the Trmple
At the bottom of the stairs you automatically turn to the left. In front of you you will now see a wide passage.
Go forward twice through this passage and then turn right. You are standing in a narrow alcove and on the back wall you see:
The Calendar Puzzle:
First zoom in once. You see a large wheel on the wall and to the left of it a plate with 20 Mayan Symbols on it. The Title Board hangs above this Symbol Board. First zoom in on that Title Board. You read that you have to set the Calendar to: 12 KABAN. Zoom out and then zoom in on the top part of the board with the 20 Mayan symbols. Looks at the LAMAT Symbol. Lamat is the mountain that Pakal ascended on his way to the throne. Draw this over because you need to recognize this later. Then zoom out and zoom in on the lower part of the board with the 20 symbols. In the bottom row you will see the KABAN symbol as the second symbol from the left. Also draw this over.
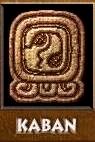
Then zoom out and zoom in on the Card slot under the wheel and insert your Temple Card. You will automatically end up in the Calendar Wheel. This wheel has a large Dial on which you see the 20 Mayan Symbols and it has a Small Dial on which you see the Mayan Numbers. In the "ARROW" you see a Mayan God Symbol in the largest hole and a Number in the Smallest Hole. The God and the Number that the arrow points to belong together. Do the following:
Place your cursor on the small dial with the Mayan numbers. Your cursor now becomes the Turning Arrow cursor. Now turn the Number Wheel until you have the Mayan Number 12 in the small Arrow Hole. Then place your cursor on the right side of the large dial and there you will also get the turning arrows. Now turn the large turning diskc until the KABAN symbol appears in the large arrow hole.
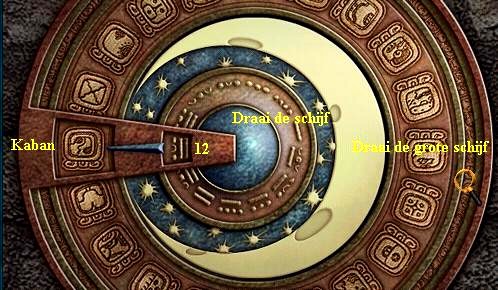
You will then hear the bell to indicate that you have solved this puzzle. Remember that the Number 12 and the KABAN Symbol belong together. Zoom out and you get your Temple Card back. Then zoom out again twice and then turn around. Turn left and then forward once towards the stairs and then turn right. Then go forward 3 times, along the stairs, through the narrow passage to the wall and then turn right. Then go forward again 3 times and you will see a Wooden Bridge over the water. Do Not Go Further Forwards but turn left and you will be in front of a:
Green Stone Tablet
Zoom in on the card slot and insert your Temple Card and you will be in the:
"Match-Up" puzzle level 3:
This works exactly the same as the Level 1 Match-Up puzzle, only there are now 9 questions to answer. On the left you see the Names of the Gods and on the right what type of Gods these are. So you have to link the correct name from the left row to the correct type of God from the right row. Again, you can look up all these Gods in the museum, but let me give you the correct solution:
| Xblanque | The Jauguar God |
| Kukulan | The Wind God |
| Yum Cimil | The God of Death |
| Eckahau | The God of Travelers |
| Ixchel | Moon Goddess |
| Balac | The War God |
| Tialoc | The Rain God |
| Ahau Kin | The Sun God |
| Yum Kaax | The Corn God |
After all the answers are correct, you will hear the familiar bell again. Then zoom out and receive your Temple Card back. Then zoom out again twice and turn around and then click the right arrow. You are now standing directly in front of the Wooden Bridge. Cross over this bridge 4 times ahead. On the other side you come to a Wooden Door and a Computer Screen. Go forward once to the computer screen and zoom in on the Card Slot. Insert your Temple Card and click on the Screen and then choose the
Level 3 Quizz
You only get 1 question to answer and the question is:
"WHAT ANNIMAL DID LORD PAKAL FEAR THE MOST"
You will not find the answer to this question ANYWHERE in the museum, nor will you find it anywhere on any kind of note. But now think back to the last conversation you had with Hendrik. He then gave you a clue about this question. He then talked about an animal with a narrow snout and a long twisted tail coatimundi. So type in this word: coatimundi and press Enter......Congratulations.......You have now solved all 9 Temple Puzzles
Zoom out and receive your Temple Card back. Then zoom out 2 more times and turn around and walk forward 4 times back over the wooden bridge and then turn left. Then go forward 4 times and then turn left again. Walk forward twice along the stairs and turn left again and go forward once through the wide passage and then turn left. Then, on the right side of your screen, go forward once and you will be in a narrow alcove which is directly opposite the Calendar puzzle.
The Pakal
On the left you will see a chest in the niche. Zoom in on the chest. You will see a card slot on the left and right. Zoom in on the left Slot and insert your Temple Card. The chest opens. The Chest contains the Jade Pakal Mask. Click on the mask. This then disappears to the left side of the chest. So there is a skull under the mask. Click on the skull and then click on the Mayan Stone in the mouth of the skull. You have found the Pakal Stone. Click on the stone to place it in your inventory. Zoom out and click on the lid of the chest to close the chest again. You will hear the familiar bell again and you will receive your Temple Card back.
Now zoom in on the right slot. There is a light stick in the container. Take it out of the container to put it in your inventory. Zoom out twice and turn around. Go forward once towards the Calendar puzzle and then turn right. Go forward once towards the stairs and turn right again and now simply follow the route back to the wooden bridge and cross it and then zoom in on the wooden door. Insert your Temple Card into the slot next to the door and the door will open. In front of you you will see a stone staircase going up. Go forward once through the opened door and it will become pitch dark. Nancy will say she needs a light. Click on the Light Stick in your inventory and then move your cursor on the stone stairs. In a circle of light, climb the stairs forward twice and at the top click on the wooden door with the Light Stick and it will open. Ahead of you you now see the open space in the garden with the Monolith
Part 5: prelude to the Finale
You have solved all 9 puzzles in the temple and you have found the Pakal again and you are now standing in the door at the top of the dark stone stairs. In front of you you see the Monolith standing in the open space in the garden. Go forward 5 times and you will run into the side of the Monolith that is directly opposite the temple exit. You hear Nancy say again: "Looks like this side is missing a part". Zoom out and turn around and you will see the temple exit you just came out of. Remember that this side of the Monolith faces the Temple. Turn around again and then turn left or right and follow the garden path back to the museum. Enter the temple again via one of the two tunnels and then go to
The Laboratory
Go to your own desk and buzz the phone. Call Franklin Rose and do this conversation in this way: "I've recovered the Pakal Carving"; "Mr. Rose, this case is far from closed. Do you trust me?"; "I'm sorry, but I can't explaine everything now. I'll take good care of the carving, I promise"; "So you call Joanna and invite her back to work?". It's late, so you don't have to expect Joanna in her office right away. So go through the museum to the Metro and travel to your Hotel Room. Set the alarm for 09:00AM and the next morning you travel back to:
Beech Hill Museum.
Enter Joanna's office and turn right and see........Joanna is back. Click on Joanna. Well, she's grateful that you got her job back, but she also puts you back to work right away. She wants you to unpack the crates in "Shipping and Recieving" and she now gives you the code for the combination lock of crate BH 1113 and this code is 0677. So write the code down. Then say hello to Joanna and go to:
Shipping and Receiving:
Walk straight ahead to the rack against the back wall (the left one, not the rack where Sonny's box is located) and then zoom in again on the silver-gray BH 1113 crate. Then click on the combination lock and enter the code 0677 and the box will open. Click on the Mayan stone (the East Key) and place it in your inventory. Well, you now have all 6 Mayan Keys in your possession. Now to combine these six into 1 key. Go to:
The Laboratory
Turn to the left here and go to that white chest with the turntable where you previously assembled the Mayan Vase. Zoom in on the dial. Nancy says: "According to Hendrik's notes, I need to make a key out of these pieces" and the base piece is immediately placed on the turntable. So you have to click the other 5 stones into that. Start by clicking the "roof piece" onto the base piece and then turn the dial to click the other 4 pieces into the cube as sides. Because that is what the key, a Cube When you are done you will hear Nancy shout: "Now I have the key".
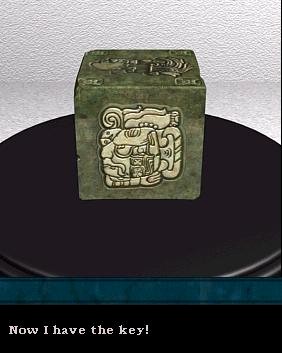
Click on the Cube to place it in your inventory.
Now of course you have to open the Monolith in the garden with this key, but that is not easy. You need the Maya Calendar Discs and a specific date for this. Let's first grab those Mayan Calendar Discs and then click on the Monolith. If you have looked closely at all the Exibits in all the display cases in the main exhibition hall while performing Task 5, then you will have come across those Mayan Calendar Discs in one of the display cases. Don't remember which display case? Well, go to Niche 5 (the Niche where Exhibit I is, look at Sonny's map if you can't remember which Niche this is).
When you are in Niche 5, turn right so that you look at the right display case.
In this display case, on the right, are the 2 round stone Tzolkin Calendar Discs.
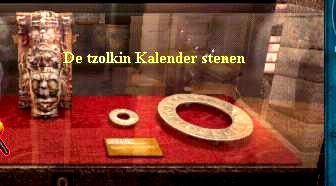
Before you open the display case and take out the two discs, SAVE YOUR GAME HERE. Let me explain first:
If you pick up the two Stone tzolkin Calendar discs, Nancy will tell you that those things are very heavy and that she cannot carry these stone discs for very long. So you have to run like crazy to the Monolith and place these two discs there on the right side of the Monolith. This right side of the Monolith is the side where Nancy said: "It looks like this side is missing a part". This needs to be done quickly, so it's best to take the path to the left of the pyramid. The route through the garden to the Monolith is then shorter than via the right path. If you don't make it in time, load your Save or choose the "Second Change" option.
Now do the following:
Open the display case with the small key that you stole from Joanna's desk drawer and then click on the largest disk 3 times. You then pick up BOTH discs. Nancy screams: “Woow, these are heavy”. Zoom out and then click somewhere on the left on the glass of the display case to close it again. Nancy shouts that she won't be able to carry the stones for long.
Turn Right and go forward twice to leave Niche 5. Turn left and go forward twice towards the Pyramid Then aim your forward arrow to the left of the pyramid and then click forward 7 times and you will have entered the garden via the left tunnel. Go forward 6 times and then right 2 times. 4 times forward and then 2 times left. Go forward one more time and you will see the Monolith. Now aim your forward arrow to the right of the Monolith and then click forward twice Turn left and then zoom all the way in to this side of the Monolith. Again Nancy will say: "Something is missing here". Quickly, dive into your inventory and click on the Calendar Discs and then click them in the circle on the Monolith.
He he…you made it. Okay, now you have to set this Tzolking Calendar to the correct Mayan Date, just like you did with the Calendar Puzzle in the temple. So click on the disks again and you are in the Close-up. Nancy will say: "The Poem said, when the first king ascends again". Do you think 12 Kaban is the correct date? Try it. Make sure that the Mayan number 12 is placed behind the line on the left and then rotate the large disk until, one by one, you have ALL the Symbols of the large disc in front of the line. However Nothing Happens.........Apparently 12 Kaban is not the correct date. So you have to set a different date.
Well...I really thought about letting you figure this out all by yourself. But I'm a nice guy so here it is. You can actually find the correct date that you now need to enter on this Calendar, near here. You also came across this date when you viewed all 15 Exhibits to complete Task 5. This date is stated on the sign of one of these 15 Exhibits. If you paid attention and took notes then you now know this date. The Exhibit where you can find this date is EXHIBIT J. And the date is 6 LAMAT
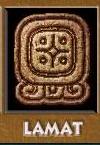
So place the Mayan number 6 right behind the line and then rotate the large disc until you have LAMAT in front of the line.
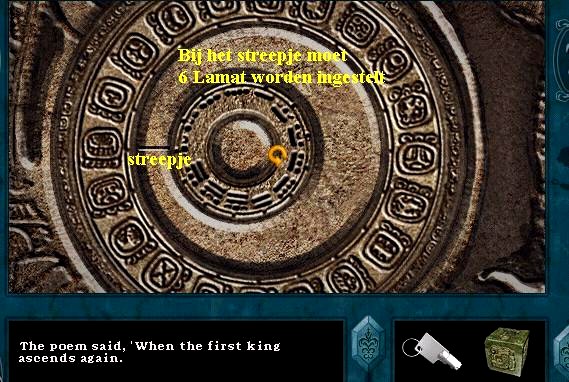
You will automatically know that this is the case because you will hear a loud click. You will then see that a stone is being inserted into one of the other sides of the Monolith and you will then automatically zoom out of this puzzle. Zoom out one more time and then keep your cursor all the way to the left edge of your screen. Your cursor will then become a thick curved arrow. Then click 4 times and turn counterclockwise around the monolith and then look at the side that is immediately left of the side where you did the Calendar puzzle. You now see a square hole at the bottom of this side of the Monolith.
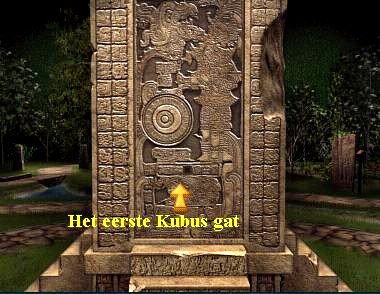
|
Go forward once and zoom in on this square hole. Take your Cube Key from your inventory and click it on this square hole. However, Nancy tells you that you must place the Cube with the correct side into the hole Click on the Cube to take it out of the hole again.The Cube will then be on the right of your screen. You can rotate the Cube one turn with the left arrow or the right arrow that you get when you place your cursor on the edge of a cube side. The Cube disappears into the hole with the side you see.
So turn the Cube one turn and then click on the cube and it will disappear back into the hole. Nothing happens? Then click on the Cube again to remove it from the hole and then turn the Cube over again. Click on the cube again to put it back in the hole. Repeat this until you have placed the cube with the correct side in the hole. You then hear a click and see that another stone is pressed on the next side of the Monolith. Zoom out and use the rotation arrow to turn counterclockwise to the next side of the Monolith and zoom in again on the new square hole. Place the cube in the hole and if nothing happens, you have placed the cube in the hole with the wrong side. Then repeat the game with the cube until you have placed it correctly in the hole here and again you will hear a click and you will see a square hole appear in the 3rd side of the Monolith. Turn counterclockwise again to this 3rd side. side of the Monolith and play the Cube game again until you have it properly seated in the hole again and the square hole is then created on the 4th side. Then find the 4th side and place the Cube here too with the right side in the hole and...... This side of the Monolith will now open
SAVE YOUR GAME……You are about to: |
Part 6: End Game
So you've opened theMonolith and you see the Scribe's Mummy inside it on her Tomb. I hope you have SAVED YOUR GAME ? Well, if things go wrong right away inside the Monolith, you can always use the SECOND CHANCE Option. I suggest you read my description of the end game first before you start.
Go forward once into the Monolith. You are standing in front of the Mummy. She clutches a book between her legs. Click on this book twice and the book will open. Hey…..there is absolutely nothing written in the book…..there are only blank pages in it……Boom…Ouch…Taylor Sinclair comes in and he hits Nancy on the head and takes the book away. So Sinclair is the villain. He chats to you a bit and then you ask him, "Why are you doing this?" Taylor then asks you if you know what is described in this book. He is under the impression that he now has in his possession the one and only copy of the Scribe's description of Mayan life, but we now know better. Well, just follow all available conversation options and eventually Sinclair disappears with the book and he locks Nancy inside the Monolith:
|
It's pitch dark, but not only that, there's very little oxygen in here. You have to act damn fast now....So do the following very quickly in succession
The Monolith opens and you can breathe again and the End Scene begins: Joanna, Hendrik and Alejandro appear and congratulate you. Then we see Sinclair who now finds out that he stole the wrong book. After this, Nancy reads another letter to her father. And finally, Nancy receives a letter from a certain Sally and this is the announcement for game 7 of the series: Ghost Dogs of Moon Lake THE END 2003: Original a Dutch Walkthrough by: Louis Koot 2024: This English translation also done by Louis Koot |