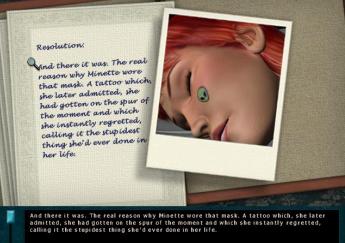
Nancy Drew 14: Danger By Design
2006: Original a Dutch Walkthrough by: Louis Koot
2024: This English Translation also by: Louis Koot
This walkthrough assumes you are playing the game as a SENIOR Detective and it is certainly not the only way you can play the game. This time I do use the "Automove" function in the game because every now and then you have to be able to turn very quickly. For the first time in a Nancy Drew game, our heroine, Nancy, will have to fight a tough battle at the end of the game.
The game is not really linear, so you don't necessarily have to do things in a predetermined order. Nancy can die at various times in the game, but you always have the opportunity to use the "Second Chance" function to return to the moment just before Nancy died and you can therefore do that part again. Despite this "Second Chance" function, it is advisable to save your game frequently. Nancy can also be fired by Minette at various points in the game and if that happens then it is also "Game Over". You can also use the "Second Chance" function.
When Nancy says the day has come to an end:
Nancy will indicate during the game that a day has come to an end. If this happens, Nancy will automatically travel by metro to Place Monge to spend the night with Jing Jing in her apartment. It will then automatically be the next day. You always start the new day in Jing Jing's kitchen. Jing Jing always stands behind her kitchen table stirring her pot. You can then talk to Jing Jing. There's every chance Jing Jing will ask if you'd like to play a game of Hangman with her. It is not necessary to play Hangman with Jing Jing. I wouldn't do this, especially if you don't no English very well.
Always read the newspaper that is fresh on the dining table every morning. There is a blue bin in the kitchen. You will see the blue bin when you go to the front door. The newspapers from the previous days are always kept in this blue bin. If you click on the blue bin you can always view all those newspapers again and then read all those editorials again. Then just continue with the game. So then go via the Metro map to the place you were going when Nancy said it was too late...
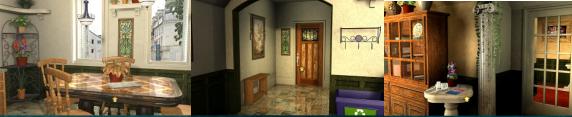
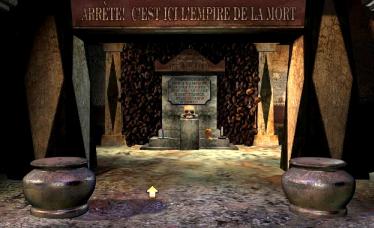
This 14th Nancy Drew adventure takes place entirely in Paris. On behalf of Amy Grunhild, a friend of Nancy's father, Nancy travels to Paris to work undercover in "The Old Windmill Studio". The Old Windmill Studio is a prestigious fashion studio, led by Minette. The studio is located in a renovated mill (Moulin) and is located in Abbesses/Montmartre, the artistic district of Paris, at the foot of the Sacre Cour. Minette, the studio's head fashion designer, has been in a bit of a rut lately. Minette is a young American fashion designer, but her star is rising quickly in the world of Haute Couture
But lately, something strange has been happening to Minette. She hides her face behind a white mask and suffers from tantrums. She also recently dismissed some long-time employees. Could Minette's strange behavior be related to the threatening letters that Minette has been receiving for some time? Amy Grunhild is Minette's main financial backer and Amy is very concerned about Minette's strange behavior. Minette is under great time pressure to complete her new spring collection on time, and Amy Grunhild naturally wants there to be no problem, because Amy wants to see the necessary return on her investments. But the troubles with Minette soon turn out not to be the only mystery Nancy faces. A greater, and more sinister, danger looms. A danger that hides in the dark catacombs of Paris. Catacombs that connect the renovated "the Old Mill Studio" with the more "dark" part of the City of Light.
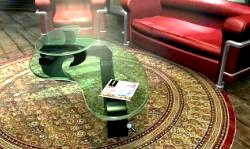
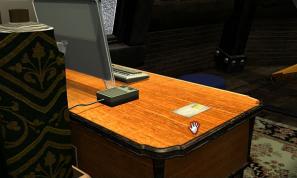
When you start the game for the first time, via "New Game" you end up at Nancy's house, in her room.
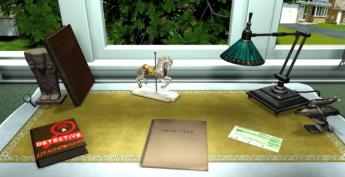
Nancy explains a few things and shows you her neatly tidy desk.
On Nancy's desk you will find the "Nancy Drew Dossier", the Nancy Drew "How to be a Detective" book, a "Case File" folder and a plane ticket. If you are already an accomplished Nancy Drew player, you probably don't need any explanation about how to play a Nancy Drew game. In that case, just click on the plane ticket immediately to start Nancy's 14th adventure. If you would like to know more about Nancy Drew first, take a look at the 2 books and the "Case File Map" at your leisure.
In the "Nancy Drew Dossier" you can view photos and notes from all older Nancy Drew games, from "Secrets Can Kill" to Last Train to Blue Moon Canyon. In the "How To Be A Detective" book, Nancy explains, with images and words, how to control and play a Nancy Drew game and she also tells something about some new tricks that "Her Interactive" has put in this 14th part. In the "Case File" Nancy tells you a little more about this 14th Nancy Drew adventure. If you have had enough of this, or are done with it, then click on the PlaneTicket to accompany Nancy on her journey and on her new adventure.... .You end up in:
Chapter 1
Abbesse:
Heather:
After a long flight, Nancy arrived in Paris and a taxi took her to "The Old Windmill Studio". The mill has been converted into Minette's House of Design. Nancy steps into the studio and......has to duck quickly to avoid a plant that is thrown at her through a door. It's quite a spectacular entrance, with lots of screaming and shouting. The screams that welcome Nancy to her first day at work come from Minette, and the girl who flees through the door, happy to have made it out alive, is Heather Mckay, Minette's assistant.

Heather welcomes Nancy and explains a few things. Nancy says that her suitcase and cell phone have been lost. During this conversation you have to answer Heather a few times. It doesn't matter at all which choices you make. Heather gives Nancy a Metro Pass, which allows Nance unlimited, free travel on the metro through Paris. You have to click on the Metro Pass yourself to grab the Pass.
Nancy can stay with Jing Jing. Jing Jing works for Minette as a model and she will also have some clothes that will fit Nancy. Answering the phone is one of Nancy's duties. Heather has placed a "To Do List" on Nancy's computer on which Nancy can see what work she is expected to do. Minette then buzzed in via the intercom. She wants to speak to Nancy immediately and the conversation with Heather is over.
Well, the great Minette has summoned you to her, so don't keep the boss waiting any longer than is absolutely necessary. There will soon be plenty of opportunity to look around the office here. Turn left and then go forward to the brown door, because that is the door to the Atelier, where Minette is working on her spring collection.
NB: if you are delaying going to Minette and, for example, first investigate your own workplace, Heather will then, at a certain point, order you not to make Minette wait for you any longer. If you still delay then Nancy immediately can take the next plane back to the States and it's Game Over
Minette:
Cup of tea please, and quickly...
Open the brown door and step forward once inside.
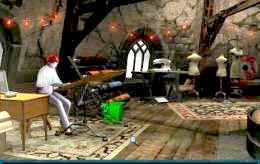
The studio is a large round room with a kind of stage in the middle, on which the millstones used to turn.
Minette now uses it to put all kinds of things on it that she uses in her fashion designs.
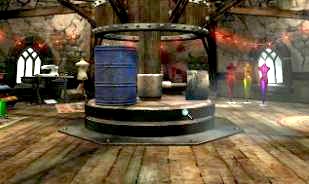
Because it is a round space, you not only get the normal left and right arrows here, but also diagonal arrows to move forward.
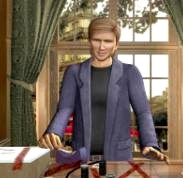
But now you immediately turn right via the short right arrow and....Nancy now meets her new boss, the completely crazy Minette:
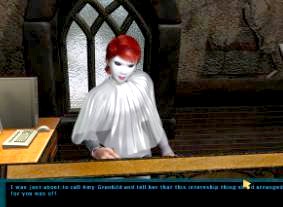
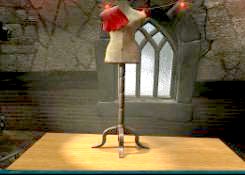
I mean...someone who hides behind such an idiotic mask all the time must be completely crazy. Minette turns out to be a rather snappy boss. She "welcomes" Nancy but also immediately warns that Nancy should not even think of fiddling with the mannequin on which she is busy designing the new dress of the "First Lady". Yes....the "First Lady" does indeed mean the wife of the American President. You have to give Minette a few answers and it doesn't matter which answer option you choose.
While Minette is talking to you, pay attention to whether Minette is left-handed or right-handed. Remember you are in front of Minette, so her right is your left. You notice that Minette is right-handed because she is drawing with her right hand. Minette then orders you to make her a cup of tea. Not just a cup of ordinary tea....no, a cup of special tea. And with this the "conversation" ends. You will then automatically be standing in front of Minette.
Take another look at Minette. Is Minette wearing a skirt or pants? Minette is wearing pants. Is Minette humming now or is she silent? Minette isn't humming now. To the right of Minette you will see 3 bald mannequins. You will get the diagonal right arrow to it. Now click the diagonal right arrow 4 times and you will go forward 4 times and then see the Tea Bar standing straight ahead.
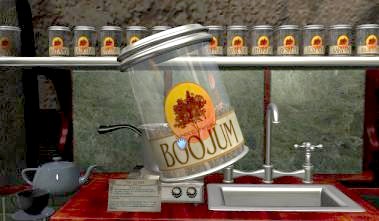
Now go straight ahead to the Tea bar and you will automatically be zoomed in on it. There are 15 cans on top of the ledge. Each can contains a certain type of herbal tea. There is a kettle with boiling water on the stove and the teapot and a teacup are on the left. The booklet with instructions is against the stove, and you should definitely read it. So grab the instruction booklet and then turn to the 3rd page and the 4th page. You can browse by clicking on the dog-ear at the bottom right. So scroll on to the 3rd page. Read the 3rd page and then turn to the 4th page. Read the 4th page. On the 3rd and 4th pages you can read what you need to know to prepare the right tea for Minette today.
On page 3 you read:
On Page 4 of the instructions you can read:
|
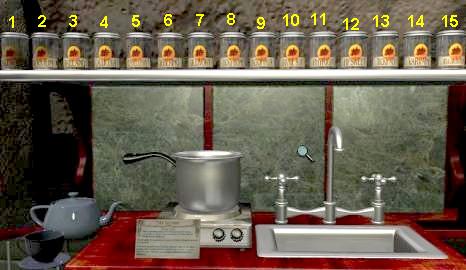
You now have all the information you need to start brewing Minette a nice cup of tea. Minette's favorite color is red and she chose the number 10. Today Minette is right-handed and she wears pants and she doesn't hum. Although Minette has just had an angry attack, that doesn't apply now because she chose red as the color. Through this information you will find out which herbs you should throw in the kettle. So you have to pick up 11 of the 15 cans. The can you take will always appear large on your screen.
Number the cans, from left to right, 1 to 15. |
|

NB: Minette will only taste the tea once you have left the Atelier. Only then will you find out whether you have brewed the right cup of tea. If you have brewed the wrong tea, Minette will order you to do it again. You must then immediately return to the tea bar to brew the tea again. If you do it wrong again, it's "Game Over".
Zoom out of the Tea bar. Nancy puts the cup of tea on the tea bar. Turn clockwise. You then look at the door of the studio. However, don't leave the studio yet. On the right of your screen you will now also see the low wooden stage on which the "First Lady" mannequin stands, so you should stay away from Minette. Go forward twice via the diagonal arrow and then zoom in on the mannequin twice. Oh....."I hope you're not touching my mannequin with your dirty fingernails, are you?" Minette asks in a threatening tone. No...No...Nancy hastens to say.
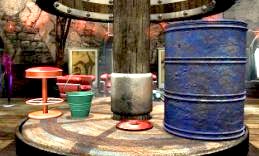
Zoom out and go forward once again. You're back with Minette. Turn right, via the right arrow. You are now standing in front of the large round stage. Check out the items on the large round stage. You see an orange bar stool, a green bucket, an orange hubcap and a blue oil barrel. So all these 4 items have round shapes, so remeber that these round objects are here....you cannot take any of them now.
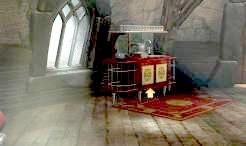
Turn back left. You see the sewing machine and the 3 bald mannequins again. Go forward twice again and you will again be right in front of the red sofa and the glass coffee table. Now turn around using the turn arrow at the bottom of the screen. You then look back at the 3 bare mannequins and now see 3 large round stone discs, which are on a ledge against the wall. The 3 discs are daubed with red paint.
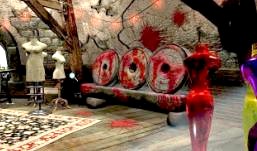
Zoom in on the 3 discs. Naturally, Nance asks Minette what on earth happened to these discs, but Minette thinks too highly of herself to give a subordinate a decent answer. I told you she's a bitch. Zoom out and turn around again via the turn arrow and go forward once again to the glass coffee table. Turn left. There is a magazine on the coffee table.
Grab the magazine and then read through the "Minette the Masked" article. Click with your hand on the right page to scroll to the next 2 pages and read about Minette's old mannequin that she named Carol. So that is the mannequin on which Minette is designing the dress for the "First Lady". Zoom out twice when you have read the article. You will then see the Tea Bar again. Now do not go to the Tea Bar but go forward via the diagonal arrow and then straight to the door of the studio. Open the door and enter the office through it.
Immediately, when Nancy steps back into the office from the studio, she is called back by Minette and you automatically end up back in the studio with Minette. Minette says the tea was just right and she enjoyed it. Minette now orders Nancy to go to the flea market in Square Du Vert Galant Park. To do this, she must take the metro to Pont-Neuf station. Minette now shows Nancy the 4 items on the round platform. What she wants is for Nancy to buy the same 4 items, but nicer and newer. Minette gives Nancy 20 euros and a basket to put the things in.
NB: If you have made the wrong tea, Minette will now ask you, when you leave the studio, to brew a new cup of tea. Then rush back to the tea bar and do the whole tea thing again. Make sure you do it right now because you won't get a 3rd chance. Then leave the studio and, once you have made the right tea, Minette will call you back to instruct Nancy to buy the 4 items.
Grab the basket and then ask Minette what exactly is the intention. Impatient as the bitch is, she snaps at Nancy again that Nancy has to buy exactly the same 4 items as are on stage, but newer. Ok....turn right twice and go back to the door, open the door and enter the office again.
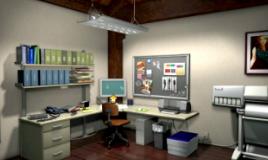
Repair the Plotter:
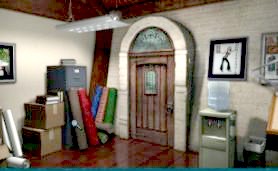
You then look at the blue front door. Turn counterclockwise until you are in front of Nancy's desk. Go forward to the desk.
Click on the computer screen, or on the mouse, and you end up in the computer.
Nice screensaver...apparently a certain Sonny was here too. There are 3 icons on the computer desktop that you can click on. First click on "Jane's Game Portal". However, you cannot play the games yet because to gain access you must enter a login name and password. And you don't know that yet. So check out the "To Do List". So this is the list of tasks that Nancy has to perform. Nancy's assignments are:
Pick up an envelope for Jing Jing at 11085 Rue Malus. Metro stop Place Monge. Collect photos from Dieter von Schwesterkrank. On the corner of Rue du Bac and Boulevard St. Germain. Then deliver the collected photos to Jean Michel Traquenard at the Café Kiki on Rue des Mauvais Carcons. Metro stop Hotel de Ville. Repair the Plotter. And to do everything Minette asks and to do it quickly.
Zoom out when you have read the list. Read the email by clicking "Mail". Read all emails.
In one of the emails you read that someone offers Minette's previous assistant money to reveal the secret behind Minette's mask. In the last email you read that the Secret Service of America will come, to thoroughly inspect the studio in connection with the visit of the "First Lady" who will come to try on her new dress.
Once you have read both the To Do list and the emails, zoom out twice. You will then be standing in front of the desk again. There are 3 drawers on the left under the desk and Nancy's phone is there too. Zoom in on the drawers. Open the top drawer. There are a few "Kringle" chocolate bars in there, but also a blue notepad. Grab the notepad from the drawer. The notebook is filled with drawings by Sonny Soon. Sonny Soon is a character that Nancy also encountered in one of her previous adventures and he appears to have been Minette's last assistant.
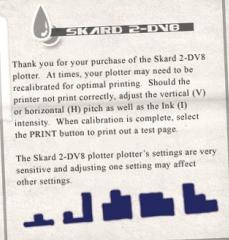
Browse through the notepad, and take special note of the drawings regarding Mannequin Carol and what Sonny writes about it in the speech bubbles "Carol" and "Rude". It seems Sonny wasn't too fond of that mannequin. Scroll to the last page. The user manual for the "skard 2-DV8" plotter is pasted on the last page of the notepad. Read these instructions carefully and take particular note of the various settings that you see drawn at the bottom.
Note: Once you have repaired the Plotter, the phone on Nancy's desk will start ringing. You should then rush to Nancy's desk to answer the phone. If you delay too long, Nancy will be immediately fired by Minette. This will happen several times in the game. So if you are in the studio and you hear Nancy's phone ringing, you have to answer the phone quickly. You really don't get much time to do this and that crazy Minette and that annoying Heather drive you crazy with their screams for you to answer the phone.
Zoom out 3 times. So one of Nancy's tasks is to repair the Plotter. Turn 4 clicks to the right. You are then standing directly in front of the Plotter.
It is a large inkjet printer with which Minette's designs can be printed on paper.
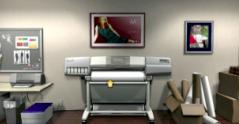
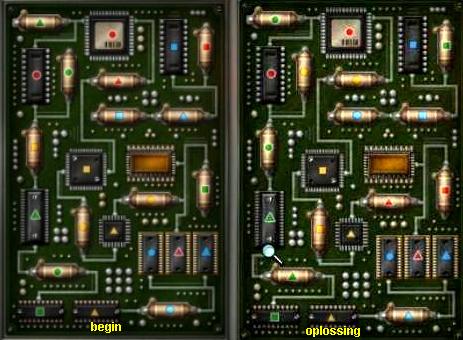
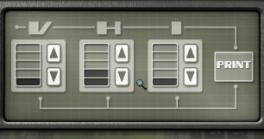
Go forward to the Plotter and then click with your red magnifying glass on the "Start screen". Nancy asks Heather what kind of device this is and Heather tells that it is the Plotter and that the thing is broken. Click again with your red magnifying glass on the "Start screen" and now the "start screen" fills your entire playing field. Now click on the screen with your hand and you are in the puzzle. In the instructions you have read what the intention is. You will see 3 screens, V, H and I. In all three screens you will see that the ink level is at the bottom level. V is to print the vertical lines, H is to print the horizontal lines and I is the ink tank. You now have to set the correct level by clicking on the arrows. The correct level is one of the 5 drawings at the bottom of the instruction sheet that you saw in the blue notepad
Let's try the leftmost solution. All you have to do now is to increase the ink level in the middle screen by 1.
So click once on the up arrow in the middle screen and then click on the Print button.
You automatically zoom out and the printer turns on and makes a test print. The printer then spits out a sheet of paper on which the letters A, B, C, D are printed. You can't grab this paper. Zoom out and..... The phone on Nancy's desk now starts ringing and immediately Minette screams from her studio to Nancy that she must answer the phone You have to be quick now because if you don't answer the phone quickly enough, Nancy will be fired immediately.
Quickly zoom out of the plotter again and then quickly turn counterclockwise to Nancy's desk. Zoom in again on the left side of the desk and then zoom in on the phone. Grab the receiver and.....a certain Lynn Manrique reports and she would like to talk to Minette about a certain Noisette Tornade. Click on one of the two answer options and Heather gets involved and says that Minette really won't be able to speak to her for the next 6 weeks. Lynn then breaks off the conversation. Zoom out of the phone twice and then turn slightly to the left. On the wall, between the blue front door and Nancy's desk, is a low cabinet. There are 3 boxes on the cabinet.

Just click on the largest of the 3 boxes. However, Heather screams that Nancy should stay away from her cigarettes. So zoom out again and turn to the left until you see the gray sofa. The glass coffee table is in front of the gray sofa and there is a stack of magazines on it. Zoom in on the magazines and then grab the top magazine. Read the article about Hugo Butterly, also turning to the next 2 pages. Zoom out twice when you have read the article. Turn further to the left, to Heather who is typing at her desk. Click on Heather with your question mark cursor to ask her anything and everything now.
Ask Heather all the questions you can. So ask about the Old Windmill, about Minette's Mask, about Dieter von Schwesterkrank and about the red paint in the studio. You can't ask about Noisette Tornade. Perhaps that can be done later. Minette tells you a few things and even offers to pick up the photos from Dieter von Schwesterkrank, but Nancy doesn't want this. Once you have asked everything you can ask, conclude with "Talk to you later".
Turn back to the right to the blue front door. Now go forward to the blue front door and.....someone slides an envelope under the door. Grab the envelope. It's a letter for Minette and Heather says you should open it. So open the letter. It's a threatening letter and Nancy reads it out loud.
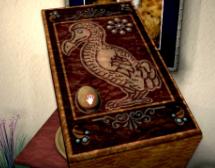
Heather now says that Minette has regularly received these types of threatening letters since April, as well as threatening phone calls. Heather then says that they always store these notes in the Dodo box that is on the low cupboard. You will now automatically be zoomed in on that Dodobox.
So that is the box that you were previously not allowed to touch. Ask Heather again: "May I keep this letter" or "Should I give this letter to Minette", but Heather answers that you have to put the letter in the Dodobox and that will happen automatically. Heather then goes on to say that the Dodobox has a special kind of lock, but that no one is allowed to open the box.
It's high time to finish the rest of the To Do list. It doesn't matter in which order you proceed. Either you buy the stuff for Minette first, or you first pick up the photos from Dieter von Schwesterkrank and then deliver them to Jean Michel Traquenard in Café Kiki. The order in which you complete the rest of the To List does not matter.
So now go to the blue front door, open the front door and you will automatically end up in the Abbesses Metro Station.
The Metro map appears large on your screen.
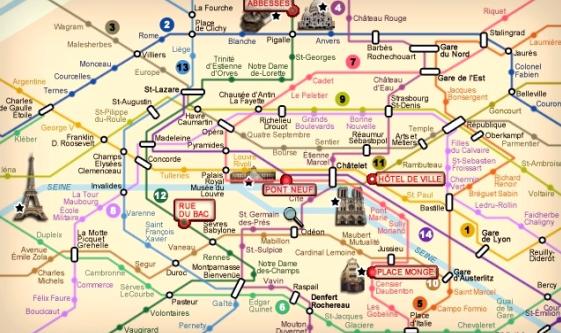
On the map you will see the stops you can travel to in red letters and outlined.
Click on the stop you want to travel to and you will automatically end up there.
We'll first collect the photos from Dieter von Schwesterkrank, so click on the Rue Du Bac stop and you will automatically end up at
Rue Du Bac:
Dieter von Schwesterkrank:
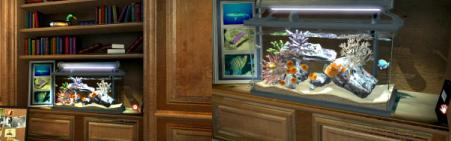
After the metro journey, you ended up in Dieter von Schwesterkrank's apartment in Rue Du Bac.
Go forward to Dieter, or turn right or left. You will naturally talk to Dieter. Dieter is quite full of himself. Answer that you are looking for Dieter von Schwesterkrank and that you are coming to collect the photos for Minette. Dieter says he hasn't had time to develop the photos yet. Give one of the two possible answers and Dieter will then ask whether you have any knowledge of developing photos or film. Say No or Yes and Dieter will explain a few things and show you the door to his dark room. Turn clockwise to the aquarium in the bookcase. Zoom in on the right side of the aquarium. There is a black book against the right side of this aquarium. Grab this book. It is an instruction book for properly developing photos.
Read this instruction book very carefully. Take notes if necessary because you are not allowed to take the book into the dark room. Take special note of the order and the various times you must adhere to. Then zoom out and turn around using the turn arrow. You are now directly opposite the door with the red lamp. Go forward to the door. Dieter warns to be very careful in the dark room. Things could go boom there. Open the door and enter the dark room.
Developing the Photos:
Dieter's dark room is dimly lit by red light and it is apparently also Dieter's bathroom.
You are standing in front of the bathtub and on the left you see the toilet. The flush button is on the right of the toilet. Remember this.
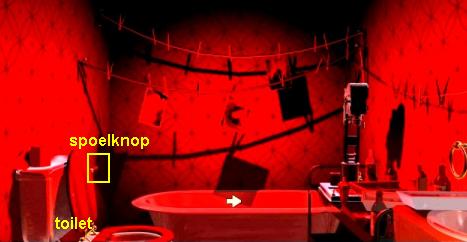
Turn right and you are in front of the Development Table. On the left is the large magnification device.
And you will see three containers in which you will have to put the photo later. Above the Fixing bath is the light button to turn the red light on and off.

As you read in the instruction book, developing the photos must be done in absolute darkness. Before you do anything now, it is best to turn off the red light via the light switch. Do it for a moment and you will notice that it has become really dark. You really can't see anything anymore. Move your cursor across the screen. You get the hand where the light switch is, the 3 containers with Fixer, Rinsing Water and Developer, and the enlarger on/off button. Find the light switch again and turn on the red light again. You now have an idea of how difficult this is going to be.
The container, which is in front of the container with Developer and the Rinse container, contains 4 photos. So you have to enlarge and develop these 4 photos, one by one, and that has to be done in pitch darkness and it also has to be done in exactly the right time. So you really don't see anything. So before you turn off the red light again, you have to know where everything is that you have to click on and then you have to click on everything in exactly the right order. And all that in absolute darkness.
You may do this difficult maner of developing the photos. And you could stick all kinds of pieces of paper on your screen that will mark the places where the on/off button of the enlarger is, and the 4 containers and the light switch. However, if you make a mistake, it's BOOM because the whole thing will explode and you'll have to use the "Second Chance" to try again. If you still want to try this difficult method, here is what you need to do:
1: Developing the Photos the Hard Way:
If you have done all this correctly, Nancy will automatically hang the developed photo on the washing line to dry and you can continue with the next photo/film roll. |
So you have to do the above 4 times and do everything in pitch darkness. You can't go wrong once. If you accidentally click in the wrong place, you have every chance of knocking over a bottle of chemicals and then the whole thing will explode and it will be Game Over. If you get 1, 2 or 3 photos right, but you make a mistake with the next one, you can start all over again with photo 1. However, there is a much simpler way to get the 4 photos ready-made in an envelope. , without having to do this nonsense in the pitch dark. All you need to know is the exact location of the light switch.
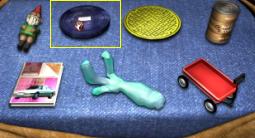
2: Developing the photos the Easy Way:
In your inventory you now have the yellow envelope containing the 4 developed photos. You now also have a nice large and purple Easter egg in your inventory as a sign that you have performed this "Easter Egg Cheat" correctly. |
You look at Dieterboy's aquarium again. Turn counterclockwise to Dieter. Talk to Dieter again and now ask him everything you can ask him.
Dieter doesn't have much sympathy for the Jean Michel Traquenard to whom you have to deliver the photos. You also experience that, at least according to Dieter, Heather is in love with Dieter. Also ask Dieter about his relationship with Minette. Dieter and Minette were an item until recently, but Minette broke off the relationship. When you have asked everything, say goodbye.
Turn counterclockwise to the small round table, which is against the wall by the bathroom door.
On the table there is a wooden marble toy and a digital photo camera.
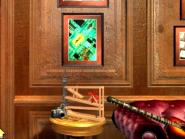
Zoom in on the table. You can play with the marble by clicking on the marble at the bottom of the marble track. You can repeat this until you see green and yellow. However, grab the digital camera. Dieter asks if you want to borrow the camera. Nancy wants that, so say yes and zoom out. You now have Dieter's digital photo camera in your inventory. Turn left again, to the door to the left of the fireplace and leave Dieter's apartment through that door. You end up back on the Metro map. Well... you have to hand the photos over to Jean Michel Traquenard and he can be found at Café Kiki in Hotel de Ville. So travel to Hotel de Ville and you will automatically find yourself in front of Café Kiki. Walk forward and you end up at:
Hotel de Ville:
Jean Michel Traquenard
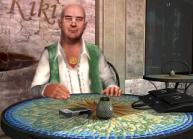
So Traquenard is sitting outside on the terrace at one of the tables. He asks who you are. Answer him in French or English. It doesn't matter because the rest of the conversation will be in English anyway. Follow the conversation and give the answers you want and Nancy will automatically give the photos to Traquenard. The conversation then continues about Dieter von Schwesterkrank and Heather, where you then choose which answers you want to give. Traquenard then invites Nancy to have something to eat and the waiter then throws the menu on the table.
Grab the menu and the choices you can make will appear in your conversation screen. Choose the ice cream, so click on "The creme de glace, please". Waiter brings the ice cream and Nancy eats it and the conversation continues. Again, ask all the questions you can. Traquenard thinks Minette is wearing a mask because the plastic surgery went wrong. According to Traquenard, Minette's greatest enemy is the fashion designer Hugo Butterly. Please ask how you can reach Hugo Butterly. You will then receive the telephone number of that Butterly. The conversation with Traquenard then ends automatically and Nancy automatically returns to the Metro station
NB: It may be that Nancy now thinks it is too late to move on. If this happens, you will automatically end up in the next day. If this does not happen, just continue. In any case, I'm going to Jing Jing first, so click on the Metro map at the Place Monge stop:
Place Monge:
Jing Jing:
Now click on the Place Monge stop on the Metro map and you will automatically travel there and then you will automatically end up in Jing Jing's apartment.
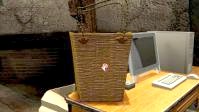
Jing Jing is standing at the kitchen table in her kitchen, stirring a bowl. Continue to Jing Jing:

Jing Jing greets Nancy warmly. Jing Jing is quite a chatterbox and she doesn't always tell the truth. She starts talking about her suitcase that she once lost and that turned up again five years later. Nancy doesn't really trust this story and so you answer "It showed up five years later?". Jing Jing then asks if Nancy doesn't believe her and you answer "Actualy, no". This makes it perfect for Jing Jing, who then asks if Nancy likes chocolate cookies. Say "Yes" wholeheartedly to this. Now you can ask Jing Jing some questions.
So ask Jing Jing all the questions, but save the "Heather wants me to pick up an envelope from you" question for the very end. Ask all the other questions first and you will then experience that Dieter is candidate number 1 for Jing Jing when it comes to Minette's enemies. You also experience that Dieter has a Boa Constructor snake as a pet. Nancy doesn't believe this but Jing Jing insists it is true. You also experience that Jing Jing, as an ideal model for Minette, must remain at a Size 12 in terms of weight and curves. Finally you say: "Heather wants me to pick up an envelope from you". Jing Jing will then show you the envelope on your screen. Grab the Envelope and then say goodbye to Jing Jing.
Take a moment to take a look around the kitchen.
You will see the large dining table, the front door, the double kitchen doors and a small white table with Jing Jing's phone on it.
There is a crate on the dining table. Every time a new day has started there will be a new newspaper on this table. Always read the newspaper first. Sometimes the newspaper gives you an important clue. So read the newspaper now. Now the newspaper has as its main article a story about a shortage of Mint in Paris. So go to the dining table and grab the newspaper and click on the article about "Mint" to get it big on your screen. Read through the article. You read that there is a serious shortage of "Mint" and that mint growers are trying to drive up the price. Parisians are currently paying up to 5 euros for a sprig of mint on the black market.
The telephone is on the small white table, to the left of the double doors. There is now also a magazine on that table. Zoom in on the table and grab the "Utne" magazine. Open it and read through the article about Zu. Zu appears to be an authority on the Paris underground tunnels. Zu is also a privateer. Zu's telephone number is listed on the last page, 01011614560. This telephone number will naturally be available from now on. Put the magazine back after you have read the article.
Jing Jing's phone is one of the 2 phones in this game that you can use to make calls. The 2nd telephone is the telephone that is on your desk in the studio. Zoom in on the phone. The telephone numbers you can call will then appear at the bottom of your screen. Right now that will just be Hugo Butterly's number and your Zippy Calling Card number. Don't call that Hugo now. If you enter the number of the Zippy Calling Card, the telephone numbers from outside Paris will appear.
Right now those will be the numbers of Nancy's friends Bess and George and Nancy's friends Frank and Joe Hardy. As always in a Nancy Drew game you can call Bess and George and Frank and Joe Hardy to ask them for hints. But since I always play Senior Detective, they won't be of much use to you and me. But if you like to chat with Nancy's friends every now and then, feel free to do so. If it turns out to be really necessary that you have to call George and Bess or Frank and Joe Hardy, because they have to sort something out for you, then I will report this when it is necessary.
If you want to change the day yourself:
You may find it useful to change your day yourself. That is possible, but it will probably never be necessary for you to do this yourself because Nancy will always indicate when it has become too late in the day for her and then you will always be automatically taken to Jing Jing's kitchen via the Metro map. you automatically end up in the next day. But if you want to do it yourself, you can do it like this:
Stand directly in front of the double doors in Jing Jing's kitchen. Go forward to these double doors and...
.....you will then see a small screen asking if you want to go to the next day.If you do not want this, click on "No", if you do want this, click on "Yes".
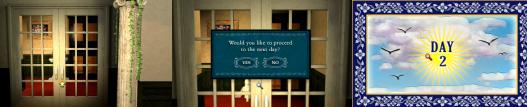
The doors open and you step into Jing Jing's hall and the screen for the new day appears.
Click on this screen and you will end up in the new day and find yourself in Jing Jing's kitchen. I've never had to do this, by the way.
Leave Jing Jing's apartment through the front door and then travel via the map to the Point Neuf metro stop.
Chapter 2:
Point Neuf:
Buy the right stuff:
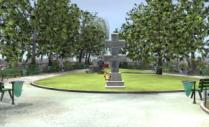
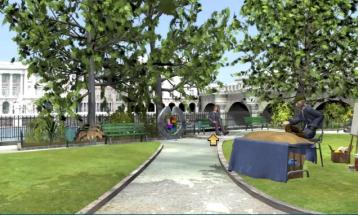
You are in the Square Du Vert Galant Park. You are standing in front of a large stone cross. Go forward and then zoom in on the cross twice. It's a memorial to the Unknown Soldier and you're zoomed in on the date. However, there is a number missing in the date, you read 1940-5. Remember this date or better yet...write it down somewhere. Zoom out 2 times.
The park is circular. There is a work of art in various places in the park that you can take a closer look. There are also 3 sellers in the park and you can buy the items you need to purchase for Minette from these sellers. The sellers always mention a price. It is possible to haggle on the price, but if you choose the lowest amount you will still have to pay the highest amount. It is best to always remain polite and choose the option: "Would you take......?" Then you have the best chance that the sellers will accept your lower offer. The items you buy are automatically stored in the basket that Minette gave you.
When you stand in front of the cross, turn to the left. Right in the corner you can already see the stall of the first seller.
This is the stall of Malika, the veiled saleswoman.
Malika:

Go forward and then click on Malika with your question mark. You will then automatically zoom in on the items that Malika has for sale. If you click on the items with your hand, Malika will tell you what it is and the price she is asking for it. You can then choose whether or not you want to buy the thing and you can also choose to haggle. Buy the 3 Green Rings from Malika now.

Click with your hand on the 3 green rings. Malika wants 15 euros for it, but you think that's too much. So ask: "Would 8 euros be okay?" and Malika will sell you the 3 green rings for 8 euros. Zoom out and after Nancy has said goodbye to Malika, turn around using the turn arrow. Follow the path forward twice, past the crucifix. The path then turns left, but on the right is the Fishfountain. Zoom in on the fountain and then click on the red button to make water spray out. Zoom out again and turn left and follow the path forward once again. Turn left and you will see Marchand sitting in the grass.
Marchand:
Go forward, turn left and you are zoomed in on the stuff you can buy from Marchand. Click on the Blue Film Can.
Marchant asks no less than 84 euros for it, but Nancy is not that crazy. So ask: "Would you take 21 euros instead?" and Nancy gets the blue film can for only 21 euros. Zoom out and.....Marchand now asks if Nancy wants to earn some extra euros by copying a few paintings for him. He wants to pay you 15 euros for each well-painted painting.
NB: You don't need to do this painting for Marchant now. However, it is useful if you are trying to earn some extra money now, but you can also do that later if it turns out to be necessary that you need money. You can paint as often as you want, so you can earn as much money as you want.
It is useful if you now copy at least 2 different paintings so that you earn an extra 45 euros. So say "Yes. please" and you have to paint the Mona Lisa. So you have to color the left drawing exactly like the right drawing. So always dip your brush in the correct color and then click in the left drawing on the places that you need to color with that color. Nancy will automatically ask Marchand if it is okay if you have colored the entire drawing. So if Nancy doesn't ask that then you haven't colored the drawing completely correctly.
When you have finished the Mona Lisa, Marchant will ask if you want to do another drawing. Say Yes again and you can then choose between the Mona Lisa or a pot of flowers. Choose the pot with Flowers because this yields more. The flowers are more work but also yield more. So also color the flowers correctly and Nancy will automatically ask if it is right. Then stop it now. You can always come back here to do more painting if it turns out you need to make more money. Zoom out, go forward, turn right and you will see Monique's stall at the end of the park. Go forward and then click with your question mark on:
Monique:
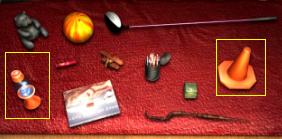
Once again you are immediately zoomed in on the items that Monique has for sale. Buy the Orange traffic cone and the Lava lamp from Monique. Buy the traffic cone for 8 euros and the lava lamp for 15 euros and then zoom out. Turn around using the turn arrow. Nancy now has 211 euros in her purse, so she earned 45 euros and spent 29.
You have all the stuff for Minette and hopefully Minette will be happy with it. But you won't find out until you give the stuff to Minette. Nancy also developed the photos and gave them to Jean Michel and she collected the envelope from Jing Jing. So basically she has now done all her tasks. So let's get back to the studio. So walk back through the park to the front, at the cross, and then click forward through the 2 gates. You will automatically return to the Metro map. So travel to Abbesses.
Abesses:
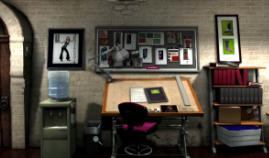
Office
Designing the fashion for Rutherford:
Walk to the blue front door of the Old Windmill Studio, open the door and step inside. You're back in Heather's and Nancy's office and immediately the phone on Nancy's desk starts ringing. Minette and Heather immediately start screaming that Nancy has to answer the phone like lightning. So don't delay and rush to Nancy's desk and pick up the phone. If you are too slow, Nancy will be fired.
The person calling calls from the States and asks if she has Heather on the line. So say you're Nancy Drew and the person vaguely knows who that is. A conversation follows and....... anyway.....this is Prudence Rutherford, a character from "Nancy Drew 6 Secret of the Scarlet Hand".
Prudence Rutherford has ordered three designs from Minette and she would like to know whether they are ready yet and when she can expect them. While Rutherford chatters happily, Heather whispers to Nancy to tell Rutherford that her designs are ready and that she can despise them by the end of this week. This is a lie because the designs for Rutherford are not ready yet and Heather whispers to Nancy that she has to start making those 3 designs now.
Rutherford then finally answers with: "I forget, too, but the important thing is, I'm going to ship you some designs very shortly". When Rutherford has hung up again, zoom out about 3 times and turn to the drawing table on the wall to the right of the studio door.
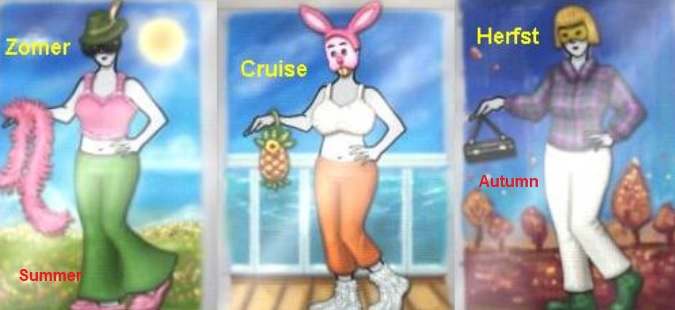
Go to this drawing board and zoom in on it. There is a letter and a book on the drawing table. Nancy asks Heather if these are the designs for Rutherford. That appears to be the case. Read Minette's letter. Minette has made 3 designs for Rutherford, a Summer outfit, a Cruise outfit and an Autumn outfit. But unfortunately Minette mixed up the different items from the 3 different designs. In each of the 3 designs there should be something for the head, face, upper body, lower body, feet and an accessory to wear. Also take note of the order in which you need to make the outfits: Summer, Cruise and lastly Autumn.Then open the book and leaf through the pages. The first 3 pages are full of design sketches by Minette, but then you arrive at the laminated page with the drawing of the model.
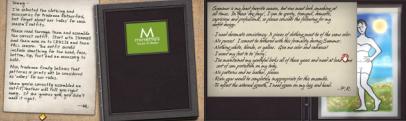
First read Minette's letter. This first letter tells the criteria of Rutherford's summer outfit. Click on the drawing of the model to remove the plastic protective film.
You will then arrive at the page where you will see all the various parts and the drawing of the model
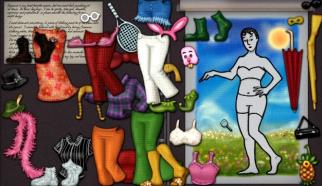
So you have to dress the model with the right clothes and accessories. First you do the Summer outfit, then the Cruise outfit and finally the Autumn outfit. The letter at the top left tells you which requirements the outfit must meet. So there is always a different letter for Summer, Cruise and the Autumn outfit. Each time you hear from Heather whether you have done well and you continue with the next one. Prudence Rutherford has given vague indications about what she wants in the 3 different outfits, but especially what she doesn't want in them. So you always pick up an item of clothing or accessory and then click it on the model and in the right place.
Summer outfit: green hat, sunglasses, pink top, green pants, pink slippers and pink boa.
Cruise outfit: bunny mask and ears, white top, orange pants, white fluffy boots, pineapple.
Autumn outfit: Blonde short wig, yellow mask, checked jacket, white pants, green boots, black bag.
When you have finished the Autumn outfit, zoom out a few times. Turn left and go to the door of the studio. However, before you can open the door, Heather tells you that you won't have much success speaking to Minette. Minette is currently completely obsessed with an internet game and refuses to do anything else until she has achieved the highest score in that game.
However, don't worry about what Heather says and open the studio door anyway. Enter the studio and go to Minette, on the other side of the round stage. Indeed, Minette is obsessively playing an online game via her laptop. Click on Minette with your question mark, but Minette waves you away. Repeat it a few more times but Minette no longer responds at all. Go back to the office and talk to Heather.
You will now be given a number of options that you can talk to Heather about. That can all be done later. So now just say: "Minette is so into that online game, she won't even talk to me". Heather then asks if Nancy is good at computer games. Give one of the two answers and Heather suggests that Nancy, under Minette's name, play online on her computer and then try to get the highest score. Minette will then think that she has achieved the highest score and will stop playing.
So go to Nancy's desk and zoom in on the computer screen and then click on "Jane's Games Portal". You have to enter a login name and a password. Nancy asks Heather if she knows what login name and password Minette uses, but Heather does not know. Well... you'll have to think and guess for yourself. But think back for a moment to Sonny's notepad, which is in the top drawer of Nancy's desk. Sonny has drawn a lot of pictures of mannequin Carol in that notepad and always added "Rude". Now enter CAROL under Login and press ENTER. Enter RUDE as password and press ENTER and.... you end up in:
Jane's Game Portal: Model Match:
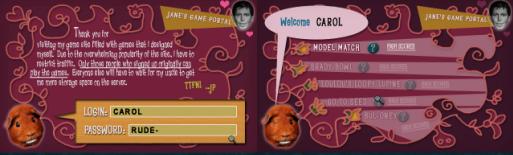
The only game you can play now is the "Model Match" game. This is the game that Minette is also playing now.
You are logged in as CAROL, so as Minette.
First click on the question mark to read the Rules of the game and then click on Model Match to get into the game.

It's basically just a game of "3 in a row" that you have to play. You always have to get 3 of the same faces in a row, next to or below each other. This can be done horizontally, vertically but also diagonally. 3 in a row always gives you 150 points. So you have to score more than 1000 points. So exactly 1000 points is NOT enough. However, you only get 120 seconds, so only 2 minutes. If you don't make it in 2 minutes, you will lose all your points and have to start over.
So you always look for 3 of the same faces to place next to or below each other. You do this by repeatedly swapping faces with each other. You click on a box that you want to move and then click on the box with which you want to exchange the first box. So you can move boxes from bottom to top, from top to bottom, from left to right and from right to left. If you do not see any faces on the screen of which at least 3 are the same, click on "Mix It Up" to get a new screen with faces.
It is also possible to get 4 or 5 of the same faces. 4 or 5 identical faces in a row will not earn you more points, but they will give you extra seconds of playing time. So if you manage to get 4 or 5 in a row a few times, you get extra time to get over 1000 points. A score of 1150 points is sufficient. Once you have scored 1150 points you can quit. Then click the "Quit" button and zoom out a few times.
Heather then screams that you have to rush to Minette now, before she decides to want to beat your high score. So go back through the studio door into the studio and to Minette, on the other side of the red stage. Click on Minette again with your question mark and now Nancy will hand over the 4 items you bought in the park. If you have the wrong items, Minette will let you know in her own rude way, but if you have bought what I told you to buy, Minette will almost wet her pants from excitement about the things you have bought for her. She then bonjours Nancy back outside. Take a look at the round podium and see that your 4 items are now also on there.
Go back to the office. As soon as you step back into the office, Minette screams through the intercom for Jing Jing to come. She called Jing Jing but she didn't answer the phone. So Nancy is now ordered to pick up Jing Jing and bring her to the studio. Don't panic... first go and talk to Heather calmly again. First say: "Here's that envelope I picked up from JJ". Nancy will then automatically give JJ's envelope to Heather. Then ask all the questions and find out why that stupid Heather keeps working for bitch Minette. You will also get another example of how bitchy that Minette is. Then say goodbye to Heather and leave the studio through the blue front door. Travel by metro to:
Place Monge: Jing Jing:
You'll automatically end up back in Jing Jing's kitchen. Jing Jing is still quietly stirring her pot behind her kitchen table. Go to Jing Jing and talk to her and say: "Minette needs you at her studio. In fact, she's been screaming for you. Literally". JJ is unimpressed and refuses to go to the studio. She wants to bake her chocolate cookies first. Great girl that JJ. However, say: "But if I go back there without you, Minette"ll fire me". Well...too bad...Nancy now offers to bake the cookies for JJ if JJ leaves for the studio immediately. JJ wants to, but she says that when she gets to the studio she will first call to ask if Nancy has the cookies ready. If not, she will return straight away. So say: "Just go, please".
Jing Jing now shows the things she has laid out on the kitchen table and explains what needs to be done. However, she also says that Nancy must first get a fresh sprig of mint and that there is no more brown sugar. However, Nancy can replace the brown sugar with a molasses mixture. A sprig of mint will be difficult as there is a major shortage of fresh mint (as you may have read in the newspaper). Jing Jing then disappears.
Get a fresh sprig of Mint:
So first you have to get a sprig of mint. Turn around and leave the apartment through the front door and travel by metro to Pont Neuf. Walk back into the park and go to Marchant. Zoom in on Marchant and you will see that he now has new stuff for sale. First say "Well, let's see" and then take a look at the items. One of the items is a cookbook, which is located at the bottom center of the counter. Click on the cookbook and you will experience that it is a booklet in which you can read which other ingredients you can replace certain ingredients with if you do not have an ingredient. Marchant asks 8 euros for this booklet, so say: "Would 4 euros do the trick?" and Nancy gets the book for 4 euros.
Zoom out, turn around using the turn arrow, then turn left and go to Malika's stall. Click with your question mark on Malika or on her stall and you will see that Malika now has a sprig of mint on offer. However, Malika asks 50 euros for it and you can buy it for 36 euros. DON'T DO THIS...there is a much cheaper way to get a sprig of mint. So say no and zoom out. Leave the park and travel to Hotel de Ville.
You are back at Café Kiki. Walk to the doors of the café and you are back with that arrogant Jean Michel Traquenard. Ask: "Do you think I could order something?". Well...that's possible, but this time Nancy will have to pay for her order herself. Say "Okay by me" and Traquenard calls the waiter. Order the ice cream again, so say: "May I please have the creme de glace". The waiter brings the ice cream but does not remove the lid yet. Nancy must first pay the 5 euros. To the left of the plate is a small gray bowl. Click on the gray bowl to pay and you can start eating. Café Kiki always serves the ice cream with a sprig of mint. Click on the ice and the mint sprig will rise. Click the sprig of mint to your inventory. Nancy eats the ice cream again. You can then talk to Traquenard some more about Jing Jing. Do that and then say goodbye and travel back to Place Monge.
NB: Nancy may now find it too late again and you will automatically return to Jing Jing and end up in Day 4 or Day 3.
Does not matter. Just continue with the walkthrough.
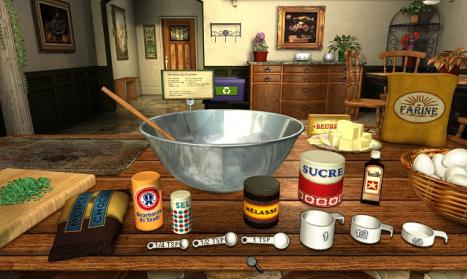
Back in Jing Jing's kitchen, you walk to the kitchen table. Then walk to the right of the kitchen table to the stove. To the right of the stove is a large gray kitchen cupboard. Zoom in on it and then open the cupboard. On the shelf in the cupboard, on the left, is a jar of Molasses. Grab the Molasses and put the jar in your inventory. There are also some books in the cupboard. Grab those books. There are 2 books for an electrician and Nancy wonders what Jing Jing have to do with them. Zoom out 3 times and turn around using the turn arrow. Now go to the kitchen table via the diagonal arrow and you will be zoomed in on the items for:
baking the cookies:
On the left you see the cutting board. Start by first opening your inventory, via the "hammer/spanner". Click on the Eye in the inventory screen to see only the items that you can view. Then click on the booklet you just bought from Marchant and read the line about Brown Sugar. You read that you can replace the Brown Sugar with 1/2 cup of White Sugar and 1 teaspoon of Molasses. Click the book again. Close your inventory. Immediately open your inventory again. You now see all the things again. Now take the Mint from your inventory and then click on the cutting board. Nancy automatically chops the mint. Now take the jar of Molasses from your inventory and place the jar in front of the mixing bowl on the table. It then looks like this:
|
From left to right you see:
Read the Recipe on the edge of the Mixing Bowl. Click the Recipe away again when you have read it. You're ready to start. You always pick up the right things and then click them into the batter bowl. The items are then automatically stirred in the mixing bowl.
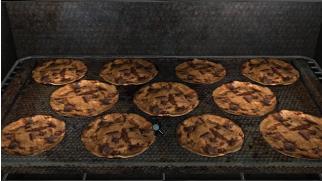
You read that you are now ready to bake the cookies. Click on the baking tray with your hand and the cookies will now be baked in the oven automatically. However, if the cookies are not flat with curled edges, you did it wrong and will have to start over. This is what the cookies should look like:
|
Zoom out of the cookies and....the phone starts ringing. You have to be quick now because if you delay, the phone will be silent again and you will not be able to talk to Jong Jing. Go forward once, towards the front door, and then zoom in on the telephone. Grab the horn and talk to Jing Jing who asks if the cookies are ready yet. Say: "They sure are" and Jing Jing then wants Nancy to tell you what the cookies look like. Nancy does that and Jing Jing loves it and will now go to Minette. Zoom out of the phone 2 times. Leave Jing Jing's apartment through the front door and travel again by Metro to Abbesses
NB: If your cookies do not look like as in the screenshot above, but are convex and round, the telephone will also ring, but then Nancy will describe the wrong cookies and Jing Jing will become angry. You then get 1 more chance from Jing Jing to get it right. If your cookies are still wrong the second time then it's Game Over.
Abbesses:
Studio/Office
Enter the studio again through the blue front door and....of course Nancy's phone starts ringing again and Minette screams for you to answer the damn phone. So rush to Nancy's desk and grab the telephone receiver off the hook. The guy who reports wants to speak to Minette. Say that this is not possible and the man continues to insist. Well...put the man on "hold" or keep saying that he cannot speak to Minette and the man will automatically disconnect the connection. This was the guy who kept making the threatening phone calls to Minette. Zoom out of the phone.
NB: You can also tell the guy that you are going to check if Minette is there. Then ask the guy to hang around for a moment and go to the studio door. However, Minette, or Heather, has put a Do Not Disturb note on the studio door so Nancy really doesn't dare go inside. Nancy will then automatically end the telephone conversation.
Turn around to Heather's desk and see......that annoying Heather isn't there now. So grab your chance now that Heathertje is absent.
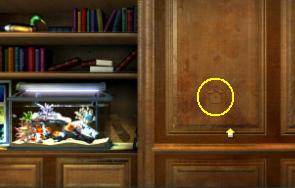
Continue to the Dodobox cabinet, which is between Nancy's desk and the front door. Zoom in on the box and click with your hand on the box:
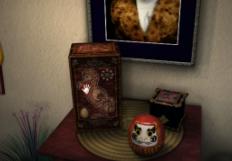
The Dodobox will float diagonally on your screen. Click with your red magnifying glass on the top of the Dodobox and .... you end up in:
Dodobox puzzle
It's a Maze puzzle.
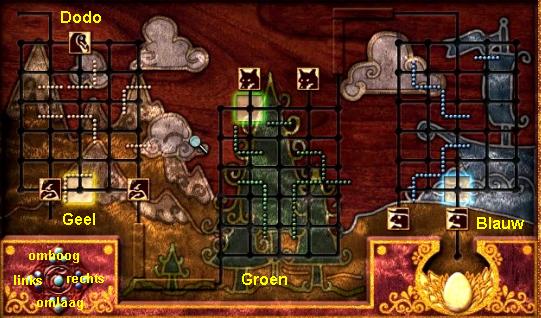
There are 3 mazes. On the left is the Yellow maze, in the middle the Green maze and on the right the Blue maze. The Dodo bird appears at the top of the Yellow Maze. In each maze there are 2 Dodo hunters. In the Yellow maze there are 2 Eagles, in the Green Maze 2 Foxes and in the Blue Maze 2 Hunters. The idea is to move the Dodo bird through each maze to the colored box and then finally to the Egg at the bottom right. The Dodo can go to the Green maze via the yellow box, to the Blue maze via the Green box and to the Egg via the Blue box. You move the Dodo to the right, left, up or down by clicking on the arrows at the bottom left of the box. For every move the Dodo makes, the 2 enemies do the same. But you can block the enemies by pinning them to a wall, which are the dotted lines in the 3 mazes.
|
We start with: Left Maze: Left, Down 2 times, Left 3 times, Up 2 times, Right 3 times, Down 5 times, Left and the Dodo disappears through the Yellow box and ends up in: Middle Maze: Right 2 times, Left 3 times, Up 2 times, Down, Left, Up 5 times, Right and the Dodo goes via the Green box to: Right maze: Right 2 times, Down 2 times, Up, Right 2 times, Up, Left 2 times, Right 2 times, Down 5 times, Left 2 times and.... .........the Dodo reaches the Egg safely and you will automatically leave the puzzle and the Dodobox will now lie flat in your screen. Click on the Egg and the Dodobox will now open. |
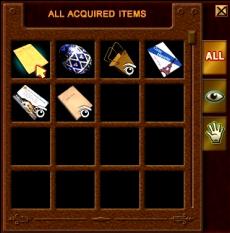
There are 4 threatening letters in the Dodobox, 2 red, 1 black and 1 purple. Click on the threatening letters and then open them to read them. Then zoom out twice to put the letter back in the box and grab the next letter. First read the 2 red and the black letters and finally the purple one. Nancy then notices that the letters of the Purple threatening letter are of a different type than the letters of the red and black threatening letters. Once you have read all the threatening letters, zoom out a few times to close the Dodobox again.
Go to Heather's desk and zoom in on it. To the left of Heather's keyboard is a purple/red folder. Grab the folder and open the folder. This folder contains Heather's fashion designs. Look at them and then zoom out a few times. Go to Nancy's desk and zoom in again on where Nancy's screen is. A pink note now hangs on the shelf to the left of the screen. Grab that pink note and read it. It's from Heather and she asks Nancy to buy her a stuffed parrot. Zoom out a few times and leave the studio through the blue front door. Travel again to:
Point Neuf:
Continue to the cross, turn left and go forward to Malika's stall, turn right, go forward and then turn right again.
You now look across the path to Marchant, but you also see Dieter von Schwesterkrank sitting on one of the benches.
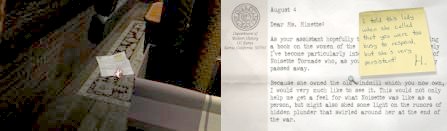
Walk forward again and Nancy calls out to Dieter. Dieter gets up and runs away. But he leaves some stuff on the bench and you are automatically zoomed in on the bench. Dieter left a newspaper and a yellow "button" on the bench. Grab the newspaper and then read the In Memoriam article about Noisette Tornade. Noisette Tornade is the woman that historian Lynn Manrique called about.
You read that Noisette Tornade was the previous owner of the Moulin, where Minette's studio is now. You can also read that Noisette worked as a translator for the Germans during the Second World War, but that she was actually a spy for the Allies. From 1973 to 1995, Noisette was the Director of Public Works of Paris.
Zoom out of the newspaper and now grab that yellow "button".......... it turns out to be a pocket watch. The watch is at 3 o'clock. Put it in your inventory. Zoom out and turn around and now go to Marchant. Zoom in again on Marchant's things. Marchant now has a blue parrot for sale. Buy the parrot for 15 euros. Then click on the black box that is also on Marchant's table. Nancy asks what kind of box this is. Marchant says that it is a Decoder from the Second World War but he doesn't wants to sell it. Nancy insists, but Marchant does not want to sell the decoder. He only wants to exchange the decoder for a bottle of old wine. Marchant wants to give the decoder to Nancy in exchange for a bottle of Moutan Fouette 1968. Zoom out and leave the park and travel to:
Rue Du Bac:
Dieter von Schwesterkrank:
Upon entering, Nancy notices that Dieter is busy in his dark bathroom. So turn left and go forward to the bathroom door.
Knock on the door and Nancy talks to Dieter through the door.
Nancy says that she saw Dieter in the park and that he left the newspaper and his pocket watch there. Dieter doesn't need that newspaper back. About the pocket watch he says that it is actually a kind of key that can be used to open a secret panel. That panel is to the right of his aquarium.
Turn around and go forward to Dieter's aquarium.
Then turn slightly to the right so that you are standing in front of the wall panel to the right of the aquarium.
You can see that there is an indentation in the panel.
Go forward to the panel. Take Dieter's pocket watch from your inventory and then place it in the indentation in the panel.
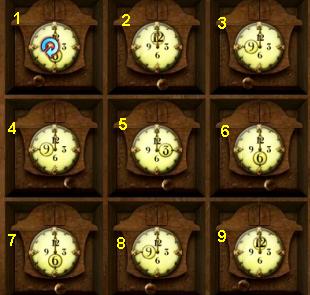
The panel opens and you now see 9 pocket watches. You are in the:
Pocket Watch Puzzle:
This puzzle is on a timer and you only get a limited amount of time. Dieter's watch is set at 3 o'clock because the 3 is circled on Dieter's watch. The 9 watches all show a different time. One is at 9 o'clock, another at 6 o'clock and still others at 3 or 12 o'clock. This can be seen from the number circled on the watches. The intention is to set all 9 watches to 3 o'clock. Place your cursor on a watch. You will then get the blue rotating arrow. Click on the watch with the blue rotating arrow until the 3 is circled. If you don't make it in time, you simply start all over again. You must first place Dieter's watch in the panel again.
|
Number the watches, from top left to bottom right, 1 to 9. If you change one watch, another watch will also change. There are 2 ways to ensure that you get all watches at 3 o'clock 1: From the starting position of the watches, set the following watches to 3 o'clock: 8, 7, 4, 1, 4, 7, 9, 6 and... bingo... the clock strikes once and the Aquarium now slides away. 2: First set all watches to 3 o'clock. Start with 1 and end with 9. However, a few watches will not stay at 3 o'clock. Then set those watches to 3 o'clock again and..... you hear the clock strike 1 stroke and the aquarium moves away. Nancy reports to Dieter that the secret passage has been opened and Dieter gives her permission to investigate. |
The Secret Passage:
Go forward once into the secret passage. Immediately on the right you will see a Spider. Zoom in on the spider. You could now take a picture of the spider with Dieter's digital camera. You don't have to do this, but it is a good exercise to get the hang of using the camera. Later in the game you have to take some photos for Dieter, so it is useful if you know how to do that.
So zoom in on the spider. Then take Dieter's digital camera from your inventory. The camera fills your screen. Click on the white button at the top right and you will return to the spider. Your cursor is now the camera's viewfinder. Make sure you have the spider exactly in the center of the viewfinder and then make the photo by pressing your left mouse button. You return to the camera screen. You will now see the photo you just took on the camera screen. You can delete the photo or keep it. If you want to keep the photo, simply zoom out. If you want to delete the photo, click on the Delete button and then on the Yes or No button. I recommend you keep the photo of the spider.
Zoom out of the camera and out of the spider and continue forward 6 times through the secret passage. The hallway is a dead end but there is a metal door in the wall. The Hazelnut Symbol is on the door. Zoom in on the door and then open the door. Oh...so you have to enter a numerical code. Zoom in on the combination lock. Nancy automatically reads the inscription aloud: "The year when our dispear ended. the year when my dispear began". The clue to the code is on the crucifix in the park. The end of the Second World War, so 1945. So put 1945 in the combination lock and.....the display slides back and a red book rises.
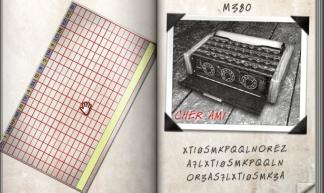
Grab the book and open it. There is a grid paper on the first left page. Grab the grid paper. It disappears into your inventory. On the right page you see a photo of the M380 Encoder/Decoder. Click on the letters below the photo. Nancy says it's a code. Scroll to the next 2 pages. There is a letter on the right page. Click on the letter and read it. The letter has several pages, so keep turning to the next page. In the letter you can read how to use the M380 Coding/Decoding Device. Be sure to read the note on the 2nd page, near the 3 red asterisks. In it you can read that the names of Paris Metro stops were used as code words. This is an important clue for a later puzzle
Zoom out a few times. The letter is put back in the book. Turn around using the turn arrow and walk back through the hallway. At the end, open the secret door and step back into Dieter's living room. Dieter is still busy in his dark bathroom. You can click on the bathroom again to talk to Dieter, but this is not the right time for this yet. Let's take the parrot to Heather first. So leave Dieter's apartment and travel again to:
Abbesses:
Enter the studio again through the blue front door and.....Minette comes running out of her studio screaming. Someone sent Minette a box of chocolates and Minette loves them. But.....unfortunately....when she opened the box, 9 Cockroaches came out and all 9 of them are now swarming through the studio. Nancy must catch those 9 cockroaches. Ask "What exactly do you want me to do?" or say "Maybe you should just call an exterminator". However, Minette is against killing living things so she wants Nancy to catch the cockroaches alive. You can ask "And if I were to...refuse?" Well...then you are fired. You will then automatically end up in the studio and see the chocolate box on the floor and the cockroaches running away in all directions. Grab the Chocolate box.

You see that there were 9 chocolates in the box, so there are 9 cockroaches to catch. Those pests are small and very fast. If you see a cockroach, you have to click on it very quickly with your hand. Nancy then grabs the cockroach and automatically puts it in the chocolate box. While you are hunting for the cockroaches you will also find 2 important clues. You will find a letter from Lynn Manrique containing her telephone number. And on Minette's desk there is also a letter that is important. But if you do your best in the Cockroach Hunt, you will find these two letters automatically. Ok...let's start with the:
Cockroach Hunting:
So the goal is to catch all 9 cockroaches. These pesky vermints are small and very fast. But they do make noise, so you hear them first and then you see them shoot away. As soon as you see a cockroach you have to click on it very quickly with your hand to grab it. So you start right in front of the round stage with your back against the door. If you miss a cockroach, don't stop and keep walking. The cockroaches always appear in the same place, but not if you stand around waiting. So if you miss a cockroach, don't wait around because then you can wait for the rest of your life.
First go left through the studio. When you get to Mannequin Carol, who is now wearing a red dress, you will see a few boxes.
Those boxes are against Minette's desk.
There will be a cockroach crawling across the floor and that cockroach will go from the desk to behind those boxes. Quickly... Immediately click on that cockroach with your hand. You probably won't catch the it right away, but you will zoom in on the floor behind the boxes and you can catch the cockroach there. But there is also a Letter on thefloor here.
Grab the letter. There is a yellow note from Heather on it. Click away this yellow note and Nancy reads the letter. It's a letter from Lynn Manrique. Scroll to the end of the letter via the down arrow and you will see Lynn Manrique's telephone number. Click on the letter to put it in your inventory and the telephone number will now be available in your telephone list on your Zippy Calling card. If you had not managed to catch the first Cockroach here now, then there is no point in waiting here. So zoom out and walk to Minette's desk. There is also 1 cockroach crawling around on the desk and there is also a letter on the desk.
First try to grab that cockroach. If it doesn't work, it doesn't matter for now. In any case, grab the letter. This letter is full of letters and these letters are of the same type as you saw in the purple threatening letter and Nancy now concludes that the purple threatening letter was made by Heather. Up to here I could help you with the Cockroach hunt because my goal was to show you the way to these 2 letters. From now on you are on your own to catch all 9 cockroaches. It's really not that difficult. You simply have to react quickly as soon as you spot a cockroach. Always walk through the studio to the left and then to the right again. Keep repeating this until you have caught all 9 cockroaches. If you have succeeded, go to the door and try to leave the studio
However, that imbecile Minette immediately slams the door shut. The weirdo refuses to let Nancy out of the studio until she is convinced that Nancy has really caught all 9 cockroaches. She also tells Nancy not to kill the cockroaches but to release them in the park. Minette then asks Nancy to count out loud how many cockroaches she has in the box and Nancy dutifully does this. But...Nancy sighs that she thinks this is a rotten job. You can then leave the studio. So open the door again and enter the office again. Well...slave Heather isn't back yet, so you can't hand over the parrot yet. So let's get rid of those cockroaches. Leave the studio via the blue front door and travel again to:
Point Neuf:
Je kunt gewoon in de ingang van het park blijven staan. Open je inventory en pak de chocoladedoos eruit en Nancy schud vanzelf de kakkerlakken eruit. Wat nu? Zeg....weet je nog dat artikel over Minette, dat je gelezen heb in het tijdschrift dat in het atelier op de glazen salontafel ligt? Toen je dat artikel las zij Nancy dat ze er op de foto's bij dat artikel ook de 3 ronde stenen schijven zag staan, zonder de rode verf erop. Dat artikel was geschreven door Jean Michel Traquenard. Nancy wil wel wat meer over die ronde schijven te weten zien te komen. Draai je om, verlaat het park en reis naar Hotel de Ville:
Hotel de Ville:
Walk back onto the terrace of Café Kiki and you are back at Jean M. Jean M barks at you what you want from him next. Say: "The picture of Minette that was in the June issue of GlamGlam---was it cropped, do you remember?". Yes...the photo was edited. "Do you know anything about the stones that are in the background of that picture. They almost look like dials?"
No...Jean M doesn't know anything about those 3 stones, but he says he still has all the original photos in his PDA. Jean M says that the owner of Café Kiki has said that Jean M can no longer keep his office on the terrace here. Now the owner of Café Kiki also has a big problem. A bus with schoolchildren has just arrived and all those children want an ice cream. Unfortunately, Café Kiki's ice cream man is just on his lunch break, so there is no one to prepare the ice creams. Jean M wants to show Nancy his photos, but only if Nancy wants to prepare the ice cream for the owner of Café Kiki. The owner will be grateful to Jean M for this and so Jean M will be allowed to stay here.
Well...agree to this and you will end up in the ice cream puzzle
Ice Cream Puzzle
The owner of Café Kiki tells Nancy what the intention is and Nancy lists the ingredients she has at her disposal.
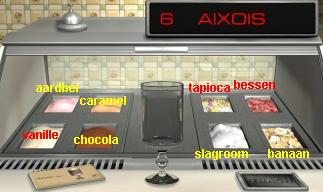
The name of the sorbet you need to make will appear in the screen at the top right. At the bottom left there is a booklet in which you will see an image of the sorbet that you have to make. So you scoop the ice from the bottom up into the glass. The whipped cream top is always put on by itself. To fill the glass with ice, click on the containers. Nancy then scoops out a scoop of ice cream or fruit. Then click on the scoop. The scoop is then attached to your cursor. Then place the scoop on the glass and make sure that your hand is the "Hand with finger". Then click to put the ice in the glass. So you always stack the layers in the glass on top of each other.
|
There are 7 different sorbets, but you don't have to make all 7. You may have to prepare a sorbet several times. When you have a sorbet ready, click on the bell. These are the Sorbets:
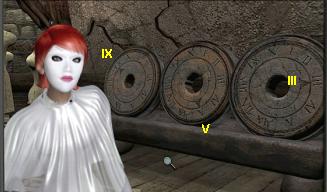
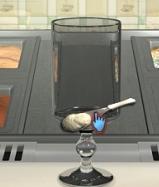
When you have finished all the sorbets, you will automatically return to Jean M and he will show you the photo with the 3 round stone discs. Take a good look at those 3 discs in the photo.
You now see the 3 discs without red paint. It has Roman numerals on it. On each disc a red arrow points to one of the Roman numerals. Write down these 3 Roman numerals. From left to right: IX (9), V (5), III (3). Zoom out and say goodbye to Jean M. Now travel back to: |
Abbesses:
Enter through the front door again. Heather is back and is happily typing away again. So go talk to Heather. Nancy now naturally gives the parrot to Heather. Then say: "Why did you write Minette that threatening letter?" Heather initially denies this, so give either answer and Heather will admit it. She asks if you would just like to tell Minette that she sent that purple threatening letter and the conversation will then automatically end.
NB: If you talk to Minette at any point, you can tell Minette that Heather sent her one of the threatening letters. Heather will then eventually be fired by Minette. You just have to decide for yourself whether you want to do this. It is of no importance for the rest of the game whether Heather stays or not.
Go to your own desk and zoom in on the phone. We're going to call a few people. First of all with Zu. At Jing Jing you read the "Utne" magazine and the article about Zu. Zu is an expert on the Paris Catacombs and now that Nancy has been in Dieter's secret passage, she wants to know more about it, especially about that Hazelnut Symbol on the door. So call Zu by dialing his number.
Zu thinks you are Jing Jing, but Nancy quickly helps him out of that dream. So she asks Zu about that Hazelnut Symbol. Now it turns out that Zu is completely crazy about Jing Jing. Well... who wouldn't be. Zu wants to tell Nancy some things about the catacombs, but only if Nancy manages to get him a piece of paper from Jing Jing with "Zu my love Jing" written on it by Jing Jing. If Nancy has that piece of paper, she must go to the Denfert Rocherau metro stop and then enter the catacombs. She must then leave the piece of paper at the bones of Magdaline Cemetery.
After you have spoken to Zu, enter the Zippy Calling Card number and then call up Lynn Manrique. Nancy introduces herself and asks if she can ask Lynn some questions regarding Noisette Tornade, and she is allowed. Ok...now you can ask Lynn a whole bunch of questions. Don't skip a question. Ask Lynn all the questions you can ask her. The order in which you do this doesn't matter much.
Make sure Lynn talks about the romance between Noisette and Hans Schwesterkrank, about Noisette during and after the Second World War, about the works of art that Noisette hid from the Nazis during the war and about Lyn's last words: "Red left... .green". If you just answer all the questions neatly, you will automatically hear all the information from Lynn.
When you have finally asked everything you could possibly ask, you say goodbye and leave the studio through the blue front door. A new stop will now be added to the Metro map that you can travel to and that is the Denfert Rochereau stop. However, don't travel there yet because first you have to get that photo from Jing Jing. So now travel again to:
Place Monge:
Play a game of Hangman with Jing Jing:
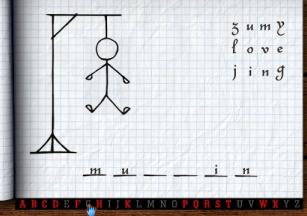
Go to Jing Jing in her kitchen and talk to her. Say: "I just talked to this huge fan of yours. He'd really really like your autograph". But Jing Jing is terrified of giving her autograph to anyone just like that. Try to insist a bit via one of the two options, but Jing Jing doesn't think about it. Jing Jing then asks if Nancy wants to play a game of Hangman. This time say that's what you want, so say "That'd be great" and you'll end up in the Hangman Screen. At the bottom are the letters you need to click on. You're not supposed to win. The idea is that you lose, but that Jing writes the words "Zu my love Jing" on the piece of paper. So click successively on the letters: Z, U, M, Y, L, O, V, E, J, I, N, G and.... this sentence has been written on the piece of paper by Jing Jing, but you will lose it game.
Nancy then asks if she can have the paper and that is allowed. Jing Jing tears the piece of paper from the pad. Click on it to store it in your inventory. Tell Jing Jing you've had enough and then say goodbye. Turn around and leave Jing Jing's apartment and now travel to:
Denfert Rochereau:
Catacombs:
Nancy automatically pays the 5 euro entrance fee.
It costs you 5 euros every time you go here, so you have to make sure you always have enough money in your purse.
Right in front of you is the memorial stone with a skull on a pillar in front of it. So walk forward and Nancy says she is now at the Skull of Magdaline. Take the hangman note from your inventory and click it on the skull and Nancy places the note in the skull. Ok...now Nance have to call Zu again, so you have to go back to 1 of the 2 phones you can use to make calls. The closest is Jing Jing's phone, so leave the Catacombs and travel back to:
Place Monge:
Walk back into the kitchen but don't talk to Jing Jing. Zoom in on the telephone on the small white table and call Zu. Zu has already picked up the note and now he tells Nancy something about how she can get to the real Catacombs. Nancy needs to go back to the Magdaline Skull to open that skull now. There is a red button in the skull that Nancy must press. Zu warns that the tunnels are largely flooded, so Nancy needs a wetsuit. Zu also warns that the police will be in the tunnels. Zoom out of the phone and leave the apartment again. Travel to:
Point Neuf:
Go into the park and to Marchant. Check whether Nancy still has enough euros in her purse. I think so, but if not, first earn a lot of money by coloring a lot of drawings for Marchant. Zoom in on Marchant again and buy the Wetsuit from him for 63 euros. Then zoom out and go to Monique, at the back of the park. Click on Monique again with your question mark and buy the French-English Dictionary from her now for 30 euros. Monique really wants 30 euros for it, so there's no point in haggling this time and you'll really need the dictionary later. Once you have purchased both the diving suit and the dictionary, you leave the park and travel back to Denfert Rochereau.
Denfert Rochereau:
Catacombs:
A: Metro Tunnel
NB: Let me tell you something about this part of the Catacombs. As Zu already mentioned, there are police officers walking through the tunnels. Nancy must not be discovered by those cops. As soon as you notice that the cops are coming towards Nancy, you dive into the nearest deep gate, which are located at various distances from each other in the tunnel. You notice that police are walking towards Nancy when you hear voices speaking French. As soon as you hear those voices, you hide Nancy in one of those deep gates and wait until the voices have passed by, then you can continue safely.
Nancy automatically pays the entrance fee again. Continue to the Skull of Magdaline again. Click on the skull again with your hand and....this time the skull opens and, exactly as Zu said, a red button appears. Click on the red button and... Nancy automatically turns right and you see that the real entrance to the Catacombs now opens. Go forward twice into the dark tunnel. You end up in a Metro tunnel.
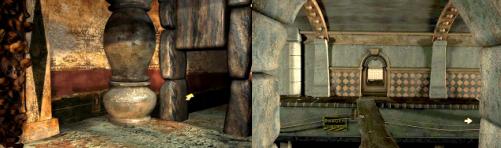
There is a plank over the rails that you can use to get to the other side. Do not do that butturn clockwise via the right arrow. You then look through the metro tunnel and see another plank lying across the rails further on. Now continue forward 5 times through this first metro tunnel and then turn left. You are standing in front of the second plank that lies over the rails. Go over the plank to the other side and then turn left. Go forward once again and turn right and then go forward through the deep gate and ..... you are now in:
B: Sewers:
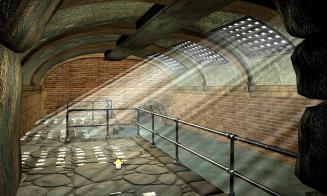
Walk forward and then turn right. You are at the top of the stone steps. Click forward to step into the smelly sewage. Nancy automatically puts on the wetsuit first and then stands up to her waist in the stinking water. Now walk forward into the tunnel until you can go no further. There is a large 2 painted on the wall in an upward arrow and you see a ladder disappearing down into the water. Nancy's oxygen meter will appear at the bottom of your screen.
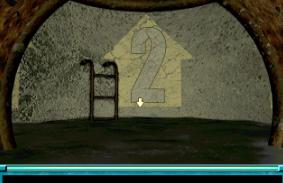
You now get the Down arrow, so Nancy has to dive underwater. However, Nancy is only wearing a wetsuit but she has no oxygen tanks. So once Nancy is underwater you need to keep an eye on her oxygen meter. That oxygen meter runs out quickly and when it's empty, Nancy drowns. Now save your game first so that you can always start again from this point. I recommend that you save a lot now, because if you always have to use the "Second Chance" you will get quite confused. So save every time I tell you to save. Ok...here we go.
Now dive under water here, via the Down arrow. Nancy automatically swims to the bottom and into the first sewer pipe. Go forward 1 time. You swim out of the tube and are in a distribution room. Right in front of you you see the openings of 2 pipes. Do not go there, but swim diagonally to the right via the diagonal right arrow and then swim forward twice to the pipe straight in front of you.
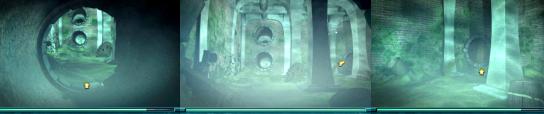
In the tube you go forward once and then turn right. You will now see a rotating fan. There is a wine bottle in front of the fan and Nancy wants it.
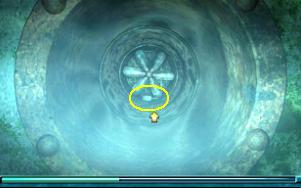
So swim forward and grab the Wine Bottle. It is a bottle of Moutan Fouette 1968, exactly the wine Marchant wants for the decoder. Click the wine bottle to your inventory. You're running out of air. Turn around using the turn arrow and now go back to where you started: forward 1 time, left and then forward 6 times. At the Arrow with the 1, Nancy automatically swims back up and fills her oxygen meter with air again. So you're back where you started. Turn around using the turn arrow and you will see the big 2 on the wall again.
Before you dive down again, I recommend that you Save your Game now and then name your save game "Sewer has wine bottle".
Dive again and then swim through the first tube into the distribution room. Now swim straight ahead and then into the bottom tube.
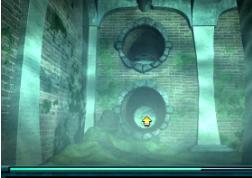
Go forward once in the bottom tube and then turn right. You are now looking into a more or less square tube.
Go forward once and then turn left again. You are now hanging in front of a "porthole" and you will see smaller pipes.
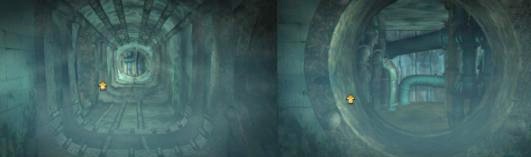
Swim through the "porthole" and then forward one more time. Then turn right again. You see even more pipes.
Go forward once and turn left again. You are again hanging in front of a "Porthole". But now you see 1 single bent pipe.
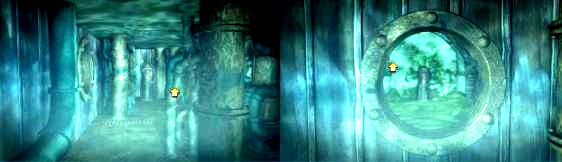
Swim forward through the "porthole" twice. At the bottom left and bottom right you will see 2 semi-circular openings.
Swim through the right opening and then simply follow the Yellow Arrows to a Wall Hole.
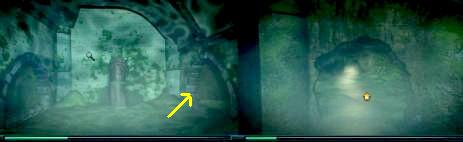
Swim through the wall hole and... you are in a larger room and see 2 wall holes again. Swim to and through the furthest wall hole.
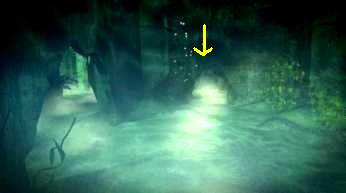
When you have gone through the furthest wall hole, turn left and swim forward 2 more times. At the bottom right you will see a brick hole.
Swim through there and.....you see a ladder that goes up into a thick pipe. There is a bold Up arrow painted on the wall here.
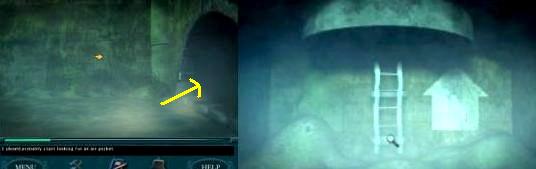
Quickly...swim forward and Nancy will automatically climb into the thick tube via the ladder and get air again. Now climb up 5 times via the Up Arrow and Nancy will end up in a tunnel at the top. You've reached the end of the swim for now. In the wall, straight in front of you, is another metal door with the Hazelnut Symbol, exactly like in Dieter's secret passageway...
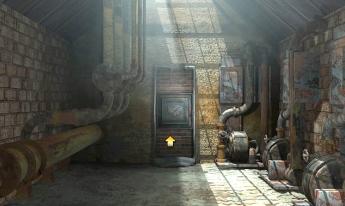
Go forward to the door. Open the door. You see a combination lock again. Zoom in on it. Nancy reads the inscription out loud again, but she doesn't understand much of it. You will read the names of 4 Metro stations: Europe, Pont Neuf, Blanche and Château Rouge. Now think back to the letter in the red book you found in Dieter's secret passage. In that letter you read that names of metro stations were used as a kind of code. You have this red book with the letter in it in your inventory, so you can read it again. So you now need to know which metro lines these 4 stations are located on. So you have to imagine the metro map and then look at which metro lines these 4 stations are located on.
So you see that: Europe is on the gray line 3. Pont Neuf is on the pink line 7. Blanche is on the blue line 2. Château Rouge is on the purple line 4.
Set the combination lock to code 3 7 2 4 and then take the propeller from the locker.
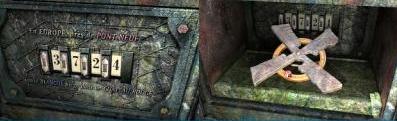
Turn around and walk back to the tube. Well... there is no other way back than through the sewer.
So you now have to swim the same route back to the starting point, where Nancy entered the sewer for the first time.
I advise you to save again first. Then name your Save "Sewer. Got propeller".
So climb down the ladder in the tube 6 times and Nancy is underwater again. Turn left and you will see the wall hole again.
Swim forward 2 times, right, forward 4 times, right.
You look through the brick semi-circular gates and see a thick white arrow on the wall straight in front of you.
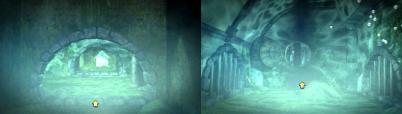
Swim straight ahead to the thick white arrow and Nancy will surface again for air. Wait until Nancy's meter is completely full again and then go underground again. Go forward once, turn right and you will see the "porthole" again. Swim forward 2 times, right, forward 1 time, left, "porthole" again, forward 2 times, right, forward 1 time, left and now forward 6 times and at the thick white 1 arrow Nancy will surface again in the beginning tunnel.
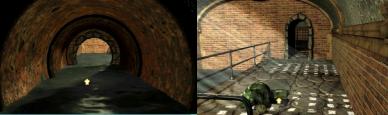
Swim forward 2 times, diagonally right, forward and turn left. Nancy is back on the "shore" at the point where she put on her wetsuit. Nancy's clothes and her belongings are on the floor in front of you. Grab the clothes and supplies. But Nancy is scared of a rat. Rat is shocked by Nancy and smears him. Click on the clothes again and grab them. Nancy is dressed nicely again and has all her things again. Ok...back to the Skull Room. Forward 2 times, left, right, over the plank, right, forward 5 times, left and step forward into the dark gate. Your screen is now pitch black. Simply click with your hand to open the secret entrance door and then step back into the Skull Hall.
Immediately turn around using the turn arrow. You are standing right in front of the Skull again. You don't have to do it now, but it would be useful if you take a picture of the skull and the candles that are left and right next to the skull. It will save you an extra trip here if you take these 3 photos now. So take Dieter's camera from your inventory and take a nice photo of the skull. Make sure that you have the skull in the center of the viewfinder and then print. Then take a photo of the candle that is on the left of the skull and then another photo of the 2 candles that are on the right of the skull. Zoom out of the camera and turn around again.
So Nancy now has the bottle of Moutan Fouette 1968 that Marchant wants in exchange for the coding machine. So now you could go to Marchant and exchange the bottle of wine for the coding machine. But that's not useful. Nancy also wants to know more about the romance between Noisette Tornado and Hans Schwesterkrank and who better to ask than Dieter Schwesterkrank. So leave the skull room and travel again to:
Rue Du Bac
Take Photos for Dieter:
It sounds like Diederik is still busy in his dark bathroom. So knock on the bathroom/dark room door again. There is another conversation between Dieter and Nancy, which boils down to the fact that Dieter is too busy to talk to Nancy. But Nancy could help Dieter hurry up by taking some pictures for him. There is a list of names of objects that Dieter would like to have a photo of on his desk.
So turn around and then left and grab the white note from Dieter's desk. Shit...the names are in French. Well... luckily Nancy was smart enough to buy a French-English dictionary from Marchant, so look up the English translation of these 6 French names in the dictionary you have in your inventory. So Nancy has to take pictures of: Agrafeuse = Stapler. Agraignée = Spider. Bougie = Candle. Crâne = Skull. Croix = Cross. Théiere = Teapot. If you followed my advice, you have already taken a photo of a Spider, a Skull and a Candle, so now all you have to do is photograph a Stapler, a Teapot and a Cross. Always make sure that you take good, beautiful and sharp photos, otherwise Dieter will not accept them. Leave Dieter's apartment and travel to Abbesses:
NB: If you did not follow my advice, you will also have to photograph the Spider, the Skull and the Candles. You know where to find it.
Abbesses:
Enter the studio again through the blue front door and go to Nancy's desk. Zoom in on the phone. There is a red/gray stapler in front of the telephone. Take a photo of the Stapler. Zoom out and enter the studio. Go to the Tea Bar and stand right in front of it and then take a photo of the Teapot. Turn around and see if Minette is in thestudio. Probably not. So go back to the office and leave the studio through the blue front door and travel to Point Neuf. Stop immediately. Do not run forward to the cross. Take a photo of the cross from the entrance to the park, so from a sufficient distance. Done....you now have all the photos for Dieter. So travel back to:
Rue Du Bac:
Dieter has crawled out of his dark room again and is standing behind his work table again. Walk on to Dieter and he asks if you took the photos. Give either answer and Nancy will automatically give the camera to Dieter. Now you can talk to Dieter. First ask Dieter about Jing Jing and the boa constrictor. You experience that Dieteris not exactly a fan of Jing Jing. According to Dieter, JJ won a big prize in a lottery and she is filthy rich. Why would she want to continue working as a slave for Minette? No...Dieter trusts Jing Jing. Finally, ask the ham question, so: "What do you know about Noisette Tornade?".
At first Dieter pretends not to know anything about Noisette, but after Nancy mentions the name Hans Schwesterkrank he collapses. Hans was Dieter's great uncle and he gave him a card. Dieter shows that card. There are a lot of eyes on it. Dieter tells Nancy to turn the card over, so click on the card and you will see the back.
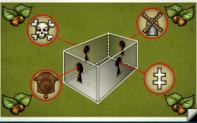
You see a transparent cube with 4 keyholes. In the 4 corners you see a hazelnut and you see a cuckoo clock, a Lorraine Cross, a Windmill and a Skull. Well... you already know that the Hazelnut symbol refers to a small metal door and you know that you have already found 2 of those metal doors via the cuckoo clock and the skull. So the windmill and the cross also refer to such a metal door. Where could you find a Lorraine cross and a windmill?
Now ask Dieter all further questions about Noisette and you will discover that Dieter has been chatting with Minette in the hope of finding the hidden art treasure that Noisette hid during the war. However, Dieter has fallen hopelessly in love with Minette and now he no longer cares about that sweetheart. He just wants to "win Minette back". The conversation will then automatically end. Leave Dieter and travel to:
Point Neuf:
Decoding
Go to Marchant and zoom in on his things again. Nancy then automatically hands the bottle of wine to Marchant and receives the Coder. But without a code book, this coder is not of much use to Nancy, so also buy the Code Book that Marchant now has on offer. Buy the Code Book for 11 euros. Zoom out and stay still. We go now:
Open your inventory and then open the Red Book that you found behind the 1st metal door, in Dieter's secret hallway. There are 2 codes in this book. The first code is below the coder's photo. Now copy this code completely. In capital letters and keep in mind that an O with a line through it is a ZERO (0). The 2nd code can be found on the last page of the letter in the red book. You will also find the key to decipher this code there. NB: It is not really necessary that you decipher the code from the letter, but it is a good exercise for a code that you will have to decipher later and that works in the same way. So copy both codes and do so very precisely. Then take the Coder from your inventory. The Coder then fills your screen. It is a kind of typewriter with numbers and letter keys. You will see a gray cover under the keys. Click on that cover and 3 Discs will appear.
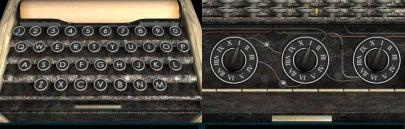
The 3 discs have Roman Numerals on them and you can click the button of each disc on a different number. Hey...don't these 3 disks remind you a lot of the 3 stone discs you saw in Minette's studio? You saw the code for these discs in the photo that Jean M showed you after you solved the ice cream puzzle. So turn the knob of the left dial to IX. Turn the center dial knob to V. Turn the right dial knob to III.
Now look up using the up arrow. You will then see the number keys and the paper that is in the machine. Nancy says that you should now type something using your own keyboard. Now type, one after the other and in capital letters and without spaces, the code that is in the Red Book under the photo of the coder. Remember that an O with a line through it is not an O but a 0 (ZERO). So you type:
XTIØlSMKPQQLNOREZA7LXTIØSMKPQQLNOR3AS7LXTIØSMK3A
And while you do that, the machine changes the letters into the correct letters and ultimately the message is:
ROUGE BLANC ROUGE BLEU ROUGE
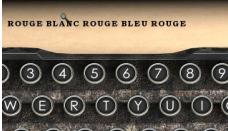
Nancy sighs desperately that this is in French again. So look up these words in your French-English dictionary and you will get:
RED, WHITE, RED, BLUE, RED, dus ROOD, WIT, ROOD, BLAUW, ROOD.
Zoom out to put the Coder away. Now take the piece of paper on which you wrote down the code from the letter. Above that code you also read in the letter the key with which you can break this code. The key is the number 109. Now write the number 109 under all letters of the code, as follows:
| F | O | F | C | L | L | B | K | E | N | I | J | D | T | K | D |
| 1 | 0 | 9 | 1 | 0 | 9 | 1 | 0 | 9 | 1 | 0 | 9 | 1 | 0 | 9 | 1 |
Also write down all the letters of the alphabet, in the correct order, and number the 26 letters from 1 to 26. Now replace all letters that have the number 1 in the code with the next letter of the alphabet. All letters in the code that have the number 0 remain the same. Replace all letters in the code that have the number 9 with the letters that are 9 positions further in the alphabet. So you end up with:
|
F |
O | F | C | L | L | B | K | E | N | I | J | D | T | K | D |
| G | 0 | O | D | L | U | C | K | N | O | I | S | E | T | T | E |
GOOD LUCK NOISETTE it says
NB: Again...it is not necessary for the game that you decipher this code, but it is a good exercise for a code that you will have to decipher later.
The 4 Works of Art in the park:
Zoom out. There are 4 works of art in the park. The first work of art is the Lorraine Cross, but there are also 3 other works of art in the park. The Mouth Artwork is located at Marchant. On the other side of Marchant is the Windmill Artwork and at the entrance to the park you will find the Fish Fountain.
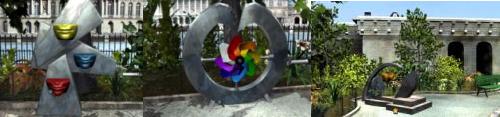
Now take a closer look at these 3 works of art. The Mouth artwork and the Windmill have a lever. When you click on the lever, the mouths open and close and make a sound. If you click on thelever of the windmill, the windmill turns and a different color appears at the top. The Fish Fountain has a red button and when you click on it, a stream of water comes out of the fountain. Once you have looked at these three works of art, go to the Lorraine Cross. Stand directly in front of the cross but do not zoom in on it yet.
Standing in front of the Lorraine cross, open your inventory. Take the Card with the "Eyes", from Dieter, from your inventory. The card will then fill your screen, probably with the cube side. So click on the card to get the Eyes on your screen. Then open your inventory again and take out the grid paper that you previously took from the Red Book. Click the grid paper on the Eye side of the Dieter card and...... all the eyes are in a box and at the top are letters and numbers.
Remember what Lynn said about Noisette's last words? Noisette's last words were: "Red, Left, Green". There are Red Eyes, Green Eyes, Blue Eyes, Gray Eyes and eyes with a cross. There are Red Eyes looking to the left. Now do the following: Click on all the Red Eyes looking to the Left and then click on ALL the Green Eyes and at the bottom of the yellow bar you will read: "Sous Lorraine 4154"
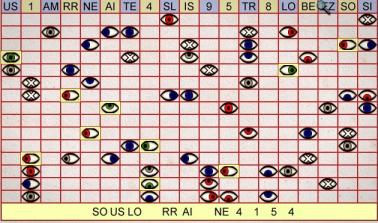
This clue therefore points to the Lorraine cross and the date on it. So zoom out and zoom in on the Lorraine Cross and zoom in on the date below the top bar of the cross. You previously viewed this date, but you could not click on the numbers. Now that is possible. So click on the numbers: 4, 1, 5, 4 and.... the plate of the bottom bar slides down and in the bottom bar you now see the solution for the "Mouths", the "Windmill", and the " Fish Fountain". Make a note of it.
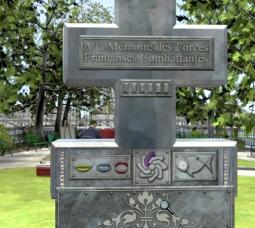
You see that the Yellow Mouth is closed, the Blue Mouth is half open and the Red Mouth is wide open. On the windmill you see that the Purple area must be at the top and on the Fish you see that it must have a Shining Eye. Zoom out and now go back to the Mouths Artwork: Yellow must be closed, Blue must be half open and Red must be wide open. The Yellow Mouth must say EEEEE, the Blue Mouth must say AHHHH and the Red Mouth must say OOOOO. Assuming that all 3 mouths are now closed, click on the lever 10 times in succession and.....it's done. Zoom out and turn around and go to theWindmill Artwork: Well...the Purple color should be at the top. So click the lever as many times as necessary to get the Purple Color at the top and then turn around to face Marchant.
However, Nancy hears a squeaking and fussing behind her and automatically turns back to the Mill and sees... a Squirrel has crawled out of the tree and has also been touching the lever, causing the mill to turn again. Shit...stupid animal...now you have to reset the grinder, but then you have to make sure that that rotten squirrel doesn't come and spoil things again. Go to Monique at the back of the park and buy the Flashlight from her now for 8 euros. Go to Marchant and buy the Tin Plate from him for 4 euros. Go to Malika and buy the long stick from her for 13 euros and the spool of fishing line for 8 euros. Go back to:
Windmills Artwork: Zoom in again. Place the Stick in the earth, to the left of the artwork. Then click the fishing line on the stick by clicking the bobbin at the bottom of the stick. Then click the Tin plate on the line and you're done. Thetin plate waves back and forth in the wind and makes noise, which will prevent that rotten squirrel from getting out of the tree. So, with the lever, put the Purple color at the top again.
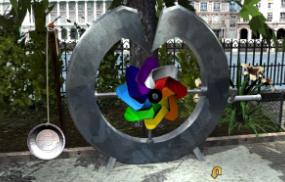
Now go to the Fish fountain, zoom in again and press the Red Button again and....
.......again a trickle of water comes from the fountain, but now the Eye of the fish will shine.
The fountain opens and the grate in the ground slides open. Descend using the down arrow.
Catacombs part 2:
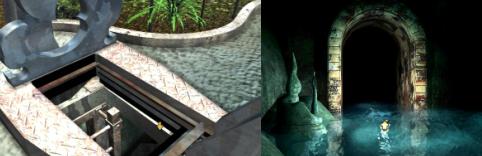
At the bottom of the ladder, turn around using the turn arrow and walk forward once. Another ladder. So descend this ladder via the Down arrow and turn around again at the bottom via the down arrow. Nancy is back in the Catacombs and back in the water. Calm down...this time there is no need to swim underwater. Just go forward into the dark tunnel and Nancy will automatically turn on the flashlight you just bought from Monique and she will automatically walk through the long tunnel to the end. In front of you there will be a chest on a boulder.
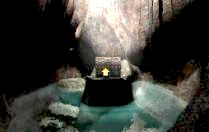
Now go further forward to the chest. The chest has the Hazelnut symbol. Open the chest by clicking on it with your hand and then grab the Key. Zoom out, turn around and walk forward into the tunnel again. Nancy automatically turns the flashlight back on and walks back through the tunnel. Then go forward to the ladder, climb up and all the way up the top ladder. Then open the grate and climb further outside, back into the park. Leave the park and travel back to Abbesses to end up in:
Chapter 4:
Abbesses:
The Paint Bomb:
Enter the studio again through the blue front door and walk straight to the studio door and.....
.......O..ooo...what is that thing that is now attached to the studio door? It's a BOMB.
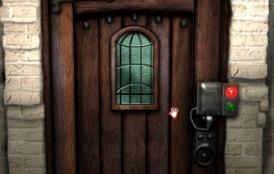
|
When you open the door it's BOOM and you can use the "Second Chance" to start over here. Minette is in the studio and she will notice that you are there and, after a while, she will open the door and then it's BOOM. So you only have a short time to defuse the Bomb Zoom in on the bomb and then open the door of the bomb. You see a panel with capacitors and circuits. There is a note on the left with an explanation. There are capacitors with green circles, green triangles and green squares. Capacitors with a red circle and a red square. Capacitors with a yellow circle or yellow square. Capacitors with a blue circle, blue triangle and blue square. The note tells you that you can put the same shapes together, regardless of the color, and that you can put the same colors together. So you have to interchange the capacitors. You do this by picking up a capacitor and then clicking it on another capacitor. You don't get much time because Minette keeps threatening to come out and at a certain point she does and then BOOM.There are different solutions possible, but below you can see my solution.
So defuse the Bomb by clicking the right capacitor in the right place in the panel and Nancy will automatically remove the Bomb from the door and throw it away. Now you can safely open the door. So do that and then walk straight ahead to the round stage. |
The Secret Hiding Place of Noisette Tornade:
The thick round rotating pillar protrudes from the middle of the stage and at the bottom of this pillar there is a thickening in which you see an engraving of the Mill wings. Take the propeller from your inventory and click it in the engraving and... a panel will appear. In the panel you will see 5 bars that you can slide to the right via the blue arrow. At this point, each bar is black. Well... the hint you deciphered via the decoder reads: Red, White, Red, Blue, Red. So move the bars to the right so that from top to bottom they are Red, White, Red, Blue, Red and.......

Cutscene The real blades of the mill start turning and a secret hatch in the floor near the 3 round discs opens.
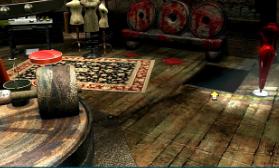
Go to the hatch and then descend the stone stairs and then follow the secret tunnel all the way to the end.
At the end of the tunnel, Nancy stands in front of a closed metal door.
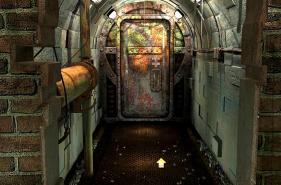
The door has a lock in the shape of the Lorraine Cross. So take the Key from your inventory that you took from the chest at the end of the long tunnel under the park, and click on the lock with the key and... the door will open. Nancy has discovered the Secret Hideaway of Noisette Tornade. Walk inside and.....Well...the treasure consists of all Stained Glass Panels. Continue to the pillar.
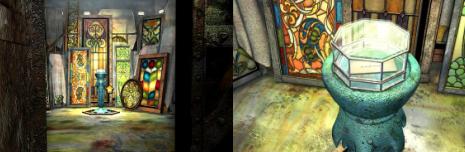
Zoom in on the pillar. There is a letter under the glass bell. Open the bell and grab the letter. It is the last letter from Noisette Tornade. Open the letter and Nancy reads the letter completely out loud. Listen and be patient until Nancy shows you the end of the letter. At the bottom of the letter are the Roman Numerals X, IV and III. When Nancy has finished reading, zoom out to put the letter back in the bell jar. Close the bell and.....Hela....what happens??? The pillar rotates and the metal door slams shut and a gate comes down, now closing the metal door. There is a small metal hatch in the fence.
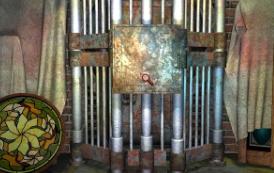
So Nancy is now locked up deep underground and no one knows she is here. Zoom in on the metal hatch and then open it. Another combination lock. Zoom in and read the inscription. Please copy this inscription onto a piece of paper. You read: UNE, DERNIERE, ENIGME, CHER AMI. He....isn't that "CHER AMI" also on the photo of the coder that is stuck in the red book? Does this mean that you have to use the Coder again? Just try it. First zoom out once and then take the coder from your inventory again. Open the cover again to see the 3 dials.
Now set the left button to X, the middle button to IV and leave the right button on III. Look up via the up arrow and now type all the letters of the inscription, in capital letters and one after the other. Unfortunately...the coder can't make chocolate out of it but could it be the number 380. Would that be the key? Should you crack this code in the same way as you practiced with the 109 key? Give it a try. So, under the letters of the inscription, write the number 380:
|
U |
N |
E |
D |
E |
R |
N |
I |
E |
R |
E |
E |
N |
I |
G |
M |
E |
C |
H |
E |
R |
A |
M |
I |
| 3 | 8 | 0 | 3 | 8 | 0 | 3 | 8 | 0 | 3 | 8 | 0 | 3 | 8 | 0 | 3 | 8 | 0 | 3 | 8 | 0 | 3 | 8 | 0 |
Then replace each letter that has the 3 below it with the letter that is 3 positions further in the alphabet and.........
each letter with the 8 below it for the letter that is 8 positions further in the alphabet. The 0 letters remain the same. You then get:
|
U |
N |
E |
D |
E |
R |
N |
I |
E |
R |
E |
E |
N |
I |
G |
M |
E |
C |
H |
E |
R |
A |
M |
I |
| X | V | E | G | M | R | Q | Q | E | U | M | E | Q | Q | G | P | M | C | K | M | R | D | U | I |
Now type this new series of letters into the coder and you will get the following translation:
DEUX....UN.CINQ..SE.PT
Now look up the word DEUX in your French-English dictionary. You will learn that this DEUX is the number 2.
Now also try to find out through the dictionary what the other 3 numbers are.
UN = 1,
CINQUE = 5
SEPT = 7.
So the code is 2, 1, 5, 7.
Zoom in again on the combination lock and enter this code, so 2, 1, 5, 7 and.... the gate disappears. So walk forward to the metal door, open the door with your hand and follow the tunnel all the way back to the stone stairs. The floor hatch at the top of the stairs is closed again. Climb the stairs until Nancy hits her head on the hatch. STOP........stand under the hatch and LISTEN....
You now hear Minette talking in the studio. She talks to the 2 German spies, which you have read about in one of the newspapers (on Jing Jing's dining table). You now hear that Minette made a deal with the Germans for money. Minette has made a dress for the First Lady, which is covered with listening devices. The voices then fade and you hear the studio door slam shut.
Open the hatch and go forward into the studio. Go to mannequin Carol and stand straight in front of it
Carol wears the red dress for the First Lady. Click on the dress with your hand to grab the dress and....
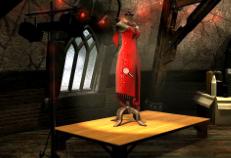
Minette comes in and is pretty pissed off. A conversation follows between Nancy and Minette and then Minette takes the karate stance.
Well...you'll have to fight Minette now.
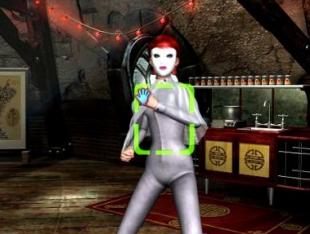
|
You can't hit Minette yourself. All you can do is try to block her blows and then keep doing this long enough until Minette falls down from fatigue. Above you see Minette's red meter and below is Nancy's green meter. You block Minette's blows by quickly moving the green square to the right spot on Minette's body and then clicking with your left mouse button. Before Minette delivers a blow, she lets out a certain cry. From those cries you can tell where Minette will try to hit Nancy. As soon as Minette gives out a cry you have to determine which kind of cry it is to know is where her punch will land on Nancy. Then you must quickly bring the green square to the relevant part of Minette's body and then quickly click when Minette is about to throw the punch to block her punch. This all has to happen very quickly. Minete's body is divided into 3 parts: Top, Middle, Bottom. it depends on where Minette's hands are when she wants to throw a punch. You can tell by her cries that she is hitting where she is going to hit. Minette has 9 different moves. Note the screams Minette lets out just before she strikes. These are the cries and when you hear Minette utter a cry, move the green area to the relevant part of Minette's body and quickly click your left mouse button. These are the cries Minette utters just before she will make a move
I'm sorry, but I can't help you further with this. There is no trick to make this easier. What can help is that, after you've had to repeat this thing a few times, you can pretty much see where Minette is going to place her thrusts. It is better to no longer pay attention to her cries but to the movement of her hands. If you manage to get a reasonable lead at the beginning of the "fight" (so that Nancy's meter remains fuller than Minette's), then you can beat Minette. If you manage to defeat Minette, you will automatically see the final cutscenes and experience the truth about why Minette wears a Mask. Minette is ashamed of a small tattoo she once had on her left cheek
The game ends in the usual Nancy Drew fashion. Not a spectacular ending video, but photos and Nancy who explains everything. Then you get the usual congratulations screen and the promotional video for the next Nancy Drew game: Nancy Drew 15: The Creature of Kapu Cave 2006: Original a Dutch Walkthrough by: Louis Koot 2024: This English Translation also by: Louis Koot |