Nancy Drew 17:
The Legend of the Crystal Skull
2007: Original a Dutch Walkthrough by: Louis Koot
2024: This English translation also done by Louis Koot
If you have found this walkthrough via google search or via another site then you have probably not visited my site.
A lot more very detailed game walkthroughs can be found on my site at: www.pcgameswalkthroughs.nl
This walkthrough was done in 2007 as a Dutch walkthrough. The texts on the screenshots are therefore in Dutch. I can't change this because I do not have this game anymore. The screenshots are also not of the best quality because when I made the walkthrough, in 2007, I didn't have very good software for taking screenshots. Most of the screenshots where taken with printscreen key of my keyboard. I didn't bother finding all the Easter eggs and other gags the creators hid in the game. Those Easter Eggs and other jokes are not necessary to complete the game, so I don't mention anything about this in the walkthrough.
This walkthrough assumes you are playing the game as a Senior Detective. The walkthrough does not explain the puzzles at the Junior Detective level.
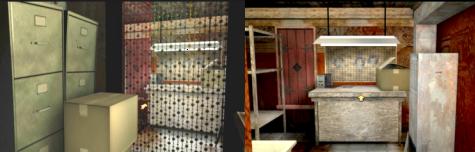
You start the game in Nancy's room, where you can browse the "Case File" on Nancy's desk.
Click on the plane ticket and then choose whether you want to play as a Junior Detective or as a Senior Detective and the game starts.
Nancy Drew and her friend Bess Marvin fly to New Orleans for a long weekend of music, sight-seeing and the culinary delights of French cuisine. It's not all fun, though, because Nancy is also planning to visit Henry Bolet. Henry Bolet is a friend of Ned. Henry's great uncle, Bruno Bolet, recently passed away, so Henry traveled to New Orleans to deal with the funeral, and the inheritance. Henry stays at his uncle's house, the Bolet House. So immediately after arriving in New Orleans, Nancy leaves her friend Bess at the hotel and heads for the Bolet House by taxi. Ned informed Henry of Nancy's arrival. The weather is bad and it will remain that way all weekend.
Part 1: Bolet House
As Nancy Drew:
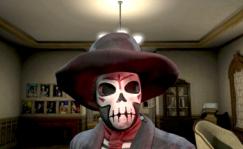
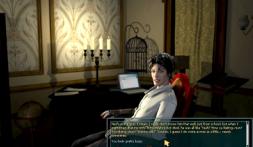
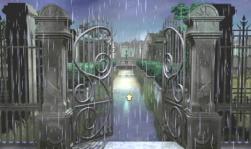
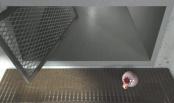
Nancy arrives at the Bolet House and she walks to the front door. Click on the front door and Nancy goes inside. No one comes to give Nancy a warm welcome, so Nancy walks through the hall and sees footsteps on the otherwise spotlessly polished floor. Nancy walks into a room to the right of the stairs and .... In the room there is a person dressed as a skeleton.
The person turns around and........the light goes out. The "Skeleton" approaches Nancy and throws an intoxicating powder in Nancy's face. Nancy falls to the floor unconscious. When Nancy comes to again a while later, Renée Amande, the housekeeper of the deceased Bruno Bolet, is standing over her. Renée offers Nancy a glass of drink.
You can refuse to drink the nasty stuff, or you can say "Okay." Just say "Okay." Nancy thinks it's a dirty drink, but it brings her back to her senses. Renée says that lightning has struck and that is why the electricity is out. Nancy tells what happened to her. Renée wants to call the police, but Henry doesn't think that's a good idea at all. Renée then disappears into the garden. You now have control over the game.
Library
So we are in the Library of the house. Get up by clicking forward to the fireplace.
Then turn left or right until you see Henry sitting at the desk in the corner.
NB: To turn left or right, place the cursor at the edges of the screen. You can then turn left or right using the curved turning arrows. If you want to do this rotation slowly, quickly move the cursor to the edge of the screen and immediately back again. You then turn 1 click to the right or to the left.
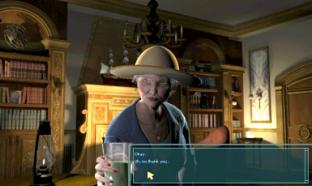
I assume you have found Henry Bolet by now? Click with your question mark cursor on the back of the chair Henry is sitting in to have a chat with Henry. You will have noticed by now that conversation options no longer appear at the bottom of the game screen, but in a little screen. In this "conversation screen" you click on the options and the questions/answers you want to use.
So talk to Henry and use all the options you get.
Henry has been appointed by his deceased uncle Bruno to inventory the estate and to pay any creditors. Because Uncle Bruno has made a mess of his administration, Henry is quite grumpy about the amount of work he has to do to get everything in order. So Henry has absolutely no need for Nancy's expressions of sympathy about his uncle's death. Henry actualy wants Nancy to leave so say "No, I can't", because Nancy wants to know who the person was who threw the sleeping powder in her face. However, Henry doubts Nancy's story, so say "I'm positive" and Nancy then gets divine permission from Henry to snoop around the house. Henry then warns Nancy that she must be careful because Uncle Bruno had a collection of exotic "pets", which he allowed to roam freely in and around the house.
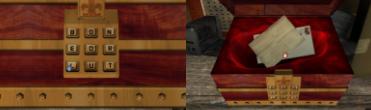
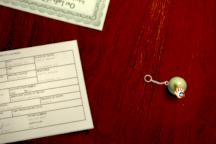
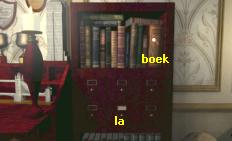
This room is a library room so there are several bookcases. Immediately to the left of Henry there is a small bookcase on the wall. Go forward to that lsmall bookcase. There are 6 drawers at the bottom of the bookcase You can only open the middle bottom drawer. Click twice with your red magnifying glass on the middle drawer to open it. This drawer contains cards on which Bruno has cataloged his books. There are 20 cards in the drawer. Each card contains the name of a book and the name of the author. Each card also has a number. Scroll through the maps and then zoom out 3 times via the "back step arrow".
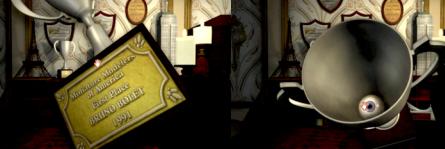
To the left of this small bookcase is a secretary cabinet on which a number of prize cups are placed. There are a few shields on the wall above the secretary. Go to the secretary and then click on each of the 5 prize cups with your red magnifying glass. Each cup will then appear on your screen and you will then read, on the base of the cup, for which event the cup was the prize. Each cup is the 1st prize of the Miniature Models club. Bruno Bolet appears to have won this 1st prize in the years 1978, 1982, 1985, 1986, 1991.
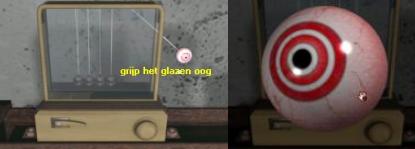
If you pick up the 1991 cup, Nancy will hear a "Low Rolling" sound. Could there be something in this cup? Place your hand cursor over the text "Miniature Modelers of America" and then click on the text. You then turn the cup over and now see the top of the cup. Click on the lid of the cup and.....Nancy removes the lid from the cup. The cup contains a Glass Eye. Grab the Glass Eye from the cup by clicking on it twice.
Zoom out 2 times. Turn left or right so that you see the fireplace. To the right of the fireplace is a bookcase that you cannot go to.
However, to the left of the fireplace is a corner bookcase consisting of 3 parts. Go to that corner bookcase.
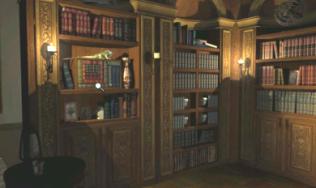
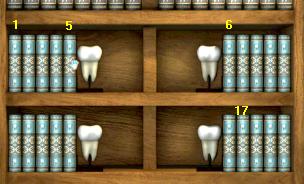
You are then in the close-up of the middle part of the bookcase. The top 4 compartments are full of gray books. The 4 bottom compartments also contain books that are held in place by 4 bookends in the shape of 4 large molars. Zoom in on the top 4 compartments which are full of gray books. You will see molars depicted on the spine of each of the books. You can click on each book with your hand and the book will slide up and down a little. However, you have no idea what to do with this, so zoom out once and now zoom in on the 4 boxes where the molars are placed as a bookend. In each of these 4 boxes there are 5 books that you can click on and these 20 books will also jump up and down.
Zoom out twice and then turn slightly to the left so that you see the leftmost part of this corner bookcase. In this left part you see a lizard lying on top of a number of books that are in a separatecompartment. Continue turning to the left until you look out through the garden doors to Henry's right. It's raining outside, so Nance doesn't feel like venturing outside into the garden at the moment. Turn further to the left until you see the double room doors. Go forward twice to the room doors, which will then open. You look into the corridor and can now turn left or right into the hallway via the curved arrow.
Hallway
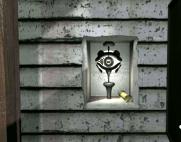
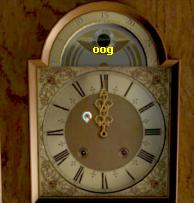
Turn right into the hallway. At the back of the hallway you see a large grandfather clock. Go to the clock. You are then in the close-up of the dial and see that the clock is at 12 o'clock. You can turn the hands of the clock using the blue turning arrow, but don't do that now. Zoom out of the clock and turn around using the turn arrow. There is a small table on the wall under the stairs. There are photos on the table. Turn right and look at the 2 photos. You can't zoom in on anything, but there are also 3 candles burning on the table... it looks like someone has set up some kind of altar. Turn left and then go 1 click forward to the front door. Then turn left again and enter the living room.
Living room
You are standing in the sitting room in front of the semi-circular bay window.
In the bay window there is a table on which Bruno has built a miniature cemetery. Zoom in on it twice.
You zoom in on the large fountain in the middle of the cemetery.
| If you press and hold the hand cursor, you can move the screen left and right and also move it up and down. So you have to move the screen left and right and up and down to view everything in the cemetery. You can then zoom in on some parts of the cemetery with your red magnifying glass and click with your hand cursor.
Zoom in on the fountain and then click on it with your hand and you press the top of the fountain and this causes the water in the fountain to change color. The water in the fountain changes from gray to purple and then to yellow/orange. Zoom out of the fountain and then slide the screen down. There is an old tree above the fountain. Zoom in on the old tree. Click on the old tree with your hand and the tree moves and you hear an owl. Zoom out and move the screen to the right. To the left of the old tree is a Mausoleum. Zoom in on the Mausoleum. In the roof of the mausoleum you see 4 tiles. Zoom in on it. By clicking on the arrows next to the tiles, you place other figures in the tiles. However, you have no idea what to do next. So zoom out twice. Now shift the screen to the left, so that you see the top right corner of the cemetery. You are then at Terra Siësta. You will see a bow of honor and a crocodile. Zoom in on the crocodile and then click on it with your hand. The crocodile opens and closes its mouth. Zoom in on the arch of honor and then click on it with your hand. The arch of honor changes color and you hear music. |

Slide the screen up. At the bottom right you will find the "Forty Winks Mausoleum". Zoom in on the building on the right.
Then click on the building with your hand. You pick up the building. Open the door and in the building there is a black Glass Eye.
Grab the Eye and store it in Nancy's backpack.
Zoom out 4 times and then turn clockwise. There is a book stand in the corner. There is a book on the book stand.
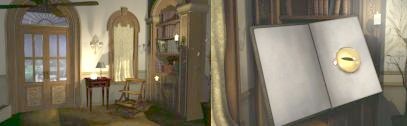
Go there and then zoom in on the thick open book. It is a Grave Book.
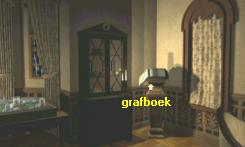
In the Grave Book you can read the names of the deceased on pages 76 to 91, complete with the date of death and the place where they are buried. You browse through the pages by clicking on the left or right edge. Zoom out twice when you have looked through the Grave Book. Continue turning to the right, until you are standing directly in front of the sofa and the coffee table. Click twice with your red magnifying glass on the coffee table and you will end up in your first puzzle of the game, the:
Marble Puzzle:
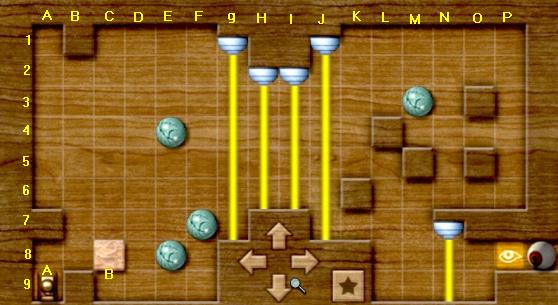
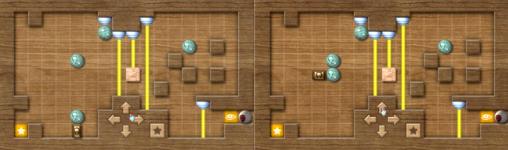
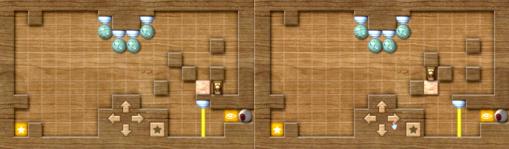
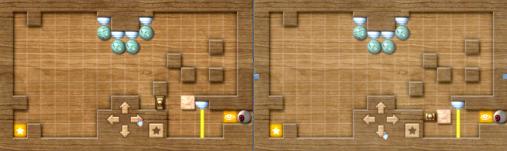
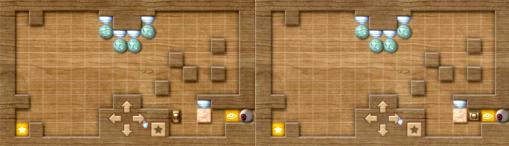
View the game board. It is divided into a left compartment and a right compartment. In the middle you see 4 yellow laser beams and at the bottom right you also see a yellow laser beam. Below the 4 middle laser beams you see arrow buttons and a star button. There are 4 blue marble marbles in the board, 3 on the left and 1 on the right. There is also a light brown wooden block on the left. At the bottom right is a Glass Eye. At the bottom left is a Metal Push Block that you operate using the 4 arrow buttons. You will also see 5 yellow laser beams.
| The game board is divided into columns and lines of boxes. Number the boxes as a coordinate system. So number the columns, from left to right, A to P. Number the lines, from top to bottom, 1 to 9. You can then name the boxes as box A1, A2, A3...... .B1, B2, B3.....and so on. The Metal Pushing Block is called A and the Wooden Block is called B.
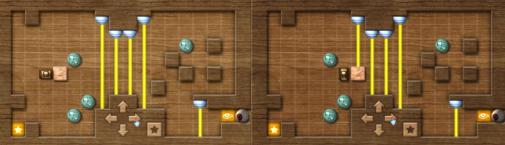
So A starts on section A 9. B starts on section C 8. There are marbles on the sections E 4, E 8, F 7 and M 3. The yellow lasers block the columns G, H, I, J and N. The idea is to bring A to the Glass Eye, bottom right. But A cannot pass through the yellow laser beams. So you have to block the yellow lasers so that you can slide A past the lasers. You have to do this using block B and the 4 marbles. You use the 4 arrow buttons to move A. So you always have to push A against B or a marble and then push B, or the marble, further with A. B moves one space at a time, but the marbles roll straight until they hit something. If you have already tried something yourself, first click on the Star button to return the puzzle to the starting position. So you control A with the arrow buttons, up, down, right, left. B you move one space at a time, but the marbles C, D, E and F continue to roll until they are blocked by an obstacle. Now first bring B to section G5 so that B blocks the laser from column G.
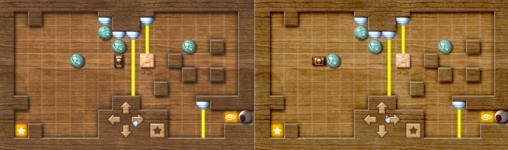
Now take A to box G7, right behind the marble at F7. Click on the left arrow and you shoot the marble to box B7. Go with A to box B8
Click the up arrow to shoot the marble up to box B2. Go with A to box A2. A is then on A2, behind the marble on B2. Click the right arrow to shoot the marble to box G2 The Laser of column G is now blocked by the marble on G2 and B on G5. Move A from A2 to F5. Then push B to box I5 with the right arrow so that B blocks the 3rd laser.
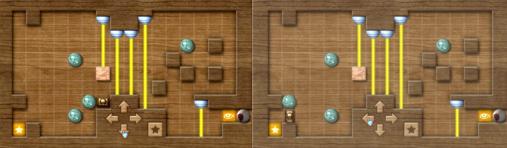
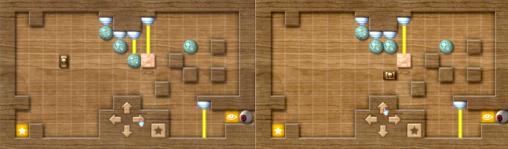
Then go with A to box E9. A is then under the marble at E8. Click on the up arrow to shoot the marble from E8 up to space E5, against the marble on space E4.
Go with A to box D5 and then shoot marble to box H5 Go with A to box H6 and then shoot the marble up to box H3.
Move A to box I6 and then move B up one box to I5. Take A to box H4 and move B to the right to J4. Laser I then blocks A again. Go with A to D4
Press the arrow right to move the marble to I4. Go with A to I5. Click on the up arrow to move the marble to I3.
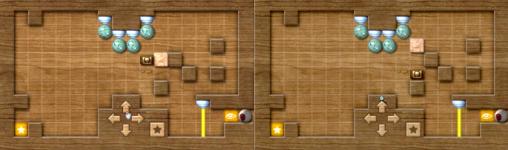
Go with A to K5 and then to K2. Go with A to N2 and then down to N3 and shoot the marble to the left. The 4 middle lasers are now blocked.
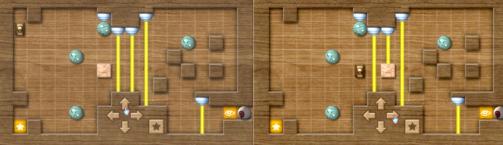
Go with A to I4. Click on the right arrow to move B to K4. Move A to J4. Click the up arrow to shoot the marble on J3 to J2. Go with A to K5. Click the up arrow to move B to K3.
Go with A to J3. Now use A to move B to the right, to box N3. Go with A to box N2 and push B down to N6. Go with A to O6. Now push B to L6
Take A to L5 and push B down to L7. Take A to K7 and push B to M7.
Take A to M6 and push B down to M8. Move A to L8 and push B to N8. The last laser is now blocked.
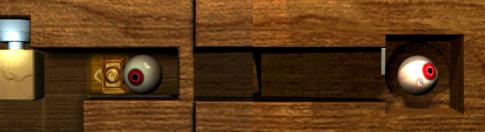
Finally, go with A to M8, M9, N9, O O8 to P8 and the eye rolls away to the end space.
Grab the Glass Eye and zoom out 2x. NB: It could be that I may have mention the wrong number somewhere in the above list. if that is the case then I'm very sorry , but I do believe that all the screenshots show you the correct route . |
Turn clockwise until you are standing in front of the fireplace and see the corner to the right of the fireplace.
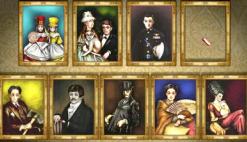
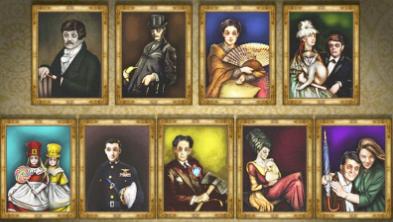
There is a piece of paper on the floor in the corner and 9 portraits hang on the wall.

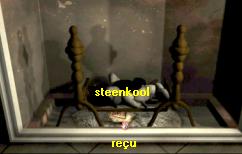
Zoom in twice on the fireplace. There is a piece of burnt paper in the fireplace. Grab the piece of burnt paper.
It's the top part of a receipt and it says "Zeke's." Store it in your inventory.
Also grab a lump of coal from the fireplace and store it in your inventory.
Zoom out 2 times and turn further to 1 click to the right. In the corner, to the right of the fireplace, there is a paper on the floor. Zoom in on it. It's a drawing of a crow. Grab the drawing. The drawing looks exactly like the 4 tiles on the roof of the mausoleum in the miniature cemetery. There is also the imprint of a shoe sole on the drawing. Zoom out via the step back arrow. The drawing is stored in your inventory. There are 9 portraits hanging on the short wall. However, the 4th portrait is gone. Turn back left, to the entrance. Go forward into the hallway and then turn right, 2 clicks forward, right, open the doors of the library and go back inside.
Library
Go back to Henry, who is still behind the desk. Talk to Henry again and use every conversation option you get.
Do it in order, so go through the conversation option from top to bottom and also use all the follow-up options you get.
Henry says that Uncle Henry was a dentist, but he has no idea whether Uncle Henry was a rich man. Henry hasn't actually had his uncle's things appraised yet. The painting that disappeared from the sitting room was a portrait of Henry's parents. It has been stolen and Henry suspects Renée of the theft. Renée doesn't like Henry that much. Henry says he knows nothing about the "Zeke's receipt. The miniature cemetery was made by Uncle Bruno and it is an exact replica of the real cemetery that you look out on from Bruno's room. Henry says he cannot tell anything about the shoe print on the crow drawing. Once you have asked Henry everything, conclude with "I'll let you get back to work".
Turn one click to the right so that you are standing directly in front of the garden doors.
Go forward and open the garden doors with your hand cursor. Step outside and Nancy is standing in the:
Garden
It's raining cats and dogs, so don't go ahead into the garden.
Turn left and you see Renée busy transplanting potted plants in the conservatory.
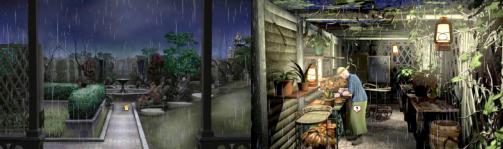
Talk to Renee. Again, use every conversation option and any follow-up options.
Don't skip anything again and go through the conversation options from top to bottom.
Renée doesn't like Henry that much. Renée knows what is in Bruno's will. Henry only gets 30% of the inheritance. Bruno's doctor, a certain Gilbert Buford, also inherits 30% and 30% goes to the "Our Lady of Route 57 School of Dentistry", a school for dentists. Renée herself inherits the last 10%. Renée suspects that Henry is secretly working to increase his 30% by privately selling some of his things and thus taking out of the inheritance. Renée has been paid in advance by Bruno and that is why she is still in the house to cook for Henry. Renée knows nothing about the missing painting, not even who is depicted in it. Renée wears a small pouch around her neck. If you ask Renée about that pouch, you experience that Renée keeps "secret objects" in it, through which she can come into contact with the " energy of the Universe".
When you end the conversation, Renée tells you that she too saw the "Skeleton Man", shortly after Bruno's death. Renée thinks "Skeleton Man" is Death and she warns Nancy. At the top right, a lantern hangs from the beamed ceiling of the conservatory. Click with your red magnifying glass on that
lantern, or just to the right next to it. You then get a close-up and see a
shovel hanging on the wall. The handle of the shovel is made of human bones. You can't grab the shovel now.
Zoom out and turn back right. Nancy is now standing in the garden in the rain. Straight ahead is the large fountain. On the right you see stepping stones that go up to a tree like steps on a staircase. Turn right and you are right in front of those stepping stones. So the stones go up the hill to the large tree on top of the hill. Go forward 3 clicks.
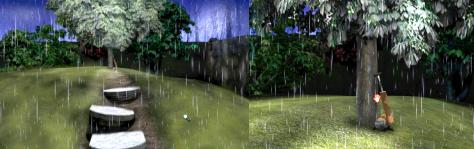
There is a large insect spray against the tree. Grab the insect spray and... you end up in:
Wasp extermination game 1st time:
You have to exterminate a horde of wasps with the sprayer. Move the round reticle across your screen to a wasp and then click with your left mouse button to destroy the wasp. You don't kill the wasps, you stun them. You have to be quick because the wasps sting and if Nancy gets too many wasp stings then it's GAME OVER. So you have to be fairly quick to get all the wasps stunned at the bottom of your screen. Only when there is no longer a single wasp buzzing around you have won and you can grab the juicy sweet Loquat Fruit as a reward. The fruit will emerge on its own. Click on the fruit to move it to your inventory.

When you have won the fruit, take a step back and then turn around. Go 2 clicks back down to the garden path. Turn right and then go forward 1 click to the fountain. The Fountain is the center of the garden. You can walk around the fountain and then in 4 directions. The fountain does not spray and there is no water in the basin of the fountain. Click with your red magnifying glass in the water basin of the fountain. You then get a close-up and see the drain. Zoom in on the drain.
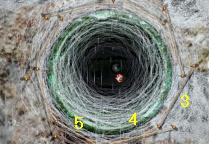
There is a key at the bottom of the drain, but.....the key is guarded by a big fat spider. When you try to get the key, Nancy is bitten by the spider and quickly withdraws her hand. Around the drain you will see 8 copper strings. Click with your hand on each of those 8 strings and... each string makes a musical tone and at the bottom of your screen you can read which tone each string makes. You can't do anything with this yet, but those strings are here for a reason, so I think we'll come back here later, when we have gathered more information. Zoom out 2 times and turn right. You now see Bruno's Mausoleum. So Bruno's Mausoleum is to the right of the fountain. Go forward 3 clicks. You are then in the Dragon Gate of the mausoleum.
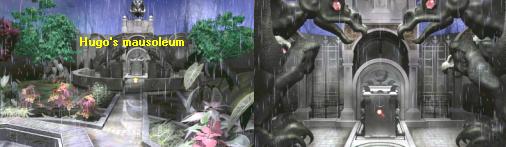
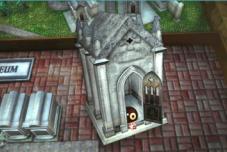
You can take another step forward, but don't do that yet. Click with your red magnifying glass on the sidewalk in front of the altar. You come into a close-up of the memorial stone and read that Bruno was born in 1912 and died in 2007. In the middle is a round hole with 4 notches. Zoom out and now go one more step forward and you will be standing on the memorial stone and in front of the altar. Look up. On the roof of the mausoleum is a...well...what is it? Anyway, the thing has 2 red gems for eyes. Look down again and turn around. You look back towards the fountain and now see that Bruno's mausoleum is guarded by 4 dragons, each standing on a pillar.
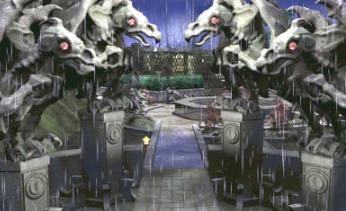
Each dragon has 2 red gemstones for eyes. Zoom in on each of the 4 pillars on which the dragons are standing. Each pillar has a circle with a symbol in it. It's always the same symbol. Look at the fountain again and then go forward 3 clicks, back to the fountain. The path on the left goes back to the house. Turn right and you will see the cemetery gate. Go to the gate and open the gate with your hand and go forward 1 click.
Cemetery
The Bolet Mausoleum
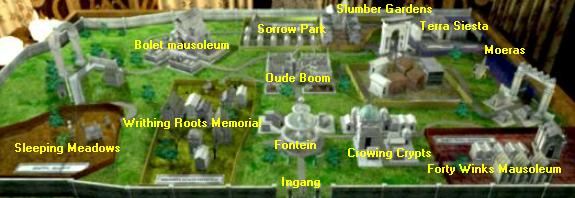
So this is the real cemetery. The miniature cemetery, in the living room, is an exact copy of this cemetery. Right in front of you you see the fountain, which changed color in the miniature cemetery. Follow the path forward to the fountain. From the fountain you can go in 4 directions, further up, to the left, to the right, and back down to the garden of the Bolet house. Place your arrow on the upward path and then click and Nancy will continue walking and end up at the Old Tree.
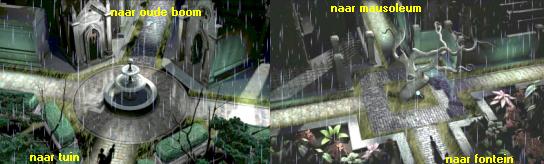
You can also go in four directions at the Old Tree: up, to the left, to the right and back down to the fountain. Follow the Up path and...Nancy continues walking and ends up at the Bolet Mausoleum. Nancy is standing at the far bottom right of the path and you only see her shadow on the path. You can see a red light shining through the windows of the mausoleum. Click on the mausoleum with your red magnifying glass and you will see a close-up of the front door.
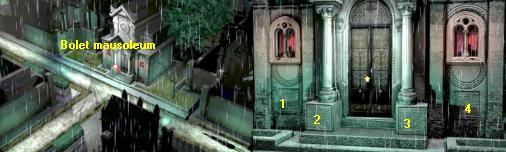
The front door is flanked by 2 round columns, both standing on a square stone. There is a square tile under both windows and in the bases of the 2 columns. Zoom in on one of those 4 square tiles and Nancy explains that in order to discover whether there is something on the tile, she needs paper. Zoom out and see if you can enter the mausoleum. That's not possible because the doors are locked.
Bolet House:
Zoom out and turn around. Go back to the Old Tree via the bottom right and then back to the fountain via the bottom middle and then back to the fence via the bottom middle. Open the gate again with your hand and continue to the garden fountain. Walk counterclockwise around the fountain and return to the Conservatory, where Renée is still busy with her flower pots. Talk to Renée and now ask her:"Do you by any chance have some plain paper that I could use?". Renée does have paper, but she keeps it in her room. Renée asks if Nancy suddenly has the urge to draw. Say "Something like that" and Renée gives Nancy the key to her room.
Grab the key and Renée then asks if Nancy would like to bring her a bar of chocolate if she is going to snoop around Renée's room. Turn left and enter the library through the garden doors. Leave the library through the closed double doors and turn left into the hallway. Go forward twice, towards the front door, then turn right and you are at the bottom of the stairs. Go up the stairs to:
1st floor:
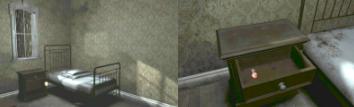
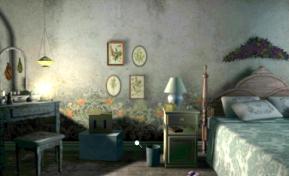
At the top of the stairs you stand in front of a door. Go forward, open the door and enter. You are in a bare room.
There is a bed and a bedside table and nothing more.
Go forward to the bedside table and open the drawer. A Glass Eye rolls into the drawer. Grab the Glass Eye and click it to your inventory.
You now have 4 glass eyes. Turn around, go back to the door, open the door and step back into the hallway. Go up the next 2 steps and then turn left. You are standing in front of the door of Renée's room. Take Renée's key from your inventory, close the inventory and then click on the door handle with the key. The door opens.
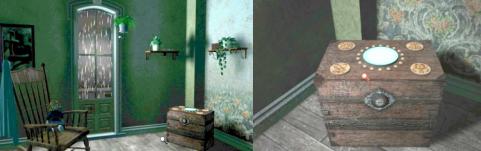
Renée's room
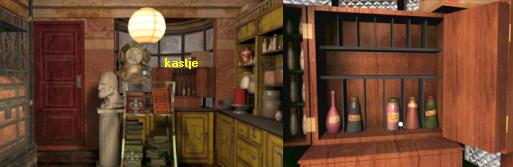
Go inside and walk to the bed. There is a bedside table to the left of the bed. Renée's work table is in the left corner. Zoom in on the bedside table and open the drawer. Grab the sheet of drawing paper from the drawer and click it to your inventory. Close the drawer and then look down using the down arrow. Open the cupboard door at the bottom of the bedside table. The cupboard is full of bars of "Kroko Kringle" chocolate. Grab a bar of chocolate from the cupboard and store the bar in your inventory. Then grab another choclate bar from the cupboard and click on it twice. Nancy eats the second bar herself. Click away the remaining wrapper.
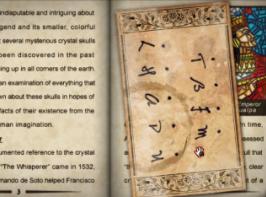
Look up again via the up arrow and then step back via the backward arrow on the bed. Turn to the left and then zoom in on the work table. Look at the items on this table. Apparently Renée mixes her herbs for her herb pouch here. There is a bottle of "Hiccup Powder" on the table. If you pick up the bottle of "Hiccup Powder" and then click it open, Nancy will get a cloud of powder in her face and.....she will suffer from hiccups for a while. Zoom out and turn further to the left. To the left of the coat rack you will see a crack in the wall. Symbols are painted on the wall to the left and right of the crack. Zoom in to see them in close-up.
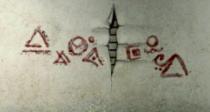
Just copy these symbols because you never know whether you will have to recognize them somewhere else. Zoom out and turn further to the left, to the left corner of the room. There is a chest in the corner and a rocking chair in front of the bed. Click on the rocking chair. There is a doll in the rocking chair.
NB: The doll will go into the rocking chair as soon as you let Nancy eat a Kroko Kringle bar from the bedside table. Y
ou only have to eat 1 bar and then the doll sits in the rocking chair. So if you don't eat a bar, the doll won't sit in the rocking chair.
Zoom out of the rocking chair again and zoom in on the chest. There is a large blue circle on top of the chest. Around the circle you will see small round buttons. You also see 4 symbols. They are the same symbols as are on the wall. When you try to open the chest you notice that the chest is locked. Zoom in on the top of the box. There are 18 small buttons around the blue circle. Click on a few of those buttons and... part of a larger symbol will always appear in the blue circle. By clicking on 4 buttons you create a large symbol. However, you don't know enough to solve this puzzle now.
So zoom out twice, turn right and leave Renée's room through the room door. Go back down the stairs and then back through the garden doors in the library to Renée in the Serre. Talk to Renée again and Nancy will automatically give the chocolate bar to Renée. Then ask: "Those weird symbols on the wall in your room- -do you know who painted them?". Renée painted those symbols on the wall because...there is a ghost living in that wall. She says that she heard that ghost whispering and so she wrote the word that the ghost kept whispering on the wall in Hoodoo language. Renée is too afraid to say the word out loud and she doesn't want to write it down. Say "I'll see you later". to end the conversation again. You now know the way to the cemetery by now and from the cemetery you also know the way to the Bolet Mausoleum. So now go back to the cemetery and then walk straight ahead at the fountain and the old tree and you will be back at:
Bolet Mausoleum:
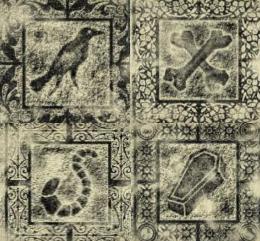
You need the piece of coal from the fireplace. from the sitting room. If you forgot the take the piece of coal, you have to go get it first. Zoom in again on the Mausoleum. You are then back in the close-up of the front door and the two round columns. Now zoom in on the 4 square tiles one by one. Then take the sheet of drawing paper from your inventory and click the paper on the tile. Nancy presses the paper onto the tile and, using the piece of coal, she now transfers the symbol, which is hidden in the relief of the tile, onto the paper. Pay attention to the edges around the drawing because the edges will help you recognize where the images should be placed. If you have made a drawing of all 4 tiles, then you have 4 drawings, namely a Cross of 2 bones, Crow, Snake, Coffin. Zoom out and go back to the Bolet house via the old tree, the fountain and the garden and enter again through the garden doors. Walk through the library and the hallway to the:
Living room
Zoom in again on the miniature cemetery and move the screen down again so that you are above the old tree.
Then shift the screen to the left so that you are back at the miniature Mausoleum in the top left corner.
Zoom in twice on the roof of the mausoleum and you are in the :
|
Tile Puzzle: There are 4 tiles in the roof of the miniature mausoleum. You can have different images appear in each tile by clicking on the arrows next to the tiles. So you have to put the 4 images of which you have made a drawing on the 4 tiles. On the edges around your drawings and around the tiles you can see which tile you should put which image on. Using the arrows, place the Crow in the top left tile, the Bone Cross in the top right tile, the Snake in the bottom left tile and the Coffin in the bottom right tile and.....
The roof of the building opens. There is a Bronze Key in the roof. Grab the Bronze Key and store it in your inventory.
Zoom all the way out of the miniature cemetery and now go all the way back to the Bolet Mausoleum in the real cemetery. So go out through the garden doors in the library, through the garden to the cemetery gate, open the gate and then straight ahead to the fountain and the old tree. |
Cemetery
Zoom in again on the front door of the Bolet Museum. Henry is on his knees in front of the mausoleum, he is crying. When he sees Nancy he quickly runs away. Go forward to the mausoleum doors. Take the Bronze Key from your inventory, close the inventory and then click with the key on the keyhole off the doors and the doors will open. Open your inventory again and put the Bronze Key back in it. Step inside. The gravestones of the deceased Bolet's are in the wall on the left and right. In the left wall are the gravestones of Marianne and Claude Bolet, Henry's parents. On the right are the gravestones of Marcel and Fifi Bolet. In the back right corner there is a rolled up piece of paper between the 2 columns. Zoom in and grab the rolled up paper. It turns out to be the painting of Henry's parents, which therefore belongs in the empty painting frame in the living room.
Store the painting in your inventory. Zoom out, turn around and go back outside.
Bolet House:
Living room
You found the missing painting and Nancy is a neat and honest girl. So go back to the house and enter through the library doors.
Go back to the living room and to the portrait wall, to the right of the fireplace.
Zoom in on the portraits. Take the painting from your inventory and place it in the empty frame.
Zoom out. Nancy has now done just about everything she could do up to this point. So let's call Ned to inform him of the developments. So click on Nancy's phone and then click on "Ned" in the small screen to call him. The telephone conversation between Nancy and Ned continues entirely by itself. At the end, click on "that's about it" to close. After the conversation with Ned, Nancy would like to go back to her hotel, so call the "Cab Company". However, Nancy is told that there are no taxis due to the very bad weather. Nancy will therefore have to stay in the Bolet house. Call Bess. Nancy also tells Bess what she has been through and that she is stranded in the Bolet house. During this conversation you will automatically become Bess, because you will now continue with:
Part 2: New Orleans
Bess Marvin:
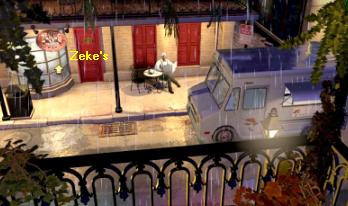
So now you are Bess and you are standing on the balcony of the hotel room and you are still talking to Nancy. Nancy tells you about the Zeke's receipt and....well.....you tell Nancy that Zeke's store" is across the street. Nancy wants Bess to play detective now and to find out everything about the "Zeke"'s Receipt" and she gives the receipt number. That number is 2-1--3-8-7-2. Bess isn't very keen on the idea of snooping so say "You... ..you want me to snoop?" and then you struggle some more, but Nancy convinces you to be a detective for a while.
The conversation is then over. Put the phone away. A man is sitting across the street to read the newspaper. It is also raining cats and dogs here in New Orleans. Click with the forward arrow to the red door of the "Zeke's store" and....Bess jumps over the balcony into the street and then stands in front of the red door. Open the door and step inside. You are in.....
Zeke's Store
Well..."Zeke's" is a kind of dump shop where you can buy the craziest things.
Walk to the back of the store and then turn right via the curved arrow. The owner of "Zeke's" is behind the small counter.
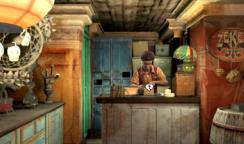
Talk to the man. The man asks if you have seen something you like. Say "I like everything" and Bess will automatically ask about the receipt. The man now introduces himself as Lamont and says that the receipt is somewhere in a box of unsorted items. Now ask Lamont all relevant questions about the box of things he bought from Henry and about Bruno and Henry themselves. Lamont bought the box from Henry Bolet but he has no idea what's inside. The box is stored in the back room. Talk to Lamont some more and then close this conversation
Bess would like to take a look at that box of unsorted items, but she obviously can't go into that back room without Lamont's permission. A ruse must be devised. Let's take a look around the store and see if we can come up with an idea. Turn right and walk back to the exit. In the window is a diver's helmet and a wooden cupboard. Zoom in on the wooden cupboard. There are 5 bottles in the cupboard.
From left to right, pick up each bottle and open it. From left to right the bottles contain Crying Powder, Giggle Powder, Itching Powder, Stink Powder and Sneezing Powder. Bess puts the bottle of Sneezing Powder in her bag. Zoom out of the cupboard and turn left. You are standing in front of an old piano. NB: You only get the Sneeze Powder if you have talk to Lamont first. If you pick up the bottles before you talk to Lamont, Bess will also put the sneezing powder bottle back in the cupboard.
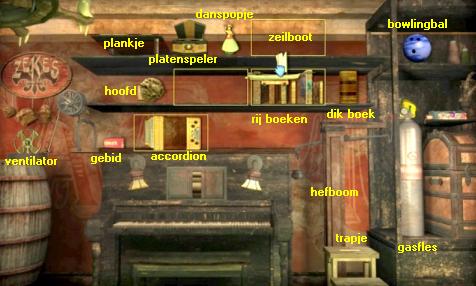
Above the piano there are 3 shelves on which all kinds of objects are placed. When you pick up an object you will see frames appear. You can then place the picked up object within such a frame and thus move it. To the right of the piano is a low yellow staircase and in the cupboard you see a gas bottle. A yellow Smiley Balloon is attached to the gas bottle. There is a lever behind the yellow stairs. If you click on the lever, the gas bottle will open and the yellow Smiley Balloon will be inflated. The inflated Smiley Balloon then pushes the shelf above the Smiley Balloon up. On the shelf, above the gas bottle and the Smiley balloon, is a blue bowling ball. To the left of the piano is a large barrel. A wheel mechanism is attached to the barrel with a rope running over it.
|
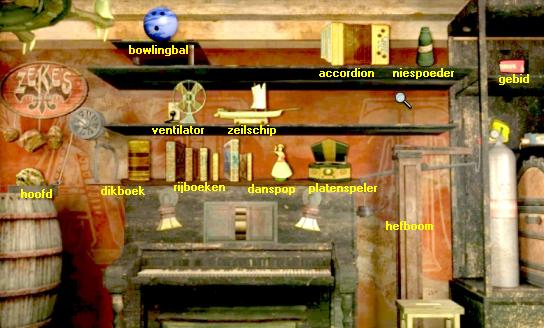
The Sneeze Powder Trap: First take a good look at which of the objects you can pick up and see where the frames appear. So pick up the objects and then click on them with your hand. You will then see the frames appear and you can then place the picked up object in one of the frames. However, place the items back where they were.
The Sneezing Powder Trap is now finished and it now looks like this
|
Click on the Lever and.....your homemade sneezing powder trap works and Bess calls Lamont who gets a load of sneezing powder in his nose and has a terrible sneezing fit. Lamont now asks Bess if she wants to go to the back room to get his nose drops. So go back to the counter and now you can go past the counter. So now go forward past the counter and then turn right, via the curved arrow, and then go forward through the bead curtain into the back room. There is a brown box on the table.
Go forward to the table and then zoom in on the box and click on it with your hand. Bess takes the items out of the box and you see a picture of a young Bruno with a dog and a picture of a lizard with a pirate hat on its head and a blue parrot on its shoulder. In the lizard photo you also see a Loquat fruit. You can view these two photos again by clicking on them.
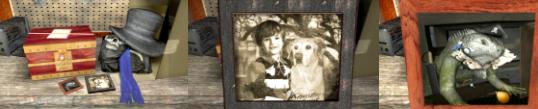
The Letter Lock of the red Chest:
A red chest also came out of the box. There is a letter on the chest and the chest has a letter lock. Click on the letter. It is a letter from Amelinda Bolet in which she writes about a holiday in France. Read the letter. You can read the bottom half of the letter via the down arrow. You will then see that there are several letters.
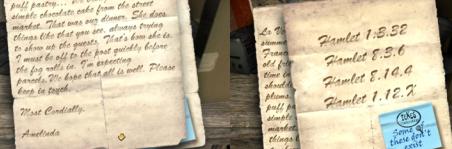
Click with your hand on the bottom right corner to scroll to the next letter. You will see 4 references to chapters of Hamlet, Shakespeare's famous play. Hamlet 1.3.32. Hamlet 8.3.6, Hamlet 8.14.4, Hamlet 1.12.X. On the enclosed blue note you can read that some references do not exist. Click on the Amelinda Letter again to return to it. You now have to use the references to Hamlet to find certain letters in the Amelinda letter. The numbers behind the Hamlet references are therefore the letters. So you have to count letters in the Amelinda letter. So you count from top to bottom and from left to right.
Start with Hamlet 1.3.32. So count the letters in the first 2 sentences of the letter.
The 1st letter is then L, from the L the 3rd letter is the E. From the E the 32nd letter is the B.
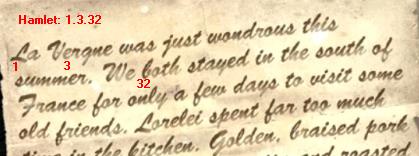
From B you continue counting for the other 4 Hamlet references. Do this with the other 3 and you will have the following list.
Hamlet 1,3.32 gives you the L, E, B.
Hamlet 8.3.6 gives you the:E, N, U.
Hamlet 8.14.4 gives you the: N, D, T.
Hamlet 1.12.X gives you the: O, D
Put all these letters together and you get: LEBENUNDTOD.
Zoom all the way out of the letter and then click with your hand on the letter lock of the red chest.
Well...the 9 buttons of the lock have letters on them. Click on the letters: L, E, B, E, N, U, N, D, T, O, D and..... the chest opens.
There is a letter in the chest. Grab the letter. In the letter, Bess reads that Bruno Bolet has purchased an object called the "Whisperer" and from the shape of the inside of thechest, Bess concludes that this object must be a skull. Bess now automatically calls Nancy to inform her of her discovery. You will now automatically become Nancy Drew again and start with:
Part 3: Bolet House:
Nancy Drew:
So as Nancy you talk to Bess over the telephone. You have just heard about the "Whisperer" skull from Bess and Nancy decides to look for this skull. Bess also told about the 2 photos and that there was a Skeleton Suit in the box. Close the phone screen. You are standing in the ground floor hallway. Turn around and then enter the library room again through the double doors:
Library:
Go to the corner bookcases. In the left part of the corner bookcase there is a green lizard on the small bookcase that is on the middle shelf. Previously you could not walk through to this part of the bookcase, but now you can. So walk to the left part of the 3-part bookcase and you will be standing in front of the lizard. In the small cupboard where the lizard is sitting, there are 3 books on the right.
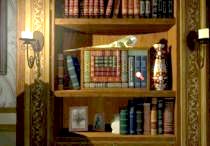
Click on those 3 books with your red magnifying glass and you zoom in on the small cupboard. The lizard turns out to be a real living lizard. The lizard is scared shitless and jumps away. This causes all the books to fall out of the cupboard onto the floor. Henry says that the lizard is called Iggy and is one of Uncle Bruno's pets. Iggy steals paper from which he then makes a nest. Henry demands that Nancy put all the books back in the small cupboard. Nancy wants to do that, but one particular book has piqued her interest. She would like to read that book. Henry only allows that after she has neatly put all the books back in the cupboard.
The Book Puzzle:
Okay...so the books from the small cupboard are now on the floor.
Click on the pile of books and you will see a close-up of the puzzle.
You have to pick them up one by one and then put them back in the small cupboard.
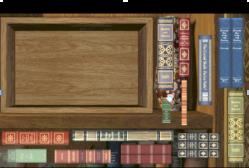
All books must be put back in the small cupboard and various solutions are possible.
It doesn't matter how you do it, as long as you get all the books back on the shelf.
Make sure that you click the books tightly against the side walls and against each other, otherwise it will not fit.
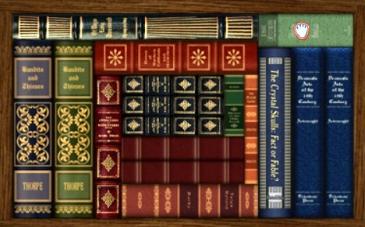
When you have clicked the last book back into the cupboard, take "The Crystal Skulls: Fact or Fable?" book off the shelf because this is the book that Nancy wanted to read. The book was written by Professor Beatrice Hotchkiss, an old acquaintance of Nancy's who has already assisted her in 2 previous cases. Open the book. On the first page you can read Beatrice Hotchkiss's telephone number. This telephone number will now automatically appear in Nancy's telephone. Flip through the book and... you will find a card with letters in the book.
Grab this card to store it in your inventory.
Continue reading the book. The book tells about the Legend of the Crystal Skulls.
According to legend, there are 13 crystal Inca skulls. One of the skulls, the "Whisperer", is said to have been stolen by the Spanish. The "Whisperer" skull is said to protect its owner from fatal diseases. The skull ended up in France via Spain and Austria. A French explorer took the skull back to the New World, America. For centuries the skull has roamed America and Canada and in 1881 the "Whisperer" skull was last seen in the hands of a traveling fair performer, one Curtis Caldwell. Curtis Caldwell eventually settled in the state of Louisiana, where he died at the age of 93 when his house was set on fire. The book concludes by noting that if you follow the trail of the "Whisperer" skull you will discover that everyone who ever owned this skull lived a long time, but they were all murdered at some point.
Zoom out of the book. Nancy puts the book back on the shelf. Nancy has now become very curious about that skull, so she wants to call Beatrice Hotchkiss now. But Nancy's cell phone has no reception in the library. So go out of the library and into the hallway. In the hallway you pick up the phone and call Prof. Hotchkiss op. Hotchkiss is now also a bit older and seems to already be suffering from Alzheimer's and in any case she has no patience. Then ask Hotchkiss all the questions you can and you will learn that:
Bruno Bolet called Hotchkiss about her book about the Crystal Skulls. When Hotchkiss asked Bruno if he owned the "Whisperer" skull he replied "The ayes have it". Ask Hotchkiss the remaining questions. Be sure to ask how you can recognize a real Crystal Skull. Hotchkiss then explains that the 13 skulls were made at a time when there were no tools, so you can always recognize a fake skull by the marks left on it by the tools. So Hotchkiss does not believe that Bruno Bolet died of a heart attack, not if he was in possession of the "Whisperer" skull.
Once you have asked Hotchkiss everything, say goodbye via "That's it for now" and close the phone screen. Open your inventory and then click on the card you took from the Hotchkiss book. There are 9 dots on the card and there is a letter under each dot. The dots are in a row of 4 and a row of 5. Hela... aren't there 9 portraits in a row of 4 and a row of 5 in the living room? Put the card back away, close your inventory and go back to:
Living room
The Portraits puzzle:
Go to the wall where the 9 portraits hang. Make sure you are in the close-up of the 9 portraits again. Now that you have taken the card from Hotchkiss' book, you can click on each of the 9 portraits with your hand. Now take a closer look at the 9 paintings. In each painting one of the people is holding a specific object. These objects are: Lollipop, Monkey, Hat , Embrella , Axe , Toothbrush, Banana, Fan, Poodle.
The first letters of these 9 objects correspond to the letters on the card from the Hotchkiss book. So you now have to swap the paintings with each other so that they hang exactly in the order of the letters on the card. You pick up a painting and then click on the painting you want to swap places with. Once you have hung the 9 paintings in the right order, a secret door will become visible in a niche.
Secret Hallway:
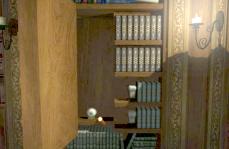
Click on the Secret Door. The door opens. Go forward through the opened door into the Secret Hallway. Go forward to the stairs.
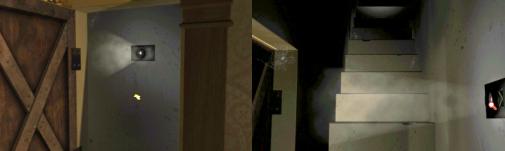
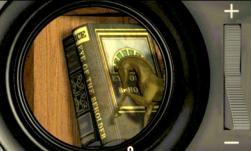
You hear a phone conversation between Henry and a guy named Summer and they argue about money. There is a peephole in the right wall. Look through the peephole and you will see one of the bookcases in the library. There is a switch on the right. There is a plus sign above the switch and a minus sign below the switch. Click on the Plus Sign and .... you now zoom in on a book that is in that bookcase, it is the "Eye of the Beholder" book.
Turn to the left via the left arrow and then go forward twice up the stairs. When you reach the top you stand in front of a door.
Turn right so that you are directly in front of the door. Click on the door. The door is locked.
Zoom in on the doorknob panel and you will get a close-up. You are in the:
|
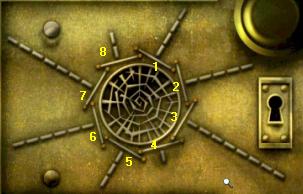
Spider web/string puzzle:
You can see a spider web depicted on the copper door plate. The outer edge of the web looks exactly like the 8 strings you saw around the garden fountain drain. You will see a dotted line next to each of those 8 strings, like spokes in a wheel. Number the 8 "strings" from top right to top left, as 1, 2, 3, 4, 5, 6, 7, 8. Then for each string, count the number of dashes of the dotted line that protrude from the string.
Remember all this because you'll need it in a moment to get the key out of the drain. That key fits on this door. |
Zoom out, turn right and go back down the stairs. Then turn right, click on the secret door and enter the living room again. Now go back to the garden and to the garden fountain through the garden doors in the library. Zoom in again on the base of the fountain and then on the drain. You see the key again in the drain, but you also see that damn spider still crawling around. The 8 strings are located around the drain. As you know, every string makes a musical note. So you now have to click on the strings in the correct order so that the sound vibrations cause the key to rise and you can then grab the key. The order in which you have to click on the strings is therefore determined by the number of dashes in the dotted lines that you saw on the lock plate.
Now also number the strings, from top right to top left, 1 to 8.
Then click on the strings in this order:
String 4, String 8, String 5, String 1, String 2, String 6, String 7, String 3 and...
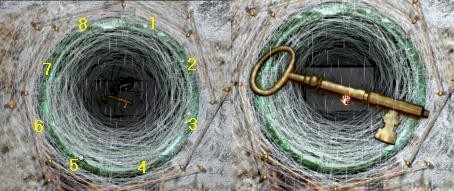
....the key rises and the spider disappears. Grab the key and click it to your inventory.
Bolet House
Go back to the living room and in the living room stand directly in front of the fireplace. There is a niche to the left and right of the fireplace and the Secret Door is in the left niche, in front of which the flower vase is. Open the secret door and enter the secret passage again and then diagonally forward into the corner. Go back up the stairs and turn right to the "spider web" door. Zoom in again on the copper door plate. Take the drain key from your inventory and insert the key into the keyhole and the door will open. Go inside.
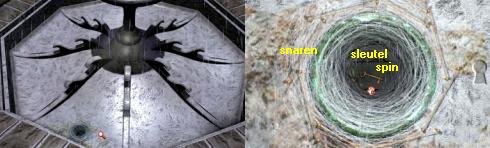
Secret room
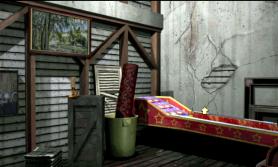
In the corner is a long red box with stars on it. It kind of looks like a shuffleboard.
Go to it and zoom in on it with your red magnifying glass. You end up in the
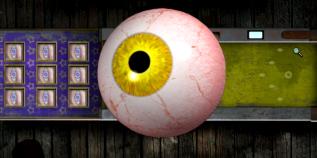
Shuffleboard puzzle
You have to play shuffleboard. On the left you see 9 teeth. At the top of the board you will see a slot with wooden balls in it. There is always 1 ball on the far right in the slot. You have to shoot the balls at the teeth. If you hit the teeth with a ball, the teeth will turn into a chicken and if you hit the chicken, it will turn into an eye. The idea is to turn all 9 teeth into eyes.
Click on the ball that is on the right in the ball slot. The ball will then automatically land on the dot in the box.
Click on the ball with your "finger cursor" and then hold down your mouse button.
You will now get a red arrow. While holding down the mouse, move your mouse back and forth and......
...you then pull out the red arrow and can then also aim the red arrow towards and between the diamonds in front of the ball.

So if you click on the ball and then move your mouse left, right, up or down, you make the red arrow larger or smaller. You can also point the red arrow straight ahead or diagonally up or diagonally down. The longer you make the red arrow, the stronger the shooting force becomes and the faster you shoot the ball when you release your mouse button. So you have to shoot the balls at the teeth.
By making the red arrow larger or smaller you determine the shooting power. By aiming the red arrow straight ahead or diagonally towards the edges, you determine whether the ball will go straight forward or bounce off the edges of the box. If you pull your mouse behind the ball, you can aim the red arrow much better than if you hold the mouse in front of the ball. First try to change the 3 back teeths into eyes, then the middle 3 and then the front 3.
So you have to hit each of the 9 teeth twice with a ball. The 1st time a set of teeth turns into a chicken and the 2nd time a chicken turns into an eye. If you hit a teeth a 3rd time, it becomes a set of teeth again. If you have turned all 9 teeths into eyes, then...a Glass Eye will roll out of the ball slot as a reward. Grab the Glass Eye.
Once you have won the Glass Eye from the shuffleboard, look around the room. Turn counterclockwise. To the left of the shuffleboard is a low cabinet with a candle on it. To the left of the cabinet there is a painting of a ship on the wall. Zoom in on that painting. The ship in the painting is threatened by a gigantic squid. Click on the painting with your hand and....it turns out to be a door that now opens. You have opened the Eyes cupboard
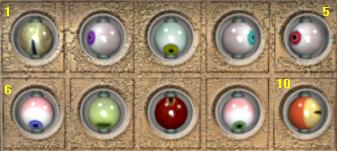
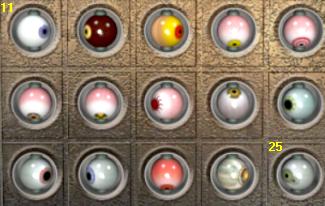
The cupboard has 25 compartments in which a Glass Eye must be placed. There is currently a glass eye in the 17th compartment. Click on that glass eye and then click the Eye to your inventory. Nancy concludes that she has to put all her Glass Eyes in this cupboard and that she therefore needs 25 of those Glass Eyes. Nancy now automatically puts her 5 Glass Eyes in this cupboard. Click with your hand on one of the 5 glass eyes. You will then notice that you can turn the glass eye so that the pupil of the eye "looks" up, down, to the left or to the right. You have already noticed, whenever you found a Glass Eye, that the pupils of the eyes are different. Nancy now has 5 Glass Eyes, so she still needs to find 20 more.
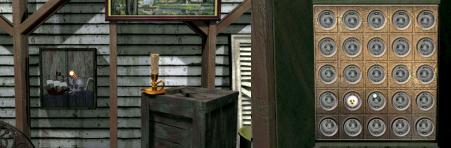
Zoom out of the eye box and... you close the box again and the 5 Glass Eyes disappear back to your inventory. Turn further counterclockwise until you are standing in front of a small table. On the wall, above the table, hangs the American "Stars and Stripes" flag and a lamp in the shape of a face. On the table is a gumball machine, an old-fashioned radio and a colored cube.
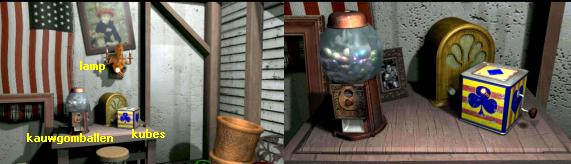
Zoom in on the lamp and then click on it with your hand and... in the corner to the right of the table, a door opens and... you look into the small, bare bedroom. However, do not enter the room now, but step back and zoom in on the table and then on the colored Cube. The cube has a turning handle. Click on the handle. The cube turns out to be a music box and you hear a "middle C" tone. Keep clicking thehandle until the cube opens. You always hear a different tone, write down the tones you hear in the order you hear them, so you hear: middle C - middle C - middle C - D - E - E - E - D - middle C - D - E - middle C.
The cube opens and a large artificial spider jumps out of the cube. You also heard the tones you heard when you clicked on the strings surrounding the fountain drain. A spider was also crawling around in that drain. Close the cube again by clicking on the spider and zoom out once. Zoom in on the gumball machine and then click on the button. A gumball comes out of the device. Grab the gumball and...Nancy eats the gumball with relish. Zoom out twice and turn further to the left. You will then be standing in front of a large desk. To the right of the desk, in the corner, you will see the outline of the Secret Door through which you entered. You can go to it, but you cannot open the door from this side.
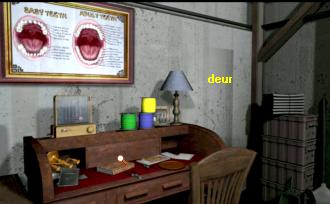
There is a dental poster on the wall above the desk. Zoom in on it. The poster shows children's teeth and adult teeth. The names of the teeth and molars are listed next to each set of teeth. Learn the position of the teeth and molars. Zoom out and zoom in on the desk. Look at the items on the desk. At the top left is a "marble game". At the top right are 3 spools of thread, a photo and a table lamp. On the desktop you will find the following items: on the left an Agenda, in the middle a "Short Stories for Tired Eyes" book and on the right is a map.
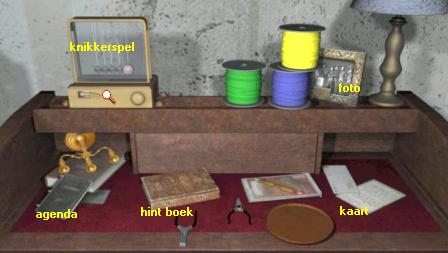
The Glass Eye in the Marble Game:
Zoom in on the marble game. There are 4 marbles and a Glass Eye in the machine. At the bottom left you will see a lever and at the bottom right a thick button. Click on the Lever and.....the Glass Eye is shot to the right by the marbles and then hangs outside.... Quickly...click with your hand on the Glass Eye when it is hanging outside. If you are fast enough you will grab the Glass Eye. You get 2 chances to try to get the Glass Eye. If you are unable to get the Glass Eye, you have to zoom out and zoom in again to try again.
When you have the Glass Eye, click it away to your inventory. Zoom out and grab the photo, which is right next to the 3 spools of thread. It's a photo of the "Jolly Rogers" club and the club members are all wearing skeleton suits. The inscription states that the photo is a gift from Gilbert. Zoom out. Grab the Agenda/ calendar. Open the calendar and browse through it. January 22nd has a "skull and crossbones" and the right page says "Shiver Parlor House". Scroll through to the May page. On May 31, a skull is drawn and the text reads "Scuttled Bones. Rampart and Dumaine". Nancy exclaims that today is May 31st. Continue browsing through the agenda and once you have viewed the last page, zoom out twice to put the agenda back on the desk.
Pick up the "Short Stories for Tired Eyes" book and read it. This book was written by Bruno Bolet and it is full of hints that will help you solve the puzzles in the game. However, most of the last page in the book is gone. Nancy stores this book in her inventory, so you can always take it out and look at it again. Grab the card, which is on the right side of the desktop. It turns out to be an invitation to Bruno Bolet to join the Jolly Jumper club and Gilbert Buford will guide Bruno through the initiation ritual. Place the card back on the desk and zoom out. Turn further to the left and you will see the Pirate sitting in a chair. Above the pirate you will see the entrance to a ventilation duct. Next to the pirate is a table with Iggy's dressing up cabinet

The Pirate has a button box on his lap. Zoom in on the pirate and then click on the button box that the pirate has on his lap. The box has 10 buttons that you can press. Each button gives a sound. At the bottom left is the word "TALK". If you press a button and then press TALK, the pirate will open his one good eye and pronounce the sound associated with the button you pressed. If you click on all 10 buttons in succession, the pirate will pronounce all 10 sounds in succession. You can press the buttons in order or in any order you want. Well...that was fun, but what do you do with it? When you've had enough of playing with the pirate, just zoom out again.
Iggy, the lizard, is walking around in the ventilation duct, but if you zoom in on the ventilation duct and then click with your hand, you will not see Iggy. Open the small cabinet, which is on the table to the right of the pirate. You open this cabinet by clicking towards it with your forward arrow. In the cabinet hang the clothes and attributes with which you have to dress Iggy the lizard. But you can't do anything with it as long as Iggy hasn't emerged and as long as Nancy doesn't know why she has to lure Iggy to get out of the ventilation duct.
Turn back to the table with the cube and the gumball machine on it. Zoom in again on the lamp hanging above the table and click on the lamp again. The door to the bare bedroomopens again. Now enter the bare bedroom. In the bare room, turn left to the room door. Open the room door and step outside. Turn right and go down the stairs to the ground floor hallway and then go to:
Library
Back in the library you look for Henry again, who is still sitting behind the desk.
Talk to Henry again and ask him all the questions you can ask now.
Start with "I'm afraid you're going to be stuck with me for a while".
But Henry had already understood that because there are no taxis due to the bad weather.
Say "Bingo", and then continue with
"How did Bruno die, if you don't mind my asking?".
Henry now shows Nancy Bruno's death certificate signed by Dr. Gilbert Buford. Apparently Bruno died of a heart attack. Bruno was 95 years old, so no one was surprised that he had a heart attack. Gilbert Buford's phone number is now also in Nancy's phone. Nancy now also sees a key ring from Bruno. A
Glass Eye hangs from the key ring.
Continue asking "How come your great uncle's crypt is in the garden and not at the cemetery?". Henry has no idea about this, but tells that Bruno built the crypt himself. Ask further "Do you think I could borrow your keychain, the one that has Bruno's glass eye on it?". However, Henry does not want to give up the key chain with the eye. Give Henry any answer and then continue with "The box of your great uncle's things that you sold to Zeke's curio shop- -that was no-no, wasn't it?". However, Henry denies that he sold a box of Bruno's things to Zeke's.
Now ask more about this, so say "I checked out that half-burned receipt from Zeke's that I found in the fireplace". However, Henry continues to deny that he has sold Bruno's things and Nancy now confronts Henry with the fact that she heard the conversation between Henry and Summer. Summer turns out to be Henry's girlfriend, but she is quite unpredictable. Ask "How is she unpredictable?". Summer turns out to be a girl who completely strips Henry financially. Summer always wants different and more expensive things and that is why Henry sold a box of Bruno's things to Lamont from the Zeke's shop. Henry asks if Nancy won't betray him to the lawyers....., say "I can't just ignore what you did, Hernry". and....Nancy may now have the Glass Eye that is attached to Bruno's key chain.
So grab the Glass Eye and store it in your inventory. Zoom out and ask Henry further "Do you know anything about the crystal skull that was in the box of junk you sold to Zeke's?" No, according to Henry, there was no skull in that box. End the conversation with "I'll let you get back to work".
Turn clockwise. In the corner, to the right of the garden doors, is the bookcase containing the book you saw through the peephole in the Secret Corridor. Go to this bookcase and then click with your magnifying glass on the 2 books. left, on the middle shelf. You grab the "Eye of the Beholder" book off the shelf. Open the book and then grab the Glass Eye and store the eye in your inventory.
Zoom out twice and go outside through the garden doors. Turn left to the Conservatory. Renée is still busy repotting plants. Talk to Renee. Now ask Renée "Did Dr.Bolet ever say anything to you about a crystal skull? He may've referred to it as The Whisperer?". Bruno never talked to Renée about a crystal skull. Ask "Were you in the house when Dr. Bolet passed away?". Renée was working in the library at the time and she found Bruno on the floor in the hallway. Fortunately, Gilbert Buford also came in immediately and Buford examined Bruno and found that Bruno had died as a result of a heart attack.
Go on with askink "How was it that Gilbert was able to just walk right in like that?". It is not customary here to lock the front door, but Renée did find it strange that Gilbert Buford came in at that exact moment. Ask further: "I understand that Dr. Bolet had some interesting pets, like an inguana?" . Renée says that Bruno has taught Iggy the lizard all kinds of tricks. Go on with "Do you know how he went about training them?" No... Renée doesn't know that. ItEnd the conversation with "Nice talking to you".
Stay standing in the Conservatory. Take out Nancy's phone and call Gilbert Buford. You will be connected to Gilbert's answering service. The man says that Gilbert is retired but that he can often be found at his favorite gumbo stand on the corner of Rampart and Dumaine......hela.....didn't you read this in the agenda? And isn't the hotel where Bess is at the corner of Rampart and Dumaine? When the telephone conversation is over, you call Bess and.....Nancy brings Bess up to date and you become Bess again:
New Orleans:
Bess Marvin:
Nancy talks about Gilbert Buford and how he can often be found on the patio of his favorite gumbo restaurant. Could you please go talk to Gilbert Buford? Bess tells Nancy that there is a guy across the street reading the newspaper on the patio of a gumbo restaurant. Put the phone away.
As Bess you are back on the balcony of your hotel room. Across the street is that Dr. Gilbert Buford reading the newspaper and enjoying a cup of coffee. Click with your question mark cursor on Buford and.....Bess jumps down over the balcony fence again and then stands with Dr. Gilbert Buford who welcomes her enthusiastically. Talk extensively with Dr. Buford and ask him all the questions you can about Bruno Bolet and his death and about the Crystal Skull.
Gilbert Buford then tells how he found Bruno dead on the hallway floor and that Bruno had a letter in his hands. However, that letter has disappeared and Gilbert thinks that Iggy, Bruno's lizard, has stolen the letter. You now also find out that Bruno has trained Iggy to bring back the things that the beast stole. Gilbert also talks about Hoodoo and that Renée believes in this kind of black magic. You say goodbye and you automatically end up back on your balcony again.
Call Nancy on your telephone to tell her what you have foun out from Gilbert Buford....you will automatically become Nancy again.
Part 4: Bolet House
Nancy Drew:
You are Nancy again and you are still standing in the rain in the garden of the Bolet House. Close the phone screen. Turn around and go back in through the garden doors and go back to the living room. In the living room open the secret door again, in the niche to the left of the fireplace. Go back into the secret passage and up the stairs to the door of the secret room. Click on the door and enter the room again.
Secret room:
Go back to the pirate and zoom in again on the ventilation duct, in the wall above the pirate.
Take the Loquat fruit from your inventory and click the fruit in the ventilation duct and Iggy appears and you end up in the:
Iggy Dress Up puzzle 1st time:
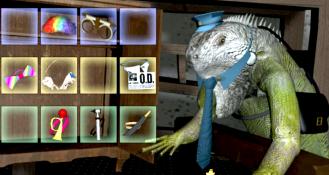
Iggy is now sitting next to his dressing up cabinet. Click on the doors of the cabinet
To the left of Iggy, the screen will now appear in which you will see all the things that you can put on Igggy.
There are 12 boxes. Each box contains an item. Number the boxes, from top left to bottom left, 1 to 12.
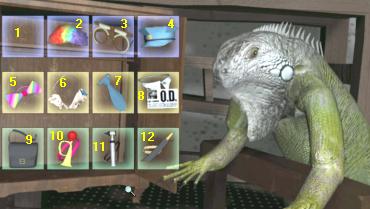
Now dress Iggy as an Optician. You take an item from the boxes and then click the item on Iggy in the places where you get the "hand with finger cursor". Take the Glasses from box 3 and place the glasses on Iggy's eye. Take out the nameplate collar. box 8 and click it on Iggy's throat. Take the Eye Gaze Tool from box 11 and click it on Iggy's left paw.

Now zoom out of the close-up and....Iggy disappears back into the ventilation duct and.......
....a little later Iggy picked up a Glass Eye and deposited it on the grille in front of the ventilation duct.
Grab the glass Eye and click it to your inventory.
You should now have 10 Glass Eyes in your inventory. Zoom out. Later you have to do the dress-up puzzle with Iggy twice more and for that you need a new Loquat fruit. So you will have to do the Wasp distribution puzzle 2 more times. But first go back to the Library. Using the lamp above the table where the cube and the gumball machine are on, to open the door to the bare bedroom again and then make sure you end up in the Library again.
Library
"Librarian's Eye" puzzle
Back in the library, dive into your inventory and open the "Short Stories for Tired Eyes" book. Flip through the pages to the page where the story "A Librarian's Tale" is described in red ink. Now read this story carefully. The sequel is on the next page. The story is in rhyme form and tells about the "Eye of the Librarian". Take special note of the sentences "Cards that keep track of every book", and "the title's the thing, addition's the hook". Put the book away and go to the low bookcase to the left of the desk, where Henry is still sitting in the chair.
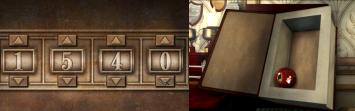
Open the middle bottom drawer in this bookcase again. This drawer contains the book catalog cards and there are 20 cards in the drawer. The cards always have a book title and a number on them. Write down the number on the card for each title that contains the word "Eye" and then add these numbers together. This concerns these cards:
| Eye Candy: number = 004. Grinding Fake Eyes: number = 511. Turn a Blind Eye: number = oo6. My Eye and Other Tall Tales: number = 401. The Camel in the Needle's Eye: number = 608. Cat's Eye: number = 010. Add all these numbers together and you have the number 1540 |
Among all the cards, Nancy also saw the title "A Librarian's Tale", but this contains the number 000. Zoom out of the drawer and look up along the bookcase via the up arrow. At the top of the bookcase is a shelf with books. Click with your magnifying glass on the thick book that is on the far right of the shelf. This is the "A Librarian's Tale" book and you grab it off the shelf right now. However, the book is locked with a combination lock. Click on the book and you will see a close-up of the combination lock. The numerical code you have to enter is 1540. So click on the arrows, below or above the boxes, and enter the code 1540 in the boxes and the book opens. Grab the Glass Eye from the hollow book and put the eye in your inventory.
Zoom out 2 times. Go back into your inventory and open the "Short Stories for Tired Eyes" book again. Now read through the "The History of Quincy T. Booker's Teeth" story in this book. This story is an account of the dentist's treatments of Quincy T. Booker's teeth. Note the order in which Quincy's teeth were treated. Put the book away and go back to the 3 double corner bookcase
The Teeth Puzzle:
There are 4 Teeth book supports in the middle part of the corner bookcase. These 4 supports each hold 5 books in place. The top 4 book shelves contain 8 books on each shelf. All these books are Dental Books. The books in the top 4 shelves are for Permanent Dentition. The books in the bottom 4 shelves are for deciduous teeth. Above the desk, in the Secret room, there is a dental poster showing Deciduous Teeth and Permanent Teeth. The poster also lists the names of the various molars and teeth.
You already know that when you click on a book that book goes up and down. You now need to click on the books in the order in which the teeth are listed in the story about Quincy's teeth. On the dental poster, which hangs above the desk in the secret room, you can read the names of the teeth and molars. Keep in mind that you saw the poster as a mirror image, so the books are mirrored in relation to the poster on the shelf.

So we start with:
Milk Teeth:
Zoom in on the 4 shelves where the 4 molars are placed as bookends. There are 5 books in each box. The books are arranged in order of the teeth and molars of baby teeth. Number the books, from top left to bottom right, 1 to 20. So the order of the dental treatments, according to the "The History of Quincy T. Booker's Teeth" story is: Upper right 2nd molar. Upper right central incisor. Upper left central incisor. Lower left lateral incisor. On the Dental Poster you can see where these teeth are located in the baby teeth. So "translate" the position of the teeth in the teeth to the books and you will then know which books to click on. Click on the books: 1, 5, 6, 17.
Each book clicks up and down and you are automatically zoomed out again. Now zoom in on the top 4 compartments of the cupboard.
Permanent Teeth
The 32 books in the top 4 boxes therefore represent the Permanent Teeth. Number the books, from top left to bottom right, 1 to 32. So the order of the dental treatments, according to "The History of Quincy T. Booker's Teeth" story is: Lower right canine. Upper left first bicuspid. Lower left canine. Lower left 3rd molar. So click on the books: 22, 12, 27, 32 and....

the entire left side of the cupboard opens and you see another Glass Eye.
Click on the Glass Eye and then click it to your inventory. Turn back to the garden doors and go through the garden doors to:
Garden
Wasps 2nd time
Go back up to the Wasp Tree via the Stepping Stones. Grab the Sprayer again and you will return to the Wasp Extermination game. Well.....shoot all the wasps again so that you win a Loquat Fruit for the 2nd time. When you get another Loquat Fruit, go back to the the secret door in the sitting room and the secret corridor:
Secret room
Dress up Iggy 2etime
Go back to the Pirate and zoom in on the ventilation duct in the wall above the pirate. Take the Loquat Fruit from your inventory and place the fruit back in the ventilation duct. .Iggy reappears and takes a seat next to the dressing up cabinet. Open the dressing up cabinet and the attributes screen will appear again. Nancy wants that letter that Bruno had in his hand when he died and that Dr. Buford thinks Iggy ran off with it. Now you have to dress Iggy up as a postman. So take the blue cap from section 4 and click it on Iggy's head. Take the blue tie from box 7 and click it on Iggy's neck. Take the mailbag from box 9 and click the bag on Iggy's waist.
Zoom out and....Iggy disappears back into the ventilation duct and a little later the Letter is on the grill. Grab the Letter and read it. The letter is from the "MILO Research and Technology" laboratory. In the letter you read that Bruno and Renée Amande brought a skull to this lab for research. You read that the skull was made with modern tools, so the skull was a forgery. Store the letter in your inventory.
Zoom out, go to the table and click on the wall lamp to open the door to the bare room and then follow the route back to the library. Go outside through the garden doors, turn left and talk to Renée again. Say: "I think I found the letter that Dr. Bolet was reading when he had his fatal heart attack. Iggy the iguana had taken it". Nancy puts the letter in Renée's basket and reads the letter aloud. She asks Renée why she denied knowing anything about a skull. Renée says that she has promised Bruno confidentiality. Ask further: "What made Dr. Bolet decide to have the skull authenticated?". That was Renée's idea. Say goodbye to Renee.
Fountain drain:
Turn right and go back to the garden fountain. Zoom in again on the base of the fountain and again on the drain. Remember the Cube, which is on the table in the Secret room? When you clicked on the rotating handle of that cube you heard music tones. You then wrote down the order in which you heard those musical notes... right? Well....there are 8 strings around the drain, each of which produces a musical tone when you click on it. If you click on a string, you will read the tone that the string produces at the bottom of your screen. So you now have to click on the strings again in the order of the musical notes as you heard them when you clicked on the rotating handle of the cube.
So the order was: middle C, middle C, middle C, D, E, E, E, D, middle C, D, E, middle C. Number the 8 strings again, from top right to top left, 1 to 8. Then click on each string and note what note each string makes. String 1= B. String 2=high C. String 3=middle C. String 4=D. String 5=E. String 6=F. String 7=G. String 8=A. So now click on the strings: 3, 3, 3, 4, 5, 5, 5, 4, 3, 4, 5, 3 and..... a Glass Eye rolls into the drain. Grab the Glass Eye and store it in your inventory.
You now have 13 Glass Eyes. Zoom out twice. Turn clockwise twice and then re-enter through the garden doors. Leave the library through the double doors into the hallway and turn right into the hallway and go to the Grandfhater Clock at the back of the hallway:
Bolet House
Hallway
The Clock Puzzle: Part 1:
Zoom in on the clock face. Above the dial is an Eye. If you click on the eye with your hand, the eye will wink at you. If you place the cursor to the left and right of the hands, the cursor will change into a turning arrow and you can turn the hands. To the right of the hands, you turn the hands counterclockwise and to the left of the hands, you turn the hands clockwise.
You now have to set the hands of the clock to different times. But at what times? Open the "Short Stories for Tired Eyes" book again and now scroll to the "Time Will Tell" story. This story consists of 3 parts. Read "Part 1" first. There are time indications in the story. Always write down the times you read:
|
"At exactly noon" = 12 noon. "When three hours have past" = 12 noon +2 hours = 3 o'clock in the afternoon. "Move ahead two hours more"= 3 in the afternoon +2 hours = 5 hours in the afternoon.. "Let's say it's nine hours before"= 5 o'clock in the afternoon - 9 o'clock = 8 o'clock in the morning. "If six hours before" = 8 o'clock in the morning - 6 o'clock = 2 o'clock at night. "moved ahead nine" = 2 o'clock at night + 9 o'clock = 11 o'clock in the morning. Put the book away again and make sure you are in the close-up of the clock face again. Now set the hands of the clock successively to the times you just calculated in Part 1. Every time you move the hands, click on the eye. So you only move the small hand. The big hand always remains at 12 o'clock The hands are already at 12 o'clock. So click on the eye. Click the small hand to 3 o'clock and click on the eye. The eye plate rotates and a Glass Eye emerges. Grab the Glass Eye and store it in your inventory. Clock Puzzle Part 2: Now read Part 2 of the "Time Will Tell" story and calculate the times mentioned in Part 2 again: "At high noon" = 12 noon. "Five hours ago" = 12 hours - 5 hours = 7 hours in the morning. "be gone in three" = 7 o'clock + 3 o'clock = 10 o'clock in the morning. "would be five hours"= 10 hours in the morning + 5 hours = 3 hours in the afternoon. "two hours from now" = 12 hours in the afternoon + 2 hours = 2 hours in the afternoon. "an hour later" = 12 noon + 1 hour = 1 hour in the afternoon. Put the book back away and make sure you are back in the close-up of the clock face. The small hand is already at 12 o'clock again, so click on the eye. Click the small hand to 7 o'clock and click on the eye. The eye rotates again and conjures up a 2nd Glass Eye. Grab the Glass Eye and store it in your inventory. The hands are then back to 12 o'clock. Clock Puzzle Part 3: Now read Part 3 of the "Time Will Tell" story and calculate the times again. "it was midnight" = 12 o'clock at night. "only four hours before" = 12 o'clock - 4 o'clock = 8 o'clock in the evening. "in a mere two hours"= 8 hours + 2 hours = 10 hours. "I realized that six hours after" = 10 hours + 6 hours = 4 hours in the morning. "the usual five hours" = 4 hours in the afternoon + 5 hours = 9 hours in the evening. "two hours later" = 9 o'clock in the evening + 2 hours = 11 o'clock in the evening. Put the book back away and make sure you are back in the close-up of the clock face. The small hand is again at 12 o'clock, so click on the eye again. Click the small hand to 8 o'clock and click on the eye. the eye retrieves the 3rd Glass Eye. Grab the Glass Eye and put it back in your inventory. Zoom out of the clock and turn around. Go to the front door, turn around and then go up the stairs to the door of Renée's room. |
Renée's kamer:
Open Renée's room door again with René's key and step inside. Walk to the bed and then turn clockwise.
Zoom in twice again on the box, which is in front of the rocking chair in the corner. You are back in the close-up of the coffin lid.
The Hoodoo Chest puzzle:
In the lid of the chest you will see a large blue circle. There are 18 small buttons around the circle. There are also 4 Hoodoo symbols painted on thechest. When you click on a button, part of one of the 4 Hoodoo Symbols will appear in the blue circle. So you now have to "draw" the 4 Hoodoo Symbols in the blue circle by clicking on the correct buttons. Name the 4 Hoodoo Symbols, from top left to bottom right, A, B, C, D. Number the 18 buttons, starting at 12 o'clock, 1 to 18. We start with Symbol A, then Symbol B, then Symbol D and if last Symbol C.
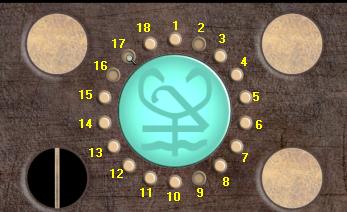
Symbol A: Click on the buttons: 1, 4, 7, 15. Symbol A turns over.
Symbol B: Click on the buttons: 5, 8, 10, 12. Symbol B turns around.
Symbol D: Click on the buttons: 11, 13, 14, 18. Symbol D turns around.
Symbol C: Click on the buttons: 2, 9, 16, 17. Symbol C turns and....
The chest opens. In the chest is the "Hoodoo Signs ans Symbols" book. Grab the book from the chest, open the book and read it. On the right page you will see a diagram of Hoodoo symbols and how to pronounce them. You cannot take the book with you, so be sure to copy the symbols for: BAH, ZAH, LOO, PAH, DEE, MOO, KAH. Then zoom out of the book. The book is put back in the chest. Zoom out of the box twice and then turn clockwise to the crack in the wall. On the wall, near the crack, are the 7 Hoodoo symbols that Renée painted on the wall. Compare these 7 symbols with the symbols from the book and you know that, from left to right, they are the symbols for: BAH, ZAH, LOO, PAH, DEE, MOO, KAH.
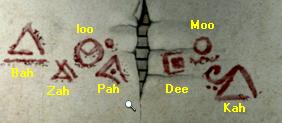
Say...where have you seen these sounds before? Right....on the sound box that the pirate has on his lap. Leave Renée's room and descend the stairs and enter the living room again. Go to the fireplace and open the secret door in the left alcove again and then go up the stairs in the secret corridor. Open the door of the secret room and step back inside.
Secret room
The Pirate and the Gumball Machine:
Go to the pirate and zoom in again on the sound box he has on his lap.
The sound box has 10 buttons and each button has a sound of a Hoodoo Symbol.
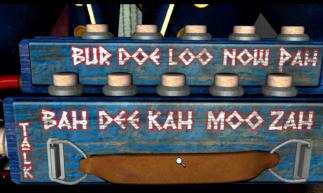
Press the following 7 buttons: BAH, ZAH, LOO, PAH, DEE, MOO, KAH, and then click on TALK and.....
....... the Pirate opens one eye and pronounces the 7 Hoodoo sounds and... .spits out his Glass Eye.
Grab the Glass Eye and store it in your inventory.
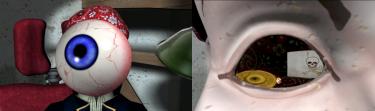
You then look into the pirate's head through the now empty eye socket. Behind the pirate's eye socket is a vending machine coin and a drawing of a skull and crossbones. Grab the vending machine coin and store it in your inventory. Grab the drawing. The drawing turns out to be a note. You read: "The last resident buried on my watch, Will be the beginning of a search through the cemetery, What is written on the gravestone will lead you to another, and on and on until you discover a small treasure." You will see a cursor flashing on the line. So you have to enter the name of the last person buried in the cemetery on the line. You don't know this name yet, so zoom out twice. The note is stored in your inventory.
Turn to the table with the gumball machine on it. Zoom in on the table again and zoom in on the gumball machine again. If you click on the fat button, a gumball will roll out of the machine and you can let Nancy eat it. Don't do that now, but take the vending machine coin from your inventory and throw the coin into the opening above the button and..... a Glass Eye will now appear from the bottom of the vending machine. Grab the Glass Eye and store it in your inventory.
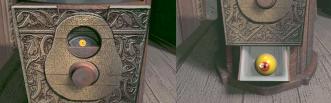
You now have 18 Glass Eyes. Zoom out and zoom in again on the wall lamp hanging on the wall above the table. Click on the lamp with your hand again to open the door to the bare room. Go back into the bare room and then back out into the hallway through the room door. You go down the stairs again and to the sitting room:
Part 5: Find out the name of Bruno's dog:
The Cemetery Puzzle;
Sitting room:
Go to the Grave Book, which is located on the book stand to the right of the miniature cemetery. Zoom in again on the grave book and turn to the last page, page 91. Write down the last name you see on page 91. This is the name of the person who was last buried in the cemetery. The name is Tammy Tassleman and she was buried on October 31, 1075 in the Terra Siesta corner of the cemetery.
Zoom out of the book 2 times. Now open your inventory and click on the letter with the skull and crossbones, i.e. the letter you took from the Pirate. Now, using your own keyboard, enter the name Tammy Tassleman on the line and then press your Enter key and... you have activated the Terra Siesta corner in the cemetery.
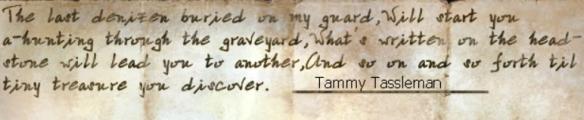
Zoom out to put the paper away again and turn around to the miniature cemetery. Zoom in again on the miniature cemetery. Slide the screen down until it stops. You will then see "Sorrow Park", above the old tree. Then slide the screen to the left until you are all the way in the top right corner. The top right corner of the cemetery is the Terra Siesta corner.
Zoom out 2 times. Leave the lounge and go to the library. Leave the library again through the garden doors.
In the garden you walk to the fountain and then turn clockwise from the fountain to the entrance gate of the cemetery.
Cemetery
Terra Siesta:
Open the entrance gate and walk to the Fountain and then further to the Old Tree.
At the old tree you take the path to the right and you end up at the Arch of Honor in front of Terra Siesta.
the Arch of Honor is therefore at a crossroads.
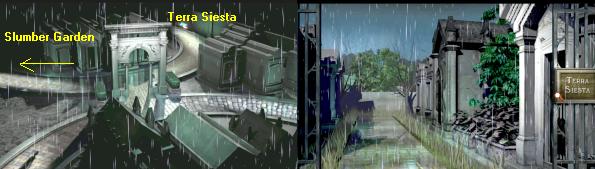
Go up via the upward path, i.e. the path at the top right, and you are at the Terra Siesta. Click on the Terra Siesta nameplate and you will see a close-up of Tammy Tassleman's gravestone. Read the sentence written on the bottom of the stone: "Couldn't Sleep Without A Peep, So When She Died We Burried Her Deep". So the sentence basically tells you to look for someone who snored loudly.
Zoom out, turn around and follow the route back to the garden of the Bolet House and go back inside through the garden doors. Go back to the Grave Book in the sitting room. Flip through the book and look for a name that you think sounds a bit like "Snorring" when you say it out loud and fast. I admit...it is far-fetched and the logic is also far-fetched, but on page 79 you will find the name Constance Norring. If you pronounce Constance Norring as Constancenorring then you can imagine that "cenorring" sounds like "snorring", so "snoring". Make a note of where Constance Norring is buried. That's in the Crowing Crypts. Take the Skull Letter from your inventory again and type the name Constance Norring on the 2nd line and press your Enter key. Crowing Crypt is now also activated
Crowing Crypt:
So back to the real cemetery. Now walk to the Fountain and then take the right path. You come to another crossroads.
Take the path that goes to the top left and you will arrive at the Crowing Crypts.
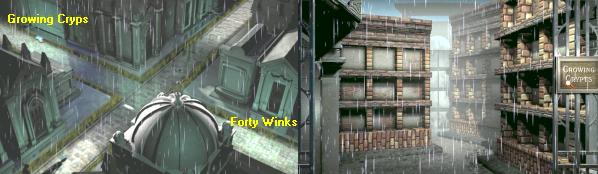
Zoom in on the nameplate and you will see Constance Norring's gravestone. Read the sentence on the bottom of the stone "Never Early, Never Late". Zoom out and go back to the Grave Book in the sitting room of the Bolet House. Now look in the book for a person with a name that you can, with some imagination, pronounce as "Just in time". On page 84 you will find someone called Justin Thyme and this person is buried in Sorrow Park. Open the Skull Letter again and type the name Justin Thyme on the 3rd line and press your Enter key. Zoom out 3 times and then look in the miniature cemetery for where Sorrow Park is. Sorrow Park is located directly above the Old Tree, so to the left of the Bolet Mausoleum.
Sorrow Park
So back to the Cemetery. At the fountain you go straight ahead again and at the old tree you go straight ahead again.
Follow the path past the Bolet Mausoleum to the left and you are at Sorrow Park.

Zoom in on the nameplate and read the sentence on the gravestone again: "All Dressed Up With No Place To Go". Well... you know it by now... back to the grave book in the sitting room. The hint from the Sorrow Park gravestone suggests that you now need to look for someone who was very lonely. But that is not the case...you now have to look for someone who had a lot of relatives, so a lot of "chin". So you look for a name that can be pronounced "many kin", and it turns out to be Manny Kinn on page 85. Manny Kinn is buried in the Writhing Boots Memorial. So type the name Manny Kinn on the skull letter and press your Enter key again.
Writhing Boots Memorial:
Back to the cemetery and walk to the Old Tree. Now take the left path and you will be at Writhing Roots Memorial.
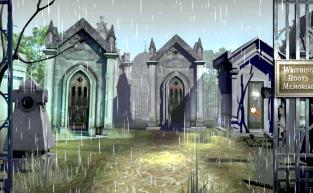
Click on the nameplate and read the sentence: "Died in Debt". Back to the sitting room and the grave book and now search the book for a name that you can make "owe more". On page 77 you will find the name Owen Moore and Owen is buried in Sorrow Park. So type the name Owen Moore in the Skull Letter and press your Enter Key again.
Sorrow Park:
You now know where Sorrow Park is, so back to Sorrow Park in the real cemetery. Click on the nameplate again and now you will see Owen Moore's gravestone. Read the sentence: “A Stand Up Person.” Back to the sitting room and the grave book. You now have to look for the opposite of the sentence again, so instead of someone who is standing upright you now look for a person who is kneeling "kneel down". On page 84 you will find the name Neil Down and Neil is buried in the Crowing Crypts. So type the name Neil Down on the Skull Letter and press your Enter key again.
Crowing Crypt:
Go back to Crowing Crypts in the real cemetery and zoom in on the nameplate again and you will see Neil Down's gravestone in front of you. Read the sentence "All That's Left Of Me Are These Old Bones". Back to the grave book. Find a name that you can make "My remains". It turns out to be Myra Maines, on page 86. Myra is buried in Terra Siesta. Enter the name Myra Maines on the skull paper and press your Enter key again.
Terra Siesta:
Go back to Terra Siesta and zoom in on the nameplate again and you will see the gravestone of Myra Maines. Read the sentence: “Bloomed Too Late, Pruned Too Early.” Back to the grave book in the sitting room. Find a name that includes rose and winter. This turns out to be Rose Winterspring on page 85. Rose is buried in the Slumber Garden. Well....Type the name Rose Winterspring on the skull letter and press your Enter key.
Slumber Garden:
Back to the Cemetery and walk to the Old Tree. At the Oude Boom you take the right path again to the Honor Arch
At the Honor arch you now turn left via the upper left path and you end up at Slumber Garden.
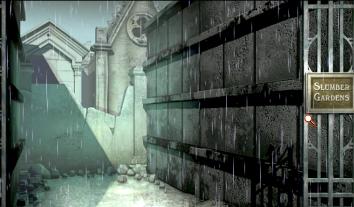
Click on the nameplate and you will see Rose Winterspring's gravestone. Read the sentence: “She Would Have Given You The Shirt Off Her Back.” Back to the grave book in the sitting room. Look for a name that you can turn into a piece of clothing. It turns out to be Polly Ester Givens on page 78. Polly is buried in the Forty Winks Mausoleum. Enter the name Polly Ester Givens on your skull paper and press your Enter key.
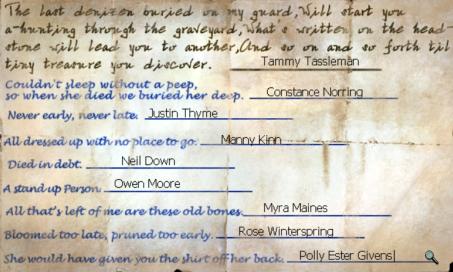
Forty Winks Mausoleum:
Back to the cemetery. Walk to the fountain and then take the path to the right.
At the 2nd intersection, take the path that goes down to the right and you will then arrive at Forty Winks Mausoleum.
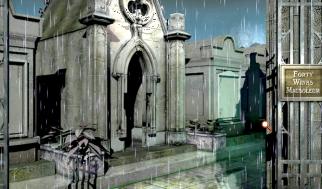
Click on the nameplate and you will see the gravestone of Polly Ester Givens in front of you.
This gravestone does not contain a sentence as a grave inscription. But GIVENS is set in a separate framework.
Click on GIVENS with your hand and.... you open a box and there is a rolled up piece of paper in the box.
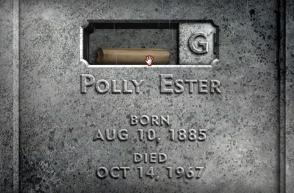
Grab the rolled up paper and you read: "Same name as my dog ate, moved from this grave and burried again." So now you need the name of Bruno's dog, when Bruno was 10 years old. Bess has seen a photo of Bruno as a 10-year-old, in the box of things that Henry sold to Lamont. Grab Nancy's phone and call Bess and......Nancy asks if Bess wants to see that photo again view to find out the dog's name. Bess resists again, but Nancy persuades her again and... you become Bess again.
New Orleans:
Bess Marvin:
You are Bess again and you are back on the balcony. Say "Okay" and.....you will automatically end up back in the Zeke's store. You know that photo of young Bruno is in the back room. You also know that you can't just walk into that back room when Lamont is behind the counter. Go to the counter and......unfortunately.....Lamont is behind the counter again. Talk to Lamont again and say: "That gumbo stand outside, whaddya think, is it pretty authentic?". Yep....great gumbo, but be careful with the "hot sauce". Say: "Ya know, I still feel guilty about that sneezing thing, so how 'bout I go and get you a nice big bowl of gumb?". Well...Lamont is interested in that. The conversation ends automatically. Turn right and leave the store through the outside door. You end up back on your balcony. Now click with the forward arrow on the van in the street and... you are at the:
Gumbo Stand:
The van is a mobile snack bar. You will see the menu on the car. The snack bar has 3 specialties "Granny's Scafood Gumbo", "Lucky Jack's Jambalaya" and "Granddad's Bowl O'Crawfish". You order one of the 3 dishes by clicking on it with your red magnifying glass.
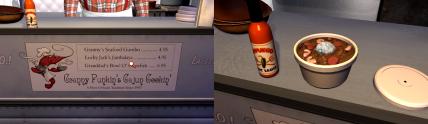
If you want, you can first order and eat the two bottom dishes for yourself. The manager then places the bowl with the food on the counter and adds a bottle of hot sauce. By clicking on the sauce bottle, Bess then puts a generous dash of hot sauce into the bowl. Then click on the bowl and Bess eats the bowl with relish. Then zoom out to return to the menu and try the other dish.
If you have tried the bottom two specialties yourself, zoom in again on the menu and now click on "Granny's Scafood Gumbo". The manager now places a bowl of this dish on the counter. Grab the hot sauce bottle and Bess pours a generous squirt of the hot sauce into the bowl. Click on the lid to close the bowl and then grab the bowl and click it to your inventory. Now zoom out twice to end up back on your balcony. Then click again with the forward arrow on the "Zeke's" door. Open the door and go back inside.
Walk back to the counter and click on Lamont again with your question mark cursor and Bess automatically gives the tub of Gumbo to Lamont. Lamont eats it a little too eagerly because Lamont is now suffering from diarrhea and so he goes to the toilet. When Lamont has disappeared, stand straight in front of the counter again and then move forward, over the counter, turn right and go back into the back room. Walk to the table and click twice on the box containing Bruno's things.
The items come out of the box and are back on the table. Grab the photo of Bruno with his dog. At the bottom of the photo you can read "Bruno and......" Unfortunately... the dog's name cannot be read. Click on the photo with your hand again to remove the photo from the frame and now Bess reads the dog's name and it is....Grant. Bess hears Lamont coming back and flees to the hotel and calls Nancy and gives Nancy the name of the dog. You will automatically become Nancy Drew again:
Bolet House
Nancy Drew:
Close the phone screen. You are back in the hallway on the ground floor of the Bolet House.
Go to the sitting room and open the Grave Book again. Now look for the name Grant in the grave book and.......
.....on page 82 you will find the name Derk Grant. Derek is buried in Writhing Roots Memorial.
Writhing Roots Memorial:
So back to the cemetery. Continue to the Old Tree and take the left path again and you will be back at Writhings Memorial. Click on the nameplate again and the Derek Grant stone will appear. Click on the box at the bottom of the stone to slide it open. It turns out to be a small drawer. In the drawer is a Glass Eye and a Pirate Hat. Grab the Glass Eye and the Pirate Hat and store them in your inventory.
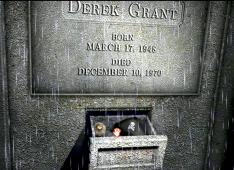
The Pirate hat is just as small as the items in the Iggy dress-up closet, so you may also be able to dress up Iggy as a Pirate.
Wespenverdelging 3e keer:
Zoom out and go back to the garden of the Bolet House. Walk around the fountain to the path that goes to the garden doors of the library, but do not go inside. Now go again via the stepping stones to the Wasp Tree on the hill. Grab the Extermination Syringe again and quickly put all the wasps back to sleep to win a Loquat Fruit for the 3rd time. Grab the fruit and click it to your inventory. Quickly go to theSecret Room, via the left alcove in the sitting room.
Secret Room
Dress Up Iggy 3rd time:
Zoom in again on the ventilation duct and place the fresh Loquat Fruit back in the duct and.....Iggy takes a seat at his dressing up cabinet again. Open thecabinet. The pirate hat is now in box 1. Take the pirate hat from box 1 and place the hat on Iggy's head. Take the collar with parrot from box 6 and click it around Iggy's neck. Take the belt with sword from section 8 and click it around Iggy's waist. Zoom out and..........Iggy waddles back into the ventilation duct and a little later there is a small treasure chest on the grill. Pick up the chest. There is a picture in the lid. Zoom in on the picture and you will read "The Name that opens every Jolly Roger meeting opens me".
Zoom out. Under the skull is the letter code lock of the box. To open the box you must know the name with which every Jolly Roger club meeting is opened. You don't know that name. Zoom out a few times and turn clockwise to the desk. Zoom in on the desk again and grab the Agenda again, which is on the left of the desk. Open the Agenda rand scroll to the May page. You've done this before and Nancy told that today is May 31st. You read that there is a Jolly Roger meeting today at the corner of Rampart and Dumaine, in front of Bess' hotel. Zoom out a few times and call Bess again.... you end up back in:
New Orleans
Bess Marvin:
Infiltrate the Jolly Jumper meeting:
Nancy asks Bess if she wants to infiltrate the Jolly Rogers meeting. Bess now flatly refuses, so Nancy begs. So say "Okay" or "no" again butit really doesn't matter and close the phone screen. To infiltrate the Jolly Jumper meeting, Bess needs a skeleton costume. Hela.....in the box of stuff that Henry sold to Lamont there is one of those skeleton costumes, right? However, Lamont's Zeke's store is now closed. Try and see if you can go to the red front door of Zeke's. That appears not to be possible now.
The gumbo car is also gone. However, to the right of "Zeke's is an alley. So click with the forward arrow to the alley and Bess ends up in the alley. There is a large green garbage container in the alley. Go forward 2 clicks and you will then have passed the garbage container. At the back of the alley see you see a double metal door. Turn left. You are now standing in front of the back door of "Zeke's". However, the door is locked with a number code lock. Zoom in on the code lock. The lock has number keys. What would be the code that you have to enter ? Open the inventory. The only thing Bess has with her is her powder box. Take the powder box from the inventory and click with it on the code lock. Click between the keys and not on the keys. The powder from the powder box will make fingerprints visible on the 2, 5, 8, 9 and 0 buttons
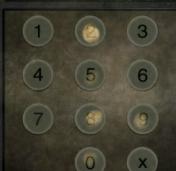
Put the powder box back away and close the inventory screen. You now know the numbers of the code. Now put the numbers in the correct order. Look carefully at the 5 numbers. The amount of powder on the keys is different on each key. The key with the most powder on it is the key that was pressed first. The key with the least powder was therefore pressed last. So the code is 28905. So enter 28905 and the door will open.
Go inside. You're right in the back room. Go forward and then turn left and click on the box twice again to take the stuff out. Then grab the Skeleton costume and click on it again and.....Bess puts on the costume. The skeleton costume is now an icon at the top left of your screen and will remain there until Bess takes the costume off again.
Zoom out and turn around using the turn arrow. Then turn right and go back outside through the Emergency Exit door (the back door). Outside again, turn left into the alley and walk through to the double metal doors. Click with your hand on the hatch between the two planks and .... A Jolly Jumper opens the window and asks for the Password.
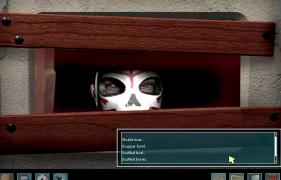
You now have to choose the correct password. Scroll down with the scroll arrow on the right and then click on "Scutled Bones" and ....Bess can enter. In the meeting the Skeleton Man appears and everyone present exclaims "Jean Lafitte", and Bess thinks to herself that she knows that guy. Bess is discovered, by Dr. Gilbert Buford because her phone starts ringing, and brought to the Skeleton Man. Bess ends up back on her balcony and calls Nancy. You become Nancy Drew again:
Bolet House
Nancy Drew:
Secret Room
Bess is still trying to inform Nancy of what she discovered. Bess is somewhat hysterical but she explains that:
"Dr. Buford hid the painting of Henry's parents in the crypt at Bruno's request because it was a clue to the whereabouts of the skull. After Bruno's cremation, Buford wanted the skull for himself. So he was the one looking for the small key in the living room when Nancy arrived. Buford now claims he doesn't want the skull anymore."
The conversation between Nancy and Bees is then interrupted after a loud clap of thunder. Close the phone screen. As Nancy you are bent over the pirate again. Zoom out of the pirate and zoom back in on the ventilation duct. Pick up the treasure chest again and click on the code lock. Well...Bess told you the name that always opens a Jolly Jumper meeting and that is Jean Lafitte.

The letter lock has 13 keys. There are 2 letters on each key. So you have to click on the keys that have the letters of the name Jean Lafitte on them. So click on the following keys: IJ, EF, AB, MN, KL, AB, EF, IJ, ST, ST, EF and... .the chest opens. Grab the Glass Eye from the chest and store the eye in your inventory. Zoom out. You now have 20 Glass Eyes. You still have to find 5 more.
Open the "Short Stories for Tired Eyes" book again and now read the story "Steps in the Right Direction". In this story you read that you have to look for the grave of Charlie Wicker. Charlie will point you in the right direction, but you also need Bruno's Shovel. Open the door to the bare room again, via the wall lamp above the table, and go back to the library via the bare room. Go back outside through the garden doors and turn left again to talk to Renée again, who, by God, is still repotting her flower pots.
Now ask Renée "That shovel over there with the interesting handle-do you think I could borrow it?" Renée says that that shovel had the special interest of Bruno Bolet. Renée uses the shovel to dig roots out of the ground. Ask "You mean, like tree roots?". No.....special roots. Renée needs mushrooms, a special type of mushroom, the Painted Conks. Renée doesn't have time to go looking for mushrooms. So say: "I'd be happy to pick them for you". Renée then explains what a Painted Conk mushroom looks like. A Painted Conk has red spots and they are mainly found in the graveyard. Renée needs 5 Painted Conks and if Nancy wants to pick them for her, she can borrow the shovel. So say "Deal" and then grab the Bag that Renée puts in her flower pot basket. Zoom out and sa ygoodbey to Renée.
Part 6: The Last 6 Eyes:
A: The Forest Maze:
Garden:
Mushrooms for Renée:
So you have to find 5 Painted Conks mushrooms for Renée. A Painted Conk has red spots. Turn right and walk to the garden fountain. Now turn left at the fountain. You are now standing in front of the path that goes to the left through the garden. At the bottom right you can zoom in on a flowerbed, but there are no Painted Conks in it. So walk 2 clicks further forward and Nancy will be standing in front of the bend in the path.
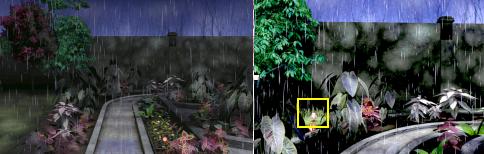
On the left, near the garden wall, is your first Painted Conk mushroom. Click on the mushroom with your hand and Nancy walks over to it and says that this must be a Painted Conk. Grab the mushroom and click it to your mushroom bag. Zoom out and... you are back on the path, but now a little further along. You see a flock of yellow fireflies flying between the trees.
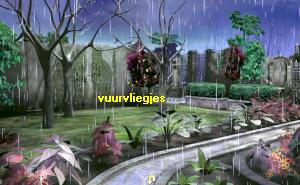
Remember that those fireflies fly there and now follow the path further, via the curved arrow and then forward twice, to the fountain.
So you are now on the other side of the garden fountain. Turn left and go to the cemetery gate. Don't go through the gate yet, but turn around and....
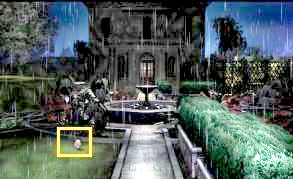
......you will see your 2nd Painted Conk in the left lawn. Go grab the mushroom and put it in your pocket. Now go through the gate to to be at the
Cemetery:
Continue to the fountain. At the fountain take the left path to the left. You arrive in a bare corner of the cemetery and here is your 3rd mushroom.
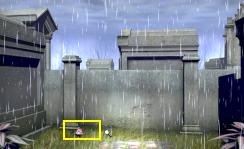
Grab the mushroom and click it to your bag. Turn around and Nancy walks back to the fountain.
Now take the path to the right and at the intersection you also go straight ahead and.....
.......Nancy comes to the back gate of the cemetery. Go through the gate and....you are in it
Swamp:
A rowing boat floats in the water. Walk through and.....there is a tree trunk on the left and your 4th Painted Conk mushroom is on the tree trunk.
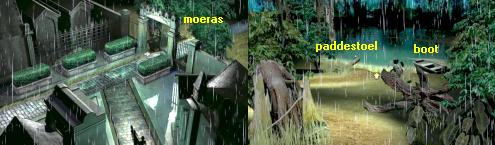
Click forward again and then grab the mushroom from the tree trunk
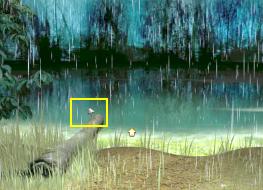
..O....a big fat crocodile emerges from the water and the crocodile bites at Nancy who just manages to jump away in time.

Turn around and walk back to the cemetery gate and through the gate back into the cemetery.
Cemetery:
Follow the path to the left and Nancy will come to the Arch of Honor. Follow the bottom left path to the Old Tree. At the Old Tree you take the uphill path to the Bolet Mausoleum. A path goes down in front of the Bolet Mausoleum. Take this downward path and Nancy will end up on the stairs at the gate that goes to the 2nd part of the cemetery.
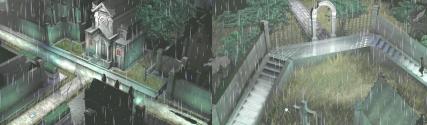
Go through the gate and..... At the bottom left of your screen is your 5th Painted Conk mushroom. Grab the mushroom and turn around.
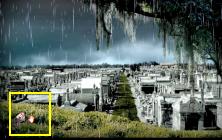
Go back to the Bolet Mausoleum via the right stairs and then to the right, to the Old Tree. Continue down to the fountain and the gate and enter the garden again and walk to the Conservatory. Click on Renée again with your question mark and Nancy will automatically put the bag with the mushrooms in the basket. Nancy tells Renée that she was almost bitten by a crocodile in the swamp. Renée says that the crocodile is one of Bruno's "pets" and that his name is Bertie. Bruno has trained Bertie, and Bertie always appears when you push "his" tree trunk underwater. Ask Renée further "Who's boat is tied up down there by Bernie, do you know?". That rowboat belongs to Renée. Say goodbey. So there is a lantern hanging at the top right. Click with your red magnifying glass to the right of the lantern and you will see the Shovel again. So now grab the Shovel and click the thing into your inventory.
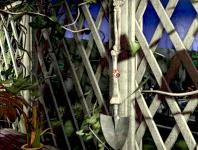
Zoom out and go back to the living room. Open the Grave Book again and now search the Grave Book for Charlie Wicker. You will find Charlie Wicker on page 82 and you will read that Charlie is buried at Sleeping Meadow. Zoom out and go to the miniature cemetery and zoom in on it. Move the miniature graveyard screen to the right until you see the bottom left corner. The bottom left corner, so to the left of the fountain, is the Sleeping Meadow corner. Zoom out and return, via the garden doors in the library and the garden, to the:
Cemetery
Go straight ahead again at the fountain and the old tree and then take the downward path again at the Bolet Mausoleum.
Nancy is then back on the right stairs. Now go down the left stairs and you will end up at:
Sleeping Meadow

You see Charlie Wicker's crypt. Behind the crypt on the right you will see a gate. Click with your red magnifying glass on the name Charlie Wicker, which is at the top of the crypt. You zoom in on it. Under the name Charlie Wicker you see a row of letters WNES... These are the letters of the 4 cardinal directions North, East, South, West. Open your inventory and take out another blank sheet of drawing paper and click the paper on that row of letters and.... with the help of the piece of coal, Nancy traces the series of letters onto the paper.
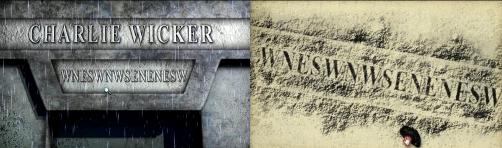
Click on the paper to store it in your inventory. Zoom out and then click forward to the gate on the right behind the crypt. You now end up in:
The Forest Maze Puzzle:
In the screen you see the top view of the forest, at the top right there is a skeleton hand that now raises 4 fingers. At the bottom right is a compass. On the compass you see the 4 directions North (N), East (E), South (S), West (W). The arrow of the compass is now on W. The blue MOVE button is in the middle of the compass. Nancy now has to follow a certain route through the forest. That route is the route you just traced on the paper. So you can always take this paper out of your inventory to view the route.
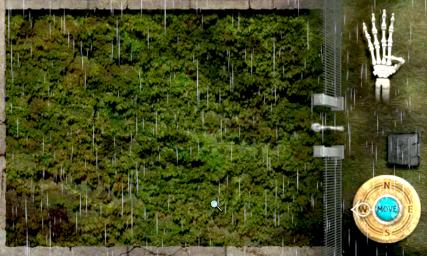
So you always click the Arrow of the compass on N, E, S, W and then press the MOVE button. The Skeleton hand will always raise 1, 2, 3, 4 or 5 fingers. The number of fingers that the hand raises is then the number of steps, so the number of times you have to click on the MOVE. You will then see the piece of bone (Nancy) moving forward from the gate.
|
So the route is as follows: W,N, E, S, W, N, W, S, E, N, E, N, E, S, W. Here we go: Step 1: The compass is already at W and the hand raises 4 fingers. Click MOVE 4 times. You are now zooming in on a piece of forest land. Take the Shovel from your inventory. Then close the inventory and place the shovel on the ground so that the shovel turns red.
Then click and...Nancy goes digging and digs up a Hexagonal Metal Box. Click on the box with the shovel and... Nancy uses the shovel to pry open the lid of the box. The shovel breaks off but the box is open. There is a Glass Eye in the center of the box.
Grab the Glass Eye and store it in your inventory. Then grab the broken piece of the shovel handle and store it in your inventory as well. |
Zoom out via the back arrow and Nancy will automatically be out of the forest again and back in front of Charlie's Crypt. Turn around and follow the route back to the garden of the Bolet House. Stay in the conservatory for a while to dry up from the rain and open the "Short Stories for Tired Eyes" book in your inventory. This time read "The Key to the Statues, The Statues are Key" section. In this story you will read about "Flying Statues" and "Metal Feathers" that can move, with the "master of the Buzzards". You will also see a small drawing that gives you the solution to the riddle. Close the book. Remember the 4 Dragon Statues that stand in front of Bruno Bolet's crypt. There is also a statue on top of the crypt. Well...that's where we're going too again. So walk back to the garden fountain and then turn right and you will see Bruno's Crypt again.
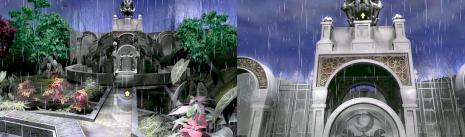
Continue 4 clicks and you will be back on the round tile, in front of the altar. Look up via the Up arrow. You look up at the Dragon's Head that stands on top of the crypt. The Dragon has red Metal Feathers on its head and you now have to put these feathers in the correct position, according to the drawing in the book. However, you cannot click on the red feathers. So look down again via the down arrow and then turn around via the turn arrow. You now see the 4 Dragons standing in front of the crypt again. Each dragon has a red Jewel as an eye. Number the dragons, from left to right, A, B, C, D. You can now press the red eyes of the 4 dragons with your hand.
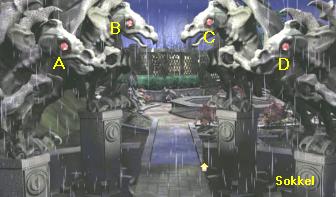
Click on the eye of Dragon C. Dragon C moves its head down and... you see that one of the feathers of the roof dragon has stand upright. Look down again and turn around and now click on the eyes of: Dragon C, Dragon B, Dragon A, Dragon A, Dragon D. You then automatically turn back to the roof dragon and .... The roof dragon now spits a strangely shaped key that falls to the ground. Grab the key and click it to your inventory.
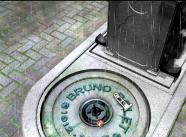
Zoom out and step forward again to the altar. Then turn around and look at the 4 dragons again. The dragons are each on a pedestal. Now zoom in on each pedestal. Start with the pedestal of Dragon A. In the Pedestals there is a keyhole into which the key you just obtained fits. So put the key in the keyhole and....a pipe comes out of the base and inside the pipe is a Glass Eye. Grab the Glass Eye and put in the inventory
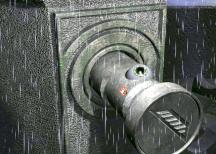
Zoom out twice and then do the same with the other 3 pedestals of dragon B, C and D and you then have found the last 4 Glass Eyes.
Part 7: Who is the villain:
You have now found all 25 Glass Eyes. Enter the Bolet House and, via the sitting room and the secret passage, to the:
Secret room:
|
The Glass Eyes Puzzle: You probably remember that the eye box is in the wall, to the left of the shuffleboard table. So go forward to the shuffleboard table and then turn left and zoom in again on the box in the wall, on which the ship and the squid are painted. Open the box and....Nancy automatically places all 25 eyes in the 25 boxes. You see that the pupil in each eye is in the middle. So the pupils are now looking straight at you. By clicking on an eye with your hand you cause the pupil of the eye to "look" to the left, right, up or down. What should you do now? First read the "Plentiful Pirates and Nautical Nonsense" story in the "Short Stories for Tired Eyes" book. There are a lot of words in this story that indicate direction. The story is on the last 8 pages and at the bottom of each page the numbers indicate how many directional words are on that page. Please note... because the letters of a direction word do not have to be written together. For example: anxious, out hunting. Or sea tricking. So find all the direction words in the story, so: south, west, east, north, left, aim, up, down and write them down in order. You will find 25 direction words. Close the book. Then number the eyes in the eye box, from top left to bottom right, 1 to 25.
You now have to click the pupils of the eyes in the direction according to the direction words from the story in the book. This means that North = up, East = right, South = down, West = left, Up = up, Down = down, Left = left, Right = right. Make sure that the pupils in all eyes are in the middle before you begin. If this is not the case, first zoom out and immediately open the box again to reset the puzzle. Here we go. so you click on an eye until the pupil is in the right position. 1st row: Move: eye 1 down. eye 2 to the left. eye 3 down. eye 4 to the right. eye 5 to the left. 2nd row: Move: eye 6 down. eye 7 down. eye 8 up. eye 9 down. eye 10 to the right.
3rd row: move: eye 11 to the right. eye 12 to the left. eye 13 to the right. eye 14 down. eye 15 down. 4th row: move: eye 16 down. eye 17 downwards. eye 18 to the left. eye 19 upwards. eye 20 to the left. 5th row: move: eye 21 to the right. eye 22 to the left. eye 23 downwards. eye 24 to the right. eye 25 to the left
The back wall of the cabinet opens and in this secret compartment is the Eye Jewel and a rolled up letter.
Take the Rolled Up Letter. It turns out to be a drawing of a Scepter and how to assemble the Scepter. Click the drawing away to your inventory. Grab the Eye Jewel. This is the Head of the Sceptre. Store it in your inventory. So you still need the Stick of the Scepter. Zoom out of the cupboard, turn left, open the door to the bare room via the wall lamp and get back outside to the garden. |
The Scepter:
Garden
According to the Scepter drawing, which you can view again in your inventory, the Scepter consists of a Leg with Skeleton Hand, a Pointed Rod and the Eye Jewel. You already have the Eye Jewel and also the Skeleton Hand because that is the broken part of the handle of the shovel. If you forgot to pick up that part of the shovel again, you will have to go back to the Forest to get the Skeleton Hand now. Walk to the garden fountain and then take the left path to the Fireflies. When you reach the bend stand off the path and see the fireflies, then aim the forward arrow between the 3 trees, between which the fireflies fly.
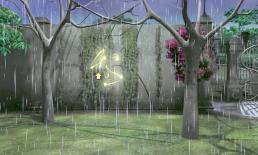
Then go forward 3 clicks to the cemetery wall. You are then in a close-up of a part of the wall covered in ivy.
Click on the ivy with your hand to move the ivy to the side and... you see that the wall is somewhat broken.
You can now click on the wall with your hand in 2 places.
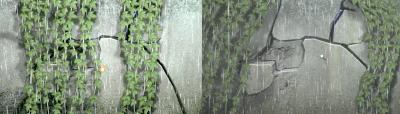
You then push a loose stone in the wall backwards. So push the 2 stones back and zoom out twice. Turn around and go to the cemetery gate. Open the gate and step 1 click forward into the cemetery. Then immediately turn back to the fence. To the right of the fence you will now see the two stones that you just pushed back, sticking out of the wall. Go there and then climb, via the up arrow, via the 2 stones on top of the wall.

You will then see a pointed lightning rod on top of the pillar of the fence. Grab the lightning rod and you have the Rod for the Scepter. Store the rod in your inventory. Now go back to Bruno's Crypt in the garden and zoom in on the round tile in front of the altar. In the middle of the round tile is the hole where you have to put the Scepter. Take the Lightning Rod from your inventory and place the rod in the hole. Take the Skeleton Arm/Hand from your inventory and place it on the arrowhead of the lightning rod. The Skeleton hand opens. Take the Eye Jewel from your inventory and place the gem in the skeleton hand and...
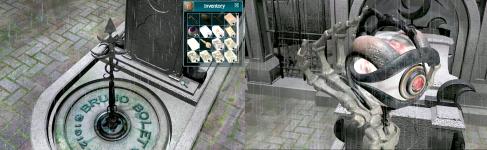
Look at what happens in the video and after this Nancy has dropped down into the crypt and she sees, straight ahead, the long sought after skull.
Go forward to the Crystal Skull. Grab the Skull and click the ugly thing into your inventory and...
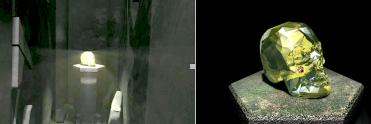
....the crypt starts to close again and..........Renée shows up and she manages to persuade Nancy to throw the Skull to her . Nancy throws the Skull at Renée but......Renée turns out to be the villain. Renée has no intention of letting Nancy escape from the Crypt, so she smears him with the skull and....the crypt closes. So Nancy is now locked up in Bruno Bolet's crypt.
Look down using the down arrow and then click with your red magnifying glass on the black window and.....
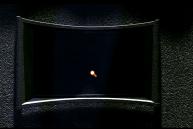
Memory puzzle:
The screen has 40 boxes containing symbols. You can only see the symbols clearly when there is a flash of lightning.
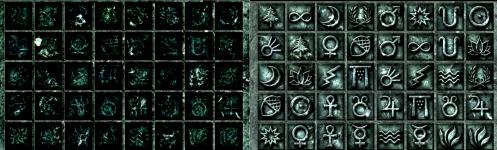
So you always have to click on 2 of the same symbols. There are 20 different symbols in the boxes and there are 2 of each symbol.
So look carefully at the screen when it flashes and always look for 2 of the same symbols and then click on them.
There is no time pressure, so you can take your time
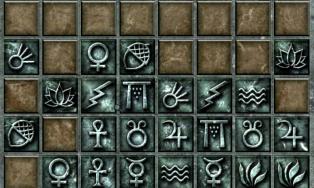
Once the puzzle has been solved, the crypt will open again and Nancy will automatically go up.
Follow the Footsteps:
On the garden path you see Renée's wet, muddy footsteps. Follow the footsteps to the Cemetery. The entrance gate to the cemetery is open. So keep walking and...You hear the sound of an outboard motor being started. Quickly... walk on to the cemetery fountain and then take the path to the right to the intersection and then the path to the right uphill. You come back to the Swamp Gate. Go through the gate to the Swamp and.....
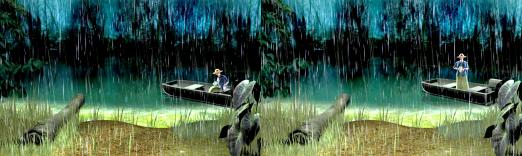
Renée is about to sail away in her boat. A conversation follows between Nancy and Renée in which we finally learn the truth.
Stay tuned. During the conversation you suddenly see Bernie the crocodile appear.

Quickly.....as soon as you get your hand on the tree trunk, click on the tree trunk and...well.....watch all the End Movies.
Once you have quickly clicked on the tree trunk, think Bernie that he gets Marshmallows and.....the animal bites at Renée and....
........Renée falls backwards in fright and the Skull flies up and.....ends up through Bernie's big mouth in his stomach.
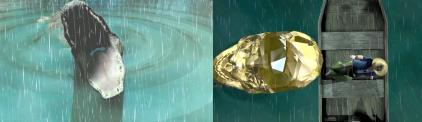
Bernie swims away and Renée is arrested. Look further at it.....
THE END:
After this, a question screen will appear where you select the correct answer, Summer.
Then click through to the next screen and you will see your score.
Click through and you will see the Promotional Video for Nancy's new adventure Nancy Drew 18:

2024: after playing 16 Nancy Drew games I had had enough of these games,
so this Legend of the Crystal Skull was the last Nancy Drew game I ever played and I have no desire to do so
2007: Original a Dutch Walkthrough by: Louis Koot
2024: This English translation also done by Louis Koot