
2019: Walkthrough by: Louis Koot
If you have found this walkthrough via google search or via another site then you have probably not visited my site.
A lot more very detailed game walkthroughs can be found on my site at: www.pcgameswalkthroughs.nl
Part 1: The Key Fragments
A: The 1st Blue Fragment
Chapter 1: Arrival Building:
You are still in the rail cart ........ Turn to the left. You see a closed fence. There is a slot on the right of the gate. Something has to be inserted there. But what. Turn right twice. You see a window. At the bottom left you see, in the frame, a White card with 3 Red Stripes. Take this card ..... it is a Key card. It is stored in your inventory.

Turn back to the left again, to the fence. Then open your inventory and take the newly-picked up Key card out.
Now click this card on the slot, right next to the fence, and the gate will go open now.

Go forward 2 times and then turn left. .....A ladder. Go forward to the ladder and climb up 3 or 4 clicks.

The ladder has brought you on a walkway. Go forward 1 time and then turn left. Look down and enjoy the view.

You look down at the ground level You see the rail cart and you see a yellow power cable. Look up again and turn left. You now see that the path you are on now continues beyond the ladder, but you can not get there. You see that there is also a rail next to the path. Should you be able to bring the rail cart up?

Turn around again and continue forward one time along the path and then to the right. You stand in front of a door.
Go forward and then click on the door button. The door slides open.

Go 1 time ahead and you enter the 1st room of the:
Arrival Building
Room 1: Monitors Room
You are in the 1st room of the Arrival Building. There are a total of 5 rooms. You stand in front of a monitor that. Beneath the monitor there is a slot and a red button. Click the Red Button and......on the monitor you'll see a recorded video. The guy who is now talking to you is Kales, the brother of Zetias. Listen to what he has to say:
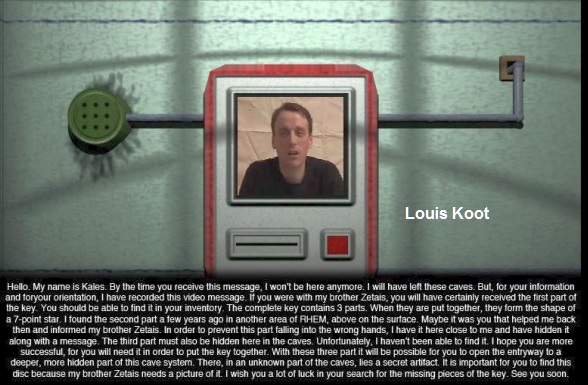
Kales has a lot to tell. He tells you that Zetias gave you the first piece of a Key that consists of 3 Parts. When all 3 parts are combined with each other, a 7-pointed Star is created. The second piece of the key is hidden by Kales, together with a message. The 3rd piece has disappeared, but must be somewhere in the caves. It is your job to find both the 2nd and the 3rd piece of the key. The complete key opens the way to a secret part of the cave and there you will find a Secret Artifact of which you have to take a picture and then you have to show this picture to Zetias.
When Kales has gone you turn right. You see a sketch of the rail cart that is on a lift. Apparently it is possible to raise the rail car.

Next to the sketch is a small screen and a red button below the sketch. Press the red button.......Nothing happens.
Turn clockwise 2 times. You then look t into the next room. There is another sketch to the right of the doorway

On this sketch you see the monitor, where you have just seen the message of Kales. You see that a CD must be inserted into that slot. Go forward 1 time. You are now in:
Room 2: Thermometer Room:
You stand in front of a narrow, elongated box that is attached to the wall. 3 thin pipes come out of the box and disappear into the wall. The box has 9 square buttons.

You can press all these 9 square buttons until eternity but nothing really happens. Should you press them in a certain order? Turn left. .......A window and a Thermometer. Click in the window. You look through the window and see the ground floor level again with the rail.

Take a good look .... in the middle you see a large round manhole cover in the ground and on the right you see the passage to a tunnel. We will go there in a minute. Zoom out of the window. Now take a good look at the thermometer. At the bottom left and bottom right you see a symbol on it. The thermometer therefore has a Left Scale and a Right Scale

Symbol A belongs at the left scale

Symbol B is for the right scale

It's something like the difference between Fahrenheit and Celsius. The red liquid in the thermometer is for scale A at level 15 and for scale B at level 10. You also see that the distance between the lines in the left scale is smaller than between the lines on in right scale. So I think that the ratio between right and left is 1: 1.5. So the distance between 2 lines on the right is 1.5 times large as the distance between 2 lines on the left. So you can also say that 15 Units of A equals to 10 Units B ........ Is this knowledge important to know? I could not tell you at the moment, but I would remember this anyway.
Turn right. You look into room 3.

Go forward . You are now in:
Room 3: The Moon Houses Room:
You're standing at a "Painting" on which you see 3 houses. Each of these 3 houses is a square with a pointed roof and with 4 windows.

A pipe comes out of the painting on both sides .It's is night in the painting and in none of the 3 houses is light. Turn counter-clockwise
You now look through room 3 and you see the back wall. A box with the impression of a key is on the back wall and also a red button.

On the left you see the entrance to room 4 and on the right wall a bulletin board with 7 photos
Go forward. You then stand at the key box. You can click on the key but the box won't go open. You can also click on the Red Button but again..... nothing happens. Turn right. You are right in front of the bulletin board now. There are 7 Photos on the board but It is clear that 1 photo is missing. All photos are night photos and on 6 of the photos you see the Moon. In each of the 6 moon photos the moon is in a different position. If you place the cursor on a photo, your cursor becomes the "Plus" with which you can zoom in on the photo. The photo will then appear larger in your screen. Then place the cursor on the left, or on the right, edge of the photo. Your cursor will then become the Hand. Click to turn the photo. On the back side of each photo are letters

|
What you have to do is to note down which letters are on the back of each of these 7 photos. You must then match these letters to the position of the moon in the photo. If you number the photos, from top left to bottom right, as 1 to 7 then you come to the following list:
You notice that in fact 3 moon phases are missing, namely Top right, Top left and Middle Left. When you have noted all this down on a piece of paper, you turn left 2 times and go forward into: |
Room 4: Clock Room:
You stand at a large round clock. The clock has 1 hand / pointer and this is at 12 o'clock. In the clock there are small squares at 2 o'clock, 4 o'clock, 6 o'clock, 8 o'clock, 10 o'clock. There is a red button at the bottom right of the clock. Click the Red Button. The pointer now makes 1 total revolution and when the pointer reaches a square, a color appears in the square. These colors are: Blue, Green, Red, Purple, Yellow. But if you click the red button again, these colors will appear in a different order in the squares of the clock. Every time you click on the Red Button to move the pointer through the clock, the order of the colors is different.

Turn left. You are standing in front of a large closed metal shutter. Turn right twice. A small hatch and this too is closed. There is an alarm clock on the shelf.

The alarm clock indicates 6 o'clock. Click on the pointer. The pointer goes until 7 o'clock but then jumps back to 6 o'clock. Would the clock be broken?
Turn right and go back to Room 3. You are back in front of the bulletin board. Turn right. You look through room 3 again and see the houses painting again.

To the right is the entrance to room 2 but straight ahead you see now Room 5. Go into room 5
Room 5: Camera Room:
You stand in front of a barred window. To the right of the window a sketch is glued to the wall and a camera hangs to the left. On the sketch you see the three parts of the key you are looking for and you also see how that key will ultimately look like. From Zetias you have already got the middle part of the key and you already have this in your inventory. You can click on the camera but you can not take it. Click in the window for a moment. You will see a stone corridor.

Zoom out and turn left. You stand at a table. Above the table is a cabinet where you will need a key for to open it.

|
To the right of the cabinet hangs a drawing triangle and a ruler and on the table are 2 Moon photos. Zoom in on both moon photos and note down the moon phase and note the letters on the back of these photos.
Moon = Left top = ro. Moon = Top right = gwa. |
We still miss the picture with the moon on Middle Left. Zoom in on the Ruler now. This will now be placed right in your screen. Study the ruler.

The ruler has an Top division and a Subdivision. On the right you see the 2 symbols for these distributions.
Symbol C is thus for the Top distribution

Symbol D is for the Subdivision.

The Sub division ranges from 0 to 25 and the Top division from 0 to 7. If you compare the dashes in the Sub division with those in the Top division you see that the distance from 0 to 1 in the top division is equal to 3.5 dashes in the subdivision . So you can say that the Top Division / Sub division ratio is 1: 3.5. In other words: 1 Unit C equals 3,5 Units D. Note all this down because you'll need this knowledge later on in the game
Zoom out of the ruler and turn right twice. On the right wall you now see a large Circle in a square.
To the left of the circle is the Tripod for the Camera. There is another sketch to the right of the Circle.

Turn right again. You look back at the passage to Room 3. To the left of the passage you see 3 squares on the wall.
This is also a puzzle that you can not do at this moment.

You have now seen all the rooms in this Arrival Building and you've looked at everything. Undoubtedly you have noticed that most of the objects that you have seen are connected by the thin pipes. I do not think it's too far-fetched to say that these objects have to do with each other and that they also affect each other. For the time being, however, we can not solve any of the puzzles here yet. We need more clues and we are going to look for them now.
Go back into room 3 and turn left and enter room 2 again. Turn left again and enter room 1 again. Then turn right and click again on the doorknob of the door to open it again. Go 2 times forward, turn left and 1 forward and.....You stand in front of the gap in the path.

Look down and click on the top of the ladder and then climb down 3 times and you will be back at the bottom of the ladder on the ground floor level.
Turn right twice and go forward to the red striped boards.

Turn right. You now see the rolling grille behind the rail cart. You now also see a turn to the right.
Go forward 1 time and turn right. 1 time ahead, left, 1 time ahead, right and you are now on the Rail path

Chapter 2: The 1st Blue Fragment for the Moon Room Door:
Manhole cover:
Follow the rail path 4 times. Then turn left and go forward 1 time.

You are now standing in front of a large round manhole cover that is in the ground. You saw this manhole cover when you looked out of the window in the Thermometer room of the Arrival Building. Click on the manhole cover to zoom in on it. The lid has 12 light blue buttons and 1 dark blue button in the middle.

The 12 light blue buttons are on the lid according to the hours of a clock. You can press all these buttons but the lid will not open. You will probably have to do this in a certain order. Zoom out of the lid and turn right. You stand in front of a wooden sign board. On the board you see 3 squares . Each of the 3 squares is divided into 4 squares. In the 4 squares of the middle square are the numbers: 2, 5, 3, 9.

Does this not remind you strongly of the 3 Houses on the "Painting" in the Moon House Room of the Arrival Building? These 3 squares are certainly those 3 houses and the squares are the 4 windows in each house. Would the numbers in the squares indicate a sequence? Note it all down
Water Cave:
Then turn right. You now see the entrance of a tunnel. You also saw this when you looked out the window in the Thermometer Room of the Arrival Building.

Go forward 3 times. You are now in the tunnel of the Water Cave. You can turn left and right. Turn left and then go forward 1 time, right, 1 forward, left and you are on the left side of the Water Cave. The path ends at a roller shutter door. There is a Lever on the right of the door. To the left of the path is another sign board. Go forward to the Roller shutter door and turn left to the sign. On this board you see the 3 squares again and now you see in the left square the numbers 8, 12, 4, 10. Note this down again

Turn right back to the Roller shutter door and no click that Lever. The roller shutter door opens but you see immediately that the next roller shutter door, in the room, closes

Go ahead into the room. You are now in the:
1st Moon Room:
You are standing in front of the closed roller shutter door and it has no lever. Turn left. Another Roller shutter door and also this is closed. The lockbox is located right next to the door. The image on the locker box looks a bit like a rabbit. To open this door you need to find 2 Blue Pieces that fit into this Rabbit Headlock. To the left of the door is a Red Button box and a Moon Photo (That's why I named this room the Moon Room) in which you see the moon slightly above the middle.

Click the Red Button. You hear the sound as if something is going open and the small red light on the box is now green

By clicking on this red button, you have opened a shutter window somewhere else. And now we go to that window. Turn completely to the other wall. A "painting" hangs on this wall. Here you see the image of a piece of pipe. Next to the "painting" another Red Button. Do not click on this red button NOW.

Turn right and follow the path back to the Rail cave, so go: 2 times ahead, right, 1 time ahead, left, 1 time ahead, right, 2 times ahead and you're back on the rail path, in front of the manhole cover.

Turn right and follow the rail path again 4 times to the end. You can not go any further because here is the lift with which the rail car has dropped down. Turn right. You will see another roller shutter door in the rock wall. Go forward to the door and click on the red button. The shutter rolls up.

Go forward 1 time. You are now in the:
Water pipe Cave:
Go 2 clicks ahead and then look down to the water in the river for a moment.

You can see that the thick pipes end just above the river and that they discharge water into the river. Or are they sucking up water?

Look up again and turn right. You now look at the back of the cave. Left beside you is the river and the thick water pipes. At the back of the cave, the water pipes are connected to a green pillar via 2 curls. You also see that, the water pipes disappear into the wall via a thick pipe. The path also ends at an open, thick pipe. Go forward 3 times and then turn right. You stand in front of a closed window in the plastered wall. Click the Red Button. The shutter in the window slides up and you see the numbers 5, 3, 9 in between the bars.

Write down the numbers and press the Red Button again to close the shutter. DO NOT FORGET THIS.

Turn right and walk back 1 step and then turn left. You look into a "Alley". On the left is a closed window, but in the back of the alley you now see an open "window".

Go ahead and you stand in front of that open "window". The window has 9 pitch-black boxes. Below the 9 boxes you see a number display that now shows the number 0. If you click in each of the 9 boxes, a Moon will appear and you will see a different number in the display.

In the Arrival Building you have found 9 black Moon Photos. On all those 9 Moon Photos you saw the moon in a different position. The 9 squares of this window can be seen as the 9 positions of the moon in the 9 Moon Photos. From top left to bottom right you name the 9 squares as: Top left, Top middle, Top right, Center left, Mid right, Bottom right, Bottom left, Bottom right.
On the back of each of the 9 photos you have seen letters. On one of the photos you did not see a Moon. If you don't click in any of the 9 squares here then you will not see a moon and the number 0. So you can conclude that the number 0 belongs to the photo on which no moon can be seen. What you must do now is to click in each of the 9 squares and then link the number that appears in the digit display to the relevant moon photo and the letters on the back of that photo. Make a clear table, such as this
| Position of the moon on the photos | Letters at the back side of the photos | Corresponding number in the window |
| No Moon | mi | 0 |
| Moon in the middle | lim | 1 |
| Moon at top left | ro | 2 |
| Moon at center below | nek | 3 |
| Moon at top right | gwa | 4 |
| Moon at bottom left | su | 5 |
| Moon left center (you will not find this photo) |
Not found. Later you know that it must be "wes" |
6 |
| Moon at bottom right | jok | 7 |
| Moon at up center | pa | 8 |
| Moon at center right | tu | 9 |
When you're ready writing this all down, turn to the right and go through the crack. Then turn left and you are again in front of the roller shutter door. Click on the red button again to open the door and then follow the rail path 2 times forward, left, 4 times forward and left. You are again standing in front of the entrance of the water cave tunnel. Go ahead 2 times into the tunnel.

Last time we went to the left. Now we are going to the right. So turn right, forwards, left, forwards, right. You see a "building".

Enter the building and the turn left. Unfortunately .... the corridor is blocked on this side by a closed gate.
On the fence you see the image of a piece of pipe.......you saw this before, in the room behind the 1st Roller shutter door in the left side of this water cave.

Turn around and then go forward and then left. You are now faced with the:
Revolving door:
You see a ladder in the revolving door. On the right is a round Red Button. Above this button you see a shallow gray niche.
Go forward to the ladder and then look up the ladder. Above your head is the ladder hatch closed with a fence. So you can not go up here.

Look down again and turn around using the slant finger that you get left and right. Then move forward 1 time and turn 2 times counter clockwise. You look again at the revolving door and the round red button. Now click the Round Red Button. From above, a Square Red Button is now sliding down in the shallow niche.

Click on the Square Red Button and ..... the revolving door now turns 1 turn and you can now walk straight through it to the other side ......... Wait a minute .... To spare yourself a lot walking back and forth it is wise to send the Square Red Button back up again. So press the Round Red Button again and the Square Red Button disappears again. DO NOT FORGET THIS.

Now advance 2 times through the Revolving door. On the other side of the of the revolving door you stand in a square corridor. Turn left. There is a dense window in the wall here.

Turn right again and now go forwards 3 times.
The square corridor is now a tunnel again. In the back of the tunnel you see another sign where the 3 squares of the 3 houses are drawn.
So continue to the back of the tunnel and you're at the sign.

On this sign board are the numbers in the right square are: 6, 11, 1, 7.

Write this down again and turn left. You stand for the entrance of the:
Rear Side Cave:
You see a Blue Ribbed Door. Go in and then click on the door button. Well ...did you really think that a door just opens...no.

Turn clockwise to the right wall. On the right wall is a large round panel in which you see a number of small circles. In these circles you see lines and each circle has an arrow.

If you click the Red Button, the large circle will rotate and all those small circles will come to a different position. Each time you click the Red Button you turn the big circle. At this point I have no idea what to do with this, so we shall leave this alone for now. Turn around to the left wall. On the left wall is a panel that consists of 5 numerical boxes. Below each number box is a button with which you can put the numbers 0 to 9 in the boxes.

This panel opens the door here, but you have to know the correct number code that you have to enter on this panel. And we do not know that yet.
Turn left, forward, right, forward and right. You are now at the entrance of the:
Middle Side Cave:
Go forward and turn right. On the wall you see 5 Green Plates. On each Plate you see 2 Pins.
From every Plate comes a pipe that disappears into the wall. On the bottom pin of the most right picture is the letter E. Or isn't an E?

These 5 Green Plates are connected, via the pipes, to the Digit panel in the rear cave. Again ..... no idea what we have to do with this, but it looks like that we have to look for Letters that we must put on the pins here. Turn right, forward, right, 2 times forward and turn right again. You are now at the entrance of the with :
Front Side Cave:
Again a Blue Ribbed Door. Go inside and try the door button again. Unfortunately...no luck.
On the right wall you see again 5 of those Green Plates with Pins and Pipes and ....

...... on the left wall also a number panel with 5 boxes.

We're really not making a lot of progress, do we? A lot of puzzles found but no idea yet how to solve them.
Turn right, forwards, right and go forward, back into the square corridor. Turn right again.
You look through a grating window and through this window you look into another square corridor. How to get there?

Turn left and go forwards, back to the Revolting door.
NB: If you did not send the Square Red Button back upwards, on the other side of the Pivot door, go back through the Pivot door to do that now. The Square Red Button must be upwards NOW or you'll get into a lot of trouble right away.
There is also a round red button on this side of the revolving door. Click on the Red Button ..... The Pivot door turns again and the Ladder is now on this side.

Go forward to the ladder and look up. He .... no fence above your head no, so climb up the ladder once.
You stick your head out of the ladder hatch and you see the entrance of an upper corridor and, left, a red button.

Climb up 1 more time and you are now in the:
Round Top Hall
You are now exactly above the Revolting door and you are facing a corridor. Turn left and press the Red Button.

You hear the sound as if something open up somewhere and a small green light is lit above the Red Button. Turn right again and go forward, right and forward again. You can not go any further. In front of you is the end of the corridor and there you see a slit in the floor. Right again the inevitable Red Button.

Click the Red Button and ....... Through the slit in the floor that Fence, which closed the corridor to the left on the lower Level, is coming up, so that way is now open.

Turn left or right twice, 1 time forward and turn left. You are back at the entrance of the Round Top Hall. Take a good look at the floor of the Round Hall. That floor is the TOP of the Revolving door and you will see 4 Shutters. The rear hatch is where you came through. The right hatch and front hatch are closed and are also covered with a Red fence. The Left hatch is also closed but has no red Fence. On the right is now the Square Red Button

NB: If you do not have the Square Red Button here now, then you have forgotten to send the button back up again. You will have to correct this first, so climb down the ladder in the rear hatch and then turn the Revolving door so that you can go through it to the other side of it, then press the Round Red Button to send the Square Red Button upwards.
If you press the Square Red Button then the Revolving door will rotate 1 turn under the Round Hall. Under the front red fence is a metal hatch and this metal hatch will turn to left hatch when you press the Square Red Button. . Click the Square Red Button once......... The Metal Hatch is then in the Left Hatch and the Rear Hatch is now closed. Click on the Square Red Button again and......That Metal Hatch is now in the Rear Hatch

The Ladder is now again under the Front Hatch. Go forward to the Rear Hatch and look down. Click on the Metal Hatch to open it and you'll see a paper.
On the paper there are 3 blue numbers. Behind each number is a time stamp. Note this, so: 4. 10:00, 5. 2:00, 6 5:00

Close the hatch and look up again. Turn around twice and go back into the corridor and turn around twice. Click the Square Red Button again to rotate the Rotating door again. Now the ladder is under the Left Hatch and this is now open. So head back into the Round Hall and turn left and look down.

Now descend the ladder using the Downward finger and when your down turn around. You are in the:
Secret Corridor of the Revolving Door:
The chest:
You stand in the Revolting door with your back at the ladder and you look into a corridor. In front of you stand a large chest in a niche. Go forward to the chest

In the lid of the chest you see a rectangular panel with 3 Circles. In the middle of each circle you see a smaller circle in which you see lines. Also you see, in each circle, 8 small squares. If you have paid close attention then the 3 small circles with the lines are familiar to you. You have seen them on the large Round Panel in the Rear Side Cave. On that large Round Panel all those circles have an Arrow
Thing of the 3 large circles as a clock, then the 8 squares are on:
12 hours, 2 hours, 3 hours, 5 hours, 6 hours, 8 hours, 9 hours, 10 hours. The squares at 12 o'clock are now gray.

In each circle you can click on the small circle and then the next square will become gray. The chest must be opened. But How? Well ... the chest goes open when you make the right square gray for each of the 3 circles. How do you do that? For this you first have to go back to the large Round Panel in the Rear Side Cave. You have to turn that panel so that the 3 small circles, that are the same as here on the chest, are exactly as on the chest. So make a drawing of the 3 small circles on a piece of paper.
Turn left 2 times and go back to the ladder in the Revolting door.

Climb all the way up again into the Round Top Hall and then turn right and go into the hallway. Then turn around twice, so that you can see the Round Top Hall again. In order to be able to go back to the Rear Side Cave, the ladder has to come back to the Rear Hatch. So press the square red button again and the ladder is back in the rear hatch

Go there, look down and descend the ladder again.
Down in the Revolving door, turn around and follow the square corridor and then the tunnel all the way back and then to the left the Rear Side Cave:
Rear Side Cave:
Turn to the right, to the large Round Panel

On the large round panel you see 8 small circles in which you see lines. 3 of these circles are exactly the same as the 3 small circles in the panel on the chest. But he circles in the large round panel are in the wrong position. You must now turn the large Round Panel so that each time the three circles of the chest will be placed exactly as they are on the chest. Then look at which direction (hour) the arrow of these circles points and note this down. You rotate the Large Round Panel by clicking on the Red Button, to the right of the panel. I can not tell you how many times you have to click on the red button to get the 3 circles in the right position. You have to do this for each of the 3 circles separately. Here is the solution:

The arrow of the Left Circle indicates 10 hours. The arrow of the Middle Circle indicates 3 hours. The arrow of the Right Circle indicates 9 o'clock.
Note this down and return to the ladder in the Revolting door. Back at the Revolting door you climb up to the Round Top Hall again via the ladder and then go ahead into the hallway. Then turn back to the Round Top Hall. To return to the chest, the ladder must be back in the Left hatch. So now click the Square Red Button 3 times and the ladder is back in the Left hatch. Go down the ladder again, turn around and go back to the chest:
Opening the chest:
Now click on the left circle 7 times and the square at 10 o'clock is gray.
Click twice on the middle circle and the square on 3 o'clock is gray.
Click 6 times on the right circle and the square on 9 o'clock is gray.

Now click on the handle of the chest and the box will now open. There are 9 Numbers in the chest.

Zoom in with your + on each of the 9 numbers. The number then rises from the chest. Then turn the number with your "hand". On the back side of each number are 2 holes. These 2 holes correspond to the position of the pins on the 5 Green Plates in the Middle Side Cave and in the Front Side Cave

Due to the position of these holes, you can determine which Number you have to attach to which Green Plate. So draw these numbers exactly over on a piece of paper but remember that you see the numbers in mirror image. If you look at these 9 numbers, you should now also realize that the E, you saw in the Middle Side Cave, is not E but the number 3.

When you have done all this, close the chest and zoom out. Turn right. You look into the corridor. This is the corridor that you saw on the other side of the Revolving door before, when you look through the grating window. Go forward 1 time. You are standing in the round hall of the corridor. Turn right. You look into a deep niche and in this niche is another tube painting. On the right side is a red button.

Go ahead and then click the Red Button. You hear the sound of a shutter that, somewhere else, opens or closes and the small light is green now

.Zoom out and turn 2 times, left or right, to the opposite wall. Here you see a Digit panel. This is the:
Wall safe:

The top panel has 4 number boxes. Above and below the boxes is a green arrow with which you put the numbers in the boxes. Below the numerical boxes there is a red panel in which you see "gwalimwessu". Left is again the inevitable Red Button. That red panel must be open, because in the space behind it is something you need in the Moon Room If you look closely at the letters in the Red Panel you will recognize 3 of the words that were on the back of 3 of the Moon photos. So these are: gwa; lim, and su. Remains "wes".
I think that "wes" is part of the missing photo on which the moon should be on Middle Left. Now look in your table of those Moon photos and look up the number associated with "gwa, lim, wes, su. Gwa = 4, lim = 1, wes = 6, su = 5. Number the 4 number boxes from the left to the right, as A, B, C, D and then......
put the number 4 in box A, the number 1 in box B, The number 6 in box C and the number 5 in box D.
Click on the Red button and the Red Panel opens

In the Wall Safe there is a Blue Fragment. This is the 1st Piece for the Rabbit Head Lock of the Roller Shutter Door in the Moon Room, which you are looking for.
Take the Blue Fragment.....It is stored in your inventory. The red panel closes again with a bang. We go on with:
Chapter 3 and 4: 100% Power and the 2nd Blue Fragment
2019: Walkthrough by: Louis Koot
