
2018:Walkthrough door: Louis Koot
If you have found this walkthrough via google search or via another site then you have probably not visited my site.
A lot more very detailed game walkthroughs can be found on my site at: www.pcgameswalkthroughs.nl
Chapter 1: Valadilene
Hotel:
Kate enters in the lobby of the hotel and has just taken off her coat and put her suitcase on the floor next to her. You now have control over Kate.
Click on the suitcase. Kate is tired from the long journey and therefore has absolutely no desire to drag even further with her heavy suitcase. Even a village hotel must have a staff to take the suitcases of the guests to the rooms? On the wall, next to Kate, you can see a bulletin board. Click on the bulletin board and Kate will take a Brochure from it.

The brochure appears large on the screen. The brochure has several pages and via the arrows, at the bottom right, you can scroll through the pages and close the thing again.

The brochure is an advertising leaflet of the "Voralberg Toy Factory" about their luxury mechanical toys, the so-called "Automatons". Read the brochure. Especially important is what is told on page 2 about the Voralberg Windup Key. The "Voralberg Windup Key" is a special key with which the Automatons have to be wound up. Each Automatons must first be wound up with such a key. Have you read the brochure, then close it and it will disappear into your "Personal Files" inventory. There you can always read it again if you need it.
Now move your cursor to the left edge of your screen and then left click.
Kate goes there (via a double click she runs) and she arrives at the next screen. To the right of the fireplace a boy sits at the table....the boy is drawing.

Click on the boy and Kate walks towards him and addresses him. This boy is Momo and he just refuses to show Kate his drawing. Your Dialogue book now appears and you will now see 2 available options, "Kate" and "Help". Choose "Kate" and Kate now introduces herself to Momo.
If you only get the Kate option now, you have forgotten to click Kate's suitcase. Go do that then. Momo mention the name Hans and then again refuse to show his drawing. Now choose "Help". Momo finds himself strong enough to carry Kate's heavy suitcase, only he has no time for it.
Click on the arrow, at the bottom left of your dialogue book, to end this conversation. Now go back 1 screen, to the right to the desk. Zoom in on the desk and you will be zoomed in on the Bell automaton. Click once on the red button. Nothing happens. Click on the puppet's back. Kate now kindly informs you that she needs a key to ring the bell. This key is just in front of the automaton on the desk.
 \
\
Pick up the key and it will disappear to your items inventory. Right click to open your inventory and then click on the "Reception Bell Key". The key will now appear at the bottom left of the game screen. Click on the Automaton's back again and the key will wind up the Automaton and it will hit the bell 4 times with the hammer. The Hotel owner now emerges. Click on the hotel owner to talk to him and in your dialog options click on "Help". A long dialogue follows, in which Momo also does his say.
If you only get the Kate option now, then you have forgotten to click Kate's suitcase.

Then Momo will be sent out of the hotel and, in his anger, he throws something on the floor.
The Hotel owner now tells you that Anna Voralberg has died and in the meantime he picks up your suitcase and escorts you upstairs to your room (room 6).

Inside the room, the hotel owner will remind you of the fax that has been received for you and that is on the table behind the bed.
The hotel owner then leaves your room again, without even nagging for a tip.
Click on the table, that stand in the corner behind the bed. Katie is going there. Then click on the Fax that is on the table and read it. The fax is from your boss, Edward Marson.

Take note of the telephone number of your office, top right: 12458902. Write it down. Click the fax away and it will disappear to your "Personal Files" inventory where it will be stored as Fax1. Kate thinks that she now has to inform her boss about the death of Anna Voralberg. So open your inventory and click on your Cell Phone and the thing will appear enlarged in your screen. Enter the telephone number of your office in 12458902 and then press the "Send" button.

Kate gets her boss on the line and informs him about the death of Anna Voralberg. Her boss sees no problem at all here, because there are no heirs. He tells you to go to Anna Voralberg's notary. Boss will fax you a fax with the address and then abruptly cancel the conversation.
Right click to store the phone again and then click on the bottom of the screen, next to the bed to return 1 screen. Click on the room door and Kate goes out into the hallway. Click on the window, in the back of the hallway, and on the next screen you just click on the stairs and Kate walks down the stairs and comes back into the lobby. Click again on the hotel owner who is behind his desk again. Your Dialogue Book will appear again and now there are 7 options on it

Again you can use all options to find out more about Anna and Hans Voralberg and about Momo and Automatons. But you MUST use the "Mission" option. Through the Momo option you discover that this boy is a bit simple. Anna Voralberg took care of Momo because he reminded her of her missing brother Hans. Furthermore, you will find out that Anna Voralberg, although loved by the villagers, was a very isolated and private person. Through the Hans option you learn that Hans Voralberg was Anna's younger brother who apparently died young and that no one in the village has ever met him.
This is all very interesting information but not relevant. Select the MISSION option and.......
Kate will ask the hotel manager if a Fax has come for her. The man looks for the fax and finds it and then gives Fax # 2 to Kate

Read this Fax. It is the promised fax from her boss and it is intended for Maître Alfolter, the notary of Anna Voralberg. Put the Fax (Fax2) in your "Personal Files" inventory.
Close your Dialogue Book and walk 1 screen to the left. You see again the table that Momo was sitting at. Do you remember that Momo, in his anger, has thrown a few things on the floor when he was sent away by the hotel manager ?. 2 of these items are on the floor in front of the table and the fireplace. Click on it and Kate picks up 2 Gears. You have to click on each gear separately. When you have picked up both gears from the floor, zoom in on the table where Momo was sitting on. On the table are also 2 Gears so pick them up also.

You now must have to have 4 gears in your items inventory.
Close the close-up and walk 1 screen back to the desk. Then, to the right of the coat stand in the corner, click on the front door and Kate steps outside and she is standing in front of the hotel.
Notary Alfolter
Kate is now outside in front of the hotel. Walk to the bottom of your screen and you will see the main street of Valadilene.

Well, Kate must now visit that notary, Maître Alfolter. Click to the left of your screen and Kate will walk to the left and on the next screen you will walk through the bottom of the screen to the next screen. Here you see a man standing in front of the bakery shop. The man wears a white apron, so it will be the baker himself.

You can talk to the baker man but it does not make much sense. He has nothing to tell you and Kate will not want to buy fresh baked baguettes either. Anyway....the bakery shop is closed today because of the funeral of Anna Voralberg. So just walk on to the left and keep doing that until you reach the next screen. You will arrive at a large house with 2 benches and a lamp post in front of it. This is the house of Notary Alfolter.

If you take a good look at the left bench, you can see that there's something on it. So click on the left bench and Kate walks towards it and picks up what's on it. It turns out to be a newspaper and you read a few articles about the death of Anna Voralberg. Put the article in your "Personal Files" inventory.
Click on the front door of the house and you will be zoomed in on the Door automaton of this house. The Automaton holds up his hand as if he wants something from you. Open your "personal Files" inventory. Make sure that the "hand" is on and click on Fax #2. This Fax 2 will now appear at the bottom left of your game screen. Then click with your cursor on the outstretched Hand (1) of the automaton and Kate will put fax2 on the hand.

Then click on the chest lever (2)of the automaton. The head goes down and the eyes now focus on the fax. Then click on the Shoulder lever (3) and view the cut scene.
Maître Alfolter now reads the fax, through the eyes of the automaton, and he opens the door. Kate goes in and she comes into the waiting room.
Walk to the bottom right of your screen and on the next screen you click on the big door.

Kate enters into Alfolter office and is invited to take a seat. Click on the left chair. Kate sits down and your Dialogue Book appears.

Choose the MISSION option (of course you can choose all other options first, I'm not going to tell you that every time).
Maître Alfolter says that there is indeed an heir for the Voralberg Estate. It turns out that Anna Voralberg's brother, Hans, is not dead . Alfolter now reads a section of a letter, written to him by Anna Voralberg. Kate is not happy. Alfolter then gives the letter to Kate. Read the letter completely and you find out that the last known place of residence of Hans Voralberg is Syberia. At least that was 6 months ago. Close the letter and this also disappears your "Personal Files" inventory. There is another talk with the notary, who mentions to Kate that if she wants the sale of the factory to be done, she has to get the signature of Hans Voralberg under the sales contract and for this she will have to find him first . Alfolter also refers Kate to the Voralberg Archive in the factory.
Click on the door and Kate will enter the waiting room again. Walk to the bottom of the screen to get to the next screen. Next to the front door stands a coat rack and at the bottom of the coat rack you see an object. Click on that object to pick it up and it will disappear to your items inventory. It is a Telescopic Key.

Go through the door to be outside on he street again
To the Voralberg Estate:
Follow the street back o the right and keep doing that until you have arrived on the screen past the bakery. Kate will now receive a phone call.

It's a call from Kate's boyfriend Dan and Danny Boy is nagging and nagging why Kate is not with him. In short, Danny Boy is a complete as hole.
After this call you remain on this screen. To the left of Kate you see a big house and to the right you see a fence with 3 lampposts in front of it. Behind the fence is the Voralberg Estate with the Factory and the large house of Anna Voralberg. The entrance is behind the middle lamp post. Click at the middle lamp post and Kate walks towards it. Zoom in on the iron gate.

On the left door of the gate you see 2 Automatons. A thick automaton is on the bottom part of the door with a big key in his chest.
At the upper part of the door hangs a smaller Automaton. Between both Automatons you see a lever.

Click on the Key (1) of the lower Automaton. Then take the Telescope Key from your items inventory and then click the upper Automaton (2). Then click the lever (3).
Your screen will now turn black for a moment and then the left door will open.

Walk through the gate and then straight ahead and Kate is standing in front of a nice big Fountain.
Voralberg Estate: Part 1:
House

There are 5 paths you can follow from the fountain. The bottom path is the path from the gate. The 4 other paths each go to a location on the Estate. The top right path goes to the station. The right center path goes to the house of Anna Voralberg. The bottom left path goes to the Factory. The top left path brings you to a platform.
Now first follow the Right Center path to the next screen. You will then see the large Voralberg House.

Click on the stone steps and Kate walks towards it. Click on the front door and Kate walks towards it. Unfortunately the door is locked. Kate automatically goes down again. Follow the path to the right and then around the corner and on the next screen you walk all the way to the right. You will then see the back side of the large house.

You see a Ladder standing against the facade of the house and to the right of it you see the back door. That back door is locked, so walk to the ladder and zoom in on it. It is a Ladder Automaton and Kate needs a key for the ladder to slide out. In the side of the thing you see a cross-shaped slot where the key has to be inserted. Zoom out and walk to the right and then follow the path to the right and then the maze.

A gardener is at work in the maze. You can of course talk to her, but she has absolutely nothing sensible to tell you, so just click on the large open gate, left of Kate. Then go through the that gate and you are in the maze. You see that the path continues, with a curve, to the next large closed gate, but where Kate is standing now you see a smaller gate and it is open.

Click at the small gate and ...... Kate comes at a fountain. Zoom in on the fountain and take out the cross-shaped-key

Zoom out and go all the way back to the Ladder.
Zoom back in on the ladder and then grab the newly found key from your items inventory. Then click on that cross-shaped slot in the left side of the ladder.

The ladder now extends completely. Click on the ladder and Kate climbs up and climbs through an attic window

Kate is now in the attic of the Voralberg house. Go 1 screen to the left and then zoom in on the school desk that is on the left.

Kate open up the desk. Take out the Inkwell and the Diary.

The Inkwell disappears to your items inventory, but the diary appears in your screen. You can now read this diary of Anna Voralberg. It is a lot of reading, but if you find it interesting you should read. You can also just click it away. The diary is placed in your "Personal Files" inventory, so you can always view it again. Close the close-up.
Walk 1 screen back to the right and then go another screen to the right. Then click on the White Sheet, in the back, and .....

Kate walks up to it and then stands in a dark corner of the attic. However, you see a bare lamp (bulb) hanging. Click on the lamp bulb to have light...

and....... Momo is here too. Kate walks back to the skylight, to Momo. Momo wants Kate to make a drawing of a mammoth for him.

Click on Momo for a short conversation followed by Momo giving Kate a piece of paper with a pencil.
Close your dialogue book and walk back 1 screen to the right. Then click on the white sheet again. Kate is back in the attic corner by the light. On the wall you see a wooden beam and in this beam you see a drawing scratched. Zoom in on this drawing. It is a mammoth. Take the piece of paper, that you received from Momo, from your inventory and click on the mammoth and......

Kate is scratching the mammoth over on the paper. Click the drawing away..... It will disappear to your "Personal Files".
Go back to the left and then to the bottom of your screen and you are back at Momo.

Pick up the mammoth drawing from your "Personal Files" and click on Momo to give hem the mammoth drawing
Momo thanks Kate for the drawing and then Momo asks you to follow him to his secret hideout. Momo climbs out through the attic window and runs to the Fountain,
The Mammoth of Hans Voralberg
Follow Momo:
Well, do not stay here like a salt bag...You must follow Momo. Click in the attic window and Kate climbs down again. Go left and go back to the Fountain. Momo is already waiting here and continues into the street. So go down the bottom path and through the gate and you'll be back in the main street.

Go right. Momo runs on. Now just follow the street all the way to the left. Just keep moving to the left until Kate can not continue. You go past the bakery and past the notary's house. At the end of the street you will see Momo standing at a gate, at the top of the steps. Click on Momo and he opens the gate and continues.

Follow Momo through the gate, over the bridge, up the stone staircase, over the stone platform to the next staircase.

Walk up the stairs and then continue through the forest .....

....across the beam bridge and past the old rowing boat and ........

....... finally you come to Momo who sits down on a rock. Click on Momo to chat with him. Use all dialog options again.

Momo tells about a doll from Hans. That doll must be somewhere in a cave here.
Then walk along the path, to the left of Momo, backwards.
Kate then comes to a side arm of the river and on the other side you see the entrance of a cave. Kate wants to go there, but she can not cross the river.

Go back to Momo and then, on the right, go up the stone staircase. Above you come to the wooden Dam.

On the left you see the turning handle. Click on the turning Handle and Kate will try to open the Dam. Kate does not succeed. Go back to Momo and click on him and ask him for his help by choosing the "Help" option. Kate and Momo walk up to the Dam and Momo now tries to turn that turning handle.... Unfortunately, Momo is too strong and the handle breaks off. Momo walks back to his seat.

Pick up the broken off part of the turning Handle and put it in your inventory. Walk back to where Momo is and then continue to the left and then to the old rowing boat. On the left is an oar in the water, next to the rowing boat. Click on the oar and Kate requests it to be fished out of the water. Kate can not reach it, the oar is too far away. Now take that broken of part of the turning handle from your inventory and then click on the oar again.

Kate slide the oar to her but she refuses to touch the oar because it is so dirty and wet. Go back to Momo and ask his help again.
Kate and Momo walk back to the rowing boat and Momo now fishes the oar out of the water and walks back to his seat.

So back to Momo, click on him again and ask his help again.
Now Kate and Momo both go upstairs again, to the dam where Momo then puts the oar in the turning mechanism and opens the Dam and then runs away.

Now go back to the end of the path, to the left of where Momo always sat (Momo is gone now) and see ..... the river is has now fallen dry here. So click in the cave entrance and Kate goes there.

Enter the cave and walk all the way through the cave until you are completely at the back of the cave

There is something on the ground. Click on it. It is a Mammoth toy.

Pick up the Mammoth and zoom out and then leave the cave again and return to the main path. Now follow the main path back until you are back in the main street of the village. Follow the main street again to the right, to the entrance of the Voralberg Estate and go through the gate to the Fountain.
Voralberg Estate: Part 2: The Factory
Oscar
Now follow the upper left path all the way until Kate has reached the canopy platform.
Here you see a large cylinder standing on the canopy platform and on the iron pillar, behind the right most of the 3 lights, you see a lever.

Click on the lever and....... a gripper arm comes out of the factory hall and it grabs that big cylinder and brings it into the factory.

Walk back to the left and back to the Fountain and then follow the Lower Left path and continue to the canopy bridge.

Go over the bridge to the entrance of the Factory, click on the doors and Kate will enter the
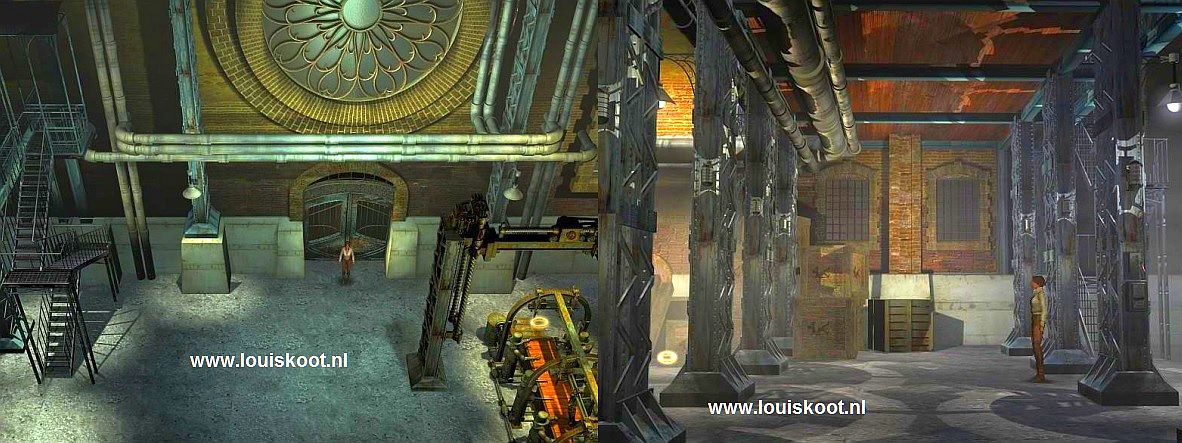
Factory Hall.
You can see an iron staircase going up. Move your cursor to the bottom left corner of your screen and then click. Kate walks 1 screen to the left and then just past that iron trap.
Click on the left side of the screen and Kate goes another screen to the left. Kate is getting a call again. It's Kate's mother calling.

Survive Mammy's chatter and then click on the door in the back wall, to the left of the stack of crates. Kate goes through the door and enters a workspace. An "Automaton without feet" hangs on an iron construction, above the large workbench, and behind you are two large windows in the wall. Click, under the right window, on the wall and Kate will walk towards it and then stand behind that iron construction.

Now you see ropes, that run down from the iron structure, and they end in a pulley. You also see a lever on this pulley. Click on the lever and ........... Kate hoist the "Footless Automaton" down and it will be placed on the workbench. Click on the Automaton and Kate will walk back to the left. Click again on the "Footless Automaton" to talk to him.

His name is Oscar and he is the train driver. Your Dialogue Options will reappear. Simply use all options, but the most important option is the "Production" option.
Oscar tells you something about Hans, Anna, Automatons and he refers you for further info to the office. You MUST use the "Production" option. Oscar tells you that he wants Kate to manufacture his feet and that his feet must be of model XZ2005_B. Oscar then gives Kate his Production Punch Card.
Close the conversation and click on the door again to go back into the factory hall. You will have noticed that the factory isn't in operation. Nothing is being made at this moment in this factory. In order to make Oscar's feet, Kate has to restart the production process.
Oscar's Feet:
Now go back 2 screens to the right and Kate stand at the bottom of the iron staircase, on the screen with the entrance of the factory. Click on this screen in the right bottom corner and Kate will come to a different screen and on this you have an overview of the entire right side of the factory hall with the conveyor belts.

Move your cursor to the left rear corner of the hall, so to the left behind the back conveyor and click.
Kate is walking along the wall, and behind the conveyor belts, towards the corner.

Go through the wooden door and then click at the bottom left of the screen. Kate is now at the "treadmill" machine with which the large water wheel, outside, is driven.
At the top right you see a lever on a rope (1) and on the left there are 2 levers.

First pull the Rope / lever 1. A mechanical "rat" comes down and it enters the small tread wheel and the large water wheel is set in motion. Now pull the left lever 2 and ...... the water wheel on the outside will continue to run now ........ Click at the bottom of the screen and go back through the door into the factory hall again.
Go again 4 screens to the left and you are back on the screen with the door to Oscar. You will have seen it the first time you were here, but on that wall, on the left at the forklift truck, is the big cylinder that you previously brought into the factory via the gripper arm. Click there and Kate is right there.

Click on the Cylinder but he is too heavy for Kate. Click on the Forklift and Kate will start the thing.......cut scene:
The Forklift now picks up the cylinder and drives it to the right and places the cylinder on a large "barrel" between the conveyor belts. The truck will then return to Kate.

Click in the bottom right corner and then go back 2 screens to the right and Kate is back at the bottom of the iron staircase. Now click on the iron staircase and Kate walks up the stairs and comes to the top of the Catwalk. At the top of the stairs is the door of Anna Voralberg's office.

Office:
Click on the door and Kate will enter. Walk to the right and then zoom in on the bookcase.
On the top shelf of the bookcase there is a row of books and on the middle shelf a clock. Click on the SECOND RIGHT book to pull this book forward.

The Clock turns away on the middle shelf and a musical box appears.
The music plays and when it is finished the Musical Cylinder of this music box automatically disappears in your Items Inventory.

Zoom out. You can now zoom in on the desk, but it is not really necessary. If you do this, you can view a blueprint of the train, read an unfinished letter from Anna Voralberg to her brother Hans. You can also read various other documents that show that the financial situation of the Voralberg Estate was not exactly rosy now. No wonder Anna Voralberg wanted to sell the factory. Zoom out and leave the office again through the door and Kate is back on the Catwalk. It is time to make Oscar's feet.
Manufacture Oscar's Feet
Walk all the way to the left over the Catwalk and then click on the iron stairs and ........Kate walks upstairs and stands on the iron platform. Zoom in on the console

On the console you see, on the right, 6 small levers that are numbered as 1 to 6. In addition to these levers you see a big black lever.
The middle part of the console contains a large round meter with underneath the name Voralberg and a groove.

On the left part of the console you see 6 lights / meters that are also numbered 1 through 6 and thus correspond with the 6 levers on the right side of the console. Below these 6 lights you will see a transparent "Roll" with a smaller black lever on the right. If you click on this lever, a colored plate appears in the transparent roll. If you click on the black lever again, another plate with a different color will appear in the roll So there are 6 different color plates from which you can choose. You now must make sure that the correct colored plate appear in the transparent roll because each plate makes a different model of feet.
|
Now do the following in this order:
|
You see Kate, who is still pressing a button, and then you see the entire manufacturing process and finally you see how a few feet will roll of the conveyor belt

NB: if you have put a wrong plate in the transparent roll, you'll see a shorter cut scene and the wrong feet will roll of the conveyor belt. But you only know that it will be the wrong feet when you give Oscar the feet. Oscar will then refuse them. If that happens, you simply return to this console and then you repeat this entire process, making sure you set the LIGHT GOLDEN plate.
After the cut scene you go back down the stairs and walk back over the Catwalk and down the stairs back to the floor of the factory hall. If Kate is at the bottom of the iron staircase, click in the lower right corner of the screen and you will return to the screen where you see the conveyor belts. Click again at the bottom right of your screen and you will see the feet on the next screen at the end of the assembly line.

Zoom in on the feet and pick them up.
Zoom out and now go back 4 screens to the left and, on the screen with the forklift, go back through the door in the back and you're back at Oscar.
Open your Items Inventory and click on the feet and then click Oscar to give him his feet.

If you've made the wrong feet then Oscar refuses them. But of course you have made the right model feet,
Oscar puts his feet "on" and then walks to his train, that stands in the train station.

Also leave this room through the door and then go back 2 screens to the right and click on the outside doors to leave the factory. Follow the path back to the Fountain and go back to the main street via the down path. Then click at the bottom left of your screen and walk through the street towards your hotel, in the direction of the mountains.

Then just follow the street, you cross the bridge, and eventually you come to the church.
Church

Go through the gate.

Kate gets a call from her boss and he's "not amused" about the fact that there is an heir to the Voralberg Estate
The path on the left goes to the cemetery. The path on the right goes around the church to the back door of the church. The front door of the church is locked so follow the path to the right and you will come at the right side of the church. Here you see a elevator cabin, but don't go in it now. Walk further back on the path and on the next screen click on the door at the top of the stairs.

Kate enters the church. Walk to the right. You will then see a cupboard of drawers and a niche with an altar in it and a cross figure on the wall.

Zoom in on the cupboard of drawers. Try opening a drawer. Doesn't work. A keyhole is located right above the upper drawer. So you need a key. On the right side of this cupboard of drawers there is a silver-colored turn lever. Click on the silver-colored turn lever ..... but nothing happens. Zoom out and then zoom in on the cross figure on the wall, behind the altar. Then click on Jesus and the cross will slide away. Take the key out of the wall hole and zoom out

Zoom back in on the cupboard of drawers. Take the key from your Items inventory and then click on the keyhole. Now you can open all drawers. Start with the top drawer and then work down to the bottom drawer. You will then pick up a music punch card from each drawer. Except from the 3rd drawer. The 3rd drawer seems less deep than the other drawers. If you have the 3rd drawer open, click on that silver-colored turn lever, on the side of the cupboard, and ......the drawer then slides open even further

Take the white Voralberg Key and also take the rolled-up letter. Read the letter.
The letter is from the church priest and tells about the "death" of Hans Voralberg and about the confession of Anna that Hans is not dead. The priest was furious with this.
Close all drawers and zoom out. You now must have 4 of those Music Punch Cards in your Items Inventory, but you will only need the Purple one.
Click on the bottom right of your screen and then leave the church via the left door. Walk back over the path and up to the stairs with the elevator cabin. If you click on the elevator now, Kate will not go there. So click on the box that you see in front of the elevator on the wall. Kate then walks up the stairs and you are zoomed in on this box.

In the box you see 2 gears in and 4 pins on which you have to place the other 4 gears. Well.... you took the 4 gears from Momo some time ago. If you do not have those 4 gears, you will first have to go back to the hotel to take them. Open your Items Inventory and click on one of the gears and then click on the pin on which this gear fits. Each gear only fits on one pin, so this is self-explanatory.

If you have placed all 4 gears, you can click on the lever and Kate will go up to the tower room with the lift. In the Tower Room you walk to the right and then walk on to the window. Kate is now standing at the Tower Clock Automaton. In the back of this thing you see a groove. Open your Items Inventory and click on the Purple Music Punch card and then click on the groove and ....

Cut scene: The church bells play the melody and then the camera zooms in on the tomb of the Voralberg's and you see the Automaton on top of the tomb take off his hat.

NB: Of course you can also try the other 3 punch cards first. You will see the same movie every time but with a different tune and without seeing the tomb.
After the video, Kate informs you that she no longer needs the Musical punch cards and they will disappear from your inventory. Go down with the elevator and then follow the path back to the front of the church. Then click on the left side of your screen to continue to the left on the path. On the next screen you click on the tomb.

Zoom in on the hat. Open your Items Inventory and click on the Voralberg Key and then click on the Cross key hole in the Hat.

The gate opens, so go inside. Walk through and Kate comes into the crypt. Walk to the left and then zoom in on the bottom burial drawer.

This is the drawer of Hans Voralberg. Click on the drawer and ..... Kate opens the drawer .. then zoom in again.
The coffin is now open ..... there is no corpse in the coffin .... but 2 items .... Take the two items from the coffin.

One item is the "Valadilene Voice Cylinder" and it disappears to your Items Inventory. The other item is a newspaper article concerning the death of Hans Voralberg.
Zoom out 2 times and leave the crypt and follow the path back to the front door of the church. Then go, via bottom of your screen, back to the main street.
Factory 2nd time
Follow the main street back to the screen where the entrance to the Voralberg Estate is, which is 6 screens back from the church. Go through the gate to the Fountain. Go back to the Factory Hall via the Lower Left Path and then return to the office via the iron staircase. Walk to the right again and zoom again in on the bookcase. Open your Items Inventory and click on the "Valadilene Voice Cylinder" and then click on the musical box, on the middle shelf of the bookcase and ........ Kate will put the cylinder in the music box and ... .

Long Cut scene

We see a young Hans and Anna Voralberg. Hans takes Anna to the cave and finds grotto drawings of mammoths and ..... on a high platform Hans find the Mammoth doll. Hans must and shall have the Mammoth doll, so he climbs up and ..... falls down and lies in a coma for weeks ... and is finally declared "dead".
After the cut scene the Valadilene Voice Cylinder is back in your inventory. Click on the upper part of the music box, so on the part with the 2 puppets.

Kate picks up the upper part and it disappears to your Items inventory. Zoom out, leave the office and the factory hall and return to the Fountain.
Train station: 1st time:
At the fountain, go into the Upper Right Path and follow it back to the Station.

Enter the station and click at the bottom of your screen to go to the next screen. You see the ticket office and on the right a part of the train carriage.

Click on the "balcony" of the train carriage and Kate climbs on it. Enter the carriage through the door and see ....... Oscar is here too. Click on Oscar.

A short greeting follows and then your Dialogue Options appear. Click on "MISSION". Kate is "hungry" for a train ride but Oscar tells her that she should have a train ticket. Oscar then disappears. Follow Oscar outside and then go left to the platform again. Zoom in at the Ticket office and guess who is in there ...... Oscar.

When your Dialog Options appear again, select "MISSION" again. Oscar is a bit of a whiner, but eventually Kate gets her train ticket.
Zoom out of the train ticket and another document appears on your screen. This is the "Train Release Permit" and with this you give Oscar permission to ride the train. However, the Permit still has to be provided with the right Stamp. Zoom out. Both your train ticket and the permit will disappear into your "Personal Files". Zoom out again and go back into the train carriage and give your train ticket to Oscar. Did you really think that we are now leaving with the train?
No ..... Oscar refuses to accept your ticket and says that not ALL the conditions for departure has been met yet . You will have to get a good stamp on the Permit. And, because the train is also a Automaton, you have to REWIND the train. Leave the train car, via the left side, and walk back over the platform to the exit of the station and return along the path back to the Fountain. Go through the bottom path again into the main street.
Stamp the Permit:
Go back through the main street to the house of Notary Maître Alfolter. Fortunately, the front door is still open, so go inside and then walk to the bottom right of your screen. On the next screen, click on the stack of papers that is on the shortest part of the desk. Kate walks around the counter and you are zoomed in on the Stamp Automaton.

Click on the Automaton's hat. The hat opens up. Take the Inkwell from your Items Inventory and then click on the opened Hat again. The inkwell disappears into the hat. Open your "Personal Files" and click on the "Train Release Permit" and then on the stamp sheet. Your Permit will then be on the sheet. Then press the Red Button and your Permit will now get the correct stamp.
Zoom out, leave the notary house and return to the train at the station.
Station: 2nd time
Leave with the train
Go back on the balcony of the train car but do not enter the car. Walk off the balcony on the right side. You are now on the right platform.
Walk to the bottom of the screen and you will see, on the next screen, a console with a large turning wheel on it and a lever on the left
 .
.
Walk to the console and click on the turning wheel. The upwind rod now comes out and hangs just in front of the locomotive. Now click on the lever and the upwind rod will wind up the locomotive. When the winding is finished, click the Turning Wheel again to retract the rod. Go back to the train car.

Go back on the balcony and now go back into the car. Ignore Oscar and walk backwards and then enter the next compartment.

You are in the "hall" between the "saloon" and the "bedroom" of the carriage. Here you see 2 cabinets, left and right one. In the middle a pillar with a round yellow plateau on it and on the right a table with a plateau. Take the Mammoth from your Items inventory and then click on that plateau on the table, Kate will place the Mammoth on the plateau. Then take the Anna and Hans part from the musical box from your inventory and click on the yellow plateau of the pillar. Kate put Anna and Hans on the pillar

Zoom in on the Left cabinet and place both Music Cylinders on the top shelf.
Now go back to Oscar.......... Oscar who is still in the car. Open your "Personal Files" and first give Oscar the "Train Release Permit" and then your Train Ticket.
Then sit back and enjoy the train journey. The train will arrive at the station of the University of Barrockstadt the next morning.
2018:Walkthrough door: Louis Koot