
2020: Walkthrough by: Louis Koot
If you have found this walkthrough via google search or via another site then you have probably not visited my site.
A lot more very detailed game walkthroughs can be found on my site at: www.pcgameswalkthroughs.nl
Page 1
After you have been working for more than a decade as a private assistant to the enigmatic railroad tycoon Hadley Strange, the news of his sudden and unexpected death surprises his entire family, including you. You are even more surprised when it turns out that you have been appointed as the executor responsible for carrying out Hadley Strange's last wishes, as laid down in his will. You should also take care of the majestic Crimson Manor manor, a luxurious house on the outskirts of London. Upon arrival at the mansion, you'll find an envelope with your name on it, and inside it you find a letter with a cryptic set of instructions that could make you change your mind about who your former employer really was.
You start the game on the main menu screen where you can change a number of things via the "Options" to your own preferences.

At "Controls" you see that you control the game with your keyboard or .......

.....you can control the game with your gamepad, if you have one.

.....you cannot change the keys / buttons for both your keyboard and your gamepad yourself because these settings are determined by the game There is no option to SAVE the game yourself in the game. The game saves your progress automatically when you leave the game and after that you can continue playing via "Continue". Click "New Game" to start and you will first see a short intro movie.

After the introductory cutscene you have arrived in the front hall of the big house, Crimson Manor
You get a message about the "Dynamic Help System".

Push this screen out of the way and you will read at the top left what your 1st assignment is that you have to perform. Continue to the double doors at the top of the stairs. Click on the doors ... you will read that the doors are not locked, but you cannot open them anyway because the doorknob of the right door has disappeared.

Turn around to face the front door. To the left is a small table with a mirror above it. To the right is a large closet.

Walk back down and then to that small table on the left wall.
There is a copy of "The Victorian Post" newspaper on the table. Click on the newspaper to read the article about a tragic accident in close-up.

Put the newspaper back on the table and then turn around and continue to the large cupboard.
Open both closet doors and then click in the closet but you won't find anything of any importance to you in the closet

Look down and then open the two drawers that stick out at the bottom of the closet.
In the left drawer is a pocket watch and a note and in the right drawer is a book and the doorknob for the door at the top of the stairs

You can take the pocket watch out of the drawer to view it in close-up and then open it via the E button.
You can't take the watch with you so put it back in the drawer. Then read the letter....

The note is from the late Hadley Strange's attorney and contains your instructions. The note also says that the doorknob is in the right drawer.
So take that doorknob from the right drawer and ...... the doorknob will be stored in your inventory.

So you now have the doorknob back to the doors at the top of the stairs and ..... the game then tells you how to open the inventory.

Stand right in front of the doors and then open your inventory and press the designated key or button to select the door knob and .....

..... you will automatically go out of the inventory and you will see the key at the bottom right. Click on the doors again and ........

......the doorknob is inserted into the door. Click on the doors to open them now and then enter the Vestibule.

Vestibule
You immediately get a new assignment and it reads: Find the will of Mr. Strange in his study.
Walk on to the round table, which is centrally located in front of the stairs in this vestibule

On the table is the map of the house and also a pack of pipe tobacco and a photo.
First take the map .... the game will immediately tell you how to open the map

You now have a floor plan of the ground floor (F1), the 1st floor (F2), the attic (A) and the basement (B). By clicking on A, F1, B, F2 you open the different floor plans. You now see the floor plan of the ground floor (F1) To the left of the vestibule is the East wing of the house and there are the study and the library. To the right of the vestibule is the West wing of the house with also various rooms

Put the map away. You can pick up that pack of pipe tobacco and look at it and put it back on the table.
Pick up the photo and turn the photo over so you can read the text on the back .....
.....Perhaps the number 1883 is important so write it down on a piece of paper.

You can't take the photo with you, so put it back on the table. Then turn right and you will see the door to the west wing of the house.
You can walk to that door, but the door is locked and you don't have the key (yet)

So look to the left of the stairs ...... You then see the door to the East wing and that door is not locked. So go to the left side of the stairs and .....

On the left is the door to the East wing and at the back is a door to the corridor behind the vestibule. In that corridor is the door to the Art Room but that door is locked and you need a key with a lion's head for it, so stay here. There are 3 cabinets here. Open the doors of the large cabinet on the right. Behind the middle doors you can pick up the patient file of one Darlene Thomas and read it ..... Darlene was admitted to the Bedlam Asylum.

On the low cabinet is a note that you can pick up and read.

In the left corner is a small cabinet. Open the door and then take the telegram from the cabinet and read it.

Then turn around to the East Wing door, open that door and step through it to end up in the East Wing hallway.
East Wing:
Turn clockwise in the corridor..... the door at the back of the hallway is locked

Turn back around and follow the hallway then right around the corner and then go left through the door into Strange's study room.

Study Room
Strange's desk is in the middle of the room. In front of the middle window is a low cupboard.
In the back right corner is a chest and in the left back corner is a large globe. A portrait painting hangs above the fireplace.

Go to the desk and stand in front of it. There is a typewriter on the desk. You can zoom in on the typewriter to take a closer look

On the right side on the desk is a photo and a diary. Pick up the photo .... with your right mouse button you can zoom in a little closer to view the photo better. The photo shows a man and a woman standing on the deck of a steamship. Return the photo and then pick up the diary and read through the 2 pages .... you read about the maiden voyage of the ss Camille.

There are 9 drawers in the desk, 4 left and 4 right and 1 drawer in the middle.
You can open the drawers on the left and right, but they don't contain anything of importance.
The middle drawer is locked and you have to find the key for it because in this drawer lies Strange's last will and testament

Go to the chest in the right corner and click on the chest to open it.
Inside the chest you'll find the first of 18 "Criminal Instict" posters that you can score in-game to earn a Steam achievement

.....I don't play the game through STEAM or through Gog's Galaxy, so I have absolutely no intention to hunt for those stupid Steam achievements but when I find these posters I will mention it in the walkthrough. Do you want to find them all, to score that achievement, then it really isn't too complicated ...... just open up every cupboard, every drawer and every chest or box you come across in the rooms of the house and you will automatically find all "Criminal Instinct" posters.
The cabinet by the windows contains nothing of any importance, but if you don't believe me open the doors of it and also click on the cigar box and on the cigar that are on the cabinet. If you zoom in on the globe, you will see that you can rotate the globe and that a magnifying glass has been mounted on the edge ..... it is not yet clear what to do with this

At the globe, turn around so that you look back across the room to the room door.
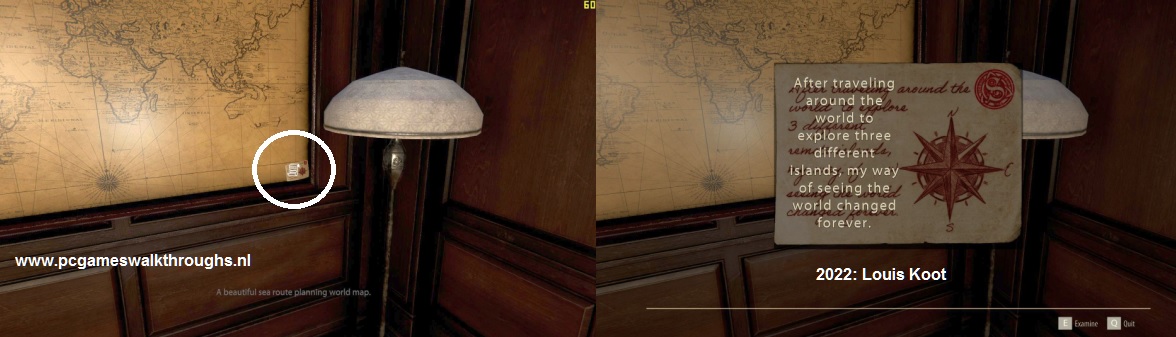
To the right of the door is a large world map on the wall and to the left of the door is an elegant pole box in the corner.

Walk to the world map and click on it. In the bottom right is a small card on the world map. Read that card and then put it back.
Go to the pole box in the left corner and look at the lock of the box in close-up.
The lock has 5 tumblers on which you have to spin the right combination of different symbols to open the box

You have no idea yet which symbols to set so zoom out and leave the room back to the hallway. Follow the corridor further right around the corner and you will arrive at the door of the library. Don't go in yet because you don't know what you're looking for in the library yet. There is a table in the niche on the right .... Stand straight in front of the table.

On the table is a wooden box ...... this is that "mail organizer" that Strange talks about in his note to his housekeeper about his lost pocket watch.

Open the box and take out the key that's in it ..... it is the Desk Key and the thing automatically ends up in your inventory

the key is for the middle drawer of the desk so run back to the study and stand right in front of the desk again.
Open the inventory and then select the desk key and then click on the middle drawer and ....

The key then unlocks the drawer. Then click on the drawer again and it will slide open.
First take the "Train Motif Key" from the drawer. This is the key for Nicholas' room door on the 1st floor

Click on the letter in the drawer and you will read that "The kids toys hold the key to the old's joy".
Also look at the card that is in the drawer on the right. On the card you see stacking stones with the letters R, A, E and an image of the typewriter.

You have now received a new assignment .... you mustsearch the children's rooms for more clues regarding the cryptic hint "The kids toys hold the key to the old's joy". Open the map (M-key) and then view the map of the 1st floor ...... There are 2 children's rooms on the 1st floor, the Twins Room and Nicholas's room

Return to the vestibule and then go up the stairs to the right side of the gallery and go through the door at the back

First Floor
You have then arrived in the 1st floor corridor of the West wing and at the door of the Twins Room.
You can follow the corridor to Nicholas's room but I go search the Twins Room first.

So enter the Twins Room
Twins Room

In the middle of the room is a round coffee table and chair. There is a couch by the windows and a teddy bear is sitting on the couch. To the left and right of the sofa is a chest of drawers. There is a bookcase on the wall by the bed. Go to the round table. There is a box on the table. Click on the box to take a closer look.

The lid of the box has a puzzle lock .... In the middle of the lid is a rosette with 6 slides. In the 4 corners is a button that you can turn by clicking on it. By clicking on those 4 buttons, the 6 sliders move, but you have to do that in a certain order. Perhaps we can find a clue for this puzzle somewhere, so leave this box alone for now. You can pick up the teddy bear sitting on the couch and take a closer look and then put it back on the couch. The drawers of the cabinet to the right of the couch are empty, but in the top drawer of the left cabinet is a Valentine Card that you can take a closer look at ..... I could not open this Valentine card to read what is written inside it.

Turn around and go to mirror cabinet to the left of the fireplace.

In the top right drawer you will find the 2nd "Crimal Instinct" poster.

Go to the bookcase. There is a piece of paper on the middle shelf of the bookcase. Look at that paper .....

It is a page from a children's book and you read a story about a soldier. There is also a picture of a soldier in full gear ...... you can't take the page with you, so take note of what the soldier looks like. The door to the right of the fireplace is locked and if you click on it you will read that a key with a crown shape is needed. The door next to the bookcase takes you into the hallway behind this room. Exit the room through this door and then turn left to the door at the end of the hallway.

Nicholas's Room
It is the door of Nicholas's room and on the door sign you see a locomotive.
The door is locked but you have that Train Motif key in your inventory.
So open your inventory and select the key and then click on the door and the key unlocks the door.

Click the door again and step inside. You end up in a hallway and stand at the bathroom door.
You can take a look in the bathroom but you won't find anything, so turn around and step into Nicholas's room

There is a rocking horse in front of the bed and a few stacking stones on the floor. On the left wall is a bookcase and right next to the bed is a chest of drawers with 4 drawers. In the bookcase on the 2nd shelf is a note and on the top shelf is a box with blocks with letters on it. Read the note and put it back.

Then click on that box with letter blocks ......

There are 6 blocks in the box and they each have a letter. The 6 letters form a word but the blocks are in the wrong order. It's a swap puzzle, so you have to swap the blocks so that the letters form the word EUREKA. Click on 2 blocks to select them and to have them switch places ...... So the word you have to make is EUREKA. Then note the colors of the letters, especially the colors of the letters E, R and K ....... E = green, R = blue and K = purple.

I don't know if the colors of the other leeters are important, but write them down anyway... U = orange, E = green and A = Red.
Go to the chest of drawers to the right of the bed. In the bottom drawer are 2 drawings that you cannot take.
In the 3rd drawer is a "Criminal Instinct" poster ........

.....and in the top drawer is a "Tom and the Nutty Pig" booklet that you can take a closer look at and read.
Each right-hand page contains a "Finger" that you can pull up and cause something to move on the page.

Ready here, so leave the room. You then look back down the hallway to the "back door" of the Twins room.
You now see that the corridor ends there and that there is a cupboard with glass doors. Go to that cupboard and open its 2 doors.

On the 2nd shelf from the top is a Cylinder. Click on that Cylinder to see it in close-up.

There are figures on the cylinder and the thing has 4 segments that you can each rotate.
You now have to recreate on this cylinder the soldier you saw on the note in the bookcase of the Twins Room.

If you do this correctly, the cylinder will open and a Chemical Battery will come out, which will automatically end up in your inventory.

Twins Room
Turn right and dive back through the door into the Twins Room en go to the box on the round table

I didn't find a clue for the box on the round table, so I'm going to try to open that box via the "Trial and Error" method. Click that box again to see it in close-up again There is a rosette with 6 slides in the lid. A rotary knob protrudes into the 4 corners of the lid. Name those 4 corner buttons, from top left to bottom right A, B, C, D

When you click on the buttons, 1 slide in the rosette always shifts ..... You have to move those slides in the right order by clicking the buttons in the right order I didn't find a hint for this so I tried it through "trial and error and here is my solution. Click on the 4 buttons in this order: C, D, C, B, A, B and ... you automatically go out of the close-up .... Click on the box again and ....... the box now opens. There is a lighter in the box ......

Take the Lighter ....... the thing automatically ends up in your inventory

Ground Floor: Study room
You now have 2 items in your inventory, this lighter and the chemical battery. Y
ou also solved the Eureka puzzle in Nicholas's room. Now go back to Strange's Study on the ground floor

Zoom in on the typewriter on the desk. Click on the letter key to type the word Eureka, so click on E, U, R, E, K, A and ....

..... the painting above the fireplace folds away to reveal the hidden wall safe . 7:45 is written on the back of the painting
Zoom out of the typewriter and go to the wall safe above the fireplace.
Note down the 7:45 clue and click on the safe .... of course the safe is locked and your new task is to find the key to this safe.

The walkthrough goes on on:
2020: Walkthrough by: Louis Koot