
2020: Walkthrough by: Dick Leeuw and Louis Koot
Text by Dick Leeuw and the screenshots by Louis Koot

You are outside on a small platform, the stairs to the next building are broken. A rope hangs above the opening.
Turn to the left and zoom in on the legs under the handrail.

On the second leg you see white stripes, turn that leg over and you see an object in the leg. Take the metal bar from the leg.

Zoom out and turn to the right and zoom in on the wooden support, you can slide it forward but there is nothing now.

Zoom out and turn to the center, click on the Oculus and go to the past. Turn to the right again and zoom in on the support again.

Pull the support forward again and then take the metal grille that is now hidden there.

View this grille in your inventory, you will see that it needs another part.
Drag the metal bar to the grid and pull the bar to the right, you now have a metal grid with a handle.

Zoom out and turn to the middle, there is now a construction hanging on the rope.
Zoom in on the construction and drag the grille onto the construction

Pull the handle back and you then go, via the rope, through the door into the other building.
You see a number of domes with a wooden scaffolding on top. If you look around you will see a number of mirrors, gears, levers and a few panels.
Dick made a drawing of it

You have to get a few things here before you can continue. Turn to the right and go up the stairs, on the right there is a wooden panel.

In the middle you see a metal object with 2 copper clamps. Zoom in on that further

Pull the clamps aside and then take the triangle.

Turn left and go down the stairs, turn around and .......

...... take the Lever off the wall.

Turn around and walk along the scaffold to the next staircase. Go up the stairs and turn right and .......

....... zoom in on the double door. Look at the object on the doors and you will see 5 holes where the posts have to go in.

When you look closely at the metal triangle in your inventory, you see that there are catches on the top. Go to the triangle in your inventory and there you have to put the catches in the correct position. Turn the triangle around and there you see 2 copper brackets, with these brackets you can move the catches. When the catches are in place, drag the triangle to the center of the doors

Pull the lever to the right, the triangle turns and you will see a second lever. Pull both levers out and the doors open, the sun is now shining in the attic.

Zoom in on the sun on the left door, you will see scratches on the door.

Click on the Oculus and you will see a mechanism, left and right and below and above you will see pins that you have to pull out.

Pull out the left pin A, then slide the 2 pieces of ring B and C to pin A.
Now you can pull the top pin D up and pin E down.
Pull the piece of ring F, bottom right, to the side and you can pull the last pin G out.

The plate with the sun then hangs down, take the wheel you see there.

Zoom out and take a look around here, there are 2 control panels in front of the doors. With these panels you put the mirrors in the right position.

Go down the stairs on the left, against the back wall you will see a hatch with 2 light sensors. On the left against the wall you see a panel on a rope.

Zoom in on that panel and take the cross-shaped object from the panel.

You will also see that you need another part for this object. Zoom out and turn around, go forward 1 time.
Diagonally left in front of you you see a round block with a hole in the top, zoom in on it.

Then drag the Lever to the hole. This is now Lever C1. At the top right you see a frame in which a mirror can slide back and forth. This is Mirror AM 1
If you now look at Lever C1, you see that if you pull the Lever to the left, the mirror slides to the other side.

If you pull lever to the right, the mirror will also go to the other side, but the mirror will also turn around. 1 side of the mirror is a mirror but the back is wood.

Zoom out and go to the entrance, go up the stairs and ....

...... zoom in on the left side of the panel.

You will see a red ring there, drag the wheel to the red ring. Turn the panel with the wheel, you now have a large mirror.

Behind the red ring you now see a metal object, take that object.

Then look at the cross-shaped part in your inventory and drag the metal object to the cross. Turn the part up and you have a handle with a cross.

Zoom out of your inventory and go to the bottom center of the large mirror.
Under the mirror you see a beam, zoom in on it and now drag the lever to the tip of the beam.

Pull the Lever forward, the mirror is folded in the middle.

The sunlight is now split into a beam to the left and a beam to the right.

Go down the stairs to the left and click once forward, back to lever C 1,

Zoom in on C 1 and pull the lever to the left and mirror AM 1 comes to C1

You now see that the light beam goes to a sensor on the other side of the scaffolding and there it illuminates a panel in the wall

Zoom out and walk back and then up the stairs. You are then back at C2 and C3 which are in front of the large double door

Descend the other stairs and zoom in on the illuminated panel

On the panel you see a map with the mirrors and the places where the light beam should shine. This map will be placed in your notebook. On the map you can see how and where the mirrors should be. You can see on the map that there are 4 positions for the mirrors AM 2 and AM 3, both mirrors are now in position 1. Position 2 and 3 are not important
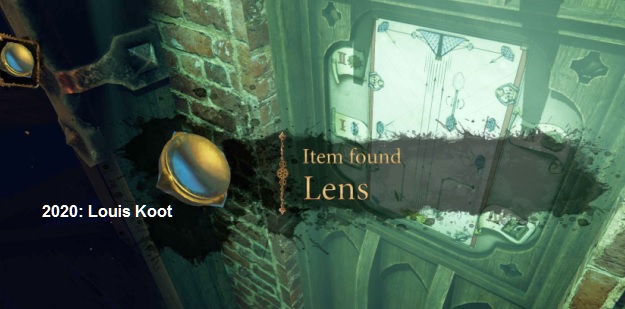
Zoom in on the top part of the panel. You will see 2 small hatches and 1 large hatch, slide the right small hatch to the right.
Then pull the handle down and ........

... the large hatch opens and you have a lens.
Go back to the platform in front of the big mirror,

You will see an empty container on the side of the entrance. Zoom in on that holder and drag the lens to the holder, now there is a second beam of light.

Now you need to place the mirrors in the correct position. On the map you see places with roman numbers, place I is ready.
You now have to aim one of the light rays at position II. Look on the map how to direct the light beam to position II.

Return to lever C 1 and pull the lever to the right again, the mirror AM 1 moves to the right and is turned.

Go to the other platform, to the controls C 2 and C 3. You can see that the light beam now shines on mirror AM 2.

Zoom in on C 2, move the lever to the right. You will also see that you are missing a gear / wheel here.

The light beam now passes over the scaffolding to mirror AM 3

Turn right and zoom in on controls C 3 and .......

.... move the lever to the left.

The mirror rotates and the light beam now goes to a sensor above spot II.

Zoom out and go down the stairs to the left and go to the illuminated spot on the wall.

Zoom in on the wheel on the wall, left and right are wing screw.

Turn the screws counterclockwise and the wheel is now hanging down.

Zoom in on the wheel, you will see 4 rings, A, B, C, D and 7 buttons.

You have to slide the knobs and turn the rings so that the openings in the rings A, B, C, D are at the top.
So you have to move the rings A, B, C, D to make room to slide buttons 1 to 7 through the slots

Here you can see how it should be in the end

The steering wheel then slides down, it is now in your inventory.

Now you have to direct the light beam, with the mirrors, on the sensor of spot III on the right wall.

You have to do this with the controls C2, C3 and lever C1. Return to controls C 2 and C 3, zoom in on C 2, drag the steering wheel to controls C 2.

Then turn the steering wheel until mirror AM 2 is in position 4 and then center the arrow lever.

Turn to the right and zoom in on controls C 3, turn the steering wheel until mirror AM 3 is in position 4. The arrow must be to the left.

Go down the stairs on the right and go back to lever C 1 and pull the lever to the left, mirror AM 1 slides to the left. The light beam is now aimed at the sensor of spot III.

Zoom out and go to sensor III and ........

..... zoom in on the wheel on the wall
Lift the cross bar upwards and then the vertical bar to the left, the disc in the wall is now free. Take the 8-sided disc.

Zoom out and go to the hatch, turn to the left and you will see the panel where you have been before.

Zoom in on the panel, you will see that you should have a disc with 3 triangles.

View the 8-sided disc in your inventory, on the back you will find a sliding puzzle.
You will see that you need this disk when you solve the puzzle. Name the 4 small triangles A to D.
Name the boxes from top left to bottom right 1 to 10.

The solution is: Slide: A from 5 to 1, C from 8 to 3, D from 7 to 11, C from 3 to 7, B from 10 to 6, A from 1 to 3, B from 6 to 2,
D from 11 to 6, C from 7 to 11, A from 3 to 7, B from 2 to 1, D from 6 to 2, C from 11 to 10.

Then drag the disc to the panel, the panel slides up and there you will find a tricky puzzle.
This is a Rubik's Cube puzzle, I have no solution for this.
I don't know if this is the same format every time, it's not too difficult. You only have to do one side.
You must have 4 arrows in the front, I will keep playing with the wheels until I have those 4 arrows.

When you have solved this puzzle you will see that a kind of sunflower with 2 sensors comes up above the hatch.
You now have to direct the 2 light beams with the mirrors so that a light beam is aimed at each sensor.

Go to controls C 1 and make sure mirror AM 1 is on the right side. You should also see the mirror side.

Go to controls C 2 and C 3. Zoom in on C 2 and turn the AM 2 mirror back to position 1 with the wheel and then turn the lever to the left.

The light beam now passes behind the doors to the right sensor on the sunflower. Turn to the right and zoom in on C 3, turn the mirror AM 3 to position 4 with the wheel. If correct, the mirror is already in position 4. Move the lever to the right and the light beam will now go to the left sensor on the sunflower. The sloping hatch now opens.

Go through the hatch and you go down the stairs, you see that the hatch is closed, you can not go back.
Search between the wooden planks and you will find a large weight,

Zoom in on the pear-shaped weight and then grab it. You still need something for the weight.

You can now click on anything but you have nowhere to go. Click on the Oculus and go back to the past.
Now you see a metal grille instead of a boarded up door.

Zoom in on the center of the grid, there you will see 4 circles with 4 symbols.

You can rotate the circles so that the order of the symbols is different. You now have to put the same symbols opposite each other in an adjacent circle. The right symbol in the upper left circle must be the same as the left symbol in the upper right circle. The symbol at the bottom of the upper left circle must also be the same as the symbol at the top of the lower left circle. This must be the case for all 4 tangent points of the circles. Starting at the circle at the top left, turn the circle so that the candlestick is at the top and the square with the dot at the left, the fish is at the right, and the inverted T with crossbar at the bottom.

Adjust the other 3 circles accordingly.

If you have the 4 circles correctly, the gate will open.
Push the gate further open and continue through the hallway with columns, you have a nice view of the mountains.

You now see a grid in the door, at the bottom of the grid you see a wheel with 4 gold buttons. Beneath the wheel you see a hatch.
Zoom in on the wheel and turn the wheel clockwise and the hatch opens.

Zoom in on the hatch and grab the hook with a screw.

In your inventory, combine the weight with the hook. Then tighten the hook into the weight

Zoom out and turn to the left and look up, you will see a chain there. Drag the weight onto the chain with a hook and see what happens.

The door opens and another door goes out, the 2 doors are connected to each other and can rotate 90 degrees.

You see 2 doors again that are connected to each other, these can also rotate 90 degrees.
Zoom in on the pillar between the 2 doors on the left, at the top you see a lever.

This lever can be on the left or on the right, so you choose which 2 doors turn a quarter turn. In the column you see a grid with a kind of keyhole underneath, only you don't have the key yet. In the door to the right of the column you see a mechanism with 4 discs and 4 copper buttons. Zoom in on that mechanism
With the buttons A, B, C, D you can move 4 pawls so that you can turn the disks 1, 2, 3, 4.

|
In the middle of the door you see a square grid and in the 4 discs you also see a large angle of 90 degrees. You should rotate the discs so that the large corners in the discs are at the corners of the grid. The 4 corners in the sliders now form a square and the grid rotates. Name the buttons A to D and the discs 1 to 4. Here is the solution Slide button A to the left and button C down, turn disc 2. Disc 2 is now in the correct position. Move A to the right and C up, B up and D to the right, turn disc 3. It is not positioned correctly. Slide B down and turn disc 1, it is now in the right position. Slide B up and then turn 3 properly, Slide D to the left and turn 4 properly.
|
The square in the middle turns around and there you will find a short key, take the key.
Zoom out and zoom in on the keyhole on the pillar, drag the key there and turn the key.

You now have a wheel with spokes. Move the Lever at the top of the pillar to the left and turn the spoked wheel.

Turn until you can go no further and the 2 doors on the left turn a quarter turn again. Turn left to the door and zoom in on the 2 buttons beneath the grille,

slide the 2 buttons outwards and you will see the wheel with the buttons fall to the floor.
Zoom out and turn to the pillar, turn the wheel with spokes until the 2 doors turn back.
Turn to the left and on the green you see the wheel with the 4 buttons, pick up the wheel.

Turn around and there you see the same door with a grid and on the outside a wheel with 4 buttons.
Zoom in on the grid and click on the Oculus, you will see a mechanism.

Move the 2 middle bars B and C to the left and the bottom and top bars A and D to the right.

You can then pull the plate up with the semicircle and the wheel with the 4 buttons falls to the ground.
Click the Oculus away and zoom out, turn to the pillar and move the lever at the top of the pillar to the right.

Turn the wheel with the spokes and these 2 doors turn a quarter turn. Turn to the right and pick up the thing from the ground.

Continue along the colonnade and you will return to a grating door, zoom in on the center.

You see 8 circles with symbols, you have to turn the circles so that adjacent symbols are the same. It is different from the first grid door, now it is 2 groups of 4 circles and you can now also rotate the groups. You have 2 wheels with 4 buttons in your inventory, look at the back of the wheels and there you will see the difference.

Now drag those wheels to the correct hole in the center of the circles.

Start again with the circle at the top left, you now have to turn the right circle towards it. The correct circle of symbols of that circle are.....
the candlestick below, the square with the point on the left, the fish above and the inverted T with the crossbar on the right.

First turn the left group of 4 circles in the correct order and then adjust the right group with 4 circles.

The grid gate opens, pull the gate open further.

Go to the bench, zoom in on the left front leg, zoom in on the knob in the front left.

There is a white stripe on the knob and on the leg, turn the knob until the white stripes are on top of each other.
The button opens, pull the button further open and you will find a small key here.

Zoom out and zoom in on the right side of the sofa. Zoom in on the white button, drag the button to the left and you will see a keyhole.

Drag the small key to the hole and pull the key to the right.

2 valves open and you see a wheel, turn the wheel clockwise.

A hidden storage place comes forward, take the key from the storage place.

Go down the stairs to the door, zoom in on the lock and drag the key to the lock.

Turn the key and pull the latch down.

Open the door further and enter the room.

On the left is the door through which you entered.
On the balustrade of the stairs you will see a blue stripe, note the blue stripe and remember that it is on the left side of the room

In front of you you see a cabinetin the corner, under the cross is a table with a desk on it.
Zoom in on the left leg of the table and on the side you see 2 yellow stripes, note the 2 yellow stripes. This table is in the middle

Zoom out and then zoom in on the lectern in the right corner, on the right side you see 3 green stripes. So green is right

You now have a color code: blue - yellow - green.
Zoom out and then zoom in on the shelf on the right wall, take the metal ornament that is on the shelf.

You can zoom in on the door, but that does not make much sense now because the door is locked. There is a bookcase to the right of the door.
Zoom in on the cabinet in the left corner,

drag the ornament to the right panel. You can move both ornaments, but how should they stand.
Click on the Oculus and you will see a mechanism, drag the left ornament up and the right ornament down.

The panel in the middle will open, take the round ornament.

Zoom out and go to the cupboard against the right wall, zoom in on the shelf under the books.
There you see a star-shaped opening, drag the round ornament to that opening.

The lock slides open and you have to enter the color code: blue - yellow - green.

You have to pay attention to blue because there are 2 colors blue.

The books slide away and you see a mechanism. Inside the cabinet you see 4 vertical bars, in each bar there are 3 recesses.
Also you see 3 cross pieces A, B, C, with a copper button and on the left you see a wheel, when you turn the wheel the first bar goes up.

You now have to move those 3 cross pieces A, B, C in such a way that when you turn the wheel all the 4 beams slide upwards togheter. You have to be careful not to put the cross pieces too high otherwise you cannot slide the beams up far enough. The cross piece in the left bar should not be in the bottom notch, otherwise the bars cannot go up far enough.

A flap drops and you are now looking in the secret library.

In the middle of the opening you see a horizontal bar with a button, slide the button to the right.
The door to the library is now open. Zoom in on the door and push it open further, enter.

You can zoom in on all bookcases, but only the N-O and O-P cabinets are important. Click on the Oculus and go back to the past.

You can see the men with the red caps along the walls.
In an alcove, the captain is reading a book, you see a key hanging on the captain's back.

Go forward and take the key, the captain is shocked and then you are back in the present.

Then zoom in on the cabinets N-O and O-P, zoom in further on the lower part of the pole between the 2 cabinets.

You will see scratches there, turn the ornament and then zoom in on the keyhole. Drag the key to the keyhole and then turn the key and ......

... you now see the alcove with a book on a desk.

Click on the book and watch the rather lame ending......

Finally, you will see a screen that shows how long you have spent actual playing time on this game

2020: Walkthrough by: Dick Leeuw and Louis Koot
Text by Dick Leeuw and the screenshots by Louis Koot
