2014: Dutch Walkthrough by:
Louis Koot .
May 2022: English translation also by: Louis Koot
If
you have found this walkthrough via google search or via another site then you
have probably not visited my site.
A
lot more very detailed
game walkthroughs can be found on my site at: www.pcgameswalkthroughs.nl
Temüjin is a 1997 game that was released by "South Peak Interactive", a publisher that has been defunct for several years. The game is on SIX, yes on 6, CD-ROMs. The beauty is that there is no need to install any files to play the game. You can play the game entirely from the
CD-ROM's. And it runs nice and smooth, even with Windows Xp and Windows 7, 32-bit versions. As soon as you put the first CD in your computer's CD-ROM drive to start the game, only a SAVE GAME folder is created on your hard drive in which the game then saves your Save Games. Nothing else will be saved to your hard drive.
Temüjin is a very beautiful game in the Adventure point and click genre. It is a filmed game with live actors and the story is set in a museum. You, as the protagonist, are in the museum. You do not know who you are, what you do in the museum and why you are there. You notice that you can't leave the museum and you also notice that the other people in the museum seems to know you.
The villains' plot involves gaining World Dominion through Genghis Khan, and you must prevent this by solving puzzles and uncovering what's going on in the museum, where in about a few days the President of America will visit.
The game takes place in a museum, and a museum usually has showcases with works of art. Likewise in this museum. There are paintings and other works of art and you can really click on anything to hear a very accurate description of the paintings or
artworks. The game is completely mouse controlled and you can save as often and as much as you want.
Intro:

The game starts with a really beautiful intro movie in which you can already
make up what the game is about. The opening movie takes you to the year 1227 BC. We see a funeral ritual for Genghis Khan. Pay special attention to the woman with the sword. She is the villain of the game. A Concubine named Mei will conduct the ceremony. Mei will become your main help in the game, but you don't know that yet. Watch the
movie in which it becomes clear that the Priestess has other intentions than Mei
Mei brings the blood sacrifice and her blood falls on the Goat's Head and the funeral ritual is about to begin....
...But the priestess has other plans for Genghis Khan than Mei..........
...the priestess wants to bring
Genghis Khan back to life and she starts to call on the Goat's Head Temüjin......
Fire spews from the gongs and everyone is consumed by the fire, but Mei ends up in the Medallion of the
Goat's head ..... and .......
.....we end up in our own modern time and in:

You play the game in a small game screen. In the edges of the screen are the arrows to move up, down, left and right. You move through the screen by clicking in the screen with the active cursor. Often you can also scroll left or right if you place the active cursor at the edges of the screen. But to really turn left, right, up or down you have to use the arrows in the edges of the screen.
At the top
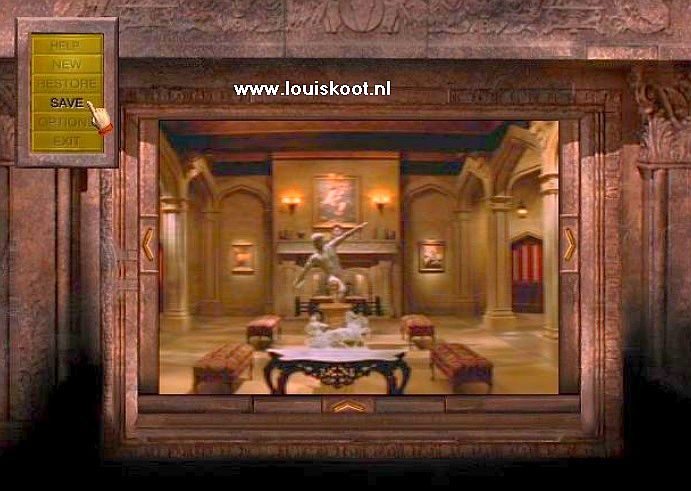
left you will see the "Menu" button. When you click the "Menu button", a box slides out in which you can go to the various functions of the game such as, "Help", "New", "Restore", "Save", "Options" and "exit". In "Options" you can change some settings of the game
Via "Save" you come to the "Save Game" screen where you can always and at any time save your game and you can then reload those Save Games via the "Restore" option. When you leave the Game, via "Exit",
you will be asked whether you want to save the game or whether you want to close without saving .... It is recommended to save often yourself because this is quite a difficult game where not only some puzzles are quite complicated but also where you have to do things in a certain order to make other things happen. Ok......"let's go"......
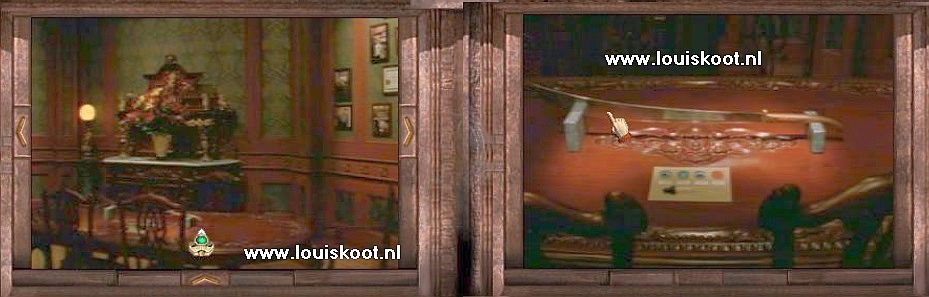
Great Hall:
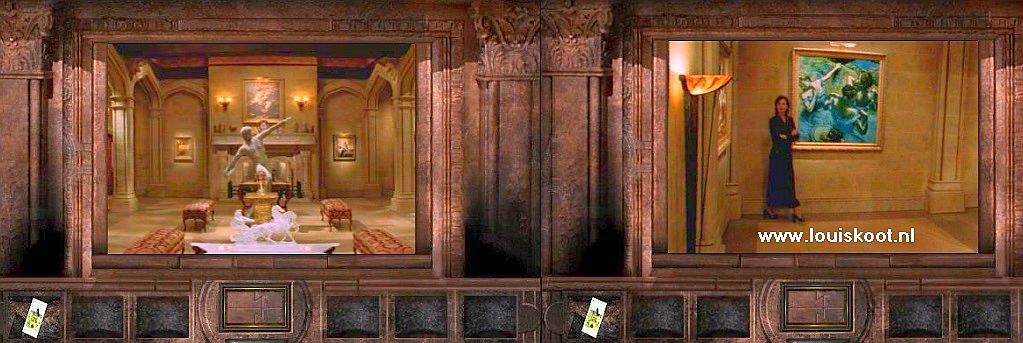
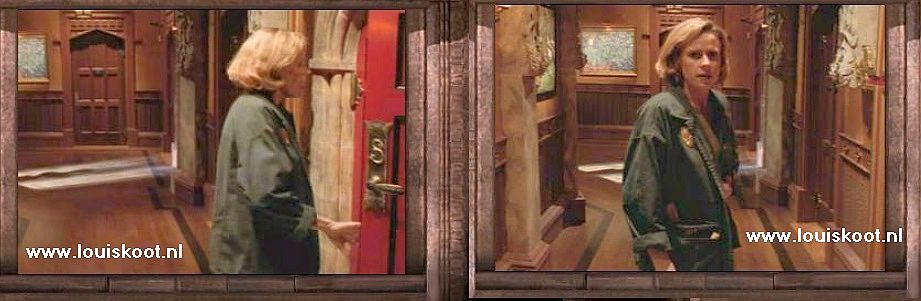
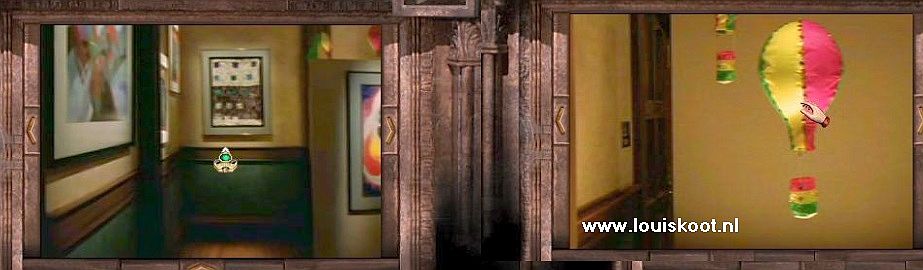
You start the game in the Great Hall, in the small hall at the front door and you look into the Great Hall of the museum. You are dazed, almost numb. You don't know who you are and where you are. You also don't know why you are where you are. Everything is one big blur for you. Behind you is the double front door of the museum. You want to get out, into the fresh air. Turn around using the arrows on the sides of the game screen. Then click on the doors. The doors don't open. However, a white "Cloud" appears and a medallion appears in the "Cloud". In the medallion you see the face of a girl. It's
Mei, but you don't know that yet.
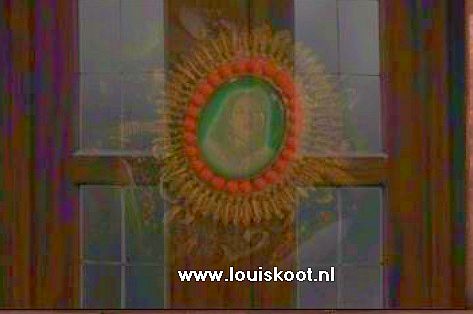
"Free Me", "Free Me", do you hear. And that's exactly what you need to do in this part 1 "Free Spirit". You must free Mei from the locket.
So you can't leave the museum. Why you can't is a mystery to you. Turn left, to the wall
that's to the left of the front door.
There is a painting on the wall. The painting is a sea scene.....
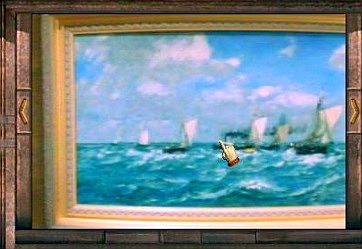
Zoom in on the painting and then click on the painting with your finger. You will hear a short, recorded, description of the painting. In the museum you can zoom in on any painting and other artwork and then click on it. You will then always hear a short description of what the painting or work of art represents. Turn a little more to the left. Next to the painting is a tray with Museum folders on the wall. Grab a
Museum folder from the tray.
At the bottom of your screen you will see the Inventory Slots. There are infinitely many, but you always see only 6. Between the inventory slots you see a larger rectangular box. That's your "Eye
Pocket" that allows you to get a closer look at the items you pick up. Click the Museum folder in this Eye area. The folder will then appear large on your screen and the "Eye" will now appear in the box.

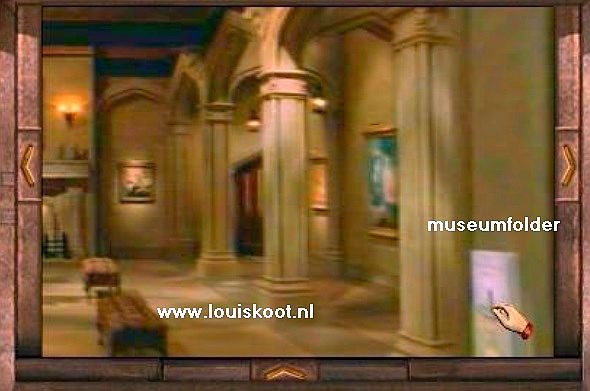
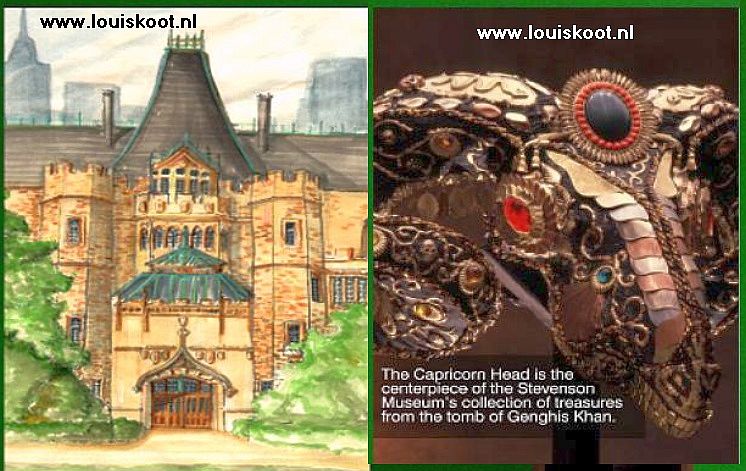
On the Museum folder you can read the name of the museum, "The Stevenson Museum". Click on the folder again. The folder will now unfold. It turns out to be a map of the museum. You are now in the Great Hall and from the Great Hall you can enter the hallway. The corridor runs around the inner garden and there are various rooms and offices in the corridor. The most important room of this museum is the
"Capricorn" room because there is the "Genghis Khan" exhibition with the Goat's Head as showpiece that you already saw in the Intro movie. You will frequently visit all the rooms because the game mainly takes place in those rooms.
Click on the "Eye" to close the Museum folder again and then click the folder in one of the Inventory Slots. Turn around again to the front door and then turn to the right, to the right wall of the shallow hall. There is also a painting on the right wall and next to this painting there is also a tray with Museum folders. Also zoom in on this painting and click on it to hear its description. Then click on the Down arrow
at the bottom center of the screen. You look down at the guest book that is on a small low table.
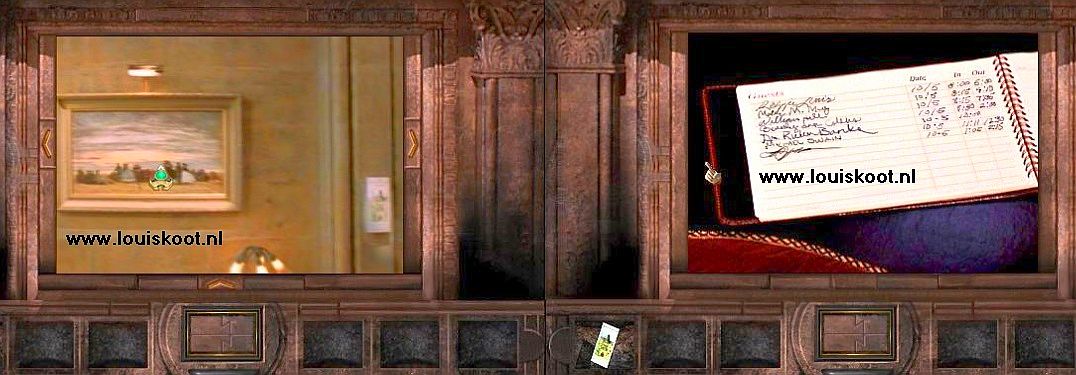
Click on the guest book to read the names of the people who visited the museum on 10-5, and at what times. Use the extended finger to zoom out of the close-up again. Then look up again via the up arrow and turn to the right so that you look again at the discus thrower statue that is in the middle of the Great Hall and .............. The game now takes over
for a while . You hear a female voice and the camera pans to the left.
NB: This only happens if you have taken the Museum folder from the tray at the 1st painting and have looked at the guest book and tried to leave the museum
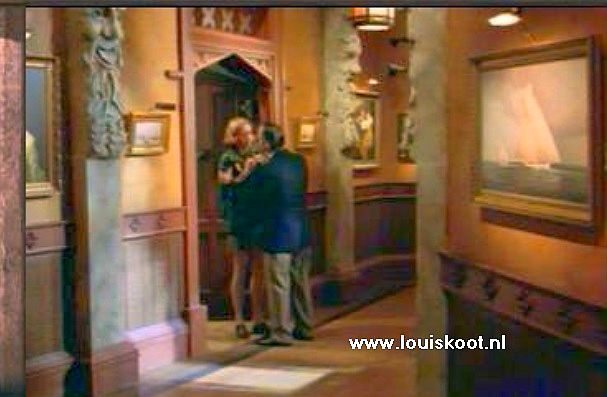
A woman approaches you from the corner of the room. She seems to know you. She's talking to you. This is Laurie Wood.
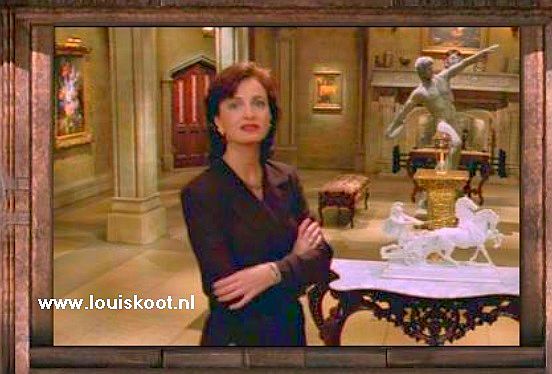
You stand rigidly looking at Laurie while she just chats to you. Who is she? Why does she know me?, you think to yourself. Listen to Laurie. She finds "something that is going to happen to you" very sorry for you. But what is that? What will happen
to you? You do not know. Laurie then exits through the front door.
Hey .... Laurie can go outside. Maybe you too? Click on the front doors again. The left door will now open, but ..... you can't go outside anyway. Turn around again and now walk into the great hall. Take a look at the things in the Great Hall at your leisure. So wander through the Great Hall, click on the paintings and listen to their description. Just in front of the hall with the front doors, there is also a
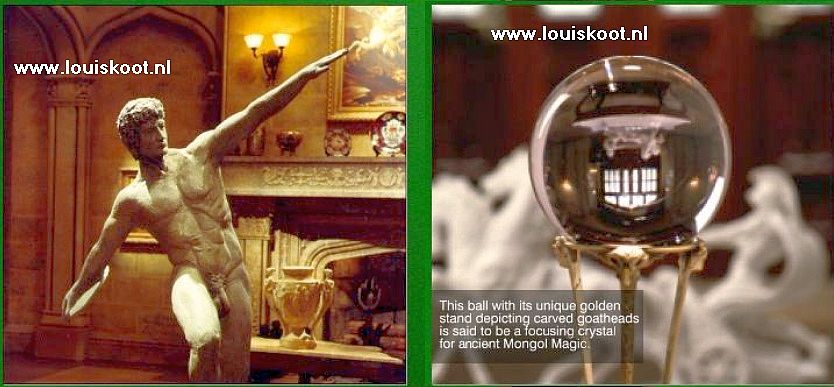
Glass Ball that you can't click on yet. You can zoom in on it. Once you free Mei she will appear in this Glass Ball and you can then always ask her for help by clicking on the Glass Ball. The Great Hall has a fireplace and in the corners, to the left and right of the fireplace, are the red doors to the hallway.
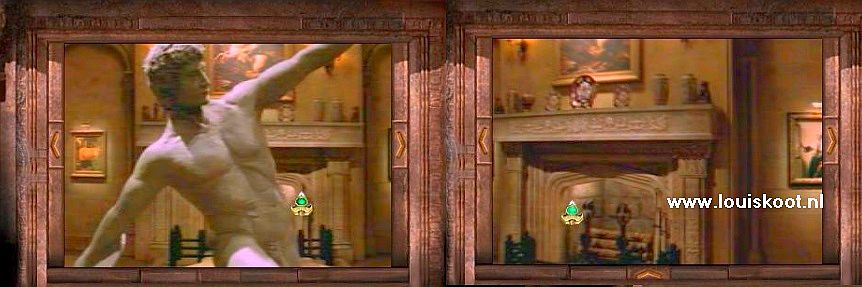
Go to the Fireplace and look down. To the right of the fireplace are the black pokers. Grab a poker and click it on the logs in the fireplace.
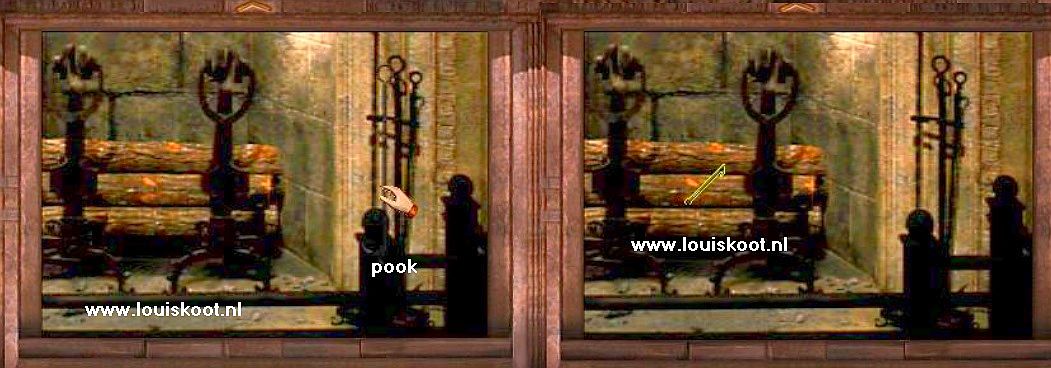
Fire appears between the fire wood and a piece of paper flutters on the ground. That piece of paper is now in the front left of the fireplace. Place the poker in an inventory slot and then place your finger on the
piece of paper that you just "poked" from between the logs. Your finger becomes a "Magic Book" cursor and you hear a typical sound.
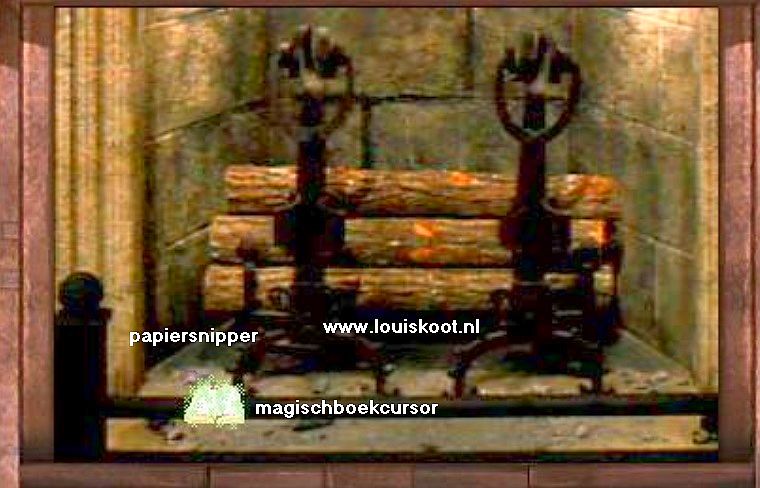
Now click with the "Magic Book" cursor on that piece of paper.
You hear Mei's voice and she says: "You do not yet have understanding, and thus no magic".
So you can't do anything with the Book yet. First you must "liberate" Mei and she will then give you the power to uncover recent events and slowly but surely regain your memory. From Part 2 you can then start collecting your memories with this "Magic
Book". It is useful to remember from now on where and on which items you always get that "Magic Book".
Look up and turn to the right. Go to the red doors in the corner to the right of the fireplace. Click on the doors.
The doors open and you automatically walk into the hallway and you hear a woman's laugh as you walk through the hallway to the red door of the Capricorn Room.
When you reach the doors of that Capricorn room, a woman steps out of the Capricorn room and this lady looks really agitated.
This is Suzanne Armstrong. Suzanne also seems to know you. She looks at you with a rather weird look in her eyes and then she runs away.
What would have scared her so much? Turn clockwise to the red doors of the:
Capricorn Room:
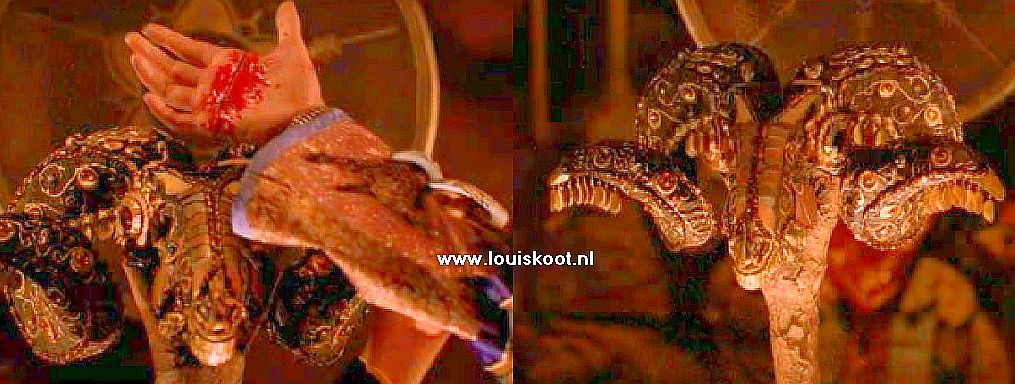
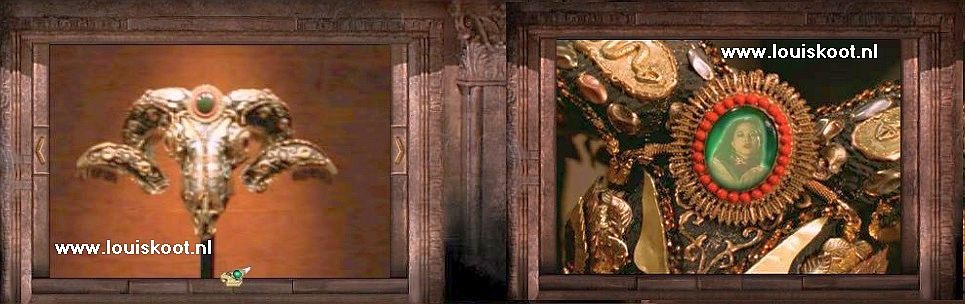
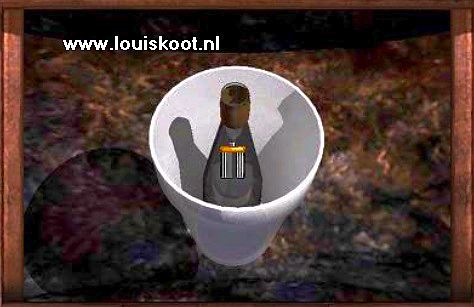
Click on the red doors. You will automatically enter and walk straight through the room to the GOAT's HEAD.
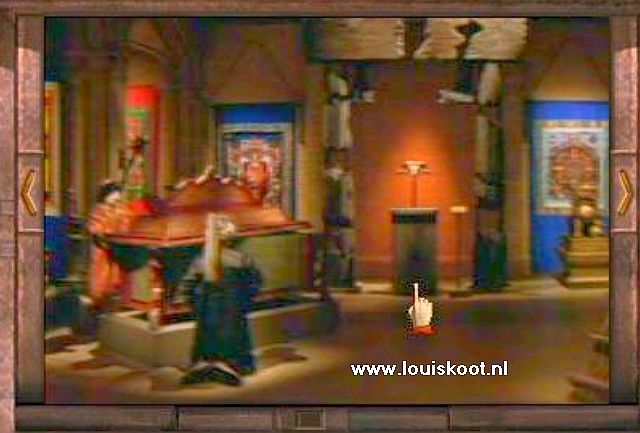
Well..... So this is what it's all about. This Goat's Head is what this game is all about. This is the Goat's Head of that Genghis Khan.
There is a green Medallion on the head. Click on the green medallion and ...... Mei appears again in the medallion.
Again Mei shouts: "Free Me". And that's exactly what you should do. Turn around and walk back to the red doors of this room. Then turn around again so that you are looking at the Goat's head again. You will then see a large
Red Chest on the left. Go to the chest and then click on the lid of the chest. The lid slides open and.....
Oops...... is that a real corpse in the chest? . It's certainly not an ancient mummy, but a modern guy who hasn't been dead very long. A piece of paper sticks out of the inside pocket of the jacket. Grab it. It is a piece of a letter and it appears in your
"Clipping Folder" in witch all the clippings you will find are stored. You can turn and read them. Zoom out via the "Point Finger" that you get at the top left. The Clipping folder is now located at the top right of your screen.

Click on the Hand of the Corpse. You grab a Pocket Watch. Watch it through your "eye" in the big screen.
Then click on the watch and read the inscription in the inside of the lid.

Place the watch in an inventory slot. Close the chest again by clicking on the lid again. Well .... you can now go and have a look around, here in the Capricorn Hall. There are different things that you can look at and that is what you should do. Everywhere you will find a nameplate and if you click on it you will hear a description of the things you are looking at. Be sure to check out the
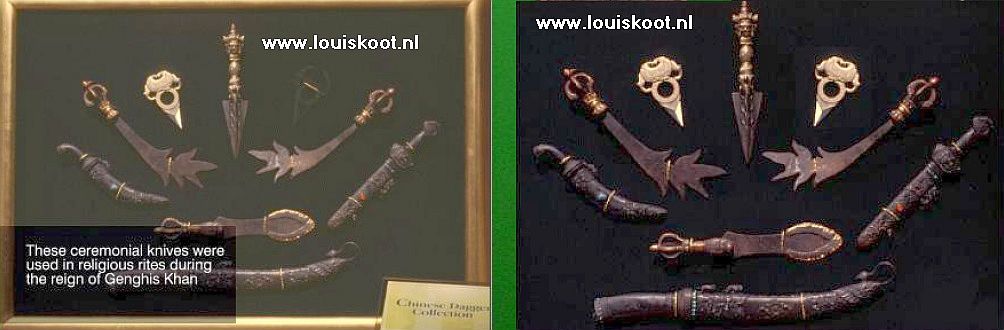
different gongs in the corner behind the red chest. You can hit it. Also find, in the front right corner, a pillar where the "Chaliceof Mei" should be on it. That Chalice, however, is gone. Also check out the "Chinese Dagger Collection" and the
large Catapult device that is here in the room.
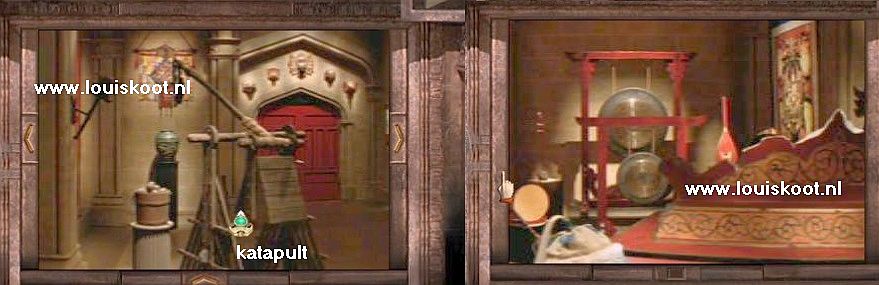
We'll come back here in a later chapter and then shoot with this Catapult / Slindhot device. When you have satisfactorily viewed everything here in the Capricorn Room, leave the room again through the red doors. Back in the hallway you hear voices. You automatically turn left and you see Suzanne again.
Suzanne is still excited and a guy tries to calm her down. That guy is Jordan Cooper, the bookkeeper of the museum. Jordan tells Suzanne to listen to the intercom in Stevenson's room. At 3 beeps Suzanne has to
answer. The two then see you coming and get scared and go away. Suzanne enters the room and Jordan walks away down the hall. Continue forward in the direction that Jordan also disappeared. Walk through and you will come to an open gate. That is the access of the:
Giftshop:

Go inside. and walk to the counter and ......... you now meet the lovely Lorena.
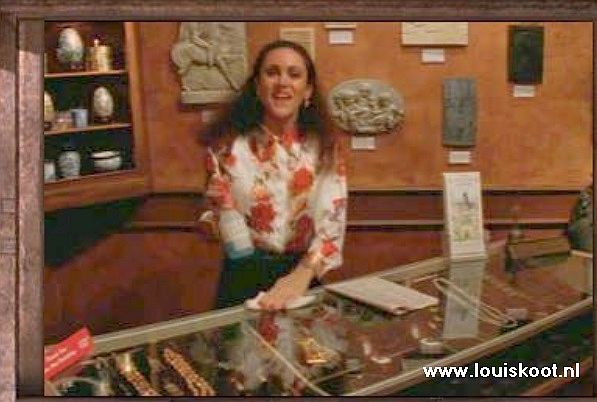
This Lorena also seems to know you well, it's almost like she treats you like you're her boss.
Lorena hears some breaking and leaves. Look down at the counter.
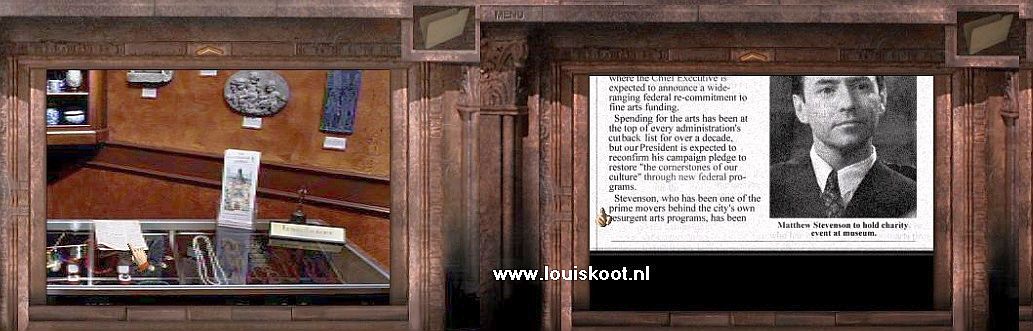
There is a newspaper on the counter. Click on it and read the newspaper article about the upcoming "Annual Legacy Club Dinner" that will take place here at the museum and will also include the President of America. View the
photo accompanying this article. That's Matthew Stevenson, the owner and founder of this museum. Somehow this face looks very familiar to you. Look up and turn to the right. In the
cupboard, which is against the right wall, are a number of Jigsaw Puzzle Boxes. Zoom all the way in.
|
The Jigsaw Puzzles
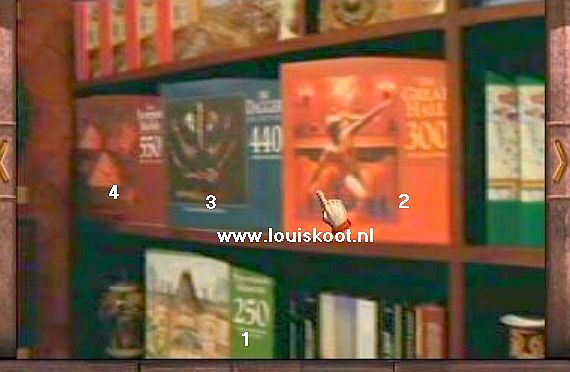
There are 4 Jigsaw puzzles in the cupboard. You have to puzzle all 4 of them together. For each solved puzzle you will then receive 1 puzzle piece for the large 660 puzzle later in the game. You will not get these puzzle pieces for the 660 puzzle now, but
you get them later in the game.
YOU MUST DOTHESE 4 PUZZLES IN THE RIGHT ORDER. So first the 250 puzzle and then the 300 puzzle, then the 440 and finally the 550 puzzle. If you don't do this, you will certainly get stuck in the further course of the game, because you will then only get 3 pieces for the 660 puzzle and then you cannot solve that 660 puzzle and
then you cannot finish the game.
If you click on a puzzle box, the puzzle pieces will appear on the screen. You can pick up the pieces and drag them. You can turn them with the finger that you get on the corners. Each puzzle has a front and a back. By right-clicking on the puzzle pieces you change the side of the piece.
You have to decide for yourself whether you find it easier to solve the puzzles from the front side or the back side. If you solve the puzzle, the puzzle will automatically change into the back side. On the back side of each puzzle you will see an object from the museum that you have to go to later.
The 220 puzzle
It must be like this
The 300 puzzle:
It must be like this
The 440 puzzle:
It must be like this
The 550 puzzle:
|
When you have solved the 4 puzzles, open your museum map again. Study the location of all rooms. In the remainder of this walkthrough I will no longer take you to each room by your hand, but will suffice to tell you which room to go to. Now let me explain who "lives" in the rooms.
You are now in the Gift Shop and this is Lorena's domain. The "New Artist Gallery" is a room with modern art. The "Studio" is in fact the workshop of the museum and is mainly the domain of Suzanne, but you will also encounter one Reg
there. You will meet Reg. The "Snack Room" is the museum's staff canteen (Employees Only" door). Behind the "Snack Room" is the "Supplies" room, a small pantry.
The "Capricorn" room is actually the main room of the museum. Here the Gengis Khan collection is exhibited and the showpiece of the museum the "Capricorn Head". That's that "Goat's Head" you've already seen. "Wood" is Laurie Wood's room, the woman you met in the Great Hall. "Security" is the room of the museum's security man, one Nick and you will meet him
later.
"Cooper" is the room of the bookkeeper, Jordan Cooper. "Macey" is Macey's room. You will be meeting Macey for the first time in a moment. "Stevenson" is the room of Matthew Stevenson, the owner and director of the Stevenson Museum. You don't know it at this point, but YOU are that Matthew Stevenson. Good .... now leave the Gift Shop and go to the:
Snack Room
The door to this room reads "Employes Only". Go inside.
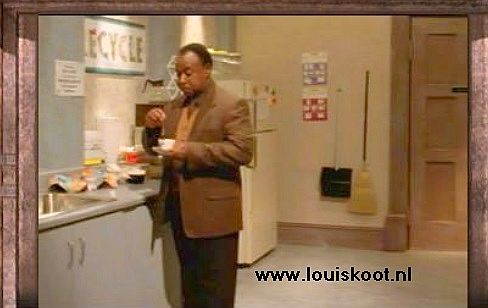
There's a guy standing at the counter with a cup of tea in his hands and he's looking at you quite curiously. Like he's waiting to see if you recognize him. You do not do that. This is Franklin Macey. Macey is the
"director" of the museum. This used to be a different museum and then Macey really ran it. But Matthew Stevenson bought the museum a few years ago and because of this Macey has been demoted to director. And Macey didn't thank that Stevenson for that. Macey is a tea lover. He drinks his tea and then leaves the Snack Room.
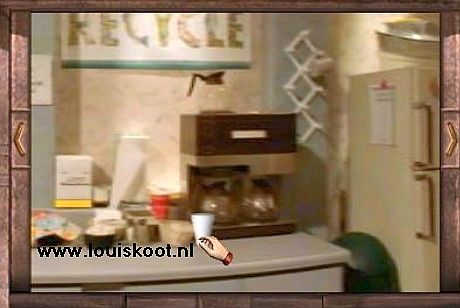
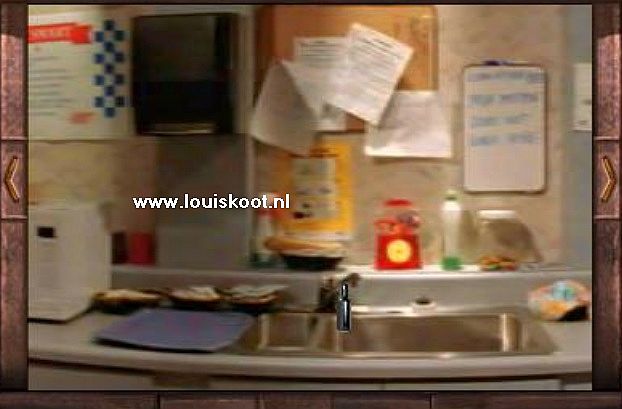
Also here in the snack room you can click on everything. However, there are a few items that you need to find here and place in your inventory. On the right part of the counter is a coffee maker. There is a white plastic cup in front of the coffee maker. Grab this
plastic cup and place it in your inventory.
There are also a number of bowls on the right part of the counter. The bowls contain plastic spoons, knives, forks and sugar cubes.
Zoom in on the bowls and take a Spoon, a Fork, a Knife and a handful of Sugar cubes from the bowl. Place them all in your inventory.

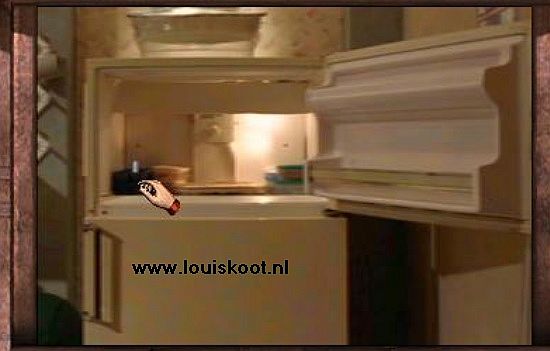
Zoom out of the counter and go to the refrigerator. Open the freezer compartment of the refrigerator.
To the left of the freezer compartment is a black bowl containing a large lump of ice. Grab the lump of ice and put it in your inventory.
Zoom out of the freezer compartment. You can look around a little further here in the Snack Room and you can enter the Supplies Room through the door, next to the refrigerator. But don't do that now. We'll have a look in the Supplies Room later. Exit the Snack Room and continue right down the hallway to the room of:
Matthew Stevenson:
You automatically walk through the room again. Aim your cursor at the fireplace mantel. There is a silver chalice on the mantelpiece.
It is the "Chalice of Mei" that should actually be on the pillar in the Capricorn room. Grab the Chalice and place it in your inventory.
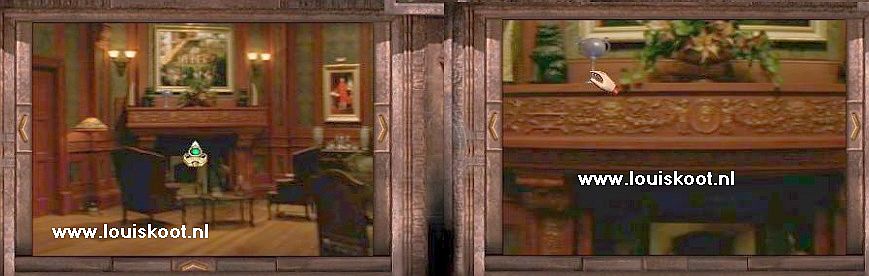
Turn left and go to the beautiful oval wooden table in the middle of the room.
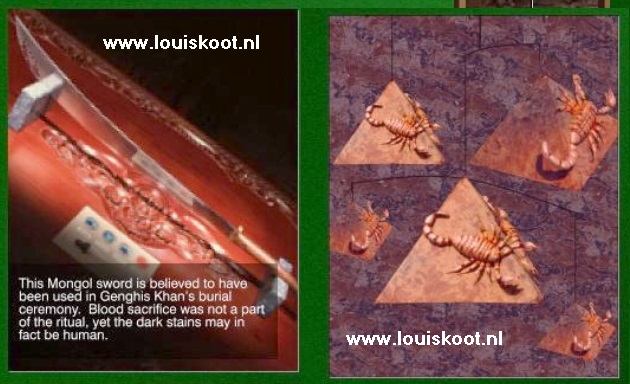
There is a sword on the table. Zoom in on it. In front of the sword is a test paper and a syringe.
On the tip of the sword you see some dried drops of blood
Take the plastic knife from your inventory and click on the blood drops of the sword.
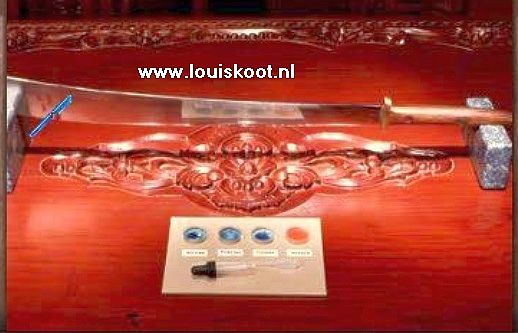
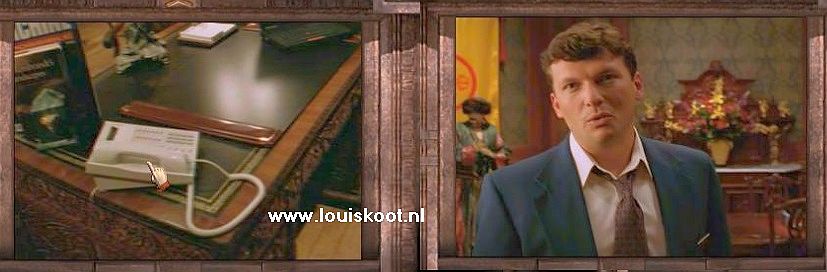
You scrape off some of the blood and a "Blood Sample" is now placed in your inventory. Place the knife back in your inventory. Zoom out of the sword and look up via the up arrow. Then turn left. To the left of the room door is a folding screen and to the left of that is a low cupboard with a tea stove. To the left of that low cupboard is the desk. Go forward and you will end up on the
right side behind the desk. There is a white telephone on the desk. Behind the phone are a few books. on the other side of the desk is a laptop computer and there is also an agenda on the desk.
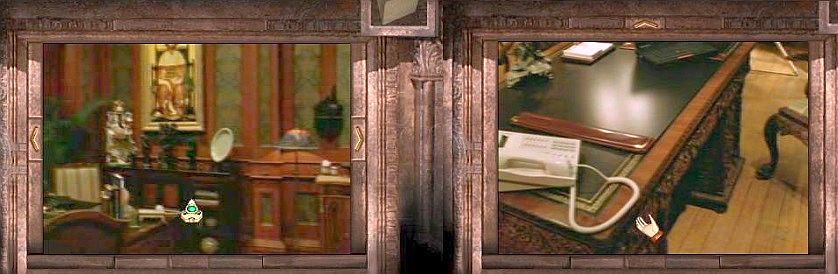
There are 3 drawers in the desk. You can only open the left drawer at this point, so open that drawer.
There are some papers in the drawer and you get the "Magic Book" on it.
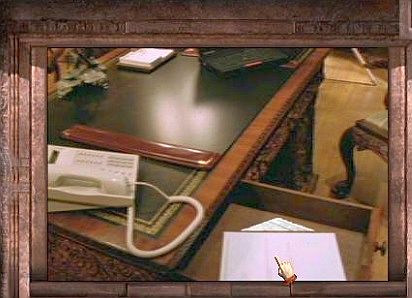
Click on the top paper. It's a memo from that Suzanne about the blood on the sword. Close the drawer and zoom out. Click on the phone. You zoom in on it and accidentally press the 991 button, thus making unintentional contact with the emergency service. Suddenly someone else presses on the phone to disconnect. You will now meet
Nick Costello, the museum security man:
"What are you supposed to do with a phone?" Nick asks. Nick promises he won't tell anyone and he leaves again. Nick is quite a "split personality" and therefore suffers a lot from "voices in his head". But you will find out
that Nick is actually not a bad guy. You're back on the phone. Click on the telephone receiver.
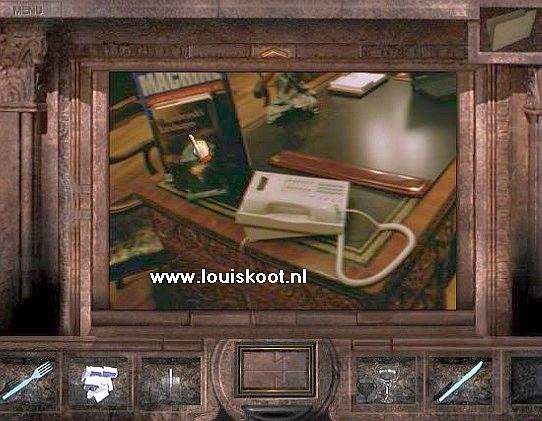
You zoom in on the keys of the telephone. Click on the "Voicemail button". You will hear that 6 messages have been recorded. To listen to the messages, you must always click on button 1. So do that and listen to the 6 messages. After each message, press key 1 again. The most important message is message 2.
Message 2 is from Professor Reuban Banks. Reuban Banks has been commissioned by Matthew Stevenson to examine an ancient goatskin with legible characters on it. Banks managed to decipher those legible characters. More importantly, Banks says he recognized an early student of his
as a museum employee and that the presence of this person in the museum worries him deeply.
When you have listened to all 6 messages, click on the "Page button" to "Page" Suzanne who has locked herself in the "Studio". Just like you heard that Jordan say to her. This will allow Suzanne to leave the studio in a moment, and this will allow you to go in there.
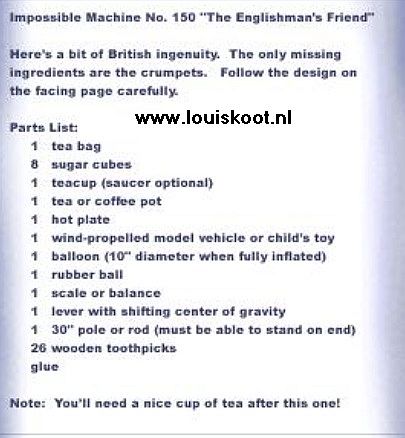
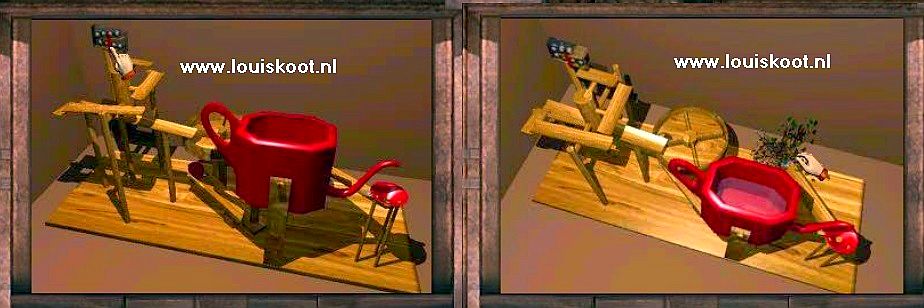
Zoom out of the phone twice. Click on the books behind the phone. The "Impossible Machine" book will appear on your screen. Open this book and browse it via the white arrow that you always get at the bottom right of the screen. Take special note of the Impossible Machine no 49 "The Automated Plant Waterer" and the Impossible Machine no 150 "The Englishman's Friend". Also read the "Partlist" of
this machine because you will have to find all the items mentioned in this list.
Close the book and zoom out via the index finger under the closed book. You can then click on that Laptop and then on the red button on the keyboard. In the laptop screen you will see that Goat's Head. If you then click in the screen, the goat's head changes. Zoom out 2 times and look up via the up arrow. Now turn clockwise to the low chest of drawers. This
chest of drawers has a glass teapot on a brazier. You don't know it yet, but here you will soon have to brew a cup of tea using the "Englishman's Friend" method. Find the room door and exit the room into the hallway. Turn left down the hallway to the:
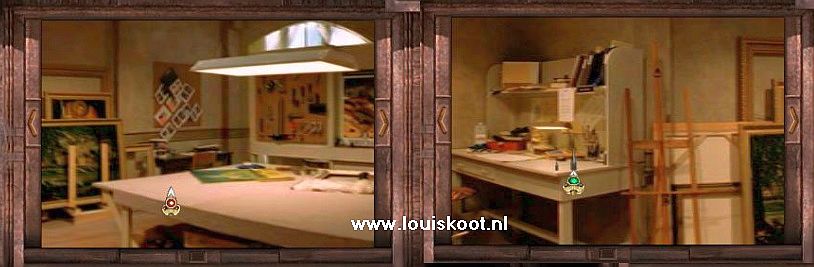
Restoration Studio:
When you are in the hallway right in front of the studio door, Suzanne comes out of the studio into the hallway.
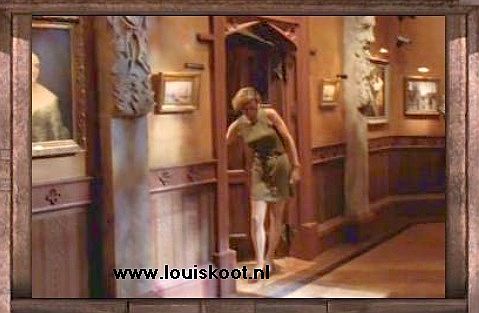
This is because you "paged" Suzanne over the phone in Stevenson's room, just like the Jordan told her he would. So Suzanne thinks that Jordan has summoned her and she heads for Cooper's room. But for some reason she doesn't dare to get past you, so she goes the other way. Walk to the door, open the door and you will go in automatically. The Restoration Studio is a larger
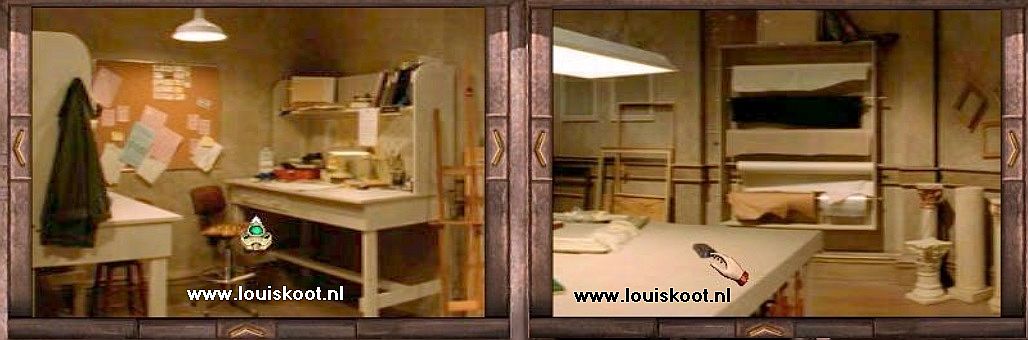
room. It is the workshop of the museum. You automatically walk on to the 2 work tables that are in a corner, behind the very large work table that is in the middle of the room. You are then standing against the front of the right work table. Click on the work table with your blinking cursor. You walk through
and then stand between the 2 work tables and are zoomed in on the right table.
There are many items on this table. For now, the most important thing is that you see the 2 empty Wine Bottles and pick them up and put them in your inventory. The 2 wine bottles are on the far right on the work table. To see them, move the cursor to the right edge of the screen and then flick the cursor back and forth with a quick jerk. In this way you move the
screen to the right and you will automatically see the 2 empty wine bottles. It is a small and a bigger bottle. Grab them both and put them in your inventory.
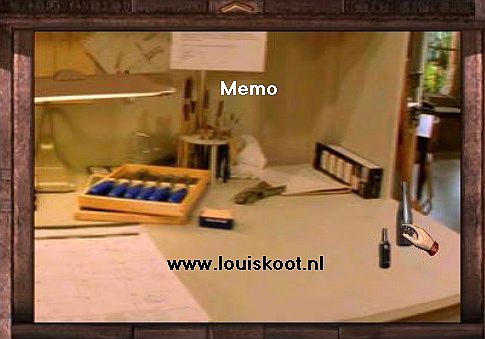
Above where the bottles were, you can see the bottom of a letter that is stuck to the boxes above the table. Click on the letter and then read the letter. It is a memo from Franklin Macey, the director of the museum, regarding some items that have disappeared from the museum. Via the down arrow you scroll down through the letter and you also get the
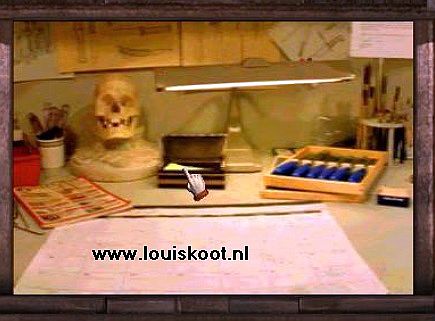
"Magic Book" on it again. If you have read this memo completely, zoom out. Take a look at the other items on this table. There is a lamp on it and to the left of the lamp is a plaster skull that you can click on. There is also a small box in front of the lamp. Open this box. There is a yellow note in it.
Click on the yellow note and read it on your screen. It is a poem about 2 beggars. Read it carefully. This poem gives you the complete solution of the Bottle Puzzle that you will soon
must solve in the Snack Room to prepare the potion that will help you free Mei from the medallion. Put the note back in the box and close the box. In the far left corner is a large bottle of LATEX on this table, were you also get the "Magic Book" on it. Well, for now you're done in this room, so turn right and find the room door. Go forward to the door and exit this Restoration Studio. Turn left down the hallway to the:
New Artist Gallery:
Enter here. You automatically enter the room and stop in front of a wall with a large chest on the floor.
Look down at the chest and open it.
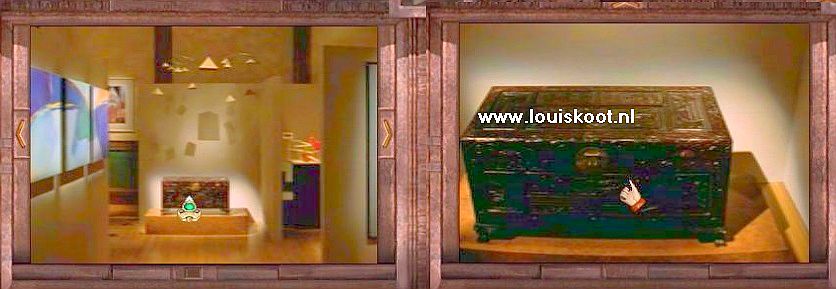
There is a large book in the chest but you are not allowed to take the book out of the chest. Zoom out. The chest closes again. Look up via the up arrow. This room is a bit of a maze, with separate corners where different objects are arranged. So you have to navigate smartly here to achieve everything you need to achieve. Turn clockwise via the right arrow and then go forward to the right wall of the room. Then turn right again. You then look ahead to the corner, to the left of the room door. There's a painting there. Go forward and then turn right. There is now a brightly colored Balloon in front of you. Grab the
balloon and put it in your inventory.
Turn right and walk forward to the other side of the room.
Then turn clockwise again and move your cursor back and forth on the right side of the screen to turn a little further clockwise with small tugs.
You will then see the passage to the right to the chest.
2 of those "Impossible Machines" are set up there. Go forward through the passage.
If you do this correctly you will end up at one of the "Impossible Machines" nameplate. Click on the nameplate.
You zoom in on the machine. It's a marble machine.
The sign says the thing is "Out of Order". At the top left you see the marbles.
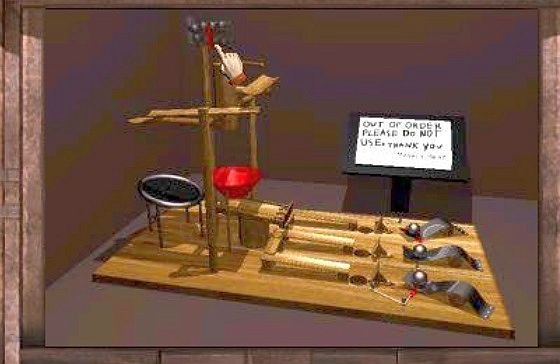
You know what...have some fun. Click 3 times on those marbles. Each time a marble rolls down and it is then shot across the room and something breaks. This is for your own enjoyment only and will not affect the further course of the game. After shooting a marble in this way 3 times, you can no longer click on the machine. Then turn left. You will see a
red Watering Can.
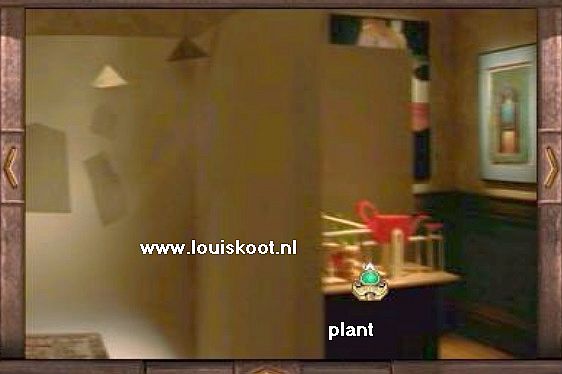
Go to the red watering can and click on it. You are then zoomed in on the "Impossible Machine no 49". You saw this in the "Impossible Machine" book that is on Stevenson's desk. This is also a marble machine. The intention is that you let the screen "Tilt". Click again on the marbles, at the top of the "tower" on the left. A marble rolls down and through the watering can into the red bowl. The screen is then "lifted" and you now see that there is a green plant behind the watering can. Grab a green leaf
from this plant and put the leaf in your inventory.
For now you're done here. So zoom out and find the room door and exit this "New Artist Gallery".
Turn right into the hallway and back to the:
Restoration Studio:
Go back inside. There is now a guy, stretched out on the large work table, hoisting drinks.
The guy is a bit tipsy and not at all polite to you.
This is Reg Westlake, the restorer of the museum. Listen to what he says. Reg is a very unpleasant character. Reg then gets up and throws his empty flat liquor bottle on the table and he leaves the room. You need that empty booze bottle from Reg, but you can't see that bottle from where you are now. Turn left and walk forward to the front of the work table from which you took the 2 wine bottles earlier. Then turn clockwise until you see Reg's flat liquor bottle on the large work table. Grab the
bottle and put it in your inventory.
You are done here for now. We will come back here a few more times, but now it is really high time to liberate that Mei.
Exit the Restoration Studio and go back to the:
Snack Room (Employees
only):
Make the "Free Mei" potion
|
Go back inside and to the counter. Stand directly in front of the sink with the water tap. You are now supposed to make a potion that will help you free Mei from the Goat's Head medallion.
For this potion you will need the following items: the 2 Wine Bottles and the flat Liquor Bottle from the Restoration Studio, the White Cup from the Snack Room, the Silver Chalice and the Blood Sample from Stevenson's room. Check whether you have all these items in your inventory.
You can read the solution to this measurement puzzle in the poem that is written on the yellow note that you found in the box in the Restoration Studio. Then do the following:
Take the smaller of the 2 Wine bottles from your inventory and click it on the tap.
You fill the bottle with water. Place the filled bottle back in your inventory. Take Reg's flat Drink Bottle from your inventory and fill it with water from the tap as well. Place the filled bottle back in your inventory.
Now take the White Cup from your inventory and click it in the "Eye compartment" of your inventory. Take the empty large wine bottle from your inventory and click it in the white cup. Take the filled flat Drink Bottle from your inventory and click it into the cup. You pour the water from the bottle into the cup.
Place the empty bottle back in your inventory. Take the Small Wine Bottle from your inventory and click it into the cup as well. You also pour the water from this bottle into the cup. Place the empty bottle back in your inventory. Take the empty large wine bottle from the cup and place the bottle back in your inventory.
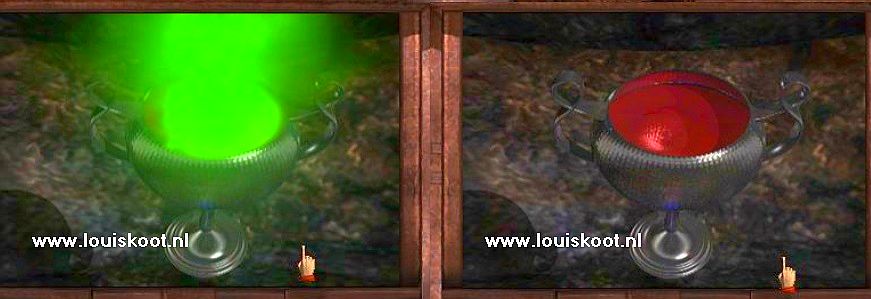
There is now the correct amount of water in the cup. Place the cup back in your inventory. Now place the Silver Chalice in the "Eye Compartment" of your inventory and pour the contents of the white cup into the Chalice. If you now have the right amount of water in the cup, the chalice will fill to the brim with water. If you do not have the right amount of water, you will see the water in the chalice burn.
However, you've poured the right amount of water into the chalice if you've done exactly what I've told you to do. Place the empty cup back in your inventory. Now take the Blood Sample paper from your inventory and click it in the Silver Chalice and ....
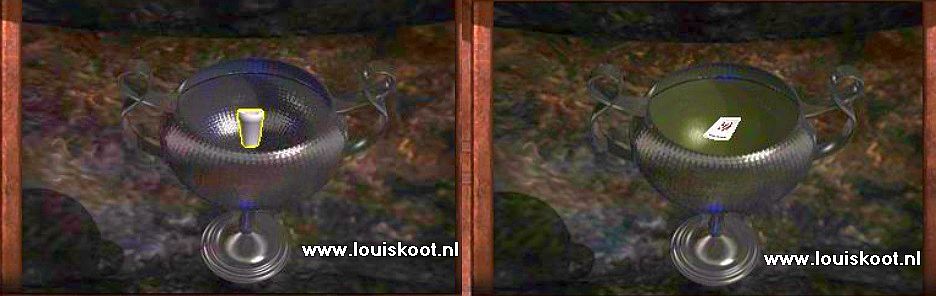
The water in the chalice first turns green and then red.
You have brewed the Mei potion. Place the chalice back in your inventory. Exit the Snack Room and go back after the red door of the: |
Capricorn room:
Go back in here. Again you walk automatically to the Capricorn Head, so to the Geitenkop.
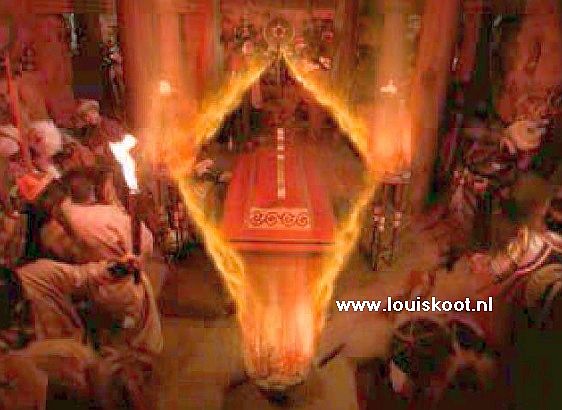
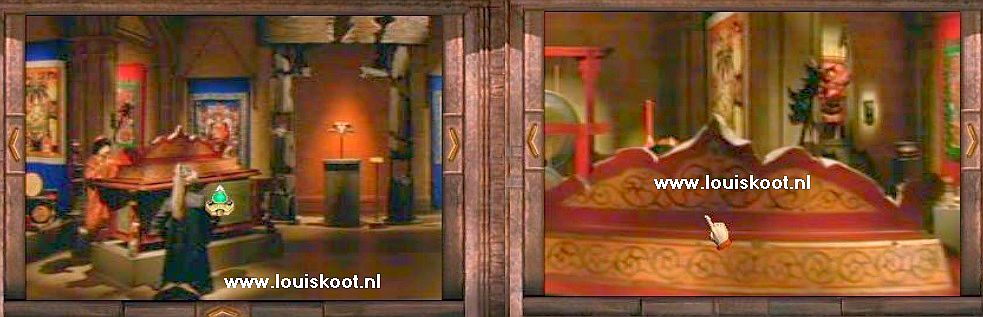
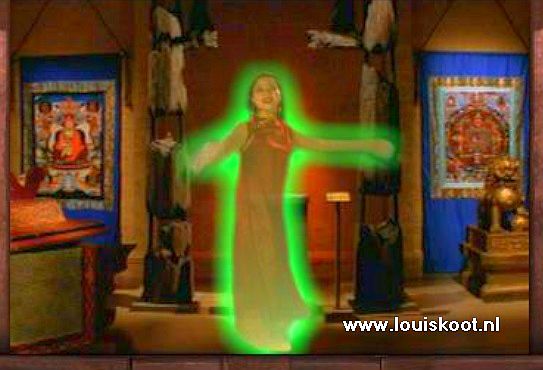
Take the Silver Chalice from your inventory and click with it on the Green Medallion of the Goat's Head and ....
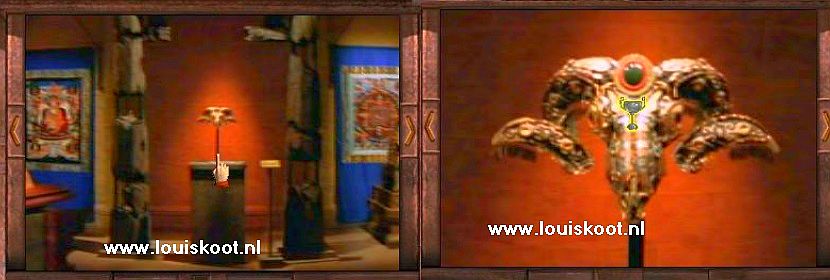
......... well ... watch the cutscene......... Mei is "Freed" and now appears with a green haze around here in the room:
Listen to May. You now have to put CD 2 in your computer or load the CD 2 ISO file
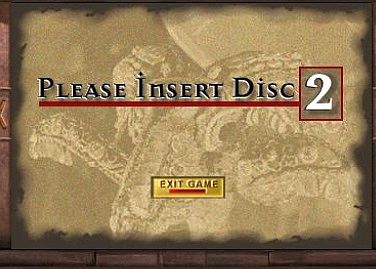
and when you've done that you end up in:
Episode 2: Past Tense
May 2022: English translation of the 2014 Dutch walkthrough by: Louis Koot