
2023: Walkthrough door: Louis
Koot:
This walkthrough is my English
translation of my old Dutch Tex Murphy Overseer walkthrough I did
years ago
If
you have found this walkthrough via google search or via another
site then you
have probably not visited my site.
A
lot more very
detailed
game walkthroughs can be found on my site at: www.pcgameswalkthroughs.nl
Page
2 of the walkthrough
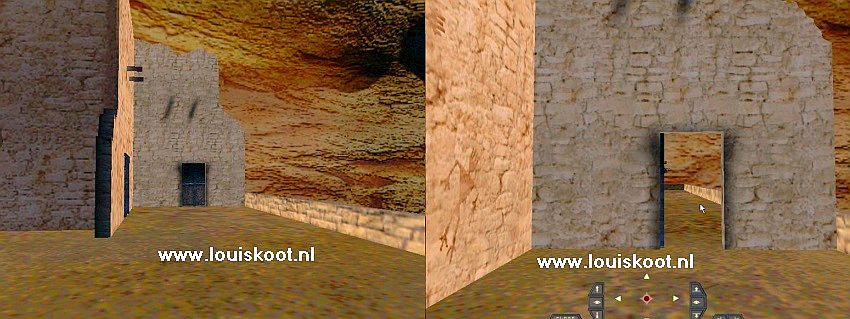
Anasazi Village:
through a cutscene Tex travels to the desert and ends up at the old Anasazi village.

Straight ahead you see 3 turnable
discs on the wall. Continue to those 3 discs. 3 levers hang above the 3 discs.
There is a hatch in the wall to the right of the 3 discs. Look at the 3
discs .....
Tex then tells you that they are 3
gears, 2 large ones and a smaller one.

Click the action screen on the gears and then choose the "Move" option and you get into the:
Gear Puzzle:
Tex explains what the intention is. You see 3 levers in 3 slots. The three levers are now all 3 in the middle position. You can click
each lever up or downin the slot by clicking above or below the lever. You have to click the 3 levers in the right order or up or down. Each time, however, the levers return to the center position.

Click the middle lever up. Click the
right lever down.
Click the left lever up, click the
right lever down and click the left lever up and .....

You go out of the puzzle and the hatch in the wall pops open. There is a stone in the hatch hole .... look at the
stone .... Tex says that there is an Anasazi symbol engraved in the stone. Take the
stone and look at the stone in inventory ... you will see the
Sun symbol on the stone. This Sun stone is Stone
5. Click the screen away and let the inventory disappear again and then turn completely around and walk back to the steps. Turn right at the steps. To the right of the steps you will see the
Well and further on you see a lonely tree.

The Well is a deep round hole in the ground ..... Continue to the round hole and then make sure you look down into the hole ..... halfway through the well hole, some roots stick out of the wall .... the water bucket rests on those roots and in the bucket is an
Anasazi stone. Unfortunately...you can't take the stone....it's too deep, but look at the stone so
that Tex gives you an idea about how to get this stone. Step back and look at normal height again. Turn around and now walk to the stone stairs of the large round hut. Stand right in front of the stairs and open the door of the hut.

Climb up the stone stairs and enter through the open door. You end up in a semicircular room. Look down and to the right .....
there are 2 small pots on the floor and behind the pots is your 2nd Anasazi stone.
Open the action screen on the Anasazi stone and click the "Get" option to take the stone.

Look at the stone again in inventory ... it has an Anasazi warrior drawn on it. This is Stone
1.
Go back through the door and then descend the stone stairs again and then walk straight ahead, to the end wall with the door.
Open the door and then go through and .......
You are then in the next part of the ruin village. At the end is a lone tree. Walk straight ahead and then turn left.
You look into an "alley" that is divided into 2 halves by a wall.
You will see a door in the right facade. Continue to the dividing wall and then look to the left.

In the corner is a wooden box. Take the
wooden box because you'll need it later.
Then walk into the alley, behind the wall, and look to the left again and ....
there is another Anasazi stone
in this alley.Take the stone .... this is Stone 2
and there is another figure on.

Step back, or turn around, and now go to the door in the right facade.
Open the door and go inside. Immediately turn right inside and look down ......
....... against the right wall is a pipe. Take the pipe.

Look at normal height again and turn around and then turn left around the corner and continue to the big Pot, which is further up in this hut.

Take the Pot
... it is a "Small pot" and you store the thing in inventory and .....
Under the Pot is your 3rd Anasazi
Stone, so pick up the Stone ..... this is Stone 4

Continue to the back and then follow the narrow corridor, right, left, and in the next bend you pick up the
Vine on a stick.

Follow the corridor further and you will end up in a staircase. At the stairs there is a large screen that you can only view now ....
...... this is the Anasazi Stone Altar screen but you can't do anything with it yet.

Turn left to the stairs and look up. At the top of the stairs is a closed double door that you cannot open .... Look at the door and listen to Tex's commentary ..... you probably have to solve the puzzle on the Stone Altar to open this double door.
Now go back through the narrow low corridor, to where you found the pipe and then go out through the door there. Outside again, turn left and walk to the edge and then turn left again. You look at the lone tree again. On the left you see a deep niche. Walk forward a few steps and then turn left and .....

......you look into that niche and you see a
"Private Property No Trespassing" sign. In the left corner is your next Anasazi
stone, so pick up the Stone ..... this is Stone
3. Turn back to the right and now walk to the Tree. Near the lonely tree, the "Guide Book" is on the ground. Take the
"Guide Book" and view it in inventory ......

In the "Guide Book" you see a drawing of the Stone Altar....read the explanation....So 8 "GOD" stones are needed and those
"God" stones must be placed in the Altar. You already have 5 of those
"God" stones and you have to find 3 more .... 1 of those 3 stones is in the well. Close the screen and the inventory. Turn left and walk to the stone stairs. Stand straight in front of the stone stairs and .... Right behind the stone stairs is another Stone.
Take the Stone ..... this is Stone 6.

Climb up the stone steps and, at the top, enter the Ceremony Room through the opening.
A large pit in the floor and on the other side of the pit are a few wooden Sticks.

Walk around the pit to the left to the Sticks and then take the
Sticks.
Then turn around again and look up ..... There is a rope above the pit ..... Take the rope.

Turn left and ..... on the other side of the pit you now see a hole in the wall and there is a stone in that hole, but that stone is guarded by a Rattlesnake. So you can't take this stone now because of the rattlesnake ..... so that snake must be chased away. Walk to the wall hole and look at the
snake. Open the inventory and now combine the
Vine on a stick with the wind-up mouse in inventory. Then combine the
Mouse/Fish stick with the Wooden
box to have a "Boy Scout trap"

Then take the "Boy Schout trap" from inventory and click it on the Rattlesnake / Stone and .....
in a short cutscene you can see how the rattlesnake is caught .....

You can then pick up the Stone, so do that.....this is
Stone 8.

Now go back outside and down the stone stairs back to the Tree. At the Tree, turn clockwise and then walk forward to the gray wall. Open the door in the gray wall again, but don't go through it yet. To the right of the door are 2 white long white sticks
Take those 2 long white sticks .... in inventory these are the Long poles and you already had the Short poles.

Go back through the door to the front part of the village. Then continue to the well.
Look down into the well again, so that you can see the stone again, which is in the well bucket.

In inventory, combine the Yucca rope with
the Pipe and then take this combo from inventory and click it on the stone and .... You fish the stone from the bucket with the pipe / rope combo .... this is
Stone 7. You now have all 8 Stones, so now go back to the
Stone Altar. When you are back at the Stone Altar, first view all 8 Stones via the Viewing Area .... There is a figure in each stone .... Remember which figure is on which stone or write it down on a piece of paper. Then take
Stone 1 (Brick 1) from inventory and click with that stone on the Stone Altar ....

Stone Altar puzzle:
On the left are your 8 Stones. The stones are in order...so the top stone is Stone 1 and the bottom stone is Stone 8.

You now have to place the 8 stones in the correct 8 boxes of the box screen ....
To do this, drag the stones, 1 by 1, to the boxes and then click them in the box where the stone should go. Here's the solution:

When you have clicked all 8 stones in the right boxes, you will hear a sound and you will automatically leave the puzzle .....
The double door at the top of the stairs is now open.

So walk up the stairs and step through the now opened door into the hallway...LOADING......Walk through the hallway to the
Circle room:

Walk to the middle of the Circle Room and then look to the right .... there is a pile of Leather Strips on the floor. Take the
Leather Strips. Turn left again and then walk up the stone steps and ...... cutscene ...... We see Tex walk out of the Circle Room and end up at the wide and deep Ravine ........ there is no bridge over the chasm to reach the other side and Tex quickly retreats to the stairs.
Ravine:
Walk up the stairs again and outside
to the Ravine. The bridge is broken so Tex has to somehow cobble together a ladder. In inventory you have the Long poles, the Short poles and the Leather strips ..... Combine the Long poles with the Shortpoles and then combine the whole with the Leather strips and .....
you have a ladder .... view the ladder through the view box .....

Tex hopes the ladder can support its weight.
Take the ladder from inventory and click it on the other side to place the ladder as a bridge over the ravine and .....
in a cutscene you see how Tex crawls over the ladder and with a lot of luck reached the other side. Tex has then ended up in a hallway
Laboratory:

You see a sturdy gray steel door. To the right of the gray door is a panel in the steel wall. On the left you see a lighter colored door.
Behind the round pole is a pair of sunglasses on the floor. Take the
Sunglasses.
Walk through and then turn to the right. There is a coin on the floor in the corner. Pick up the
coin.

Turn further to the right ..... in the corner, to the left of the light door, is a Pocket Watch on the floor .... Pick up the Watch.

Dive into the inventory and view the
sunglasses through the viewing area and ...... there are 2 strips of adhesive tape around the sunglasses and Tex now removes them from the sunglasses. Close the screen .... you have lost the sunglasses, but the 2 strips of adhesive tape
are in an inventory box. Also view the Pocket Watch via the viewing area and ..... Tex unscrews the watch to remove a
coil spring. You will then lose the watch, but you keep the
coil spring
You can open the light door, but not the gray doors. Look at the
panel, to the right of the gray door ....... Tex thinks that behind the panel is the mechanism for the gray doors. The panel is screwed with 2 screws .... the bottom 2 screws are gone. Take the
coin from inventory and click it on the panel and ..... with the coin Tex unscrews the 2 remaining screws from the panel and the panel is gone. You now see a red thread, a purple thread and a green thread in the hole ..... the red thread has been cut. You need to connect the 2 ends of the red wire back together. Take the
coil spring from inventory and click it between the
2 red wires. Then use the 2 strips of tape
on the coil spring and ..... the gray doors slide open.

Walk through the now opened doors and ....... Cutscene ...... Loading and ..... Tex has now ended up in the
Laboratory of Bosworth Clark. On the wall are 3 large consoles, each with a round screen. The middle console has an On/Off button. Above the 3 consoles are 3 monitors, which are now also off. Turn left. In the short left wall are 3 steel doors and each door has a keypad. There is a device above the left door ..... Look at the 3 doors and then look at the device ..... That device is a
smoke detector .....Take the smoke detector and view the thing through the viewing area in inventory. A Disc comes out of the smoke detector.

Walk to the wall and then turn clockwise and look down to the side of the left console.
A paper is stuck on the side of the left console .....
Look at the paper ..... there is 1 word written on it and the paper is held in place by a magnet.

Take the paper ..... In inventory you then have the Magnet and the Printout paper. Look at the
Printout paper.....On the paper there is a password: TCAHCMEKE.....it is an anagram, so the letters are mixed up....you have to make a good English word with these letters... .it's not that hard....but ok....here's the solution:
CHECKMATE.. Now walk to the other wall, where the computer is on the table. Above the table hangs a large screen on the wall and also a poster. To the right is a cove. Go to the computer. Left click the
computer and then click the "Move" option and ......

You get a screen in front of you with a large Hexagon with colored segments. You must click the segments in a certain order to open a secret compartment in the computer. You don't
know the right order yet so click EXIT. Look to the right .... in the cove is a camp bed, a round table and a cupboard. There is an ashtray on the round table.

Take the ashtray and then view the ashtray through the viewing area of the inventory .... the ashtray is full of butts, but there is also a half-burnt matchbook in it. When you close the screen again you have lost the ashtray but you then have that
burned matchbook in inventory. Walk to the round table and then look under the camp bed .... Under the camp bed is a Video Disc player. Take the
Video Disc Player.

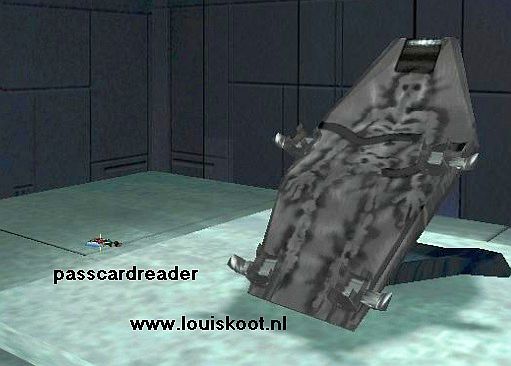
Turn around to the cupboard and open the door of the cupboard.
There is a Passcard reader on the top shelf of the cupboard ..... Take the Passcard reader.

Turn around to the 3 Console and now turn them on using the On/Off button on the center console. 2 of the 3 monitors will also turn on

Duik de inventory weer in en
combineer nu de Disc met de Videodiscspeler om de Disc in de speler te
stoppen.
Klik dan de Videodiscspeler in het Bekijkvak en....Je ziet dan nu de
opname die
op de Disc staat.....Luister tijdens de film goed naar de geluidjes
als Bosworth
zijn
ID-Card in de computer stopt...Je ziet vervolgens Bosworth Clark wordt
gedwongen
om Russische Roulette te spelen en zichzelf dus door de kop
schiet, maai
in feite is het moord Na de film draai je om naar de
computer en klik je weer de "Move" optie en je geraakt dan weer in het
scherm met de Zeshoek....Los nu de Zeshoekpuzzel op....
Dive back into the inventory and now combine the
Disc with the Video Disc player to put the Disc in the player.
Then click the Video Disc Player in the View Area and ....
You will now see the recording on the Disc ..... During the film, listen carefully to the sounds when Bosworth inserts his ID Card into the computer ... You then
see how Bosworth Clark is forced to play Russian Roulette and shoots himself in the
head but in fact it's murder
After the movie turn to the computer and click the "Move" option again and you get back to the screen with the Hexagon ....
Now solve the ......
Hexagon puzzle ....

the 6 sounds you heard during the film gave you the solution, but ok .... you may be deaf or hard of hearing .... Click on the 6 segments in this order:
Red, Yellow, Blue, White, Red, Yellow, green and ...... a drawer slides open in the computer and it contains the ID-Card G. Take the
ID-Card G. Take the Clark's Passcard reader from inventory and click it on the computer ... .... Then take the
Passcard G and click it on the Computer and ..... you have to type the password and that is
Checkmate. You then get into the computer ... look at the screen and wait for the next screen where you see a satellite floating around the Earth. Exit the computer, open the
Location screen and now travel back to Wanda Peck, so to the:
Capricorn Organization.
Wanda has now examined the Linsky photo.
Click "Ask about" and then ask Wanda about the "Linsky, Klaus photo", "STG", "Wanda's Letter", "Poison Pawn" and "Jorge Valdez".
Then end the call and travel back to your office:
Tex's Office
Turn on the Vidphone and turn on the AID. Ask the AID for information on the
"STG". Switch off the Vidphone and then wait for the message that a Fax has been sent and then take the Fax
from the Fax machine. Read this "STG"Fax through the inventory view box.....the STG is located in California and it is an abbreviation of "Security Technologies Group", a subsidiary of the Gideon Enterprises group. STG was founded ten months ago, but it appears to no longer exist. Journey back to Wanda:
Capricorn Organisation:
First give Wanda some meaningless answers to get the "Ask about" option.
Then ask Wanda about the "Gideon Enterprises", "J. Saint Gideon" and "Frank Schimming".
Say goodbye again and return to:
Tex's Office:
A Fax has been sent to your Fax machine. Take the
Fax from the device and read this "Fax from A Friend" through the view box ..... someone
has faxes you the telephone number of that Frank Schimming and this person now becomes available in the Vidphone as someone you can call. So close the inventory and turn on the Vidphone and see .... You can now call that Frank Schimming. So click on
Frank Schimming and then on the "Dial" button and you will get Frank Schimming on the line ..... You must now first give the correct reactions ..... if you give a wrong reaction, Schimming hangs up. ....if that happens, simply call Schimming again to try again.
First say "STG reference" and then you continue with "Go easy", "Cop a plea", "A dish called Wanda", "The unofficial CAPRICORN slogan" and .... you get the "Ask about" option, so click "Ask about" and then continue asking Schimming about everything on the notepad, but especially about "J. Saint Gideon", "Frank Schimming", "Gideon Enterprises", "STG", "Capricorn" and "Chess" .

If you have asked Schimming all important questions, you can end this conversation via "Done" and "End conversation".
In the Location screen, the "Saint Gideon house" is now also available, so now travel to the:
Gideon House:

Long film in which we get a look at Gideon's house and then we end up with J. Saint Gideon, who is
in a wheelchair. A long conversation follows between Tex and Gideon, after which you click the "Ask about" option again to question Gideon further via the notepad.

You can of course ask Gideon anything, but the only thing that really matters now is that you question Gideon about
"Jorge Valdez". Gideon then tells you about the "Rank and File Chess Shop" of that Valdez and this location becomes available in the Location screen. When you ask Gideon about the "Poisoned Pawn"
he explains that this is a chess term and that it a sacrificial move is meant. Say goodbye and travel now to the:
Rank and File Chess Shop:

So here we meet that Jorge Valdez, the owner of this chess shop. Give Valdez some random answers again and then question him further about everything you get on your notepad, but especially ask about
"Wanda's Letter" ...... Vadez says he doesn't know anything about that note. When you have asked everything again, you say goodbye again and travel back to your own office:
Tex's Office:
Your Vidphone rings, so turn on the Vidphone...."a friend" calls and asks if you are working on the Linsky case....

....this "friend" tells Tex about Val Davis's lab and gives Tex a hint..."The Chess move" and......
automatically we end up in Val Davis's lab on the campus of the University:
Val Davis's Lab:
Turn left. You will see a long examination table on which the computer is located. On the right part of the table is a yellow "Post-It" note.
Take the "Post-it" note
and view it in inventory ..... It says NEQUE on the note and this is another anagram of which you make
QUEEN.

Turn around to the stairs .... Behind the stairs are metal cages and in the middle cage is
Koro, the gorilla monkey. Koro's cage is locked with a code lock that requires a passcard. Look at Koro .... Koro is holding a box and Tex wants that box. Walk back to the examination table and then turn right .... in the long wall is the door to the Radiation Room. To the right of the door, a long stick leans and the Open/Close panel sticks out on the wall. Grab the
long Stick.

Loop terug naar de KORO kooi en ga
er nu voor staan. Combineer in inventory de Slaappillen (Sleeping
pills)
met de Bananen...je hebt dan Gedrogeerde Bananen (Drugged bananas).
Pak de
Gedrogeerde Bananen uit inventory en klik ze op Koro en........
Walk back to the KORO cage and now stand in front of it. In inventory, combine the
Sleeping pills with the Bananas ...
you then have Drugged Bananas. Take the
Drugged Bananas from inventory and click them on Koro and .....

Koro eats the bananas and falls asleep and
Tex automatically grabs the box with the long stick and you then have the Passcard A in inventory.
Go back to the Radiation Chamber door and now open the door via the Open/close panel and then go inside:
Radiation Chamber:
The door is hermetically closed behind Tex and a computer voice screams that the radiation level is rising .... Tex is now trapped in this radioactive room and the radioactive radiation will continue to rise .... You have to
act quickly now because Tex can get here die now ...... Turn right immediately .... Next to the door is the "Override panel .... Left click on the panel and then click the "Open" option .... Then quickly take the Circuit Kit
from inventory and click it on the panel and .....

....Override
Puzzle....

This is a difficult puzzle and you have very little time to solve it ....... If you are too slow, Tex will die from the increasing radioactive radiation and it will be GAME OVER. I'm not even going to explain this puzzle to you because I haven't solved it myself....now just type code
911 on your own keyboard to skip this puzzle....the game immediately solves the puzzle for you
and the alarm is then off and the radioactive radiation has disappeared and the door is open again. Then turn around to the chair .... There is a Passcard reader on the floor behind the chair .... Grab the Passcard reader.
Draai terug en verlaat deze
radioactieve
kamer. Ga naar de
computer, op de onderzoekstafel. Klik de Passcardreader op de
computer en dan de
Passcard A en typ dan in het computerscherm als wachtwoord
Queen in....op het
computerscherm zien we dan een vergroting van de Passcard A waarop
je dan een
schaakzet ziet.....QxD7....vanzelf ga je weer
uit de computer. Reis terug naar:
Turn back and leave this radioactive room. Go to the computer, on the examination table. Click the Passcard reader on the computer and then the
Passcard A and then type in the password Queen
in the computer screen. On the computer screen you then see an enlargement of the Passcard A on which you see a chess move .....
QxD7. ...you will automatically leave the computer. Travel back
to Tex's office
Page 3 of
the walkthrough
2023: Walkthrough door: Louis
Koot: