2019: Walkthrough by: Louis Koot
If you have found this walkthrough via google search or via another site then you have probably not visited my site.
A lot more very detailed game walkthroughs can be found on my site at: www.pcgameswalkthroughs.nl
The 11th Hour is the sequel to The 7th Guest and it was released 3 years after The 7th Guest, so in1997.
The story plays 22 years after the events in The 7th Guest.
You will visit the Stauf House again, in the American county town of Harley on Hudson. This time you are Carl Denning.

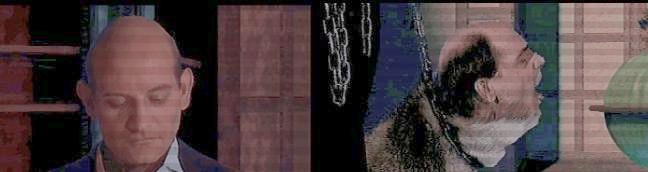
Carl Denning is the star reporter of the popular TV crime program "Case Unsolved." Like any TV program, "Case Unsolved" has a producer and in this case her name is Robin Morales. Robin Moralis is an attractive young woman. That is what Carl Denning thinks, and despite his own strict rules not to enter into a relationship with an employee, Carl starts a fairly passionate relationship with Robin.
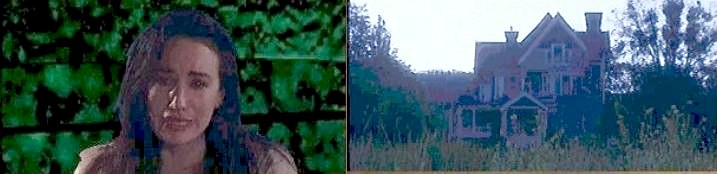
Meanwhile, a number of inexplicable murders are happening in Harley on Hudson. Bodies are turning up everywhere and the police doesn't seem to be able to solve it . Carl and Robin have spent several episodes of "Case Unsolved" to the mysterious murders in Harley on Hudson. In those episodes "Case Unsolved" made the link to the events in the Stauf house, now almost 70 years ago, and which was reported of in The 7th Guest. Robin Moralis has traveled to Harley on Hudson to visit the Stauf house in person, as part of a report on recent murders in and around the town. Robin Moralis, however, has not reported back since her departure a week ago.
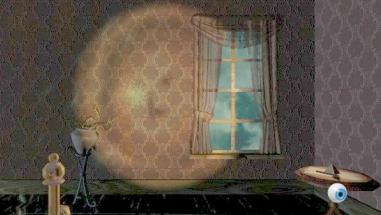
As Carl Denning you go back to the Stauf House to save your girlfriend / producer Robin Moralis from the clutches of Devil Henry Stauf. While the Stauf House in The 7th Guest was a beautifully decorated house, in The 11th Hour the house is a ruined house. Over the years, the house has been completely robbed and decayed. Once in the Stauf House you will again have to deal with Stauf. In the various rooms of the Stauf House you have to solve puzzles and search for objects.
For the objects that you must find, Stauf provides you with all kinds of cryptic instructions through the GAME BOOK. These instructions are usually anagram puzzles. When you have found an object you will see a fragment of the 11th Hour movie. All those fragment of the movie then tell the story of the game and show you what happened to Robin Moralis from the first moment she arrived in Harley on Hudson.
At the end of the game you have to make a choice and your choice then determines the final outcome of the game. When you finally reach the end of the game, and you have made the right choice, you will have the opportunity to watch the entire movie, which will then take approximately 1 hour
Samantha
For solving the puzzles, and the cryptic instructions from Stauf, you can get help from Samantha. Samantha has sent you a GAME BOOK and lured you to the STAUF house. You can call on Samantha for help at any time via the GAME BOOK. Samantha gives you hints on how to solve a puzzle and can even solve most puzzles for you. But Samantha does the solving of the puzzles step by step and move by move. Samantha also gives you clues about the cryptic hints that Stauf gives you and who lead you to all objects. BUT ...... Samantha is in a fight with Stauf and that fight costs energy and Samantha's energy is not unlimited. So you cannot make unlimited use of Samantha's help and ..... some puzzles cannot even be solved by Samantha.
The last clue of every hour brings you to an object which then starts a puzzle. These are the end hour puzzles and you play these puzzles against STAUF. The GAME BOOK does not solve these END HOUR Puzzles for you. But you can ask Samantha to solve them step by step. If you have solved the end hour puzzle, you will see all the film clips of the past hour in succession, with the missing pieces that you have not seen before. It then ultimately becomes a logically continuous film. Then you hear the large grandfather clock downstairs in the hall beating the entire hour, as a sign that the next hour has begun.
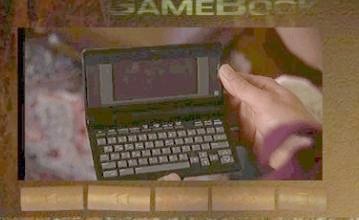
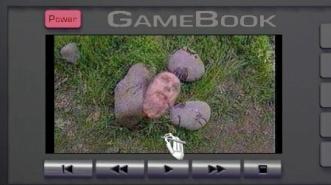
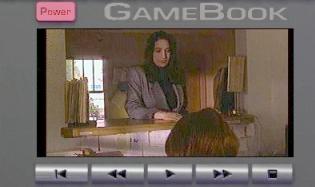
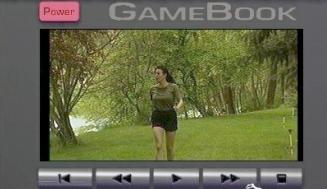
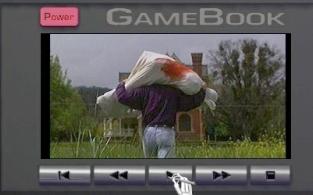
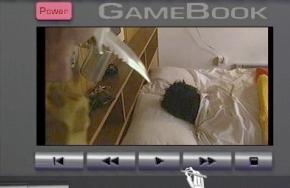
The Game book:
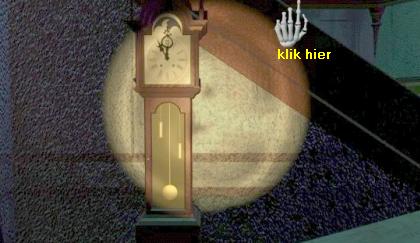
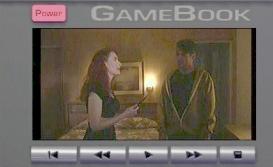
You open the GAME BOOK by clicking with your hand cursor in the top black border of the screen.
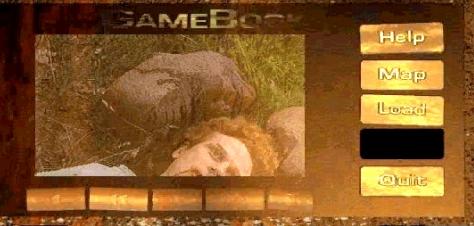
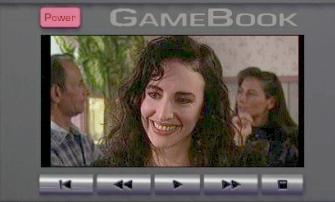
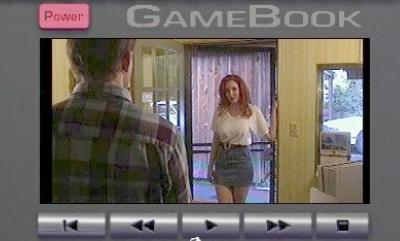
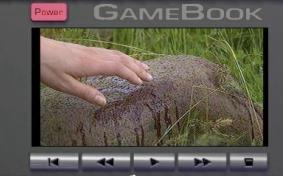
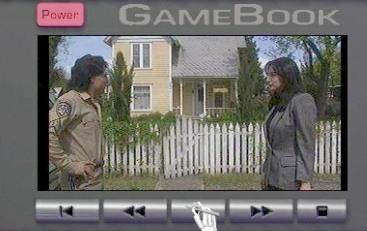
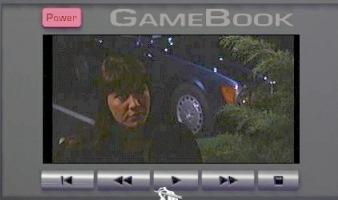
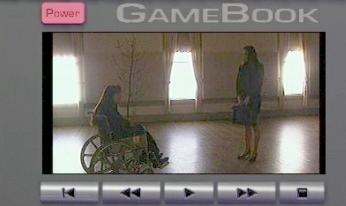
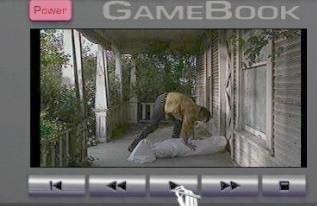
The GAME BOOK is the screen where you watch the movies. The Game book also contains the floor plans of the Stauf House. The red "Power" button is the button with which you close the game. Via the "Help" button you ask Samantha for help. Samantha can help you to solve Stauf's cryptic instructions. Samantha can also help you solve the various puzzles. Via "Map" you open the floor plans of the house. There is a floor plan for each floor of the house.
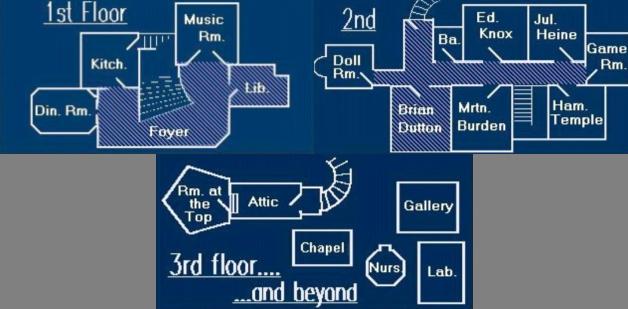
The shaded rooms are the rooms that are open and where you can enter. You can save the game via "save". There are 10 Saves Slot.
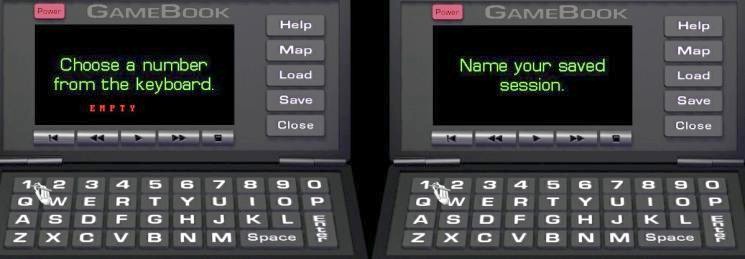
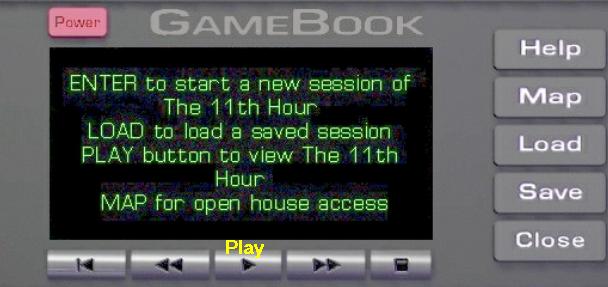
To save, click on the "Save" button. Then click on 1 of the numbers on the GAME BOOK keyboard to select a Save Slot. Then you can use the GAME BOOK keyboard to type a name for your Save. Then confirm this by clicking on the SAVE button. You have 10 Save Slots and if they are all used you will have to overwrite saves in one slot. Once you have created a Save Game, you no longer need to go through all the home screens when you restart the game. You will then see this screen:

By clicking on the "Load" button you will get to the "Load" screen. Then click on the number of the save game that you want to load.
Start a New Game:
When you start the game you always end up on the home screen first.
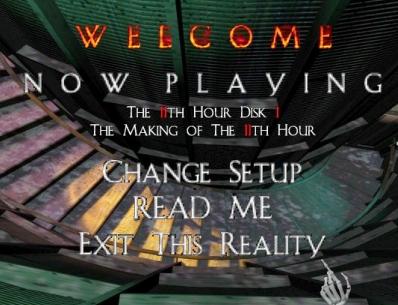
On this screen you can set, via "change Setup", whether you want to see the in-game movies in full screen or in a small screen.
The movies are sharper in a small screen than in full screen.
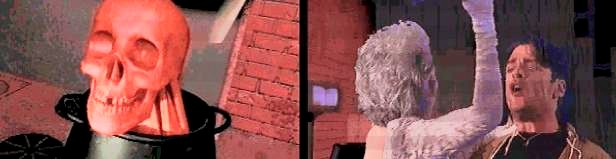
When you start the game for the first time you will see the Skull screen after the start screen.

Read the rhyme. There is an X in one of the eyes of one of the skulls. Click on the X to continue.
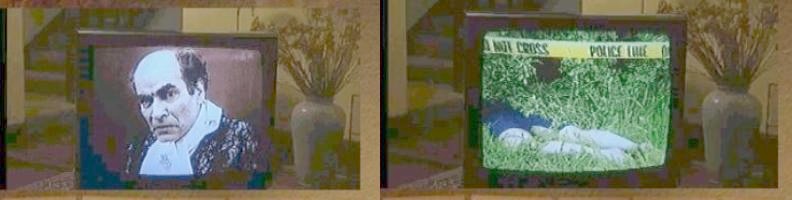
You will see the Trilobyte logo and the Virgin logo and then you move through the Stauf House, while the names of the makers roll across your screen. The camera then zooms in on the GAME BOOK. The GAME BOOK shows a live TV broadcast. An other corpse has been found in the vicinity of the town of Harley on Hudson.
Now the long intro movie of the game starts.
Carl Denning is, a bit grumpy, at home watching the video of "Case Unsolved". His relationship with Robin Moralis broke down and Robin has disappeared. The Video shows a broadcast about the recent killings in Harley on Hudson and "Case Unsolved" links these murders to Henry Stauf.
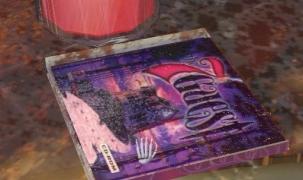
The postman then delivers a package. Carl opens the package. Someone has sent Carl a sort of calculator.....It is a GAME BOOK.
Carl is looking at the thing in surprise and presses some buttons.
Robin Moralis appears in the screen. Robin seems to be in a sort of basement and she cries and she asks for help.
Robin shouts that she cannot leave the basement. You see the Stauf House.
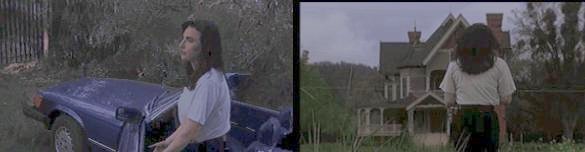
Carl thinks he's being fooled and he closes the GAME BOOK and puts the thing on the TV. But Carl has become worried anyway, all the more so since he hasn't heard from Robin for more than 3 weeks. Carl grabs the Game book and gets on his motorcycle and drives to Harley on Hudson

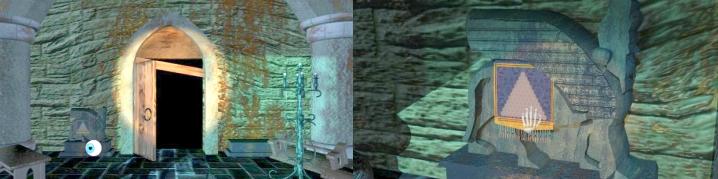
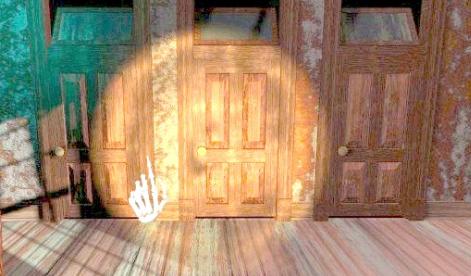
During the long motorcycle ride, you get, via a few flashbacks, more background information about the relationship between Carl and Robin. Carl then arrives at the Stauf House and he walks to the front door. Although the house is a ruin, Carl cannot open the front door. The GAME BOOK then starts beeping and a cryptic message about a blind mouse appears in the GAME BOOK screen.
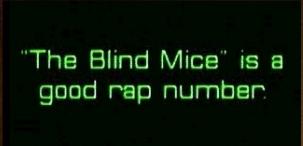
Carl understands this blind mouse hint and knocks 3 times on the front door and .... the door opens.
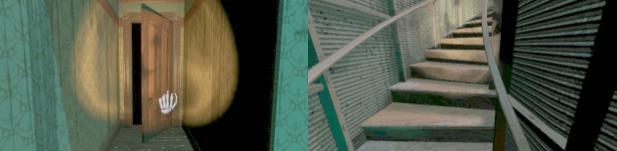
It's night, so it's dark, but luckily Carl brought a flashlight.
Carl enters the Stauf House and here begins your new adventure in the Stauf House
Chapter 1: The 1st hour:
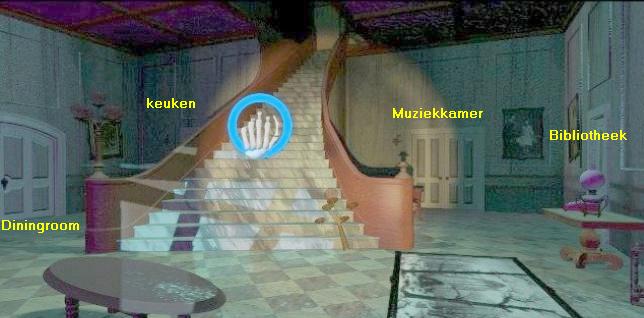
Well .... you are inside and standing in the Main Hall on the 1st floor Your cursor starts beeping immediately and gets a pulsating blue circle. This is a sign that Stauf has a cryptic clue for you about the object that you are supposed to search. So open the GAME BOOK and read the 1st clue from Stauf.
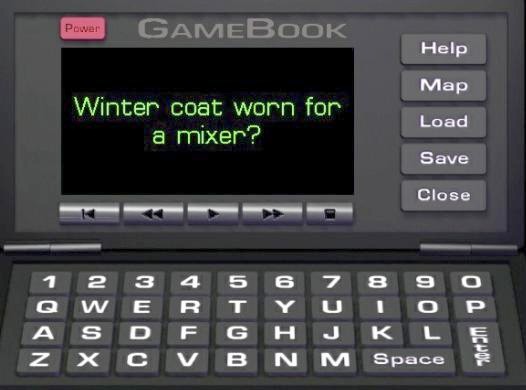
1st clue from Stauf: Winter coat worn for a mixer?
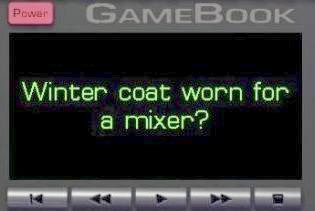
It is an Anagram puzzle. Via the "Help" button you can ask Samantha for help. You can do this a few times and finally you then read the solution of this anagram in the screen. Mixer means that the letters of WINTER COAT are mixed up. If you play a little with those letters you will quickly find the words TONIC WATER. So you have to look for a bottle of Tonic Water. Go to the:
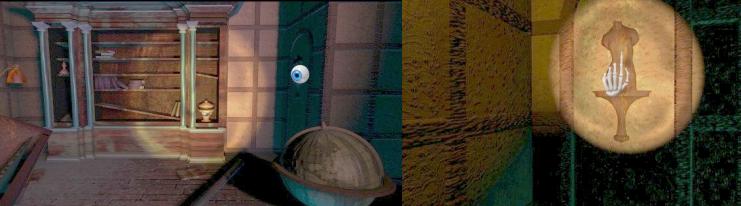
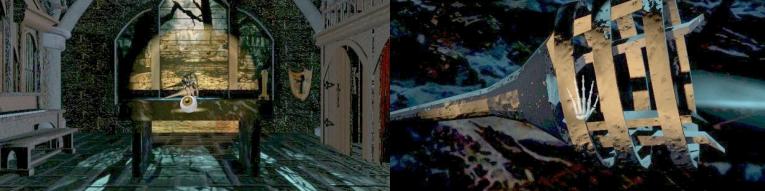
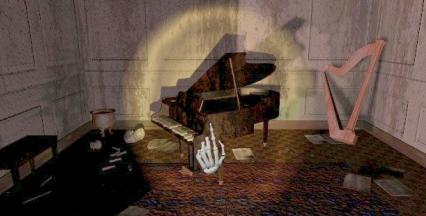
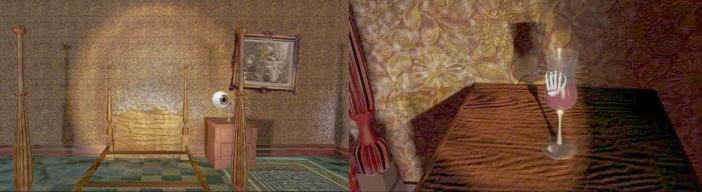
Library:
The telescope is still in front of the French doors. But you can't go to the telescope. Turn clockwise.
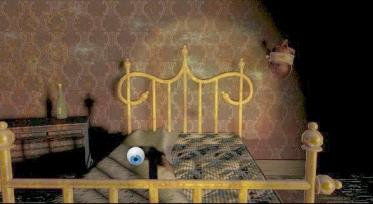
You look at the fireplace. There is a bottle on the mantelpiece.
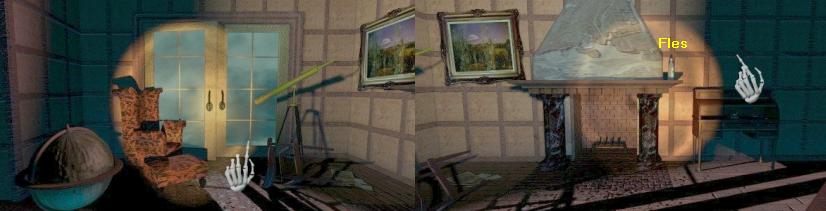
Click on the bottle with the Eyeball Cursor. You zoom in on the bottle. It is a bottle of Tonic Water.

Grab the Bottle, so click with your hand on the bottle and .... you have solved the very first cryptic puzzle from Stauf and .... the GAME BOOK will open automatically.
The Game book screen now shows the first fragment of the film. Click on the "Play" button to view the film clip.
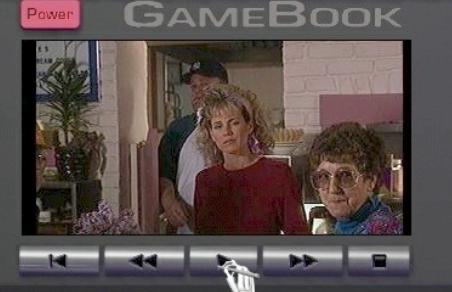
You see Robin Moralis who has arrived in Harley on Hudson and is going to have a cup of coffee at the local Diner.
Arlene Wiley, the waitress, welcomes Robin. Note that Arlene has no left hand.
Close the Game book again via the "Close" button. You then look at the bottle of tonic water again. Turn left or right to step away from the bottle.
Your cursor will start beeping again, so open the Game book again and you will read Stauf's 2nd clue:
2nd Stauf Clue: Rolling rock, bottle cap.
Rock "rolls" so this word is also an anagram. Bottle cap is therefore a closure for a bottle ... Rock = Cork = so you have to look for a Cork.
But first you can solve your first puzzle here in the library. Turn clockwise. You then look at the room door and at a large bookcase.
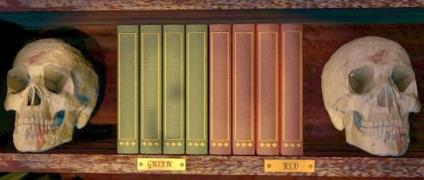
In the bookcase are 2 skulls that serve as bookstands. Between those 2 skulls is a row of books.
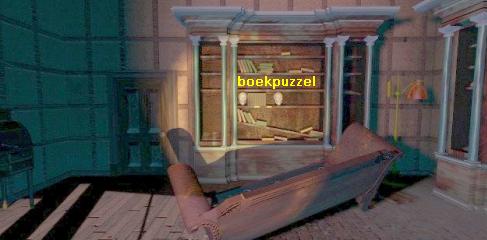
Click with the eyeball cursor on the row of books that are in between the 2 skulls. You are in one swoop closer to the bookcase.
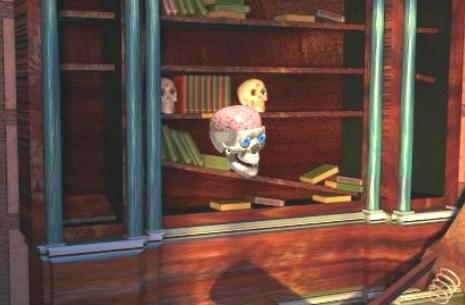
Click with the Skull Curb on the books between the 2 skulls to activate the puzzle
|
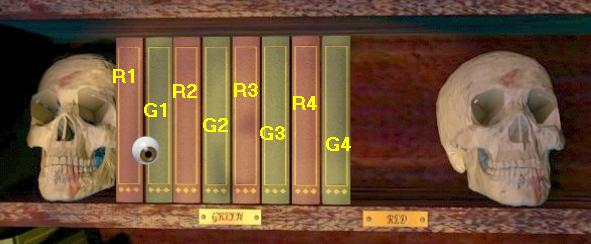
The book puzzle: There are 4 green and 4 red books. The green and red books are mixed up and that is not appropriate. The red books must be to the right and the green books must be to the left. Name the books, from left to right: R1, G1, R2, G2, R3, G3, R4, G4.
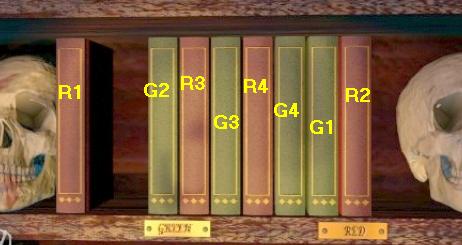
You have to move the books and you do that by clicking with the eyeball cursor between a red and green book. The red and green book then come out of the cupboard and go either to the right or to the left. All 4 red books must go to the right and all 4 green books must go to the left. However, you may only make 4 moves. The initial setup is: R1G1R2G2R3G3 R4G4. Here is the only correct solution Move 1 = click on the border of: G1R2 result = R1..G2R3G3R4G4G1R
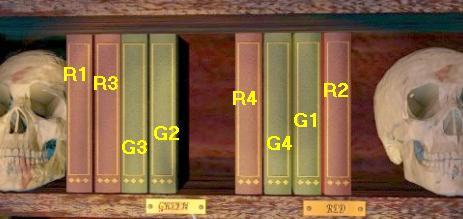
Move 2 = click on the border of: R3G3 result = R1R3G3G2..R4G4G1R2
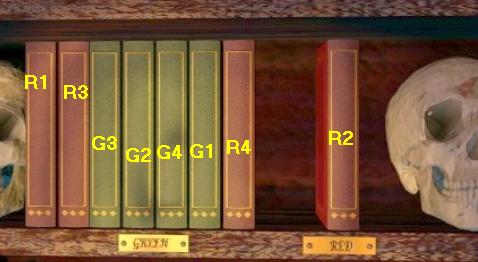
Move 3 = click on the border of: G4G1 result = R1R3G3G2G4G1R4..R2
Move 4 = click on the border of: R1R3 result = G3G2G4G1R4R1R3R2
Solved: Stauf is pissed off and curses you because you have solved his puzzle and you leave the books. |
Now that you have solved the puzzle here, various items, such as paintings, have become "clickable" in the library. So now you can view a few more paintings here in the library and also the telescope and the writing desk and also the globe. Stauf always has a "nice" comment ready for you because none of the objects in the library is of course the cork you're looking for. Leave the library to the main hall. Back in the hall, turn left and head forward to the barricaded front door.
Click with the eyeball, and then with your hand, on the boards in the front door to "enjoy" Stauf's humor. Then turn left or right 3 times. You are again right in front of the large stairs to the 2nd floor. Go up the stairs. You end up on the 2nd floor. You are standing in front of a flower arrangement painting. Turn left and go forward 3 clicks down the corridor. Then turn left. You are now at the door of Brian Dutton's room. Go inside,
Brian Dutton's room:
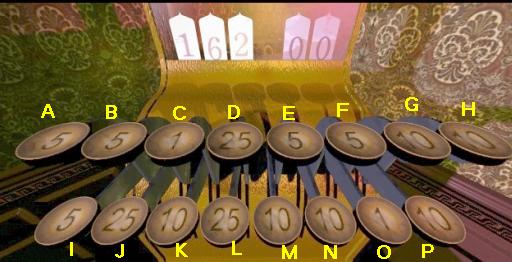
In the rear right corner is a cupboard and on that cupboard stand a cash register. Click with the Eyeball Cursor to the right next to the front right bed style and you will see the cash register. Click with the Skull on the cash register to activate the puzzle.
|
Cash Register Puzzle: In the cash register's screen you will see 162 on the left and 00 on the right. The intention is to get the number 81 in both counters. The keyboard is divided into an Upper part and part. By clicking on the keys, the left counter will count down and the right counter will count down. As you can see there are several keys on the keyboard with the same number. You must click on the correct keys to be able to solve this puzzle. Number the keys, from top left to bottom right, A, B, C, D, E, F, G, H, I, J, K, L, M, N, O, P.
Multiple solutions are possible but here is my solution: Click on the keys: A, B, C, D, E, I, J, K and .... both left and right there will be 81. Puzzle solved. |
You will be back in front of the bed. You can now click on various objects here in the room to have a closer look. Turn clockwise. In the corner, left of the room door, is a TV. A champagne cooler is on the floor in front of the TV. A bottle of Champagne is placed in the Champagne cooler. The bottle of Champagne has a CORK.
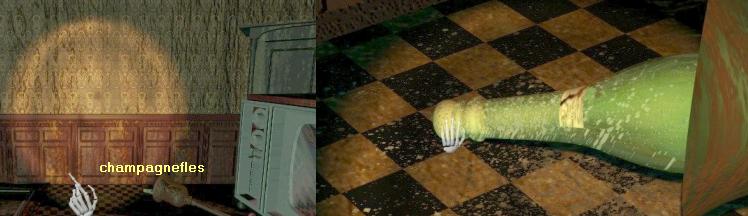
Click with the eyeball on the champagne bottle to zoom in on it and then click with your gripping hand on the Cork and .....
you have solved the 2nd cryptic clue from Stauf.
The Game book opens because you have unlocked another movie clip. Click on the Play button to view the film clip.
Robin Moralis talks to Arlene Wiley, the diner's servant. When she was a teenager, Arlene was in the Stauf house to have been and has survived too.
However, Arlene does not want to talk about it.
Close the Game Book and step away from the champagne bottle. Your cursor will beep again, so open the Game Book again to read and hear Stauf's 3rd clue
Stauf's 3th clue: Artsy, excited, lecher:
Lecher = lecher, Artsy = Satyr. So you have to look for a Voluptuous Satyr.
Because you have solved the cash register puzzle here in Dutton's room, you can now click on all kinds of objects such as the broken TV, the wardrobe, the cuckoo clock hanging on the wall. You can now also go through the door in the left wall to the Chapel, but do not do so now. Leave Dutton's room to the corridor, so through the door behind the TV. In the corridor, turn right and go forward 3 clicks. You are back at the stairs. Just before your feet there is a statue of a lion on the floor. Remember that this statue is here. Turn right and down the stairs to the ground floor. You are then again at the front door:
Main Hall:
Turn left. You look to the left side of the hall and you see the double doors of the Dining room. Go forward to the Dining room door.
You cannot enter the Dining room yet. Turn right. You can now see the kitchen door, but you are not allowed in the kitchen either.
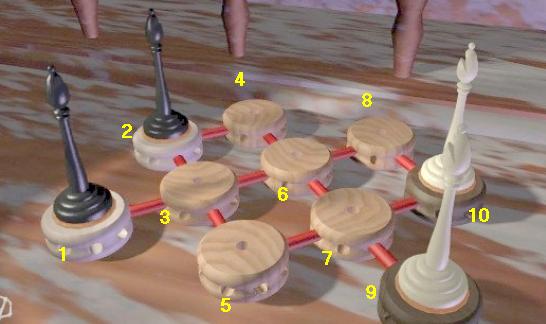
Turn right again. You look at the left side of the stairs. There is a long table here and there is a chess puzzle on the table.

Click with the eyeball on the table to zoom in on the:
|
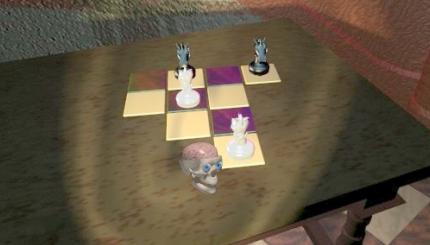
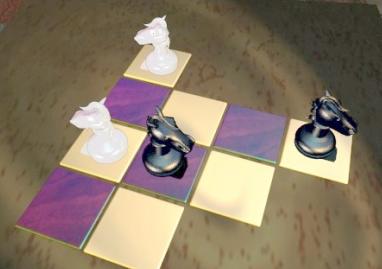
Knight's Jump Puzzle: Click with the Skull on the piece of chessboard to activate the puzzle:
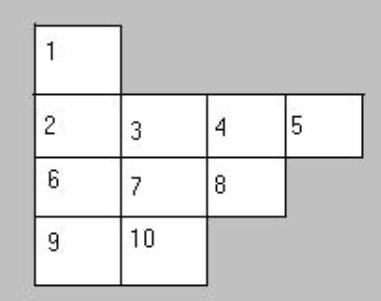
There are 2 White and 2 Black Knights on the piece of check board. The playing field has 10 squares. If you do not understand the meaning, you can ask Samantha for help and Samantha can also solve the puzzle for you. The Knights are on the wrong square. The 2 black Knights must be put on the 2 squares that are marked with a black Knight. The 2 white Knights must be on the squares that are marked with a white Knight. Number the boxes, from top left to bottom right, 1 to 10.
A white Knight is drawn on the squares 1 and 6. A black Knight is drawn on the squares 5 and 7. The white Knights must therefore be moved to the squares 1 and 6 and the black Knights to the squares 5 and 7. You need 40 moves to solve this puzzle. So you always click on a horse and then on the box where you want the horse to go.
|
Under the stairs, behind the chess puzzle table, is a large grandfather clock. Turn left and go to the kitchen door. Then turn right and ... you are now standing in front of the large grandfather clock. You can click with the eyeball on the dial face of the clock but that makes no sense at the moment.
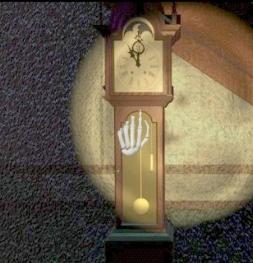
On the clock case, you get the beckoning hand. Click by hand on the clock case and .....
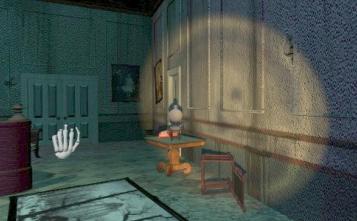
The clock opens and you step into the clock and you go through a secret corridor and you end up in the:
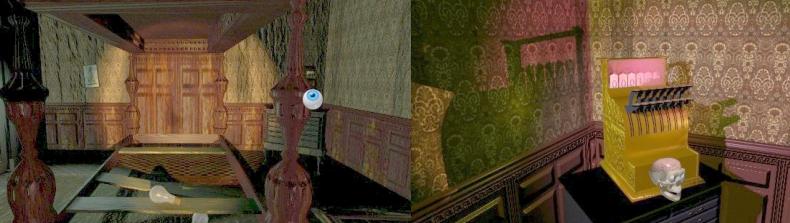
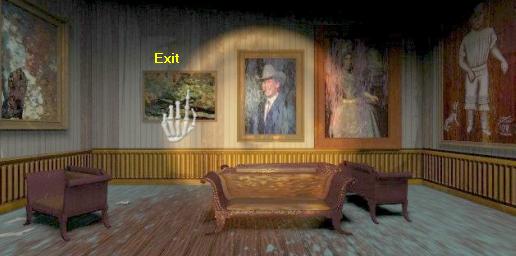
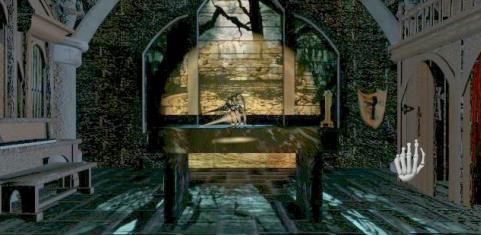
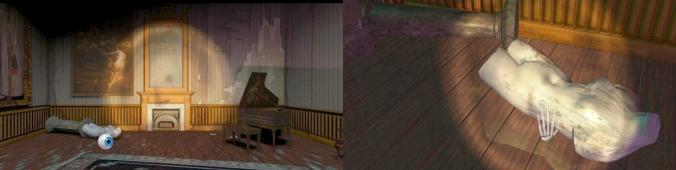
Portraits Gallery Room:
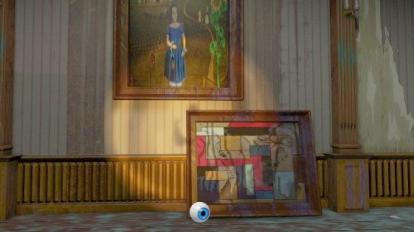
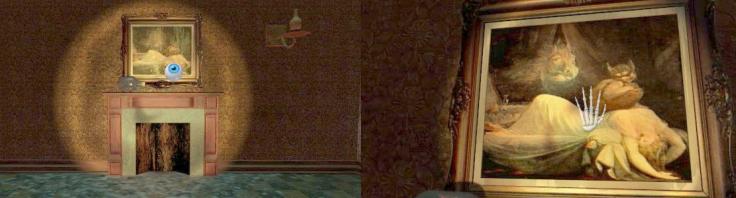
In the left corner lies a Torso on the floor. Above that Torso a large painting hangs on the wall. Zoom in on that painting via the eyeball.
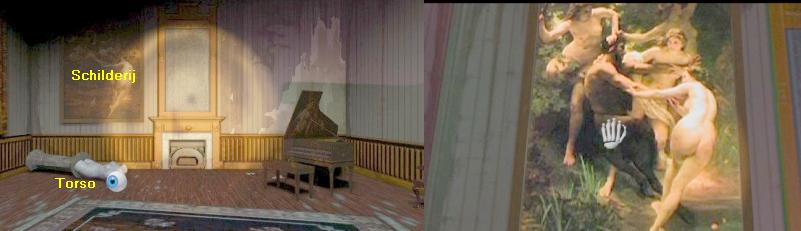
The painting shows a voluptuous naked man with 3 voluptuous naked women. The man is therefore the Lust full Satyr you are looking for according to Stauf's 3rd clue. Click the painting with your hand and .... you have solved the 3rd clue and you can watch another piece of film in the Game book.
Click the Play button again to view the film.
You are now introduced to the voluptuous Marie Wiley, the daughter of Arlene Wiley.
Marie enters the reception of the local motel and she asks the man if Chuck is in.
Close the Game book and exit the painting. Your cursor will beep again, so open the Game book again to hear and read Stauf's 4th clue.
4th Clue from Stauf: A heart attack could put you into the ground
Heart = Heart, but you can also see the letters as an anagram again and then Heart becomes Earth = Earth = ground = ground.
So in search of the Earth. Say ........ is there not a globe in the library? You can click on various paintings here in the portrait room to hear Stauf's comments. You can also click on the harpsichord (type of piano), so click on everything you can click on. A kind of Mondrian painting is leaning against one of the long walls. That painting will be, at the 6th clue of Stauf, the End Hour Puzzle. So you will come back here to solve that Mondrian puzzle. There is no door through which you can leave the room. On 1 side of the room are a few sofas and chairs. On the wall behind those sofas and chairs are 3 paintings. The painting on the left is the exit from this portrait room.
So click with the beckoning hand on the left painting and .... through the secret corridor and the grandfather clock you will return to the Main Hall. Go back to the
Library:
There is a globe in the library. Click with the eyeball on the globe to zoom in on it.
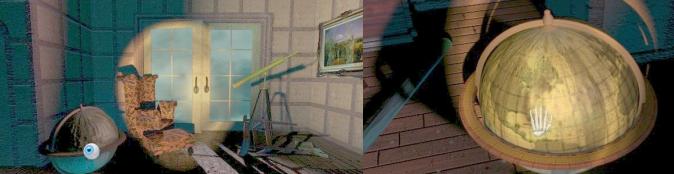
Then click with your hand on the globe and .... you have solved Stauf's 4th clue and can watch a film clip again in the Game book.
Robin Moralis walks around the town and finds blood on a stone. A man appears. However, we do not see the man yet
Close the Game book and leave the globe. Your cursor beeps again so open the Game book again and read Stauf's 5th clue:
BattleGround:
Two words = Battle = anagram for TABLET. Ground = the past tense of GRIND. The English word Grind means Grinding. So you have to look for a tablet.
Close the Game book. You look again at the globe and the telescope. Turn left. Behind the globe you see a narrow wall.
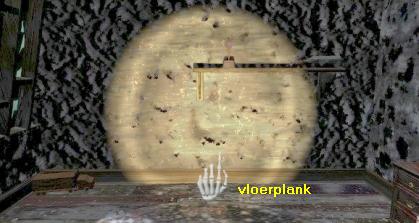
in that narrow wall is an elongated panel with a shelf hanging on it.
Click with the eyeball on that panel to zoom in on it. The panel is in the shape of a torso.
Click with your beckoning hand on the torso and ...... via a secret corridor you end up in:
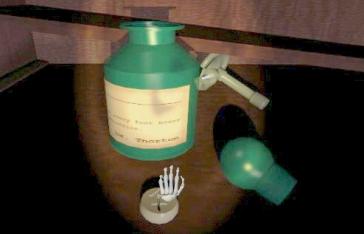
Laboratory:
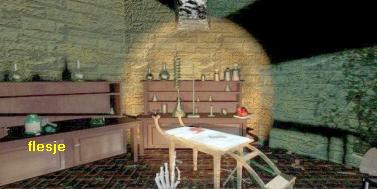
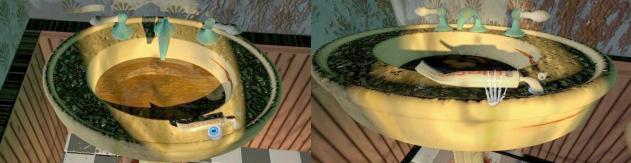
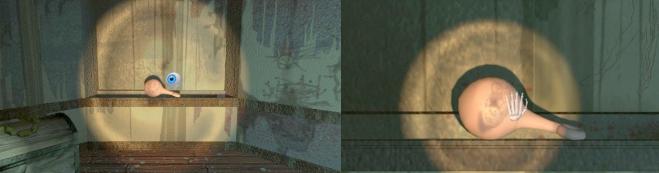
On the left cupboard stand a green bottle. Turn left. Next to the green bottle is a box on the cupboard. Click with the eyeball on the box to zoom in on the box. There is a tablet in front of the green bottle but you cannot grab that tablet yet. First you have to solve the puzzle in the box here.

So click with the skull on the box and .... you end up in the:
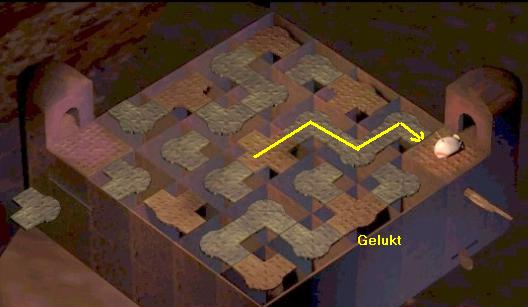
Mousetrap puzzle:
The intention is to make a continuous route for the white mouse to the Exit in the right cage . If the mouse ends up in the left cage then you have lost and you have to restart the puzzle. The box is divided into sections and a section of the path has risen in each section. By clicking on such a section of the path, it will flip over, but also in other boxes, pieces will flip over. The initial situation of this puzzle is always different, but the Mouse always starts in the middle.

By clicking on the gray pieces of paths you ensure that certain pieces fall down and then come up again in a different form. So you have to ensure that the mouse can go from the middle to the right cage. The logic of how the different sections influence each other is far away. Also how the puzzle starts is always different. I can get very complicated about this but the truth is that there is no ready-made solution for this puzzle. You just have to try it for yourself. So you have to click on the gray bends in the sections.
Let Samantha Solve this puzzle for you
You can ask Samantha for help via the Game book. Samantha will not solve the puzzle for you in one go, but will do it step by step But .... Samantha also does not always manage to solve this ridiculously difficult puzzle. So you will often have to restart the puzzle to get a starting situation that Samantha can handle. Of course you can also try it yourself and I wish you a lot of luck with it, but above all a lot of patience. You have to solve the puzzle because otherwise you really can't continue with the game.
If you want Samantha to try to solve the puzzle for you, then open the Game book and click on the Help button. Samantha first gives you a few hints about what to do in the puzzle. So you have to click on the help button again and again to see the next hint. Stauf will try to disturb your connection with Samantha and you will hear that because Samantha then falls away and you will hear Stauf laughing . After you have asked Samantha 3 times for a hint, she will ask if she should do the next MOVE for you.

If you click Yes, Samantha will make the next move in the puzzle. If you want Samantha to solve the entire puzzle for you then you will always have to ask Samantha for the next move via the Help button of the Game book. Even if you choose to let Samantha make all the moves, it is not yet a guarantee that she will solve the mousetrap puzzle for you in one session. With a lot of luck and with a little help from Samantha, I came through this mousetrap puzzle fairly quickly, so don't be discouraged if you can't solve this puzzle right away. Just hold on.
When this Mousetrap puzzle is solved, you will automatically exit the puzzle. Now you can click on the green bottle with the eyeball.
So click on the green bottle with the eyeball. You come in close-up of the green bottle. There is a tablet in front of the bottle.
Click with your hand on the Tablet and ..... you have solved Stauf's 5th cryptic clue.
You can watch a film clip again in the Game book, so click on the play button
The clip shows you a head between the stones. The head disappears
Close the Game book and zoom out of the green bottle. Well ... you don't know now? Open the Game book and see and hear Stauf's 6th clue:
Bars deter cuckoo bird:
Cuckoo = Grazy = disturbed. Bars deter is an anagram for redbreast = robin. So you have to look for a robin bird
If you have been paying a little attention so far, as you went from one place to another in the house, then you have seen a painting in the Main Hall that depicts birds. Now that you have solved the mouse trap puzzle here in the laboratory, you can click on various objects to hear Stauf's comments. The 7th Guest Cd sits on a table. A gate door is open in one of the corners of the laboratory. Go through the gate door and .... you end up in the Chapel
You can't do anything here in the chapel. To the right of the altar the door of the confessional booth is open. Enter the confessional and ..... through a secret corridor you end up in Brian Dutton's room. Turn right and leave Dutton's room through the door behind the TV. You are back in the 2nd floor corridor . Turn right and walk 3 clicks forward. You are back at the stairs. The Lion statue is at your feet.
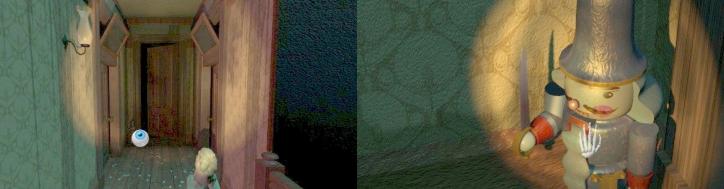
In the back of the corridor, in the left corner near the door of the Game room, is a small statue of a clown. You can now zoom in on the objects anywhere in the corridor with the eyeball. So take a look at the Lion statue and the clown statue. You must remember that clown's statue because it is a nutcracker and you will have to find this thing later. Go down the stairs to the 1st floor.
You are back at the front door. Turn left and go forward to the Dining room door. To the right of the Dining room door hangs a painting on the wall. Turn right and go to the kitchen door and then turn left again. You are now standing in front of the painting, that's right next to the Dining room door. Zoom in with this eyeball on this painting. It is the robin painting. In the painting you see 5 birds.
You can click on any bird with the hand grip. But there is only 1 bird the right one. 3 of the birds are robins.
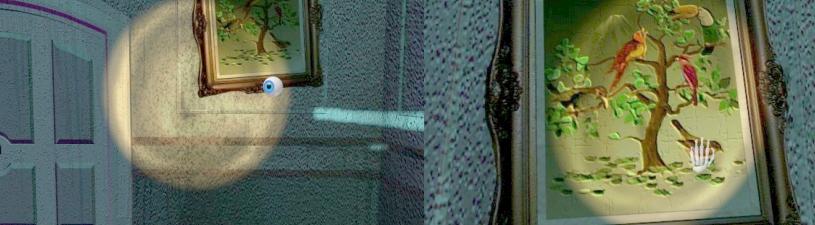
Click with your gripping hand on the Little Redbreast / Robin that sits on the right under the tree and ....
Longer video clip
In the large painting on the floor in the hall you see Robin Moralis. Robin is locked up in the basement of the Stauf House.
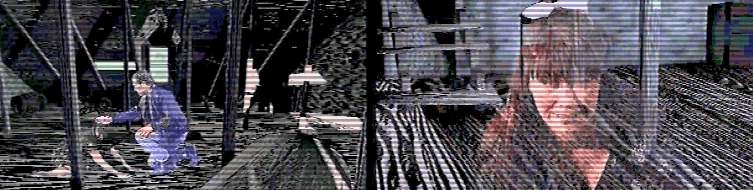
You will then see yourself, Carl Denning, in the hall. Carl gets to see Robin in the screen of the Game book.
Some suction hose is pushed out to Robin and Carl tries to warn Robin. Robin, however, cannot hear Carl. Then we see Samantha. Samantha is sitting at the computer in her home and she is trying to maintain the connection with Carl. Samantha can apparently look into the Stauf house through her computer. Samantha also sees Robin in the basement.
Samantha is apparently disabled because she is in a wheelchair. Stauf manages to break the connection between Samantha and Carl's Game book.
After this video you turn to the right to get out of the close-up of the robin painting.
Your cursor will beep again, so open the Game book and read Stauf's 7th clue:
Modern art flourisches under the sun:
This is the last cryptic clue of this 1st hour. If you solve this, and also the puzzle, this first hour will be over. Where did you see Modern Art? Is there not a Mondrian painting in the portrait room? Turn around to the large grandfather clock and step back into the clock and .... via the secret corridor you end up again in the:
Portraits Gallery Room:
You are again in front of the Torso and the harpsichord. Turn to the right and .... you are again in front of the "Mondrian" painting.
Above the "Mondrian" painting there is a large painting on the wall and in that wall painting you see a girl and a ..... Sunflower.
The 7th clue is: "Modern Art flourishes Under the Sun ". Well ..... the Mondrian painting is Modern Art and it is under the Sun, because it is under the painting that depicts a Sunflower. Zoom in on the "Mondrian" painting and then click with your gripping hand and .......You must solve the puzzle
The Mondrian Painting puzzle:
You have resolved Stauf's 7th clue, but you will not see a film clip. You are in the close-up of the "Mondrian" painting and this is the END PUZZLE of this first hour.
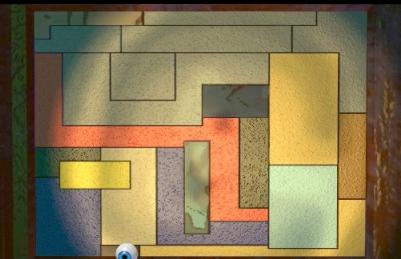
The painting is full of colored segments. You can click on the segments with the eyeball. You play this puzzle against Stauf. You click on a segment and it is then illuminated, but other segments are also automatically illuminated. Then Stauf turns a number of segments gray and it's your turn again. The intention is that you can make the last move. So YOU must be the last person to click on the remaining clickable segment. However, if Stauf is the one who can make the last move, you will lose this puzzle. To reset the puzzle, click on it with the skull again.
I am very sorry but also for this puzzle there is no ready-made or step-by-step solution. You play against Stauf and you cannot predict which moves Stauf will make. This puzzle too, can only be won with great difficulty. You can have Samantha solve the puzzle move by move, but that too is not always a guarantee of success. Samantha too may have difficulty solving the puzzle for you. I wish you a lot of strength with this puzzle. I haven't been able to discover any logic in this puzzle.
Once the puzzle is solved, click with the beckoning hand on the painting and ....... The Game book appears. You can now watch the entire video from the 1st hour, so all the clips you've seen before plus the missing pieces between the clips. So click on the Play button and sit down to watch it......
End of the first hour video:
The film starts with Robin Moralis arriving in Harley on Hudson. Robin enters the Diner and meets Arlene Wiley.

Notice that Arlene is missing her left hand. Robin wants to interview Arlene because she is the only one who ever came out of the Stauf House alive. However, Arlene does not want to talk about it. Then we see Marie Wiley, the almost mature daughter of Arlene. Marie enters the reception of the local motel and asks for Chuck. Marie has a meeting with Chuck in one of the rooms of the motel.

Chuck Lynch is married, but that doesn't stop him from fucking Marie. It remains unclear what role Marie and Chuck play in the story at this time. Then we see Robin Moralis again. Robin walks through the forest and finds a bloody stone. Robin now meets police chief Jim Martin.

A conversation follows between Robin and this local sheriff and then they leave.
We then see the head appear among the stones and then the film with Robin in the basement and Samantha in her house.
When the movie ends, you close the Game book, via the "Close" button and ... you have arrived in:
Chapter 2: The second hour.
You are still in the portrait room. Open the Game book and read Stauf's 8th clue:
Skedaddled.
Sked = desk = writing desk.
Leave the portrait room through the painting behind the couches. Back in the main hall you go to the:
Library:
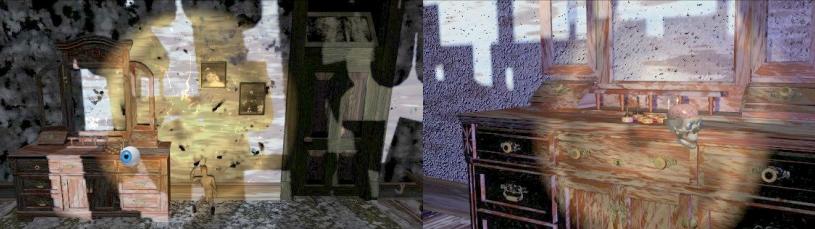
Back in the library, turn clockwise to the fireplace. To the right of the fireplace is a writing desk.
Zoom in on the writing desk. There is a green ink pot on the desk. There is also a piece of paper.
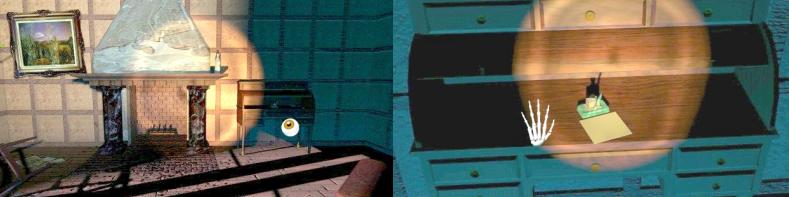
Click with your hand on the desk, left or right next to the green ink bottle and .... you have solved the 8th clue.
The drawers in the desk will open and close again, but you will not see a film fragment. Open the Game book to see Stauf's 9th clue
Part of the body in doctor's office:
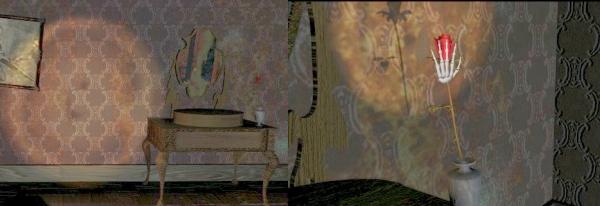
The solution is hidden in the words "Doctor's office" and if you look closely at these two words you get the word Torso. Well ... a Torso is a part of a body. Where is a Torso on the floor? Exactly .... in the portrait room. So you have to go back to the Portrait Room. Leave the library and go back to the large grandfather's grandfather clock in the corner of the hall. Step in the clock again and through the secret corridor you end up in the:
Portraits Room:
Zoom in on the Torso, which is on the left on the floor, and then click on it with your gripping hand and .....
The Game book opens because you have earned another film clip. So click on the play button.
Robin wants to see Dr. Thornton. Marie appears to be the assistant of doctor Thornton.
Close the Game book and turn left or right. Your cursor will beep again, so open the Game book again to get Stauf's 10th clue.
Libation for an affectious pupy named Sounder:
This is a difficult one. It is in the word Sounder .... or "sounds like ...."........ A pup is a young dog. An "affectious puppy" is an affectionate young dog. What do puppies do? Well ... they kinda lick. "Lick'er" sounds as "Liquor". Liquor is strong drink. Where have you seen a bottle of spirits? Oh yes ... the champagne bottle in Brian Dutton's room. Leave the Portrait Room again and go up the stairs to the 2nd floor and to Brian Dutton's room:
Brian Dutton's room:
Zoom in again on the champagne bottle in the champagne cooler, which is on the floor in front of the TV. Click again on the cork of the bottle and.....
you have solved the 10th clue. However, you will not receive a film clip as a reward. Open the Game book again to see the 11th Stauf clue
Annimal sullied street.
Sullied means jumbled up. Street has been confused. Street is an anagram of Setter. An Irish Setter is a dog. So you have to look for an Irish Setter. Here on the 2nd floor the Bathroom, the Knox room, and the Game Room are now also open. Leave Dutton's room to the corridor, turn right and go to the Game Room at the end of the corridor.
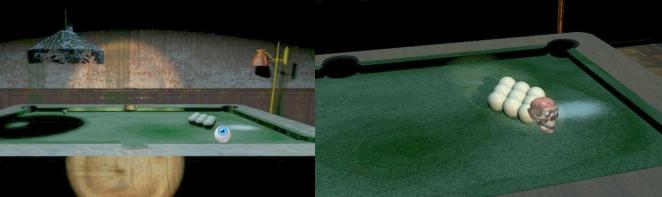
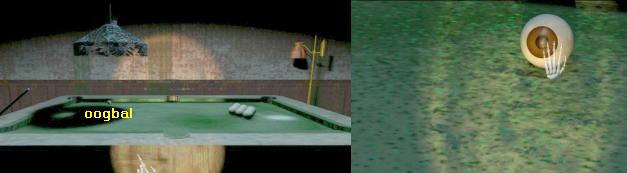
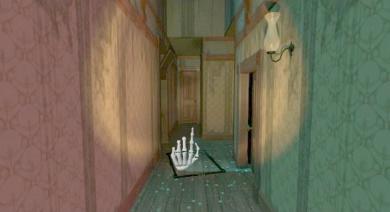
Game Room:
In the Game Room you must first solve the puzzle before you can do anything else. In the middle of the room stand the billiard table. Turn to the right so that you are right in front of the billiard table. There are 9 billiard balls on the billiard table. Zoom in on the 9 billiard balls and then click on it with the Skull to start the puzzle.
The billiard balls puzzle:
You have to color the 9 billiard balls and provide them with the numbers 1 to 9. But that must be done in the correct order.
Number the billiard balls, from top left to bottom right, as A, B, C, D, E, F, G, H, I.
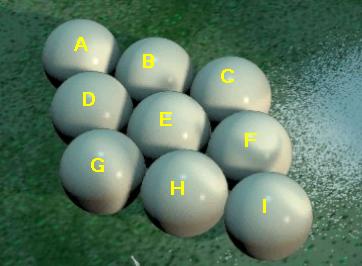
If you click on a billiard ball, the ball gets a color and a number. Click on the balls in this order:
F, H, I, E, G, D, A, B, C and ...... solved.
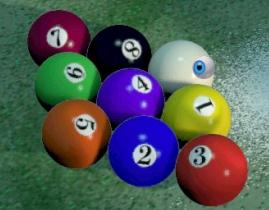
Stauf is angry but that doesn't bother you. Now you can click on everything else in this Game Room. On the left on the billiard table is a lonely billiard ball. If you look closer at that billiard ball, it turns out to be an Eye Ball. Remember this billiard ball. Turn around. Against the wall is the chessboard table (where you solved the Kings puzzle on in the 7th Guest). To the left of the chess table is a painting on the wall.
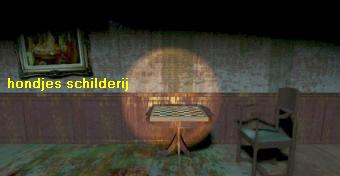
Zoom in on that painting. There are 3 dogs depicted in the painting. The right dog is an Irish Setter, so click with your hand on the right hand dog and ...
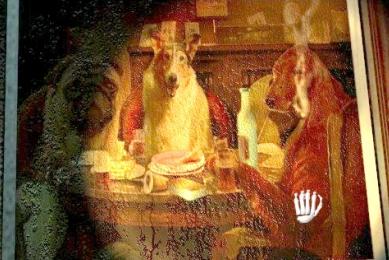
You have solved Stauf's 11th clue. As a reward you can watch a film fragment again. So press the Play button.

Robin talks to Doctor Thornthon about what happened with Arlene's hand. It was a bloody situation.
Close the Game book and turn left or right for a moment to get away from the dog painting.
Your cursor will beep again, so check out the 12th clue of Stauf in the Game book:
Jfcr vxq ...... So a lot of letters:

Well .... here you better ask Samantha for help because I can't make head or tale from this. Samantha says it's a coded message. If you click on the Help button further, Samantha will explain it further. Samantha is talking about the Grandfather and that it is not a wrist watch. Well ...The Grandfather Clock that's in the Main Hall on the 1st floor
So now you have to go to the large grandfather's grandfather clock in the Main Hall, beneath the stairs. So leave the Game room then go down the stairs to the 1st floor. You are again in front of the front door, so turn right again and go to the Dining room door and then to the kitchen door. Turn right again at the kitchen door. You are again in front of the grandfather's clock. Now do not click on the pendulum of the clock but zoom in on the dial.
Then click with your gripping hand on the dial and ..... You will automatically see a film fragment.
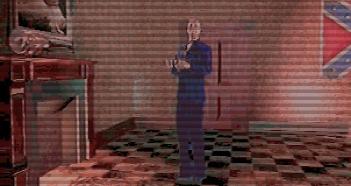
This clip is in real time. You, as Carl Denning, meets young Arlene Wiley in the hall of the Stauf House.
Arlene is clearly in a panic and screams that something terrible has happened to Samantha. Arlene disappears.
So this was a "ghost" from the past. Turn left or right and your cursor will beep again. Open the Game book to get the 13th clue from Stauf.
again a lot of letters: zu gotdy od mpy .....
So ask Samantha to explain this again. Samantha explains this step by step and eventually you understand that you have to look for a razor. Well .... where could you find a razor? In the bathroom maybe? The bathroom is on the 2nd floor. Look at the large grandfather's clock. The clock stand against the side of the stairs. Place your beckoning hand cursor on the side of the stairs, to the right of the clock, and then click and .... you then automatically go to and up the stairs up to the 2nd floor.
When you reach the top, turn left and go through the hallway for 2 clicks. Then turn right and enter the bathroom.
Bathroom:
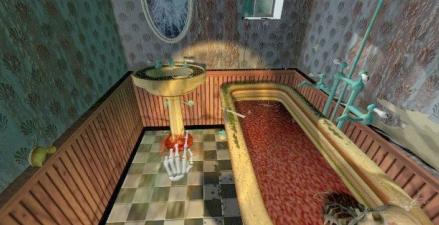
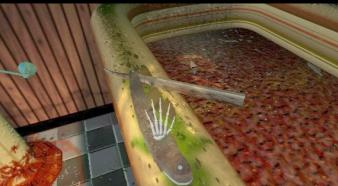
It is a bit dirty here. The bath is full of blood and a skeleton floats in it. There is a razor on the edge of the bath, but you can't grab it yet. You must first solve the puzzle here. Turn clockwise. In front of the bath, in the corner, is a flat-round box on the floor. Zoom in on that round box.
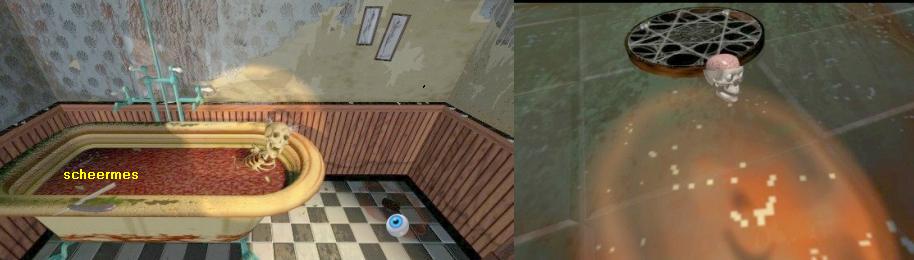
Then click with the Skull on the round box and you will be in the:
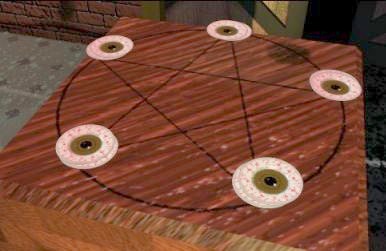
|
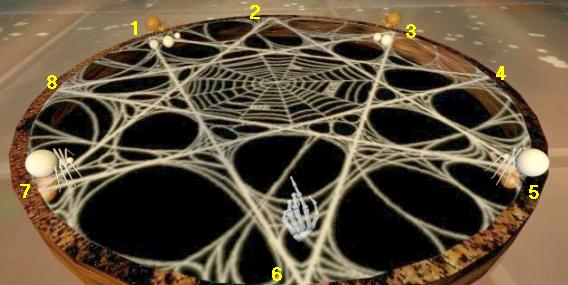
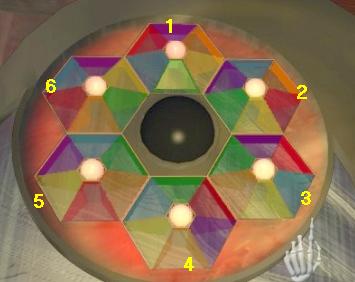
Spider Web Puzzle: The puzzle is a "David's Star". The star has 7 points. There are 2 brown spiders and 2 white spiders. The brown spiders must go to the brown eggs and the white spiders must go to the white eggs. Number the points of the Star as follows: Starting with the top left (the white eggs) and then clockwise: 1, 2, 3, 4, 5, 6, 7, 8.
You click on a star point and then you click on the star point where you want the spider to go to. A move is only finished when you click on the next spider.
Click with the eyeball and then with your grip on the razor which is on the edge of the bath.
Stauf's 13th clue has been solved and you can watch another movie clip.
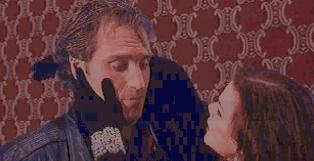
Marie and Chuck are embroiled in a rather horny embrace and then .... Marie puts a razor on Chuck's throat. |
Close the Game book and turn left or right. Your cursor will beep again, so open the Game book to read Stauf's 14th cryptic clue.
Fruit loop om stove:
If you ask Samantha for help you will find out that you have to look for an orange. Zoom in on the sink. There is a tube of toothpaste on the edge of the sink. Remember this. Zoom out, turn around and leave the bathroom. Take a look at the Game book on the map of the ground floor. The Ding Room is now also open. So go back to the ground floor and now to the:
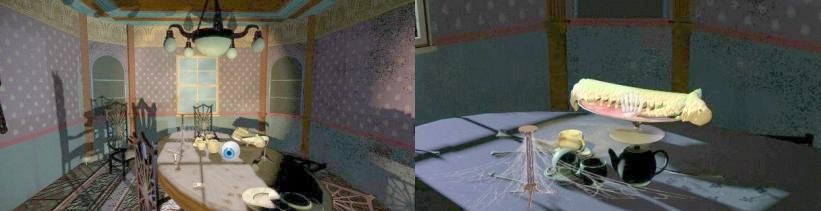
Ding Room:
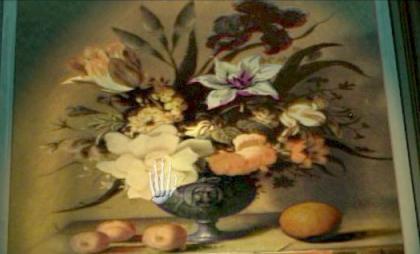
You can click on everything in the Dining Room. There is no puzzle to solve here now. Only later, at the end of the 4th hour, you come back here to solve a puzzle. Turn left to the left wall. On the left wall hangs a painting with a fruit basket on it. There is an orange in the fruit basket. So zoom in on the painting and then click the orange, on the left next to the tomato.
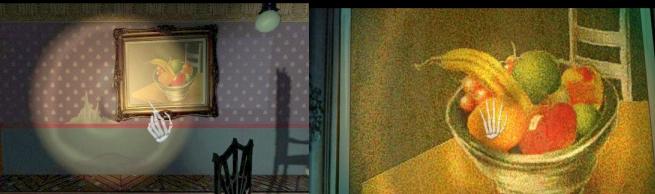
A dirty worm comes out of the orange. You have not earned a film clip, but you have solved the 14th clue. Turn left and view the 15th clue in the Game book.
Dreams obound of arming the rebels what of nocturnal horses schedules?
Well .... ask Samantha for help. You find out that you have to look for a "nightmare". Somewhere in the house is a painting by Fuselli and that painting depicts a nightmare. Leave the Dinning Room. In the hall you are again in front of the table where you have solved the Knights jump puzzle. View the map of the 2nd floor. You see that Edward Knox's room has now become available. So go to the 2nd floor and to
Edward Knox's Room:
You must first solve the puzzle here. The puzzle is in the large mirrored door of the cupboard.
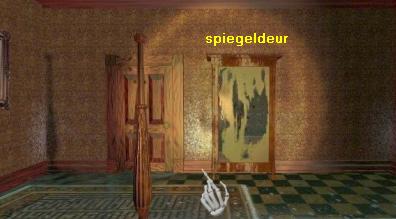
So zoom in on the mirror and activate the puzzle there by clicking the Skull twice
Slider puzzle:
This is a slider puzzle and it is quite difficult. Because the puzzle always starts differently, I cannot offer you a step-by-step solution.
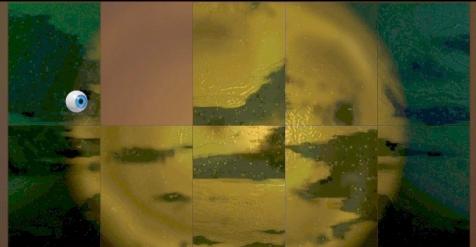
So you will have to do it all by yourself or have it solved by Samantha. Samantha can solve this slide puzzle in one go. However, if you want to try it yourself first, then, once the puzzle has been activated, immediately exit the puzzle because then you will see what the puzzle should look like when it is solved. Then activate the puzzle again and try to solve it. This is how it should ultimately be

When the puzzle is solved, you can look around the room and zoom in and click on the various objects. On the bedside table, which is to the right of the bed, is a glass of red port. Remember this. The Fuselli painting hangs above the fireplace. Zoom in on the painting and then click in with the gripping hand and .....
you have solved the 15th clue and deserve another film clip.
Robin runs through the woods and she bombs into Chief Jim Martin
16th clue: A distance, ancient castle keep ......... upset Teagarden
It concerns the words "upset" and "Teagarden". Teagarden is an anagram and it contains 2 words and well: Great and Dane. You have to look for a Danish dog. Have you been paying attention so far during your stroll through the house? If you have looked around the library, you have seen a painting of a dog. So leave this Knox room, through the door next to the mirror, and go back up the stairs to the ground floor and dive back into the library.
Library:
Turn clockwise to the fireplace. To the left of the fireplace is a painting and a Danish Dog is depicted on that painting.

Zoom in on the painting and then click on the dog. As a reward you can watch a film clip again, but not via the Game book.
You see a guest (don't know who this is), who apparently loves Marquis De Sade. Then Marie shows up with a big dog.
The dog's head changes to Stauf's head. And Marie too suddenly doesn't look that tasty anymore.
Zoom out of the painting and view Stauf's 17th clue in the Game book.
A man horse on the fly Sounds like a wounded Bull's eye.
Bull's eye = Shot at bull's eye. A man hors = Centaur = a horse with the head of a man.
You have to go to the Chapel for this. There are 2 secret corridors that can take you to the chapel. So the first secret corridor is here in the library and it will take you to the laboratory. From the laboratory you can go through the gate to the chapel. The second secret corridor is in Brian Dutton's room, behind the door in the left wall. This 2nd secret corridor takes you directly to the chapel. You have to know yourself through which corridor you go to the chapel. But you are in the library so it seems logical to go all the way to Dutton's room. But you have to know for yourself. Anyway .... make sure you end up in the chapel.
Chapel:
When you are back in the chapel, you are standing in front of the altar, when you have come from the laboratory. If you came from Dutton's room, look at the wall against which the organ stands. Turn around completely, or turn left. You are then in front of the entrance to the laboratory. To the left of the door is a Stone Plate with a Pyramid on the wall. Zoom in on that Stone Plate Pyramid
This is the End Hour puzzle that you must now solve to end the 2nd hour. Click with your hand on the pyramid in the figure to activate the puzzle.
The Pyramid Puzzle:
So you play against Stauf. You make a move and Stauf responds. You are red and Stauf is blue. Click in a box and you will see what happens.
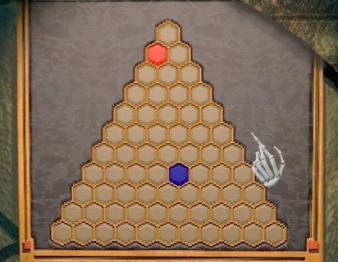
You must create a continuous red route that touches each of the 3 sides of the pyramid, and you must do this before STAUF succeeds. Samantha can solve this puzzle for you step by step. You can start and Stauf responds to your moves. Try to block the blue boxes from Stauf while trying to make a red route from left to right and below. However, winning this puzzle is not that easy. I cannot offer you a ready-made solution either. You will have to do it all by yourself, or have it solved by Samantha. However, here is how I ultimately won. But there are of course several possibilities to win. Or to lose.........

When you have won, click on the pyramid with your finger and ..... The Game book will appear. You can now watch the entire movie from the 2nd hour, so all the clips you've seen before plus the missing pieces between the clips. So click on the Play button and sit down for a moment.
Movie of 2nd hour
Chief Jim Martin brought Robin to Dr. Thorton's house. Robin goes inside and asks Marie Wiley if she can speak to Dr. Thorthon. After some hesitation Robin is allowed in and has a conversation with doctor Thornthon about how the young Arlene Wiley lost her left hand. It was a bloody affair and it is almost impossible for a dog to bite Arlene's hand off
 .
.
Then we see Marie Wiley and Chuck Lynch in their cheeky embrace at the reservoir. Marie puts the razor on Chuck's throat.

Marie then has a conversation with her mother Arlene, in the diner.

Arlene cannot appreciate that her daughter has an affair with Chuck, who is married after all. However, Marie clearly has a crush on it. We then see Robin, at the reservoir. Robin suddenly seems to get scared because she runs away in a panic and runs into Chief Jim Martin.

Chief Jim is quite charmed by Robin and he has arranged a pair of sturdy walking shoes for her.
After this we see a man running through the forest. The man is clearly panicking because he is being chased. The man stumbles and ....
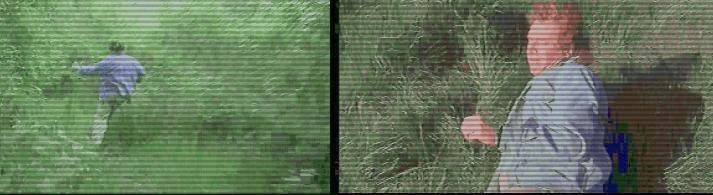
The killer bends over the man and cuts the man's throat with the razor he got from Marie Wiley. Because .... the killer is Chuck Lynch ...

After this you are in:
Chapter 3: The third hour
So you are still in the chapel. Step away from the puzzle and open the Game book to get the 18th clue from Stauf.
Put an olive in a stein .......
If you ask Samantha for an explanation, you understand that you have to look for a television. Well ... the only television you've seen in this damn house is in Brian Dutton's room. So turn around to the altar and then dive into the confessional corner to the right of the altar. Through the secret corridor behind the confessional you end up in the:
Brian Dutton room:
Stand straight in front of the TV and then zoom in on it and then click the TV with your gripping hand and ....
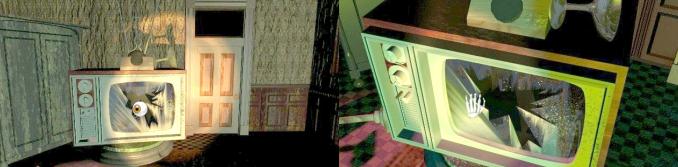
View the 1st film clip of this 3rd hour in the Game book
Robin goes to Samantha because she wants to talk to her about Arlene Wiley.
Close the Game book and get out of the TV. A new clue from Stauf, so check it out in the Game book:
19th Clue: A vital instrumental part:
Vital = Vital = Living? A living part, an Organ? But an Organ is also a musical instrument it also means
Hell ... does Stauf mean the church organ in the chapel? Turn around and go back through the door at the left of Dutton's bed
Chapel:
Zoom in on the large church organ and then click the organ with your hand and ......
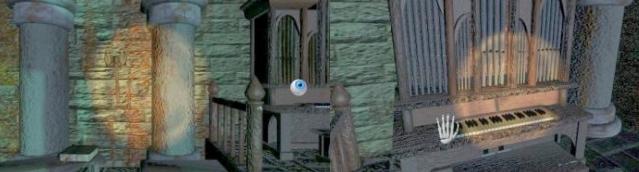
. ........you will not receive a film clip as a reward.
But Stauf comes with his 20th clue in the Game Book and this time it's a bunch of digits
22233642-736846873.
Well ..... You really need Samantha's help with this. If you ask Samantha for help, she finally says that an "Ivory Tower is a White Castle".
So you have to look for an ivory tower.....a chess piece????....the Rook???.
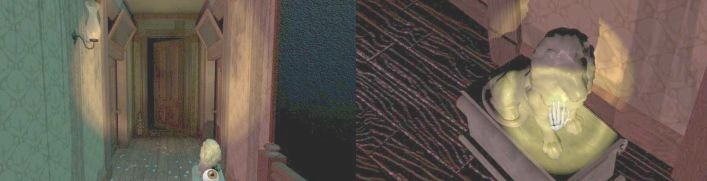
Open the floor plan of the 3rd floor and see .... the Attic is now also available. Also the kitchen on the ground floor is now open and on the 2nd floor you can now also enter the rooms of Martine Burden, Julia Heine and Hamilton Temple. Go through the confessional and the secret corridor back to Brian Dutton's room. Then leave Dutton's room through the door to the corridor. Right in front of Dutton's room is the door to the attic. Click forward on the door and .....
via the spiral staircase you end up on the:
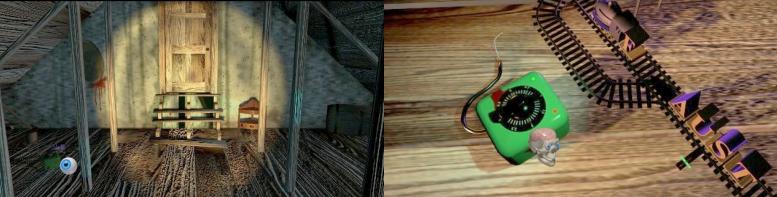
Attic:
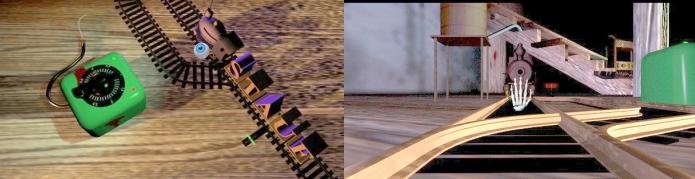
You are in the attic, where you have done the final puzzle in The 7th Guest. You can't go to the rear attic room yet. You are not allowed to do anything here because you first have to solve the puzzle here. On the left you see a green transformator of a miniature train. Zoom in on the green transformator and then click on it with the Skull to start the puzzle.
|
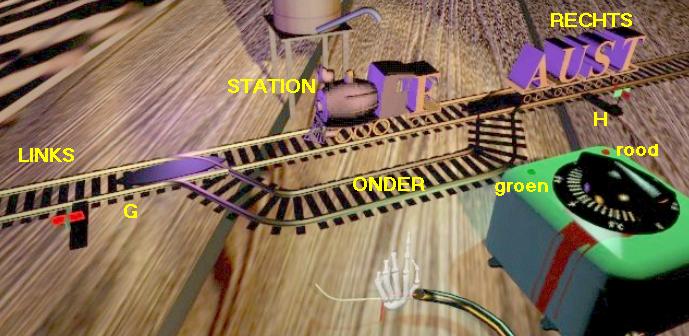
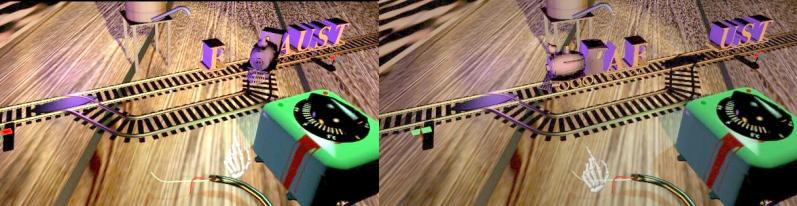
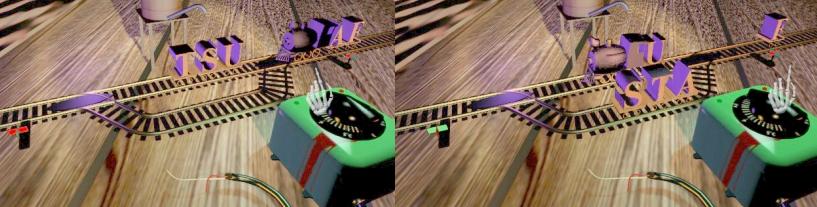
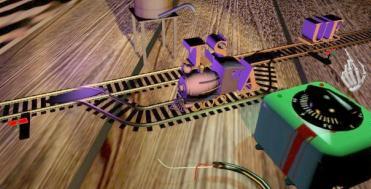
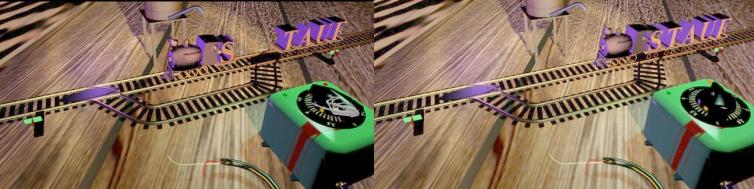
The Train puzzle: The locomotive is at the station. There are 5 carts. There is a letter on each cart. The carts now make the word FAUST. With the locomotive you now have to put the carts the other way around so that they make the word STAUF. The bottom rail is therefore the parking rail. There are 2 switches, left and right. You switch the switches by clicking on them. There is a flag at the switches. If the switch's flag is red, the locomotive goes to the bottom rail. If the switch's flag is green, the locomotive remains on the top rail. Divide the rail into 4 parts: Left, Station, Right, Down. The left is therefore for the left switch. The Station is between the 2 points. Right is behind the right switch and below is the parking rail. Name the left switch G and the right switch H.
The green transformator has a thick black button and a small green light and a small red light. By clicking on the green light the locomotive goes forward and by clicking on the red light the locomotive goes backwards. When the puzzle starts, the locomotive with F stands at the station. The carts A, U, S, T are on the right. The locomotive can pull the carts forwards but also push the carts backwards. It is a lot of work to solve this puzzle and I also believe that you will only get a certain amount of time. Samantha solves the puzzle for you in 1 go, but it is fun to try it yourself. Moreover, the music is pleasant to listen to, so why not try it yourself. Here is the solution: We do this puzzle in 7 steps Step 1:
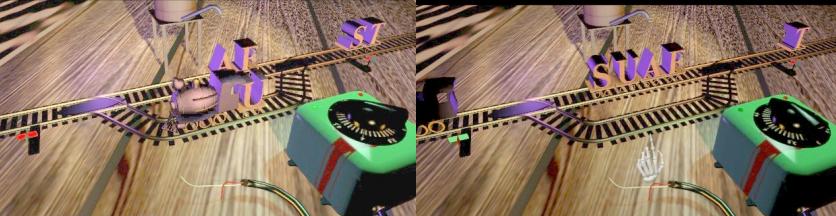
This was step 1 and you now know how the puzzle works. Now continue with the following steps, and I will not explain them so extensively anymore. Step 2: Take U and S, one by one, to station via the Down rail:
Step 3 Move T from Right to Left and then back to Down. Park T on Down Now bring S, U, A one by one from station to bottom, so to T. So you always have to switch Swap G. Don't forget to flip the left switch !!
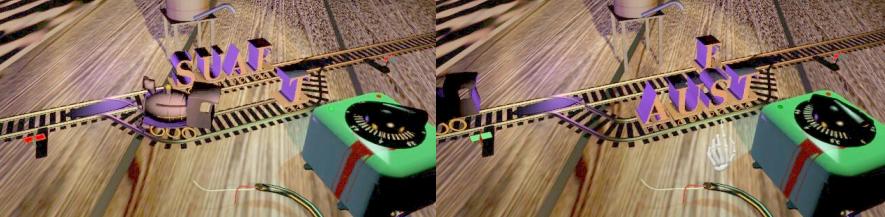
Step 4: Set switch H straight on (red) and then push F from station to Right. Now go pick up A and bring A from Below via Station to the Right
Step 5: Set switch H to red again, so to Down. Take, one by one, U, S, T from Down to Station (always switch G) Take A from the Right, via Down, to the left and then back to Down Bring T and S, one by one, from station to Down
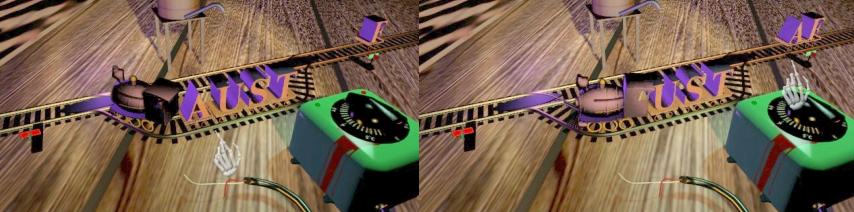
Step 6: Put switch G and switch H on straight (green) and then take you from Station to Right, against F. Take the locomotive, via Station and Left, back to Down. Return S and T to Station.
Step 7
.. STAUF ....SOLVED.
|
You go out of the train puzzle and look again at the door of the back room. Turn to the left. A mannequin is leaning against a wooden table by the window. At the far left of the wooden table is a chessboard with chess pieces. Zoom in on the chessboard. All chess pieces are down but the White Rook is still standing
Zoom in on the White Rook (tower) and then click it with your hand and ....

You see another video in Real-time
Carl meets the young Samantha in the attic. Samantha is on her knees and she is crying. She lost Arlene.
You hear Arlene then scream and Samantha runs away in a panic.
Turn left or right 2 times to leave the chessboard. You will receive the 21st clue from Stauf
Light piece from great orchestra:
This contains the word TORCH. There is a torch on the altar in the chapel. Leave the attic via the spiral staircase and then enter Dutton Back in the room.
In Dutton's room, go through the door in the left wall to the:
Chapel:
Turn clockwise to the altar. On the altar is an iron torch holder. Zoom in and click the torch holder with your hand and .......
you have earned another film clip.
Chuck Lynch brings the corpse of the man he killed to the Stauf House.
Close the Game book and zoom out of the altar and then view Stauf's 22nd clue in the Game book
Cheese gadget that sound larger:
You have to look for a cheese slicer and you can find it in the kitchen. So via the confessional back to Dutton's room and then via the 2nd floor corridor and the stairs back to the ground floor. Then to the Dining Room door and then to the Kitchen door. Then enter the kitchen now.
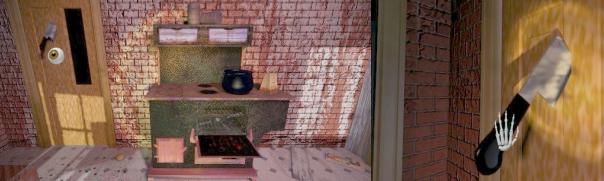
Kitchen:
You must first solve the puzzle here. There are plates on the large chopping block.
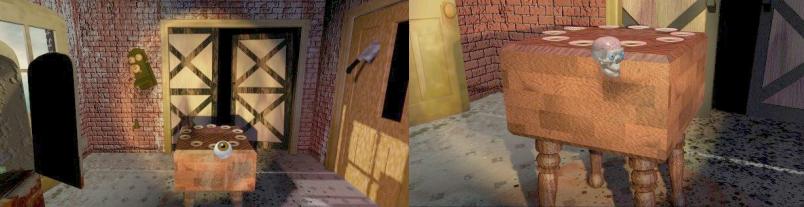
Zoom in on the chopping block and then click with the Skull.
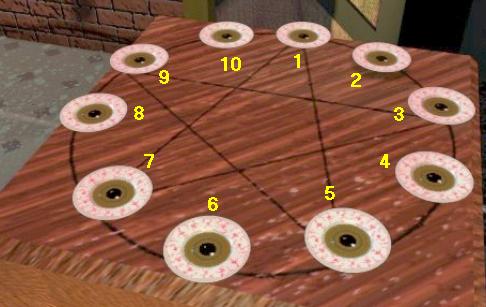
Plates puzzle There are 10 plates on the chopping block. The plates are on a circle. A Star of David is drawn in the circle. 5 plates are on the points of the Star and 5 plates are in between the points. Number the signs that you see, clockwise, 1 to 10 and start at the top star point.
You have to get a stack of 2 plates on every star point, 1, 3, 5, 7 and 9. You click on a plate and then on the plate on which you want to place the first plate. A plate always goes over 2 other plates. A pile of 2 plates counts as 2 separate plates.
|
You automatically get out of the puzzle. Turn clockwise. A cheese slicer stands directly on the stove. In the door, to the left of the stove, is a chopper.
Remember that chopper. Zoom in on the Cheese Slicer and then click on it with your hand to solve Stauf's 22nd clue
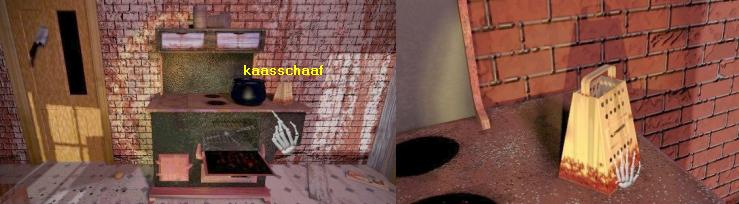
Some fingers are dancing under the cheese slicer. You will not receive a film clip as a reward. Turn left or right and view the 23rd clue of Stauf in the Game book.
500 = 100 = 0.
Translate 500 and 100 into Roman Numerals and you get: 500 = D and 100 = C. But what is 0. Well .... 0 is nothing, so in fact it says ..... D is C, or in English: Disc = CD-ROM. In the laboratory there is a CD-ROM of the 7th Guest. So you have to go back to the laboratory. Leave the kitchen to the hall and go to the library. In the library, go through the secret corridor, behind the globe, to the:
Laboratory:
Turn clockwise. You are back in front of the table on wheels. In front of the table is the CD-ROM box of The 7the Guest.
Behind the table is a 7th Guest book.

Zoom in on the CD-ROM box and then click the CD box with your grab hand and .....
You have earned another movie clip, so press the Play button.
Samantha Ford knocks on Robin's motel room door. Samantha is willing to tell Robin the truth about what happened to her and Arlene at the Stauf house.
Close the Game book and turn left and view Stauf's 24th clue in the Game book.
Blent a TEAPOT SHOT and the pearls won't rot.
You have to look for a tube of toothpaste. Well .... you know where you can find a tube of toothpaste .... in the bathroom. Turn around to the gate door and go through the gate door to the Chapel. In the Chapel you enter the confessional again to get to Brian Dutton's room upstairs. Leave Dutton's room down the hall. Turn clockwise and go forward 1 click. Turn left and enter the bathroom again.
Bathroom:
Zoom in on the sink and then click with your eyeball on the tube of toothpaste. Then grab the tube of toothpaste with your hand
You have solved the 24th instruction but do not receive a film clip. Turn left or right twice and view the 25th clue in the Game book.
Slyness holding shipment in choppe:
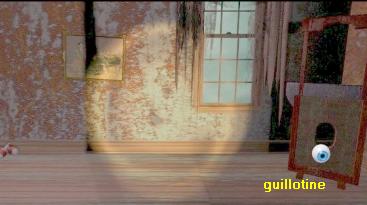
Well .... Samantha explains it to you. You have to find a guillotine. Leave the bathroom and go to the Hamilton Temple room.
Hamilton Temple's room:
There is a Guillotine in the corner. But you can't do anything here. You must first solve the puzzle here. Turn to the bed. There is a knife in the back wall of the bed. Remember this knife. To the left of the bed is a cupboard. There is a Cube in the lower section of the cupboard.
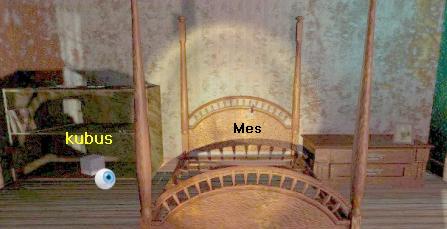
Zoom in on the cube and then click on it with the Skull. You are then in the:
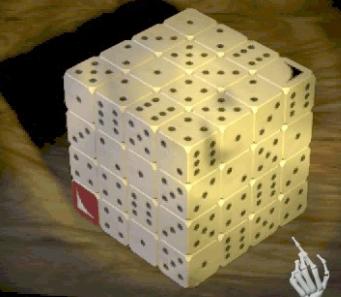
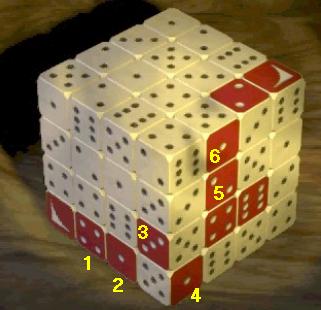
|
Cube puzzle: The cube consists of dice. You must create a continuous red path from the white arrow, bottom left, to black arrow, top right.
You have to click on certain dice to make the path. There are several solutions. Samantha can solve the puzzle for you, but try to save Samantha's powers for the more difficult puzzles to come. Here there is a possible solution. So you see the left side, the right side and the top side of the cube.
|
Turn left twice. On the right in the corner is the Guillotine. Zoom in on the Guillotine and grab the thing and ....
you've earned another movie clip, so click the Play button in the Game book.

You can now see how Arlene Wiley lost her left hand.
Close the Game book, turn left or right and view the 26th clue from Stauf in the Game book
Poor drainage could still produce a flower.
Drainage = an anagram of Gardenia. Gardenia is a white flower.
At the top of the central staircase, there is a painting of a pot of flowers and a white Gardenia is also depicted on it. Turn left. The room has 3 doors.
The left door brings you back into the corridor. The middle door takes you through a secret corridor to the ground floor Main Hall. The right door takes you, also through a secret corridor, to the Game Room. Go through the left door to the corridor. Turn left and go forward 1 click. Turn right. You stand in front of the flowerpot painting. Zoom in on the painting and then click with your hand on the white flower.
You will see a real-time film clip.
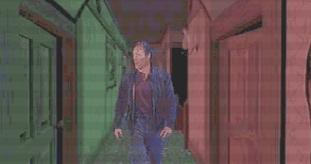
Carl walks down the 2nd floor corridor and finds that it smells funny in the house.
The house, so Stauf, responds with a comment. Carl has no idea where that voice came from.
Turn left and view the 27th Stauf clue in the Game book.
Sounds like it got higher from wine.
Wine? . But what kind of wine? Chablis, Rosé? He ... Rosé = Rose? Do you have to look for a red rose? Go to Martine Burden's room.
Martine Burden's room:
You must first solve the puzzle here. In the right corner is a round table. There is a pyramid on the round table.
Zoom in on the round table and activate the puzzle with the Skull. The puzzle is a:
Word puzzle:
15 letters have appeared in the pyramid. You have to make a 15 letter word with the 15 letters. You have to do this twice.
So you click on the letters. The letter that you click on disappears from the pyramid and appears in the bar below the pyramid.
Here is the solution. You notice yourself in which order you have to click on the letters.
1st word = Unintentionally
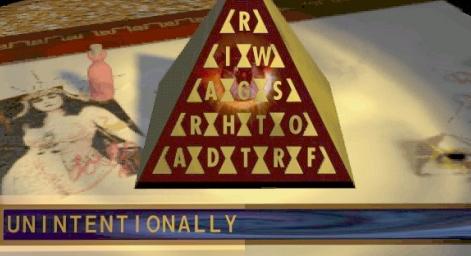
Now make the 2nd word = Straightforward.
When you have solved the puzzle, turn clockwise. You then stand in front of the dressing table.
There is a red rose on the dressing table. Zoom in on the Red Rose and then click the rose with your gripping hand.
You see a real-time film clip again.
Carl meets Martine Burden and the meeting does not suit Carl very well. Martine then dissolves into nothing.
Zoom out and see Stauf's 28th clue in the Game book
What kind of jewelry is angrier.
Well ..... you have to look for an Earring. However, first check the bed here in Martine Burden's room. There is a bloody sheet on the bed. Remember this. Leave the room. You have not yet visited Julia Heine's room and the Doll Room here on the 2nd floor. The Doll Room is not yet available, but Julia Heine's room is. So go to:
Julia Heine's room:
|
You first have to solve the puzzle. In the corner to the right behind the bed is a cupboard and on the cupboard is a jewelry box and there is the puzzle. So zoom in on the box and then click with the Skull on the jewelry box to activate the puzzle.
The Emerald puzzle: There are 6 emeralds. The 6 emeralds form a circle. Each emerald has 6 faces, each with a different color. You have to swap the emeralds with each other so that the sides of the same color always come together. To change emeralds, click on an emerald and then on the emerald with which you want to change places. To rotate an emerald, click twice on the emerald,
Number the Emeralds, from above, 1 through 6 and then do the following:
|
You automatically get out of the puzzle. Turn left. The mirror table is on the wall. Zoom in on the mirror table. There is an Earring on the mirror table.

Do not click with your hand but click with the eyeball on the earring and then grab the Earring and.....

Stauf makes the corresponding ear appear. You have not earned a film clip. Turn left or right and view the 29th clue from Stauf.
You might hear a well manered Cockney with 60, s hairstyle.
Well manered = to behave = in Cockney English = Beehive
You have to go back to the attic. Leave Martine burden's room and head back down the corridor to the attic door, opposite Brian Dutton's room. Go through the attic door again. You end up in the attic via the spiral staircase. In the attic you can now go to the back room, the Room at the Top. So go through the door at the top of the stairs.
Room At The Top:
You first have to solve the puzzle. Behind, in the corner, is a yellow Beehive on the floor.
Zoom in on the Beehive and then grab the beehive with the gripping hand to activate the puzzle:

The Beehive puzzle
The bees are flying out of the hive. Well .... the hive is therefore a honeycomb and consists of cells. You are yellow and Stauf is red. The intention is to fill the honeycomb with more yellow cells than red cells It is a bit the same puzzle as the Blood cells puzzle in The 7the Guest......and......It's almost impossible to win this mini game
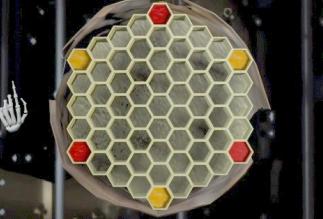
So you always have to multiply your yellow cells. You click on a yellow cell and then on an empty cell. Your yellow cell then multiplies. Stauf then responds to your move. The intention is that your yellow cells will eat the red cells of Stauf and turn them into yellow cells. But Stauf will do the same with your yellow cells. You win this game if there are ultimately more yellow cells than red cells. This is an impossible puzzle to win. You can't beat Stauf. Unfortunately, I cannot give you a solution or strategy for it either.
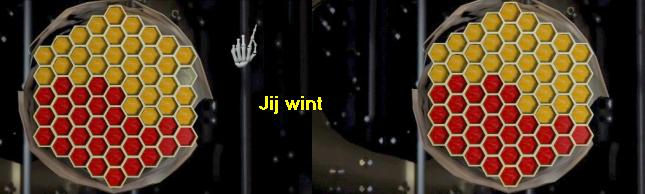
The best thing you can do is to have Samantha solve this puzzle from the very first move. In the pictures above you can see how Samantha won this game for me. You always have to ask Samantha for the next move. Even then it is quite a job and there is no guarantee that Samantha will win. You may have to restart the puzzle multiple times before Samantha has found the right strategy to win the puzzle for you. I wish you a lot of patience and success.
When you have won this game, click with the beckoning hand. The 3rd hour has now ended and you can now watch the entire movie from the 3rd hour.
End of the 3rd hour of movie
Robin Moralis visits Samantha in her home. Robin tries to get Samantha to tell the truth about what happened to her and Arlene 20 years ago in the Stauf house. However, Samantha refuses to talk about these events and Robin leaves again. Then you see how Chuck Lynch "carries" the corpse of the man he murdered to the Stauf house. Then you see Samantha who goes to Robin to tell her the truth. It is really an incredible story that you now get to hear from Samantha.
Two young boys disappeared 20 years ago. Those were the boys Peter and Charly. The 2 teenagers Samantha and Arlene then secretly entered the Stauf house to find the 2 boys. Samantha and Arlene have been raped by the Stauf House. The Stauf House is a living thing .... the Stauf House is ..... Henry Stauf. Arlene lost her left hand that night. Arlene and Samantha were both made pregnant by Stauf. Samantha has opted for an abortion but Arlene has not. Samantha was paralyzed by the abortion. So Arlene gave birth to Marie, the daughter of Stauf. Marie, now 18 years old, is the driving force behind all the evil that has recently taken place in the town and the Stauf House. Marie is now Stauf's star.
When the movie ends, close the Game book. You have arrived in:
Chapter 4: The fourth hour.
Turn left or right and view Stauf's 30th clue in the Game book
Instrument is sharp but is missing it’s head.
Sharp is missing it's head = Sharp therefore misses the first letter S, so there remains Harp. You have to find a harp and you might find it in the Music Room.
Leave the attic room. You are then back in the front attic room. Leave the attic through the door and via the spiral staircase you end up on the 1st floor again. Turn left and walk down the hall to the stairs and descend the stairs to the front door. Turn to the left and go to the double door of the music room.
Music room:
To the right of the piano stand a beautiful red Harp. Unfortunately you have to solve the puzzle here before you can touch the harp.
Turn left. You stand in front of the fireplace. There is a clock on the mantelpiece.
To the left of the clock is a Miniature Music Room on the sandstone mantelpiece

Zoom in on the Miniature and then activate it with the Skull. You are in the:
Slide the Piano out of the room puzzle:
On the board there is a piano, 4 sofas, 4 chairs and a table. The exit is the red arrow.
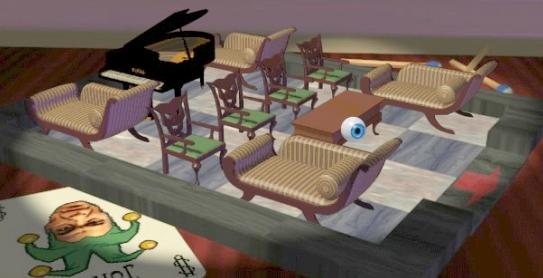
You have to get the piano off the board through the exit. To slide the piano off the board you have to move all furniture over the board so that you can move the piano to the red arrow. It is quite a job because you always have to create space to be able to move a piece of furniture.
You need 90 moves to push the piano off the board. You click on a sofa, chair, table or piano to move them to a free space. Of course you first have to make a free space by moving other pieces of furniture. You start by moving the table. Sorry ..... but I don't feel like explaining this puzzle further. To give you a step-by-step solution for this puzzle, I have to write a complete walkthrough for it. And I really don't feel like it. So ask Samantha to solve this puzzle, or find it out for yourself. Samantha solves this puzzle for you in 1 go.
When you have solved the puzzle, or Samantha did it for you, you turn back to the Harp and .... hello ... the real piano is now gone too. Zoom in on the harp and then touch the thing with your gripping hand. You have resolved Stauf's 30st clue but you will not receive a film clip as a reward. Zoom out of the harp and receive Stauf's 31st clue in the Game book.
A defective truck with a crane makes ball-busting ballet.
Truck and Crane are an anagram. Balls are "Nuts". But "Nuts" also means the things that you can eat but have to crack first....,.So.... You must find a Nutcracker.
It's the weird clowns statue that stands in the 2nd floor corridor near the Games room door. So leave the Music Room and go up the stairs to the 2nd floor. Turn right and stand still. Zoom in with your eyeball on the weird statue that stands on the floor near the Game room door......it's a clown but it is also a nutcracker....
Then click the clown with your hand and .... you can watch another film clip.
Chuck meets Marie in the motel room. Marie orders Chuck to kill Robin.
Close the Game book, turn left and receive the 32nd clue from Stauf in the Game book.
Look at key missing first misprinted label.
Ask Samantha to explain this, because I can't......I'm just a stupid Dutchy for witch this kind of cryptic English is way above my level of education.......
You have to look for an eyeball. He .... isn't there an Eye Ball as a billiard ball on the billiards table in the Game room ?. So enter the Game room again. Turn to the billiards and zoom in again on the lonely billiard ball, which is on the left of the billiards. Then grab the ball with your gripping hand and .....
you don't earn a film clip with it, but you have solved clue32
Step away from the billiards table and get clue 33 in the Game book.
Disabled cutting edge:
Well .... This is the knife that sticks into the back wall of the bed in Hamilton Temple's room. So leave the Game room and turn left and enter the Temple room again. Turn to the bed and then zoom in on the knife that is in the back wall. Then grab the knife with your hand and ...
You have earned another film clip.
Chucky sneaks into Robin's room. Someone is in bed. Chuck thinks it's Robin who's sleeping.
Close the Game book, step away from the bed and view clue 34 in the Game book:
Unreasonable reason:
A Reason = a motive. Motive is the last syllable of ..... locomotive? So you must go find a Locomotive?
So up to the attic. Leave the room through the left of the 3 doors and go back to and through the attic door to the attic.
Zoom in again on the green transformator and then on the locomotive and then grab the locomotive and .....
you will be run over by the locomotive. Joke from Stauf. Turn right twice to get out of the close - ups and view the 35th clue in the Game book.
Paper used in unusual theses:
Theses = Anagram = Sheets ......bed sheeds? = the bloody sheet on Martine Burden's bed.
So leave the attic and go back to Martine Burden's room. Turn to the bed anti-clockwise and zoom in on the bloody sheet that is on the bed.
Then click with your hand on the bloodstain and ....
View the film clip in the Game book.
Chuck delivers the corpse, which he thinks is Robin Moralis, to the Stauf House. But .... Chuck is now also pulled into the house.
Close the Game book and get out of bed and you get clue 36 in the Game book.
Adroit holding a sharp instrument:
Adroit = handy, smart. Handy, smart = clever. Clever with an A in it then becomes Cleaver = Chopping knife.
He... the Chopping Knife that sticks in the kitchen door. So go to the Kitchen.
Turn to the stove clockwise and then zoom in on the chopping knife in the door. Then grab the knife and ....
well .... you can now see what happens to Chuck..
Chucky enters the kitchen and Marie and Stauf appear.
Stauf and Marie are fooling Chuck and the soup kettle is also involved. But Stauf and Marie aren't kidding
Marie kills Chuck and Chuck ends up as soup meat in the soup
You get clue 37 in the Game book
A deserted arthropoid.
An arthropoid is a crustacean. Desserted contains Dessert ..... A crustacean for dessert? Well .... you eat dessert after dinner and you dine in the Dining room. So leave the kitchen and in the hall you go 1 click forward and then turn clockwise and go through the double door into the:
Dining room:
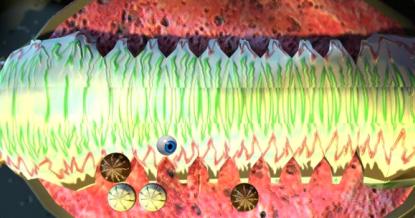
In the middle of the large dinner table is the dessert. It is a crustacean pudding.
Zoom in and grab the dessert with your grab hand. You end up in the puzzle and the:
|
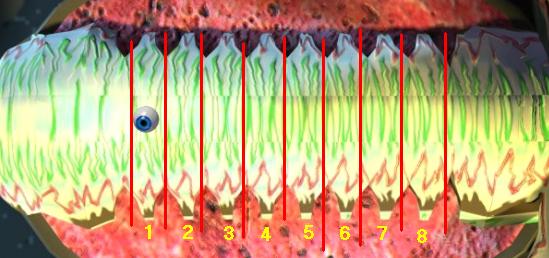
4 in a row puzzle: The crustacean is divided into rows. You recognize the rows by the point at the bottom of a row. There are 8 rows. Number the rows, from left to right, 1 to 8.
You must place Chocolates in the rows and you must get 4 in a Row before Stauf makes 4 in a Row. Click on a row to put your white bonbon in it. Stauf reacts with brown Chocolates.
7 Chocolates can be placed one above the other in a row. Well ... you must have played 4 in a row in real life. It is a matter of following a good strategy. Try to prevent Stauf from making 4 in a row, while at the same time you are trying to make 4 in a row. So 4 in a row means 4 white Chocolates on top of each other, or 4 next to each other or 4 diagonally. A strategy that usually works is this: When it's your turn then click on Row 4, 7, 4, 5, 5, 8, 7, 7, 6, 6, 8. However, it remains dependent on how Stauf reacts whether you win or loose. It may well be that you first loose a few times but there will come a time when you win. If you find it all too difficult, let Samantha solve this game for you.
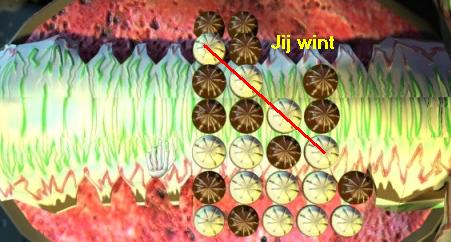
If you have won, so you have 4 white Chocolates in a row, then you click on the ice with the beckoning hand and .... you can now watch the entire film of the 4th hour. |
End of 4th hour movie:
Marie orders Chuck to kill Robin. Chuck refuses, but Marie threatens to tell Stauf that. Chuck does not dare to refuse, so he is on his way to kill Robin. But .... he killed Jim Martin, who spent the night with Robin and is still sleeping in Robin's bed. Typical case of being in the wrong place for Chief Jim at the wrong time. Chuck take a chance and delivers Jim's corpse to the Stauf House in broad daylight. But Stauf knows and sees everything, so Stauf knows that Chuck has killed the wrong person. Chuck is now also experiencing his own end ...... in soup as soup meat.
Robin then takes on the challenge of Arlene and she enters the Stauf House, watched by Samantha.
From now on Robin cannot be saved anymore, but that will come clear at the end of the game.
Close the Game book and eat your pudding. The 4th hour is not really over yet because the Grandfather's Clock has not yet been 12 o'clock. We go on in:
Chapter 5: On your way to the Endgame:
You will receive the 38th clue from Stauf.....a lot of numbers....
663 264625 46 2 6455466.
Million without mil = lion = the lion statue at the top of the central staircase.
So leave the Dining room and go up the stairs to the 2nd floor. At the top of the stairs you turn to the right and you remain standing.
The lion statue stands at your feet. Zoom in and grab it and ....
You see Robin walking down the corridor. Stauf talks to Robin. Stauf knows everything, so also that Robin, as a little girl, drowned 4 young kittens.
Stauf relies on the fears and the secret desires of people. Stauf makes a lion appear and the lion jumps Robin.

You get the 39th clue when you zoom out of the lion statue.
Drink left at sea.
Left at sea = port, from where the ships go, but it's also a drink. The glass of red port in Edward Knox's room, on the table next to the bed.
So go to Edward Knox's room. Turn to the bed. On the bedside table, which is to the right of the bed, is a glass of red port.
Zoom in on the glass and then grab it with your gripping hand.
As a reward you get a meeting with Edward Knox.
After the video you will get the 40th clue from Stauf:
Snake, baby, trap.
A kind of snake? Something for a Baby? A rattle.
View the map of the 2nd floor and see that the Dolls Room is now open. The Dolls room is now the only room you have not been to yet.
All other rooms on the map are now colored blue. Leave the Knox room and turn clockwise in the corridor.
Go through the corridor to the door at the back of the corridor. Go through that door and you are in the:
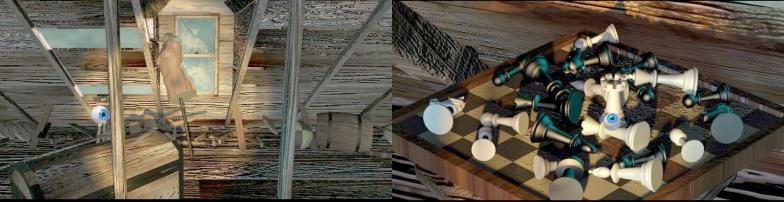
Doll's room:
You cannot do anything here, you must first solve the puzzle. You stand at the window. Turn around 2 times. On the wall is a mirror cabinet. There is a chess game on the cabinet, in front of the mirror. Zoom in on the chess game and then activate the puzzle with the Skull.
|
The Bishop puzzle: There are 2 black and 2 white bishops. The playing field consists of 10 wooden circles. The black bishops are on the 2 white circles and the white bishops are on the 2 black circles. Well .... you have to get the white bishops on the white circles and the black bishops on the black circles. Number the wooden circles as follows:
You click on a bishop and then on the wooden circle where you want the bishop to go. If there is only 1 possible circle where a bishop can go to, the bishop you clicked on will automatically go there. Make the following moves: Click on 10. The white bishop on 10 automatically goes to 7. Click on 1 and then on 8. The black bishop on 1 moves to 8 Click on 2. The black bishop on 2 automatically shifts to 3. Click on 7. The white bishop on 7 automatically shifts to 4. Click on 3 and then on 5. The black bishop on 3 moves to 5 Click on 8 and then on 10. The black bishop on 8 moves to 10 Click on 9. The white bishop on 9 automatically goes to 6 Click on 6 and then on 1. The white bishop on 6 goes to 1 Click on 4 and then on 6. The white bishop on 4 goes to 6. Click on 5. The black bishop on 5 automatically goes to 2 Click on 10. The black bishop on 10 automatically goes to 5. Click on 6 and then on 8. The white bishop on 6 goes to 8 Click on 5. The black bishop on 5 automatically goes to 7 Click on 2 and then on 4. The black bishop on 2 goes to 4 Click on 8. The white carpet on 8 automatically goes to 3 Click on 7 and then on 10. The black bishop on 9 goes to 10 Click on 4 and then on 9. The black bishop on 4 goes to 9. Both black bishops are good now. There is only 1 move left
Click on 4. The white bishop on 4 will automatically go to 2. Puzzle solved |
You look at the cabinet again. Turn to the left. You look at the left wall. A shelf hangs on the wall.
You get the beckoning hand to the plinth at the bottom of the wall.
Click the beckoning hand and .... through a loose floorboard you go under the wall and you end up in the:
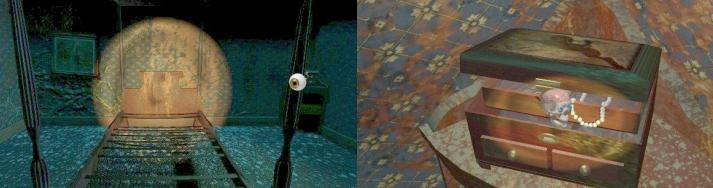
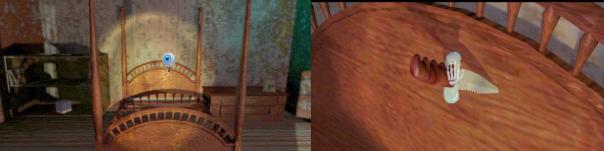
Children's room (Nursery)
Turn right. In the window sill of the blinded window is a beautiful large Rattle. Zoom in on the rattle and grab the thing and ....
You will see a video:
Robin finds a baby doll. The doll makes an ugly face to Robin and she drops the doll with fright.
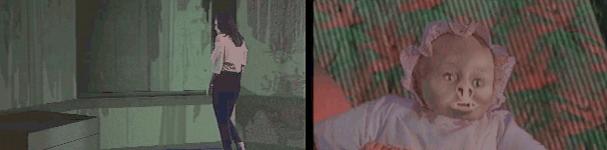
Stauf turns up and is now talking to Robin for a while. Stauf tells about the magical powers of the house. The house is a living thing, and like everything else that lives, the house must eat to survive. Hence all the murders. Stauf offers Robin infinite power and influence when she turns to him. Robin seems to be interested.
After this video you step away from the rattle. You get the second to last clue from Stauf:
41st clue A letter in Creeke is a number in Rome.
Just ask Samantha. Samantha explains that you have to look for the Roman numeral for 11 = XI.
Well .... where did you see this ? On the dial of the Grandfather's Clock in the hall by the kitchen door. However, first look around in the nursery. In one of the corners is a dollhouse. Remember this dollhouse because in this dollhouse you will play the last game against Stauf. If you look at the dollhouse you turn left and leave the nursery through the door. You are then back in the Doll's Room. Exit the room through the door to the corridor and go to the ground floor via the stairs.
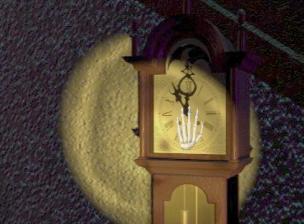
Again on the ground floor you go to the Grandfather Clock, in the corner near the kitchen door. Zoom in again on the dial.
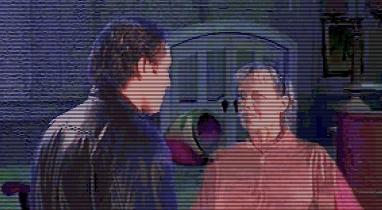
Then do not click with your gripping hand on the dial but click with the eyeball on the hands. Then click with your hand on the hands and ....
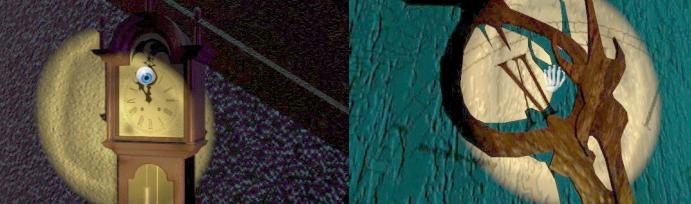
Samantha sees Robin with Stauf. Stauf offers Robin her own TV show. Samantha sees all of this and is now contacting Carl via the Game book.
According to Samantha, Robin cannot be saved anymore because she has said YES to Stauf.
42nd clue...the last clue
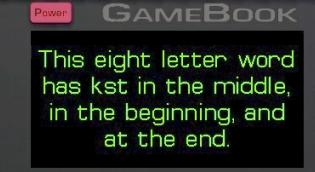
Samantha explains this for you, because I can't.....Via Samantha you learn that you now must find an Ink Set / Ink Stand. Well .... on the writing desk in the library is a green ink set, with pen and paper. Ok .... This was the last clue and also the last time that Samantha could help you. Go to the:
Library:
Turn around to the fireplace and the writing desk.
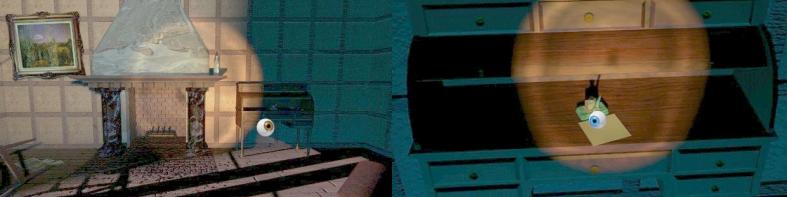
STOP ...... Wait a moment .... Once you have clicked on the ink set you can not SAVE YOUR GAME ANY MORE.
I advise you to SAVE your game for the last time now, before touching the Ink Set.
Save your game in SLOT 1 and Name your Save END GAME, so that you can find it easily
When you have saved, zoom in on the writing desk and then zoom in on the green ink set. Then click with your hand on the ink set and ....
The pen writes on the paper "Play in my dollhouse".
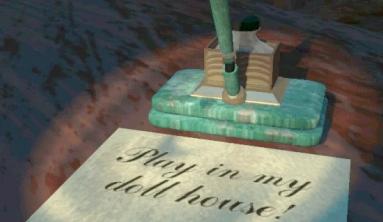
Get out of the desk. OK. You are no longer allowed to save. You now have to go to the dollhouse in the nursery.
So leave the library and go to the Doll's room. Crawl into the nursery room again, via the loose floorboard under the wall
Nursery / Doll House
Turn to the left and zoom in on the dollhouse and then click with your gripping hand on the white floor in the middle compartment.
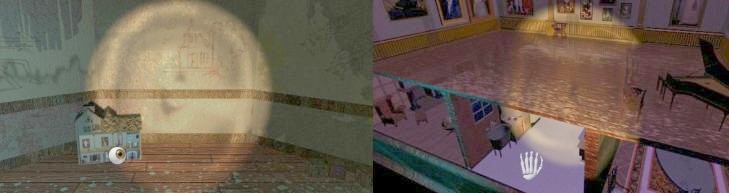
You now have to beat Stauf in the.......
The Pente Game:
You play against Stauf. You must get 5 Chocolates in a row or 10 Chocolates from Stauf. The floor is covered with diamonds.
You click on a diamond to place a dark brown Chocolate. Stauf responds by placing its light brown Chocolates.
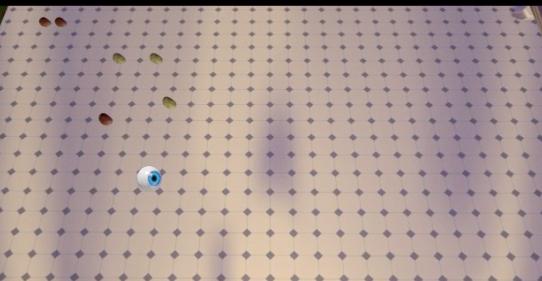
So you have to get 5 dark brown Chocolates in a row, or 5 times 2 = 10 Chocolates from Stauf. in a row can be: horizontal, vertical or diagonal.
Stauf will, however, block your attempts with its light brown Chocolates and also try to make 5 in a row. When 2 of your Chocolates are enclosed by Stauf's Chocolates then you lose those 2 Chocolates . But you can do that too. So you can also embed 2 of Stauf's chocolates to take them. When you have obtained 10 Stauf Chocolates, you win this game too.
Unfortunately .... I cannot help you with this game. It is almost impossible to beat Stauf. You have to devise a very good strategy to beat Stauf.
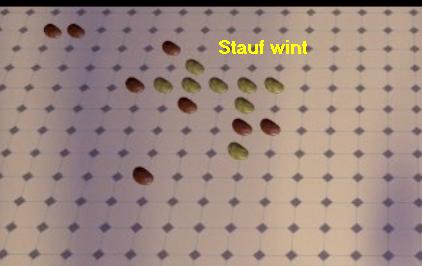
You must win this game because otherwise you will not continue to the End Game. Samantha can no longer help you now. Samantha can still explain the rules to you but she cannot help you win the game. Stauf has now blocked the connection to Samantha. You will have to play this Pente game many times to win one time against Stauf. I wish you a lot of strength and success. Again ... you win if you have 5 Chocolates in a row or if you have conquered 5 times 2 = 10 Chocolates from Stauf.

If you have won then click on the playing field with the Beckoning Hand and .... It will then go on automatically.
You will be brought to the room of Hamilton Temple and here you play the END GAME "Let's Make A Real Deal" with Stauf
If you cannot win the Pente game:
There is a way to skip this Pente game and still be able to play the "Let's Make A Real Deal"
If you play the CD-ROM version of the game then you must have loaded CD 4, but that is already so when you are in the Pente game. If you play the download version from gog then you just restart the game. I will now explain to you what you have to do in order to skip to the Pente game and then to go to the End game anyway.
Close the game completely. Restart the Game with CD 4 , if you play the CD-Rom version. You will get to the Skull Screen.
Do NOT click on the X in the skull. Keep the skull screen on your screen. Then use your own keyboard to type the following CHEAT:
Then R Zaphod B g
This cheat is case sensitive and you must press your space key after each word. You must also provide a space between B and g.

So remember .... Use uppercase letters where I typed an uppercase letter, and give a space after each word and between B and g.
No sentence appears on the screen but you'll see the beckoning hand moving after every time you press your space key.
Once you have typed the entire cheat, you will be taken from the nursery to the room of Hamilton Temple and you can start playing the Endgame. The Endgame:
Final Game:
Let's Make A Real Deal:
If you win the Pente Game or have used the Cheat.......you automatically go to Hamilton Temple's room. A Quiz board appears and Stauf enters.
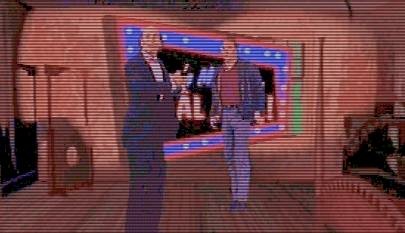
Stauf is now Martin Stauf, quizmaster. Stauf wants to play a game with Carl and he gives Carl $ 600.
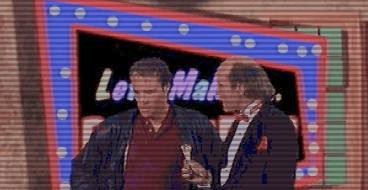
|
Carl may keep the $ 600, but Stauf now shows Carl the 3 doors. Stauf says that there is something hidden behind every door that Carl would like to have. Stauf will open 1 of the doors for 200 dollars. Well .... Carl is quite curious and he pays 200 dollars to see what is hidden behind the 3 doors.
The Good Ending: Choose Door 2, so the middle door. So click on Door 2 and .....
Carl opens door 2 and touches Samantha's hand with his hand and ..... ZAP .....Carl is zapped to Samantha and together they look at the downfall of Stauf, but also at the downfall of Robin.
Robin could not be saved anymore because she said YES to Stauf. The Credits now go over your screen. Keep watching because when the Credits are finished the Game book appears and you read what you can do now.......
You read that you have now unlocked the OPEN HOUSE function. You can now also watch the entire 11th Hour film. You can start the OPEN HOUSE function by clicking on the MAP BUTTON. You can then roam freely through the house and start doing all the puzzles again. You can watch the entire 11th Hour movie via the PLAYKNOP. You will then see The 11th Hour as a cinema film. You do have to load CD 1 and the film takes a little longer than an hour. The Bad Endings: If you want to see what happens when you open up Door 1 or Door 3, you have to load your last SAVE. You must touch the Ink set again and you must play the Pente game again and win the game. You have to do this twice more, if you want to see both endings via door 1 and door 3. Of course you can also use the Cheat in the Skull Screen to skip the Pente game. If you choose Door 1 in the Endgame, so if you choose Marie, then Stauf wins. Marie then changes to Stauf and Stauf kills Carl and eats him up If you choose Door 3 in the Endgame, so you choose Robin, Stauf wins. Carl marries Robin but is found dead during the honeymoon. Robin becomes the new director of Stauf's television company, Stauf's Network. Robin gets her own show 2009 Original Dutch Walkthrough by: Louis Koot 2019: This English translation by: Louis Koot |