Anniversary Edition
2009: Original Dutch Walkthrough by: Louis Koot
2019: English translation by: Louis Koot
The 7th Guest is a classic amongst point and click adventure games and it was first released in 1994. Now it is 2019 and because of the 25th anniversary of the game they have made the 7th Guest 25th Anniversary edition with better graphics and better controls. But the 25th Anniversary edition is the same game as the original game from 1994, so the story and all the puzzles of the Anniversary edition are the same as in the original game from 1994. Therefore you can use this walkthrough with the original game and with the 25th Anniversary edition
The 25th Anniversary Edition of The 7th Guest is available at gog.com. When you buy it it's best to download and install the game Galaxy version of this edition because that's the 25th anniversary edition. If you don't want to install and play via Gog Galaxy then you must download all files and do the of-line setup. The other setup, Setup t7g, is the original Cd-rom / DVD-version of the game
You play as the 7th guest in the haunted house of the devilish Henry Stauf. 6 other guests have preceded you and they have all been murdered in a horrible way. The spirits of the 6 murdered guests are still wandering in the big haunted house and it is up to you to find out what happened to them. You go from room to room and in almost every room there is a puzzle to solve. By solving the puzzles you will gradually discover the truth. These puzzles are mostly logical puzzles, such as chess problems in various variants. There is of course also the inevitable maze that you have to go through.
Not all rooms are available immediately. As you solve more puzzles, more and more rooms become available. There is an in-game Hint system that can also solves the puzzles for you if you wish. You play the game with your mouse. Most puzzles in the game are solvable without using the Hint system and in this walkthrough I shall give you the solutions. But there are a few puzzles in the game witch are almost impossible to solve because they behave randomly. I had to use the in game-hint system to solve those few puzzles and in the walkthrough I will explain how you can do this.
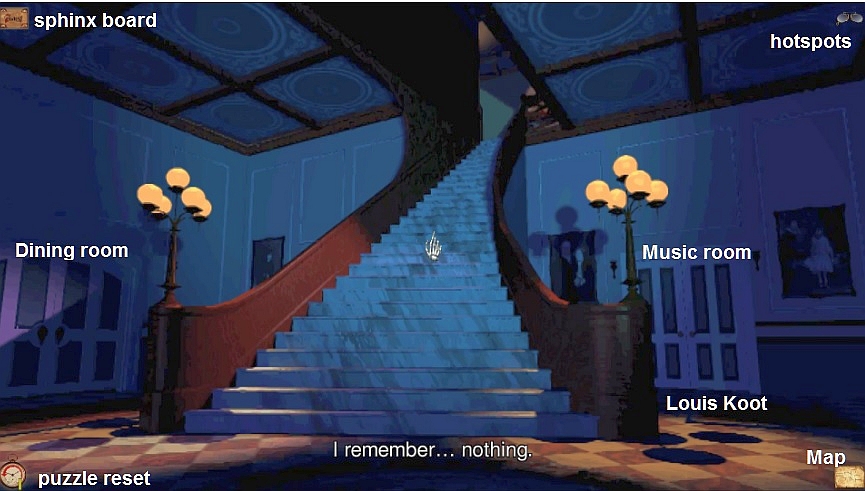
The original 1994 game, but also the 25th Anniversary Edition, always starts on The Sphinx Board.
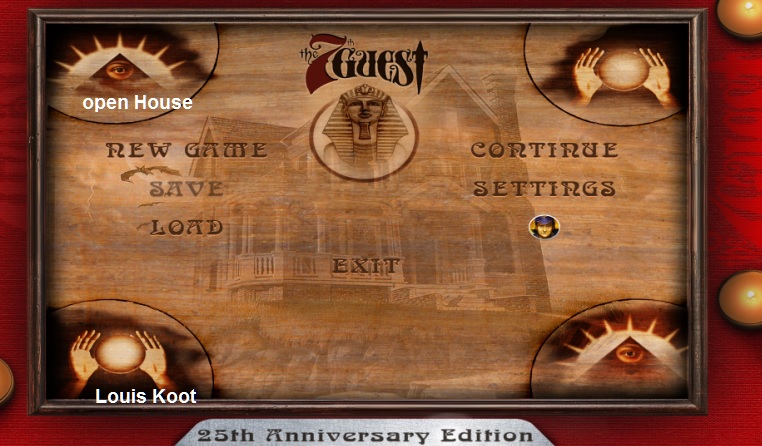
On the Sphinx board you have the various game functions at your disposal. In the 1994 game you reach the Sphinx board by clicking with the triangle cursor in the black border above the game screen. For the 25th Anniversary Edition you use your ESCAPE key or you click on the Sphinx Board Icon that you always see in the upper left corner of your screen. The 1994 game hasn't any Game Options that you can set. The 25th Anniversary Edition does have some game options that you can set to your own preference
A "New Game" starts with
The Intro:
He was a tramp, a vagabond, and his name was STAUF. Stauf was a small criminal who made a living by robbing a gas station or a shop every now and then. But ... One day Stauf roamed the woods. Stauf was hungry and cold, so he was miserable. She was a god fearing woman and she was en route from church choir rehearsal to her house. Her route went through the dark forest. Stauf, cold and hungry, saw his chance when he met her in the forest. Stauf smashed her brains in with a bat and then he stole her money pouch.
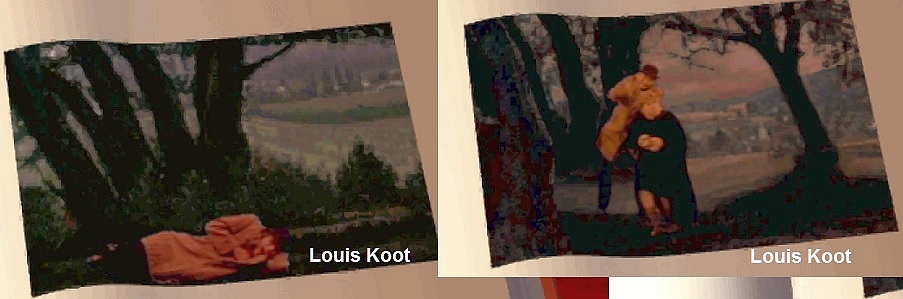
Stauf was no longer a petty criminal. Stauf was a murderer from this moment on. Stauf fell asleep in the forest and during his restless sleep Stauf gets a Devil's Vision. Stauf saw a doll and Stauf grabbed the doll. The doll had no face. The doll was so beautiful and the next morning Stauf immediately started to cut the doll out of the best wood.
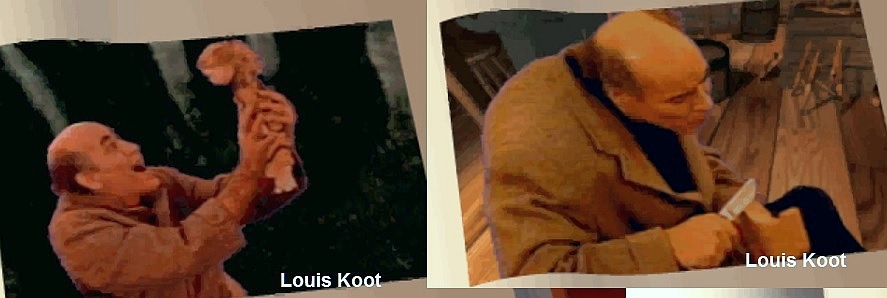
Stauf went to a village with the doll and showed the doll to the innkeeper at the local inn. The innkeeper had a daughter and he wanted the doll for his daughter. Stauf gave the doll to the innkeeper and, as a thank you, the innkeeper offered Stauf shelter and food. That night Stauf slept, for the first time in many years, in a nice warm bed, his stomach filled with the innkeeper's free food. Stauf again had a vision.
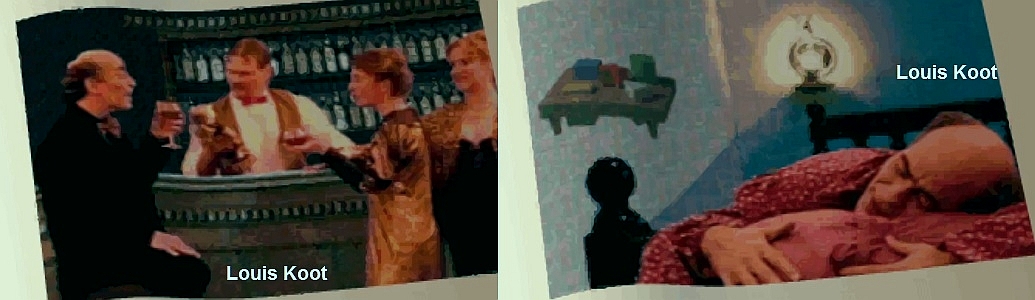
This time Stauf dreamed of a puzzle. Stauf started to make the puzzle and he opened a toy store in the village. Every child in the area wanted a Stauf Doll and things went very well for Stauf. But then the virus came ......the children fell ill and died. The children held their STAUF Doll tightly until their last breath was blown out.

Stauf got 1 last vision. In this vision, Stauf was commissioned to build a large house, and so Stauf build a large house.
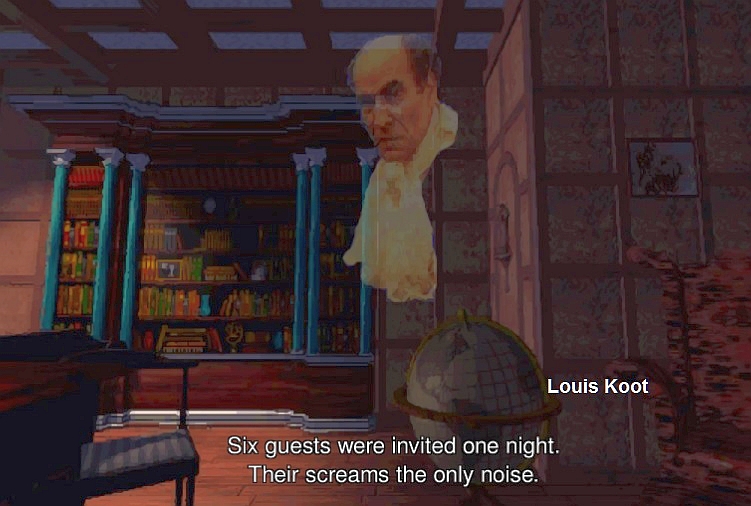
When the Stauf House was ready, Stauf invited 6 guests.
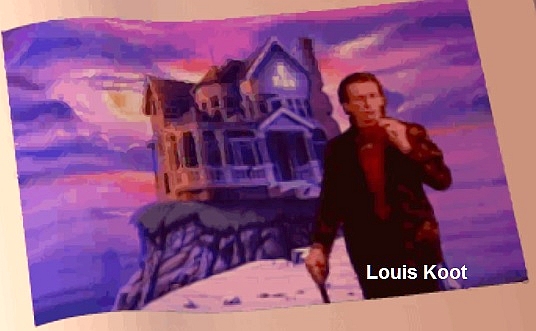
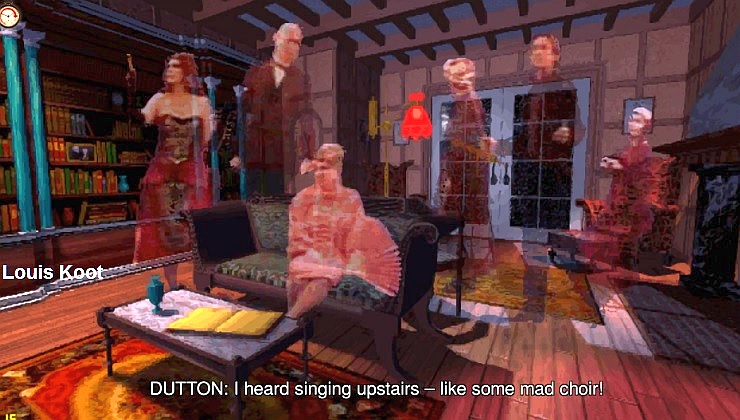
6 notables from the area were lured to the Stauf House in anticipation of a grandiose dinner and ..... the promise that one of them would own whatever he or she wished, the next morning. None of the 6 guests has ever been seen again and nothing has been heard from Henry Stauf either. It is then 48 years later and ..... We are in the main hall of the Stauf house. 1 by 1 we see the 6 guests coming in.
First we see Martine Burden and then the Knox couple.
Then Julia Heine and Brain Dutton appear.
Finally, Hamilton Temple enters
Didn't you notice anything special about the guests? The guests are all DEAD. What you saw ware the ghost of the 6 guests
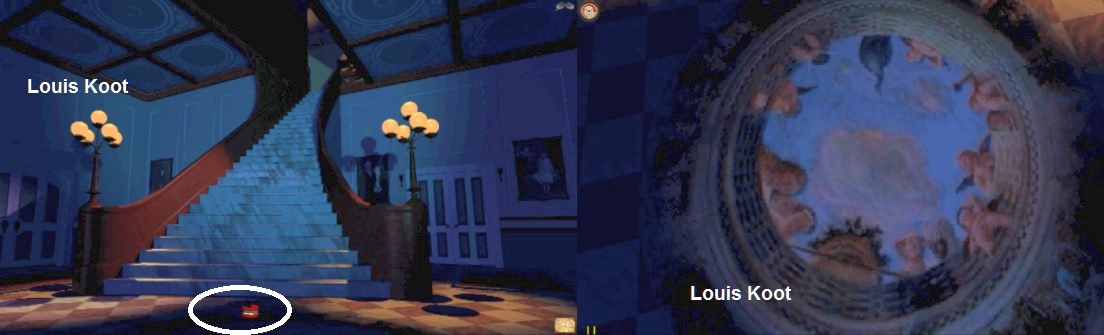
After the 6th guest has arrived, you automatically turn to the beautiful large staircase.
You hear yourself talking with a rather childish voice. Who are you? Where are you? Why are you here? Are you dead too?
you are the SEVENTH GUEST and you are in the Stauf house, and you must find out what the hell has happened here, 48 years ago
Part 1
1st floor:
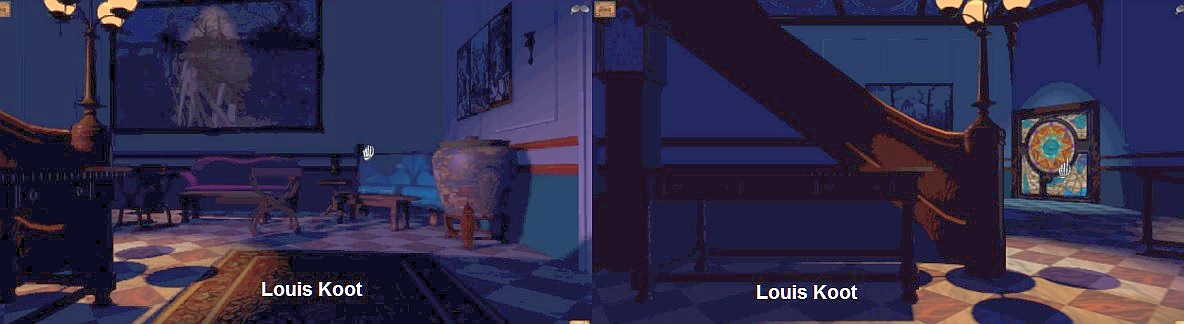
Main Hall:
You now have control over the game and you look at the stairs. The game also has a map of the house. You can find the Map in the lower right corner of the screen.
in the 1994 game you find the Map ion the Sphinx board
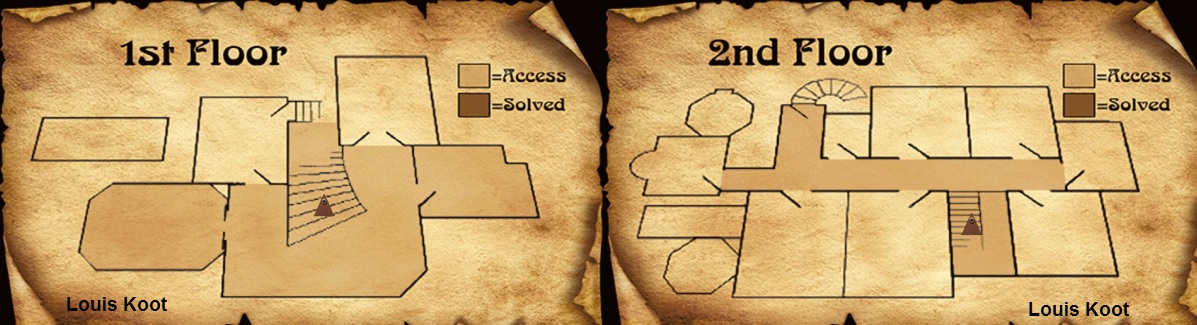
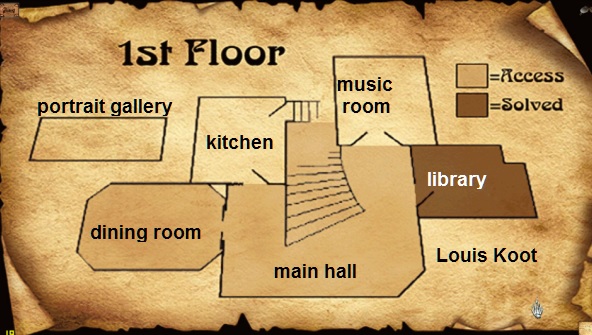
The rooms filled in brown are the rooms you can go to. You cannot enter rooms that aren't brown yet. If you click on the stairs you will see the map of the 2nd floor. At this moment only the corridor of the 2nd floor is available. You cannot enter any room on the 2nd floor now. There is also an attic floor but the floor plan does not yet show the attic. Close the map to return to the game. You look at the stairs again. Turn right and the go forwards to the Library door
Click with your beckoning hand on the library door and .... you end up in the:
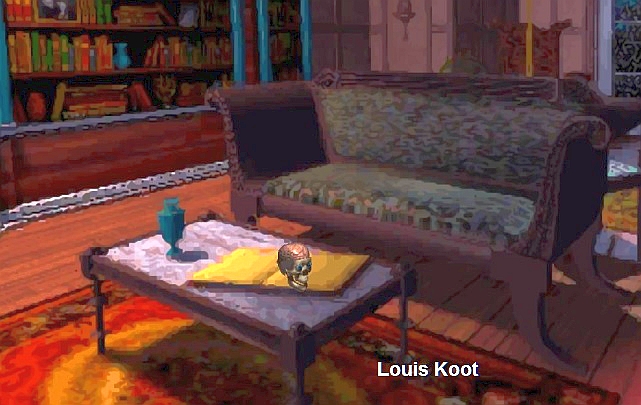
Library:
At the garden doors, in the back of the library, stand a Telescope. On the coffee table, which is in front of the sofa, lies an open book. That book is the Puzzle / Hints book.
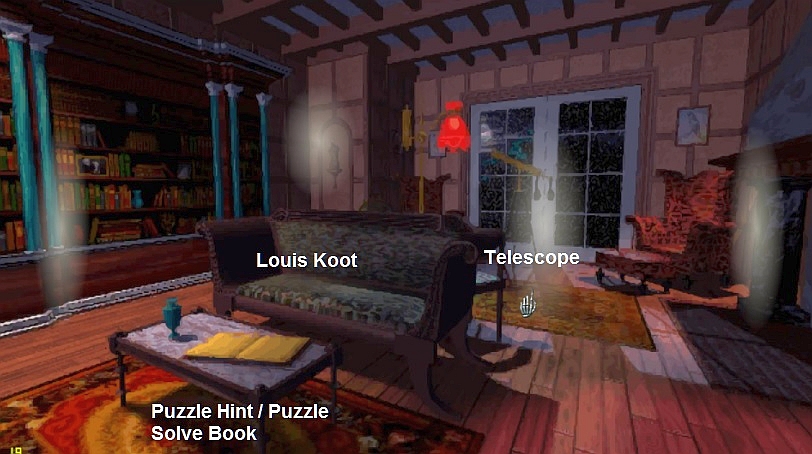
The Puzzle book gives you hints about the puzzles that you must solve. However, you must first activate a puzzle before you can use the hints in the Puzzle Book. The Puzzle Book not only give hints about a puzzle but it can also solve the puzzle for you. I shall explain how this works when I need the puzzle book to solve a puzzle for me
Go forward to the Telescope. A whirlwind appears behind the garden doors and almost blows the doors out of their joints. Place your cursor on the telescope. Your cursor will now become the "Skull with pulsating Brain" as a sign that you have discovered a PUZZLE that you must solve.
Click with the Skull on the Telescope and ..... You end up in the:
|
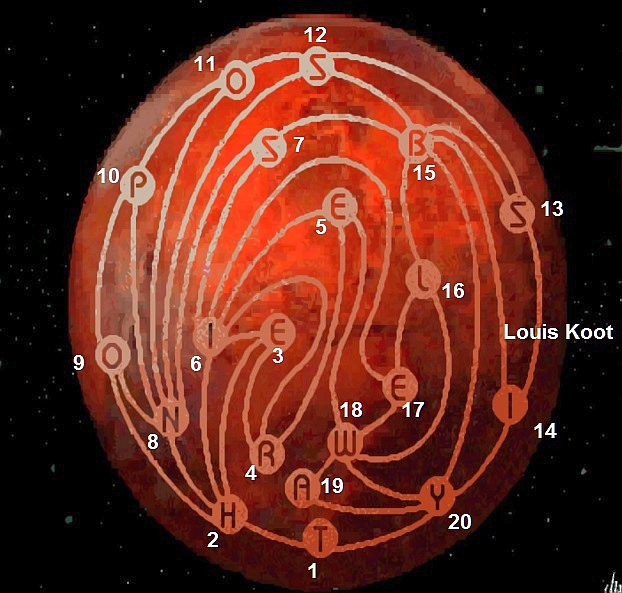
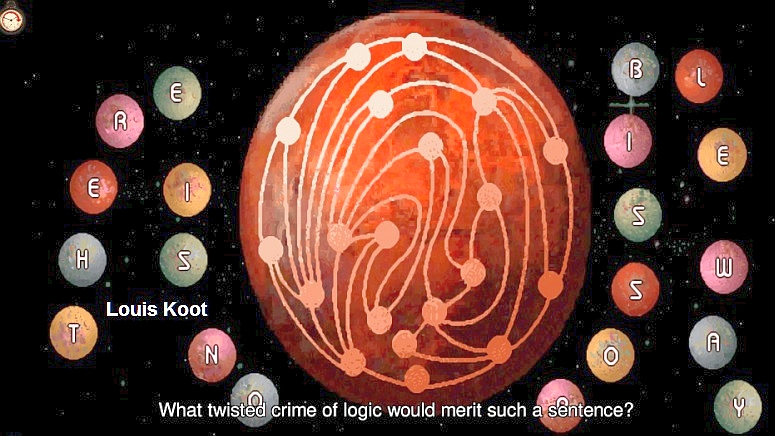
Telescope puzzle: You look through the telescope at a red Planet and you hear Stauf. Stauf will always fool you when you try to solve a puzzle. Letters appear on the planet. The letters are connected by white lines. You must create a logical English sentence with all letters. You click a letter with the Eyeball Cursor to select it. You start with the T and then you just follow the white lines to the next letter and then to the next letter. The letters that you click will be placed to the left and right of the planet.
If you click on the wrong letter, the puzzle will be reset automatically. The sentence you have to make is: THERE IS NO POSSIBLE WAY. In the picture above you see the solution. Just follow the numbers 1 to 20 While you click the letters away you hear yourself, but you should not bother. If you have clicked all the letters from the planet in the correct order, the sentence is made and you receive a compliment from Stauf.
You then naturally go out of the puzzle and see and hear Stauf says a rhyme.
You have solved your first puzzle. This puzzle wasn't that difficult. If you now just open the Floor map you will see that the color of the library has now changed from brown to red to indicate that you have solved the Library.
|
Close the Sphinx board. You will come back here soon because there are 2 secret passages in this library room. But that will come later. Leave the library. You are then back in the main hall. Turn left. You look again at the pontifical front door of the house. Go forward to the front door. You will now see the "Mask Cursor" on the front door. Click with the "Mask Cursor" on the front door.
You will then see a video with Brian Button
When this is over again, turn left. You will then see the dining room door.
Go forward to the Dining room door and then enter it now.
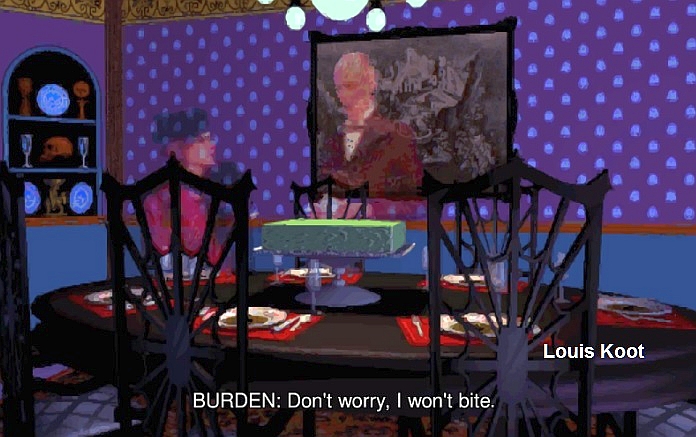
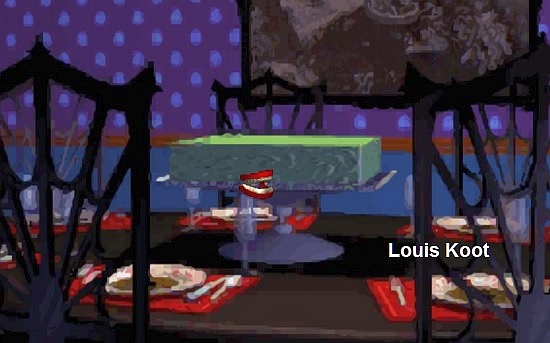
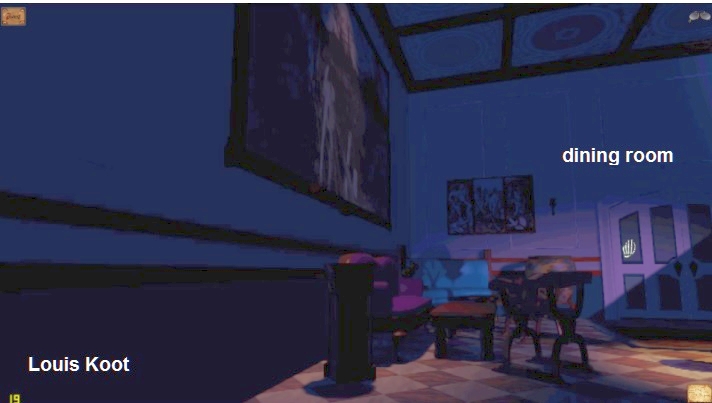
Dining room:
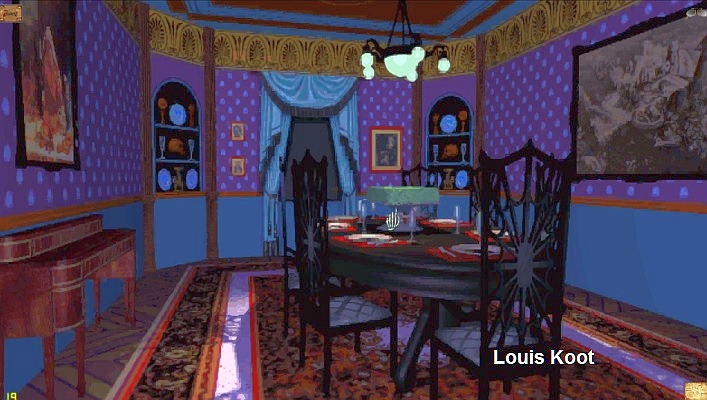
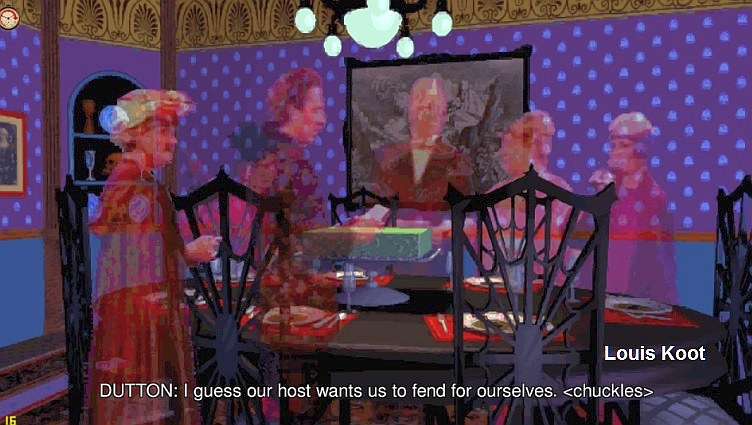
Go forward to the beautiful large dining table, which is already set for the guests. The 6 guests appear and they briefly discuss the situation.
There is a cake on the table. Click on the cake with the "Skull Cursor".
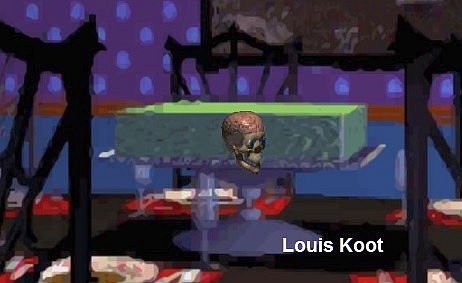
The Cake puzzle:
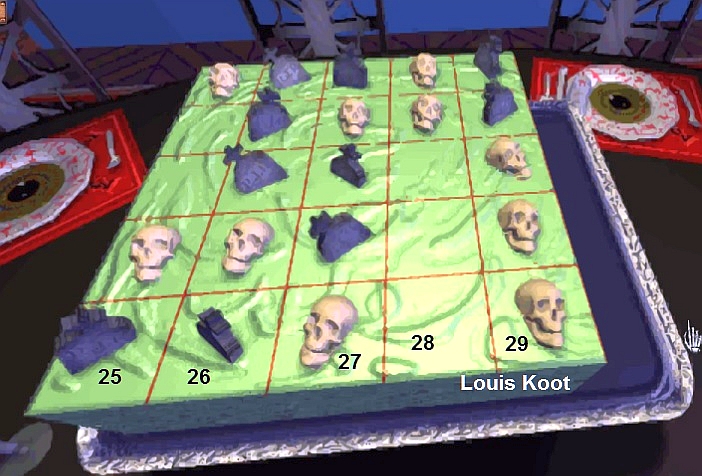
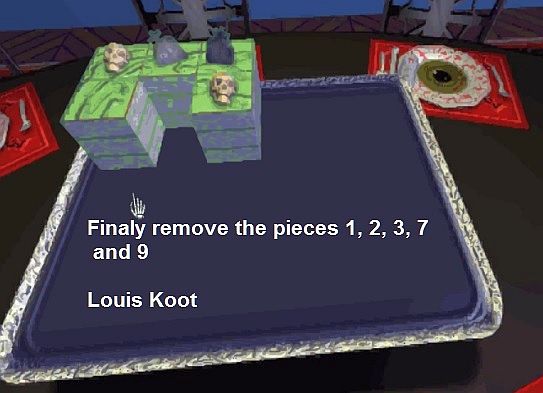
The cake is divided into 30 slices. Some cake slices have a skull. Other slices have a gravestone and there are also blank slices. There are 6 guests and you now have to "cut" 5 cake slices for each guest. You must select 5 cake slices and these 5 slices must consist of 2 skull pieces, 2 tombstone pieces and 1 blank piece. Number the cake pieces, from top left to bottom right, 1 to 30.
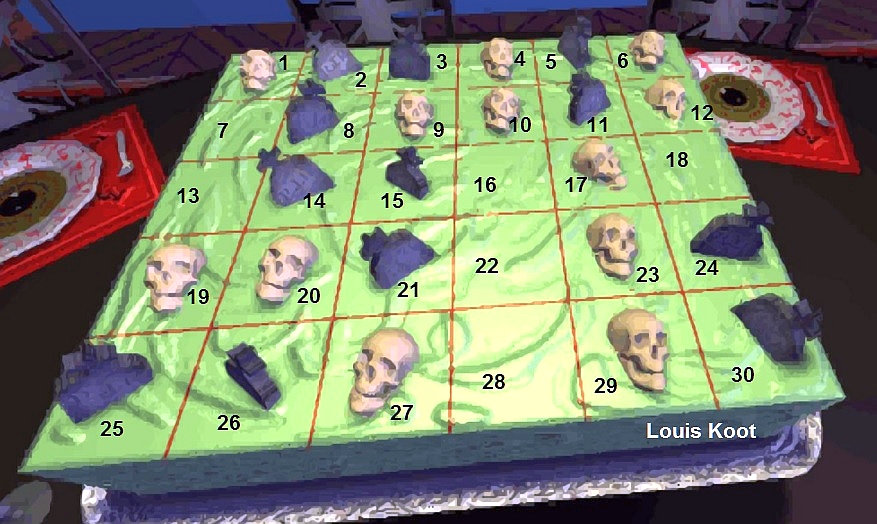
We do this in 5 steps: Here is the solution, you click with the eyeball cursor on the cake slices. Every time you have clicked on 5 slices, those 5 cake slices disappear from the tray. So you always have to click on 2 Skull slices, 2 Gravestone slices and 1 Blank slice. You click with the eyeball cursor on the cake slices to make them come out of the cake. If you have clicked on 5 good slices, then they will disappear from the cake.
|
Step 1 = click on the cake slices: 6, 12, 18, 24, 30. These 5 slices come up and then disappear from the page.
Step 2 = Click on the slices: 25, 26, 27, 28, 29.
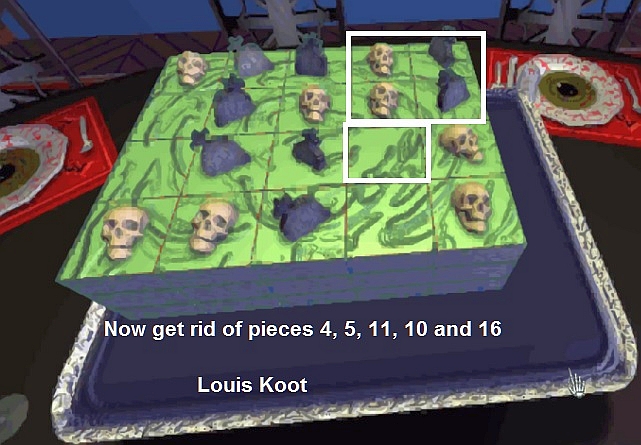
Step 3 = Click on the slices: 4, 5, 11, 10.16.
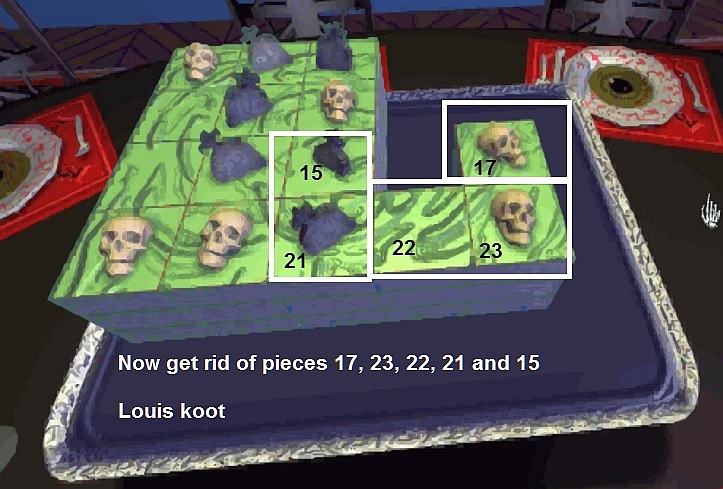
Step 4 = Click on the slices: 17, 23, 22, 21, 15.
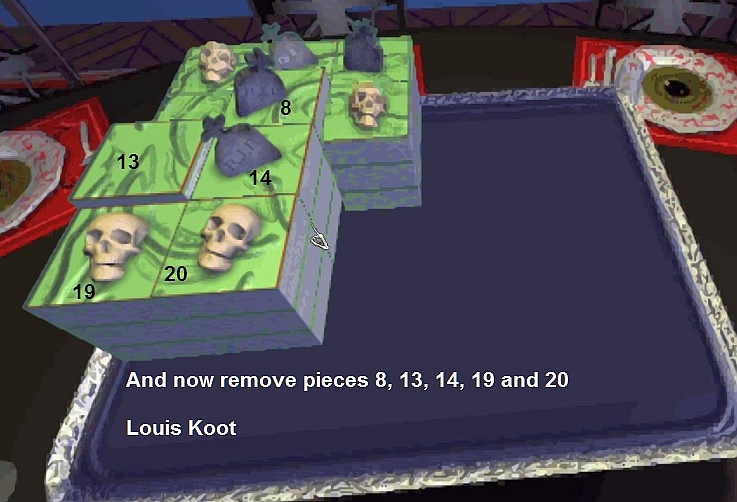
Step 5 = Click on the slices 8, 14, 20, 19, 13.
Step 6 = So click on the slices: 1, 2, 3, 7, 9. .......
Solved .... the tray is empty. You automatically go out of the puzzle and see Edward Knox and Martine Burden.
Martine Burden invites Edward Knox to visit her in her room. The cake is completely on the table again. You can now click on the cake with the teeth cursor.
If you do that, you'll see the cake and everything else on the table make a little dance. |
Turn right and then leave the Dining room again. You are then back in the hall. Turn left. You now see the kitchen door.
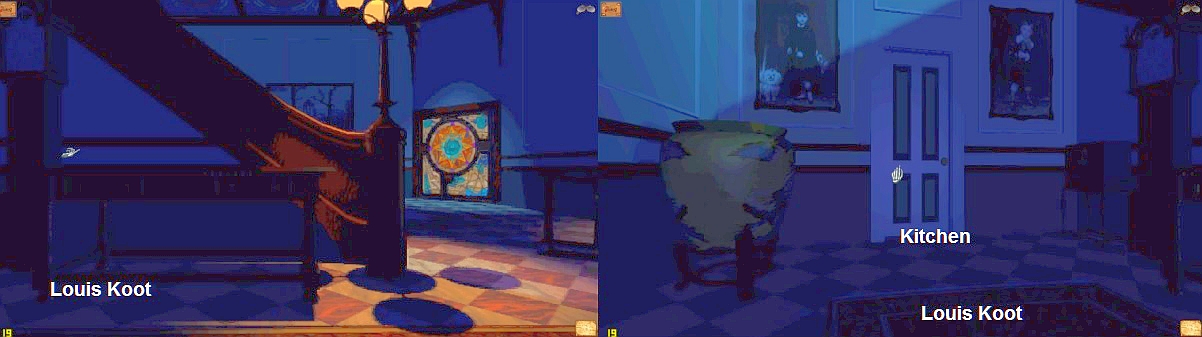
Go to and through the kitchen door. You are then in the:
Kitchen:
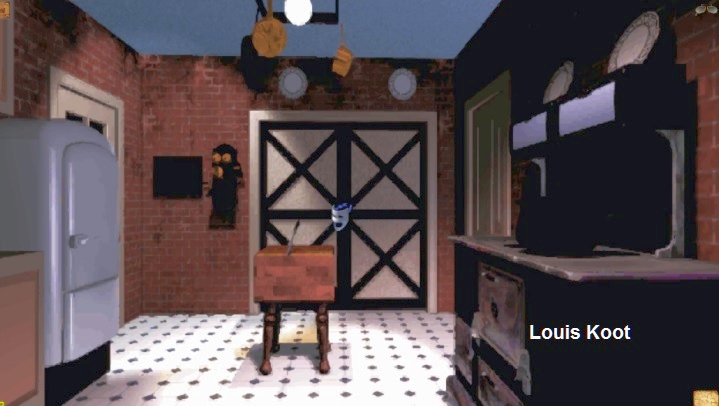
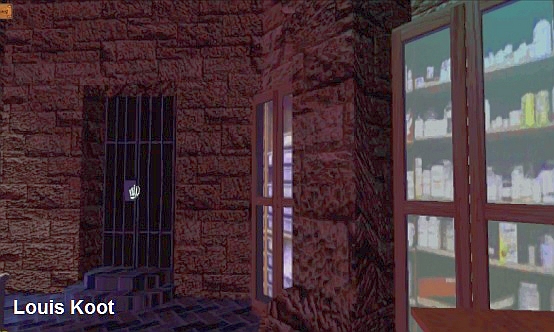
There is a large chopping block in the kitchen. A chopping knife sticks in the chopping block. Behind the chopping block you can see the compartment doors of the cupboard. You get the "Mask" on the chopping block / cupboard doors. Click with the "Mask" on the chopping block and ... you see Julia Heine in the cupboard behind the chopping block putting all kinds of tins in the right order.
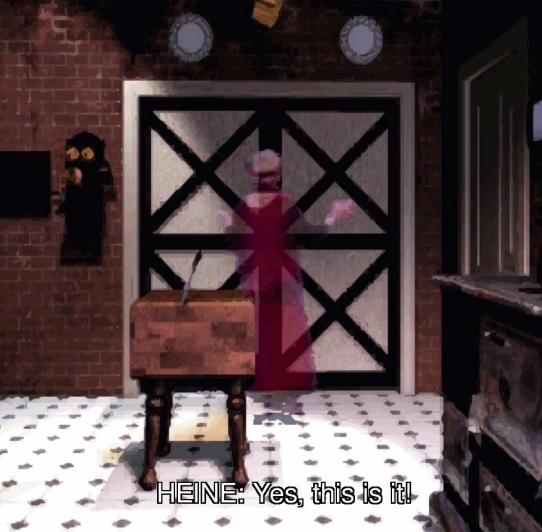
She does not manage so well. Go forward to the cupboard doors. Click with the "Skull Cursor" on the cupboard doors and .... you end up in the cupboard and in the:
|
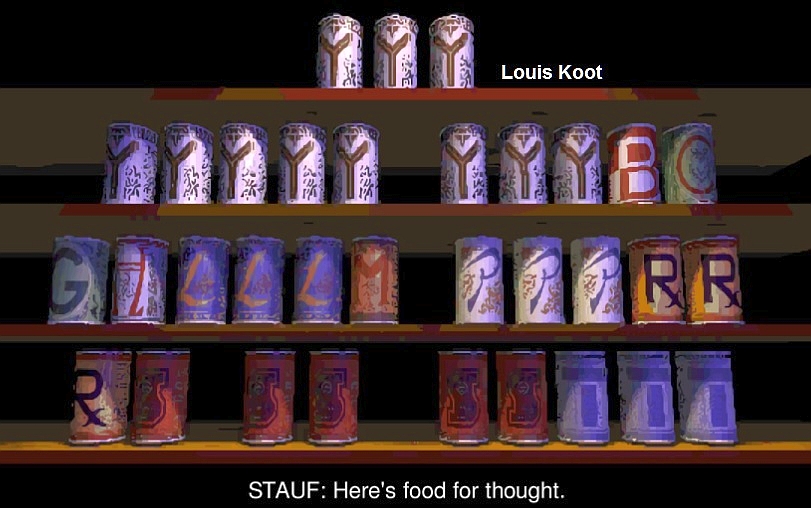
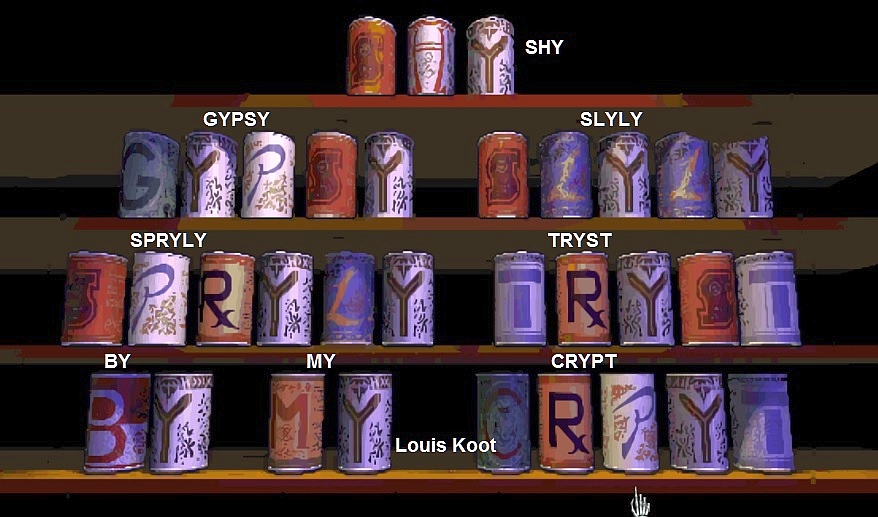
Tin Can Puzzle: You see 4 cupboard shelves with tin cans on it. The tins are varied in color and have letters on them. The letters are all consonants. There is no single vowel. You now have to rearrange the cans to create a sentence of 8 words. The words therefore only consist of consonants.
You have 11Y cans, 3L cans, 4S cans, 3P cans, 3R cans and 3T cans And you have a 1G can, a 1C can, a 1B can, 1 H can a 1M can . The sentence that you have to make with the cans is: SHY GYPSY SLYLY SPRYLY TRYST BY MY CRYPT. So now you have to swap the cans places with each other. By clicking on a can you select that can and that can then come up from the shelf and then appears on the left or right of your screen. Then click on the can with which you want the selected can to change places.
First make the word SHY on the top shelf. Then on the 2nd shelf the words GYPSY and SLYLY. Then on the 3rd shelf the words SPRYLY and TRYST. And then on the bottom shelf the words: BY, MY, CRYPT.
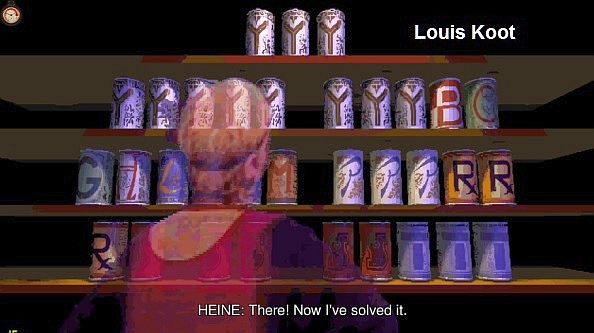
When you have solved the puzzle you will see Julia Heine again who says she has solved the problem.
|
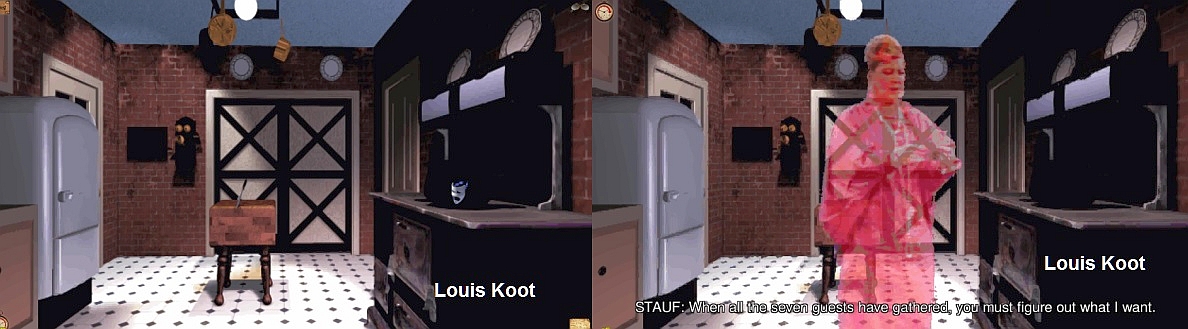
Standing in front of the closed cupboard, turn right again. You see a door. This door, to the right of the can cabinet, is the entrance to the underground maze and the Crypt, and you don't want to get caught up in it right now. So don't go through that door yet. Turn right again and go forward to the door to the hall. Then turn clockwise. You then look through the kitchen again. The stove is on the right. Click with the mask on the stove and .... you will see Mrs: Knox who, with the voice of Stauf, reads her invitation
Turn back to the left and leave the kitchen through the door to the hall.
Main Hall:
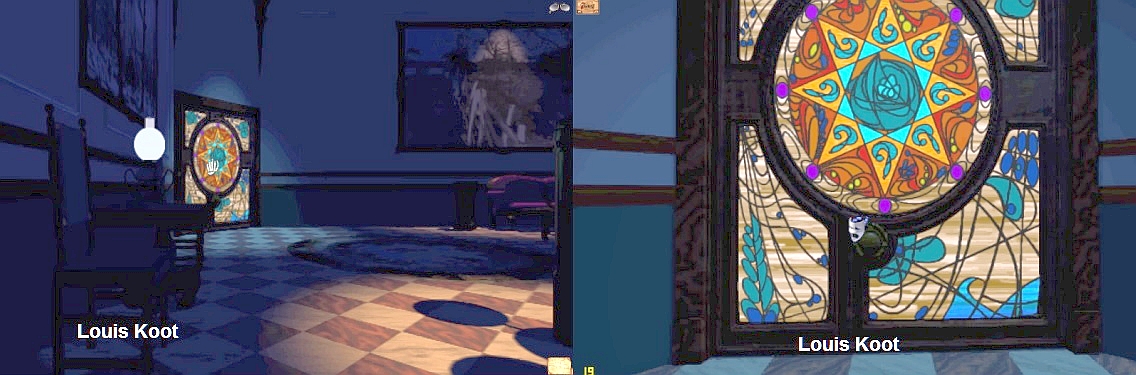
Go forward, turn left and go forward again to the beautiful stained glass front door.
|
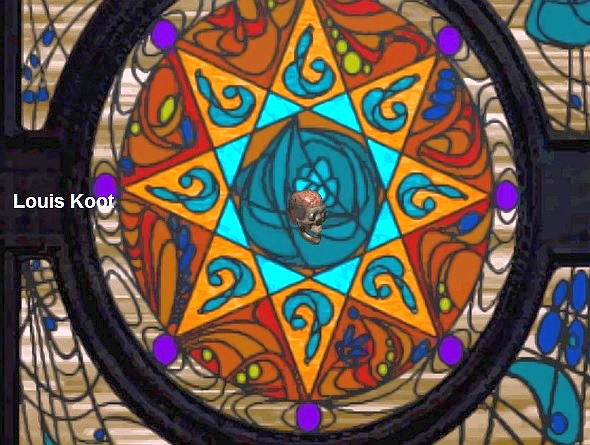
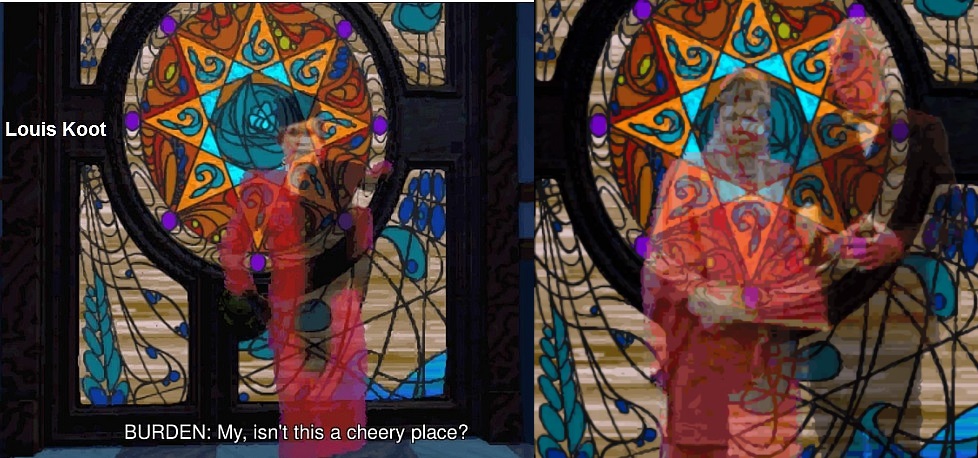
Front Door: You now get the Skull Cursor on the front door as a sign that there is also a puzzle in the front door.
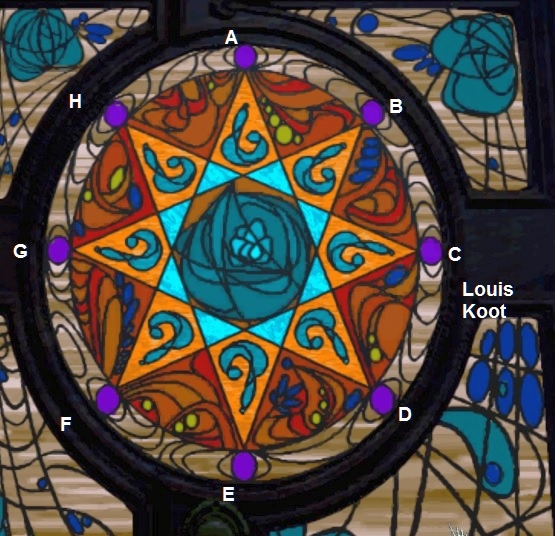
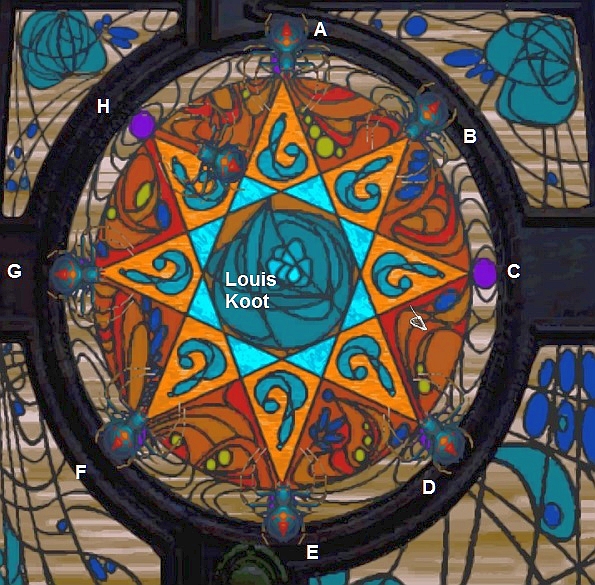
So click with the skull on the front door and .... you end up in the: Spider Puzzle You are zoomed in on the large circle in the middle of the door. Stauf has said that "it is easy to find the start but it is hard to find the finish". Around the circle see 8 purple dots. The dots are on the 8 points of the big star. If you see it as a clock, the dots are at 12 o'clock, 2 o'clock, 3 o'clock, 4 o'clock, 6 o'clock, 8 o'clock, 9 o'clock and 11 o'clock. The dots are connected by lines. So call the dots on: 12 o'clock dot = A. 2 o'clock dot = B. 3 o'clock dot = C. 4 o'clock dot = D. 6 o'clock dot = E. 8 o'clock dot = F. 9 o'clock dot = G. 11 o'clock dot = H
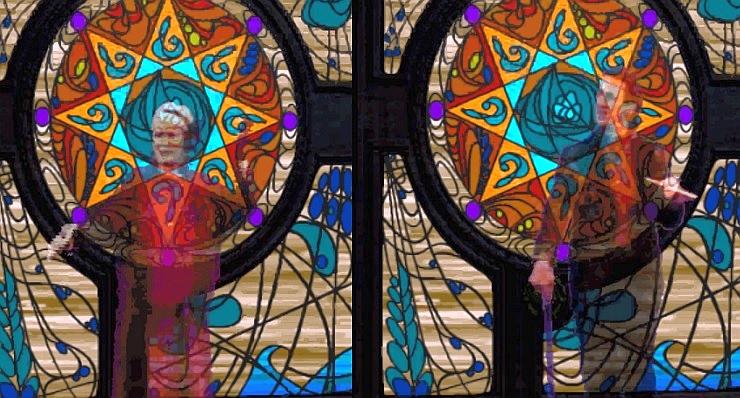
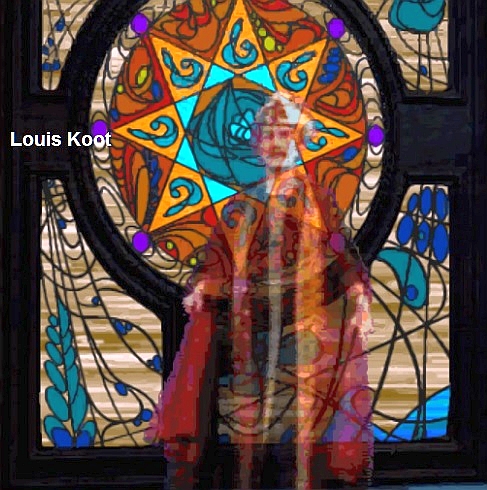
If you click on a dot, a spider appears. The goal of this puzzle is to place a Spider on 7 of the 8 dots. There are several solutions possible, depending on which dot you start with. You can start on any dot. If you click on a dot, a Spider appears on it. You must then click on 1 of the 2 dots with which the first dot is connected through the lines. The Spider then goes to that dot. Next you have to bring a spider to the dot where the first spider has left. You repeat this until you have a spider on 7 dots. However, you may only make 7 moves. As said .... there are several solutions possible, but here is my solution: Click on A and then on F. A spider goes from A to F.
Solved. You then see yourself as the boy who was the 7th guest 48 years ago.
You desperately try to open the door to escape the horrors of the Stauf house. Unfortunately ... you can't open the door and you run away in a panic |
You look at the stairs again. Click at the top of the stairs and .......
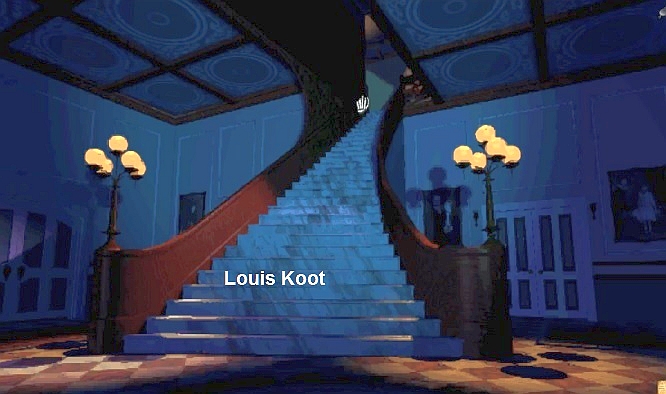
you will automatically walk up the stairs and end up at the top of the stairs on the 2nd floor
Part 2 2nd floor:
You stand in front of a painting and you get the red teeth on the painting. Click with the teeth on the painting and ..... 2 hands appear in the painting.
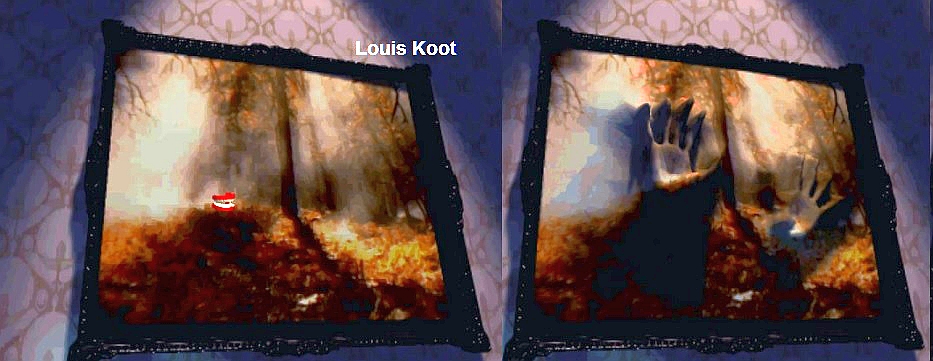
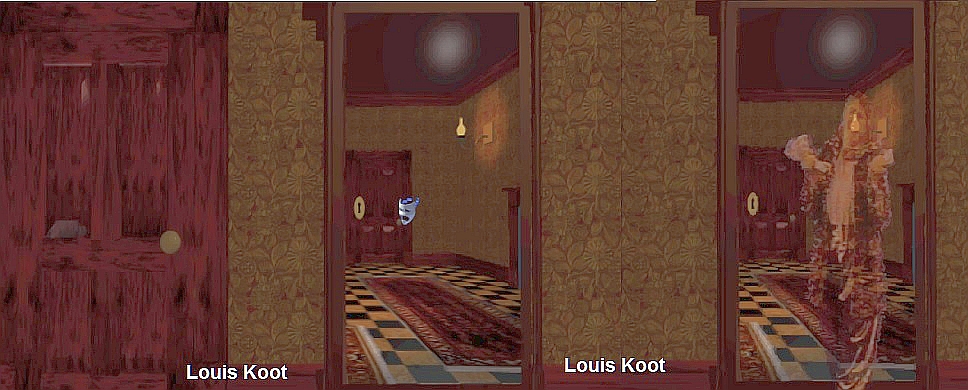
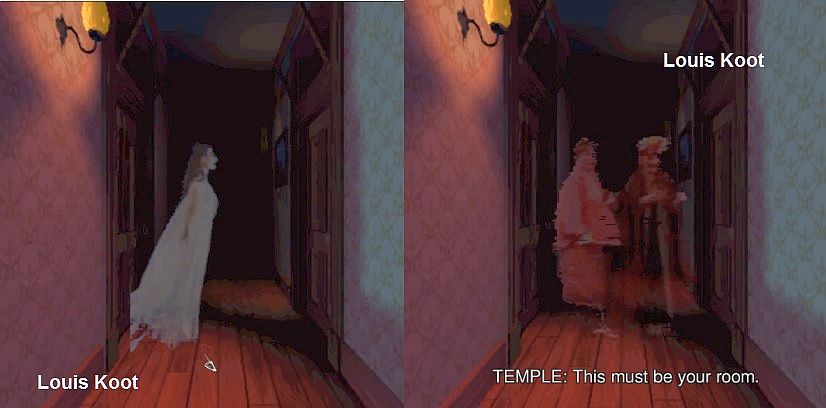
The hands desperately try to get out of the painting, but that doesn't work Turn left. You see a beautiful lady in a white robe. The lady floats backwards down the corridor and she beckons you to follow her. The white lady disappears and you see Edward Knox and Martine Burden in a close embrace. Knox and Burden disappear into Martine Burden's room.

You see 2 doors. The left door is the door of Martine Burden's room. Go forward 1 click, then turn left and go through the door into the room of:
Martine Burden's room:
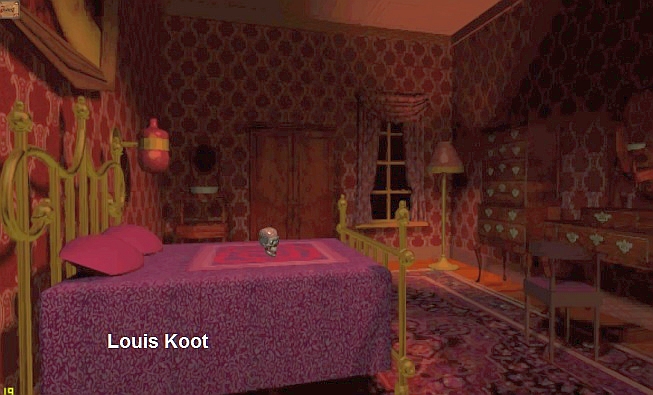
There is a rug on the bed. You get the skull cursor on the rug, so click and .... you end up in the:
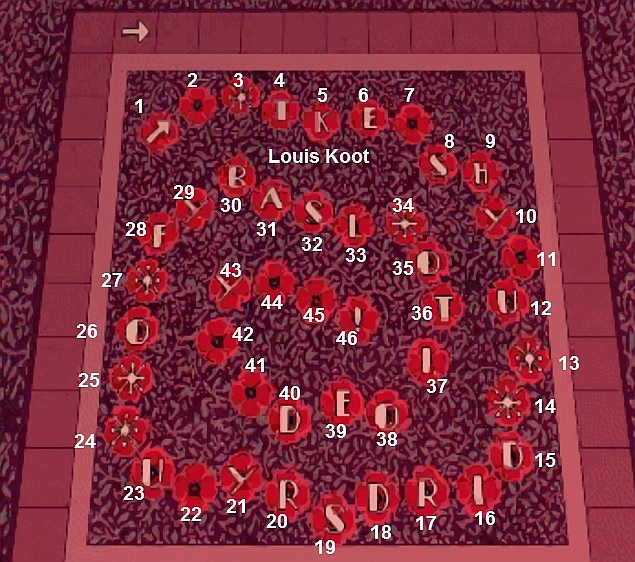
Word Snake Puzzle You hear Stauf who says that you must always skip 3 and 5 (Skipping three's and skipping five's). You see a word snake. The snake consists of circles. In the circles are letters or an asterisk or a black dot. You hear yourself. You say that there are "Stars and spaces. But spaces are not allowed, only stars." So you have to make an English sentence by clicking on the letters and on the stars. The sentence you need to make is this: The * Sky * Is * Ruddy * Your * Fate * Is * Bloody There should be no spaces between the words, only put in an asterisk. You click with the eyeball cursor on the letters and on the asterisks. There are 46 circles. Number the circles 1 to 46, starting at the top left with the arrow circle.
Stauf has given you a clue. You start on the T in circle 4. The next letter is 5 circles further away and that is the H is in circle 9. The next letter is then 3 circles back and is therefore the E in circle 6. You then have made word THE. Then you count 5 more circles ahead. You then come to circle 11 and this is a asterisk. So keep going until you have made the whole sentence. The letters that you click will be placed in the edges of the square.
You have now made the whole sentence: The * Sky * Is * Ruddy * Your * Fate * Is * Bloody ........SOLVED
|
You automatically go out of the puzzle and see a scene with Edward Knox and Martine Burden.
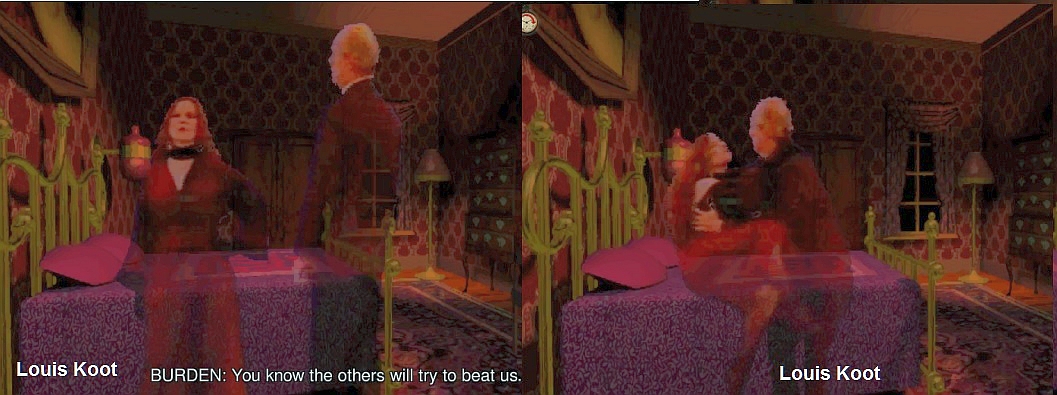
If you want to hear Martine's moans in horny pleasure while Edward Knox penetrates her, you click on the bed with the teeth. There is nothing more to do here in Martine's room, so turn left or right and leave the room through the room door. You are then again in the corridor and at the door of the Knox couple. Go inside.
Elinor and Edward Knox Room
You see Elinor Knox sitting on the bed. Mrs. Knox is delighted about her room.
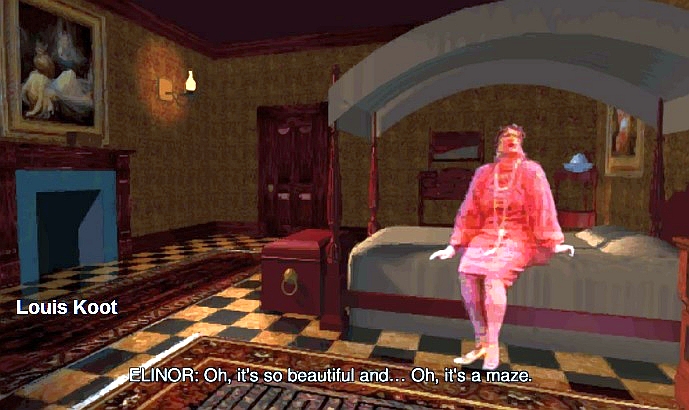
Elinor Knox looks at the carpet lying on the floor in front of her bed and she says that the design on that carpet represents a Maze.
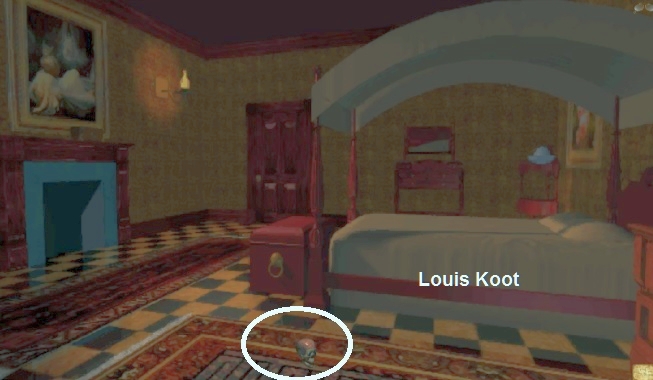
Click with the Skull on the carpet and .... you look down at the carpet.
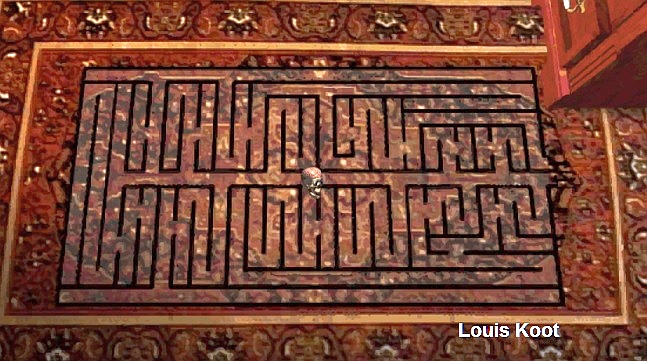
Examine the line pattern on the carpet as it shows you the route through the Maze to the Crypt. So that maze starts behind the right door in the kitchen. You will soon have to go through that maze, so it is handy if you take a good look at the maze here on the carpet. When you're done, click on the carpet again with the Skull and ..... you'll end up in the:
|
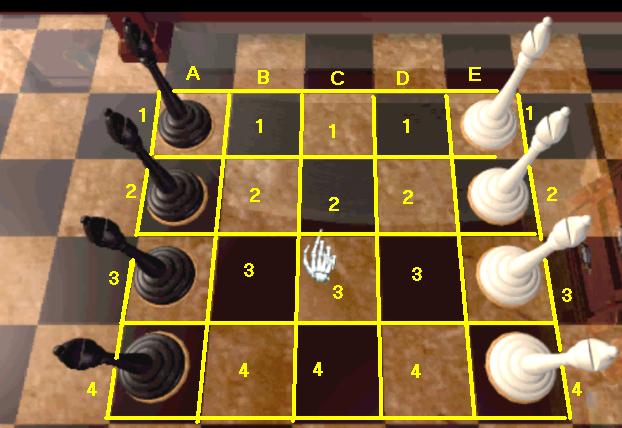
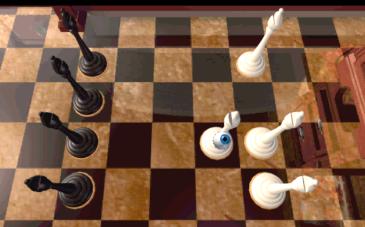
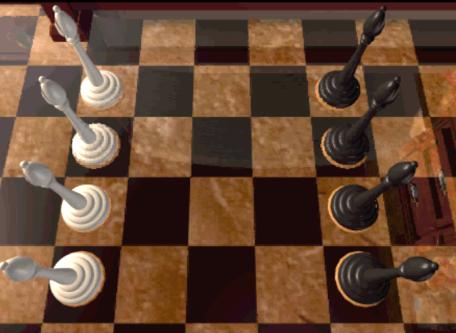
Bishop's Puzzle: On the left are 4 black Bishops and on the right are 4 white Bishops. This puzzle is therefore a chess problem. You must bring the black Bishops to the right and the white Bishops to the left. The Bishops can only move diagonally and they cannot end up on a space where they can be hit by a Bishop of the other color. The playing field consists of 20 squares in 5 columns with 4 rows. Number the columns A, B, C, D, E and number the rows 1, 2, 3, 4, 5.
When the puzzle starts, the Black Bishops are on the squares: A1, A2, A3, A4 and the white Bishops on E1, E2, E3, E4. You click with the eyeball cursor on a Bishop that you want to move and then on the square where you want the Bishop to go too. You need 36 moves to solve this puzzle.......
PUZZLE SOLVED |
Stauf is not happy there. All Bishops sink into the ground and you stand up straight again and look at the bed again. Turn clockwise to the room door. To the right of the room door is a large mirror on the wall. Click with the Mask on the mirror and ... Elinor Knox appears in the mirror.......Elinor is not a beautiful woman, but her greatest desire is apparently to be beautiful.
Leave the room. Back in the corridor you are again in front of Martine Burden's door. Turn left and go 1 click forward, to the stairs and .... Hamilton Temple and a boy come running down the corridor. Move forward one more time. You are now at the right end of the corridor and you are at the door of the Game room. On the left is the room of Julia Heine and on the right the room of Hamilton Temple. Turn left and enter the room of Julia Heine through the door.
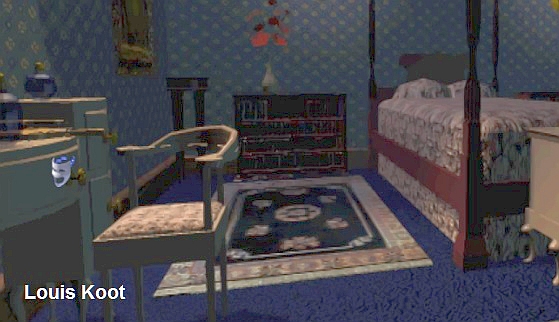
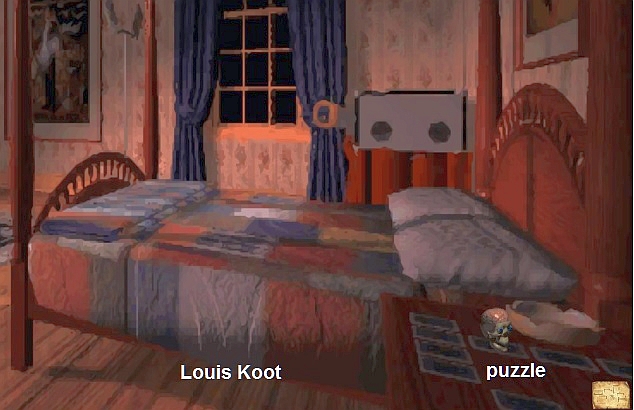
Julia Heine room:
You see Julia Heine and she is completely delighted with her room, especially the bed. On the left is the dressing table.
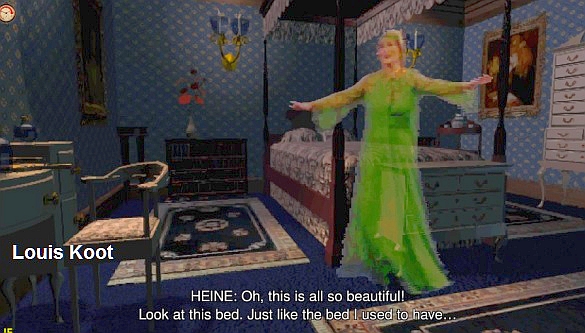
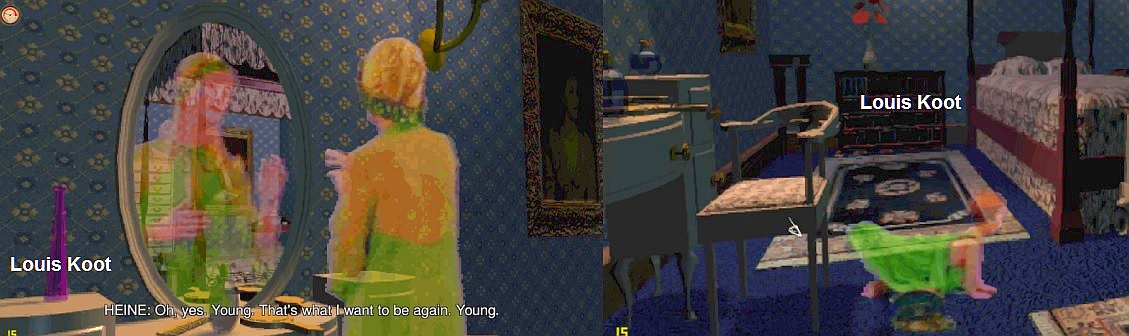
Click with the Mask on the dressing table and you see another scene with Julia Heine.
Julia wants to be young and beautiful again and you see her change in the mirror .But the change goes Julia a bit too far because Julia will be a baby again.
There is a chest at the foot of the bed and a carpet on the floor in front of it.
Click with the Skull on the carpet and you end up in the:
Blood Vessels Puzzle:
On the left you can see Julia's heart. The intention is for the heart to pump blood through the blood vessels to the exit on the right. Only .... the valves in the blood vessels are closed. The valves are the black stripes that you see in the blood vessels.
So you have to open the right valves in the right order so that the blood can flow freely from the heart through the blood vessels to the right. Multiple solutions are possible.
In the screenshot you can see my solution.
Click with the eyeball cursor on the valves in the order 1 to 12, as I show in the screenshot.
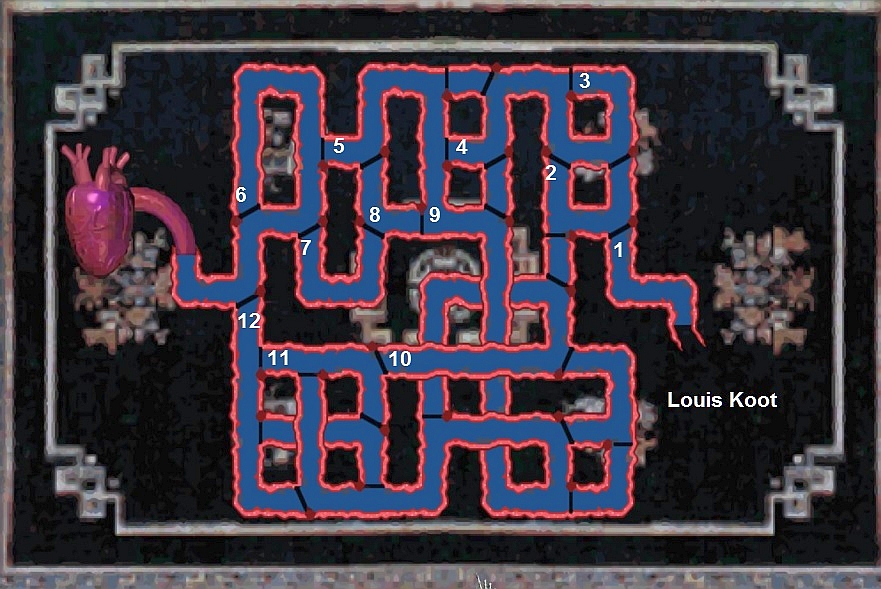
If you have clicked on the valves 1 to 12 to open them up then you click with the teeth on the heart and......
......The red blood flows from the heart through the blood vessels and .... "YOU WIN".
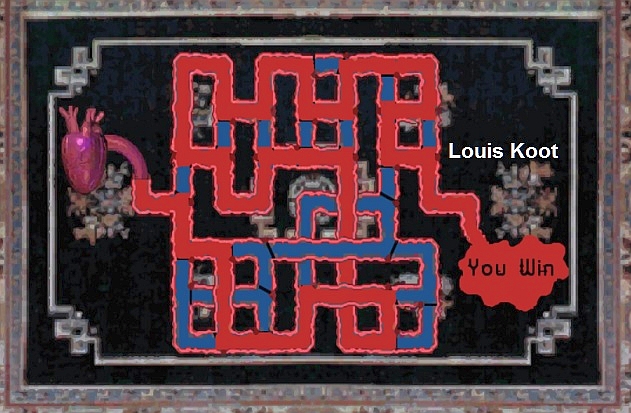
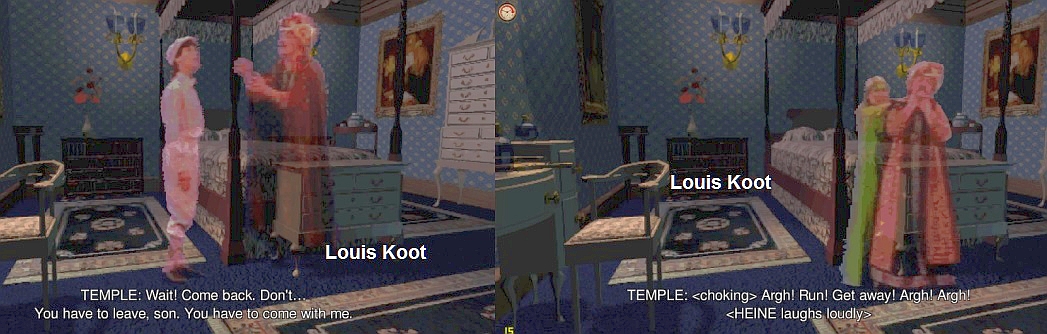
Once you have solved the puzzle you will see a scene. You see Hamilton Temple and the boy. Hamilton tells the boy to go with him.
But the boy asks why he would trust Hamilton. The boy then runs away and you see how Hamilton Temple is strangled by .... Julia Heine.
Turn left or right and then leave the room through the room door.
You cannot enter the room opposite Julia Heine, so turn left and go through the back door to the:
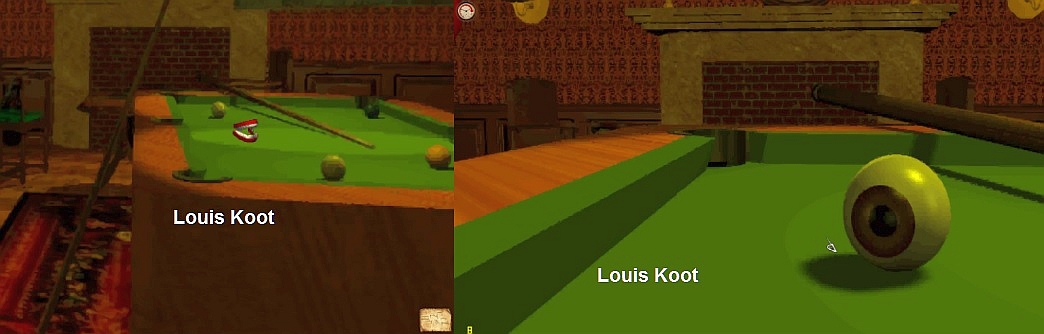
Game Room:
You see Hamilton Temple asking "Madman" Stauf to show him real magic.
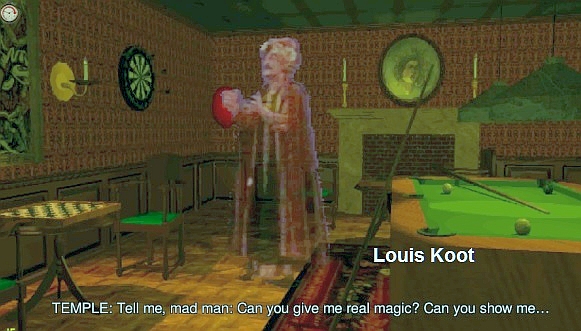
You have arrived in the Stauf playroom. On the left is a chessboard on a table. Do not click with your teeth on the billiards because then you will return to the kitchen and that is not the intention. You first have to solve a chess puzzle here. So click with the Skull on the chessboard. You end up in the:
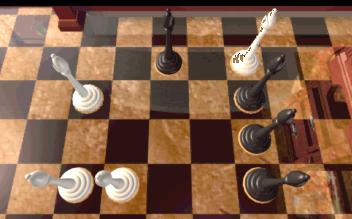
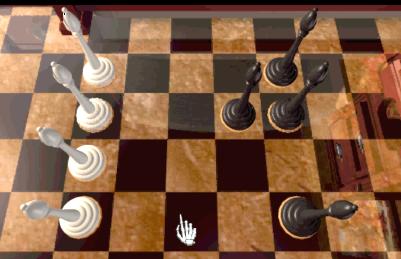
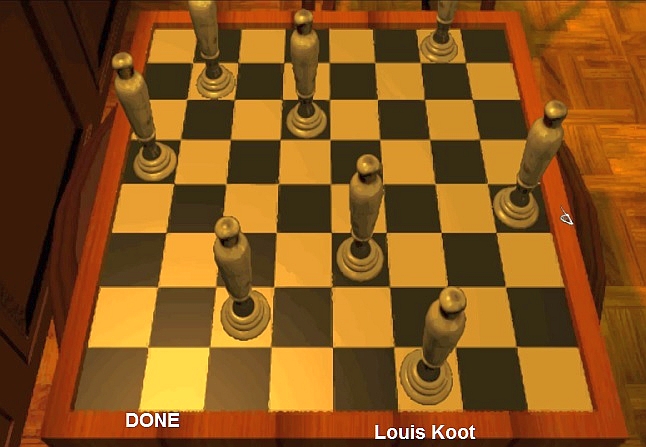
Queens puzzle:
You see a bare chessboard. As you know, a chessboard has 8 by 8 = 64 squares. You must place 8 Queens on the board. But there should never be 2 Queens on the same horizontal, vertical or diagonal line. Number the squares of the chessboard, from top left to bottom right, 1 to 64. Here is my solution .... click with the eyeball cursor on a square to set up a Queens.
Click on: square 62, square 51, square 45, square 25, square 20, square 10, square 7 ..... and finally on square 40 ...... solved
You see a longer scene with Hamilton Temple and the boy.
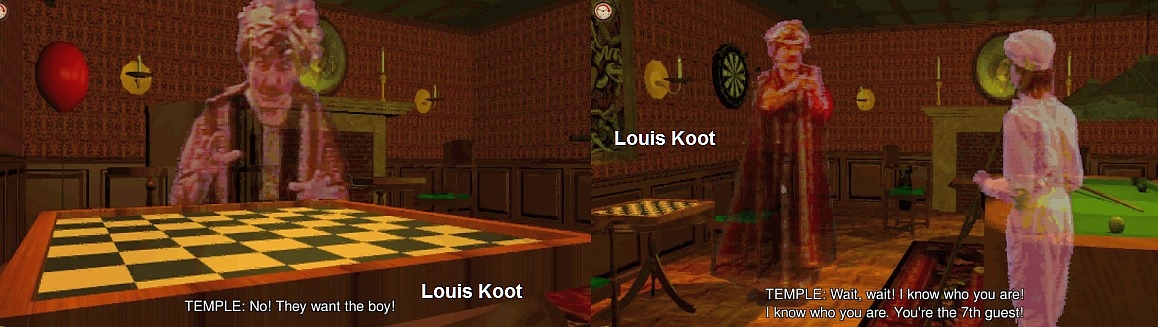
That boy is the 7th Guest and .... You are that boy and your name is Tad ......... 48 years ago you were the 7th guest in the Stauf house. Now open the Sphinx board and go to the floor plan of the 2nd floor. You will see that you have now solved the puzzles in the Burden, Knox, Heine and Game room rooms. The other rooms, from Dutton, Temple and the Doll house room and the Bathroom, are not yet available. The Music Room on the ground floor is also not yet available. Close the floor plan and return to the game.
The only way to move forward now is the Maze behind the kitchen. Click with the teeth on the billiard table and .....
you are sucked into the billiard table and you end up in the kitchen via a pipe that opens into the oven.
You are again in front of the tin can cabinet. Turn right and go through the door. You arrive at the entrance of the Maze:
Slider puzzle:
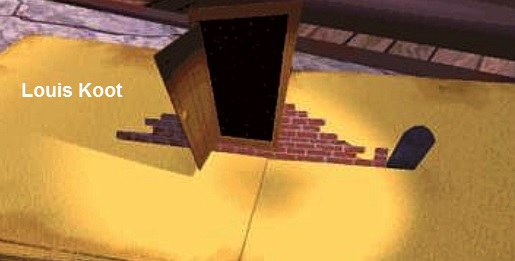
You stand in a corridor behind the kitchen. You are standing in front of a wall. At the bottom of the wall is a slider puzzle. Bottom right is a hole in the wall. That hole is the entrance to the maze. However, you cannot go through the gap because of the grilles. There are 5 grilles. 3 grilles have whole bars. 2 grilles have no bars. You have to shift the grilles and then ensure that the 2 grilles, without bars, are placed above each other on the hole in the wall. It is a fairly simple slide puzzle that you can easily solve, so do your best. Here is a solution
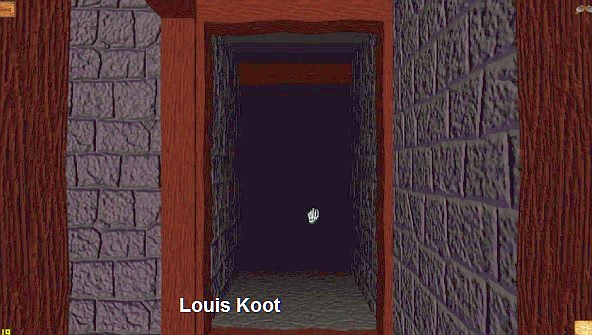
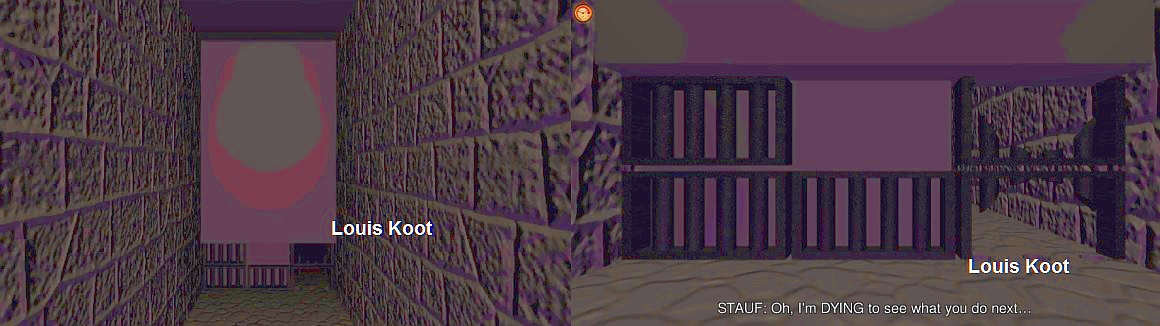
When you have solved the puzzle you automatically go through the hole and you end up in the:
|
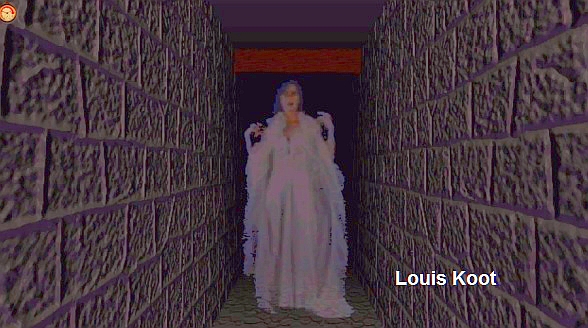
Maze: You hear Stauf and he is kidding you a bit. Then you see the lady in white again and she beckons you to follow her and that happens automatically
You will then automatically stand still at the START of the maze.
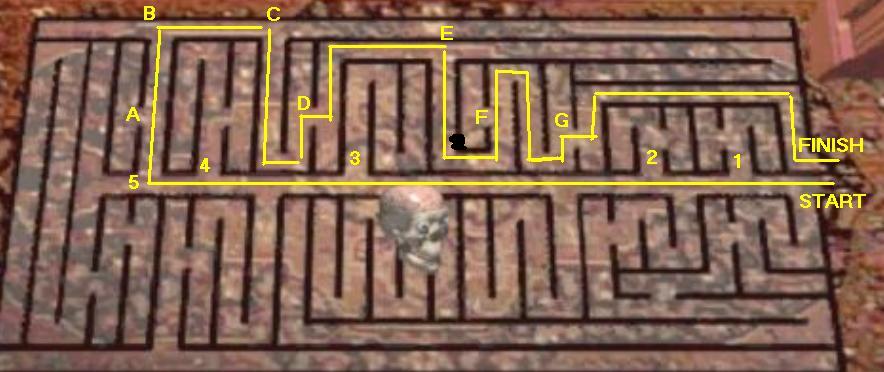
You can see the route through this maze on the carpet in Elinor's Knox's room.
If you click then you will always go a bit further forward. Even if you turn to the right or to the left, because you are standing at a left turn or a right turn, you continue to move on and then you stand still again. You are now in front of the first long straight corridor. In the screenshot of the carpet this is the START. You now have to go a few clicks through the long corridor until you reach the 5th corridor to the right. Each click brings you a lot further forward. If you have stopped then there is either a corridor to the right or a corridor to the left and you can also go straight ahead. Here is the route from the start.
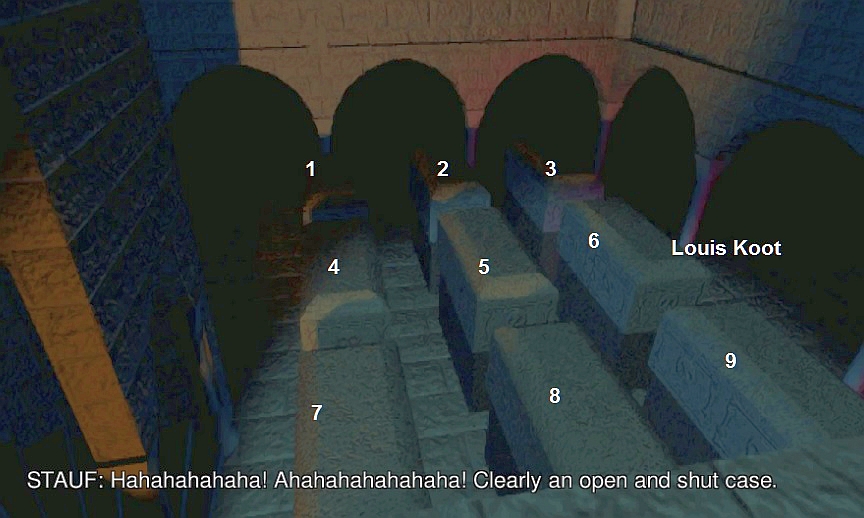
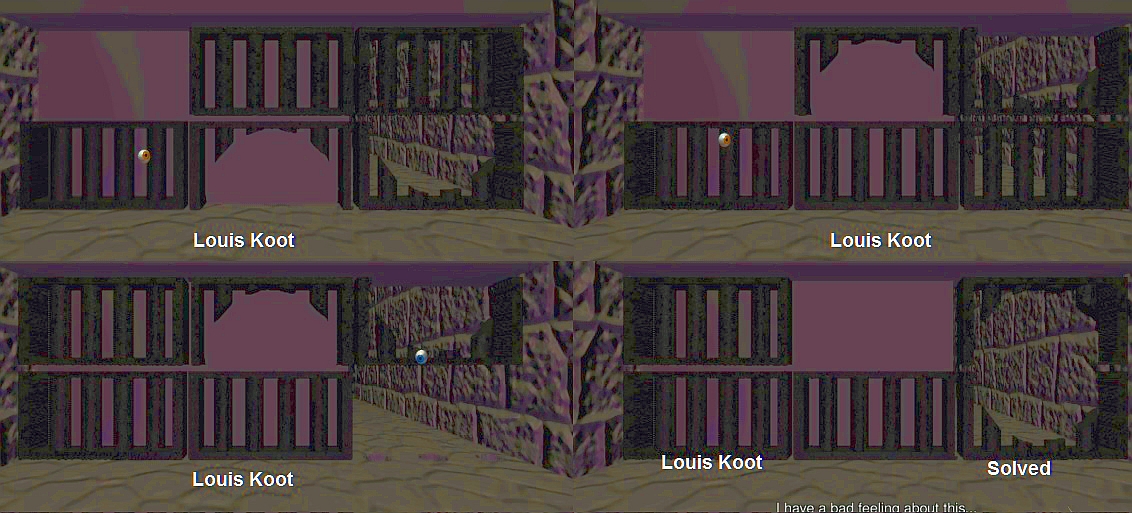
You hear Stauf saying "You Shouldn't Have Turn Around Here". Do not worry about this because you are in the right direction. You now go a long way down the corridor and .... you end up in the: Crypt: The Coffins puzzle There are 9 coffins in 3 rows of 3 coffins each. The idea is that you manage to close all 9 coffins.
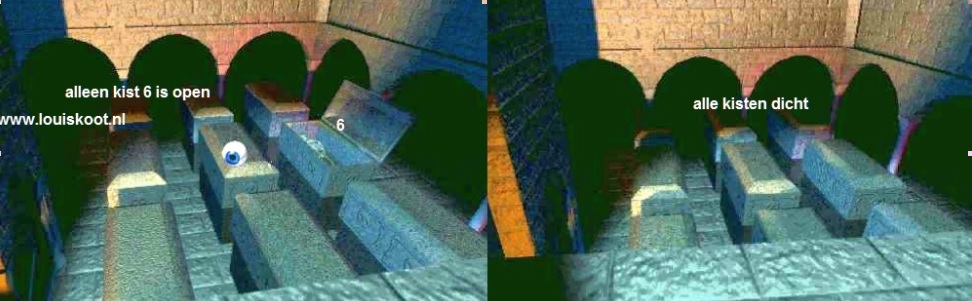
When the puzzle starts, a number of coffins will open .If you close, or open, a coffin then other coffins will open and vice versa. The coffins thus influence each other. So you first have to figure out which coffins influence each other. Number the crates, from bottom left to top right, 1 to 9. I cannot offer you a real solution here because it is completely randomly determined which coffins will open at the start of the puzzle. You will therefore have to find out for yourself which coffins influence each other. What you can do best is to first ensure that only 1 coffin will be open. Then you can use 1 of the solutions below. So if you start with, for example, 3 or 4 coffins open, then you first have to make sure that only 1 of the 9 coffins remains open. Below you will see all the possible solutions that are possible, but they assume that , when you start, there is only 1 coffin open. I can't do more for you here. If only coffin 1 is open: Click on the coffins: 1, 2, 3, 4, 5, 7. Here you can see that only coffin 6 is open. You can then use the solution as above at "if only coffin 6 is open" to get all coffins closed .....
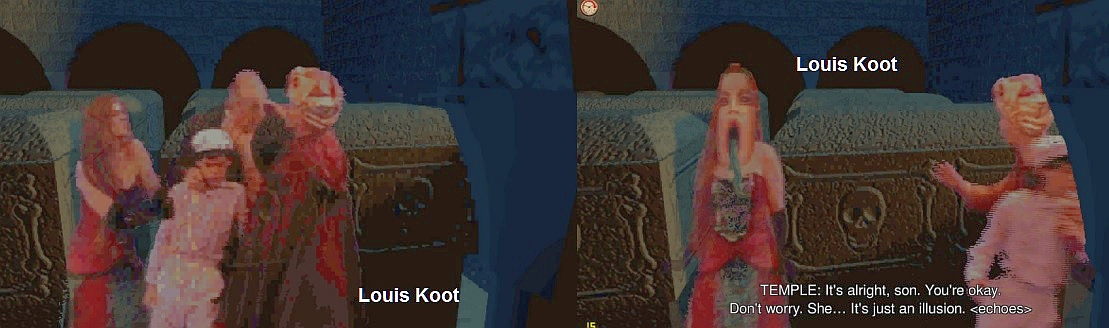
When none of the above suggested solutions work for you then there's always the Puzzle Book, in the library, that can solve the puzzle for you When you have finally succeeded in closing all the coffins, you will automatically descend deeper down a staircase to the bottom of the Crypt. You then see a scene with Martine Burden, Edward Knox and yourself as the boy Tad
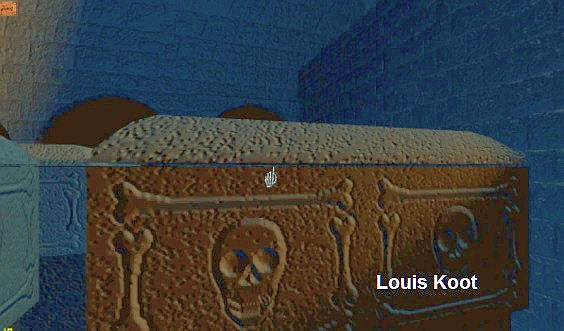
Burden and Knox try to kill the boy. But then Hamilton Temple appears and strangles Edward Knox and Martine Burden sticks out her tongue. After this scene, click with the beckoning hand on the tomb and....
The tomb opens and you are sucked down and end up in the kitchen through the entrance to the maze. |
Library:
Leave the kitchen. You are then back in the hall on the ground floor. Go to the Library. The 5 guests are gathered in the library and discuss the situation in which they ended up.
Hamilton Temple believes that all 5 must stay together to try and defeat Stauf as a team. Edward Knox does not agree with this.
Go forward to the telescope and then turn right. You stand in front of the fireplace. Click in the fireplace and ......
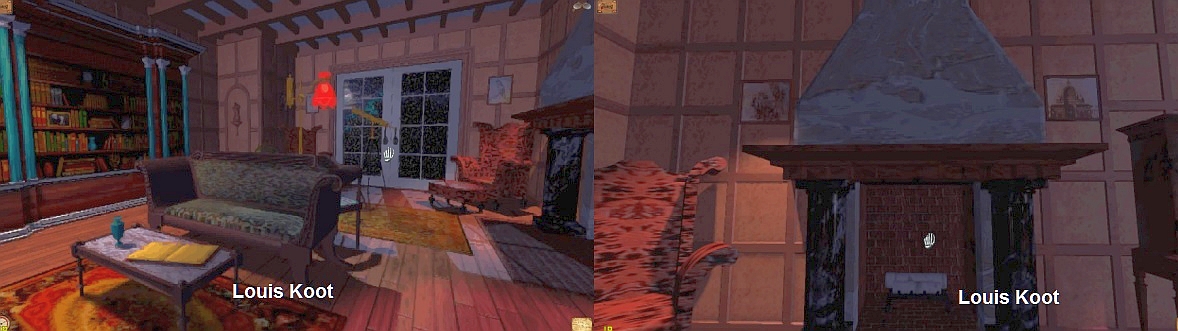
.... you are sucked into the fireplace and the back wall opens and .... you end up via a secret corridor on the:
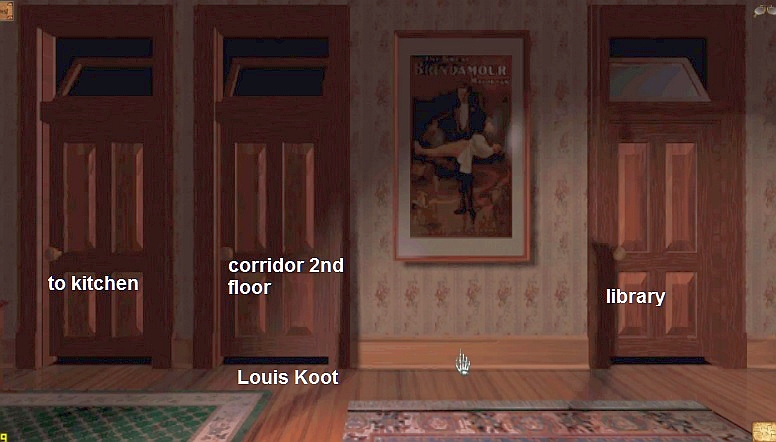
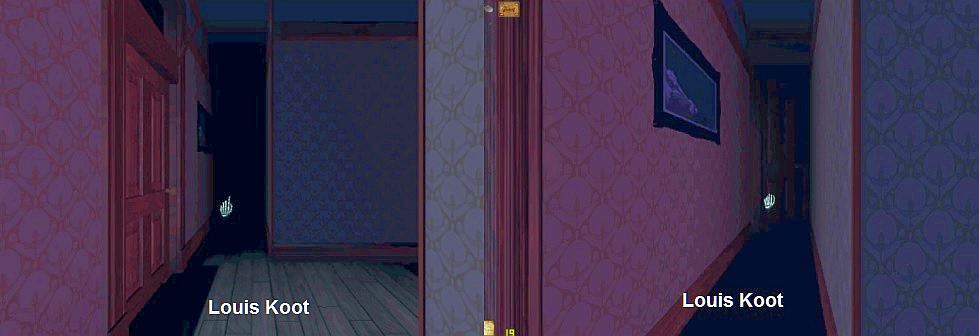
2nd floor:
Straight ahead is the door of Brian Dutton's room. Go ahead. You can enter Dutton's room but don't do it now.
You can turn right and left. Turning right takes you to Stauf's Children's room. Turn left and ... the white lady beckons you to follow her again.

Go through the corridor to the end, so past the stairs, to the door of the Game room. Then turn right.
You are standing in front of the door that is opposite Julia Heine's room. Go inside. You are then in the:
Hamilton Temple room :
No scene when you come in. To the right of the bed is a table and on that table are playing cards.
Click with the Skull on the table and ... you end up in the:
|
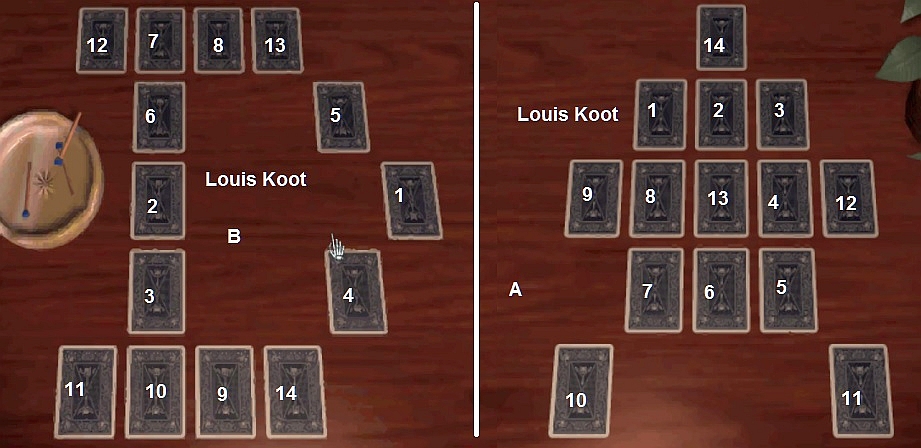
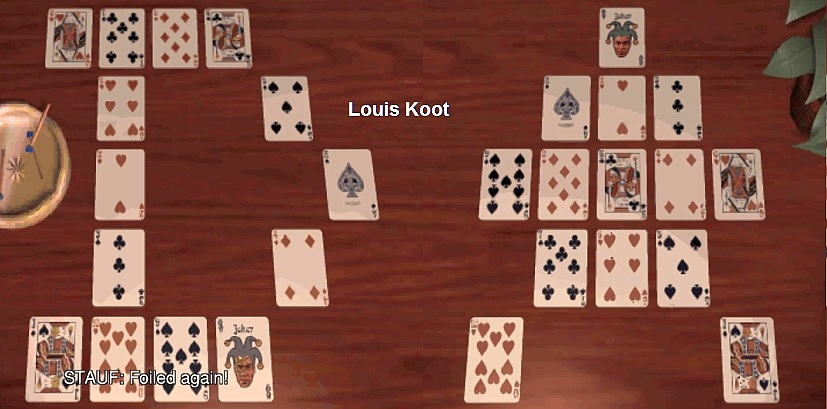
Playing cards puzzle: There are 2 series of playing cards on the table. The cards are placed upside down on the table. So you have to turn the cards over, but that has to be done in the right order. You may only turn over connecting cards or cards with a space between them. So you cannot go diagonally. A turned card also counts as empty space. Here is the solution. So click on the cards according to the numbering
You start with the right series of cards and if you have resolved them then continue with the left series. So you click on the cards to turn them over. When
you have turned over both series of cards you will see a scene with Hamilton Temple and Brain Dutton.
Hamilton Temple's greatest passion is Magic. He hopes that Stauf can teach him real magic. Hamilton finds a magician's hat on the bed Turn around to the room door. Hell ..... Hamilton Temple's room has 3 room doors.
The left door brings you back to the kitchen. The middle door brings you back into the corridor. The right door will take you back to the library immediately, which is handy to know if you want to go to the Puzzle Hint Book quickly. |
Exit Temple's room through the middle door. You are back at Julia Heine's door. Open the map of the 1st floor again, on the Sphinx board. You can see that all rooms on the first floor are now available. You have already had the rooms that are now red. You can also see that the chapel can only be reached via Brian Dutton's room
Turn left and go 1 click forward through the corridor. You see a scene.
From Martine Burden's room the white lady floats to the room of the Knox couple. Then Elinor Knox and Hamilton Temple appear
After the scene you go 2 clicks forward. You are then at the door of the bathroom and further up is the door of Brian Dutton's room.
Go forward another click and then turn left and go through the door. You are now in the:
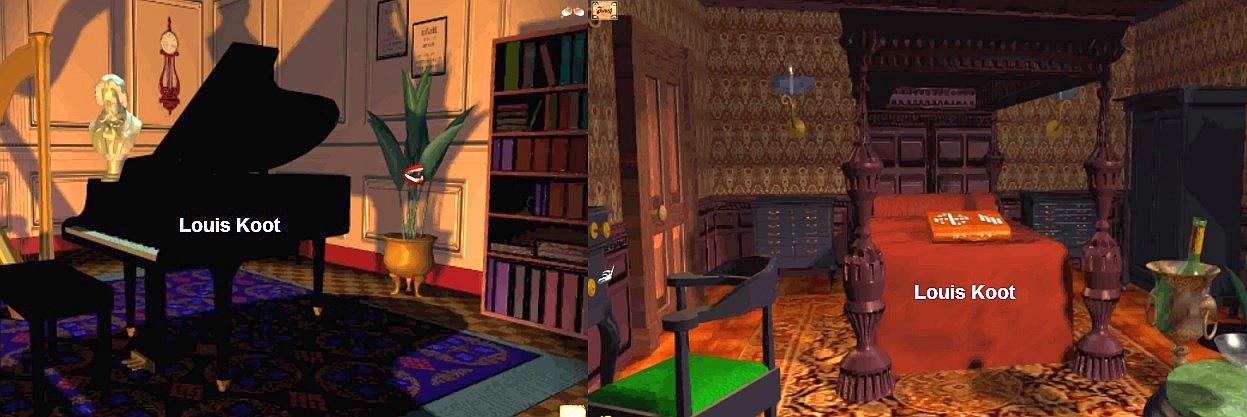
Brian Dutton's room:
On the bed is an orange briefcase. At the back left you see a door. To the right of the bed is a large champagne cooler with a bottle of champagne.
Click with the Mask on the champagne cooler and .... the champagne bottle is uncorked. Click with the Skull on the orange briefcase on the bed.
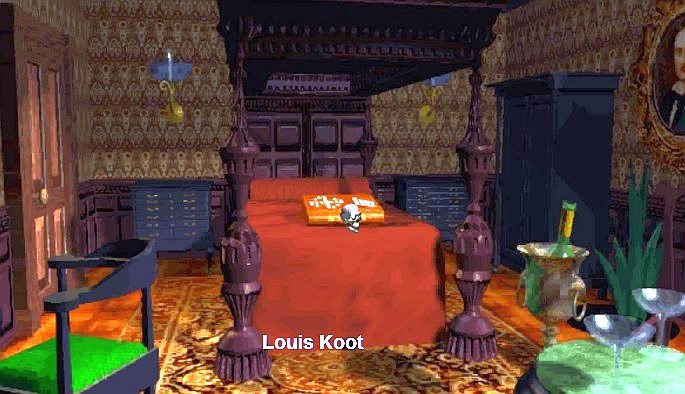
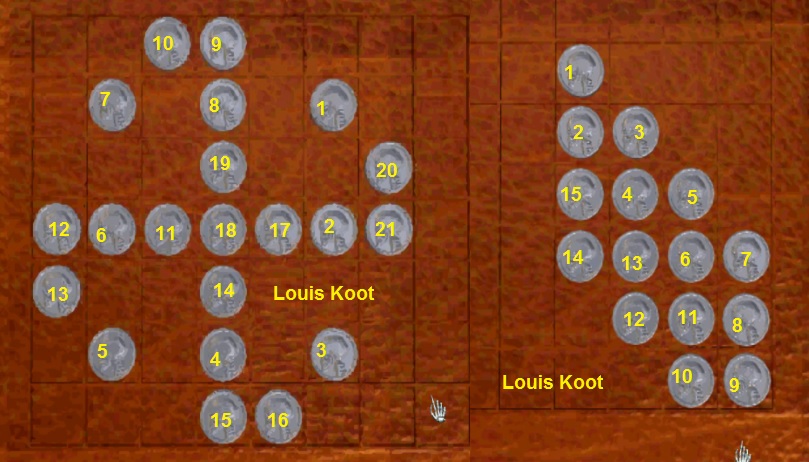
Coin Puzzle:
Well ... this is about the same puzzle as the playing card puzzle in Hamilton Temple's room. The coins are upside down and you have to turn the coins over so that they come up with the coin side up. You can only go left and right and up and down. So you can't tilt You do this puzzle again in 2 parts and you start with the right part. Here is the solution. Click on the coins according to the numbering.
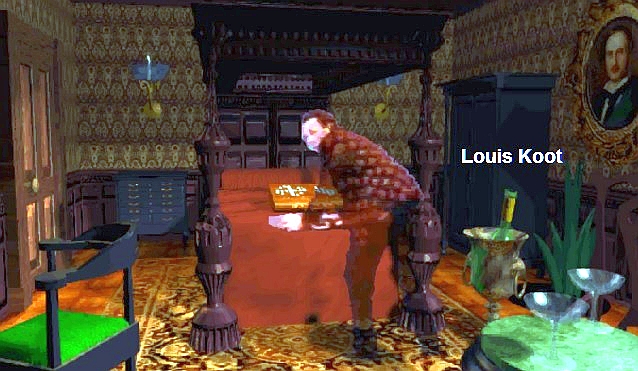
When you have solved both parts of the puzzle you will see a scene with Brian Dutton who thinks he has found a lot of money, but gets disappointed.
After the scene click with the Mask on the door in the left wall, You see Brian Dutton again who tells that this door leads to a Secret Room,
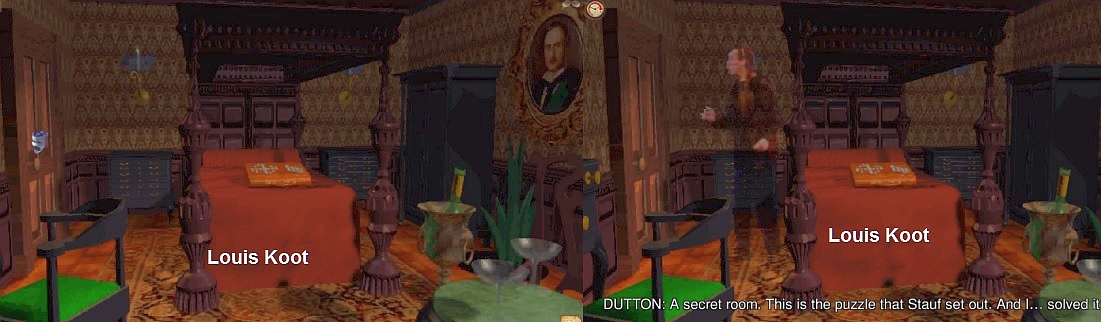
Dutton then disappears through the door and you hear a woman screaming. Then you disappear through the door and you end up in the:
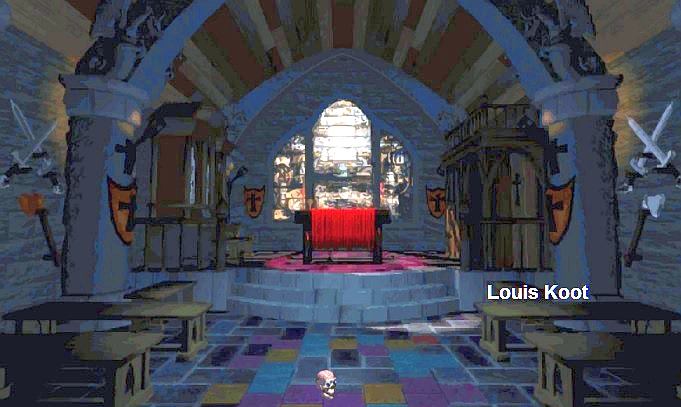
Chapel:
You see Dutton being attacked by a bat. Dutton then disappears. You cannot go forward to the altar yet.
The floor is a tiled floor of colored tiles. Click with the Skull on the tile floor.
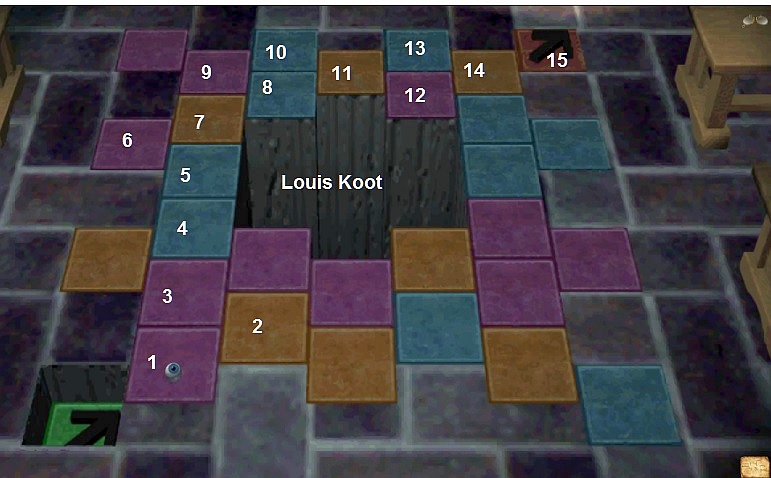
Floor Puzzle
There is a hole in the floor. There are yellow, purple and blue tiles around the hole. The goal is to get from the green arrow tile to the red arrow tile, according to a certain route. So you step from one tile to the other. If you step from one tile to the other, the tile where you came from will disappear. Purple tiles disappear after every 3 steps you take. Orange tiles disappear after every 2nd step that moves and orange tiles always disappear after 1 step. Here is the correct route, just follow the numbers 1 to 15.
When you have solved the puzzle you will hear Stauf say "Careful that you don't slip and fall".
You then automatically zoom out of the puzzle and you can now move forward to the altar.
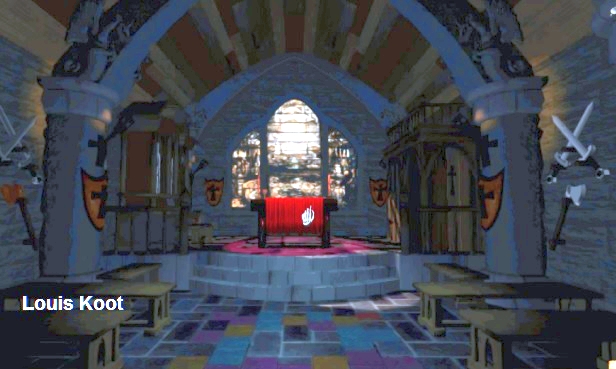
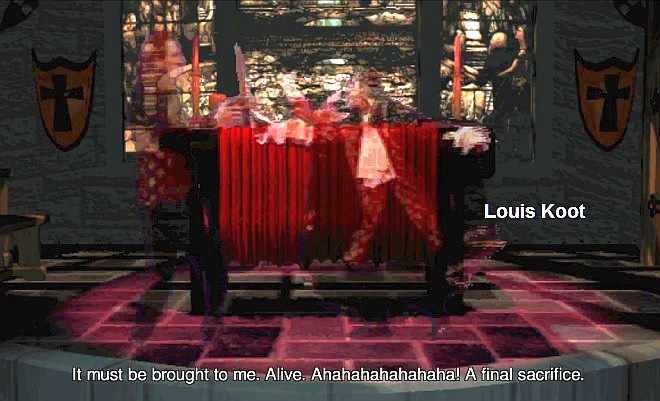
Go forward to the altar. You see a scene at the altar. Brian Dutton and devil Stauf appear before the altar. A living baby is lying on the altar.
To the left of the altar is the church organ and a confessional. To the right of the altar is a confessional.
urn left and then click with the Mask on the church organ and ...... well ... isn't this a handsome organist?

Turn back to the altar and then turn right and ..... you go through the right confessional and you have arrived in the:
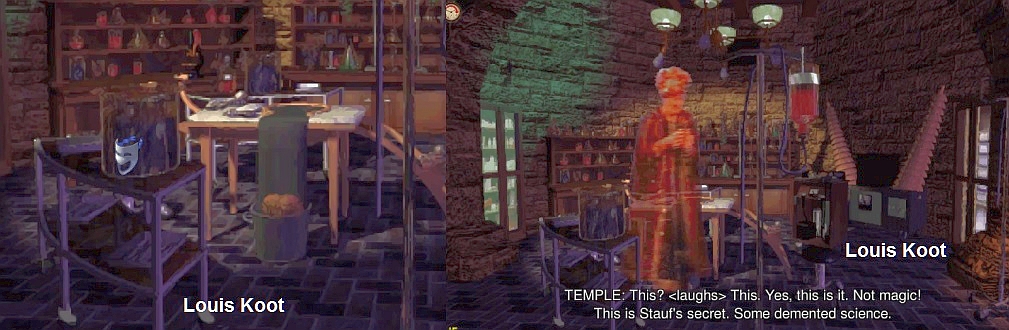
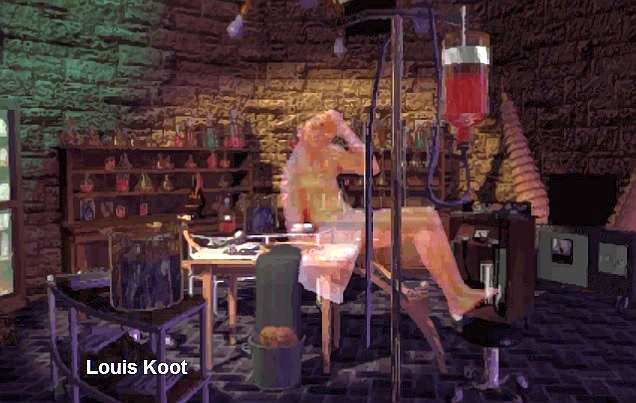
Laboratory:
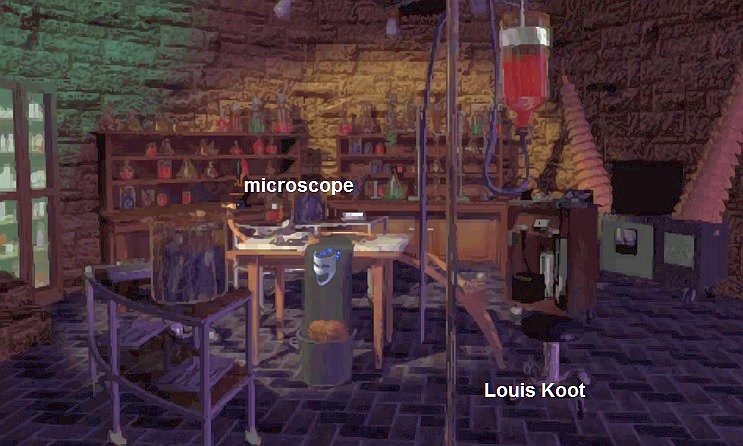
Click with the mask on the table and see a scene of a man whose brain has disappeared
There are 2 cupboards against the back wall. Go forward to the left cupboard and then click with the Skull on the microscope and ....
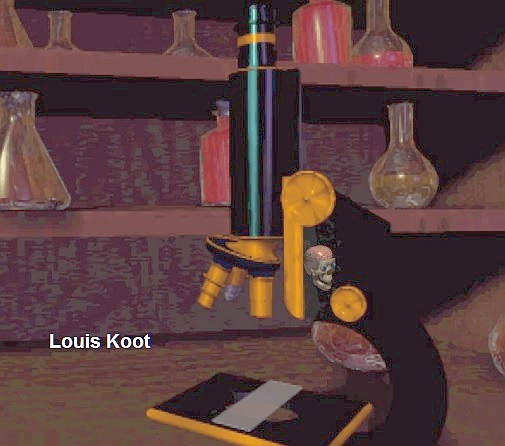
you look through the microscope and you have ended up in the:
|
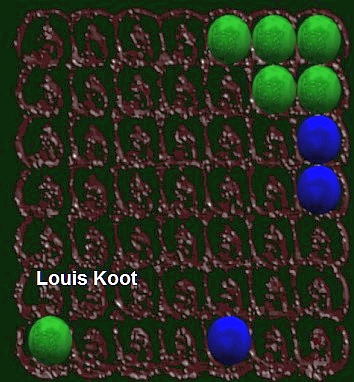
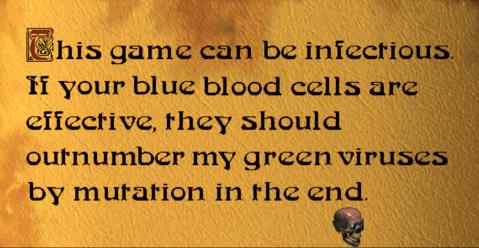
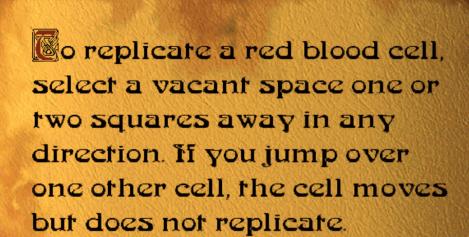
Blood cells puzzle: You see a grid of 7 by 7 = 49 squares. 2 blue and 2 green blood cells appear. You are blue and your computer is green. This is more a mini game than a puzzle and ....it's almost impossible to win this game.
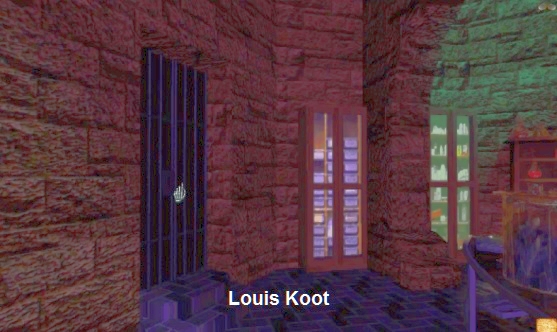
The intention is that there will ultimately be more blue cells in the grid than green cells. You always have to do the first move and your computer calculates its counter moves Click with the eyeball cursor on a blue blood cell and then click on an empty space that is 1 or 2 spaces away. The blue cell you clicked then divides into a new cell and that new cell lands in the empty space that you have clicked. The computer responds to your move with the same move. If a green cell ends up in a space next to your blue cells, the green cell will eat your blue cells and the blue cells will turn into green cells. . There is no meaningful solution for this puzzle. You can hardly beat your computer. So I propose to have this puzzle solved by the Puzzle Book in the library. I will now explain how the Puzzle Book can solve the puzzle. Solve the Blood Cell Puzzle via the Puzzle Book: Get out of the Blood cell puzzle via the left edge or the right edge of the screen. You are again in front of the microscope. Turn left. You see an iron gate door.
Go forward to the gate door. The gate door opens and you go through it and end up in the Library. So the Puzzle Book is on the coffee table.
Click with the Skull on the Puzzle Book. You end up in the puzzle book and you read a first hint about the puzzle you are working on, in this case the Blood cells puzzle.
Click with the skull on the page and .... the puzzle book closes and through the door you end up in the laboratory again
Go back to the microscope on the left case and activate the puzzle in the microscope again. The grid with the 4 blood cells appears again. Immediately leave the puzzle again and go back through the gate to the puzzle book in the library. Zoom in again on the puzzle book. You now read a second hint about the puzzle
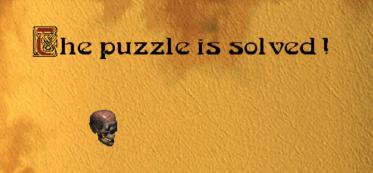
Click again with the skull on the page to close the book and to return to the laboratory through the door. Activate the puzzle in the microscope again for the 3rd time. The grid appears again with 2 blue and 2 green cells. Immediately leave the puzzle again. Go back through the gate to the puzzle book in the library. Zoom in again on the puzzle book and ... you now read in the puzzle book "The Puzzle is Solved".
The Puzzle Book has now solved the puzzle in the microscope for you. So .... to have a puzzle solved by the Puzzle Book you have to activate the puzzle 3 times and then open the Puzzle Book each time. After the 3rd time, the puzzle is then solved. Click with the Skull on the page again to close the book and return to the laboratory. Back in the laboratory you look again at the cupboards that are against the back wall. Click with the Mask on the little table and .... you will see a scene with Hamilton Temple.
NB: if you have succeeded in solving this Blood cell puzzle without the puzzle book then you will see this scene automatically. Turn left and click on the gate again and, after a detour through the microscope, you will return to the Library
|
Library:
Go forward again to the telescope and then turn right again and dive back into the Fireplace, to end up again via the secret corridor on the
2nd floor
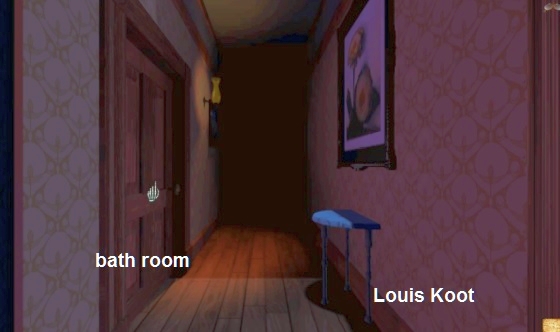
Go forward again to Dutton's room door and then turn left again. Go forward 1 click and turn left. You are at the door of the bathroom. Go inside.
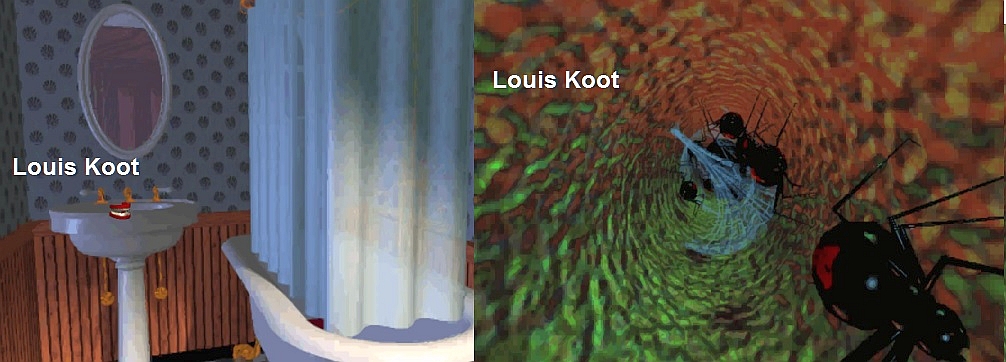
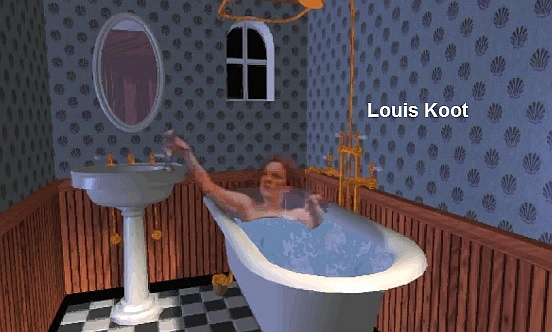
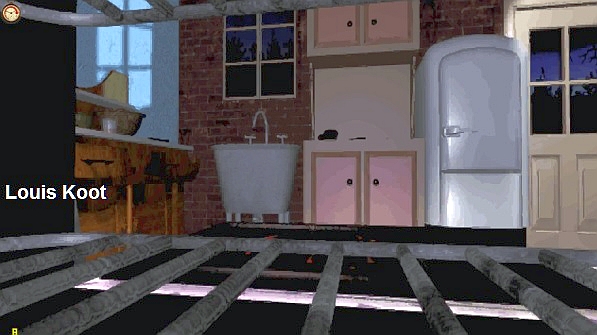
Bath Room

The puzzle is in the tile floor, so click on the floor with the Skull. You end up in the:
|
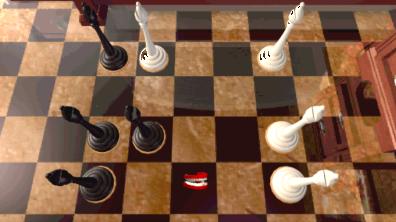
Knight's Jump Puzzle: When you want to solve this yourself Black and white Knight chess pieces appear on the floor. So this is another variant of the chess game and a bit similar to the puzzle in Knox's room. The white Knights must come on the black tiles and the black Knights must come on the white tiles. The playing field is 5 by 5 = 20 spaces. You can only move the Knights across the playing field according to the Knight's jump, so in an L-shape, so 2 squares ahead and then 1 square to the left or right. Here is the solution. It is a lot of work, so if you don't feel like it, let the puzzle book solve this puzzle. Divide the game area into columns and rows. Name the columns, from left to right, A, B, C, D, E. Name the rows, from top to bottom, 1, 2, 3, 4, 5.
Make the following moves: So you click on the indicated Knights. The Knight in that section automatically does the jump to the nearest free section that can be reached via the Knight's jump
STEP 1: Click on the Knights: A4, C5, B3, A5, C4, E3, D1, B2, C4, A3, C2, E1, D3, C1, E2, C3. When the puzzle is solved, you will automatically see a scene in the bathtub. Solving through the Puzzle Book:
Martine Burden is in the bath and while she is soaking, she drinks a glass of champagne.
But then ...... you see how Martine came to her end because she is drowning in the bathtub. |
Turn around and leave the bathroom through the door to the corridor. Turn right. You see Brian Dutton's room door again. Past the Dutton door the corridor becomes narrower. Open the Sphinx Board and then the map. You can now see that the last 2 rooms are also available on the ground floor. These are the Music Room and the Paintings Room. On the 1st floor you see that there are still 2 rooms to do, and the corridor itself. You also see that, right in front of Dutton's door, is a door that goes to the attic. But that door is not yet available.
Return to the game. You end up on the 1st floor at the painting where the 2 hands came out. Turn left and go through the corridor until you reach Brian Dutton's door. You are then in front of the narrow last part of the corridor. On the right is the door to the attic, but you can't go through that now.
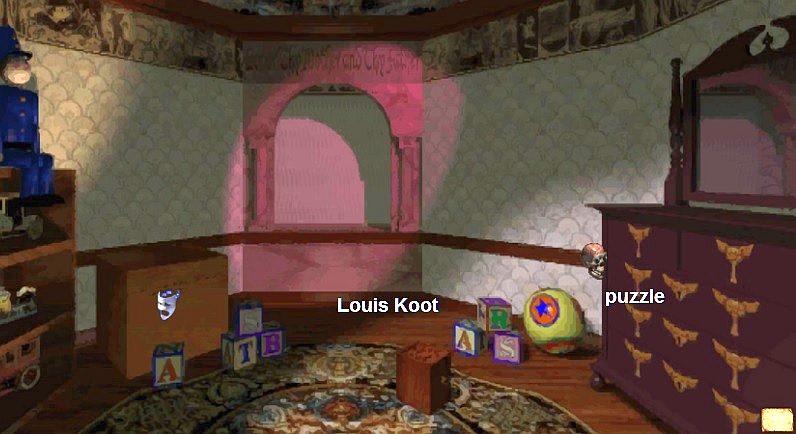
Go forward through the narrow part of the corridor. You arrive at the door of the Children's Room. Go through the door. You are in the:
Children's room:
You hear children's voices and see some shadows on the wall. At the right window is a doll that salutes. The shadow of that saluting doll is big on the wall.
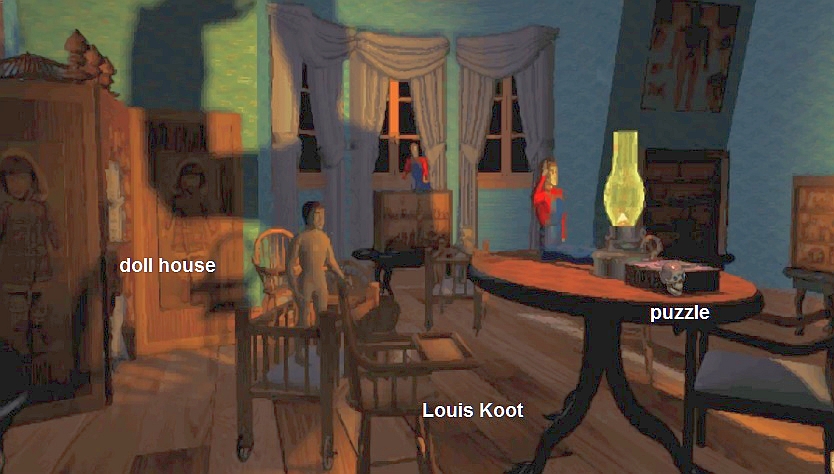
There is a box on the round table. Click with the Skull on the box and .... you end up in the:
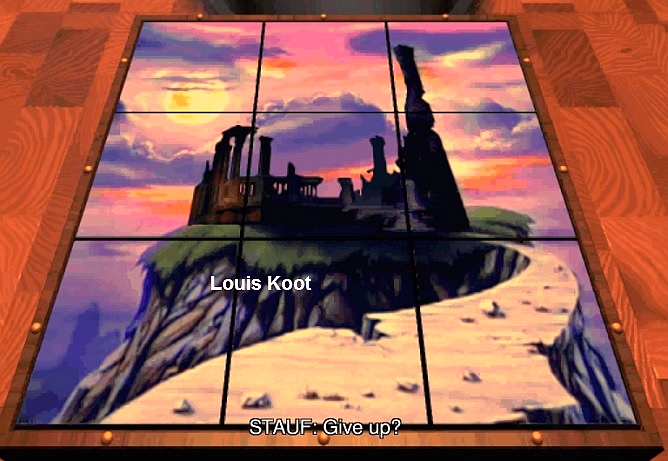
|
Stauf House puzzle: When you start the puzzle you will see the ruins of the Stauf House.
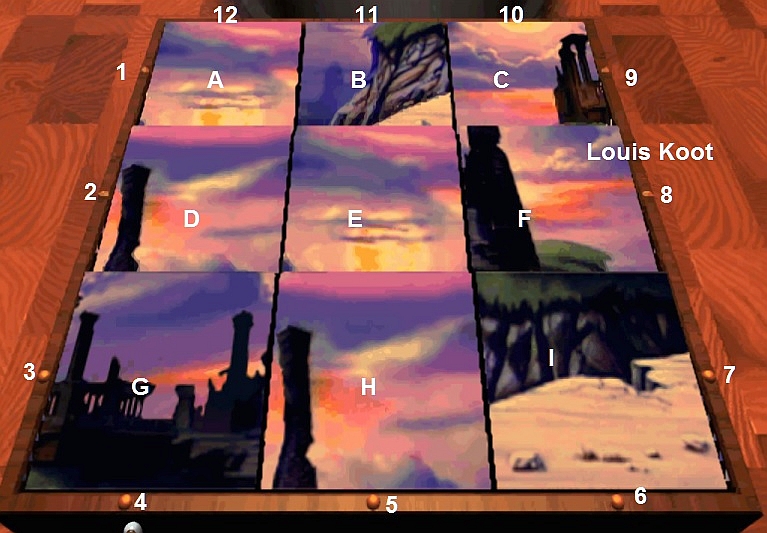
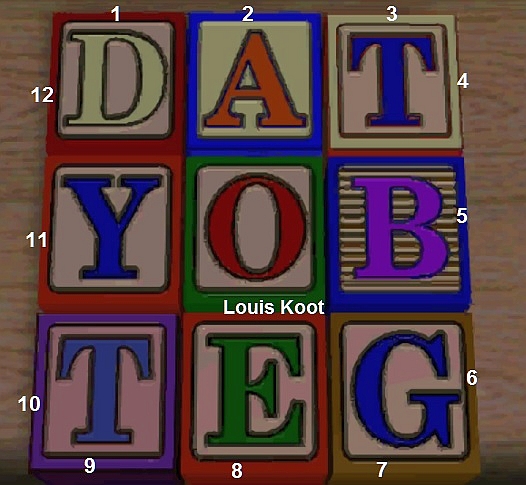
But then the 9 blocks collapse and the Stauf House is mixed up. The goal is therefore to restore the original photo of the Stauf House. There are 9 Blocks. On the edges of the coffin there is a Golden Button on each block. By clicking on the Golden Buttons you turn the blocks. Number the Blocks, from top left to bottom right, A, B, C, D, E, F, G, H, I. There are 12 Golden Buttons on the edges of the coffin. There are 3 Golden Buttons on each edge. Number the Buttons, from left to top, 1 to 12.
I can not give you a step by step solution for this puzzle because the starting position is completely random and also how the blocks turn is random, so any step by step solution that I would give you here and that have worked for me would not work in your game. So I suggest that you use the Puzzle Book in the Library to solve this one for you, |
When the puzzle has been solved you see a scene with Hamilton Temple and Elinor Knox.
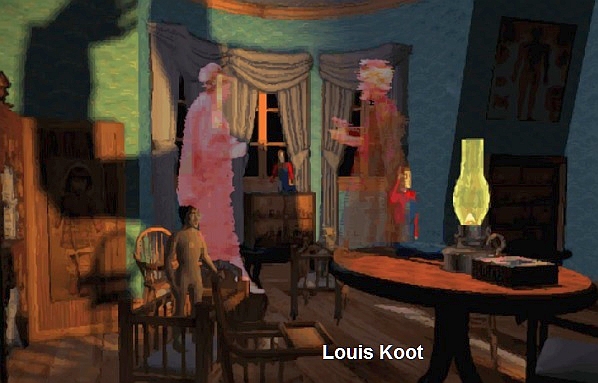
Temple and Knox come to the conclusion that the dolls in this room contain the souls of all the children who died because they had a Stauf doll.
In the back left corner is a large dollhouse. The doors of the dollhouse are open. Go forward to the dollhouse. There is a small door in the dollhouse.
Click with your beckoning hand on the door and .... you end up in the:
Doll House:
Against the right wall is a commodity cupboard where the puzzle can be found. On the left is a chest. Click with the Mask on the chest and ... a bloodthirsty wolf comes out of the coffin. The chest is a secret connection to the library, so if you want the Puzzle Book to solve the puzzle right away, you can quickly go to the library via the chest. Click with the Skull on the commodity cupboard to activate the puzzle. This is the:
|
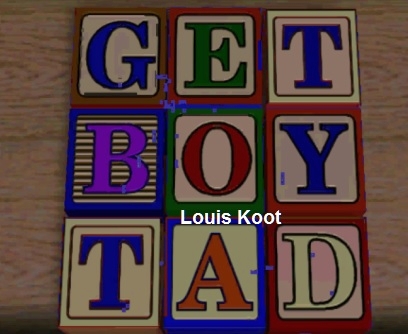
Blocks Puzzle: It is a word puzzle. There are 9 blocks and there is a letter on each block. It is a Magic Square You have to make 3 words. You cannot click on the blocks themselves. The blocks are in a square of 3 by 3 = 9 blocks. You can only click on the outer edges of the squares. So there are 12 click points that you can click to change the letters in each block. Number the 12 click spots 1 to 12.
From top to bottom the blocks shout read: GET BOY TAD. You do this as follows: Click on the edges: 2, 7, 4, 10, 2, 7, 6 and 11 and ..... SOLVED.
You automatically go out of the puzzle and then see Stauf who is bullying the baby.
Click on the chest and ..... you crawl into the chest and end up in the Library: |
1st floor:
Exit the library through the door to the hall. In the hall you are next to the stairs. Turn right and go to and through the double door. You are now in the:
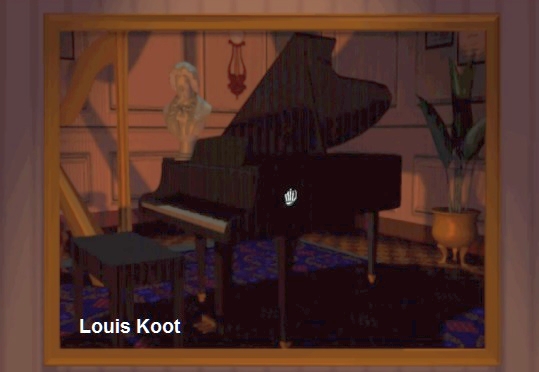
Music Room:
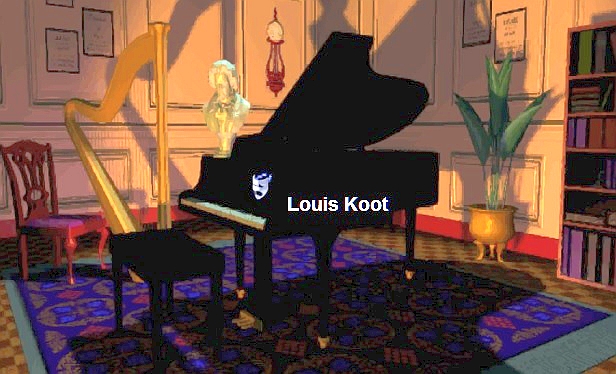
There is a nice piano in the music room. Click with the Mask on the piano and ..... you will see 2 hands playing a piece of music on the piano. You then get the Skull on the piano. Behind the piano is a green fern plant in a pot. If you click on that plant with the teeth, the plant will grow up and you will end up in Brian Dutton's room. But you no longer have anything to look for in Dutton's room, so don't click on the plant.
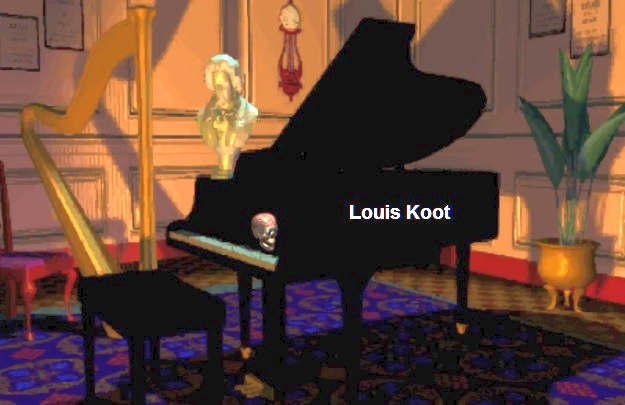
Click with the Skull on the piano and .... you have ended up in the
Follow the Leader puzzle
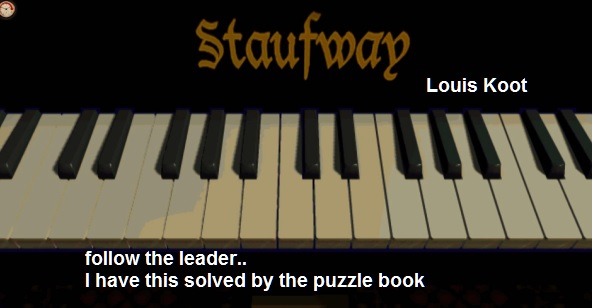
You zoom in on the keys of the piano. 1 key is immediately pressed and you hear a musical note. Well .... this is a "repeat the tune" puzzle. So you always have to click on the keys that are pressed by Stauf to always play the melody, until the last note. There are 14 white keys and 10 black keys. So you must always click on the keys that you are being pressed. It is a simple puzzle but it requires a lot of concentration and it is a lot of work. If you go wrong along the way then you have to start all over again.
I utterly dislike this kind of puzzles. So if you want to solve this yourself, go ahead. I have used the Puzzle Book in the Library to solved this puzzle for me. Do you also want this puzzle solved by the Puzzle book then you go out of the puzzle, via the left or right edge of the screen. Then leave the room and go to the library and open the puzzle book. Do this 3 times and the piano puzzle will be solved. I know .... it is a weak bid but I simply hate these kind of puzzles. Of course you can also solve the puzzle yourself. When the puzzle is solved you see a scene in the music room.
Brian Dutton, Edward Knox and Martine Burden are fighting for the young Tad. Edward Knox then kills Brian Dutton.

Ok .... there is 1 more room where you have not been. It is the room that you see on the ground floor plan next to the kitchen. It is the Portrait Gallery Room. Turn around and leave the music room through the double door. Back in the hall you go to the front door. When you are in front of the front door, turn 2 times to the left so that you are right in front of the stairs. There is a large circle, in front of the stairs, on the floor of the hall.
You now get the red teeth on the floor in front of the stairs. Click with the red teeth and ... you sink through the floor and end up in the:
Portraits Gallery Room.
You see a scene with Edward Knox and Martine Burden.
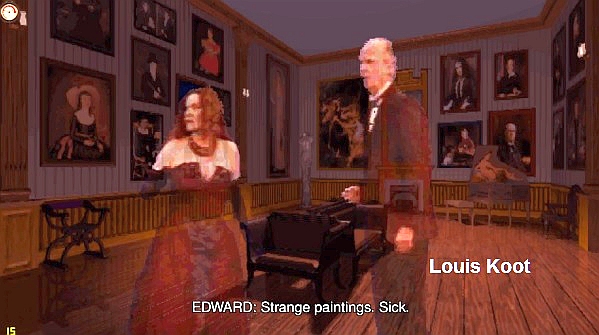
When the scene is over, click with the Mask on the left wall and on the back wall......
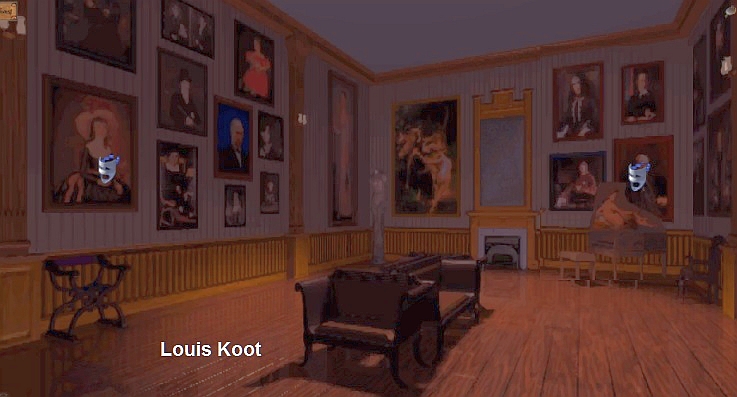
All the paintings on the left wall change into 1 large painting where something moves and flames. After this scene you turn to the right wall and .... You are standing in front of the portrait of Henry Stauf. Click with the Skull on Stauf. You zoom in on Stauf's head. You are in the:
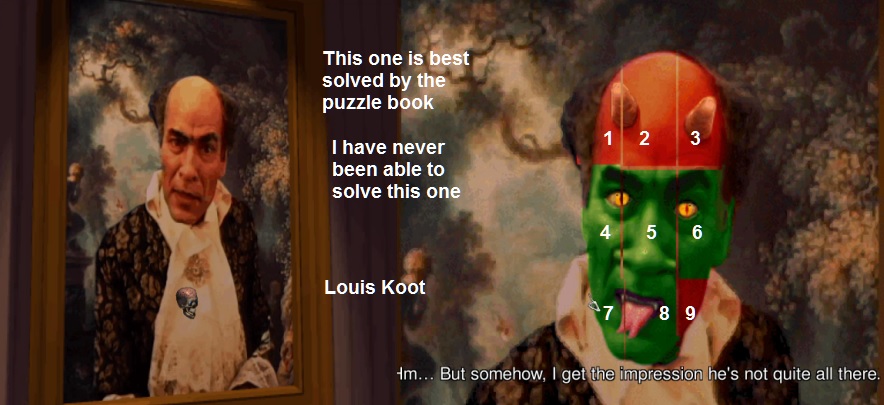
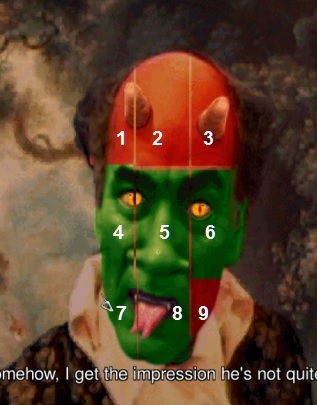
Fix Stauf Puzzle
Stauf's head changes. Some parts turn red, some parts turn green and 2 horns appear on his forehead. Stauf's head is divided into 9 segments and they become either red, green or normal. So Stauf has 3 faces, normal, red and green. By clicking on a segment, that segment changes color, but other segments also change color. The segments therefore influence each other. So you have to restore Stauf's head to its normal flesh color. Well .... this too is a puzzle for which I cannot give you a ready-made solution. The puzzle simply starts differently. The segments change from normal to red and then to green and then back to normal. So a Normal segment changes to red and then to green and then back to normal. So to get a red segment back to normal it must first be green. You will have to solve this puzzle either on your own or solve it via the Puzzle Book. It is not possible to offer you a ready-made solution for this puzzle. Perhaps the following can help you. Number the segments, from top left to bottom right, 1, 2, 3, 4, 5, 6, 7, 8, 9.
If you click on Segment 1, the segments 1, 2, 4 and 5 change color. To restore a segment to its normal flesh color, a segment must first be green. Good Luck by trying to solve this puzzle on your own..... To have the puzzle solved by the Puzzle Book in the library, go out of the puzzle (so don't click again with the Skull because then restart the puzzle). Then turn right. You then stand in front of a painting of the piano in the music room.
Click on the painting with your beckoning hand and ... you end up in the music room. From the music room, go to the library and open the Puzzle Book. Do this again 3 times and the Stauf Puzzle is solves |
When the puzzle is solved, either by you or by the puzzle book, you can click on some paintings in the Portrait Room with the mask for some peculiar scenes. Then go through the Piano Painting back to the Music Room. Click with the red teeth on the green plant, behind the piano and ....you climb up the plant to Dutton's room.
2nd floor:
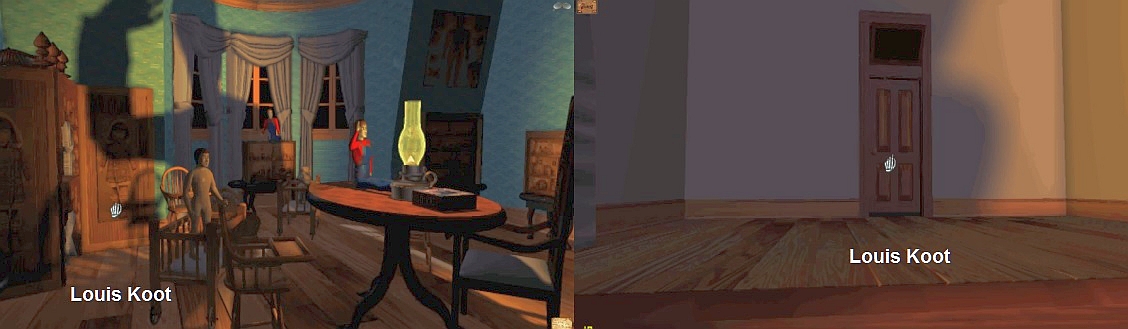
Attic Door Puzzle
Exit Dutton's room through the door to the corridor. Then go straight to the door opposite Dutton's room.
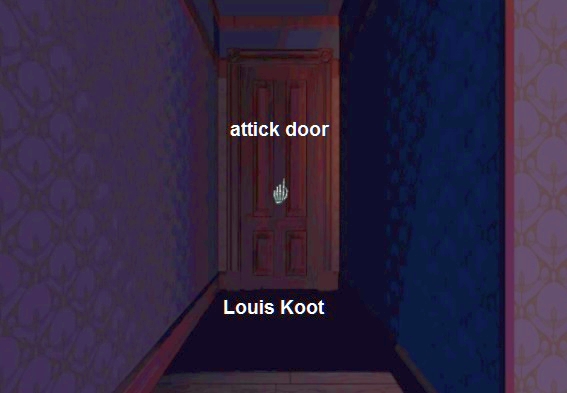
Click with the beckoning hand on the door and ... On the door you get the
Swords Puzzle:
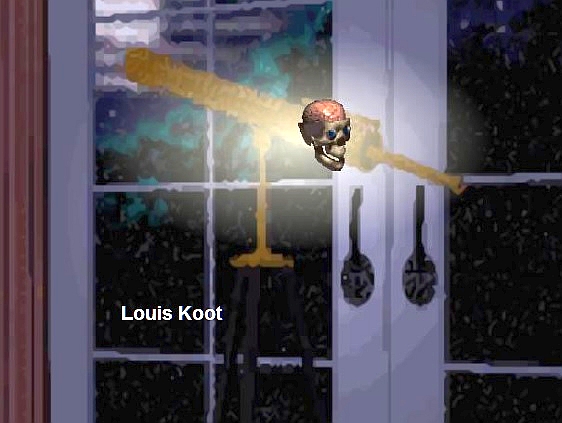
A face has appeared in the door. There is a Star of David in the forehead of the face. 9 swords are stabbed in the Star of David.
The swords stick at the points of the star but also at the intersections of the double star. You have to click the 9 swords out of the star and the door will open.
The star has 5 outside points and 5 intersections. Number these 10 points 1 to 10, as in this picture.
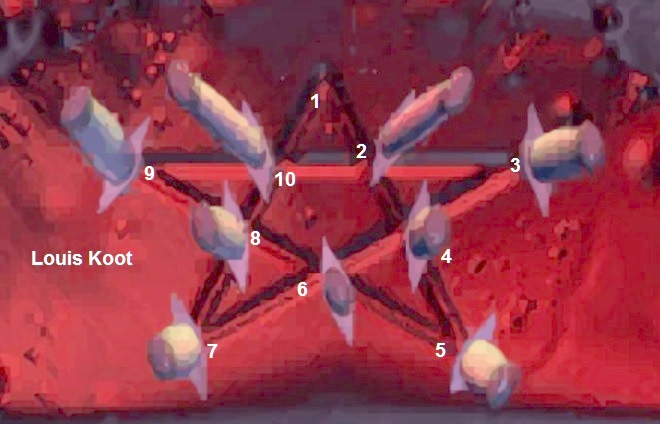
Then click on the points in this order to remove the swords: Click on point 8, point 3, point 6, point 9, point 1, point 3, point 5, point 7 .... SOLVED.
You see all the swords again but then they disappear.
You are then automatically out of the puzzle and can now go through the door.
So click again with your hand on the door and ....Walk up the stairs.
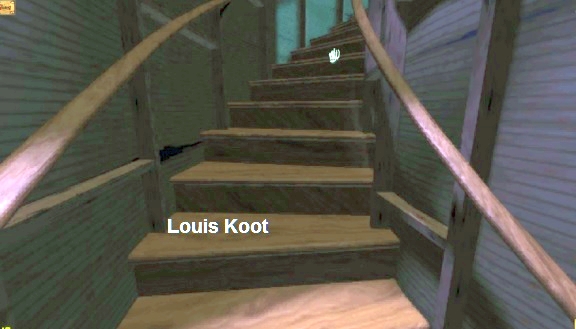
You end up on the:
Attic:
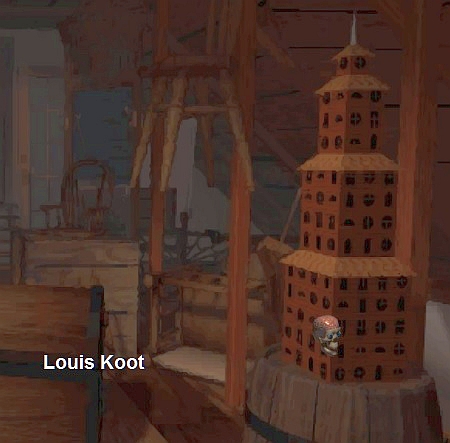
No scene. To the right stand a Tower House on a barrel Click with the Skull on the house. You end up in the:
|
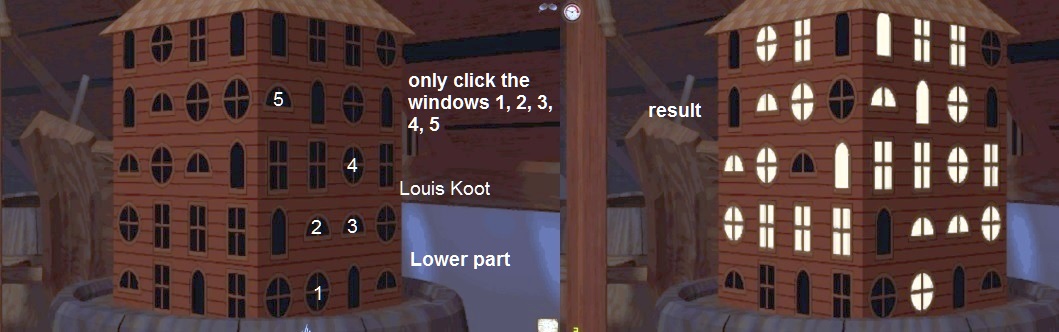
Windows Puzzle: You are in the close-up of the lower part of the tower. You see a left facade and a right facade. You also see a lot of windows. Well .... you have to click the right windows in a certain order. The windows are in rows. The intention is to make a path of illuminated windows, all the way up in the roof of the house. You start at the bottom and when you have solved the lower part you will automatically move on to the middle part and then to the upper part. In the pictures below I have numbered windows that you have to click on as 1 to 7. The window that you click on will turn on. You only have to click on 7 windows. So click in sequence on windows 1 to 7. You start at the bottom with window 1
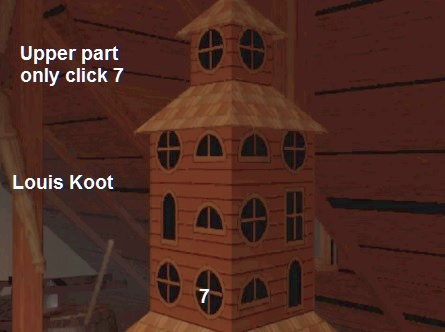
If you have done the lower part of the tower right then you go to the middle part. Only click on window 6
You proceed to the upper part. Click here only on window 7 and ......
Solved |
You go out of the puzzle and see a scene. Boy Tad appears and the head of Mrs. Knox appears on the mannequin. Then Julia Heine appears.
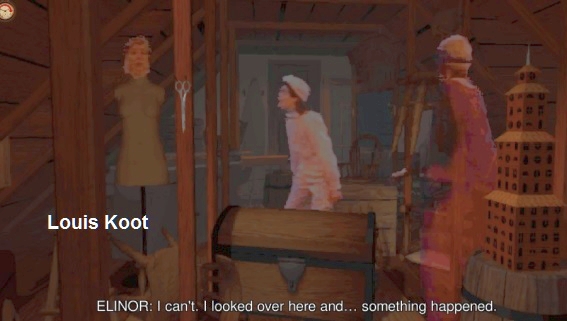
Julia grabs Tad and calls that one last puzzle still needs to be solved. Julia disappears with Tad to the back attic room.
There is a door in the back of the attic. Go forward to the door. You end up in front of a large mirror. Boy Tad appears in the mirror
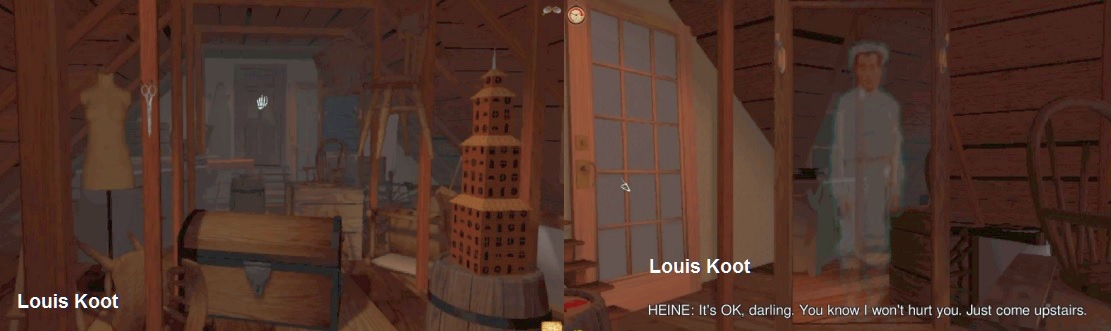
Listen to what TAD says. You also hear Julia Heine. When this scene is over, turn left and ..... you go through the door and end up in the back room
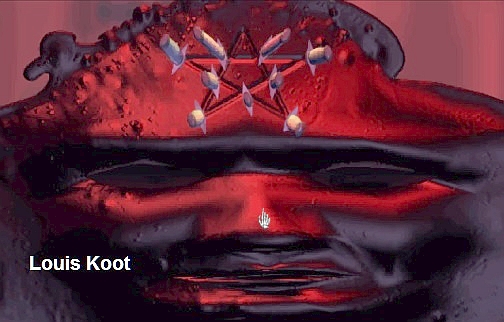
Well .... view the END SCENE of The 7the Guest.
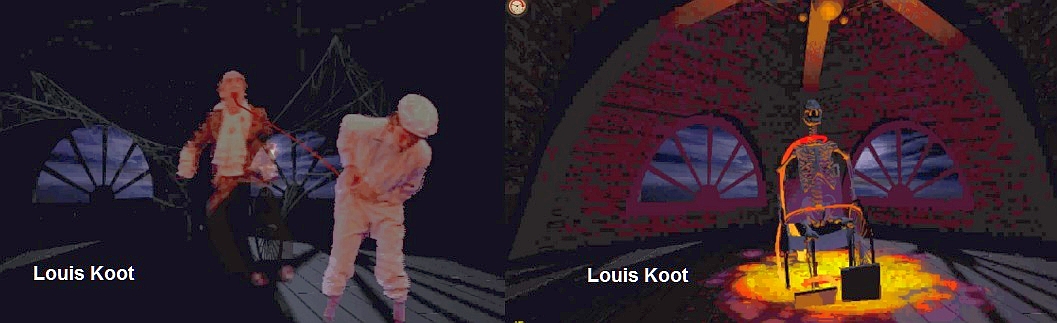
Stauf appears on his throne. Then Julia Heine appears with TAD. Julia delivers TAD to Stauf and expects to be rewarded. But ... well .... STAUF is the Devil and you can't trust that. Stauf spits a poisonous green stuff about Julia and Julia slowly disappears in the pool of toxic green mess from Stauf.
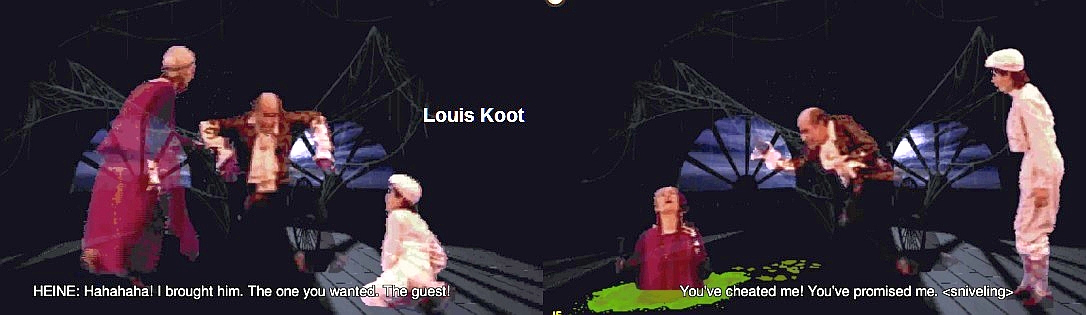
TAD tries to flee but Stauf grabs TAD with his filthy huge tongue. TAD is struggling to free itself but the boy is not succeeding.
But then you apparently intervene because Stauf's tongue is cut off and Stauf disappears with throne in a lake of fire.
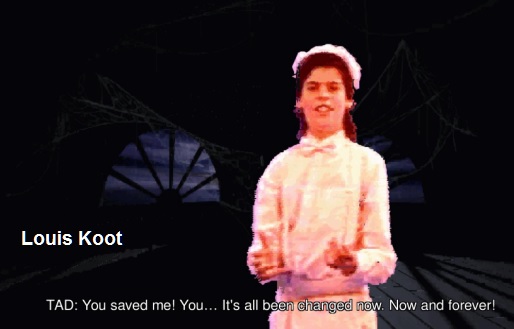
Boy Tad is grateful and thank you very much
Then listen to the end music, while the credits roll over your screen. The music is worth it, so be patient for this. The photo album is then closed

You end up on the Sphinx Board and you have no the "OPEN HOUSE" option available....
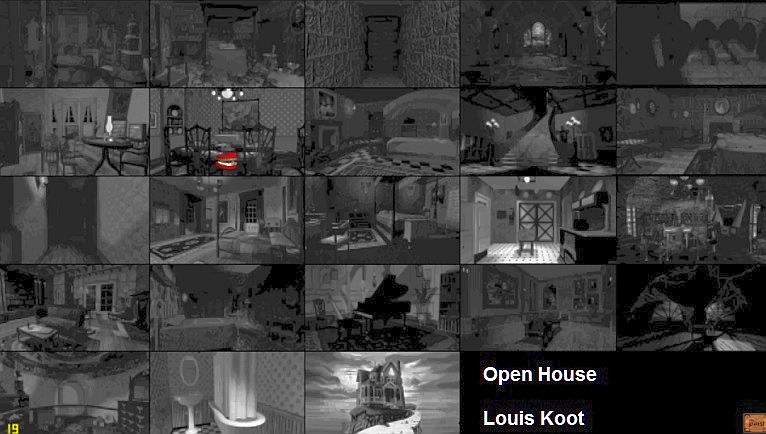
By clicking on a room, with the teeth or the eyeball, you go back to that room and you can see and do all the scenes and puzzles again.
This will stay that way, even if you close the game and restart. However, you will lose the Open House function as soon as you start a NEW GAME.
THE END
2009: Original Dutch Walkthrough by: Louis Koot
2019: English translation by: Louis Koot