2018: Walkthrough by: Louis Koot
If you have found this walkthrough via google search or via another site then you have probably not visited my site.
A lot more very detailed game walkthroughs can be found on my site at: www.pcgameswalkthroughs.nl
In The Frostune you unravel a mystery that is based on the centuries-old Mythology and Culture of the Vikings. You are a 13-year-old girl who, in the year 965, is the only survivor of a shipwreck and washed ashore on an island off the coast of Norway. Soon it appears that the island is completely deserted and that the inhabitants of the only village have fled away. In the woods of the village you will find ancient rune stones and burial grounds that help you solve the mystery.
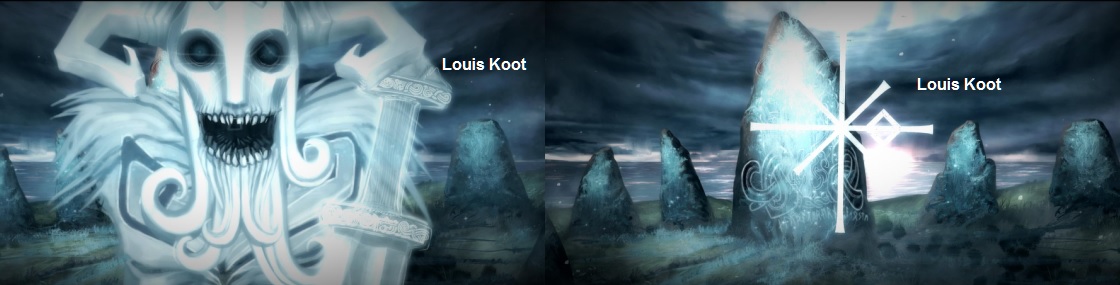
Click "New Game" to start. You will then see the short Intro ......
The year is 965 as a Viking ship sinks in the rough waves of the sea off the Norwegian coast. The only survivor of this shipwreck is a girl of 13 years and ...... You are that girl that girl.......You wash up on the beach of an island off the coast of Norway. The island is completely deserted, as you will soon find out.
Village:
Enter the Temple:
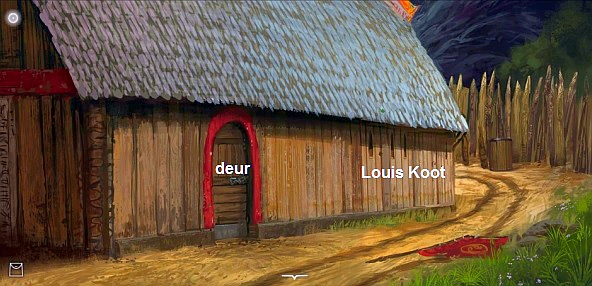
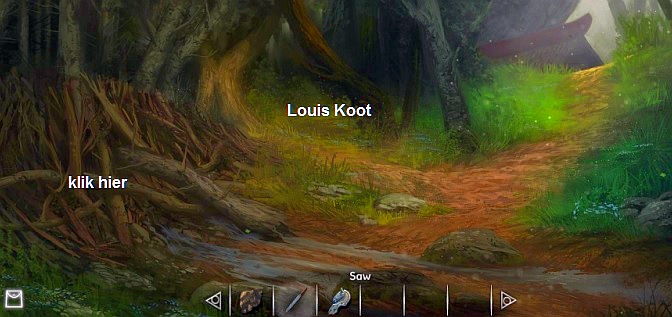
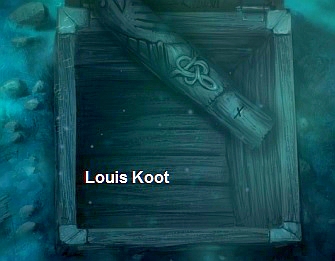
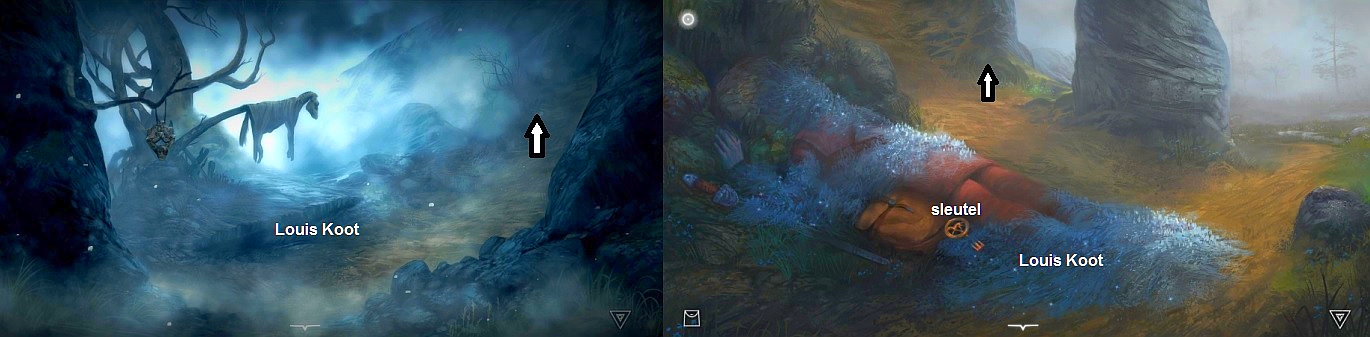
A box floats in the water. Click the box ....... but the box is locked. You will have to find the key to the box if you want to see what is in the box. On top of the hill you see the houses of the only village that's on this island. Click with your hand cursor at the houses to end up in the village.
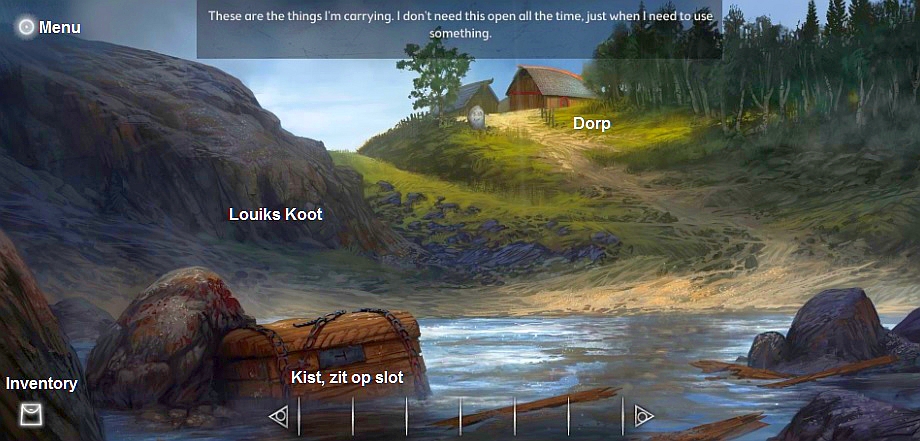
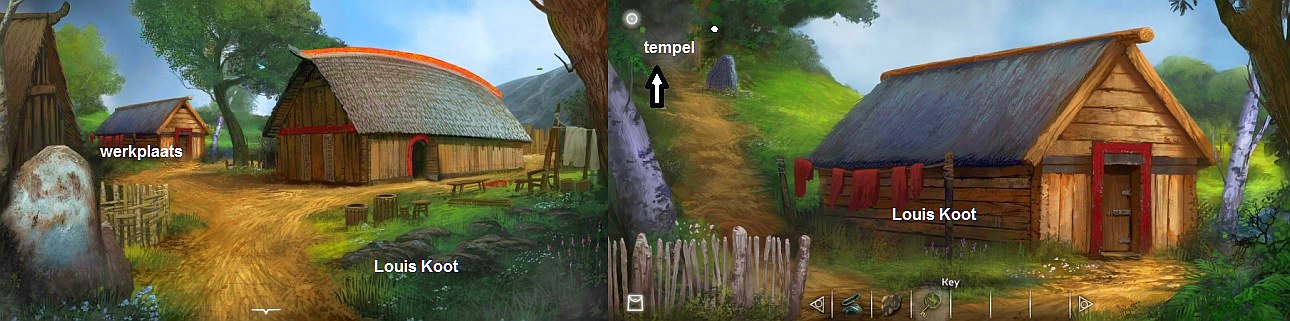
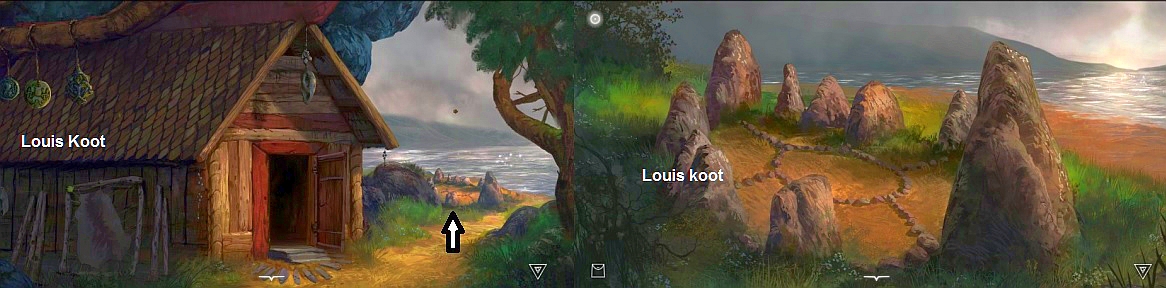
On the left stand a Rune Stone ..... the Rune Stone is covered with a thick layer of ice. The big house is the town hall of the village and the house behind it is the workshop. At the bottom of the screen you always see a white arrow .... that is the Step Back arrow ....... You click the Step Back arrow to return screens. To step forwards you continue to click with your hand cursor
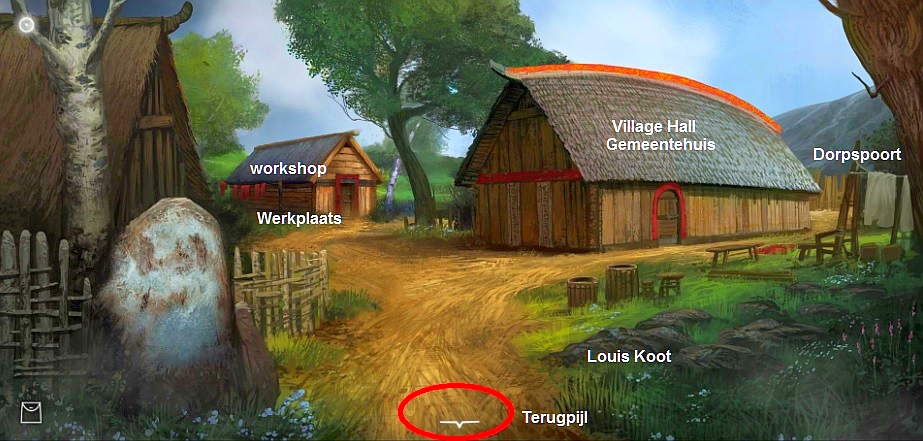
The door of the town hall is locked. Right behind the town hall is the Village Gate, but we will not go there yet. Click on, or just in front of, the workshop to end up there.
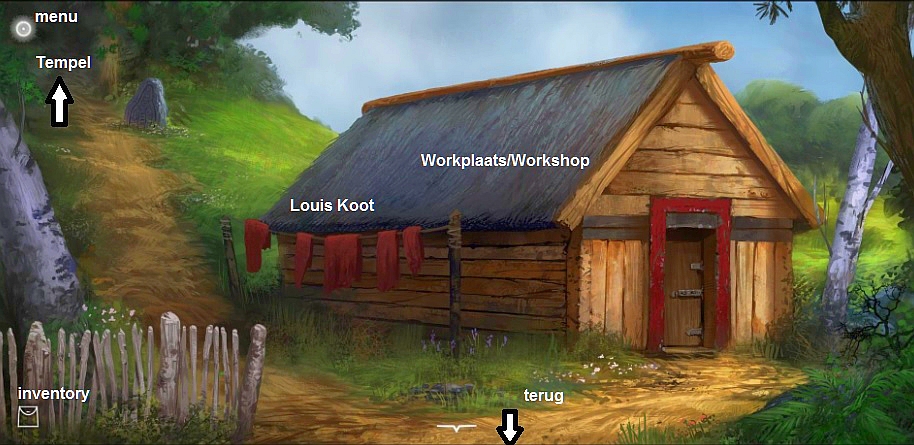
The workshop is also locked. The path continues up the hill, on the left side of the workshop. Click at the top of the path to go further up and .......
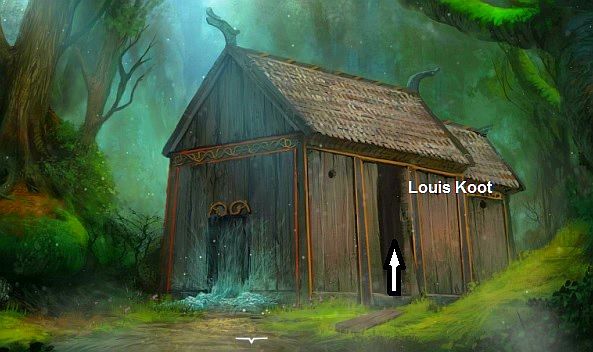
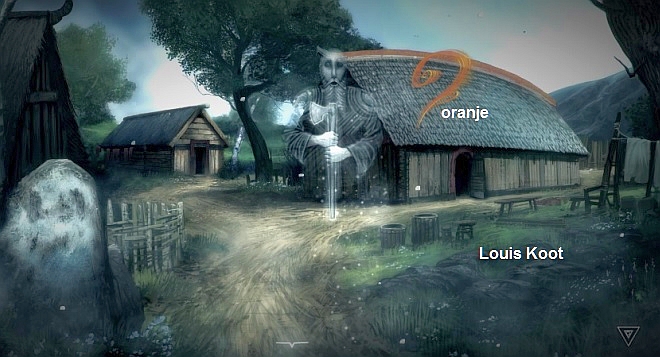
You end up the hill and at the Temple of this village. There is a knife in the grass ......
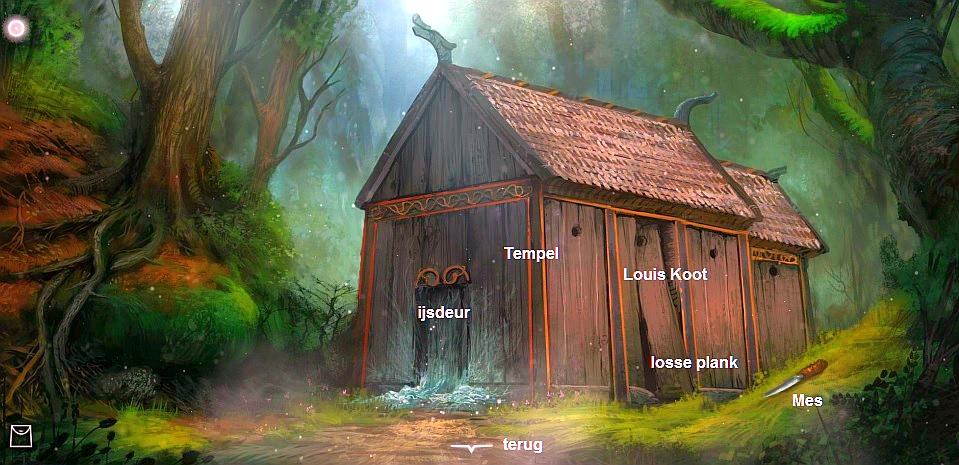
Take the knife ..... The knife is stored in your inventory.
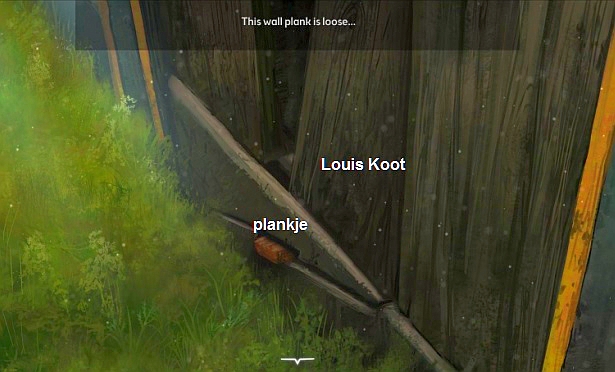
The front door of the temple is covered with a layer of ice, so you will not get in through the front door. However, in the side wall of this wooden temple there is a shelf that is already quite loose. Zoom in on the loose shelf. You will then see the bottom part of the shelf. The loose plank, however, sticks with a small plank that holds the loose plank in place like a wedge. You need something with which you can remove that small shelf.
Click 3 times the back arrow to return to the Town Hall. Click on the door of the Town Hall. You arrive at the door. However, the door is locked.
Further on stand a wooden bar ...... Click on the wooden barrel and ......
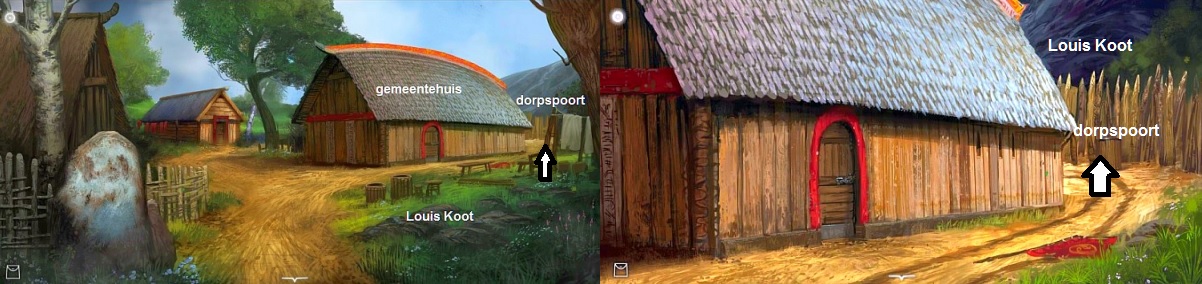
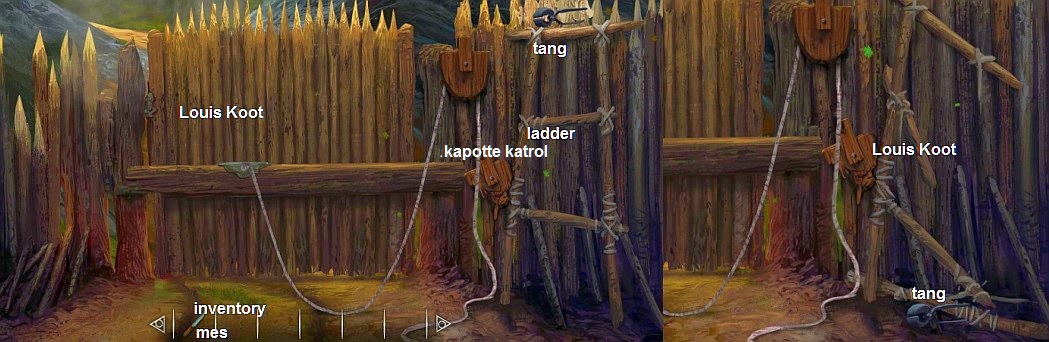
You have arrived at the Village gate. The gate is closed. On the right are 2 pulleys where the rope goes through. However, the lower pulley is broken. To the right stand also a ladder against the wooden wall and above that ladder lies a pear of pincers on the wooden wall. The ladder is tied to the wooden wall with a rope. Click on the ladder or on the pincers ....... You think that if you cut the rope, the pincers will fall to the ground. Open the inventory and then select the Knife and then click with your hand on the ladder and ........ You cut the ropes and therefore the ladder collapses and the pincers fall to the ground. Take the pincers.
Close the inventory and click twice the back arrow to return to the Town Hall. Then head back to the Workshop and then further up the hill to the Temple. Back at the Temple you click again on the loose shelf. In inventory, select the pincers and then click with your hand on the locking board to remove the shelf and the separate plank from the façade.

You automatically leave the close up and you can now enter the Temple through the hole in the side wall. So go inside.
Temple
The Seer:
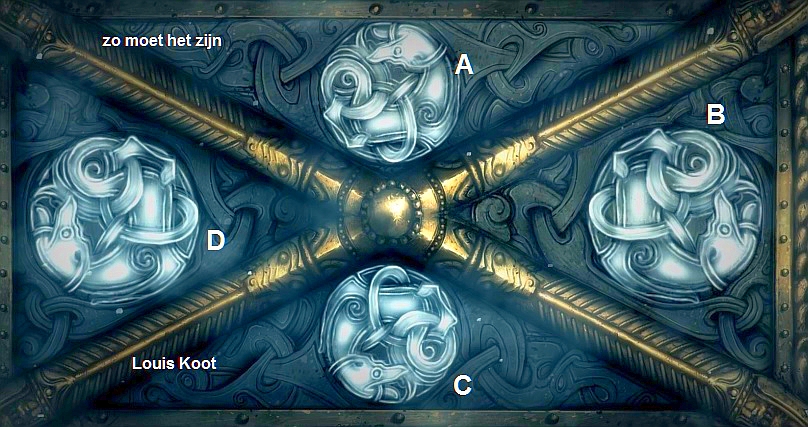
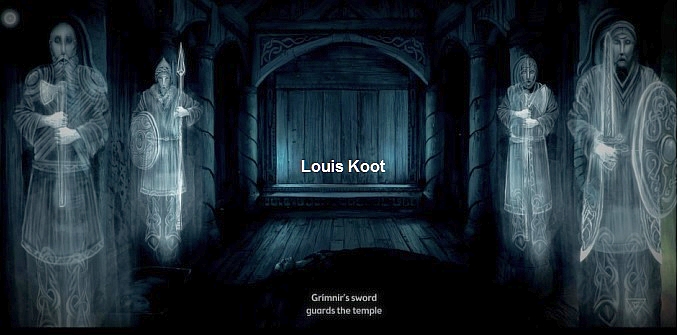
It is a small temple. On the floor lies the body of the Seer. Left and right are two life-size statues of Viking knights. Number the 4 knight statues, from left front to the right, A, B, C, D.
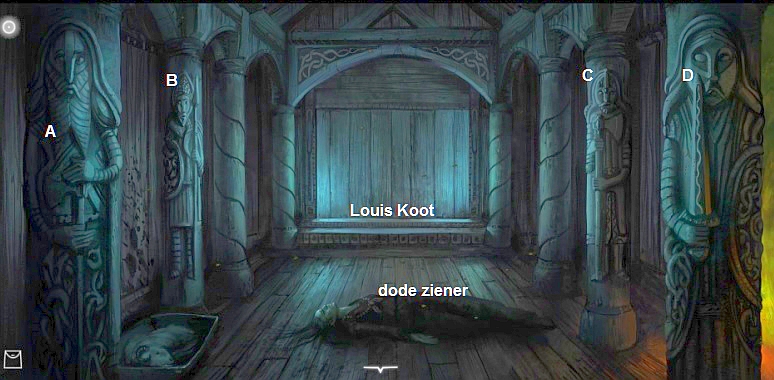
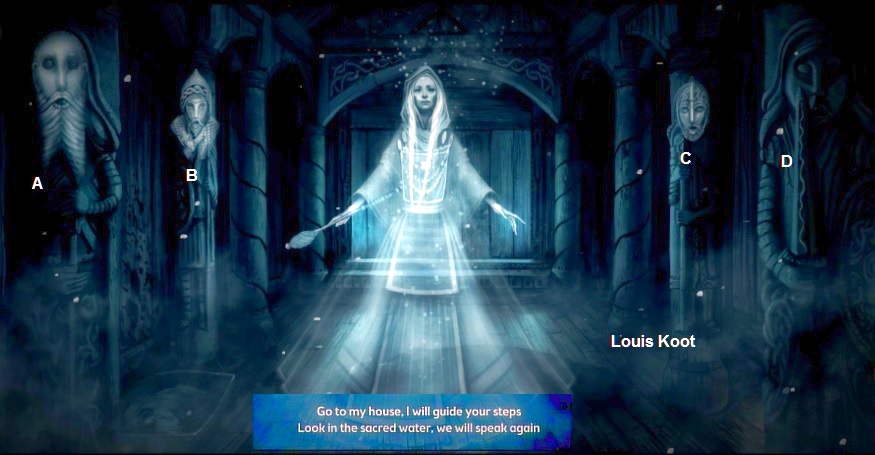
Click on the deified body of the Seer and ...... the Spirit of the Seer appears and she talks to you. Note that at the end of this "conversation" you see 3 of the 4 knight's heads light up ...... Remember which of 3 knight heads light up. The Seer tells you what she wants from you. You must find the house of the Seer and enter it.
When the Seer is done talking to you, she will disappear again. Behind the body of the Seer is then a key. Grab the Key ...... It's the Key to the Town Hall .....

Now take a good look at the 3 knight's heads that you saw light up ... they were the heads of the Knights A, B and C. Take a good look at those knights because you have to recognize them later.
Click 3 times the back arrow to get back in front of the Town Hall.
Town Hall:
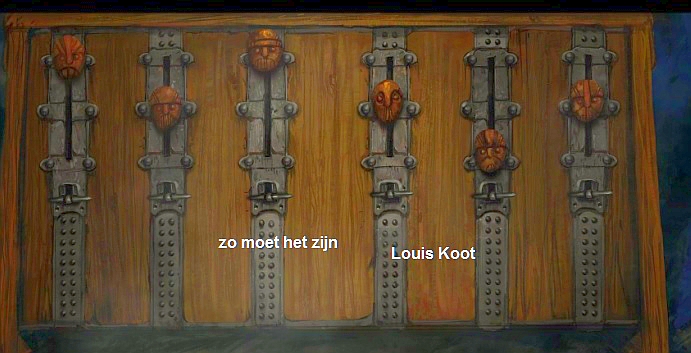
Click twice on the door of the Town Hall ..... You are then in the close-up of the door lock of the Town Hall door .. The lock consists of 3 keyholes. In the middle and in the right lock already is a key, but that key is missing in the left lock. So select the key you have, just found, in inventory and then click with your hand on the keyhole in the left slot to insert the key.
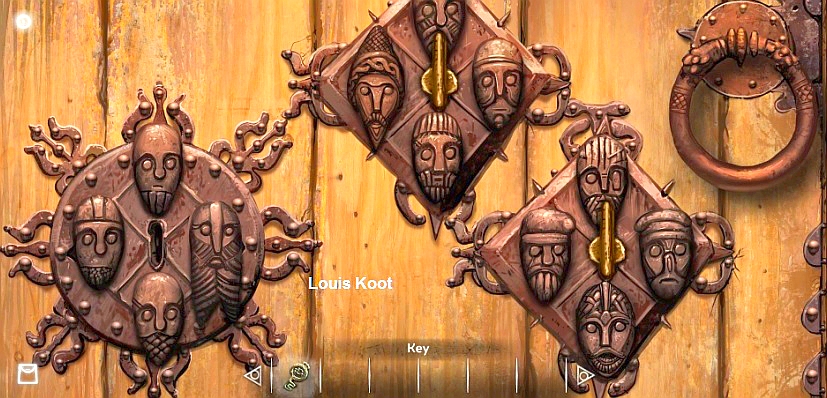
However, the door does not open yet. On each of the 3 locks you see 4 faces and on each of the 3 locks one of those faces is a face that you saw light up in the temple. Click on each of the 3 keys to spin them ... So turn each of the 3 keys to the face you saw light up in the temple ...
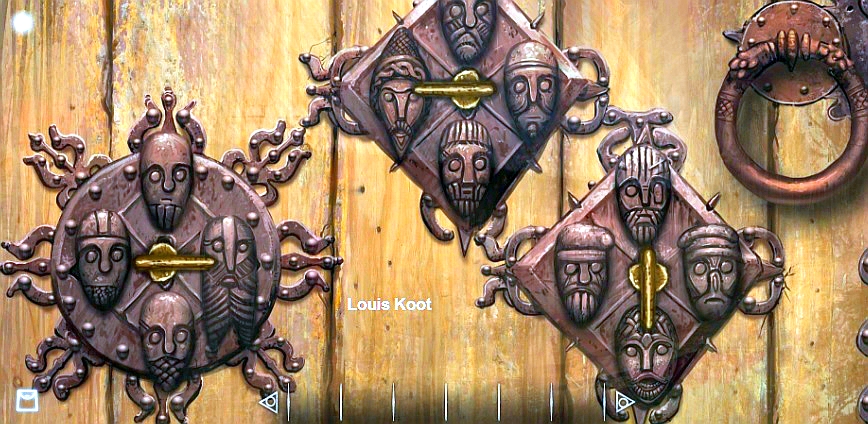
When you If you have done well, you will automatically leave the close-up and you can go inside through the now open door. So do that. You are then inside the Town Hall.
On the long table lies a Pulley and a Flint. On the left wall hangs a tapestry. Take the Pulley and take the Flint.
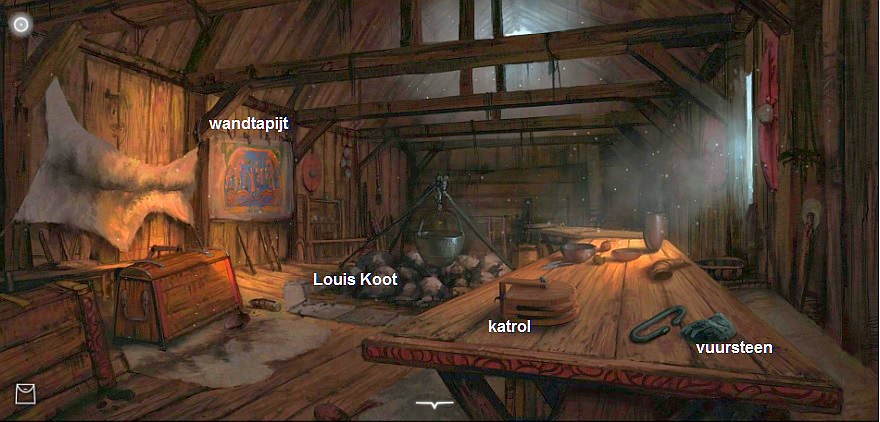
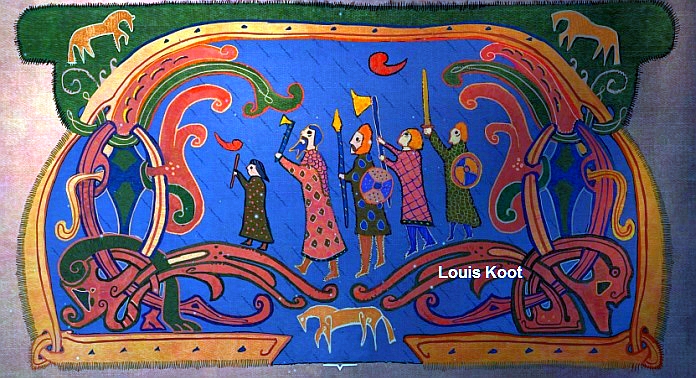
Look at the Tapestry in close-up ... On the tapestry you see 5 figures of different sizes. Each of the figures has a weapon in his or her hand.
Remember the order in which these 5 figures stand and which weapon they have in hand.
Click twice the back arrow to end up outside the Town Hall. Click again on the wooden bar to get back to the
Village Gate.
Select in inventory the just found Pulley and then click with your hand on the broken pulley to replace it with the new pulley.
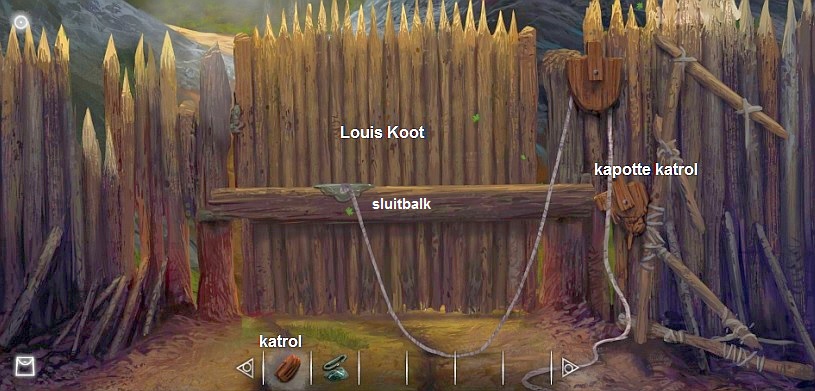
Then click on the wooden gate beam with which the gate is closed and ...... the gate opens.
Explore the area outside the Village and find the Key to the Workshop
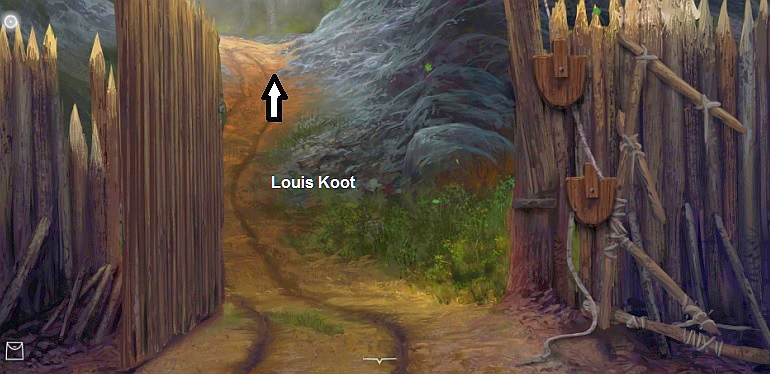
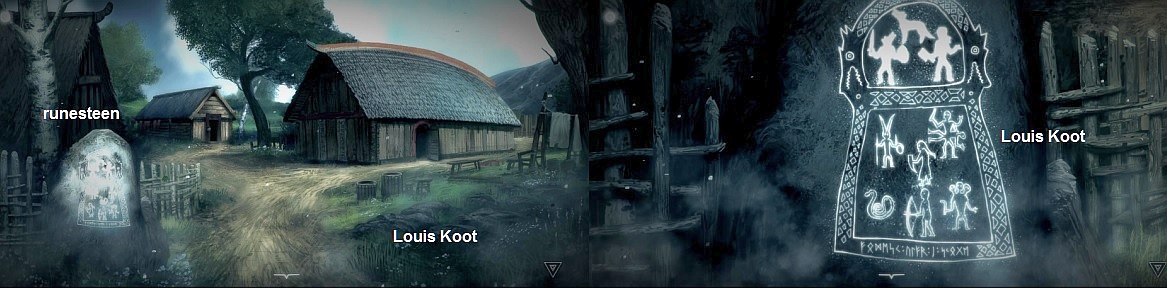
Go 1 time ahead through the gate and ..... You end up at Crossroad 1. Straight ahead it goes to Crossroad 2. To the right the path goes to Crossroad 3. On the left a part of the rocky mountain has collapsed. In front of the collapse, on the middle of the crossroad, lies is a wooden board.
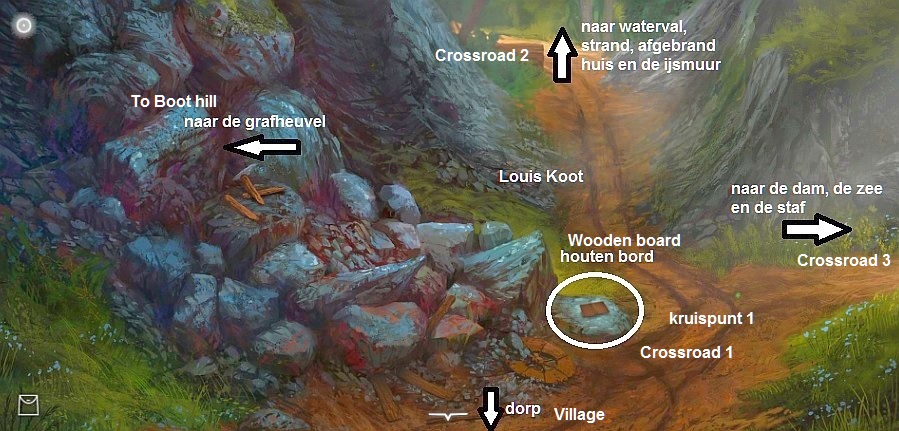
Click on the wooden board to view it in close-up. On the left part of the board a story is written in rune language .... Click on the story and ...... it is translated in English ...... read the story
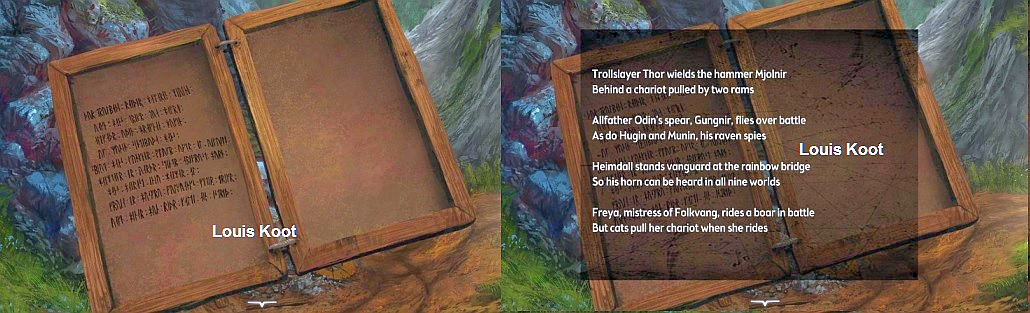
The story tells you about the 4 main gods of the Vikings and their attributes. Click next to the wooden sign to go out of the close-up ......
NB: If you accidentally click the back arrow then you will return to the village gate ... If you do this then immediately return to Crossroad 1.
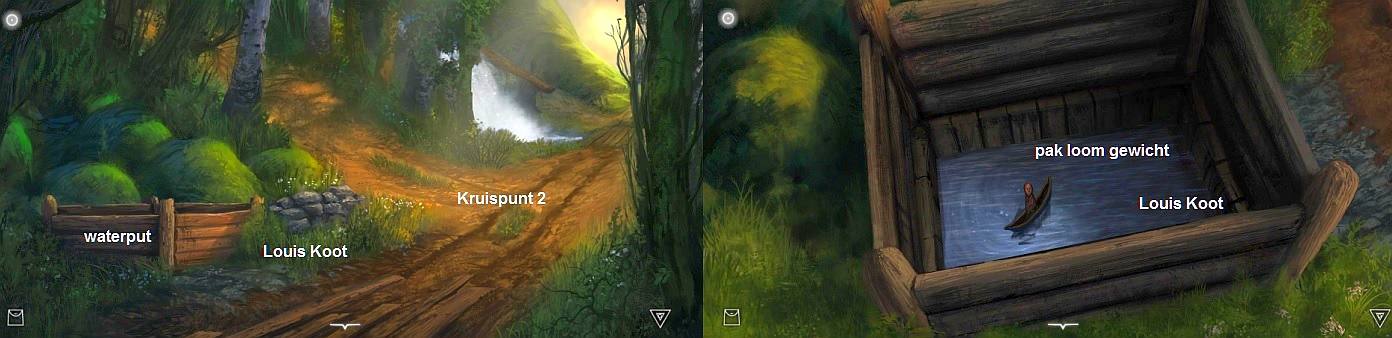
On Crossroad 1 move 1 screen forward to Crossroad 2. Left next to the path you see a square wooden well. Straight ahead the path goes to the waterfall and then further to the beach. Past the well, there is also a path to the left, deeper and higher into the forest.
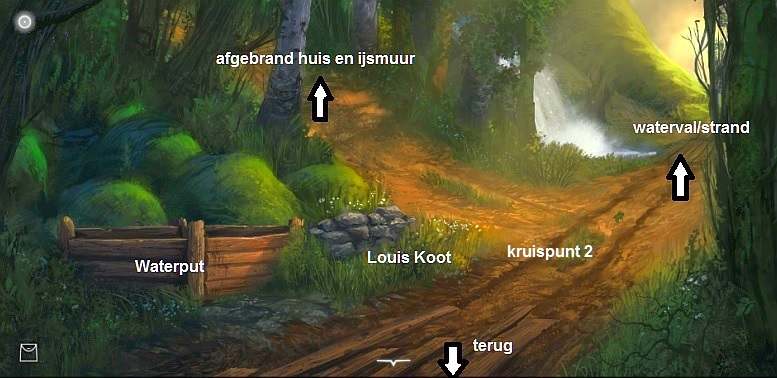
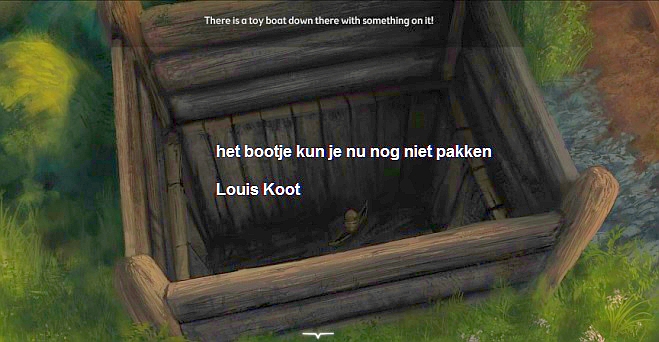
Click the well ..... You look into the well ..... the well is dry ... at the bottom of the well you see a small toy boat but the well is too deep to take the boat.
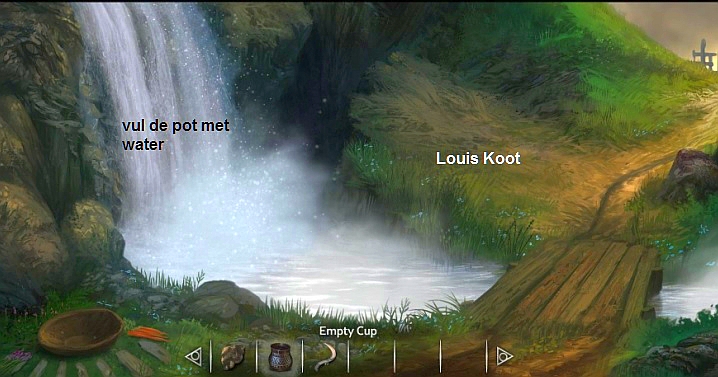
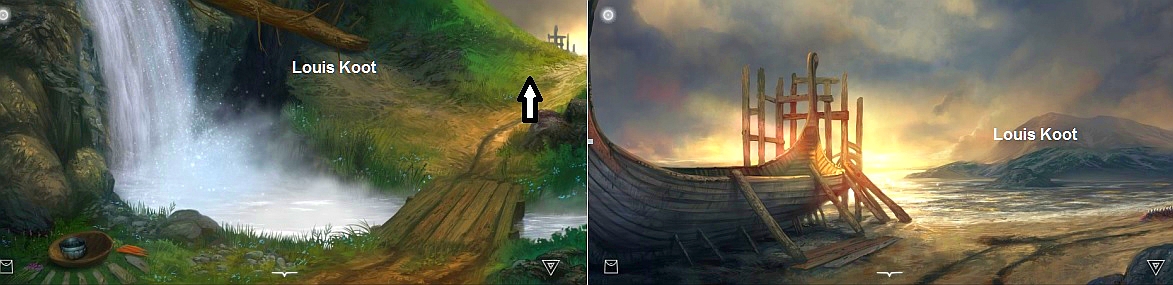
Click the back arrow to get out of the close-up and then continue 1 screen ahead, to the waterfall. There is a sacrificial scale at the waterfall.
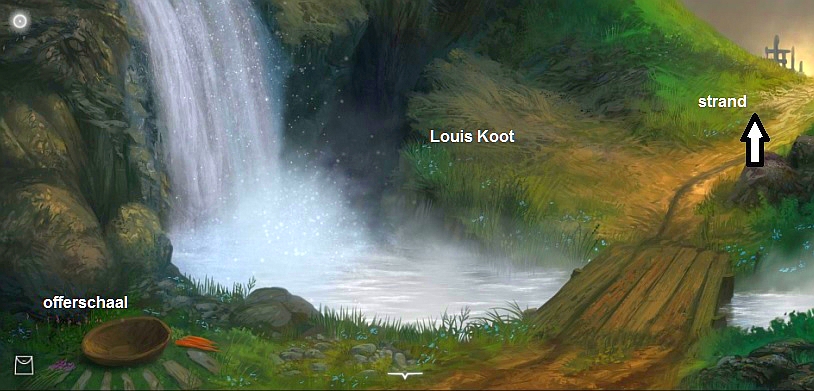
Apparently the villagers put their sacrifice for the water god in this scale.
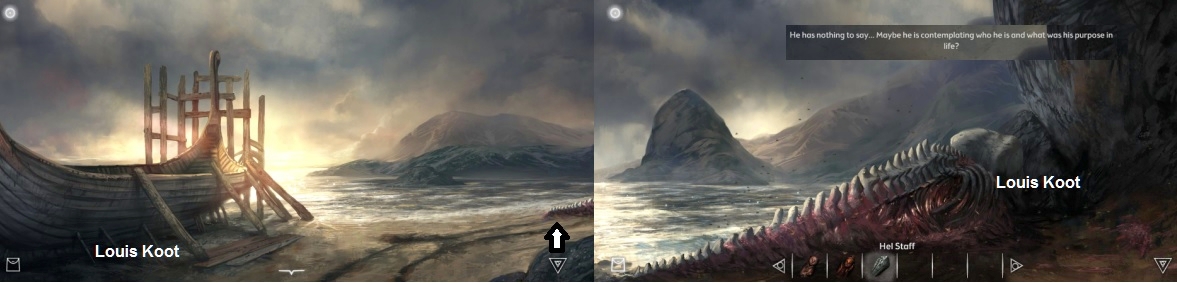
You can not take the scale and you have nothing to offer the Water God at the moment, so continue ahead to the beach. There is a Viking Ship on the beach.
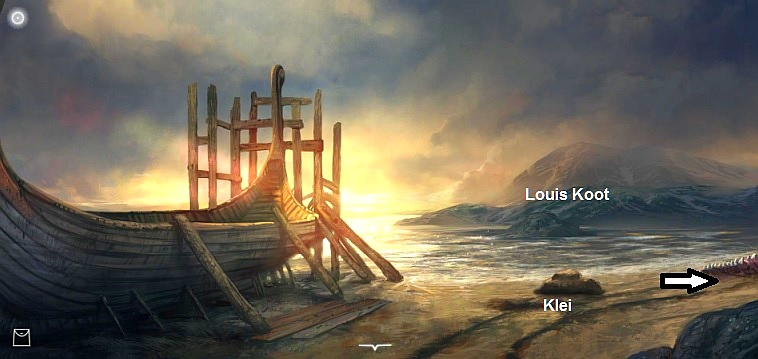
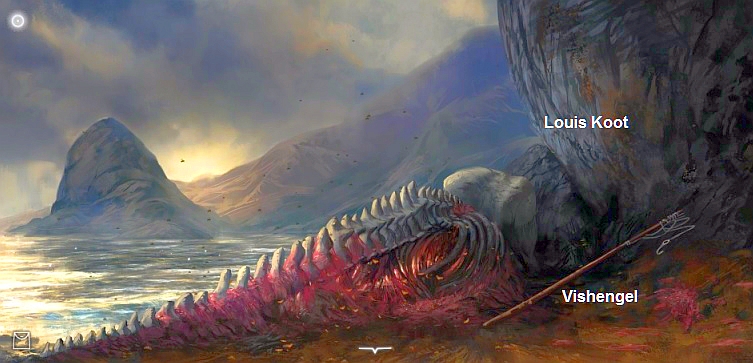
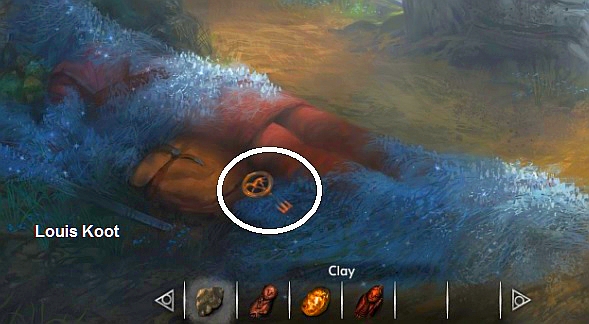
The Viking Ship is clearly under construction or in "renovation". On the right you see the stinking decaying remains of a sperm whale. Between the Viking ship and the dead sperm whale lies a big lump of clay on the beach. Take the Clay. Click on the sperm whale to end up there. A fishing rod leans against the decaying remains of the sperm whale,. Take the fishing rod.
Click 3 times the back arrow to get back at crossroad 2. Now take the left path up the hill.
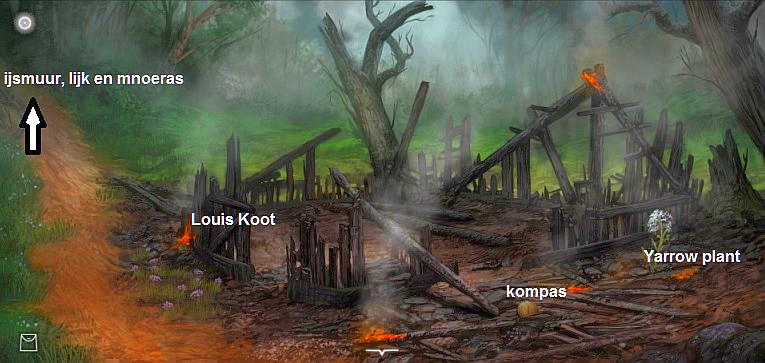
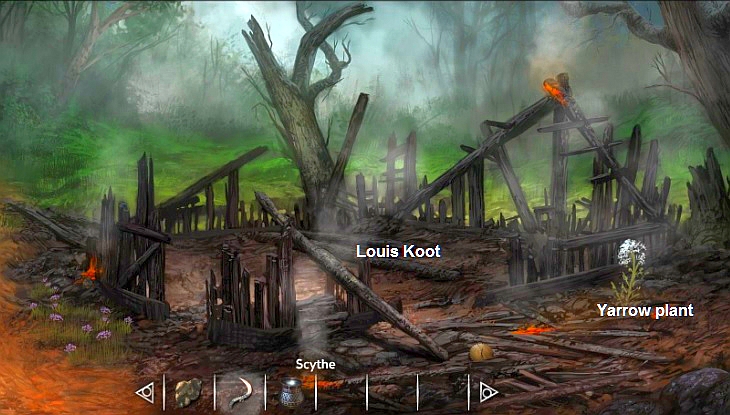
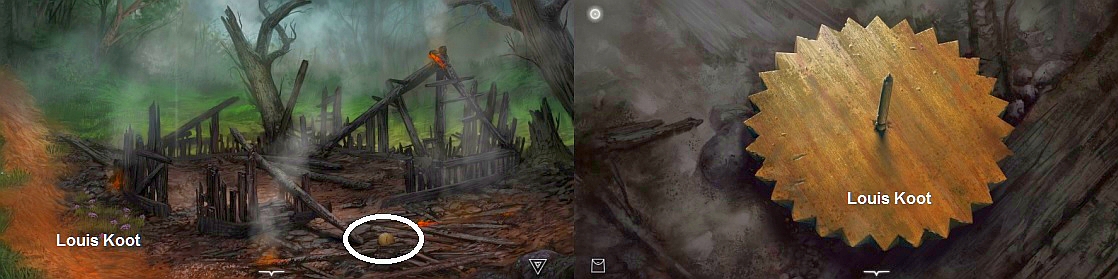
You end up at the Burned Down House . Well ... It's still burning, so the fire has raged here not so long ago. A wooden Compass sticks out between the smoldering remains and a single white plant grows here as well. You can zoom in on the round wooden compass but you can not do anything with it now. If you click on the white plant then you read that it is a Yarrow plant. The path goes up so go further up and ..... You end up at the
Arrow Head Rock and Ice Wall.
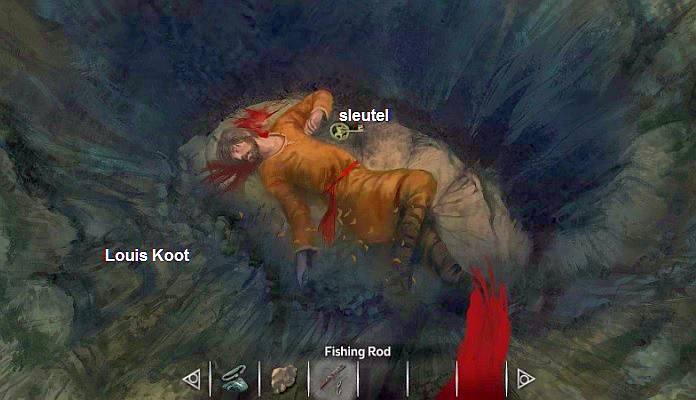
A thick rock, which has the shape of an arrow head, lies over the path. You can go to the ice wall under the arrow head, but do not do this yet. Right next to the wooden board is a deep hole.
Look in the deep hole and ....... Oops ..... At the bottom of the hole lies a fresh corpse ...... certainly one of the villagers and he hasn't been killed long ago, but the maggots are already eating on the corpse. At the body is the key for the workshop but the hole is too deep to get the key with your hands. So select the Fishing Rod in inventory and then click with your hand on the Key, to get the with the rod to your inventory.
Click the back arrow to get out of the close-up. Now click below the Arrow Head rock to get to the Ice Wall.
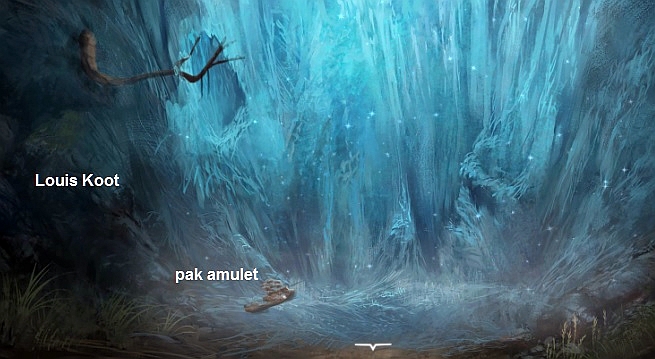
The ice wall is an impenetrable barrier but in the ice an Amulet sticks, behind the branch that protrudes from the rock. Unfortunately you can not take the Amulet yet.
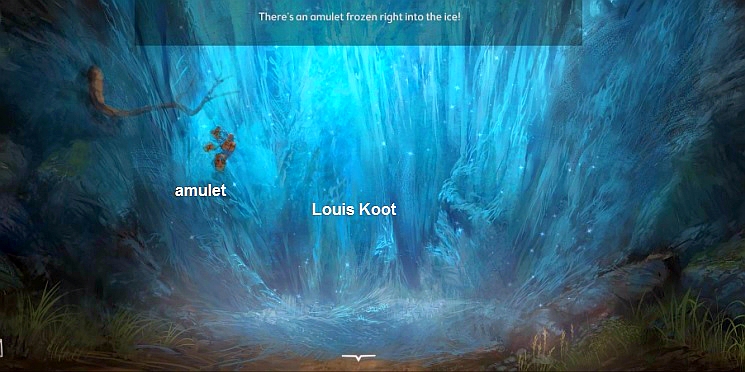
We will come back here several times later. You now have the workshop Key, so let's go back to the village.
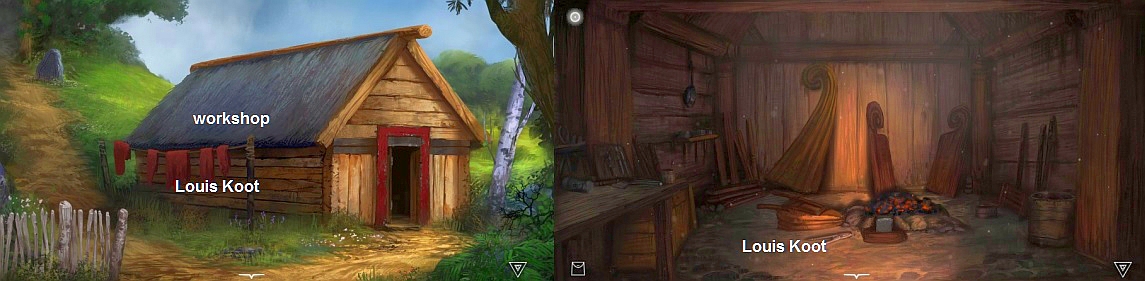
Village: Workshop:
Click 7 times the back arrow to return at the Town Hall in the Village. Then head back to the Workshop. Select the key in inventory and then click on the door of the workshop
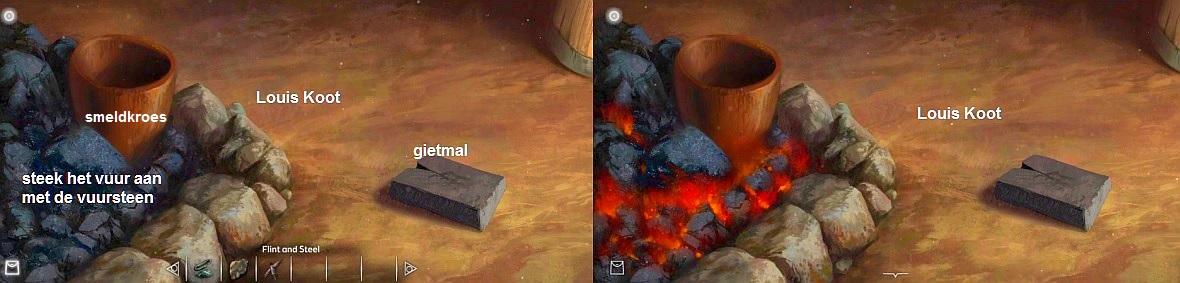
The door opens, so enter. To the right a Pickaxe leans against the wall and in the middle is the Fire Pit. Pick up the Pickaxe.
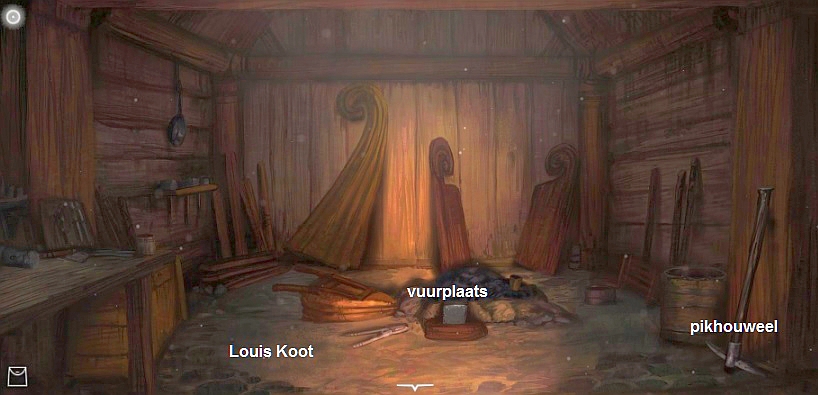
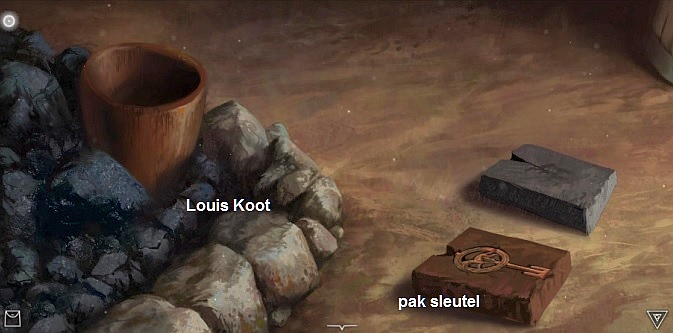
Click on the fire pit. The fire is out. In the coal of the fire pit there is a melting pot and there is a casting mold in front of the fire. You have no material to melt and to pour into the casting mold but you can light a fire. Select the Flint in inventory and Steel and then click with your hand on the coal under the melting pot and ..... you have a fire.
We'll come back later to cast the key for the chest. Now go back to Crossroad 1 via 3 times the back arrow and then 3 times ahead.
On the collapse rocks are a few wooden planks. Select the Pickaxe in inventory and then click on the rocks, where the 3 wooden planks are located, and ........
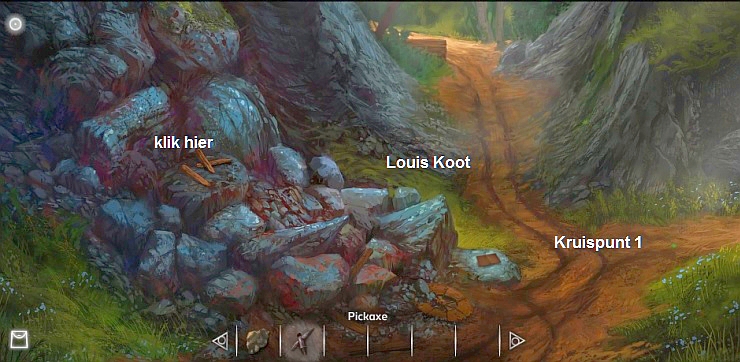
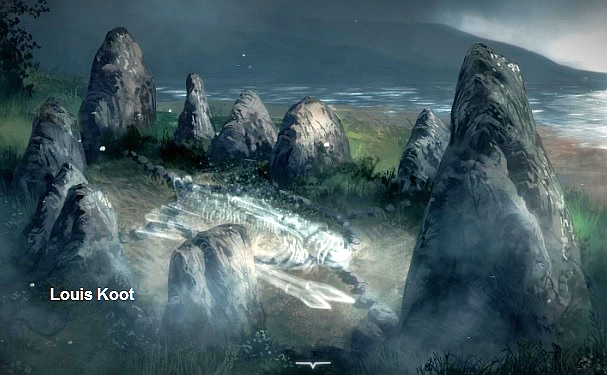
You have made a hole in the rocks through which you can crawl. So crawl through the hole and ....... you end up on the other side of the rock at a green burial mound.
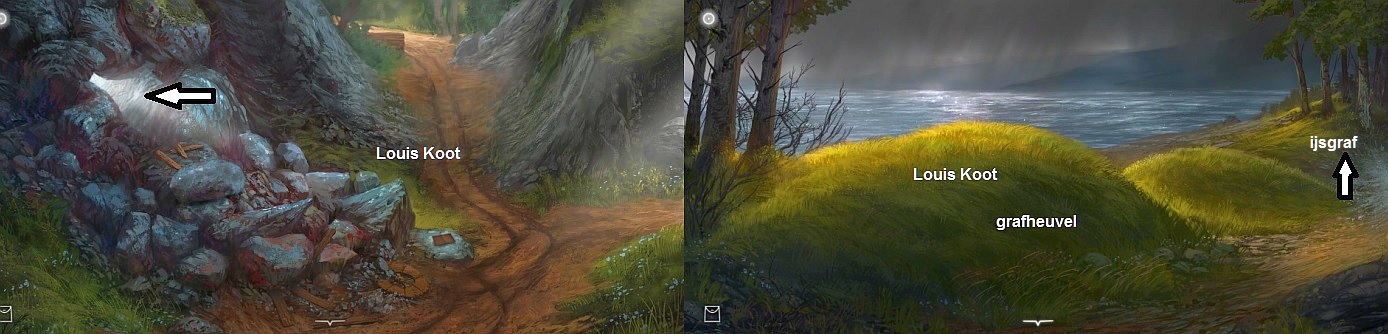
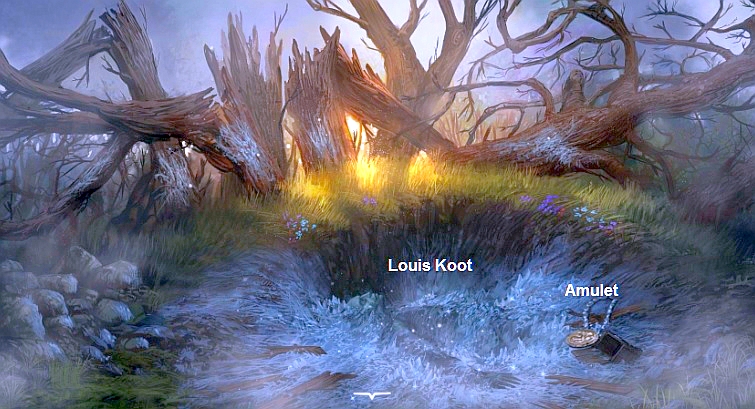
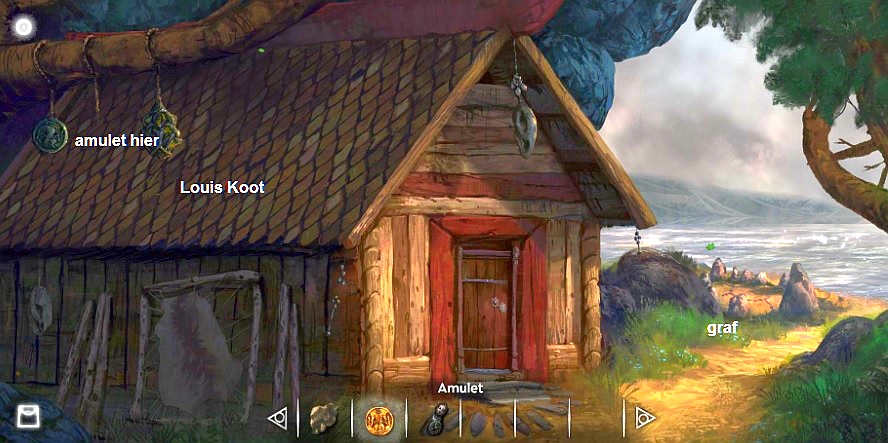
Go one screen further ahead, to the trees and ...... You end up at an ice tomb. An Amulet lies on the ice-grave. Take the Amulet.
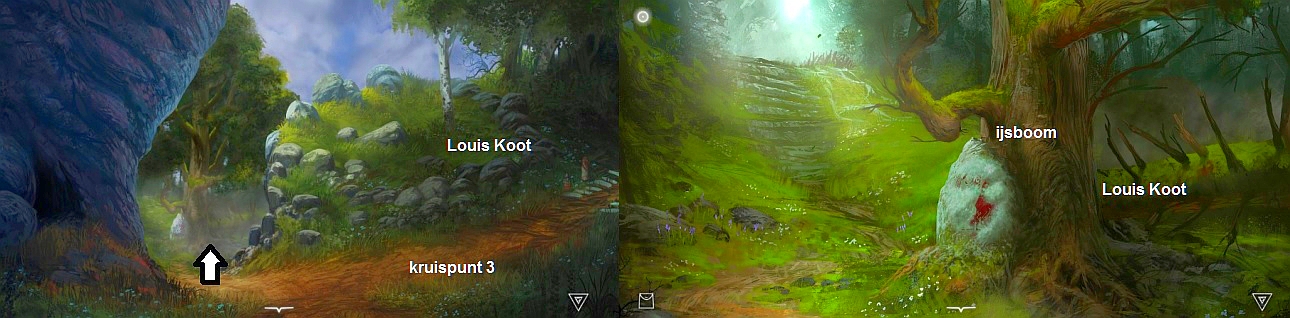
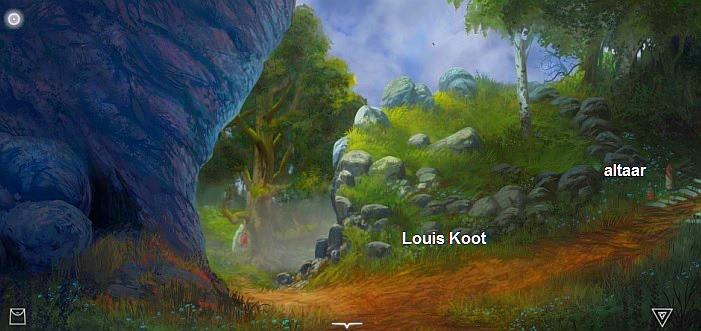
Click 2 times the back arrow to return to Crossroad 1 and then follow the path to the right and ..... You are at Crossroad 3. The path splits to the left and to the right. To the right is a kind of Altar. Go look at that Altar for a moment. The altar has sculptures but everything is covered with a layer of ice. On the altar there is a broken Amulet but you can not take it because of the ice.
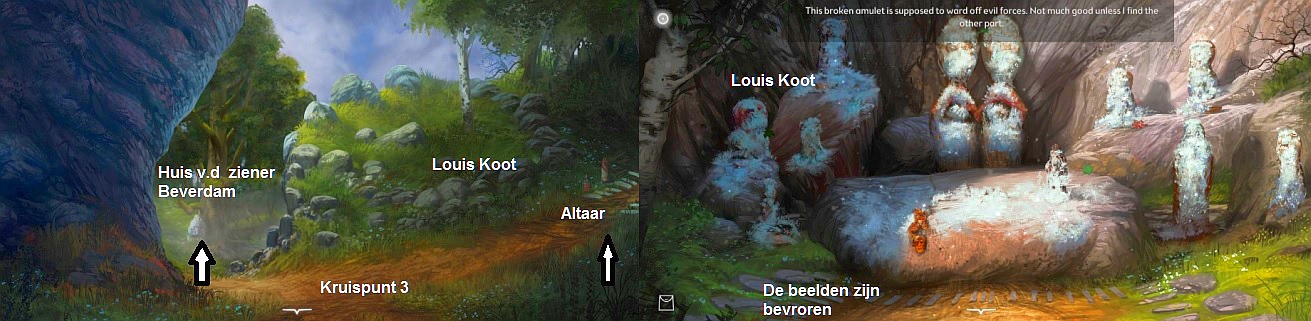
Click the back arrow to return to Crossroad 3 and then continue along the left path. You come at the Ice Tree ..... I call this the Ice Tree because of the ice lump against the tree. You can look at the ice lump in close-up and if you do that you will see that it is in fact a frozen Rune Stone. But you can not do anything with it now, so click the back arrow to get out of the close-up. Beyond the "ice tree" the path goes up to the Beaver Dam. Continue a screen further to get to the top of the Beaver dam. The path continues to the Seer House, but to the left is a clearing in the forest arranged as a children's playgrounds. The Beaver dam is blocking the river here ..... if you click on the beaver dam then you think that you could break the dam if you had the right tools for it.
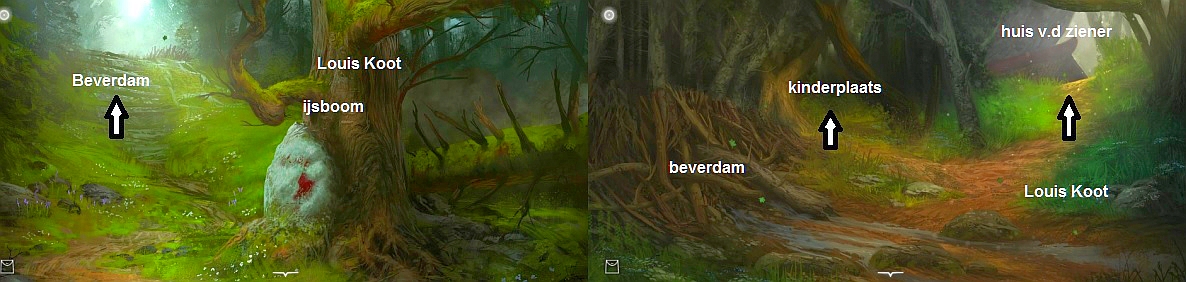
Take a short trip to the Children's Playground. There is a small house on the playground and in front of the house stand a Loom weight statue. In the trunk of the thick tree, between the thick roots and behind the house, the children of the village carved a drawing. Take the Loom weight statue.
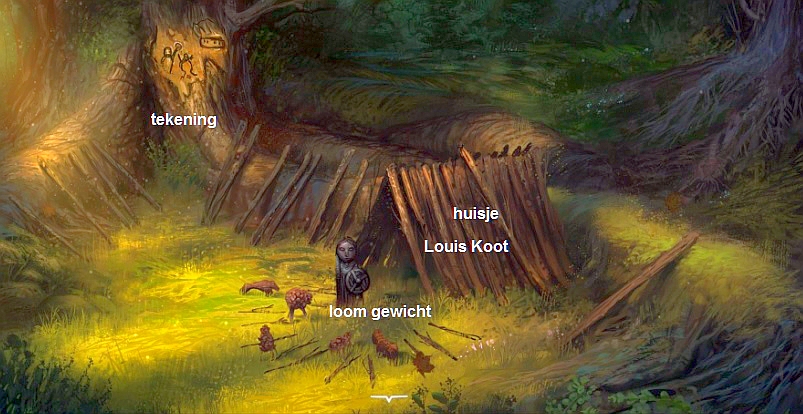
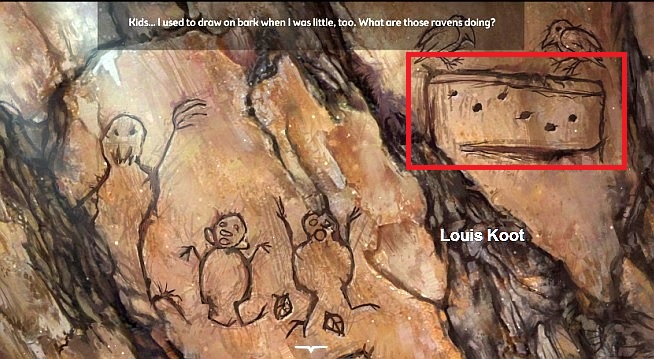
Click on the drawing to view it in close-up. Top right you see a bird .... the bird sits on a rectangle and in the rectangle you see 6 dots that are at different heights in the rectangle. Remember the positions of the 6 dots in the rectangle, or even better ... make your own drawing of it .......
Click twice the back arrow to leave the children's playground again and then continue on the path to the:
Seer House:
Past the house is a grave, but we'll see that later. The door of the house is locked and you do not have the key. There are 2 amulets hanging from a thick tree branch, but apparently there suppose to be 3. Select the Amulet, which you found at the ice tomb, in inventory and then click with your hand on the string that hangs between the 2 amulets and ..............
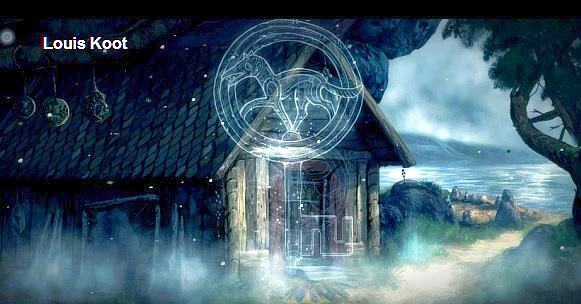
You hang the Amulet between the both other amulets and ...... you go into the "Spirit View" for a moment and you see a vision of the key of the house.
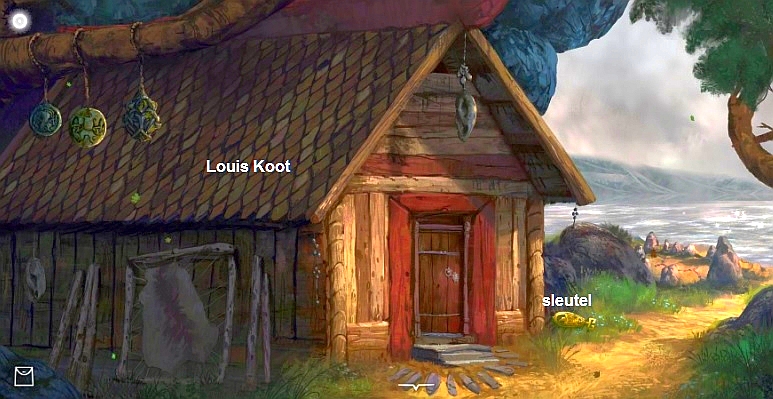
You come back in the real world and ..... right next to the house you will now find the key. Take the key
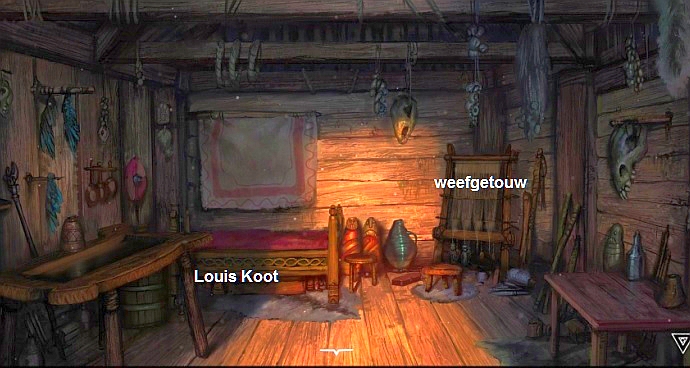
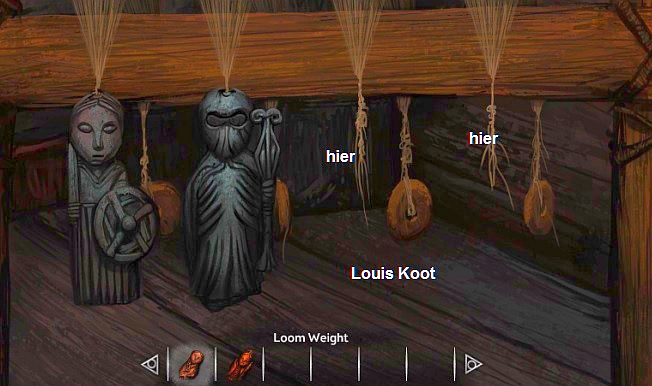
Select the key in inventory and then click on the door of the house .....the door opens, so go inside. Against the right wall stand a table on which a scythe lies. In the back right corner stand a loom and a silver pot. At the left wall stand a wooden water basin. Take the Scythe and grab the Silver Pot.
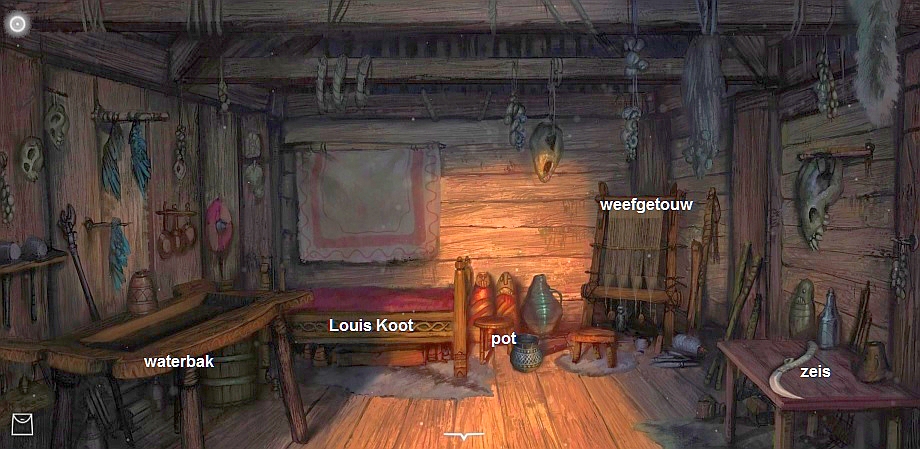
Click on the Loom to view the thing in close-up. You look at the bottom of the loom. There is only 1 Loom Weight at the loom .... the 3 other Loom weights are missing. But you have already found 1 Loom weight so select that weight in inventory and then click on 1 of the 3 stings to hang your Loom weight there.
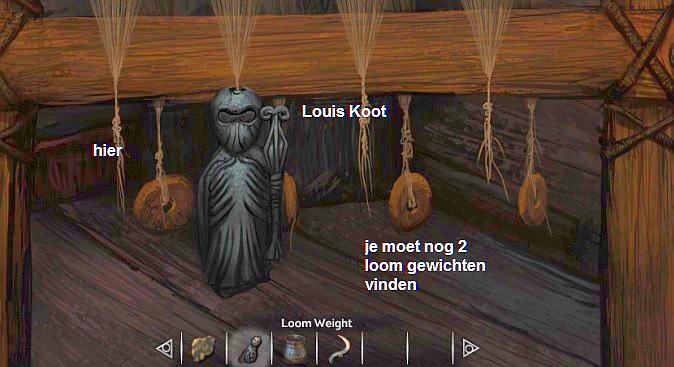
You have to find 2 more weights and then hang them here on the loom. Click the back arrow to leave the close-up. Then click on the water basin to look into it. The water basin is empty but something has been written on the bottom in rune language. Click on the rune text and it will be translated ........
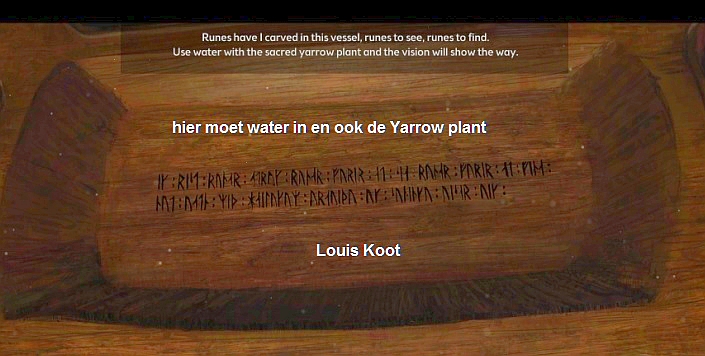
You read that you have to fill the water tank with water and that you also need to throw in a Yarrow plant.
So you need water and the Yarrow plant. You can get water at the waterfall and the Yarrow plant can be found at the Burned Down House. So click 5 times the back arrow to return to Crossroad 1 and then ahead to Crossroad 2 and then another screen ahead to the Waterfall. Select the silver pot in inventory and then click on the waterfall to fill the silver pot with water.
Return to Crossroad2 and then go, via the left-hand path, to the Burned down House. Select the Scythe in inventory and then click on the white Yarrow plant to take this plant.
Return to Crossroad 1 and them go on via the right-hand path again to Crossroad 3. Continue via the ice tree and the beaver dam to the Seer House. Enter the Seer House again and zoom again in on the water basin. Pour the water from the silver pot into the water basin and then throw the white Yarrow plant in and...... ........ You get to see a vision in the water ..... you see Crossroad 3 and you see that on the left, at the boulders, a light appears.
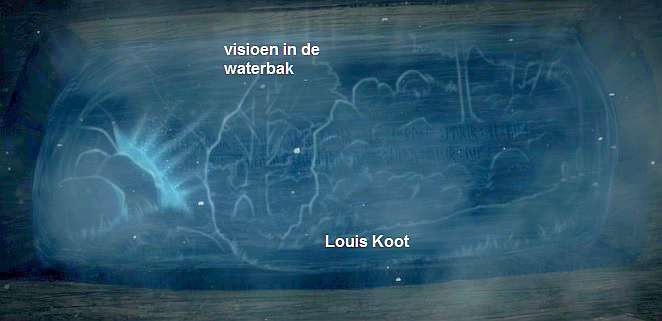
When the vision has disappears again, click 5 times the back arrow to return to crossroad 3.
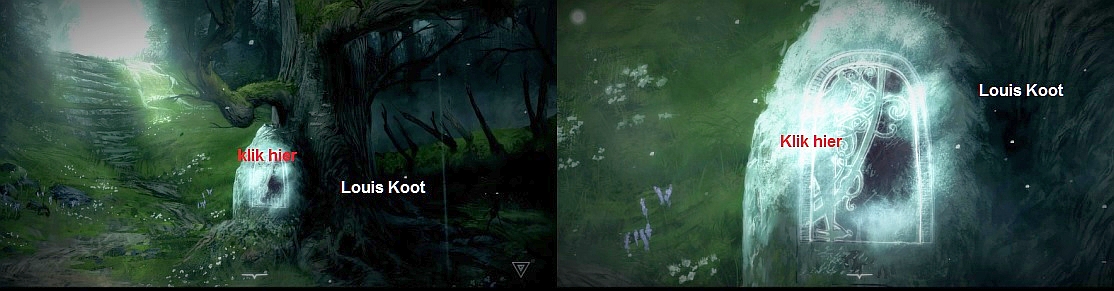
On the left you see those boulders that you just saw in the vision in the water. Click those boulders to open a small cave
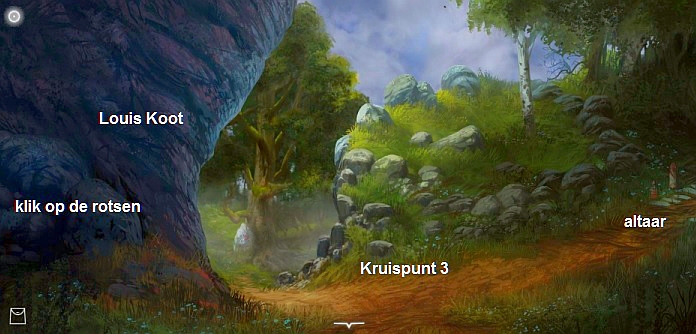

Click in the cave opening and ......... you have found the Staff of the Seer.... Click on the Staff to take the thing ......
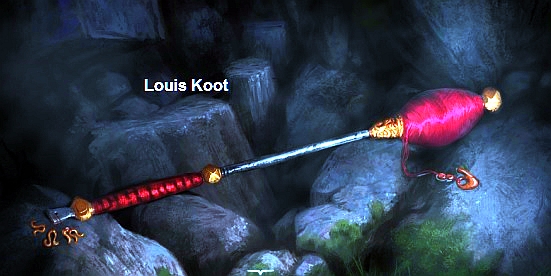
You go back to the "Spirit View" for a moment ... The Spirit of the Seer appears and she explains a few things about the use of the staff.
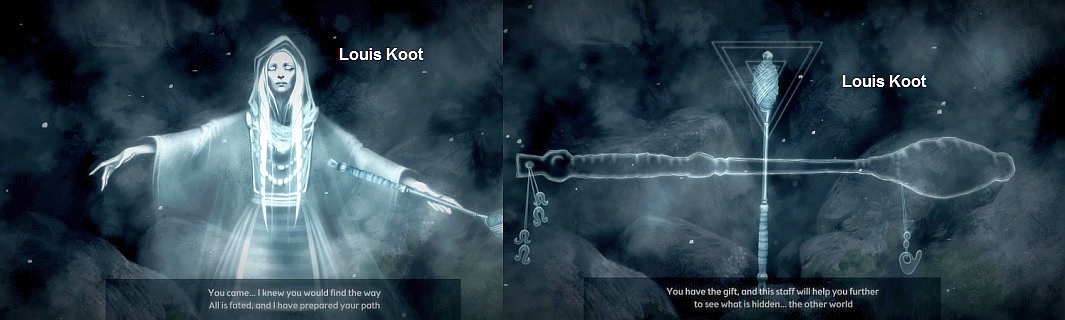
When the Seer is gone again, you have her Staff in inventory. Click the back arrow to get back to the crossroad.
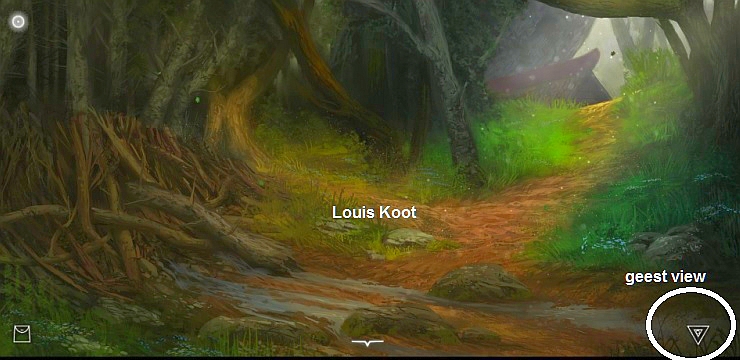
From now on you can switch between the real world and the Spirit world via the triangle that is now always at the bottom right of your screen .... I call this the "Spirit View". To see the Spirits, you click the triangle. To leave the Spirit world, click the triangle again. We are now going to search for the spirits of the four knights who are standing in the temple.
Go back to the Beaver dam via the ice tree.
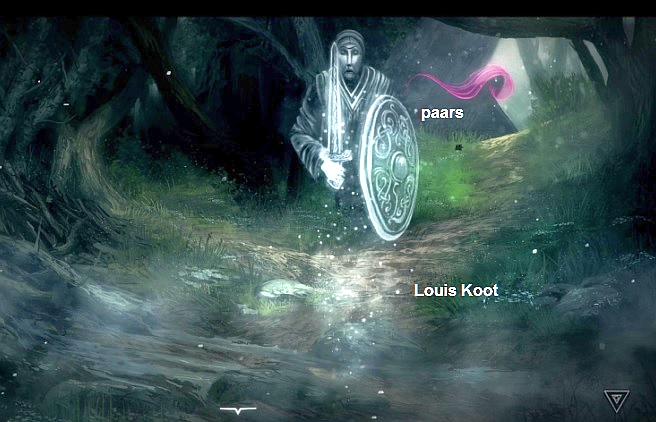
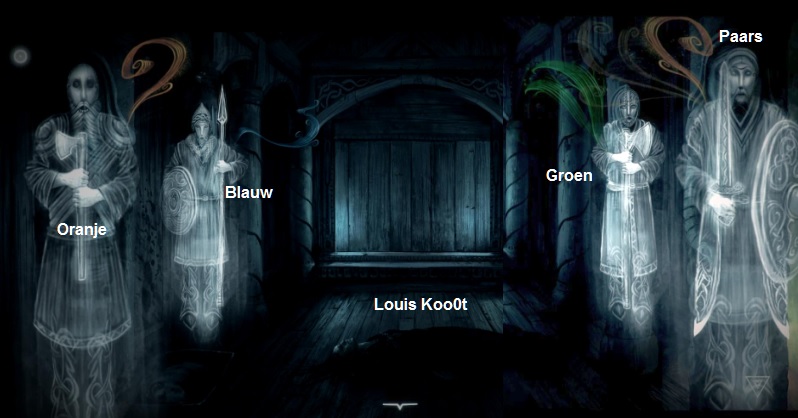
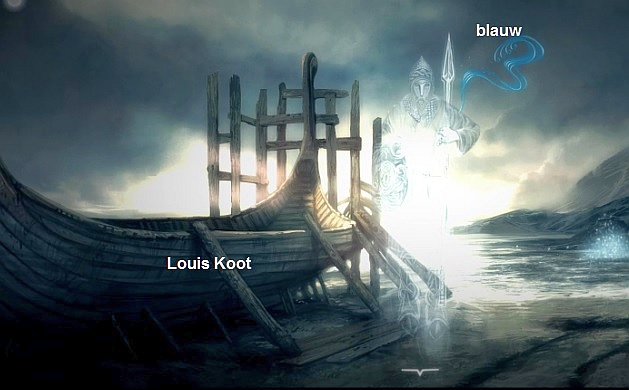
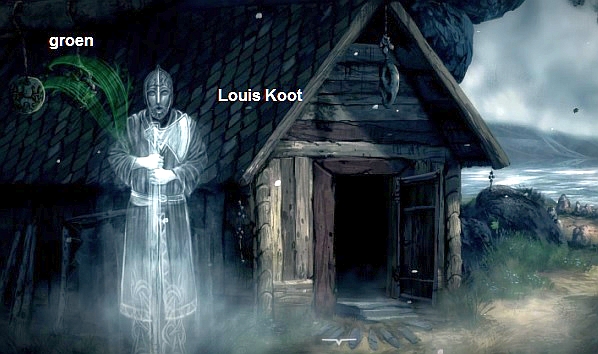
When you are at the top of the beaver dam, click the triangle at the bottom right of your screen to get into the Spirit World. You'll see the spirit of one of the four knights. The knight sings a chant. A banner sticks out from the back of the knight ...... The color of the banner of this knight is PURPLE ..... This is Knight D ..... remember that Knight D has a purple banner.
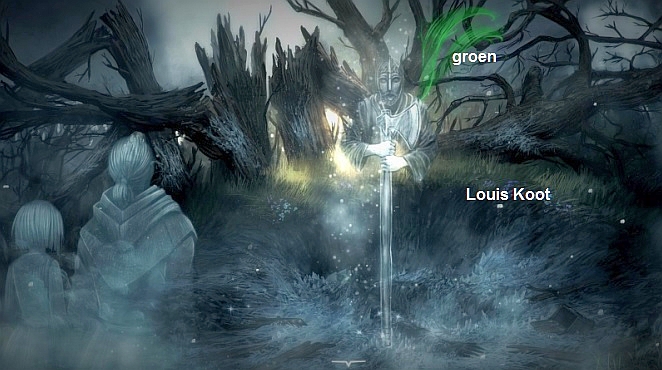
Stay in Spirit View. Go to the ice tomb, so click the back arrow 3 times. You will then be back at Crossroad 1. Once again, crawl through the hole in the rocks to end up at the green burial mound and then go one screen further to get back to the icy tomb. You see the spirit of Knight C and this knight also sings a chant. The banner of knight C is GREEN....... remember this.
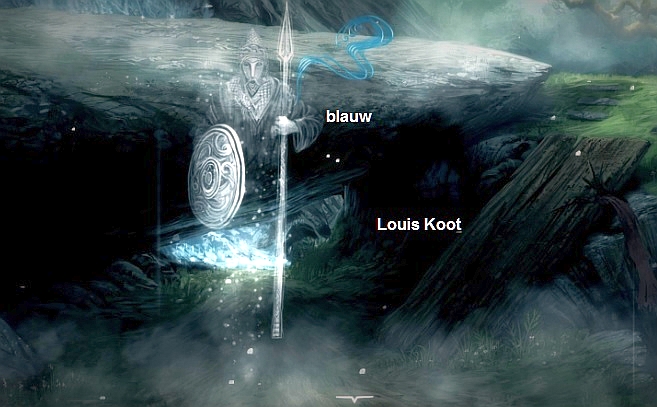
Still in Spirit View click the back arrow 2 times to return to Crossroad 1. Go up to Crossroad 2 and then, via the left path, further up to the Arrow head rock and the ice wall. At the Arrow Head Rock you see the spirit of Knight B and his banner is BLUE. Knight B also sings a Chant but that is not important now. Remember that Knight B has a blue banner.
Still stay in Spirit View. Now go all the way back to the Village via the back arrow, until you are again in front of the Town Hall and you see the Workshop.
Village
In front of the workshop you'll see the spirit of Knight A and his banner is ORANGE.
Stay in the Spirit View ..... Now go up the hill to again to the Temple and go inside.
Temple
Click on each of the 4 knights until each knight has his banner in the correct color...... Knight A = orange, knight B = blue, knight C = green and knight D = purple.
The 4 knights then chant the Holy Chant together and ....... in the back of the temple then the wooden wall opens up. In the now opened niche you see the Holy Altar
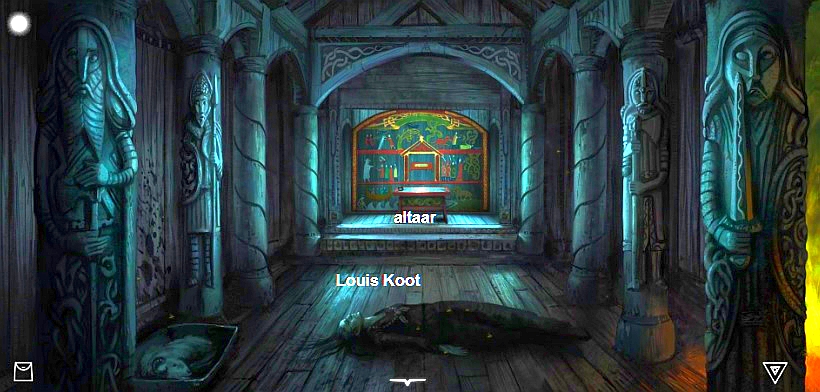
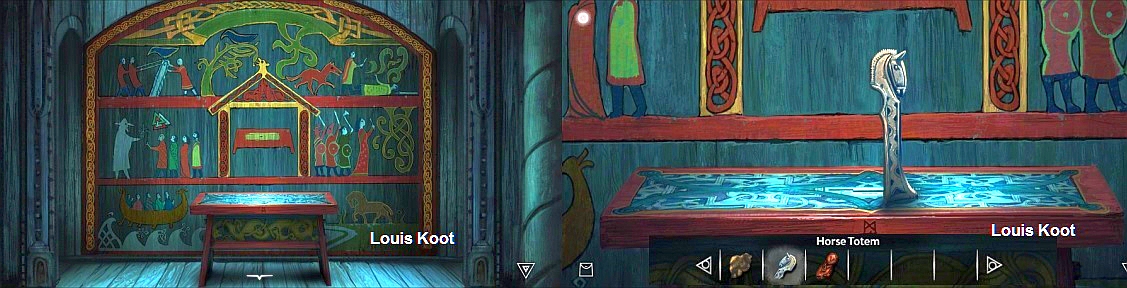
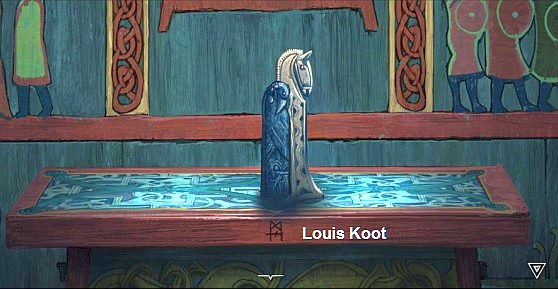
Leave the Spirits View and then click on the altar to walk to it. On the altar stand a Silver Bowl. Behind the altar the wall is painted with all kinds of illustrations
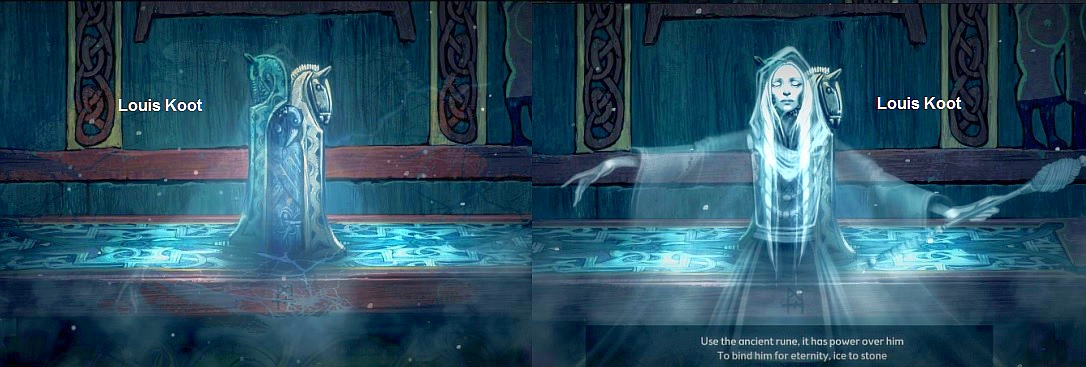
Click on the Silver Bowl and ........ You go back into the Spirits View because the Spirit of the Seer appears again and she tells you a few things again.
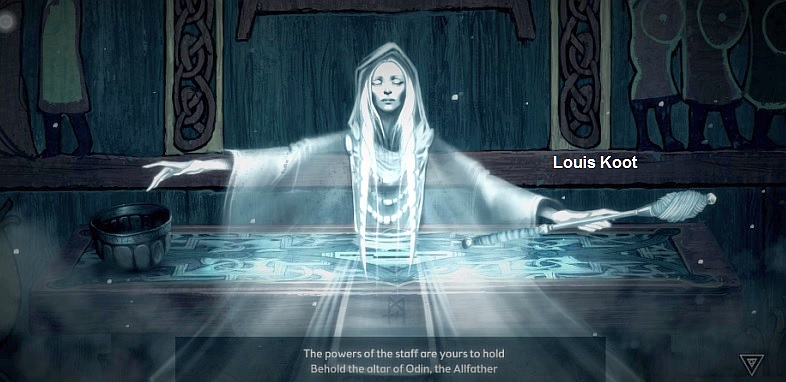
When the Seer is done talking, she disappears and you are back in reality. Now take the Silver Bowl

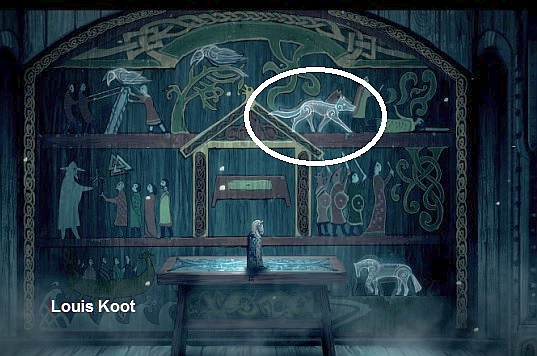
Click the back arrow to step out of the close-up of the altar and then go back into the Spirit View for a moment, because then you see that the horse lights up and moves, in the bottom right corner of the wall.
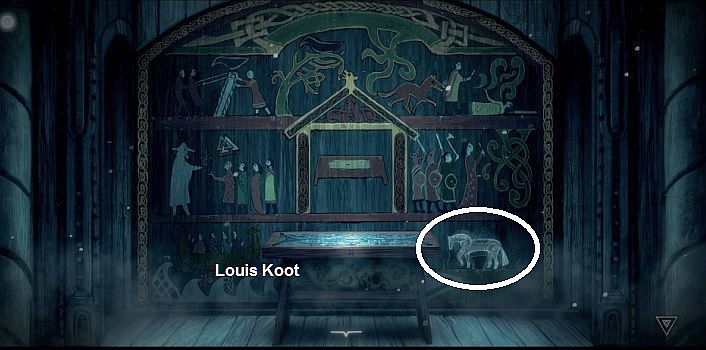
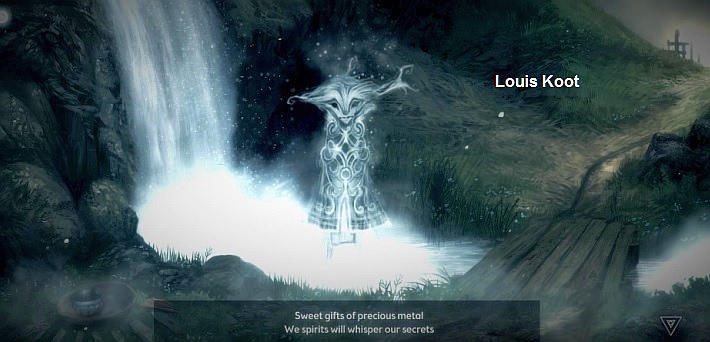
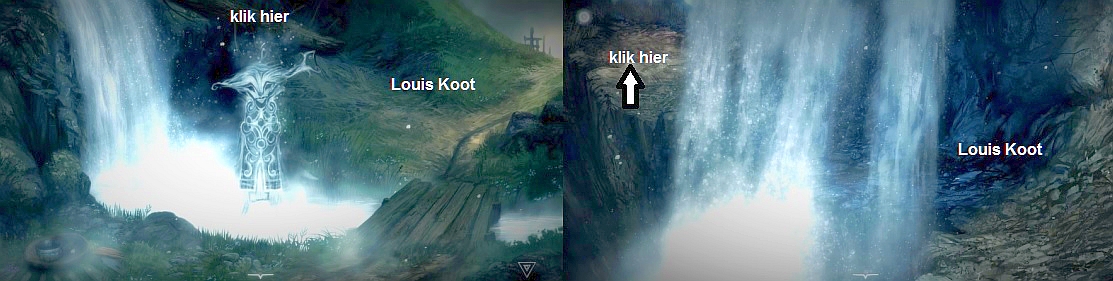
You must now find that horse. Go out Spirit View and go back to the Waterfall. I assume you now know where the waterfall is and how you can get there from the temple. Back at the waterfall you go into the Spirits View again and ..... The spirit of the Water God appears. Click on the spirit to hear what he has to say
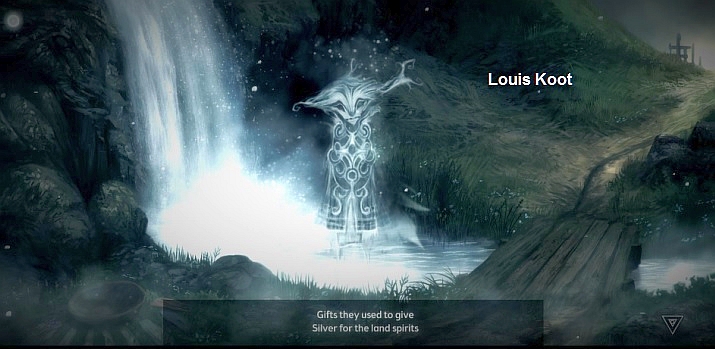
The water spirit wants you to offer him a sacrifice ...... a silver offering.
Go out of Spirits View and then select the Silver Bowl in inventory and then click with your hand on the Sacrificial Bowl to offer the silver bowl to the water spirit.
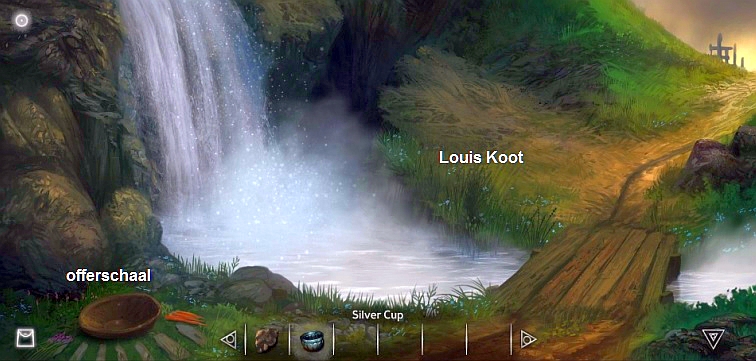
You will see the water spirit accepting your sacrifice. The spirit has a gift for you
You automatically leave the Spirit View. The silver bowl stays here in the sacrificial bowl ... you can not take the silver bowl back.
The water spirit has opened a path behind the waterfall. Click with your hand on the thick branch that protrudes above the waterfall and ...... You end up on a path that goes past the waterfall and then further up the hill. Behind the waterfall a wooden shovel leans against the rock wall. Click with your hand on the wooden shovel to store the thing in your inventory.
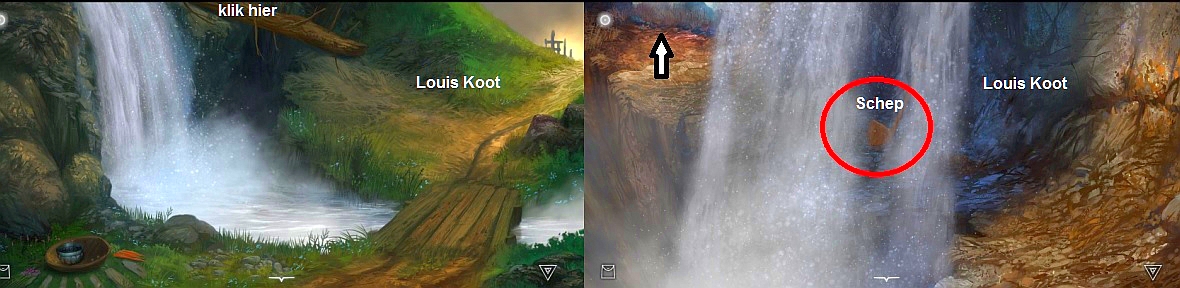
You can now follow the path behind the waterfall, but we are not going to do that now.
Instead click 3 times the back arrow to return to Crossroad 1 and then go on to Crossroad 2 and continue to the ice tree.
At the ice tree you go into Spirits View again and then you click on the ice lump .... The ice lump appears to be a frozen Rune Stone and you see a "Spiritual image" on it
Click on the image to zoom in on it. You then see a number of ghost figures and you see the horse. The ghost figures are the same figures that you saw on the tapestry in the town hall. Only ...... the 5 figures on the Rune Stone are standing in the wrong order.
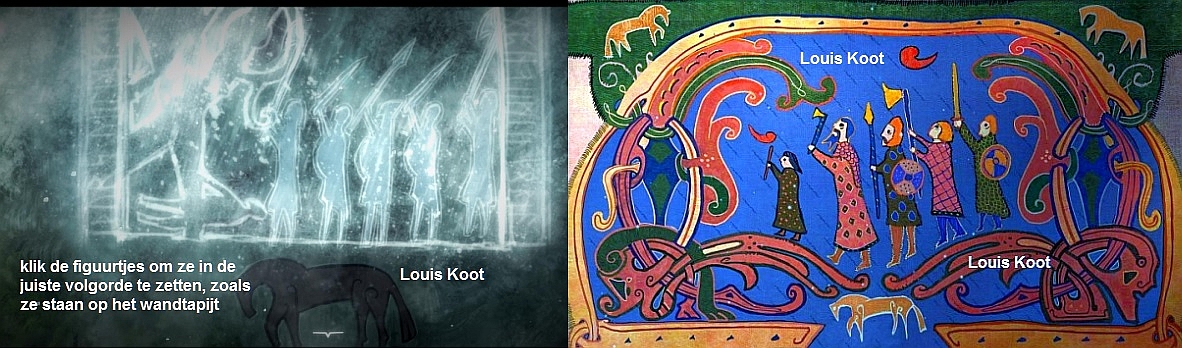
By clicking on the figures you can change them into a different figure .... Start with the left figure and then work your way to the right ... Change the 5 figures until you have the figures as they stand on the tapestry.
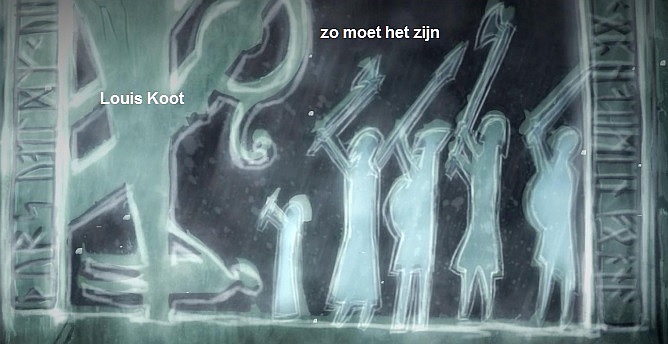
When you have the figures in the right order then the horse comes to "life" and "gallops" away.

Stay in "Spirit View" but get out the close-ups via 2 times the back arrow ...... You will see the hoof prints of the horse on the ground .... Follow the horse hoof prints back to crossroads 1 ....... The prints point to the opening in the rock, so crawl through the opening to the burial mound ...... On the burial mound the spirit of the horse appears
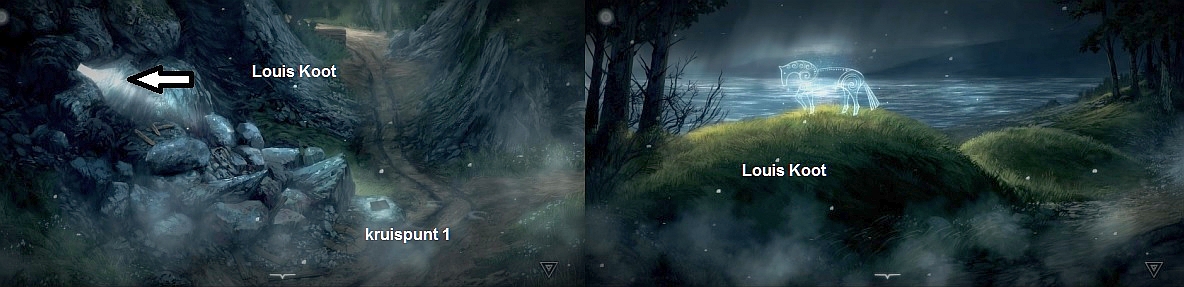
Click on the horse spirit ..... You think the horse wants you to dig the Burial Mound down because something is hidden underneath.
Go out the "Spirit View" and then select the wooden shovel in inventory and on the green hill and ......
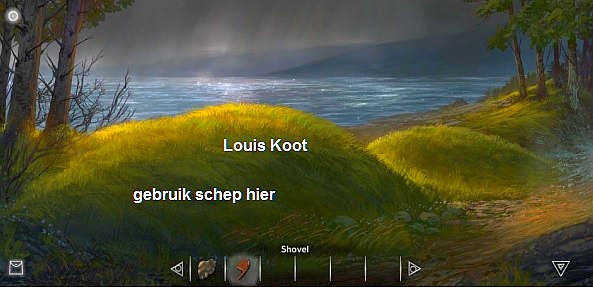
You dig out a part of the hill to uncover the grave. There is a chest in the grave and a Saw.....First take the Saw.
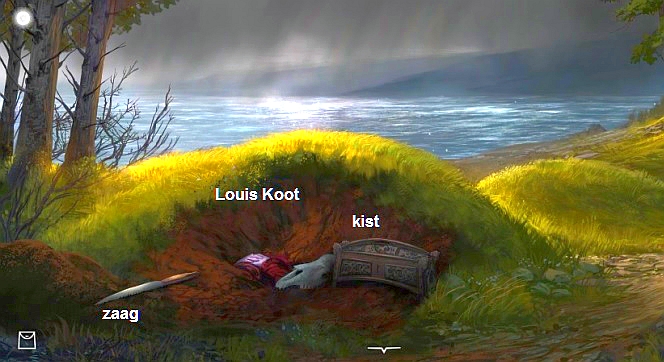
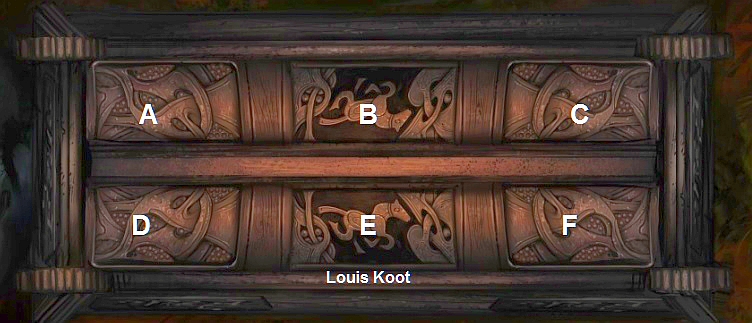
Click on the chest ....... You go in the close-up of the lid of the chest. The lid has 6 compartments each with an image. Number 6 boxes, from top left to bottom right, as A, B, C, D, E, F. The chest is locked. To open the chest you have to press the compartments 4 times in a certain order.
Go in "Spirit View" because you then can see that 4 of the 6 compartments light up. Remember which 4 compartments light up. Go out "Spirit View" and then click in normal view on those 4 compartments, in the order in which you saw them light up in "Spirit View". You have to do this 4 times ..... so you have to imitate 4 series ....... Have you done the first series then you go back in "spirit View" to see the 2nd series ..... do the 2nd series in normal view and then go back in "Spirit View" to see the 3rd series and do it again in normal view. Go back in "Spirit View" to see series 4 and do it again in normal view. ( It good be that this puzzle is different in each game)
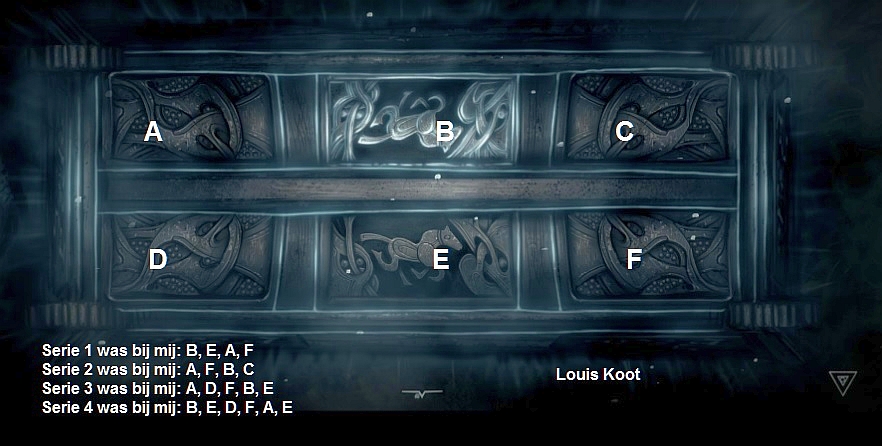
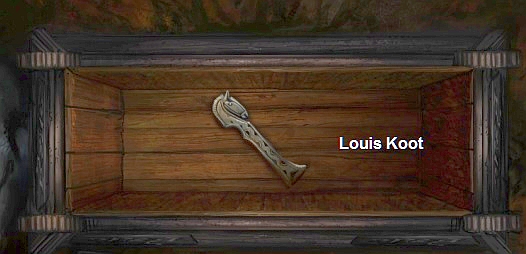
When you have done the 4 series well then the chest opens. In the chest you'll find the Hors Totem......Take the Horse Totem
Click 2 times the back arrow to end up at Crossroad 1 again. Now go back to the Beaver dam, so via Crossroad 3 and the Ice Tree.
Select the Saw in inventory and then click on the dam and ......
.... you saw a hole in the dam so that the water in the river is free again. Return to Crossroad 2 and look again in the square wooden well. Because you have made a breach in the beaver dam, the well is now filled with water so you can now take the boat out of the well. The boat is a Loom weight. So take the boat Loom weight out of the well.
Go back to the village and to the Temple and enter the Temple again
Village: Temple:
Go to the altar and zoom in again. There is a slot in the altar ..... Select the Horse Totem in inventory and then click on the altar and ...... You place the Horse Totem in the slot ......
Click the back arrow to get out of the close-up and then go in "Spirit View".... On the wall behind the altar you can now see the 2 Raven light up.
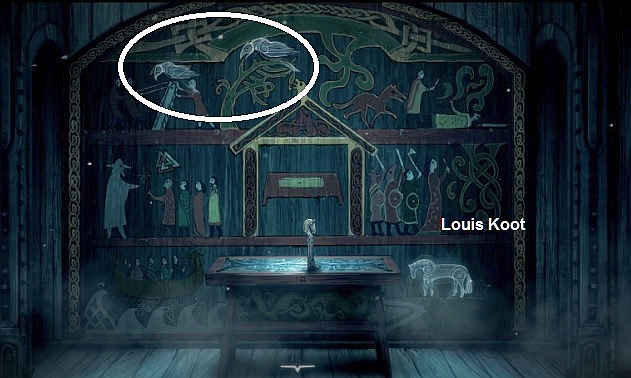
You must now search for the Raven Totem and place it here on the altar. Go out "Spirit View" and return to the Arrow Head rock via Crossroads 1 and 2.
Back at the Arrow Head Rock, click with your hand on the grass above the plank to land in the swamp at the Old Tree.
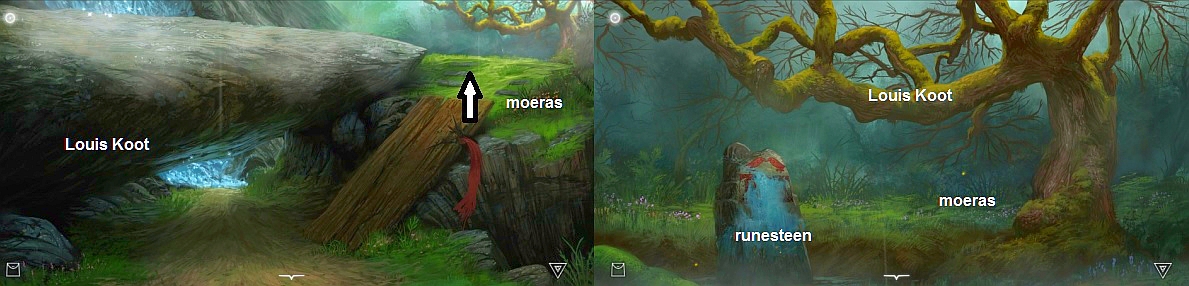
At the Old Tree stand another thick Rune stone that is covered with ice. Go in "Spirit View" and then click on the Rune Stone to view the stone in close-up.
On the stone you see 2 ravens, because this is the Raven Rune Stone.
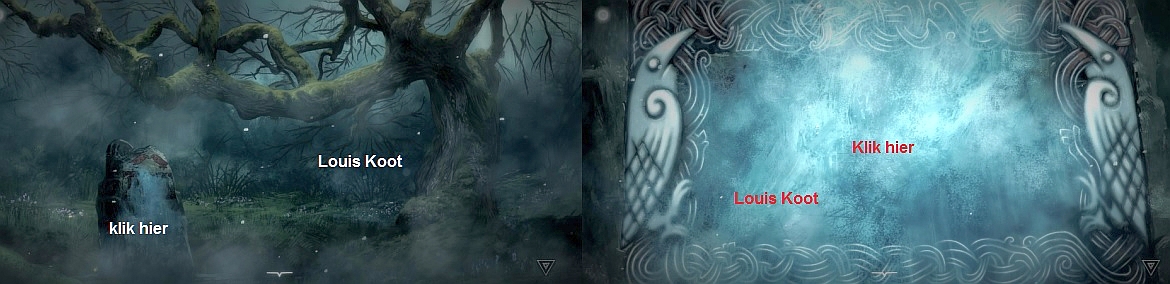
The ice between the 2 ravens is rather vague. Just click with your hand between the 2 ravens on the ice and .......
a number of figures on the stone will be visible and you hear the voice of the Seer
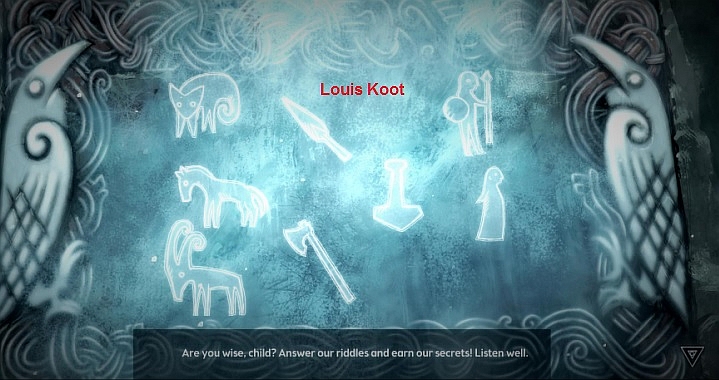
The Seer will now ask you 4 questions on which you must give the right answer by clicking on 2 of the figures in the ice.
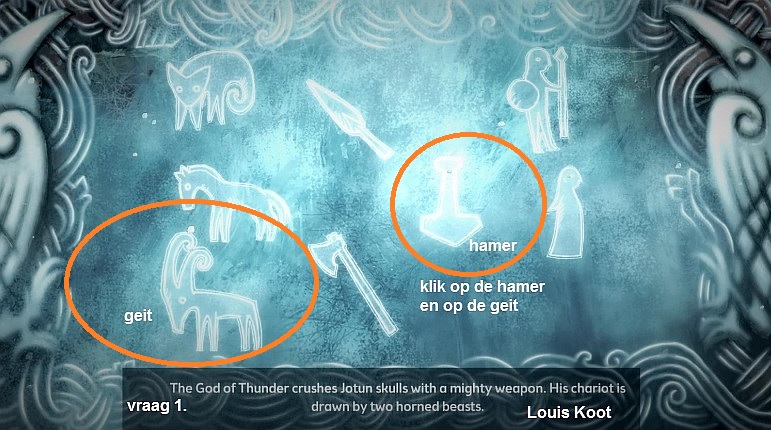
Question 1: The God of Thunder crushes Jotun Skulls with a mighty weapon. His chariot is drawn at two horned beast.
Answer = click on the Hammer and on the Goat
Other figures appear and the Seer then asks question 2:
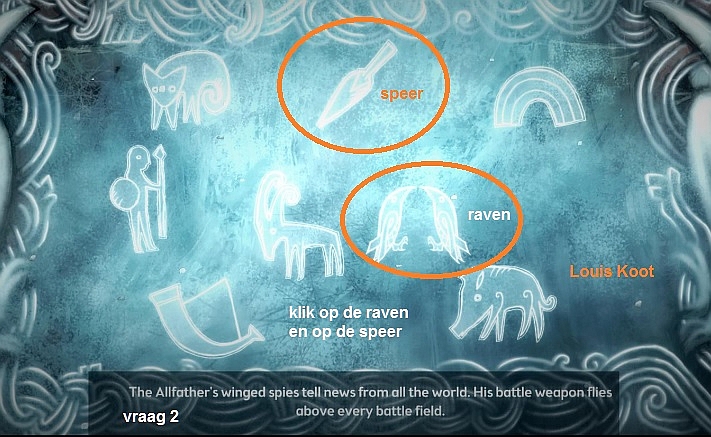
Question 2: The Allfather's winged spies tell news from all the world. His battle weapon flies above every battlefield.
Answer = Click on the Spear and on the Raven.
Other figures appear and the Seer asks question 3 ...
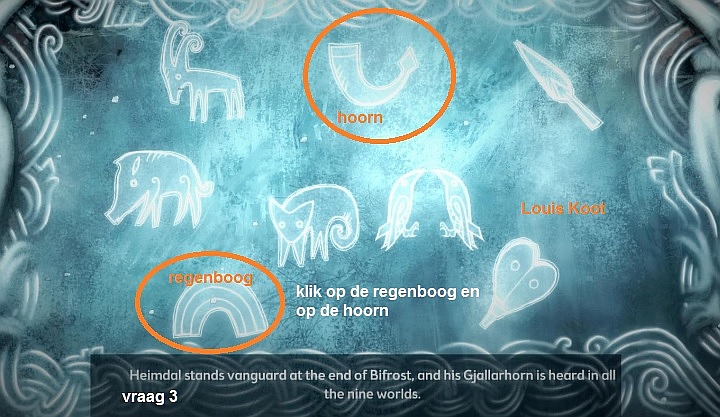
Question 3: Heimdal stands vanguard at the end of Bifrost, and his Gjallarhorn is heard in all the nine worlds.
Answer = Click on the Horn and the Rainbow.
The figures change again and the Seer gives question 4 ...
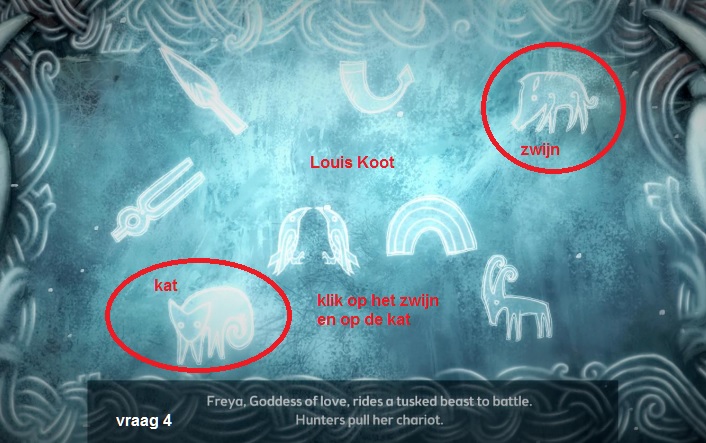
Question 4: Freya, Goddess of love, rides a tusked beast to battle. Hunters pull her chariot.
Answer = Click on the Boar and the Cat and .......
..... you answered all 4 questions correct and ..... raven feathers fall down the stone. Stay in "Spirit View" and click the back arrow and go back to Crossroad 2 and then continue to the Waterfall. Because you are in "Spirit View" you can see the water god at the waterfall, but you ignore it. Click again on the thick branch that hangs above the waterfall to get back on the ledge behind the waterfall, where you found the wooden shovel. Then click on the path behind the waterfall and ........
....... You end up behind the waterfall near a stone and hopefully the 2 spirits of the 2 ravens are sitting.
Click on the ravens and they will tell you that you have to go back to Jotum's Arrow and that is the Arrow Head Rock
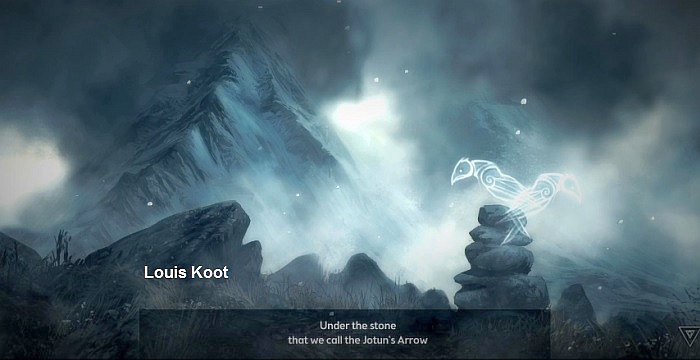
Stay in "Spirit View" and go back to Crossroad 2 via the back arrow and then via the upward path again to the Arrow Head Rock, past the Burnt-down House . At the Arrow Head Rock, which is "Jottum's Arrow", you now see a "Spirit Cloud" .... That "Spirit Cloud" designates a Chest that you see behind the cloud, in "spirit View". Click on the cloud or on the Chest to see the Chest in close-up
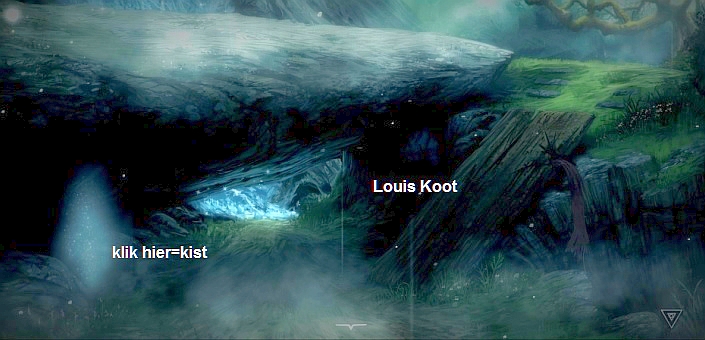
in the close-up go out "Spirit View" to see the Chest in normal view. The chest is locked with 6 slider locks. A lump of Bronze lies in the corner....Take it
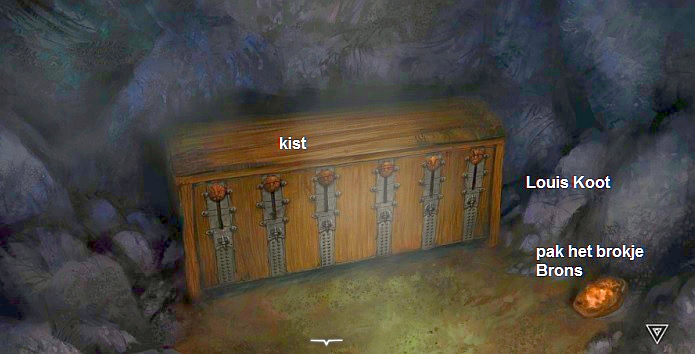
Click on the chest to see the locks in close-up. There are 6 sliders in which you can slide a face to 3 positions. All 6 faces are now in the top position in their slider. Slide each slide to the right position in the slider by clicking on the faces or by clicking in the slider. The solution for this slider is found on the children's drawing that you saw on the children's playground.
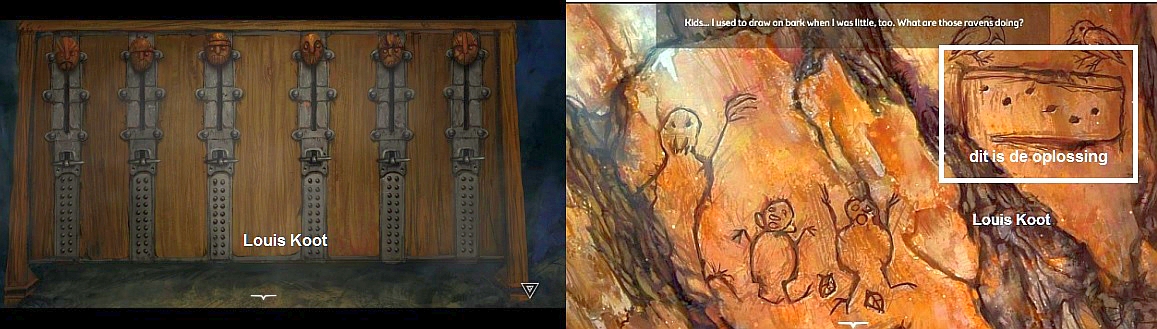
So slide all 6 sliders to the right position, according to the dots in the rectangle on the child's drawing .......
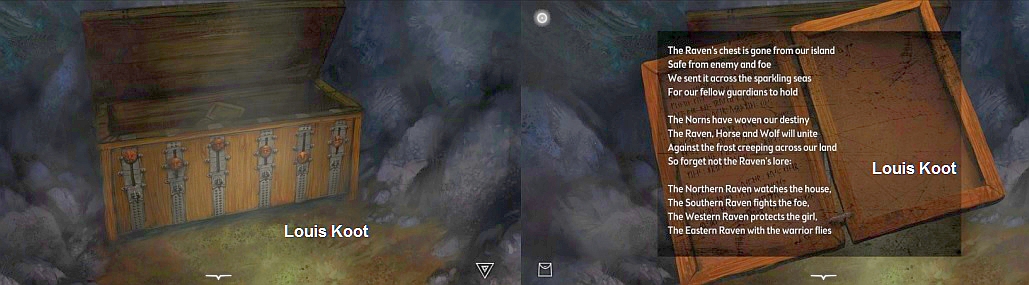
The chest then open. Look in the box ..... in the chest you will find a Rune board .....
Click on the story and then read the translation. It is again a poem. You read about a wolf and about the 4 ravens
Click the text away. If you haven't picked up the lump of Bronze, you can take it now. Go back to the waterfall and then continue to the Viking ship on the beach.
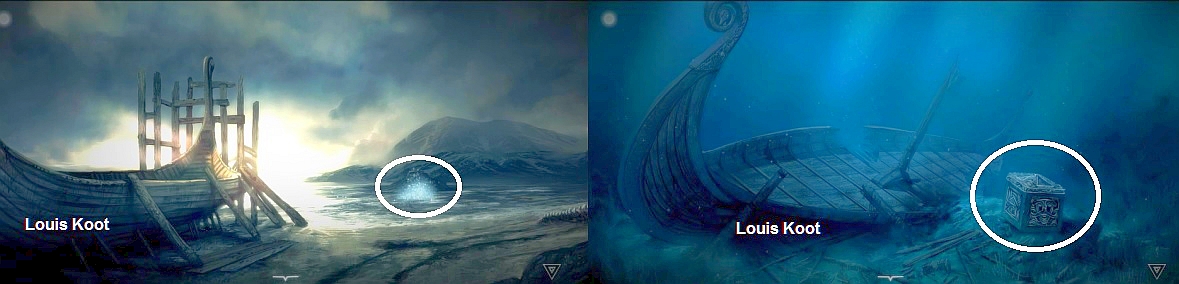
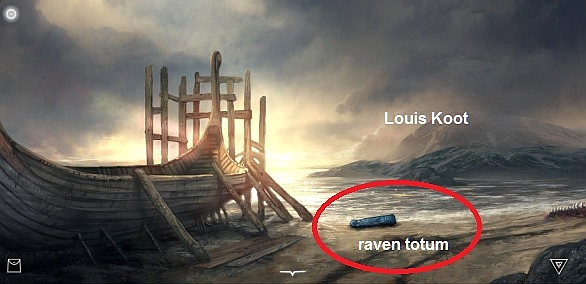
At the Viking ship go again in "Spirit View". A rock protrudes into the sea and you get the spirit cloud at that rock. Stay in "Spirit View" and click with your hand on the rock and ......... You dive under water and land on the bottom of the sea at the wreck of a Viking boat. At the shipwreck is a square Chest.
Click on the chest to get in the close-up of the lid. The lid has 4 triangles and each triangle has an image. If you click a triangle, that triangle gets a different image.
So you have to get the right image on each of the 4 triangles and then the chest will open.
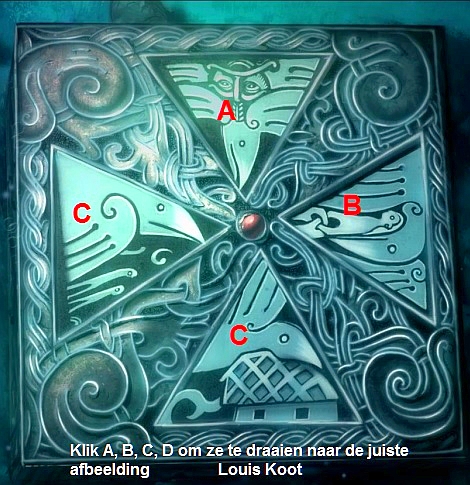
This is really a "trial and error" puzzle because nowhere in the game I have found a clue for this chest puzzle. But on the screenshot below you see the correct solution.
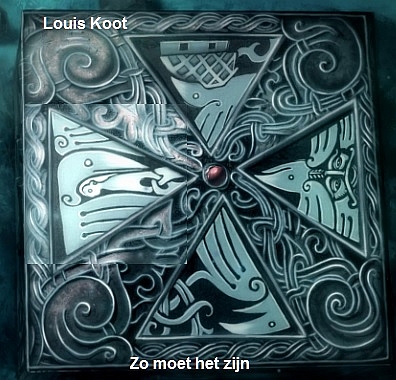
When you have given the 4 triangles each the right image, the Chest will open and in it you'll find the Raven Totem and that thing goes out the chest to land on the beach.
You can not go out "Spirit View" underwater so click the back arrow to get back on the beach and then go in Normal View and then take the Raven Totem.
Well. .... you know where to bring the Raven Totem ...... So back to the village and the temple and place the Raven Totem, at the Horse Totem, in the slit of the altar
Go out of the close-up and view the mural again in "Spirit View" and ... the Wolf is now lid up.
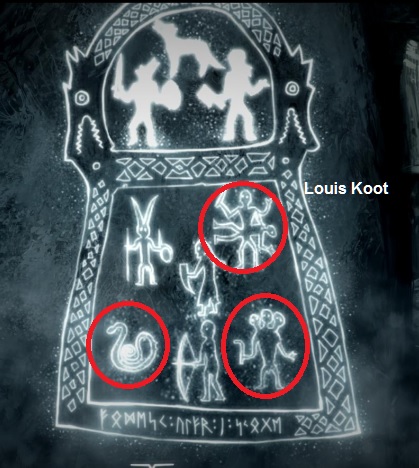
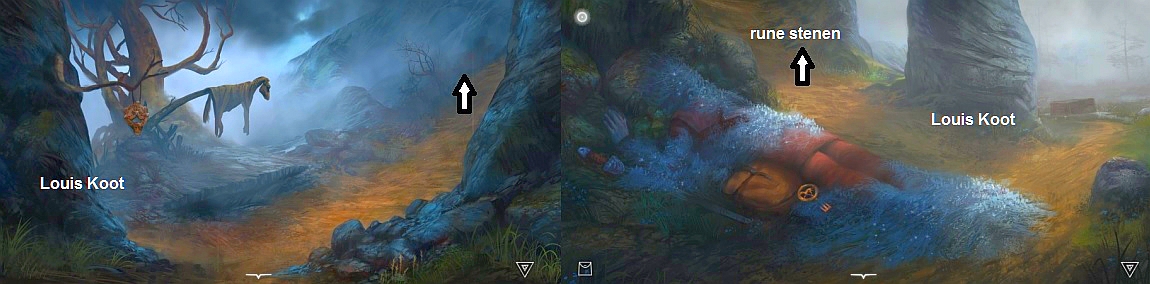
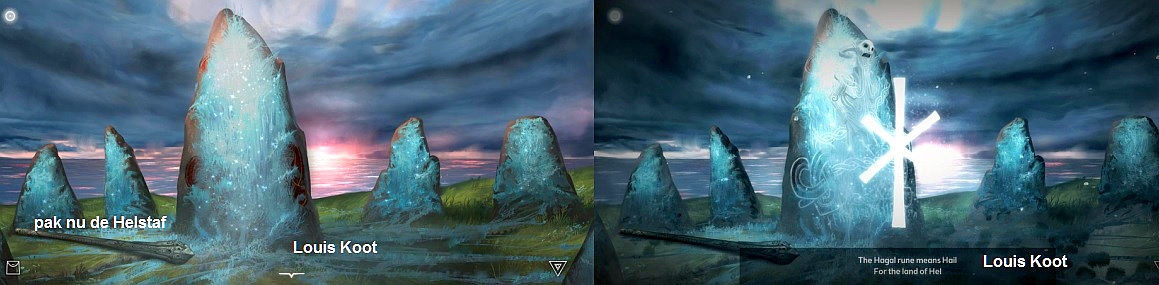
Stay in "Spirit View" and go back 4 times via the back arrow. You will be back at the back entrance of the village, where you started. You see that big Rune Stone now in "Spirit view" and so you see that the stone has a "spiritual image" .....Look at the stone in close-up. The image consists of 2 parts ..... in the upper part you see 3 figures, the wolf, the swordsman and the axe man. In the bottom part you see 6 figures .......
You have to "match" the top 3 figures with a figure in the lower part, but which figures belong together? You do not know that yet but we are going to figure that out. You can go out of "Spirit View" or you will stay in it. Go back to the Burnt-out House via Crossroad 1 and Crossroad 2 ........ Click again on the Wooden Compass at the Burnt House to see the thing in close-up.
If you are out of "Spirit View" you are now going back in it..... On the compass you see a "clock". In the middle of the "clock" you see 1 of the 3 figures of the upper half of the rune stone and at the arrow you see the figure that "match" with it. Click on the compass to see the next "match" and then the next and the next. In total you see 4 figures with the corresponding "match".
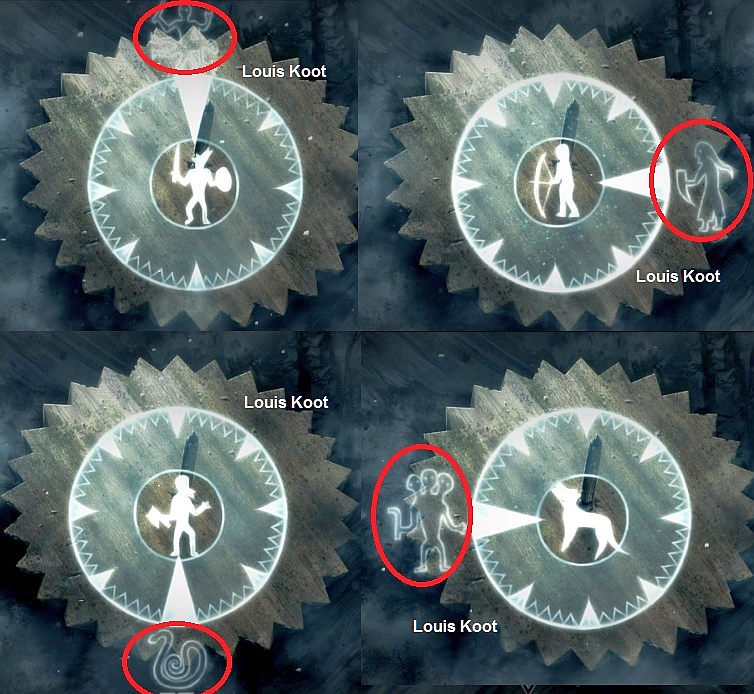
The figure that is missing on the upper half of the rune stone is the archer. Stay in "Spirit View" and return to the rune stone in the village and look at the stone again in close-up and then, in the lower part, click on the 3 figures that you just saw as a "match" on the compass of the 3 figures of the upper half ..
...... the wolf cries and runs away .... Stay in "Spirit View" and get out of the close-up and follow the Wolf .... you always see the wolf's footprints.
Follow the wolf to the Ice Wall beneath the Arrow Head Rock ........

At the ice wall the wolf cries and the water spirit appears. Click the water spirit and .... he / she tells you to repair what is broken and the spirit makes sure the Amulet falls out of the ice wall.
Go out of "Spirit View" and pick up the Amulet .... it is a broken amulet.
Go back to Crossroad 1 and then to the right, to Crossroads 3 and then to the right to the large frozen Altar.
Select the broken Amulet in inventory and then click with your hand on the broken Amulet that lies on the frozen altar and ... ..
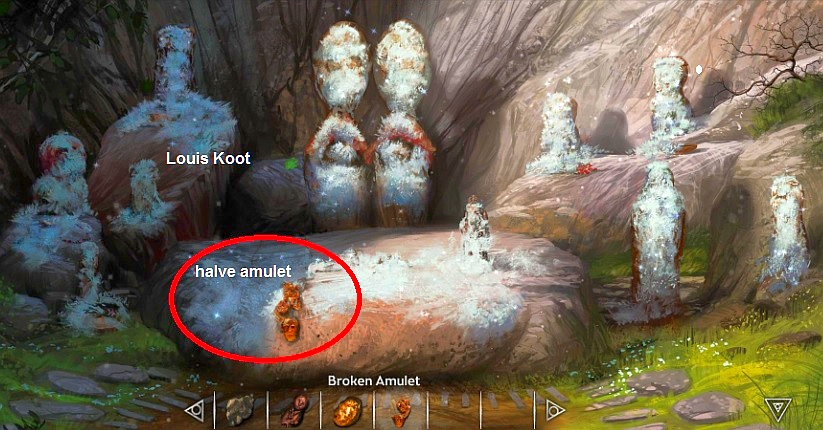
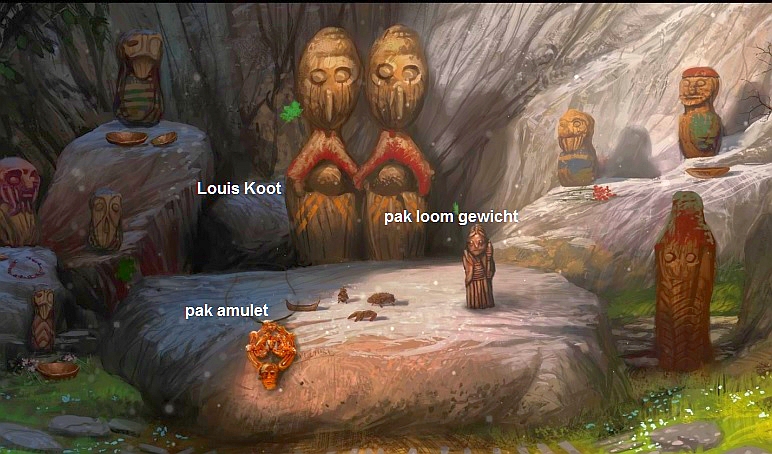
You put both half amulets together and this defrosts the altar ...... On the altar stand the 4th Loom weight statue, so take it Also take the now repaired Amulet
Go back to the Ice wall. Select in inventory the Amulet and hang the thing on the branch and ...........
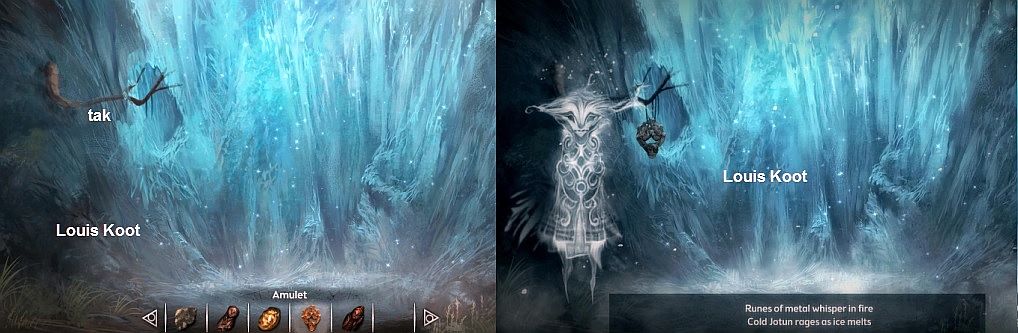
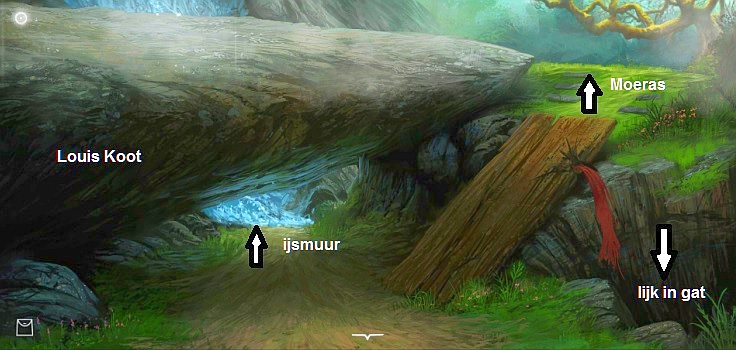
the water spirit appears again and that makes the ice wall melt. Go out of "Spirit View" ..... You can continue here now, so go through a screen on the top right and you'll end up at a frozen corpse.
Behind the corpse is a big rock. You can go further up at the left side of that rock and you can also continue at the right side of the rock, but we are not going to do this yet. On the frozen corpse lies the key of the chest that floats in the water behind the village. Unfortunately, the key is frozen stiff at the corps so you can not take the key. But maybe you can make a Clay casting of the key, provided you have taken the lump of clay from the Viking ship on the beach.
Select in inventory the lump of Clay and then click on the key to make a clay print of it ........ In inventory you then have clay duplicate of the key.
Click the back arrow until you are back in the village and then go to the workshop. Go inside and go back in the close-up of the Fireplace.
Select the Casting Mold in the inventory and then on the casting mold that lies in front of the fire ...
You click your half of the casting mold on the other half. Select in inventory the piece of Bronze and then click on the Crucible and .....

The bronze is melted and a copy key is poured into the mold. Take the Key from the mold
Click 4 times the back arrow to get back to the chest that floats in the water. Open the chest with the newly cast key and then look inside the chest. Click on the rune text and read the story
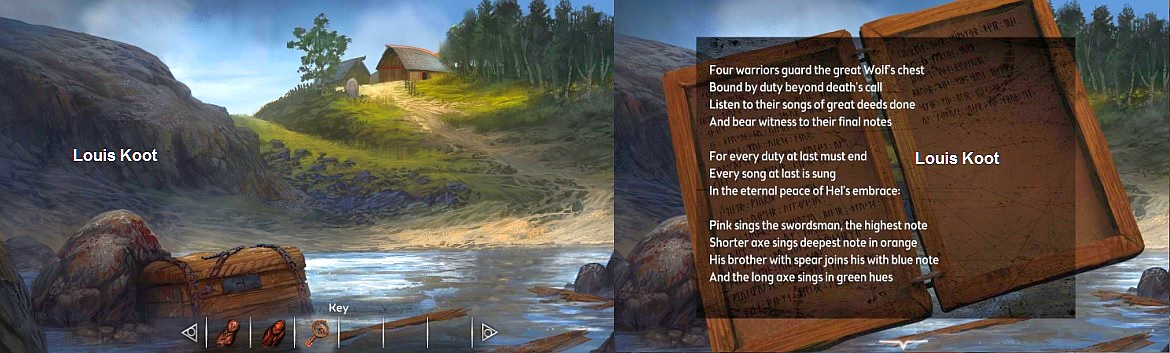
The story tells about the 4 knights who guard the Wolf Chest and of course these are the 4 knights you have seen before and who are also in the temple. You have to go to those 4 knights again and give them the correct color banner so that they will each sing the correct tune. The Sword Knight is purple, the Little Axe Knight is orange, the Spear Knight is blue and the Long Axe Knight is green
You have to take a long walk on the paths and crossroads to find the 4 knights. You can do this in "Spirit View" or you can walk in a normal view. Now go back to the frozen corpse, where you made the clay mold key .. So go back to the Arrow Head Rock and then underneath the arrow head to the frozen corps.
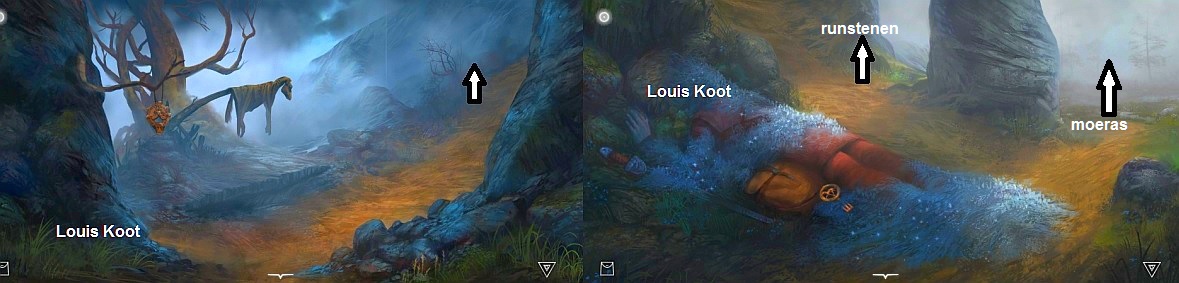
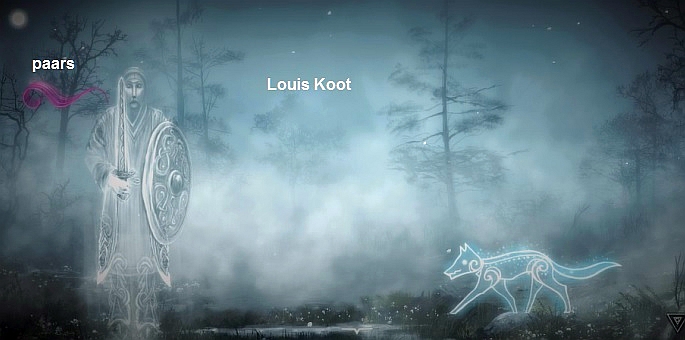
Back at the frozen corpse you go, on the right side of the big rock, 1 screen further up to the Marsh. .... You then can not go any further ... Go in "Spirit View", if you wasn't already, and ....... You see the Sword Knight and the Wolf ..... The Sword Knight sings a tune and has the orange banner. The tune that this knight sings is the wrong tune. Click the knight until he has the purple banner and ..... The knight then sings the tune in the right pitch.
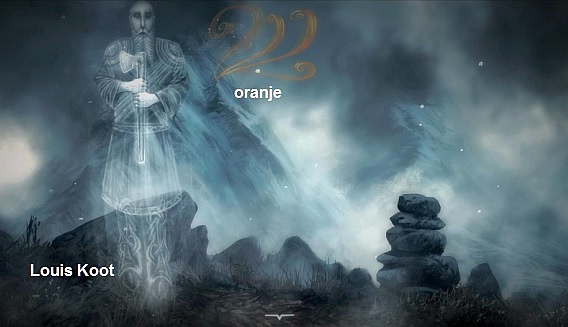
Now stay in "Spirit View". Go back to the waterfall, so click the back arrow 5 times to return to Crossroad 2 and then continue to the waterfall. Click on the branch that hangs above the waterfall to get back on the ledge and then continue to the cairn behind the waterfall, where you saw the 2 ravens. Here you can now see the Little Axe Knight. Click the knight until he has the Orange Banner and ...... the knight then sings the tune in the pitch that belongs to him.
Click the back arrow 2 times to get to the waterfall again and then go on to the Viking Ship on the beach. Here you will find the Spear Knight ... Give this Knight the Blue Banner
Click the back arrow until you are back at Crossroad 1 and then go to the right and via Crossroad 2 and the Beaver dam to the House of the Seer.
You will meet the Long Axe Knight. Give this knight the Green Banner
You have now given the 4 knights the right banners ..... Now, still in "Spirit View", go back to the frozen corpse and then further on to the Marsh and ......
If you have given all 4 knights their right color banner they are now all 4 here and they sing in chorus the Wolf Chant ......
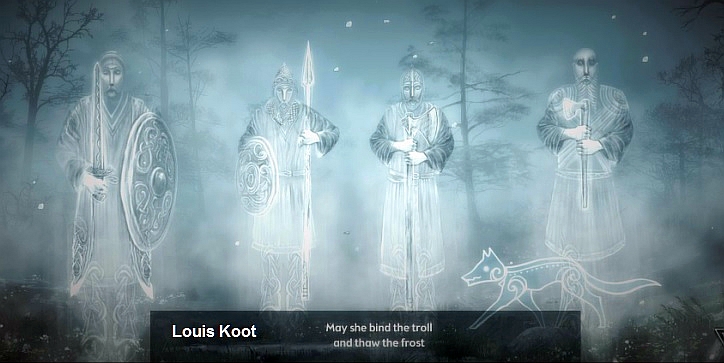
The knights and the wolf disappear but the Wolf Chest appears.

Go out "Spirit View" and then click the chest to get in the close-up of the chest's lid ...... The lid is divided into 4 compartments and in each compartment there is a circle image that you can rotate by clicking on it. In Normal View you see how in each compartment the circle should be but in "Spirit View" the 4 circles are not rotated properly.
Number the compartments as A, B, C, D, as in the picture below. Print in your memory how the images on the 4 circles look in Normal View and then go into "Spirit View"
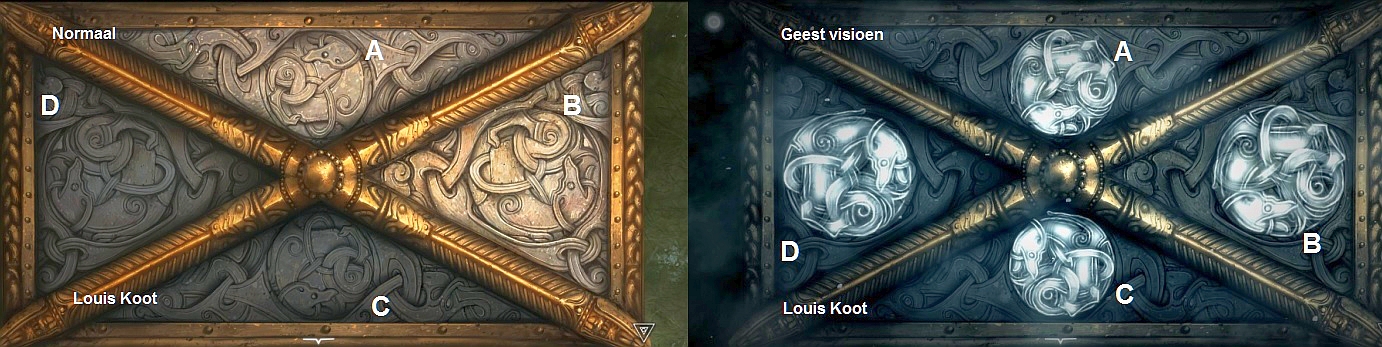
| In "Spirit
View" you can see that the images in the 4 circles are distorted. You must
rotate the circles until in every circle the image is as shown in Normal View. But there is a problem because if you click Circle A then Circle C is also rotated.
If you click Circle B then also Circle D will rotate. Circle C rotates
the Circles B and D. Circle D is the only one that only rotates
itself.
Click the circles to rotate them and do so until you have rotated the images in all 4 circles as they are in Normal View. It is not really complicated ...... First make sure that the circles A, B and C are all right and then you can turn Circle D properly because that one has no influence on the other 3 circles .... .. It must be like the picture below
|
When you have rotated the 4 circles in "Spirit View" then the chest opens and in it lies the Wolf Totem.
In "Spirit View" you can't take things, so get out of "Spirit View" and then take the Wolf Totem.
You know where to go with the Wolf Totem, don't you? So back to the Temple and place the Wolf Totem in the slot on the altar and ....... The Seer appears again
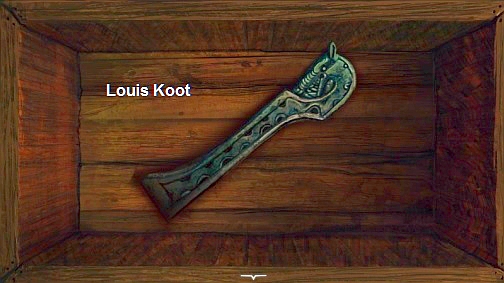
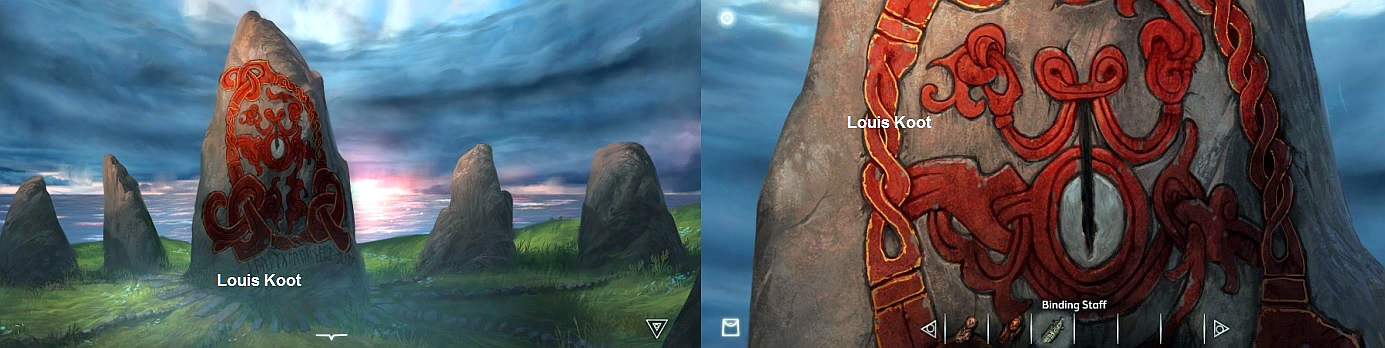
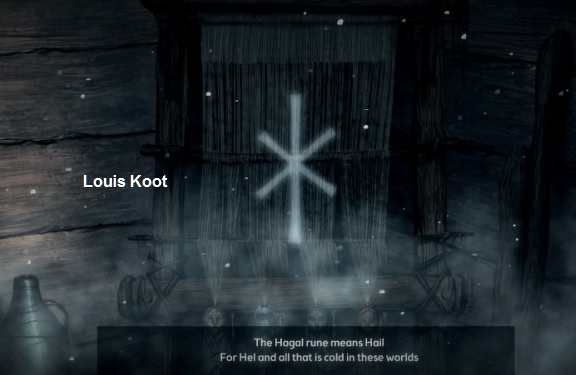
The Seer tells a story again, so listen carefully. When the Seer is gone again, a niche is opened in which the Binding Staff is located ..... Click on the Binding Staff and ....... You zoom in on the Binding Staff and automatically you're in "Spirit View" and the Seer now shows you another Rune sign
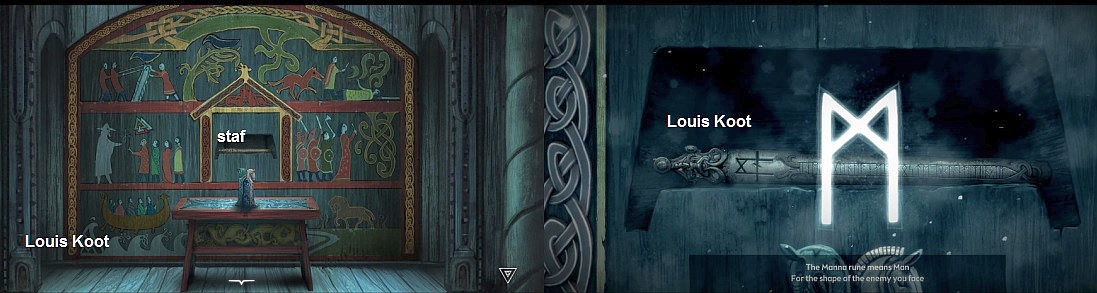
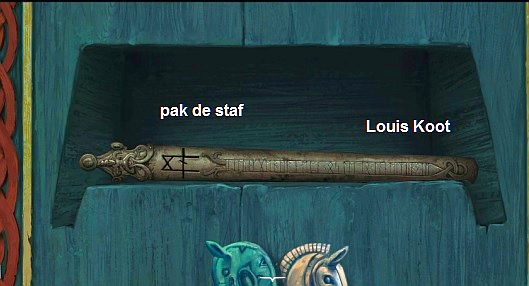
You will automatically return to the normal view .... Then take the Binding Staff
if you have listened carefully to the Seer, then you know what to do with the Binding Staff and where to do that.
Go back to the frozen corps, past the Arrow Head Rock. Back at the frozen corps you now click to the left of the rock and ........
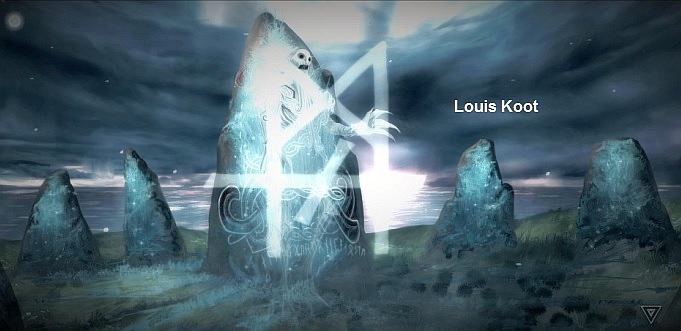
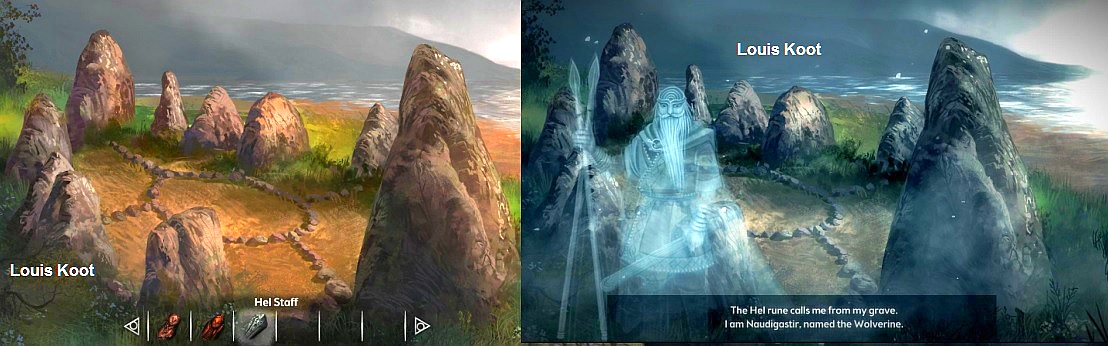
You now end up in a circle of rune stones, a kind of Stonehenge. In the middle of the circle stand a large pointed stone on which a red painting has been applied. Click on the stone to get in close-up. In the middle of the painting you see a groove ...... Select the Binding Staff in inventory and then put the Binding Staff in the groove and ........
You will automatically enter "Spirit view" ......... this Stonehenge gets frozen and .......
the ICE DEMON appears and tries to grab you but the Binding Staff pulls the Devil into the stone ..... and Runes signs pup up ... .....
.....With all his might the Devil tries to grab you but he is always pulled back into the stone and then ...... The Binding Staff is falls out the stone .......
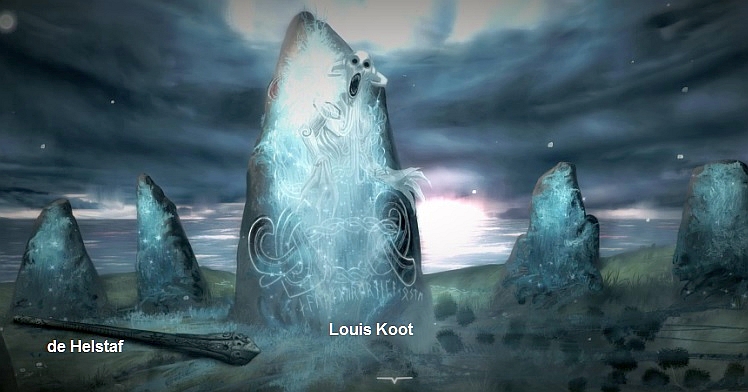
Go out "Spirit View" now and then pick up the Binding Staff again .... the Binding Staff has now been "promoted" to the Hell Staff.
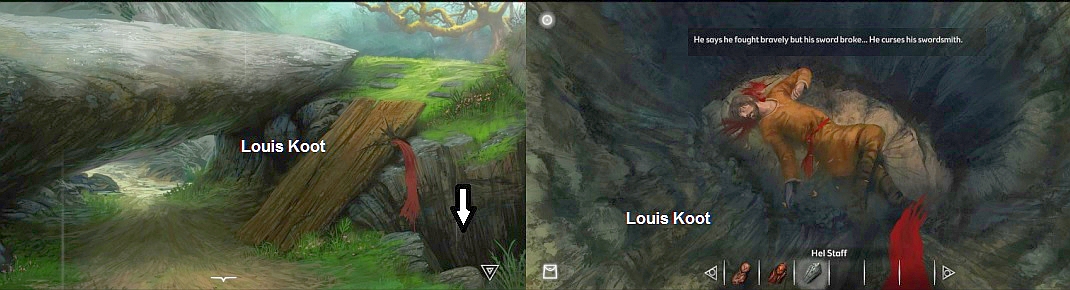
Now you have the Hell Staff you can talk to the dead. So now go to every corpse, human or animal, that you have found and then always select the Hell Staff and then click on a corpse and you will hear what the spirit of the corpse is saying. The first corpse you come to is the frozen corps,

From the frozen corpse you go back to the corpse in the deep hole ... Look back in the hole, select the Hell Staff and click on the corpse and you hear what this corpse says
Go to the cadaver of the sperm whale, on the beach near the Viking ship. Select the Hell Staff again and click on the stinking cadaver and you hear what it has to say.
Go back to Crossroads 1 and then through the hole in the rocks to the burial mound and listen to the corpse in the burial mound.
Also go to the ice tomb and listen to the body that is buried there

When you have visited all the bodies then go back to the:
House of the Seer :
Behind the house you see a circle of stones ....... Continue to that stone circle and then click in the middle of the circle ........ There is a knight buried in the circle.
Go in "Spirit View" and ......... you see the knight lying ....
Go out "Spirit View" and select the Hell Staff and then click again in the middle of the circle and ........
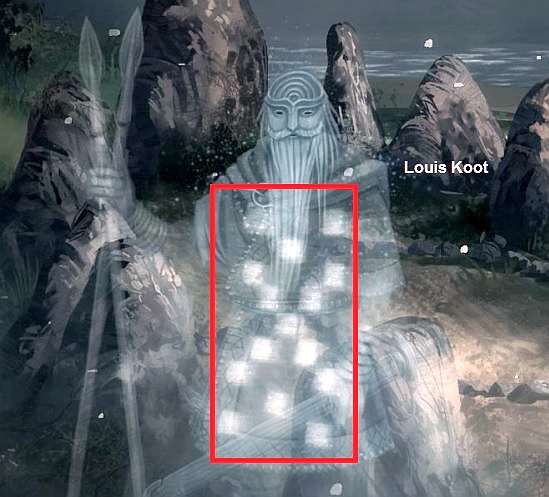
You will automatically enter the "Spirit View" again ........The knight rises from his grave ... ..... Click on the knight to hear what he has to say ....
During the chat of the knight you see a squares pattern light up on his body ...... Try to remember the squares pattern or better note it down on a piece of paper
You must make this pattern on the loom that is in the Seer's house.
When the knight has finished talking, you go out "Spirit View". Click the back arrow and then enter the Seer's House again.
Go back into the close-up of the loom and now hang the two other Loom weights on the 2 remaining strings.
Then go in "Spirit View" and ....... You now have the make Pattern of the Knight on the loom.
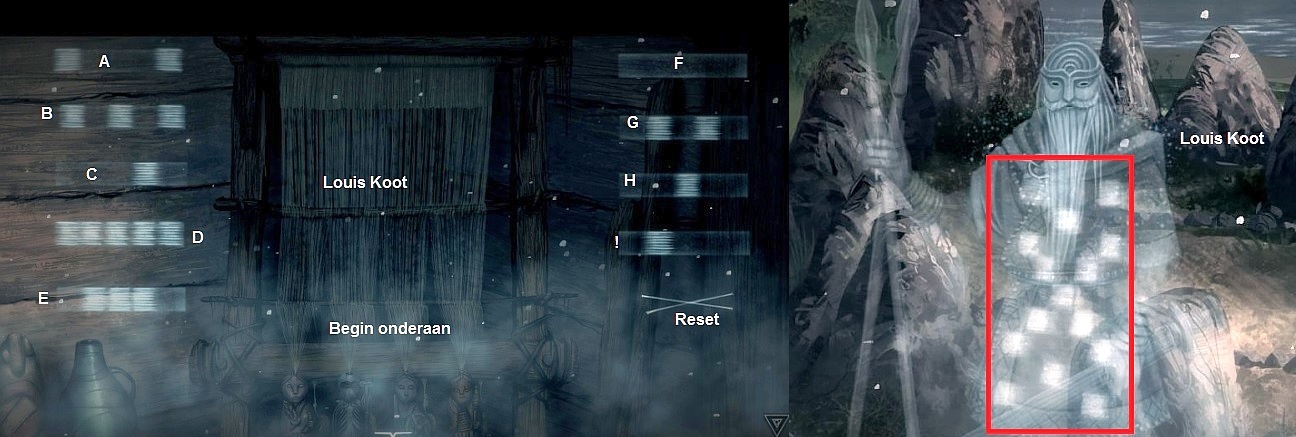
You must do this weaving in "Spirit View" ..... In the middle you see the Loom and left and right are the pattern parts that you can weave .... I have numbered those parts as A to I .... The cross is the reset button that you click if you unexpectedly make a mistake .... you can then try again from the beginning. You click on the parts A to I to weave that part that you click on the loom. You have to start from the bottom up and then work your way up.
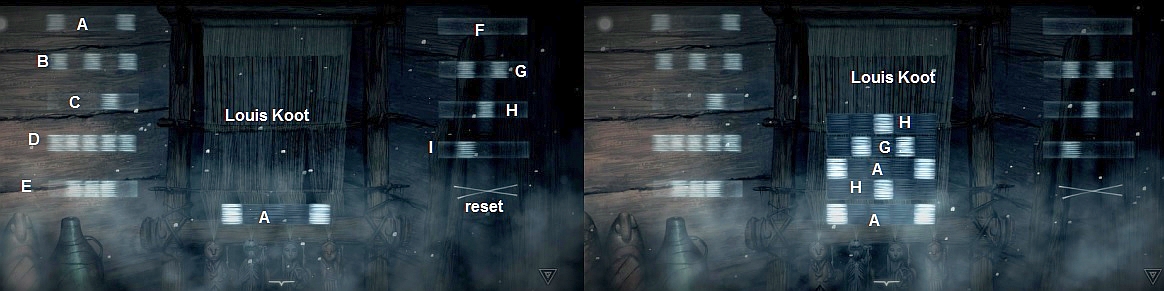
Here is the solution: Click on parts A, H, A, G, H, G, A, H, A and ....
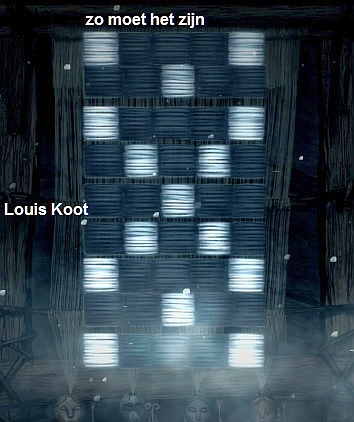
You have done it well when the pattern automatically disappears and a rune signs appears while you hear the Seer explain what these rune mean.
Stay in "Spirit View" and return to the circle tomb, behind the Seer's House and ...... The Knight will talk to you again and finally he will give you his Frostrune Sword
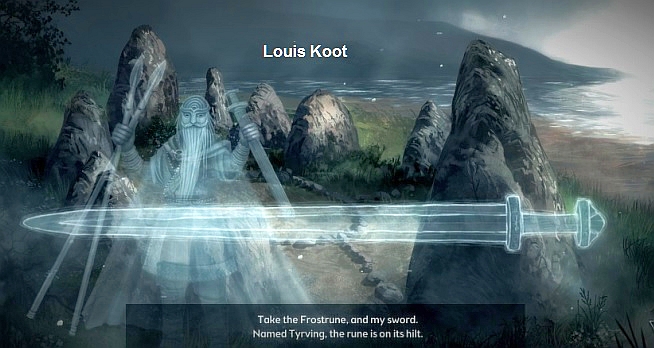
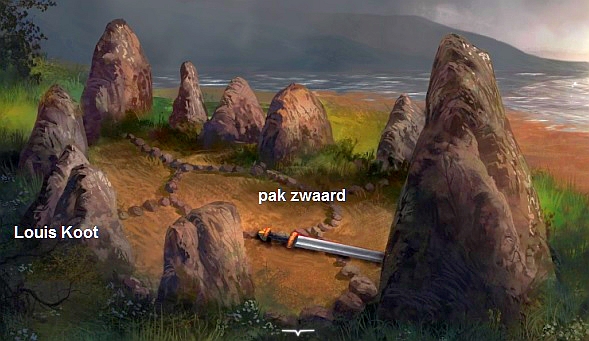
The Knight automatically returns to his grave and you automatically leave the "Spirits View" ..... The Frostrune Sword is on the grave .... Take the Frostrune Sword
Now go back to the "Stonehenge circle" ..... ..Do not go into "Spirit View and do not zoom in on the Stone ......
In Inventory select the Frostrune Sword and then click on the Stone and ......
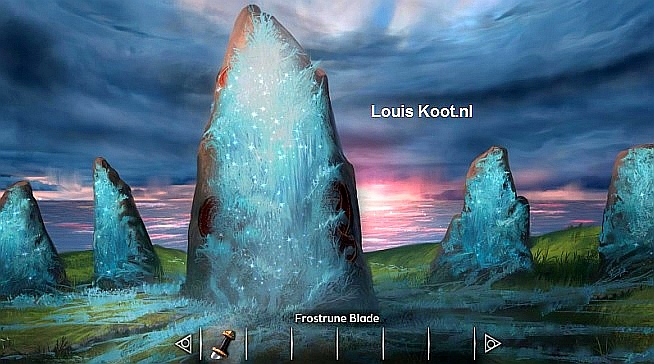
Well ...... look at the ENDING
You have beaten the Ice Demon ........and......the ice disappears from the island
De Seer is delighted and congratulates you ...........
After the Credits the water god appears who says that your story still has not ended.......
..... so probably there will be a sequel .........
THE END
2018: Walkthrough by: Louis Koot