
2018:
Walkthrough by: Dick Leeuw and Louis
Koot
Text
by Dick Leeuw. Screenshots, and a bit of text by Louis Koot
If you have found this walkthrough via google search or via another site then you have probably not visited my site.
A lot more very detailed game walkthroughs can be found on my site at: www.pcgameswalkthroughs.nl


Go
to the door, make sure you see the indication "Enter" and then click
your left mouse button, you will see loading again and when you are inside you
will see auto-save at the bottom.

Every
time you enter a new space, the game makes an auto-save. If your cursor is on
the lock of a door you will see "open", but that does not mean that
they are open. The doors can then also be locked and you have to find the key
for that. You're in the hallway of the sheriff office. You see the door of a
closet, the cell and the door of the toilet. Walk to the end of the corridor,
turn right and click on the lock of the door ... the door opens

Enter the office, you have to look in all corners and holes and also open all drawers. Some drawers and doors are locked and you have to come back later for those.
Immediately
to the left of the cupboard is a map of Painscreek and there is also a
flashlight on the cupboard.

Click
on the map to view it.

Click
the map away and this is now in the Map-section that you can open with your
M-key. Here
is an extensive map with the houses and also the byways.

Also
on that cupboard is a flashlight, pick it up and put it in your inventory by
pressing F-key.

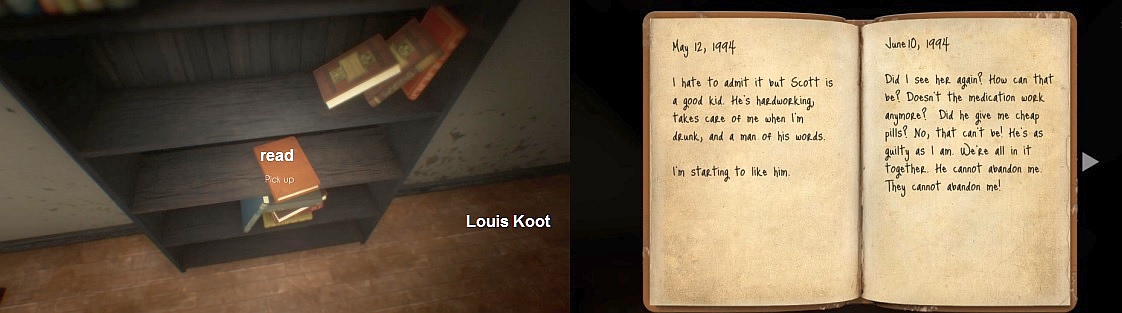
You
can now use the flashlight by pressing L-key. You also have to look / click on
all books. With most books you cannot do anything but some others are diaries or
contain clues. Sometimes you can only pick up books and put them back again. In
this office there is one book that you can pick up and put down again.
A notice
board hangs on the wall next to the cupboard. There are several things on the
bulletin board ..... watch and read them all, especially the newspaper article
about the murder of Vivian Roberts, because this is the murder that you came to
investigate here in Painscreek.


The
letter tells that this sheriff’s office will be closed because of the reduced
population of Painscreek and that the sheriff, James Howard, will be stationed
on Long Island. This letter is also stored in the journal section, which you can
open with your J-key. In the corner, to the left of the window is a file cabinet
with a combination lock at the top.

Move your mouse to the combination lock so that
you see "unlock", then click with left and you can now enter the code.

Unfortunately
you do not have the code so click this away and turn around to the desk.


Click
the newspaper away and this is also saved and you can read it later. Step
backwards slightly so that you see the drawers again. The upper drawer is locked
but the other drawers can be opened. Go to the left of the office chair and then
look under the desk ........ there you see a key lying on the floor. Take the
key, maybe you have to crawl to get the key.

Back
to the desk drawers. Zoom in on the top of the top drawer and put your mouse on
the lock. Make sure you read "Unlock" and then press your
I-key to
open the items inventory. Then select the office key in the items inventory.
This key is then on the right. Now click on "USE" and ..... You now
use the key to lock the drawer, you hear a "click".

There is a key and a letter in the drawer. "Read" the letter .... it
is the "Vivian Robert's Murder Case Report".

Take
the key out of the drawer. It is an "Old Gate Key". Press your F-key
to store the key in the items inventory.


When you have finished reading, you click the book away ... It is stored
in the "Diary" section of the journal, so you can read it later. Close
the drawer or leave it open.


Go
through the gate and follow the road, many houses are boarded up. The other are
locked. Immediately across the bridge you can go straight, left or right. The
path to the left and to the right is along the river, but the right path is closed
with a barrier. Follow the street straight ahead and walk to the square and you
will come to "Anne's Courtyard Inn"
there is a car parked in front of the door.

You
can try to open the doors of the car but that is not possible now.. Walk to the front
door of the Inn. Look up at the window ....... On the sign above the window you
can read that you are indeed at the front door of "Anne's Courtyard Inn".
Look down at the door again .....


To the left of the
window there is a dartboard on the wall with the explanation of the count. If
you do not know how the counting is going, make a picture of it, you will need
it later.

The
photo is saved in your photo inventory that you open by pressing your P-key.


Walk into the hallway
right next to the bulletin board and if you have seen everything there, open the
door and go inside.


Turn
to the right, a number of bottles and glasses are on a sideboard. In addition,
there is a closet, you can open everything there but there is nothing to find.
Turn to the right and between the door and the water cooler there is a key rack
with 3 keys. Take all 3 keys, they are from rooms 202, 203 and 204.


You
cannot do anything here anymore, you have 1 clue and that is the key and the
address that goes with it is 7 Black Pine Rd. So
let's go and find this address. Go back
down and leave the Inn through the front door again. You are back outside on the
square. It takes some effort to find the address, you have to walk back to the
river and then to the left.


Only a safe that is there is interesting, open the safe. At the
bottom you will find a hip flask and at the top a letter, read this. It is a
letter to Daniel.

Click the letter away, it is automatically saved in your journal. Go back to the living room and then up the stairs, there is one room here.
Enter the room and close the door, turn around to the door and see a text on the wall: She is coming for us.

Turn to the right and you will see a circle on the
ground, what you have to do with it I still do not know ... just take a photo of
it ...


In the Inn you have read about the Painscreek Community Hospital ...... Let's go and explore this hospital ..... Go back to the main road and to the right, back to the square ....


Painscreek
Community Hospital:


Go
behind the counter and search everything,

in
one of the drawers you will find the list of who is in which room.

You can search these
toilets for a while but there is nothing to be found.
Enter the hallway opposite the stairs.


Grab
the key, turn around and go to the bulletin board ........


Go
out of the cafeteria and walk through the hallway, the doors here are all locked
and you do not have a key. At the end you will find the elevator and to the
right of it a staircase. The elevator does not work, turn to the left and walk
through the corridor. Past the reception, left into the hallway and past the
counter of the nurses


Leave
the staircase and turn right, there you will find 2 toilets, search them for a
while. Go back to the hallway, to your right you will find room 208. Click on
the door and it will open, search the room.

Walk
back and enter the hall opposite room 208, room 206 is open.


Read
the letter and take a picture of it


You
can pick up and view a book here, but you cannot do anything with it. Exit the
room, the room opposite is locked. Continue through the corridor, on your left
you will find room 205. In the corner near the window on the right you will find
a letter on the floor behind a box. Furthermore, nothing can be found here.
Further through the corridor, room 203 and 204 are locked. Walk on and go to the
left, room 201 is locked. Walk on and you will reach the elevator that is not
working.
On
the right you will find another staircase. Turn around and walk to the other end
of the corridor. On the left you see room 202 and in front of you the exercise
room, you can search through everything here, but there is nothing more
important. Turn around and go back through the side corridor to the left, at the
end to the right and you will be back at the stairwell.


Walk back to the stairwell and go to the ground floor, there you go
to the left. At the reception you go outside and to the right and to the right
of the tree


Apparently
someone here has fallen from the roof and died here ... Accident or murder?
You have one key in your inventory,
that of Wanda Tyler, of 43 Silverlake Blvr, so let's look for this address.

Chapter
2: Wanda Tyler's house, the Mansion and the Church:
2018:
Walkthrough by: Dick Leeuw and Louis
Koot
Text
by Dick Leeuw. Screenshots, and a bit of text by Louis Koot