2019: Walkthrough by: Dick Leeuw
Text
and screenshot by Dick Leeuw
If you have found this walkthrough via google search or via another site then you have probably not visited my site.
A
lot more very detailed game walkthroughs can be found on my site at:
www.pcgameswalkthroughs.nl
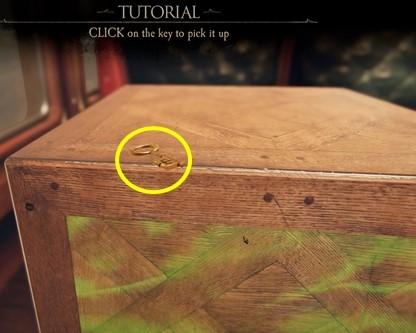
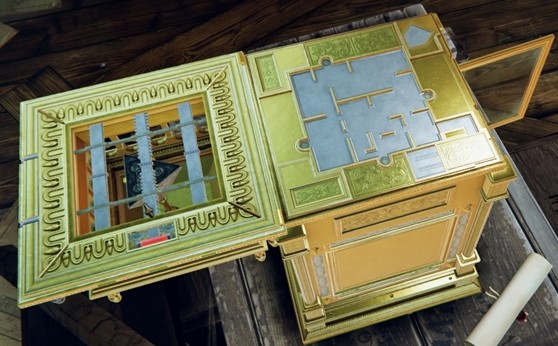
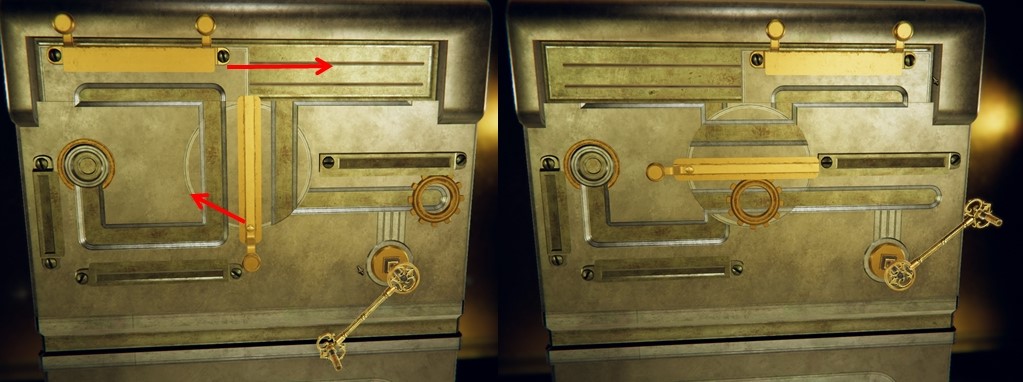
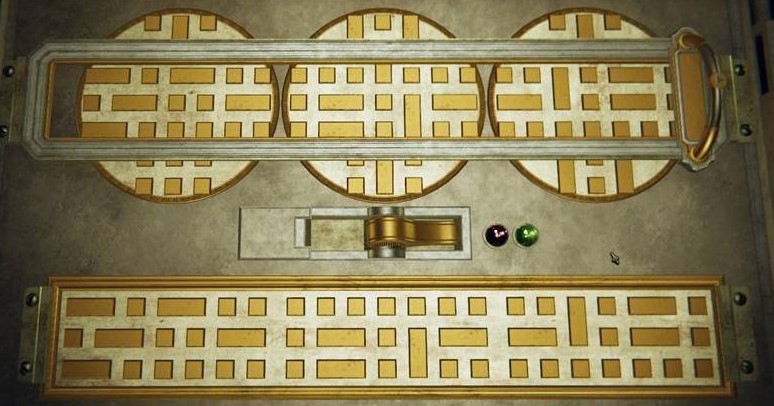
Create a profile and start a new game.
The controls are the same as with The Room 1
and 2, you don't need to have played these to play The Room 3.
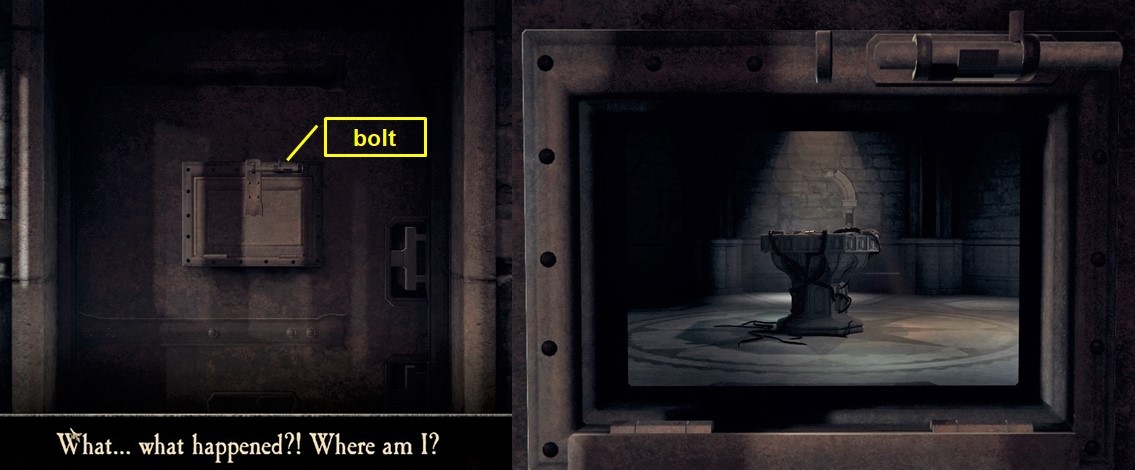
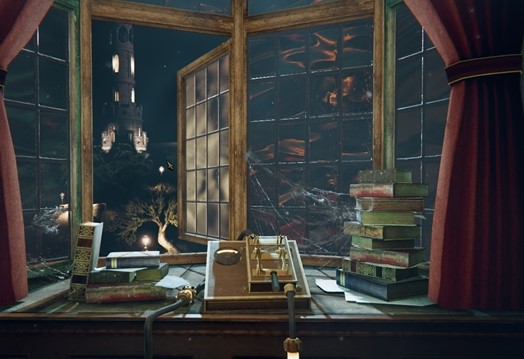
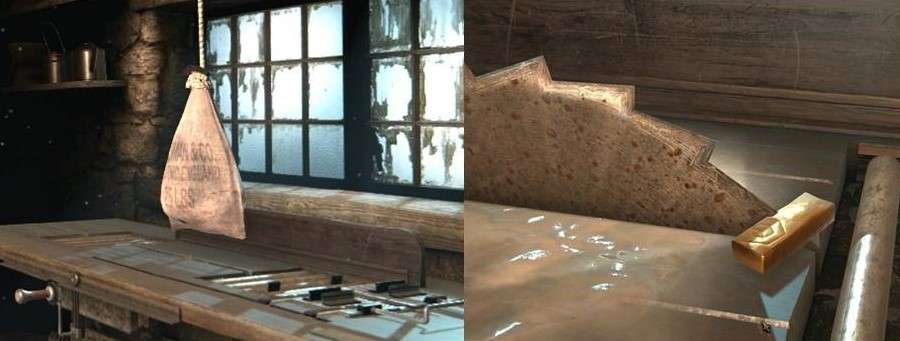
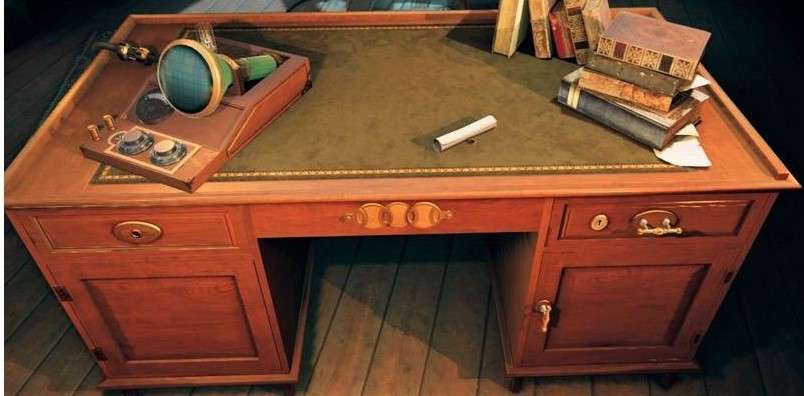
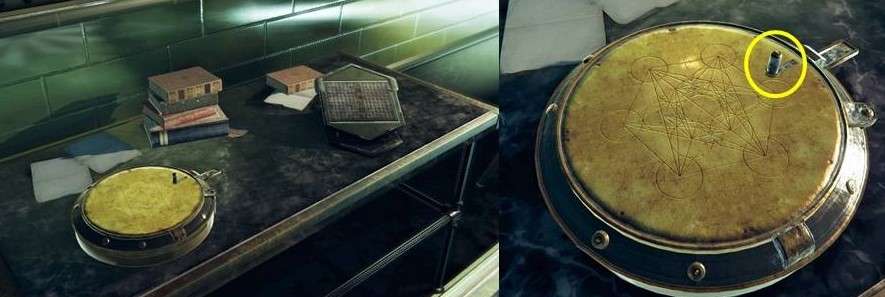
You are on a train and there is a journal on
the table, double click on the journal to open it.

Read through the journal and then zoom out by
right clicking.
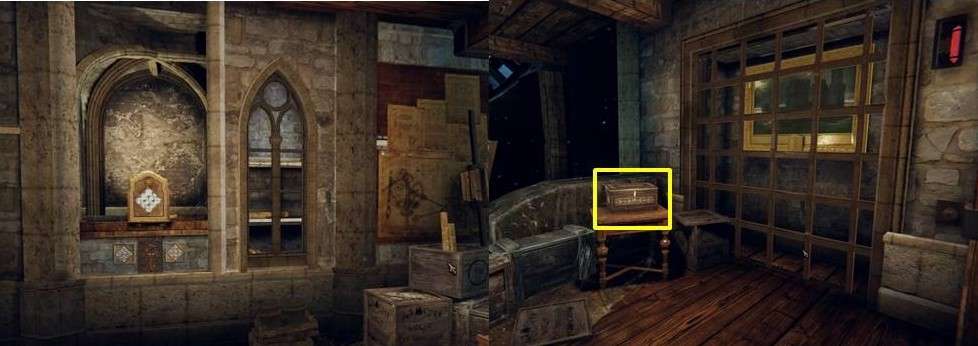
A moment later he is gone and now there is a
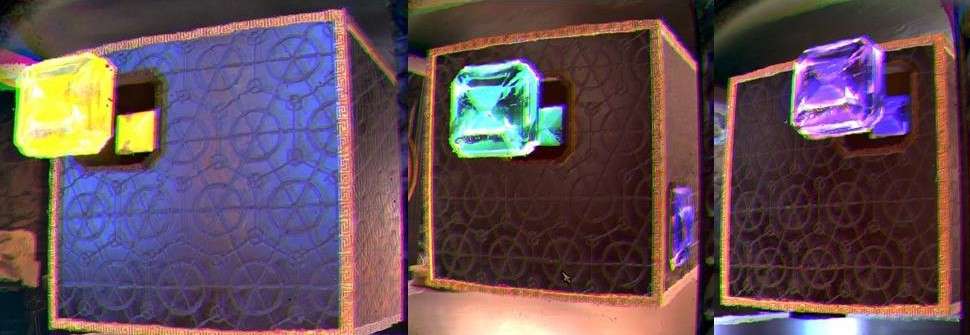
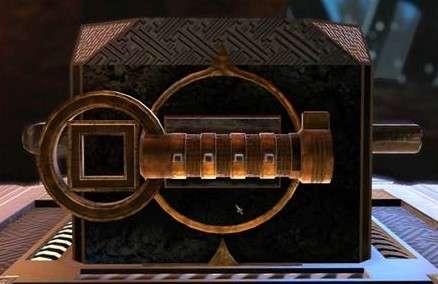
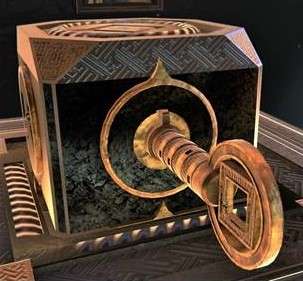
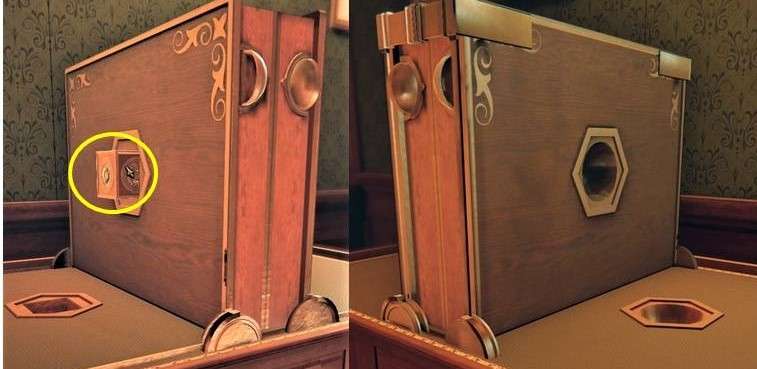
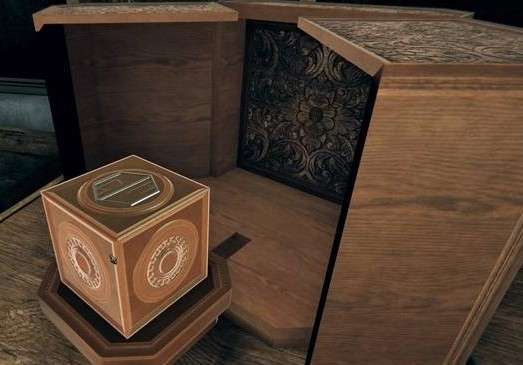
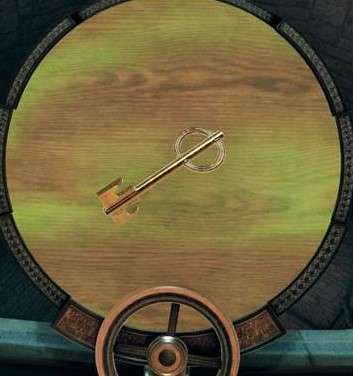
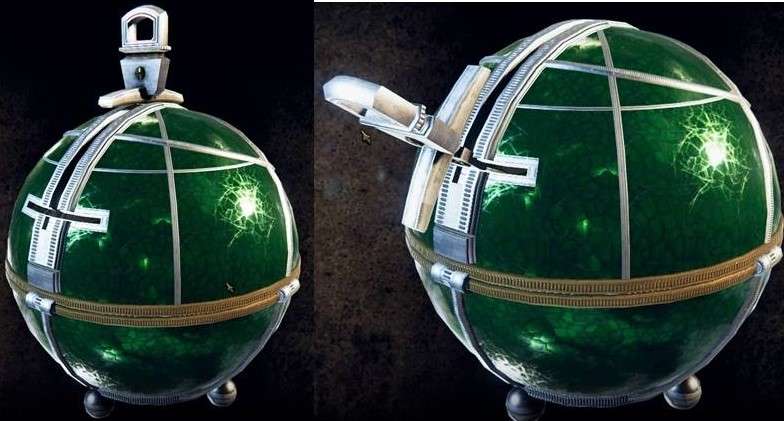
box on the table, double click on the box.
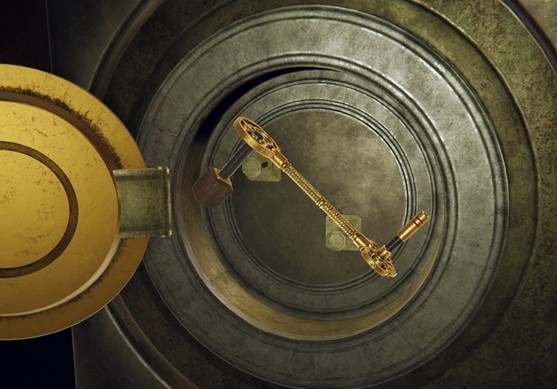
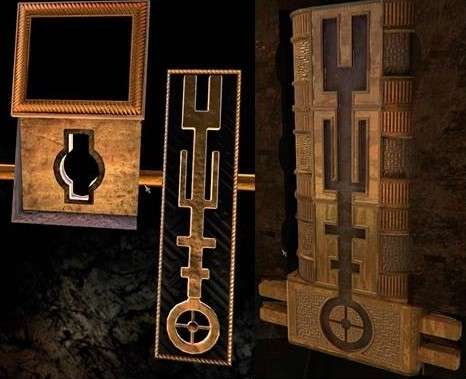
You zoom in on the box and you see a key on top
of the box, get the key.
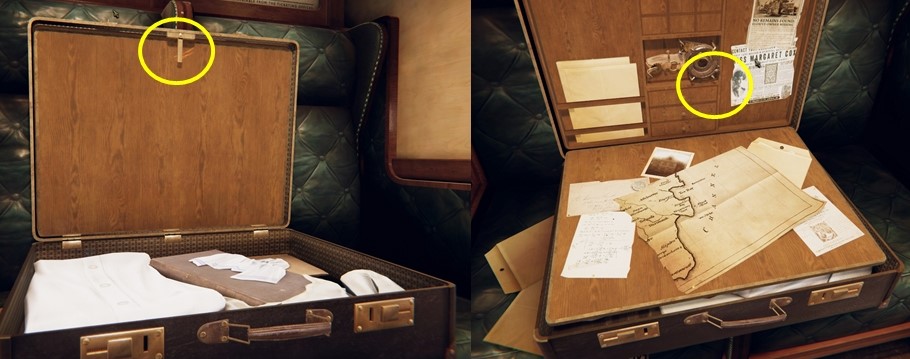
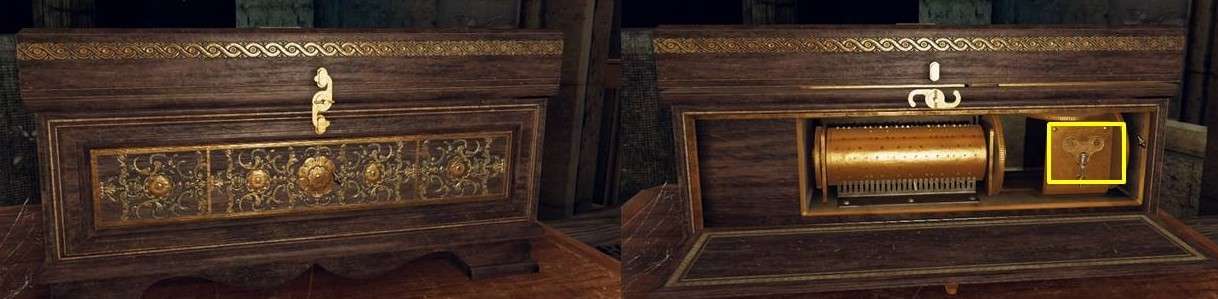
This is now on the right of your screen, click
on it to see hidden things.
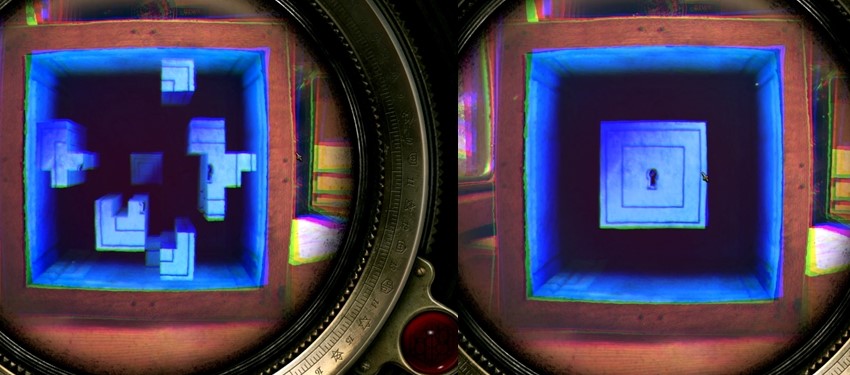
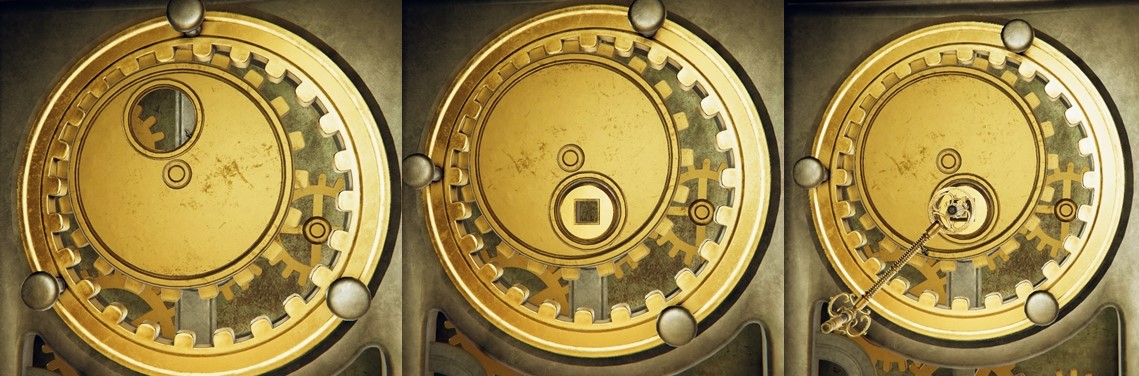
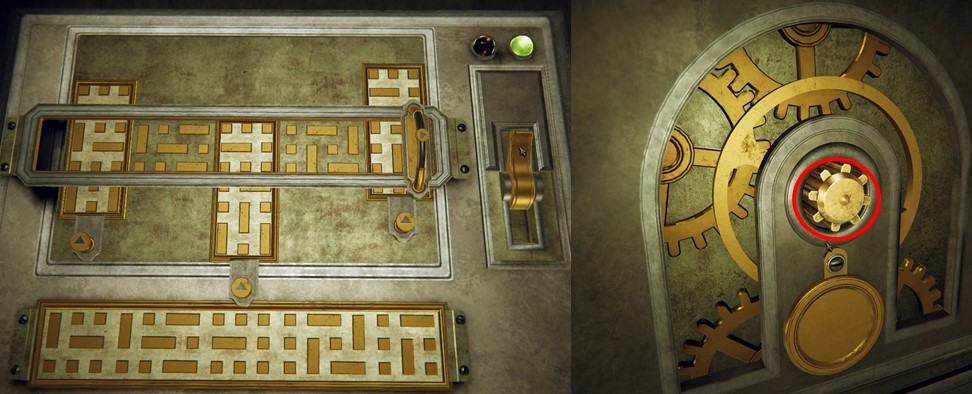
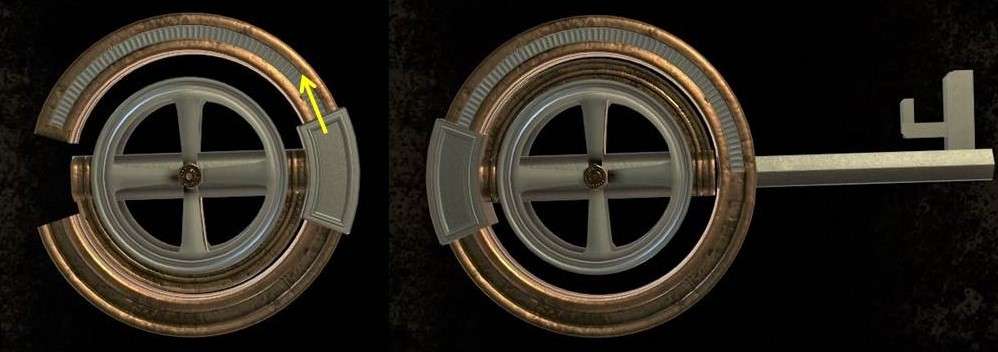
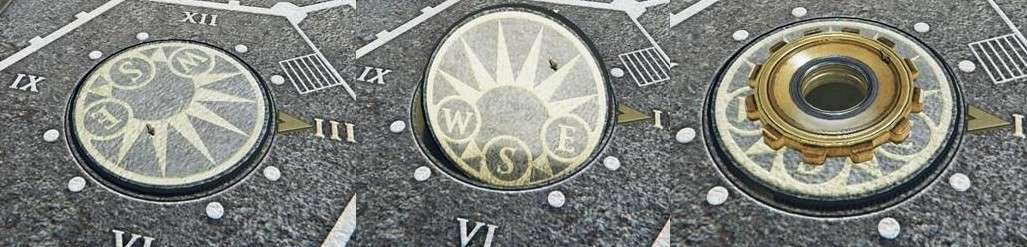
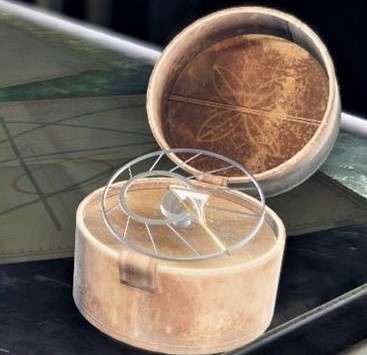
You see a number of separate pieces, which you
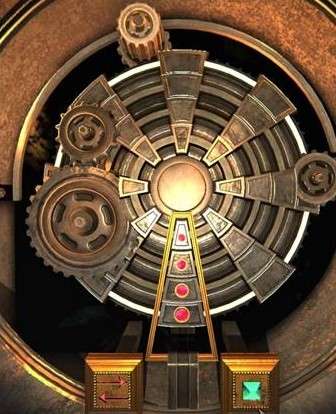
can slide into a cube with a keyhole in the middle.
You will then see the direction that you must
turn the key.

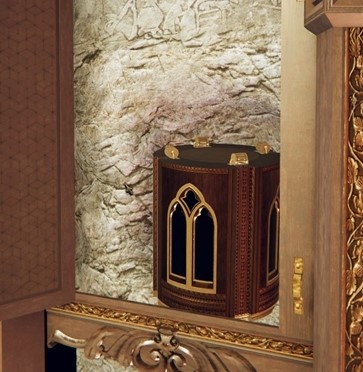
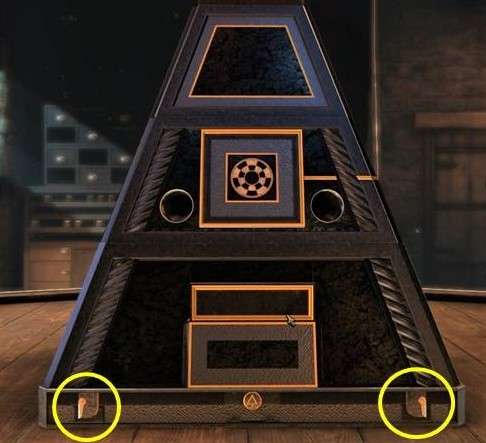
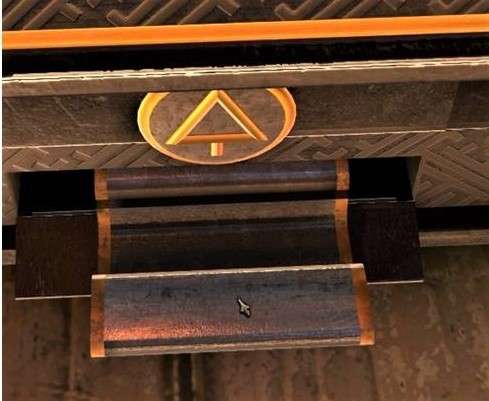
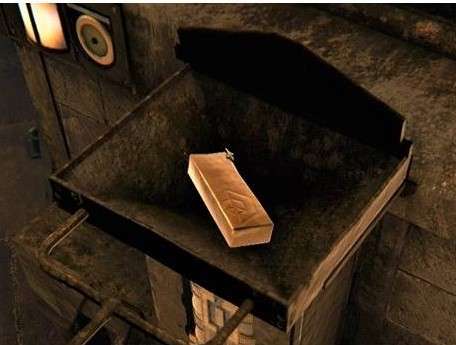
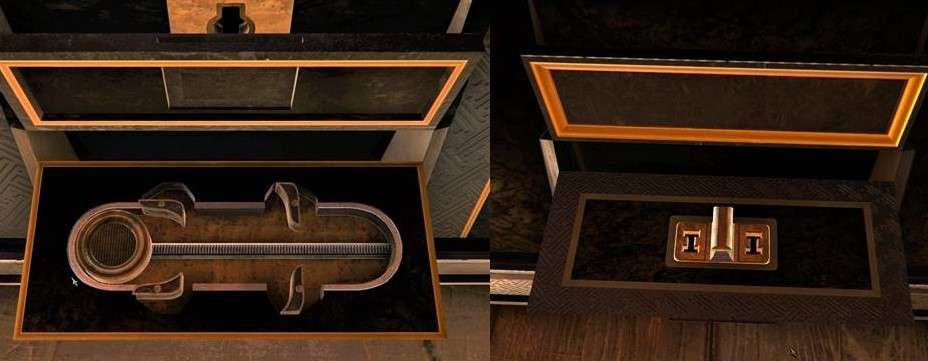
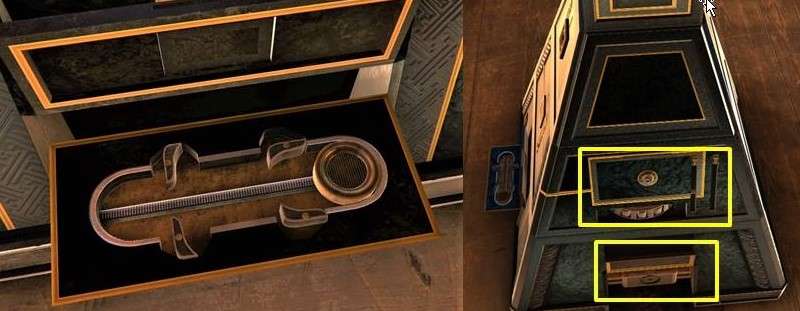
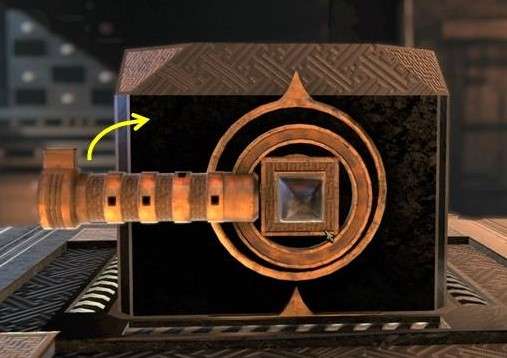
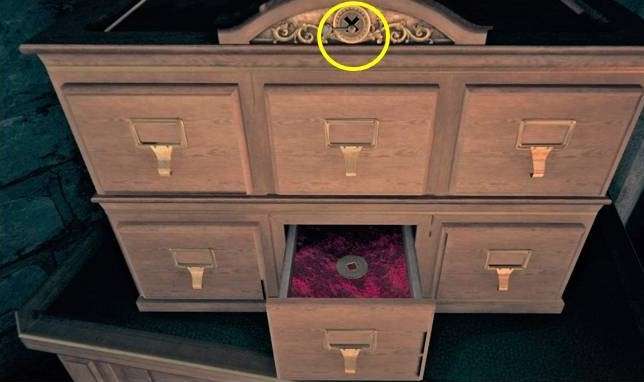
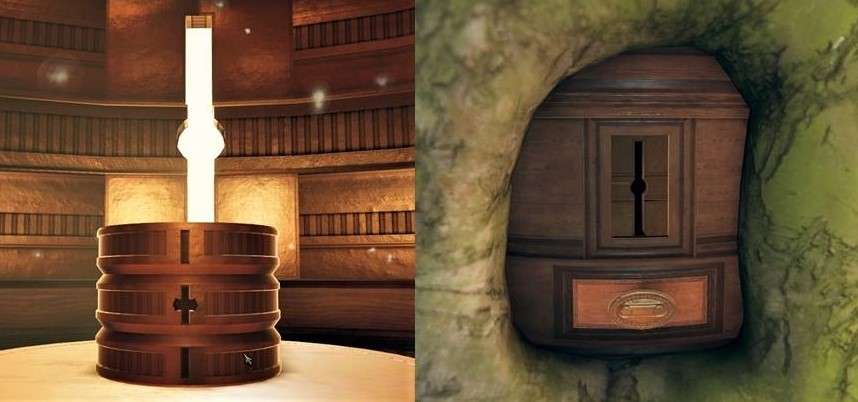
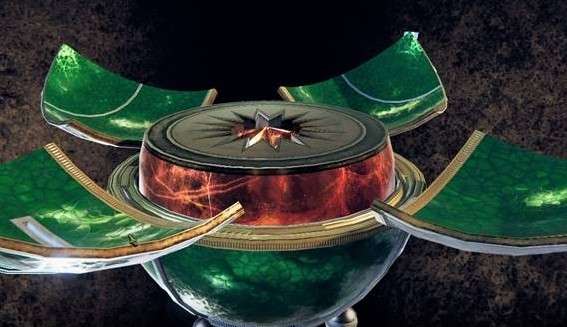
The chest folds open and there you will find a
pyramid, take the pyramid.
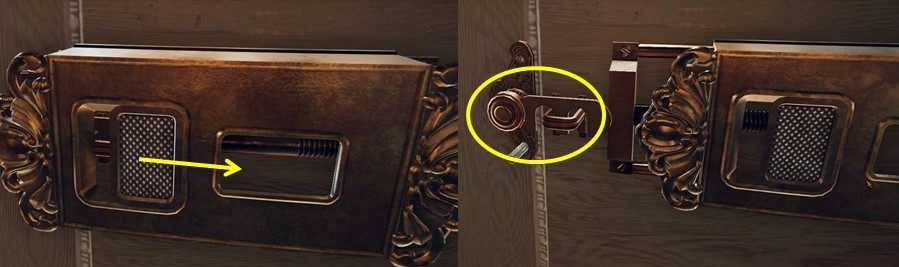
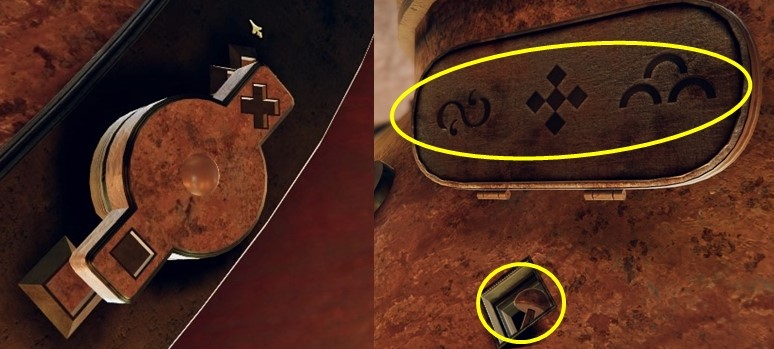
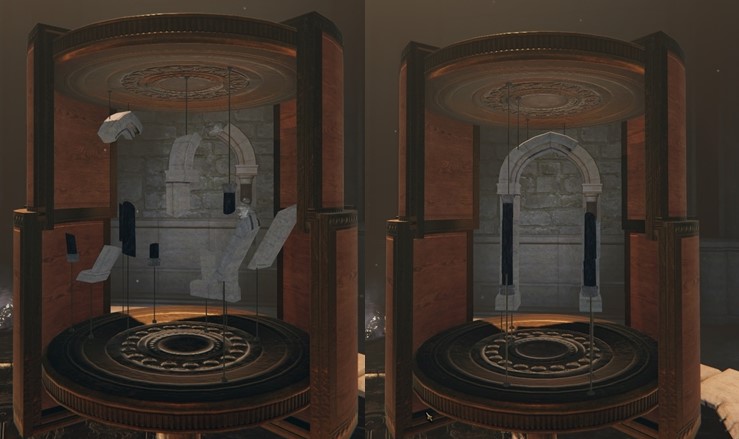
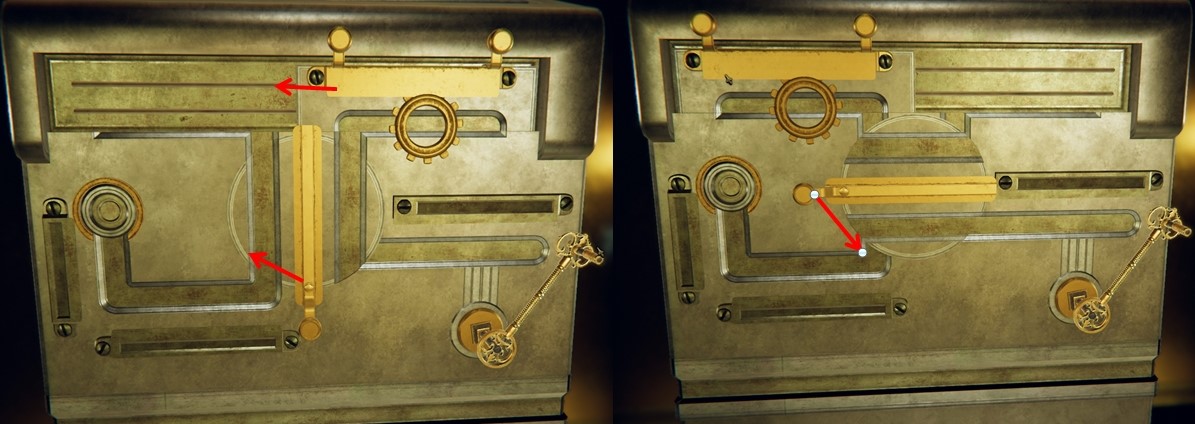
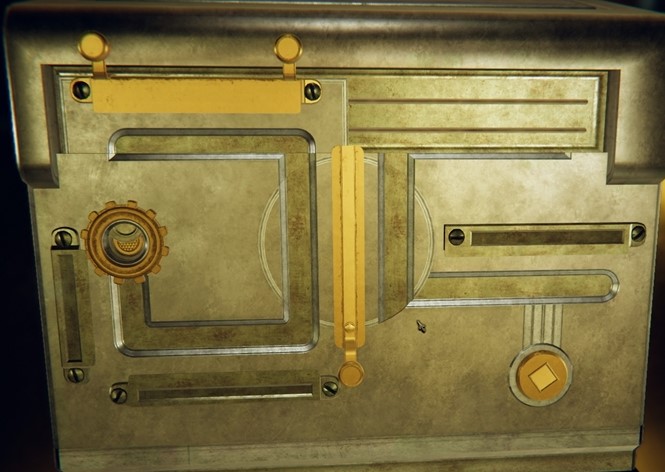
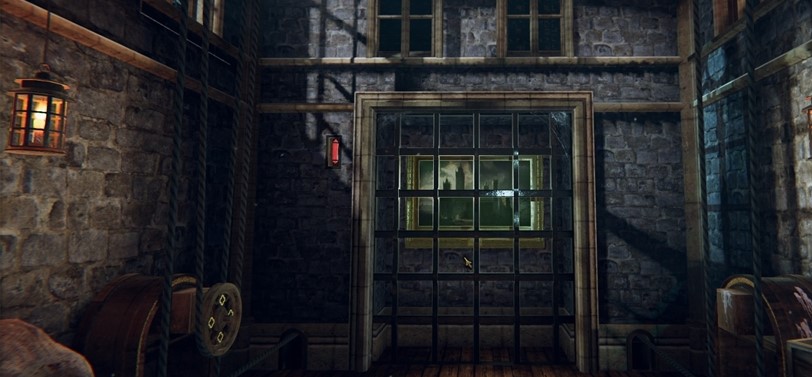
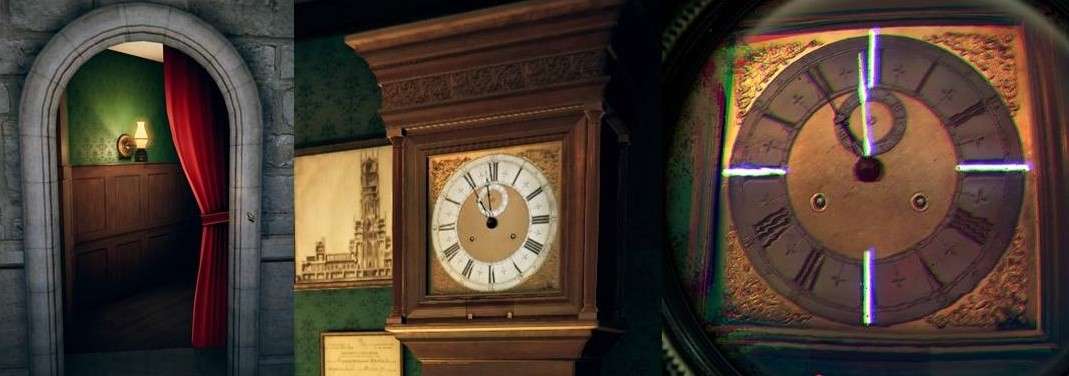
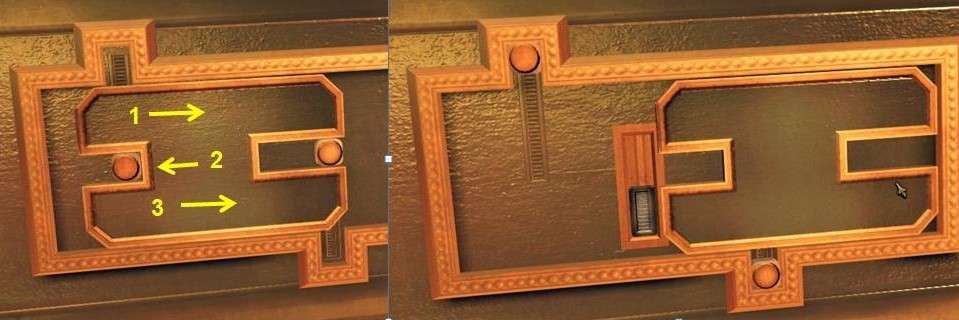
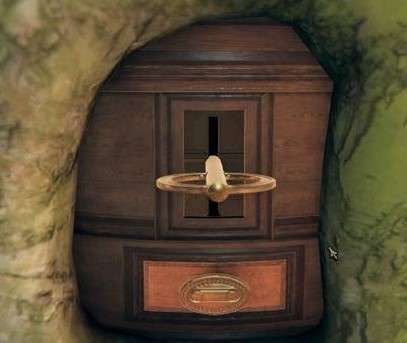
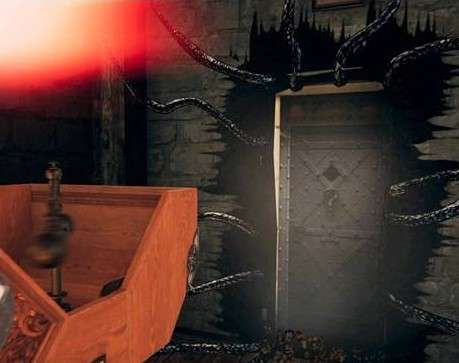
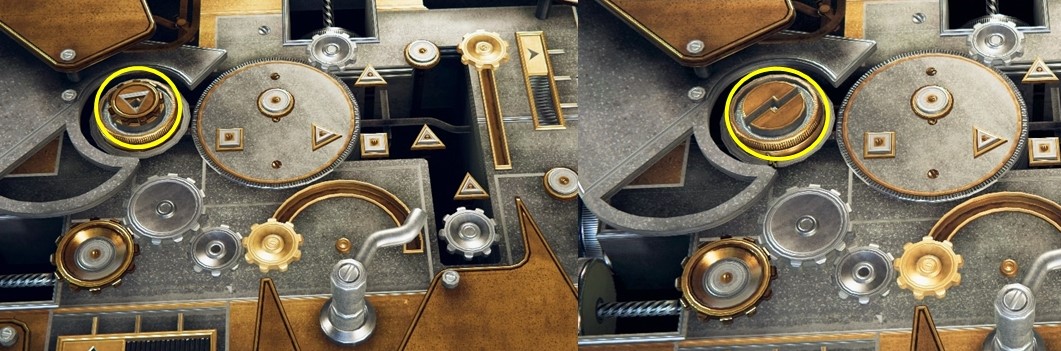
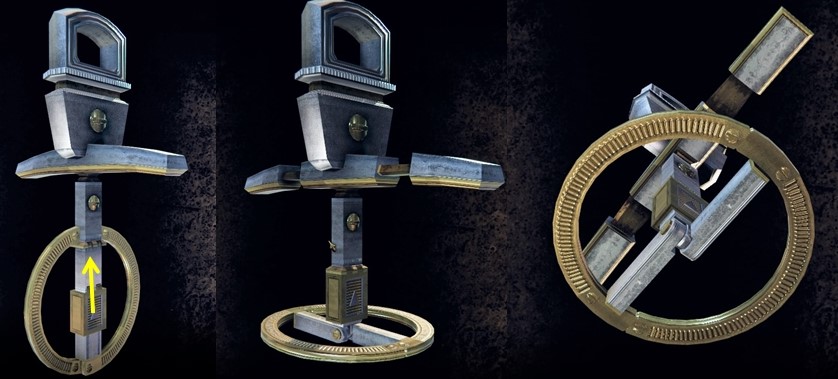
Zoom in on the cell door and open the hatch.
You see a stone table and a man comes in, he
walks to the table and then leaves again.
You see a fence, you have to open it to play
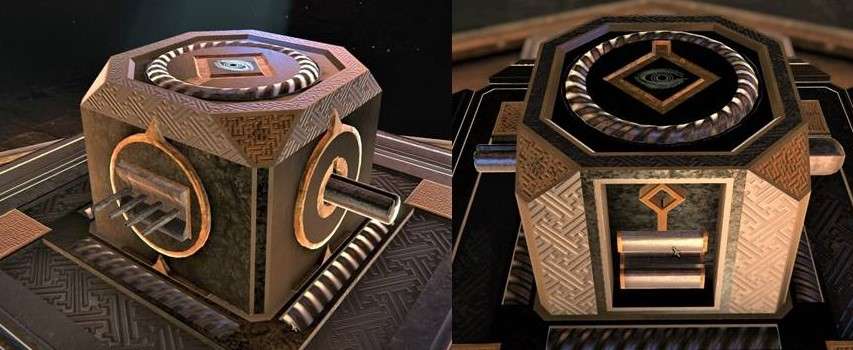
the other ends.
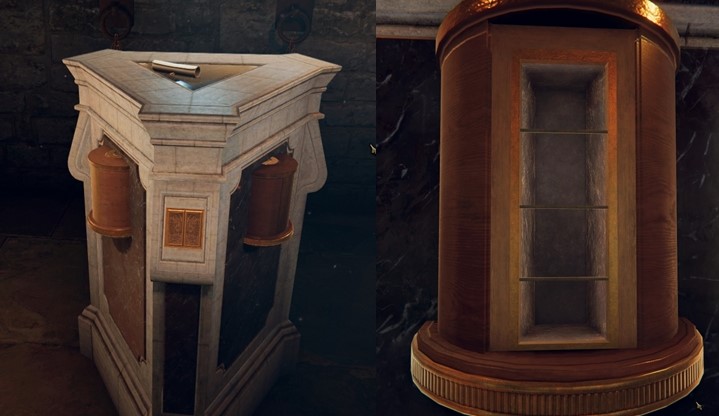
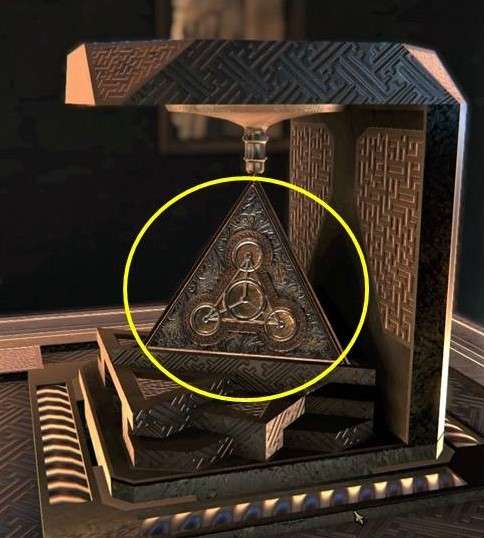
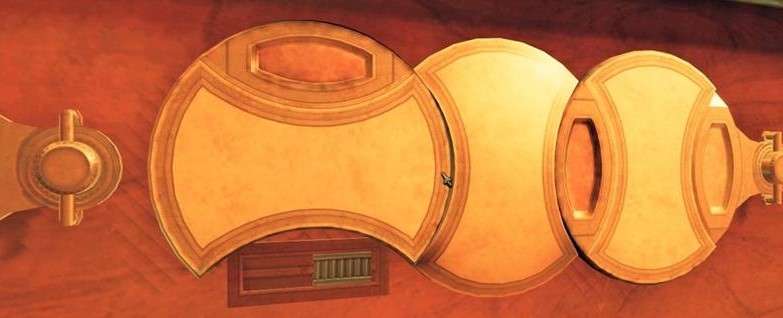
You also see a triangular base, with a paper
roll on top.
On the sides you see semi-circular boxes and on
the front point you see a square plate.
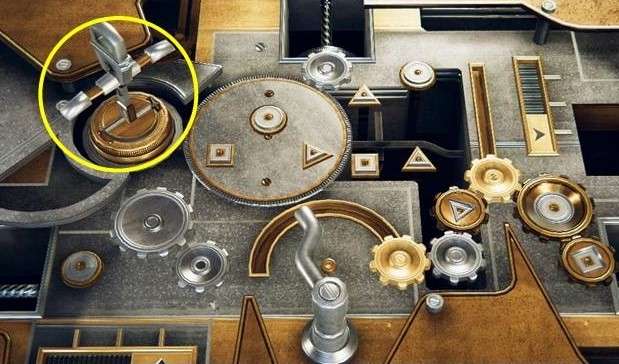
You must now turn the right item to the front.
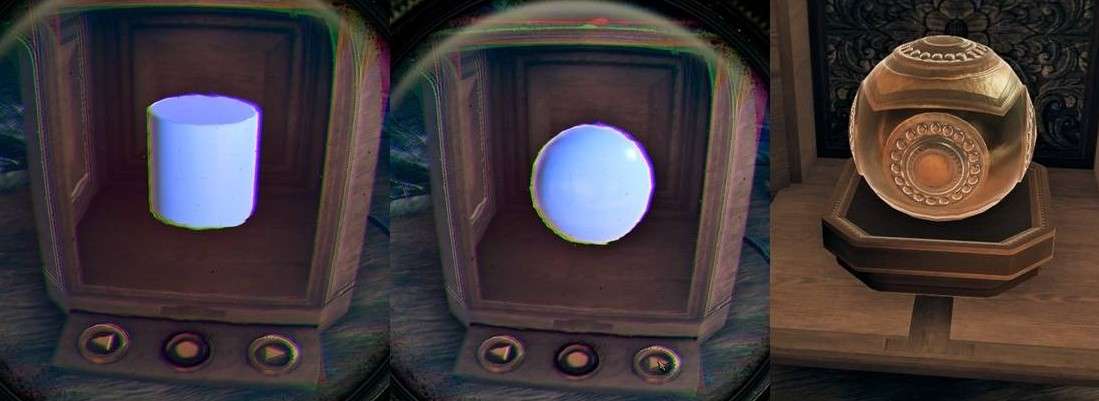
But what's the right item, zoom out and click
on the lens. You now see a text.
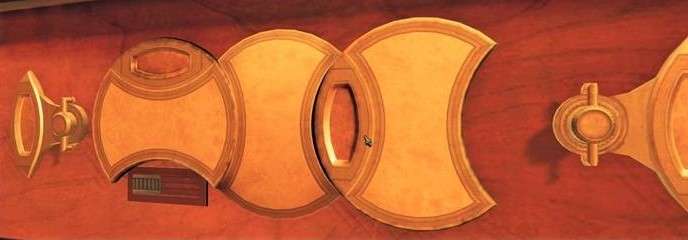
Zoom in again on the box below this text and
turn it until you see an empty box.
The following sentence is: "My face is
silent without my hands".
Zoom in on the box again and turn it until you
see a watch.
Then turn to the last side, where it says:
"The power of flight the well of knowledge".
Zoom in on the box and turn until you see a
feather.

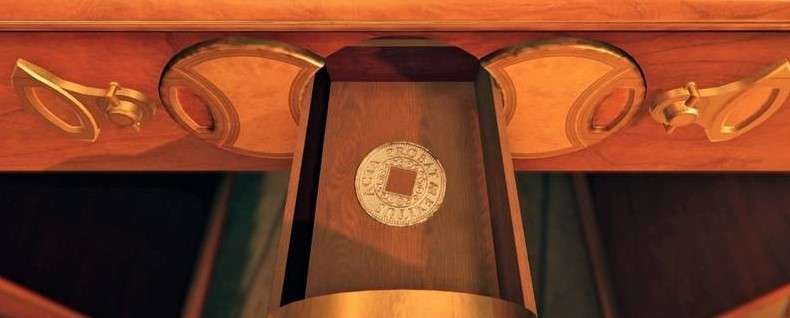
The front plate now slides open, you see a
letter. Click on it to read it.
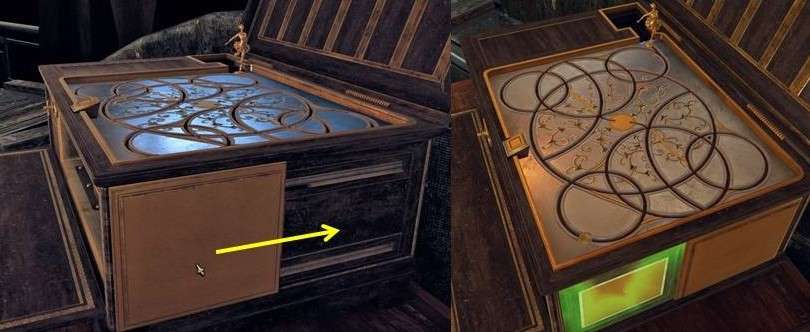
Click the letter away and then pick up the box
behind it.
Click this box to your inventory and then click
on that box in your inventory.
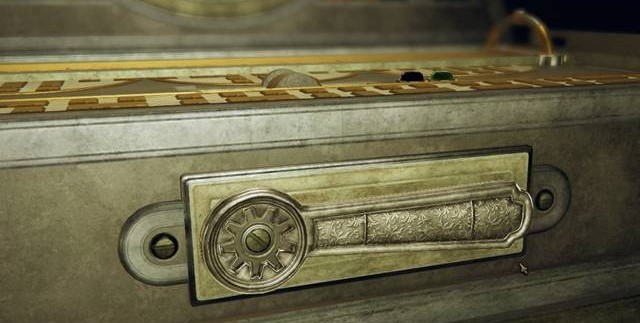
This will now appear in your screen, turn the
lock to open the box.
Then drag the lid upwards, inside you will find
another lens.

This is placed on your magic lens.
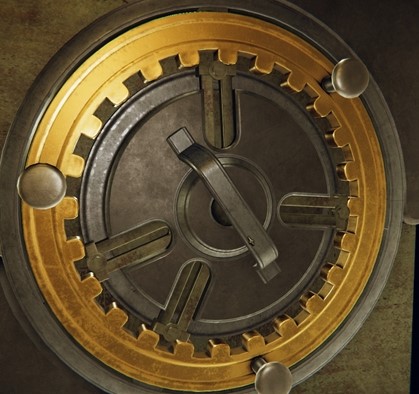
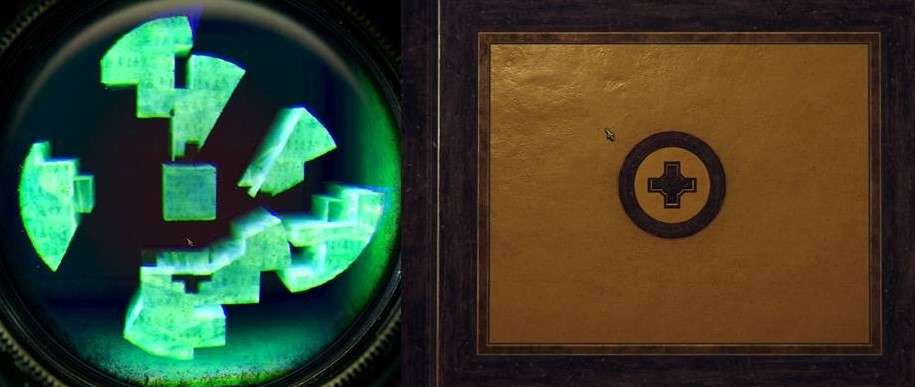
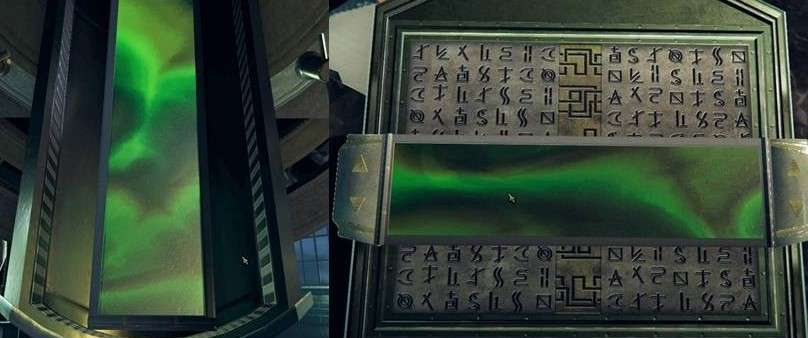
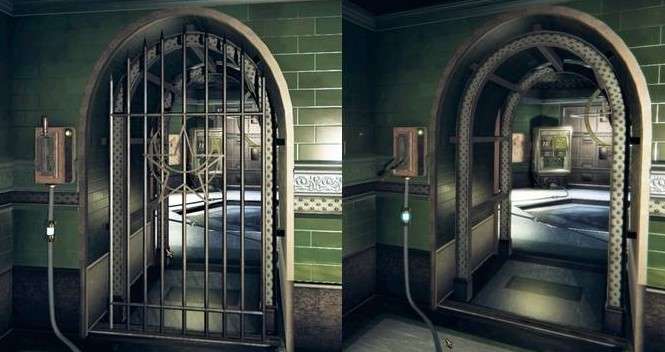
You now see a shimmer on the lock of the door,
click on your lens and zoom in on the lock.
Then zoom in on the shimmer and you enter the
lock, you now have to put the 4 white stripes at the same height.
If that is successful, the door will unlock,
when the door is open enter the next room.
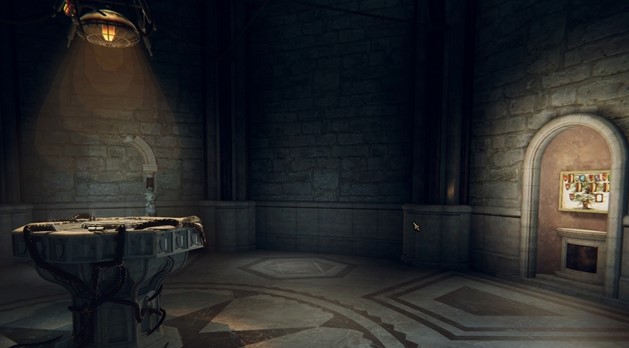
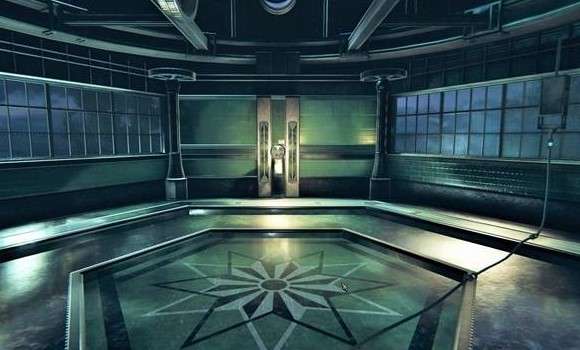
You can walk around here and look at the doors
but you can't do anything with it.
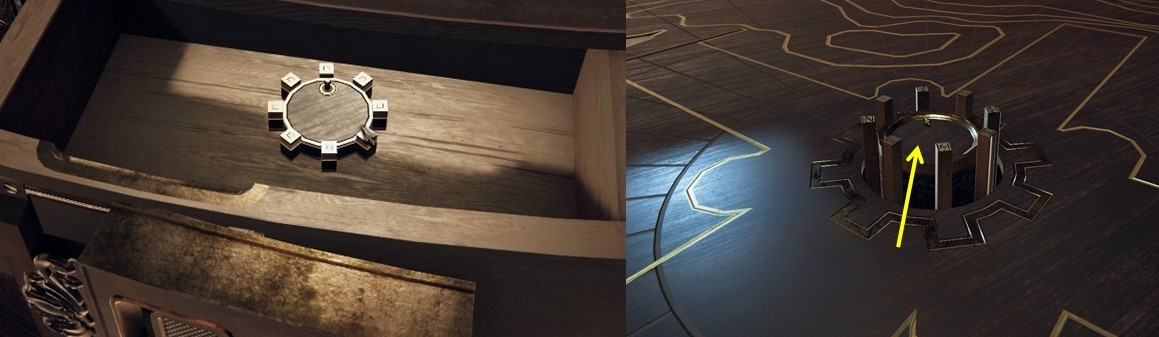
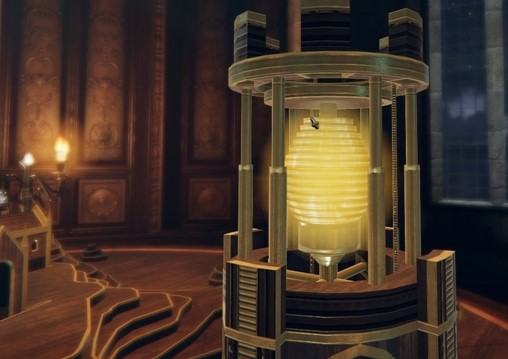
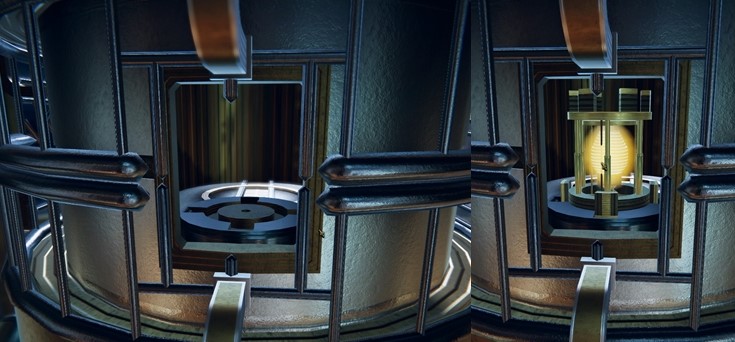
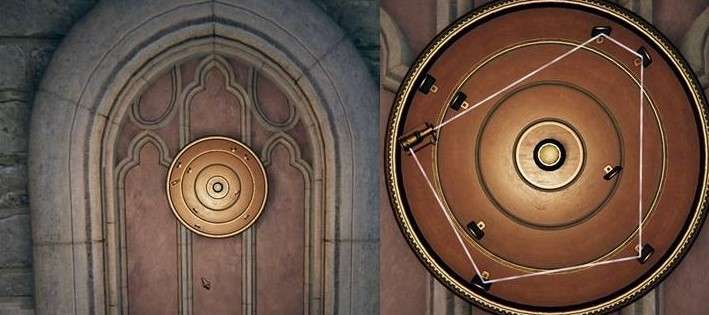
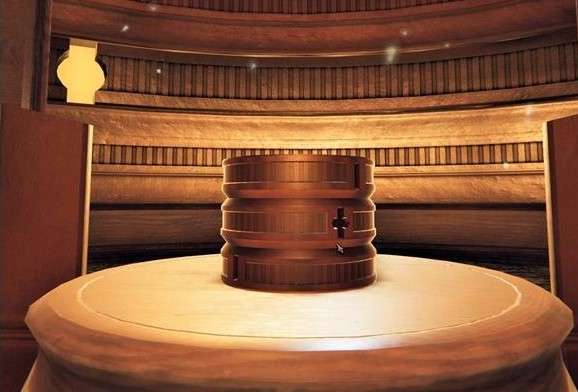
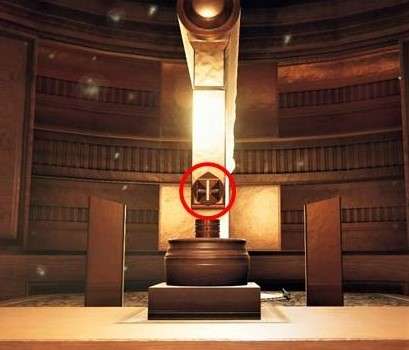
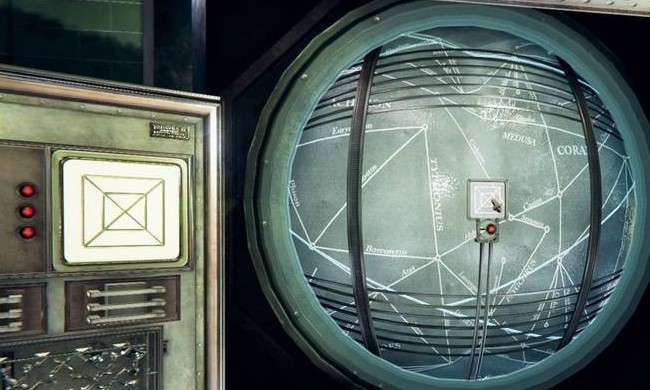
Walk to the centre to the stone table, it is
not actually a table but a container with a thick liquid mass in it.
There is a round disc in the middle, on the
disc are 5 circles. On the edge lies another roll of paper.
Double-click the role and then click the role
again to open it.
Read the role and then zoom out.
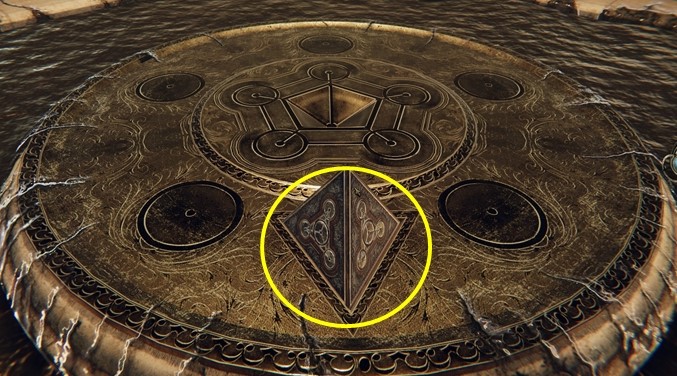
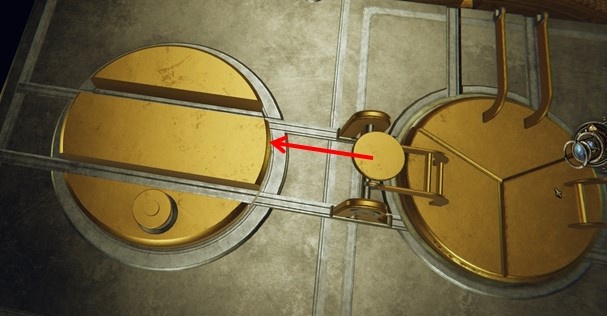
Zoom in on the round disk in the middle and
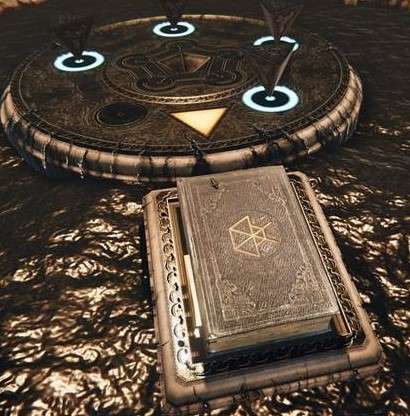
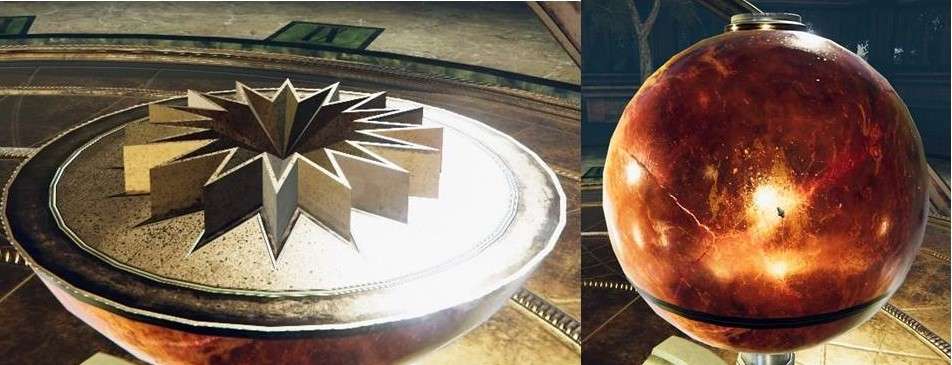
drag the pyramid from your inventory to the yellow area on the disk.
The Pyramid pops up and turns and then stands
on the middle circle.
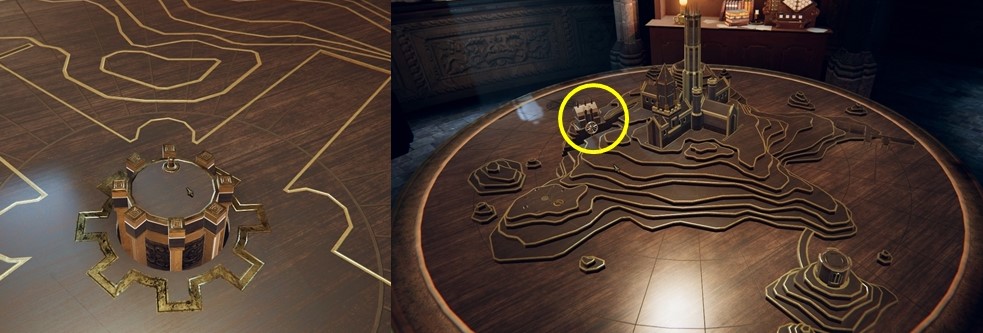
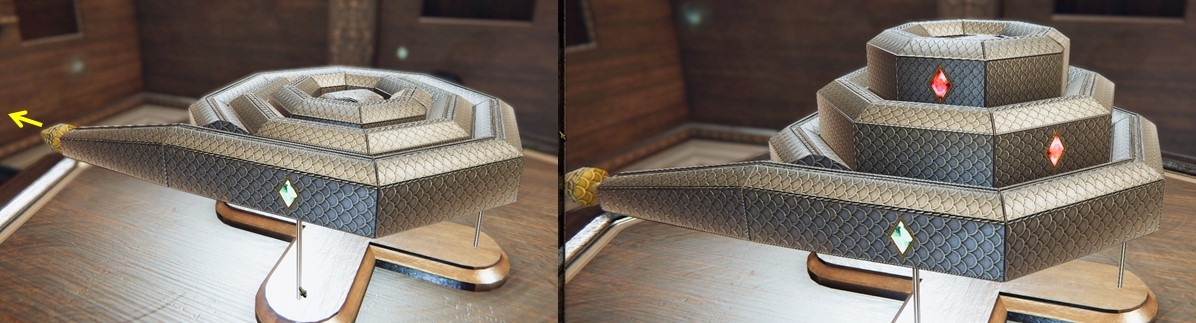
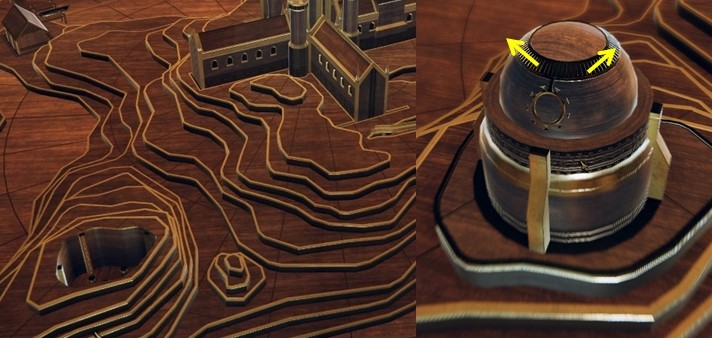
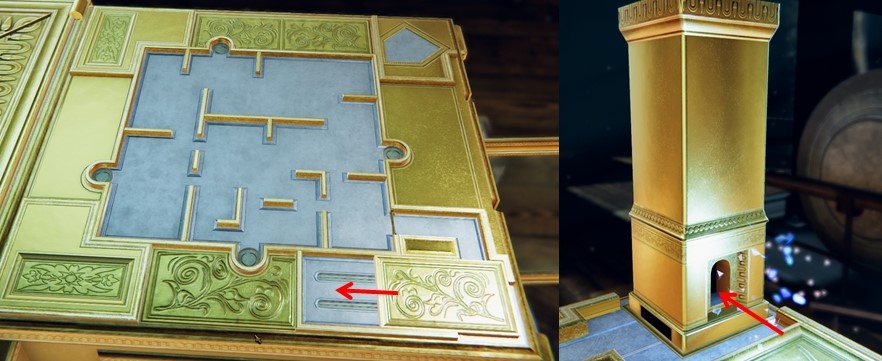
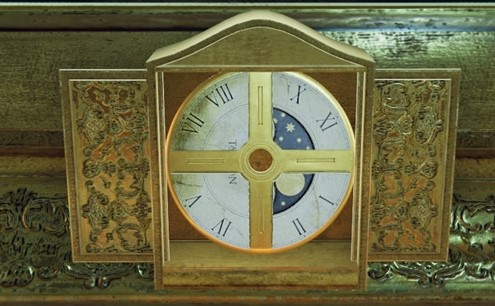
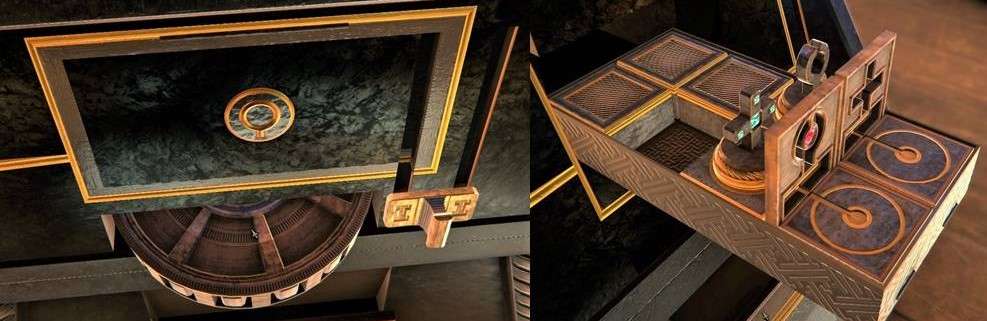
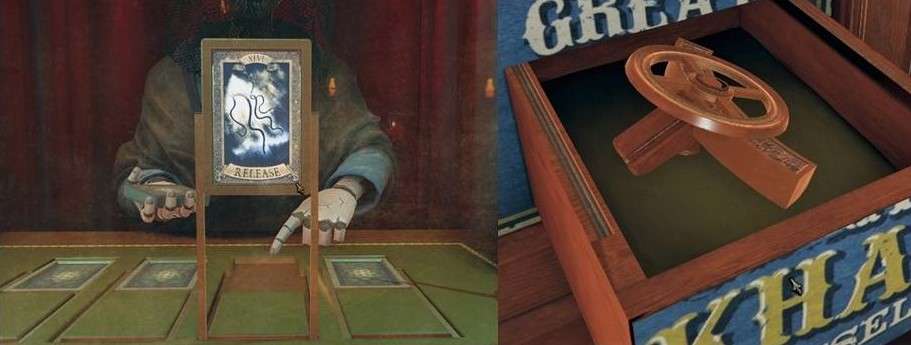
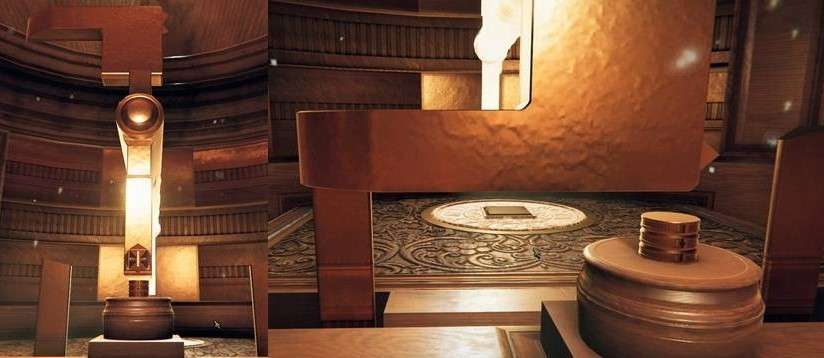
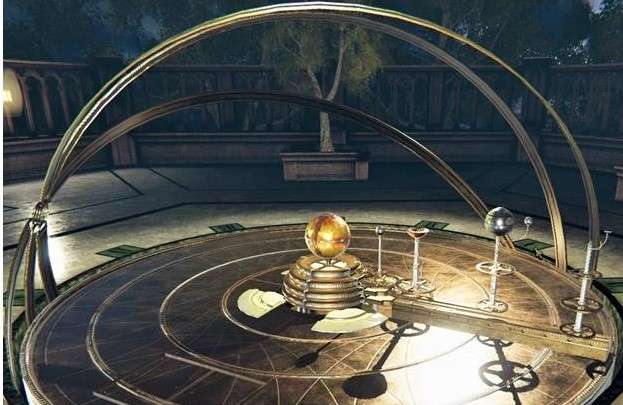
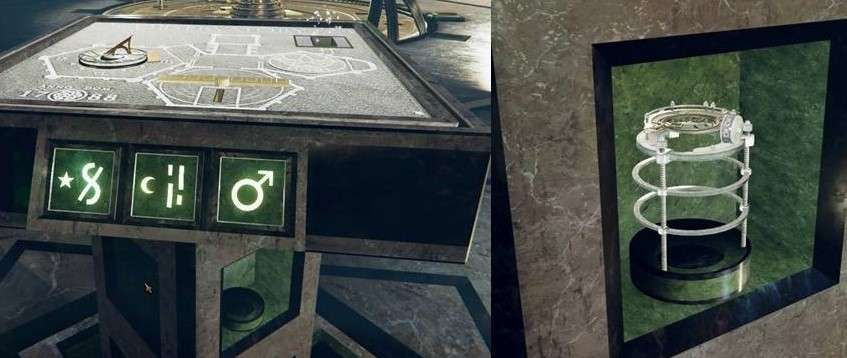
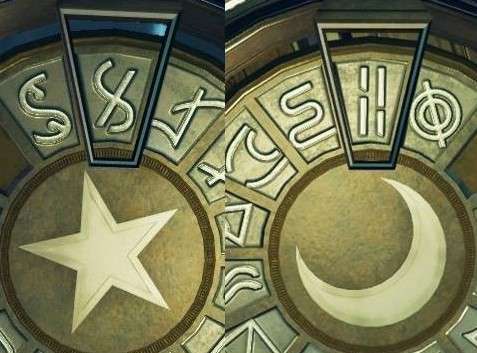
Chapter 2: The Light Tower.
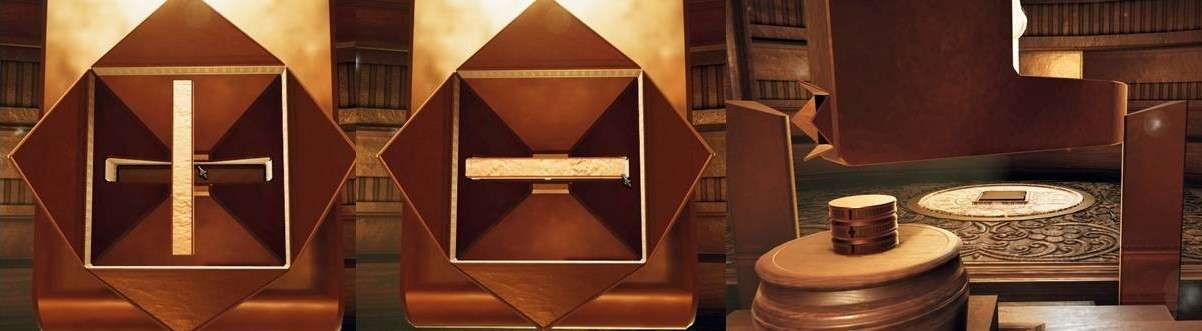
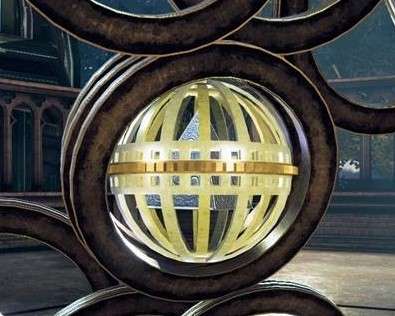
An emblem emerges from the liquid, take this
emblem.
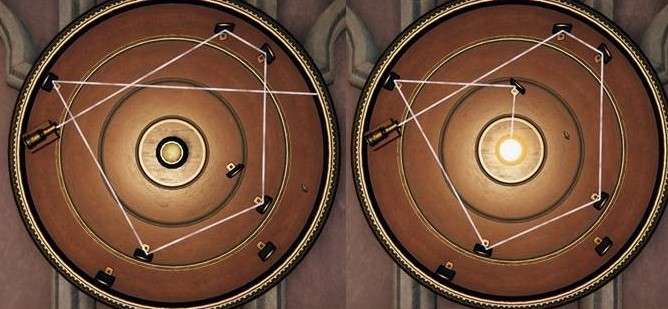
Zoom out and turn to the right, there you see a
panel with emblems.
The 4 other empty spaces now also have emblems,
you can change these emblems.
Now zoom in on the left side of the panel, you
now have to rotate these 2 emblems so that you can make the bottom emblem.
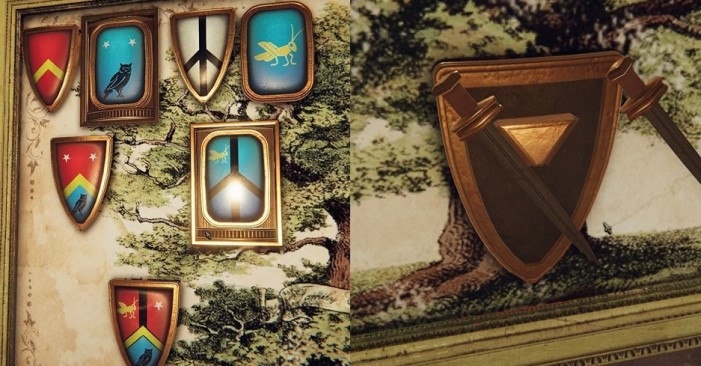
Done, you then automatically zoom in on the
bottom and you see the left sword twist.
Also twist 2 emblems here so that you can make
the bottom emblem.
Now the right sword turns, you zoom out and the
niche where the panel is hanging moves up.
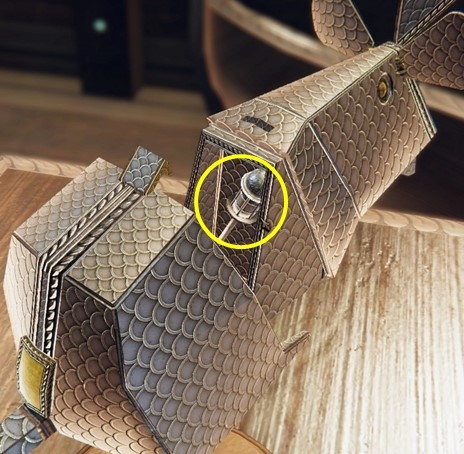
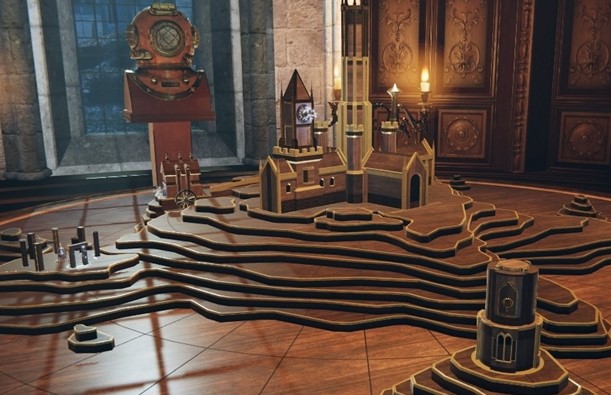
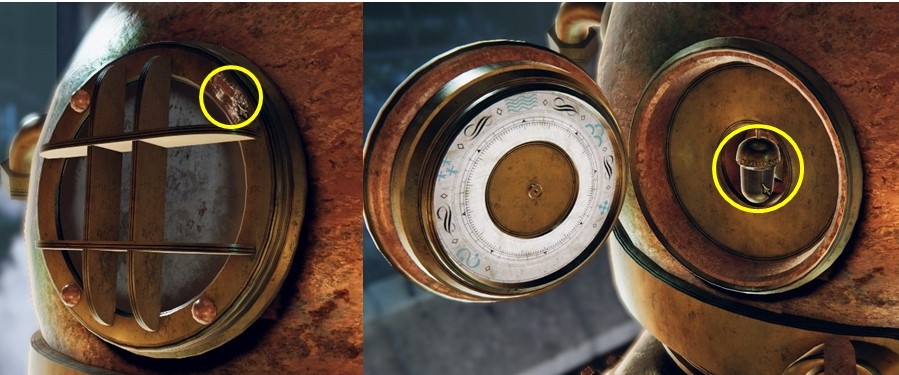
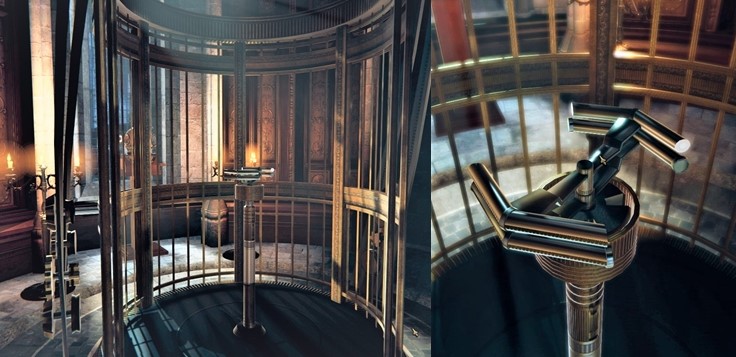
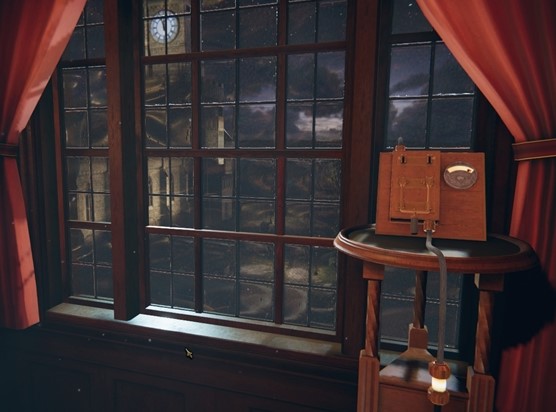
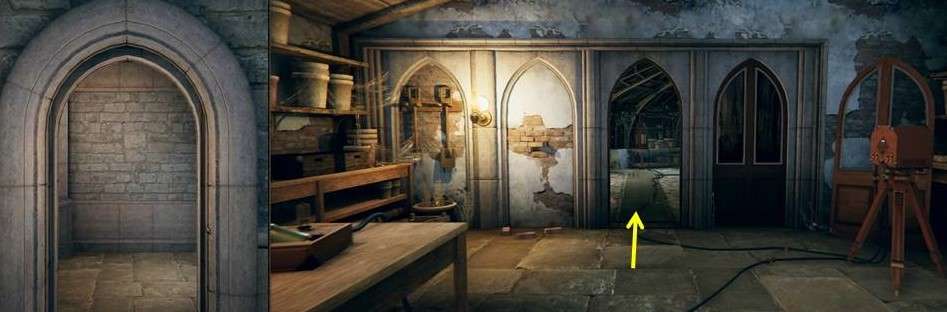
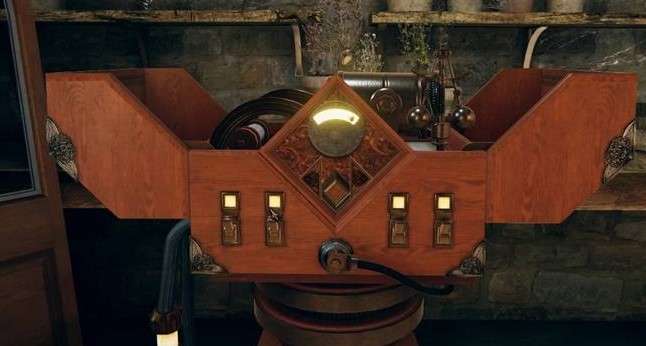
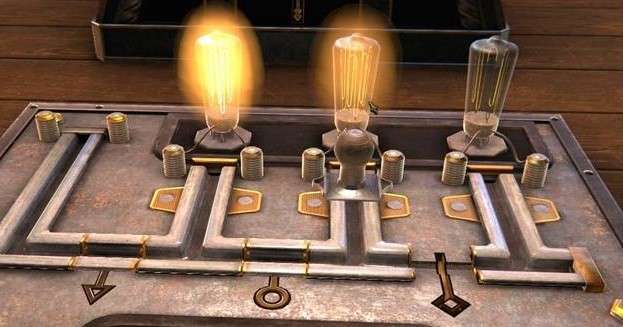
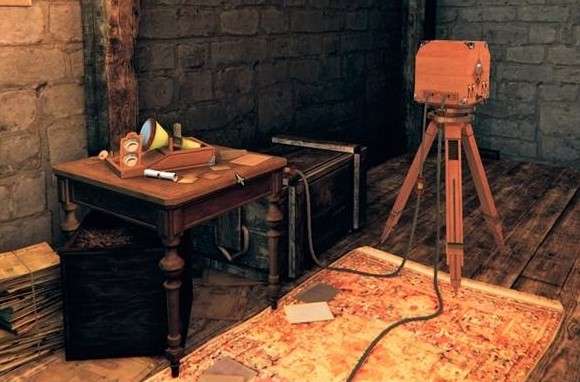
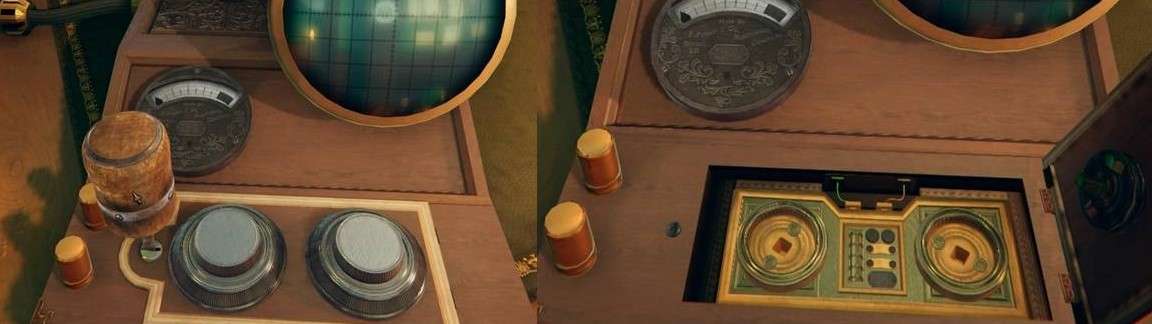
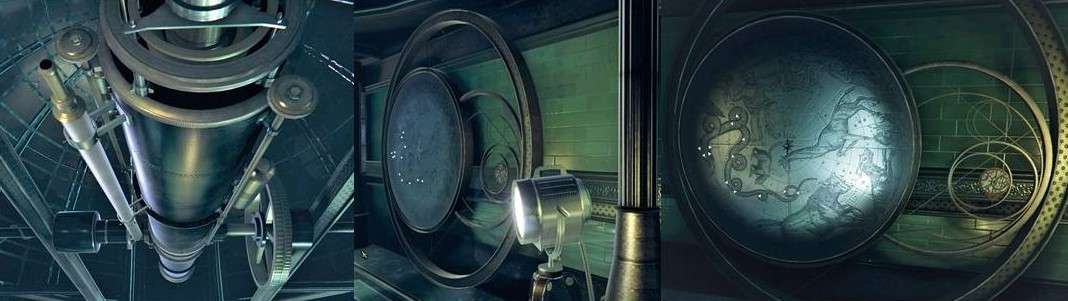
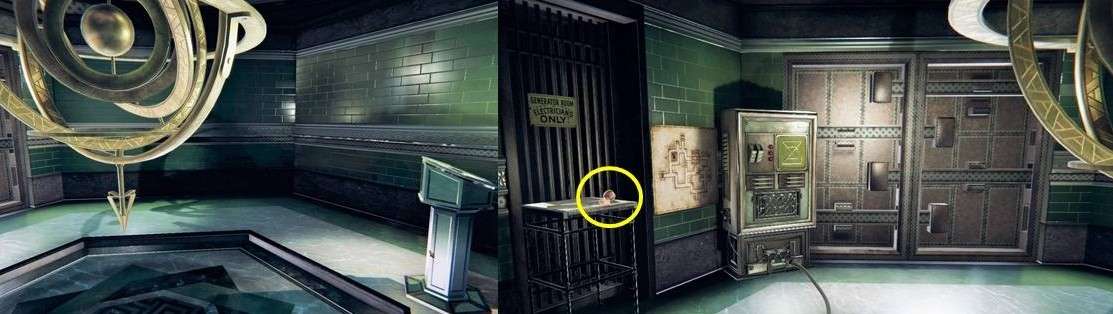
Enter the room and take a look around, in front
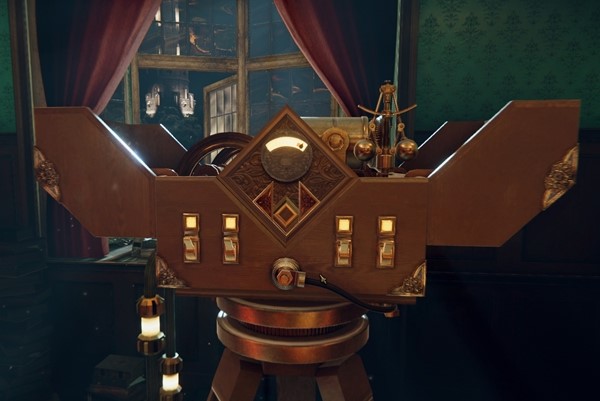
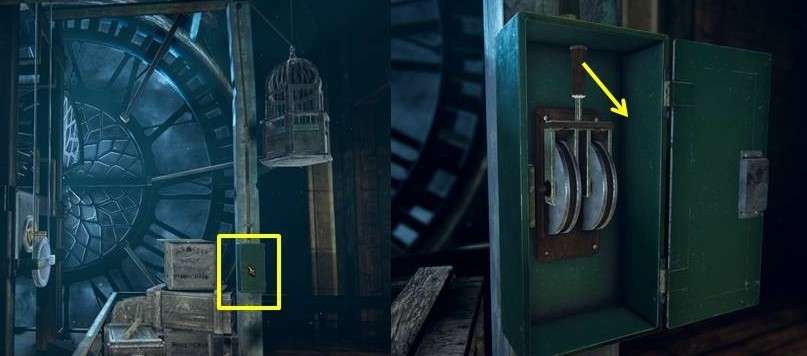
of you is a window with a power device to the left.
In the window you see a switch and you also see
a device on a tripod on the right.
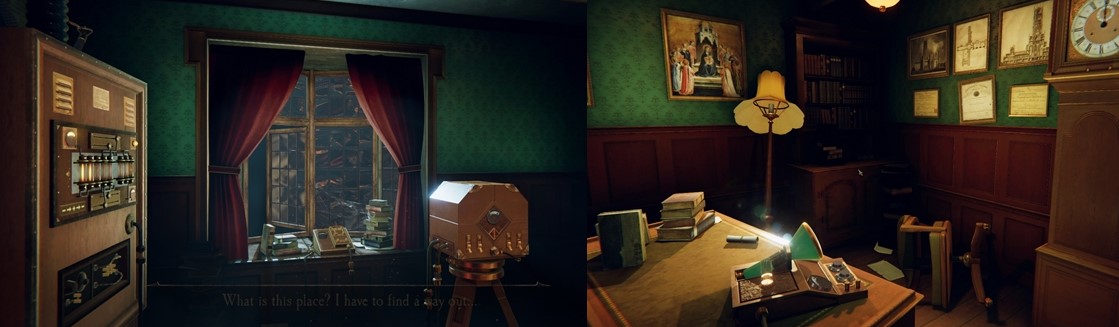
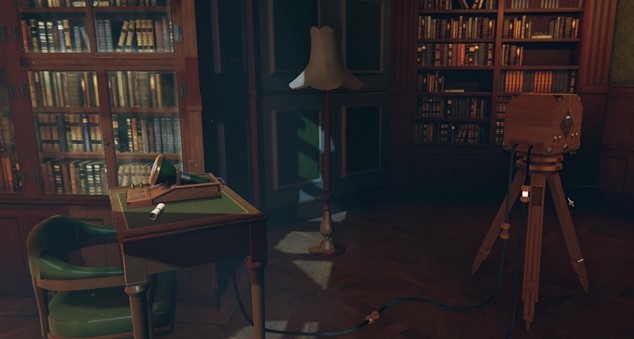
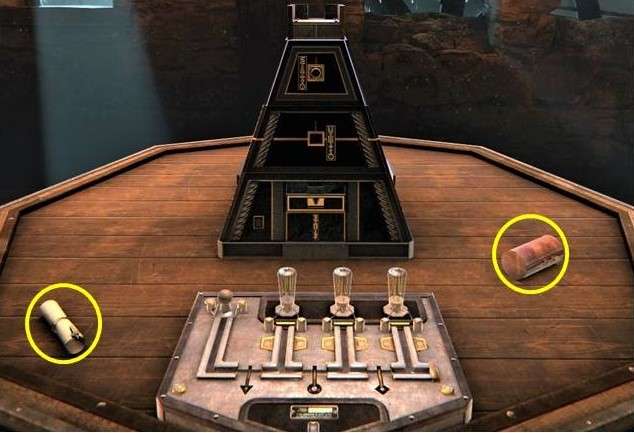
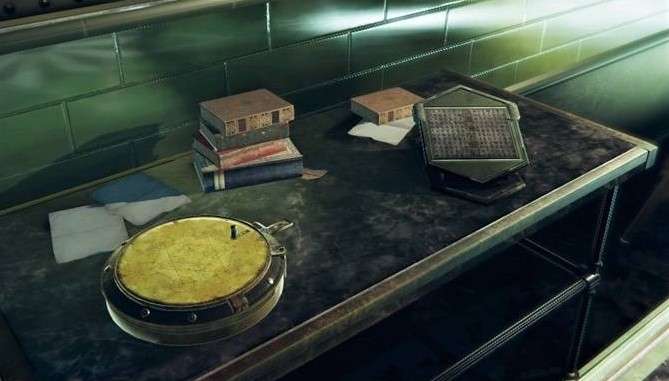
If you turn around, you see a desk with a
device on it, and there is also a paper roll.
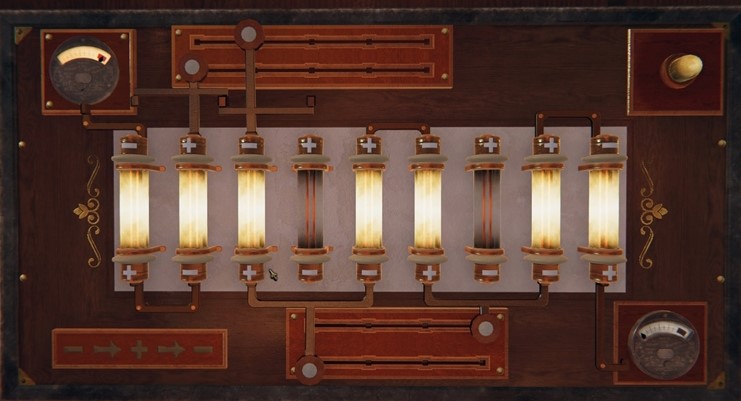
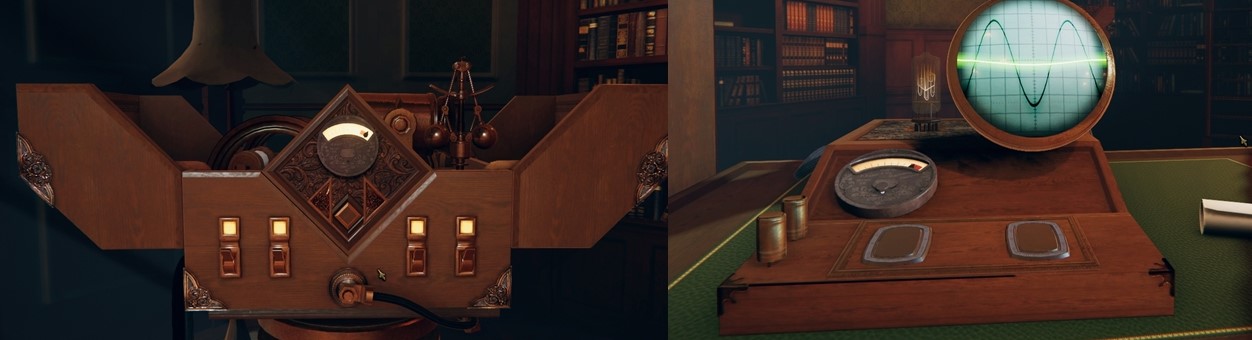
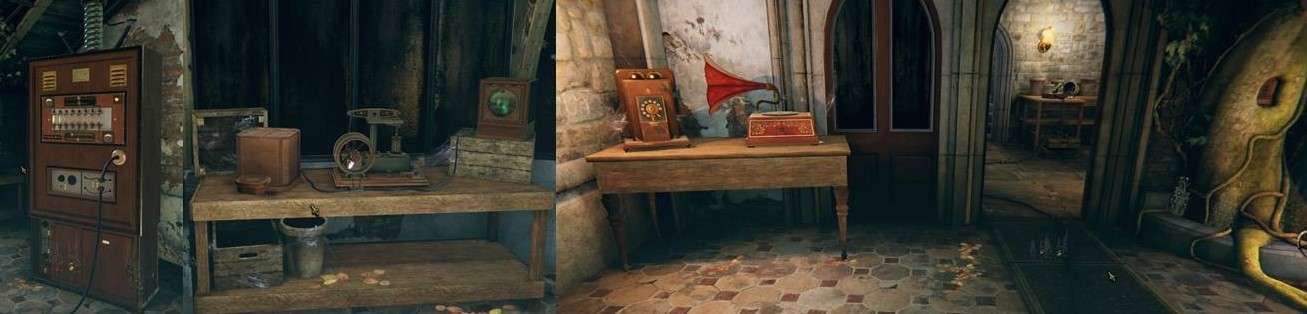
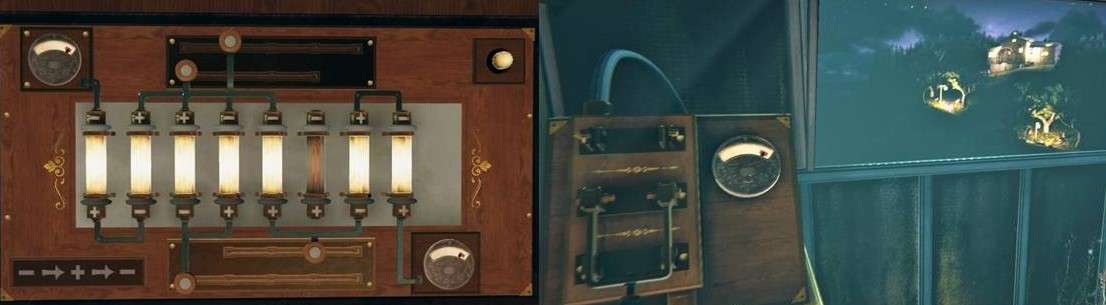
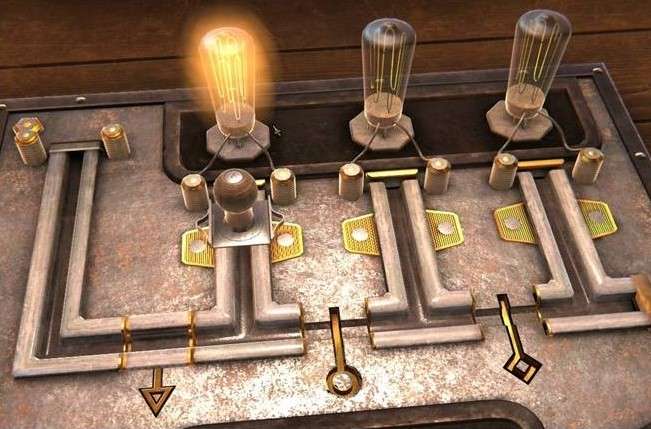
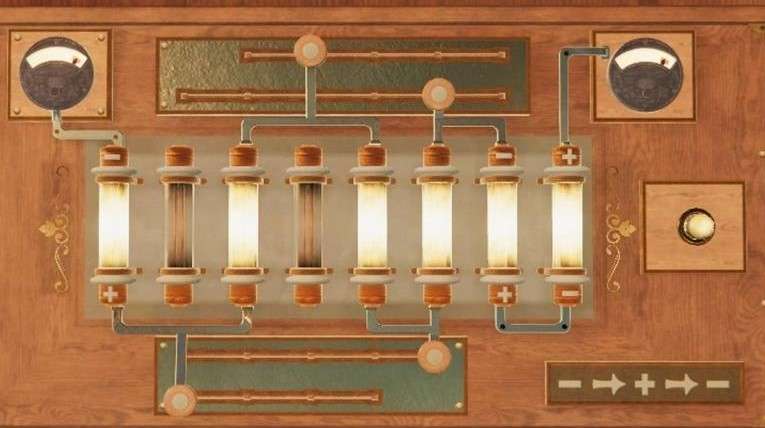
Go to the power device, you now have to move
levers A, B, C and D so that the current starts to flow.
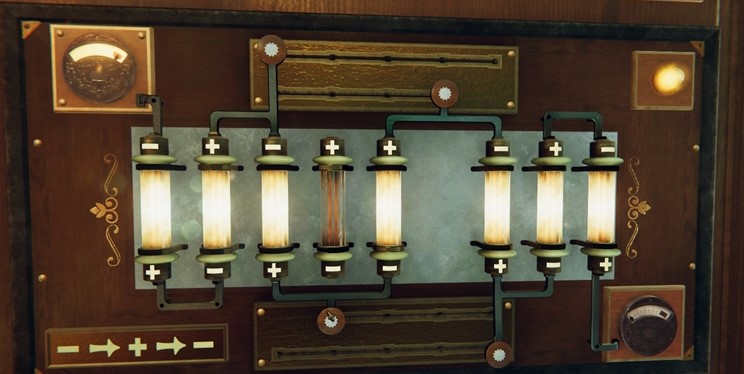
You go to the switch by the window.
You also see that the cord also has power and
goes to the device on the tripod.
Press the button and the device will open.
The power now continues to the device on the
desk.
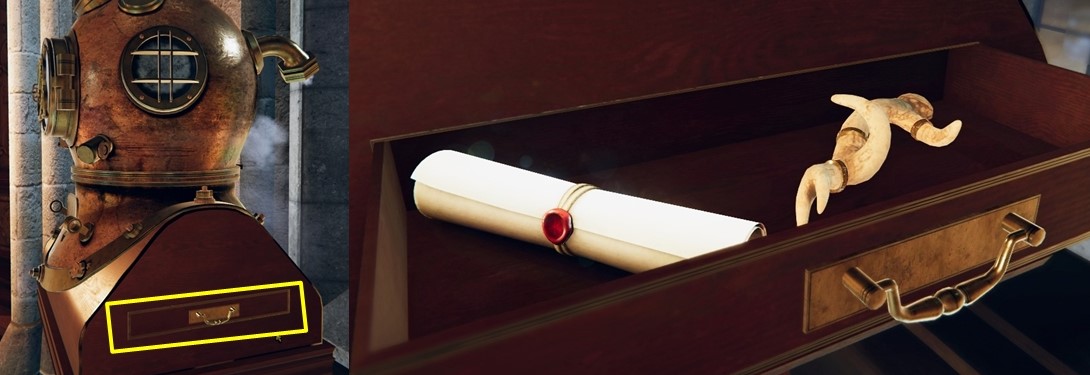
The drawers and doors of the desk are locked,
you come back for that for the other endings.
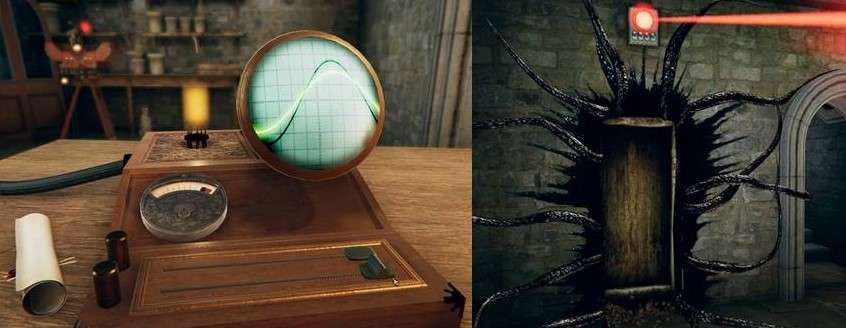
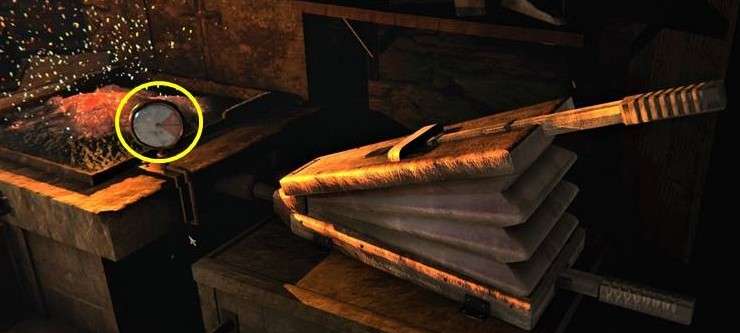
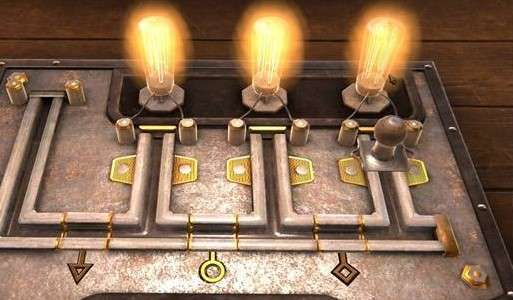
Zoom in on the paper roll to read it, zoom out
and then zoom in on the device.
It is an oscilloscope, with the left button you
change the height and with the right button you change the frequency.
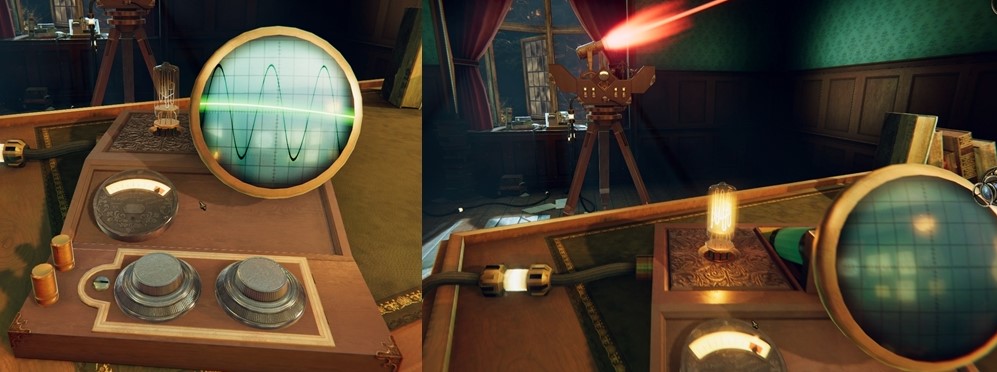
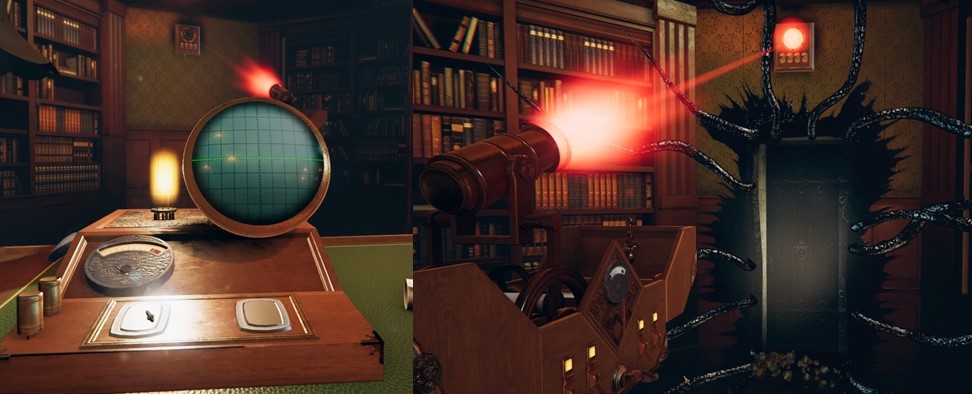
You have to turn the knobs until the lines
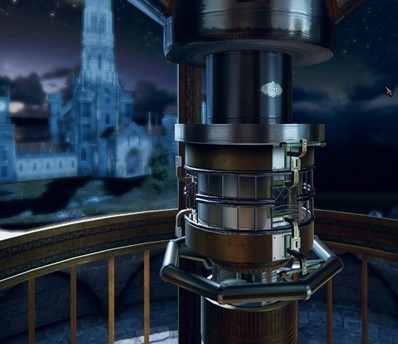
coincide, a red lamp lights up on the tripod device.
Where the light shines on the wall, a door now
appears, you go through it and you are at a table in the Light Tower.

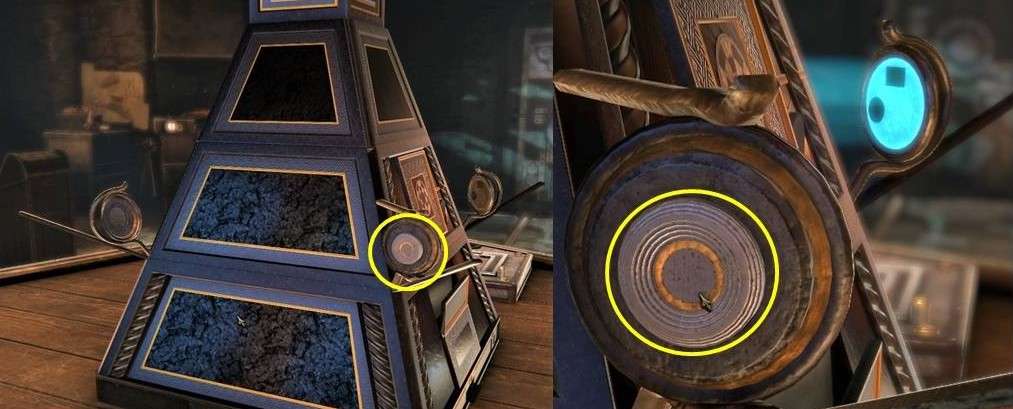
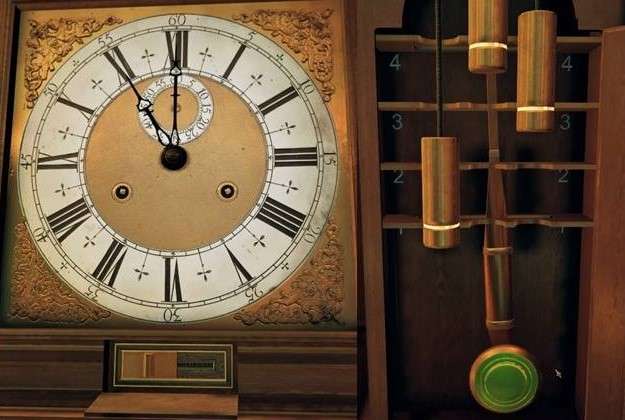
A little to the left you see a plate, zoom in
on it.
You see a plate with ridges, click on it and
move the plate to the right.
A drawer now slides out slightly, pull it out.
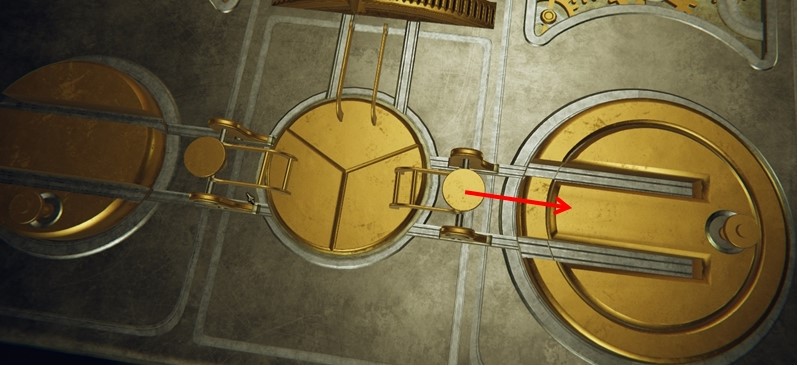
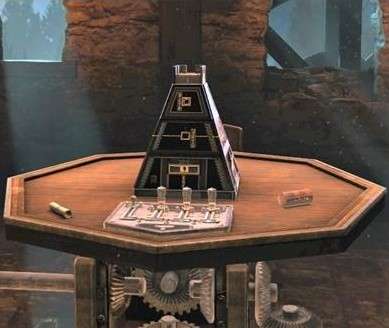
Zoom out and then zoom in on the centre of the
table, now drag the round disk to the device that you see here in the middle.
The disc will now be placed here and you will
see a button on the disc.
Click on that button and keep your mouse button
pressed, now turn the button until you can go no further.
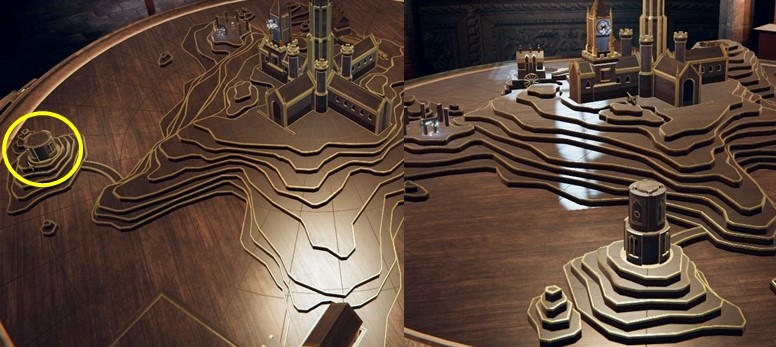
A village is now rising on the table.
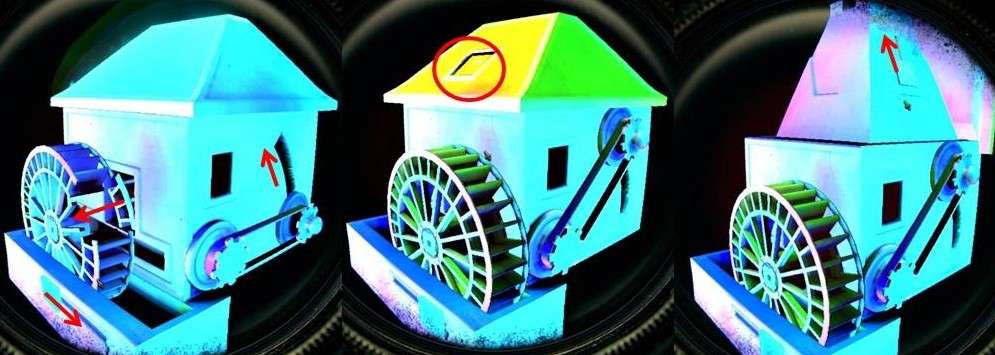
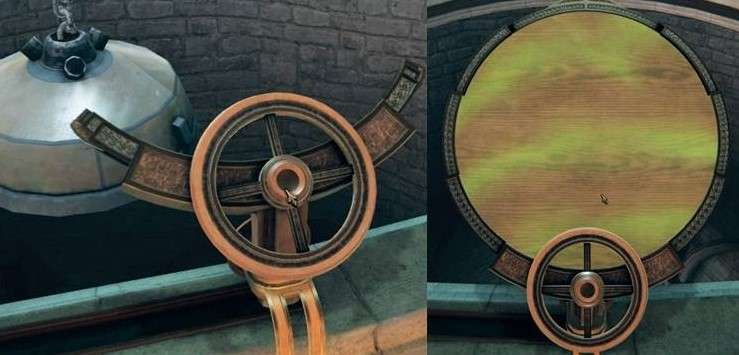
Now zoom in on the house with the water wheel,
zoom in on the water wheel and turn the water wheel.
You now see a door opening at the front, you
also see a sparkle again.
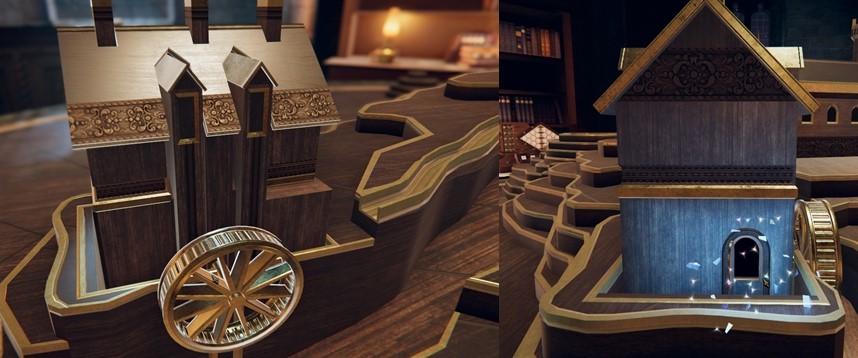
Click on your magic lens and then double-click
on the doorway.
Zoom in on it and turn to the back, there you
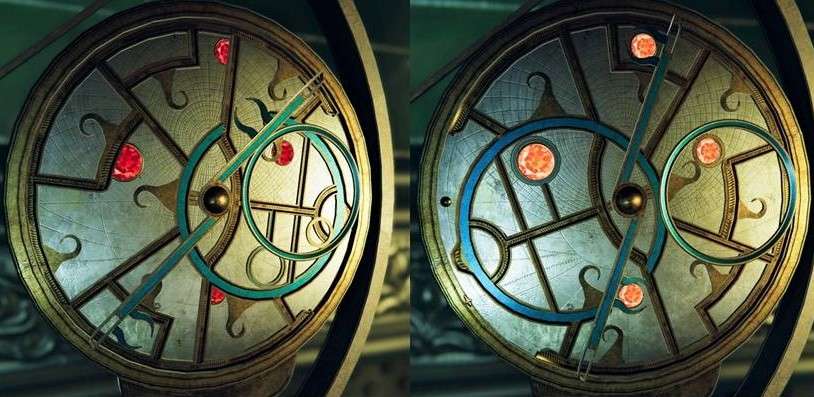
will see a golden button.
You now see 1 green and 2 red stones, turn the
rings with the red stones until you see 3 green stones on top of each other.
The head of asnake now rises in the middle of
the upper ring.
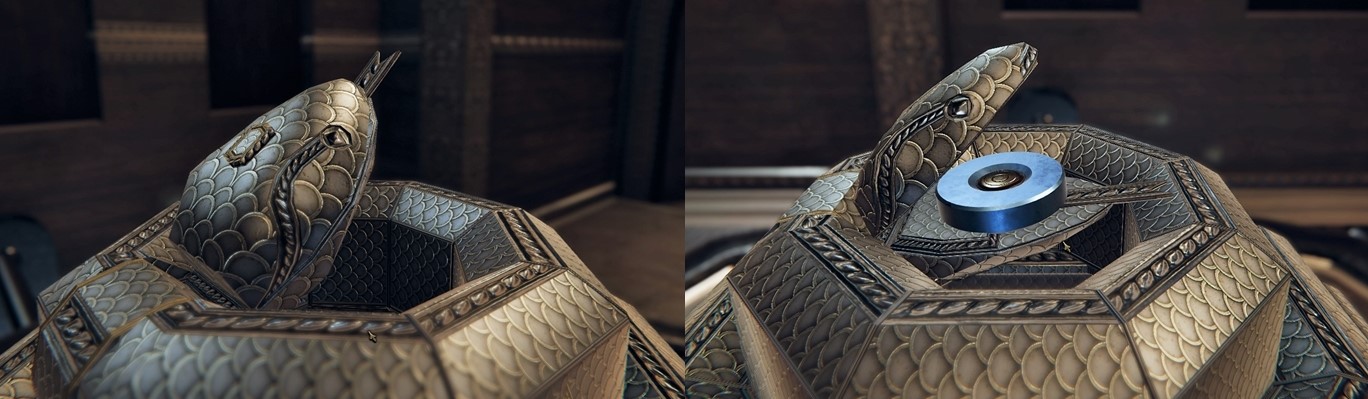
On top of the head you will see a button, click
on it and the mouth of the snake will open.
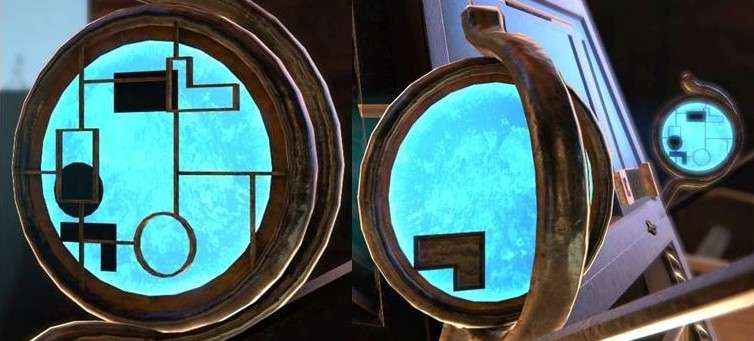
Turn slightly to the right and you will see a
bookcase standing against the wall.
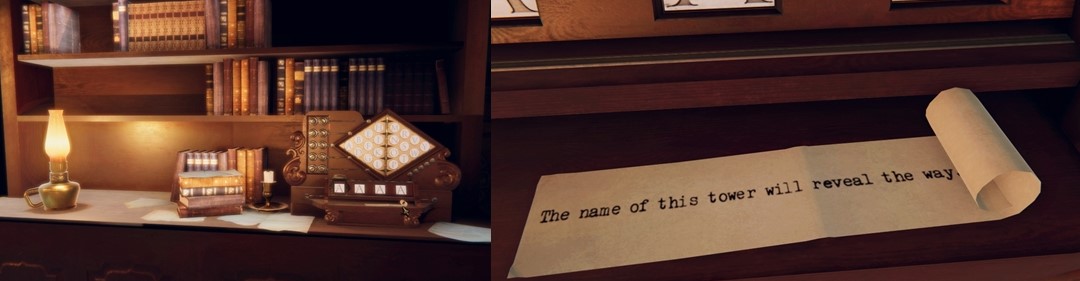
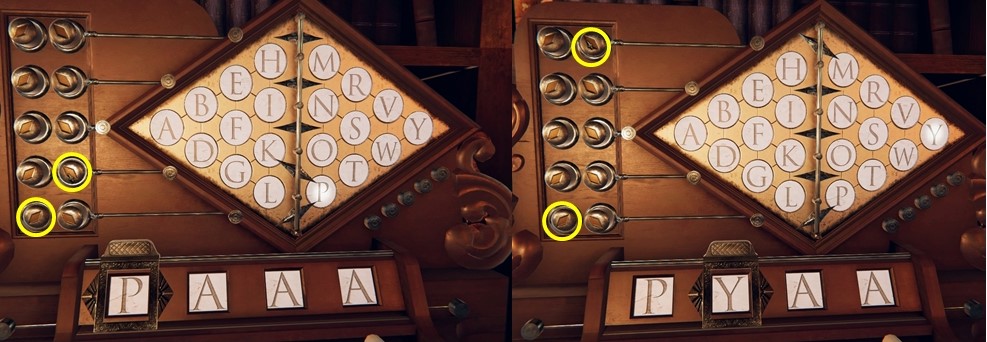
You see a diamond with 20 letters in it, below
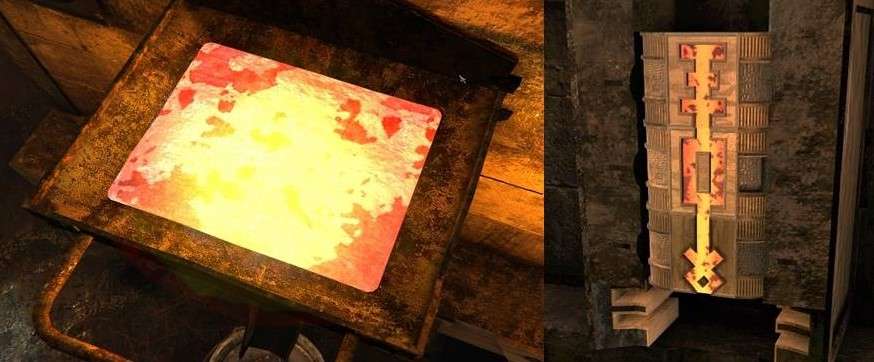
that you see 4x the letter A.
It says: "The name of the tower will
reveal the way."
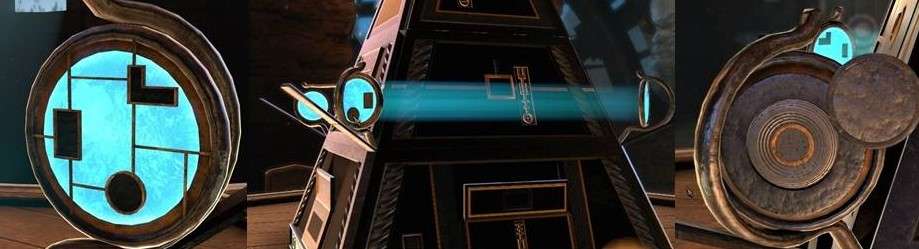
Zoom out completely and then look to the left
of the table.
You see a word of 4 letters on top and
something is hidden under the tile.
The word on it is: PYRE and that is the name of
the tower.
The device comes in your inventory, click on
the device in your inventory and device stands in the centre of your screen.
You can turn the green part so that the flat
part is on top.
Turn the flat part to the front and click on
it, keep the mouse button pressed.
Turn the disc quickly so that the parts slide
apart. Inside you will find a magnet again.
You do that by letting the arrows in the middle
of the window point in the right direction.
To the left of the window you see a plate with
10 buttons, with these buttons you put the arrows in the right direction.
For the P you need the bottom 2 arrows, if you
have it right you will see the letter P in the first box.
Then slide the slider with the opening to the
next letter.
Then set the arrows correctly for the letter Y,
you now need the lower and upper arrow.
If they are correct, you will see the letter Y
in the second box, then place the slider on the third letter.
Do the same for the other 2 letters, when the
word PYRE is made then a drawer opens.
Take out the item you find there, it's anarch.

Zoom all the way out and turn slightly to the
left. In the extension of the 2 towers you see a place with a number of shapes
on the ground.
Zoom in on it, you'll see a gold-coloured ring,
among other things. Zoom in on that ring.
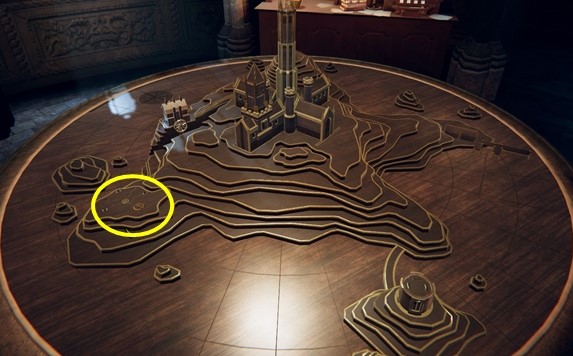
Now drag the arch from your inventory to it,
turn the arch and now 6 columns will rise from the floor.
You also see a shimmer in the arch.
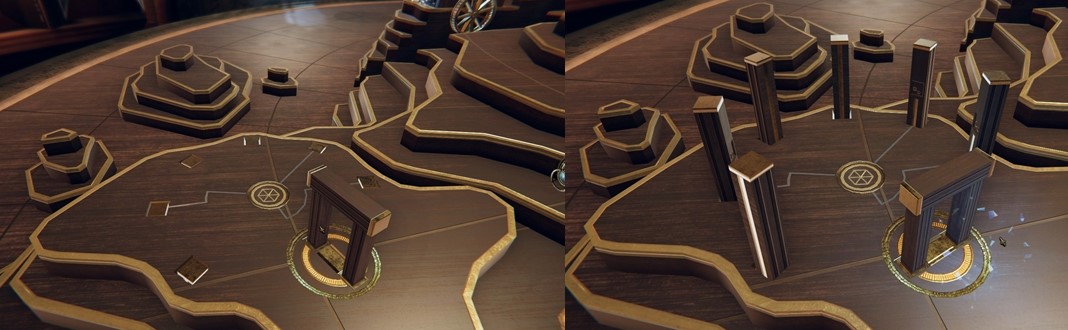
Click on your magic lens and then double click
in the arch, you are now in the circle of columns.
In the middle you see a circle, from that
circle lines goes to 3 columns.
Zoom in on 1 of those 3 columns, you will see a
rectangle with 2 buttons.
Click on both buttons and you will see a circle
with symbols. In the middle of that circle you see a figure.
Remember what that figure looks like and where
the small round is.
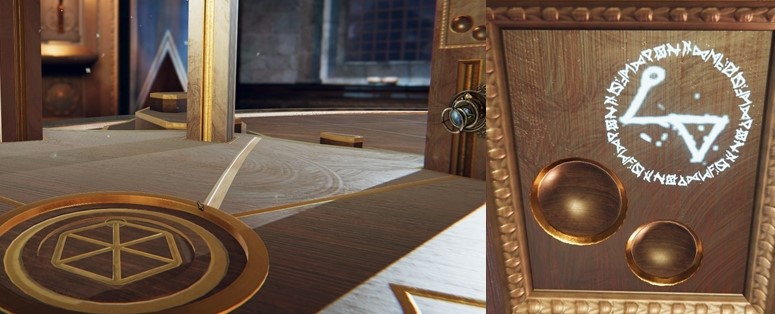
Zoom out and then zoom in on the circle in the
middle of the ring with columns.
In the middle of that circle you see a hexagon
with a circle at 1 of the corners.
You now have to copy the figure of the column
here on the hexagon.
If you have done this correctly you will see a
part of the circle with the symbols.
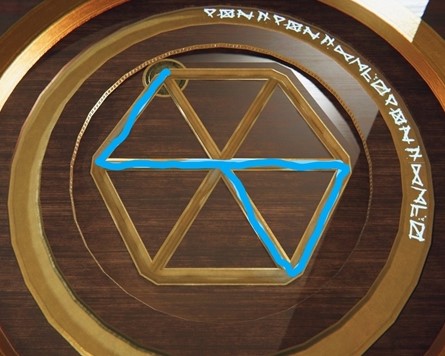
Do the same with the other 2 columns and draw
the figures in the centre circle.
If you have done this correctly, the circle
moves to the side and a tower comes up.
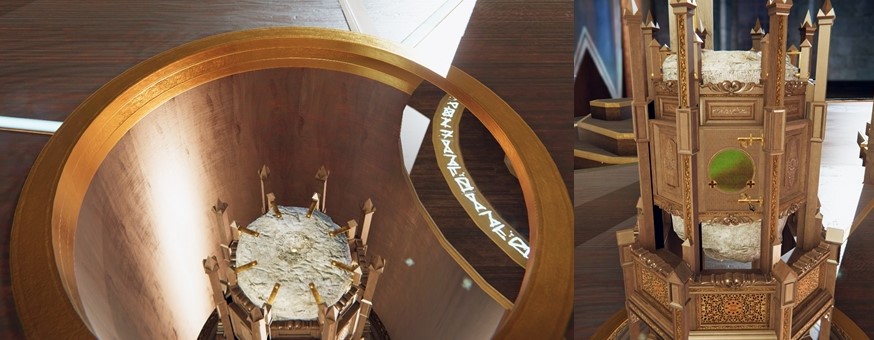
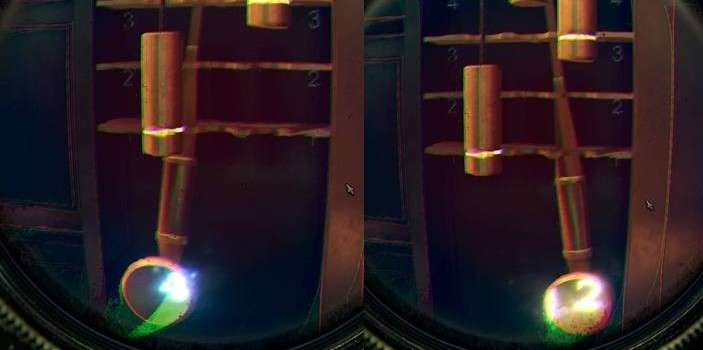
Now zoom in on the green circle, at the bottom
of the circle you see 2 crosses.
Drag the magnets to the crosses and stay away
from them.
Note that if you now move the magnets
along the circle, the solution I am giving you will no longer work and you will
have to look for the solution yourself.
Click on your magic lens and you'll see a grid
with 4 gray buttons in the green circle.
You have to put these buttons in the right
place by sliding with the magnets, but what is the right place?
Zoom out and turn 2 faces to the right, you'll
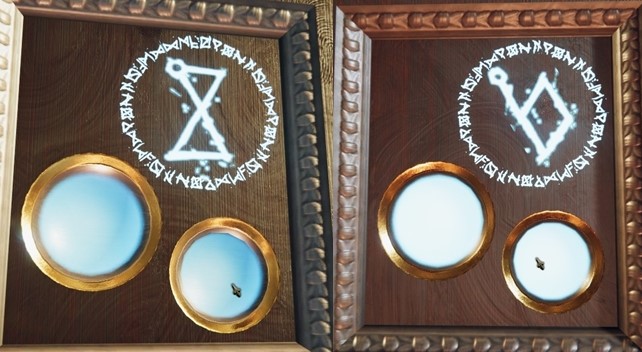
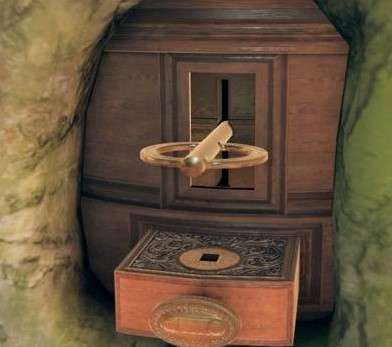
see a drawer there. Zoom in on the drawer.
At the top right of the drawer you see 2
symbols, draw them and zoom out.
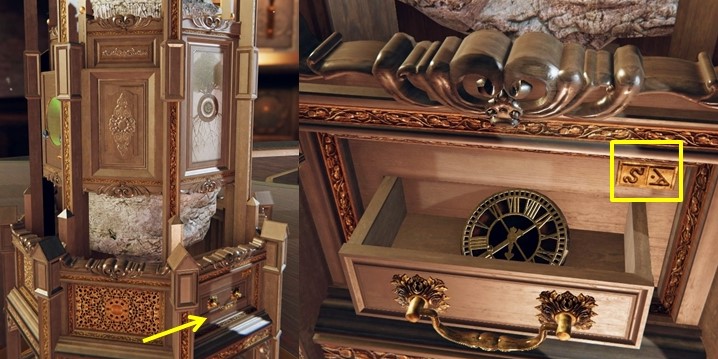
Now open the drawer, you will find a clock
face. Take that clock face.
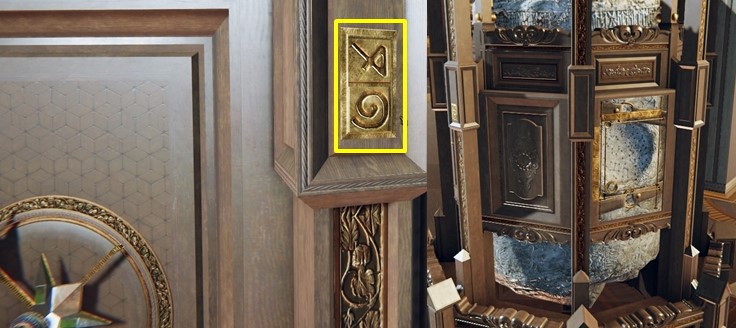
Zoom out and turn further, on 1 of the corners
you see 2 symbols again.
Zoom in and draw these symbols.
Zoom out and turn further, 2 faces to the right
you see a cavity in stone.
Zoom in and you'll see a row of symbols above
and to the left of that cavity.
The 2 x 2 symbols are coordinates for this
grid.
By dragging the buttons on the side you can put
the buttons on the right symbols.
Set the coordinates and then zoom in on the
circle at the intersection of the lines.
You will now see a grid with 4 gray buttons,
note where the gray buttons are.
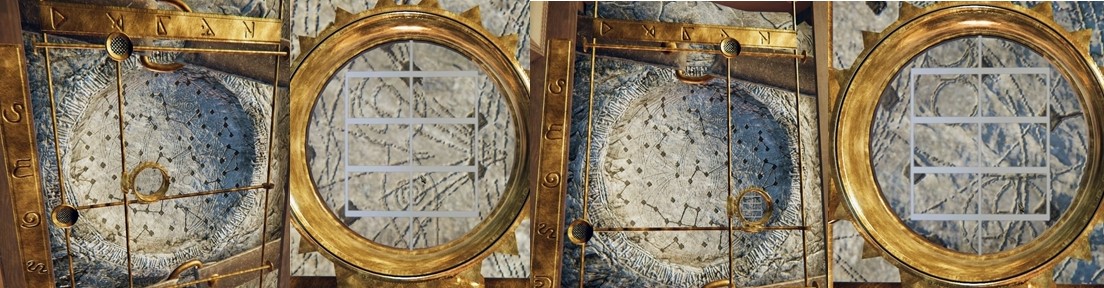
Zoom out and set the other set of coordinates.
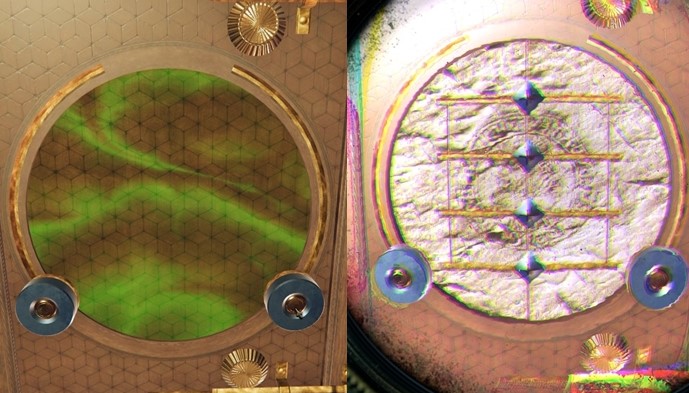
Zoom out and turn to the plane with the green
circle and the magnets.
You see 4 lines with a gray button on each
line.
Move the left magnet to the third line and
leave the right magnet at the bottom, the buttons move and are now positioned
correctly.
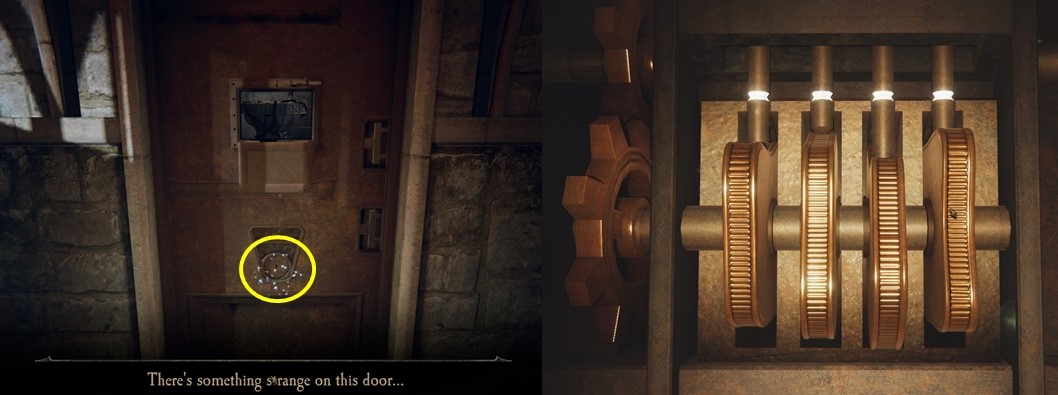
You can see the lower bolt being pushed away.
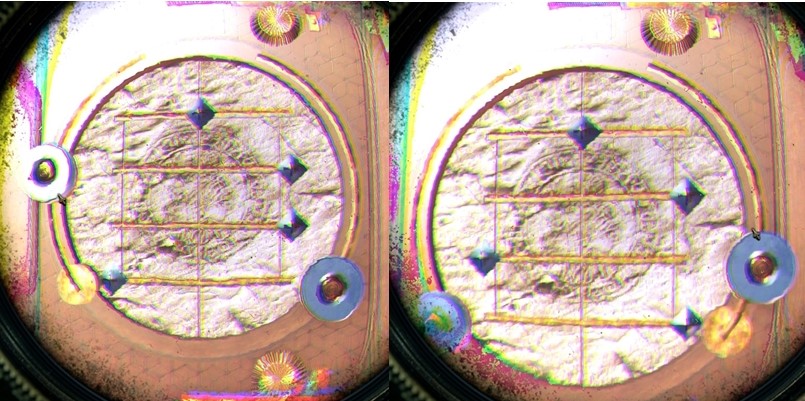
Now put the left magnet down again and then put
the right magnet on the second line.
The area with the green circle comes loose, now
open that area further.
Zoom out and turn back to the corner where you
found the second set of symbols.
Zoom in and click on your magic lens, you will
see parts of letters. These are the letters of the compass: N, E, S and W.
You can slide the parts in from the edge and
when you click on the button in the middle they turn around.
Click twice on the button and then move to the
top left to the middle.
Click once on the button and move to the bottom
left and bottom right to the middle.
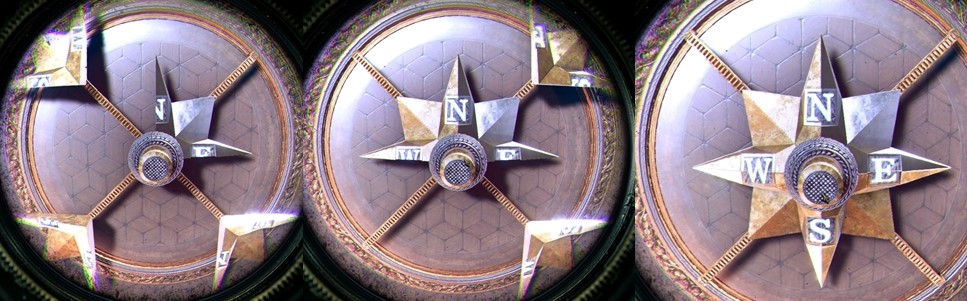
The compass rose is now complete and the
surface opens, pull it completely open and you will find a rectangular block
there.
Take this block and zoom all the way out and
you have an overview of the village again.
At the bottom left you see a rectangular
opening, zoom in and drag the rectangular block to it.
A hut will emerge and on the left you see a
bracket coming.
Zoom in on the circle on the tower and drag the
clock face to it.
The middle part of the clock face opens and you
see a shimmer again.
Click on your magic lens and double-click on
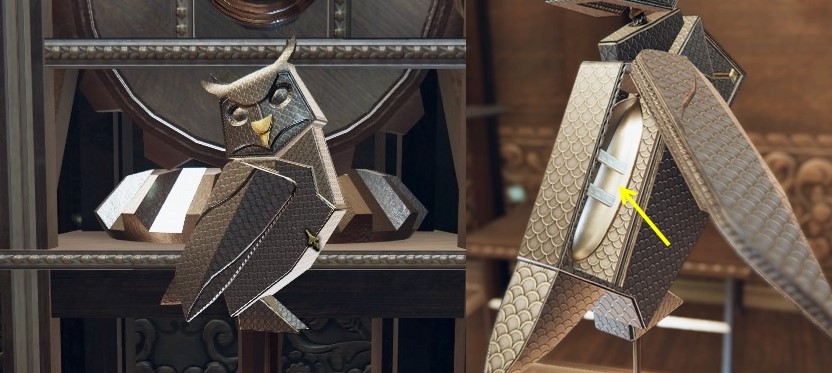
the opening, you will see an owl on the table.
Zoom in on the owl and slide its beak up, then
turn its head.
On the right you see a panel sliding out, on
the panel you see a button.
Move that button to the right and you will see
the right wing come off.
Open the wing and get the canoe out that you
see inside the owl.
Zoom all the way out and then zoom in on the
bracket to the left of the house.
Then turn the canoe and push it towards the
jetty.
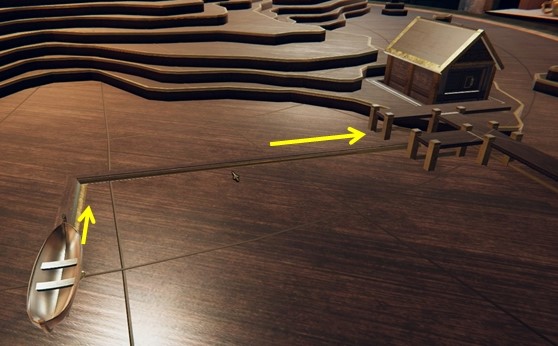
A window in the house opens and you see a
shimmer again.
You enter the house and you see a metal mouse
on the table. Zoom in on the mouse, above its tail you see a
button. Move this down.

His head goes up, turn to his head and pull it
up further.
A button is hidden behind both ears, click on
both buttons.
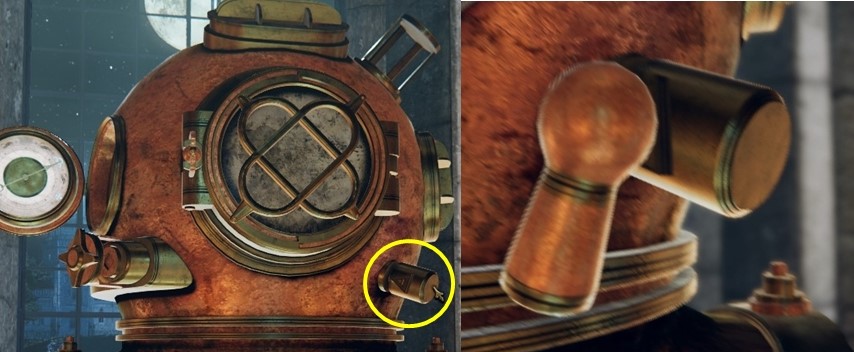
Get the key.
Zoom out completely and then zoom in on the
small round tower at the front of the table.
When this second part is on the tower, you see
a round disk sliding away in the ceiling.
Zoom in on the round tower and drag the key to
the keyhole in the round tower.
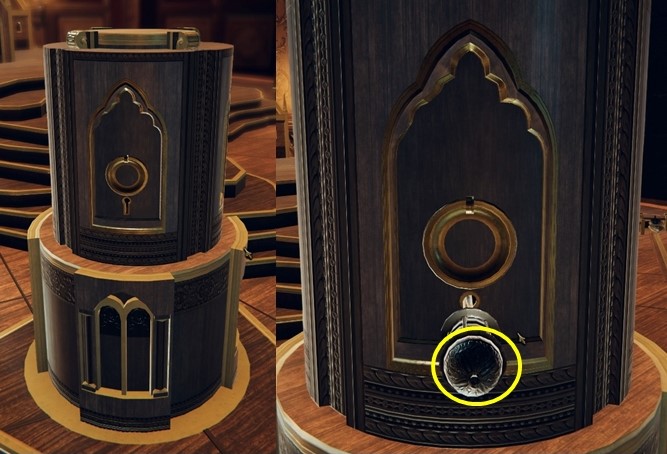
Click on your magic lens and then double click
in the opening, you enter the tower.
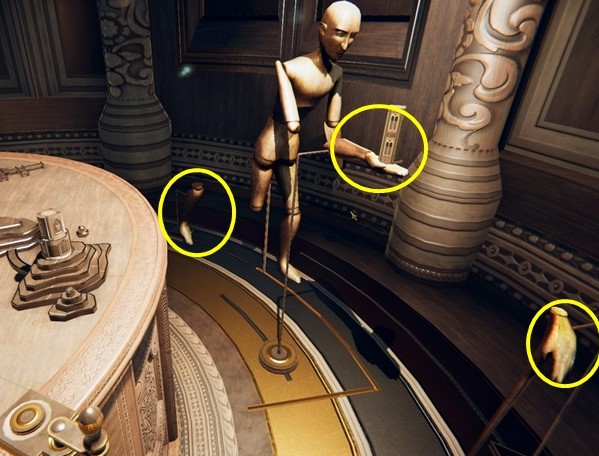
At the front on the edge of the table you see a
rotary handle, turn it counter clockwise and you see that the right forearm is
put on the dummy.
On the table you also see the tower that you
are in now and you see the hatch open again.
You also see a shimmer again, zoom in on it.
Click on your magic lens and double click in the opening.
You dive into that tower again and now you turn
the lever clockwise, now the right lower leg is placed on the dummy.
You see the hatch open again and you also see
the sparkle again.
Zoom in again and click on your magic lens,
double click in the opening and you dive into the tower again.
Now turn the lever to the left again and now
the left hand is put on the dummy.
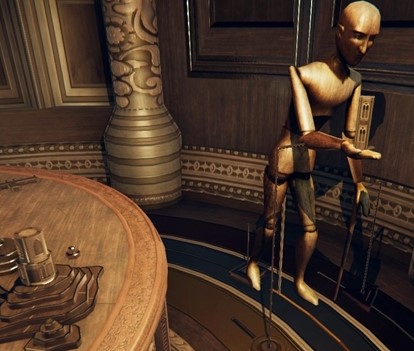
Now it goes automatically, the dummy comes
forward and goes to the table.
The part of the tower that stood on the hand of
the dummy is now placed on the round tower.
You will now zoom out a number of times until
you are completely zoomed out.
You now see the round tower again but now a lot
higher, the top moves further up.
You see a place where a light source must be
placed.
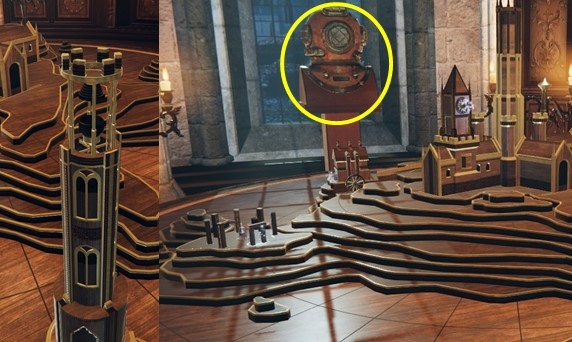
Zoom out and turn slightly to the left, on the
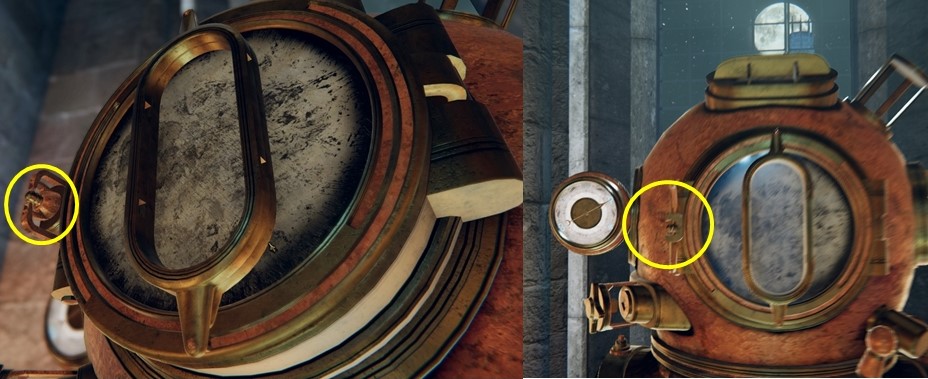
other side of the room there is a diving helmet in front of the window.
Zoom in on it, on the bottom edge you see a
number of nuts.
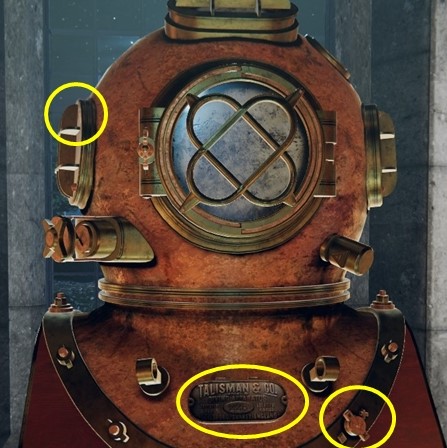
1 of those nuts has been turned, turn the nut
to the correct position.
A nameplate turns up, on the inside of the
nameplate you see 3 symbols.
You also see a box that was hidden under the
nameplate, there you will find a rivet.
Zoom out and then zoom in on the sight glass on
the left side of the helmet, you see that there is a rivet missing.
Drag the rivet there and slide the rivet down,
the sight glass opens.
You see a clock face with symbols but you don't
have any hands yet.
You can see that a switch was hidden
underneath, put the switch down.
A hatch opens under the sight glass, there you
will find a wooden model that must go on the table.
Then go to the other side of the block where
the helmet rests.
Part of an antler and letter is in the drawer.
There is a dome on top and you see an opening
there.
Turn that ring over the opening and you'll see
a shimmer again.
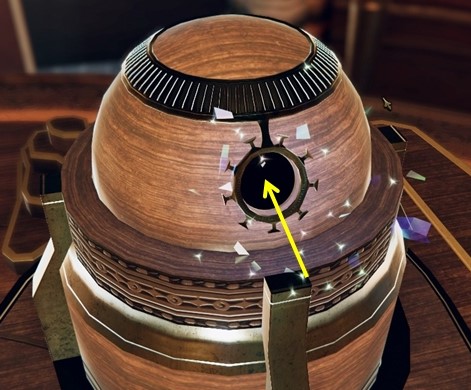
Click on your magic lens and double click in
the opening, you enter that dome.
Zoom in on the grasshopper.
Lower the slider and the tail will open. You
see a switch there, turn this switch over.
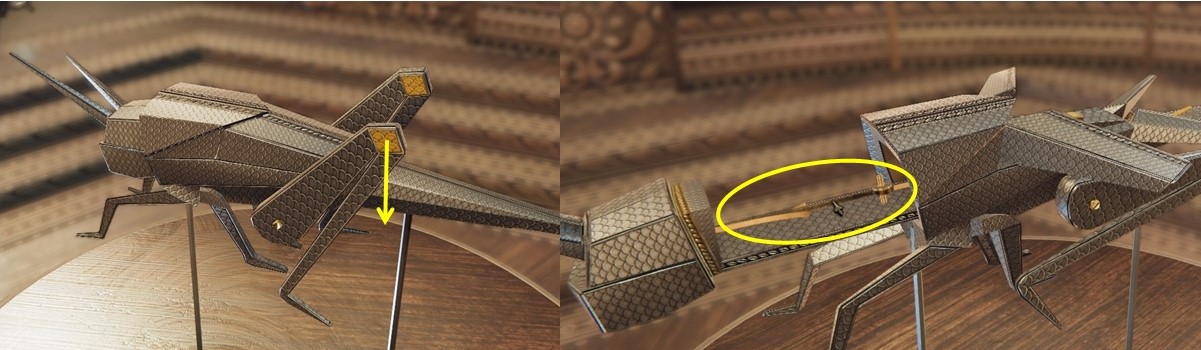
The head moves out a little bit, pull the head
further out, and then pick up the pointer that is lying there.
Drag the pointer there, a button underneath now
slides out.
By turning the knob you can put the pointer on
the symbols that you see there.
On the nameplate on the front you have seen 3
symbols, you must now put the pointer on these symbols.
Turn the knob anti-clockwise, if all 3 symbols
are lit, this knob slides back in and something slides it out at the top right.
Inside you will find a small lever, pack this
lever and zoom out.
Then zoom in on the bottom right of the large
sight glass.
Drag the lever there and pull it down, you will
see the 2 iron ovals on the sight glass come forward.
Then first rotate the rear one with the point
upwards, then the front oval also with the point upwards.
If they are both positioned correctly, they
will slide in and the lock of the nut on the left-hand side of the sight glass
will be released.
Zoom in on the nut and loosen it completely, watch
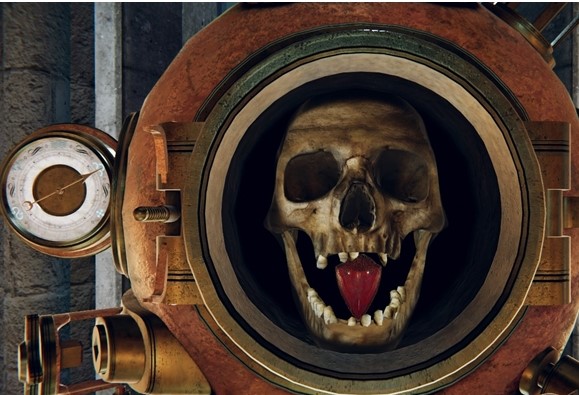
what happens.
Then you see a skull with a red crystal in the
mouth, grab the red crystal.
Click on your magic lens and double click in
the arch, you will be at the tower again.
In the middle you see a keyhole but you don't
have a key.
Click on the acorn in your inventory, it will
be placed in the middle of your screen.
Click the acorn back to your inventory and then
drag it to the keyhole in the tree.
Now drag the antler from your inventory to it,
you now have to turn that part of the antler properly.
There are 3 pivot points that you must set
correctly, then the stone in the middle of the tower split and the parts
movesapart.
Then zoom in on the gap between the 2 pieces of
stone, drag your red crystal to it.
A glowing stone comes up in the middle of it,
grab this glowing stone.
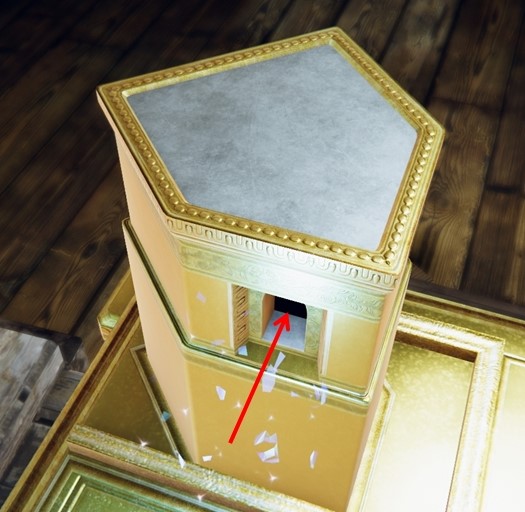
The lamp lights up and the top of the light
tower comes off.
Take this piece from the tower and you now have
a burning lamp.
The table now sinks into the floor and a cage
comes down from above.
Turn the upper part 90 degrees, you now have a
ring with 8 corners. The gate closes and you go up with the cage.

The upper part of the cage slides downwards and
a device comes down from above.
The lamp has to go in here but there is still a
grid in front of it.
Below and above you see a lever with which you
can connect the grid to the ring, you can then rotate the grid.
Click the top lever down and turn the ring
until there are no more bars in front of the hole.
Now you have to click the top lever up, you
should probably be on the other side of the column.
Make sure your cursor is at the gate and then
turn around the column looking for the top lever.
If you are too low with your cursor, then the
ring turns again and there will be bars in front of the hole again.
Disconnect the top handle and then connect the
bottom handle to the rack.
Now turn the ring again until there are no more
bars in front of the hole.
Then zoom in on the hole and drag the lamp to
it.
You zoom in on the column and a hatch opens,
there you will find the next pyramid.
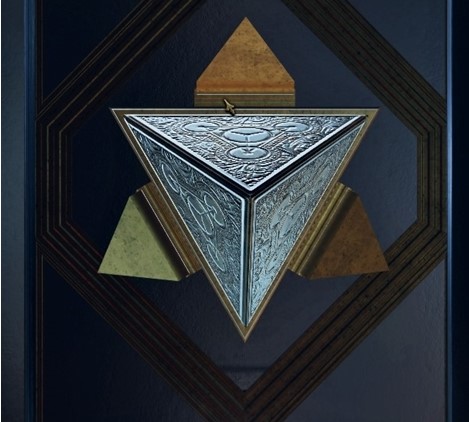
Take the pyramid.
You are back in room with the clock and the
view of the light tower.
Zoom out and leave the room, you are back in
the central hall.
Zoom in again on the table with the black
liquid, zoom in on the centre and drag the pyramid to the yellow triangle.
This will spin and will be placed on a circle.
A cylinder emerges from the liquid, with a knob
on top.
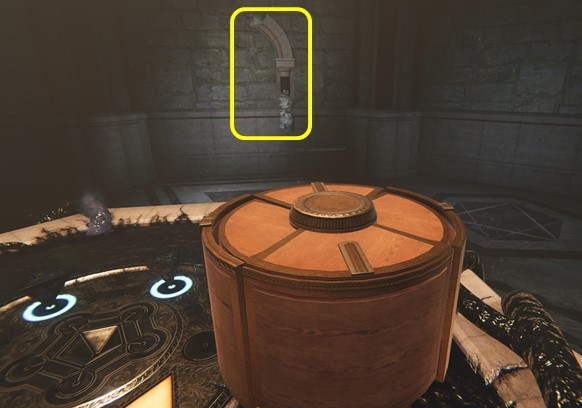
A flash and on the wall the arch has been
restored and you see a passage.
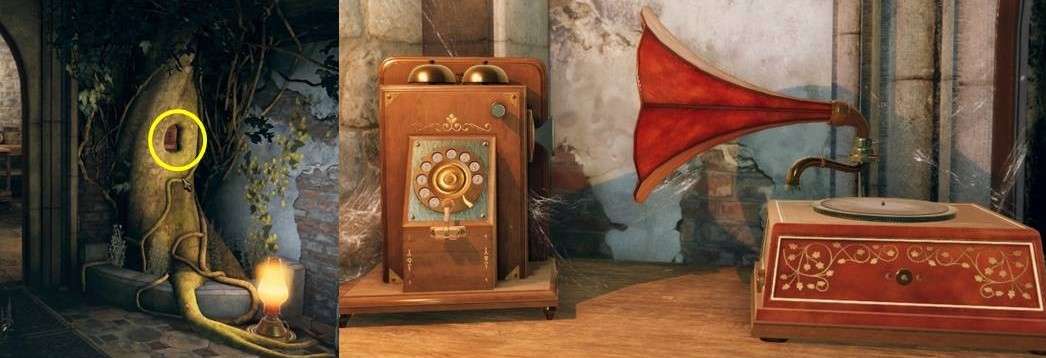
Go through it and you will arrive in a library,
there is much to see here again but you cannot do everything here now.
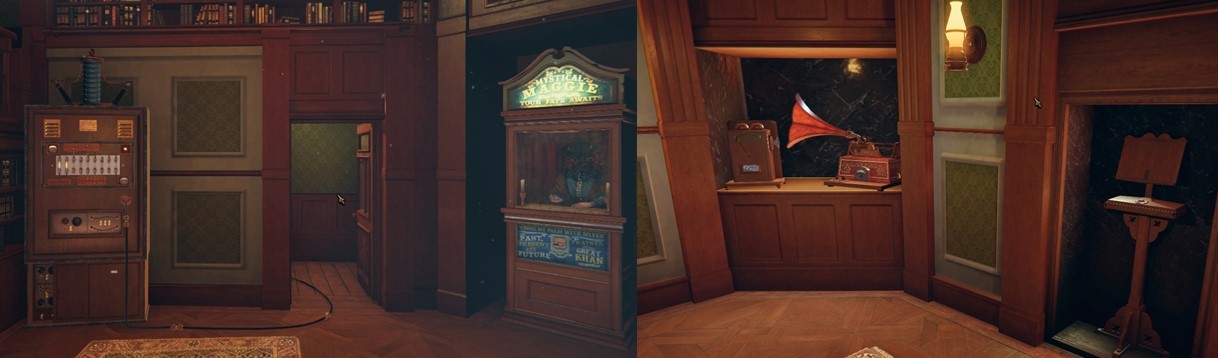
You see here a cupboard with a fortune teller
Mystical Maggie and when you turn around you see a telephone and a phonograph.
A number of things are for the puzzles for the
other endings.
Go to the power generator and slide the levers
under and above the lights again to make the connection.
The meter goes to full again, now follow the
cord with lamps.
Go up through the door and you'll see another
large switch on the right in front of the window.
Zoom in on the switch and lower the lever.
You can see through the window that the clock
tower is lit, you turn around and you see the cord go down again.
Go down and you will see such a device on a
tripod on the left.
Go to the device on the tripod, put the 4
switches up on the front side.
A hatch opens, press the button that you see
there.
Zoom in on the oscilloscope, it now has power
and you have to make the green line coincide with the black line again.
You now have push buttons but it works the same
as in the first room.
If you have done it correctly, a red lamp will
light up on the device and a passage will appear on the wall again.
You automatically go through it and you are in
the clock tower.
Behind it you see a large weight hanging, on
the left you see a locked door.
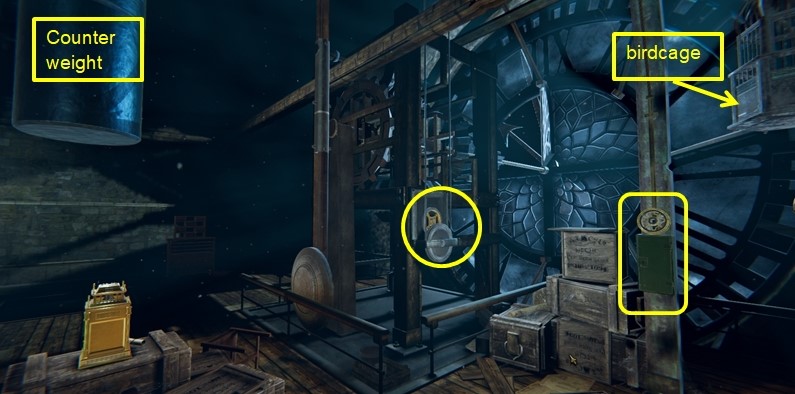
On the right you see gears and the clock face,
and you also see a bird cage.
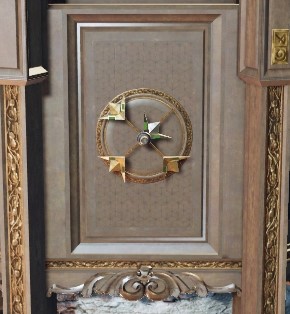
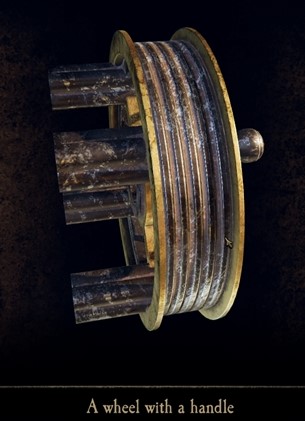
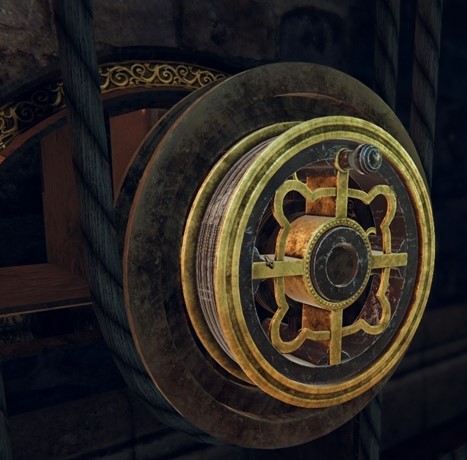
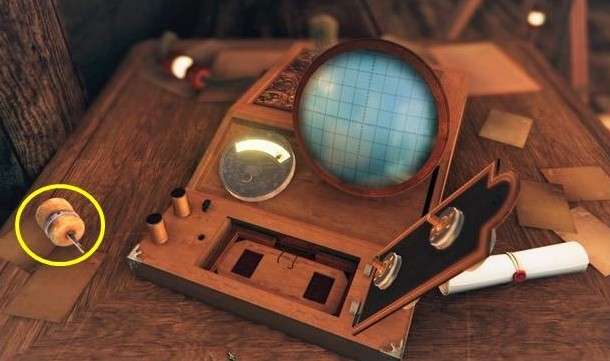
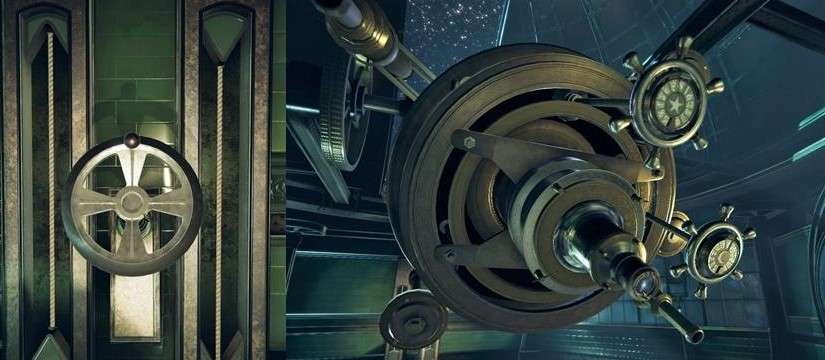
Take this wheel, view the wheel in your
inventory. On the back of the wheel you see 4 catches.
Go to the gold-coloured box and read the paper
roll that lies there.
You turn to the side and you see a pawl twist.
Zoom out and then zoom in on the 2 buttons
above the circle that still needs something.
To the left under the circle is a small pillar,
grab this pillar.
Zoom out and then zoom in again on the top, you
see a slot with a round hole.
The top is now loose, pull the top completely
open, you will see the next pyramid here.
Zoom in on top of the box, at the top right you
see a plate that you can move.
Move it forward and a tower will rise.
At the bottom of the tower you see an opening
with a sparkle in front.
Click on your magic lens and then double click
in the opening, you enter the tower.
Zoom in on the circle, you can see that the
inner round plate is fixed with 4 bolts.
Zoom out and go to the other side and zoom in,
click on the round plate and then pull it further open.
Zoom out and go to the front and zoom in on it.
There you see a round disk with a square hole,
drag the handle here.
Turn the handle and you will see a valve open
on top.
Zoom in on the top, at the bottom you see a
narrow plate with different holes.
Above that you see a wider plate with holes,
you can slide this plate with the button with the arrow.
On the right you see 2 lights with a locked
switch underneath.
You now have to move the plate so that you have
the same pattern in the opening as the plate below.
There is a slider on the left side of the
opening, put it to the right, if you have the right pattern in the opening, the
green lamp will light up.
Also the lock of the switch is gone.

Turn the switch, gear wheels are turning and
you leave the tower.
At the bottom 2 plates turn around and there
you will find 2 buttons.
You also see 4 openings where the pucks must
go.
It is not that difficult otherwise you will see
the solution on the screenshots.
If you have a puck in an opening you will see
something moving at the gears and the crank.

If you have all 4 pucks in the openings, a
tower will rise at the top left, also a shimmer there.
Click on your magic lens and double click in
the opening, you will enter this tower.
Zoom in on the front of the device, drag the
rotary handle to the hole on the bottom right.
At the top you see a plate, slide it to the
right and turn the disc in the middle, to the right.
Now turn the handle until the sprocket is on
the disc in the middle.
Turn the disc upwards and then turn the lever
until the gear wheel is on the top plate.
Then turn the disc in the middle down again,
now slide the plate with the gear to the left.
Turn the centre disc up again and then turn the
handle until the gear wheel is at the end.
Now a button comes up.
Press the button and the top of the device
turns over.
Now slide the 3 pieces in the correct position
and set the slider above the opening to the right.
If you have done well then the green lamp will
light up and you can turn the switch over.
Then turn the switch and you turn to the right
side of the device.
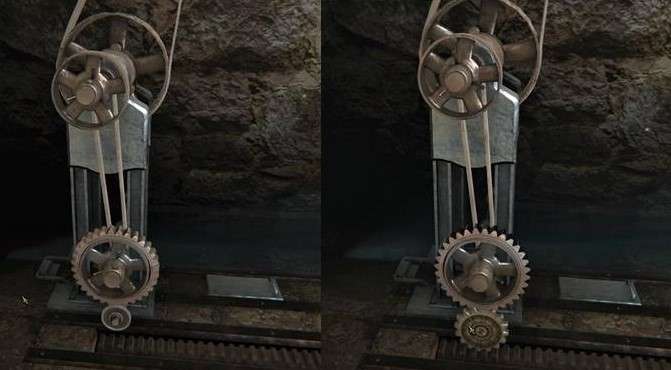
Take the gear.
You automatically zoom out and get out of the
tower. Zoom out even further and turn clockwise to the sprockets.
You see 2 small cogs on top of each other, zoom
in on them and drag the cog there.

The belt starts rotating and you see the
counterweight fall, on the left you see a weight coming up.
Double click on the stairs and you go upstairs.
At the top you see a painting of a castle
behind bars and a red crystal to the left next to the gate.
On the left you see the drive mechanism for a
bell.
Zoom in on that mechanism and you'll see 4
holes in the drive wheel.
Take the wheel with the 4 catches from your
inventory and drag it to this mechanism.
There is a button on the wheel, turn the wheel
until the game continues automatically.
You can see that the bell is moving above the
mechanism, a moment later the bell is ringing.
The red crystal next to the bars breaks into
pieces and the bars disappear.
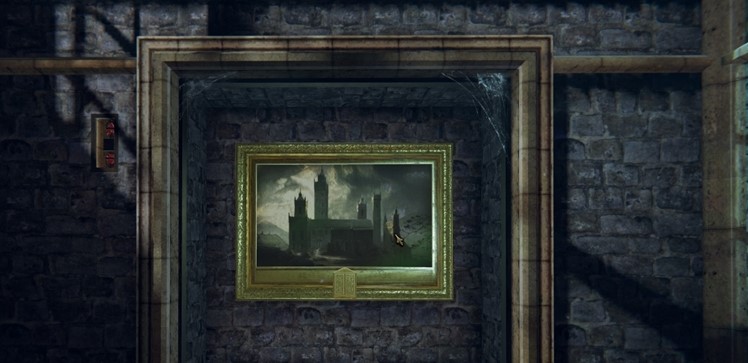
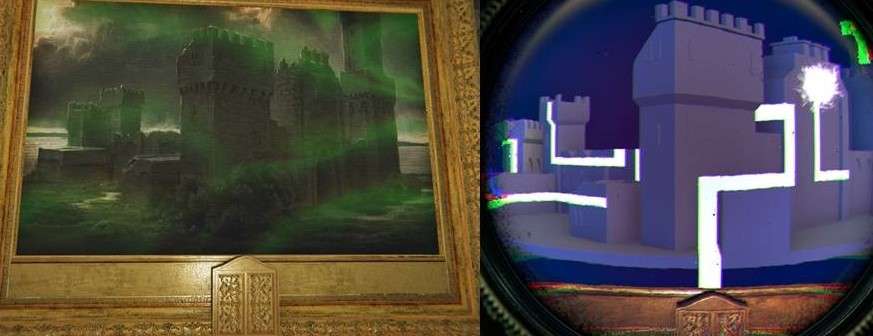
Zoom in on the painting and click on your magic
lens, you will see white stripes on the painting of the castle.
You can also see a white flaming sphere on the
left of the tower.
Now drag the white sphere over the line, if you
can't go any further you have to turn the castle again until you can move
further with the white sphere.
Drag again with the white sphere, turn the
castle again until you reach the high tower with the white sphere.
Now turn the castle forwards, you will see a
white line straight ahead to the edge of the painting.

Drag the white sphere to the edge, flash and
you are zoomed in on the bottom edge of the painting.
2 doors slide open and behind it is a clock
face, take the clock face.
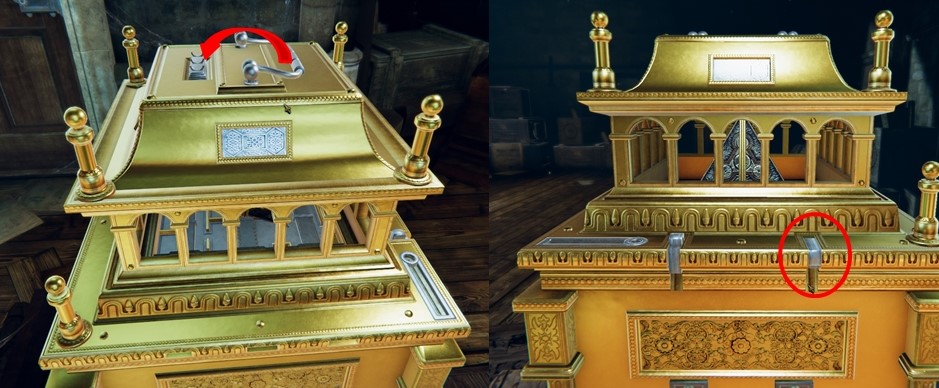
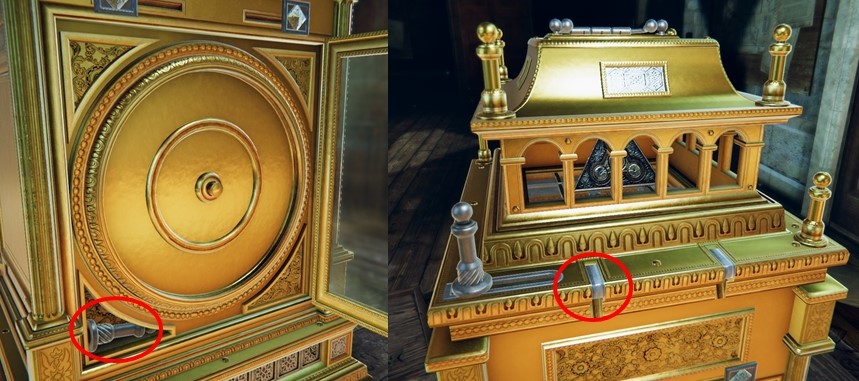
Go back down and zoom in on the golden box, go
to the back of the box.
There you see a circle, drag the clock face
here.
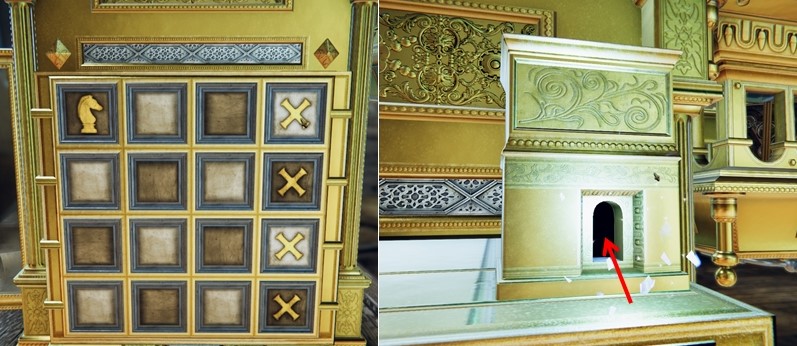
On the front of the block you see 16 squares,
on 5 of them you see pictures of chess pieces.
Above you see the Knight and on the right you
see the Rook, the Queen, the King and the Bishop.
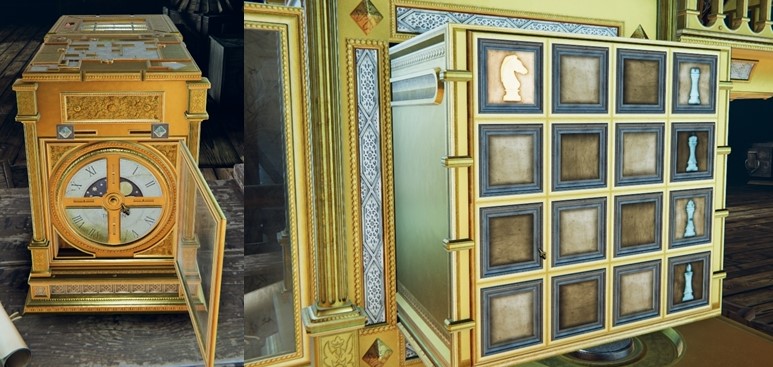
Through the Knight’s moves you must now reach
each of those other chess pieces.
Click on the Knight and you see where you can
jump, then click on one of the illuminated boxes.
The Knight jumps to it and you see where you
can go again.
When you have reached one of the pieces on the
right, the Knight jumps back to the top left.
You must now go to 1 of the other pieces.
When you reach the last one, a small tower
comes up on top of the block, you also see a shimmer again.
Click on your magic lens and then double click
in the opening, you will come to a device again.
It is a variation on the devices that you have
seen before.
In the middle a circle that is divided into 3
parts, left and right and above the circle you see constructions.
These are to move the 3 parts of the circle.
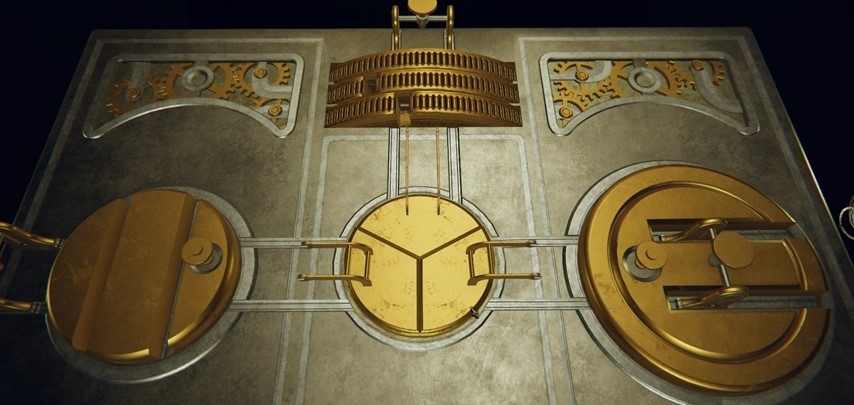
Zoom in on the left, rotate the dial so that
the rails continue.
Now zoom in on the right, turn the disc a few
times with the knob until the rails run to the middle.
Move the lever to the centre, it clicks in
place and now slide the lever back.
Now zoom in on the lever above the circle, you
have to turn the discs so that the rails run to the middle.
Part 3 has now also been pushed aside, you see
a square hole.
Now drag the rotary handle to that hole and
then turn the handle clockwise.
You will then see 3 circles with patterns and
below that a plate with a pattern.
Then move the lever to the right and if you
have done it right, the green light will now illuminate.
You now see a niche on the side of the block,
zoom in on it and you see a statue.
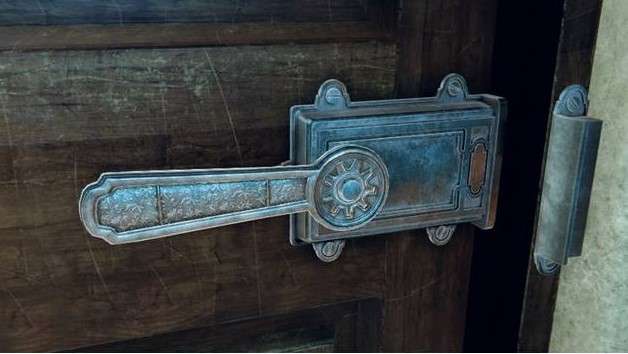
Zoom out and turn left, towards the door, zoom
in on the lock and drag the key / lever to the lock.
Go down, on the left you see a niche with 3
squares at the front.
Turn to the right and there you see another
painting behind bars with a red crystal to the right of the bars.
Open the lid and a statue of a ballerina comes
up.
Move it to the right, click now on your magic
lens and zoom in on the screen on the side of the box.
Slide the puzzle together and you will see a
keyhole.
Wind up the key and you will see the ballerina
move, it is intended that the ballerina comes in the middle.
That is not the way the board is, you see black
circles and lines but also a few gold pieces.
If you click on the button at the bottom of the
board, those gold pieces will also turn black.
Then the ballerina can also go to the other
circles and also to the centre.
You have to click at the right moment, those
extra pieces will turn golden again and the ballerina will no longer be able to
follow these pieces.
You can see which route to follow on the
screenshots.
When the first ballerina is in the middle, a
holder opens at the bottom right.
When the ballerina is in the middle you turn to
the back of the ballerina and there you will find a gem.
Take that gem.
Zoom out and turn to the left wall with the
niche and zoom in on the top square.
At the bottom there is still room for a gem so
drag the stone you just found here.
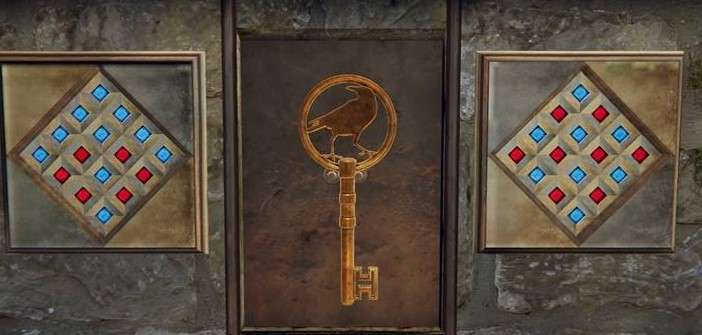
Zoom out and look at the 2 plates with precious
stones next to the key behind a fence.
Look at the left board and copy it on the board
in the middle, then press the button at the top.
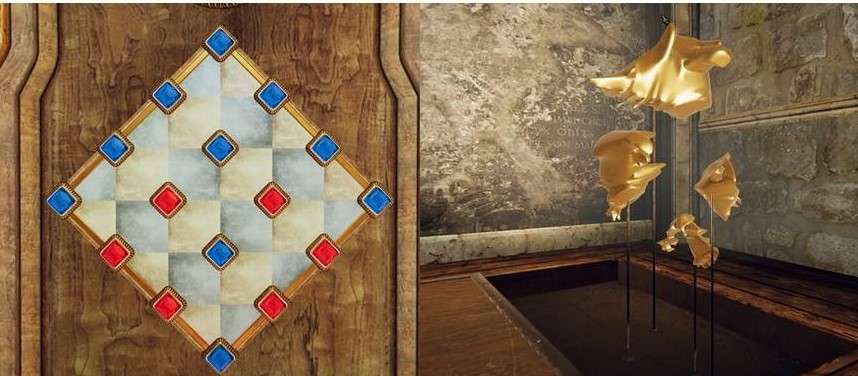
The floor in the alcove slides open and 4
shapes emerge.
4 buttons appear on the edge of the niche, with
these buttons you can rotate the shapes.
Now look at the right board and copy the
pattern on the board in the middle.
Press the button at the top again and you will
see shadows of the shapes on the wall.
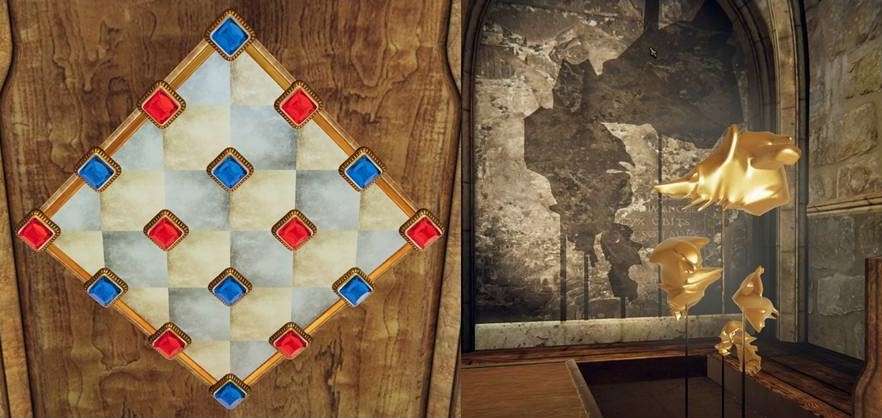
By placing the shapes in a certain position you
get a shadow of a bird on the wall.
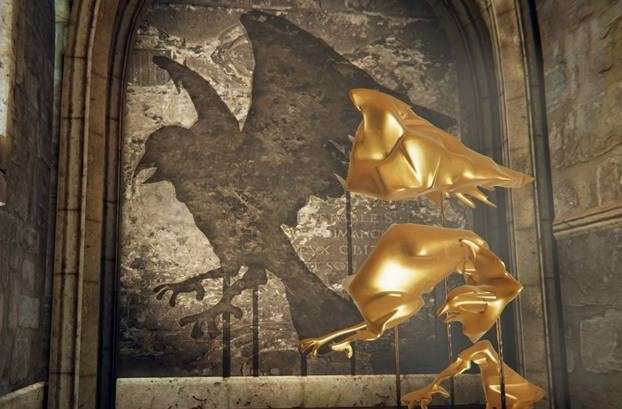
You zoom out automatically and you see the gate
slide away for the key,
Open the door and there you see a lever, pull
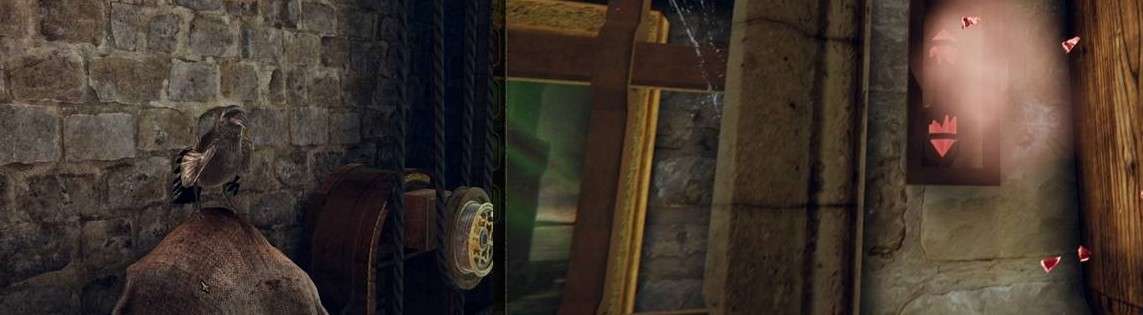
it down.
The birdcage falls to the ground and a crow
flies out.
The bell starts ringing and you can see the red
crystal downstairs vibrating, broken.
Go down and further down to the painting where
the bars are now gone.
Zoom in on the painting and click on your magic
lens, you will see a white sphere and white stripes on a castle again.
By turning and dragging the castle with the
white ball over lines you end up at the bottom edge of the painting.
Flash and you see 2 doors sliding on the edge
of the painting.

You will find the hands for a clock there, get
the hands.
Go upstairs to the golden box, go to the side
with the glass plate.
You turn to the left of the golden box, here
you see a keyhole.
The clock goes to 12 o’clock, the big bell is
sounded and on the lid of the golden box the red crystal breaks.
You are back in the upper room of the library.
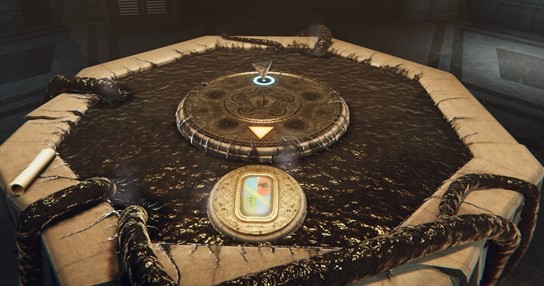
Go down and to the central hall, put the
pyramid on the yellow surface.
It is an optical instrument, take this device
and zoom out.
On the left side of the outer ring there is
room for that instrument, drag it to it and you will see a white beam.
The door slides up.
Go inside, you will enter a room with the
tripod and the oscilloscope.
Go through the door to the next room, here is
the generator.
There is more here, but you will come back
later because you do not have everything needed to solve those puzzles.
Zoom in on the generator and slide again with
the buttons to switch on the power.
You turn to the window by yourself, go there
and put the lever down. Lights come on in the garden.
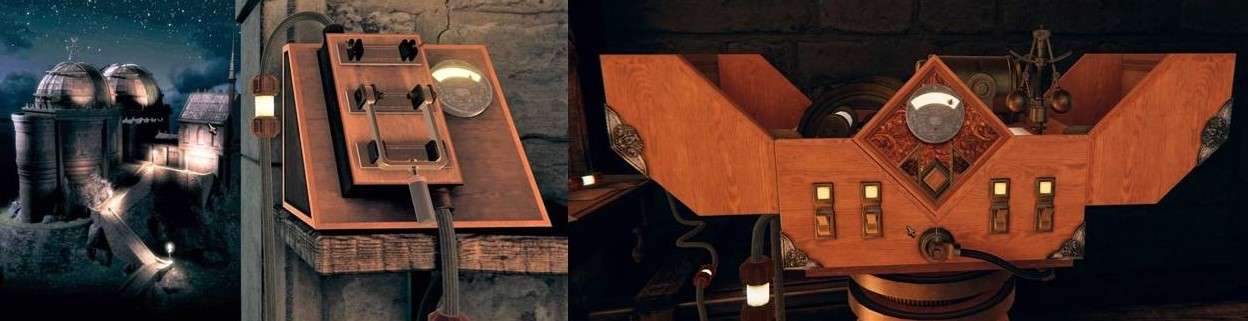
Go back to the first room and zoom in on the
tripod box.
Zoom in on the oscilloscope and read the letter
that lies there.
The top button moves automatically, you have to
follow the top button with the bottom button.
If you do this well, you will get the familiar
red light beam again and a door will be formed.
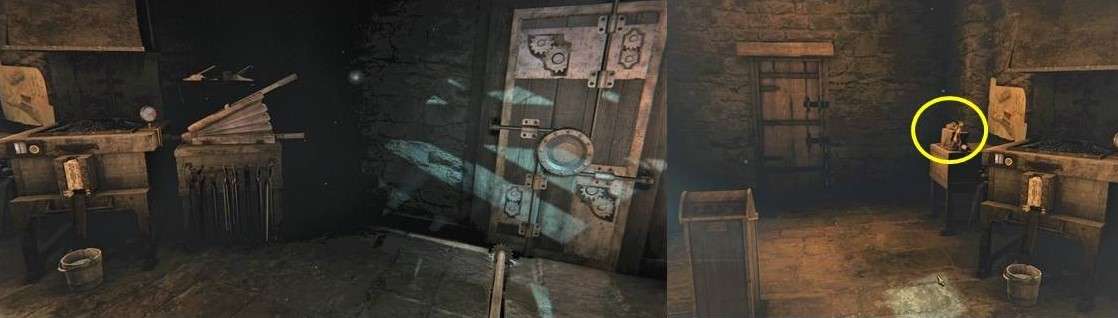
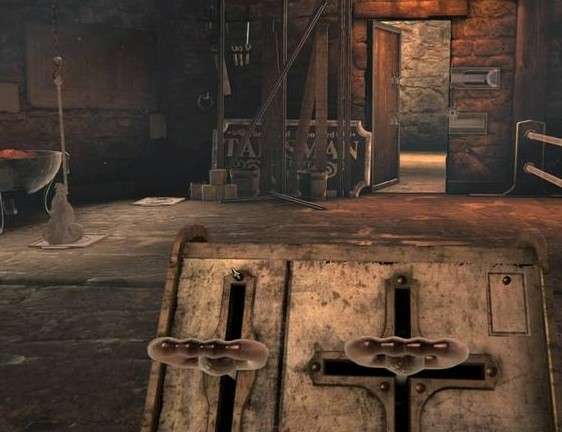
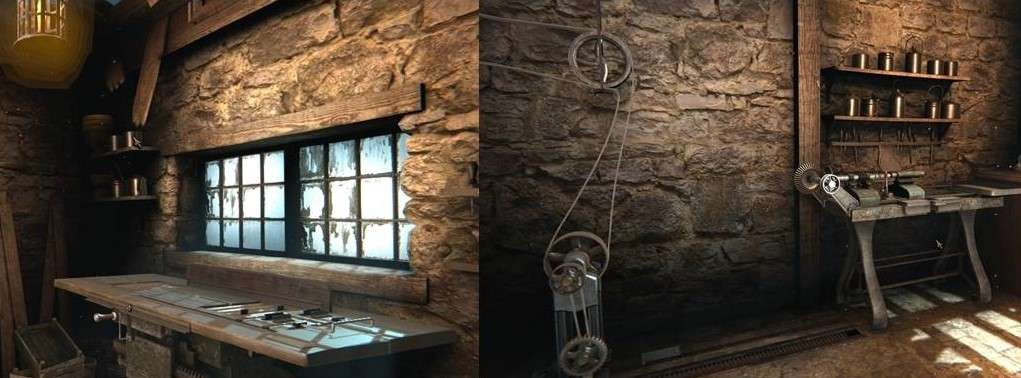
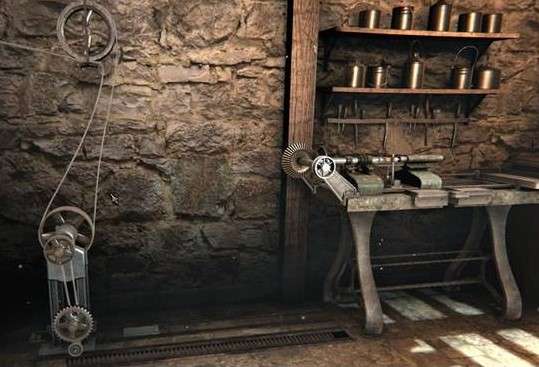
You are now in the workshop / forge.
Turn to the left and you see a door with 2 locks,
on the right is a hatch in the wall.
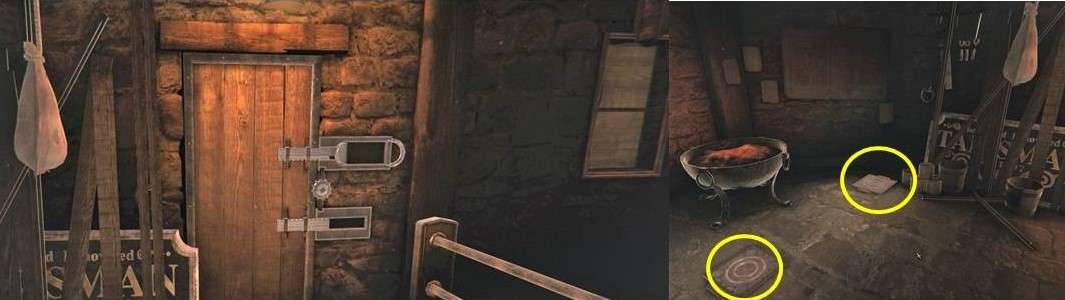
Turn a little further to the left and you will
see 2 plates on the floor, next to that you will see another door.
Turn even further to the left and you will see
the smithy.
There is a base in the middle of the room,
behind the base you can see the door through which you entered.
Turn even further to the left and there you
will see a hatch in the floor under the window.
Zoom in on the base and turn to the other side.
Get the key.
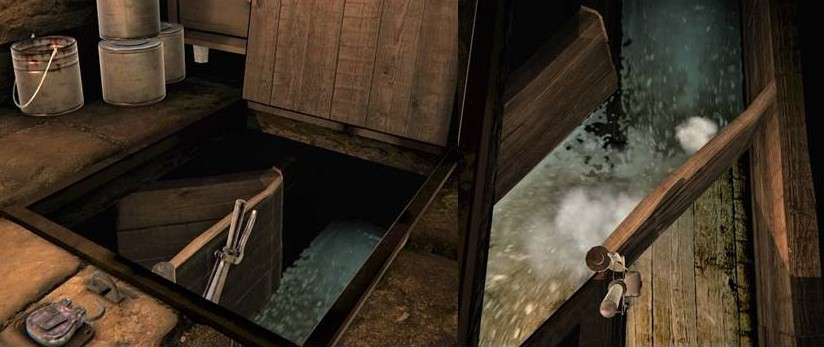
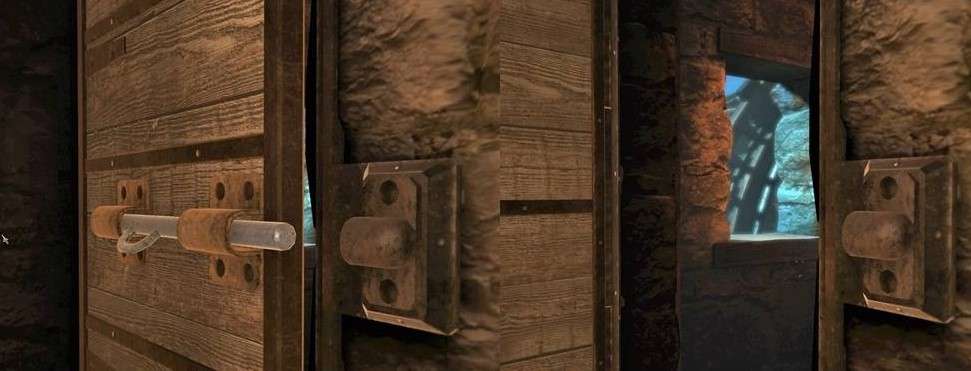
Zoom out and then zoom in on the hatch in the
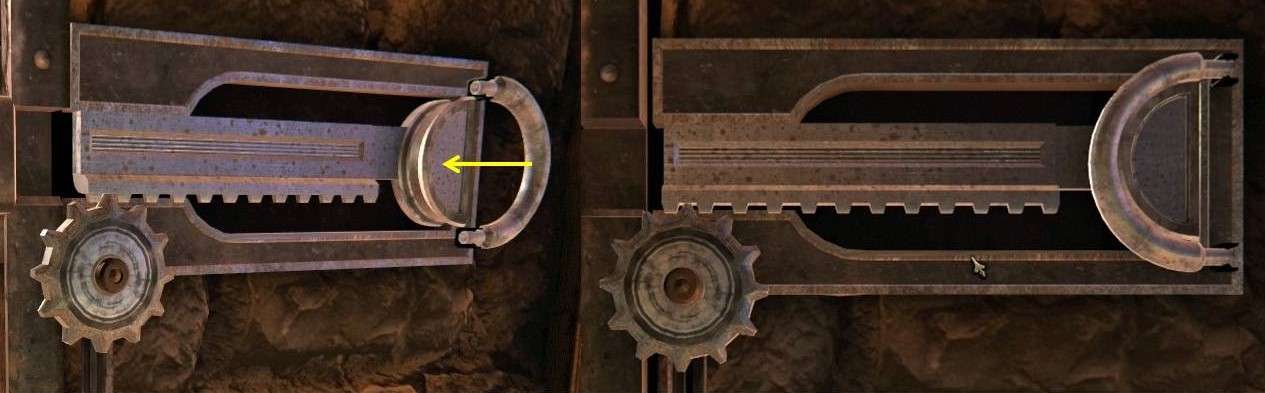
floor, it is closed with a rod and a padlock.
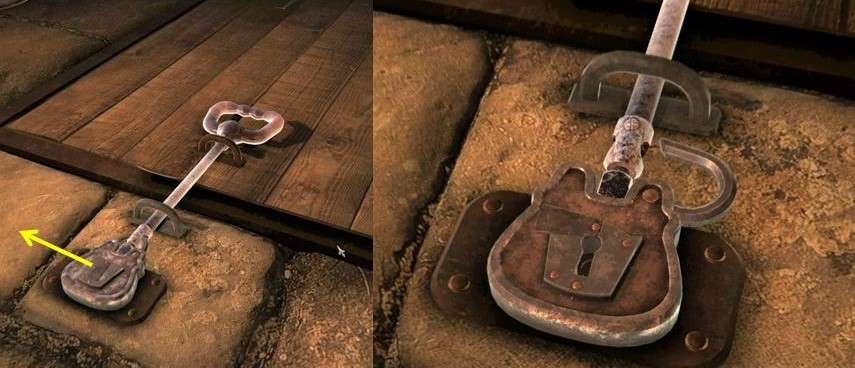
Drag the key there and turn the key, then grab
the metal bar.
Pull the lever backwards and the water will
turn to the left, the water wheel will turn outside.
Go back to the panel on the base, drag the
metal bar there.
The left lever is for up and down.

You now also see the 2 plates lying on the
floor.
Pull the right lever to the left and you will
see the sandbag go to the left, it is now hanging above and plate.
Pull down the left lever and the bag will be on
the plate.
Zoom in on the lock because you have to block
this because otherwise you cannot lift the sandbag.
On the right side of the top slot you will see
a bracket, pull this bracket to the left and the lock will be blocked.
Go back to the panel on the base and pull up
the left lever.
Then pull the right lever down and the sandbag
now hangs above the other plate.
Pull down the left lever, the sandbag is now on
this plate.
You see that the bottom lock on the door opens,
the door opens.
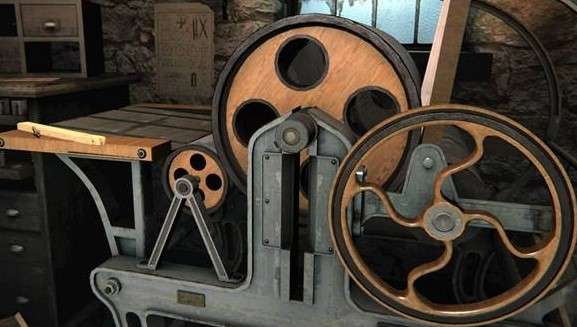
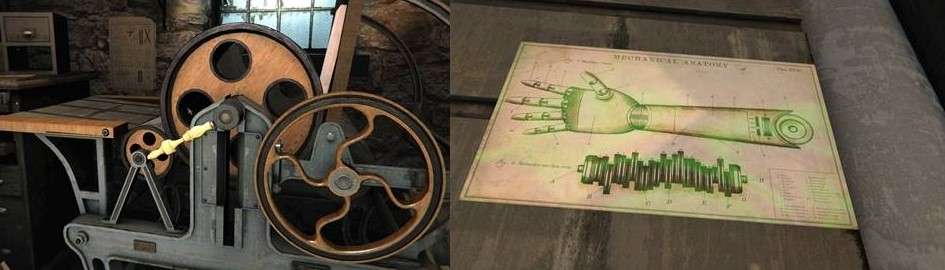
On the other side there is a milling machine,
only this one is not yet connected.
Turn to the door and you'll see a hatch to the
left of it.
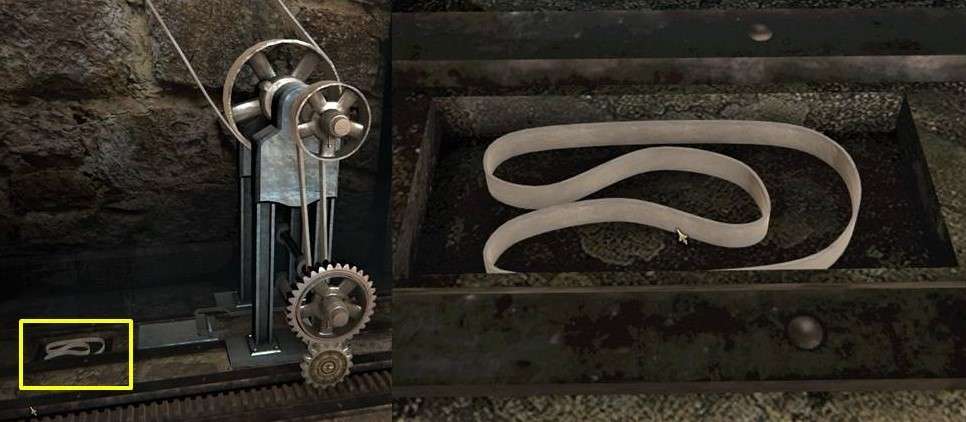
A few pieces are missing in the rail.
On the left is a letter, read this. Zoom out
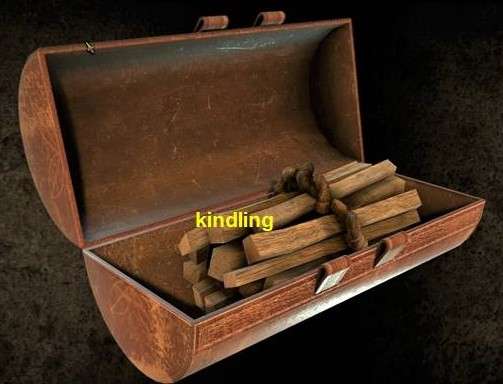
and zoom in on the tube on the right.
Inside you will find kindling wood. Take that
wood.
Zoom out and turn to the left side of the iron
box, zoom in on the lower part.
A drawer slides out with 4 buttons on it, you
have to put it in the right place.
The green with the green and the blue with the
blue.
Follow steps 1 to 9
If that is successful, the drawer will close
and you can now grab a piece for the rail.
Zoom out and turn to the panel with the lamps,
zoom in on the panel.
Drag the piece you just found to the right
place.
You can now slide the button from the left to
the first lamp, the lamp lights up and you see a gearwheel turning.
Zoom in on the front of the box and on the
bottom left, there you see a button.
Zoom in on the button and press it, a drawer
will come out.
There is a flint in this, take the flint.
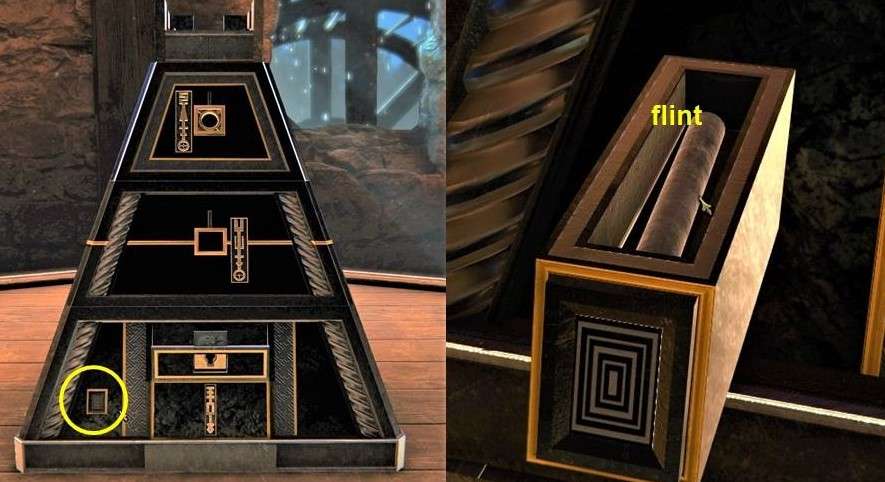
Zoom out and then zoom in on the golden key to
the right of the button.
You are going to make this now, first make a
drawing of the key.
Zoom out and go to the forge, in the middle at
the front you can set the shape of the key.
Take your drawing and set the shape correctly
so that the key will be made with it.
Open the block and put the wood in it, close
the block again.
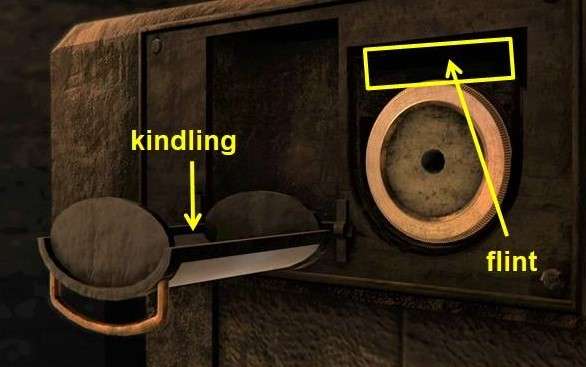
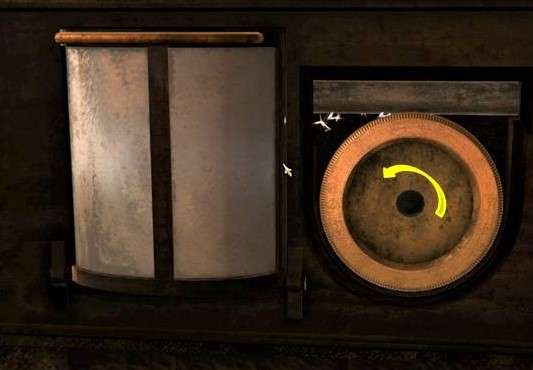
Now you have to turn the wheel to the left
quickly, you will see sparks going to the wood.
This lights up, you zoom out and you see the
coals turn red.
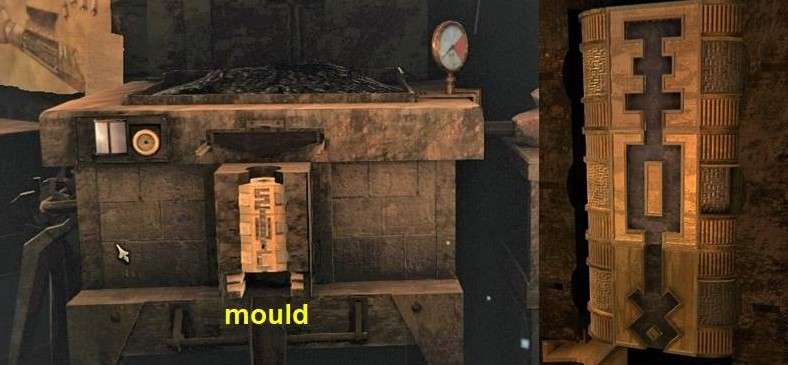
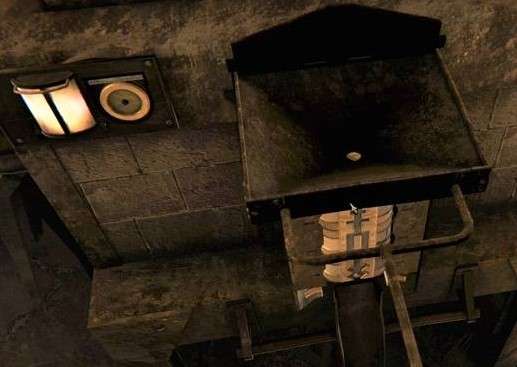
A drip tray is pushed out above the mould,
metal has to be put in, but you don't have metal yet.
Zoom out and then go to the base with the
control panel for the sandbag.
• Pull the left lever upwards, the
sandbag goes up.
• Then the right lever up, the bag goes back.
• Now right lever to the right, the bag goes to
the right and now hangs in front of the hatch.
• Then lift the right lever and the bag goes
through the hatch and now hangs above the saw table.
• Go to the other room and zoom in on the saw
table.
• Lift the saw handle and the bag will break.
• There is a block of metal on the saw table,
grab this block
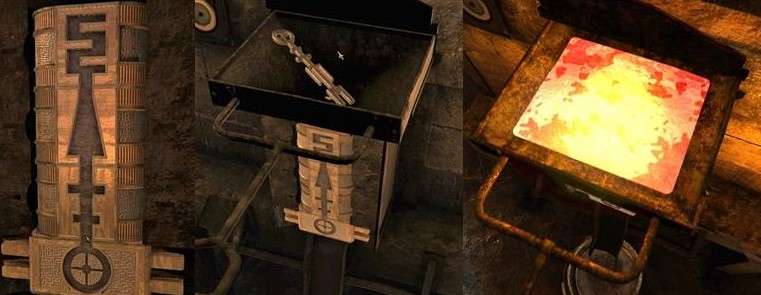
Zoom out and turn around, then go back to the
forge.
Push the tray in, zoom out and zoom in on the bellows.
You now have to pull the bellows down a number
of times until the meter near the fire is in the red zone.
You go to the tray and the mould, the tray
comes out with liquid metal.
The metal flows into the mould, then the key
comes out of the mould and falls into the bucket of water.
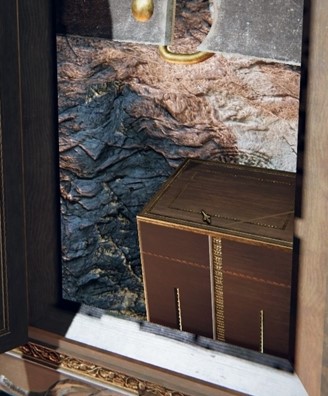
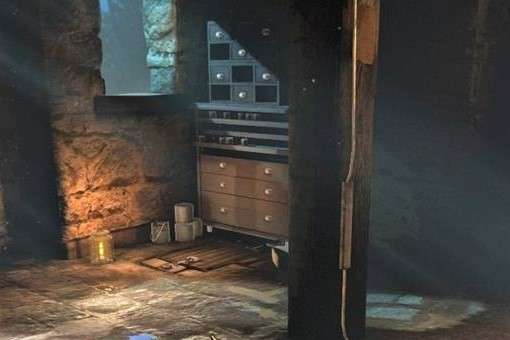
Zoom out and then zoom in on the chest on the
table, zoom in on the keyhole at the bottom of the front.
Drag the key to the keyhole and turn the key
and a button comes out, this button can go left and right.
Move the button to the left, then go to the
left side of the box.
Zoom in and grab the connector. Zoom out and go
back to the front.
Zoom out and go to the right side of the chest,
there a hatch has opened.
Zoom in on it and take the block that lies
there, this is the bottom part of the mould at the forge.
Zoom out and then zoom in the panel above.
Turn the wheel and the coupling piece with the
buttons will come down.
The wheel comes forward, grab the wheel. The
hatch above the wheel opens and a sliding puzzle emerges.
You have to swap the 2 forms or they cannot
pass through the gates.
Puzzle solved then a hatch opens at the front
of the puzzle, take the piece of rail that lies there.

Zoom out and turn to the panel with the rail,
zoom in and drag the rail to the right place.
Drag the button over the rail to the next lamp,
more axes will now turn.
Go to the other room and turn to the left, you
can see that the drive is now working here, but the milling machine is not yet
connected.
Click on the wheel in your inventory, turn the
inner ring clockwise and teeth will come out.
You now have a gear, click it back to your
inventory.
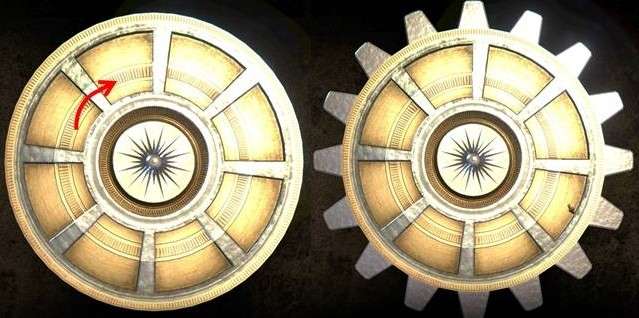
Zoom in on the bottom of the drive and drag the
gear to it.
The drive goes to the milling machine and in
the meantime pulls a plate away.
Zoom in on that hole and take the drive belt
out of it.
Zoom out and zoom in on the top of the drive,
drag the belt here.
The milling machine will now turn, in the
holder you will find a chess piece.
There is another chess piece on the plate to
the right of the cutter, take this one too.
Zoom out and go to the chest on the table, zoom
in on the centre on the left.
Drag the 2 chess pieces to the 2 holes that you
see there.

The hatch in between opens, zoom in and click
on your magic lens.
You see a watermill, turn the waterwheel, a
piece is out but that piece is pushed in from the window.
Pull the sprocket up at the front, below the
water wheel you see a button.
Move this to the right, the roof rotates and
you will also find a button there.
Press the button and the roof will open, there
is also a button. Move this button up.
Flash and mirrors / lenses now appear on the 4
corners.
Go to the rear left lens, there is a button on
the rear of the lens.
Press that button and you will see a beam of
light.
On the 2 front mirrors you see shapes and on
the mirror on the right you can see where those shapes should be.
Zoom in on the front right and turn the mirror,
you can see at the back right if it is correct.
Then go to the front left and turn the mirror,
you can't see it, but you will notice if the shapes are in the right place.
You automatically go to the rear right mirror
and on the back a plate slides to the side.
Press the button that you see there, the
mirrors disappear into the box again and at the front you now see a keyhole.
You see a key there, make a drawing of the key.
Now you have to make this.
Go to the forge and zoom in on the mould, drag
the block to the bottom of the mould
Take your drawing and set the mould correctly.
Zoom out and then drag the old key to the tray
and slide the tray in.
Zoom out and zoom in on the bellows, ignite the
fire and you will see the key being made.
Take the key from the bucket.
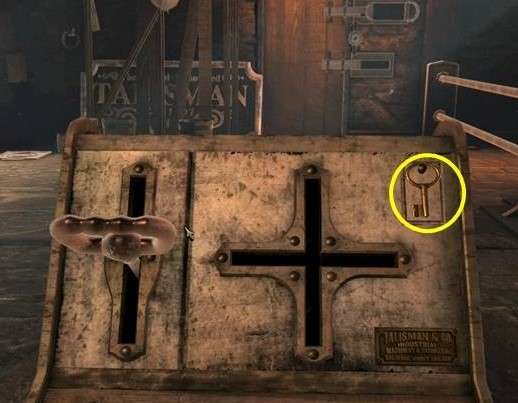
Go back to the chest on the table and zoom in
on the keyhole in the middle of the front.
Drag the key to the keyhole and turn the key.
On the left you see a blue stone, on the right
a green stone and on the back you see a yellow stone.
Zoom in on the front and click on your magic
lens, you will see a cube with a red stone behind bars.
You also see 2 discs with which you can rotate
the cube.
With the right disk you rotate the cube on the
horizontal axis and with the disk on the bottom you rotate the cube on the
vertical axis.

There are 3 holes in the cube, 1 for the blue
stone, 1 for the green stone and 1 for the yellow stone.
You must now rotate the cube so that the yellow
hole is behind the yellow brick.
Then push the yellow stone into the hole, do
the same with the blue and green stone.
Every time you push a stone into the right hole
you see bars slide away in front of the red stone.
When the last tile is in the correct position,
you will see a flash and you can take the red gem.
Then zoom in on the hole next to the top key,
drag the red gem to it.
The plate slides up and you have a keyhole.

Make a drawing of the key and then go to the
forge.
Zoom in on the mould and adjust it for the new
key.
Then zoom in on the tray above the mould and
drag the old key into it, slide the container under the fire.
Go to the bellows and blow air to the fire,
when it is hot enough the key is cast.
Take the key from the bucket.
Go to the chest on the table and zoom in on the
keyhole at the top, drag the key to the hole and turn the key.
The top folds open and you see the familiar
shimmer again.
Zoom in and click on your magic lens, then
double click on the eye.
On the bottom you see a box where all 4 red
tiles must be placed underneath each other.
You also see 2 buttons below and you also see 3
gears, at the top you see a drive shaft.
With the left button you can move the axis,
there are 3 positions for the axis.
Left, right and top centre, name the positions:
L, M and R. number the rings from inside out 1 to 4.
Ring 4 is rotated with the shaft in position M.
The rings 1, 2 and 4 are rotated with the shaft
at position L
Rings 3 and 4 are rotated with the shaft in
position R.
The rings are turned with the button on the
right.
Set the axis on position L and press the green
button a number of times until rings 1 and 2 are positioned correctly.
Then place the shaft in position R and press
the green button a number of times until ring 3 is correctly positioned.
Now place the shaft in position M and press the
green button until ring 4 is also in the correct position.
All red stones below each other than zoom out
and you will see a block rise from the chest.
Axes protrude on 3 sides but at the rear you
will find the last piece of rail.
Grab the piece of rail, zoom out and zoom in on
the panel with the rail and the lamps.
You see now that the last axis is going to
turn, you automatically turn to the door behind you.
Turn around and enter the room, you will see a
printing press.
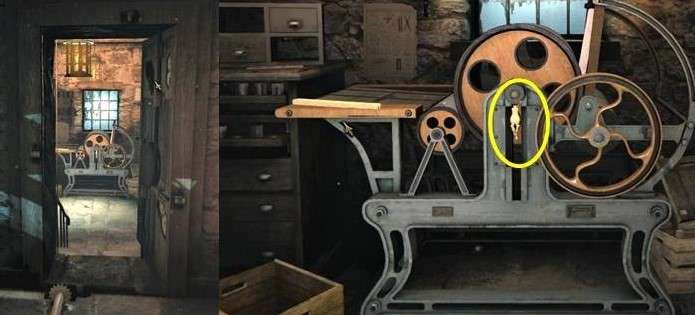
Zoom in on the lever on the rotary wheel, turn
the lever and it breaks off.
On the printing press you see a piece of wood,
grab this.
Zoom out and turn around and go to the room
with the saw table and the milling machine.
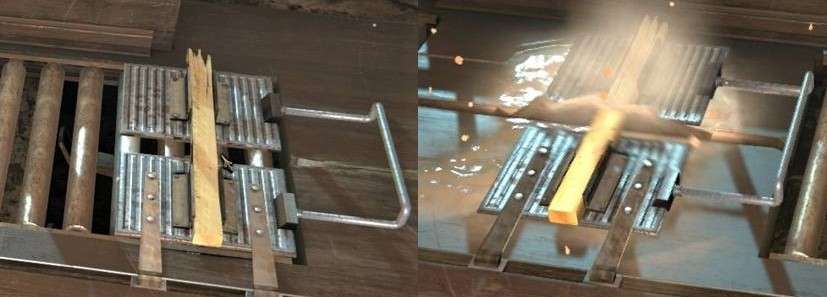
Zoom in on the saw table and place the piece of
wood in the bracket on the right.
Slide the bracket above the saw and then pull
the saw upwards.
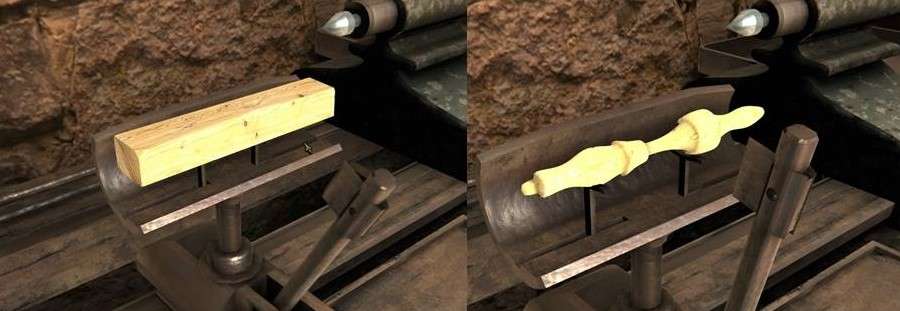
Take the front piece of wood and go to the
milling machine.
Zoom in on the holder and put the piece of wood
in it, the machine now makes a new lever.
Take the handle from the milling machine, zoom
out and turn around.
Go to the table behind the smithy, there is the
artificial arm, zoom in on the lid and there you see 3 symbols.
Note these symbols because you will need them.
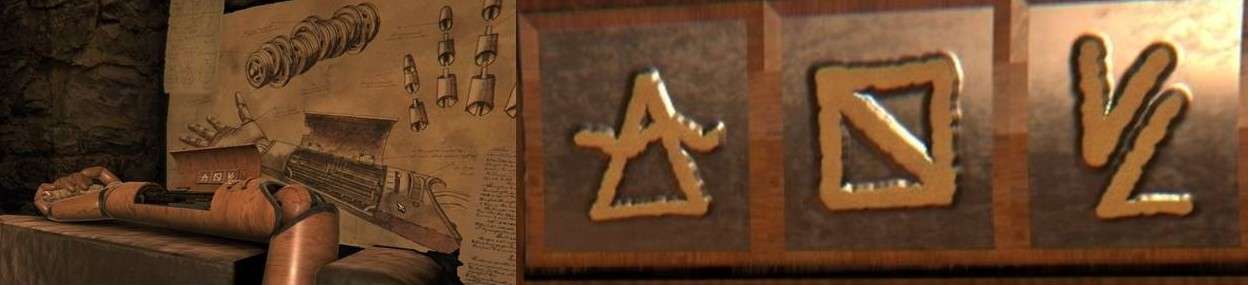
Zoom out and go to the printing press, zoom in
on the rotary wheel and drag the lever there.
Turn the handle and a drawing will be printed.
Zoom in on the drawing and click on your magic
lens, you will now see 3 reels with symbols.
Put the right symbols on the reels, flash and
you'll see a camshaft in the drawing.
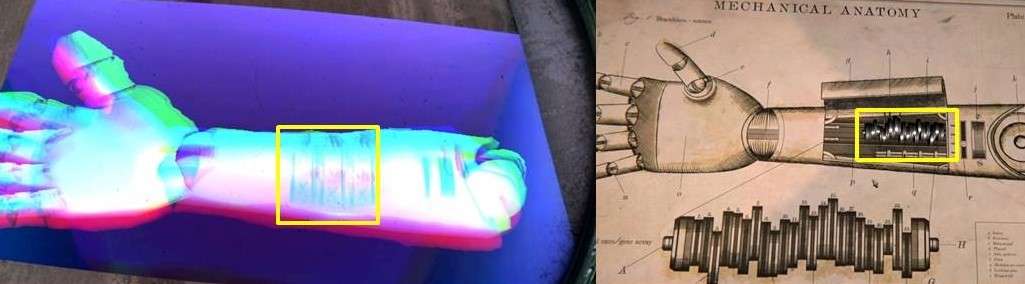
Take the camshaft and zoom out, go to the
artificial arm.
Place the camshaft in the artificial arm, zoom
in on the stripes and the wheel.
Place the pin at the third line and then turn
the wheel.

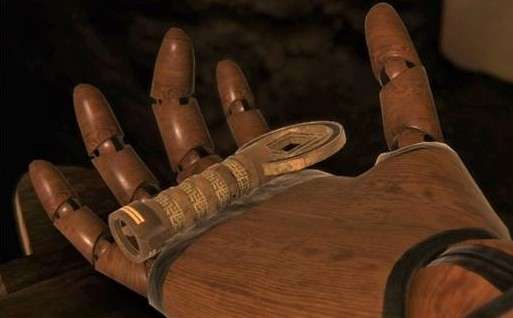
You now see the fingers moving and the hand
opens, take the strange key that lies in the hand.
Zoom out and go to the box on the table, zoom
in on the block on top of the box.
Click on the key in your inventory, you will
see 3 square holes.
You need four so you have to turn the second
ring and then you have 4 square holes.
Now raise the beard of the key.
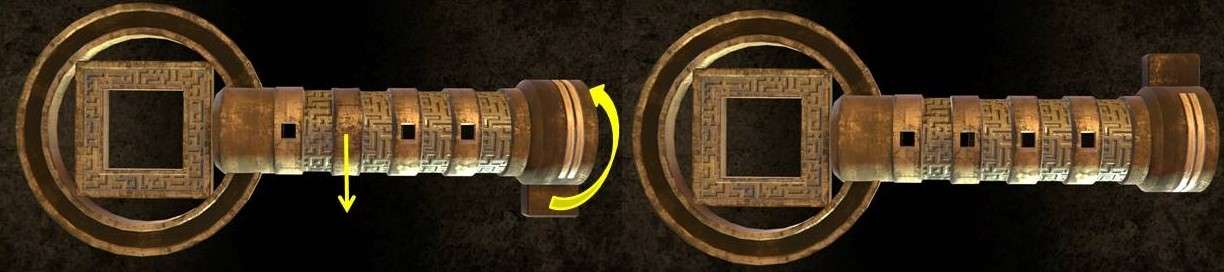
Click the key back to the inventory, you can
now put the key on the 4 pins at the front of the block.
Then turn the key so that the arrows face each
other, the pins slide inwards.
Go to the left and drag the key there, turn the
key and the axle will retract.
Go to the right and drag the key to the axis,
turn the key and this axis also slides in.
The block drops and then rises again, there is
the Pyramid.
Take the pyramid, flash and you are back in the greenhouse
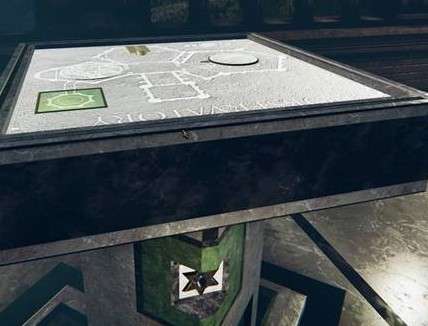
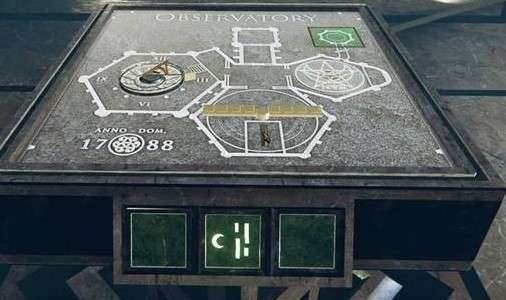
Chapter 5: The Observatory and
the extra puzzles for the other ends.
The extra puzzles:
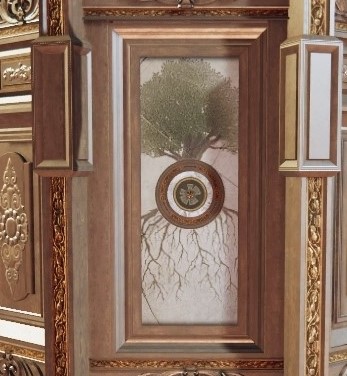
Zoom out and turn around, you see the tree that
you need to do something with.
You will solve these puzzles in a moment and
also a number of other puzzles.
First go to the central hall and put the fourth
pyramid on the disk.
Take the book and go to the library, on the
left you will see a book stand.
You will end up in a lift, turn to the lift
lever and turn it to the right.
On the right you see the tripod again and the
oscilloscope.
Turn to the centre of the tower and you will
see a lamp hanging in a round hole in the floor.
Left and right a corridor goes around the hole
in the floor, go through 1 of the corridors to the other side where the
generator is located.
You must first ensure that there is power here.
Zoom in on the generator and slide with the
buttons until there is power.
Zoom in on the switch and set it down, you can
now see that the observatory has power.
The box on the tripod opens and the power now
goes to the oscilloscope.
Close the lid of the oscilloscope and you will
see that this device is the same as the oscilloscope in the office.
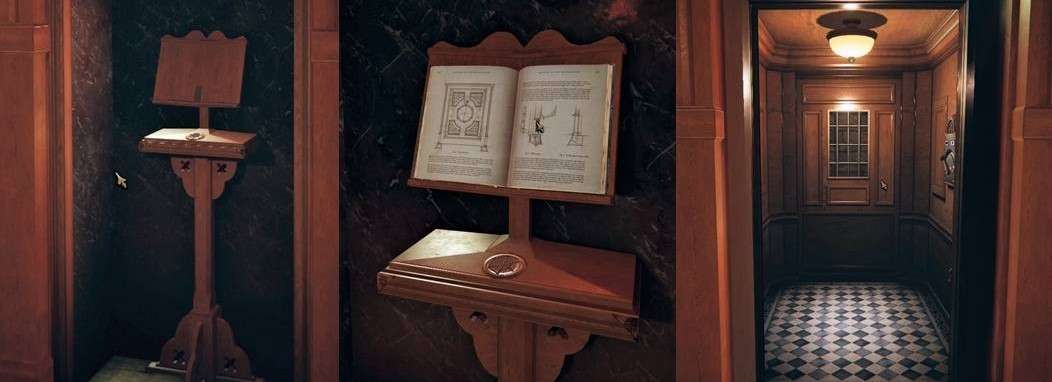
Take the screwdriver that is lying here, also read
the letter on the table here.
You are now going to solve a number of puzzles
for the other ends.
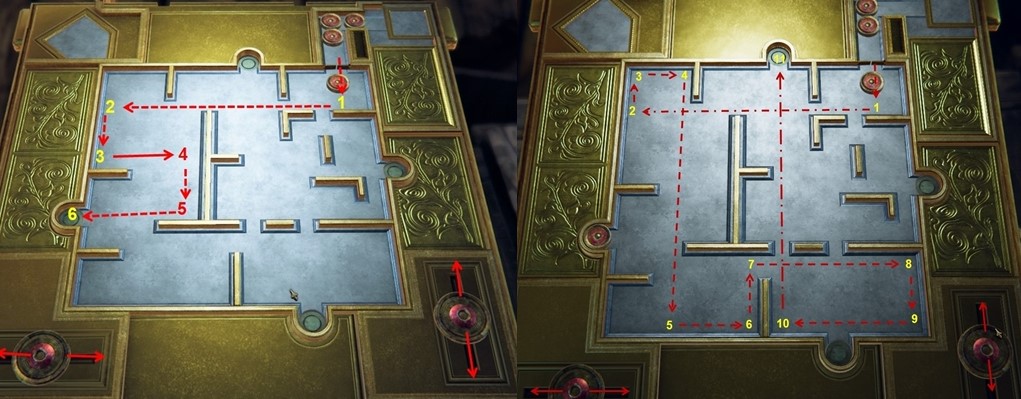
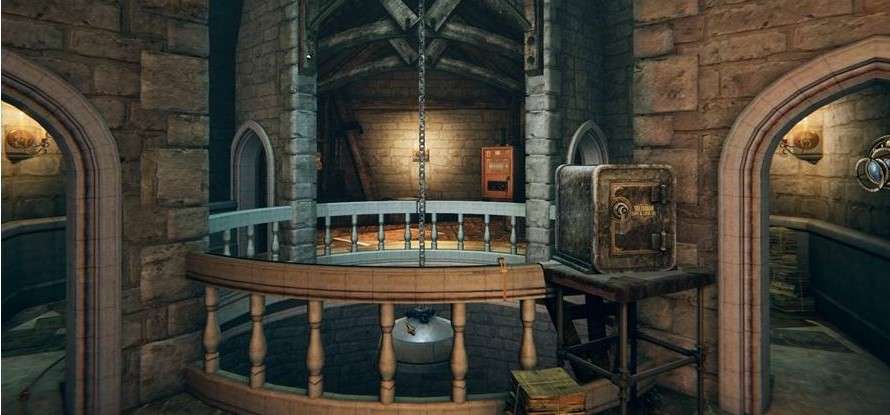
In the middle of the balustrade you see a
button, zoom in on it.
Move your cursor to that button and then press
and hold your left mouse button.
Now move your cursor up and down over that
button in the direction of the safe.
Your cursor does not have to stay on that
button as long as you keep your left mouse button pressed.
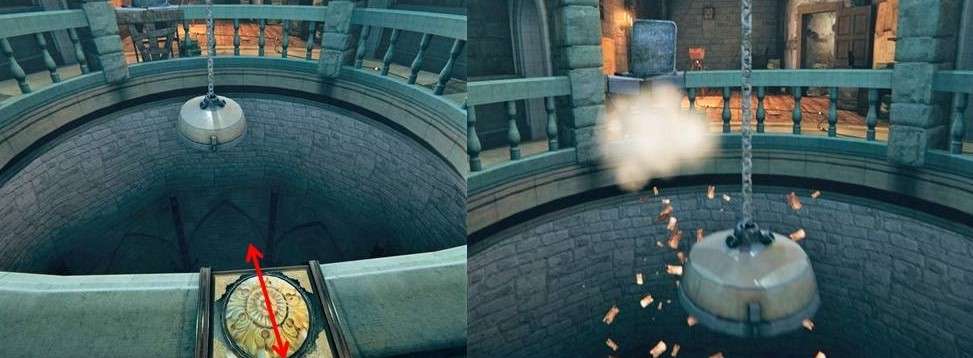
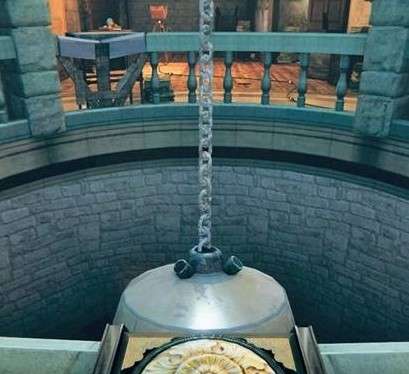
You will see the lamp hanging there, move, let
the lamp make bigger and bigger movements.
You must focus the movement of the lamp on the
safe until the lamp collides with the balustrade under the safe.
The safe falls down and is lying in the central
hall.
Go through the hallway to the other side and
then down the hallway to the elevator.
First go past Mystical Maggie via the stairs to
the upper room of the library.
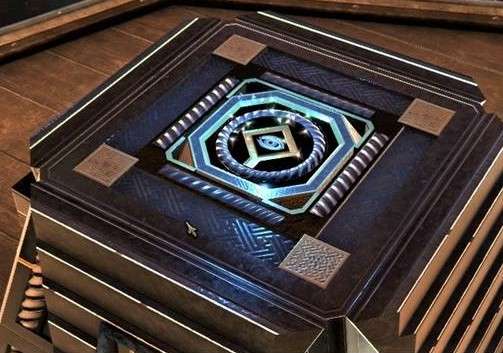
Zoom in on the table, there is a flat box on
it, there are 2 handles on the box.
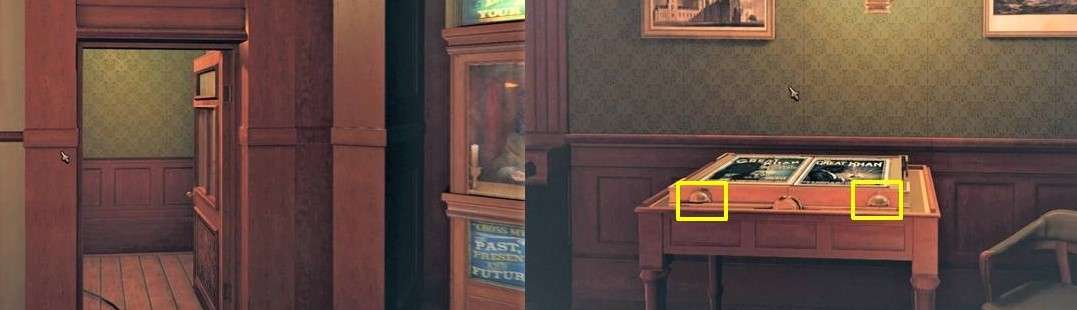
Pull 1 of the handles up and the box closes.
On the left side you see a cube sticking out,
take the cube.
Zoom out and go down to the cupboard of
Mystical Maggie.
Pull this mechanism out, there is a small
circular mechanism in the hole.
Click in your inventory on this circular
device, on the right you see a gray block.
Slide this block from the top to the left side,
the mechanism opens and you have a small key.
Click the key back to your inventory and zoom
out, turn around and go to the central hall.
The safe is on the floor, the safe's door is
now open.
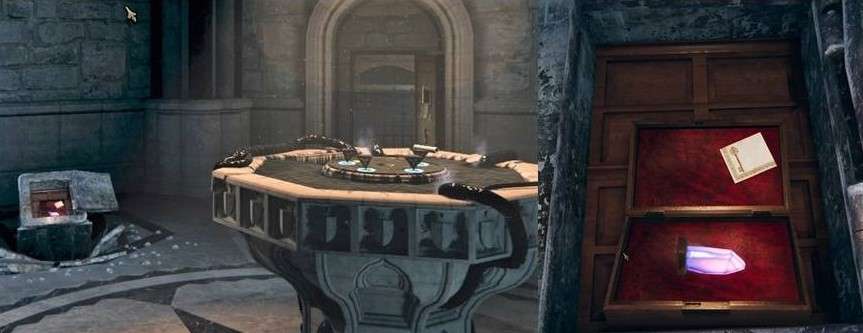
Zoom in on the safe, there is a note in it and
a crystal.
Zoom out of the safe and turn to the left,
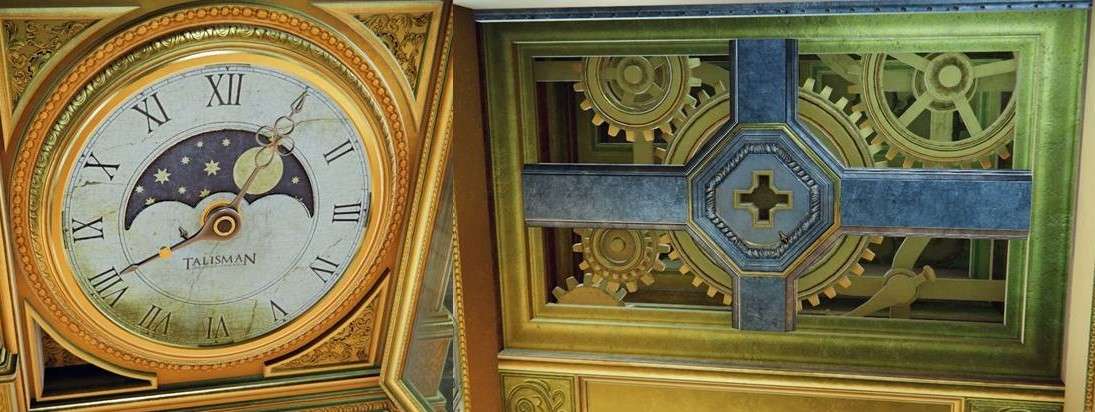
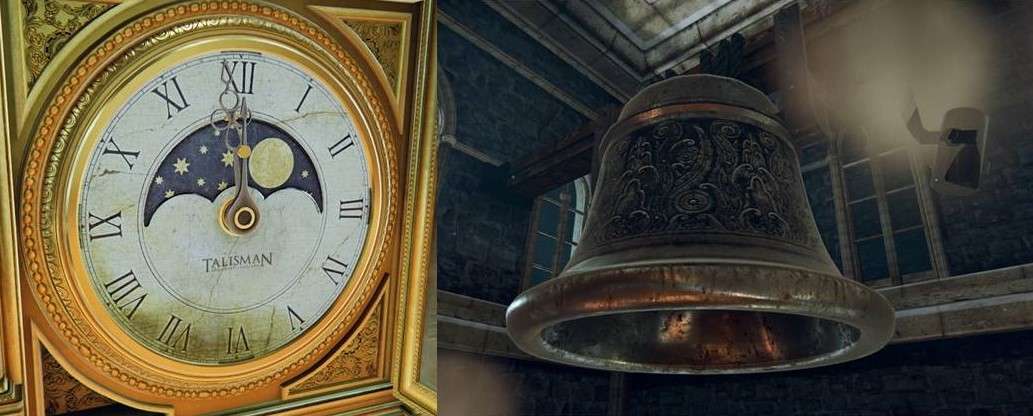
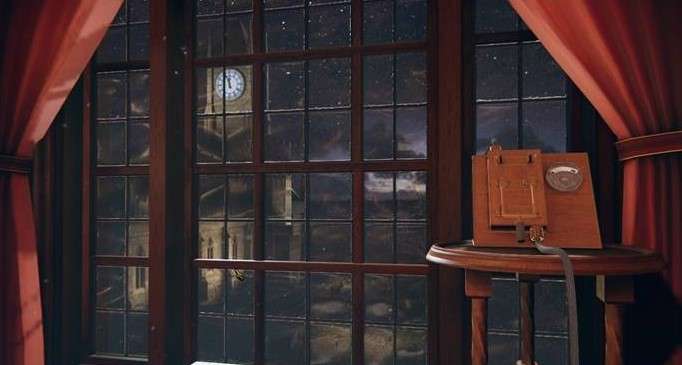
there is the office, turn to the clock and see what time it is.
This clock now shows the time of your computer,
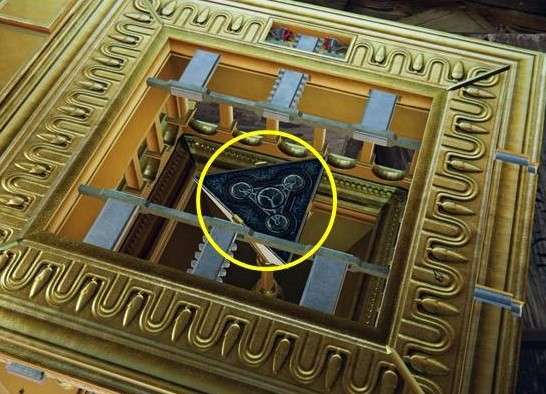
click on your magic lens and you will see stripes at 15, 30, 45 and 00 minutes.
This is the actual time, maybe you have to wait
almost 15 minutes until the pointer is on 1 of those 4 lines.
You don’t have to wait so long and doing
nothing, you can solve the desk puzzle.
If the pointer is on a line, you will see a
slider under the clock face.
You see the weights hanging, you also see the
numbers 1 to 4.
Click on your magic lens and you will see the
numbers 4 1 2.
Now slide the left weight upwards, the weight
in the middle all the way down.
The door of the clock closes and the clock face
opens.
Zoom out and then zoom in on the desk, zoom in
on the keyhole in the right drawer.
Drag the key to the keyhole in the drawer, turn
the key and the drawer comes out.
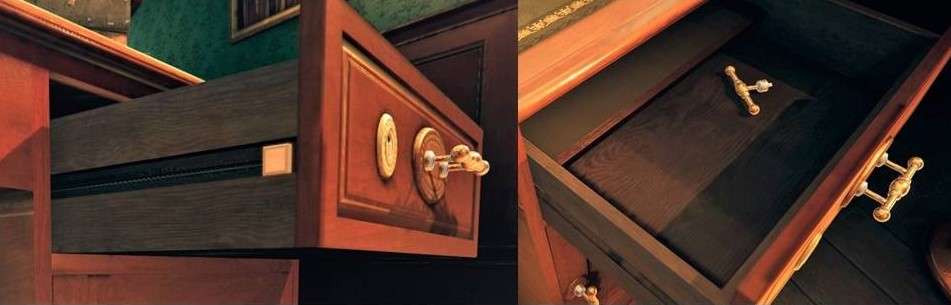
Look at the left side of the drawer, there you
see a slider, drag it to the left.
Zoom out and then zoom in on the hole in the
left drawer, drag the lever to the drawer.

Look in the drawer, on the right side you see a
slider.
You see 3 round discs between the 2 drawers,
when the slider in the drawer is up you see the left part of the discs turning.
Now turn the left wheel 90 degrees to the left,
here you see a slider.
Push the drawer closed and open the door
further, read the note that lies there.
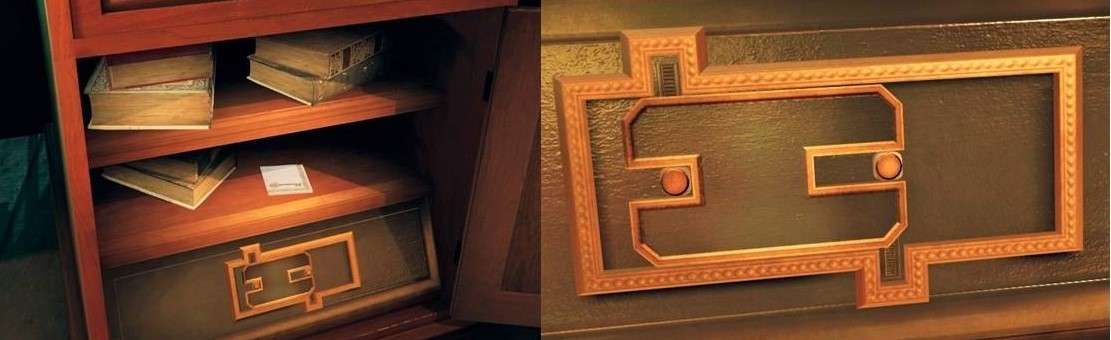
First pull the plate to the right, pull the
knob upwards.
Now drag the plate all the way to the right and
pull the slider upwards.
The right end of the 3 round discs now turns
away.
Turn the right-hand disk 180 degrees and the
left-hand disk another 90 degrees to the left.
The middle disk comes out, in the drawer you
will find a token.
Take the token.
Zoom out and then zoom in on the oscilloscope,
this is the same device as in the tower.
Drag the screwdriver to the plate with the
knobs, then unscrew the screw.
Pull the plate up and take out the electrical
circuit.
You can now repair the oscilloscope in the
tower, but there are still a few puzzles to solve.
Zoom out and go to the library via the central
hall.
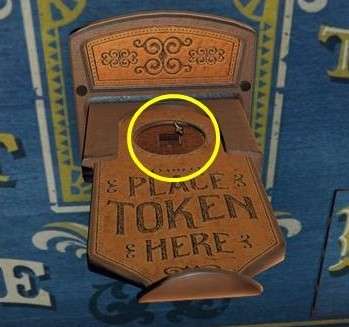
Zoom in on the case with Maggie, zoom in on the
coin mechanism and place the token in the hole.
Push the plate with the token inwards.
Maggie now places 4 cards and then points to
the left card: Imprisonment.
A drawer slides open in the blue compartment,
inside which lies a wheel with a star-shaped centre.
Take the wheel.
Zoom out and turn around, go to the cell where
you entered this building.
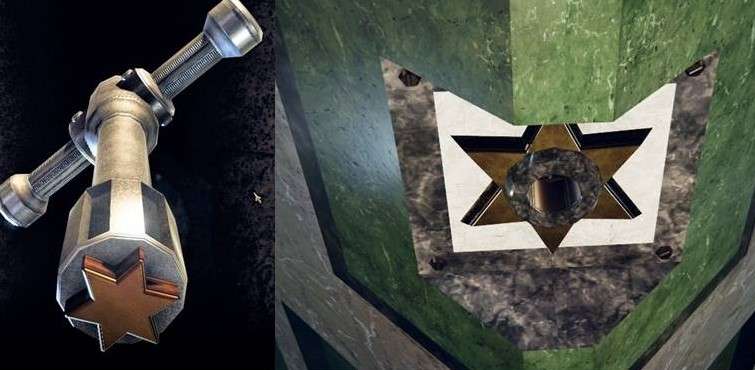
There you have a gate with a star-shaped lock.
Drag the wheel to the lock of the gate and turn
the wheel, the gate will fall to the ground.
Enter the basement, on the left is a cupboard
with 6 drawers.
Open the drawer at the bottom left and read the
note that is there, push the drawer closed again.
Zoom out and turn to the right, there you see 2
cupboards, the left has 3 levers with a drawer under each lever.
Each drawer has a puzzle, you start with the
easy puzzle.
Move the left lever forward, the drawer slides
open, you have to set 3 switches correctly to get the number on top.
Solution: 17 = 8 + 4 + 5, set the lower and
upper switch to the right.
Zoom in on the lever above the middle drawer
and move it forward, the drawer slides open.
A slightly more difficult puzzle: solution 31 =
7 x 4 + 3, move the middle switch to the right.
Now zoom in on the lever above the right drawer
and move it forward, the drawer slides open.
A slightly larger sum but here is the solution:
30 = 8 x 2 + 7 + 3 - 5 + 9.
The drawers close again and the levers are
back, you turn to the right cupboard.
Place the levers in the correct position
between the lights.
Go to the library and turn to the telephone
that is now ringing.
Move the lever to the right and on the
phonograph the cylinder slides to the right, it will be upright and turns
around.
You will find a rotary handle with a cross,
take the rotary handle.
Also remember the phone number: 1795.
Then go back to the cellar in the cell and zoom
in on the cabinet with the 6 drawers.
Zoom in on the top, there you see a
cross-shaped lock, drag the key with the cross here.
Turn the key to the right and pay attention.
You now see a sign on 4 drawers, you see them 1
by 1. Remember the sequence.
Now pull the drawers out in the correct order,
the last one is always in the middle below.
There is now a token in it, take the token.
I cannot give you a code for this because it is
different every time but it is not difficult.
You are now done here, zoom out and go to the
greenhouse.
In the room with the generator you turn to the
left, you see a wheel with 1 crystal in it.
Zoom in on it and drag the 2 crystals to that
wheel, the 3 crystals slide in and the latch over the button comes off.
Move the button to the left, the wheel will turn
and you will zoom in on the screen on the right.
You see 3 buttons on the edge, with this you
determine the movement and the direction.
Above the edge you also see an arrow, which
indicates where you need to go.
The buttons left and right speak for themselves
with the button at the top you move forward.
You have to look for a strange object in this
space, solution:
3 x forward, turn left, 5 x forward, turn
right, 4 x forward, turn right and then 3 x forward.
Take the strange object.
Zoom out and you are again in front of the
wheel with the crystals, on the left next to the wheel is a chest.
Zoom in on that chest, there is a platform for
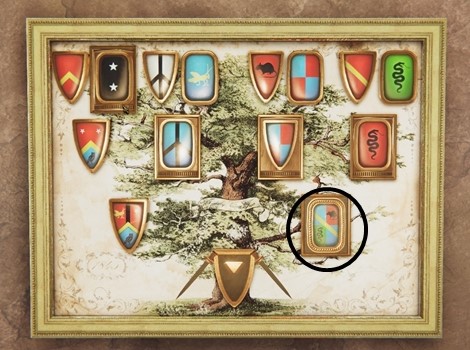
the chest with an emblem.
In the upper room of the library you have taken
a cube from the chest on the table.
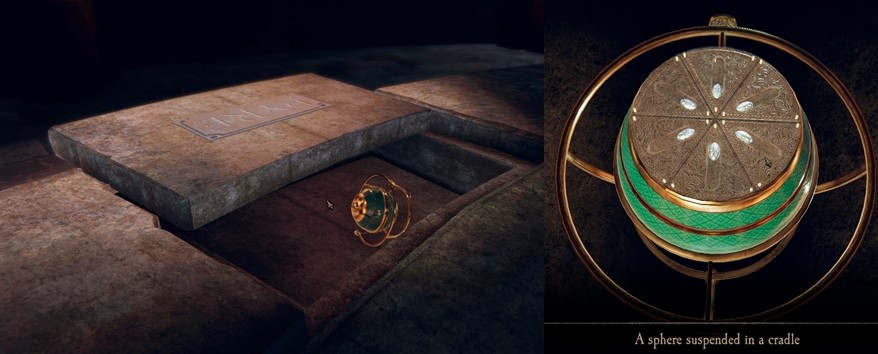
This cube has the same emblem on the top and
bottom, drag this cube to the platform.
The cube is pushed into the box and you now see
3 buttons on the front of the box.
Click on your magic lens and you will see the
inside of the box.
If you press the left or right button, the cube
changes shape.
Click as often until you see a sphere, then
click on the middle button and the sphere comes out.
You are not done here yet, you still have to do
something with the telephone and the gramophone and also with the tree.
Zoom in on the tree, you will see a rectangle
with 3 rings and a drawer below it.
You can't do anything with this yet, zoom out
and go to the other room.
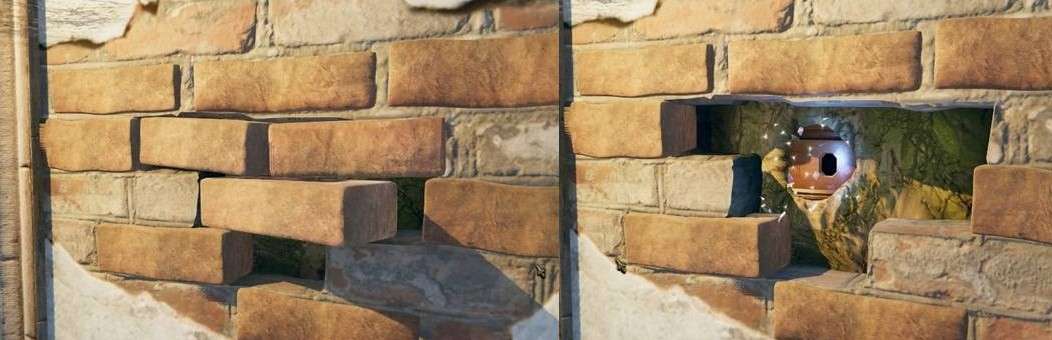
Turn around and zoom in on the wall to the left
of the door, there you will see a few loose stones in the wall.
Click on the loose stones and they fall to the
ground.
You will now see an opening with sparkle, click
on your magic lens and double click in the opening.
Inside you zoom in on the top of the round
block that is in front here.
There you see 3 rings with an opening in it, if
you turn the rings, the large ring behind it is also rotated.
Turn the 3 rings until the openings are above
each other in the middle.
You can now see that there is a keyhole in the
large rings.
If you want to check this, you need to zoom out
and zoom in on the tree in the other room.
Zoom out, you still have to do something here,
but you need a key for that.
Go up the stairs to the upper room and zoom in
on the table.
On the right side of the box there is room for
a sphere, drag the sphere to the hole in the box.
Then pull 1 of the handles downwards, you will
now see a stage with sparkle.
You know what to do now, magic lens and double
click.
You go through the curtain and you stand in
front of a phonograph, on top you see a role.
Click on that role and you now have a blank
role.
Zoom out again and go down, go to the
phonograph, drag the blank roll to the holder.
The holder then slides to the left under the
needle, zoom out and turn around.
Zoom in on the cupboard with Maggie and zoom in
on the coin mechanism, pull the plate out.
Place the token in the hole and push the plate
in.
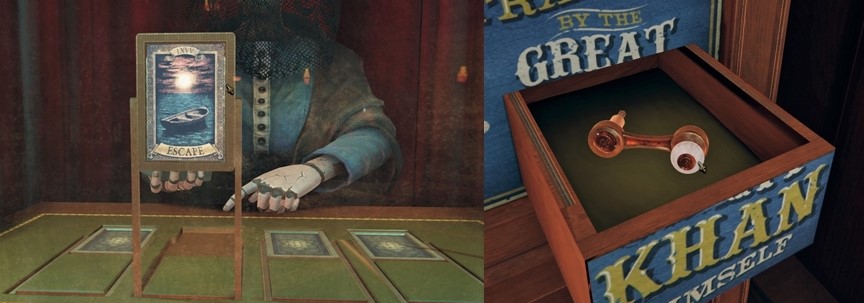
Maggie again places 4 cards and then points to
the second card: Escape.
The drawer slides open again, with a rotary
handle. Take this lever.
Zoom out and go to the greenhouse, go to the
telephone and the gramophone.
On the front of the gramophone you see a hole,
drag the rotary handle to that hole.
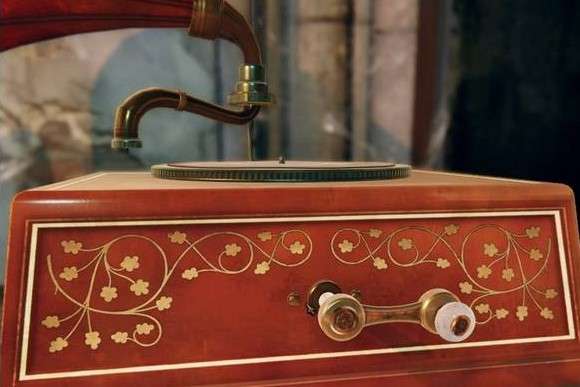
Turn the handle and the gramophone plays the
record on it.
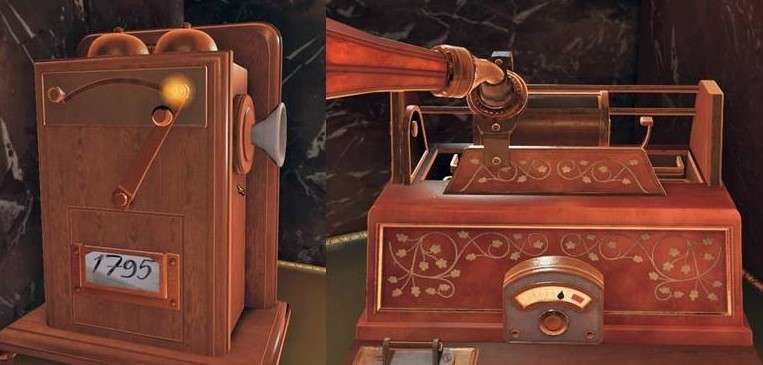
Zoom out and then zoom in on the telephone and
dial the telephone number in the library: 1795
Zoom out and go to the library, the phone
rings.
You now hear the music from the record and this
is recorded with the phonograph.
The roll is described and the holder is then
upright, take the roll out.
Zoom out and turn around, go up the stairs to
the upper room.
Behind the curtain you are at the phonograph,
drag the roll to the phonograph and press the button.
The roll moves to the left and the music starts
playing, the curtain opens.
Under the chest a drawer comes out, containing
a note and a token.
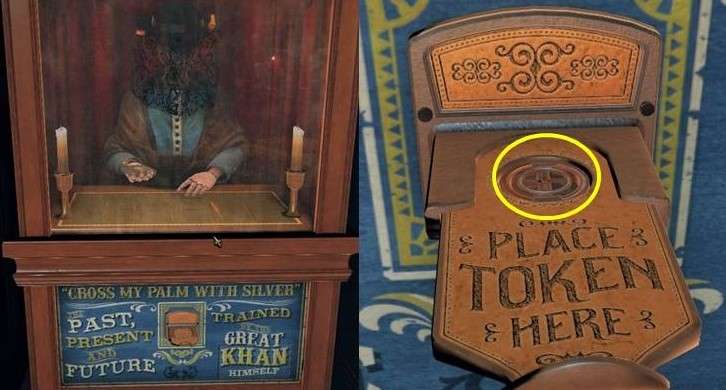
Go down and turn around, go to Maggie, pull out
the coin mechanism.
Maggie again places 4 cards and then points to
the third card: Release.
Zoom out and enter the elevator, move the lever
to the right.
At the top you walk to the balustrade, to the
left of the table on which the safe stood, you see a holder on the balustrade.
Zoom in on that holder, drag that device to the
holder.
Click on your magic lens, you will see 3 pieces
of a drawing of a key in the hole in the floor.
You must complete the drawing by turning the
wheel and also turning the lens.
Now go through the elevator and the central
hall to the greenhouse, walk on to the next room.
Turn around and zoom in on the tree, drag the
key to the keyhole.
Zoom out and go to the other room, turn around
and zoom in on the hole in the wall.
Go through the lens and double click inside and
zoom in on the round block at the front.
You now see a part of the key, you see a plate
standing vertically.
Turn the plate 90 degrees, the plate slides
inwards. The lower part turns outwards and pushes a catch away.
You have to go back to the front of the tree,
you now know how to do that.
Turn the key 180 degrees and then go back to
the back of the tree.
Go inside again and zoom in again on the block,
you will now see the other part of the key.
Turn the plate 90 degrees here too and the
bottom of the key turns outwards and push another catch away.
Go back to the front of the tree and zoom in on
the key.
You can now pull open the drawer, you will find
the last token there.
Zoom out and go back to the library, to Maggie
and zoom in on the coin mechanism.
Maggie again places 4 cards and then points to
the fourth: Lost.
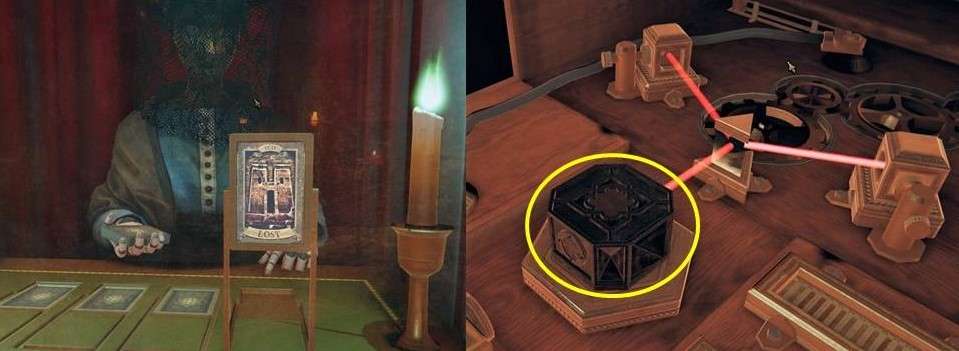
In the middle you see a strange object, grab
that object.
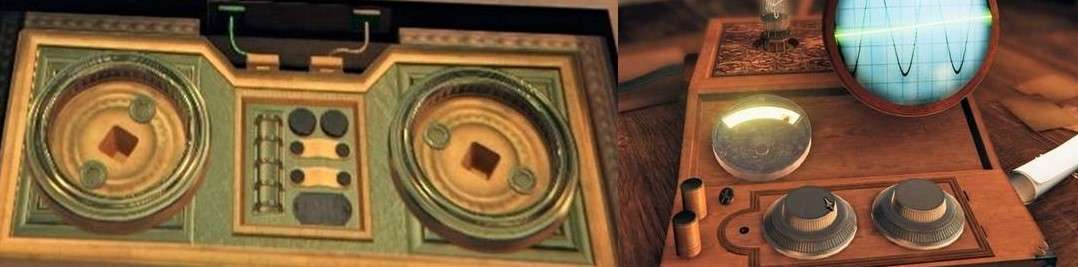
The oscilloscope is now working, turn the knobs
until the lines coincide.
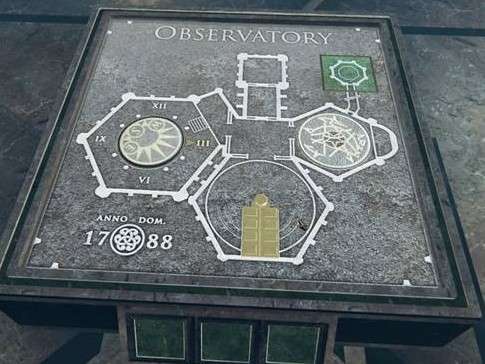
The Observatory
You are now in the observatory.
Take a look around, the telescope hangs in the
top of the dome.
1 solid circle with lights and an open circle
with a number of circles in it.
To the left against the wall is a low table
with a round disk, a few books and a plate with symbols.
First go to the other side, there is a rotary
wheel with a rope with a weight on the left and right.
Turn the wheel and the weights will rise.
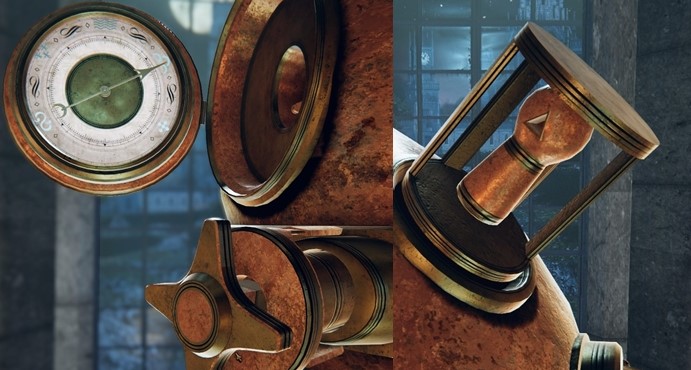
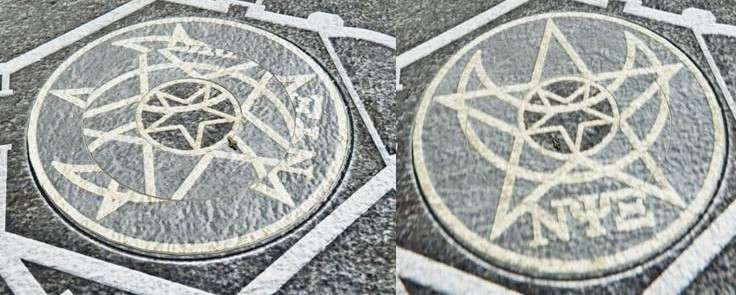
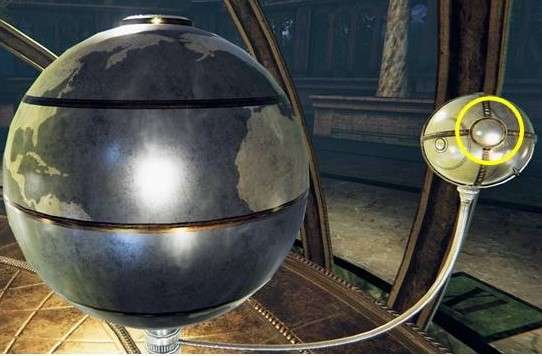
Zoom in on the eyepiece (sight glass / lens),
the lens is broken.
Zoom out and turn to the right and then zoom in
on the smaller open circle.
You must now turn those blue circles and that
blue pointer so that all the red stones light up.
The circle with the red stones turns away and
behind it you will find a glass disc in which figures are etched.
Take that disk.
Zoom out and turn to the table against the left
wall.
On the top you see a button, pull it to the
outside edge and the top turns away.
Drag the other glass disc to this device.
On the front of the device you see a
rectangular button, click on it and the glass plate is illuminated.
Only the drawing is not right yet, you can see
a little plate on the top right.
You have to turn them in such a way that you
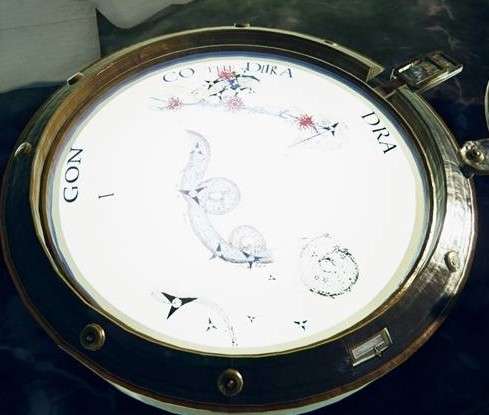
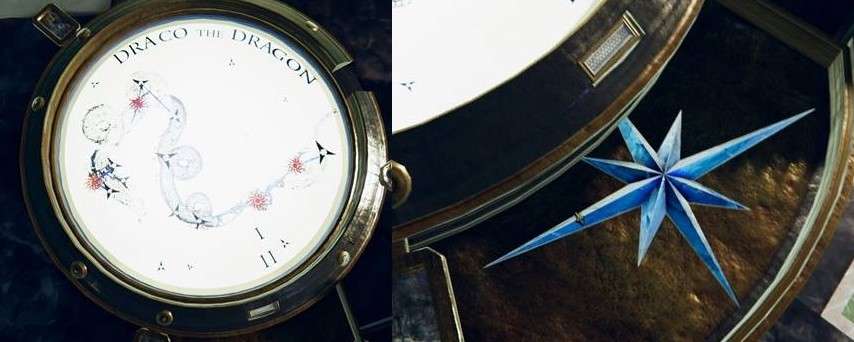
can read along the edge: Draco The Dragon.
A drawer now slides out with an elongated star
inside it, take that star.
Zoom out and look at the drawing.
Zoom out 2x and turn to the right and then zoom
in on the closed circle with the lights.
When the correct lights are red then the centre
turns around.
Underneath you see a piece of parchment with 3
holes and a star and a half moon.
Zoom out 2x again and turn to the left, zoom in
on the plate on the right of the table.
Then drag
the piece of parchment to the plate on the table. You can now slide the
parchment up and down.
On the parchment you see a circle, a square and
a diamond on the left and right of the middle hole.
Only these are not in the same order on both
sides.
In the middle of the plate you see patterns
with lines, you now have to move the parchment on the correct pattern.
Then the different forms are connected on both
sides.
The correct pattern is the fourth pattern from
the top.
You now see a symbol in the hole near the star
and also in the half moon.
Make a drawing of the symbols and to which they
belong, the star or the moon.
Zoom out 2x, you are again in front of the
telescope, you see rotating wheels above and to the right of the lens.
In the turning wheels you see symbols, in the
middle of those wheels you see a star or a half moon.
Zoom in on the top rotary wheel, which is for
the star. Turn the wheel so that the correct symbol is at the top.
Zoom out and then zoom in on the right-hand
dial, this is for the half moon. Turn the correct symbol upwards.
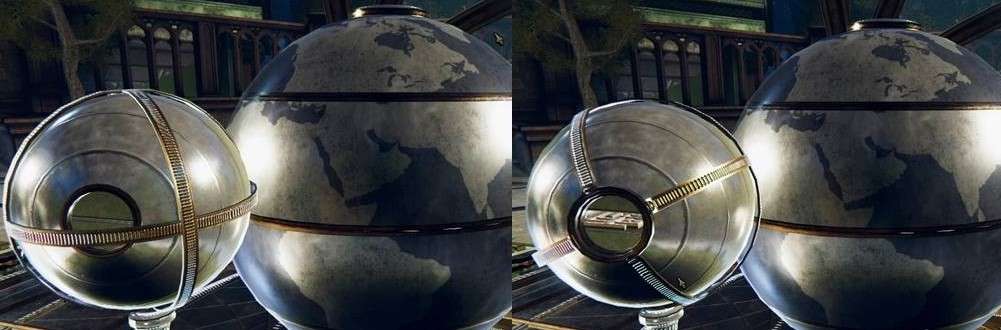
Zoom out 1x and drag the new lens to the
opening for the lens.
In the middle at the top you see 3 green
lights, left and right next to those lights you see buttons.
At the right place and the drawing correct then
flash and under the lens a compartment slides open.
Zoom out a few times and turn to the left, zoom
in again on the plate with the symbols.
Drag the metal plate to the parchment, then
click on your magic lens.
Slide the plate up, you will see planets
spinning at the right place.
On the left you see the star appear and on the
right the symbol that goes with it.
Drag the plate down and there you will find the
crescent with the symbol.
Click away your magic lens and zoom out 2x,
then zoom in on the star wheel and set the correct symbol.
Zoom out and zoom in on the other wheel and set
the correct symbol there.
Then zoom out and then zoom in on the lens.
Flash and another compartment will open under
the lens, you will find a lever here.
Zoom out and turn to the other side of the
hall, there you will also see a fence.
Turn the lever to the left and the gate will
open.
Double click on the stairs and you go to the
terrace.
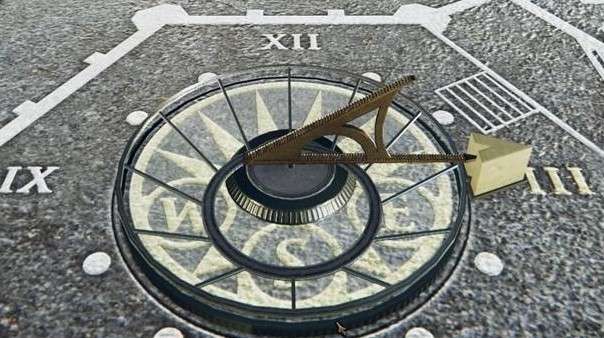
You can view the sundial but you can't do
anything with it.
Stand behind the table, on the top you see a
kind of floor plan with 3 hexagons and a few squares.
Zoom in on the right hexagon, above this
hexagon you see a square with that strange glow.
The middle circle is fixed so turn with the 2
other circles.
Then zoom in on the middle hexagon, you can
slide the plates/wings to the side, underneath you will find a small gear.
Take the gear and you will see that it has a
square hole in the middle.
Zoom out and then zoom in on the left hexagon,
turn the circle so that the letters are at the bottom.
The circle turns and there you will find a
large gear.
Take the gear, you'll see a round hole in the
middle of the gear.
Zoom out and go to the hall, you will now see
lights burning behind the fence.
Zoom in on the lever to the left of the gate,
lower it and the gate will open.
Go inside, there is a lot to see here and you
also have to solve some puzzles here.
In the middle there is a large sphere of
circles, on the right is a base.
On the other side you see a few large doors
with a device on the left.
Unfortunately, this device has no power yet
On the left is also a table for a grille, on
the table you see a few drawings.
Grab that sundial, zoom out and turn around.
Go to the table on the terrace and stand behind
the table again.
Turn the pointer to III o'clock and this
pointer is locked there.
You can see that the large sundial now also
rotates to III o'clock.
Then slide the sundial lock outwards and the
sundial will flip over.
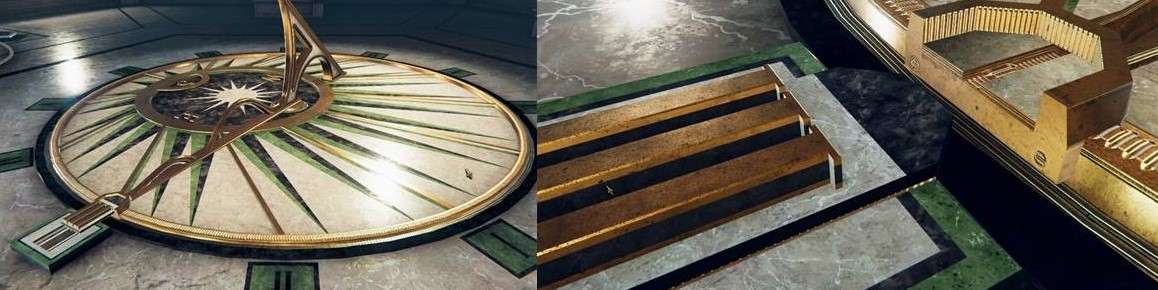
A plate slides open and a mechanism comes up.
You see a number of gears, sliders, a rotary
handle and a set of cams that you can click on.
There are round cams, square cams and
triangular cams.
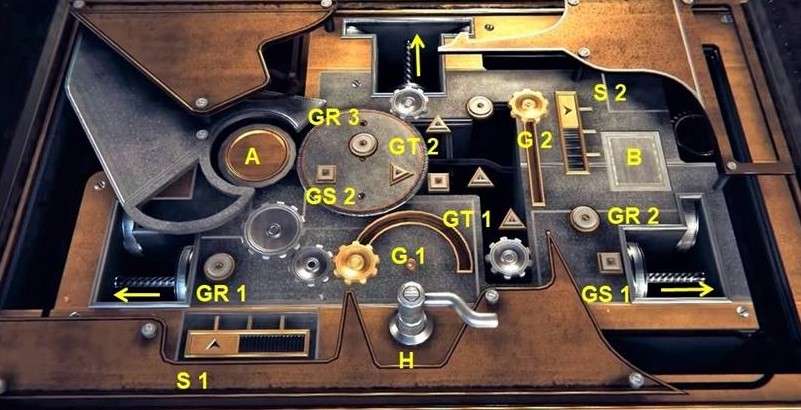
S1 and S2 for the sliders, G1 and G2 for the
gears, GR1, 2 and 3 for round cams.
GS1 and 2 for the square cams and GT1 and 2 for
the tri-angled cams.
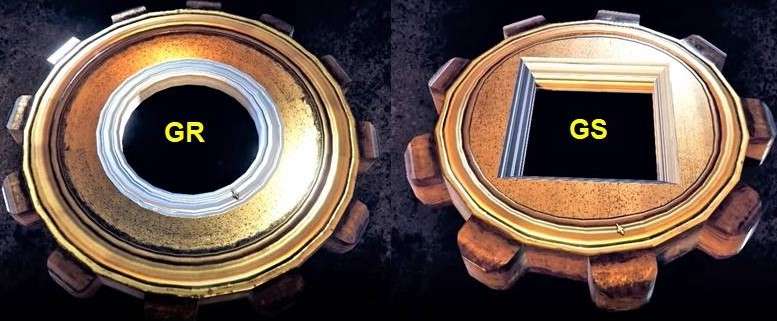
In your inventory you now have 2 gears, 1 with
a round hole in the middle (GR) and 1 with a square hole (GS).
You will solve this puzzle in 3 steps.
Step 1:
Now drag gear GR to cam GR 1 and move slider S1
to the left, then turn lever H to the left, you will see that a disc goes to
the left.
If you cannot turn further, you will see that
round disk A turns.
There is a gear with a triangular hole in the
middle (GT), grab this gear.
Step 2:
Now drag gear GR to cam GR 2, then drag gear GS
to cam GS 1.
Move slide S 1 to the right and then move slide
S 2 down.
Gear G 1 goes to the right and gear G 2 goes
down.
Turn lever H to the left and you will see a
disc go to the right.
If you cannot turn further, plate B will open,
there you will find a large lever.
View this handle in your inventory, you will
see that the handle has a star-shaped bottom.
If you have previously viewed the table here on
the terrace, then you have seen a star-shaped lock.
Step 3 of the gear puzzle is done later, zoom
out and go to the table here on the terrace.
On the front of the table's foot you see a
star-shaped lock, drag the lever there.
Turn the key and there you will find a sphere
with a lever on top.
Take the ball and view it in your inventory, turn
the ball and you see that you can slide the lever down.
Do this and then take the handle out of the
bulb, the handle will then be in your inventory.
The sphere opens and there you will find a
hemisphere with a star-shaped opening, take the hemisphere.
If you look at that hemisphere in your
inventory, you will see the button at the bottom, which you will need later.
Then look at the handle in your inventory, at
the bottom you see a ring and in the middle you see a slider.
Move the slider up and the ring goes down.
Look at the bottom of the handle and there you
will see an elongated Z shape.
You also saw this shape on disk A in the
gearwheel puzzle.
Click the lever back to your inventory and zoom
out, go back to the gear puzzle.
Drag the lever to disk A and now you can turn
the middle disk with the 3 cams.
Now place slider S 1 in the middle and turn the
centre disk so that the squares cam is opposite to gear G 1.
Now drag the gears GS, GR and GT to their
positions on the centre disc.

Now turn lever H clockwise until you can no
longer turn.
The puzzle with the gears drops and you see a
planetarium coming up.
On the left you see a sphere of bars, in which
you see the last pyramid.
You can't grab this yet, zoom out and then zoom
in on the little planet next to the sun in the middle.
You see a button on top and 2 sliders, put
these sliders down.
The top of the planet is covered with a layer
and now you can press the button.
The planet Mercury is going to spin, naturally
you go to the back of the table.
There you saw 3 squares and now a symbol
appears in the middle square.
It is a half-moon with a symbol, you also saw
this symbol at the telescope.
Zoom out and go back to the planetarium, zoom
in on the half planet.
Now drag the other half of this planet from
your inventory here.
The planet is now complete, press the button on
top and the planet starts its orbit around the sun.
You stand behind the table again and you will
see a symbol in the right-hand box.
Zoom out and you are back at the planetarium,
zoom in on the earth with the moon.
Around the moon you see 3 rings that are
connected to each other.
On 1 of the connecting points of the rings you
see a round hole.
Go to the back of the moon and there you will
see a round hatch.
Now drag the rings until the hole falls over
the hatch, the hatch slides open.
You will find a metal shape there, grab this
shape.
Take a good look at this shape because you have
to copy it now.
Zoom out and go to the table.
On top of the table, on the right in the
corner, is a square with that strange glow.
Zoom in on the square and click on your magic
lens.
You see a white building where you can make a
shape at the front.
There are 3 layers that you can rotate, rotate
these layers so that it is the same as the metal shape in your inventory.
Flash and you have a place where you can put
the metal shape.
Drag the shape there and the plate will slide
away, you will see sparkle again.
Click on your magic lens and double click in
the opening.
On the other side of the room you see a
pedestal, go there.
Grab 1 of the buttons and turn anti-clockwise,
the hemisphere will open.
A hexagonal block is located in the hemisphere.
Take the block and click it to your inventory,
you will see the sphere with the spearhead fall.
Zoom out twice and you are back behind the
table, zoom out again and you are back at the planetarium.
Zoom in on the earth now. You see a few rings
on the earth.
The lower ring is fixed, now turn the ring
above it properly.
Then turn the ring above it to the correct
position and finally turn the upper part to the correct position.
Now you can press the button, the earth will
also turn around the sun.
automatically you go to the side of the foot of
the table, there a sliding door opens.
Zoom out and note all the symbols that you see
in the 3 boxes, which symbol belongs to the star.
Also which symbol belongs to the half-moon and
also the symbol in the right-hand box.
Zoom out and go to the telescope, zoom in on
the telescope.
Zoom out and zoom in on the telescope lens,
drag the attachment onto the lens.
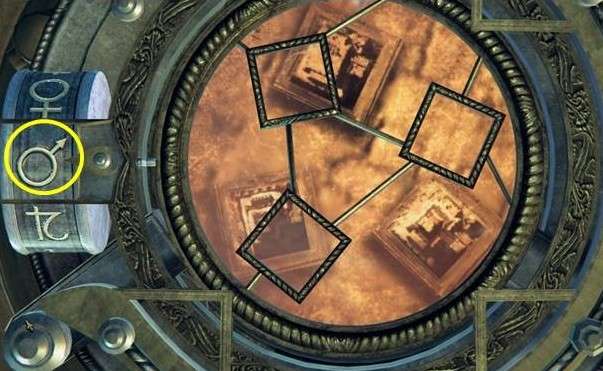
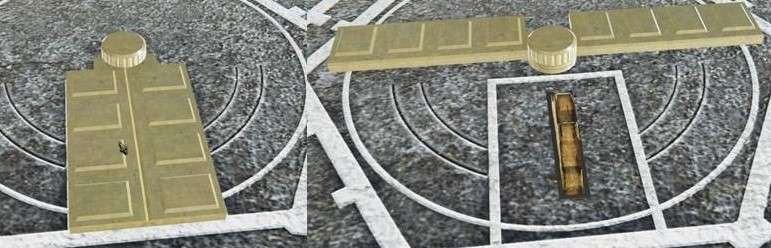
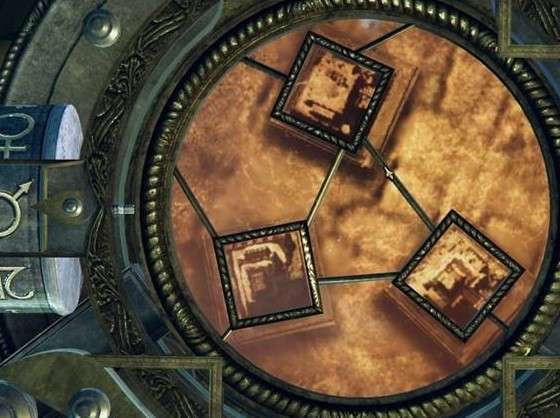
You zoom in further, you see 3 Pyramids on the
ground and on the lens you see 3 squares.
With the ring on the lens you can rotate these
squares so that they coincide with the Pyramids on the ground.
Flash and you can see that the cord with lamps
now has power.
Follow the cord to the room behind the fence
and you will see the cord go to the cupboard near the large doors.
This cabinet now has power.
Zoom out and turn around, you can see that the
floor is now broken.
On the floor you now see a number of coloured
circles with symbols.
Then go to the base, zoom in on the top.
Drag the block there.
You see a cross with a triangle at the ends.
Drag the lower or upper triangle to the left or
right.
The triangles now coincide with the other
triangles and the top turns around.

You see a sliding panel, 2 rectangles that are
connected and 7 buttons with the same colors and symbols as the circle on the
floor.
You now have to slide on the panel here with
the buttons until they have the same pattern as on the floor.
It is not difficult and you can do it in
different ways.
A large sphere is pushed forward.
In the centre of the sphere you see a visor
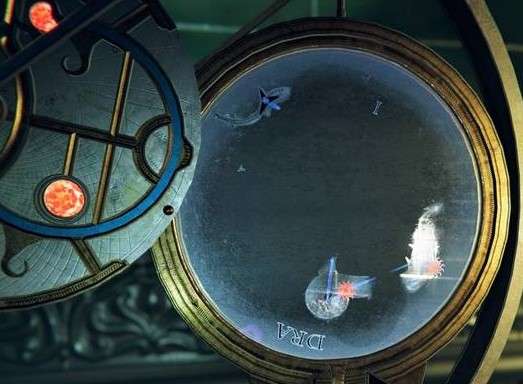
with the same pattern as on the display on the device to the left of the doors.
Under the visor you see a red lamp, when you
zoom in on the sphere you see that the red lamp is divided into 4 parts.
You have to find 3 places on the globe where
there is a drawing.
There are 3 drawings on the table in front of
the fence, these indicate the places where the drawings are.
You can also do it just like that, drag with
the bulb and watch the red lamp.
If you come close to a drawing, the lamp will
beep and also indicate in which direction you should go.
You then have to go in the direction of the
part of the lamp that is burning.
If you have found a drawing put it under the
sight.
You have to copy the drawing on the device,
then the lamp lights up continuously.
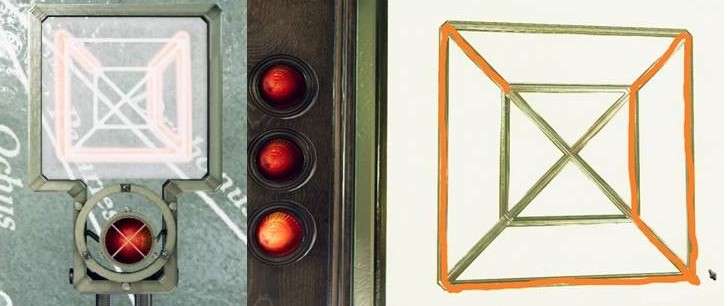
Back to the sphere and looking for the next
drawing.
The second red lamp now lights continuously.
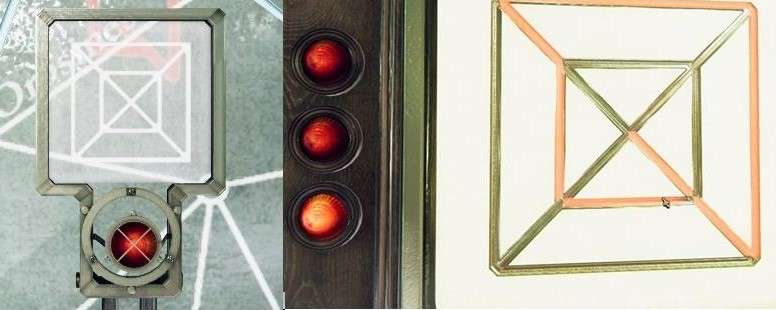
Back to the sphere and looking for the last
drawing.
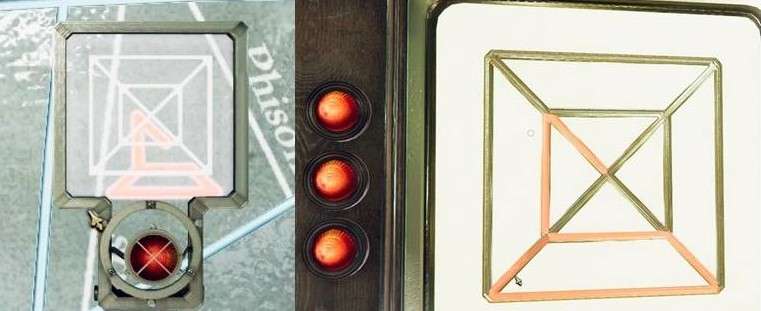
The display turns around and you are zoomed in
on a pyramid.
Top centre is forward, right and left is clear.
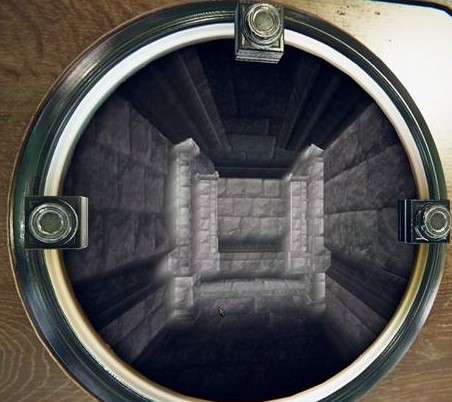
Before you start the tour through the corridors
zoom out and view the map that is to the left of the device.
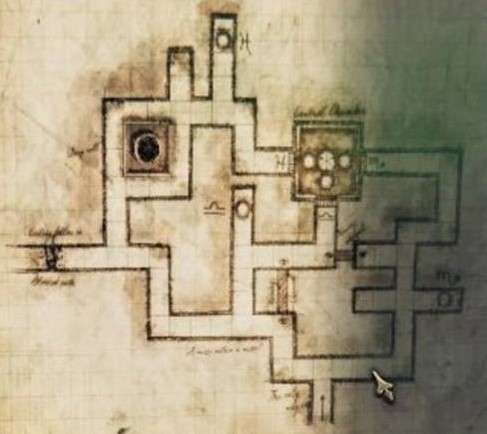
On the map you can see the corridors and the
room with the 3 entrances.
It is not difficult but if you are lost you can
always go back to the map.
Just draw the map and go through the corridors.
Zoom in on the display and click on M, 1x R, 1x
M, 1x L, 1x M, 1x R, 1x M and you are on the first symbole.
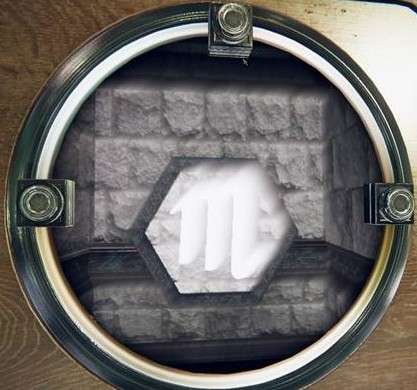
2x R, 1x M, 1x R, 2X M, 1x R, 1x M, 1x L, 1x M,
1x L, 1x M, you are at the first entrance. You see a beam of light towards the
centre.
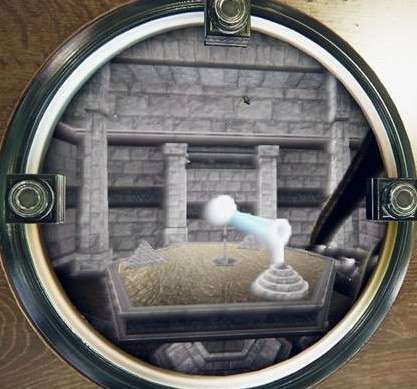
Second symbol and entry:
2x R, 1x M, 1x R, 1x M, 1x R, 1x M, 1x L, 3x M,
1x R, 2x M, 1x R, 1x M, 1x L, 1x M, 1x R 2x M, you stand up the second symbold.
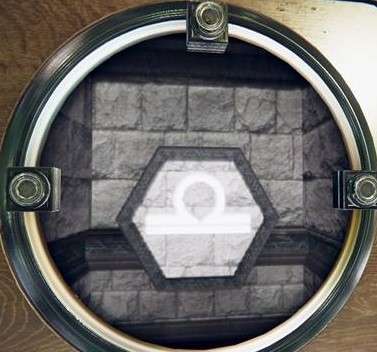
2x R, 1x M, 1x L, 1x M, 1x L, 1x M and you are
in the second entrance. Here too, a beam of light comes to the centre.
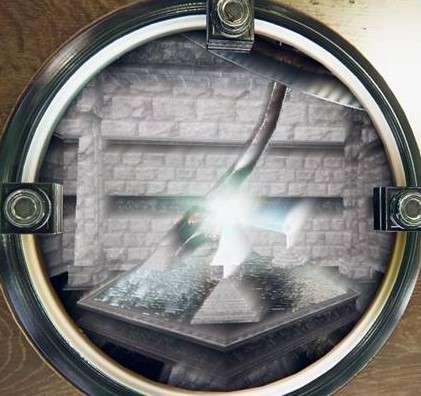
Third symbol and entry:
2x R, 1x M, 1x R, 1x M, 1x L, 1x M, 1x R, 1x M,
1x R, 1x M, 1x L, 1x M, 1x R, 2x M, 1x R, 2x M, 1x L , 1x M and you are on the
third symboli.
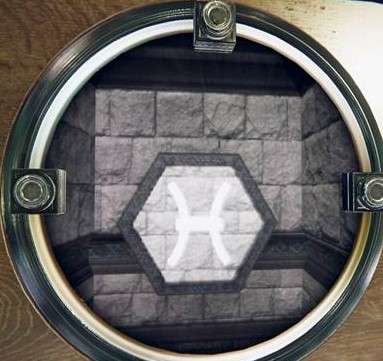
2x R, 1x M, 1x L, 1x M, 1x R, 1x M, 1x L, 1x M
and you are in the third entrance.
Again a beam of light to the centre of the
table.
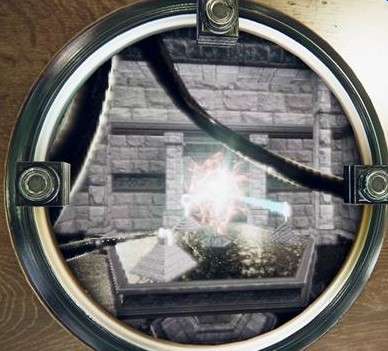
Flash and you are again in front of the device,
the broken display now shows a golden sphere.
Take the golden globe, you now have the last
planet.
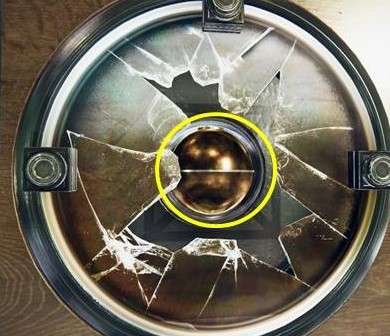
Zoom out a few times and turn around, go to the
planetarium on the terrace.
Zoom in on the outer pole with planets, drag
the golden sphere there.
The sphere slides open and you see a sparkle
again.
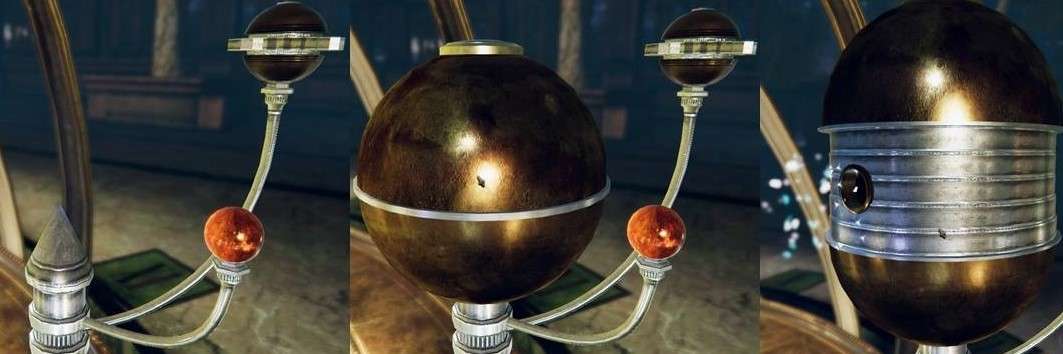
Click on your magic lens and then double click
in the shimmer.
You see gears turning, you are standing in
front of a pole and you have to connect the upper part with the lower part.
On the upper part you see a lever and it has to
go down to the lower part.
Stand straight in front of the lever, you must
now provide 2 continuous slots from the lever downwards.
You can turn the gray part and there are pawls
with which you can link the dark parts at the top and bottom to the gray part.
You have to look where the 2 slots are on the
dark parts.
First connect the lower part and turn it to the
front under the handle.
Disconnect this piece and then connect the
upper dark part to the middle piece.

Then turn the upper part with the 2 slots to
the front under the handle and disconnect the upper part.
Now turn the 2 slots on the centre piece to the
front under the handle.
Pull the lever down and you will zoom out, the
bulb will close again and you can press the button.
Press the button, this planet will also spin.
All planets now stop on the line between the
sun and the sphere with the Pyramid.
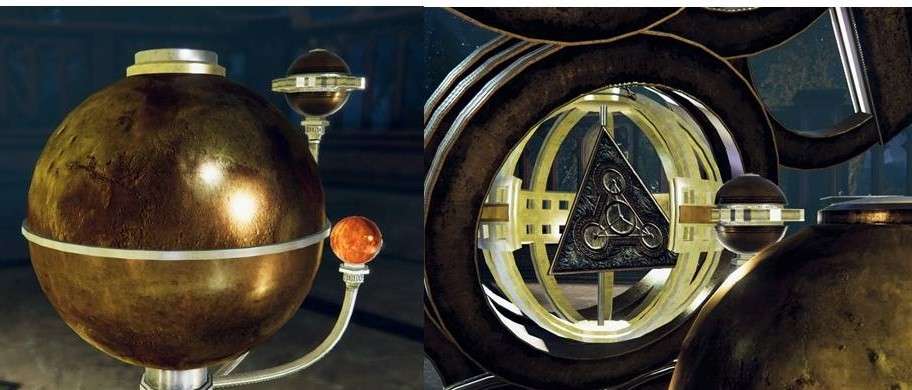
The sphere opens, take the pyramid now.
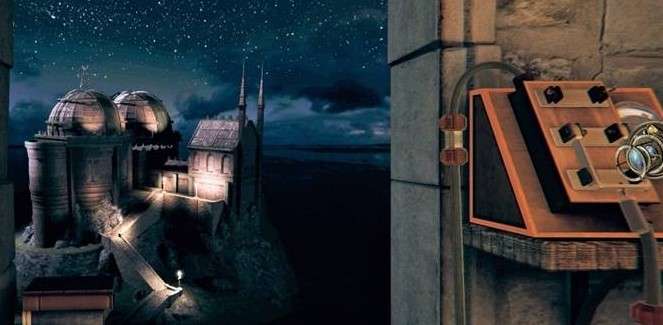
Zoom out and turn around, walk to the other
side and go down with the elevator.
This was the final chapter, now you have
everything to play the 4 ends.
In the middle is now the key of the
"Craftsman".
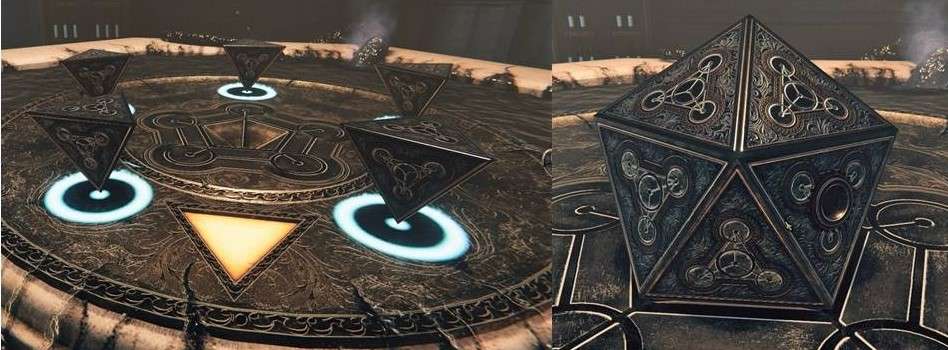
Take that "Craftsman Key" and you
will see a new passage.
Click in the passage and you will reach the
roof of the tower.
Zoom in on the device in the middle. In the
middle of the dome there is room for the "Craftsman Key".
Drag it there and the dome opens.
In the middle you see the "Craftsman
Key" on a scaffold.
You also see a rectangle with a ring on it.
Zoom in on the ring and grab it, view the ring.
At the back you see 4 legs.
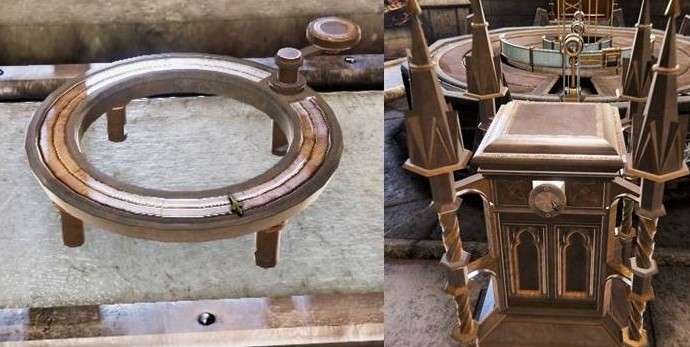
Zoom out and turn to the back of the tower, at
the top you see a circle with 4 holes.
Then turn the ring clockwise and the opening
appears, the familiar sparkle is back.
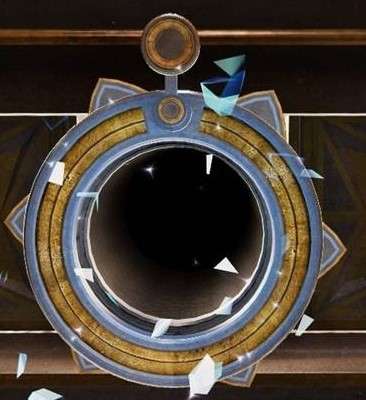
Click on your magic lens and then double click
in the opening.
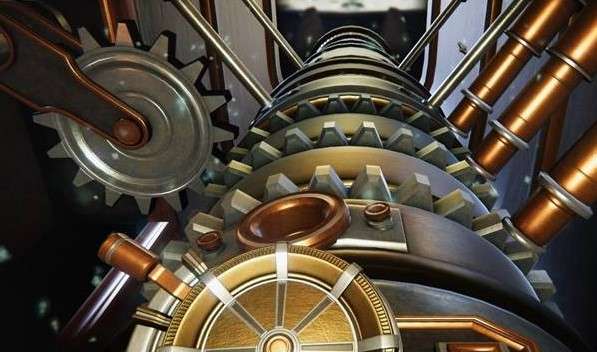
On the right you see 3 bars and below the bars
you see 3 rolls.
On every roll there is a holder where the rod
must go, on the front roll you see the holder.
You still have to turn the holders in the right
place, you do this with the front wheel.
Select the role with the lever to the left of
the wheel.
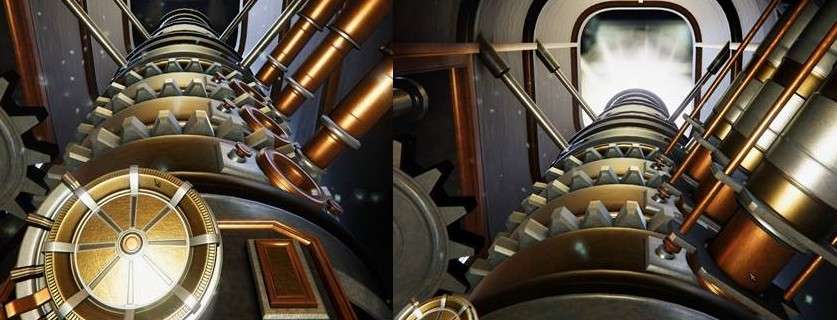
If all holders are positioned correctly, press
the button to the right of the wheel.
The rods come down and there is now a beam of
light.
You zoom out yourself, you see that the light
beam goes to the front lens.
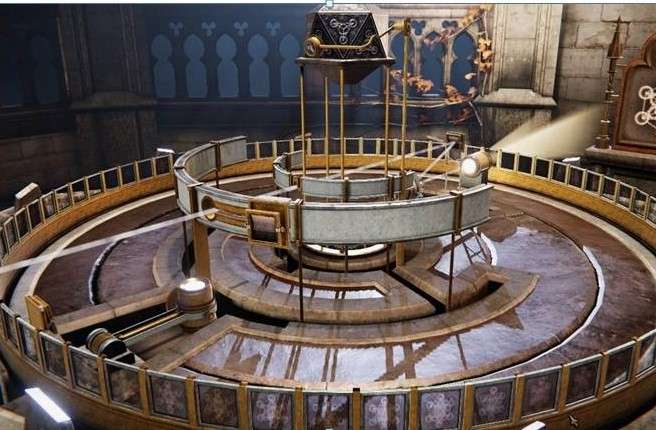
This lens falls over and a ring with slides
comes up on the edge.
The 2 half circles also go further up and a
slide is projected onto a panel.
Zoom in on the front semicircle, there you see
a mirror.
Move this mirror to the left in the light beam,
the light beam now follows a different path.
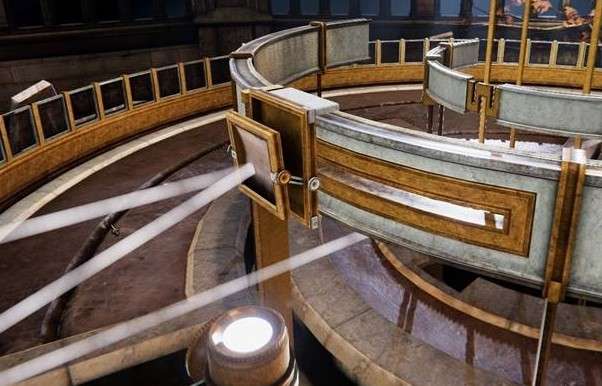
The light beam comes on a light sensor, this
sensor falls over and the slide is displayed again.
The ring with slides will now turn and you will
see a moving pattern on the panel.
Zoom out and then zoom in on the grille below
where the ring was.
The fence is linked to the ring with slides,
the fence turns occasionally along the niche.
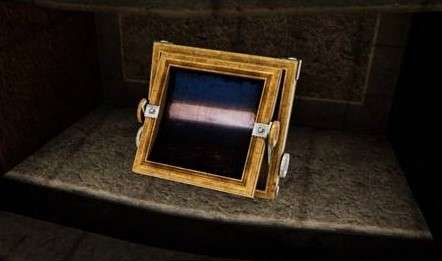
There is a mirror in the niche, take the
mirror.
Zoom out and then zoom in on the inner half
ring, drag the mirror to the half ring.
Zoom out and then zoom in on the other half
ring, slide the mirror back to the right.
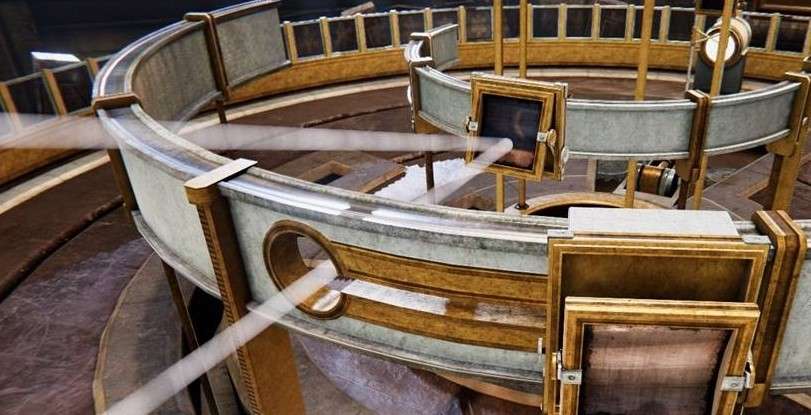
The light beam now goes to another sensor on
the "Craftsman Key".
The sensor goes to the front and an opening is
created, the sparkle is there again.
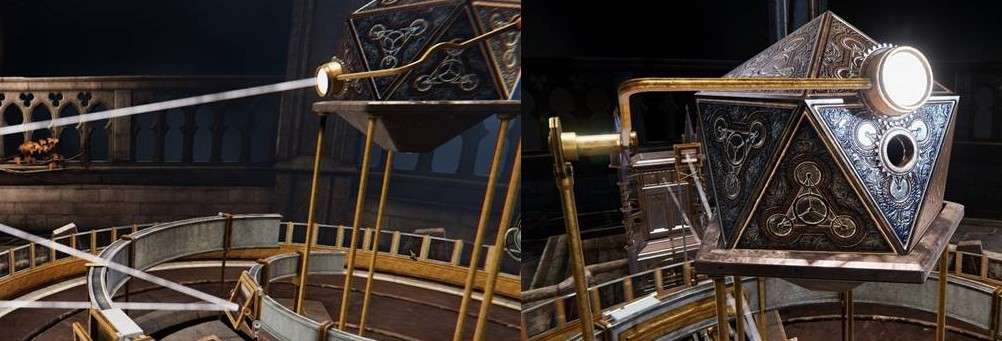
Click on your magic lens and double click in
the opening.
Inside you see a crystal with 4 lights around
it, the light rays must fall on the crystal.
You also see 2 push buttons, if you click on
the right button then 2 lights turn.
The other 2 lamps are kept in place.
With the left button you determine which lamps
are held.
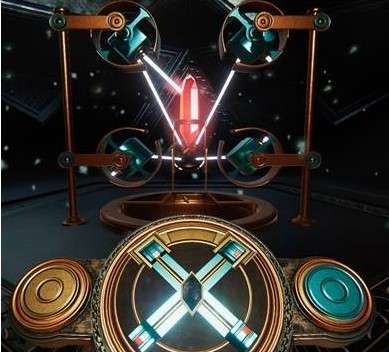
If you have not yet clicked on a button, this
is the solution:
Click 2x on the right button, the 2 left lights
are now correct.
Click 3x on the left button, now the 2 left
lights are held.
Click 1x on the right button and the 4 lamps
are now correct.

You now zoom out and you will see a red beam of
light.
On the edge where the tower stands on, 2 other
towers are now coming up.
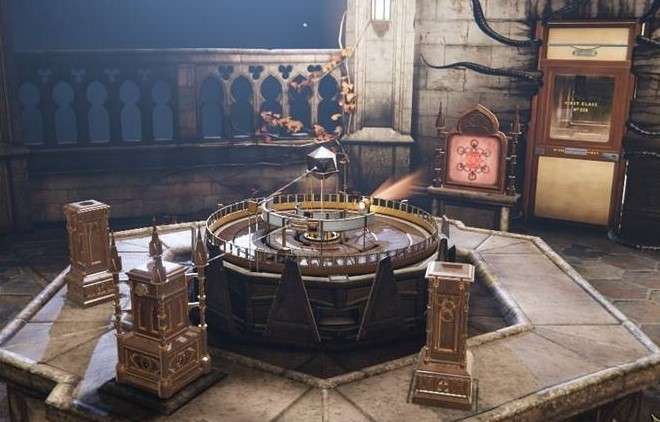
You also see a door emerging in the wall, it is
the door of the train compartment that you were previously in.
For the other 3 ends, this part, from the
central hall until here, you must repeat.
Enter the coupe and enjoy the ride, read the
letter on the table.
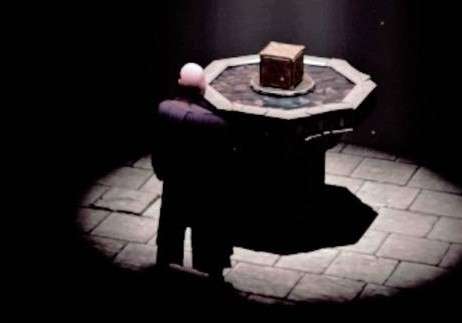
You can see the complicated chest closing from
the beginning and it is on the table in the central hall.
You will now see a text with the time you
played underneath.
Below you see 4 cards, the first is turned
over: Imprisoned.
Again underneath it says: Continue, click on it
and you will be taken to The Room 3 home screen.
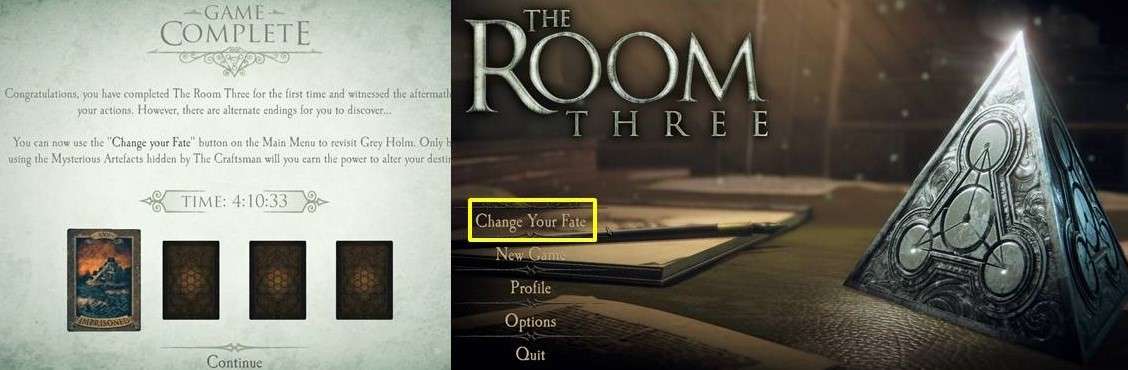
Choose the top option: Change your fate.
You are then back in the central hall,
double-clicking in the opening in the wall.
You are back at the top of the tower.
Do not enter the coupe but zoom in on the left
tower.
Only 1 fits.
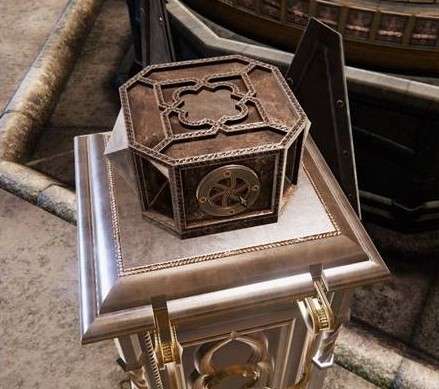
2 brackets are moving to the front and back of
the strange object and you will see a circle on the back of this tower.
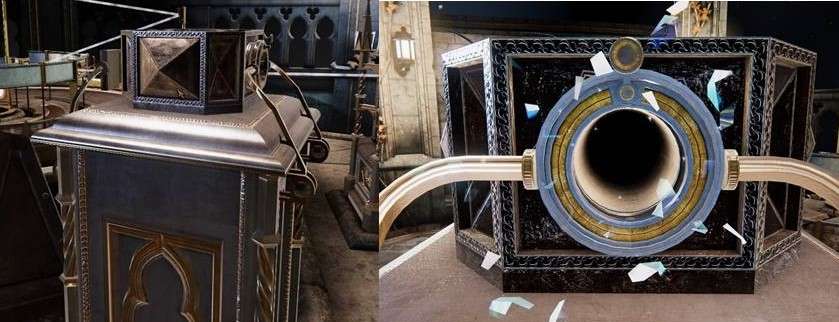
Zoom in on the circle and turn the knob
clockwise to create an opening with the sparkle.
Inside you see another crystal puzzle.
In the middle there is a green crystal, on the
left and right you see 8 lamps on the outer edge.
Between the lamps and the crystal you see a
ring with a button, on the other side of the ring you see a sensor.
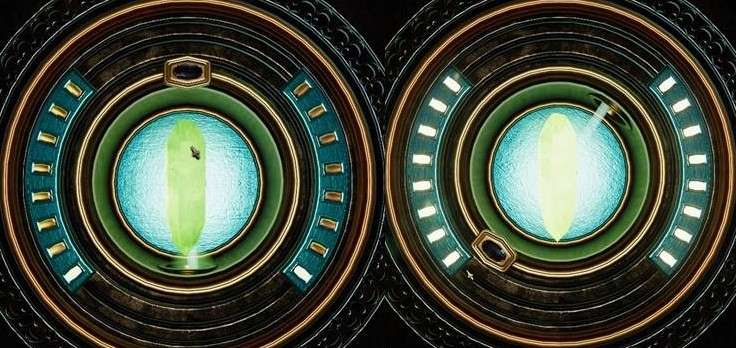
From the crystal comes a narrow light beam, you
have to stay close to that light beam with your sensor.
If you do this long enough, all the lights will
burn and the puzzle will be solved.
You naturally zoom out and the top of the
object opens.
There you will find a button, press this button
and the train compartment door will disappear.
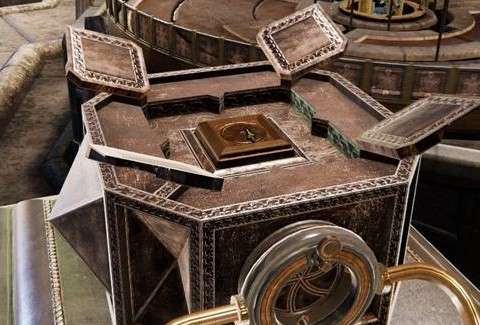
A wooden door now replaces it.
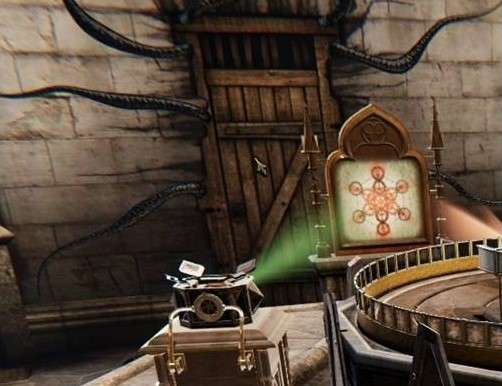
Double click on the wooden door and you will
end up in a boathouse, but this is also not a good end.
The tentacles come to destroy everything and
you float in a boat.
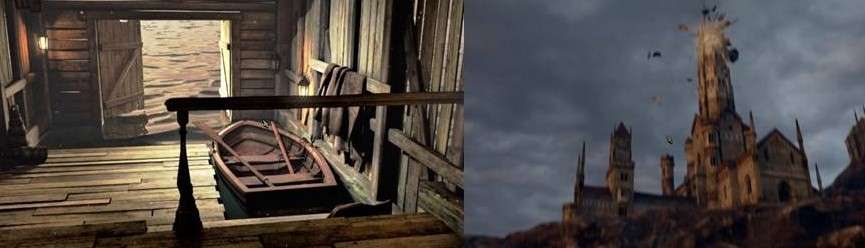
You see all buildings collapse.
Click on continue and on the home screen on:
Change your fate and you will be on top of the tower again.
Also do not enter the coupe this time, but zoom
in on the right tower.
Both strange objects are present but only 1
fits.
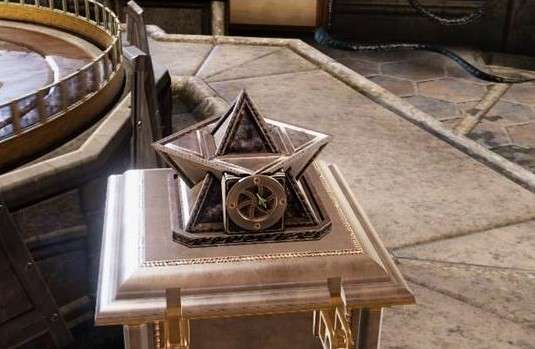
Go to the ring on the back of the tower turn
the knob clockwise.
Click on your magic lens and double click in
the opening.
Do not press the buttons yet,
otherwise you will have to find the solution yourself.
You see a blue crystal in the middle with 6
lamps around it.
Name the lamps L1 to L 6 clockwise.
Below you see 2 round buttons, each button is
divided into 2 buttons.
On the left you have buttons A1 and A 2, on the
right you have buttons B 1 and B 2.
Around the top 2 lamps L 1 and L 6 are holders
that hold the lamps.
You can move those holders with the A 1 and A 2
buttons.
You can turn the lamps with buttons B 1 and B
2.
The intention is that all 6 lamps shine on the
crystal, now only lamp L 1 shines.
Solution:
• Press 1x button B 2, L 1, L 2 and L
5 are now lit.
• Press 1x button A 2, the holders are now at L
1 and L 2.
• Press 1x button B 2, L 1, L 2, L 4 and L 6
are now lit.
• Press 2x button A 2 , the holders
are now at L 3 and L 4.
• Press 3x button B 2, L 4 and L 5 are now lit.
• Press 1x button A 2, the holders are now at L
4 and L 5.
• Press 1x button B 2, all lights are lit,
puzzle solved.
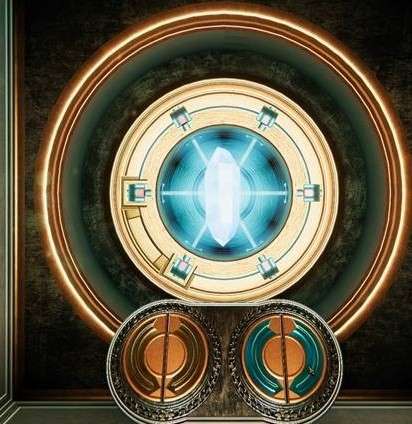
You naturally zoom out and the top of the
object opens.
Press the button and the train compartment door
will disappear and a wooden door will appear.
Double-click on the wooden door again and you
will see a repeat of the previous end.
You will return to the screen with the cards
and the third card is now turned over: Release.

Click on continue and on Change Your Fate and
you are back on the tower.
Repeat the part up to the door of the train
compartment.
Now drag both objects to their towers.
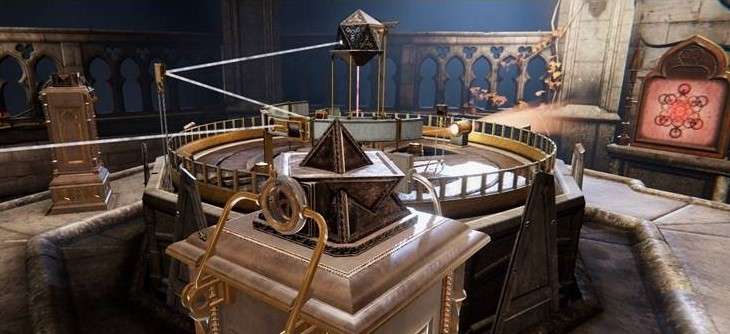
First go to the right tower and turn to the
front of the tower.
At the top of the plate is a screw, zoom in on
the screw.
Drag the screwdriver to the screw and loosen
this screw.
Move the plate to the right.
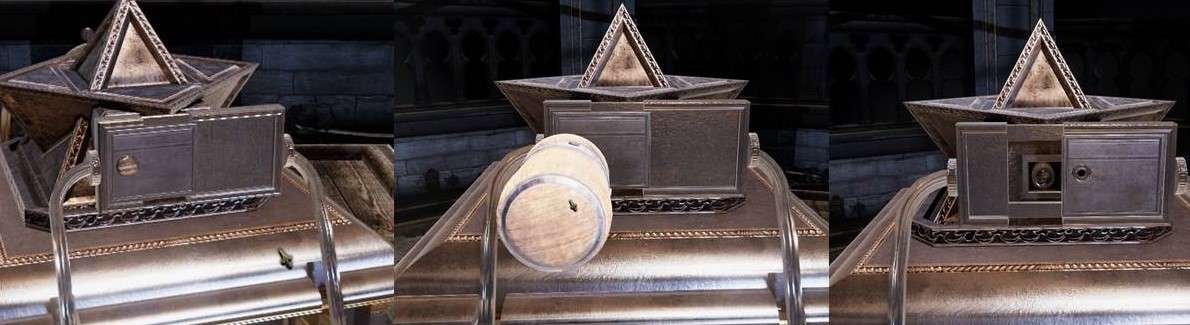
Zoom out and turn to the back, zoom in on the
circle and go inside.
Solve the crystal puzzle again, you will zoom
out.
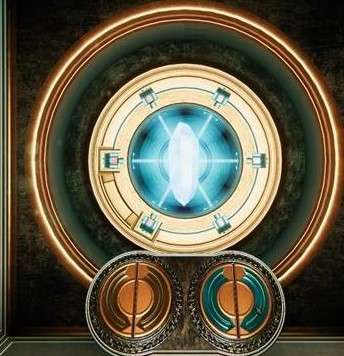
The top is open, press the button, you will see
the wooden door reappear.
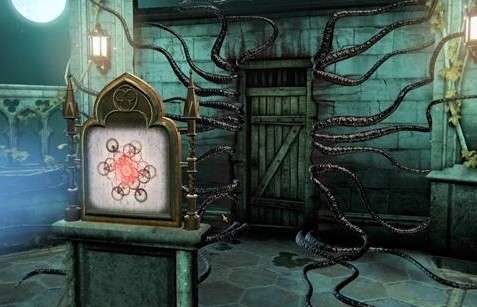
Now go to the left tower and zoom in on the
circle.
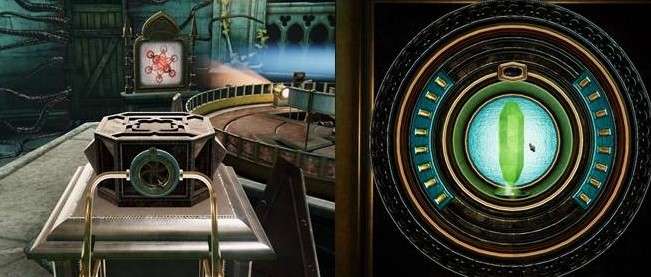
Go inside and solve the crystal puzzle, you
will zoom out.
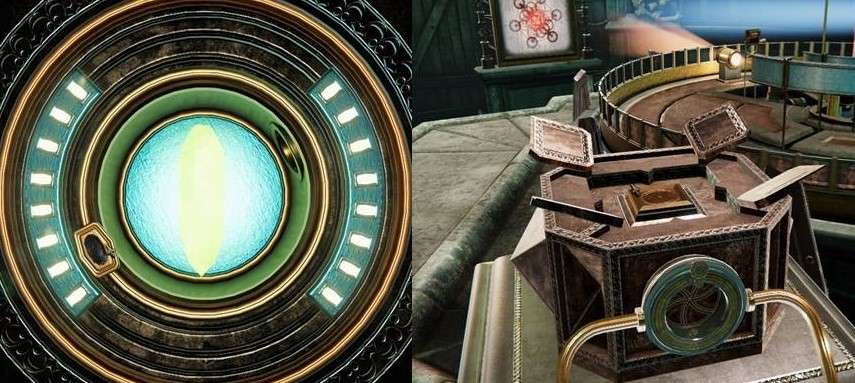
This top is also open now, press the button.
The wooden door disappears, the opening
remains. Double click in the opening.
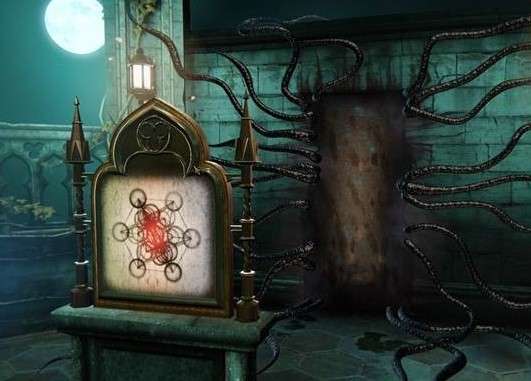
Watch the final film.
You are back on the screen with the cards.
The last kart is now turned: Lost
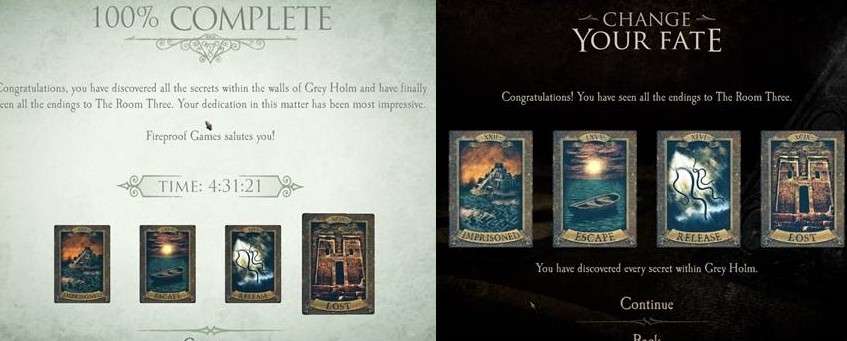
End