
2021: Walkthrough by: Dick Leeuw
Text by Dick Leeuw. Screenshots by Louis Koot
If
you have found this walkthrough via google search or via another site then you
have probably not visited my site.
A
lot more very detailed
game walkthroughs can be found on my site at: www.pcgameswalkthroughs.nl
As in all The Room games you first have to create a profile, you can create 3 profiles.
Then you enter the menu: New Game / Continue, Options, Profile and Quit.

Click on New Game.
You are in the attic of a house, you see a text at the bottom. Click and you get another text, click again and then start the game with a Tutorial.
Attick

You have to turn on the lamp, follow the tutorial.
Double click on the lamp and you will see that you have to put the switch down, the lamp is broken.

Zoom in is double click and zoom out is right click.
Zoom out and then zoom in on the box, open the locks and pull the lid up.

Zoom in on the notebook and scroll through the book with the left mouse button pressed, read the notes.

Zoom out of the book and take the screwdriver that is to the right of the book, you can view it in your inventory.

Zoom out of the box and zoom in on the lamp, drag the screwdriver to the lamp.

Remove the screw from the lamp and open the lamp, zoom in on the inside of the lamp.

You have to close the circuit, pull up the small coil at the bottom right.

In the light of the lamp you see a dollhouse on the table.
Zoom in to investigate the dollhouse.

If you have ticked the hint system in the options, you will now see a question mark on the left.
Click on that and you will now see the first hint.
Zoom in on the center of the fence, turn the coat of arms to the left.

Now open both gates, the doors of the house will now also open.

You see a blue / green haze in the doorway, you need something more from the chest.

Zoom out and then zoom in on the chest, pull the right handle down and a hidden hatch will open.
Take the item that is there, it is an Eyepiece.

View the item in your inventory, on the side is a lever. Pull the lever down.

The Eyepiece is now ready, click on the arrow to the right.
You zoom in on the map in the lid and the Eyepiece is now on the right.
Click on the Eyepiece and now you see things that are otherwise invisible, you see a drawing on the map.

Zoom out and zoom in on the doorway of the dollhouse.

Click on the Eyepiece and you will now see a corridor that is twisted.
With the chair, the painting and the lamp you can turn everything to the correct position,

then you enter through the hallway.
You now see the doorway, zoom in on the doorway and you will see the opening getting bigger.

Click on the Eyepiece and you will see a circle with a red drawing in the middle.

Double click on the red drawing and you are in the:
Foyer

Zoom in on the table, zoom in on the book and slide the latch to the side.
See what happens to the book, read the 2 pages.

Zoom out and then zoom in on the rotating ring at the bottom of the device on the table.

Turn the ring clockwise, the ring will come down.
Take the item that is there,

Look at the item in your inventory.
Slide the right side up or the left side down, you now have a mechanical coin with 4 wings.

On the front and back of the device you see a round disk, left and right you see a place where that mechanical coin fits.
Zoom in on 1 of the sides and drag the coin there,

1 of the round discs will now open.

Zoom in on that disc and click on your Eyepiece, you will now see a number of thin lines and you also see a shape with 2 crossbars.
You can rotate the ring around the disk and under that ring you see a rotating wheel.
By turning those 2 wheels you have to fill that shape with a thin line.

White light and then you will find a coat of arms in the ring, take the coat of arms.

You now have to go back to the outside of the dollhouse.

Zoom out a few times and you will see a place for the coat of arms at the top centre of the dollhouse.

Zoom in on that and drag the coat of arms there, see what happens.

Press the emblem in the centre, keep pressing until the entire drawing is illuminated.

You will then see 2 pedestals in the garden, the right one has a rotating ring and there is a statue of a deer.
Go to the horse on the right pedestal
Turn the ring on the pedestal and a drawer slides open, here you will find another mechanical coin.

Also view this in your inventory and slide the right side up, click the coin back to your inventory and zoom out.

Zoom in on the entrance and click on your Eyepiece, click on the red figure in the middle.
You are back in the Foyer, now zoom in on the other side of the device.
Drag the coin there and the other disk will open.

Zoom in and click on your Eyepiece, you will see another drawing.

NB: Did again and here is the solution

Turn the rings until the drawing is correct, white light again and you will find metal panel.

Zoom out and the top of the device will open.
This is the first of 3 puzzles: you see 2 buttons but you cannot press them because there are glass plates in front of them.
Turn the puzzle over and the glass plates slides down, now you can press the 2 white buttons.

The first puzzle solved, the puzzle block turns to the side and you now see the second puzzle with 4 buttons and 2 glass plates.
In the middle is a slider with a lever, with the lever you can move the slider to the left or to the right.
Now the 2 plates are below and are in front of a white and blue push button.
Leave the slider in this place and turn the puzzle over, now 1 plate slides down.
Now 2 buttons of the same colour are open, press those buttons.
Turn the puzzle over again and then move the slider to the other side.
Turn the puzzle over again and now you can press the buttons with the other colour.

Puzzle 2 solved and the puzzle block turn to the side again.
Now a puzzle with 6 buttons, 4 glass plates and 2 sliders with which you can block the plates.
Move the bottom slider to the right and the top one to the left, turn the puzzle over and now you can press the white buttons.
Now move the bottom slider to the left and then the top one to the right, now you can press the orange buttons.
Now first move the bottom slider to the right, turn the puzzle and now move the bottom slider to the right.
Now you can press the blue buttons, solve the puzzle and the puzzle block goes down and the roof closes.

The side will open, take out the artefact.

Zoom out and see what happens.
Foyer is ready.

Click on Continue.
You must now view the artefact in your inventory, click on the round button in the middle until the entire drawing is lit up.
The artefact will open, take the statue of the swan.

Zoom in on the pedestal on the left,

drag the swan to the pedestal and a drawer will slide open.
Here you will find the lamp of a lamppost.

Zoom out and zoom in on the right, here you see a lamppost that is missing a lamp.

Drag the lamp from your inventory here,

you now turn around the dollhouse.
Go to the back of the dollhouse and zoom in on the balcony.

Drag the panel / piece of balcony fence from your inventory to the right side of the balcony.

On both panels you see an ornament with 5 hands.
You have to adjust the right ornament so that it is the same as the ornament on the left.

To the left and right of the ornament see 2 pawls ( F and G) that you can move up and down.
This will block and unblock the circles A, B, D, E.
You must first set the middle hand (C) correctly.
First turn the circles D and B at the bottom left and top right so that the hands point to the centre.
Now put the left 2 pawls up and the right 2 pawls down, now you can turn the other 2 circles
A and E to point to C. You can see on the left ornament that the middle pointer C should be down, so turn that pointer down.
It should be like this now

Now put the hands in the circles A, B, D, E the same as in the left ornament, like this...

The balcony will now drop down, click on your Eyepiece and you will see another white circle with a red drawing in the middle.

Double click on the red drawing and you enter, you are now in the
Study
Turn to the right and you see a desk at the right wall

zoom in on the right side of the desk.

Zoom in further on the bottom there you see a slider with 3 images above it: a tree, an acorn and a leaf.
Now slide the bud first to the acorn, then to the leaf and finally to the tree.

The images turn away and you zoom out to the front of the desk.
In the middle a handle comes out, grab the handle and pull it forward.

A top comes out and it flips down.
You see 3 panels, on the left a panel that is blocked by a bolt.
In the middle hatch that is blocked on the 4 corners and on the right you see such a strange screen again.

Click on your Eyepiece and zoom in on screen C, you will see an octahedron with a drawing on each side.

You can turn the left (1) and right (2) sides to restore the drawing, then turn the octahedron with the turning wheel
3 to do thenext one.
You must restore the drawings on 3 sites of the octahedron and they are like this

then you zoom out and a drawer comes forward.

Zoom in on that drawer and open the flap, you will see 4 points and a turning wheel.

You can turn the wheel and the points slide apart but also go back.
Zoom out and turn around, you will see a safe on the other side of the room.

Zoom in and then zoom in further on the handle at the bottom of the safe, open the drawer.
Here is a locket with 4 holes, take the locket and go back to the desk.

Zoom in on the drawer again and drag the medallion to the 4 points, then turn the ring and the medallion will be pulled open.

Take the button you see there.
Zoom out and zoom in on the latch of the left panel.
Drag the knob there and turn the knob anti-clockwise,

the latch moves to the side and the panel opens.
Open the panel further,

zoom in on the screen and click on your Eyepiece.

You have to turn the drawings properly with the left and right sides again, but now you also have to set the top and the bottom correctly.

If all sides are in the right position, you zoom out and a cupboard turns out.

At the bottom you will see a button, click that button and a drawer will come out.
Inside you will see an image of the 4 corners of the middle panel and 2 buttons.
At the front you see a handle and if you pull it you see a latch turning at a corner.
Press the 2 knobs and pull the handle, now the drawer can be completely moved forward.
Grab the handle in it,

then look at the latch (3) on the corner point and then push the drawer back a bit until the latch no longer blocks the corner point.

Zoom out and then zoom in on the top of the cabinet, pull the latch away and open the flap.

Now drag the lever to the mechanism, you now have to bring the red buttons to the right and the blue to the left.

By turning the handle, the plate goes back and forth to the other side.

There are more ways to do this, but it is not difficult.

When the knobs are in the right place, a handle will come up.
Pull the handle upwards and an open cupboard will come up.

Take the miniature well from the cupboard.
If you looked closely when you lifted the case, you saw that the latch (1) turned from one corner point.
You now have to push the cabinet a bit down until the latch is in the right position and the corner point is free.

Now you must leave the dollhouse again, so right click a few times until you are outside the dollhouse again. You will see a well at the bottom left,

zoom in on that well and drag the miniature well to it.

Turn the handle of the well and you will see a wall turning and then sliding away.

Click on your Eyepiece and then click on the red drawing in the middle.

You are now in the:
Kitchen
Turn to the left and you will see a sink, underneath you see a grate.
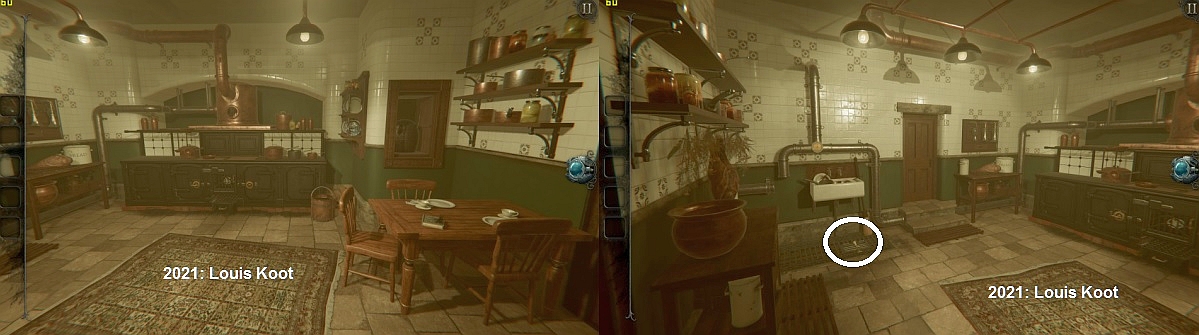
Zoom in on the grid, you will see a lever with a white handle. Pull that handle out of the grill.

Pull up the small grid and you will see a bottle there. You can't take this one yet.

Zoom out and then zoom in on the board with 3 bells.

The left bell is missing a lever, drag the lever from your inventory to it.

Then zoom in on the name plate under the 3 bells, unscrew the wing nut.
You now see 4 symbols: a triangle, a line, a double triangle and 2 circles.

On the left bell you see a red circle, which symbols belong to the other 2 bells.
Click on your Eyepiece and you will see the symbols, you must now click on the handles of the bells in the correct order.
Pull the levers of the bells in this order: right, middle, 2x right and finally 2x left and a drawer slides forward.
Take the inkwell that's there.

Zoom out and then zoom in on the stove, zoom in on the left lever.

Turn the handle anti-clockwise and the bolt will slide away, pull the door further open.

Click on your Eyepiece and you will see a double turn puzzle.

First place the golden yellow parts in such a way that white blocks can run past them.
Turn the bottom disc until the blocks are over, now see a few blocks at other heights.
Turn the gold parts to the correct position and turn the bottom disc again.
Finally you have to clear a path in the middle, then turn the bottom disk again.
Here are some screenshots to give you some idea how to solve this puzzle

White light and you see the bolt for the door in the middle slide away.
Open the door further and take the wheel.

Zoom out and zoom in on the table, there is a book. Open the book and read the text.

Zoom out, you will come back here later, but now you first have to go back to the study.
So right click a few times to be outside the dollhouse again and then go to the back of the dollhouse and go into the study again

Study:
Zoom in on the desk, zoom in further on the bookshelf above the drawer.

Drag the inkwell to the opening on the right side of the shelf, the lid will come off. Open the lid further and press the button.

A cupboard slides forward, you are zoomed in on the side and you see 2 flaps

Behind the 2 flaps are 4 symbols, but you can only see 2 at a time.
There is a latch on the bottom flap, if you slide the top flap up, the bottom flap slides up with it.
You will then see the bottom 2 symbols, if you slide the latch to the right and open the flap, you will see the top 2 symbols.
You have to make sure that the symbols above and below are the same.

If correct, a handle will slide out of the cabinet, pull open the drawer and take the item.

Look at the drawer and there you also see the symbol of the 4 bolts, now slide the drawer back in to the golden line.

Zoom out and turn to the front, the third bolt on the panel is now in the right position.
You can also see the symbol of the 4 latches on the drawer under the bookshelf.
Turn to the side and zoom in on the slider you used first.

Now slide the knob / bolt all the way forward on the drawer, a hatch will open.
Open the hatch further and take the object, a Fire Steel.

With this hatch you can now properly set the last bolt, So push the hatch a bit back in an .....

......then open the panel in the middle.

You will see a hole with a sparkle in front of it, click on your Eyepiece and then double click in the hole.

You go in, you have to slide 3 pieces of rail in the right place so that wheel A can go down on the big wheel at the arrow E

With the 2 levers B and C you move Wheel A to the left and right and up and down.
In addition to the levers you see another wheel D, when you turn this wheel B the wheels in the rail also turns if you put Wheel A on top of the wheels I, J, K.
Now first move the wheel A to the right and then down, then turn the wheel and slide the piece of rail under the rail on the left.
Move the wheel up and all the way to the left, turn the wheel and put the piece of rail under the rail in the middle.
Now lower the wheel and turn the wheel at the front and place the piece of rail above the arrow.
Use the levers to move the wheel back to the wheel to the right and now put the piece of rail in its place.
NB: Louis: If you don't understand how to solve this puzzle then perhaos these screenshots can help you

Now put the wheelA via the rail down on the arrow and then turn wheel D, keep turning D until the large wheel turns by itself.

Under the panel in the middle a hatch opens, take out the handle of the miniature pump.

You are now done with the bottom half of the desk, so everything you have opened up in the desk will nu close again

Right click a few times to leave the Dollhouse again and outside turn the dollhouse to one of its side where the kitchen is and you see the Pump. Zoom in on
the Pump

Zoom in on it and drag the lever there, the pump will start pumping.
Enter the kitchen again

Turn to the left, zoom in on the grate under the sink.
The bottle now floats in the water and you can now take it.

Look at the bottle in your inventory and unscrew the bottle cap, pull the piece of paper out of the bottle.
You can see that it is part of a photo of a locomotive.

Zoom out and go back into the Study. The walkthalkthrough will continue in:
Part 2: Study
2021: Walkthrough by: Dick Leeuw
Text by Dick Leeuw. Screenshots by Louis Koot