
Atlantis 3: The New World:
2023: Walkthrough door: Louis Koot
If you found this walkthrough through Google search or through another site, you probably haven't visited my site.
Many more highly detailed game walkthroughs can be found on my site and here is the url of my site: www.pcgameswalkthroughs.nl
Part 1
Chapter 1: Desert of Hoggar part 1.
You now have control over the game for the first time. Your inventory is at the bottom of the screen. Right click to open inventory. You will see that you now have a short Stick and a Disc in your inventory. Go forward 1 step and then turn to the left. Then go forward 2 steps and you will come to the sentry station standing guard at the water source. You can now click on the guard post to have a chat, but that is of no use at all.
Standing in front of the guard, turn all the way to the right until you see the end of the wooden gate on the left side of your screen. There is a slope going up here. Click forward to go up this slope and you will arrive in front of a large rocky outcrop. You can now go left or right. Actually it doesn't matter, but it's easier to turn left here now. So turn to the left and then go 1 step forward again towards the "Rock Arch" and........

.......Cut scene: We see how our little archaeologist is again saved from certain death (or worse) by the Touareg.
The Touareg cuts a villain's throat with his scimitar.

A chat follows between the archaeologist and the Touareg, whose name turns out to be Targui.
After this we see how Targui is going to hide the corpse and you regain control of the game.
Turn slightly to the right and then click forward again, towards the rock arch.
When you have stopped, turn to the right and turn all the way straight until you see the entrance to the cave.

Then click forward to enter the cave and then turn slightly to the right.
You see the back of this cave and there you see a big round "Mirror?". Click forward to get right in front of that "Mirror".

In fact, this is not a mirror but a so-called Portal, a "door" to another dimension, but you can't go through it yet. Standing in front of this round portal, look down at the ground in front of your feet. You will see a large circle carved into the rock floor with 5 Symbols above it that are connected to the circle via a dotted line. Right click to open your inventory and take out the Disc and place it in the middle of the circle on the floor. Open your inventory again and now take the stick and place it next to / on the disc in the circle.

Congratulations: You have made a spinning top. The intention is
that you click on the 5 symbols above the circle with this spinning top, one by one. Each time the spinning top will roll into the circle and always leave a STAR on the edge of it. You have to do those clicks in the right order. So now number the 5 symbols above the circle, from left to right as: 1, 2, 3, 4, 5 and then, in the correct order, click on the 5 symbols with your spinning top:
In my game this order was: 4, 1, 3, 5, 2.

NB: The order in which you have to click on the symbols is probably different every game.
The Spinning Top then successively makes a Star appear in the circle on:
| 1 = Symbol 4 = Star in circle to Lower Right 2 = Symbol 1 = Star in circle on Left Top. 3 = Symbol 3 = Star in circle on Top Right 4 = Symbol 5 = Star in circle on Left Down 5 = Symbol 2 = Star in circle to Top Center. |
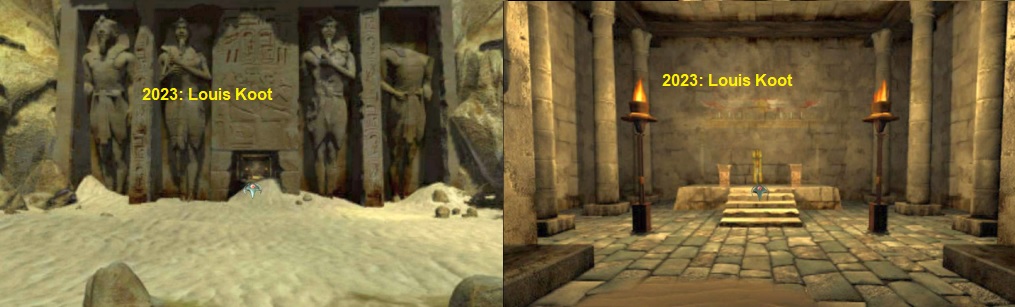
Cut scene in which you see how the young archaeologist steps through the portal and ends up in an Egyptian burial chamber in another time.

Chapter 2: Egypt
The Rebirth of the Pharaoh.
You are standing in an Egyptian Pyramid in a Burial Chamber and in front of you is an oval sarcophagus.

The intention is to open the sarcophagus, but how do you do that. First turn around completely, so just stand and turn to the right and then just turn to the right until you see a Pillar to your left. Look down at the floor behind this pillar. There is something on the floor, against the pillar. Pick it up and it turns out to be a Wooden Bird.

Place the wooden bird in your inventory. Turn back to the sarcophagus and then turn left to the left wall.
On the left wall you see a 5 pointed Star. On the right wall you see an image with hieroglyphics.

First go look at that hieroglyphic image and especially the top part. In that upper part you see in the middle a vertical stripe with 5 star points, from top to bottom those star points are left, right, right, left, right. Remember this. Then go to the 5 pointed star on the left wall. If you hold the cursor on the end of the left and right star point, you will find out that you can click on these 2 points, which will make the star rotate left or right. If you correctly interpret the hieroglyphic drawing on the right wall, you will find out the click order in which you have to click on the 2 star points. So that order is: 1x left, 2x right, 1x left, 1x right.

The sarcophagus will now open. A Mummy crawls out of the sargophagus.

Don't be alarmed because it is a friendly, albeit somewhat amnesiac, mummy.

The mummy introduces himself to you as your Psychopomp and he gives you a nice box with a beetle in it.
Click on the box to open it........ there is a beetle (Scarab) in the box

We will call this mummy Psycho from now on. Psycho will be your indispensable sidekick in this part of the game now. Talk to Psycho and exhaust all conversation option. So you get the conversation options in the form of pictures that you have to click on and after each conversation option you have to click Psycho again to get the conversation options back on your screen

Psycho doesn't seem to remember many things anymore, but as the game progresses and you get to more places, his memory will get better and better. After exhausting all conversation options, turn to the left and click 1 click to go between the 2 pillars to the exit. So this is a staircase up, only you are not allowed to leave here. Sunlight enters the burial chamber through the stairs. Now open your inventory and take out the Wooden Bird. The Wooden Bird is now "stuck" to your arrow cursor, so now click with the wooden bird up the stairs and .......

Cutscene: You and Psycho are now "flying" out of the pyramid.

You are now on a platform, high on the outside of the pyramid, and Psycho is already waiting for you in a kind of gondola on the right.
Click forward and ...... Psycho invites you to take a seat in the gondola, so look down and click into the gondola and .....

long cut scene: With you and Psycho in the gondola you now fly away and we also see that you find a Map in the gondola. Finally you land in the water at the Temple of the High Priest. Psycho tells you to enter this Temple to meet the High Priest who will then give you your assignments.

So enter the temple and keep clicking forward and you will eventually "bump" into the High Priest.
The High Priest makes the Pharaoh appear on the back wall and he tells you that the Pharaoh is dying, but the Pharaoh must not die. This priest further tells you that you must now look for a Feather and the Symbol of Life. Fortunately, the guy refuses to say anything after this in that filthy sharp voice of his.
Turn around and go all the way back to the gondola, click on Psycho and talk to him.
Use the new conversation option, or just all conversation options.

Psycho now remembers a bit more and explains to you what is meant by the Feather and the Ankh Cross. Then open the inventory and click on the map. The map now appear large in your play screen. Via the map you can travel to the various available locations and Psycho will fly you there with the gondola.
The central point on the map is the Great Sphinx. You are now at the temple between the front legs of the Sphinx (1). If you move the cursor over the map, you will notice that other locations are now also available. These are: on the Sphinx itself, between the front legs and the back leg a rock cave (2), to the left above the Sphinx a large temple (3), to the left below the Sphinx a smaller temple (5) and then to the right of a piece of the beach (4).

Now select the cave in the Sphinx (2) on the map, click your mouse and you will travel there.
Cave
When you get here, turn around and walk into the cave and go all the way straight until you can go no further.

You are then standing in front of an altar with a nice little box on top. On this box you see 3x the Ankh Symbol.
Click on the lid of the box and the box will open. Take the Ankh, the Symbol of Life, from the box and place it in your inventory.

Then click on the map again and now select the large temple (3), left above the Sphinx

Temple of the High Priestess
On arrival you go 2 x forward into the Temple and you "meet" the High Priestess.

The priestess tells that the story of her people has been forgotten and she would like you to bring that story back to life
Behind the priestess you will see 2 rows of 6 Image stones on the wall. Click forward to get close to these image stones.

You see 2 rows of 6 picture tiles each. Under each tile you will also see a smaller stone.
You can pick up and move both the picture tiles and the smaller stones.
If you click on one of those smaller stones, you will hear the High Priestess say a sentence.

So these 12 picture tiles and the 12 sentence stones below them tell the story of Osiris and Seth, but both the sentences and the pictures are not in the correct order. So you have to find the right sentence with the right picture and then put everything in the right order, from top left to bottom right. It is best to first put the sentence stones in the correct order. If you can't do it, here is the right solution: So you start at the top left and then work to the right and so to the bottom right. Click on a narrow sentence stone and the priestess will read it aloud. Place the sentence stone in the correct spot and continue with the next sentence
|
The order of the sentences, from top left to bottom right, is:
If you have the sentences in the correct order, you will put the images in the correct order, also from top left to bottom right. Here's the right solution:
|
When you have solved this puzzle correctly, you will automatically turn back to the High Priestess.
The priestess thank you for restoring the story and in return you receive a Talisman. Place this thing in your Inventory.

Select the Map and then select the Beach.

Beach
You arrive at the beach. Turn to the left and then go forward. Turn to the right and go forward to the fisher boy

Then turn slightly to the left to see the fisherboy again and talk to him. The fish won't bite. Give your Talisman to the boy.

The boy runs away to the right, so turn slightly to the right as well. The boy throws out his net and then reels it in again. View the content of the net. There are 2 fish in it and some other stuff. Click on it and you will take out a scale. The boy talks to you again and gives you a Stone in the shape of an Egyptian man's head.

You must now have this stone and the scale (Libra) in your inventory. Select your Map and now click the small temple, left below the Sphinx.

Feathers puzzle
When you arrive, turn around and go up the stairs twice. You are standing in front of a stone altar in a ruined temple.

Look down a little to get a full view of the altar.
Both on top of the altar and on the front you see an image of a woman with a long bird feather.
A piece of the woman's head has disappeared on the front. Turn to the left and you will see 2 narrow round pillars with a low wall in between.

Go forward and you will be in front of the left pillar. On this pillar, look for a Nail (on the border of the gray stones with the dotted stones).

Open your inventory and take out the scale and then hang this thing on the nail so that the scale is now hanging on the pillar.

Turn around and walk back and then turn left so that you are in front of the altar again.
Look down, open your inventory, take out the Head shaped Stone and now click it on the click spot of the woman image on the long front.

The lid of the altar now slides open and you see that there are a number of colored feathers in it. One of them is the feather you need. But which feather? Turn around and go down the stairs, back to Psycho and ask him about the feathers. He tells you that the feather you need is heavier than Pharaoh's Soul. So you have to weigh the feathers. Back to the altar. Now take the Feathers from the altar and they will be neatly lined up in your inventory.

|
Now go back to the scale on the pillar and place one of the feathers in the left scale. This scale therefore drops down due to the weight of the feather. Take another feather from your inventory and place it in the right bowl. 1 of the two feathers is heavier than the other. The heavier spring is therefore on the scale that is now the lowest ..... for me this is now the feather on the left scale
Leave the heaviest feather on the scale and put another feather on the other scale and repeat this until you have figured out which of the feathers is the heaviest of the whole set. For me it was the Yellow Feather this time. Leave this heaviest feather on the scale and first put all the other feathers back in the altar, one by one. Then take your heaviest feather from the scale. Open the Map and click on the temple between the front legs of the Sphinx
|
You return to the High Priest in the temple. Walk all the way back to the High Priest.
There is a low pillar to the left and right of the priest. Turn left and place your Feather on this left pillar
Cut scene: The Pharaoh dies........
Turn around and place your Ankh on the right pillar .....

Cutscene: The Pharaoh is reborn as a Swan and flies away.

Go outside back to the gondola and talk to Psycho about the Pharaoh's rebirth ......
Psycho is delighted and tells you that you can now go back through the portal, but you don't know how. Psycho tells you to ask the Scarab.

Open the map and now choose the Cave in the middle of the Sphinx as your destination. Upon arrival, turn to the right and enter the cave and walk to the altar. It still shows the opened box from which you took the Ankh Cross earlier. Open your inventory and click on your box containing the beetle (Scarab) to take it out of your inventory ...... then click on the box again to open it and .....

Cutscene: You end up in a new room
Chapter 3: Hoggar Part 2
You are back in your own dimension, in a room with round pillars. Just stand still and turn around until you see the large Round Portal again. So through this portal you entered Egypt. Then click forward to go through the portal and you are back in the cave above the Oasis. Click further forward towards the exit.

You now hear machine gun fire from outside. Turn slightly to the left and click forward again to get outside the cave. Then turn left or right, it doesn't matter, and you'll come face to face with this game's VILLAIN. If you turn to the right you will see that the Touareg Targui has now been captured, if you then click forward you will also meet the villain. On the other hand, if you turn immediately to the left, you will immediately come face to face with the villain. Talk to the villain

There now follows a longer conversation between our girl and the villain, after which we end up in the room behind the portal again via a cutscene. Another long conversation and then villain brings out a Crystal Skull. Villain peers into the eye sockets of this skull, but apparently nothing happens.

After this he asks our girl to look through the Eye Sockets of the Skull.
You are back in control of the game. Save your game here......... Then click on the Crystal Skull and........

......Our archaeologist looks into the eyes of the skull and.........she ends up in a strange dimension.

Crystal Skull part 1
Well .... probably the creators of this game meant that you are now inside the brains of the crystal skull. This is nothing more or less than the umpteenth variant of the inevitable maze that you apparently have to encounter in almost every adventure game. It's very easy to completely lose your bearings here, and I'm not sure if the route I'm going to give you here will work the same way for you. Well, here it goes:
You will see a number of "paths" (so these will be the brain pathways) and you will see a lot of "air bubbles" floating. There are a number of paths you can take. If you start turning to the right, you will find yourself in front of a path that you CANNOT cross. Take this path as your starting point.

Then turn back to the left, skip the 1st path you come across, and continue to turn left until you are in front of the next path (to the left of the "bar").
It is a path that goes straight back under a "bubble".
Click forward to go down this path. On the next screen, turn all the way to the right.

If all goes well, a DOLPHIN will swim towards you. Click on the Dolphin and the animal will give you a clue

Then click on the Dolphin again and use all conversation options in succession.

When you have discussed everything with the dolphin SAVE your game again before continuing.
Then, to the left of the Dolphin, go forward along the path
On the next screen, turn to the left, skip the 1st path and turn further to the left, then click forward across the path to the left of the rod.

On the next screen, click forward on the path in front of you.
Then turn slightly to the right and click forward again on the path that you see in front of you.

On the next screen you will see a number of "air bubbles" in which you see a corridor with doors.

Click on one of these "air bubbles" A, B or C and you end up in a long wide corridor with 6 doors on the left and right.
Now remember the Dolphin's clue: "go through the 1st door on the left and then through the 3rd door on the right" is what the Dolphin told you.
So immediately turn to the left and click on the 1st door.

The door opens and you go through it and you end up, damn it, in the same hallway. Go forward here 2x and .........

........, turn to the right and see if you are now in front of the 3rd door. If so, click forward to go through this door and ......

............ again you end up in the same corridor. Turn around and go through the "Back door" and you will return to the "brain maze".

Now find the exit. You will immediately see a "bubble" with the Oasis in it.
Click forward on the path to the left of this bubble. In the next screen you will arrive between 2 paths.

Turn to the left and click forward on the next Path.
On the next screen, turn a little to the left and you will see a "Bubble" with a kind of "Eye" in it

Well, that bubble with the eye in it is the exit, so click on that eye bubble and you will return to the Pillar room and the villain.

The villain welcomes you back and chats with you for a while and then disappears with his cronies.
You are now alone in this room. You now have the Crystal Skull in your Inventory, but you should no longer need it at this point.
Save your game here again
The Pillar Room and the Tubelar Bell
There are a number of large round pillars in this room and on one of them you see a picture of a Man.
Find this pillar and then click on the pillar man

the Man comes to "alive", at least his upper body. Click on him and you talk to him.
The Man now tells the story of the Crystal Skull.

After this, the man "disappears" back into the pillar. You can click on him again for a clue. If you have EXACTLY followed the instructions of the Dolphin about the doors in the maze before, then a Tubelar Bell has now appeared on the left side of this room. So turn to the left and go forward into the corner and turn left again and you will see the Tubelar Bell hanging behind the pillar of the Crystal Skull.

NB: If the Tubelar bell is not hanging here now, then you have done something wrong in the brainmaze, then open your inventory and click on the Crystal Skull and then enter the maze again and do that part again and then follow Dolphin's instructions exactly, then return here and click on the man in the pillar again.
Go forward to the Tubelar Bell, which is now hanging there by the wall . Click on the Bell and the thing starts to open and something falls out.
Look down and you will see a circle with a large triangle in it that is divided into 4 smaller triangles.

Click on this and the large triangle in the circle turns around.

You can now click on each of the 3 point triangles. If you click on the Top Left triangle, this will break. So you can't do anything with this. If you click on the right point triangle, a white snow landscape will appear behind the circle. If you click on the lower point triangle, a view of BAGHDAD by night will appear behind the circle. I go to Baghdad first. So click on the bottom triangle (with the lamp in it) and Baghdad will appear. Then right click to place the bubble/triangle/circle in your inventory and then click forward towards Baghdad.

Chapter 4: The Thief of Baghdad:
2023: Walkthrough by: Louis Koot


