2020: Walkthrough by: Dick Leeuw
Text by Dick Leeuw. Screenshots by: Louis Koot
If you have found this walkthrough via google search or via another site then you have probably not visited my site.
A lot more very detailed game walkthroughs can be found on my site at: www.pcgameswalkthroughs.nl
|
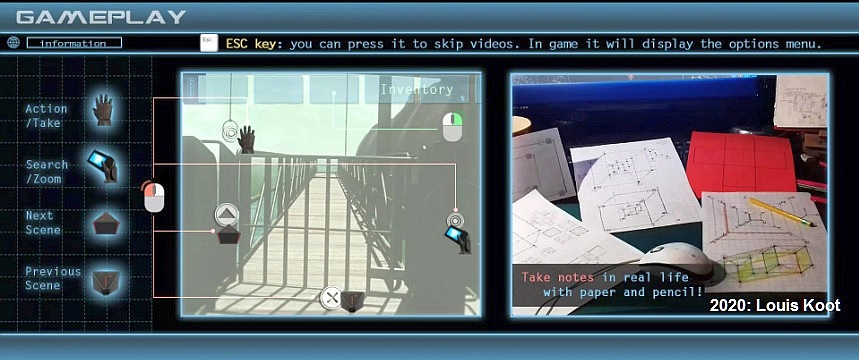
I played this game in 2016, so the original version. There are some differences but you can use this walkthrough for both the Original and the Light Edition. You can also use a Cheat for this: click in the game on Backspace and then type: thesequeltoasa and then click Enter. It is a point & click game, you move through the game by clicking arrows and hotspots. In the light Edition, click on the cross to go back a screen. Start the game and you now have to choose which Edition you want to play: the Light Edition or the Original Edition. If you have chosen, click on PLAY.
If it is clear, click OK at the bottom right.
|
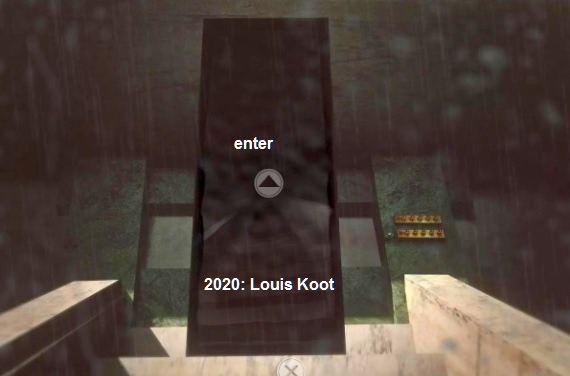
Tytaah.
After the intro movie you are on top of a big black cube, you are on the fifth moon of Catyph,
Tytaah.
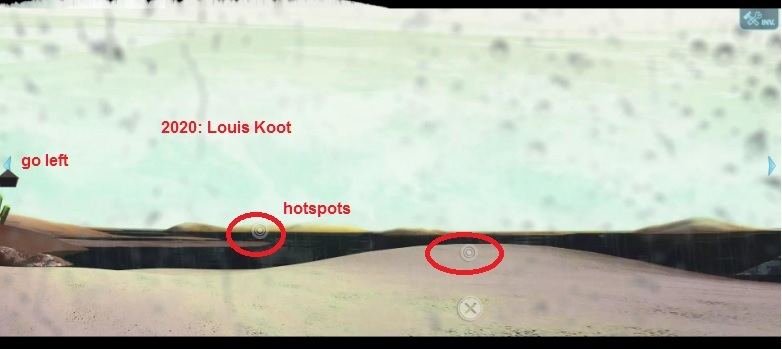
You will see a number of rings in different places. They are hotspots, if you click on it with your cursor you can get information there.
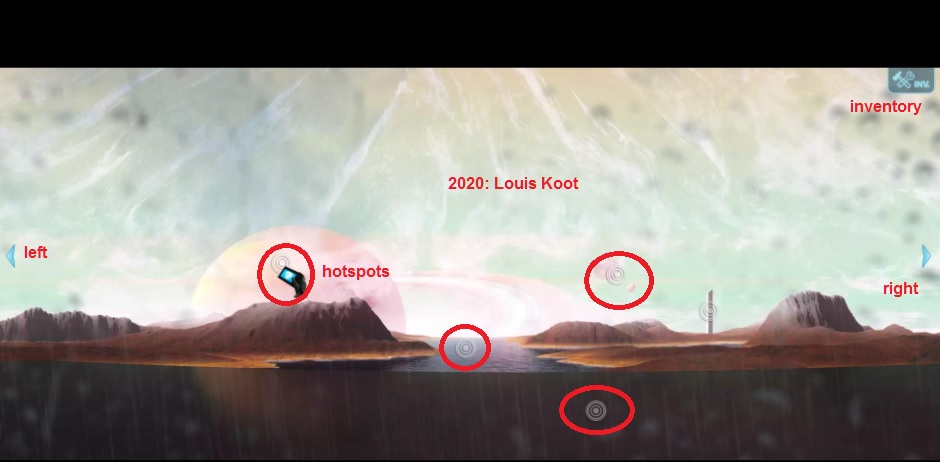
With the big blue arrows you can move from left to right.
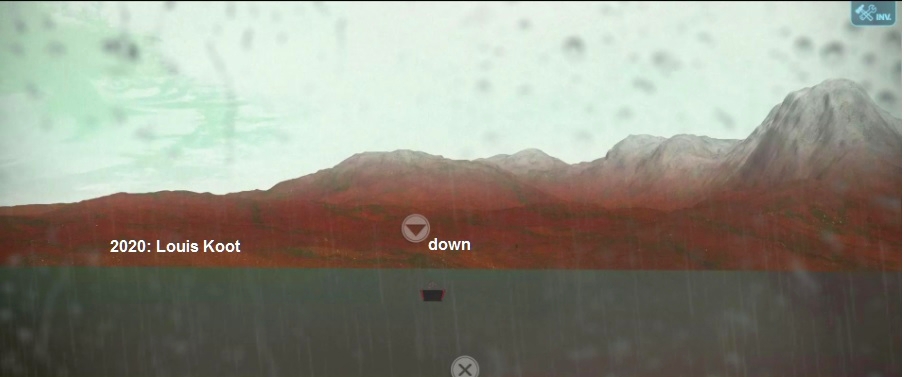
You went down a screen and you have 2 possibilities.....Straight on or to the right
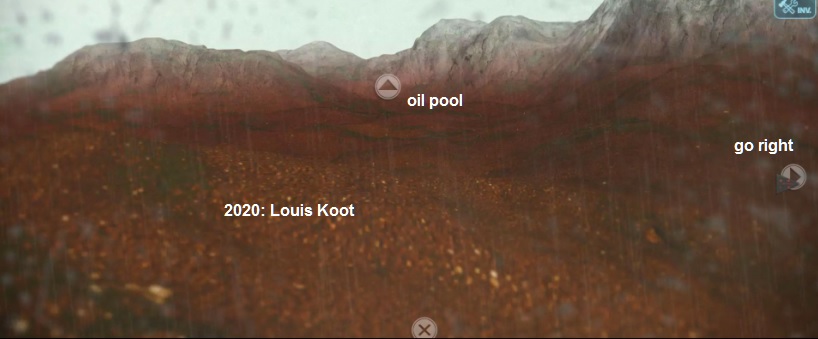
Straight on you will come to a pool of oil, you can go there to look but you cannot do anything with it.
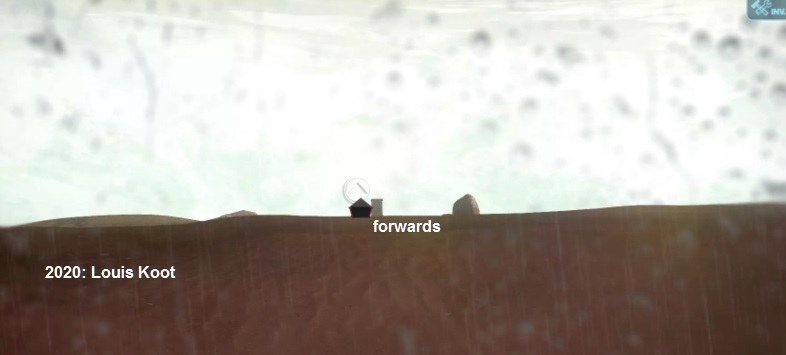
.......in the middle you see a tower. There you will also see an arrow, click on the arrow to go forwards and on the next screen you click the
arrow again.

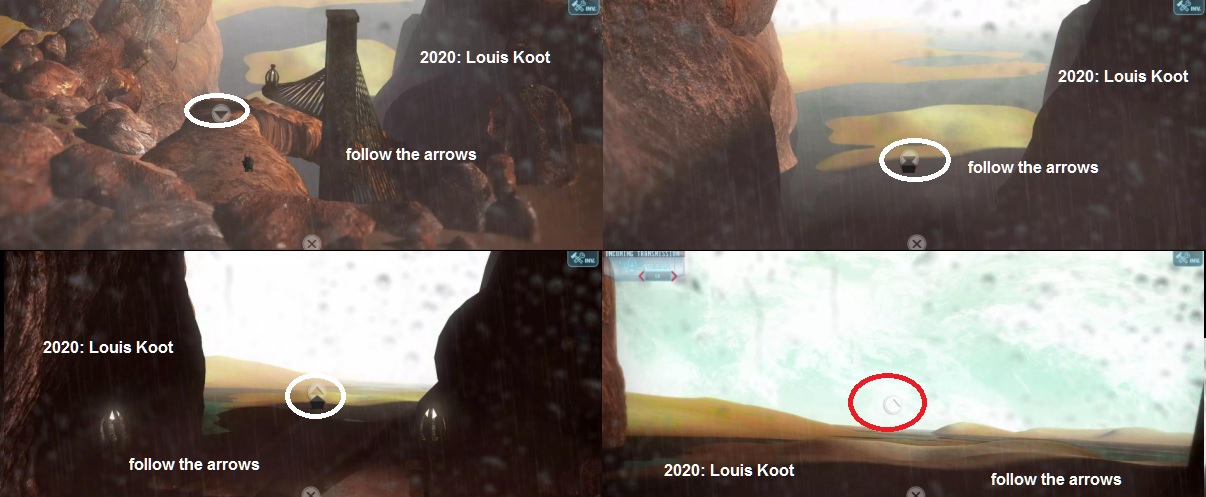
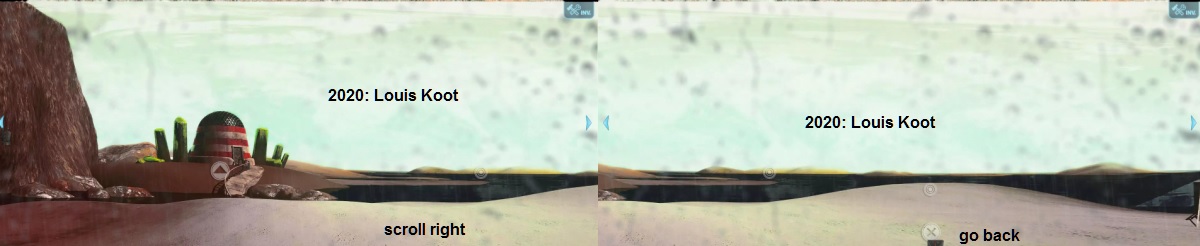
Now keep following the arrows until you are on a stretch of beach, and.........
......... you will receive a message from
general Lantier.

Listen and read the message, you can also read this message in M.A.I.D.E.N. memory system.

Click on it and then next to it on memory or Datalog.
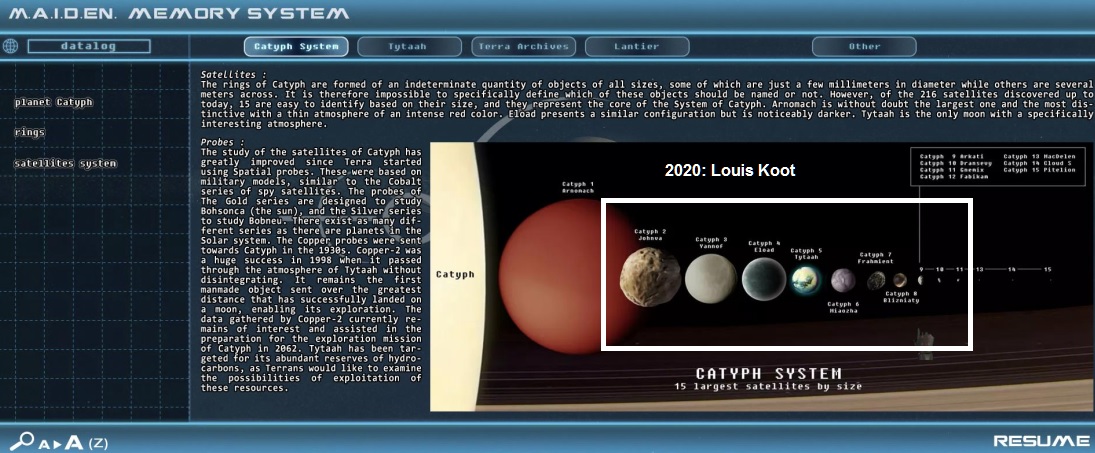
Read everything, in Catyph System you read 2 things to remember.
And at Satellites System you can see a picture of the satellite system of Catyph.
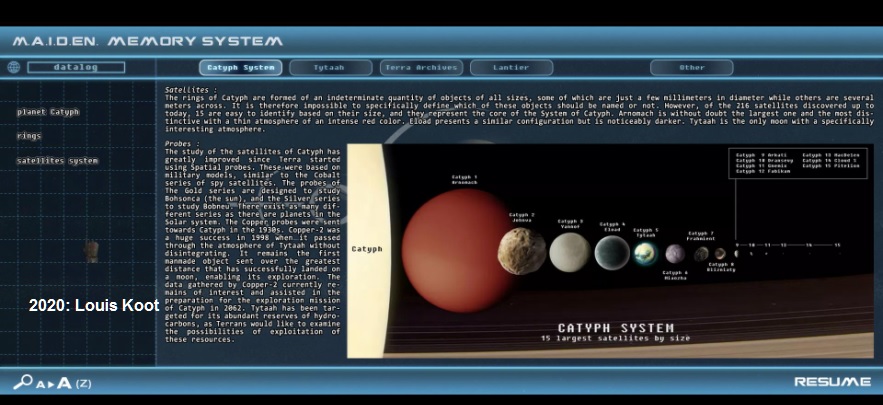
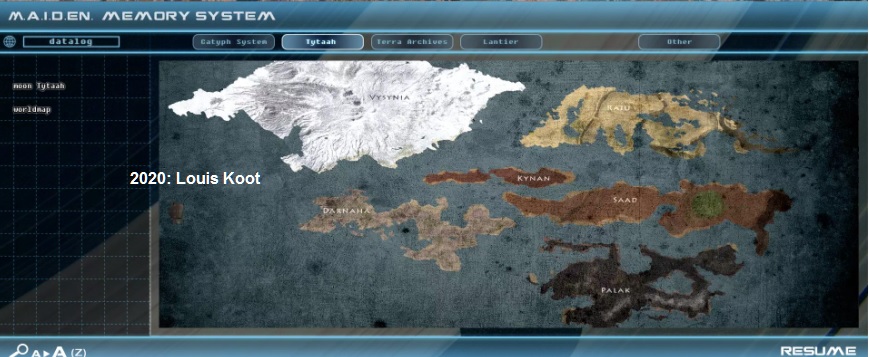
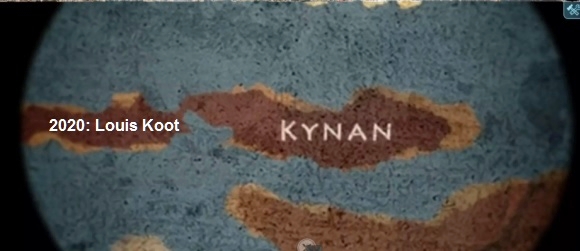
At Tytaah you read that there are 6 important areas on Tytaah, you are now in area 6, Kynan.
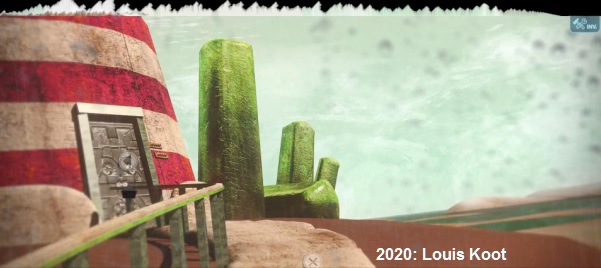
Turn to the left, there is a red striped building. On the left and right of the building you will see green stones.
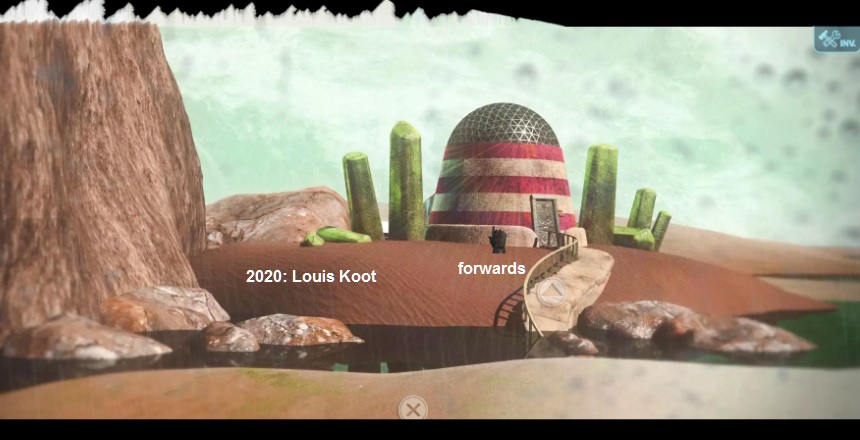
Follow the path to the door of the building. After one click stand still and Note down the position of the stones: upright or lying down.
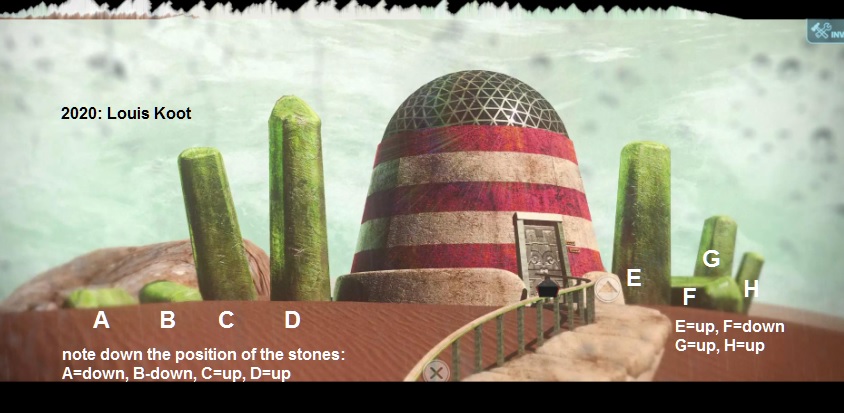
The stones on the lift side are A, B, C, D are and they are: Down, Down, Up, Up. The stones on the right side are E, F, G, H and they are: Up, Down, Up, Up
Go on to the door.........
The door of the building is locked but there are 2 x 4 switches, on the right side of the door
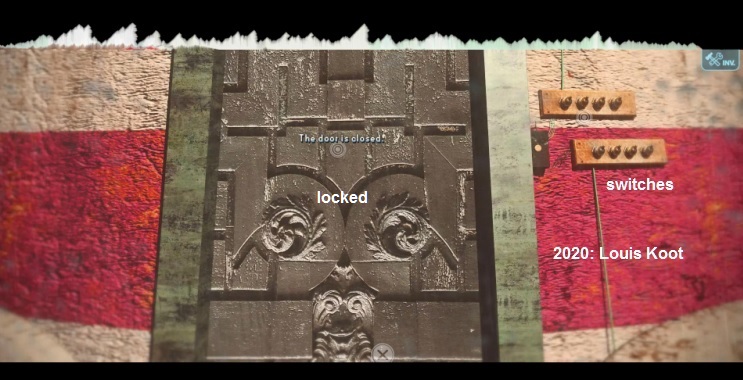
Zoom in on the switches. You now have to put these switches correctly, up or down according of the position of the green stones. The top switches correspond with the left stones and the bottom switches with the right side stond. A stone that's down means that switch must be down. A stone that's up means the switch must be up.
So the top switches must be set like this: Down, Down, Up, Up. The bottom switches must be set like this: Up, Down, Up, Up
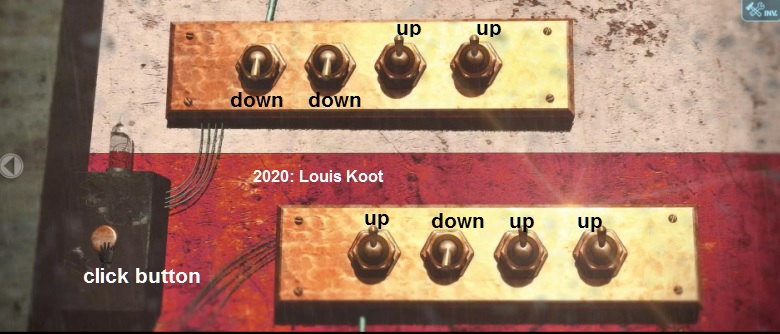
When you have set the switches correctly press the button near the light bulb.
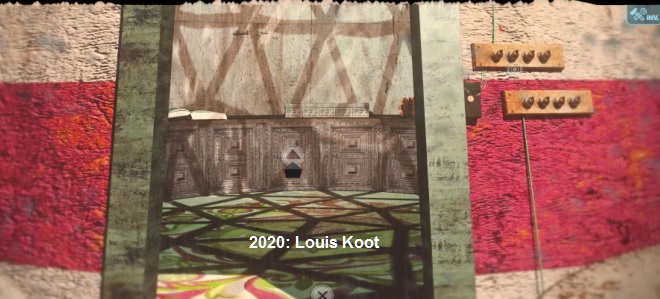
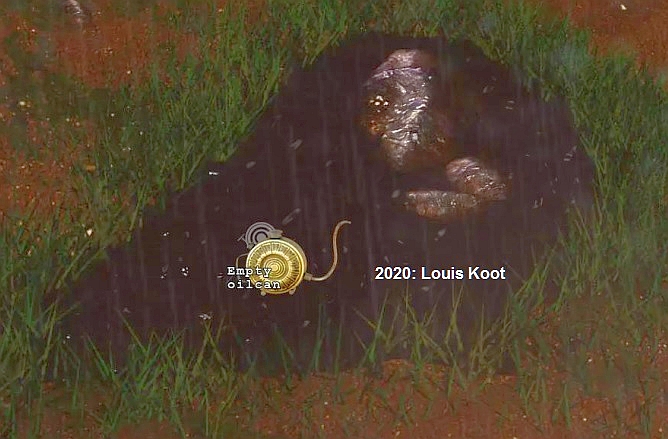
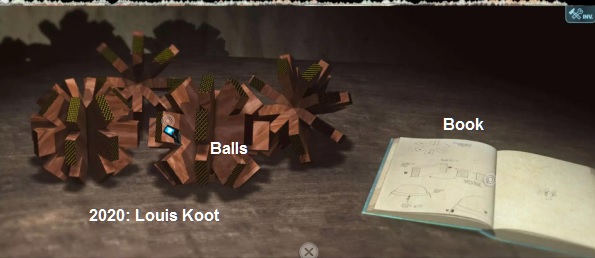
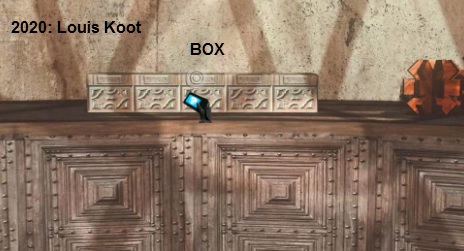
Go inside....... There's a box and a book on the left and a book and wooden balls on the right.
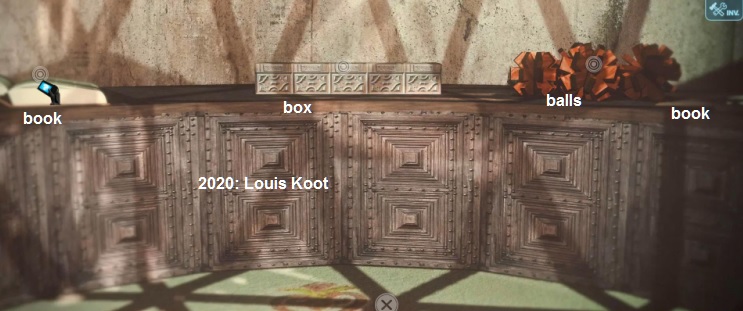
Click on the book on the left, you will see the book an oil can
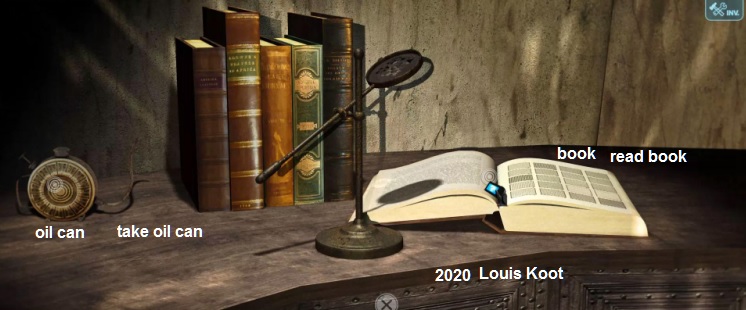
Take the oil can. You cantake a look at the book but you don't yet know what to do with it, so zoom out again
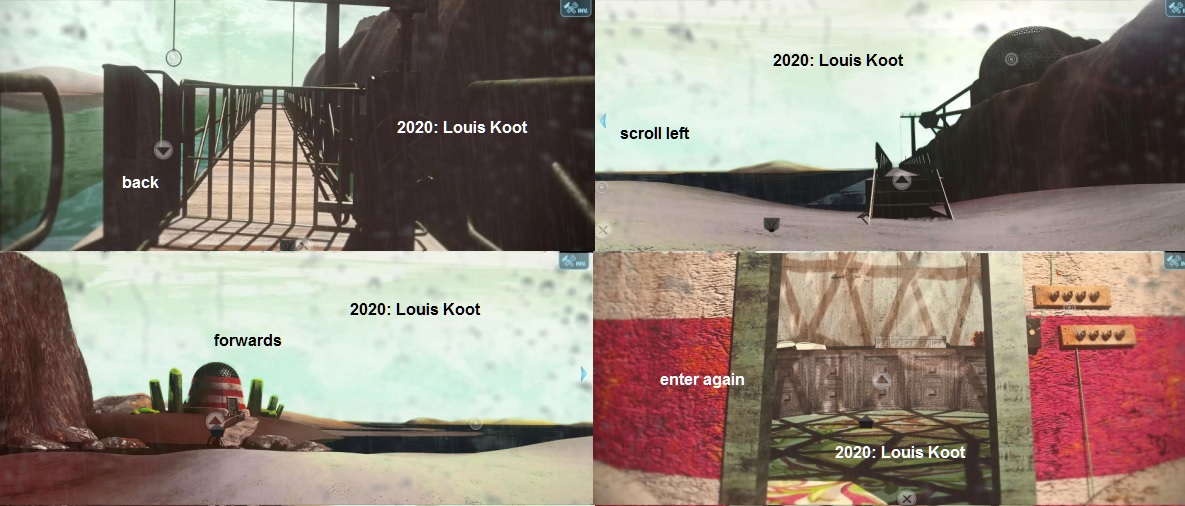
We leave the box, the balls and the right book alone for now. Go back a number of screens by clicking on the cross each time. Do this until you return to the screen where you see the red striped building again. Then scroll the screen slightly to the right and then click the cross again to go back one more screen
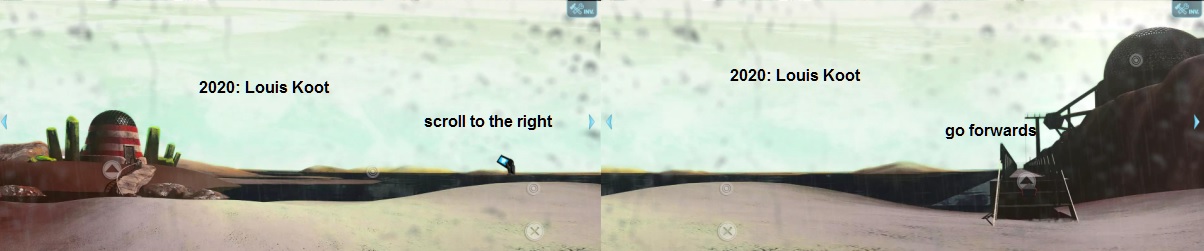
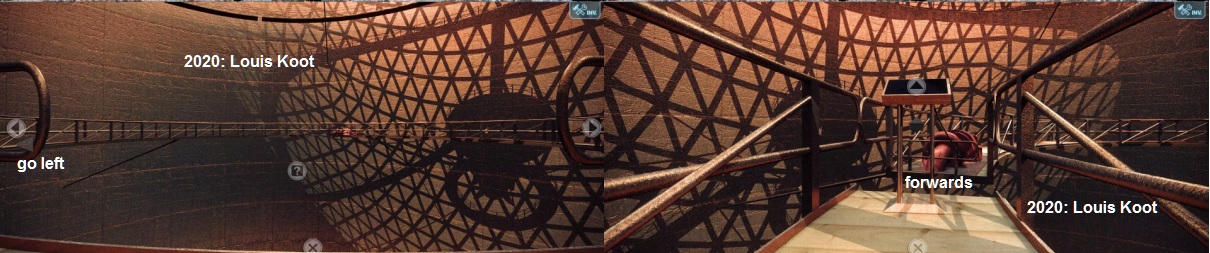
When you see the tower again, click on the arrow on the left.
then click on the forward arrow until you reach the pool of oil.

Take the oil can from your inventory and click on the oil,
You now have a full jug of oil.
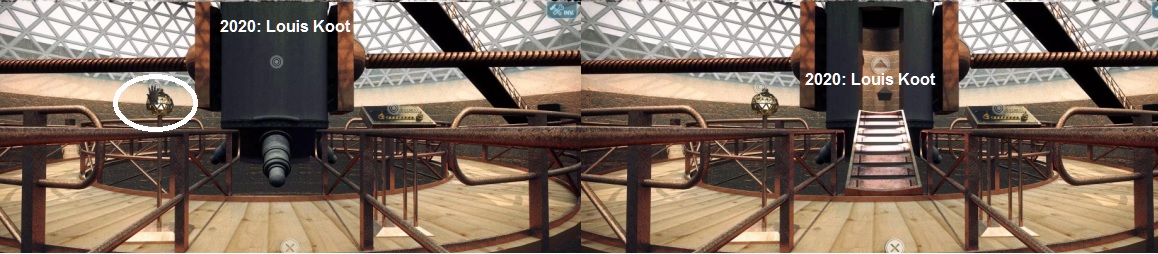
Right in front you see small stairs, click on the stairs.

Click the lever, click again to delete the text.
Take the jug of oil from your inventory and click on the shaft.
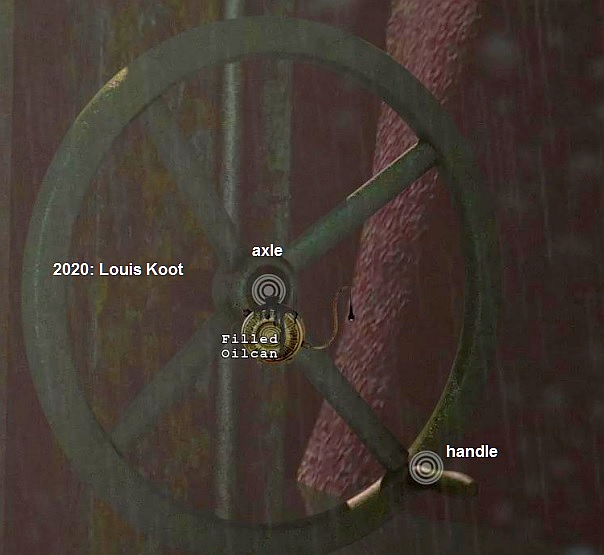
Then click on the handle of the rotary wheel, the wheel does not want to rotate enough.
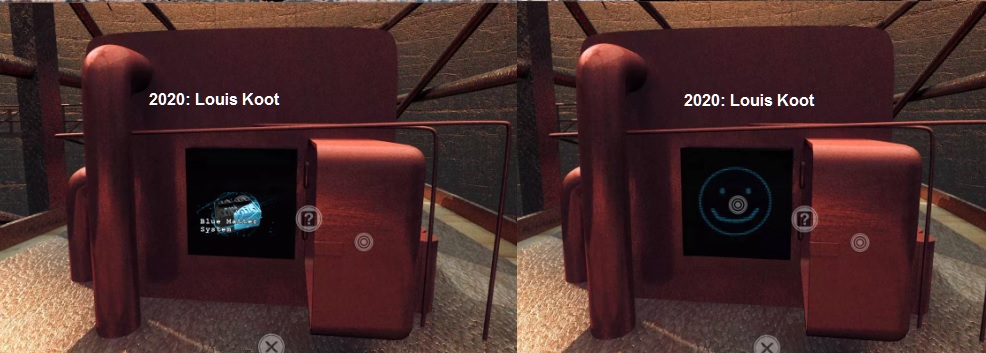
You need more power, now click in your inventory on the Blue Matter System (BMS) and then click on the handle of the rotary wheel.
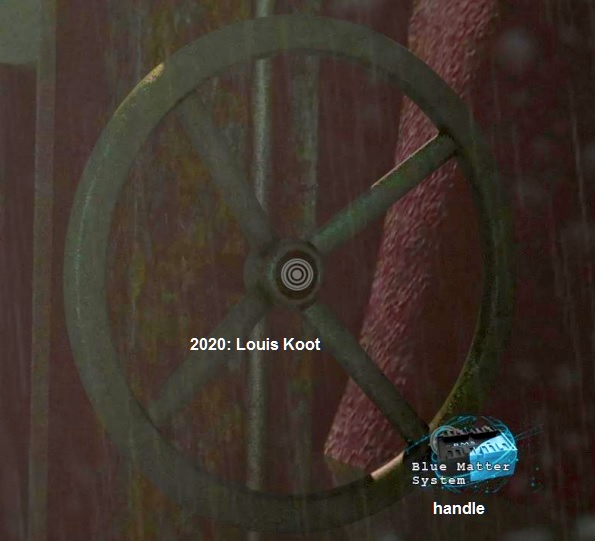
Thanks to the BMS you can now turn the wheel.
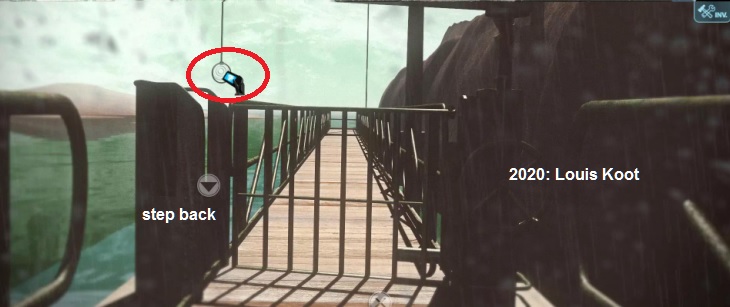
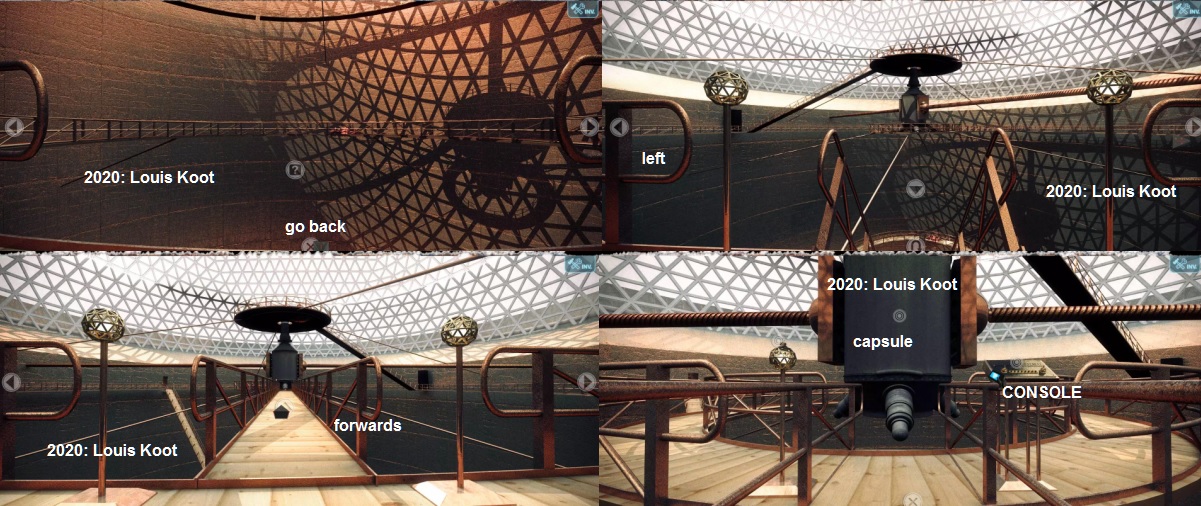
Go back a screen and click on the ring,
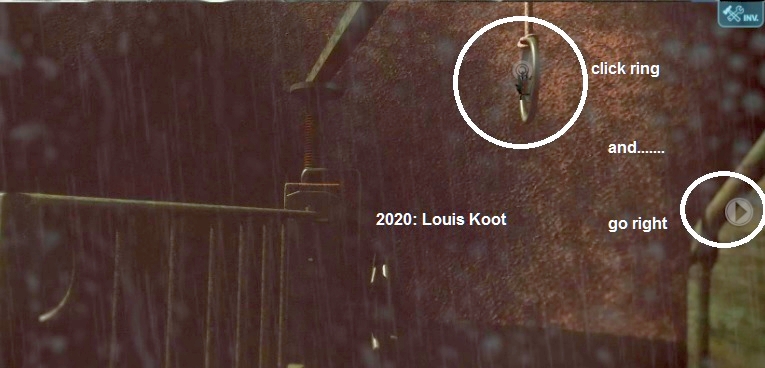
The gate is now open.
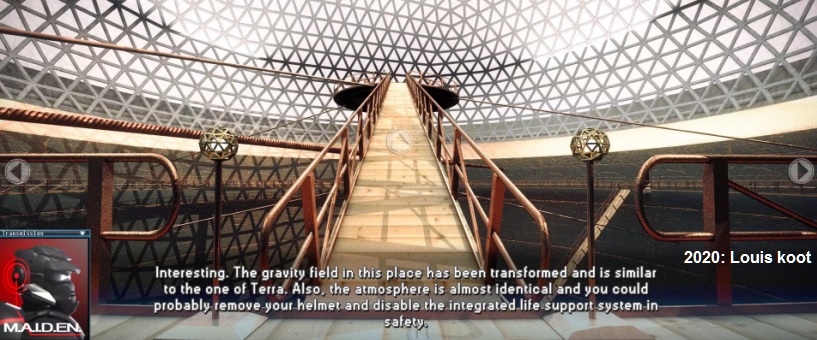
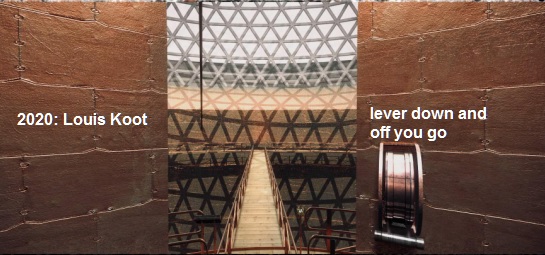
Continue on the walkway, turn right and up the ladder and continue on the stone steps to the dome.
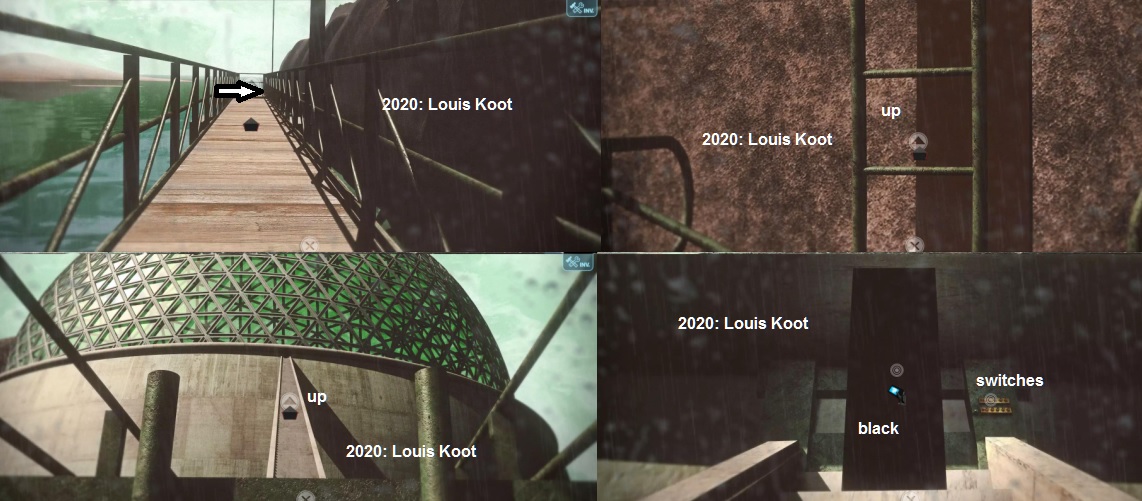
You are standing in front of a black area, click on that area your cursor and read the text.
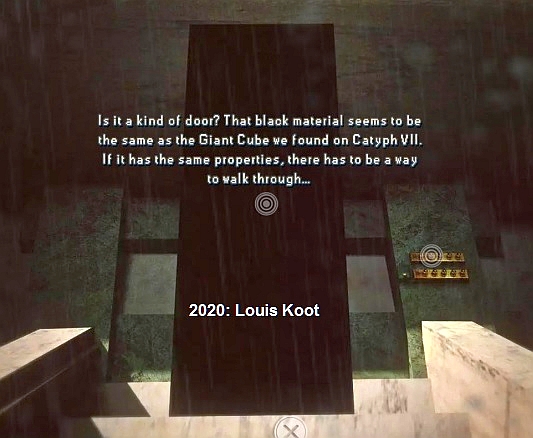
Then click with the BMS and you will see a pattern.
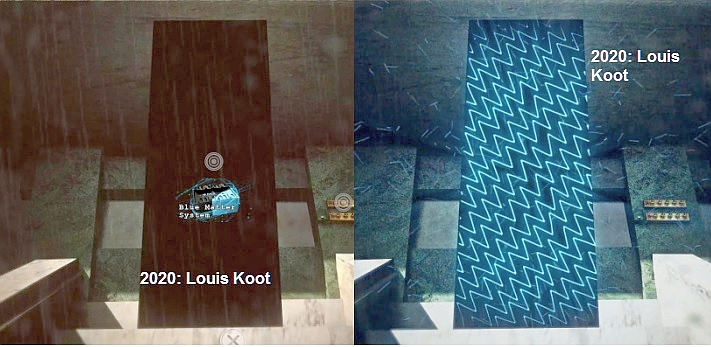
You have to copy this pattern.
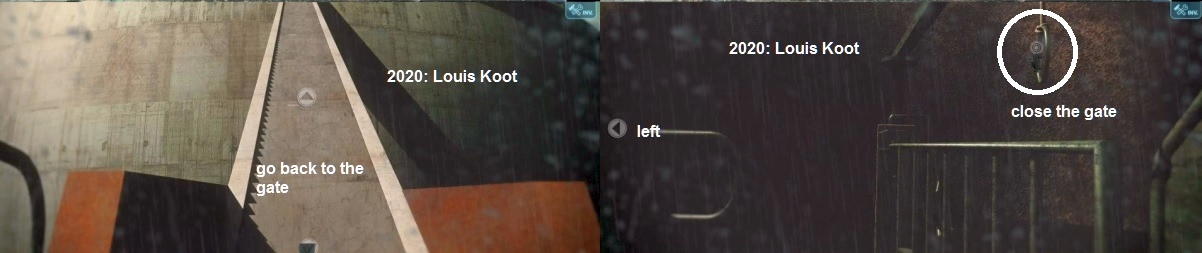
Go back to the building with the red stripes, you have to close the gate on the walkway or you can't go any further.
Then further back to the building with the red stripes and go inside it again
Inside the building you will see the 3 hotspots again, on the left the book where you found the oil can.
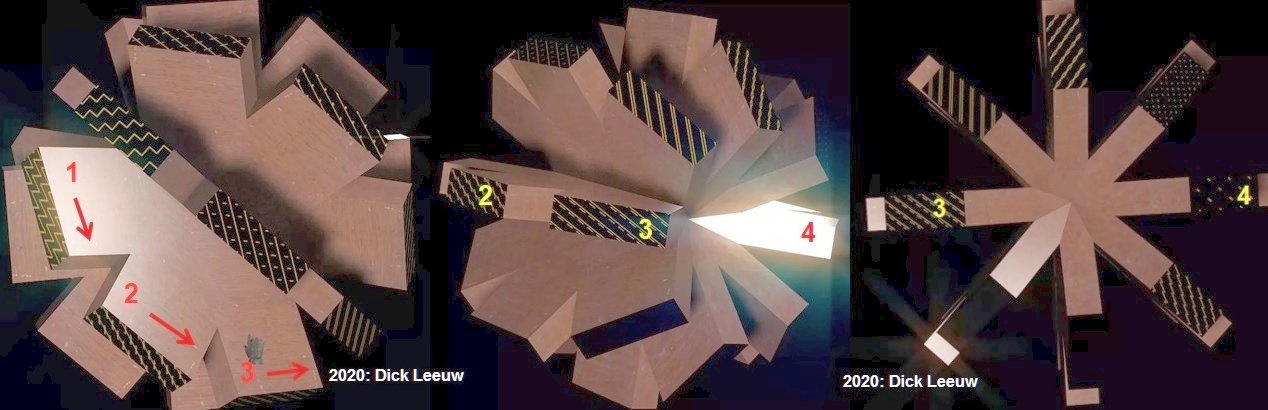
In the middle a box with 5 compartments and on the right you see 3 wooden balls.
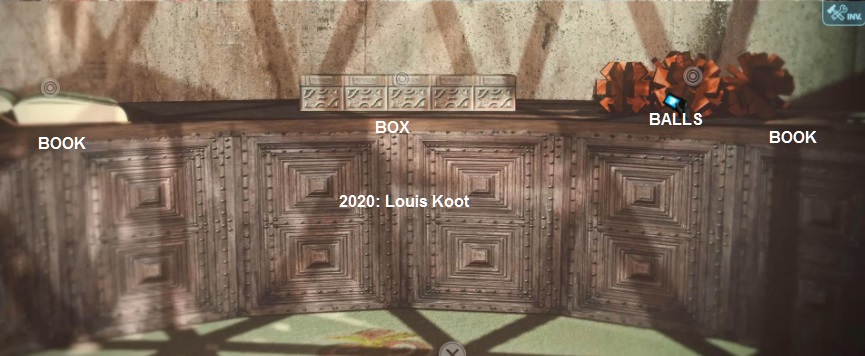
Click on the balls and then click on the book on the right.
At the bottom of the left page you see that the directions are for the entrance of the dome.
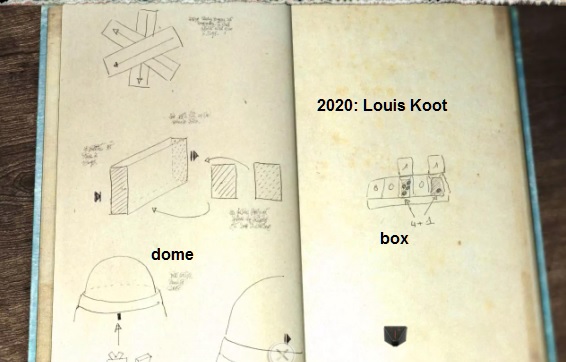
In the middle you can see that the black area is actually a tunnel, you have to find the pattern of the back of the tunnel, you already have the front.
Then take a good look at the patterns on the balls to find out what the pattern is on the back.
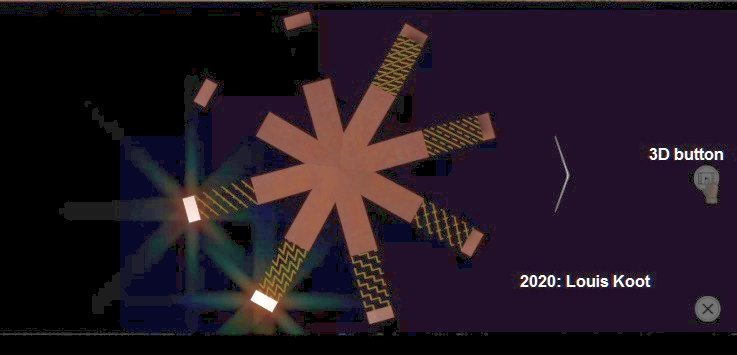
By clicking on the 3D button you see how the Ball turns to saw you all the paterns
When you have find it, go back to the book on the left.
In the book you see 20 patterns.
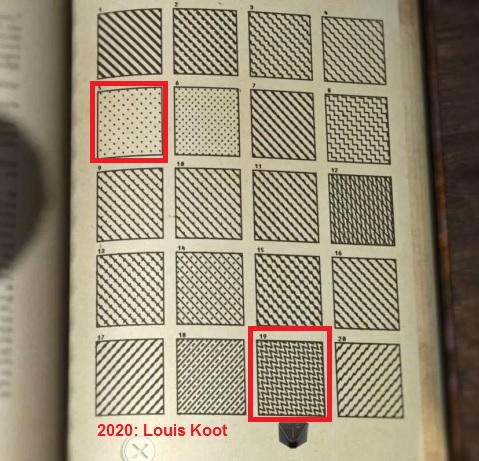
The pattern on the front is pattern 19 and you should have found that the pattern on the back is pattern 5.
You now have the numbers 19 and 5, you have to convert them to binary numbers.
Open the 5 compartments.....the compartments contain marbles, 16 - 8 - 4 - 2 - 1.
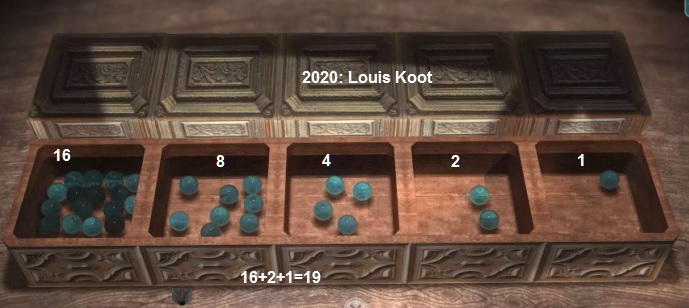
To make 19 you have to open some boxes and leave others closed.
To make 19 you close the compartments 8 and 4 but you leave the compartments 16, 2 and 1 open.
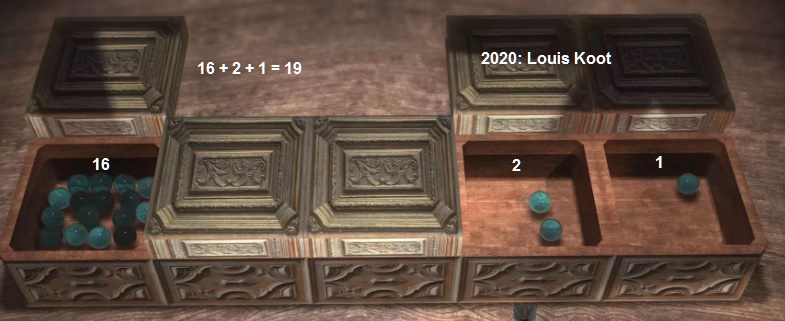
Open = 1, close = 0, so 19 becomes: 10011. Open is Up, close is Down. So 10011 becomes Up, Down, Down, Up, Up.
To make 5 you close 16, 8 and 2 but you leave 4 and 1 open. 5 = 00101, so Down, Down, Up, Down, Up
Go back to the black area near the dome. At the walkway you must open up the gate again via the Ring
Follow the walkway to the Dome again
When you're back at the dome zoom in on the switches.
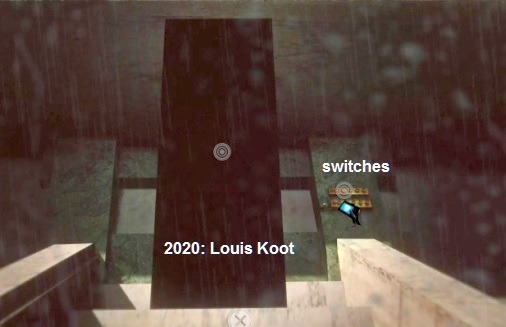
You need to click the switches up or down acording the codes you just have found out.
The upper switches must be: Up, Down, Down, Up, Up
The lower switches must be: Down, Down, Up, Down, Up
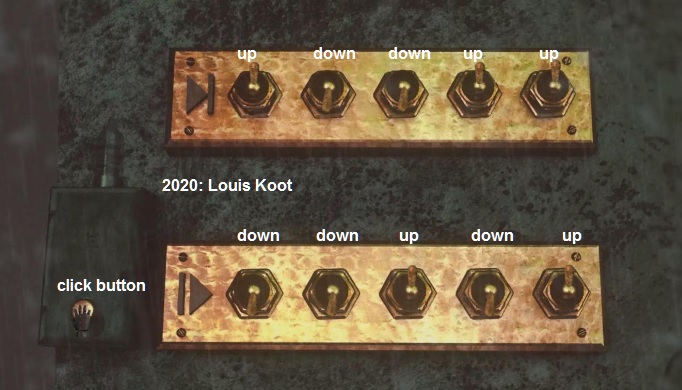
Then press the yellow button and then click the arrow in the black area.
Inside the Dome
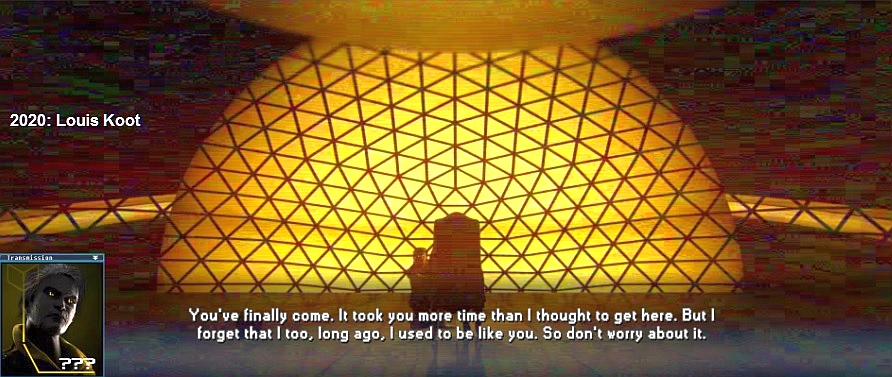
You will enter the dome and you will receive another message.
It is important that you receive and read all messages, you also need to find 6 small cubes (Die).
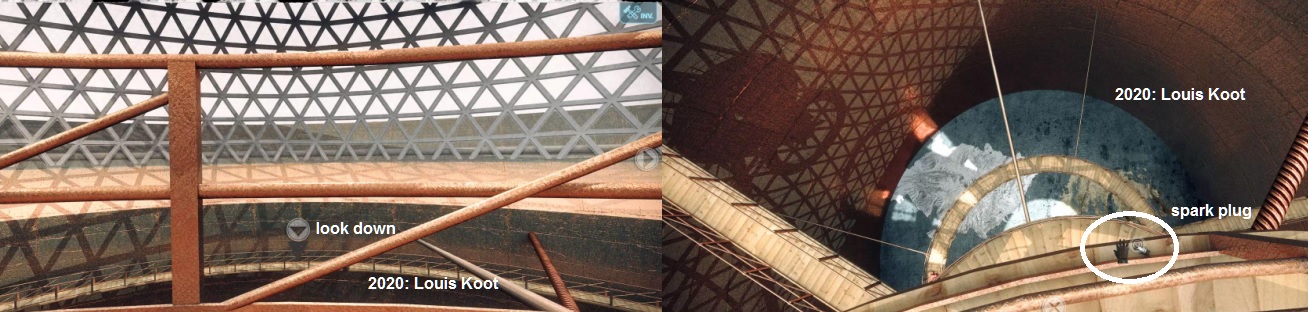
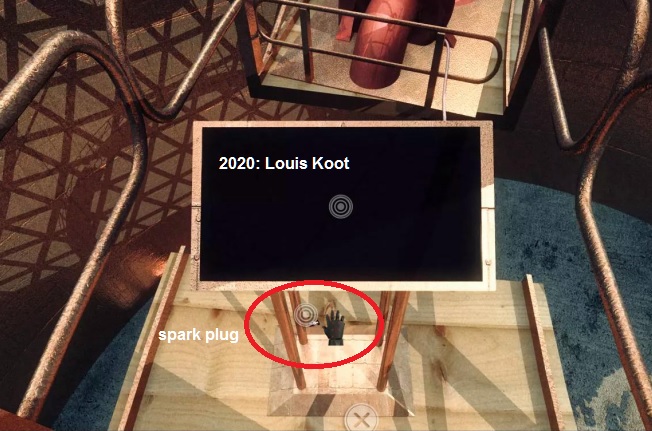
...... you will see a spark plug in the handrail.
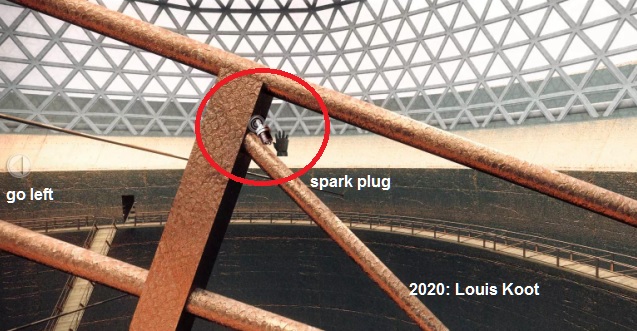
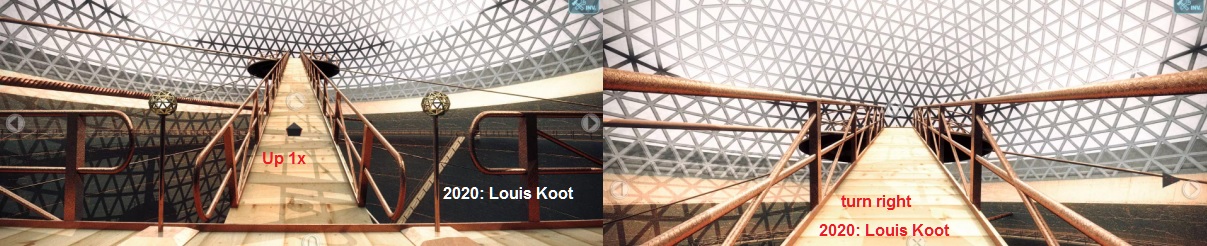
Grab the spark plug and turn left and go further up to level +1.

At the top, click on the arrow to the right, then go to the other side of the ring, then click the down arrow.
There you see the second spark plug, take the spark plug.
Look up again and click left or right and then go down to level 0 and then click on the left arrow,
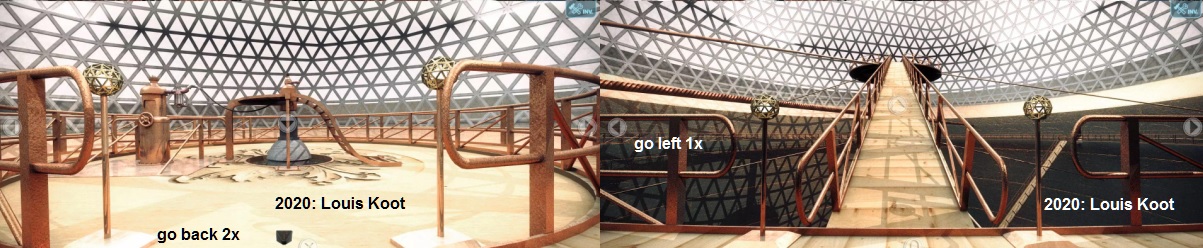
you will be in front of the path to the device in the middle.
Go back to the big ring and then go to the left, you are facing the path to level -1.
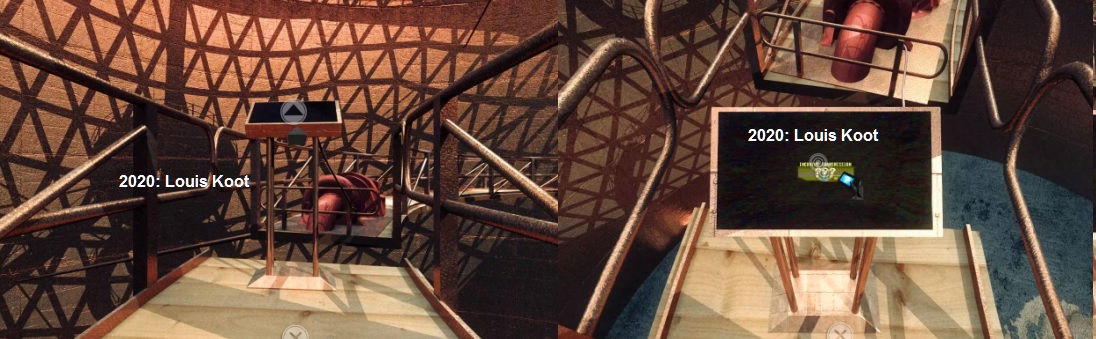
Go down to level -1, in the middle you will see a question mark.
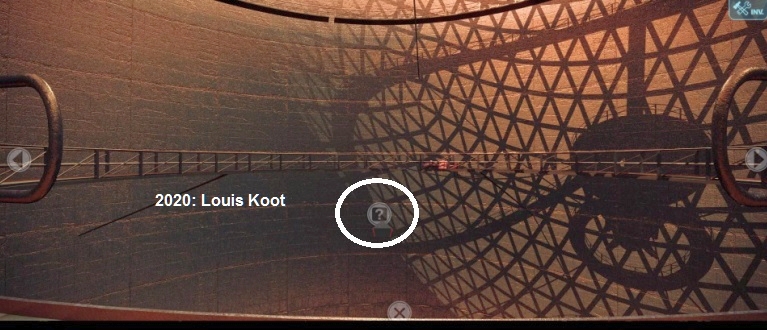
Click on the question mark and you will see the map of Tytaah below.
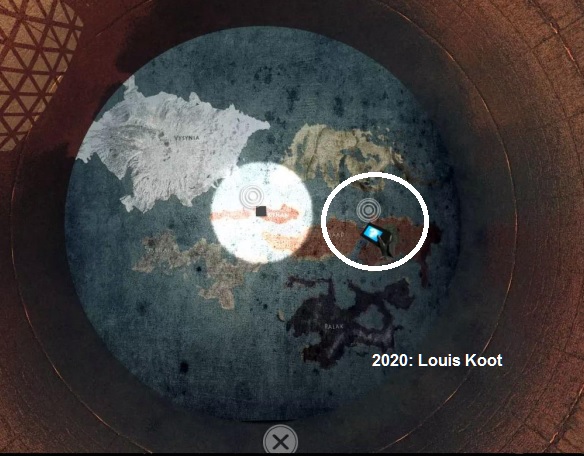
Go to the Datalog and click on Tytaah, there you will find the worldmap.
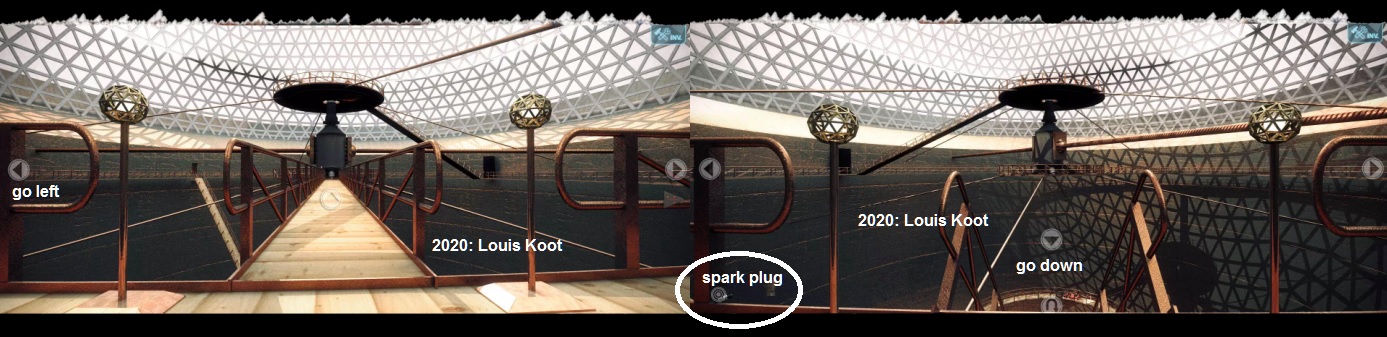
You can go left and right on level -1, go left and to the monitor and......
... on the floor just behind the monitor you will find the 5th spark plug.
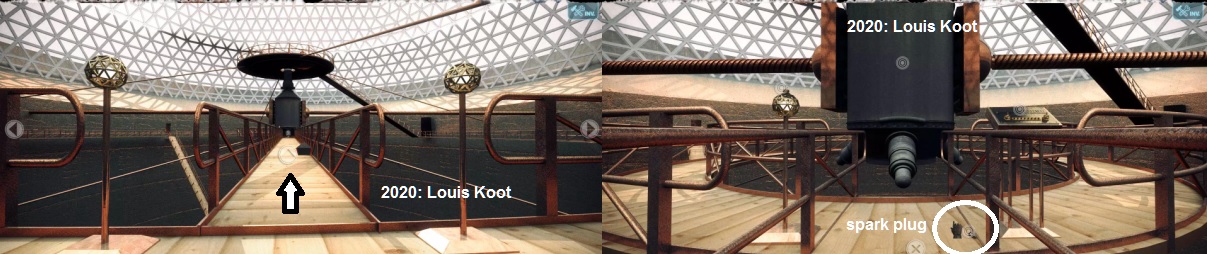
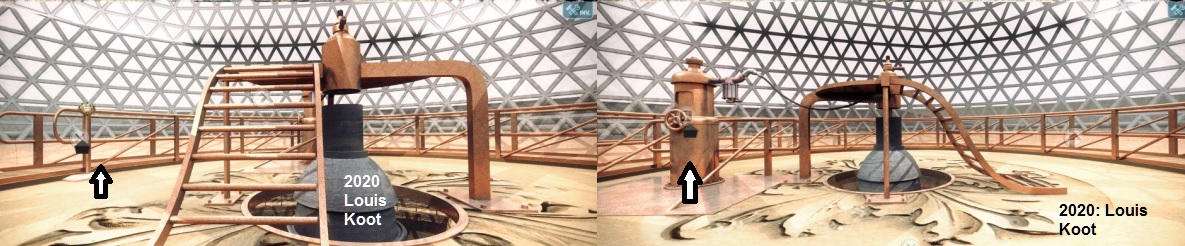
Then go to the right part of the ring on level -1, there is a device.
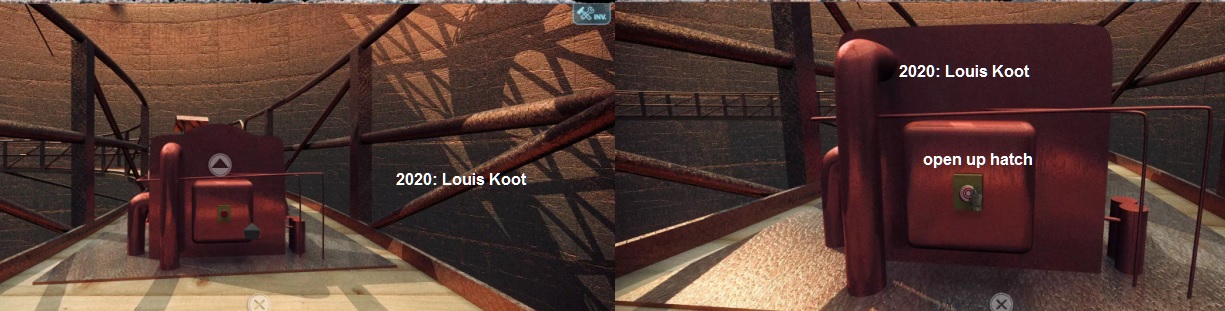
Click on the hotspot and the generator will open, then click on the question mark.

You will see the inside of the lid, you will see 9 holes.
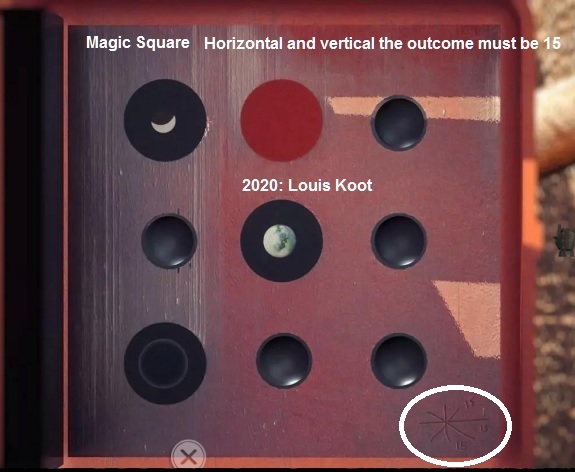
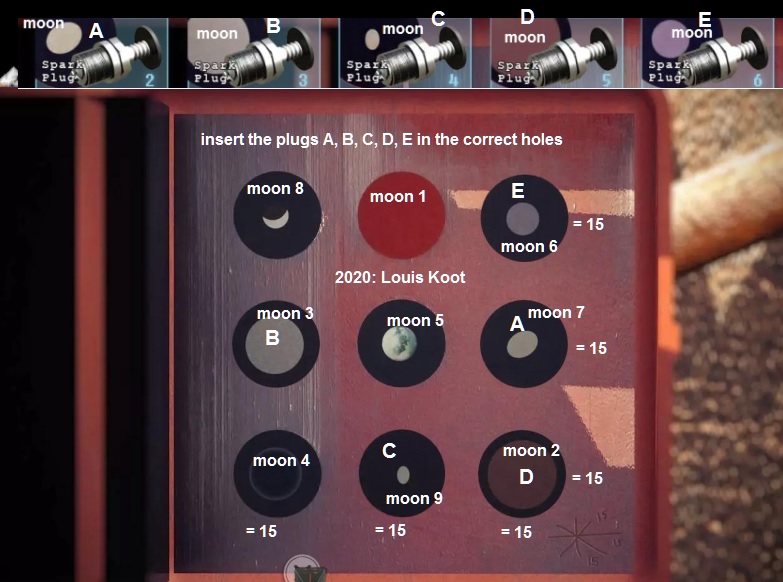
Then look at the spark plugs in your inventory, on those spark plugs you can also see an image of a moon of Catyph.

There are many moons of Catyph but only the first 9 have been used for this.
|
These are the numbers of the magic square. 8 1 6 3 5 7 4 9 2 |
In the Datalog click on Catyph, look at the satellite system and see which number belongs to which moon.
The 4 spark plugs already in the device are: top left is moon 8, top centre is moon 1, centre is moon 5 and bottom left is moon 4.
Now it is not so difficult to put the other spark plugs in the right place.
When you have everything in the right place, click on the black area with the BMS and you will see a Smiley.
You will then hear that there is an incoming message.
Click on the message on the screen, listen and / or read the message.
Finally, he is talking about a password for the Teleport capsule (Pod), it is his own name GERMINAL.
Go to the device in the middle of level 0, on the panel on the right you have to enter the password.
Click on the wooden arrow and place it under the G, then click and click on the right switch.
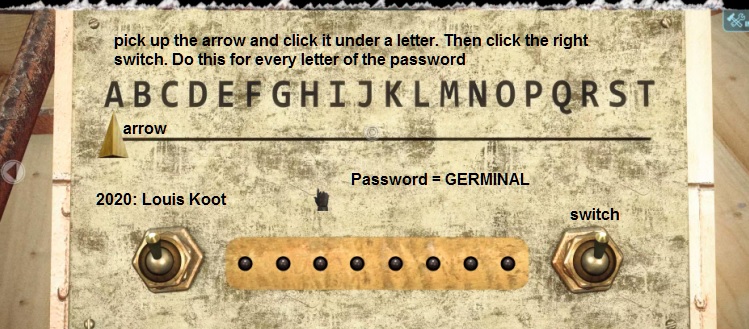
So you have to do each letter, click on the arrow, put it in the right place and click, click on the right switch.
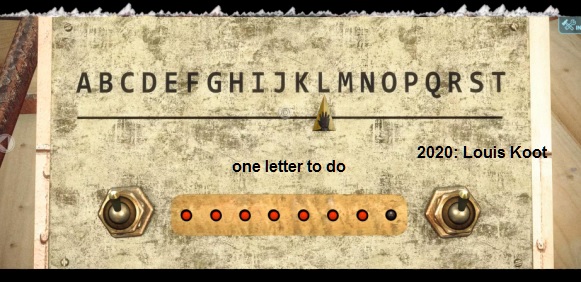
If you have entered the password, GERMINAL, correctly, the capsule will open.
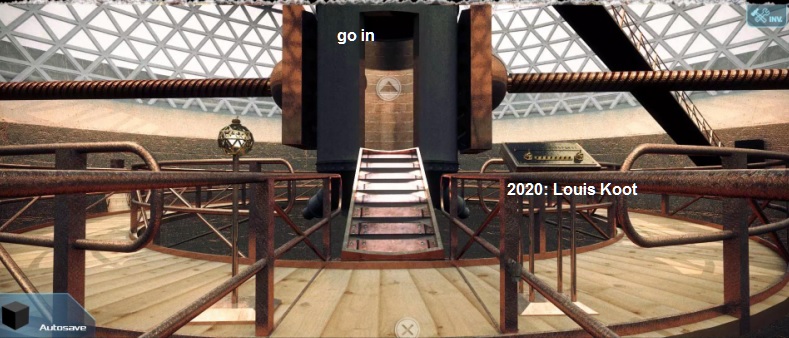
Sit in the capsule and look down first, t
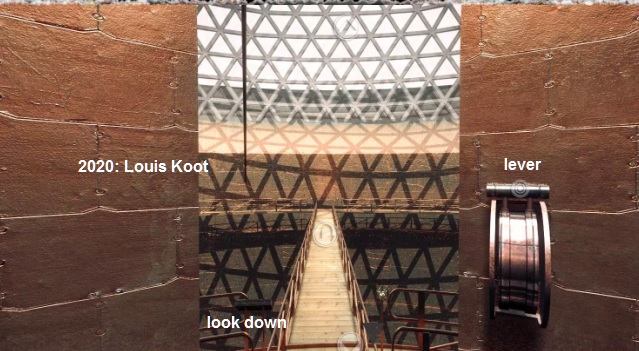
here you will see a small black cube.

Look up again and pull the lever, nothing happens because you have to select a destination first.
Go to level +1, in the middle is a telescope on a platform.
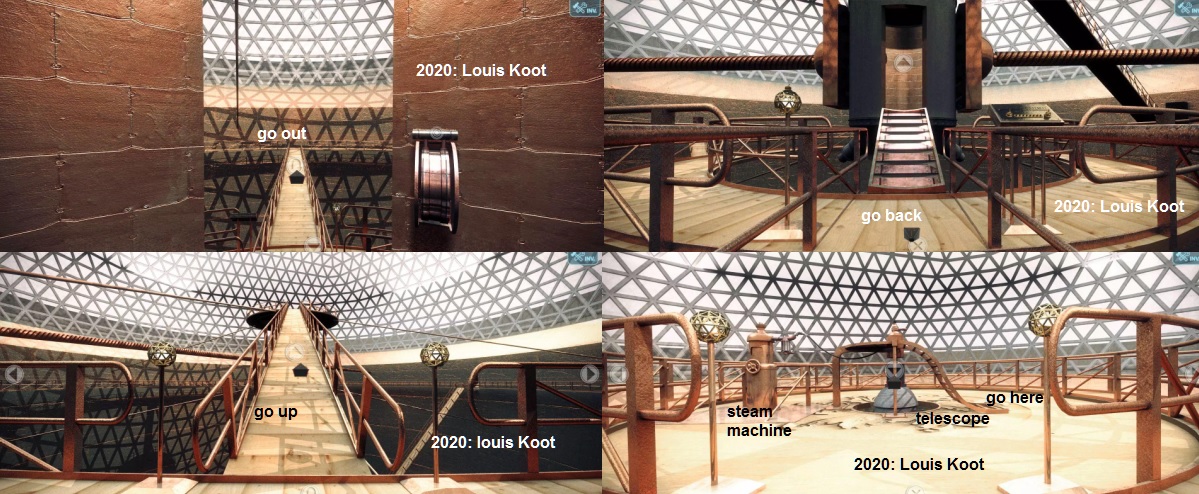
Go to the telescope and climb up.
Stand on top of the device and pull the lever to zoom in, then click on the lens.
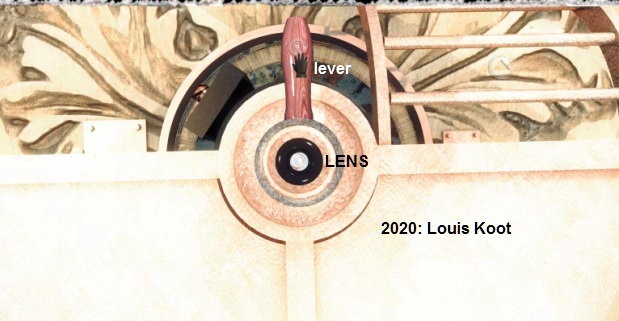
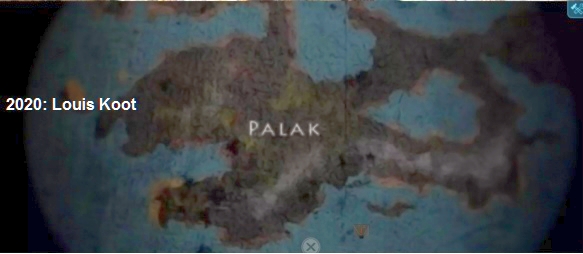
You will see that the destination is Kynan, but you are already there.
You have to choose a new destination here, you can choose from 6 destinations:
1. Palak
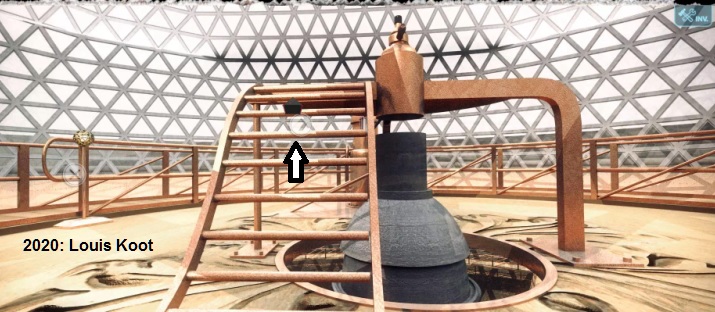
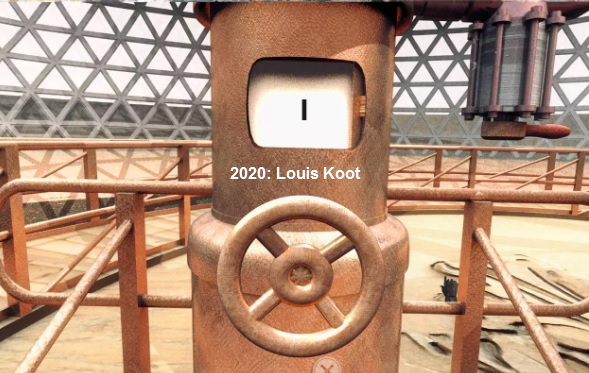
Go to the steam generator that is on the ground in front of the telescope.
Open the hatch, now it says 6.

Move the lever to the other side and click on the wheel, open the hatch and see which number is now here.
You have to click on the handle and wheel a number of times to get the number what you want.
You can check in the telescope if Palak is now selected on the map
When you have chosen the destination, go back to the capsule and click on the sphere on the left, to open the capsule again
The capsule opens, get in and pull the lever and...........
A little later you are at your destination.
2020: Walkthrough by: Dick Leeuw
Text by Dick Leeuw. Screenshots by: Louis Koot