2020: Walkthrough by: Louis Koot
If you have found this walkthrough via google search or via another site then you have probably not visited my site.
A lot more very detailed game walkthroughs can be found on my site at: www.pcgameswalkthroughs.nl
Indiana Jones Fate of Atlantis can be played entirely with your MOUSE. Indiana Jones stories are set in a time just before, during and just after the 2nd World War. So in this game Indy takes on the Nazis. To be clear ... This is not a fighting game but a point and click Adventure game. But in 1 of the 3 scenarios there will be fist fighting, but that really does not amount to much.
You open the menu screen, where you can Save, Load and exit, by pressing your F1 key.
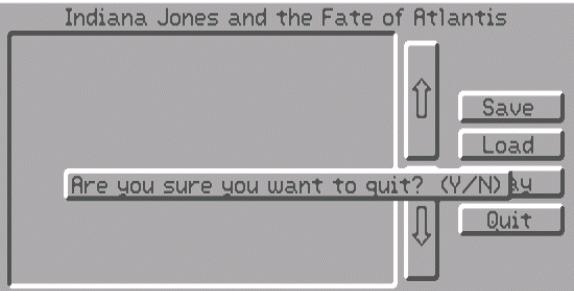
If you want to save, click on Save. If you want to load, click on Load. If you want to exit, click on Quit and then on your Y-key.
If you want to save then click on Save. You will then enter the Save Game screen.
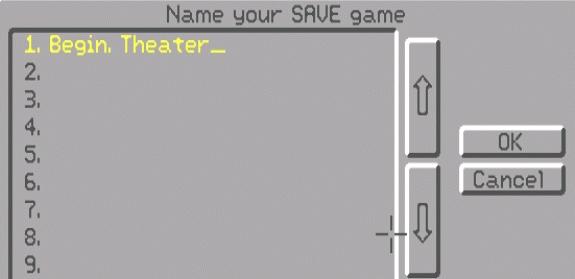
In the Save Game screen, click on a number in the screen and then type a name for your Save Game. Then click OK.
You can play the game according to 3 scenarios. At the end of the General Chapter 1 you have to choose which scenario you want to play. You can choose from the Sophia scenario, the Thinking scenario and the Fighting scenario. This Walkthrough deals first with the General Chapter 1, then I do Chapter 2: The Sophia scenario. Then I do: Chapter 3: The Thinking scenario and finaly I do Chapter 4: Atlantis.
General Chapter 1 is the same for each of these 3 scenarios. Some things and puzzles are different every game. At the very end of Chapter 4 I will give the solution for the endgame and how best to use the 3 stone discs if you need to use ALL 3 of them. This solution is the same in all three scenarios.
The search for the "The Lost Dialogues of Plato" book:
Barnet College
Indiana Jones dives through a window at Barnett College and finds himself in the College's cluttered attic. The attic is full of archaeological items such as statues and urns. Our Indy is looking for a specific statue. If you like, you can look around and click on everything you can click on. Indy will not grab anything, but has some comments to make. However, the intention is for to find that specific statue as quickly possible.
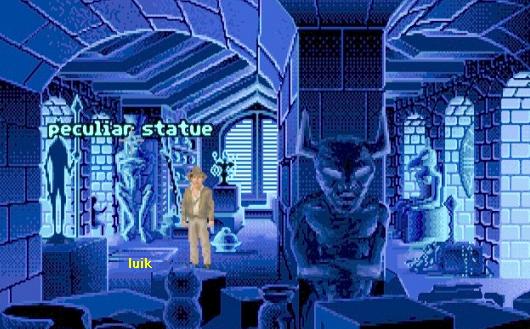
To the left, behind Indy, stand a peculiar statue in the corner. There is a hatch in the floor in front of that that peculiar statue. Click on the "Peculiar" Statue and ..... To view the statue more closely Indy will stand on the hatch in the floor and ..... the hatch breaks and Indy thunders down through the hatch hole and ends up one floor below in a storage room
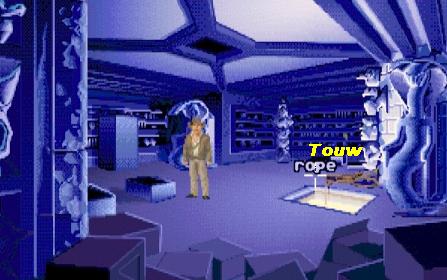
You can also look at everything in this storage room, but again Indy will not take anything. To the right is a hatch hole in the floor and there is also a Rope at that hatch hole. Click on the Rope and ..... Indy loses his balance and falls again through the floor hole and ends up on the floor of the Library.
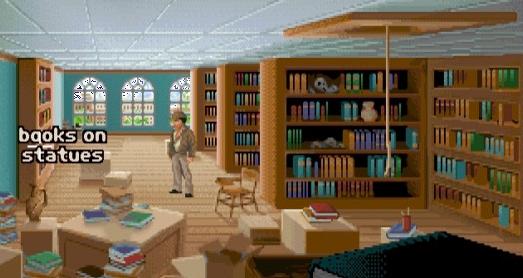
You have to wait for Indy to regain his senses. There is a school bench and there are bookcases full of books about pots, tools, weapons, excavation sites and statues. The rope Indy was trying to pick up is dangling down from the hole in the ceiling. The bookcase on the far left of the wall contains books about statues. Click on the left bookcase to extract a book and ..... unfortunately ... the bookcase falls over, on top of Indy and ..... the floor collapses and Indy falls down again and is a bit of the world again
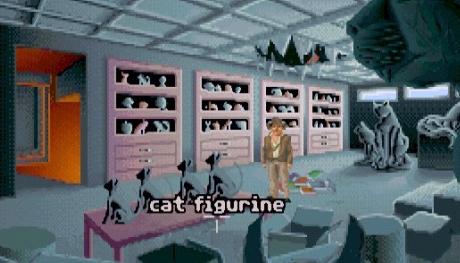
Another storage room. On the long table are 4 Cat figurines. The table stand opposite an orange niche and in that niche is a "coal slide" to the boiler room. Click on the leftmost cat figurine and ...... The left cat statue turns out to be a real cat who does not like to be touched. Indy is startled and staggers backwards into the niche and thunders down the slide into the boiler room. On the wall are 3 locker closets. When Indy has woken up again, click on each of the 3 locker doors to open them. In 1 of the 3 lockers Indy finds the Horned Statue that he is looking for. The statue can be in any of the 3 lockers, so you have to open all 3 of them.
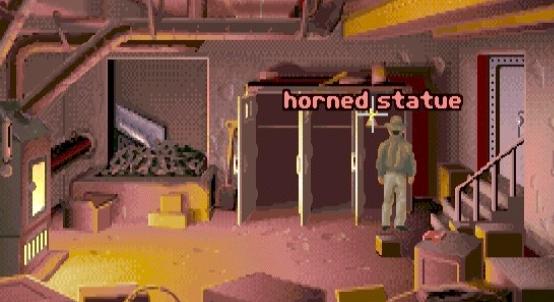
Indy doesn't automatically take the Horned statue out of the locker, so click on the statue to take it.
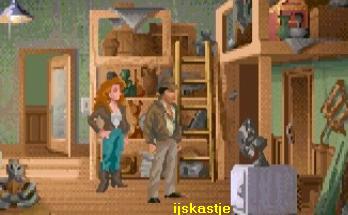
When Indy takes the statue out of the locker, he automatically goes back to the office. In the office, Marcus and Mr Smith are waiting for Indy.
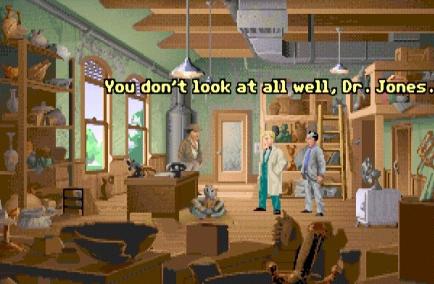
Mr. Smith asks Indy if he has found the horned statue of the bull.
Smith has a key that fits in the lock in the bottom and he asks Indy to open the statue. A small metal bead emerges from the statue.
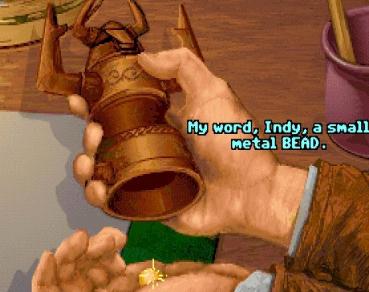
Indy says the statue is a fake. Mr. Smith pulls a gun and threatens Indy and Marcus and demands the statue. Indy then distracts Smith with a question about an getaway car. Mr. Smith then turns around to look out the window, and Indy then jumps on top of him. A short fight follows. Mr. Smith manages to flee with the statue, but he has to leave his jacket behind. In the jacket Indy and Marcus find a passport. Mr Smith is actually called Klaus Kerner and is a secret agent in the service of the Nazi Germany and Hitler.

Indy now confesses to Marcus that the statue is not a fake at all. Furthermore, Indy and Marcus find an old episode of the National Archeology magazine in the jacket.
The article is illuminated with a photo of Indy and his ex-assistant Sophia Hapgood.
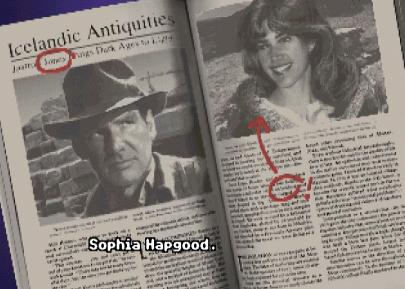
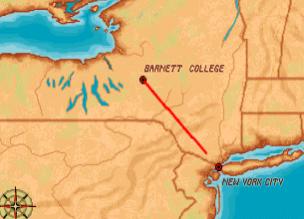
The article is about an excavation on Iceland that Indy was in charge of a few years ago, together with Sophia Hapgood. Indy tells Marcus that Sophia is now a medium and teaches paranormal matters in New York. Indy decides to go to New York to warn Sophia about the German spy. So Indy takes the plane to "The Big Apple"
New York:
Outside the Theater.
Indy stands at the entrance of the theater where Sophia Hapgood gives her paranormal performance.
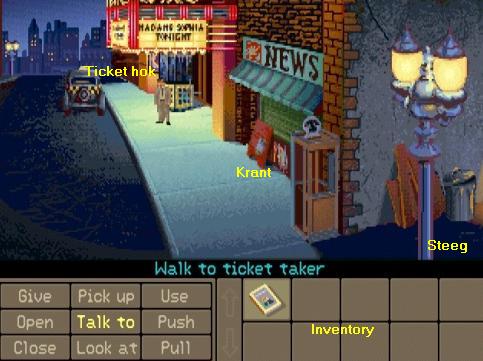
Below the play screen you will now see the Actions screen which contains the actions that you can have Indy perform. The screen at the bottom right is your inventory. You have the National Archeology journal in inventory. To have Indy perform an action, click on the action in the Action screen and then in the play screen where Indy must perform that action. However, you can also sometimes right-click to perform a certain action. For example, if Indy has to open a door, right-click on the door to open the door immediately.
The theater has a ticket booth that houses the ticket seller . In the Actions screen, click "Talk to" and then place your cursor on the ticket booth so that you read "Talk to ticket taker". Then click to talk to the ticket seller. The person in the ticket booth says the show is sold out. Some conversation options will now appear at the bottom of your screen. Click one of the conversation options, no matter which one, to get Indy to answer. Indy is not allowed to enter because the show is completely sold out.
There is a telephone box on the corner. Behind the telephone booth is a shop that sells newspapers. The store is now closed, of course, but in front of the store is a sign with 1 newspaper left. View the newspaper, so click Look at newspaper. The newspaper appears to be today's newspaper. In the Actions screen now click Pick up newspaper and Indy takes the newspaper. The newspaper disappears to the inventory. In inventory you also use the commands in the Actions screen to view, take and / or combine items.
The alley starts at the telephone box. Walk one screen to the right, to enter the alley. Indy arrives at the side door of the Theater. There are a lot of crates in the alley. Indy can enter the theater through the side door or by pushing crates out of the way. There are 3 ways Indy can enter the theater here. If you want to try all 3 ways, I suggest that you now save your game. Way 3 is the ideal way to get in. I enter through Way 3, but I will explain Way 1 and way 2 first
How to get Indy into the theater:
|
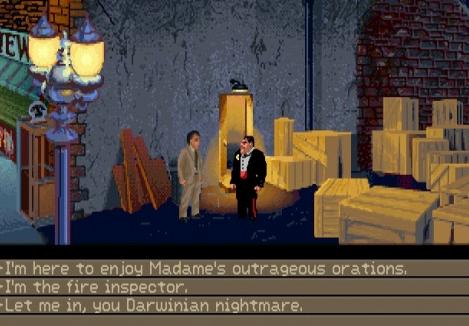
Way 1: Talk your way in: Right click on the side door and the door opens and Biff comes out. Biff is the doorman / bouncer of the theater and his job is to prevent unauthorized persons from entering through this side door. Conversation options appear.
To be let in by Biff you have to use the right conversation options. Not only is Biff big and heavy, he's also a big fan of Sophia, so now you should only use those options that say good things about Madame Sophia.
Indy is now allowed to enter and ends up on the stage where Sophia is talking. Way 2: Beat Biff: Talk to Biff but piss him off now. So use these options:
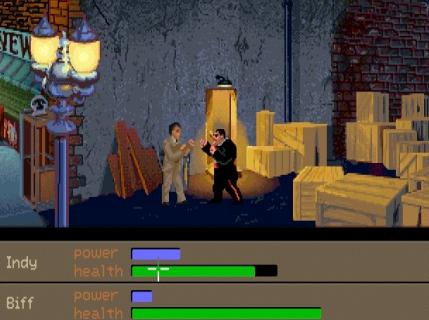
Biff is getting really mad now and you have to fight with him now. Indy and Biff's health meters appear at the bottom of the screen. You must hit Biff now to make sure that his green meter is empty before Indy's green meter.
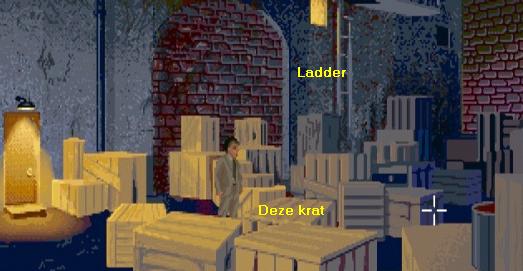
Click on Biff's head in quick succession to get this done. This is the only way you can fight ... by clicking on your enemy and the best thing to do is to click on the head. If you hit Biff faster than Biff hits Indy, Biff will be out earlier than Indy. If you're too slow, or not accurate enough, Indy won't make it. When Biff is unconscious on the floor, you walk in through the side door. Indy also ends up on the podium. Way 3: Get in through the fire escape: (the best way) Walk in the alley as far as possible to the right. You will see many more crates and ..... you will see the fire escape ladder. To reach the ladder, Indy now has to push some crates out of the way and you do that with the "Pull / Push" commands. So first click in the action screen on "Pull" or on "Push" and then on the crate you want to slide / pull out of the way.
So "Push", the front crate forward. Then continue to the right. Push the next crate forward and then walk a little further until Indy is behind the crate you moved first.
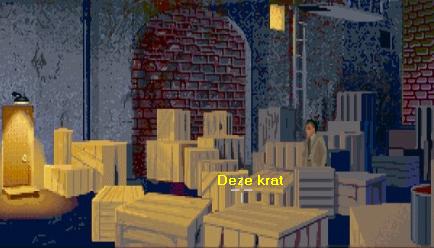
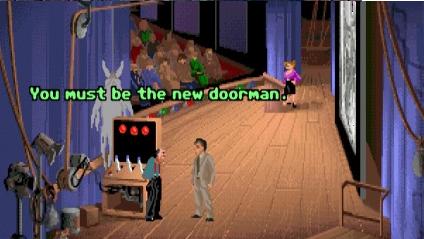
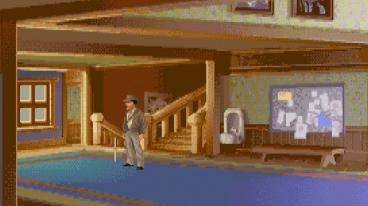
Now slide this crate back via "Push" and then walk a bit further. Indy is then at the last boxes behind which the fire ladder hangs. Push the next crate away and then click on the Fire Ladder and ... Indy climbs up the fire ladder and ends up on the Podium and is immediately addressed by the Stage man. The man thinks Indy is the new doorman.
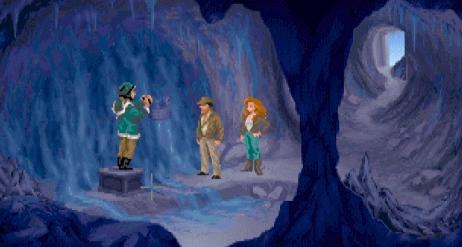
Give the man an answer. The "conversation" is then ended automatically. Talk to the man again, so click on the man with "Talk to ..." and ...... You will now see the Sophia Hapgood Show and you have to look at it patiently. Sophia talks about Atlantis and shows a few slides on the big screen. Then you return to the intern. Click again with "Talk to" on the intern to see the continuation of Shopia's show. Sophia goes on to talk about the destruction of Atlantis and also about Nur-Ab-Sal ... the Great Spirit who guides her. You will then return to the Stage man. Talk to the man again and use the following options: "Isn't there something you'd rather be doing?" If Indy gives the man something to read, the man will leave here for a moment to read somewhere quiet. So click in the Actions screen on "Give" and then in inventory on the Newspaper and then click on the Stage man (Give newspaper to stagehand) to give the newspaper to the man. The man now disappears with the newspaper and asks Indy to guard the lamps. The cabinet, in front of the man, is the control console for the Nur-Ab-Sal doll, which hangs on a rope in front of the cabinet. The cabinet has 3 levers and a red button. In the screen of the cabinet you see 3 red lamps. You now have to click on the levers to make the 3 red lights green. For this you use the "Push" command. So click on "Push" and then click on the left lever. The 3 lamps turn yellow. Click on Push again and then on the right lever and ... the 3 lights will turn green.
Click on "Push" again and then on the red button and ..... |
The Nur-Ab-Sal doll goes crazy and Sophia is forced to end her show prematurely. Sophia then sees who is responsible for sending the doll and she goes to Indy. Indy and Sophia go to the office to talk to each other there. Indy and Sophia go to the office. It appears that the office has been burgled and Indy thinks that Kerner is the perpetrator. Indy walks outside for a moment, but sees no Kerner. When Indy goes back inside, we see that Kerner show up behind the boxes. Kerner makes a phone call and then disappears. Back in the office there is a conversation between Indy and Sophia in which you have to use a conversation option a few times
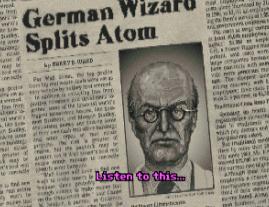
Sophia says that it was reported in the newspaper that a German scientist managed to split a uranium atom. In this way he wants to provide the Third Reich with energy. Because practical application of this is still miles away, the Nazis are already looking for the power of Atlantis
Indy doesn't take Sophia seriously, although he thinks she's a good scientist. Use the option 'Yet you've been concealing important artifacts'. Indy and Sophia then have an altercation because Indy thinks that Sophia should not have stolen important archaeological finds. But Sophia thinks she should keep something for herself. Sophia then changes clothes behind the folding screen and tells Indy to take a small copper bead from the drawer in the desk. Indy finds the bead and Sophia then puts the copper bead in her necklace
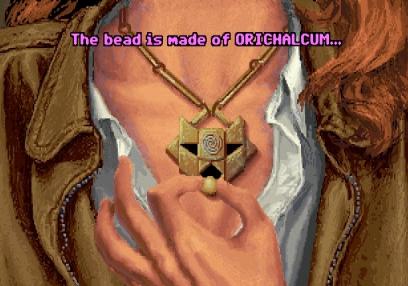
The bead is said to be made of "Orichalcum", a material that Plato described in his book about Atlantis. For a moment the light flashes and the earth trembles and the spirit of Nur-Ab-Sal appears. Sophia says the "Spirit" is very close. The "Spirit" tells her that in order to find Atlantis, they must first find the "The Lost Dialogue of Plato" book. Indy doesn't believe it all. But in the end, Indy decides to go to Iceland with Sophia. Back to the spot where Sophia found the necklace. A certain Björn Heimdall is now excavating there. We then end up in:
Iceland
I assume that you now know how to perform certain actions through the commands from the action screen.
From now on I will no longer explain this in detail. I now restrict myself to say "Talk to ...." "Pick up ...." etc ......
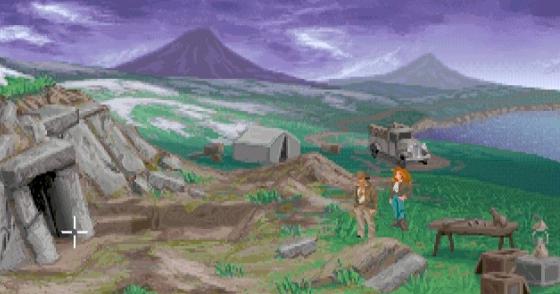
Indy and Sophia have arrived at the excavation site on Iceland. On the left is the entrance to the cave where the excavations have occurred.
So walk into the cave. In the cave, Dr. Heimdall busy beating an icy object from the icy cave wall.
Talk to Dr. Heimdall and use a few conversation options until you can ask Heimdall about Plato's Lost Dialoque book. Then ask: "Have you ever heard of" Plato's Lost Dialoque "? Heimdal tells you to talk to someone who's called Costa and one Sternhart. Leave the cave and walk outside and to the truck Click "use" on the truck and ...... Indy and Sophia drive back to the airport and the map will appear on your screen.
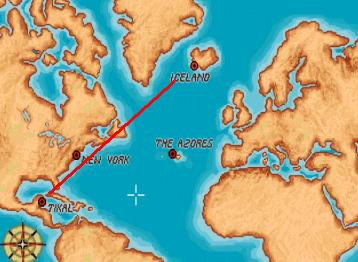
You now have to "tell" the game where you want to travel to now. You can go back to New York or the Azores or Tikal.
Click on the Tikal location and ...... we will end up in:
Tikal.
|
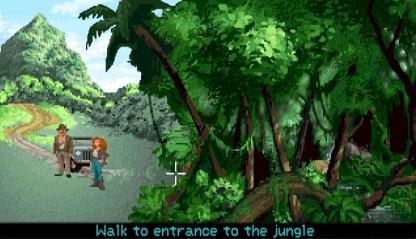
Jungle:
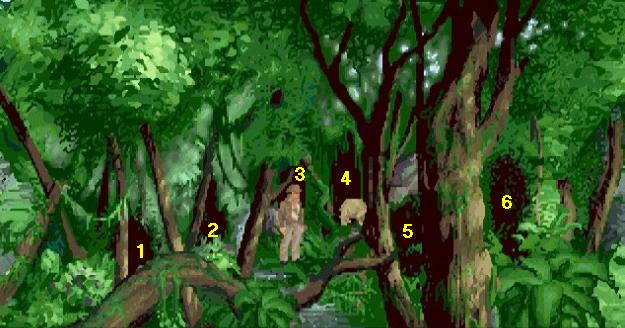
Indy and Sophia have landed on Tikal and are at the edge of the jungle. In your inventory you have Indy's Whip. To the right is the Entrance of the jungle. There is a wild boar (rodent) on the jungle path. Walk into the jungle path to the wild boar. Then walk on and ..... the wild boar also walks away and then goes stand further up. There are now 6 dark paths Indy can walk take. All 6 paths are called "Dark Jungle Pad". Number the paths, from left to right, 1, 2, 3, 4, 5, 6. The wild boar stands at path 3.
Take path 4 and..... Indy comes out of the jungle on the right side and he is at the ravine.
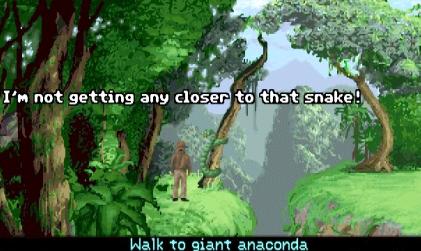
Indy has to cross the ravine to the other side. But how? There is a bare tree trunk on the edge. However, the tree trunk contains a dangerous Anaconda snake. If you try to make Indy click in the tree trunk, Indy refuses to do that because of the Anaconda. Walk back into the jungle. Indy comes out of the entrance to pad 4 again.
...........the Anaconda likes this tasty snack and takes the pig in a stranglehold. Anaconda with boar then disappear into the ravine. Now walk back to the ravine through path 4. Click "Use" on the tree trunk and Indy climbs into the tree trunk, the tree trunk then bends over the ravine and Indy lands safely on the other side
Indy is greeted by Sophia who has found a much easier route to get here. Well .... that is a joke according to the Lucas Arts tradition. Talk to Sophia for a moment and then finish. We end up at |
Temple:
In the tree on the left sits a Parrot. On the right is a souvenir window. An oil lamp hangs in the souvenir window. Walk to the temple and .....
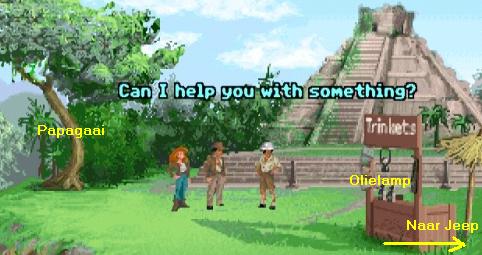
Dr. Sternhart comes out of the temple and tells Indy not to like the temple. Sternhart asks what Indy is doing.
|
Use these conversation options: "I hope so, Mr ....." "What can you tell us about" Plato's Lost Dialoque? " "What can you tell us about the Temple?". "Why aren't we allowed inside?" Sternhart first wants to know whether Indy and Sophia are not ordinary tourists. Sternhart only allows real scientists to view the temple from the inside. So say, "I'm Dr. Indiana Jones, is that scholarly enough?". However, Sternhart is not impressed, So continue with "I'd really like to explore the temple". |
Sternhart now wants you to tell him the title of Plato's Lost Dialoque book to prove that you really are a scientist. You will now receive a list of names from which you must choose the correct name. However, you do not know the correct name and if you click on the wrong name you will not got a chance to correct your mistake, so say "I don't know the title". Sternhart disappears. To enter the temple, Indy must therefore tell Sternhart the title of Plato's book.
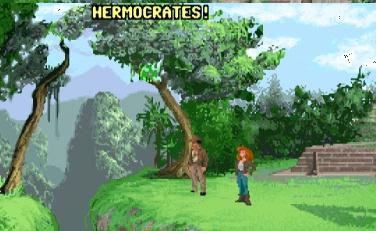
During the conversation with Sternhart you occasionally heard that parrot sitting in the tree.
Walk to the tree and talk to the parrot. Ask the parrot "Title" and ..... the parrot calls the title of the book and that is "Hermocrates".
Walk back to the temple and Sternhart will reappear. Talk to Sternhart again and say "About exploring the temple ...." and .... Sternhart asks again for the title of the book, so now say: "The Hermocrates" and .... Indy and Sophia may now enter the temple. Sophia tells Indy that she does not trust that Sternhart and then we end up in the temple. On the left is an Animal head on the wall. In the right foreground you see, left and right, Spirals on the wall.
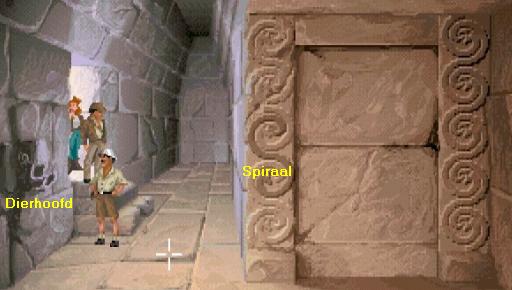
Look at the Animal Head and the Spirals. The Animal Head is missing a nose. Those Spirals are beneath each other. Indy says that the bottom spiral, in the left row, is etched deeper into the wall. It is annoying that Sternhart keeps an eye on everything. When you leave the temple again, Sternhart will walk out also. Sternhart must therefore be kept busy for a while.
Talk to Sophia and ask her to keep that Sternhart busy for a while, so say, "Could you talk to Sternhart and keep him occupied?". Sophia goes to talk to Sternhart in the corner. Now walk back outside and then continue to the souvenir shop. There is an oil lamp in the souvenir shop. Take the oil lamp (pick up kerosene lamp). Go back into the temple.
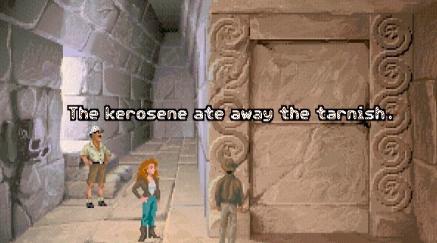
In inventory you have to open the oil lamp, so click "Open" on the oil lamp to open the lamp. Click with "Use" on the oil lamp and then click on the bottom spiral of the left row of spirals (use kerosene lamp with spiral design). The kerosene from the lamp eats away the tar and Indy can now take the spiral.
So click "Pick up" on the spiral to get it. Then use the Spiral on the Animal Head.
Indy hangs the spiral on the animal's head, which now resembles an elephant's head. The spiral is now the nose of the "elephant".
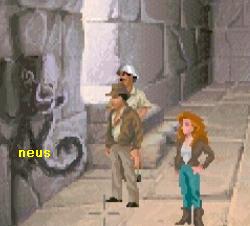
Click "Push elephant's nose" and ..... a secret compartment will open in the wall.
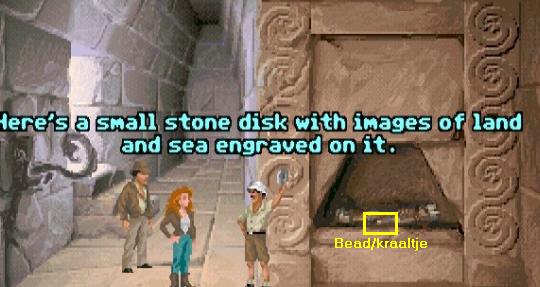
The secret compartment is the tomb of an Atlantic King and Sternhart finds a World stone in it, Sternhard grabs the World stone and disappears through a secret door in the gray wall. In the compartment, there is still a yellow copper bead. It is such an Orichalcum bead. Take that yellow Bead. Leave the temple. Right behind the souvenir window is the path Sophia has taken (Walk to path around jungle). So take that path to return to the jeep. Then use the Jeep and then fly back, through the map to:
Iceland:
Enter the cave again. Dr. Heimdal is now frozen in the cave.
View the spot in the wall where Heimdal was busy with here pick axe (ice-obscured object). It turns out to be an eel head. Look at exposed eel head.
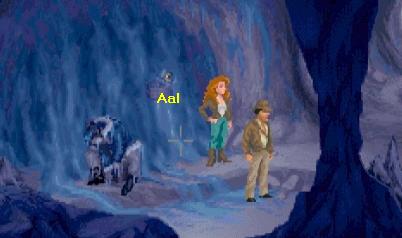
Indy says that a bead fits in the mouth of the eel. So take the Bead from your inventory and then Use orichalcum in exposed eel head. Due to the heat of the bead, the ice melts and you can grab the Eel head. So Pick up eel figurine. You then have an Eel statue in your inventory. Leave the cave and use the truck again and now fly to the:
Azores:
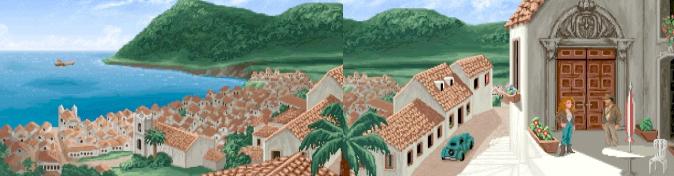
Indy and Sophia have arrived at the house of Dr. Costa. Knock on the door and Costa puts his nose out the door. Talk to Costa and ask "I hear you know something about Plato's Lost Dialoque?". Then say, "I'm Indiana Jones" and ..... Oops ..... that was not good. Costa does not want to talk to Indy further and slams the door shut. Sophia thinks she will be more successful, so talk to Sophia and say, "Here, you talk to the man." You will be Sophia for a while. Knock the door again as Sophia and Costa is coming out now. Talk to Costa and use these dialoque options:
|
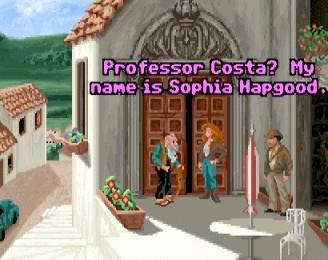
"Professor Costa? My name is Sophia Hapgood"
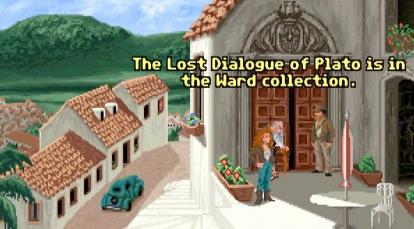
Costa only wants to tell where the Plato book is when Indy and Sophia give him a precious Atlantic artifact. Costa wants Sophia's necklace, but Sophia refuses to give it up. Say, "Would you do business with my friend here?". Costa now wants to talk to Indy about a deal. So talk to Indy and say "I think you better take over" and .... you're Indy again. Knock on the door again and talk to Indy again and say "Let's talk about a trade" and then "I'm offering this mysterious eel figurine". Costa is now willing to exchange his information for the Eel figure and he will tell you where to find the Plato book. Costa mentions the name of a collection of which the Lost Dialoque book is a part. Costa then goes back into his house and Indy then calls that the collection is owned is from Barnett College. The name of the collection where Plato's Lost Dialoque book can be found, and which is therefore mentioned by Costa, differs per time. The name of the collection, which you will hear from Costa here, can be
NB: There are probably more Collection names that Costa can give. So I can't tell you which collection name you hear from Costa, so remember the name because you have to go find that collection at Barnett College. I received from Costa de Ward collection as the collection in which the Lost Dialoque book is hidden. The Dunlop, the Ward and the Spraque collection are the names that Costa is most likely to mention.
|
So Indy and Sophia have to go back to Barnett College and meanwhile we see an scene with that Nazi spy Kerner in a laboratory somewhere in Germany.
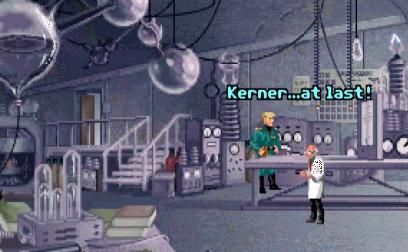
Klaus Kerner meets with Dr. Übermann. Kerner shows the stolen statue and convinces Übermann that it comes from Atlantis. Übermann puts the Orichalcum bead, which was in the statue, in the mouth of the statue. The force that is created is strong enough to drill a hole in the concrete wall. Übermann is enthusiastic. We are then back at:
Barnett College:
Sophia wants to know why they are back here, say "Plato's Lost Dialoque should be here somewhere". Sophia asks if she should help search, but Indy prefers not to, so say "No thanks. You'd just get in the way". Sophia disappears and will wait for him in Indy's office. The building across the street is where Indy's office is. Follow Sophia to the office (Walk to office door).

In Indy's office, on the right, is a small refrigerator (ice box). Open the refrigerator.
There is a jar of mayonnaise in the refrigerator. Take the jar of mayonnaise from the refrigerator.
Leave the office again and when Indy is outside on the street again, click at the left side of the screen to re-enter the exhibition building. Walk to the left to the stairs.
Indy now has to find the Lost Dialoque of Plato book here at Barnett College. There are 5 places where this book can be hidden. Where you will find the "Lost Dialoque of Plato" book depends on the collection name you have heard from Costa. Those 5 places are always the same, but the names of the collections in those 5 places can also be different every time. So I can't exactly help you here, so I'm going to take you to all those 5 places and then tell you what to do there. Go down the stairs to the:
Boiler room:
On the right is a chest and on that chest is a Dirty Old Rag, take it.
A pile of coal now lies in the coal pile to the left of the cupboards. Grab a Coal.
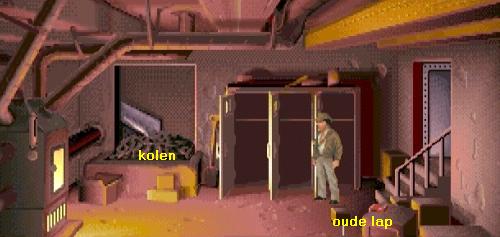
Walk out the door again. You end up back in the hall. Now go up the stairs to the:
Library:
To the right of the fallen bookcase is an old school desk. Look at the school desk.
Indy says there is gum stuck under the school desk. Pick up the gum.
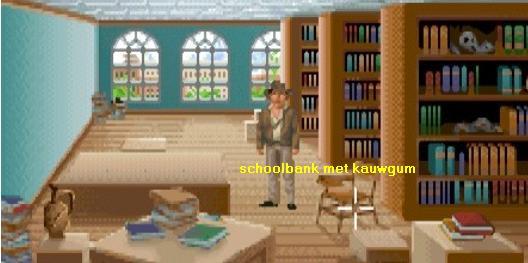
On the left is the fallen bookcase. View the fallen bookcase. Indy then says that the books in the cupboard are part of a Collection and it may be that this is the collection that Costa has washed. The rope still hangs from the hole in the ceiling. Climb up through the rope to the:
Between attic:
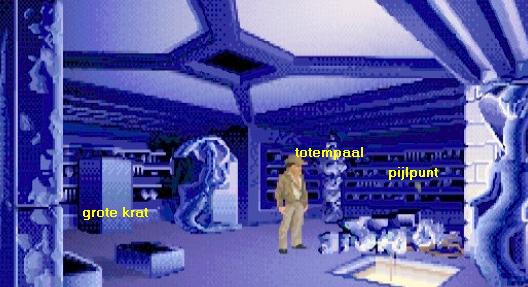
This is the attic room directly above the library. At the back, in the corner, stand a Totem pole. In the cabinets, to the right of the Totem Pole, is an Arrowhead. At the left cabinets is a big crate. Push the big crate to the right, so click. When Indy has pushed the big crate away, see a dusty old Chest in the cabinet
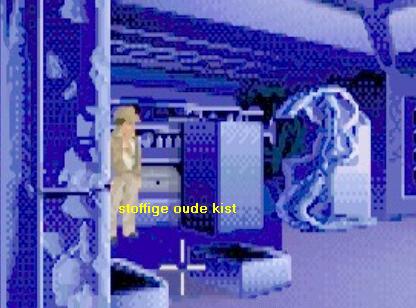
Check out the dusty old chest. Indy will then tell you the name of the collection of which this chest is part. Perhaps this is the Collection that Costa has mentioned. The chest is locked. Take the Arrowhead. In the ceiling is the hole through which Indy fell down early in the game. Use jar of Mayonnaise on the totem pole. Indy lubricates the bottom of the totem pole with the oily mayo. Now click twice with Pull on the totem pole to place the totem pole under the ceiling hole.
Then use the totem pole and .... Indy climbs up and ends up on the:
Upper attic:
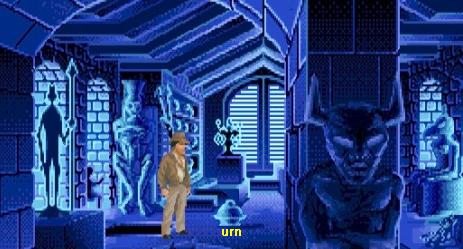
So Indy is on the left side of the attic. An Urn is on the floor next to Indy. View the Urn. Indy tells that the urn is a funeral urn and is part of the collection that also includes the old dusty chest. Open the Urn. Then view the opened urn again. There is ashes in the urn. Now click with "Pick up" on the opened urn and .... Indy takes a dusty key from the urn. Climb through the floor hole back down to the
Between attic:
Use dusty key with dusty old chest and ....
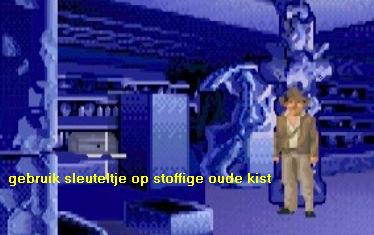
If this chest belongs to the collection from which you got the name of Costa, Indy will now find the "The Lost Dialoque of Plato" in this chest.
If Costa has named you another collection then Indy will not find the Plato book is in this chest. You will then have to search further for the book
library
In the library, the left bookcase is flat on the floor. The bookcase is with the back up. The back wall of the bookcase is screwed with 5 screws.
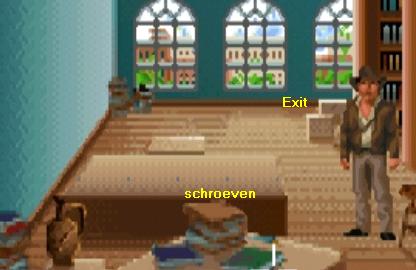
In inventory, use arrowhead with dirty rag to wrap the old lap around the arrowhead. Then use the Arrowhead on each of the 5 screws in the bookcase to unscrew each screw individually. You always have to click "Use" on the arrowhead and then use the arrowhead on each of the 5 screws. Indy keeps saying the screw is unscrewed. When you have unscrewed all 5 screws from the cabinet, click "Open" on the bookcase and .....
Indy lifts the back wall and .... finds the "Lost Dialoque of Plato" book when Costa has given you the name of this collection. If the collection in this bookcase was not the collection Costa has told you, the Indy will not find it Plato book in this bookcase. You will then have to search further,
Boiler room:
Use the chewing gum on the coal chute in the coal niche. Indy sticks the gum under his shoes.
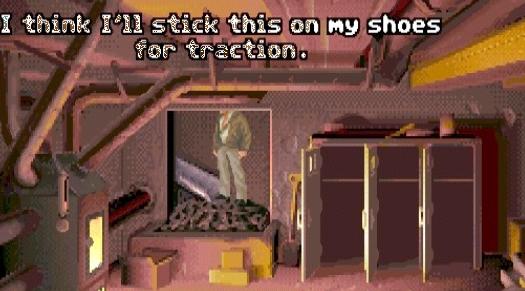
Click on the chute and Indy climbs up the slide and ends up in the:
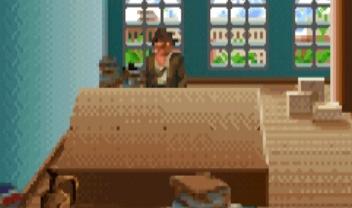
Cat Room:
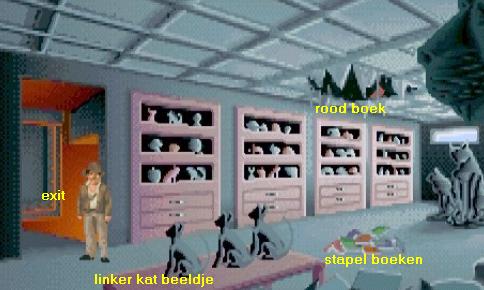
So in the Cat room is the hole in the ceiling, which Indy fell down at the beginning when the bookcase in the library fell on him. So that bookcase lies over that ceiling hole. In the ceiling hole you see a red book. Use lump of coal with book and .... Indy throws the coal at the book and the book falls to the floor. The red book then lies at the stack of books that are already on the floor. Check out the red book. Indy says it is a Script. Take the red book and .... For me it turns out to be the "Lost Dialoque of Plato" book.
For you it could be that you find the Plato book among the stack of books already on the floor here. The 3 cats, which are on the table, are also part of a collection that you may have got the name from Costa. If so, pick up the left cat statue. This cat figurine is made of Wax. Slide back through the chute niche to the:
Boiler room:
Open the door of the large stove / oven and then throw the Wax Cat figurine in the hot oven and ....
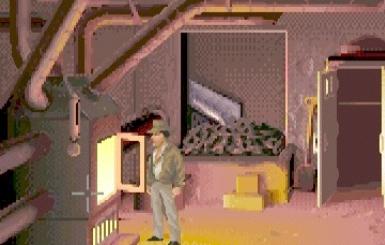
If Costa gave you the name of the collection that this cat figurine belonged to Indy now finds the Plato book in this cat figurine.
Ok ... these were all possibilities where you could find the "Lost Dialoque of Plato" book. So one of these options applies to your game and it depends on the Collection Name you've heard from Costa. When you finally have found the Lost Dialoque of Plato, you will return to Sophia in Indy's office.
Save your Game first because in the office you have to choose from 3 options and your choice then determines how you will continue to play the game.
Indy's Office:
|
Indy reports Sophia that he has found the Plato book. Sophia wants to see the book and Indy shows it to her. You will then get the book large in your screen. You can browse through the book via the paper clips. So browse through the book and read the texts on each page.
During the rest of the game, you will frequently consult this Plato book because it contains instructions on what to do with the Round Stones Discs you are going to find and how to use them. Click at the bottom of the book to put the book away again and then continue talking to Sophia through the conversation options. Sophia starts by asking how this Plato book can help find Atlantis.
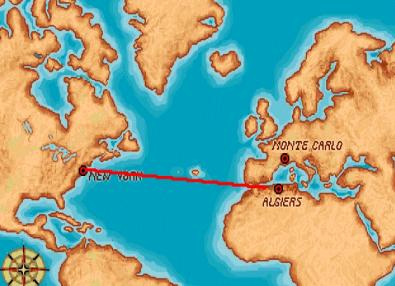
Sophia then wants to know why this is important. There remains 1 possibility for answers and that is: "If Plato is right, Atlantis is in the MEDITERRANEAN". So 300 miles from Greece instead of 3000. Say, "Yes! The cradle of civilization." Sophia thinks Indy is right and then tells that Nur-Ab-Sal said he is from the Center of the Earth, and Mediterranean means Center of the Earth. Give Sophia 1 of both possible answers. Sophia feels a vision coming up and stands up with her hands high up in the air Use 1 of the 4 possible answers again and Sophia will tell about the Worldstone stolen by Sternhart. Sophia says that she bought this World stone from a certain Al-Jabbar in Algiers. Ask: "Why should he help us?". Sophia is in doubt and says she could have bought the World stone from a certain Allain Trottier in Monte Carlo. Say "I'm ready to go" and Sophia will talk to Indy for a while and then you will have a choice of 3 options Which option you choose now determines how you will continue to play the game, with or without Sophia. You now have 3 options to answer Sophia 1. You're right, I better think this through alone 2. I'd rather tackle this together with you. 3. I'd rather go into action by myself Option 1: The Thinking scenario: If you say "You're right, I better think this through alone", Indy will continue alone, without Sophia. but will meet up with Sophia in Atlantis This is the Thinking scenario. There are many puzzles to solve, but less than in the Sophia scenario. There is no fighting. Option 2: The Sophia scenario: If you say, "I'd rather tackle this together with you," you're going to play the Sophia scenario. This is the TEAM scenario in which Indy and Sophia set out together, all the way to Atlantis There are many puzzles to solve and Indy and Sophia have to work together here and there. Option 3: The Fighting scenario: If you say: "I'd rather go into action by myself", Indy continues alone but will meet up with Sophia at Atlantis This scenario contains very few puzzles but a lot of fighting. Indy then fights his way through the game. But of course there are also a few puzzles to solve |
This walkthrough will cover all 3 scenarios but I will now start with the Sophia Scenario, so Indy and Sophia continue together and many puzzles have to be solved. If you want to keep following the walkthrough logically, you now say: "I'd rather tackle this together with you" and then "Yes, I'm sure. We should team up" and then "Let's get going. We can still catch tonight's clipper "..... Indy and Sophia get in the car together and drive to the airport. On the map you now have to choose where Indy and Sophia will fly to. Your choice is Algiers or Monte Carlo. First go to Algiers, so click on the Algiers location and ...
you end up in:
Chapter 2: The Sophia Scenario
2020: English Walkthrough by: Louis Koot