
2018: Walkthrough by: Louis Koot
If you have found this walkthrough via google search or via another site then you have probably not visited my site.
A lot more very detailed game walkthroughs can be found on my site at: www.pcgameswalkthroughs.nl
Chapter 1: J'Nanin Age
A: How to get into the Observatory

After the Linking movie you have landed in J'Nanin and you see the thief Saavredo, dressed in rags, running away from you and then disappearing to the right.

You are standing at a post with a sort of Reflector with a Red Marble on it. This is the 1st Red Reflector.
Ignore this Red Reflector now and follow the thief over the yellow bridge and........
if you were fast enough then you turn right and .......... You see a steel ladder going up to the cliff.

You may just see that Saavredo has climbed up this ladder. Click ahead on the ladder and then look up the ladder and then click up to climb up the ladder
When you reach the top you might just see Saavredo enter the Observatory.

Go forward to the door and then click on the round door window.
You look through the round door window and then you see thief Saavredo walking back and forth with the Releeshan book in his hand.

Zoom out of the round door window and look down slightly and then try to open the outer door by clicking on the door handle.
Unfortunately the door does not open because the door is locked on the inside.
Look around you. You can see that the Observatory, where Saavredo is, is standing on a rock that rises up out of the middle of the lake.
Walk back along the yellow path and then look down and climb back down the ladder

Down again you'll be standing in front of the yellow bridge. Straight ahead you can see a ladder that goes down to the beach.

However, we are not going to the beach yet. Turn left and walk back over the yellow bridge back to the 1st Red Reflector.

Behind the Reflector you see another yellow bridge and a large Ivory "Tusk", which rises up from the sea.

The Reflector has sight glasses that you can see through. You can turn the Reflector through the Wheel. You can stand on all sides of the Reflector to look through the sight glass, but you can also just stand on one side and then turn the Reflector by clicking on the Wheel. This 1st Red Reflector has 3 positions. Click on the wheel to rotate the Reflector and then look through the sight glass. You will see something vague in succession, First you see the water of the ocean and then ... another Reflector with a Purple Marble on it.

Leave the 1st Red Reflector aimed ad that Purple Reflector. If you have turned this 1st Red Reflector 3 times and have seen the Purple Reflector, you zoom out.

Go 3 steps forward, over the 2 yellow bridges, to the large Ivory Tusk. At the tusk, turn slightly to the right and look at the strange black / gold pattern that is depicted in the niche on the tusk. You know what ...... draw that strange pattern on a piece of paper.

When you are done with your drawing, turn slightly back to the left and then you continue 2 times ahead. You will see a round hole in the ground to your left.

Turn slightly to the left and then continue to the hole in the rocky ground, at the end of the cliff.
The Round Stone Puzzle:
Look through the round hole. You see a ladder.

So descend via the ladder. You end up on a walkway in a cave. Depending on how you are standing now, turn left or right and ...
At the end of the walkway you will see an Orange Door. However, there is a strange but nicely carved Round Stone blocking the path

You can not go around the Round Stone, so you can not reach that Orange door. Go stand against the Round Stone for a moment and then turn left. If you look closely you will see a turquoise colored column on the other side, near the rock wall. To the left of the column you can just see a ladder leading up to the rock.

That pillar is your next destination. Walk back to the ladder and climb up the through round hole through the ladder.

When you are back on top of the rock, turn left. You will see the Ivory Tusk again. Now turn completely to the left so that you see the left point of this rock cliff, so far left of the tusk.

Go forward 2 times and then turn right and look down and ..... You are now at the top of the ladder that you saw from the cave.

Go down the ladder and when you're down turn to the right.
You are now at the pillar that you saw at that Round Stone and you can see that cave with that orange door and that Round Stone, which is so annoying in the way.

On top of the pillar are two levers. With these levers you now have to make sure that you get that round stone out of the way. So you have to get that Round Stone all the way to the right side of the cave. The left lever is now lowered and the right lever is now raised. With these 2 levers you can hoist the walkway, where the Round Stone is on, up and down so that the Round Stone will roll to the left or to the right. The idea is that you get that Round Stone all the way to the right, so to the right of the ladder. If you want to use my Solution for this puzzle then you should not start messing around with the 2 levers, because my solution only works from the starting position of the 2 levers.
SOLUTION
Click the left lever 1x.
The left part of the path is slanted and also the ladder is slanted.

Click the right lever 1x.
The ball now rolls to the right and stays at the ladder.

Click the left lever 1x again. T
he round stone is now completely on the right. But the ladder is still slanted and so you can not enter the cave now.
Click once again 1x on the right lever to straighten the ladder again.

Now you can descend via the ladder and then continue to the Orange . Turn right and look up and climb back up the ladder.

Go back to the round hole and climb down again.

Now walk on to the Orange Door and click on the round Door Opener to open up the door.

Then take 1 step forward and ..... You are now in that Tusk. This is the Linking Book Room to the Amateria Age. Thief Saavredo, however, has destroyed the floor of the room to make it impossible for you to cross over to the other side, to that pillar. Look up and you can see the Amateria Linking Book, hanging in a cage.

But because you can not reach that pillar now, you can not lower the cage but you now know where this Amateria Linking Book is.
For the time being you're done here, but you still have enough to do here in J'Nanin.
There is no hurry, so take a moment here f to read the Atrus Diary, which is located at the bottom of your game screen. In order to open the Diary, you first have to "freeze" the screen by clicking with your right mouse button. Then move your cursor down and click with your Hand on the Journal to get it big in your screen. Open the Diary and read it carefully.

Especially important is what Atrus writes about how an Age should be put together.
Atrus diary: A brief summary
Atrus decides not to rebuild the D'ni civilization. It seems better to him to transfer the survivors to a new Age that will be written by him. An Age in which the natural balance in the world will serve as a counterweight to the abolition of civilization. Atrus wants to use Nature as a basis for the new civilization. He thinks that nature will promote mutual trust. Atrus thinks that nature is a safer foundation than energy, that always goes forward and is harder to control. Finally, Atrus decides that he must consider all three concepts for the new civilization if he wants to keep everything under control. A balanced system promotes civilization. This contemplation of Atrus and what he tells about the different Ages, will be at the end of the game of GREAT importance to you.
When you have read Atrus diary, you leave this cave via the gangway and then climb back up the ladder through the round hole.
On top of the rock you turn to the left so you see the Amateria tusk again and then you click 5 times forward to get back to the 1st Red Reflector.

Then, on the left side of the reflector, go 2 more times over the yellow footbridge and then turn left. You are back at the ladder that you can climb down to the beach

Click once to get on the beach via the ladder. Then turn right and then go forward 2 times.

Straight ahead you can see a Parabola Antenna and a Reflector in the distance. That Reflector has a Yellow Marble. If you turn right now you will see that you can also go up to a Blue Reflector here.

However, we are not yet going to the Blue Reflector. Turn left again and go one step further and then turn slightly to the right and ....... At the top of the slope stands the Yellow Reflector.

Go ahead and move your cursor to the left of the Yellow Reflector and then click and ..... You walk up the slope and you are at Yellow Reflector.
Further on you see a pole where once a reflector was on, but Saavredo has that reflector demolished.

Standing in front of, or next to, the Yellow Reflector, turn left until you see the Parabola Antenna in the distance. To the right of the Parabola Antenna there is a pillar.

Click twice to get to that pillar and then look down. You look down at the ocean and the top of the pillar.

On top of the pillar is a turning wheel and in the ocean you can see a Dome rise up out of the water. On the dome you can also see a sort of Parabolic Antenna. The turning wheel on the column has 4 white handles. The Dome must be turned and you do it by clicking on the bottom right handle of the turning wheel. Click 4 times, always on the bottom right handle of the turning wheel to turn the doors of the dome 4 times counter clockwise.

The Dome will then open and via the Antenna on the Dome, Sunlight will now be sent to the Parabola Antenna, to the left of the wheel.
Turn around again so that you see the Yellow Reflector again and ..... the sunlight is sent to the Yellow Reflector via the Parabola Antenna.

Walk back to the Yellow Reflector. Make sure you have the ocean in your back.
If you look closely now, you will see how the Sunlight beam, through the lenses of this Yellow Reflector, is sent to the foot of the Tusk, seen in the distance.

Now turn to the right and you will see further on, on the platform, that Blue Reflector again.

There are 7 of these Reflectors on this island, namely: 2 Red, 2 Yellow, 1 Blue, 1 Green and 1 Purple and you are now the 1st Yellow Reflector.
Turn back to the Yellow Reflector. Now click once with your hand on the revolving wheel of the Reflector to turn the yellow reflector 1 turn.
This will then send the beam of sunlight from this Yellow Reflector to that Blue Reflector.

To check that this is the case, look through the lens of the Yellow Reflector (with the ocean in your back).

If you now see that Blue Reflector through the Yellow Reflector , then it is good. If you do not see that Blue Reflector then it isn't good.
Go out of the close-up and now look to the left along the Yellow Reflector. You can see that pole without a Reflector in the distance. Click twice to get to that pole.

Past the pole the path goes down via a sand slope. Walk one step further and then turn slightly to the right.
You now look down along the sand slope and see that tusk in the distance. You will also see that steps have been carved into the rock under the tusk.

Go 2 times ahead, to descend through the sandy slope. Then turn slightly left and go forward one more time to get to the top of the next slope
 .
.
On top of the slope you turn right and then you look down. Stop for a moment to enjoy the magnificent view. If you look down you will see a stone staircase.
Deep below you can see the lake and the observatory that rises high above the lake. Look up again and take in the environment.

You are high above the central lake and in front of you, you see the Observatory rising from the lake. To the left of the Observatory, you see the Amateria Tusk. If you turn further to the left, and then look further up, you will notice that you are actually at the foot of another tusk. That tusk is the Voltaic Age Tusk and a Parabola Antenna is standing in front of it. If you look at the Observatory again, you see the 3rd Tusk in the far distance to the right of the Observatory. That is the Edanna Age Tusk and that tusk stands about at the Yellow and the Blue Reflector.

Look down again, at the stone staircase, and then go down one click. You end up on a left / right junction in the stone staircase.
To the left it goes up to that Voltaic Age Tusk, but now the door is locked. Right it goes further down, to the lake and that's where you want to go now.

Now go to the right 1 time further down the stairs. You end up on a large white round stone. Turn to the left and you will see that it goes down further via a winding metal walkway.

At the first bend in the winding metal path you see a big rock and you now hear the "Wind Flutes". If you move your cursor over that rock, you will read at the bottom of your screen that this is the "Whistling Rock". Now follow the winding metal walkway further down via 4 clicks. You end up on a lower white rock.

Turn to the right on the white rock and you will see that you have to go further down a stone staircase. You can also see where you end up in the end, namely at the beautiful "garden house" at the foot of the Observatory rock in the lake. Follow the stairs further down and then walk over the path in the lake to the Garden House.
Garden House

Click on the door handle of the door to open the door and then step inside the garden house.

You are in a small hallway and at a lever. Turn slightly to the left and ..... You can see that the gate, the left of the lever, is closed. Click with your hand on the lever and the gate opens.

Step 1 times forward through the now opened gate and you are in the next hall.
Straight ahead you can see the second entrance door of this garden house. Just keep standing and turn right and ........ you are at the next closed gate.

Turn around. You look into a small conservatory with flowers and you see a small pillar with a large, round copper button

Press the button and .. .....You turn back again automatically and you see how that fence is now sliding downwards and that the passage is now free.

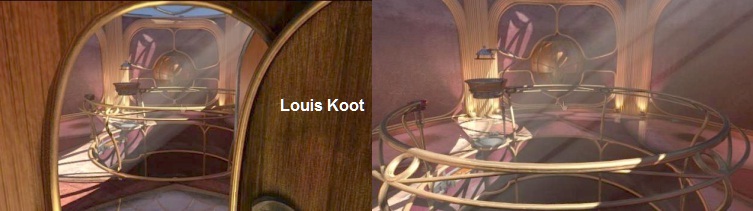
Go 2 times ahead and you enter the round room of the "garden house". In fact, you are now deep under the Observatory. Turn right and walk 1 time forward to the hammock hanging there.

The hammock blocks your way. Turn right and zoom in on the Mobile with the 3 figures, that stand on the stone column.

Click on the puppets in the close Up to run the Mobile. Strange, there are 3 puppets hanging on the mobile, 2 on one end and 1 on the other end, and yet the whole thing is in BALANCE.
Exit the Close-up and turn back to the Hammock. There is a Book lying in the Hammock.

Pick up the book and then open the book. This book is the Journal of Saavredo.
Read this book carefully because it gives you insight into what is going on and also gives you the instructions and even the solution for the up coming elevator puzzle.
Saavedro's Journal:

This journal gives you insight into the twisted mind of Saavredo and how he, revenge fully, spied on Atrus for a long time and reads his books. Saavredo is looking for revenge...... Revenge for the alleged death of his wife Tamra and his two young daughters. You find out that Saavredo comes from another of Atrus's Ages, Narayan, and that Sirrus and Achenar, the 2 criminal sons of Atrus, have destroyed and plundered his world.
You also discover that pages from this journal have disappeared. On your search through the various Ages you should especially look for the missing pages because they tell you more and more about the background of Saavedro's motives, but also because they contain instructions for the puzzles you have to solve. For now see the drawings of the 4 mechanisms on the last few pages. These 4 drawings actually give you the complete solution for the upcoming Lift Puzzle. You also read that Saavredo is not in possession of Atrus latest journal. Close Saavredo's journal when you done reading through it. The journal will be placed next to Atrus's journal, in the black space beneath the game screen.
You should have notice that there are missing pages in Saavredo's journal. From now on you will also have to find and pick up the missing pages from Saavedro's journal. Every time you have found and retrieved a journal page, these pages will automatically be inserted into Saavredo's journal. Then you open the journal again and to read the newly found pages.
When you are finished reading Saavredo's journal, turn around so that you have the hammock in your back.
Now walk 3 times ahead, to continue your walk across this round room. A portrait of a girl is painted on the wall.

Is this perhaps Tamra that you have read about in Saavredo's journal? But why doesn't she have no eyes? Further on you see the round elevator house and the semicircular desk. Walk one more step to the elevator, and then turn right and ....You are now right in front of the half-round desk. Look at everything on the desk because the devices that are on the desk will give you important clues for some of the most important puzzles that you will encounter later in this game. There is a scale on the right of the desk. View the scale. You can move the scale.

The scale has a tray with 4 green / blue Crystal balls on the right. On the left scale, however, there is only 1 brown metal ball on the scale. Yet this scale is perfectly balanced. Apparently the weight of 4 green / blue Crystal balls equals the weight of 1 brown metal ball. Remember this detail because you need this knowledge for a puzzle in the Amateria age
Turn left and you'll see 2 devices that are connected by wires. The left device is a dynamo and has a crank. Click on the crank and see what happens. The current from the dynamo activates the glass tube and small leaves appears in the tube . Turn again to the left and ....... on the left end of the desk stand a large plant. It is a so-called "Venus Fly Trap" plant.

One of the roots of the Venus Fly Trap plant runs all the way to the connecting wires between the 2 devices. Turn to the right again and now click on the wires that connect the dynamo to the glass tube. The wires now separate from each other and the end of the plant root makes contact with the light brown wires of the dynamo. Click on the crank again and see ....

Because of the electric current the Venus Fly Trap plant opens up and the fly, that was caught up in the plant can now escape. However, the fly is stupid because it keeps flying around the plant, so when the plant closes again the fly is caught again. This whole "Venus Fly Trap" device is a clue for one of the main puzzles that you have to solve in the Edanna Age.
Now look to the round Lift house again and then take 1 step forward. You are now standing in front of the elevator house. Turn right and ......
You see the Hammock again, but now from the other side. At the Hammock there are 3 pillars and on the highest pillar stand another scale.

Walk to Hammock and then look at the scale that is on the highest pillar.
In the left tray of the scale is 1 Green / Blue Crystal Ball and in the right tray are 4 Wooden Balls. Yet the scale is in balance so you can conclude that 1 Crystal Ball is as heavy as 4 Wooden Balls. From the scale on the desk you already know that the weight of 1 Brown Metal Ball is equal to the weight of 4 Green / Blue Crystal balls. Both these 2 scales and the Venus Fly Trap plant with the dynamo on the desk are important indications for later puzzles. The Venus Fly Plant device clue helps you later in the Edanna Age and the Scales clue is of great importance in the Amateria Age
But now it is high time to get into the Observatory, so turn left to the Lift house. Now put your cursor in the "corridor" to the right of the elevator house, and then take 2 steps forward.
You are then facing the white wall. Turn left and .........you will see the elevator door.

To the right of the elevator you can see the elevator handle, hanging on the wall. You can zoom in on the elevator handle but do not click on it because then the elevator will go up without you. Open the elevator door by clicking on the door handle and then step into the elevator. In the round elevator you turn to the right. Through the window in the elevator you see that elevator handle.

The elevator handle consists of 2 levers. The upper lever is larger than the lower lever. There's no glass in the window so you can stick your hand trough the window to reach the elevator handle. Click on 1 of the 2 levers and .....The elevator door closes and you go up with the elevator . When you have reach the top, turn to the left and look through the round window into the Observatory and......

Saavredo sees you and he thinks you are Atrus. You see how Saavredo puts the stolen Releeshan Book in an Egg-shaped Cage and how it goes down in a kind of well, out of your reach.
Leave the close-up of the window and turn to the right, past the green elevator button, to the door. Open the door. There appears to be another door with a round window in it, behind the first door. If you look out through this window you'll see the ocean and the parabola antenna and the 1st Yellow Reflector where you already were.

Apparently this second door is the entrance from the elevator into the observatory, but the elevator has not properly turned when you went up with it.
The elevator must turn one turn as it goes up, so that the elevator door is placed in front of the observatory.
Turn to the left and press the green elevator button and the elevator will drop down again. When the elevator is down again, open the elevator door and click 1 time to get out of the elevator. You are standing with your nose against the white wall again. Turn to the left and you will see the elevator handles again, right next to the elevator.
Stay outside the elevator now and zoom in on the elevator handle.

In the close-up, click again on one of the two levers and....... The elevator closes again and goes up again, without you.

When you have control again, look down to the bottom of the elevator shaft and then click one time forward to get to the bottom of the elevator shaft.

The Elevator Puzzle:
You are on the bottom of the elevator shaft. Look up. You can see a mechanism in the wall of the shaft. This mechanism has 3 weights. No turn to the right.....You'll see another mechanism in the wall of the elevator shaft. In total there are 4 mechanisms in the wall of the elevator shaft and these mechanisms are: The 3 Weights mechanism, then a Turntable with cylinders, then a Pallets mechanism and finally 2 Cogwheels.

If you have carefully studied Saavredo's journal you have seen drawings of these 4 mechanisms. These drawings give you the complete solution for this elevator puzzle.

So you have to set each of these 4 mechanisms exactly as you see them on the drawings in Saavredo's journal. Here is the solution:
A: The 3 weight mechanism:
Click twice on the Left Weight. Don't touch the Middle Weight. Click twice on the Right Weight.

B: The turntable mechanism with the 3 cylinders:
This is a turntable with 3 cylinders. Each cylinder has 3 rings on one side. You can turn the cylinders around by clicking on the left part of a cylinder. By clicking on the right part of a cylinder you turn the turntable one step further. View Saavredo's journal because on one of the last pages there is a large drawing of this mechanism and it also tells you what it should look like. If you start all three cylinders have the side with the rings on the right side.
Click on the first cylinder to turn it over so that the side with the rings are then on the left side.

Then turn the turntable 1x time to get the 2nd cylinder in front.
Click on the left part of the cylinder to turn this second cylinder too, so that the rings are on the left side.
Turn the turntable again 1 time to get the third cylinder op front but don't touch the third cylinder.
The third cylinder must have the side with the rings on the right side. Done
C: The Pallets mechanism:

This one is easy. Pull the pallet towards you. So click with your hand on the pallet and ...... Ready
D: The Cogwheel Mechanism:
You see that the left cogwheel has a recess. You turn the left cogwheel 1 turn when you click on it with your hand.
So turn the left cogwheel as many times is needed until a tooth of the right cogwheel fits exactly into the recess of the left cogwheel

When you have done this last mechanism, you look up and then you click 1 time forward, to climb back out of the elevator shaft again.

You are standing against the white wall again. Turn left again and zoom in on the elevator handle. Click the elevator handle again to lower the elevator.

Then go into the elevator and inside you turn right to the window. Click again on the elevator handles.

Now that you have set the 4 mechanisms correctly, you now see through the window. how the elevator turns counter clockwise and then goes up with you again.

If the elevator does not make a left turn first, but goes up immediately again, then you have not set one, or more, of the elevator mechanisms correctly
You will have to check the mechanisms again to see witch one is wrong
When all is well and the elevator has turn and has gone up again then the elevator door is in the right position to enter the Observatory.
Click on the elevator door to open it and ...... through the round window of the 2nd door you look into the Observatory and you see Saavredo again.

Saavredo knows that you are about to enter the Observatory and ........he disappears through a Linking Book and .......
......the Egg-shaped Cage, containing the Releeshan book, disappears into the pit.
B: Inside the Observatory:
As soon as you have control again you open the 2nd elevator door and you step 1 time into the Round Observatory room.
You are in front of the Central Hole. Turn right and walk 2 times ahead. On the floor there are a few lost pages from Saavredo's Journal.

Look at the floor and pick up the lost pages of Saavredo's Journal. The pages automatically end up in Saavredo's journal, so go read these pages in Saavredo's journal. When you're done reading close the book again and then take 2 more steps forwards. Then turn left. You are now standing in front of the Viewer and a Blue Button.

Press Blue Button ..... and ...... Three Telescopes are now being opened in the wall and ..............

You look up automatically to see a video message on a screen:
First Atrus appears who has a message for his sons. Apparently Atrus has meant this Age as a learning Age for his sons.
But soon Atrus is pushed away and the ferocious head of that Saavredo appears.

Listen carefully to what Saavredo now tells you:
You need 3 Codes to open the Egg-shaped Cage, in which Saavredo has stored the Releeshan Book. Saavredo, thinking that you are Atrus, wants to force you to follow the same learning process that Atrus has ever thought up for his sons. However, Saavredo has changed those 3 codes, so you have to find them. To find the 3 codes you have to travel to the 3 different Ages: The Voltaic Age, The Amateria Age and the Edanna Age. Each of these Ages is reached through the Linking Books, which hangs here on the J'Nanin island, in the 3 Tusks. Each Tusk contains one of the Linking Books to the relevant Age. So you have to get inside the Tusks and you have to enter a Code again to get the relevant Linking Book available. So we first have to find the 3 Codes.
So you have 3 tasks:
Then you have a fourth task to do, but that is for later on. |
After the cut scene with Saavredo you turn to the right and walk to the first Telescope in the wall, right behind that blue button.

Click on the Telescope to get in the close-up. This is the Voltaic Telescope and it is focused on the Voltaic Tusk.
The Voltaic Linking Book Code:
|
This is the Voltaic Telescope and in the round lens you see the Voltaic Symbol.
What must you do now
Step 1 You must first focus the round telescope screen on the Niche in the Voltaic Tusk. Click with your hand curser in the round screen and then hold down your mouse button and then move the cursor over the screen to move the lens up, left, right or down So, by shifting the telescope screen, find the niche in the Voltaic Tusk and make sure that the Voltaic Symbol in the telescope is roughly on that niche.
Step 2: Now you must, using the left lever and the right lever, "fine-tune" the Symbol, so that the Symbol in the Lens lands on the Symbol in the niche. With the left lever, which you can push up and pull down, you zoom in and out, so that the Lens symbol falls almost exactly on the Niche Symbol. Then you can fine-tune it with the right lever. If you have the Lens Symbol exactly on the Niche Symbol then the 4 Marbles are in the correct position. Make a note of this marble code.
This is the Code that you will have to enter later on, within the Voltaic Tusk, to get the Voltaic Linking Book |
Leave the Close-up of the Voltaic Telescope and turn to the left and go back to the elevator. The elevator handle is located on the right side of the elevator door.

Turn to the right and then pull the elevator handle. You see the elevator drop down again.
Turn left again and walk to the 2nd Telescope, on the left side of the elevator shaft.

Go into the close-up of this Telescope. This is the Amateria Telescope and it is focused on the Amateria Tusk.
This is the tusk where you previously have moved the large round stone in the cave. In the lens you can now see the Amateria Symbol.
Amateria Linking Book Code:
Do with this telescope exactly the same as you did with the Voltaic Telescope. So, first drag the lens to the Amateria Tusk.
Make sure that the lens symbol is roughly on the niche in the Amateria tusk.

Then use the two levers to get the lens symbol exactly on the symbol in the niche and then note the marbling code.
|
If you do this well, you will see the Marbles in the rings around the Lens as follows:
This Code should be entered later, in the Amateria Tusk, to get the Amateria Linking Book available. |
Leave the close-up, turn left and walk to the last Telescope. This is the Edanna Telescope and it is focused on the Edanna Tusk.

Go into the close-up and you will see the Edanna Symbol in the Lens.
|
Edanna Linking Book Code: Do exactly the same as you did with the previous 2 Telescopes. First drag the lens upwards, left, right or down, until the lens symbol more or less falls on the Niche of the Edanna Tusk.
Then use both handles to get the lens symbol exactly on the Niche symbol. The Marbles are then as follows:
This Code must be entered in the Edanna Tusk, in order to get the Edanna Linking Book available. |
You now know all three codes with which you can link to the 3 different Ages. But to use these codes you have to get inside the relevant Tusk and as you already know these tusks are locked or unattainable. It does not matter for the further course of the game in which order you go to the 3 Ages, but in this walkthrough I do it in following order:
You can now also choose to open up all 3 tusks first and then go to the 3 Ages in your own order to do what you have to do in those Ages. But then you will not have much use of this walkthrough.
The first thing to do now is to get that door in the Voltaic Tusk open. We will do this with the aid of the Sunlight and the 6 Reflectors with the colored marbles on it, which are scattered on this island.
C: Opening up the Voltaic Age Tusk:
The Reflectors Puzzle:
Go back to the elevator and open the door. You have already sent down the elevator, so the "floor" of the elevator shaft is now the roof of the elevator.
Cross over the elevator to the next door and then left click on the door latches to unlock the door

Then click on the door handle to open the door. Step outside. ......

You where here once before, immediately after arriving in J'Nanin when you followed Saavredo up here. But then you couldn't enter the Observatory. Click 2 times forward, look down and click once more to go down the ladder. When you're down, go 2 times forwards to the ladder that goes to the beach. Go down the ladder again to the beach and then turn right.

Go forward 4 times and you are back at the 1st Yellow Reflector. Go back to the side of the Reflector, where you have the Ocean and the Parabola Antenna in your back, and you will see the Voltaic Tusk in the distance. If all is well, this 1st Yellow Reflector will still send the Sunlight to the Blue Reflector.
We now continue with the alignment of all other reflectors on this island so that eventually the beam of sunlight is sent to the door of the Voltaic Tusk through all 7 reflectors. It is ABSOLUTELY IMPORTANT that you maintain the correct COLOR SEQUENCE of the Reflectors. We have to work through all 7 Reflectors because Saavredo has removed that one Reflector, which should be on the right side of this 1st Yellow Reflector. If Saavredo had not done that then it would have been easy because then you only would have to direct the Sunlight through 2 Reflectors. But because Saavredo has removed that 1 reflector you now have to align all remaining 7 Reflectors.
Turn to the right of the Yellow Reflector. You then look back over the beach path to the Observatory and the Edanna Tusk. On the left you see the platform with the Blue Reflector.

Now click 2 times forward to go over the beach again. After 2 clicks turn left and .... you are under the Blue Reflector again.

Click once forwards to go to the Blue Reflector via the ladder. Stand right in front of the Blue Reflector. Behind the Reflector you see the Observatory. If you look through the Blue Reflector now, you will not see another reflector. So, turn this Blue Reflector once by clicking on the turning wheel. The sunlight then goes through this Blue Reflector to the left and.......... if you now look through the lens again, the receiving reflector is a Green Reflector.

That Green Reflector is our next destination, but it is a long walk to get there
Turn around and descend the ladder again to get back on the beach. Turn to the left and now follow the beach back to the end.

You will come to a water pool, under the bridge at the Observatory. In the water there are large stepping stones at regular intervals.
On the other side you see a slope and on top of that slope you see the Purple Reflector.

Walk over the stones to cross the water pool and then turn left and .... you are standing in front of the steep slope. Go 2 times forwards, to get to the top of the steep slope.

On top of the plateau stand the Purple Reflector, but we leave it alone for now because we have to go to the Green Reflector first.
Look to the left of the Purple Reflector. In the distance you see a stone staircase going up to the 2nd Yellow Reflector. You also see the Edanna Tusk.

Now go forward one time, to the edge of the plateau and then look down. Via a stone staircase you can go down here.

So, go 1x down and......You will see, deep beneath you, 2 yellow bridges. If you now look right and up, you will see the 2nd Yellow Reflector again.

But we are not yet going to the 2nd Yellow Reflector. Look down again and now aim your cursor at those 2 yellow bridges, deep below you, and then click once.

You have decent 1 time. Turn slightly to the left and descend the stairs, which go down the Observatory rock.
After 1 click you turn slightly to the right and you walk, via 2 clicks, over the first yellow bridge 2 yellow bridge.

You end up on the rock platform between the 2 yellow bridges. If you now look to the right and up, you'll see the entrance of the Amateria tusk. But that comes much later.

On the other side of the 2nd Yellow Bridge you see a Stone Staircase. Continue over the 2nd Yellow Bridge and turn slightly to the left and you are then standing in front of that stone staircase.

Climb the stone stairs. At the top of the stairs the lake lies deep beneath you, so I hope you don't suffer of fear of heights or vertigo.
Turn clockwise and look up and ....... you see the Green Reflector, on top of a rock platform.

If you turn further to the right you will also see the 2nd Red Reflector, also on a rock platform.

Go through the two rock platforms, 2 times ahead and then turn left and then go up the stairs to the Green Reflector.

You see that the Sunbeam goes into this reflector. Turn this Green Reflector now 1 time.
The sunlight then shines brightly in your eyes, because this Green Reflector now sends the sunlight to that Red Reflector behind you.

That red reflector is your next goal, so turn around and descend the ladder.

Turn right, 1 time ahead, turn left and then go t 1 time up the stairs to the 2nd Red Reflector.

Now turn this 2nd Red Reflector 2 times, so that the sunlight shines in your eyes again.

Turn around and you will see that the sunlight is now sent across the gap to the other side and .....
...... is received by the 2nd Yellow Reflector. You have to go there now. So descend the stairs again.

Then turn slightly to the left and walk up the round rock. Then turn slightly left again and descend the stone staircase back to the yellow bridges.

Click 4 times to get cross back over the 2 yellow bridges and then climb up the next stone stairs.

Then turn left and you will see the 2nd Yellow Reflector again.

Go up the stone stairs to the 2nd Yellow Reflector. In the distance you can see how the sunlight is sent to you via the 2nd red Reflector.

Do one more step forward and then turn slightly to the right and you are right behind the yellow Reflector.
Now click twice on the turning wheel of the 2nd Yellow Reflector to turn it 2 times now and .....

The Reflector shines the sunlight back in your eyes.
When you turn around you see the Purple Reflector in the distance. So this 2nd yellow Reflector now sends the sunlight to the Purple Reflector. So now we are going to that Purple Reflector. Descend the stairs back and then turn slightly left and look up and .......now walk back up the stairs to the plateau of the Purple Reflector.

Stand right in front of the Reflector. Through this Purple Reflector the sunlight now goes to the left into the sea.

You see the Amateria Tusk and the yellow bridges where the 1st Red Reflector is. Turn the Purple Reflector once and ....

The Purple Reflector now sends the sunlight to the right ...... to the 1st Red Reflector.
If you now look through the lens of the Purple Reflector, you will see the 1st Red Reflector.

So the 1st Red Reflector is the very first Reflector that you saw on your arrival in J'Nanin, but then you were in a hurry to go after Saavredo. You now have to go back to the 1st Red Reflector because that is the last Reflector in the series and that should now be directed towards the Voltaic Tusk. Turn slightly to the right and you will see the 1st Red Reflector and ..... Click 1 step forward and ..... you will see the water pool with stepping stones in it again.

Go down the slope and jump back to the beach via the stones. Then walk 1 step ahead and then turn right and .......
climb up the ladder to the Yellow Bridge at the foot of the Observatory.

Turn to the right and walk to the 1st Red Reflector. If all is well now then the sunlight will now shine through this red Reflector in your eyes.
If that is the case then you do not have to turn this Reflector now.

Now click left of the Reflector 1 time ahead and then turn again to the Reflector .... You can see that the sunlight is going to the right through the Reflector.

Now look through the Lens of the Reflector and ........ If all goes well, you will see that the sunlight is being sent to that PRISM thing, which is on the door of the Voltaic Tusk.

Through the Prism the sunlight is broken into the 5 colors of the rainbow and beamed on that door. If you do not see the 5 colors of the "rainbow" in this 1st Red Reflector, you have done something wrong somewhere. You can then try to turn this 1st Red Reflector until you see the 5 colors of the rainbow.
Get out of the close-up and click 2x forward to get back on the yellow bridge at the foot of the Observatory. Turn left again and descend the ladder to the beach again. Turn right and click again 4x forward to return to the 1st Yellow Reflector. Go forward 2 times again and you're back at that pole without a reflector on it.

Then click again 3 times and then turn slightly to the left and click once on the slope, to go up the slope again

At the top of the slope, turn slightly to the right and click once before the stone stairs. You are back on the left / right junction of the stone staircase. Now turn left and now go up the stone staircase.

At the top of the stairs you are finally at the Voltaic Tusk. Take a look at the Parabola Antenna, from where the sunlight in the rainbow colors is being beamed on the door of the tusk

Turn around to the door in the Tusk .. You are now finally in front of the entrance door of the Voltaic Tusk.
The Prism Door Puzzle:
You see a large circle with 5 buttons and you see that, through that Prism Device behind you, the sunlight that you have led to here via the 7 color reflectors, now falls in 5 colors on this circle and the 5 buttons. What you have to do now is to press these 5 buttons IN THE RIGHT COLOR SEQUENCE. The Order is thus the order according to which you have sent the sunlight from reflector to reflector.

Surely you have written that down? In case you didn't........here is the correct order: YELLOW; BLUE; GREEN; RED; YELLOW; PURPLE; RED.
In this order, click on the 5 buttons and the door will open.

Go inside and then look up. High above you, you'll see the Voltaic Linking Book hanging in its egg-shaped cage. So that cage has to go down. Go to the pillar and zoom in on it.

|
You'll see those rings with those 4 marbles on the pillar You now have to set up the marbles according to the Voltaic Linking Book code as you found them via the Voltaic Telescope in the Observatory. You did wrote that code down, didn't you? ...... here this code is yet again:
Then click on the button in the middle and you will see the marbles jump back but the Voltaic Linking Book now comes down.
Click on the book to open it and then click with your hand on the screen of the right page and .....
enjoy the video in which you are transported to:
Original Dutch Walkthrough from 2013 by: Louis Koot 2018 English translation, screenshots and lay-out by: Louis Koot |


