2018: Walkthrough by: Louis Koot
If you have found this walkthrough via google search or via another site then you have probably not visited my site.
A lot more very detailed game walkthroughs can be found on my site at: www.pcgameswalkthroughs.nl
Chapter 5: The Amateria Age
J'Nanin:
The Amateria Linking Book
You're back in the Observatory in the J'Nanin Age and you have the Edanna Nature Symbol with you.
Walk to Viewer and stand straight in front of it again. Freeze the screen again and then drag the drawing of the Edanna Nature Symbol to the Viewer and then release your mouse
You deposit the Edanna Nature Symbol drawing in the Viewer and the symbol is copied.
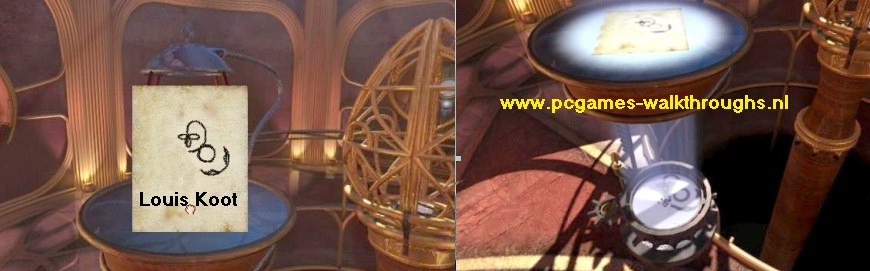
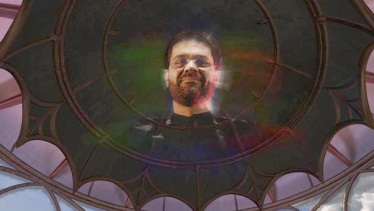
The Golden Egg is now open and you'll see a video message from Saavredo again. Listen to Saavredo.
In the now opened Golden Egg lies the Narayan Linking Book but you can not get it yet. You still have to get 1 Symbol before you can go to Narayan, and that is the Amateria Symbol. So you have to go to Amateria and for that you have to enter the Amateria Tusk. Unfortunately, Saavredo has destroyed the floor in the Amateria Tusk so you can not get to the Amateria Linking Book. You have to come up with something to get to the Amateria Linking Book.
Go through the elevator and descend the ladder back to the yellow bridges. Cross the 2 yellow bridges to the Amateria Tusk.
Do you remember that in Chapter 1 you already entered the cave under the Amateria tusk and that, after you had moved the big Round Stone to the right, you went through that door? And that you couldn't continue because Saavredo has broken the floor? Well, we are going to do something about that now.
If you are standing next to the Amateria Tusk then you walk on 2 more steps and then you go to the rocky point where the ladder goes down to the lever pillar.
Walk to the rocky point and then turn right and look down. Go down the ladder again, to the ledge with the lever pillar
Turn right and you are again in front of the 2 levers with which you can move the walkway in the cave.
The big Round Stone is still on the far right. On the left is the door to the Amateria Linking Book room where the floor is out.
You now have to use the levers again to ensure that the large Round Stone rolls to the left again and then falls through the door into the hole. You do this as follows:
Click: Left Lever, Left Lever, Right Lever .... and ..... The round Stone now rolls into the Linking Book room.

Click the Right Handle again to straighten the ladder again
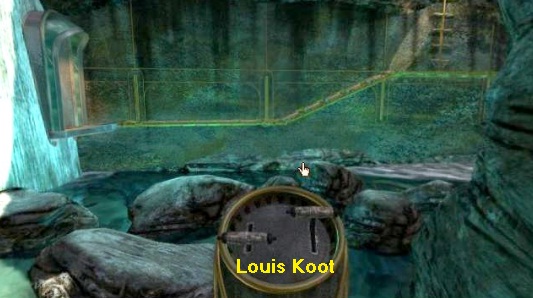
Turn right and look up and climb up the ladder again. Now head back to the Round Hole and climb down to the walkway into the cave.
Turn around and walk down and go through the door and see ........ The round stone is now in the hole of the floor
|
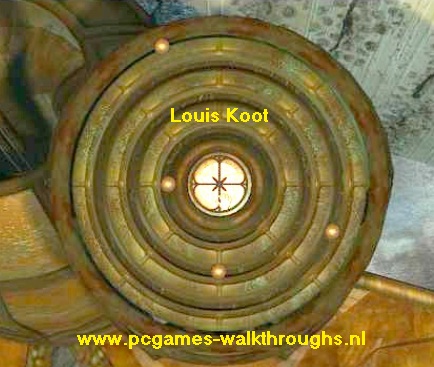
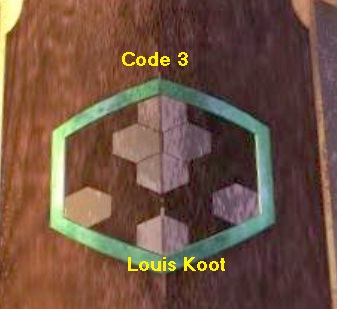
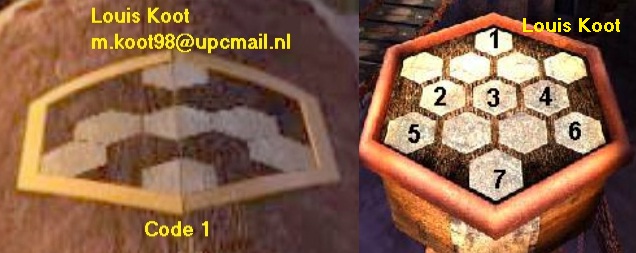
Walk over the Round Stone to the Marble Pill and zoom in on it. Put the 4 marbles in their proper place in the rings, according to the Amateria Linking Book Code that you determined in Chapter 1 in the Telescopes of the Observatory. Didn't you note that marble code? .............. Deep Sigh ..... well...here it is:
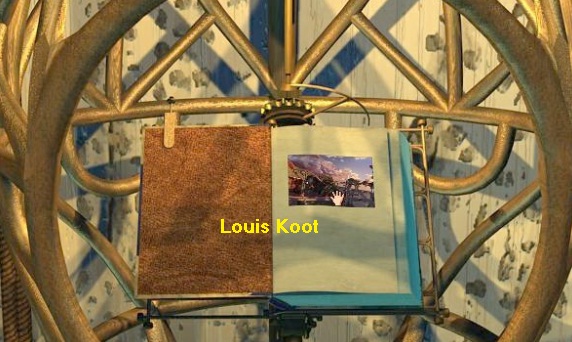
Click on the button in the middle of the circle and .... The Egg containing the Amateria Linking Book comes down. Open the book and click on the screen in the right page and ....
.... you travel to: |
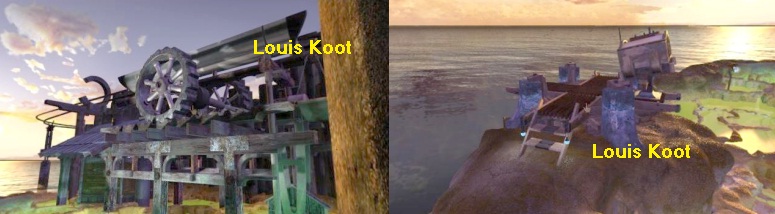
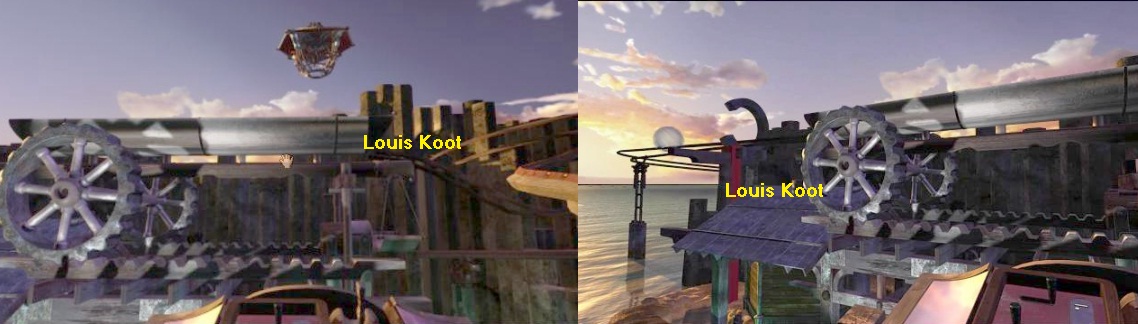
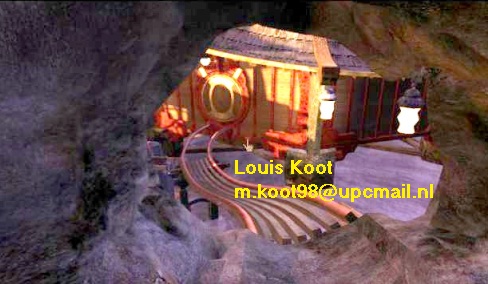
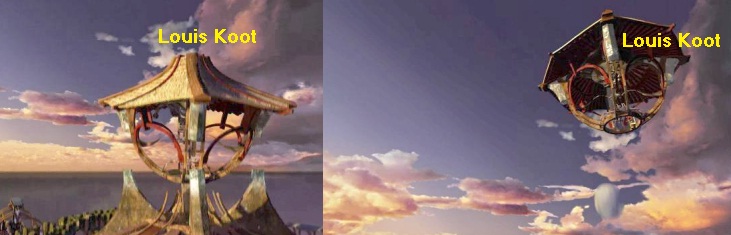
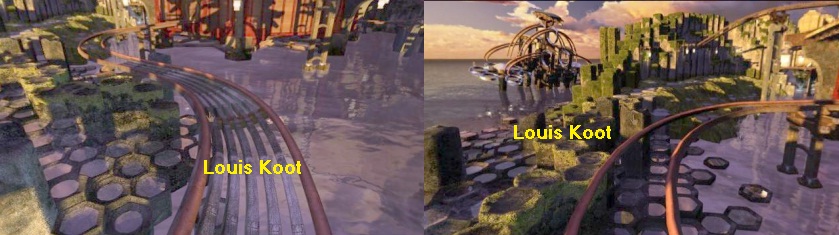
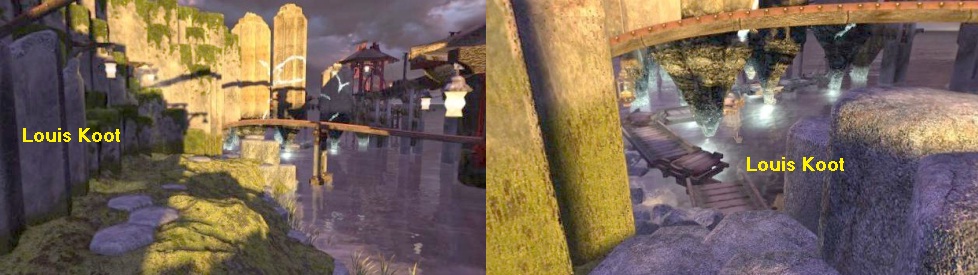
The Amateria Age:
Amateria is the Age of the "Dynamics of the Continuing Movement". In fact, this island is one big roller coaster and if you can solve all the puzzles here, you will experience the ride of your life. There are a few gaps in the roller coaster and the intention is that you close these gaps. You do this by solving a number of puzzles that have everything to do with MOVEMENT
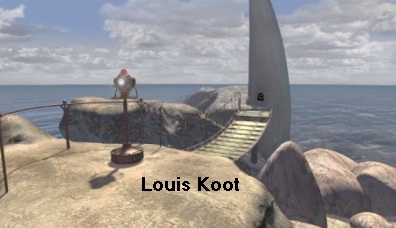
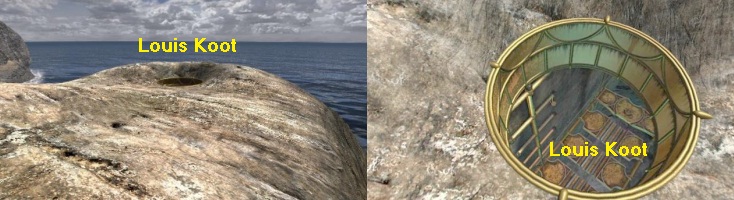
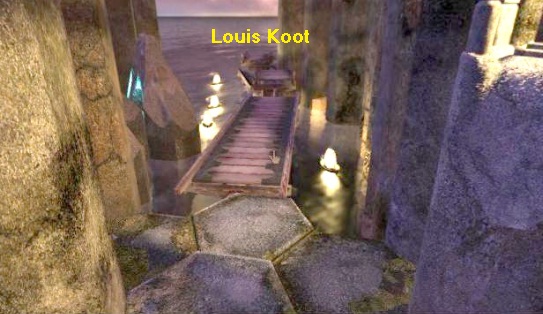
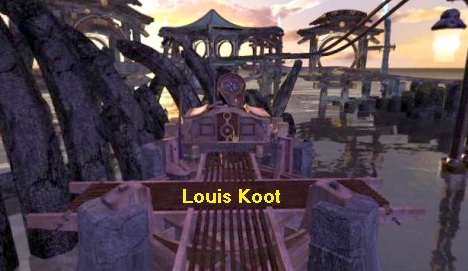
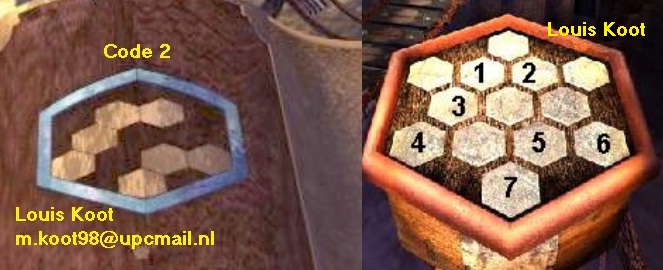
Upon arrival in Amateria you stand before a wooden suspension bridge. Turn to the right and you will see a kind of metal ramp that goes up and ends at the top of the Central Pagoda Tower of this island. You also see that there are, in succession, 3 large holes in this ramp. Click 1 time forward and you are facing the first hole. So you can not go up any further. Turn left and you will see that there is a 6-angled plateau next to the ramp
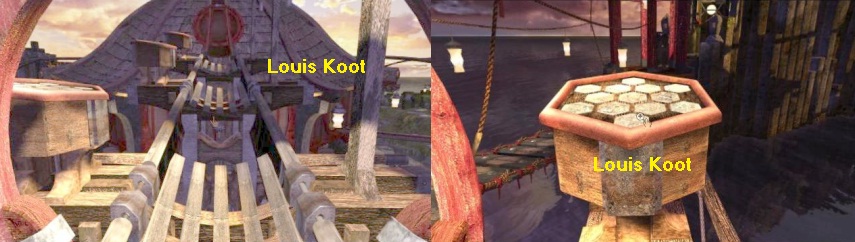
On the 6-angled plateau you see a bunch off small white hexagons. Zoom in on this 6-angled plateau and you will notice that you can press those white hexagons. You can now press a few of these white hexagons on good luck, but that does not make much sense. If you know the correct code, so which of these hexagons you have to press in which order, then the first holes in the ramp will be "closed" and you can go over it to the second hole. At the second hole there is another 6-angled plateau where you have to press another code again. And so also at the 3rd hole. So you have to find 3 codes.
Zoom out the close-up and turn left and walk 1 time back to your starting position.
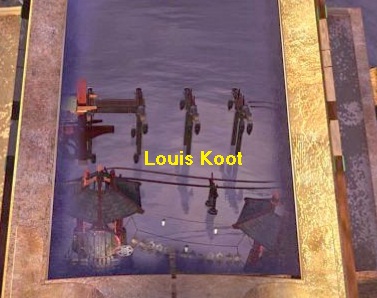
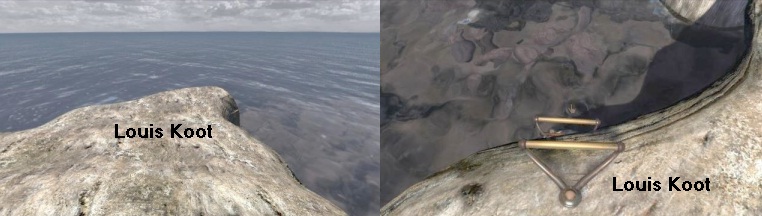
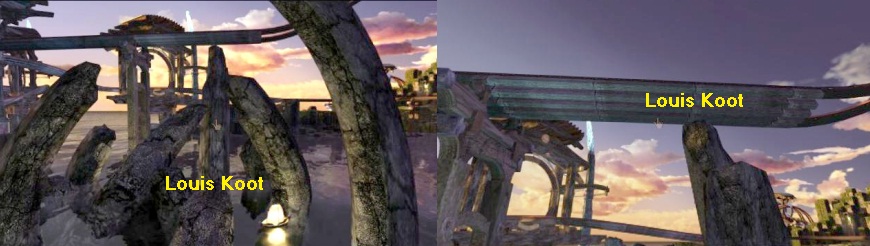
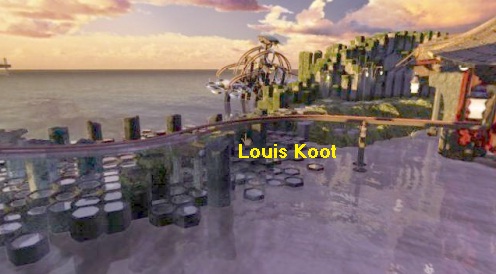
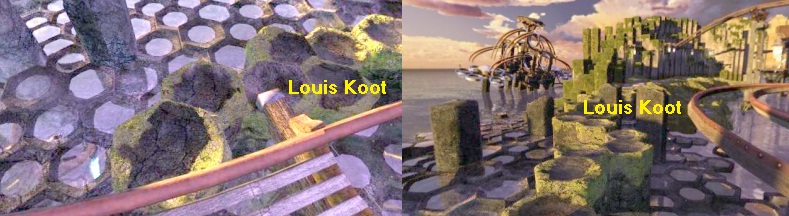
You are now looking out over the ocean and you'll see an long structure in the ocean, right before you. To the right of the structure 3 Pillars protrude from the ocean.
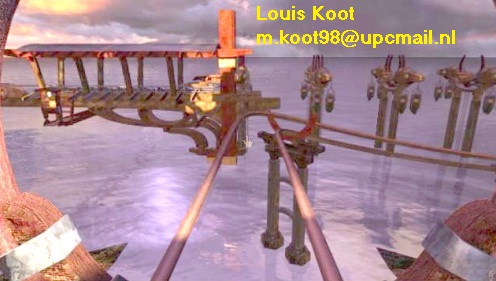
A rail, which is an extension of that ramp behind you, goes through a curve to those pillars and it is not illogical to consider that the rail runs over those pillars to that structure to the left of it. But there is no bridge over those pillars. I can now tell you that the structure to the left of the pillars is your ultimate destination here in Amateria. Ok ..... it's time to do something .....
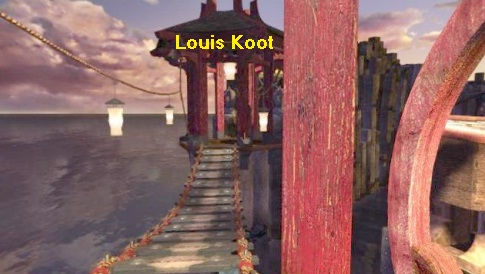
Turn right and .......you'll see that suspension bridge in front of you again.
Now click 3 times to go over the suspension bridge and you'll stand for the next bridge. If you turn right now you'll see a J'Nanin Linking Book but you will never use this book.
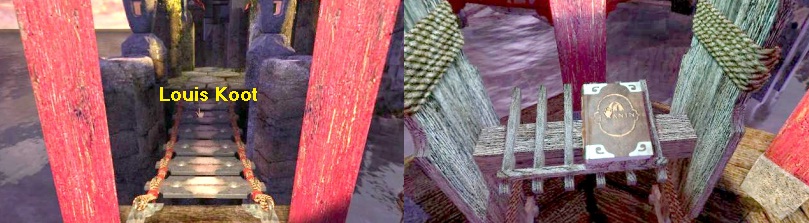
Turn left again and walk 2 steps over the 2nd Suspension Bridge and .....
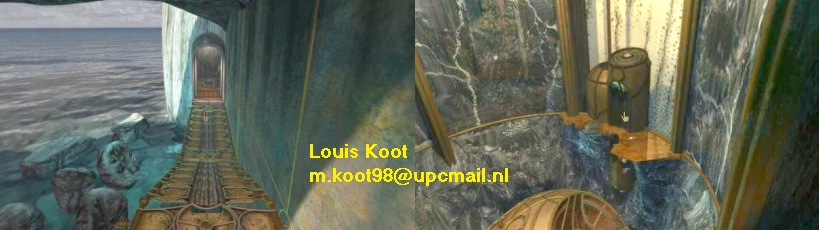
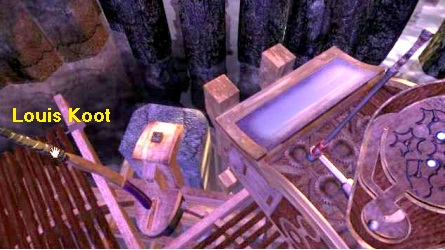
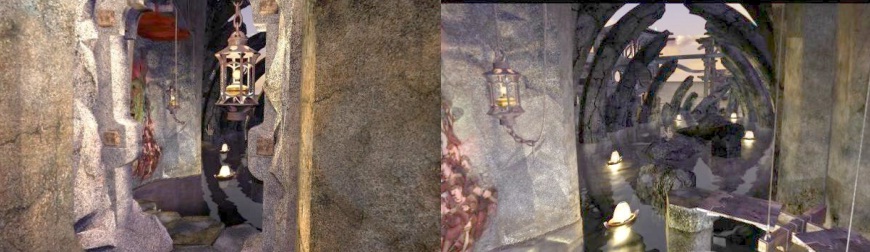
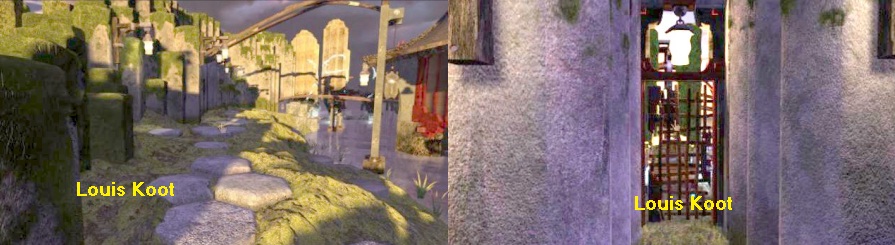
..you are then standing in a stone hallway. In the back of the hallway there is a square pillar with a light in it. A chain goes to that pillar.
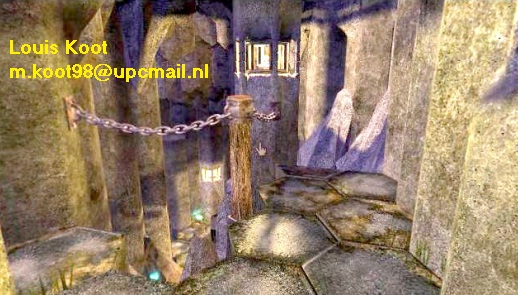
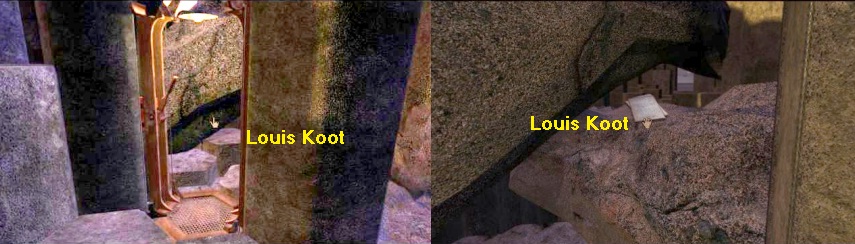
Walk one step further and ....... You are next to that square Pillar. Look down and ..... Right next to the pillar you see the first steps of a Staircase that goes down, behind the pillar.
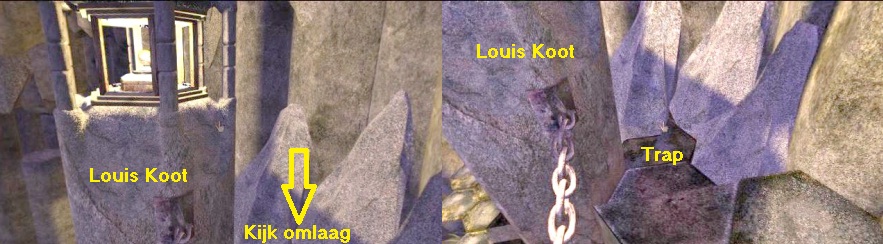
Go a bit to the right of the Lamp Pillar to the wall and then click 1 time forward and you will descend the first steps of this staircase. Then turn slightly to the left and go back to the wall again and click once again forwards and then do this again. Turn to the right and you will see the tiled floor of the lower corridor below you. Aim on that tile floor and then click 2 times forward and you end up in the bottom corridor.
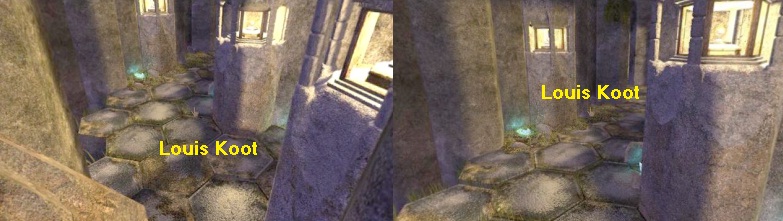
Walk 4 times forwards through this lower corridor and ........... you'll walk straight against another lamp pole, that stands in the next corridor.
Turn to the right and you'll see, a niche with a light brown platform.

Put your cursor on that niche and then click 2 times to get in that niche. You are then standing in the niche on a narrow elevator platform. Look down and then click the brown lever and .........
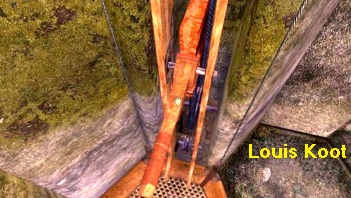
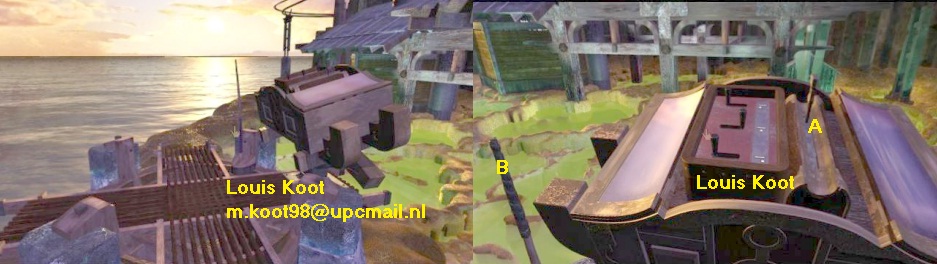
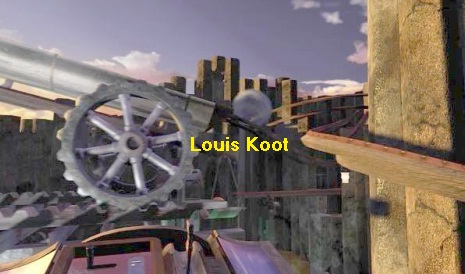
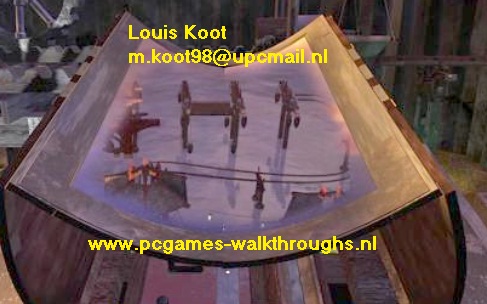
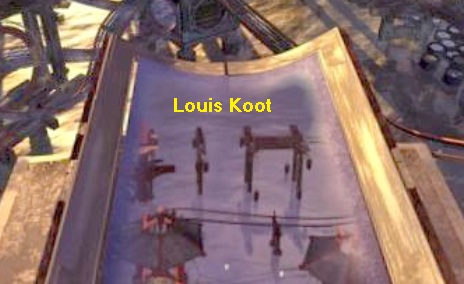
The elevator brings you up. When you arrive at the top, you remain standing for a moment. You see a part of the rail system.
There is a long and white metal gutter here in the rail. The gutter is standing on a pair of large iron wheels. At the moment, the white gutter is completely horizontal.
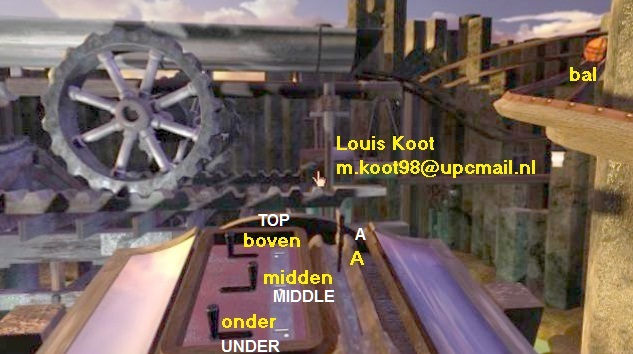
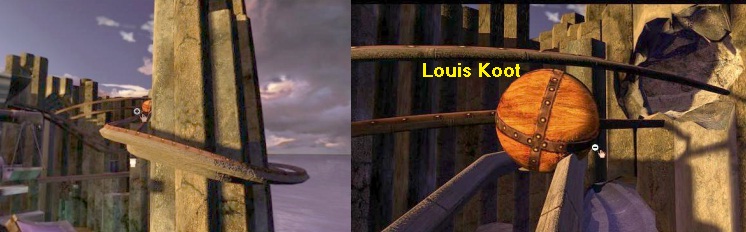
Click 1 time forward to get closer to the gutter. Turn left and you will see a red / orange ball lying in the rail.
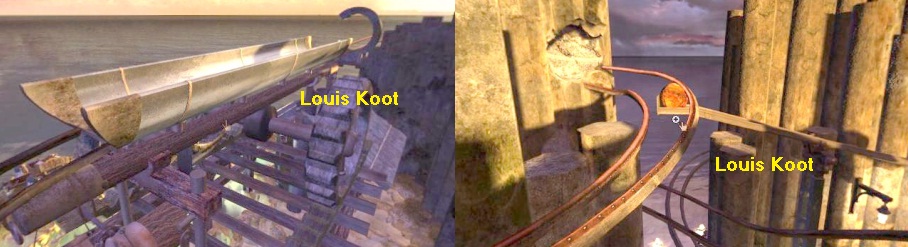
Zoom in on this red / orange ball to see it close-up. In the close-up you see the top half of the ball and you see that this half consists of two different types of materials.
This half of the ball consists of 3 parts WOOD and 1 part CRYSTAL ............
Hey...doesn't this remind you of something you saw earlier in Chapter 1?...... think back at the 2 scales that you have seen in J'Nanin, in the Garden House .....
Zoom out of the close-up of the ball and turn around and walk back to the elevator. When you are back on the elevator platform, turn slightly to the right and look up and .........
You'll see a few Saavredo Journal Pages. Pick up and read the Journal Pages and then close the Journal again.
Turn left again and pull the elevator lever again and ....... you will sink back down again. When your back down in the corridor, turn slightly to the right and click twice through the corridor. Turn right again and you will now see the wooden path that runs outside this part of the island.
Now click 6 times forward to cross this wooden path, always turning with the turns. You come to the end of the wooden paths at a kind of a swamp filled with green water.
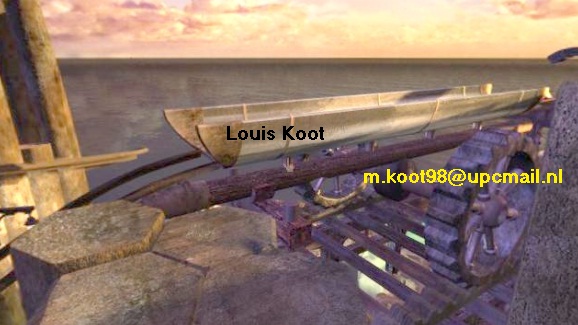
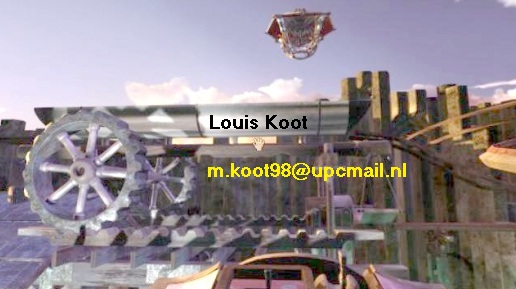
There is a brown dyke around the swamp. If you look at the top right now, you will see that White Metal Gutter on its big Wheels
Look in front of you and then click twice on the brown dyke and you will come to the platform, right in front of the Gutter.
Turn to the right and you will see a large Control Panel. To the left of the panel stands a large l lever. Click on the lever and....You go up with the platform.
The Gutter / Scale Puzzle
Look at the Gutter and you'll see that the wheels are now in the middle of the gutter, witch makes the gutter stay horizontal. At the far right you can see the Orange Bal again.
View the control panel. On the left you see 3 small levers and on the right a larger lever. Name the 3 small levers: Top, Middle, Bottom. The large lever is Lever A. The lever on the left is lever B.
We are going to do a little experiment now.
Experiment 1: The wheels are in the middle of the gutter.
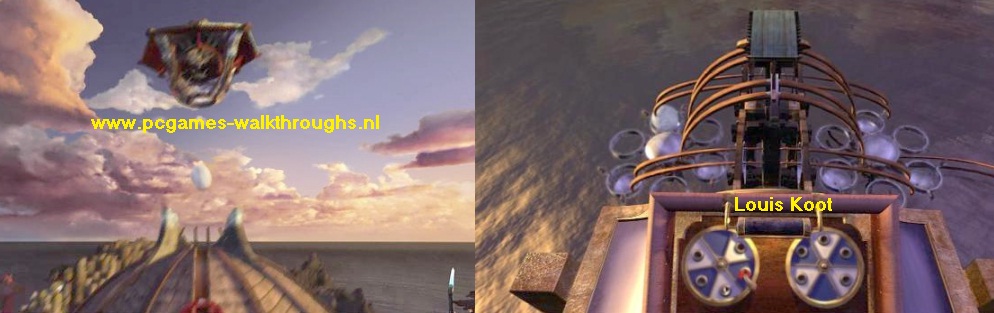
Now click Lever A and see what happens ........
Behind the gutter the upper part of the roof of the Pagoda Tower flies into the air and a white ice ball falls down.
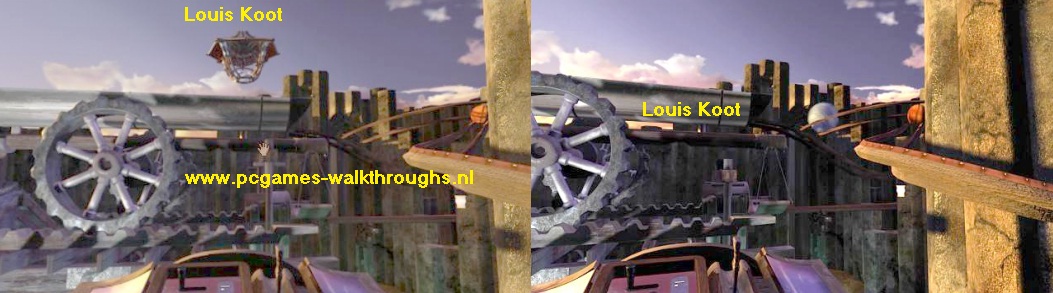
The Ice Ball lands on the rails and starts rolling through the rails. At the same time, the red ball rolls down through the rails and it falls into the box, that is to the right under the gutter. Due to the weight of this red ball, the left side of the gutter rises slightly and the gutter is slightly tilted upwards. The Ice ball is coming and starts his journey through the gutter but ......... The Ice ball does not roll through the gutter and breaks into pieces.
We shall try this again, but first change the position of the wheels under the gutter. You can do that with those 3 small levers Top, Middle, Under, on the control panel. With these 3 levers you can move the wheels to the right, left or center.
Experiment 2. The wheels are located on the right see under the gutter:
Move the wheels under the Gutter all the way to the right by clicking on the Lower Lever and then click again on Lever A and see what happens again .........
again it does not work to get the ice ball through the gutter because the gutter does not stay horizontal.
Experiment 3. Place the wheels at the far left under the gutter:
Now place the wheels under the gutter all the way to the left, by clicking the Upper Lever and then click on Lever A again and see what happens ..........
Again it is not possible to get the ice ball through the gutter. Conclusion ....... If the wheels are right below the gutter then the gutter is very slanted upwards, and if the wheels are at the far left, the gutter is only slightly tilted upwards. But the Ice ball never goes through the gutter. How is that possible? Apparently something strange is going on with that red ball.
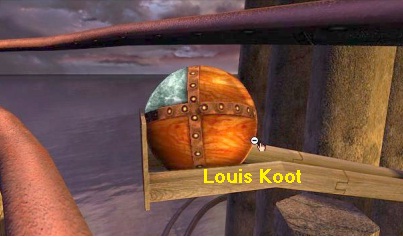
Look to the right and zoom in on the Red Ball. You now see the Lower Half of the red Ball and you see that this half consists of 4 parts of WOOD.
The Red Ball is thus the Balance Ball. You now know that this ball is made up of: 1 Segment Crystal and 7 Segments WOOD and you know that if this ball ends up in the box, below the gutter, then the gutter, depending on the position of the wheels, will be more or less OFF BALANCE T . You have to see this gutter as a balance scale. In order for an object to roll through, the "scale" must remain in BALANCE, or in other words...remain Horizontal. So you have to make sure that there is also a Balance Weight hanging at the left below the Gutter and that Balance Weight must be just as heavy as the red ball.
Now think again of the 2 Scales that you saw, in Chapter 1 in the Garden House in J'Nanin. Those two scales were perfectly balanced, in spite off the different types of balls that lay in the dishes of those scales. You then learned that 1 Crystal Ball is equal to 4 Wooden Balls. And that 1 Metal Ball is equal to 4 Crystal Balls. You now know that this Red Balance Ball consists of 7 Wood parts and 1 Crystal part. So you can now conclude that 1 Crystal part is equal to 4 Wood parts.
So in other words ........ the Red Ball has the weight of 7 times 4 = 11 WOOD PARTS. To get the Gutter stay horizontally, when that red ball is in the box under the gutter, you have to hang a weight below the gutter that is twice as heavy, so the weight of 22 parts of wood. Do you already have a headache?
We're going to work now. Zoom out of the close-up of the red ball, turn left and down and click again on Lever B .....
You drop back to the ground. Turn left and .... you will see a green shed ....
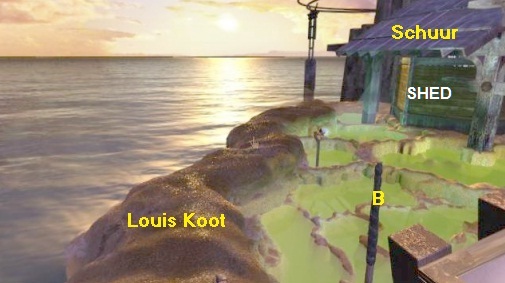
Now follow the brown dyke, through 6 times forward, all the way to the back. Then turn to the right and you are standing in front of the entrance of the green shed.
Click 1x forward, open the door and click 1 time to enter. Turn to the left and click 1 time forward and turn to the right. Take a look at everything here. There is a Large Round Platform hanging here on a rod. Against the wall you see Bal Segments lying on the "bench" and on the floor you can see the damage that Saavredo has caused here too. Saavredo has destroyed the Upper Half of the Counterweight. You must restore this now.
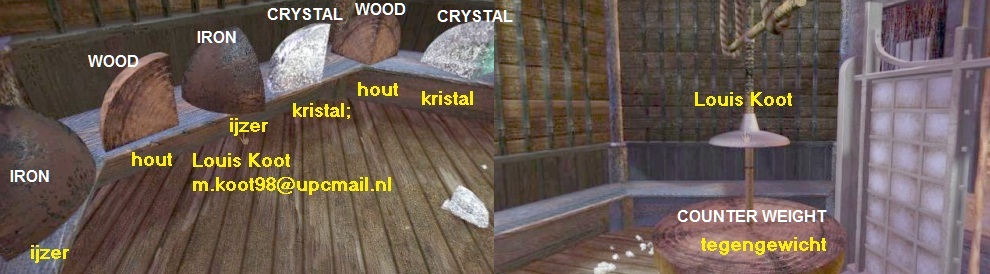
If you look at the Ball Segments that stand against the wall, you see that they have different Colors. The Dark Brown segments are Iron, the Light Brown segments are Wood and the White segments are Crystal. See that Round Platform now as the bottom half of a Ball. So it is the Lower Half of the Balance Weight, and it hangs below the Gutter. So this Lower Half consists of 4 Segments of Wood. You still have to put 18 parts of Wood on top, but there are only 2 Segments of Wood along the wall.
You have to do the math's now....
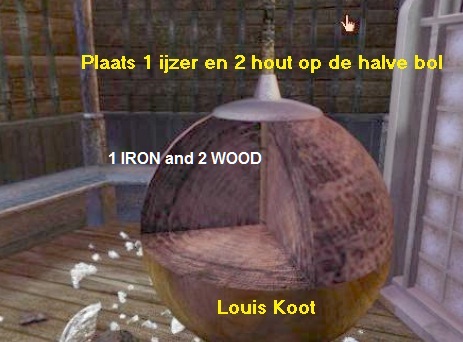
1 Iron = 4 Crystal and 4 Crystal is 4 times 4 = 16 Wood. So 1 Iron Segment is equal to 16 Wooden Segments. Together with the 2 Wood Segments that are located here, you make with 1 IRON Segment the weight of 18 WOOD. If you click on a Segment and then hold down your mouse button you can place them on top of the Round Platform. Then let go and you have placed a segment on top of it. So place on the Round platform 1 Iron Segment and the 2 Wooden Segments and you have a Counter weight under the gutter of a total of 22 Woods
Leave the Shed and go back over the dyke to the control panel and let it go up again by clicking on Lever B again.
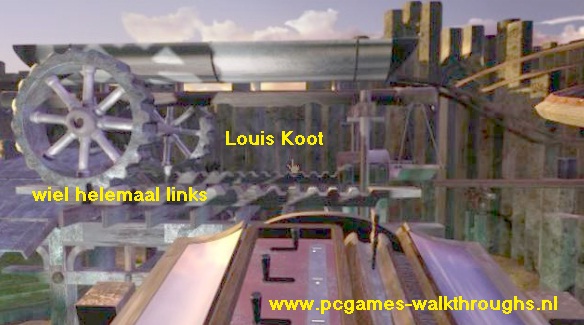
If all is well, the wheels under the gutter are still completely on the left. If this is not the case, make sure that the Wheels under the Gutter are all the way to the left.
Ok ..... here we go ..... Click again on Lever A and ..... look at what is happening with the Ice ball now, .......
Again the roof of the pagoda rises and again a white ice ball falls out and again it begins its journey over the rail.
The Red Ball falls back into the box right under the gutter, but this time the gutter remains completely Horizontal. The Gutter is therefore in BALANCE because of that Counter weight that you have attached to it in the Shed below. The ice ball is coming and starts his journey through the gutter and ........ The Ice ball is now rolling all the way through the gutter and then continues its way over the rail ....
When this has happens, the lids on the panel will close and you will now see those 3 pillars in the ocean and ......you'll see how a Bridge section now rises between these pillars.
That Bridge section also drops down again but that is not bad because by solving this "Gutter / Scale Puzzle" you have activated this bridge section.
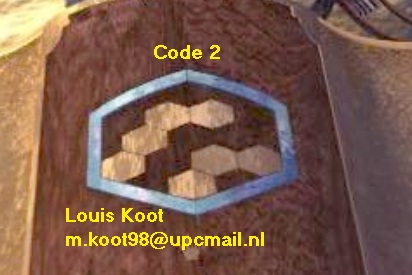
The lids of the control panel turns again and now you see some of those White Hexagons.

Write down the positions of the white hexagons because it is your first code for those holes in the ramp to the Pagoda.
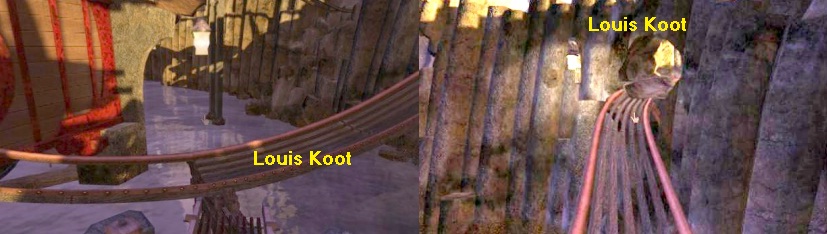
Pull the lever B to lower down again. When you have dropped down again, turn right and then click 2 times to go back over the dyke to the beginning of the wooden path. Then click 6 times forward to return to the stone corridor. Then turn left and you will see the light brown elevator again. Do not go to the elevator now but walk 3 times ahead to go through the corridor, so past the elevator. You end up at the entrance of a rocky tunnel.
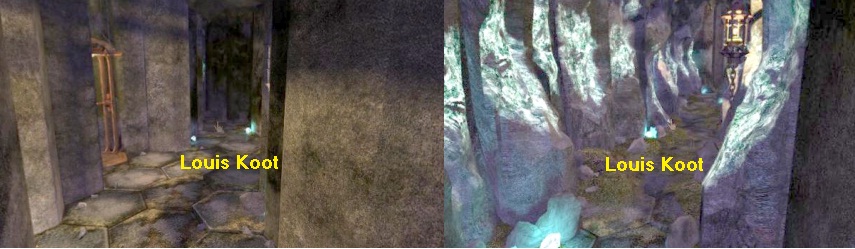
\Walk through the rocky tunnel and ....... you end up at the "back entrance" and at a lantern. You see the water sloshing.
We are not going out here yet. Turn sharply to the right and you will see that a ladder has been cut into the wall.
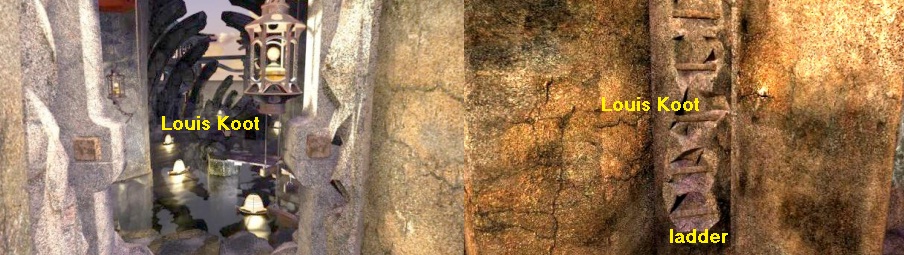
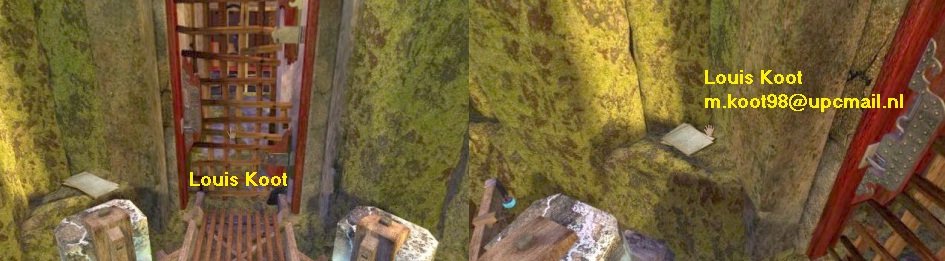
Click once to get to the ladder. Then look up and click 1 time forward and you end up at the top of the ladder. You will probably have to look down to look straight ahead again. Then turn slightly to the left and you will see a "slide", and this is part of the big roller coaster. The first part has a wooden bottom but the last part does not. The "Slide" ends at the roof of the Central Pagoda Tower. We're going to do the main puzzle of this Amateria Age now......
The "6 Pagoda Houses" Puzzle
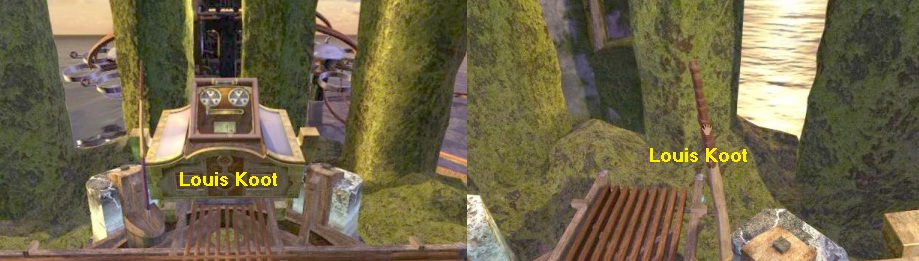
Click 3 times ahead on the slide and then turn left. You are then standing in front of such a Control Panel, as there is at the Gutter.
Click 2 times forward to get right in front of that control panel and then look down slightly and turn to the left. Pull the big lever and you will rise up with the panel
 .
.
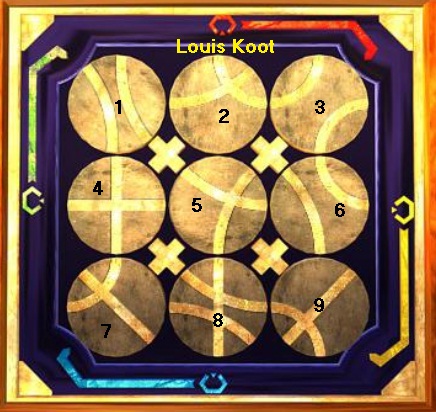
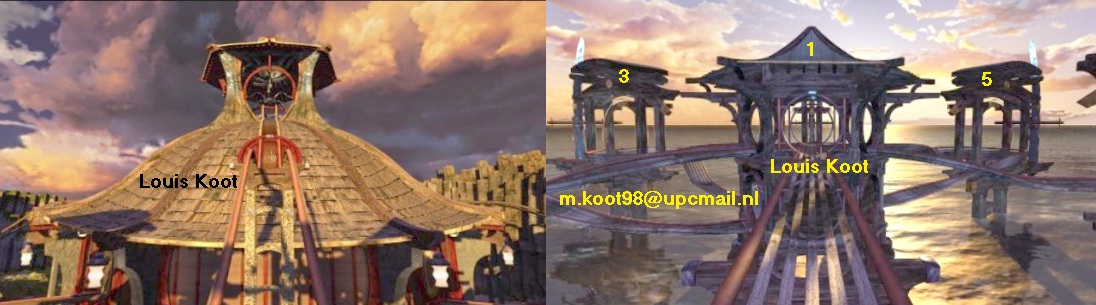
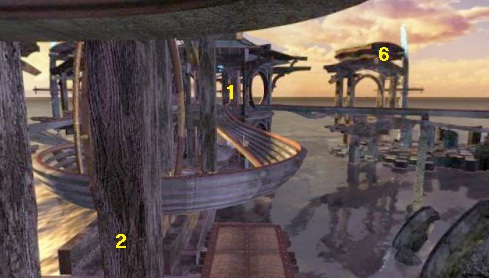
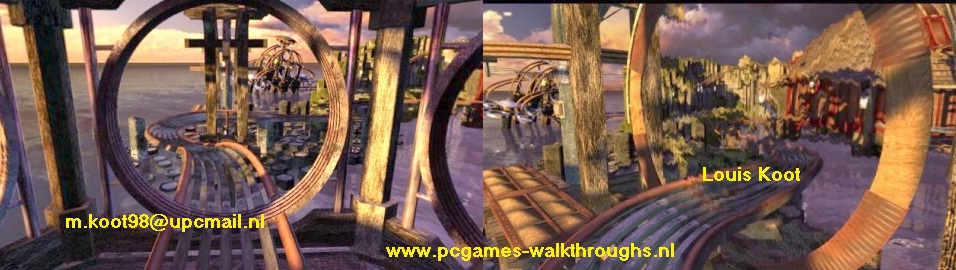
You see part of the Great Roller Coaster and you see 6 Pagoda Houses, where this part of the Roller Coaster goes through. You see a Central House with a half circle in it, and you see 5 other smaller Pagoda Houses. Look at the control panel and you will see an illuminated circle. On the illuminated circle you now see schematically this part of the Roller Coaster. The 5 Blue lights are those 5 houses that stand around the Central House.
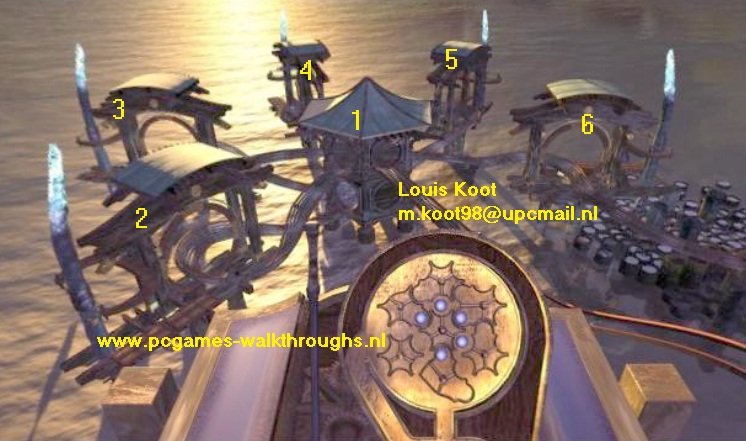
Look back at the houses, grab a piece of paper and a pencil or pen, and make a drawing of the positions of all 6 Pagoda houses. Name the Central House as 1 and then from left to right the houses that surround it: 2, 3, 4, 5 and 6, where the rightmost house is 6. So you start from the fact that, even later when you are in that Central House 1, you have the Central Pagoda Tower always in your back.
Now pull the lever, which is located to the left of the illuminated circle on the control panel and ....... Look carefully at what happens.
Again, but now behind you, the roof of the Central Pagoda Tower rises and again an Ice ball falls out. The Ice ball lands on the Roller coaster and rolls through the Middle house and then through House number 4. Unfortunately the Ice ball is splashing in the ocean. In the illuminated circle you see that the ball has to go through all the houses.
The intention is it that the Ice ball follows a route through all 5 houses, always through the middle house or underneath it, and then continue on the roller coaster. Apparently something is wrong with this part of the roller coaster. The Ice ball does not follow the right route. You're going to fix that now but you can't fix it here.
Look down and turn left and click again on the big lever and ......
.you go down again. Turn around and click 2 times to get back on the "Slide". Turn right and click 3 times forward, to the round hole in the wall.
Then look down and click 1 time forward to descend that ladder again. Back down in the corridor, turn right and click twice to get to the water, through the opening with the lanterns.
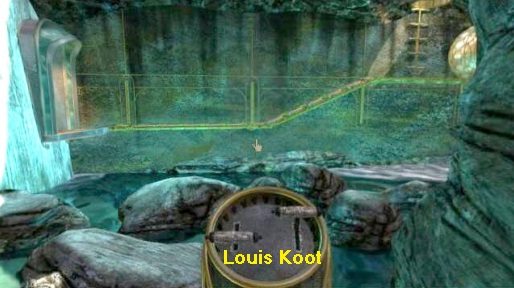
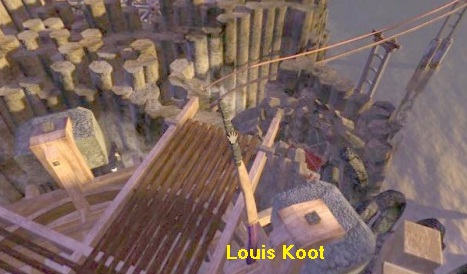
You can now see a kind of Skeleton of curved beams floating in the water.
Turn to the right and you will see a wooden path. Aim at the 1st board and then click 1 time forward to get there.

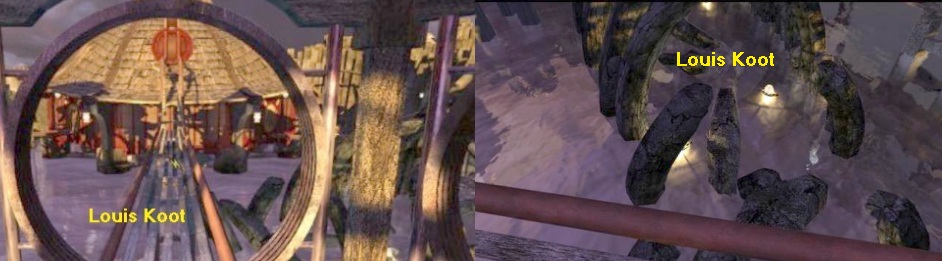
Then turn slightly to the left and click again 2 times, to get to the back plank. Now you stand at the beginning of that Skeleton and in front of you, behind each other, big stones are in the water. Through the Skeleton you can see behind those 6 Pagoda houses. Now click 5 times forward to get to the back of the Skeleton, through the stones in the water. The "tale point" of the skeleton is bent upwards. Look up and you can see that the upper point of the "tail" touches the roller coaster rail above it.
Click 2 times forward to climb up at the rail of the roller coaster through the rear "tail" point. If you first turn right, you will see the Central Pagoda Tower. Then turn all the way around and in front of you'll see the 6 Pagoda houses. You also see that you are standing on the rail, right in front of the Central House.
Now click 3 times forwards and you are then standing exactly in the middle of the Central House, so of House 1.
This Central House is apparently a crossroad of the roller coaster, because from this Central House the rail goes in all directions, but there are no switches in the rail. Get your drawing, that you have made of the positions of the 6 pagoda houses. We are now going to "set" up the Pagoda Houses, so that the Ball can go through all the Houses.
House 2
You are in the Central House 1. Always make sure that, when you are in the Central House 1, you look at Central Pagoda Tower .
So look at the Central Pagoda and then turn right once, so that you see the rail that goes to House 2.
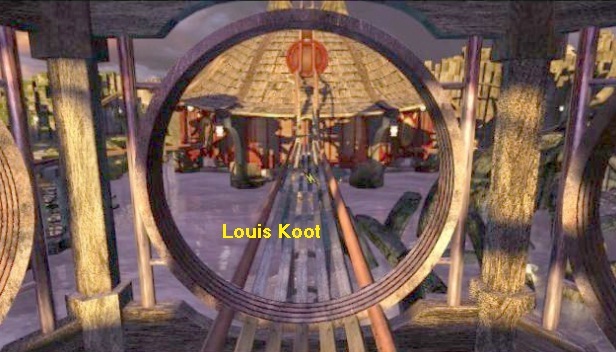
You can see that the rail goes through house 2 through a bend. Walk three times forward over the rail and you will arrive at that bent in the rail
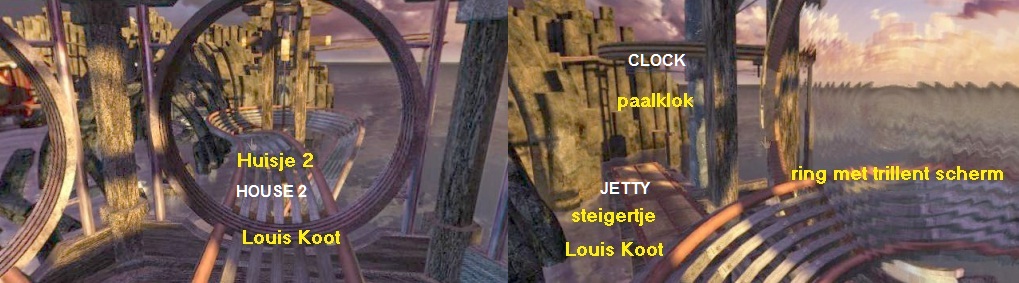
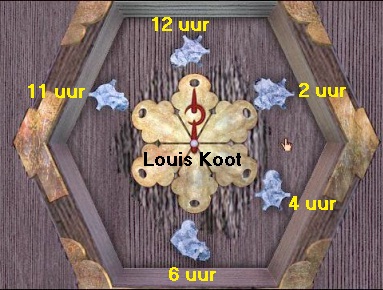
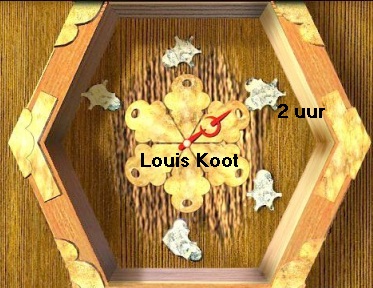
In the bend the rail goes through a large RING and in this Ring is a kind of vibrant and translucent screen that also makes a humming sound. Do not go through the Ring on the rails but aim your cursor on that brown jetty", behind the bend, and then walk forward to land on the brown jetty. Turn to the right and you will see the post of the structure. You see a kind of "Clock" in the post.

I call this the "Pole clock" and every house has one". It is the intention that you put the pointer of the "pole clock" in the right position for each house. Zoom in on the "pile clock". You can see that the red hand is now on the 2 o'clock "spot". Click on the 12 o'clock "spot" and the red hand will jump to it. The red hand of this clock must be at 12 o'clock.
You hear that humming sound of that Screen changes in the Ring. Zoom out and turn right and ....
..... aim your cursor at the Central House and make sure you get back in the middle of the Central House 1
You are back in the middle of the Central House and you look at House 5. Turn around so that you look at the Central Pagoda again and then turn right twice to see the "entrance" of House 3.
House 3:
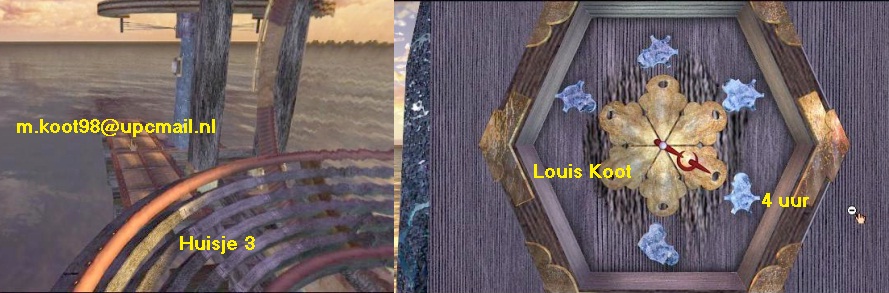
Go make sure that you end up at the brown jetty of House 3. Turn to the "pole clock" of House3 and set the red hand to the 4 o'clock position by clicking on the 4 o'clock spot.
House 4:
Return to the center of the Central House and look at the Central Tower again and then turn right three times, so that you look at House 4.
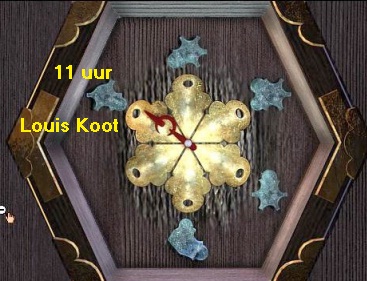
Go to the brown jetty of House 4 and zoom in on the "Pole clock". Put the red pointer of the clock at 11 o'clock.
House 5:
Return to the center of the Central House, look at the Central Pagoda and turn left twice. You then look at House 5.
Go to the brown the scaffolding of House 5. Zoom in on the "Pole clock" and put the Clock Pointer at 2 o'clock.
House 6
Back to the middle house, look again at the Central Pagoda. Turn left once and you will see House 6.
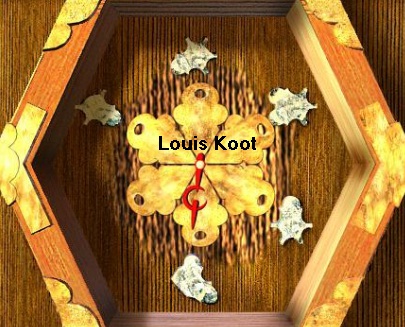
Go to the brown jetty of House 6 and zoom in on the "Pole clock" and set the pointer at 6 o'clock.
You are now done with the 6 houses and can test whether the Ice ball will really goes through all the 6 houses and continue.
Go back to the center of the Central House 1 and then look again at the Central Pagoda. Then walk 3 clicks ahead, over the rail towards the Central Pagoda, and then stay.
Turn right and you are again above the back of the skeleton. Look down and click 2 times forward to jump down. Walk back through the stones in the water and then over the plank path around the water to the stone corridor. Go back to the Wall Ladder, climb up and return to the Control Panel for the Pagoda Houses. Pull the big Lever again to go up again and then click again on the lever, to the left of the illuminated circle and .........
....... Again there will be a Ice ball from the top roof of the Central Pagoda and again it starts its journey through this part of the roller coaster, but look ...........
Now the Bal follows the right route through the 6 houses and then disappears to the right of your screen and goes to the next puzzle.
The control panel flaps close and you see the 1st bridge section now rising up and down again at those 3 pillars.
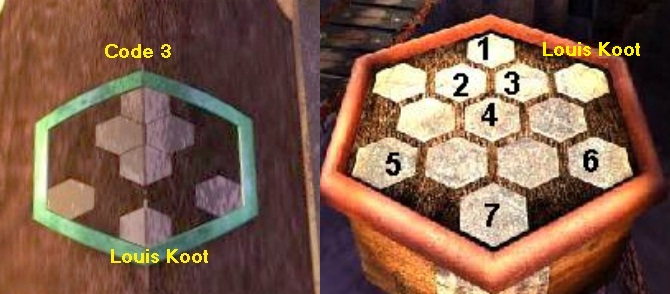
The flaps clap and you will see the 2nd Hexagon Code. Note it down
Pull the big lever again, to lower again and get ready to solve the last part of the roller coaster puzzle.
Turn around and return now, via the wall ladder and the back of the Skeleton, to the Rail of the roller coaster. I do not explain this road anymore. You have already gone back and forth twice, so you have to know it now. When you are back on the Rail you look at the ocean in front of you. You'll see a Greenish Wall. Behind the wall you see the next part of the Roller coaster.
Behind that greenish wall is your next puzzle and I call this the "pinball machine" puzzle. You have to go there now. Turn left and go forward until you're back in the middle of the Middle Pagoda House 1. Turn left once. You'll see House 6. Follow the rail to House 6 and then turn around and step through the Ring with the vibrating and transparent screen.
Then walk 3 more steps and ..... You can not follow the rail any further
On the left you now see the "Pinball machine" in the ocean. Turn left ....... left of the rail you now see a path of round stones.
Jump down and then turn right and then click 5 times forward over the round stone path.
You end up on the green dyke and on your left is the beginning of the green pillared wall. To your right is the Central Pagoda Tower.
Walk forwards 3 more clicks and then turn left and you will see a fence door in the wall.
Walk to the door, open the door and walk to the Control Panel. Click on the big Lever and ...
.. ...you rise again with the control panel and you'll see the "pinball machine".
|
The "Pinball machine" Puzzle:
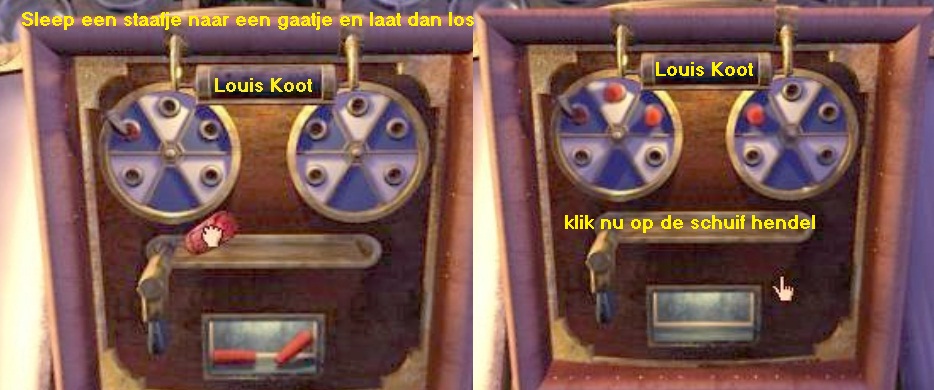
The "Pinball machine" consists of a middle part of tubes and a left turntable and a right turntable. Both turntables consist of circles and some of these circles have a "bottom" and others are open. Now look at the control panel. On the control panel you see... 2 Circles divided into 5 segments which are white or blue. Each segment has a hole. In the Left circle there is a red button in the hole at "10 o'clock". That is Saavredo's sabotage work again. These two circles thus represent the two turntables of the Pinball machine and the White Circles are the holes with a bottom and the Blue the holes without bottom. Under the Circles you see a slider that is now to the left and below it a tray with three red pins. First let's see what the problem is here. Pull the Slider, that's under the circles, to the right and ...... The Roof of the Pagoda drops another Ice ball and it ends up in the left turntable of the Pinball Machine.
But the Ice ball lands in a HOLE WITHOUT BOTTOM, and the ball thus makes its way into the ocean. The intention is that you ensure that the Ice ball lands in a hole WITH BOTTOM, so that the Ice ball moves back and forth between the left and right turntables a few times and then goes through an open hole in the right turntable back on the rails. Look at the 2 Circles on the control panel and the 3 red pins. You must now put the 3 red pins in the correct holes of these 2 circles to achieve all this. You can now try it endlessly, just like I did before I found the right solution, but here is the right solution:
If you have placed the 3 red pins correctly, click on the Lever and .... The roof of the Pagoda rises again and again spits out a ball and ..... the ball now goes through the "pinball machine" in the right way and then continues its journey along the rail
You then see how the last bridge section between the pillars comes up........
.........and your 3rd Hexagon Code appears. Copy it again.
Pull the large Lever again to descend back down. Turn around and click once to the gate. Then turn left, because to the left, in the corner, are a few Saavredo's Journal pages.
Take the pages and read them and then close the book Turn right again, open the gate and click twice. |
You are back on the Green dike. Turn to the left and click 5 times forward, over the green dyke.
You are back at the water and another plank path goes through the water. Follow the Planks all the way, always follow the bends. You end up at the bottom of a rope ladder.
Look up and then click 1 or 2 times to get to the top of the rope ladder You see that you are now back at your first arrival point here in Amateria.
The "Hexagon Code" puzzle:
Click 1 time forward and then turn right and you stand again right in front of the ramp with the 3 holes in it. Click 1 time forward and turn left and zoom in on the first Hexagon Plateau.
Hexagon Code 1: The "Gutter " Code
Well, you know all the 3 codes now. On this first Hexagon plateau, press the Hexagons now according to the "Gutter" Code that you got after solving the Gutter Puzzle
Then zoom out and you automatically turn to the right. If this does not happen, you have pressed a wrong code.
Two Iron Valves now jump up in the hole and you can continue. Click 1 time forward and then turn left again and zoom in again on the Hexagon platform.
Hexagon Code 2: The 6 "Pagoda House" Code
Press the hexagons on this 2nd hexagon panel according to the "6 PAGODA HOUSE Code".
Zoom out again and you turn right again and the second hole gets closed also. Go forward once again, turn left and zoom in on the 3rd Hexagon Plateau.
Hexagon Code 3: The "Pinball Machine" Code
Press the hexagons according to the "Pinball Machine Code".
Zoom out again and the last hole gets closed.
Click 1 forward and you are at the top of the ramp and standing before the Round Attic Door of the Central Pagoda Tower. Open the Round Door.

The Central Pagoda Tower Puzzle:
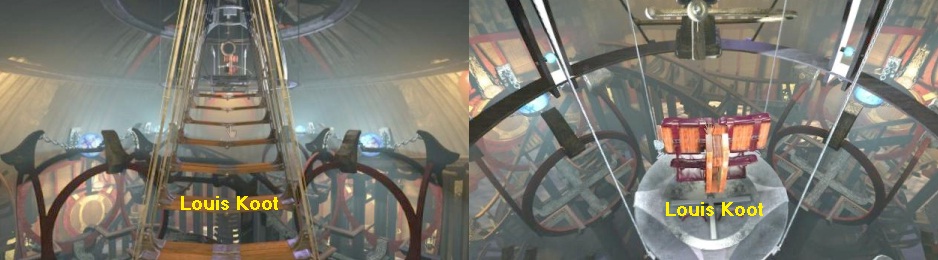
Click 1 time forward to go through the now open round door. A movie starts in which a staircase is folded out. Before you go here, first look beneath you and around you. You see that this Central Pagoda Tower is really the HEART of the Roller Coaster. Then go 2 times forward on that stairs above you and then once again 1 time forward to the Chair
Click on the chair and it turns around. Well, you are tired so why don't you sit down. Click on the Chair and you're in it.
You see again such a round View Screen. Click on the button below the screen and watch and listen to one of Saavredo's monologues.
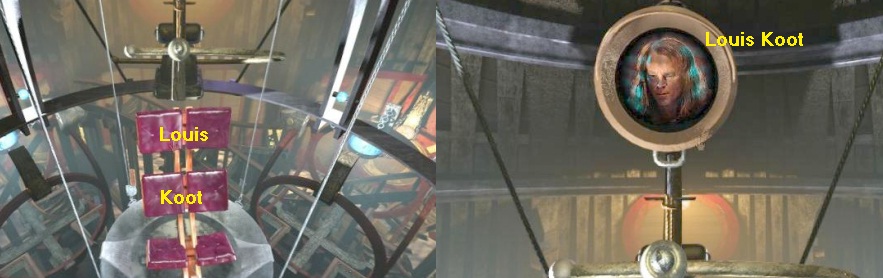
Then look up and........ above your head you see a Triangular Lever......
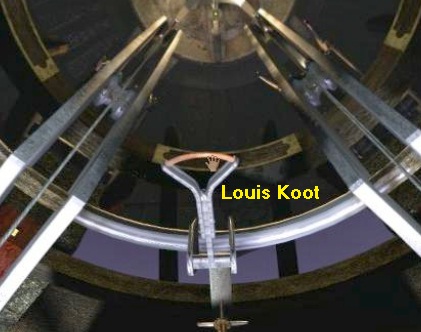
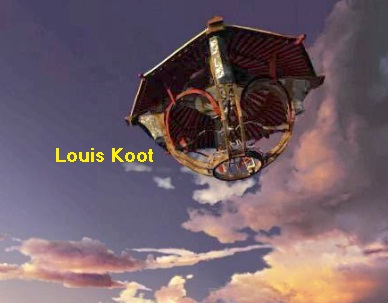
Pull this triangular lever and ....... you go up. You are now in the little roof house that always came out of the pagoda and where the Ice balls came from......
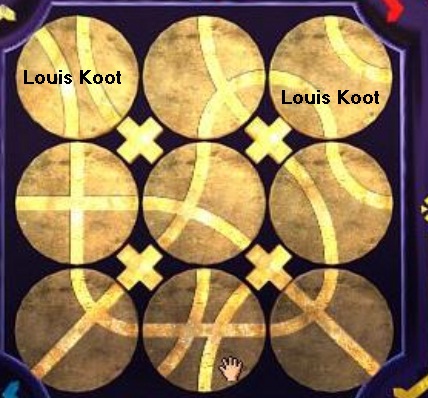
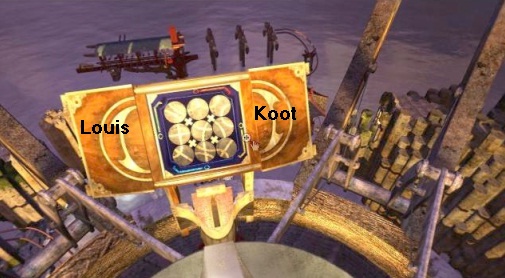
You are now the "Ice ball". A yellow panel goes open and you see a square with 9 circles. Behind this panel you see that Structure with the 3 Pillars in the ocean.
|
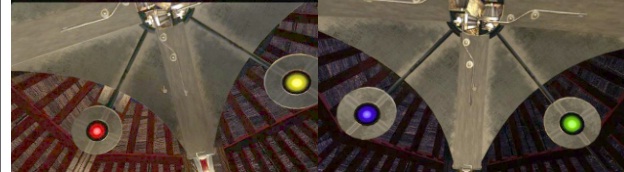
Look up again and you will see the ceiling. Turn around and you will see 4 Colored round Lamps on the ceiling, a Green, Blue, Yellow and a Red lamp.
These 4 Lamps correspond to the 4 major structures on this Island:
You are floating here, high in the sky, in the "Dome" of the Central Pagoda Tower. Look down again and now zoom in on that yellow panel and you come in a close-up of that square with the 9 circles . On this panel you see the route of the Roller coaster, but the route is jumbled. You must now restore that route by clicking on the circles in the correct order so that the circles rotate. Along the square you see the entrance/exits of the ball, the Red, the Green, the Blue and the Yellow. The Blue one is the starting point, because you are now hanging above it, so you are now hanging right in front of the "6 Pagoda Houses". The Red one is the exit because that is that Structure in the Ocean, your ultimate goal. To save you a lot of boring work here is the solution of this puzzle. Number the 9 circles now, from top left to bottom right, as 1 to 9
Zoom out the close-up and look up again. Look for the Blue Lamp on the ceiling and click on it and ......
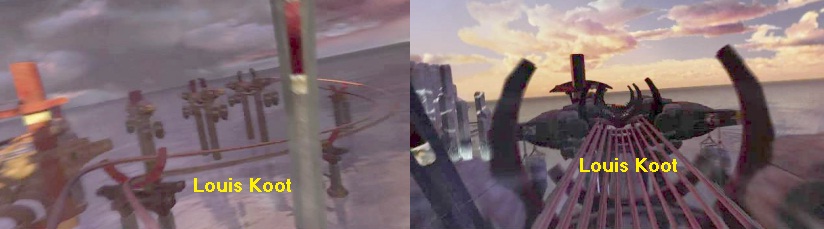
Now sit back and ...... Enjoy your fantastic journey in the "Ice ball " through the Roller Coaster: Everything goes perfectly, you go through the 6 Pagoda houses, through the Central Pagoda, through the Gutter and again through the Central Pagoda, through the Pinball Machine, again through the Central Pagoda and then you go via the bend over the water to the 3 pillars ..... Will the Bridge parts come up in time ?? .........YES... they DO IT ........
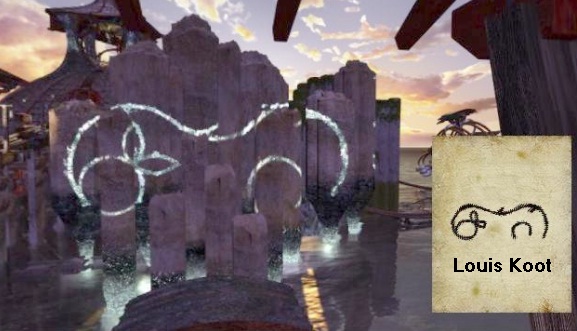
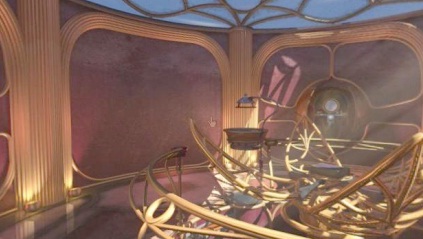
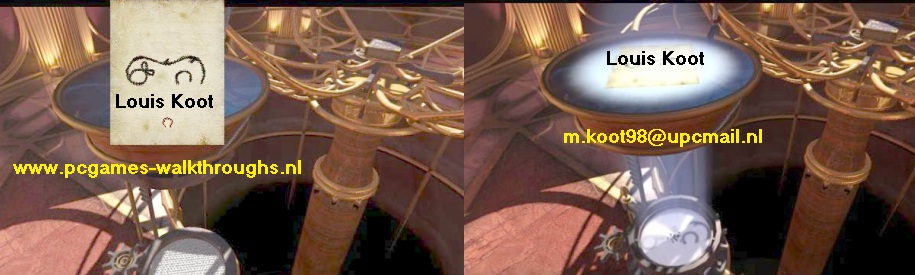
You come to a halt in the Structure and now the Amateria Symbol will be drawn for you and it will disappear next to the Journals.
The "Ice" breaks. Look down and you will see the J'Nanin Linking Book. Click 2 times to get to the book
Open the book and click on the screen and you go back to J'Nanin |
Back in J'Nanin:
Walk back to the Blue Viewer again and insert your Amateria Symbol.
A "bridge" is now being rolled out to the open Egg Cage containing the Narayan Linking Book.
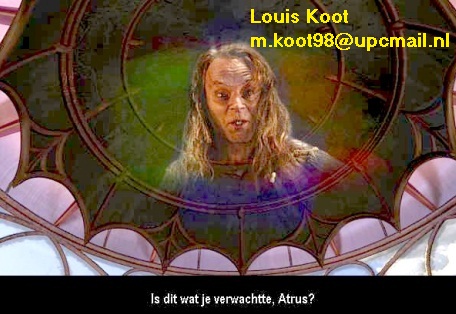
In the viewing screen you now get a movie in which you see and hear Atrus, who is rather proud of his sons.
Then you look down and walk 1 time ahead on the "bridge" and then zoom in on the Narayan Linking Book.
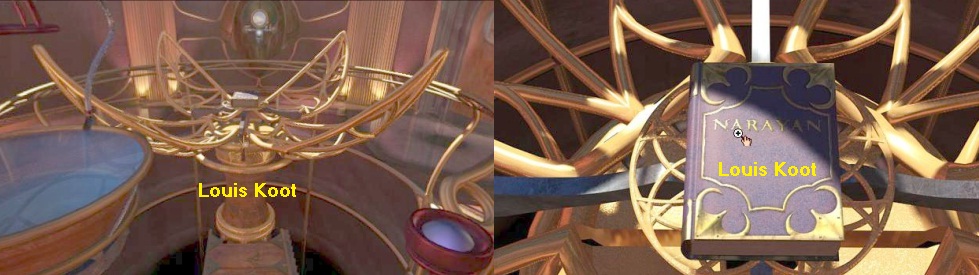
The book opens automatically.
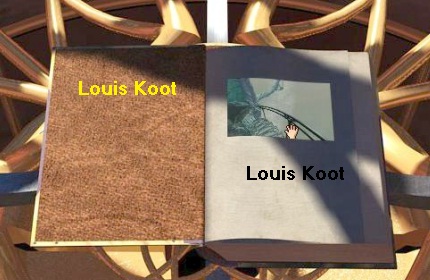
Click on the Linking screen and you will travel to:
Original Dutch Walkthrough from 2013 by: Louis Koot
2018 English translation, screenshots and lay-out by: Louis Koot