2022: Walkthrough by: Louis Koot
If you have found this walkthrough via google search or via another site then you have probably not visited my site.
A lot more very detailed game walkthroughs can be found on my site at: www.pcgameswalkthroughs.nl
Chapter 3: At the Border between District 1 and District 2:
The National Bunker is located in the middle of the First District, the walled center of the city. The elite also live in the center. The rest of the population lives in the Second District, the neighborhoods around the center. Arriving at the border between the districts, Nikopol is stopped by a Border Guard. You are not allowed to enter the District 1. Only residents of District 1 are allowed to go in and out freely, due to the alleged coup.
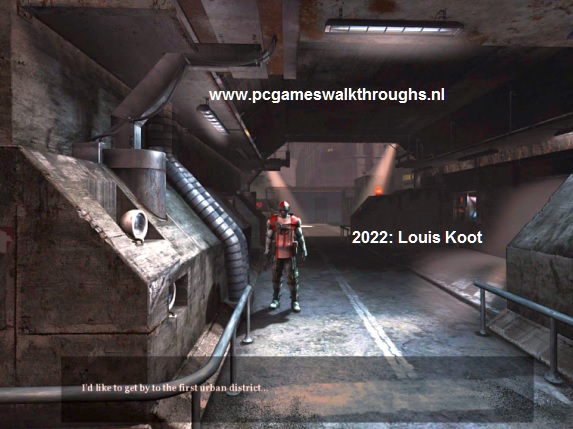
So Nikopol has arrived on the border of District 2 and District 1.
The entrance to District 1 is a tunnel and in the tunnel stand a border guard who will not let Nikopol pass.
Look down and to the left. You see a broken sewer grid in the ground. Near the broken grid is a Iron Rod. Pick up the Iron Rod.
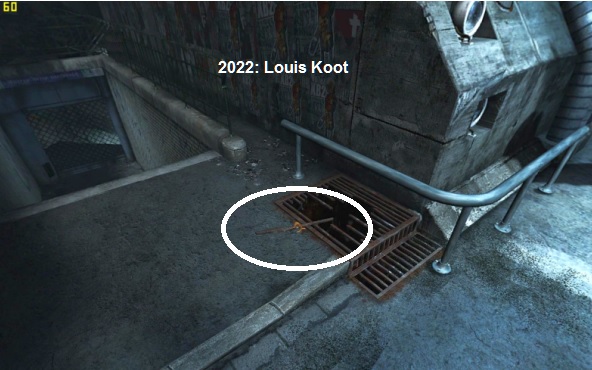
Above the broken grid you see a concrete column with 2 round lamps. Also on the right side of the tunnel you see 2 of those lamps and also a red lamp.
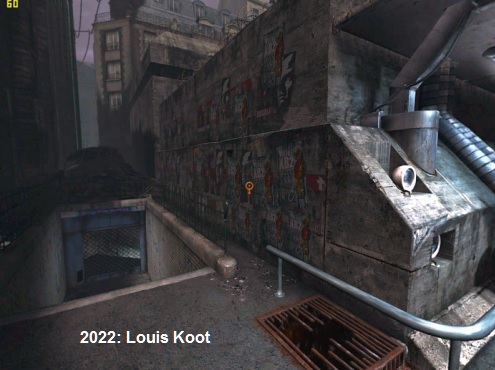
Look at those lights with your loupe cursor. Nikopol tells you that invisible laser beams come from those round lamps. In the alley, left behind the broken grille, a staircase goes down to the entrance of the Metro. However, the Metro entrance is closed with a gate. The concrete wall is covered with posters. Check out those posters. They are election posters that call for voting for XB2 tomorrow. XB2 is therefore the opponent of Dictator Choublanc. Nikopol has mentioned from Anubis that XB2 is an android and that an XB2 android is guarding his father in the National Bunker.
A: Metro tunnel:
Go down the stairs to the gate of the Metro. At the bottom of the stairs you are then in front of the closed gate.
At the bottom of the left pillar you see a metal plate. Click on that metal plate and Nikopol will tell you that plate doesn't look that sturdy.
Take the Iron rod from your inventory and then click 4 times on the metal plate.
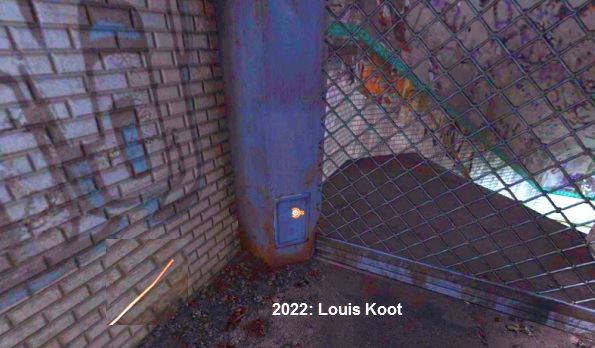
You break the metal plate loose, but you have lost your rod. Click in the hole with your action cursor. There is a chain in the pillar.
Take the Chisel from your inventory and then click in the hole again and .... you chop the chain with the chisel and .... the gate now opens.

Well .... go through the now open gate and .... you end up at the metro station, underground. Nikopol says that the metro has been out of use for 10 years because of the toxic mud that has flowed into the tunnels from the Seine. A wrecked subway train blocks the tunnel to the right. So walk 1 click forward and then turn left. You are in front of a double metal door. The right half of the door is open is a bit open.
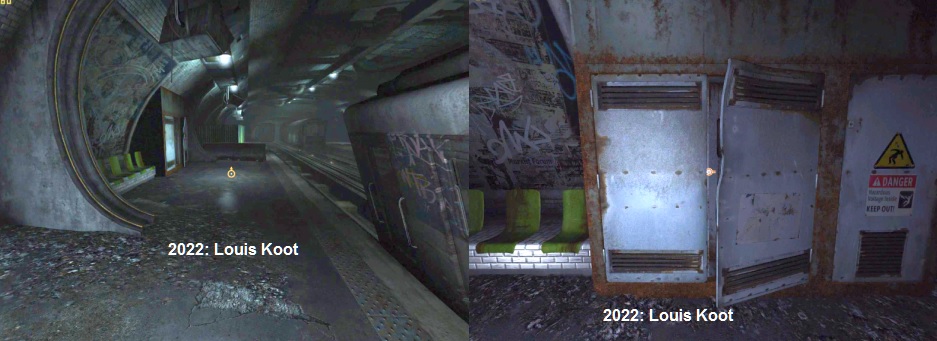
Click on the doors to open them all the way.
|
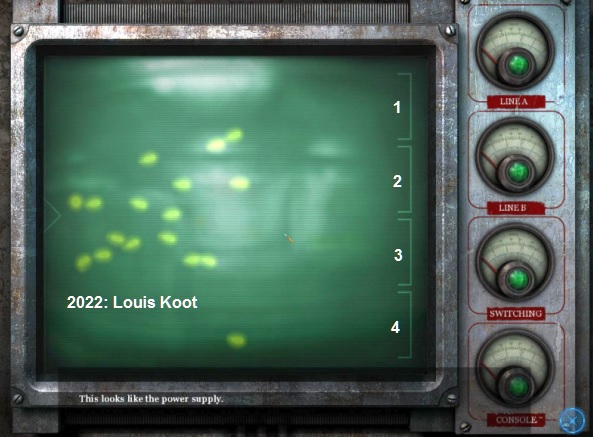
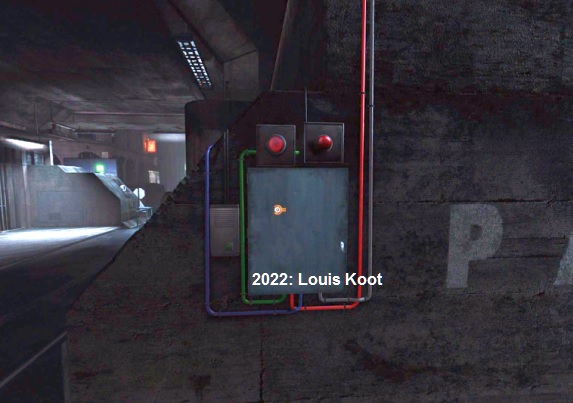
The Power Cabinet It turns out to be a power cabinet. In the left part of the cabinet is the control panel with which the train running in the tunnel was controlled. In the right part of the cabinet hangs a monitor. Click on the control panel that is in the left cabinet
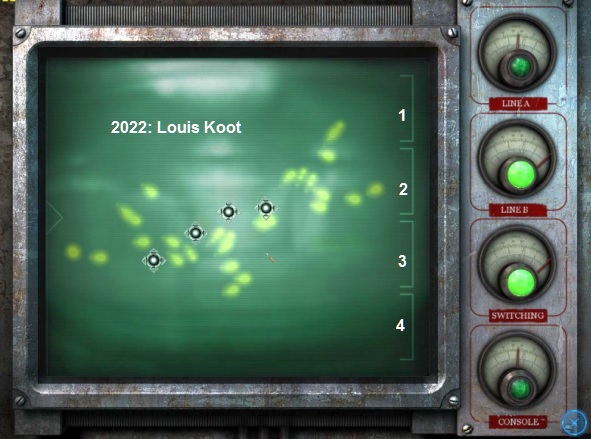
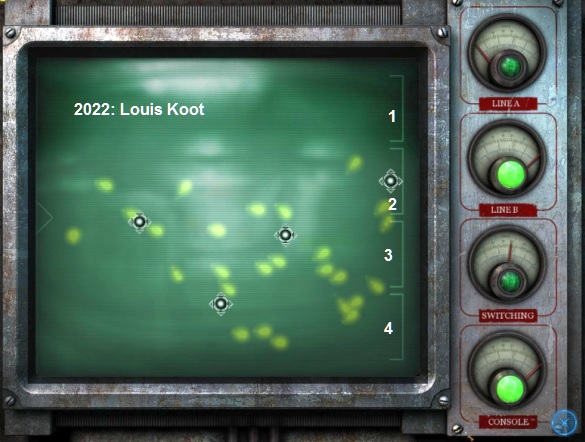
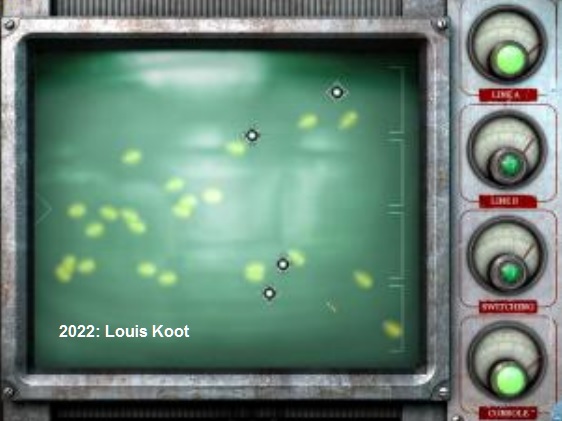
You can't do anything now on this panel because this panel has no power now. Zoom out via the cross button, bottom right. Zoom in on the working monitor in the right cabinet. This is place to regulate the flow of the power to the tracks. On the right you see 4 meters. Each meter contains a green lamp that turns on and off. From bottom to top these are the buttons for Line A, Line B, the Switch and the Console (the panel in the left cabinet). The 4 meters will light up when they have enough power. You will now see that the meters keep on lighting up and going out again. You will see moving dots on the screen. Those dots indicate the direction to which the current flows. On the right side of the screen you see a line with 4 coves. Those coves are connected to the buttons. Number the 4 "coves" in the line as 1, 2, 3, 4. The flow particles have to be led through such a cove to a button to give that button enough current. You now have to make sure that all power is routed to the bottom button, the Console button. Now click 4 times with your cursor in the monitor screen. 4 magnets will appear on the screen.
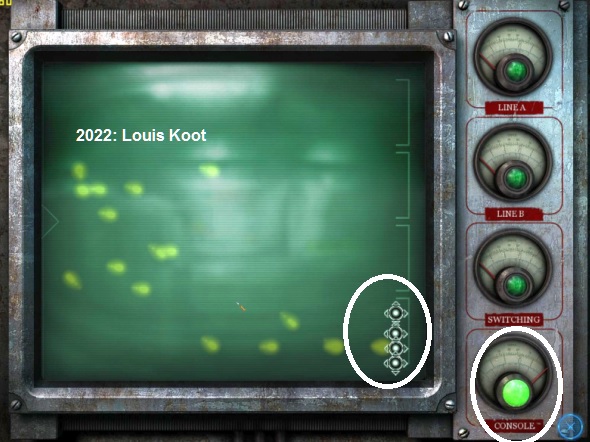
You can drag the magnets across the screen to another place. With these magnets you can deflect the current particles so that all current particles then go to 1 specific inlet, so a button. The magnets therefore attract the current particles towards them. Move the trains on the track: You now have to place the 4 magnets in the screen in such a way that all current particles go to the bottom cove 4, which then activates the Console button and thus the control panel, in the left cabinet, receives power. Click on a magnet and then drag the magnet across the screen to where you want it. Now place all 4 magnets in cove 4 and .... all current particles now go to the Console meter and only the console button is lit.
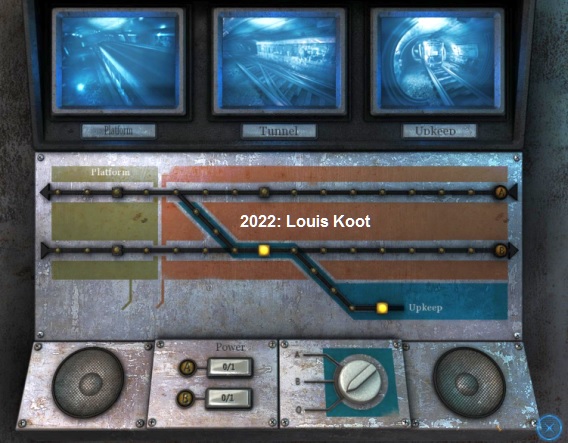
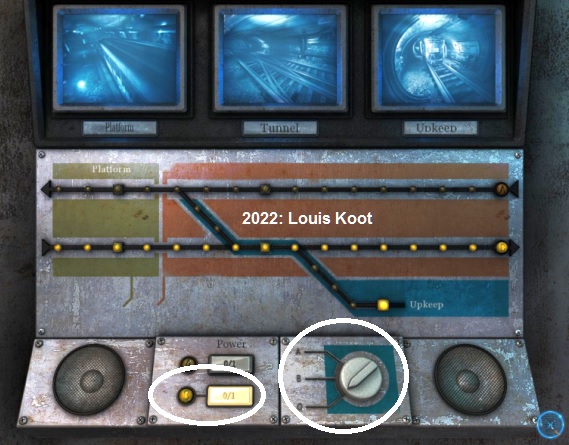
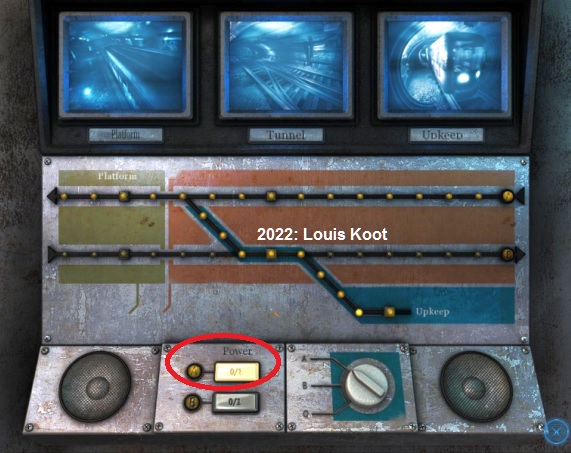
Zoom out via the cross button. Zoom in again on the control panel, in the left cabinet. The 3 monitors are now working. On the Platform monitor you now see the broken metro train on Track A, You can now see the switch on the Tunnel monitor. There is also a train on Track B, right on the switch. On the Upkeep monitor you see a good train set on the Upload track.
Nikopol says he can use the depot train to push the broken train, on track A, out of the way. In the Upkeep track you will now see 2 yellow illuminated blocks. The block on track B is a train that has been standing there for 10 years and the block on the Upkeep track is the train in the depot. The train on track B must first be driven out of the way, otherwise the depot train cannot be driven at full speed to the broken train on track A. Zoom out again and zoom in again on the power monitor, in the right cabinet. You now must to place the 4 magnets in the screen in such a way that the current particles mainly go to the Console and to Track B.
As soon as you only have the buttons of Track B and the Console lit, you zoom out. NB: It is quite difficult to find the right places for the 4 magnets. What matters is that you let the flow particle now deflect so that part of it goes to cove 2 and part to cove 4. As soon as you see that only the buttons of Track B and the Console are lit, you quickly zoom out. Zoom in again on the control panel, in the left cabinet. You will now see the small lights in Track B are lit and the white B0/1 button is also on. The 3 monitors are also still on. Make sure the dial is set to O (zero). Click on the white B0/1 button and .... you will see that the train, which is on Track B, is driving away to the right.
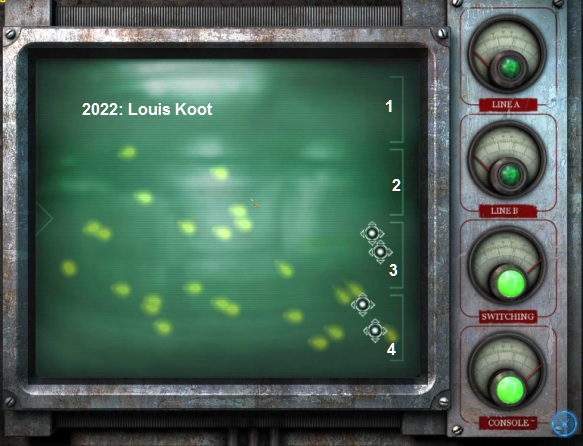
Zoom out and zoom in again on the power monitor, in the right cabinet. Now you have to place the 4 magnets in the screen in such a way that the current particles mainly flow to the Console and to the Switch. This is again a bit difficult. As soon as you see that only the Console and the Switching button are lit it's okay, zoom out.
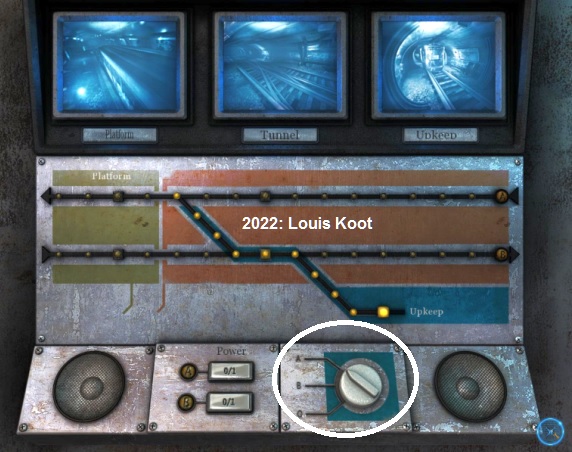
Then zoom in on the control panel again. Now set the Switch to A. If the Switch is already set to A, first turn the Switch to O (zero) and then to A again. You will then see that the lights from the Upkeep to Track A will light up.
Now you need to activate Track A. Zoom out again and zoom in again on the monitor. Now you must place the 4 magnets on the screen in such a way that the current particles then only flow to the Console button and to Track A button. This is the most difficult part of this puzzle.....you have to "play around" with the 4 magnets a bit and If you see that only the Console and the Track A buttons are lit a nd stay lit, then you have it right
Zoom out again. Zoom in on the control panel again. In Track A, the lights are now also lit. The white A0/1 button is now also on. Click on the white A0/1 button and .....
see what happens..... .... the Upkeep train leaves the depot track and thunders to track A. Zoom out and .....The depot train thunders over track A to the train wreck and rams the wreck out of the tunnel. |
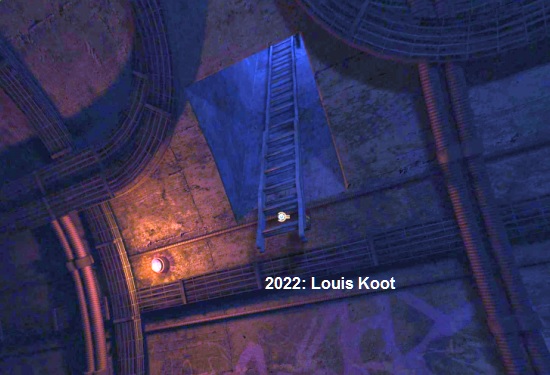
Go forward 2 clicks. You are then in the tunnel and at the back of the train.
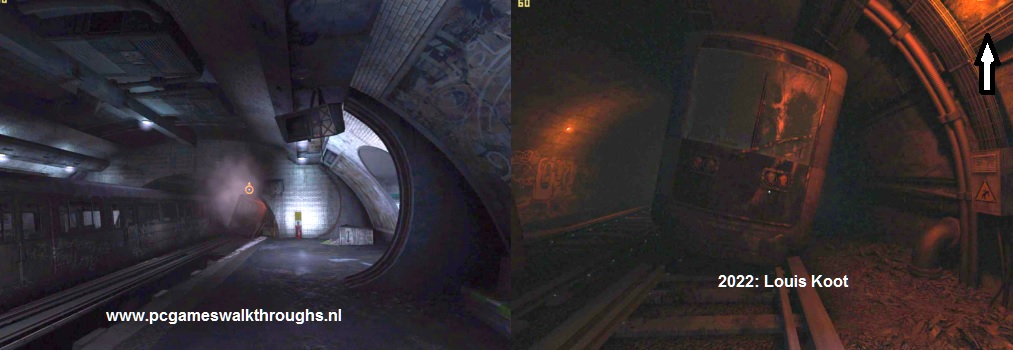
Look up and to the right. You will see a ladder shaft. A sliding ladder hangs in the shaft, but the bottom of the ladder is hanging too high.
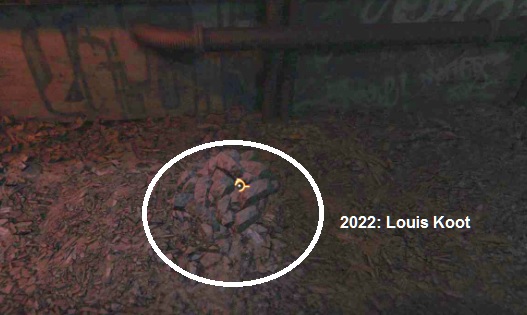
Look down at the ground and then slightly to the right. There is a pile of stones next to the rails.
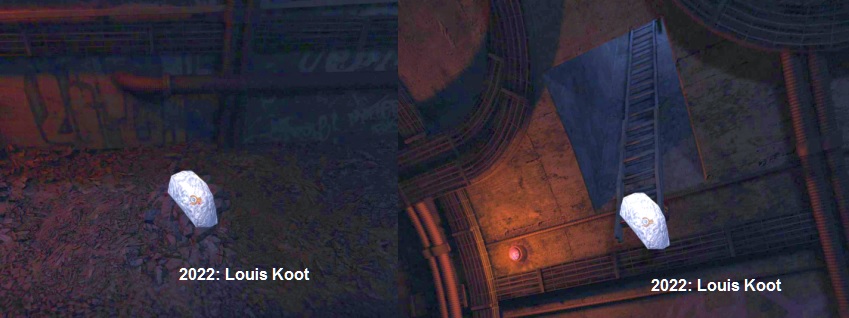
Grab a stone from the pile and look up at the ladder again.
Click with the stone on the bottom of the ladder and .... the ladder slides down.
Look up the ladder to get the forward arrow cursor, then click to climb out of the tunnel via the ladder.
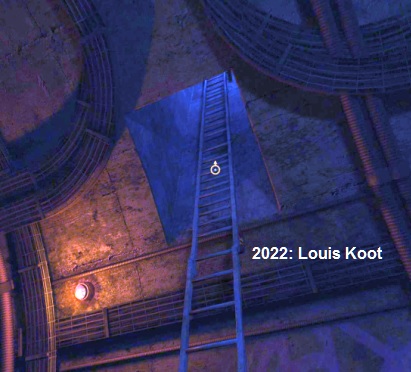
You end up behind the border guard in his guard booth.
Get past the 2 Guards unseen:
Guard 1:
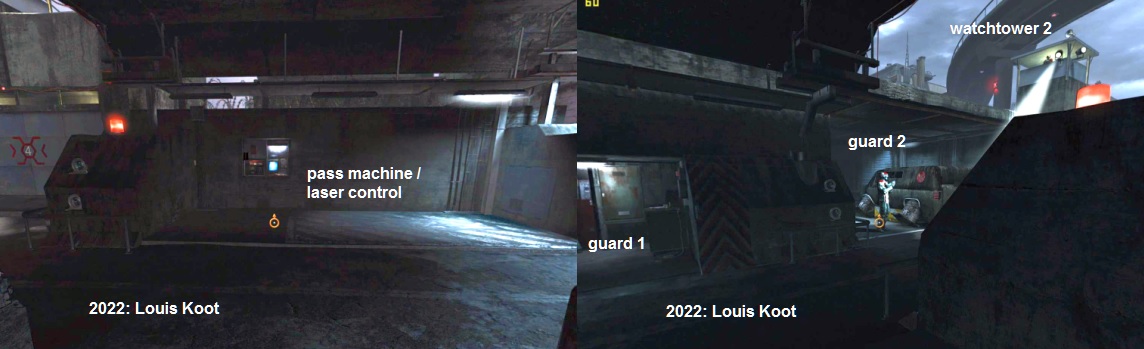
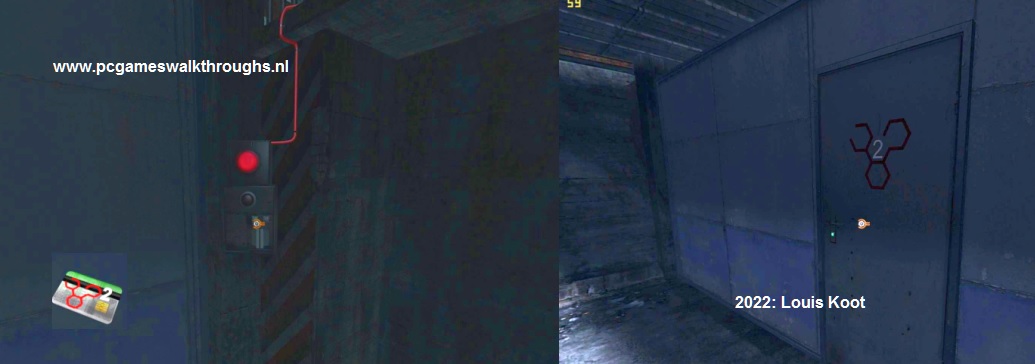
The guard in the tunnel has his back to you, so he's looking at District 2, where you came from. A card machine hangs on the wall across the street. If you look to the right you will see a watchtower with a search light and a guard. Round welding lamps are again on the concrete pedestal. The lamp on the concrete base lights up red, indicating that the lasers are on.
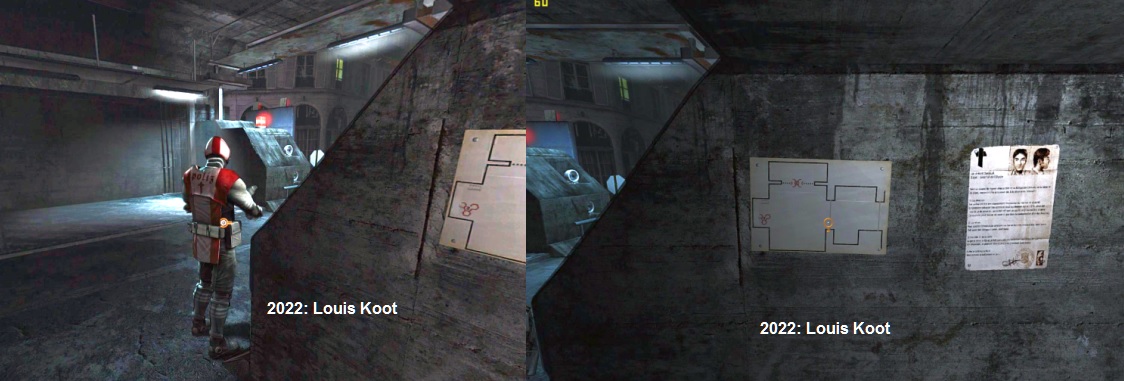
On the right wall of the guard booth is a map and a "Wanted poster". Look at the "Wanted poster". Nikopol reads that someone has gone from the Second to the First District without permission and that person is now being sought. Nikopol thinks it was his father. Look at the map. It is a map of this border post. District 1 is on the left. So you have to turn left to leave the border post through the MontParnasse door. Right opposite the booth where you are now, a card machine hangs on the wall. You will also notice that the entrance to the courtyard, and the MontParnasse door, is guarded by lasers. You will see that the code for the MontParnasse door is code 2. Click the map away again
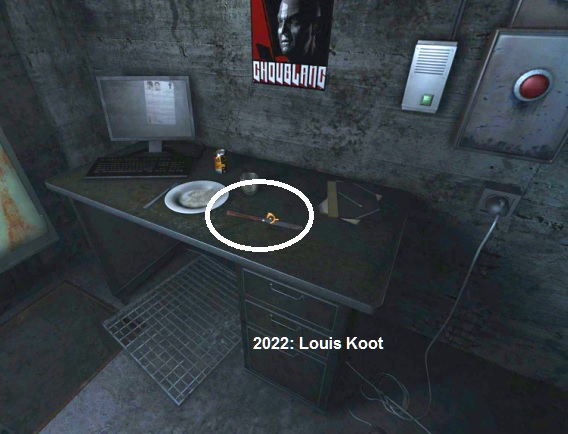
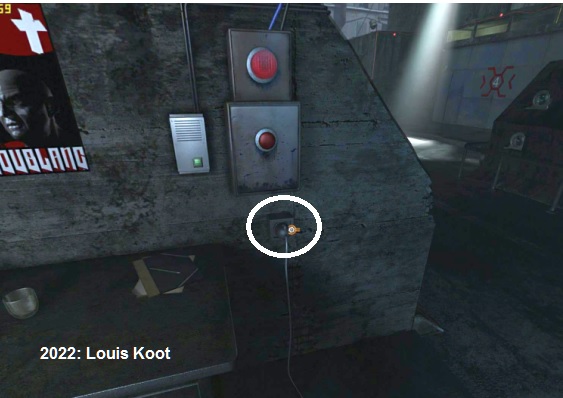
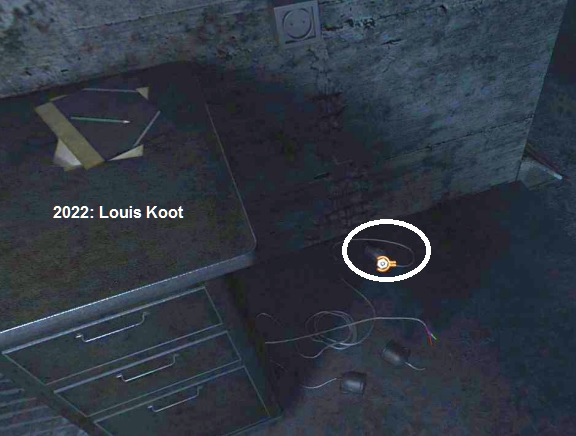
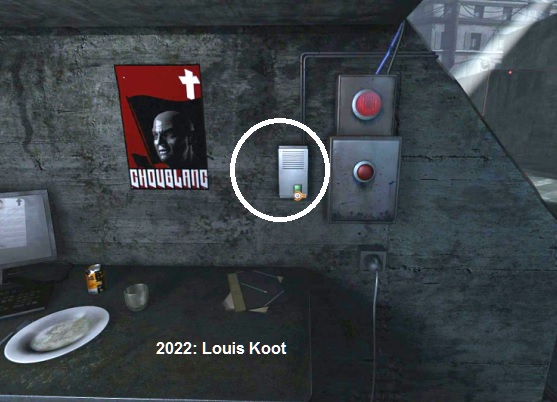
There is a coffee machine in the corner. Next to the coffee machine is the closed door of a cupboard. Click on the cupboard door. However, Nikopol cannot open the closet door without the guard hearing him. To the right of the door is a desk. There is a knife on the desk. Above the desk hangs a poster of dictator Choublanc, which you can click on. To the right of the Choublanc poster you see an intercom with a green button and a larger box with a red alarm button. There is a red lamp above the box with the red alarm button. A plug from an electrical device is plugged into the socket under the alarm button.
Take the Knife.
Click the plug out of the socket.
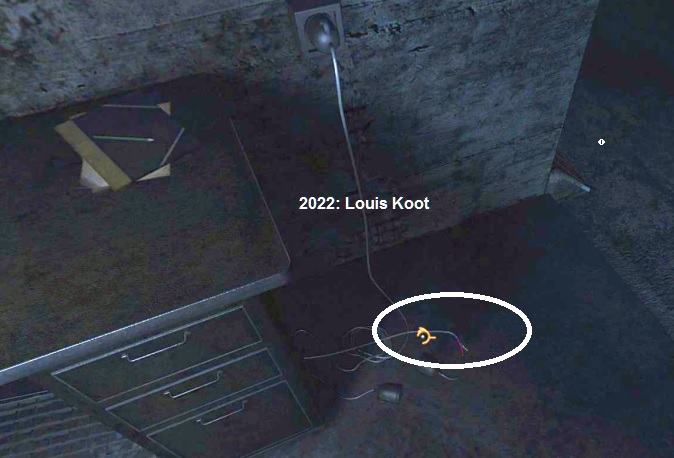
The plug falls to the floor. Look down at the plug and small device
Take the Old knife from your inventory and then click on the device (not on the plug).
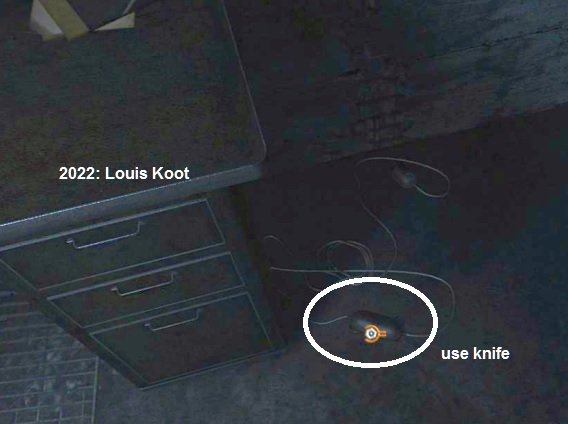
You cut the device from the wire. Store the knife again. The end of the wire is now exposed.
Click on the plug again to put the plug back in the socket.
Now pick up the wire, just behind the bare end.
The "life" wire is then attached to your cursor.
Turn around to the guard and click on the guard with the electrical wire and ....
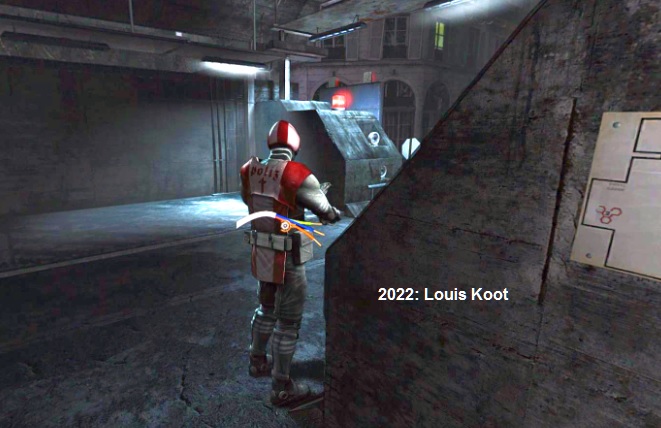
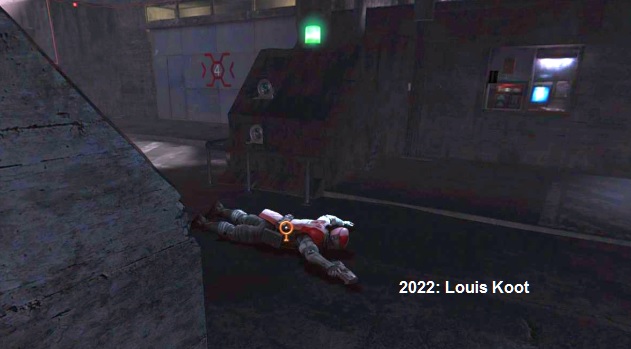
.......the guard is electrocuted and falls to the ground dead. Click on the disabled guard again.
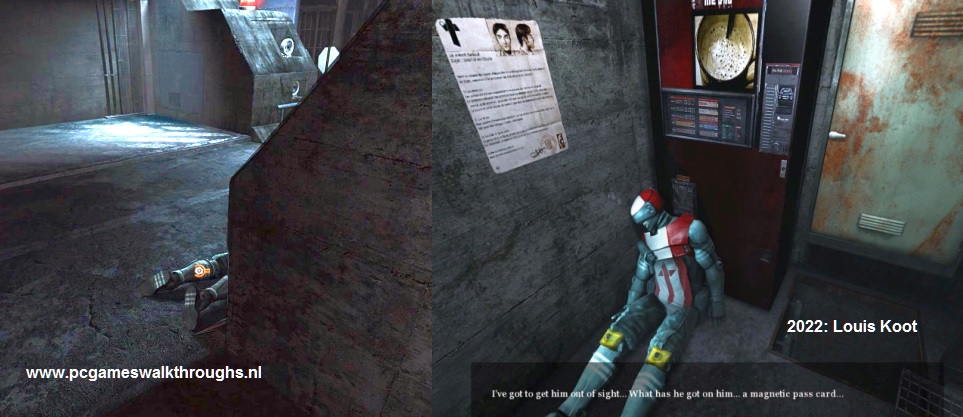
Nikopol picks up the corpse and places it in the pen against the coffee machine and healso steals the Magnet Pass from the guard.
View the magnetic pass in your inventory. Unfortunately, the magnetic pass has the number 1, so you cannot use the pass for the MontParnasse door.
Guard 2:
Turn back around and quickly cross to the other side, to the Pass machine.
Then turn around and ..... you will see the 2nd guard in the garage, below watchtower 2.
Cross back to the guard booth of guard 1. Back in the booth stand in front of the desk again.
If you hadn't done so before, click the green button on the intercom.
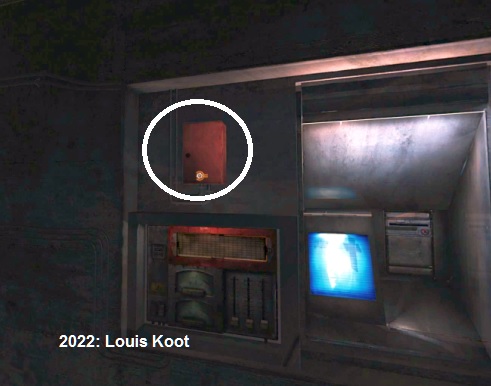
When Nikopol has recognized the green button as a radio/intercom, click the green button again. Nikopol poses as guard 1 and asks guard 2 if he can come and help. Guard 2 wants to come, but first you have to turn off the laser beams. Look across. On the concrete pedestal, to the left of the card machine, you will see a red lamp burning, indicating that the laser beams are on. Cross over to the card machine again. At the top left is a brown power box. On the right is a monitor and next to the monitor is the slot for the magnetic pass. Open the small brown power box and then zoom in on it.
In the box you see a green wire with a green lamp and a red wire with a red lamp. Click on the green wire and then on the red wire to pull them out of the white plugs. When the wires hang loose, click on the green wire again and then on the red wire. The green wire then plugs into the plug under the red lamp and the red wire then plugs into the plug under the green lamp.
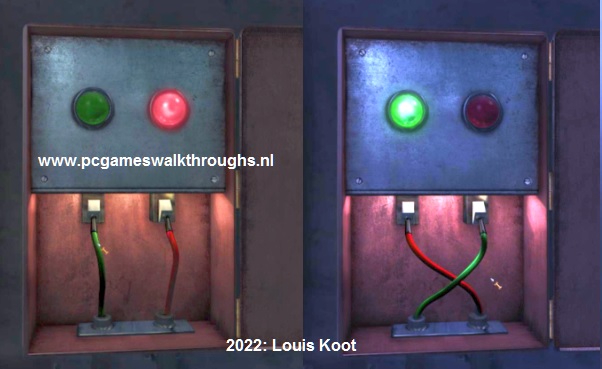
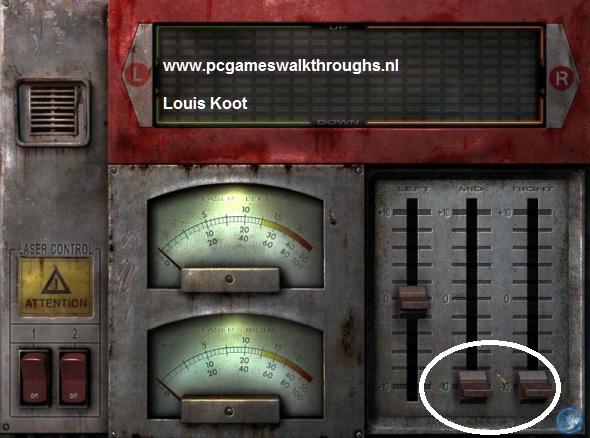
Zoom out via the cross button. Go back to the other side for a while and then look again, from the guardhouse, at the red lamp on the concrete base. The red lamp on the pedestal is now also green. Go back to the card machine. Now zoom in on the panel under the brown power box, because that panel is now activated. You are in the Laser Control Panel. At the bottom left you see 2 red switches. These 2 switches are now down, so on. The 2 meters are for the left laser and the right laser. The hands in both meters move back and forth. On the right you see 3 sliders that you can move from +10 to -10. All 3 sliders are now set to 0. Click on the 2 red switches to turn them off. But .... the hands in the 2 meters keep moving. The lasers do not switch off because you have swapped the wires in the power box but the lamp on the pedestal is green, so guard 2 will think the lasers are off.
Zoom out and go back to guard 1. Click on the green intercom button again and .......
......Nikopol informs guard 2 that the lasers are off and ..... guard 2 is grilled by the lasers.
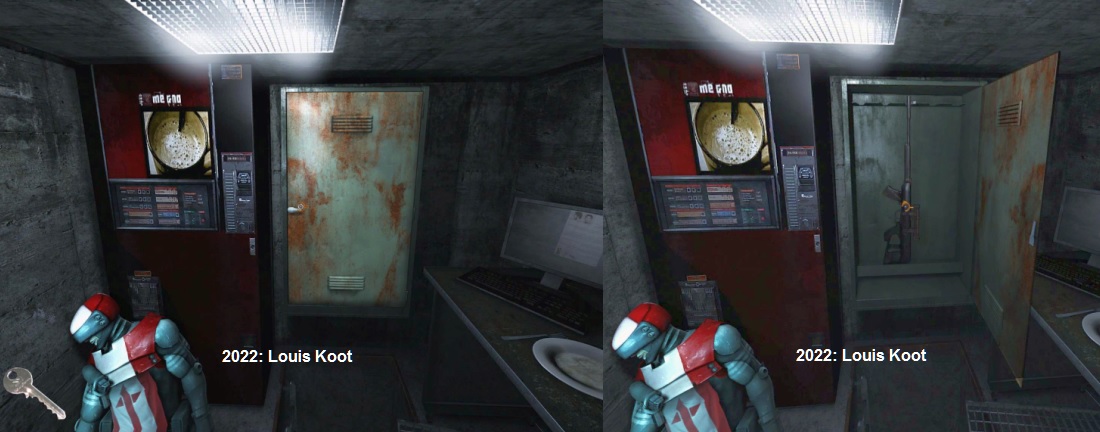
Click on the corpse of Guard 2. On the corpse Nikopol find the armory key. Turn around to the cabinet door.
ake the Armory Key from your inventory and click on the closet door to open the cabinet. In the cabinet is a Sniper rifle.
Grab the Sniper Rifle.
The rifle has a telescopic sight so it is a great weapon for sniping. Turn around and look again at the corpse of guard 2. Behind the corpse is the courtyard with the barracks of the border guards and you see watchtower 1. There is a guard in the watchtower and the searchlight moves back and forth. Stay in the guardroom. Take the Sniper Rifle from your inventory. You then look through the telescope of the rifle. Aim at the guard in the watchtower. Aim the reticle at the guard and then kill the guard.
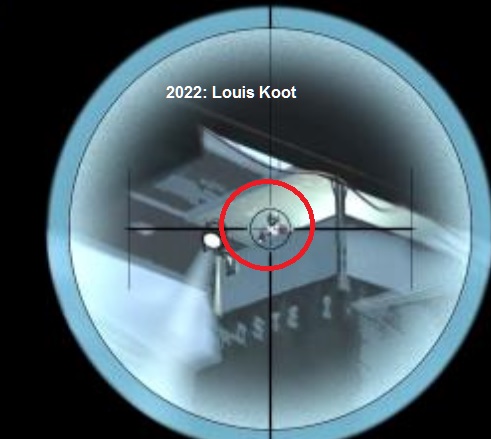
Note: When you look through the telescope of the rifle, the aiming circle will slowly move back and forth and up and down on its own. You can adjust the reticle a bit by sliding your mouse. However, it doesn't go smoothly at all. You also really need to make sure the circle in the center is exactly on the target before firing. With your left mouse button you fire
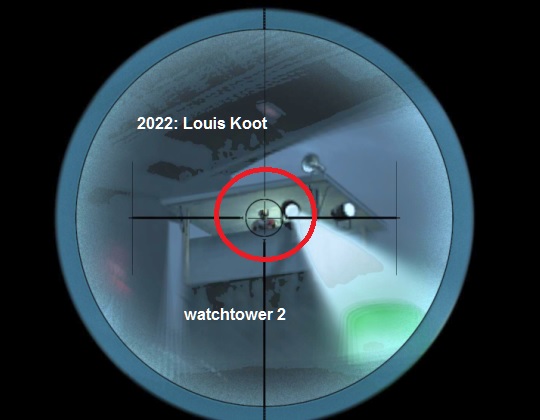
When the guard in watchtower 1 is dead, walk to the other side again, to the card machine. When you are standing in front of the card machine again, turn left. You will then see the left watchtower 2, above the garage. Well ... take the Rifle from your inventory again and aim at the guard in the watchtower and also kill the guard in the 2nd watchtower.
Well....not bad for an artist.....you killed 4 guards. At what art school do they teach you that at? Now don't storm out like a screaming madman and into the courtyard, because the lasers are still on. You really need to turn off the lasers now. Turn back to the card machine. Zoom in again on the control panel, under the brown power box. The 2 red switches are now set to OFF, so with the top to the front. However, the lasers are not out yet because you have switched the wires in the brown power box. Now slide the middle slider and the right slider all the way down, to -10 and .... both lasers are now really switched off. Zoom out again.
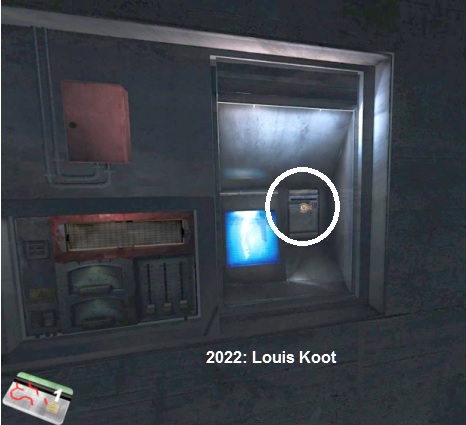
The magnetic card you stole from Guard 1 has Code 1. However, Code 1 is not the correct code for the MontParnasse door. You need a pass with Code 2 for that. Fortunately, you can change the code for a magnetic card yourself via the card machine. Stand right in front of the card machine again. In the right part there is a monitor and the slot where the magnetic card has to go. Take the Magnetic card of guard 1 from your inventory and then put the card in the slot.
You will automatically end up in the monitor screen On the monitor you now see 16 hexagons. They are buttons that you can turn on and off by clicking in a hexagon. If you click in a hexagon, the edges of the hexagon will turn red. If a hexagon is white, that hexagon is on. If a hexagon is not white, then the hexagon is out. At the top right you see the code 1, of the magnetic card.
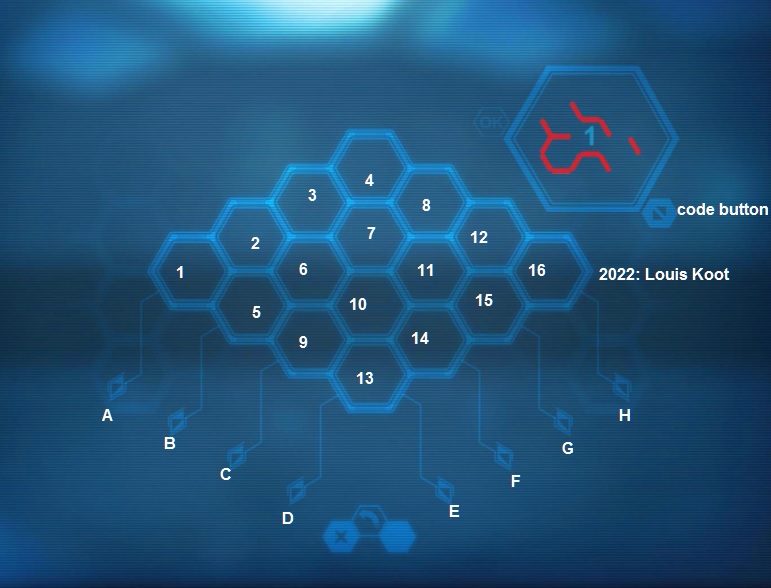
The bottom row of hexagons has lines with arrows. The edges of each hexagon consist of 6 segments. With the arrows you can disable the segments that are on the same line as the arrows. You are supposed to put Code 2 on the magnetic card in the 16 hexagons. At the bottom right of the code of the magnetic card is a Code button with which you can set other codes. At the bottom of the screen is the Reset button to return the puzzle to its initial position. Number the 16 hexagons, from left to right, 1 to 16. Number the 8 arrows, from left to right, A, B, C, D, E, F, G, H.
Experiment a bit to learn how this puzzle works. Randomly click on some hexagons to make some edges red. Then click on some arrows to see which arrows disable which edge segments. When you have finished experimenting, click on the Reset button to exit the monitor. Then put the magnetic card back in the slot to restart the puzzle.
Click on the Code button at the bottom right of the magnetic card to get Code 2 in that screen.
Then click on the hexagons: 3, 7, 8, 10 to make the edges of these 4 hexagons red.

Now you still have to make the right edges of those 4 hexagons red.
Click Arrow G, Click Arrow B, Click in hexagon 8, Click Arrow B, Click in hexagon 8, Click in hexagon 7 and .....
The screen with Code 2 will flash, indicating that you have done it right.
You will automatically exit the puzzle and get the magnetic card back. You now have the correct code on the magnetic card, but that does not mean that you can just walk to the MontParnasse door. There are more guards and they musn't see you. You should now turn off the alarm. From the card machine, turn back up and look at the body of Guard 2. Guard 2 was standing in the garage when he was alive. You will see a van in the garage. Go forward to the van in garage.
In the garage, turn left towards the wall. There is a box on the wall. This is the Alarm box. Click twice on the box to open the box.
You will then automatically look in the box. At the top right is the On/Off button. At the top left is the flow meter.
At the power meter you will see a row of small "LED" lights. You will see various colored wires.
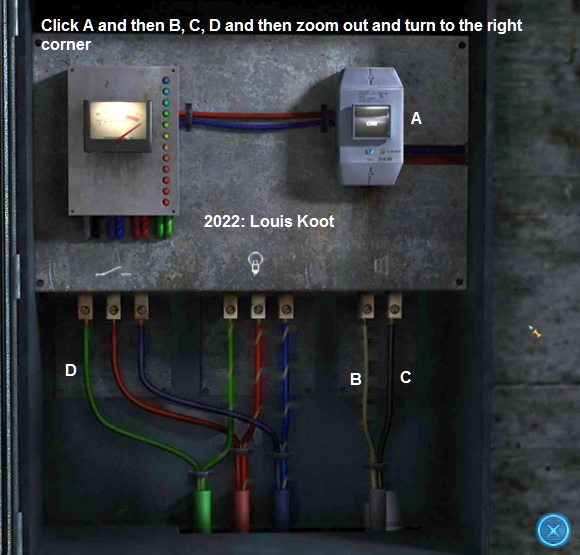
When you click the On-Button, the "led" lights will turn on and you will see the pointer in the power meter move to the left. However, the row of "LEDs" will go out one by one. When all "LEDs" are off, a guard will come to see what is going on. If you then are still standing at this box , you will be shot dead by the guard. So, once you click the On Button, you will have to act quickly. Under the power meter and the On button you see 8 color wires. The 2 right wires are for the speaker. The 3 left wires are for the power meter. You must act quickly now. So you have to act quickly. Do it like this:
Click the On Button A. The LEDs on the current meter light up. Immediately click on the 2 right wires B and C to pull them out of the plugs. Then click, on the left, on the Green Wire D to remove it as well. Immediately click the Cross button to zoom out. Immediately turn right and go forward to get behind the cars.
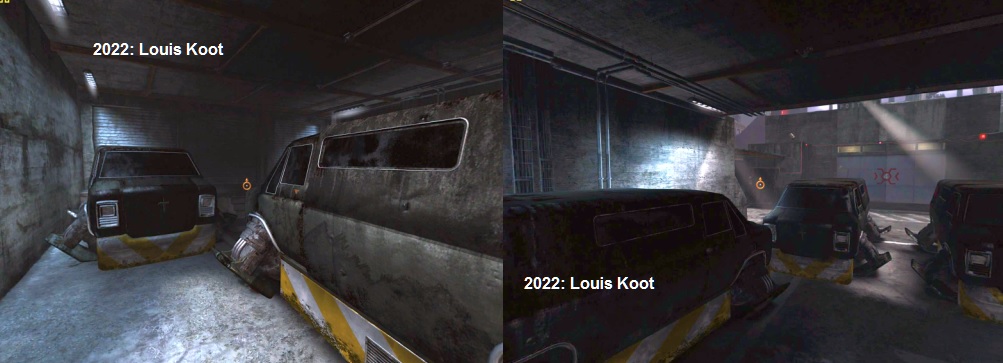
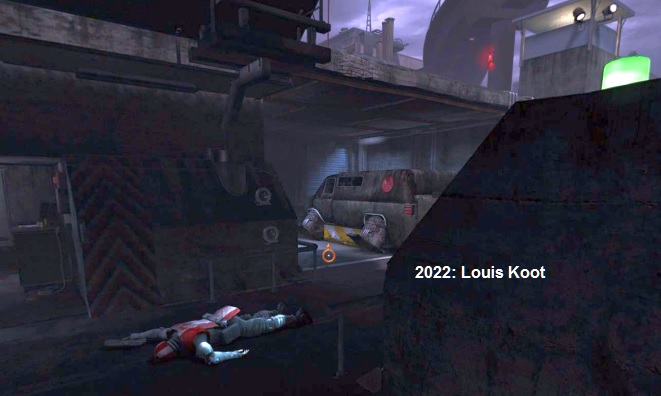
Behind the cars you see a guard coming out of the barracks. The guard goes to the power box. When the guard is at the power box you quickly click to go forwards to the top left on the otherside of the street. You will then be standing in front of the magnetic pass slot of the MontParnasse door. Quickly... take the magnetic card from your inventory and put the card in the slot. Turn left and click on the MontParnasse (2) door and ....
Nikopol goes through the MontParnasse door and ends up on the square, in front of the MontParnasse Tower. High above the city 3 military vehicles appear that fire missiles at the jellyfish, which hovers above the tower. In the square, a guard wonders what kind of jellyfish hangs above the tower, and what the thing is doing there. The guard then walks to the entrance of the tower and stands behind a stack of chests.
Chapter 4: MontParnasse Tower:
2022: Walkthrough by: Louis Koot