2017: Original Dutch Walkthrough by: Louis Koot
2019: This English translation
by: Dick Leeuw
If you have found this walkthrough via google search or via another site then you have probably not visited my site.
A lot more very detailed game walkthroughs can be found on my site at: www.pcgameswalkthroughs.nl
Chapter 1: Hannah 1:
Hannah has landed in a city on a sort of organic ship. Parts of the city float in the water. A path goes over the water. Go forward 1 x along the path. Hannah goes
over the path, a fish jumps from the water over the path, and Hannah then stops on a round platform and she tries to contact Sam via the radio ...
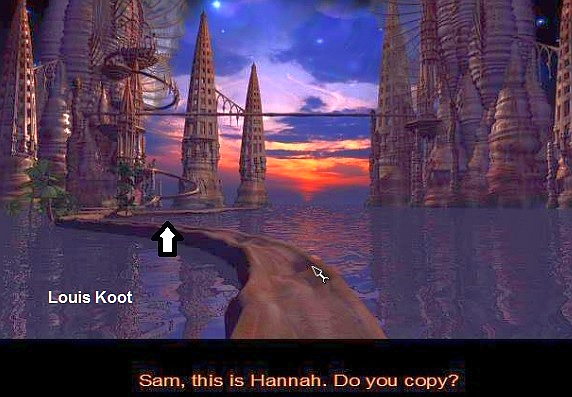
However, Sam does not answer. Go forward again 1x on the path. Hannah lands on the next platform. The path on the right is a dead end, so continue forward on the left
path until you cannot go any further. Then turn right and follow the path up. Hannah then lands on a round platform and she sees a white flash of light and she reports this to Sam via the radio
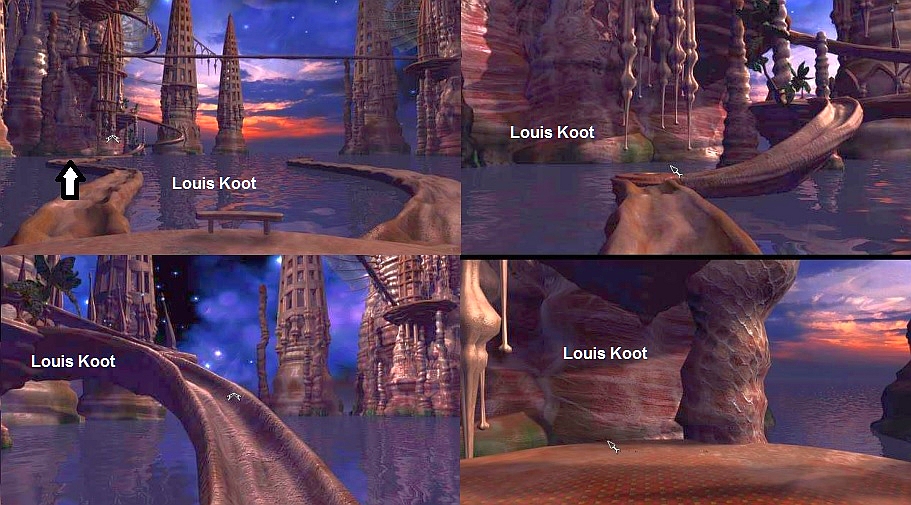
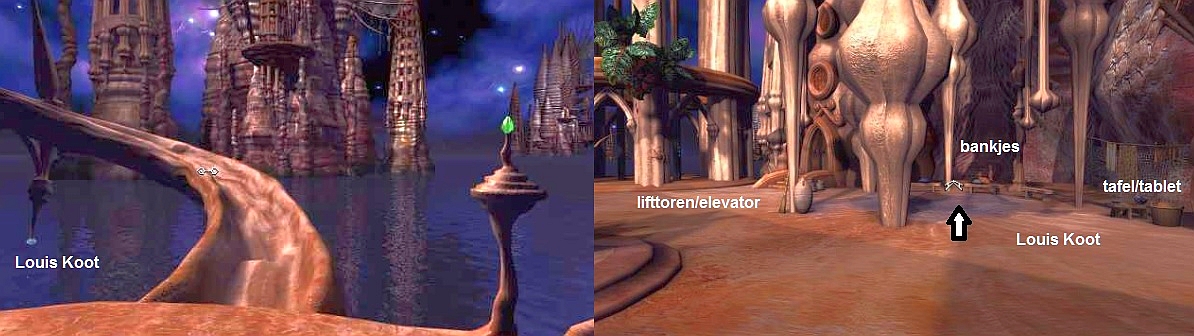
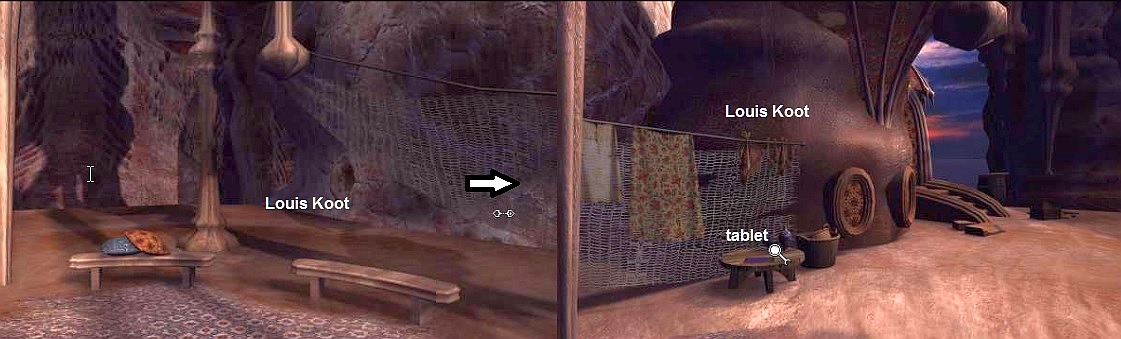
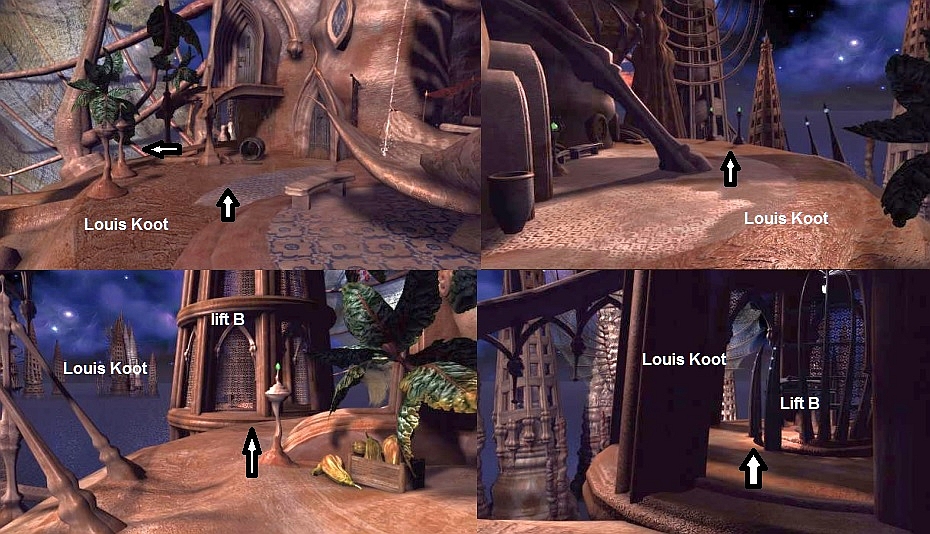
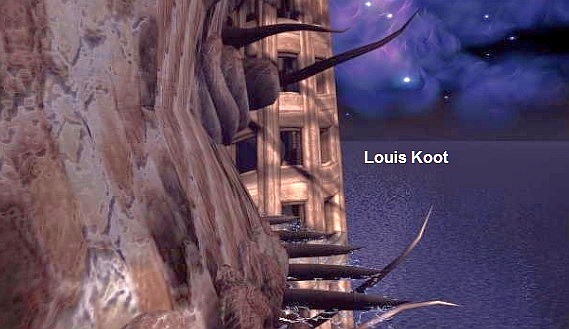
Hannah comes up on the lower level of the city. Stand still and look around. You see a kind of square with 3 benches in front of. To the right of it is a sort of
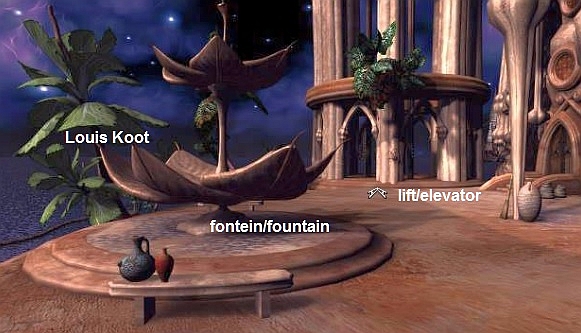
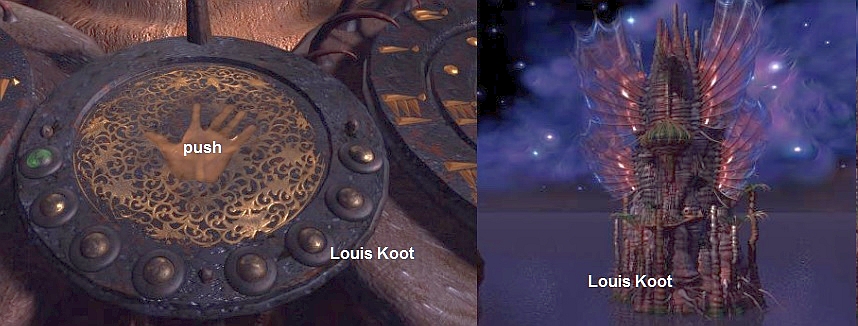
washing line with a low table and a barrel in front of it. Turn to the left for a moment and you see a kind of fountain without water with a bench with 2 jugs on it. Behind the fountain you see a large, openwork, "Tower" and that is an elevator tower
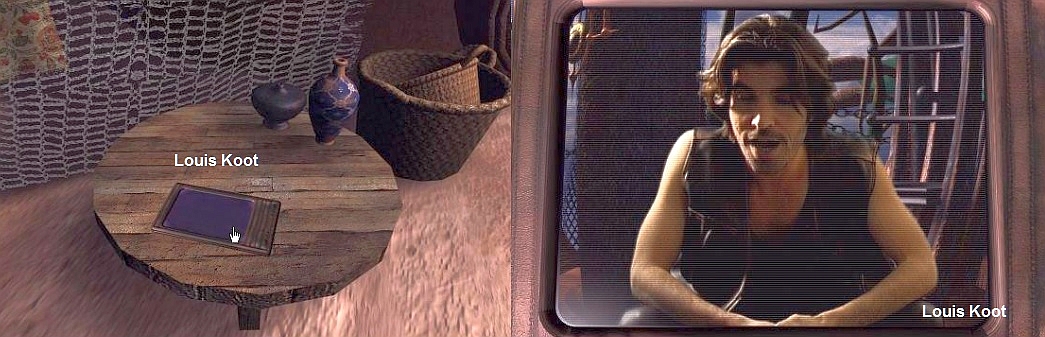
When you get there, turn clockwise until you see that round table
in front of the clothesline.
On the left pillar next to the
entrance is a "Fan with a button", and that is the call button to get the elevator here.

You can now click on that button or simply click further forward to enter the tower. In both cases, a lift comes down in this tower. The difference is that if you
click straight ahead into the tower, you will automatically end up in this elevator, while if you first click on the button on the pillar, the elevator will also come down but then you still have to click forward towards this elevator to get into the elevator.
At least when you are in the elevator, turn left and you see the 2 arrow buttons to move the elevator up or down. Click on the top arrow and the elevator will take you up.
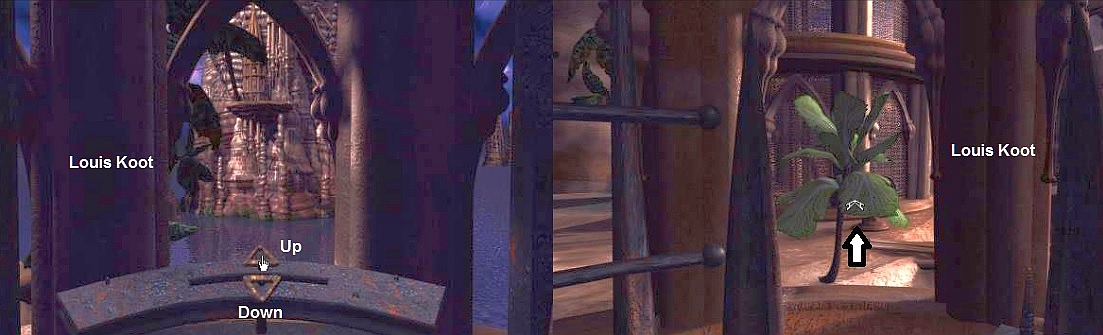
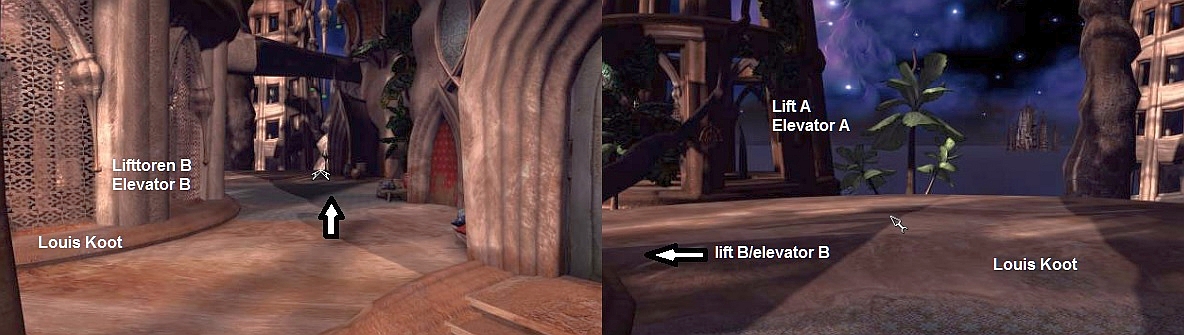
At the top, turn to the left and then click forward 1 time to get out of the elevator. You are now at level 2 of the city. You have stepped out of Lift A and in front
of you is Elevator tower B. Stand still again to take a look around. You can go forward, towards the doors, but first turn to the right. You will then see a short wood scaffolding with a control console next to it, which is sandwiched between the scaffolding
and Lift tower B.
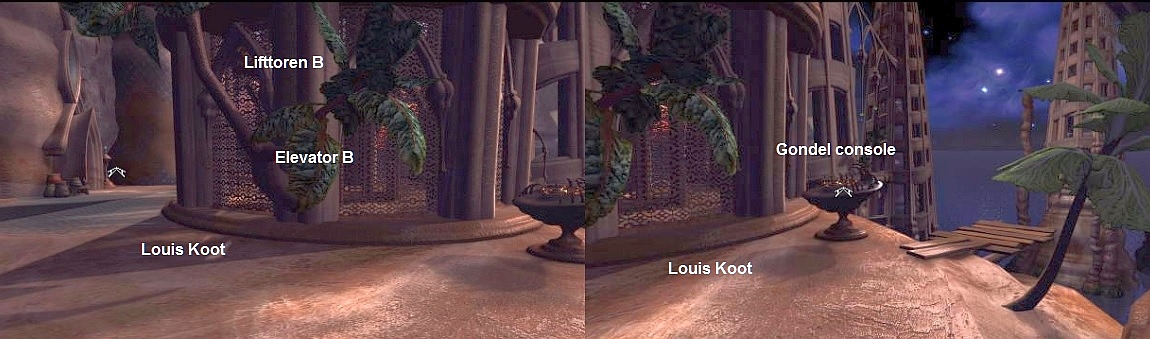
Do not go to this console yet, but if you do, do not press the button in the middle of the console. If you push that button, a gondola will come from the other side
and Hannah will automatically step into the gondola and take it to the other side ....... this is not the intention yet. Now remember this Gondola Console and turn back to the left.
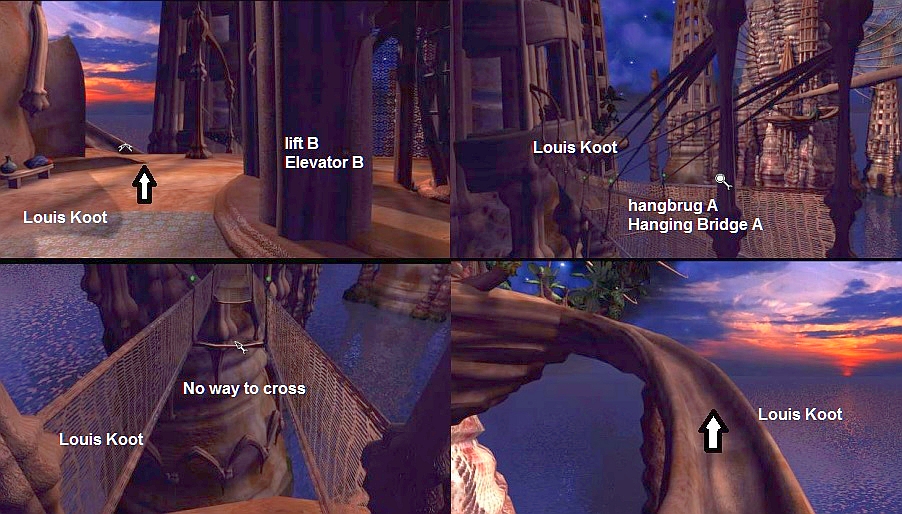
Click forward towards the doors of the "houses" and ...... Hannah then ends up at the rear of elevator tower B and she says "People lived here? ......
where are they?". Go forward one more time, to the path that goes further up behind the last "house" and then turn clockwise to the suspension bridge. Zoom in on the suspension bridge. This is suspension bridge A and it connects this part of the
city with the district on the other side, but unfortunately the suspension bridge is broken ..... the bridge has no "road surface". Zoom out and turn back to the path to the left and continue up the path
Hannah arrives at the top of a small mezzanine of the city and is standing in front of a wooden door that you can click on but nothing happens now.
You hear the
buzzing of bees. Turn left and you see a swarm of bees flying above 2 pots of honey?
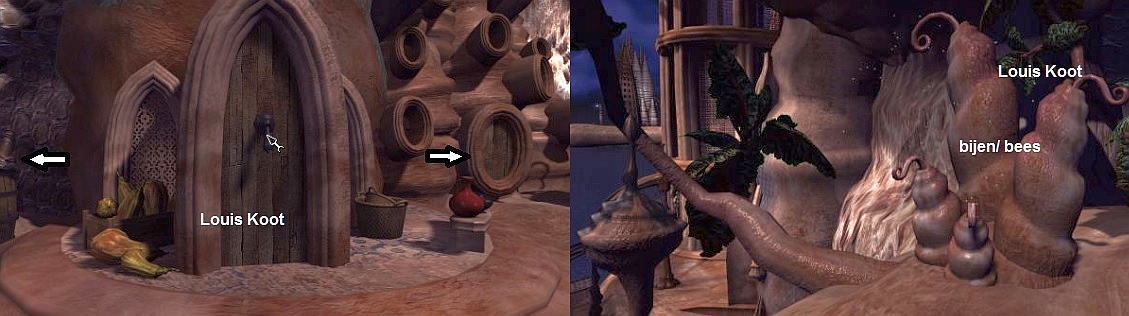
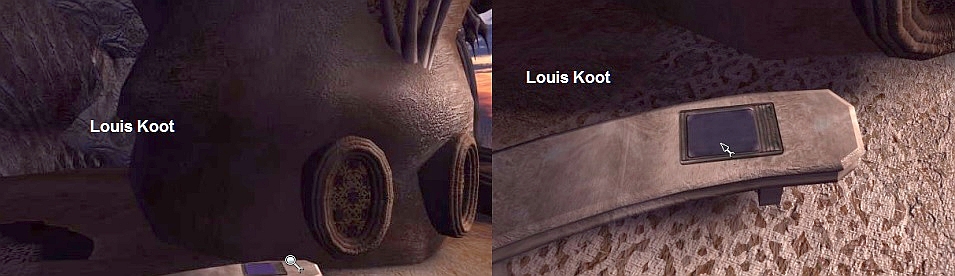
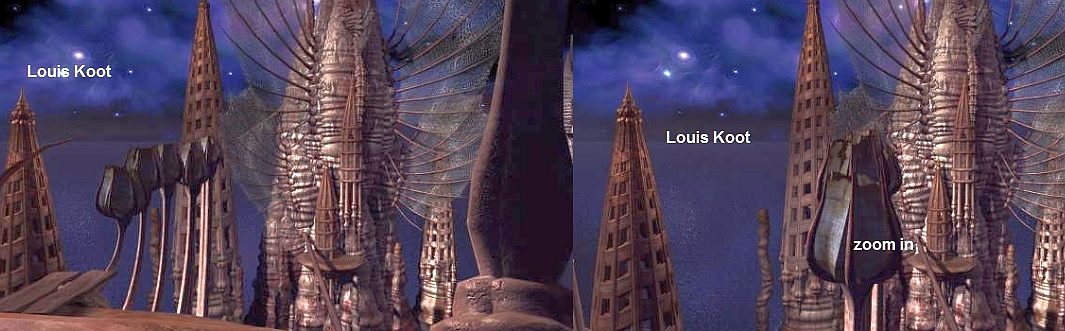
Turn back to the right and past the wooden door and ......... on the edge of this platform you will see a few pots with a swarm of bees circling and a large Pear at
the back. Move forward to that "pear-shaped thing". Hannah is then on the right next to the "Pear", so turn a little to the left to get right in front of the "Pear".
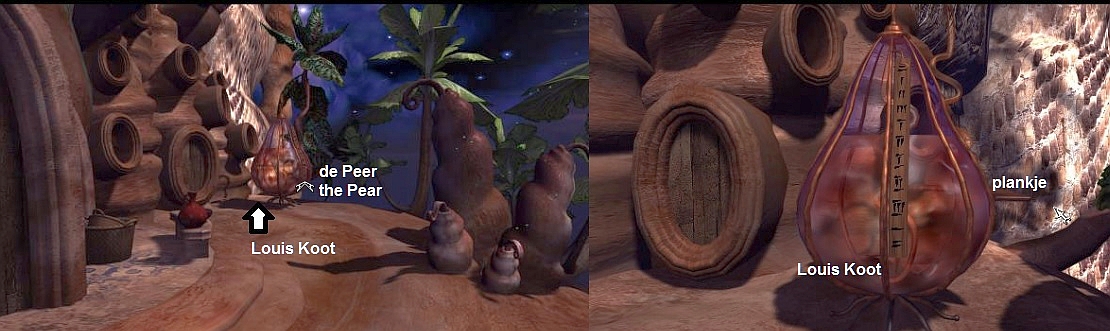
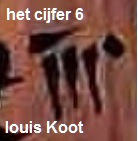
The "Pear" is translucent and you will see that there is liquid in the "Pear". On the front of the "pear" is a flag with 11 characters.
There is a board on the right side of the "Pear". Zoom in further on the "flag" with the marks .... The upper mark is not clearly visible because this mark is partly covered by the clip that holds the "flag" to the stick.
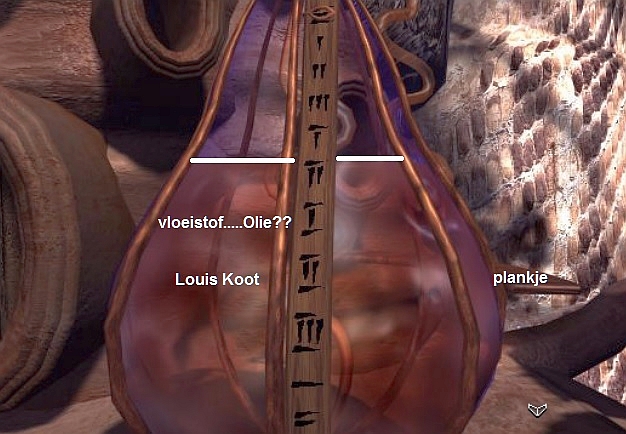
Count the characters from top to bottom and you will see that the pear is filled with liquid up to the 6th mark. The liquid in the "pear" comes close to the
height of the Mark, this flag with the 11 characters accurate and also note to which mark the content of the pear comes. Then point your magnifying glass cursor at the "board" that is attached to the pear on the right and zoom in on it.
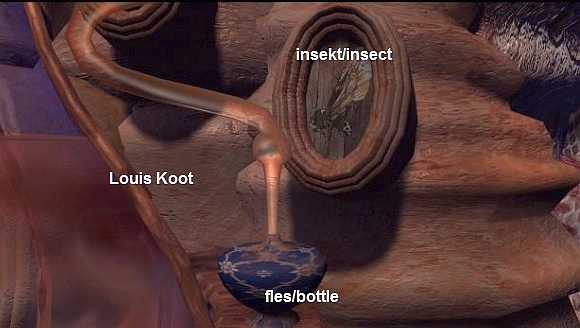
It has a bluish bottle that is connected to the Peer. Behind the shelf with the bottle on it, you see in the round of the house, a relief image of some Insect.
Remember this image. You cannot pick up the bottle now, it will come later. So zoom out again but remember this pear and this bottle. Turn around and go forward 2 x, back down to the suspension bridge.
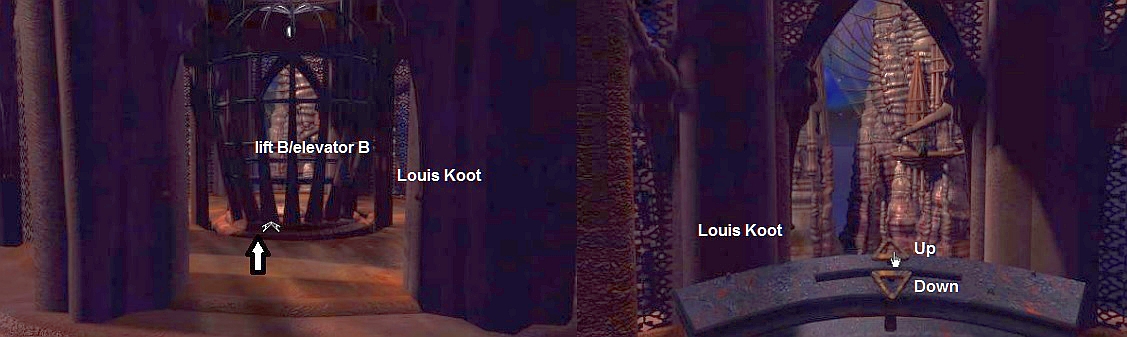
Hannah is then again one level lower and at elevator tower B. Now click 1x forward towards the red door, but you will not get there.
When you have stopped again you
will see elevator tower A in front of you but you do not want to go back there now.
\Turn left again and
click on the top arrow to go up.
Turn to the right ........ you will see another Suspension Bridge in the
distance ......
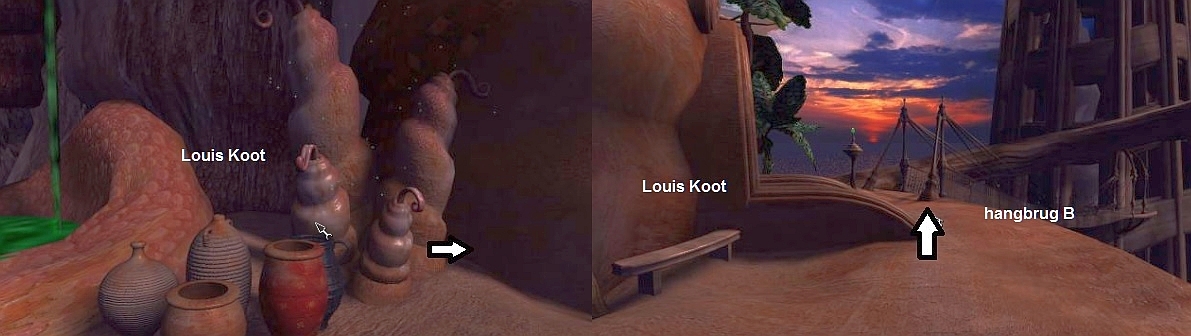
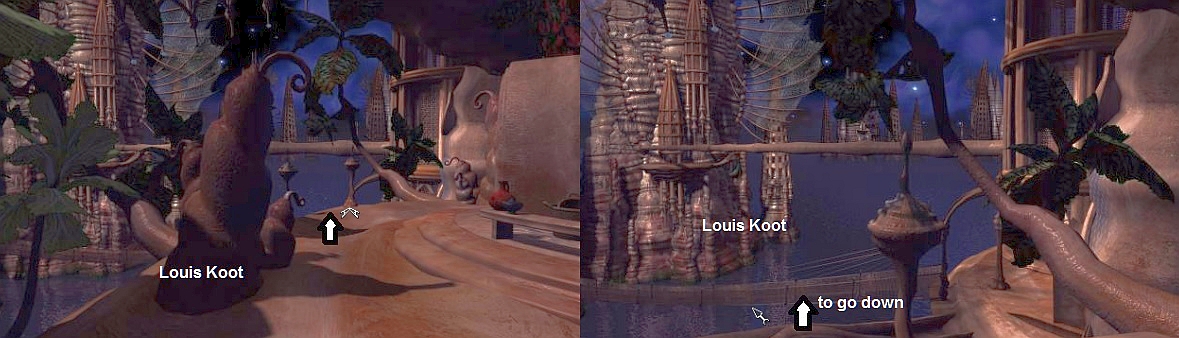
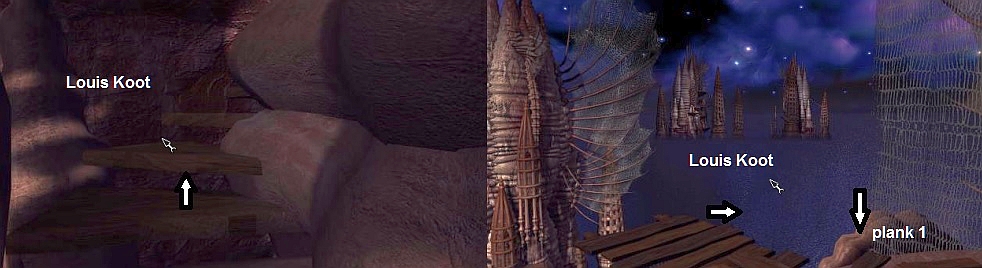
Go forward, towards the suspension bridge. This is Suspension Bridge B and Hannah is then directly in front of the Suspension Bridge and this is passable. However, do
not go over the suspension bridge ...... Behind the suspension bridge another path goes up further, but do not go on that path yet ..Standing in front of the suspension bridge turn slightly to the left, aim you cursor to the far corner and then move forward
...... Hannah stops at the corner, so move forward one more time and ......
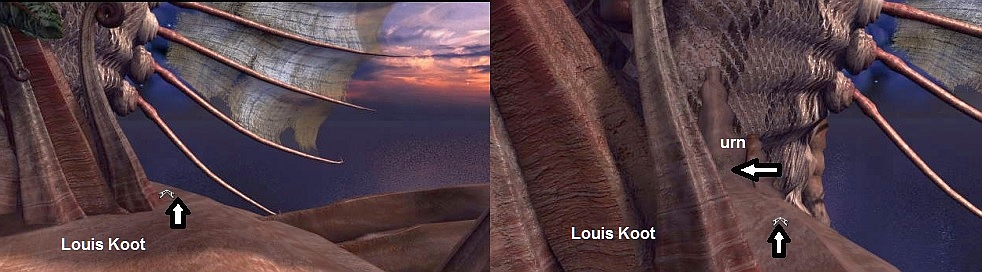
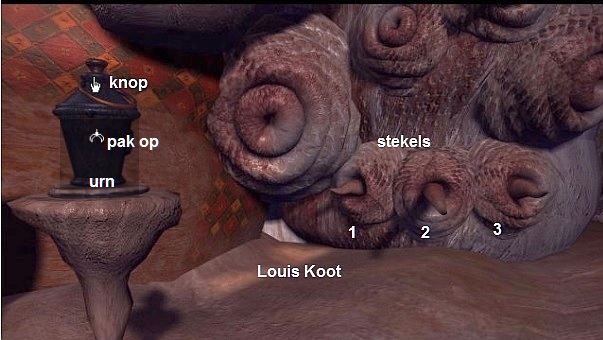
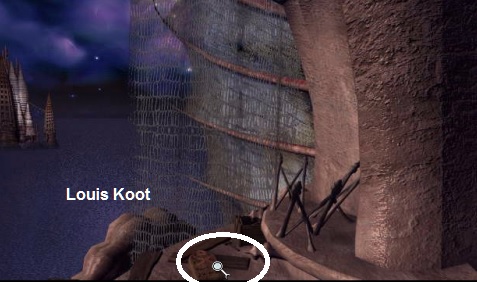
There is a button on top of the Urn. In the wall three holes from which spines come. If you click on the Urn button you will see the middle spine go in and the 2
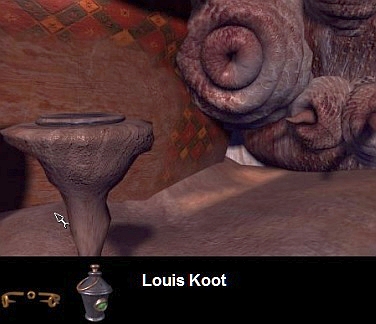
outer spines come out. A push of a button on the Urn therefore "always" serves 3 of these holes. Remember this and now pick up the Urn and it will appear at the bottom of your screen in your inventory.


He further said that these coordinates are constantly changing. You must therefore always have the latest coordinates.
Zoom in on the tulip. This opens but
there is (now) nothing in it.

Turn right and go forward again and you
go up the spiral staircase. If you then stop, click forward again to continue going up. You stop again.
You are now about two thirds of the stairs and you see a panel with circles on it. Zoom in on this. On this panel you see 5 circles with an arrow. Below you can
now also see those tulips again. In the rear Tulip is now one of the Panels that you are looking for and by clicking on the 5 circles in a certain order you have to make sure that this tablet is placed in the front tulip.
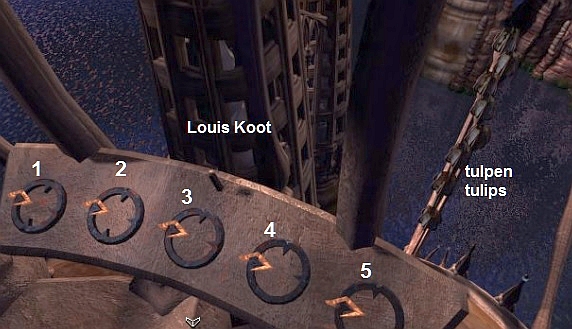
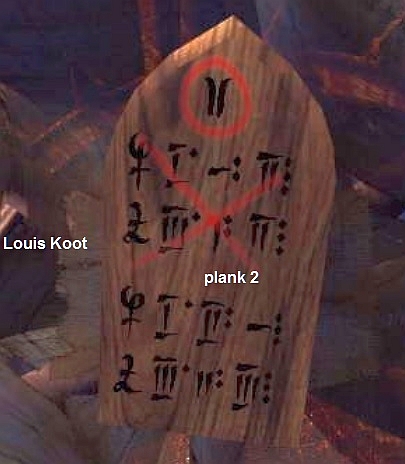
Zoom in on the shelf. This is Plank 1.
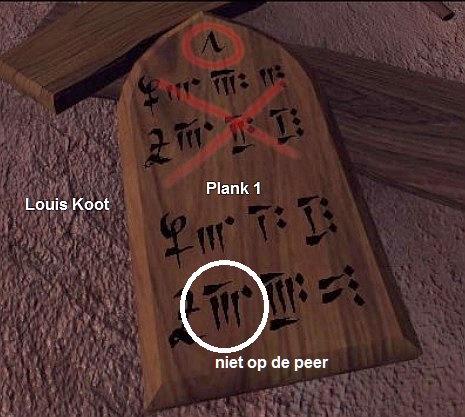
You see a lot of strange signs and dots on the plank. The signs appear familiar because they are the same as those on the Pear. However, there is 1 sign on the shelf
that is not on the pear .... A large red cross is drawn through the top 2 rows of characters. So those are the old coordinates that are no longer valid. The bottom 2 rows are the NEW Coordinates. Draw the whole thing as accurately as possible. The dots behind
the Signs represent the Hours, Minutes and Seconds, but that is concern for later.
Zoom out and turn left and then descend all the way down the stairs in 4 clicks and ........
When Hannah is down at the fountain again, that appearance pops up and
says she is on the right track .
Now go back to the Tulips, behind the fountain on the right.
Back at Elevator A you go to that Gondola console, at the jetty (left of elevator 1) and then press the button in the middle and .....

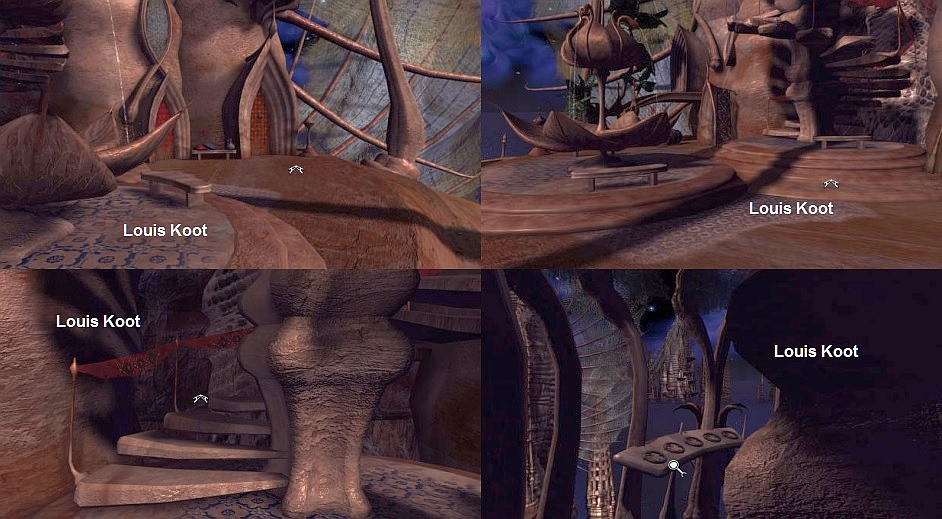
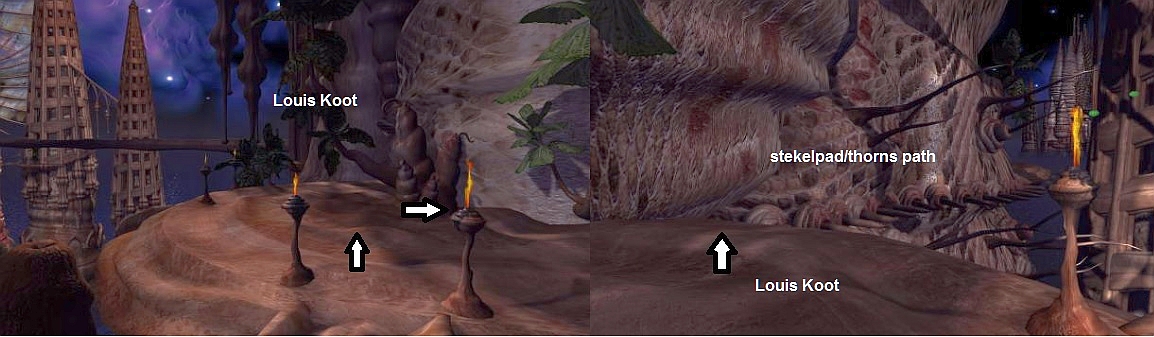
Follow this path upwards and you will come across 2 burning torches,
who are standing in front of a path .... this path goes to 3 "curls"
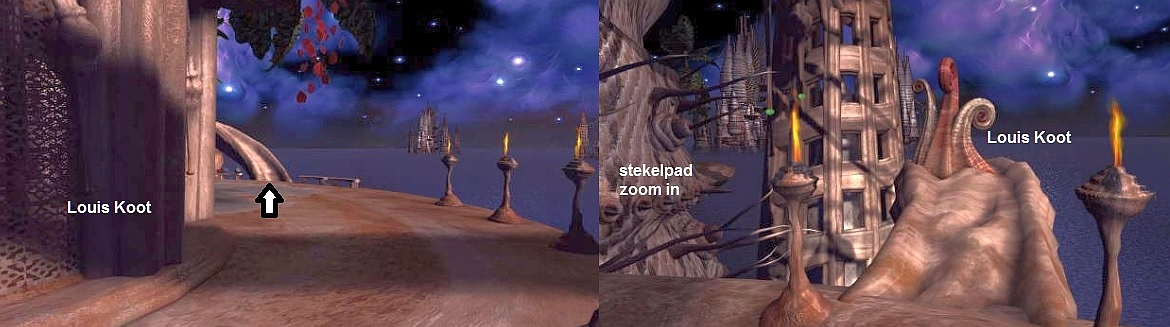
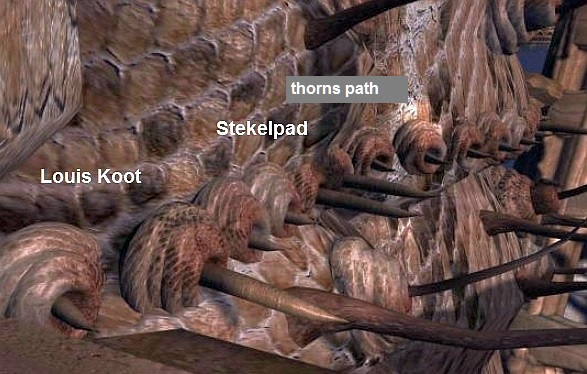
A spine protrudes from some of the holes and the other spines are retracted. This is actually a path, but you can't cross it because not all of the spines are pulled
out. Zoom out and stand in front of the path between the torches again. Between the 2 torches, a small path continues a little higher and ends at 3 "Curls". Click forward on this path and you will end up with the 3 "curls". Zoom in on the
right curl and ........
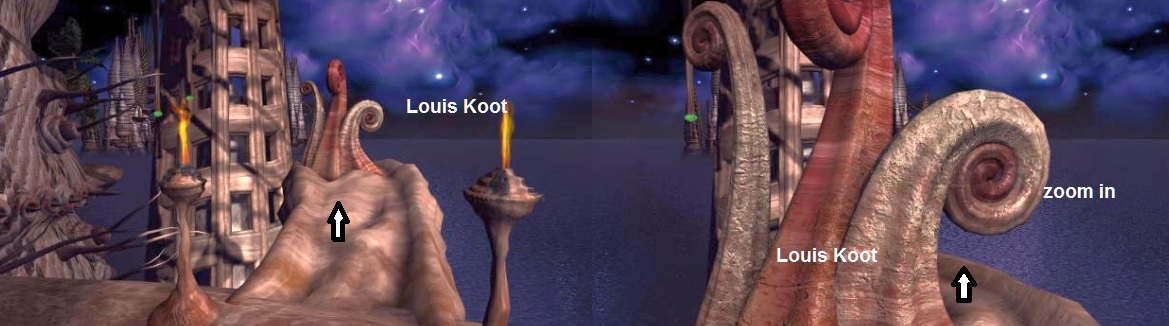
You then end up behind these 3 curls. You see a platform with an arrow and 14 lines on it. Behind this platform you can see the 14 Spike holes in that rear wall. Now
place your Urn from your inventory on the platform. You know that if you click on the Urn button, you "operate" 3 spike holes. Spines that are out then go in, and spines that are in then go out, in 3 of the holes. The 14 lines on the platform
represent the 14 thorn holes in the wall and the urn is now on a turntable.
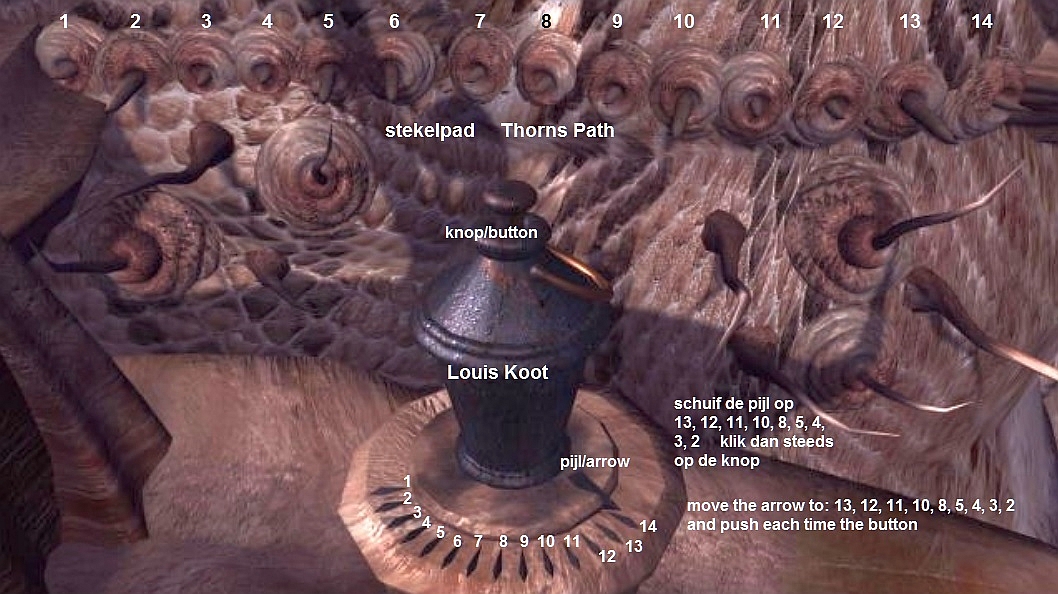
If you place the cursor on the arrow at the bottom of the urn and click it and then hold down your mouse, you can rotate the urn to the right or left, so that the
arrow points to the next line. If you then click on the button of the urn, the spines go in or out of the same hole in the wall, plus in the holes on the left and right of it. The intention is now to ensure that all 14 spines protrudes out the 14 holes. You do
this as follows.
Now number the lines under the Urn, from left to right, as 1 to 14, so the left line is 1 and the right line is 14. Then click on the arrow, hold down your left mouse
button and drag the arrow on the next line and then always click on the urn button. This is the order: Set the Arrow button / arrow to 13, 12, 11, 10, 8, 5, 4, 3, 2.
If you have done well then all the spines are outside and you see an electric field under the spines light up.

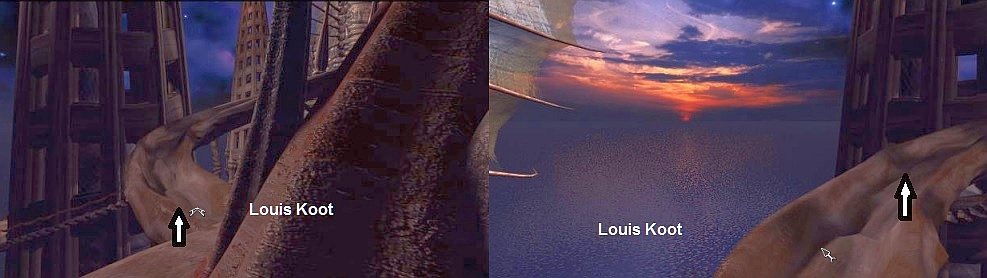
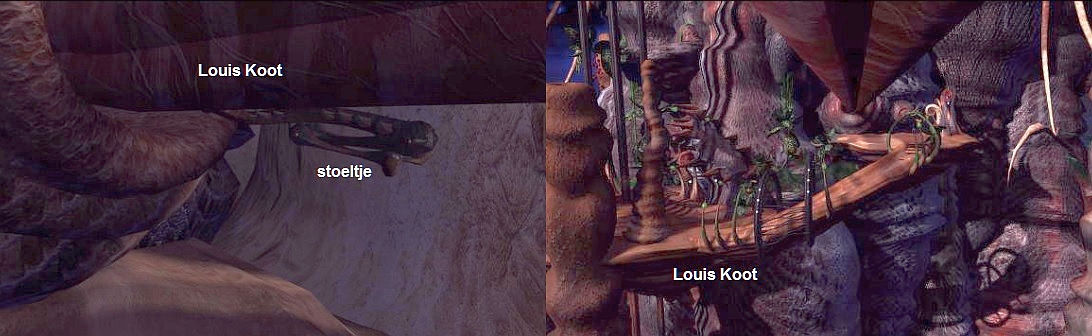
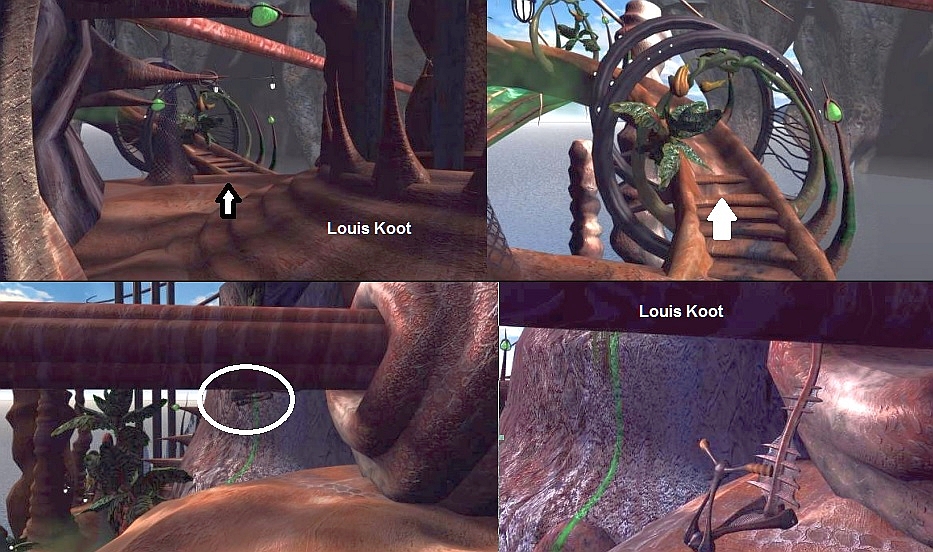
You automatically go around the corner and over a second spine path and you end up in front of a round beam that runs all the way to the right to an
"island" on the other side. On the left under this bar you can see something hanging. Zoom in on it and then click on it. Hela, it's a kind of chair that is now opening.
Island ship.
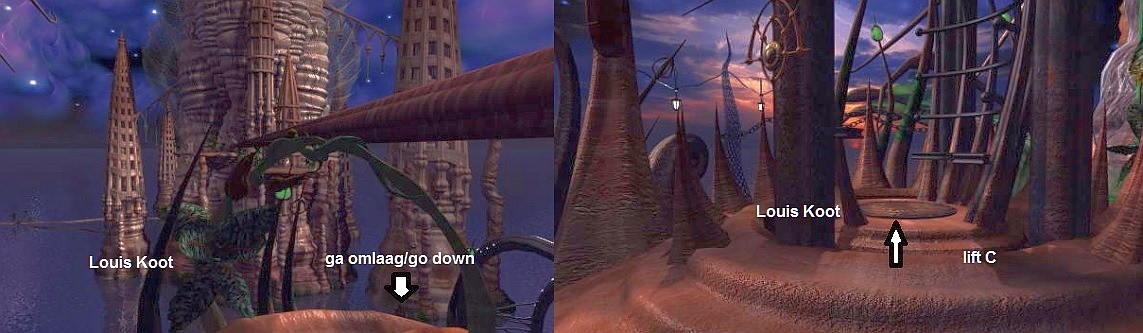
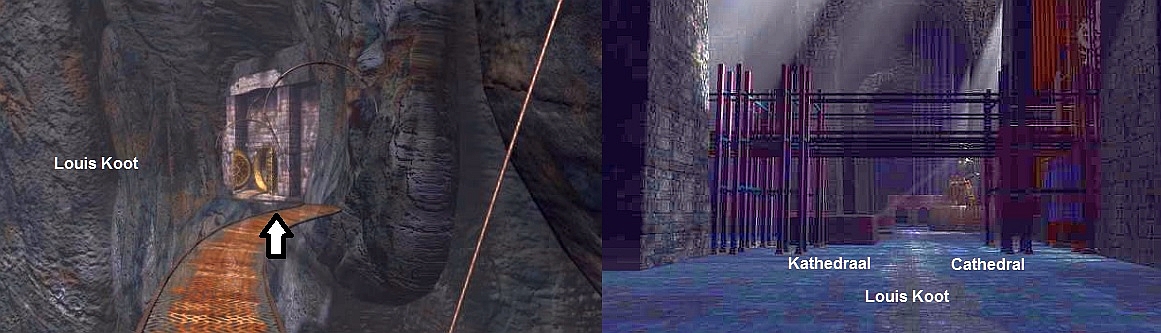
When you reach the bottom you stand in front of elevator tower C. Enter the tower
and an elevator comes down.


Zoom in on the middle disc / middle wheel. A Hand in the middle and 1 green light on the left. This is the Hand Scanner. The lit green light on the left is the
"remember" function of the coordinates entered, so this first light has the coordinates of the landing place for the Island Ship where you are now. Now zoom in on either the left wheel or the right wheel.
You see that these 2 wheels consist of 3 circles and on each circle you see images of some of the signs that you also saw on the 2 tablets, and which you hopefully
have copied. There are also dots on the circles. If you zoom in on the wheels, 3 characters light up green on each wheel. These are part of an old set of coordinates. So you have to make 3 new characters, per wheel, green. 1 sign or dot per circle.
Unfortunately, not all characters of the 2 tablets are on these wheels. This means that you can click on a DOT for a missing sign on these wheels.
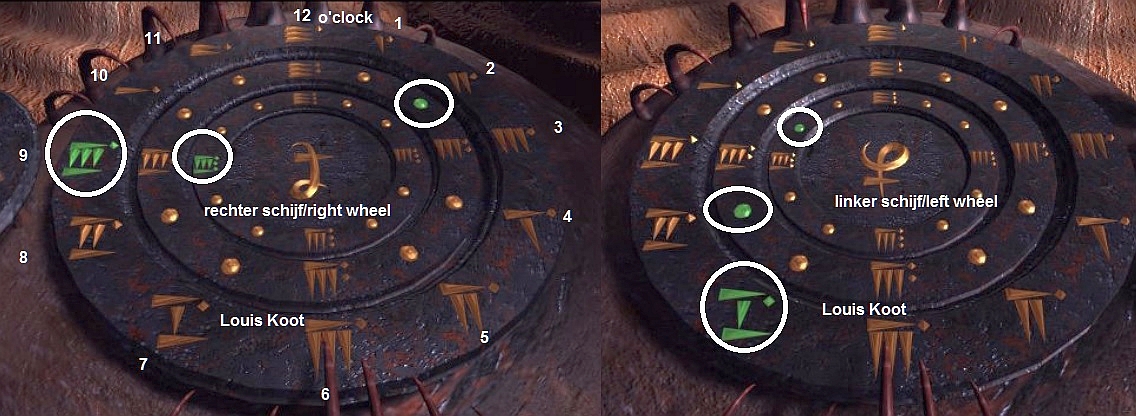
Now consider the 2 large wheels as a clock with the Marks and the Dots as the hours of the clock. So at the top it is 12 o'clock, and then clockwise, 1 o'clock, 2
o'clock etc ..... Hannah must now enter the new coordinates on both the Right Wheel and the Left Wheel. So click on:
Right wheel: Outer ring: the 9 o'clock sign, 2nd ring: the 2 o'clock dot, 3rd ring: the 9 o'clock sign
Left Wheel: Outer Ring: the Mark at 7 o'clock, 2nd ring: the Dot at 8 o'clock, 3rd ring: the Dot at 10 o'clock.
Then zoom in on the middle wheel and click on the HAND.
Cut scene: Hannah is happy and the "Island Ship" is now sailing away.
|
Hannah has found the Pear with the 11 symbols on it and the coordinates Planks 1 and 2 on City Island. It is the panels that she found at the top of the
spiral staircase and in the front Tulip. This therefore shows the Old and the New Coordinates for the Island Ship. Now let's take a good look at these 2 Coordination Panels and also at the symbols on the "PEAR". First take a good look at the 2 Planks with the Old and the New Coordinates. Each of these 2 planks has 4 Lines ( reading from left to right) with 4 symbols each. Number these lines 1 to 4. In addition, you can also "Read" the planks from Top to Bottom, then each of these panels has 4 ROWS (so under each other) of 4 symbols each. Also number the rows from 1 to 4. The planks have symbols without a point, symbols with 1 point, symbols with 2 points and symbols with 3 points. We can safely assume that these are COORDINATES,
For each plank, lines 1 and 2 (so the top 2 lines with the red cross through them) are the OLD Coordinates and the bottom 2 lines, so lines 3 and 4, the New Coordinates. If you now, on both planks, compare lines 1 and 2 with lines 3 and 4, you will see that in the NEW Coordinates compared to the OLD Coordinates, the Hour symbols are unchanged, but the MINUTES and the SECONDS Symbols have changed. So the HOURS stay the same but the MINUTES and SECONDS change. Now we have to translate all of these SYMBOLS into NUMBERS. Now look at the 12 symbols below each other on the scale on the PEAR and compare these characters with the characters on Coordination
panels.
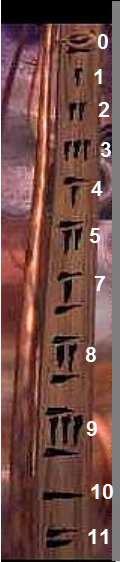
Now number the 12 characters on the Pear, from top to bottom, as 0 to 11, where 0 is the topmost character (with the circle through it) and bear in mind that 1
character is not on it. You then get the following numbering and you come to the inevitable conclusion that the missing symbol must therefore be the number 6.
So you have now translated the SYMBOLS into our NUMBERS 0 through 11. PLANK 1:
Now compare the Line 1 with the Line 3 and you will see that in Line 3 the following change has occurred compared to Line 1:
Do this comparison now also for Hannah's Panel 2:
It is all very complicated to explain well, but just take the following from me: The difference between Lines 1 and 3 on both panels is therefore -1 minute and 7
seconds and the difference between Lines 2 and 4 is on both panels therefore +1 minute and 4 seconds. Hannah must now use the New Coordinates of Plank 2 on the "wheels" of the Coordination system. So Lines 3 and 4 on this plank. We have just
"translated" the Symbols of these rules into Hours, Minutes and Seconds. On both "Wheels" next to the Hand Scanners you see circles. The Symbols on the Outer Circle are the HOURS, the MINUTES on the 2nd Circle and the SECONDS on the Inner
Circle. Points represent the missing Symbols. |
We continue
After the video, turn to the right and click forward until you are back in the elevator. Go back down with the elevator. Exit the elevator and continue to the uphill
path. You can now go straight up the path to the chair, but first turn around and then go forward to the back of lift C. You will then come to a Telescope
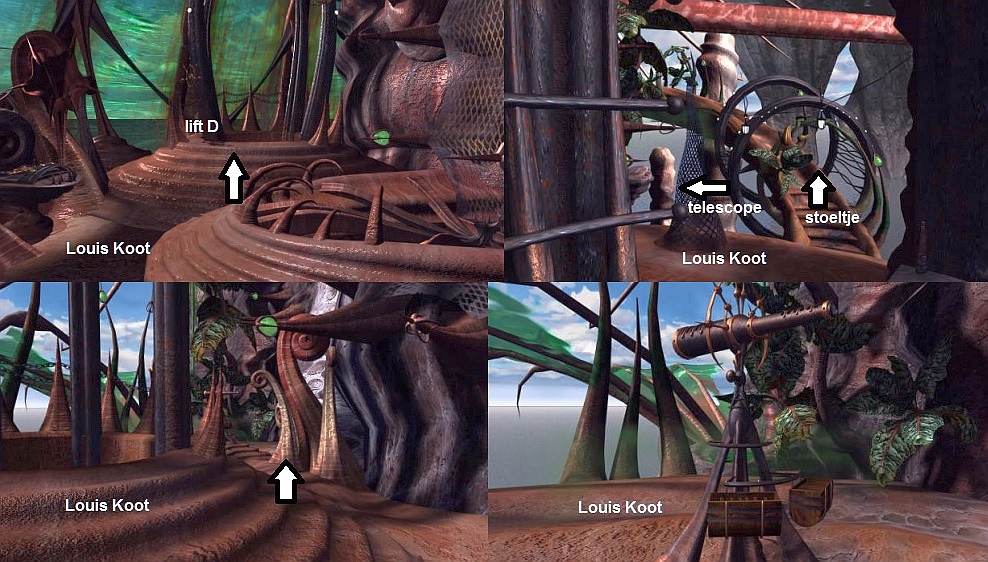
Turn back and zoom in on the chair at the bottom of the bar, click on it, and then you travel to the other side.
Chapter 2: Sam 1: Gas Collector Island
2019: This English translation
by: Dick Leeuw