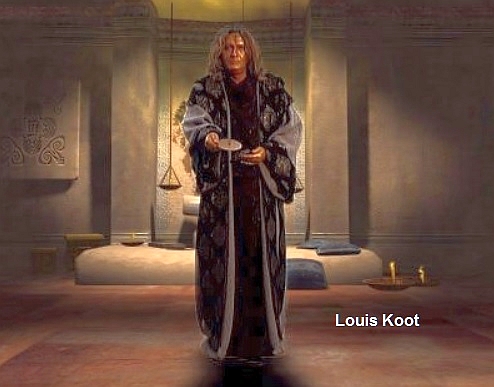
2017: Original Dutch Walkthrough by: Louis Koot
2019: This English translation
by: Dick Leeuw
If you have found this walkthrough via google search or via another site then you have probably not visited my site.
A lot more very detailed game walkthroughs can be found on my site at: www.pcgameswalkthroughs.nl
Chapter 6 : Sam and Hannah:
Now things are getting complicated again, because from now on you must continue with both Sam and Hannah. You must now constantly change person. If you want to save,
you can just do it as Sam or as Hannah. The game "remembers" the place where you last left the other and what you have already done with the other. So you don't always have to make a separate save for Sam or for Hannah. We first stay with Sam.
Sam: Getting Oil:
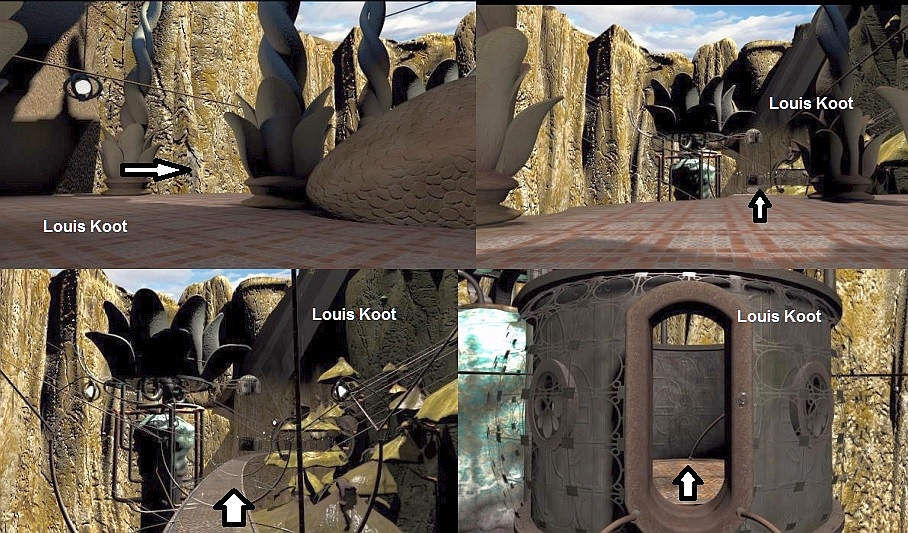
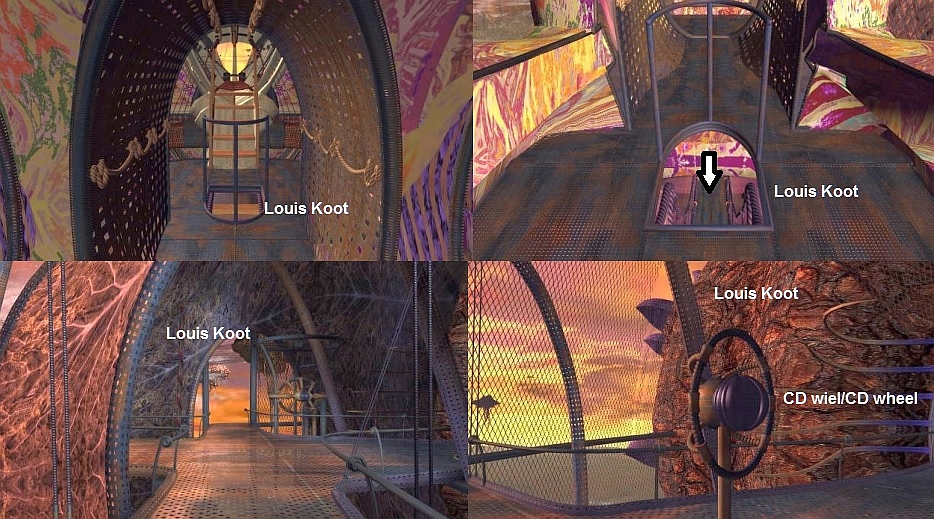
You can now first go and see that "church organ" with Sam, but you still can't do anything with it.
So turn to the left and bring Sam, through the gallery, next to the Statue, which is directly opposite the tunnel entrance of the Cathedral, that is at the
Egg.
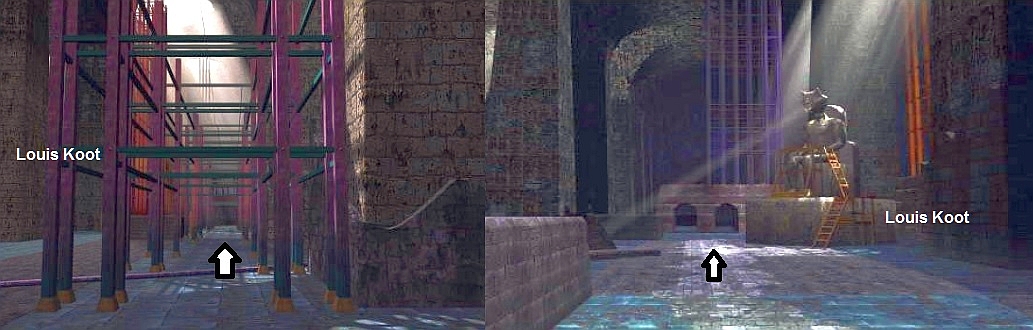
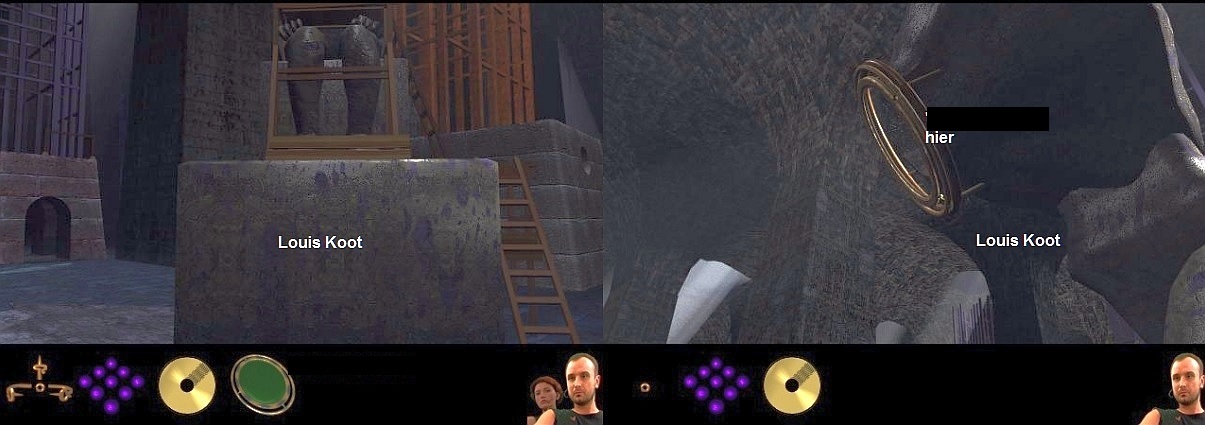
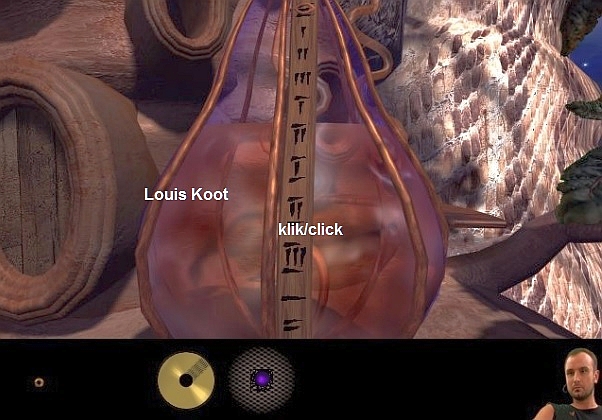
As Sam climb the ladder next to the statue. At the top you zoom in again on the face of the statue with the Visor.
Now place the "Mirror" on this visor,
that green optical filter from your inventory.
|
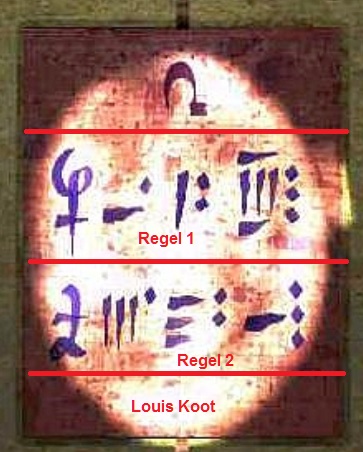
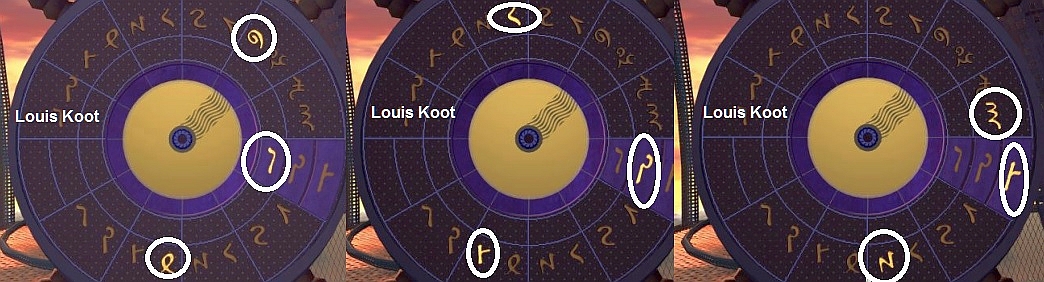
EXPLANATION : This Egg now shows 2 lines with 4 symbol characters each. Now view these 2 symbol lines on the Egg. So these are OLD Coordinates and we now have to start calculating
again the new coordinates from these Old Coordinates rules, so rules 3 and 4. The Coordinates that you see now at the Egg are, if you do not remember, view the explanation for this at Hannah 1 above. Line 1 = 10 hours, 1 minute and 9 seconds. Line 2 = 3 hours, 12 minutes and 10 seconds. Now to get to line 3 you have to subtract 1 minute and 7 seconds from line 1, starting with the Seconds, so: 9 seconds - 7 seconds = 2 seconds. For the minutes you get 12 minutes, because you must now also see the minutes as a separate clock on which you have deposited the numbers 1 to 12 according to the
hours of a clock and if you then start from 1 (hour) 1 goes back then you end up with the 12, so the NEW LINE 3 = 10 hours, 12 minutes and 2 seconds So for the new line 4 you have to add 1 minute and 4 seconds, starting again with the seconds and then you get: NEW LINE 4 = 3 hours, 2 minutes and 2 seconds (because you have to start with the seconds, the minutes now do not jump to 1 but to 2) The new set of Coordinates, which you later have to enter on the Left and Right wheel at the Hand Scanner, then loudly LEFT WHEEL: 10 hours, 12 minutes, 2 seconds. RIGHT WHEEL: 3 hours, 2 minutes, 2 seconds Copy these coordinates now because Hannah will need them later. We leave Hannah here now and continue with Sam: |
Sam has been carrying those 8 blue balls in his inventory all the time. So far, you still haven't used this for anything. Now that you have got Sam and Hannah
together in one place, this also means that Sam can go to the places where Hannah has been and Hannah can go to the places where Sam has been. You must now take Sam via the Island Ship from Hannah to the City where you started the game with Hannah

Island Ship:
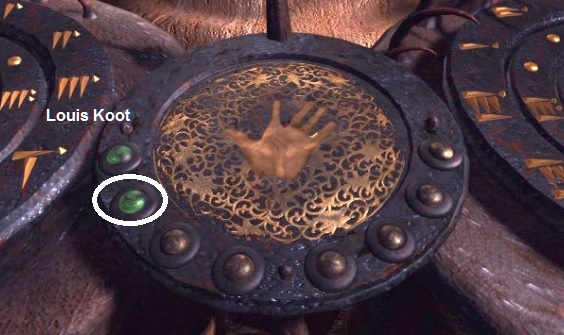
Turn right and zoom in on the Hand
scanner.
Click on the top left green light and then click on the Hand and ..........
City:
Go forward, turn right and then go forward 2 x and then go up the path, left next to the suspension
bridge, to the intermediate level of the city.

Now think back to that side room in the temple, at the top of the stairs on the left side of the pool. It is the room where that wall painting
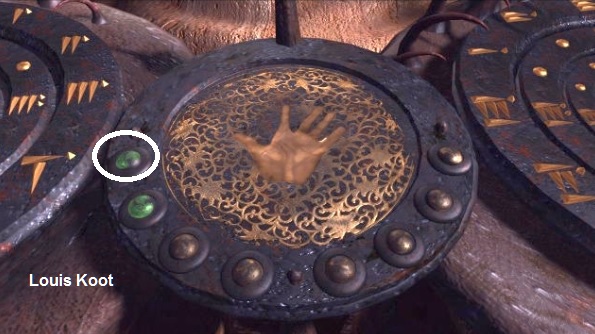
is from a priest above an altar and where you have zoomed in on a large stone tablet on the wall to the left of that wall painting. You then saw a symbol in the middle of that wall tablet. That symbol was 1 of the 11 symbols that are also depicted on this
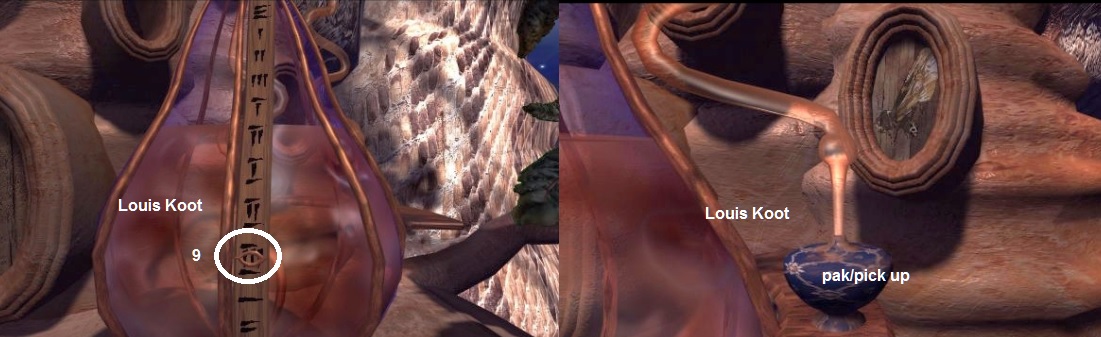
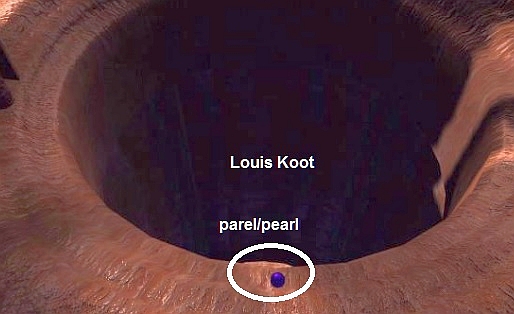
pear. It is the 9th symbol on this pear.
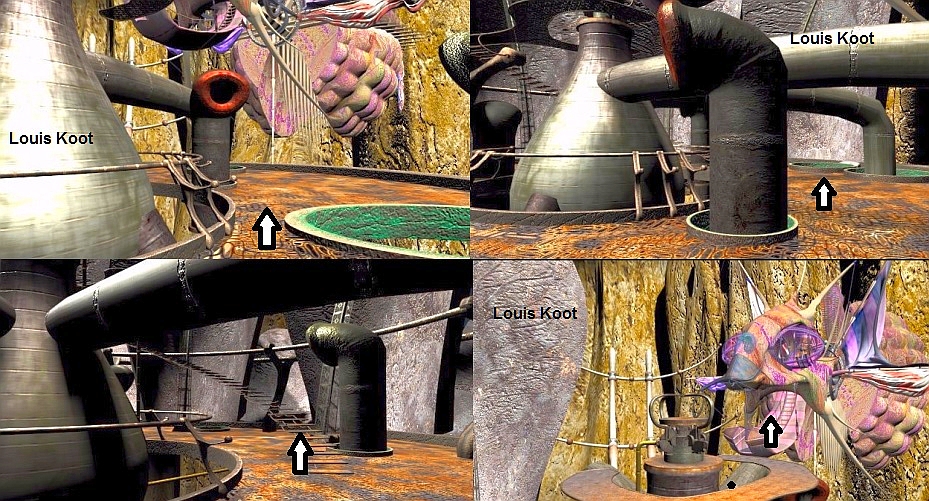
Click on the 9th symbol and you will see how the ring comes from top to bottom and lands on this 9th symbol and then goes back up again. Your Blue Balls now disappear
from your inventory. Then zoom in on the board attached to the Pear on the right. Oil has now entered the blue bottle. Pick up the blue bottle.
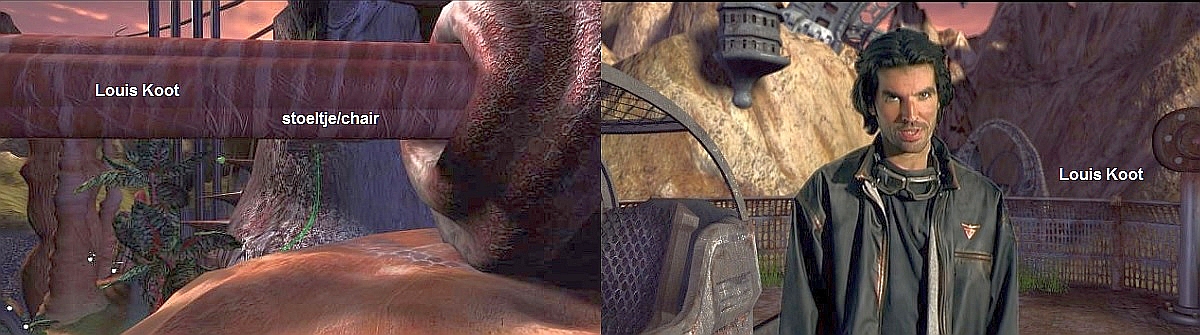
Sam now has to take this oil-filled bottle to that priest's room, that is, the room with that priest's wall painting above the altar. Sam now has to go all the way
back, first via the gondola and the chair under the round beam, to the Island Ship. Back on the Island Ship, take Sam to the hand scanner. Then first press the 2nd green button and then the Hand, to sail back to the Bosch Tunnels, where the Cathedral is.
Cathedral
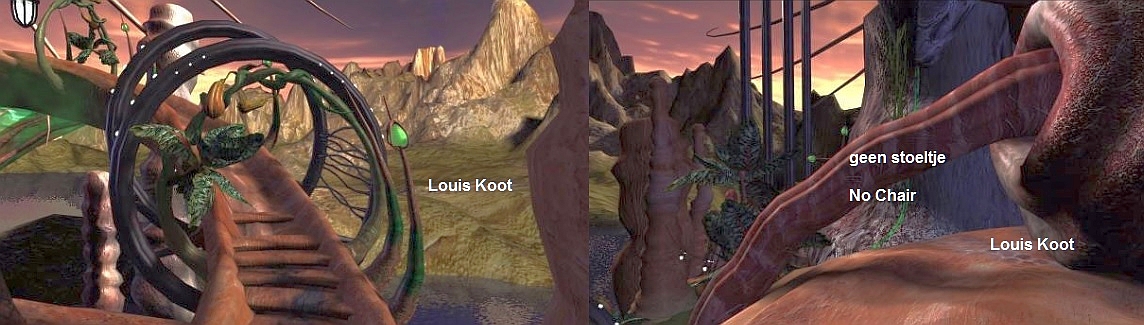
When the ship has docked again you go down again with the lift and then up again via the path to then take the Chair under the round beam to the Cathedral. Hannah is
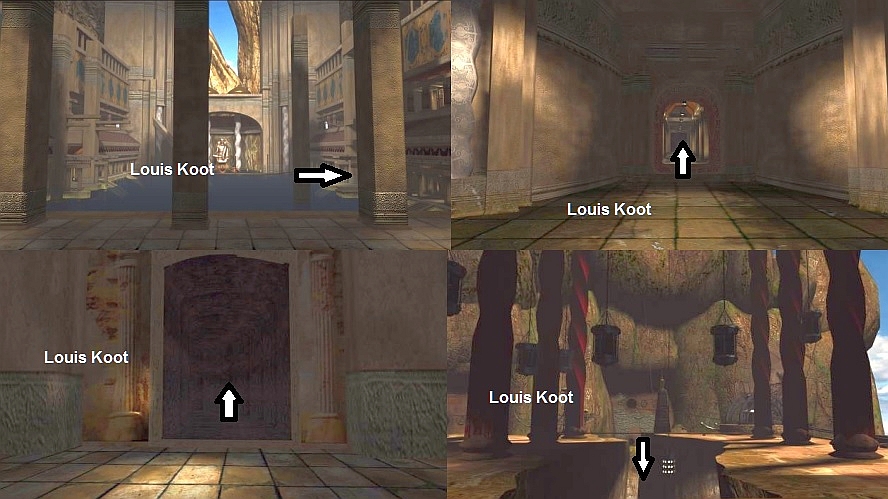
still standing here next to that big statue. When Sam is back in the Cathedral, go 1x forward, then turn left and follow the Gallery all the way back. On the left is that "church organ". Turn right and walk back to the entrance of the secret
corridor.
Go through the secret corridor and Sam is behind the Astronaut statue again. turn right and go forward twice along the path and through the tunnel. Then turn right
and go over the thatched walkway to the other side of the "swimming pool". Then turn left and follow the gallery all the way back until you can go no further. Then turn left and go forward 1x to the top of the stairs.

You can tell from his hand gestures that you do not have the correct amount of oil in your bottle. The guy from the house
cheated on you. You have received too little oil.
There is now no alternative but to return all the way to the Pear with oil, but this time we will take Hannah with us. We do that in stages. First return with Sam, through the secret corridor behind the astronaut statue, to the cathedral and go with him through the cathedral and then through the tunnel outside to the seat under the red bar. "Park" Sam here.
Switch over to Hannah and bring her outside to the
seat. Keep in mind that Sam and Hannah still can't see each other and you can't move them both at the same time. But you will need BOTH at the Pear with Oil to get what you need to get ahead in the game. So transfer them one by one with the seat under the
round beam to the Island Ship and put them both there in front of the hand scanner.
Do
you have both Sam and Hannah back at the hand scanner? Then click, and it does not matter now whether you do that as Sam or as Hannah, again on the back green left
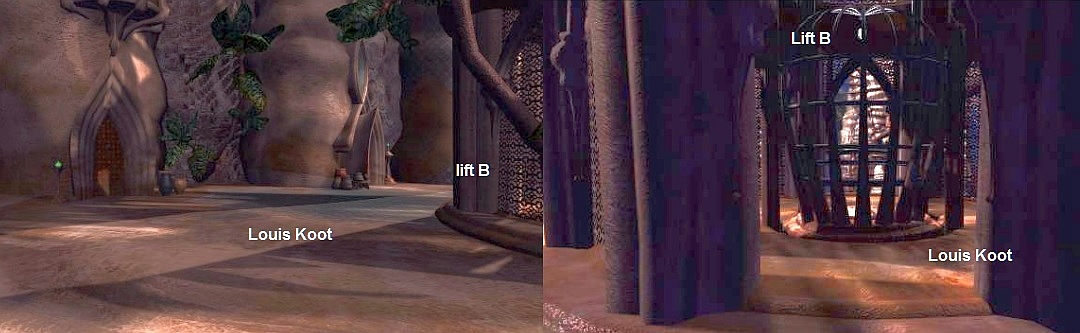
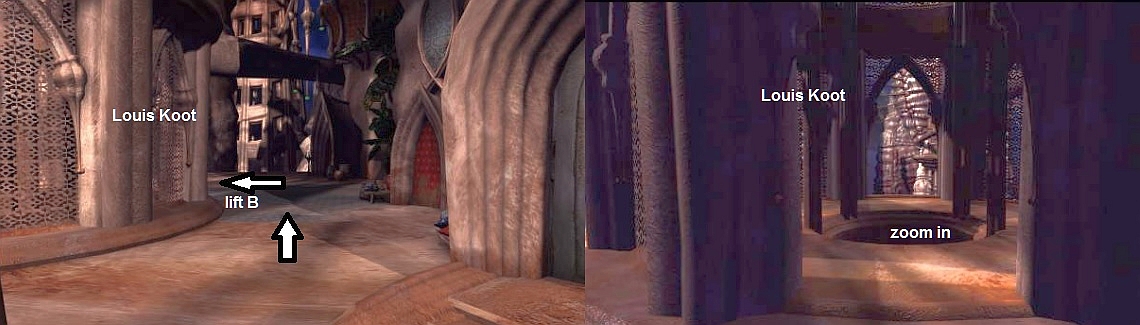
button and then on the Hand and they are now sailing back to the city together. Then bring them back, one by one, via the chair under the round beam, the Spine path and the Gondola to level 2 of the CITY. You now have Sam and Hannah on City Island on level 2,
with elevator shaft A on the left for the elevator going down and on the right the elevator shaft B for the elevator up.
The guy disappears inside again and there is brief consultation via the radio between Sam and Hannah.
Turn around and head back down to the elevator shaft of Lift B.
Zoom out and go back up to the mezzanine and go right here to the Oil Pear. Zoom in again on the shelf on the right side of the Pear and put your Blue Oil Bottle back on it.
Then zoom out and immediately zoom in again on the front of the Pear and click on the number symbols.

When the guy is gone again, bring Sam down and "park" him briefly at the Gondola button behind the uplift on level 2. Then switch back to Hannah and bring
her down with the elevator and go with her to the gondola button . Now, in various stages, take both Sam and Hannah, via the Gondola, the "Spine path" and the Chairlift under the round pole, back to the Island Ship and put them both there in front of
the Hand scanner. If you have both of them at the Scanner on the Island Ship then switch to Sam because we will continue with him for a long time. Hannah stays behind on the Island Ship..
Go forward
1x, turn left and then go forward 3x over the gallery to the back (on the left is again "church organ"). Turn right and go forward 3x to get behind the astronaut statue through the tunnel. Turn right and go forward 2x, turn right and go forward 3x
over the thatched walkway to the other side of the "swimming pool". Turn left and go forward 5x to the end of the gallery. Then turn left and go up the stairs 1x and at the top turn right and go forward once again, into the altar room again.
The new CD contains new Coordinates for the Fish Airship with which Sam arrived here from the Gas Valve Island. Sam has to go back to that now because to be
able to "Read" these new Coordinates, Sam has to put this CD in that CD Wheel again.
Then turn left and go forward 3x to the end of the gallery. Turn to the right and click 1x forward to go out through the dark tunnel.
Then go forward 2x over the 1st arch bridge and then again forward to the 2nd arch bridge.

When you are in control again, go over this arched bridge via 3x forward. Then turn right and go 3x forward over the narrow suspension bridge to the other side. Turn
left and go forward twice through the dark round tunnel and you will be back in the main hall with all those weirdly shaped pillars.

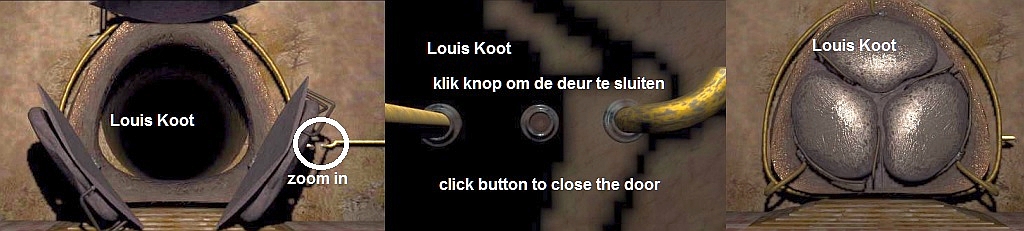
If you leave this door open now, the airship will catch on and
you will not be able to fly back to Gas Valve Island.
Then enter the elevator, turn right and click on the lever to go up with the elevator. Step 2 out of the elevator and you are back on that round platform with all
those thick tubes. Now go 3x forward and you go up the stairs, turn left and click once more forward and you will automatically land in the airship again.
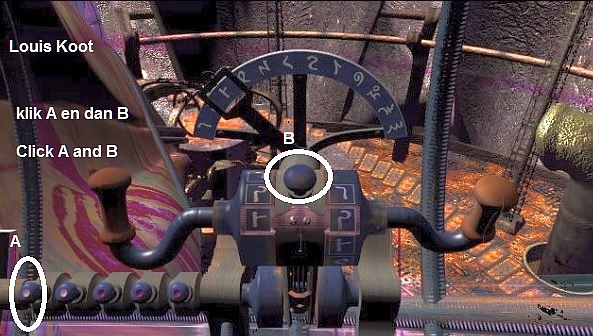
So click, on the left under the left control stick, on button A and then on the Blue Button
B and ......
.... the Airship now sails Sam back to the Gas Valve Island.
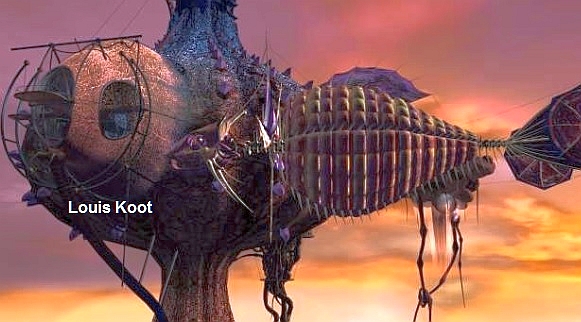
Gas valve island
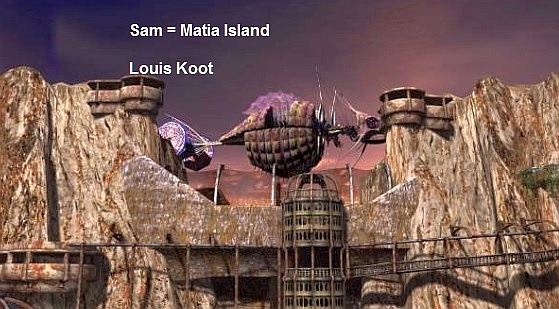
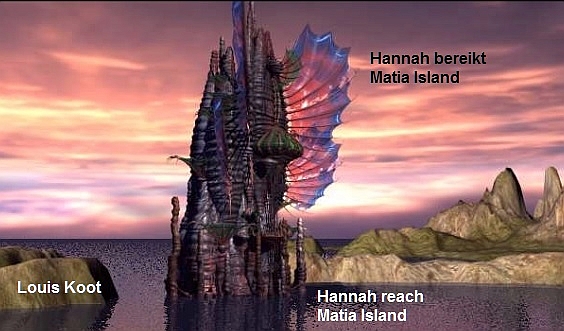
Switch now to Hannah because she must now also sail to Matia Island with the Island
Ship.
|
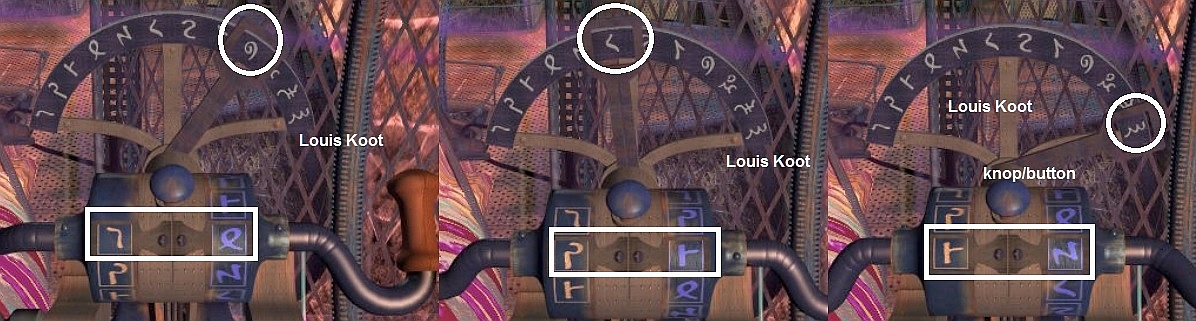
Hannah is still standing in front of the Coordination wheels and the hand scanner and must now enter that new set of coordinates on the left and right wheels. I hope
that you have been able to follow the explanation of the calculation of the coordinates a little, if not then that of course does not really matter because I will give you these coordinates one more time. The Coordinates for Matia Island are therefore: LEFT WHEEL: 10 hours, 12 minutes, 2 seconds RIGHT WHEEL: 3 hours, 2 minutes, 2 seconds We calculated this, through that complicated calculation, from the 2 Old Coordinate lines that Sam and Hannah found on the "Egg" at the Statue with the
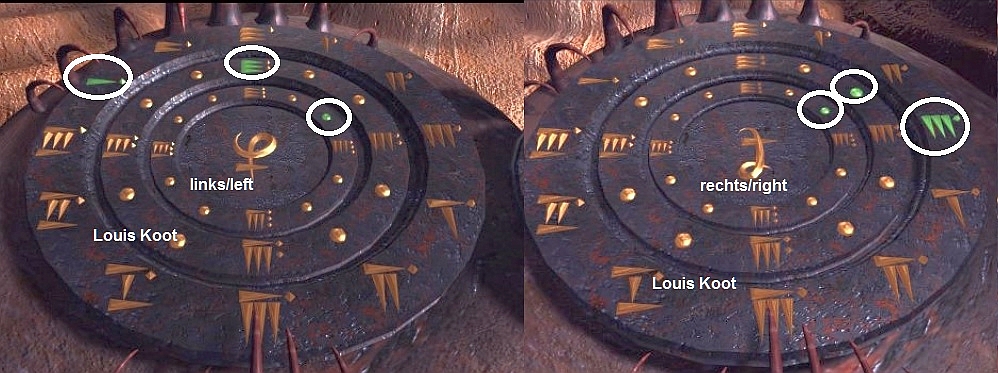
visor in the Cathedral. LEFT WHEEL: Outer Circles on the Symbol at 10 o'clock; 2nd circle on the Symbol at 12 o'clock; Inner circle on the Symbol at 2 o'clock. RIGHT WHEEL: Outer Circle on the Symbol at 3 o'clock; 2nd Circle on the Dot at 2 o'clock; Inner Circle on the Dot at 2 o'clock
Then zoom in on the Scanner between the 2 Wheels and click on the HAND and Hannah will sail and the Island Ship will moor at Matia Island. Unfortunately ..... you can see in the video that the island ship is not docking correctly at Matia Island ..... the Tentacle of the island ship is too short and will
be withdrawn again. The island ship is now not tied to Matia Island and this gives Hannah a big problem |
Take Hannah, from the consoles of the Island Ship, with the lift down and then up the path to the seat and ......
.. SHIT ..... because the Island Ship is not moored to the island through the Tentacle, the seat is not here now.
So Hannah cannot get off the island ship and she
must now find another way to land on Matia Island.
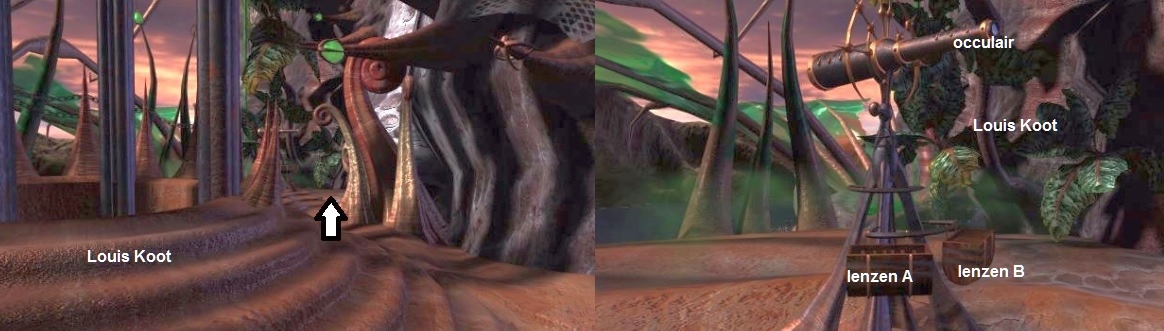
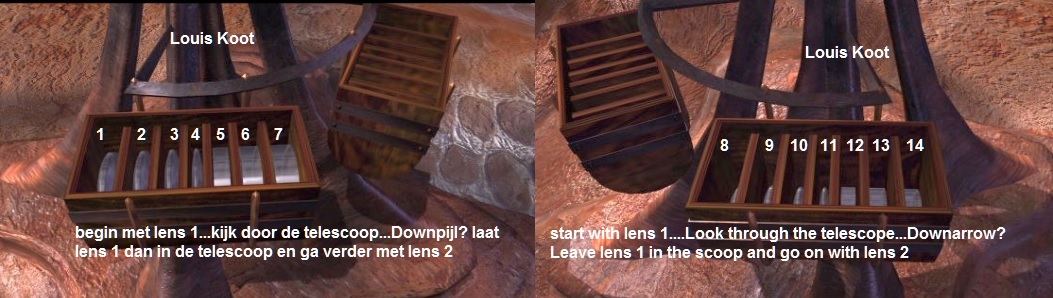
There are 2 bins on the telescope and there are 7 lenses in each bin that you can place in the telescope. First look through the telescope by zooming in on the sight
glass, eyepiece, of the telescope. Hannah sees a very blurred image through the telescope and she sees an up arrow and a down arrow. The Down arrow is now active (Highlighted)
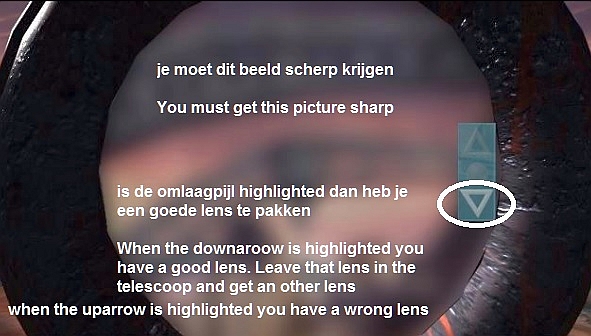
If you click on a lens, that lens is automatically
placed in the telescope.
The point is therefore that, with every lens you place in the telescope, the down arrow must remain active. If that is the case, then you have always put a good lens
in the telescope and ultimately you have a clear view of the image in the telescope. You may already achieve this with 2 or 3 lenses, but you may also have to try all 14 lenses. You always place a wrong lens back in the box and then you continue with the next
lens ..... always do this in the 1 to 14 order and you always place a wrong lens back in the right box.

This is a very difficult part, I have used a camera and recorded the light code, replay it slowly and then you can follow the code.
When you are sure that you have correctly note the code that applies to you, zoom out and go back up with the elevator.
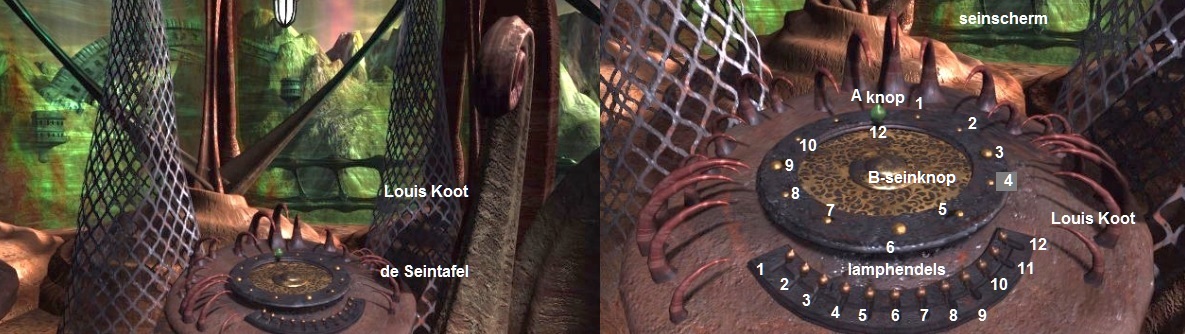
Now you have to find out at which position those 12 levers send a long or a short signal. Number the levers, from left to right, as 1 to 12. All 12 levers are in the
UP position. Now click Lever 1 down and let all other levers stand up. Then press the B-sent Button and see if Lever 1 is now sending a short or a long signal in the signal screen. If it is Short then you know that Down is Short and Up is Long, or vice versa.
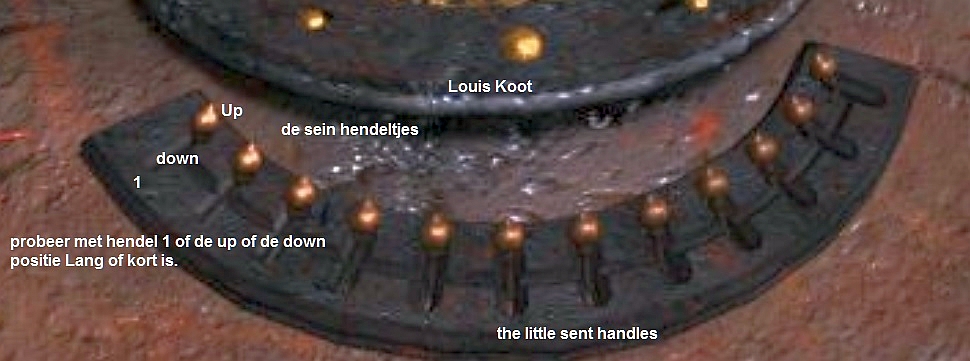
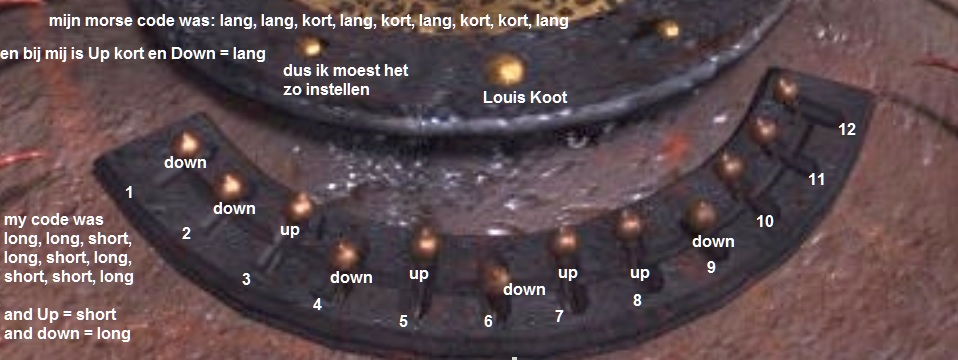
You then know whether Up is Long or Short and whether Down is Long or Short. For me, Down = Long and Up = Short. Now set the levers of your Morse code, starting with
lever 1, in (Down / Up) according to the Morse code that you received in your game and then press the Signal button. So my code was Long, Long, Short, Long, Short, Long, Short, Short, Long, and lever Up was short with me and Lever Down was with me Long, so I
had to set it that way.
Zoom out of the signal table and turn
left and then walk forward to the Chair and .......
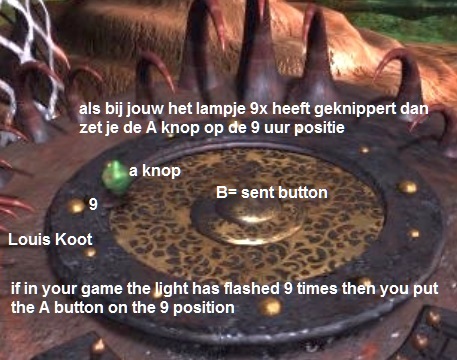
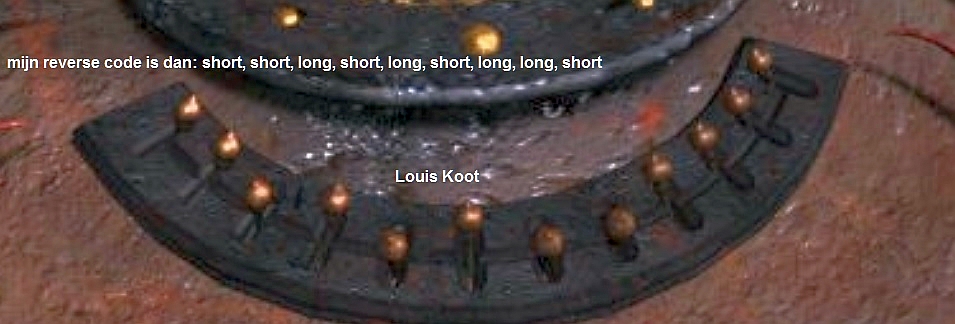
You must enter your Morse code in REVERSE. So where in your code is Long it must be Short and Short must be Long. But you also have to enter jour code BACKWARDS. So
back to the Signal Table and zoom in again. The A button is still correct so stay away from it. So now you have to set the levers the other way around, so Short must be Long and Long must be Short.
My Code was: Long, Long, Short, Long, Short, Long, Short, Short, Long, but in REVERSE it becomes: Short, Long, Long, Short, Long, Short, Long, Short, Short
If you have done everything right from the Telescope then you can see
in a video how the Tentacle is now docking properly and you can further.
NB: If you do not see this video, you have gone wrong somewhere and that may mean that you have used a wrong Morse code because you have not correctly recorded the
Morse code of the light in the telescope. Then go back to the telescope and zoom in again and you will see the light signal the code again ... Unfortunately this can be a completely different code, but you have to set it upside down on the signal table.
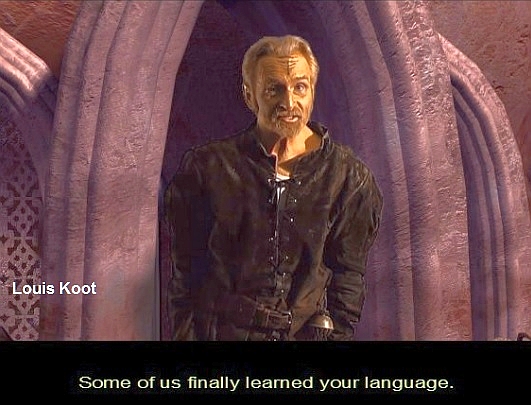
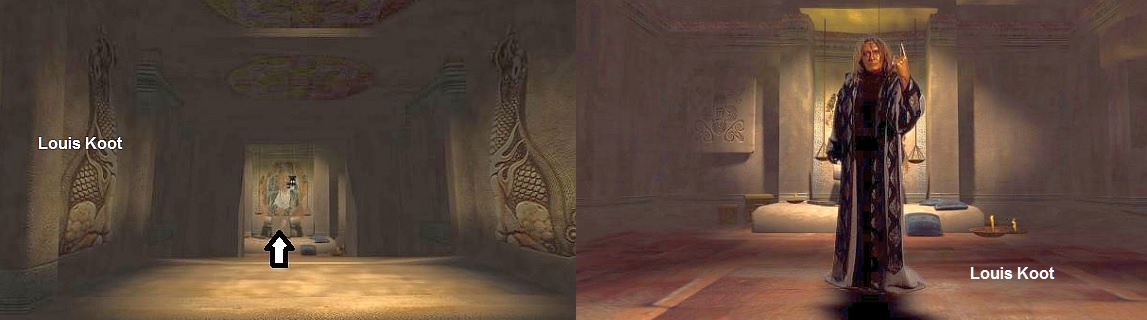
The scientist, which Hannah metst at the beginning of the game on City Island, appears immediately again. The man says that Matia is not only a defence system but
also a control system and that, after the Argilanders returned from their journeys to foreign worlds, Matia was considered infected and put into the prison dimension. He goes on to say that the Wanderer is not a treasure but a destruction system that is not
only capable of killing the group of scientists but is also capable of destroying this entire world.
Click 1x Forward to get into the rail cart and then click on
the console in this cart. The console turns around and you see a screen with symbols.
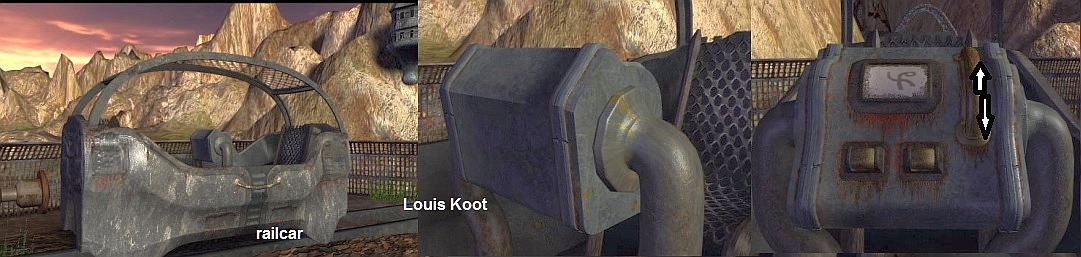
To the right of this screen you will see a thick "Copper" handle that you can click on and which you can then pull up or down so that another symbol appears
in the screen. 2 buttons under the screen. To start the railroad train, Hannah has to put the right symbol in the screen and then click on the right button below the screen. Of course you can now, with good luck, set all the symbols in the screen and then
always press the button and then you will get the right symbol and the train will also start, only you will not get there where you have to go.
2017: Original Dutch Walkthrough by: Louis Koot
2019: This English translation
by: Dick Leeuw