2006: Original Dutch walkthrough by: Louis Koot
2019: English translation by: Dick Leeuw
If you have found this walkthrough via google search or via another site then you have probably not visited my site.
A lot more very detailed game walkthroughs can be found on my site at: www.pcgameswalkthroughs.nl
Chapter 4: Indonesia: Free Sam:
Max ended up in the temple through the back door. It is very dark in the temple. You will see a red glow in the middle of your dark screen. View that red glow. View
the yellow miner's helmet in inventory. There is a lamp on the helmet. Take the yellow miner's helmet from your inventory and click on Max and .....
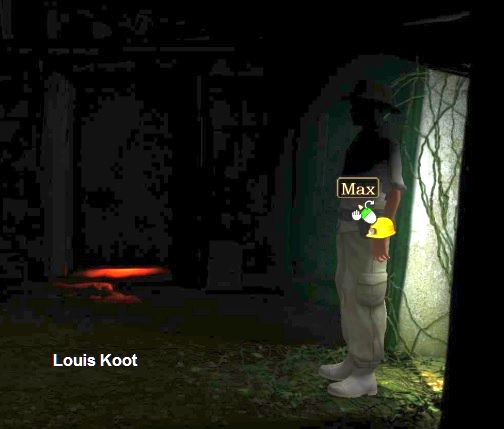
Max puts the helmet on his head and there is light now. You now see a stone door. The red glow comes from behind that door. Click on the door but the door wont go open. To the left of
the door there is a wall painting on the wall and to the left there is a control panel on the wall.
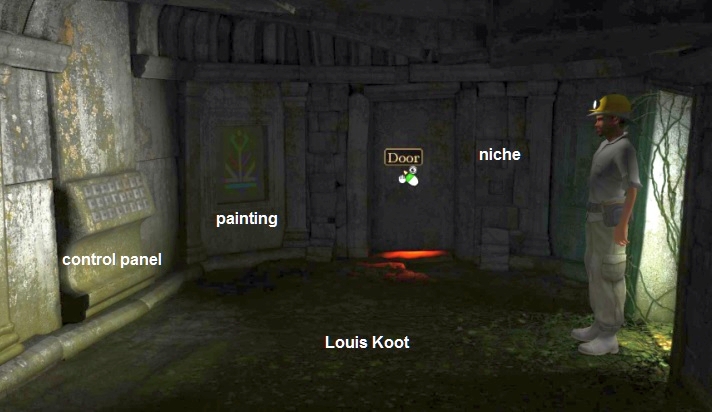
View the wall painting and view the control panel.
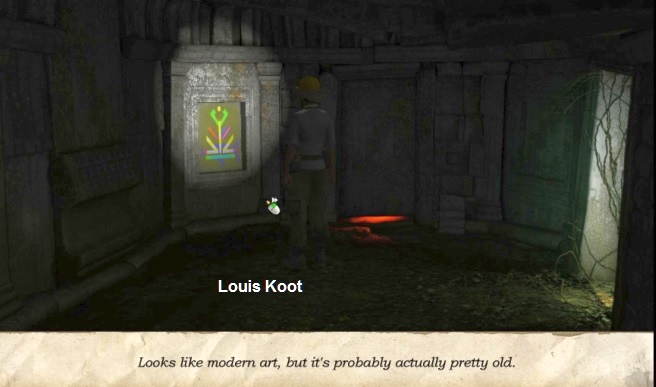
The control panel looks like a keyboard with 3 rows of keys with 8 buttons each. In each row you can only press 1 of the buttons. But which buttons should you press? View the mural
again. The wall painting looks modern but is actually very old. This wall painting is the hint for the keyboard. There are symbols hidden in the mural that you must make visible.
Now combine the green balloon with the yellow miner's helmet in the inventory. Max pulls the balloon over the helmet's lamp
and you can only see the green symbol in the mural. Combine the blue flag with the helmet in inventory and ...... you will only see the blue symbol in the mural. Then combine the red foil with the
helmet (that is the wrapper that the donut has been in and that you have previously made red by clicking on the teapot) and ... you will see the red symbol appear.

You now know the 3 symbols, so the 3 buttons on the keyboard, which you have to press. Now only find out in which order you have to press the 3 buttons. The 3 symbols you just saw are the symbols of 3 planets, so of 3 gods. View the planet list again and compare the 3 symbols you saw with the symbols on the list. You will see the green symbol belongs to Venus, the red symbol belongs to Juno and the blue symbol belongs to Neptune. The order is therefore Red, Green, Blue, or Venus, Juno, Neptune.
Close the screen and view the keyboard again.

the entire panel slides open and you can see that Sam is standing in the cage on the other side the large stone face. Max calls to Sam.
The guard first thinks the stone face is talking, but still finds the voice too human. He's not scared enough yet.
You are now Sam for a while but you have to go back to Max. Open the inventory bar. The Max icon is now on the right in your inventory bar. Click on the
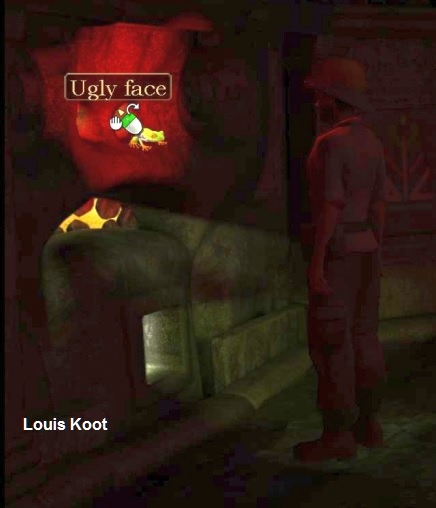
Max icon to switch back to Max. So you continue to play as Max. Max must make the guard somehow more frightened. So Max stands behind the Ugly Face. In the upper red part of the Ugly Face are the 2 eye holes and the mouth. The square hole is in the lower gray
part. Take the Frog from your inventory and click with the frog on the red upper part of the Ugly Face.
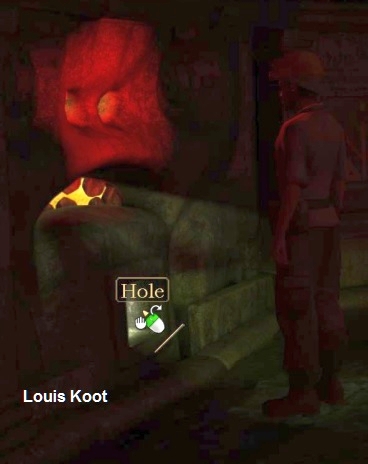
Max thinks it's a good idea to let the frog croak through the Ugly Face. But he also thinks it won't be enough. The guard may also need to be drugged for a moment. Take the long hollow
Bamboo tube from your inventory and click it on the bottom, gray, hole and ..... Max passes the bamboo stick through the hole to Sam. Also give Sam the white berries through the bottom hole.
Then switch to Sam by clicking on Sam's photo in the inventory bar.
Sam:
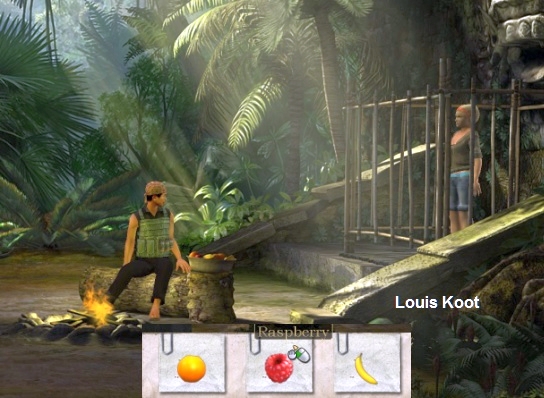
So now you are Sam again. The guard is sitting on the tree trunk behind the campfire again and with his back to Sam. The bowl of fruit is now on the tree stump next to the
guard. Click on the guard to talk to him and then ask him for some fruit. Click at the bottom of your screen on the fruit bowl icon and Sam asks if she can have some fruit. The guard asks what kind of fruit they want. Click on the
Raspberry icon.
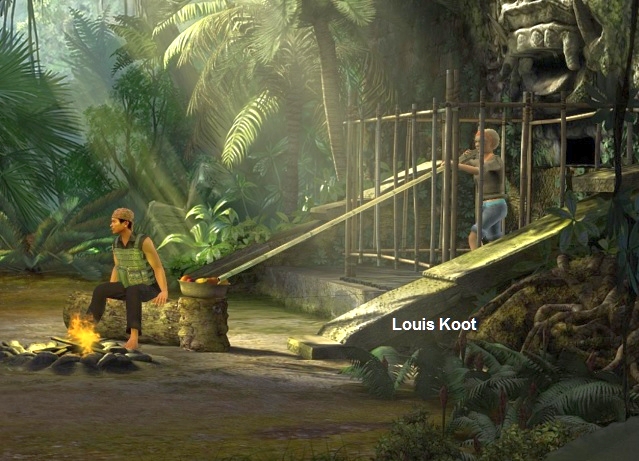
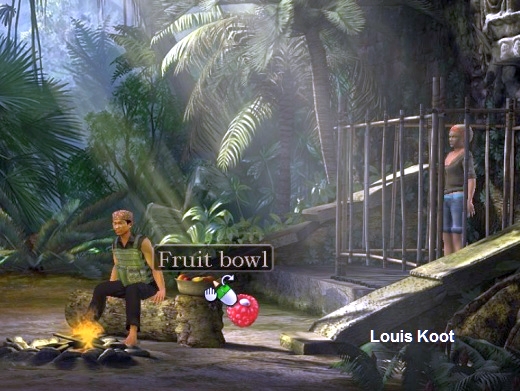
Talk to the guard again and ask him for a raspberry again and .... The guard likes bullying Sam so he eats the last raspberry himself. But this is the
raspberry with the white berry inside, and those white berries are poisonous. Soon the guard starts to feel touched and sees the Ugly Face moving back and forth. Switch back to Max
Max:
The guard is under the influence of the poison of the white berry. Take the frog from your inventory again and click it again on the upper, red, part of
the Ugly Face and .... The frog croaks through the mouth of the Ugly Face and the guard thinks that the God speaks to him. The guard panics but does not run away yet. Take 1 of your 2 flares (Glow sticks) from inventory and place
them in the upper, red, part of the Ugly Face and ....
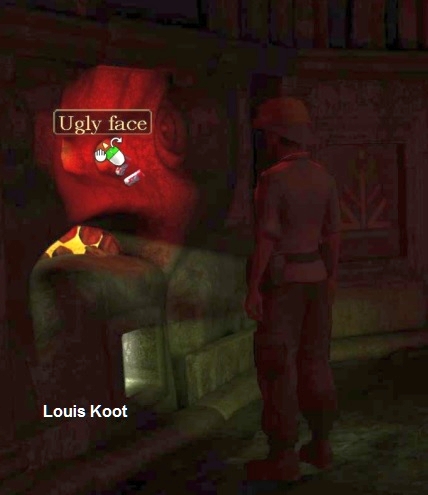
Through the flare of light the eyes of the Ugly Face glow and this fact with the croaking of the frog pushes the guard over
the edge. The guard panics and runs away, Max frees Sam. A long conversation follows between Max and Sam. Max sends Sam to the coast to warn the police while he himself will go back to the
temple. Max finds a kind of key on the floor that the guard has lost, and with this key he opens the stone door in the temple.
Max ended up at the crater of the volcano. A rocket bomb hangs above the crater. Meanwhile, the white villain returns and sees that both Sam and the guard have
disappeared. The villain contacts his boss and he gives the order to activate the Rocket. Max suddenly sees that the counter on the bomb is on and is quickly counting to zero .
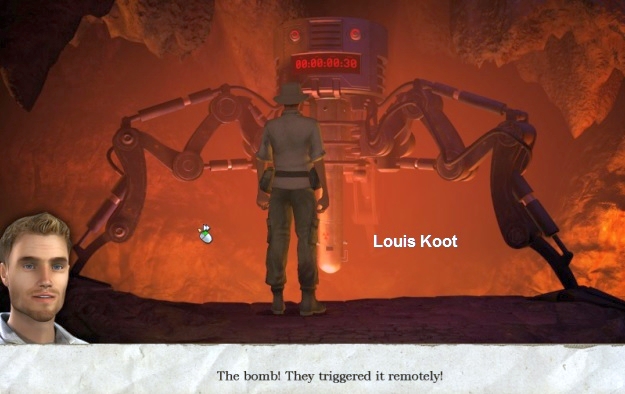
Max runs out of the temple in a panic and ... a moment later we see the rocket shoot into the depths and explode. The result is a huge eruption of the volcano. Max,
however, survived but is now being captured by 2 villains employed by Puritas Cordis. We end up in:
David and Nina have arrived in Gatineau. The place is one big ruin. So Nina and David are looking for the key Sister Elise talked about in her letter. But where to
find the key ?. Sister Elise's letter said that every night she saw the Saint who showed her the way to the key. David carefully reads the letter again to see if any mistakes have been made in the translation of the letter. In the meantime, Nina wants to look
for something that looks like a Saint and she gets a sketch from David, which was also with Sister Elise's letter. David also does not know what that sketch represents.
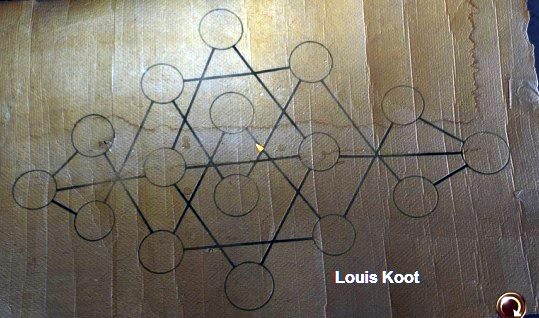
So you are Nina again and in your inventory you have the Sketch. View the sketch. You get the sketch in close-up and it consists of 16 circles that are interconnected. It looks
something like the Atomium in Brussels.
You have no idea what the sketch means and what to do with it, so put the sketch away. Behind David is a sign that warns of falling rocks. On the left is a Surveyor working on a lamp.
Go talk to the surveyor.
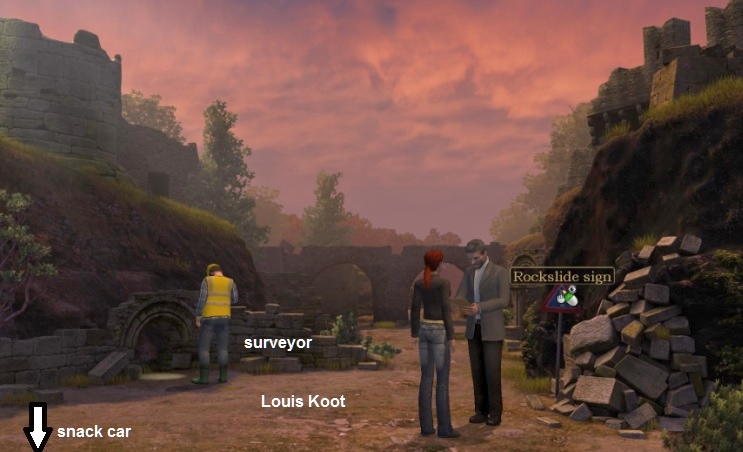
Use all the talk options that you get. The surveyor says that Nina is not allowed to walk around here. An amusement park will be built here, of which the ruins will
be part. The surveyor is therefore investigating the ruins to determine which parts of the ruins are safe for tourists. The surveyor also says that the archaeologists have already viewed these ruins and are done with their excavations. If the surveyor still
finds valuables in the ruins, he will keep them for himself. The surveyor has access to a heavy excavator that can excavate the entire area if necessary. No .... the surveyor has not seen anything that looks like a Saint at all.
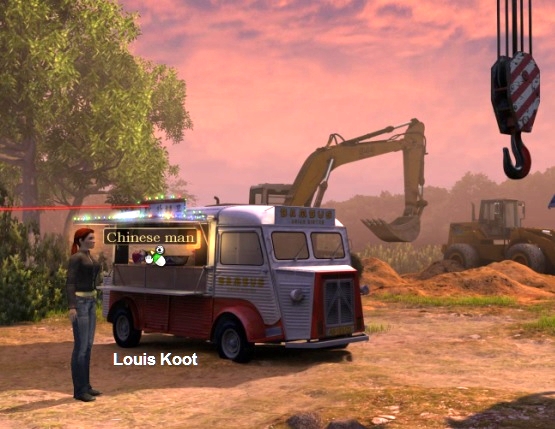
Food truck:
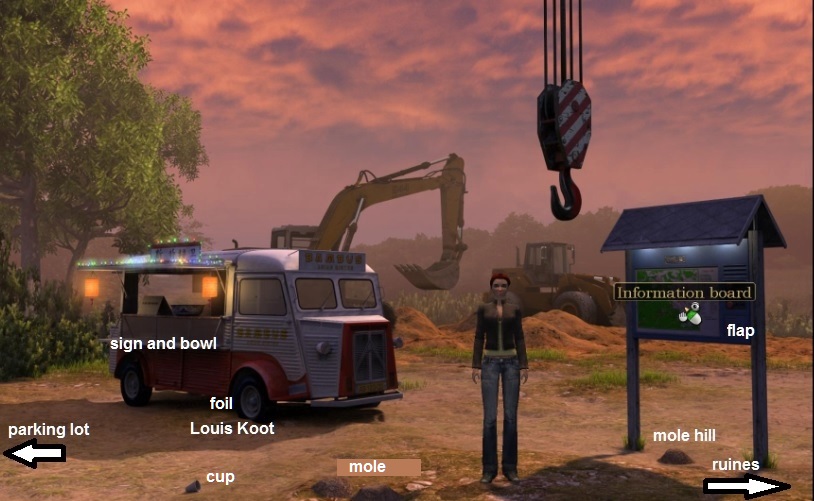
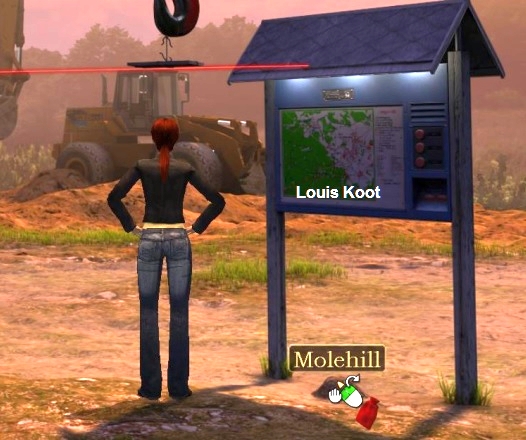
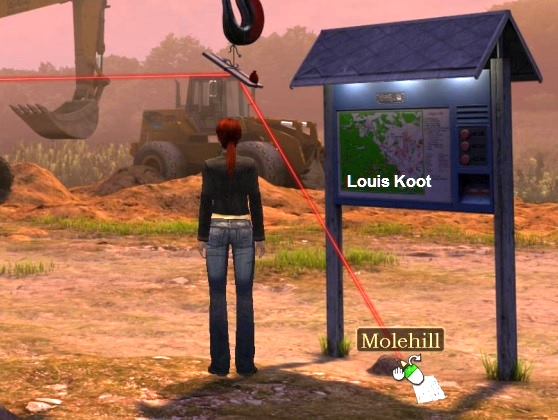
Continue down one screen, via the Exit (Path) at the bottom left of the screen. You then end up at the information board, the Food Truck and the excavators. You can also see the hoist
of a crane hanging prominently in the screen. At the bottom of the screen, in front of the Food Truck, is a paper cup on the floor. To the right of the cardboard cup you see a Molehill in the ground and also below the information board you see a molehill. At
the right front wheel of the Food truck is a roll of Aluminium foil on the ground.
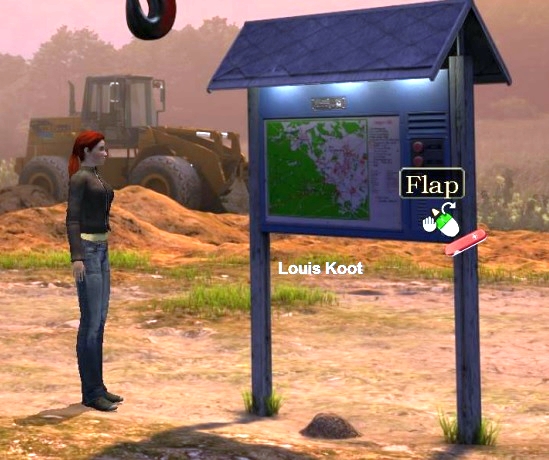
Left click on the information board. The board contains the map of Gatineau and surroundings and there are 3 red buttons. Beneath the 3 red buttons there is a cover that Nina cannot
open. Nina automatically presses one of the red buttons to hear some information about the area. The 3 icons of the 3 info buttons now appear at the bottom of your screen. Click on each of the 3 icons and then listen to the
information that you will then hear. You hear info about the foundation, the demise and the rediscovery of the town of Gatineau.
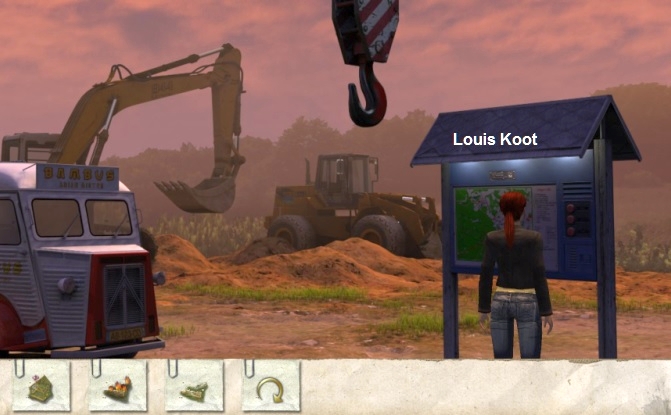
In the late 17th century Benedictine monks built a monastery here, which quickly grew into a city that became an important trading place between Rouen and Paris. On
April 5, 1648, a major fire destroyed the city, killing half of the population. The survivors fled to surrounding cities. Gatineau was never rebuilt and fell into a ghost town. Work started on the construction of an amusement park in 2002. When unexpectedly
the ruins of this medieval city were discovered, Lazare Construction decided to reconstruct some buildings and even build a museum as part of the park.
Close the screen when you have heard all the info. The Food Truck is open but the manager is not visible. On the counter of the food truck is a notice Sign and a bowl .View
that notice sign and view the scale. The notice sign says "Be right back" and the bowl contains Fortune Cookies.
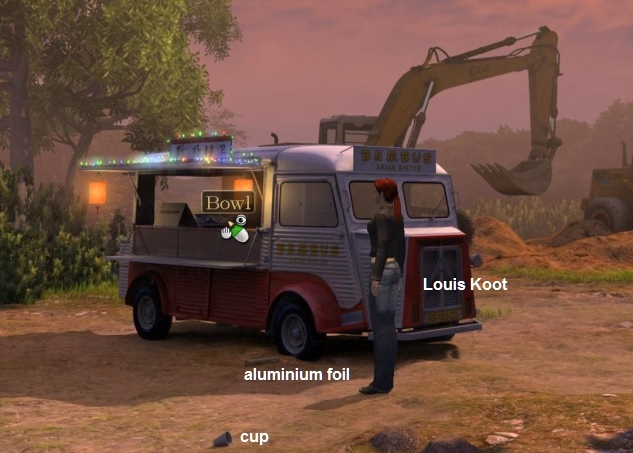
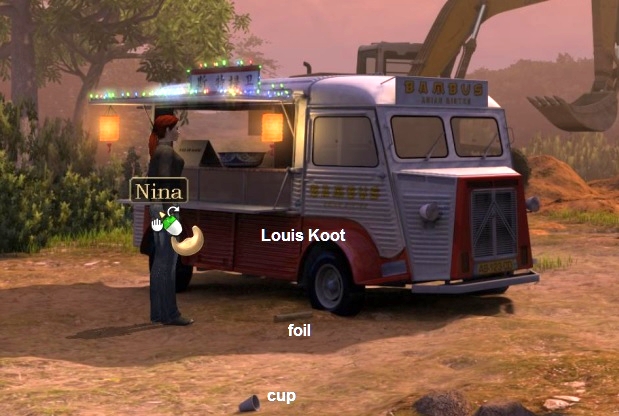
Nina eats the cookie, but she doesn't really like it, and she now reads the Chinese wisdom from the Fortune Cookie.....it says: "If the crane flies upside
down at half past six, then happiness will smile at the Bearded One". Well .... would this be a hint? Pick up the aluminium foil. Pick up the cardboard cup. Go another screen further to
the left, via the exit (Path) at the bottom left. Nina ends up at the:
Parking lot:
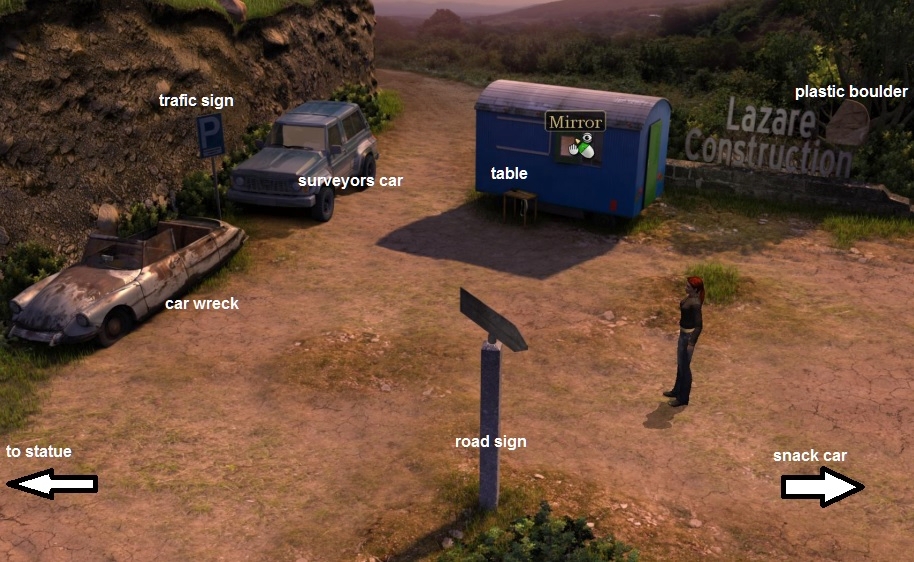
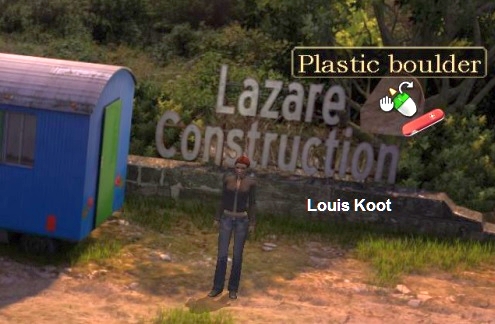
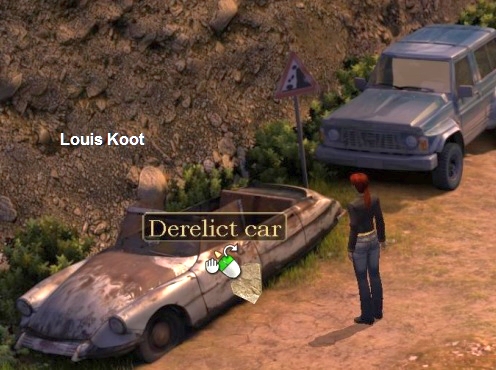
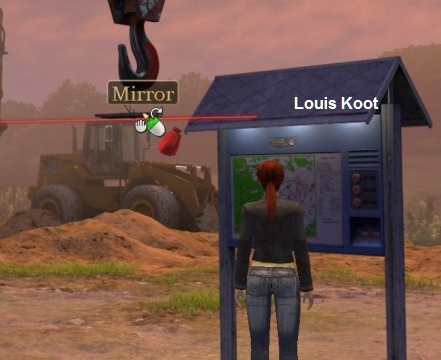
There is a blue site trailer (Trailer), an SUV car and a car wreck. There is a parking sign between the two cars. There is also a signpost (Post). Behind the site hut is a wall with
"Lazare Construction". You can also see the plastic Logo (Plastic Boulder) of the Lazare Company in the form of a plastic rock. The Lazare Company is therefore the builder of the amusement park. There is a small table in front of the site office. The
site office is locked. There is a window in the site office and that window has a hatch. A Mirror (Mirror) hangs on the hatch of the window. First view everything again.
On the table, which stands next to the site hut, lie things that Nina can use. So left click on the table and ...
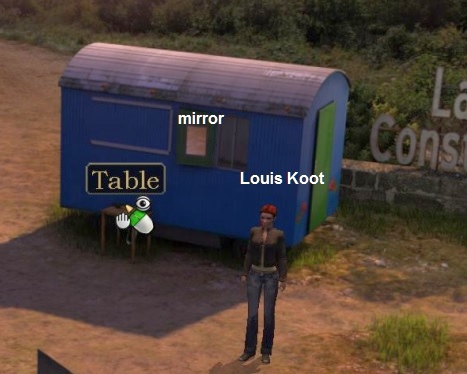
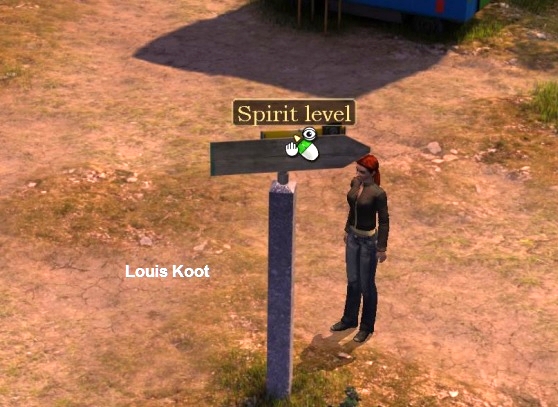
Nina runs to the table and takes all the stuff from it and that is: a pocket knife, a spirit level with laser an electric cable
and a Cloth pouch. Also grab the Mirror, which hangs on the window hatch of the site office.
Nina unscrews the thing and is very satisfied with the pocket knife that has various functions. When you have seen everything here and have taken the things from the table and you have
the mirror and the plastic rock, you go another screen further to the left, again via the exit (Path) at the bottom left. Nina ends up at:
Statue:
Nina has landed at a large statue on a pedestal. Nina naturally walks on to the statue and David also comes here. David tries to decipher the text plate on the base, but he does not
get any further than "Holy ......". Nina and David wonder if this image is the Saint where Sister Elise was talking about. Nina receives from David the new translation of the letter from Sister Elise. If you wish, you can view this new translation of
Elise's letter in inventory. You will see the video with Sister Elise again.
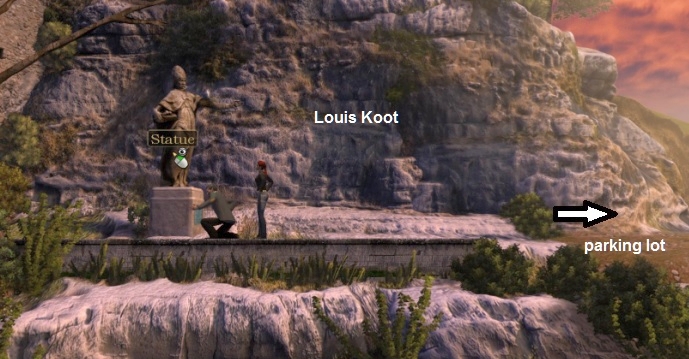
View the statue, so right click on it. You then view the statue in close-up. Move your cursor from above to below, and from left to right, over the statue. You then discover a number
of click spots on the statue and these are: the Head, right arm, left arm, right leg, left leg. View these parts and left click on them. Wherever you click, Nina always says that the statue has no turning places anywhere.
Right-click the Head, right arm, left arm, right leg, and left leg a few times. The image carries something under the right arm, but Nina has no idea what it is. The left arm points to
the ruins of Gatineau but Nina cannot see the exact location the arm is pointing to from here. Take the spirit level from your inventory and click it on the left arm of the statue.
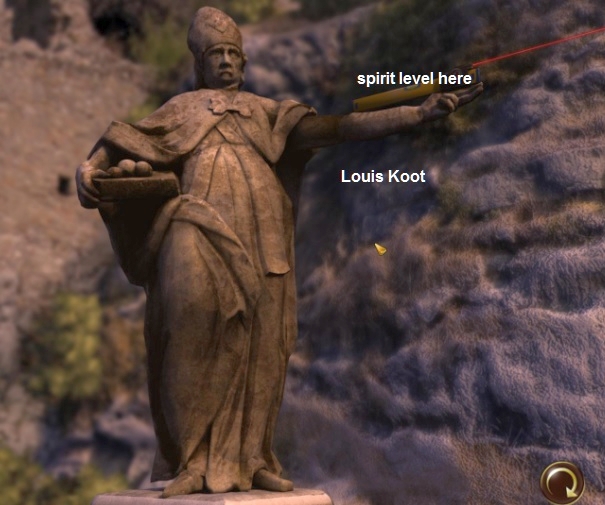
Nina places the spirit level on the left arm and the laser beam from the spirit level indicates exactly where the left arm is pointing. Leave the spirit level on the arm of the statue
and leave the close-up. You see the red laser beam go to the parking lot, so go back to the:
Parking lot:
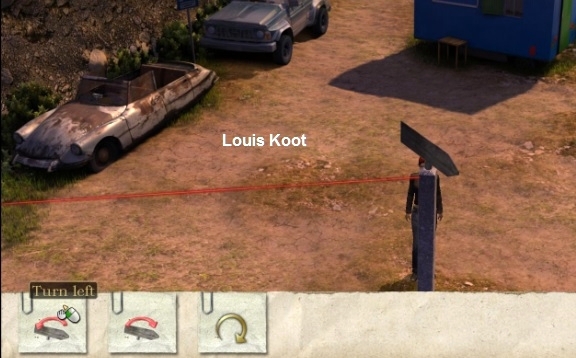
By clicking on the left icon, Nina will turn the Arrow to the left. By clicking on the right icon, Nina will turn the Arrow clockwise. Click 3 times on the left
icon. The arrow is then
exactly in line with the laser beam and the tip of the arrow now points to the right. Close the icon bar. Nina then tells that the arrow is now in line with the statue's arm.
Then follow the red laser beam one more screen to the right, to the:
Food Truck:
The laser beam ends on the food truck. The Chinese owner is now sleeping with his head on the counter in the food truck.
Click on the Chinese man to wake him up and talk to him. Then
use the talk options.
The manager of the snack wagon is a bit disappointed. He has no clientele. But because he has a contract with the construction company, he must remain here as long as there are still
workers on the construction site. However, the work was stopped some time ago, so the only worker present is the surveyor. However, the surveyor always brings his own lunch, so the food truck man does not sell anything. But because the surveyor is present, the
snack truck must be present every day until the surveyor goes home.
If Nina wants the red laser beam to go even further than the food truck, she must ensure that the food truck disappears. To make the food truck disappear, Nina must ensure that the
surveyor disappears. Go another screen to the right, to the:
Ruins:
The surveyor is still working on his lamp. Talk to the surveyor again and use the call options. The SUV car, which is parked in the parking lot, belongs to the surveyor. The surveyor
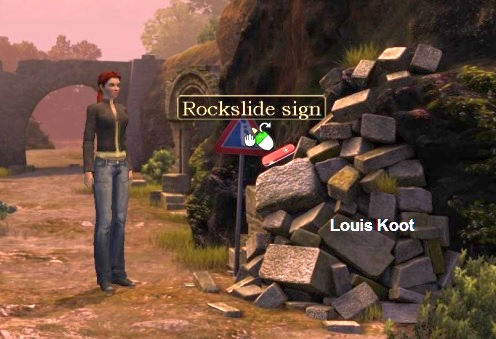
is not going home yet because he is looking for archaeological valuables. To the right is the warning sign that warns of falling rocks. Click with the pocket knife on the warning sign to unscrew it and store it in your inventory.
Go back to the:
Parking lot:
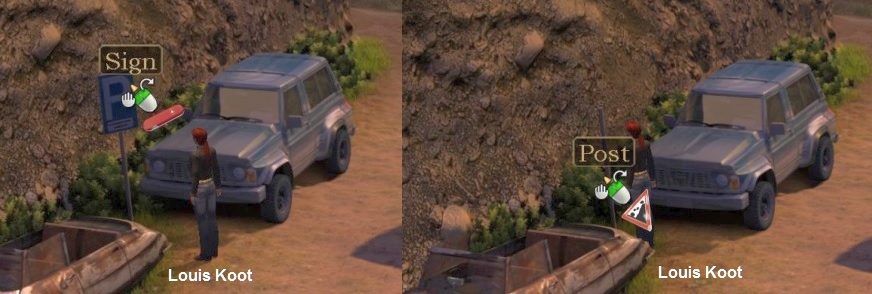
There is a parking sign between the SUV and the car wreck. Also unscrew the parking sign from the pole with your pocket knife. Then take the falling rock sign from your inventory and
place it on the pole of the parking sign.
Nina now tells the surveyor that his SUV box is not safely parked in the parking lot. The man goes with Nina to the parking lot to see it with his own eyes. The surveyor admits that
there is danger, but otherwise he is not worried about it, because the boulder did not end up on his beautiful car. The surveyor believes in the stars and his horoscope has predicted a lucky day for today and he relies on that.
Take another Fortune Cookie from the bowl. Nina didn't like the first Fortune Cookie very much, so instead of having Nina eat the cookie, you can also open the cookies with your pocket
knife. To do this, combine the pocket knife with the Fortune Cookie in your inventory to remove the letter with the Chinese wisdom. Then read the note.
You must get a Fortune Cookie with the following wisdom on the note: "If you ignore the warning and disregard your neighbour’s misfortune, disaster will strike you also".
So keep grabbing and opening Fortune Cookies until you have the note that says the above wisdom. In your inventory you recognize this note because it is then horizontally in your inventory, while all other Fortune Cookie notes are tilted. When you have found
the good Chinese Wisdom, go back to the surveyor and click on the surveyor with the good Chinese Fortune Cookie note.
Nina shows the surveyor the note but the surveyor is not impressed. After all .... he didn't take the cookie, so wisdom does not apply to him. Go back to the food truck. Take the good
Fortune Cookie note from your inventory again and click it on the sleeping manager. Nina asks if the man wants to pack the note for her in a new cookie and so does the man. Go back to the surveyor and then give him the newly baked Fortune Cookie.
The surveyor eats the cookie and then reads the wisdom and now gets a little worried. He takes Chinese wisdom seriously. Talk to the surveyor again and use the car
topic again and
..... Nina and the surveyor go back to the parking lot and Nina now convinces the man that it is better to move his car and the surveyor does that now . We are then back at the ruins. The surveyor did not go home, but his car is no longer visible in the
parking lot. Go back to the:
Food truck:
Click on the sleeping manager again and then use the Snack stand topic. Nina points out to the man that the surveyor's car is no longer in the parking lot. The Food truck man concludes
that the surveyor has gone home and that he can now also leave. The snack wagon man drives away with his snack wagon. The red laser beam now continues as far as the information board but ..... then suddenly disappears.
The red laser beam has disappeared. The spirit level batteries would have run out. Look at the information board. Below the 3 red buttons is a flap. Left click on that cover but
Nina tells you that the cover is screwed tight to the board. So take your pocket knife from your inventory again and click it on the cover and ..
Then combine the newly found batteries with the spirit level in inventory to put them in the spirit level. Then place the spirit level again on top of the signpost arrow and see ...
the red laser does it again. Go back to the:
Then place the filled red bag on top of the mirror and ....
Nina now points the surveyor at the glittering cup that you have just put under the stones. The surveyor goes to look and thinks he has found a silver object and he quickly goes to get
his excavator to scoop away the heaps of stones. The surveyor takes the "silver" cup and leaves to take it to his fence.
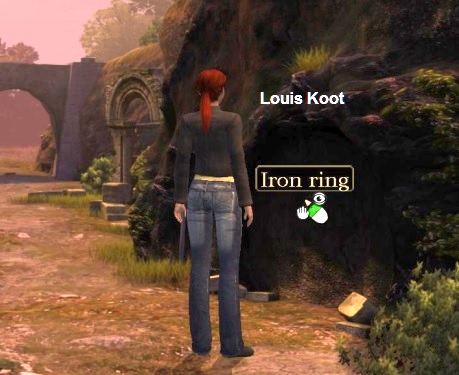
Left click on the iron ring and ... Nina turns the ring and then pushes the heavy stone door open and ends up in the:
Wine cellar:
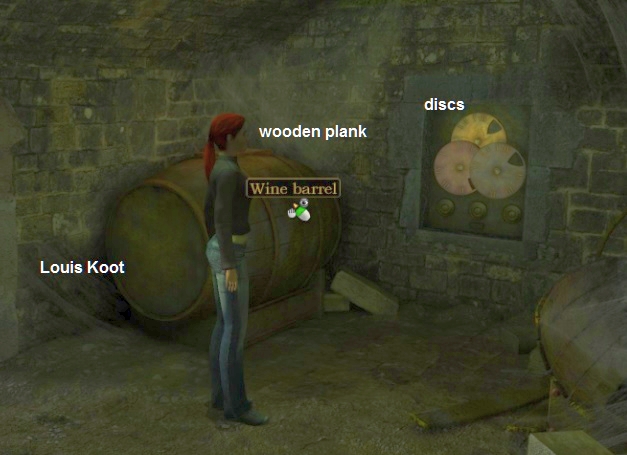
Each button has a letter of the alphabet. There is a shallow hole on the left (Indentation). The 16 letter buttons are pressed and Nina wonders why the buttons do not rise. Close the
close-up screen. Now view the panel with the 3 stone discs, so right click on it. You come in close-up of the 3 turntables.
|
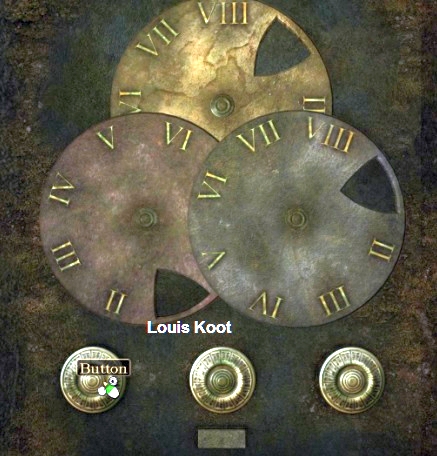
Roman numerals appear on the 3 discs. There is also a hole in each of the 3 discs. Below the discs are 3 round buttons and a rectangular button. The 3 discs each
have a different color. The top disk is yellow, the left disk is red and the right disk is blue. By clicking on the 3 round buttons you can turn the dials. With the middle button you turn the yellow dial clockwise but also the red dial to the left. With the right button you can
simultaneously turn the red and the blue disc to the right and the yellow disc to the left.
You are supposed to turn the discs so that the holes in the discs exactly overlap in the middle. With the rectangular button you can reset the puzzle to the starting position, should
you lose your way completely. Multiple solutions are possible, but here is my solution. Step
1 = click the right button 5 times. The Blue disk is in the right position. Step
2 = click the middle button once. The Yellow disk is now also in the right position. Step
3 = Click the left button 4 times and ....
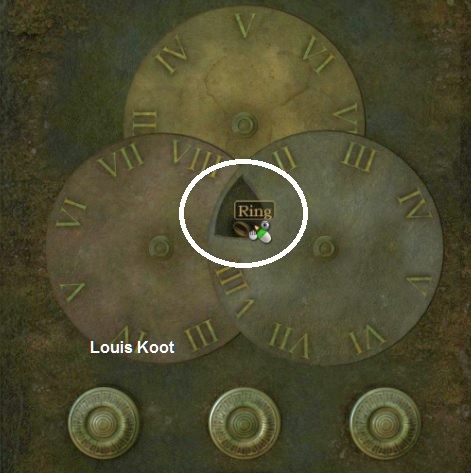
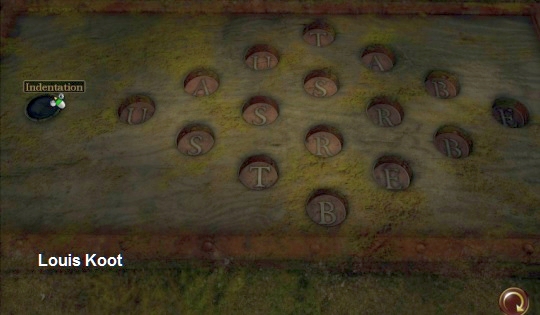
The 3 holes of the 3 discs now overlap into 1 hole and in the hole there is a signet ring (ring). Grab the Signet Ring. |
Zoom out of the close-up. Zoom in again on the wooden board on top of the wine barrel. While you are in the close-up of the wooden board, look at the
sketch, in inventory, that was
with Sister Elise's letter that David gave you. So there are 16 circles on the sketch, just like on the wooden board. Nina thinks the sketch can help her solve this puzzle, so she puts the sketch on the wooden board. Take the signet ring from inventory and
then place it in the shallow hole (indentation) and ..... all letter buttons now come up and .....

David comes in. David now tells that the statue is the statue of Austrebert, the Archbishop of Rouen. Ask David a little further about the statue, but he doesn't know anything else
either. Zoom in again on the wooden board.
|
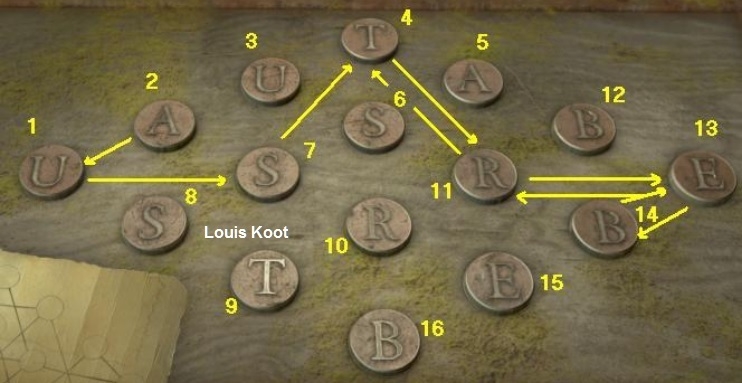
It is therefore the intention that you click on the letters in the correct order so that you play AUSTREBERT. A button can be pressed multiple times. However,
you can only click on the buttons that, on the sketch, are connected by a line. The first letter is therefore the A, but which A is that? Number the letter buttons, from bottom left to bottom right, 1 to 16.
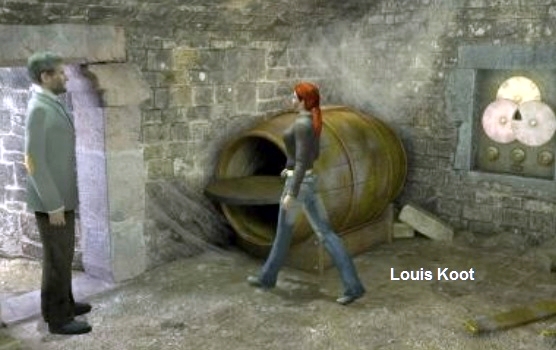
The front of the barrel opens and Nina picks up a letter and a few pieces of leather with holes from the barrel. David reads the letter and while he does you see a video;
|
The letter is written by Brother Bernard, the brother of Sister Elise. The letter is addressed to Cardinal Coubertin in Paris. Brother Bernard has previously sent the Cardinal
supporting documents, with which Zandona can be brought before the Inquisition. Zandona made sure that his false predictions came true, so that his sect got more and more followers. He also predicted that "a big city would go up in flames". Zandona
has therefore put Gatineau in ashes.
The supporting documents were encrypted. The leather laps with holes are the key to be able to read those pieces of evidence. Bernard wanted to send Sister Elise to Paris with these
keys. She never arrived.
Or are there people who recently restarted into Puritas
Cordis and, based on directions from Zandona's writings, made the predictions come true again. With as final goal an Apocalypse. David and Nina suspect that Bernard's evidence is still hidden somewhere on the Cardinal's estate. They are on their way to Paris.
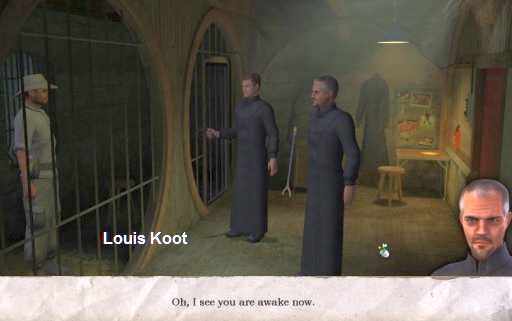
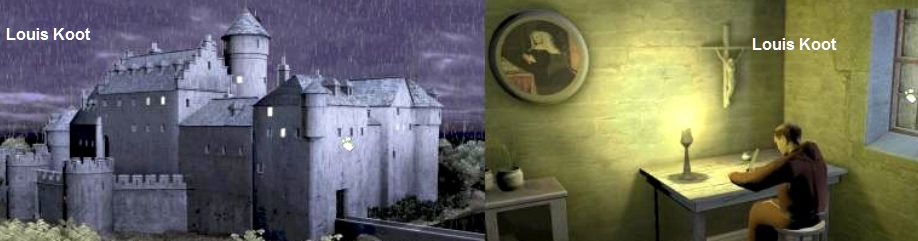
Max is now trapped in the Puritas Cordis headquarters. Two men in long robes are standing by the cell. One of the men is the fake bartender of the Calypso. The other man is Pat
Shelton. The fake bartender has found a photo of Nina in Max's pockets, which he of course recognizes from the ship. Pat Shelton, the leader of the cult, now wants to know the name of the woman in the photo and where she is. Max obviously does not know where
Nina is. They don't believe him. He is threatened and gets some time to think about it. We end up in:
2006: Original Dutch walkthrough by: Louis Koot
2019: English translation by: Dick Leeuw