If you have found this walkthrough via google search or via another site then you have probably not visited my site.
A lot more very detailed game walkthroughs can be found on my site at: www.pcgameswalkthroughs.nl
2018: Walkthrough by: Louis Koot
This is the sequel to Syberia 1, and Kate Walker continues her adventures on her way to Syberia. The game simply continues where Syberia 1 has ended. This second part works exactly the same as part 1 and the system requirements are more or less the same. On a Pentium 3 500Mhz computer with a little decent 3D video card and sound card, this game is also good to play.
The game starts with a movie. Katie's boss is still an arrogant as hole ....

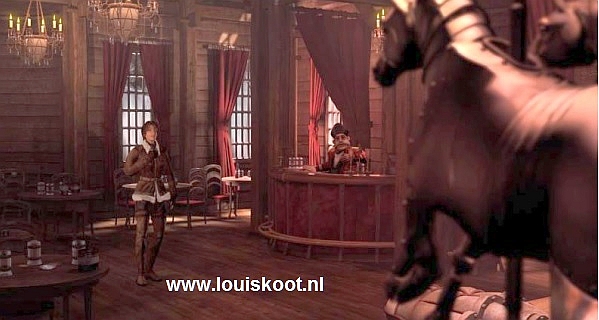
Meanwhile Kate Walker and Hans Voralberg are on the train and we see a conversation between Kate and Hans in the train. Hans is very sick and he tells Katie a few things about the mythical island of Syberia. Kate's boss calls again and Kate listens to him but she does not give him an answer. Kate has burned her "ships behind her". Her only goal now is to make sure that Hans Voralberg reaches his beloved Syberia. The train arrives at a station and the game now starts with
Chapter 1: Romansburg:
A: Winding Up the train again:
Kate is in the front part of the train carriage. Walk to the bottom of the screen. Kate takes a step forward and her phone starts to ring. It is Oscar, the always friendly train driver. Oscar is just as humorous and "to the point" as in part 1. Listen to the conversation between Kate and Oscar. Oscar tells us that we ended up in the city of Romansburg.
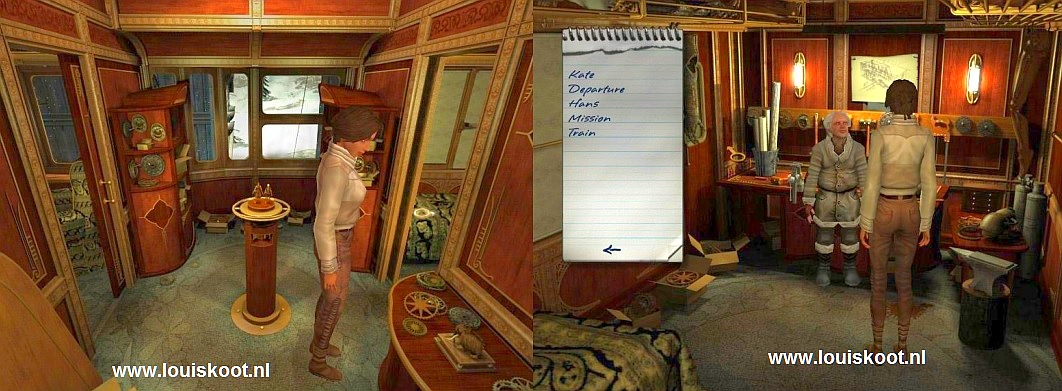
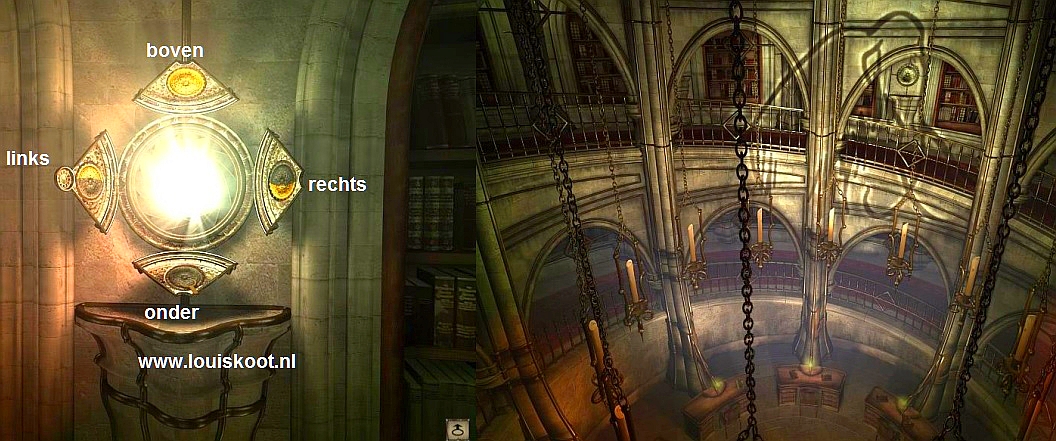
Then click in the doorway behind Kate. Katie turns around and enters the intermediate hall. Here stands the pillar with the miniatures of Hans and Anna Voralberg on it. This pillar is the Cylinder Machine. You probably know this from part 1. You can click on it. On the table, at the bottom right of the screen, you will also find the Mammoth doll of Hans. You can click on the Mammoth doll. Then walk through the doorway, to the right, into the sleeping compartment. Walk to the bottom of the screen and Kate will come to Hans Voralberg. Hans is doing something at his work table. Click on Hans to talk to him. Your conversation options appear on the screen. Use them all and exhaust them completely.
Hans tells Kate that they are still a long way from Syberia and he also tells that Oscar is the one who decides whether the train will start driving again. In order to get the train moving again, it must first be wound up again. There should be a rewind machine on the platform.
After this conversation you go back through the bottom of the screen and then back in between the hallway. Then continue to the front part of the train car and walk to the bottom of the screen. You can then enter the bathroom through the door to the left, but that has little use. So go through the door, right in front of Kate and......Kate is standing on the outside balcony of the train carriage. Go of the balcony on the right and onto the platform.

We now meet the retired Colonel Emeliov Goupatchev. The colonel is the manager of the store of which he has just opened the door. The colonel begins to introduce himself to Kate but is brutally interrupted by the "City Announcer". Romansburg seems to be pretty much the "End of the World". After this city there's nothing more then ice cold wasteland. The good Colonel goes into his shop grumblingly.
Walk to the bottom of the screen and on the next screen you repeat this. You are then at the Locomotive and at Oscar.
Click on Oscar to talk to him. Use all your call options again and exhaust them completely.
Oscar, although an Automaton, is worried about his future. What will happen to him, and the train, as soon as Syberia is reached ?.
Oscar would like Kate to talk to Hans about this. Oscar also tells Kate that the train has to be wound up again.
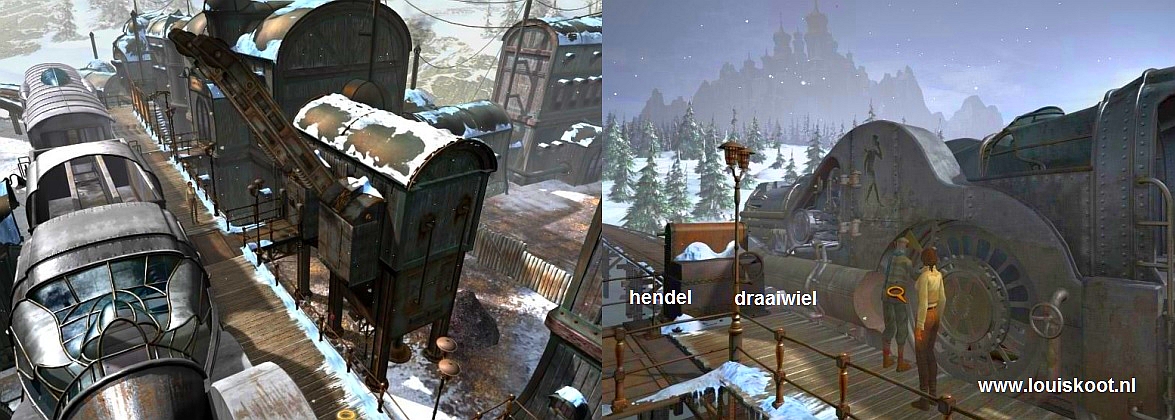
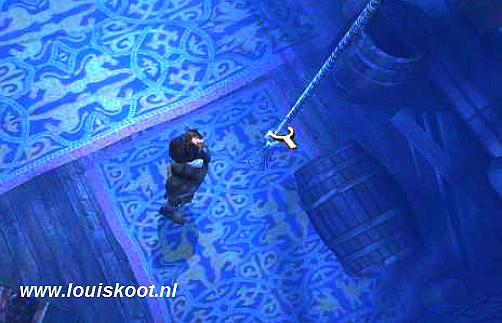
At the end of the platform stands the Train Winding Machine. On the right is the turning wheel and on the left is the large lever. Click on the turning wheel. The upwind rod emerges. Click on the big Lever, behind Kate. The rewind rod disappears into the locomotive and now winds it up. Click on the turning wheel again to make the rewind rod disappear into the machine again. If the train is wind up again then go and talk to Oscar again. Use the "Hans" topic and then the "Train" topic.
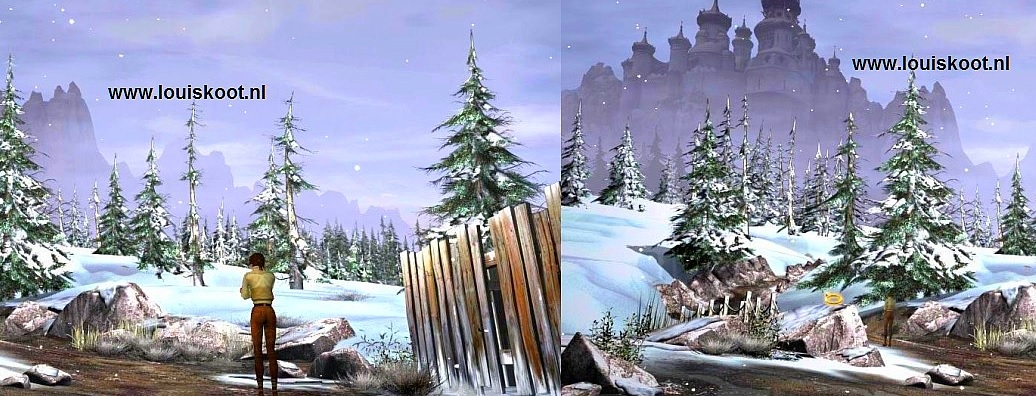
Well...Kate....Did your really thought that Oscar would thank you for winding up the train? ....No way..... Oscar tells that we are going to the "Cold Area" and that Kate will have to take care of Coal to keep it warm in the train. No Coal, then we will not go any further. Notice the big "castle" that stands in the background on the hill. Kate will also end up there later. It is a large monastery.
B: Coal for the train:
Go back to the right via bottom right. You are then on the overview screen of the station. You see the train and the buildings. Behind the locomotive is the coal car and behind it is the carriage. At the coal car of the train you see the front building. A conveyer belt protrudes from this building. The next building is the store of Colonel Emeliov Goupatchev. There is an iron hatch in the floor of the balcony in front of the store and also in front of the building with the conveyer belt That building with the conveyer belt sticking out is the Coal warehouse.
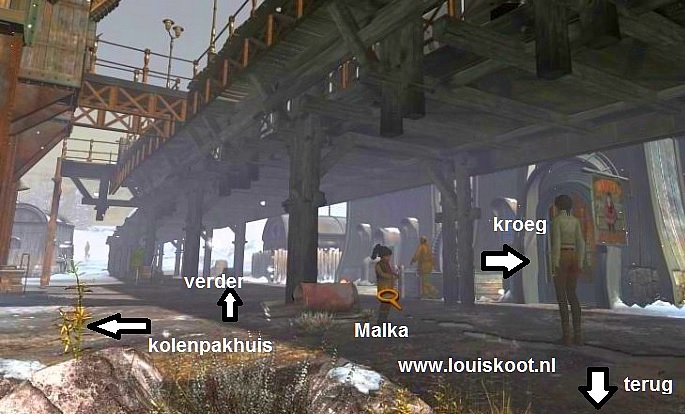
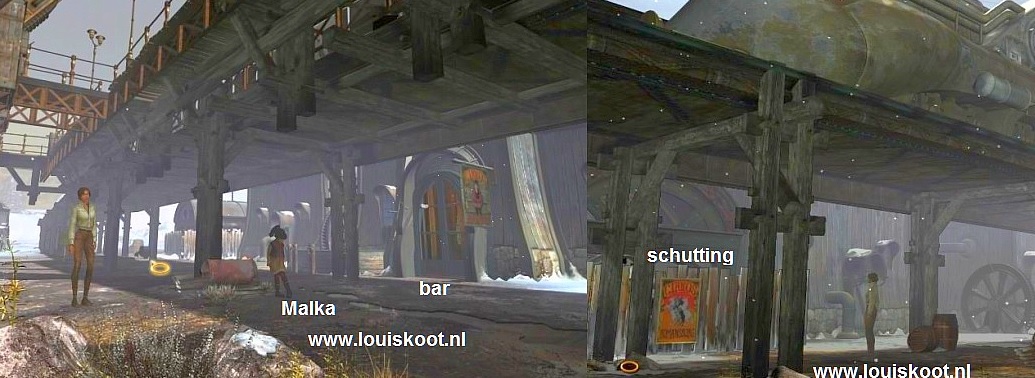
Malka
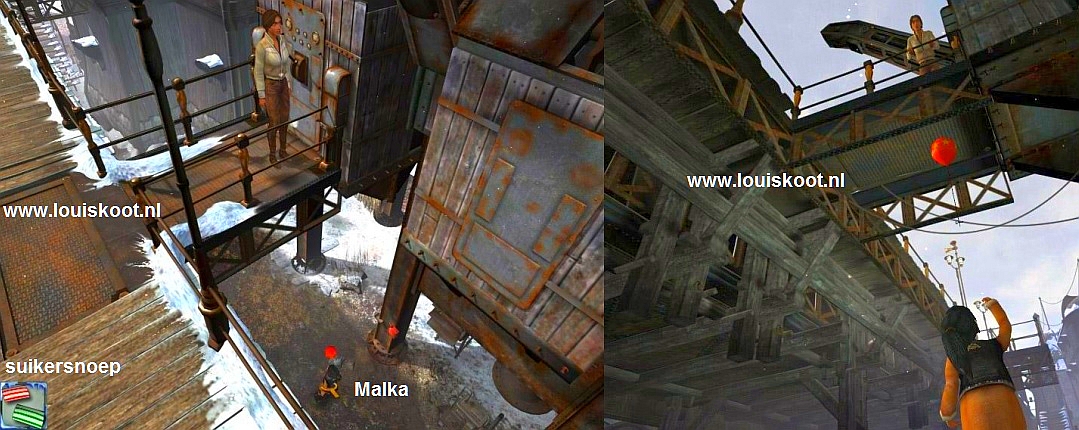
Right from the hatch at the coal warehouse is a kind of balcony. Hold your cursor there and click and Katie runs onto that "balcony" and she stand in front of the control panel of the coal warehouse. You see a lever on it. Wait a minute ..... Do not click on that lever yet. You see a child at the bottom right of your screen. The child is therefore beneath the station. Click on the child. Kate bends over the railing and calls the child.

Kate introduces herself......... it's a girl and her name is Malka. Use the "Kate" topic. Malka likes Katie and asks if she comes to visit her. Malka disappears.
Now click on that lever. You come in the close-up of the control panel. Click again on the lever.
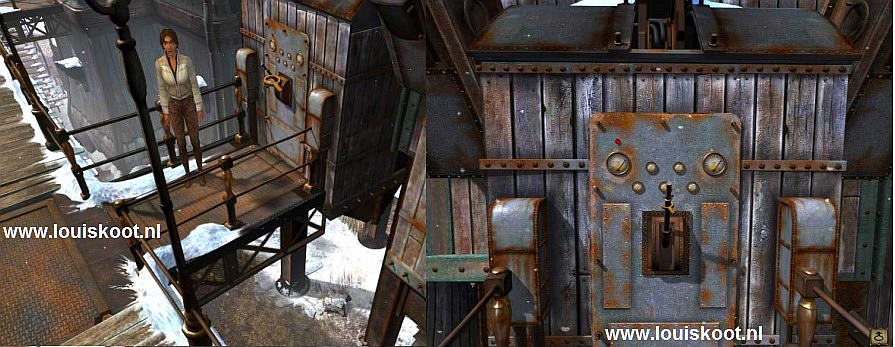
You now see the conveyer arm going down and you notice that it is now hanging above the coal car of the train.
However, no coal comes out of the warehouse and the conveyer arm goes back up again. Kate says "something is not right with this machine".
Go back to the platform again. Now go all the way along the train to the back end, so to the top of your screen, of the platform.
You come at the back of the train. At the end of the platform stand a large lever and you also see a closed gate.
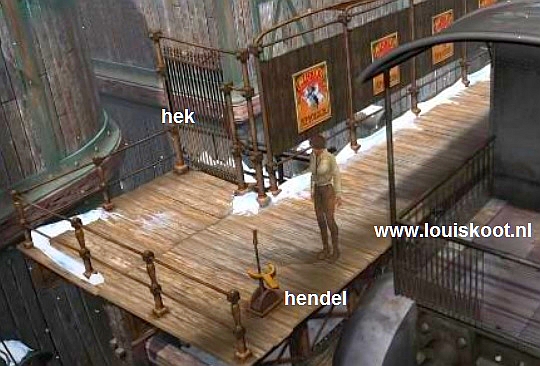
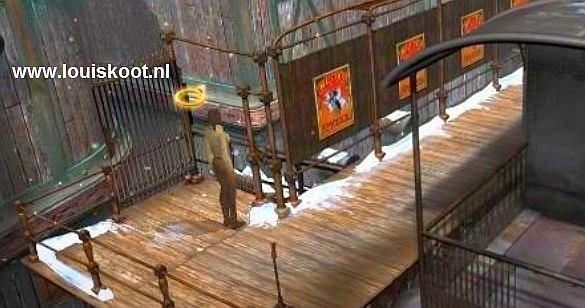
Click on the big lever. Nothing happens, however. Click on the closed gate. Kate walks to the gate and you come into the close-up of this fence. Behind the fence a wooden staircase goes down to the world below the station. To the right of the gate you see the keyhole. Click on the keyhole. Unfortunately, the gate is locked. Close the close-up via the small arrow at the bottom right. Go back 1 screen over the platform and then click on the Shop door. Kate enters the shop.
Shop:
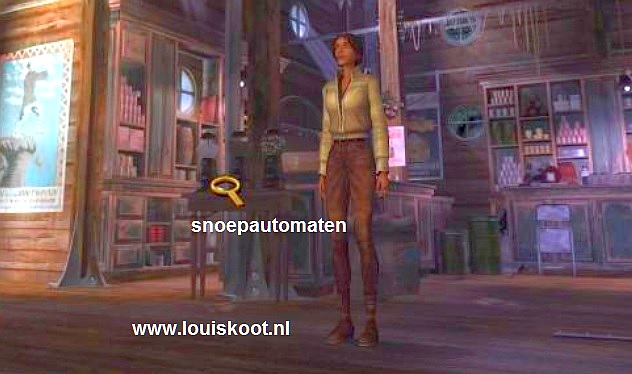
It's quite a big store. Kate is on the left at the door. There are two counters. Behind the left counter you see that lame Colonel Emeliov Goupatchev. A ladder is hanging down from the ceiling. However, the ladder does not reach to the floor. Against the side of the left counter there is a small table with 3 candy vending machines. Continue into the store via the right arrow. Kate will then stand at the counters.
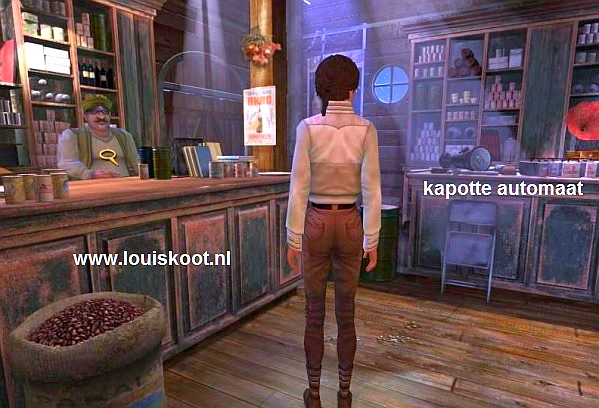
As already mentioned, Colonel Emeliov Goupatchev stands behind the left counter. Click on the Colonel to talk to him. Kate introduces herself and the Colonel says that he is also the "Administrator" of the Romansburg District. Your conversation options appear. Use them all, but the main options here are the "Coal", the "Gate" and the "Key" options.
Via the "Coal" option you find out that there is a "Coal Dispenser" on the platform. Kate has to use the lever to fully load the coal from the warehouse into the coal car of the train. Well, we already knew that and also that the thing does not work. The Colonel then goes on to say that Kate will have to wait for the maintenance crew who will repair the coal machine. However, it will take a week or so before that maintenance team will arrive.
Via the "Gate" topic you find out that the Fence, at the end of the platform, is a BORDER FENCE. Apparently there is an "upper world" and a "underworld" here in Romansburg. The "Upper World" is the station and the "Underworld" is everything under the station. The Colonel calls the inhabitants of the "Underworld" "Low-Lifes". The fence is there to prevent the inhabitants of the "Underworld" from entering the "Upper World". The fence is locked. Via the "Key" topic you find out that the Colonel has the key for that fence but that he has lost it. He mentions that he was busy repairing a machine but that he was disturbed by the arrival of the train. Then he still had the key. Use all other l options or just end the conversation when you have all the info about the coals, the fence and the key from the colonel.
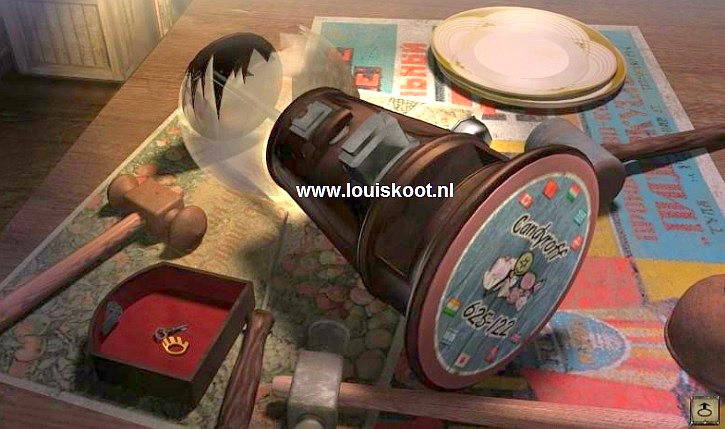
On the corner of the right counter stand a broken machine. Click on it and you'll come in the close-up of that broken machine. It turns out to be a broken Candy machine. On the bottom of the candy dispenser you read: "Candyroff 625-122". To the left of the broken candy machine is a small bowl with a red bottom. There is a small key in the tray. Grab the key.
The key will disappear into your inventory. Close the close-up. Open the inventory and click Kate's phone. The phone will then appear on the left of your screen. Via the two arrows, below the screen, you can retrieve the phone numbers of Oscar, Kate's Mum and Kate's office from memory. If you want to call a number, press the "Send" button. Ah, for fun you can just call Oscar and also Kate's mother and Kate's office. Then use the number buttons to enter the number of the Candyroff, ie 625122 and press "Send". Kate learns something about the candies that Candyroff has in there assortment.
Put the phone back via a click with your right mouse button. Go back 1 screen via the bottom of the screen. You are then back on the overview screen of the store. There is a small table next to Kate. The table stand against the "head end" of the left counter. Click on this table. You enter the close-up screen.
A candy for Malka:
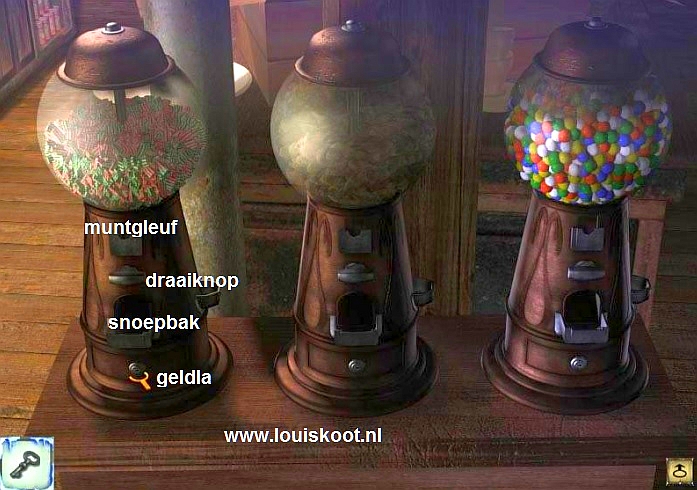
On the table are 3 Candy dispensers. Each candy machine gives a different kind of candy. The candy machines consist of a glass ball in which the candies are and this glass ball stands on a thick stand. In the stands you will find, from top to bottom, the Coin Slot, the Rotary Knob, the Candy Slot and the Money Tray. The money tray is at the bottom of each machine money tray and has a small lock.
|
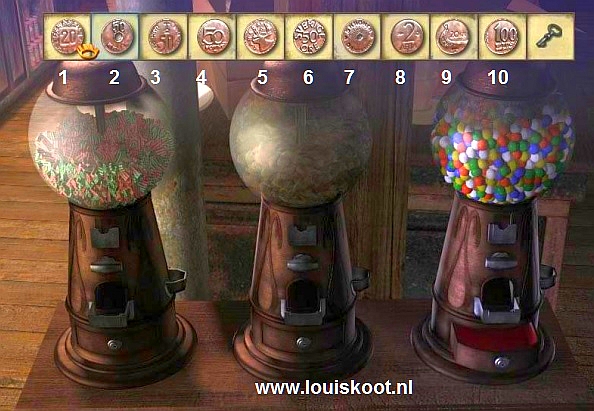
Stay in this close-up screen and open your inventory again. Click on the coins. The coins are now, in succession, at the top of your screen and also the key is there. Number the coins, from left to right, as 1 to 10.
Return the coins and the key to your inventory via a click with your right mouse button. Open your inventory. You should now have a "Fish candy" and two "Sugar candies" in your inventory.
|
Close your inventory and close the close-up. Leave the store by clicking on the doors. Back on the platform you go back to the coal warehouse via the bottom of the screen. Go back to the "balcony". Malka is back again. She is down again, right at the bottom of your screen, and she now has a nice red balloon. Click on Malka again and after the greeting you will see your talk options.

First use the "Romansbourg" option...... Malka tells that the locked fence is there to prevent the "Lower People" from going upstairs. The "Upper people" are allowed to go down. Then use the "Mission" option....... However, Malka does not know how that coal machine works. Then ask Malka about the "Key". Malka wants to tell Kate who has the key of the fence, but she wants to have a present first. Ask further about the "Key". Malka wants to have "kalalas", so sweets and she also tells what kind of sweets se wants. Use the "Candy" topic and...... Malka says that Kate must throw the candy down.
Now open your inventory and click on the "Sugar Sweets". These will be shown at the bottom left of your screen. Click again on Malka and ......
Katie throws the candy down and Malka catches them with her left hand. She screams to Katie "Catch" and she only gets one chance. Malka then releases the balloon and it floats up and is grabbed by Kate. The key of the fence was attached to the string of the balloon and it is now in your inventory.
Now return to the closed gate at the back of the platform. Click on the fence again and in the close-up of the gate you open your inventory and click on the "Gate Key". Then click on the keyhole of the fence. The gate swings open and also the gate at the bottom of the stairs. Go down the stairs.
Kate's boss hires a private detective to track Kate. His name is Nick Cantin.
The "Lower World"
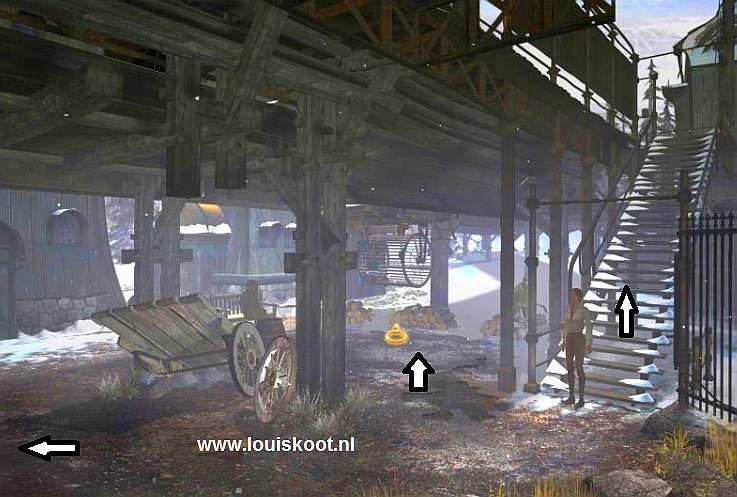
Katie is now at the bottom of the stairs and is now in the "Lower World". Left behind the stairs you see a guy who's busy with a pickaxe and further to the left is a guy on a bench. Click to the left of the stairs to get under the train tracks. There is a strange machine under the rail. Click there. Odd thing, Kate thinks, but it is a treadmill.
Go back to the stairs, at the bottom of the screen, and then click the bottom left of the screen to go to the left. Kate is again under the train tracks and we see Malka, who's standing here also.
Click on Malka again to have a chat with her thought those candies were "not bad". Talk to Malka about "Kate". Malka's mommy died and a man by the name of Cirkos now takes care of her. Then use the "Kate" topic again to get the "Syberia" topic. Then ask Malka first about "Cirkos". Cirkos has taken care of Malka and her mother and has been taking care of Malka since the death of Malka's mother. Then ask about "Syberia" but Malka has little to say about this. Then use the "Mission" topic last and exhaust it completely. Malka then talks about the Bourgoff brothers and says that these brothers would be able to get that coal machine going. Malka does not trust those Bourgoff brothers, she even calls liars. There appears to be a small and a big brother.
After the conversation with Malka hold the cursor on the left side of the screen and then click the Left Arrow. Kate walks to the left and then ahead and she comes at the Coal Warehouse. You see the conveyor belt with which the coal is transported into the warehouse. On the left iron pillar stand a small red Jerry can. Against the right iron pillar stand the generator and on the right iron pillar you see a red button which is connected to that generator.
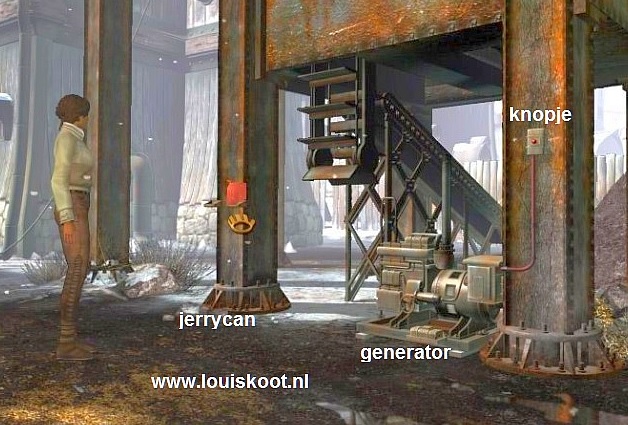
Click on the generator. Katie examines the thing and comes to the conclusion that there's no fuel in the generator. Click the red button...........Nothing happens......Kate must fill the generator with petrol, but where to get petrol? Grab the red Jerry can from the left pillar. The Jerry can moves to your inventory.
The Bourgoff brothers: Getting the petrol:
Go back to the screen with Malka via the left side of the screen. Then click the ahead arrow, between Kate and Malka, and Kate will continue to move forwards and a she passes Malka. Kate ends up again under the rails, right under the locomotive. On the left you see a fence with a "Cirkos" Poster stuck on it.
Click on that Cirkos poster, or just walk to the left, and ......... Your screen will scroll with you and when Kate has reached the fence you will get the arrow on the left side of your screen. So, walk along the fence 1 screen to the left. Kate is on the left next to the rails and you now see a large piece of the fence. Behind the fence is a shed. Walk to the left and you will see the wooden gate in the fence.
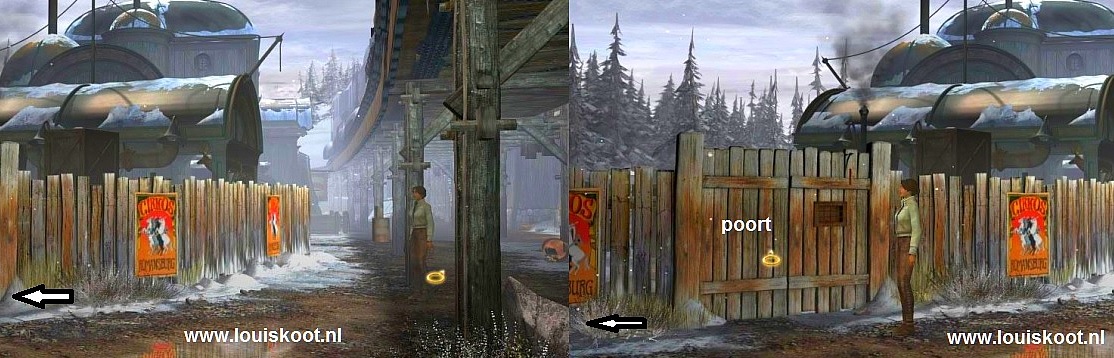
Click the gate. Kate walks towards it and pulls the bell. We then see the two Bourgoff brothers and the smallest, Ivan, appears at the gate.
Ivan Bourgoff doesn't open the gate but looks and talks to Kate trough the little window. Use all conversation options and exhaust them completely.
Of course, the "Gas" topic is the most important thing here. The brothers say they do not have petrol, and no matter how much Kate keeps insisting, she does not get any petrol from these two brothers. Kate starts to believe that Malka was right about these two Bourgoff brothers.
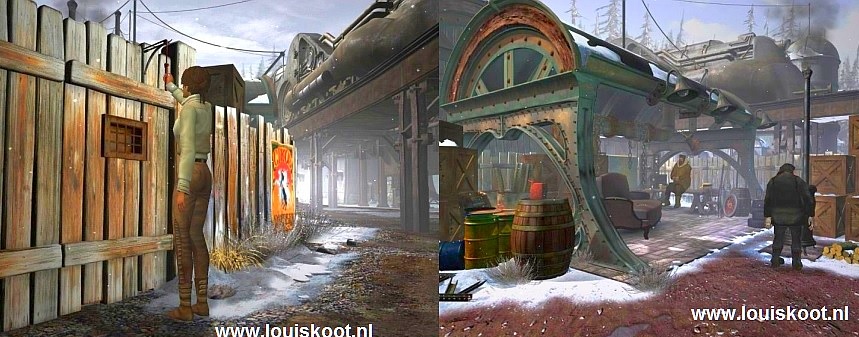
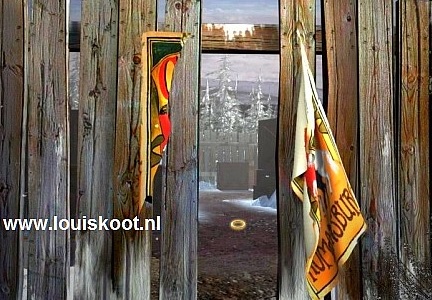
After the "conversation" with Ivan you continue along the fence to the left and on the next screen you walk further to the left. Kate will then stand at the last "Cirkos" poster on the fence. Click on this "Cirkos" poster. You come in close-up. Click, on the top left, on the C of "Cirkos" and .......
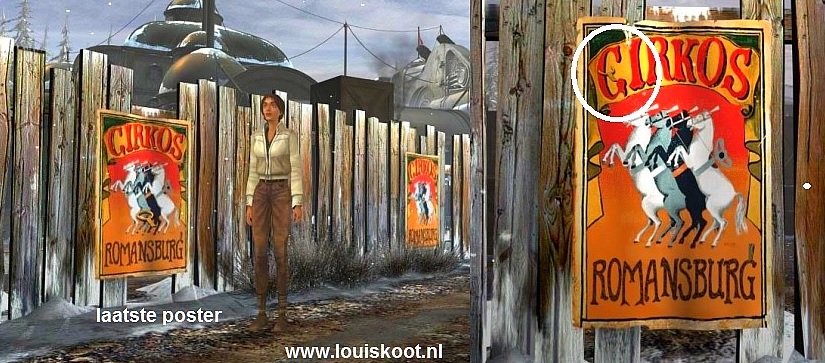
Kate tears the poster and reveals a hole in the fence. Click with your "round cursor" in the fence hole and Kate crawls through and lands on the yard of the Bourgoff brothers.
In the middle of the yard stand a large crate. In the front side of that crate is a small "window" and through that "window" you see that an animal is locked in the crate. If you look further to the left, you will see Ivan Bourgoff. He stands in front of the shed and in front of a stinking smoking stove. When Kate talked to Ivan at the gate, we also saw that his big brother, Igor, is in the shed. Kate would like to go to that shed, but for that she must first get rid of Ivan
Click with your cursor on that big crate that contains that animal. Kate walks towards it and you come in close-up from the front.
You see that animal through the "window in the crate. Click on the latch, at the bottom right ...
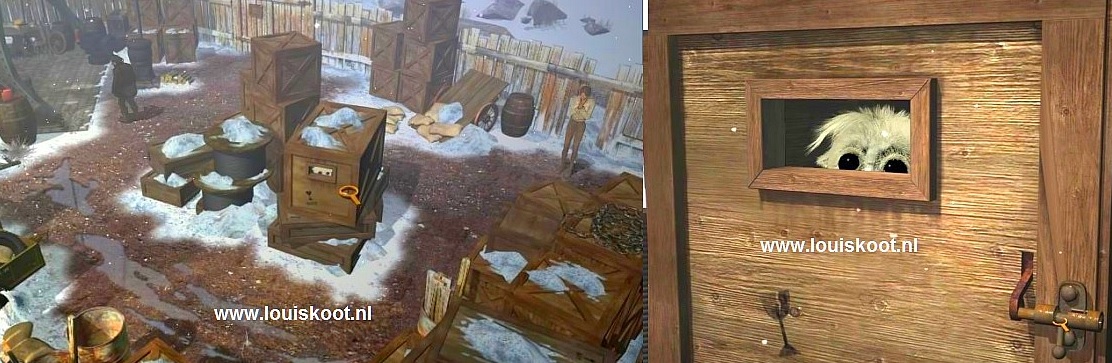
Cut Scene: Katie opens the crate and a small sized polar bear runs out of the crate, throws Ivan over and then runs further away with Ivan behind him. Kate walks in the direction of the shed.
Walk to the stove and then click on the stove . Kate thinks it is a dirty thing. There is a big round barrel, on the left side of Kate at the side of the shed. On that barrel stand a red Jerry can. Click on the Jerry can and.....Kate takes the jerry can, which is full of petrol, and puts her own empty jerry can in its place .
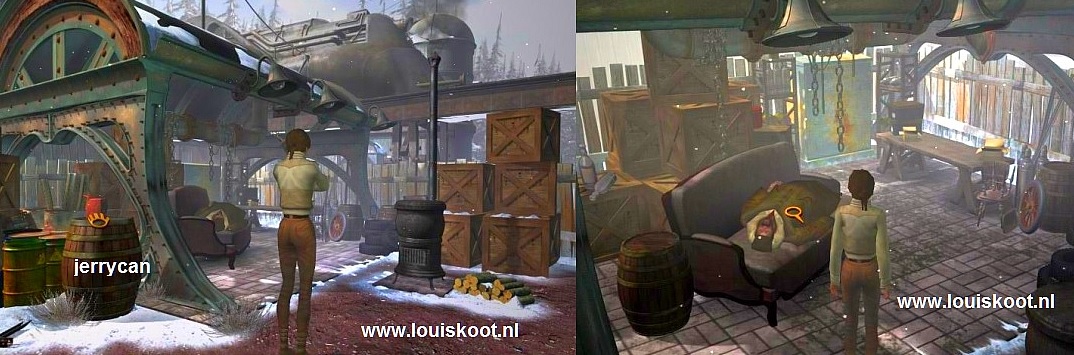
Go into the shed now....... Igor is snoring on the dirty sofa. Click Igor to wake him up and to have a rather foolish "conversation" with him. Igor may be the biggest of the two Bourgoff brothers, he is certainly not the smartest of the two. Suddenly Kate hears that Ivan is coming back and so she runs away. Kate goes through the hole in the fence back to the other side of the wooden fence
Go a screen to the left, via bottom left. Kate then stands at the end of the fence that runs around the yard of the Bourgoff brothers. Kate stares into the icy wilderness and we see the path that goes all the way to the great Monastery, on top of the mountain. Now follow the path to the left. The screen scrolls along while Kate follows the path. Click the yellow arrow cursor to continue along the path to the left.
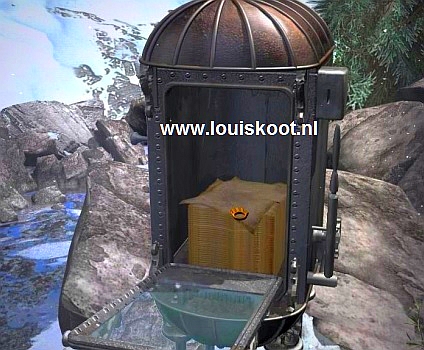
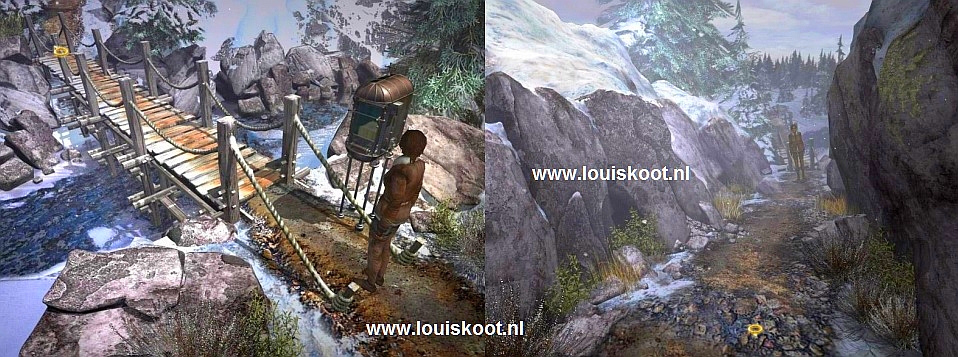
Kate arrives at a wooden bridge that crosses the fast-flowing river. There is a kind of a machine standing at this the bridge. Click on the machine.
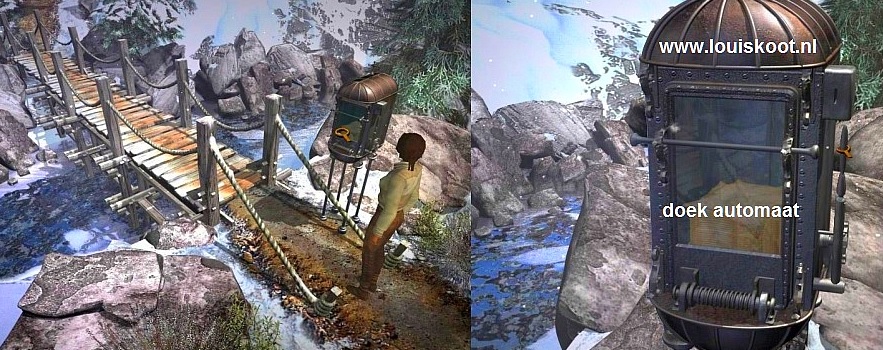
You enter the close-up screen and you see that there is a pile of "Cloths" in the machine. This machine is a "cloth dispenser". On the top right you see a coin slot. So a coin must be placed in the machine and then you will be able to take out a cloth. Close the close-up and then cross over the wooden bridge. Kate will standstill on the other side of the bridge and she does not want to continue. The path goes all the way to the monastery, and that is a long walk and cold walk.
Go back to the Bourgoff boy's fence, via bottom right twice, and then follow the fence back to the right until Kate back at the "gate" in the fence. Then continue to the right and hen click with your yellow arrow on the right side of the screen and Kate will be standing under the locomotive again. Walk to the right and you will end up at Malka again. At Malka, click again on the left side of the screen to return to the Coal Warehouse.
Open your inventory and click on the red Jerry can and then click the Generator and .......... Kate now fills the generator with the gasoline.
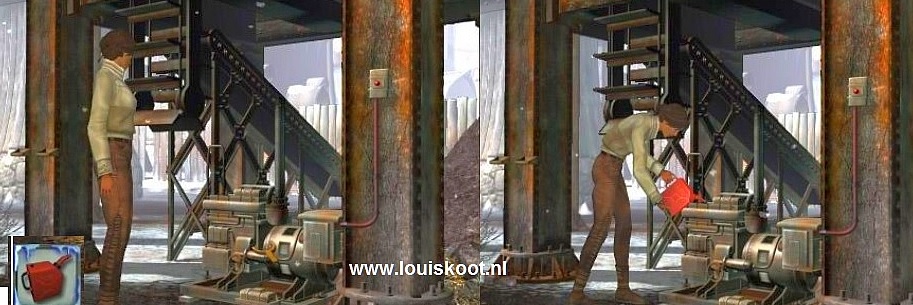
Then click on the small red button, on the right pillar, and the generator will start up.
Go back to the left and talk to Malka again. Use the "Mission" topic to say goodbye to Malka. Afterwards you go back to the stairs, via the bottom right , Go up the stairs to the platform and follow the platform to the Coal Warehouse. G stand back onto the "balcony". Click on the lever again and in the close-up you click again on the lever and ....
Cut Scene: The coal car of the train is now filled up with nice round black coals but ..... Oscar appears and, in so far as an automaton can panic, Oscar is in panic. Hans Voralberg has disappeared. Oscar says that Hans has become very ill and has left the train and disappeared. Kate must find Hans
C: Find Hans Voralberg:
Go left and then across the platform to the Colonel Emeliov Goupatchev store. Enter the store and walk to the counters. Click on the Colonel to talk to him again. Use all options and exhaust them completely. However, the Colonel does not know where Hans is and furthermore he is also of no great use. So leave the store again and go to the end of the platform and then down the stairs again to the:
Downstairs world
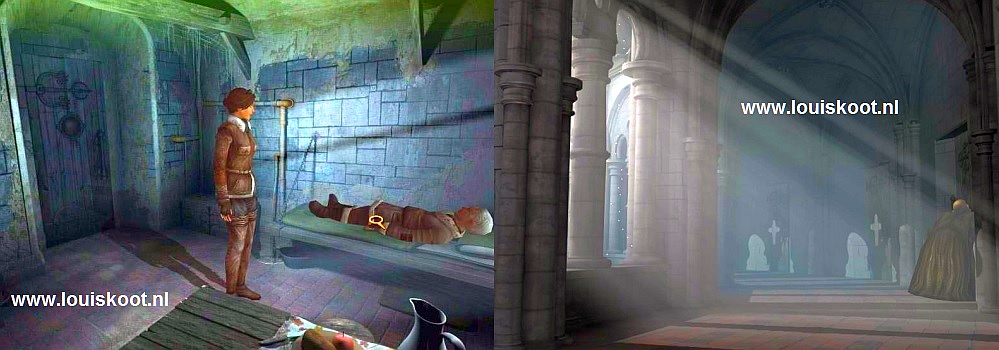
Go a screen to the left and talk to Malka again. Malka is surprised that Kate has not left yet. So ask Malka about "Hans". Malka has seen Hans, even talked to him. Hans told her about the Mammoths and then went into the "Cirkos Place" to visit an old friend. To the right of Kate, so on the right side of the train tracks, you see a large glass door with a banner. That is the entrance of the "Cirkos Cabaret", the local amusement hall. Click on that door and Kate goes inside .....
Cut Scene: Kate enters Cirkos Place and we see Hans.
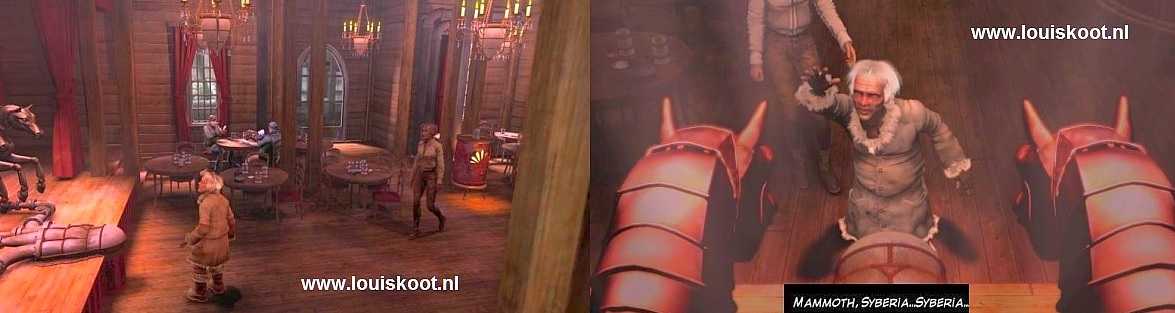
Hans has an attack of the fiver and crashes on the floor and then we are back in the sleeping compartment of the train.
D:To The Monastery:
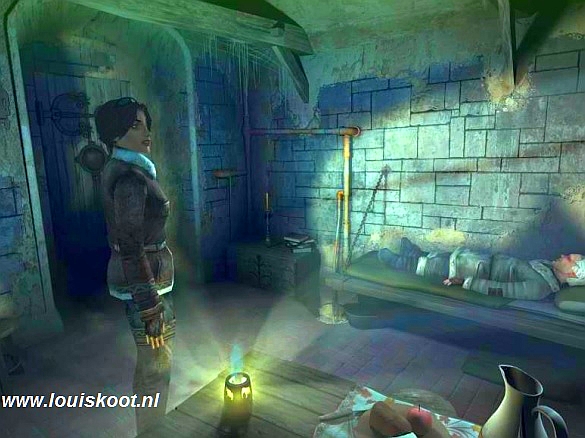
Hans is safely in bed again, but is seriously ill. Click on Hans. Hans has a feverish dream. Leave the compartment and enter the front compartment. Oscar is here too and there is a "conversation" between Oscar and Kate. Oscar disappears again. Through the bottom of the screen you walk through the compartment and then you go outside through the door. Go back up the platform and go over the platform to the stairs again and descend via the stairs down to the:
Downstairs World
Go to Malka again, so one screen to the left. Talk to Malka again. Use all your conversation options again and exhaust them completely. Malka tells Kate about the Monastery and about the monks and she tells us something about the strict rules that the monks use and what Kate must abbeys to if she wants to get help from the monastery superior, the Patriarch. After this conversation you enter the "Cirkos Cabaret" through the large glass door.
Cirkos Cabaret:
Walk through the hall through the bottom left and you end up at the half round bar counter. Behind the bar stand the manager, Cirkos.
Talk to Cirkos about everything. You will get new options witch you also use completely.
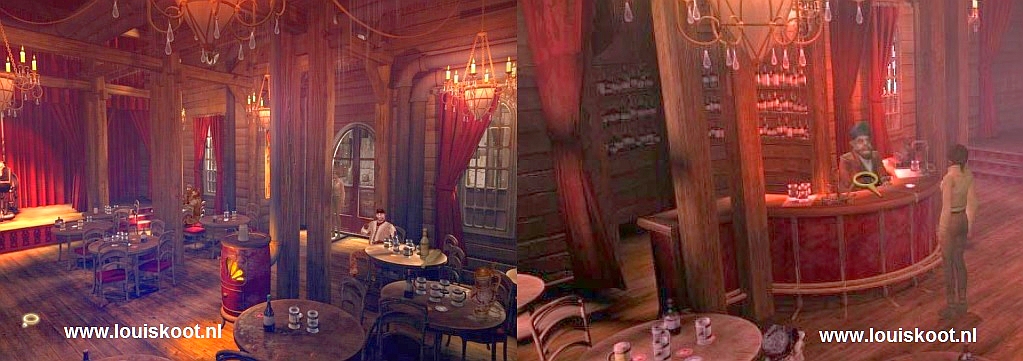
Cirkos tells about Malka, her mother, the monastery and the monks and about their ritual with the cloths. Cirkos also tells that Hans has repaired a few machines for him on the big stage. Cirkos says that if Kate wants to go to that monastery, she will have to do that walking. Cirkos also talks about the "cloth dispenser", which stands near the wooden bridge and he tells that Malka got the "management" of this automaton from the monastery. To be able to go to the monastery, Kate needs warm clothes, but Cirkos can not help her.
When you have used all options in this conversation, it will come to an end automatically. Then go back through the hall via the bottom right and then back out through the glass door. Click again on Malka and talk to her again. Ask Malka about the "Monastery" and then "Help". Malka gives Kate a coin, a "Token", for the cloth dispenser and she briefly explains what Kate has to do with that cloth from the machine.
The "cloth dispenser" at the wooden bridge
Now that Kate got the coin she can go back to the "cloth dispenser" "at the wooden bridge. I will not fully explain the route to it again. So make sure you come back to the fence of the Bourgoff brothers and follow the fence all the way to the left and then continue the path through the wilderness to the wooden bridge. When you come to the wooden bridge, click on the "cloth dispenser" to get to the close-up screen. Then open your inventory and click on the "Token", which Kate got from Malka. The Token is shown at the bottom left of your screen. At the top right of the "cloth dispenser" you will find the coin slot and on the right side of the machine is a large lever. Click on the coin slot to put your coin in the machine and then click on the lever. The glass door opens.
Click on the stack of cloths and Kate takes a "Shroud" from the machine.
Close the close-up screen and now go all the way back to Malka and then one more screen to the right to the stairs. Go up the stairs again to the platform.
Warm clothes for Kate:
Go over the platform to the shop and then enter the train carriage on the left. Walk through the train car to the sleeping compartment. Hans is still lying sick in bed. Open your inventory and click on the "Shroud". Then click on Hans. Kate puts the death blanket on Hans's face and after a few seconds she takes it off again. The Shroud now has a print of Hans's face.
Leave the train car and enter the store of the Colonel. Go to the counters and go talk to the Colonel again. The most important option here is the "Help" topic. However, if you want to "enjoy" the statements of the Colonel first, then first use all other options and finally the "Help" topic. Through the "Help" topic, Kate asks for warm winter clothing. The Colonel then lowers the ladder further down and says that Kate has to take a look in the attic. Kate will certainly be able to find the appropriate clothing there.
Go back 1 screen at the bottom of the screen. The ladder now reaches all the way to the floor. Click on the ladder and Kate climbs up to the attic.
A crate is placed against the back wall and the clothes for Kate are on that crate. Click on top of that crate and Kate grabs the clothes.
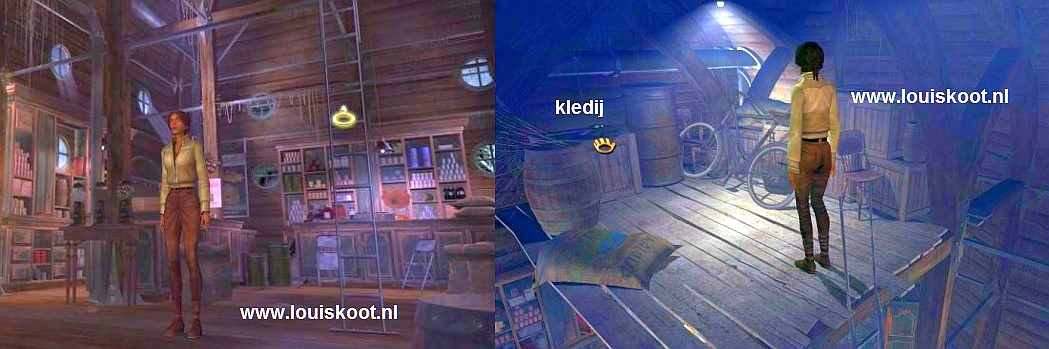
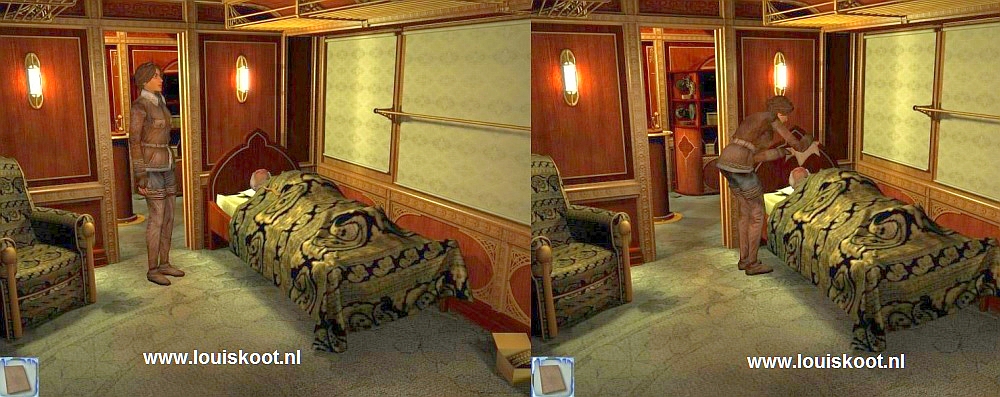
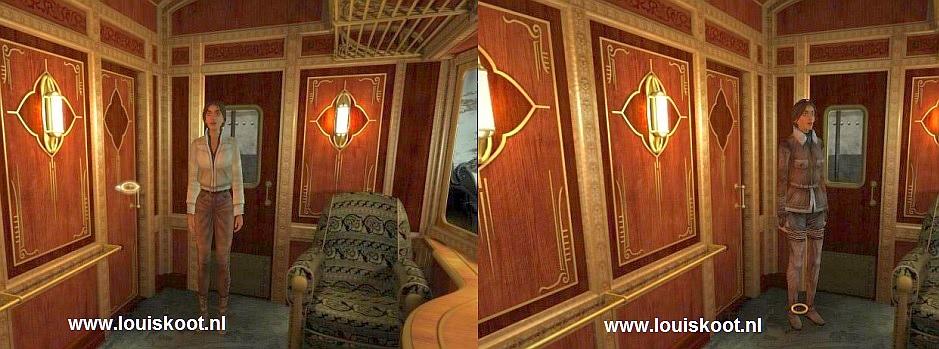
Now find a private spot to change clothes. Go back down the ladder and leave the store and enter the train wagon. Inside you click, right, on the bathroom door and .
...We will give Kate a private moment to change in private.
Leave the train and go back to the platform and then, via 2 times bottom screen, to Oscar at the locomotive. Talk to Oscar and use all options again to enjoy Oscar's humor. Well ....... Did Kate really think Oscar would accompany her to the monastery? Ha ha ...... Go to the other end of the platform and down the stairs again. Kate is back in the "Downstairs World". Follow the route again to the Wooden Bridge and cross it.
On the next screen you will follow the path, via the bottom of the screen, and Kate arrives at the Monastery
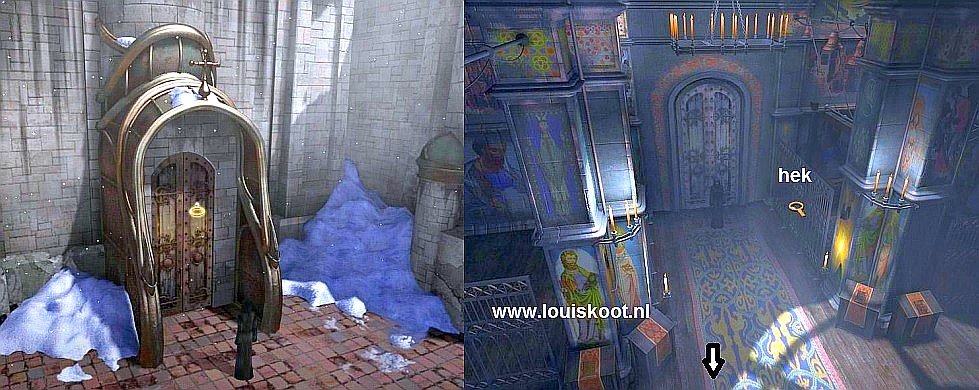
Enter the Monastery
The monastery is high above Kate on the mountain. The path continues to the right, but on the left you see the elevator tower of the monastery. There is a Bell cord.
Click on the Bell cord. Kate pulls the cord and we hear the bell ring. Kate looks up at the tower and we see a Monk looking down from the high tower at Kate.
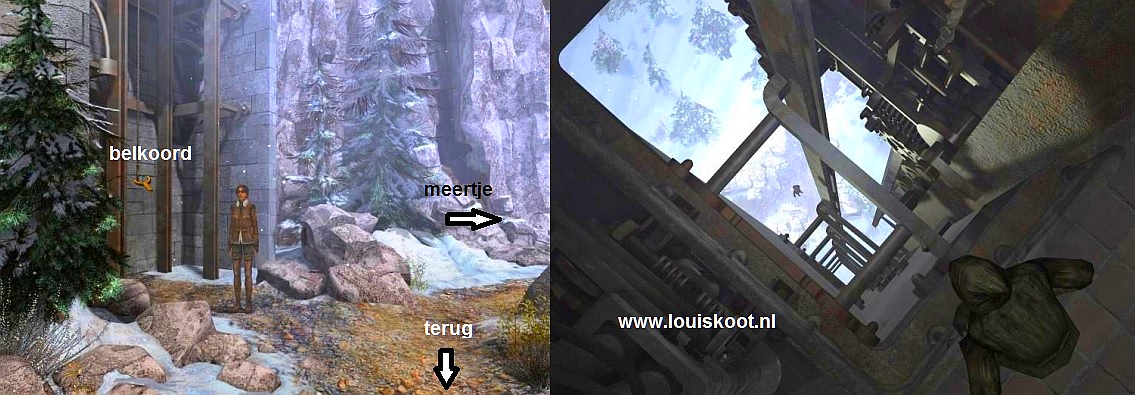
The monk says nothing and also does not send the elevator down. What's Kate to do to get into the monastery? As mentioned, the path continues to the right. Follow the path to the right and on the next screen you do that too. Kate comes at the end of the path and at a small mountain lake. A monk is doing the laundry here. Let's call him the "Laundry Monk".....
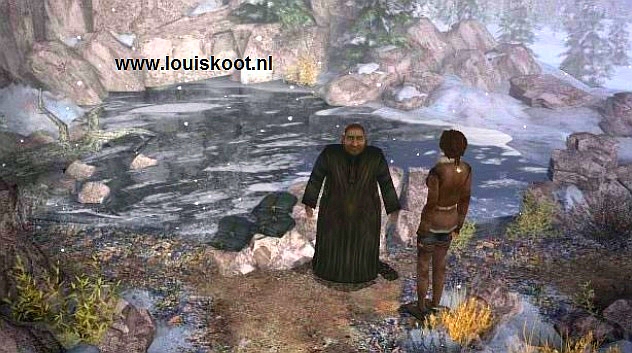
Go talk with this monk and use all options and exhaust them completely. Some options provide new options, use them all too.
2 times, during the conversation, the monk will be briefly distracted by the singing of a bird. The monk then listens to this bird's song for a moment. You find out that it is the "Merula Alba" bird. This "Laundry monk" is quite charmed by this bird. It is a very rare bird and the monk would like to see it. The monk tells something about the Patriarch and that he is a good doctor, not only for the body but also for the soul.
The monk uses a lot of Latin. When Kate asks why no one opened the gate when she rung the Bell, the monk says a few times that "The Law is the Law and nothing goes above the Law". The monk also says that "Some are worthy to be let in and some are not worth it". Kate gets the impression that she is" not worthy "to enter the monastery. Kate finds out that the" Merula Alba "bird is a rare White Raven by the" Bird "and the" Latin "subject is. And that Kate can not enter the monastery because she is a WOMAN. For these monks, women are the "source of all sins". The conversation comes to an end when you have used and exhausted all topics ..................
Well, Kate is a woman and therefore can not enter the monastery, so she must hide her femininity for the monks. Kate must go back to the train now, so follow the path back to the elevator tower of the monastery and then continue to the Wooden Bridge. Go back over the wooden bridge and continue to the Bourgoff fence. Follow the fence to the right until you can go under the train tracks and continue to the stairs and up the stairs to the train. Go to the Shop and enter. Go talk to the Colonel again and use the "Help" topic .Kate asks the Colonel if he also sells "bird whistles". And that turns out to be so. ..... Kate gets 3 bird whistles from the Colonel and that is the "Gold Bird Call", the "Silver Bird Call" and the "Black Bird Call".
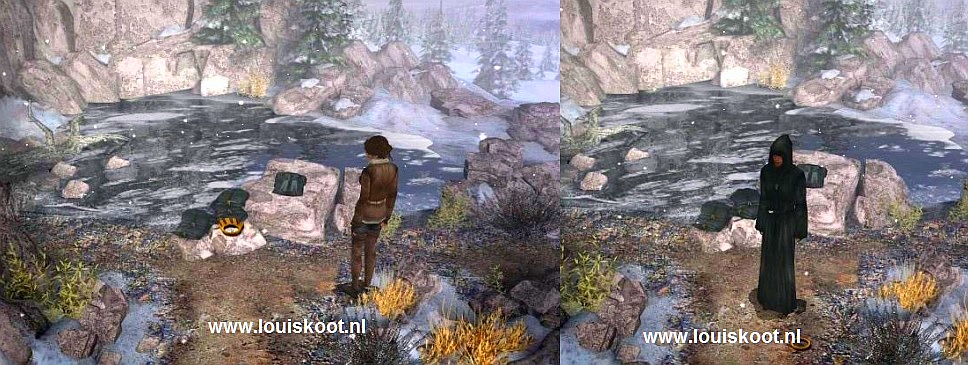
Leave the Store and go all the way back to the laundry monk at the mountain lake on the monastery mountain. Back at the laundry monk, take the "Silver Bird Call" from your inventory. (Of course you can first try whether the Laundry monk is also happy with the other two whistles). Then click on the laundry monk and ....
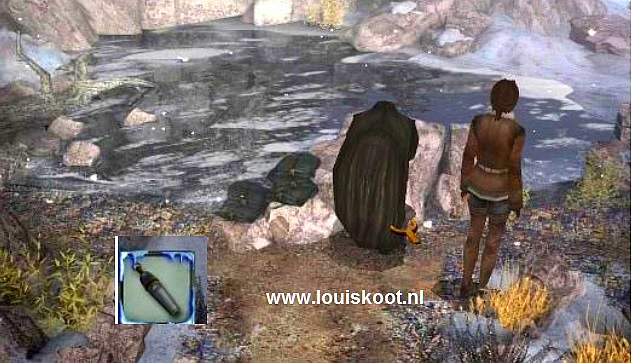
Cut Scene: The laundry monk is very pleased and he tries the whistle out right away. The white raven answers the call and the monk runs away and he leaves the washed monk outfits unattended on the rocks.
On the smaller rock there are 3, freshly washed and ironed, monk suits. Click on the Monk suits and Katie will dressed herself as a monk
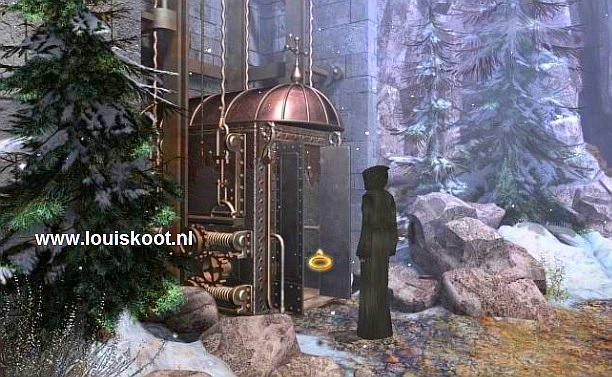
Follow the path back, first via bottom screen and then via top left, to the elevator tower of the monastery. Notice that you can not get Katie to run now. Back at the elevator pull the Bell cord again and......... this time the monk, on top of the elevator tower, sees a monk standing below and he lets the elevator go down. Enter the elevator and Kate goes up to the monastery.
E: Inside the Monastery:
Kate comes upstairs and gets out of the elevator. To the left of the elevator a monk stand at the window. You can also see an oven on the left.
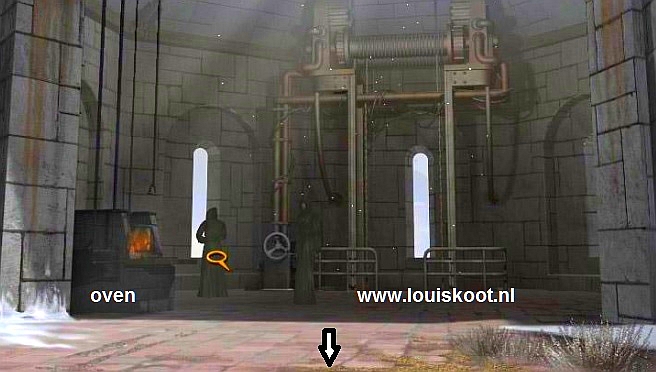
Click on the monk at the window. Kate says good evening but the monk turns around and makes a gesture with his hand, meaning that Kate must keep her mouth shut. Apparently the monks are in their "quiet period". Click on the oven, which is against the left wall. You come in close-up. Later on you will have to solve a puzzle here, but for now you just grab the box of matches that are lying on the edge at the bottom left.
Then close this close-up again and then go to the next screen, via the bottom of the screen.
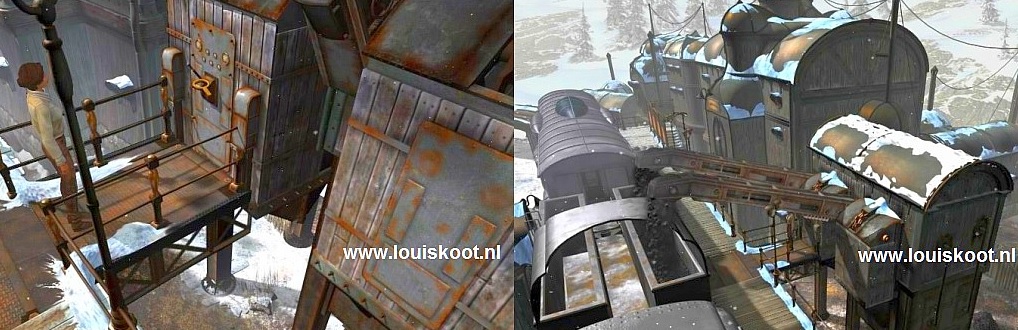
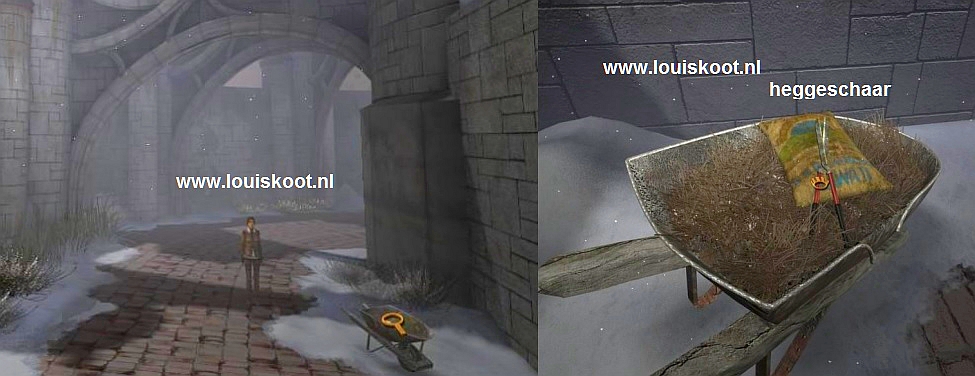
As it turns out, Kate is on the track that runs outside around the entire monastery complex. There is a wheelbarrow to the right of Kate. Click on the wheelbarrow.
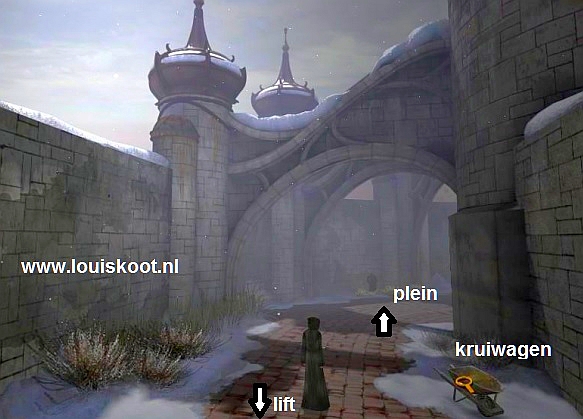
The wheelbarrow appears to be full of branches and other stuff from the garden. There is also a bag in the wheelbarrow. Remember this wheelbarrow. Close the close-up.
A little further on the path a monk is busy pruning some flowers. Continue forward by clicking the arrow at that garden monk........... Kate continues and she turns around the corner and enters the front Yard of the monastery". We see some meditating monks coming out of the chapel and then we see this front yard from above. There are 3 Exits here.
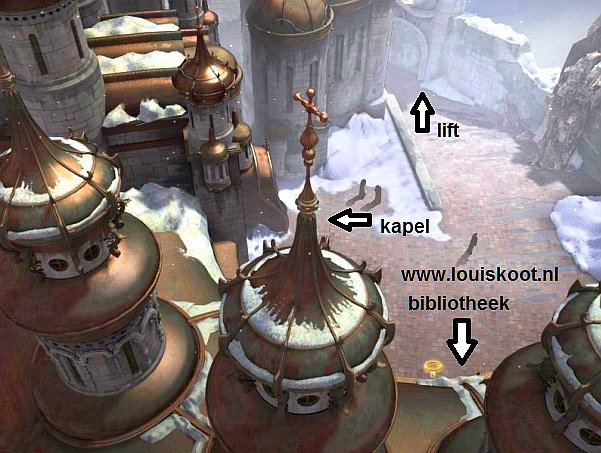
The Exit at top right goes back to the elevator tower. The Exit in the lower right corner goes to the right corner of the square where Kate for now has nothing to look for. The Exit in the middle of the screen goes to the Chapel. Two monks are standing in the middle of this screen. They are standing by the snow. If you move your cursor to the left from these two monks, you will get the Exit that goes to the chapel.
Chapel:
Go to the Chapel and......... Kate comes at the entrance of the chapel. Click on the doors to go inside.
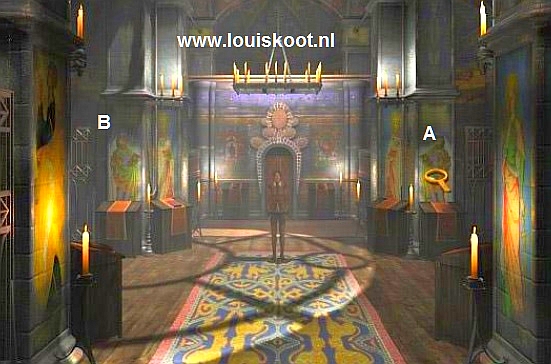
Kate is in the chapel and she is standing in front of the entrance. To Kate's right is a fence. Click on the fence. In the close-up you notice the keyhole. Click on the keyhole and Kate tells you that the gate is locked. Close the close-up and continue further into the chapel. You will see Kate on the back, standing in the "corridor". On the other side you see a door, but you also see 4 pillars. Both on the left and on the right of the corridor you see two pillars and on each pillar a painting of a Saint is depicted.
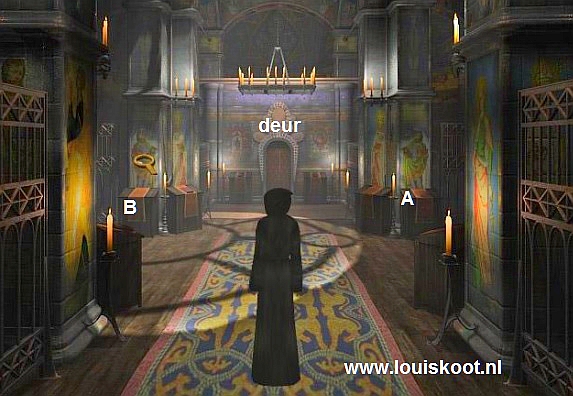
Move your cursor over both the pillar on the left and the pillars on the right (A and B). You notice that you can click on the front two. So click on the pillar left (B) in the corridor and then on the right pillar r(A) in the corridor. On both pillars you come in the close-up of the same Saint . This Saint has a Bible in his right hand and a staff in his left hand.

You notice that you can click on the Bible. You will have to do something with it. But what?
When you have looked at both these Saint paintings and are out of the close-up again, you move Kate further on to that door. Kate walks to the door and she calls to see if anyone is there. The Patriarch comes out and your conversation options appear.....use them all and exhaust them completely.
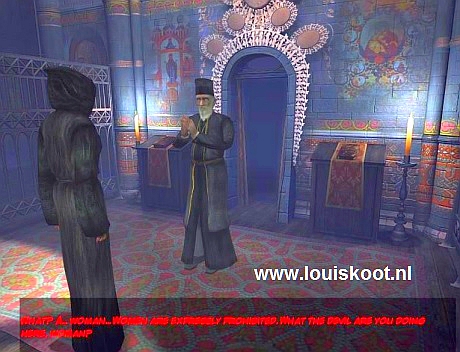
You eventually get the "Help" topic and when you use that, the "Shroud" topic. Use these two subjects and Kate shows the "Death Shroud of Hans" to the Patriarch, who decides to take a look at Hans.
Cut Scene: We see Kate's boss who has a phone conversation with the hired detective. Then we see the monks pick up Hans from the train and bring him to the monastery.
How to cure Hans:
Kate has ended up in a corner of the square, in front of a gallery .......The Patriarch tells Kate that he can not heal Hans's body and that he shall concentrate on "healing of his soul". Kate does not accept this, but the Patriarch insists that Hans is dying. Conversation options appear, so use them all again......Kate wants to talk with Hans, but because the "Rules are as they are" the Patriarch does not allow that. Keep insisting and finally the Patriarch tells in which room Hans is. The Patriarch disappears. Open your inventory and then click on Kate's phone. Use the arrows to select Oscar's phone number and then call him via the "Send" button. Kate then informs Oscar of the latest developments. NB: all the time that Kate is in the monastery, you can call Oscar to give him an update about the situation and to enjoy Oscar's humor.
Right in the screen you see the Gallery. Click with your straight arrow now in the rear gate of the gallery and Kate goes through that gate to the next screen. Kate is then on the gallery. At about the bottom right of this screen you'll see the door of the room where the monks have put Hans Voralberg, so enter that room.
Hans is lying on a bunk bed. Click on Hans. Hans is awake so talk to him The main conversation topic here is the "Monastery topic". During this conversation you see the laundry Monk appear on the gallery and that sneaky little monk decides to eavesdrop on the conversation between Kate and Hans
Via the "Monastery" topic, Kate finds out that Hans wants her to search for a man called Alexei Toukianov. Hans is convinced that only this Alexei Toukianov can heal him. Alexei Toukianov is a monk who lives with the Youkol people and he seems to be a "Shaman" who specializes in Youkol medicine. Kate will receive 2 new conversation topics, "Brother Alexie" and "Youkol". Landry Monk now listens through the keyhole of the door...Use all topics and then again the "Mission" topic". When you have completely exhausted all the options, this conversation ends automatically.
Then click on the door. De sneaky laundry monk notices that Kate is coming out and he plays the " innocence". Kate returns to the gallery. Click on the Laundry Monk to talk with him and use all options that you get. Via the "Hans" topic you get the "Brother Alexei" topic but save this for last because the conversation will end abruptly. So first use all the other topics and finally the "Brother Alexei" topic. Via the "Brother Alexei" subject, the laundry monk will say some Latin spells, but then he gives a large Scroll to Kate and then he runs away.
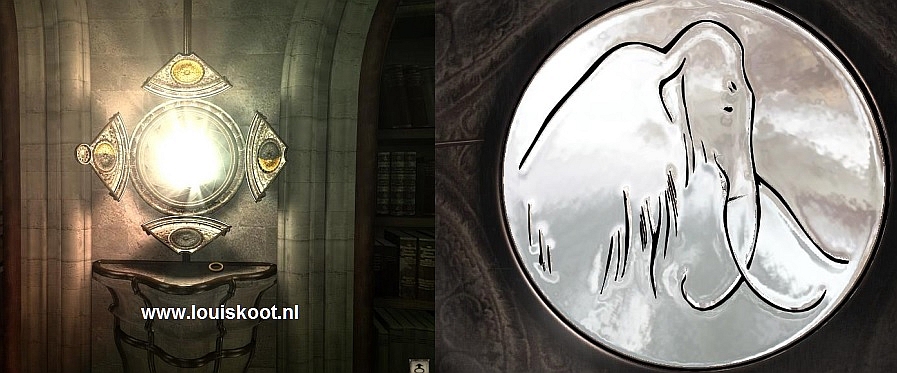
In your screen appears the Scroll and also a large round Medallion on which you see an image of a Mammoth. This is the "Stained Glass Mammoth" medallion. Close this close-up. Then open your inventory and then click on "DOCUMENTS" at the top. Your inventory is now expanding and you will see the Documents screen. At the top of this screen you see a "hand" and an "eye". Click on the "eye" and then click on the Scroll that you just received from the laundry monk. The scroll appears rolled out in your screen. Read the scroll .....
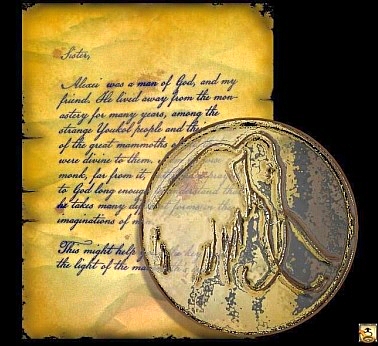
"Sister: Alexei was a" Man of God" and my friend. He lived outside the monastery for many years, between the strange Youkol people and their stories about the Great Old Mammoths. These Mammoths are Sacred Animals for the Youkol people, I'm not a learned man, far from it, but I prayed to God long enough to understand that He manifests in many forms. Maybe this can help you: THE KEY IS IN THE LIGHT OF THE MAMMOTH EYE."
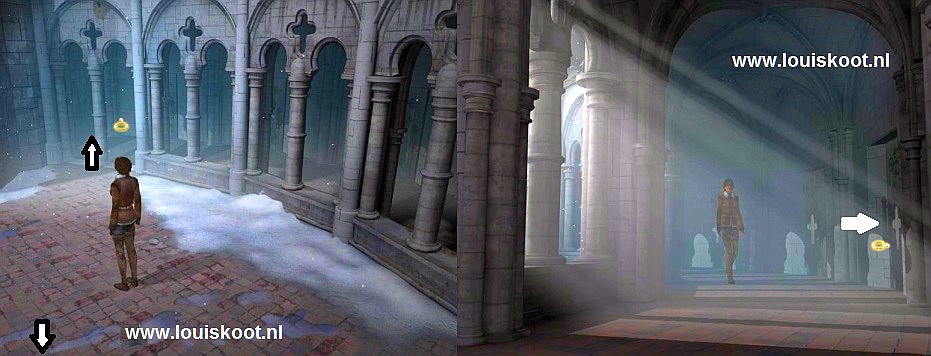
Take good note of this last sentence. It is an important clue for the Mammoth Puzzle that you will have to solve later. Close the close-up screen and click with "eye" on the "Stained-Glass-Mammoth" to view this medallion as well. Close the close-up screen again and then also close your inventory. Leave the gallery via the left arrow, left of Kate. There is now a bucket on the ground, near the snow. A Scrubber lies next to the bucket. Pick up the Scrubber and it disappears into the inventory.
Then take the Exit at the bottom left of the screen. You come to the next screen and see that you are now in the right corner of the "forecourt".
You see the gallery and the door of the Library building. In the left in the corner is the graveyard.

Go again through the lower left corner of the screen and you are back on the overview screen of the forecourt.
Now go through the Exit in the middle of the screen, left to the Chapel. Enter the chapel again.
Chapel:
Walk through the chapel again, via bottom screen, and then walk on to the door in the back. The Patriarch comes out again and the conversation options appear, so use them all out completely.
Kate is now really pissed off with this nasty and hypocritical Patriarch. It appears that Brother Alexei has been a disgraced monk who has had the guts to leave the monastery, to live among the heathen Youkol people with their pagan customs. According to the Patriarch that guy Alexei Toukianov has been dead for a few years.
|
The Saint puzzle When this conversation is done you go back one screen, via the bottom of the screen. Kate stand again between the pillars that are left and right in the "corridor". When you were first in this chapel, you saw the paintings on the left and on the right pillar. We will do this again.
Click again on the painting, on the right pillar (A). You will enter the close-up screen of this Saint again. You see that you can click with your cursor on the Book. Open your inventory and click on the Scrubber.... The Scrubber will be shown at the bottom left of your screen. Now move your cursor over the Book that the Saint holds in his right hand. You notice that you can not click on it now. In short, this is the wrong Holy One.
|
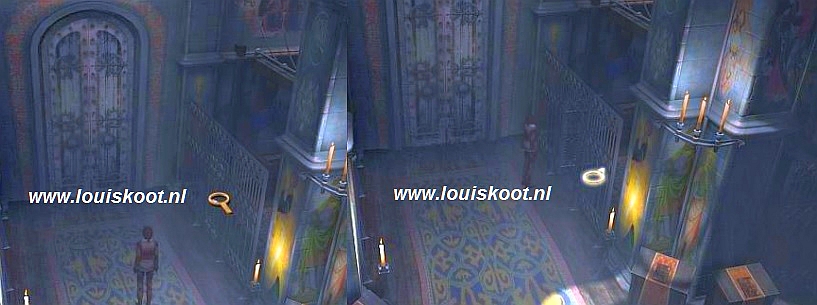
Close the close-up screen and go back to the front door, via the bottom of the screen, and then go back outside through the front door. Then go to the overview screen of the "forecourt" via the bottom of the screen. Then, via the exit at the bottom right, go back to the right corner of the "forecourt", i.e. the corner where the gallery is.
The door on the left is the entrance to the Library. To the left next to the Library is the cemetery. Click on the door of the Library and Kate will enter:
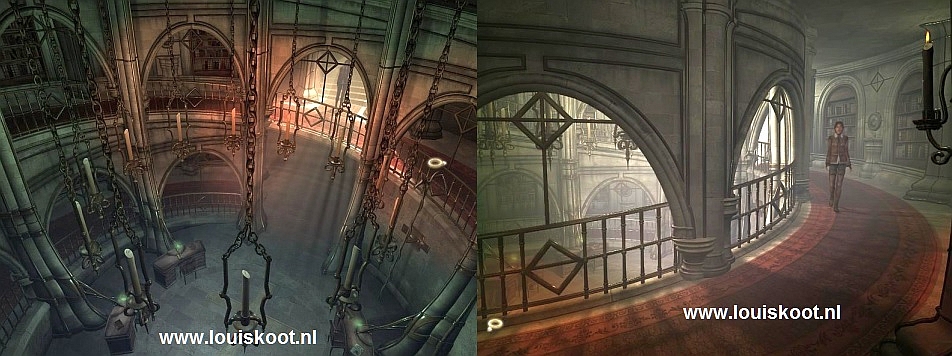
Library:
The Glass Mammoth Puzzle:
Kate is now at the top of your screen under a staircase and on the Upper Gallery. Below Kate you can see the floor of the Reading Room. The intention is that Kate will end up in the Reading Room. To achieve this you have to follow the Upper Gallery to the right by clicking on the top right of your screen. Kate then walks to the right and she arrives at the next screen of the gallery
Then click at the bottom left corner of your screen and Kate will continue to walk to the next screen and she will be almost completely downstairs. Kate is almost invisible, but she is on the left. Now just click with your "round cursor" on the floor in the gate and Kate continues to the gate. Move your Cursor right now. At the wall, on the right side of the screen, there is a big metal HOOK ..... it is a metal candle bar ...... You get the "grab hand" on it, so click on the big hook.
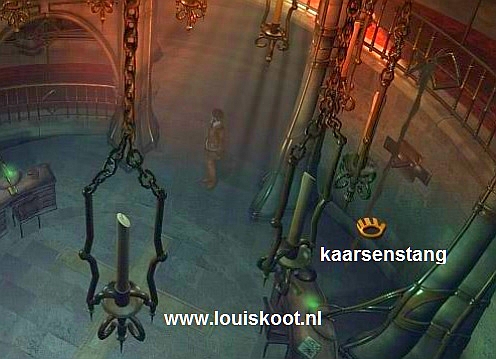
Kate grabs the hook. and she walks with it to the center of the reading room. Kate is now standing in the center of the reading room with that big hook in her hands.
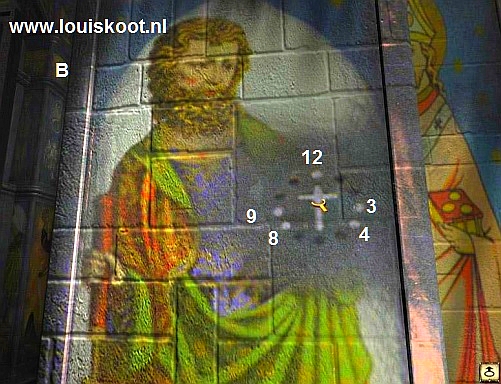
12 CANDLES are hanging above the lecterns, and Kate must pull the candles down with the hook.....the candles will then burn
You have to see this Candle Circle now as the Dots Circle that you saw around the white Cross that you made visible on the Saint's painting in the Chapel. Kate only needs to pull down the 5 candles corresponding to the position of the 5 White Dots, on the pillar B in the chapel .......So see this Candle Circle now also as a clock. The 12 o'clock candle is then the left of the 2 candles hanging in front of the gate.
So number that candle as number 12 and then you number the next candles, clockwise as 1, 2 , 3, 4, 5, 6, 7, 8, 9, 10.
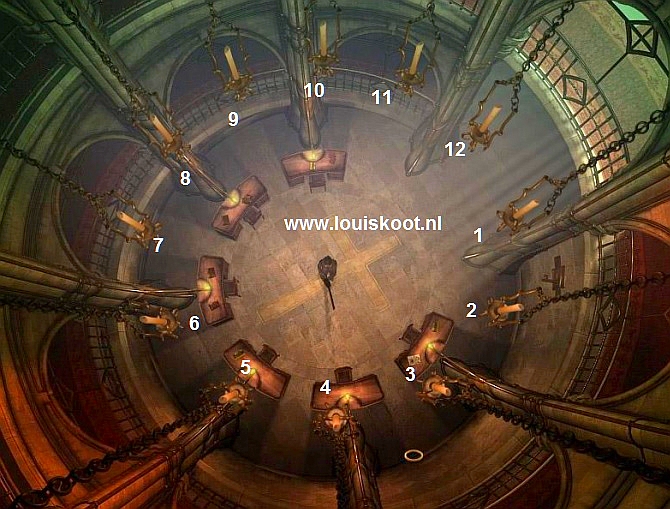
Now click on the Candles 12, 3, 4, 8 and 9 ...........
When you have done this then you see a round open "window" at top of the tower. Bright sunlight flows through this window.
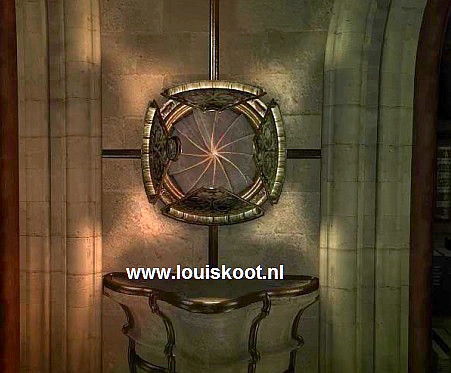
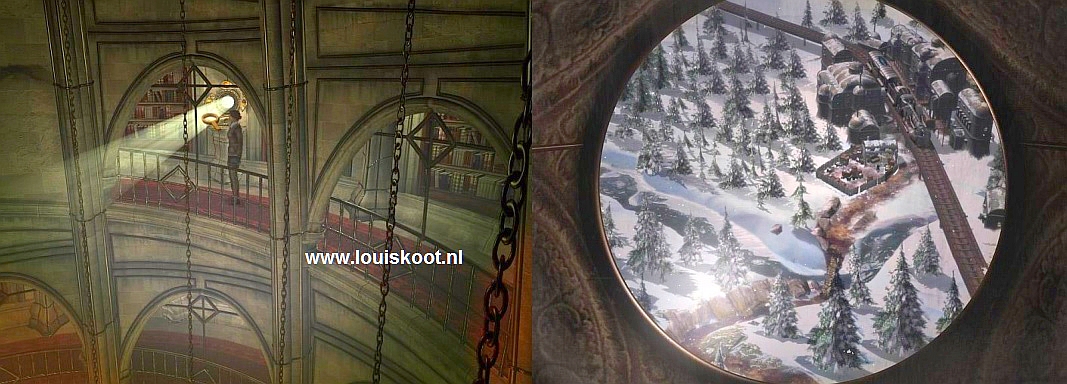
Now go via the lower left, back up to the upper gallery and on the next screen you follow the gallery further back to the stairs at the top. Do not click on the stairs..........Kate must now follow the gallery completely to the left. So continue by clicking at the top left of your screen and Kate moves all the way to the left and arrives at the next screen. Go back to the screen above on the top left. You will then see the round "Window" that you have just opened through the candles. Click on this round window. Kate walks towards it and she looks out through this round window and she sees the Train, the Bourgoff Boy's yard and the path with the Wooden Bridge.
You automatically leave this close-up again and you will see the round window again. Four hatches have been opened around the round window. Name those hatches as: Up, Right, Down and Left. Kate has got a Scroll from the Laundry Monk, and in it was the Glass Mammoth Medallion ....... The last sentence of the Scroll reads: THE KEY IS IN THE LIGHT OF THE MAMMOTH EYE. Click again in the round Window. You look through the window again.
Open your inventory and click on "Documents". Then click on the "Hand" and then click on the "Stained-Glass Mammoth".
The Medallion will be placed at the bottom left of your screen. Now just click in the round window and the Medallion will be placed in the round window.
Close the close-up. The intention is that you, through the sunlight that shines through the transparent medallion, let the SHADOW of the Mammoth shine on a certain spot on the tower. For this you now have to close the 4 hatches in the correct order. Click in this order on the 4 hatches around the round window: Down, Left, Top and Right .......... You will see the "Shadow of the Mammoth" appear.
Close the close-up and go 1 screen back to the right, via bottom right. You will then see the "Shadow of the Mammoth". The "Eye" of the Mammoth is formed by such a close round "Window" Click on the "Eye" of the Mammoth ...... Kate comes in the close-up of the "Eye". Click exactly in the middle of this round "window" ..............
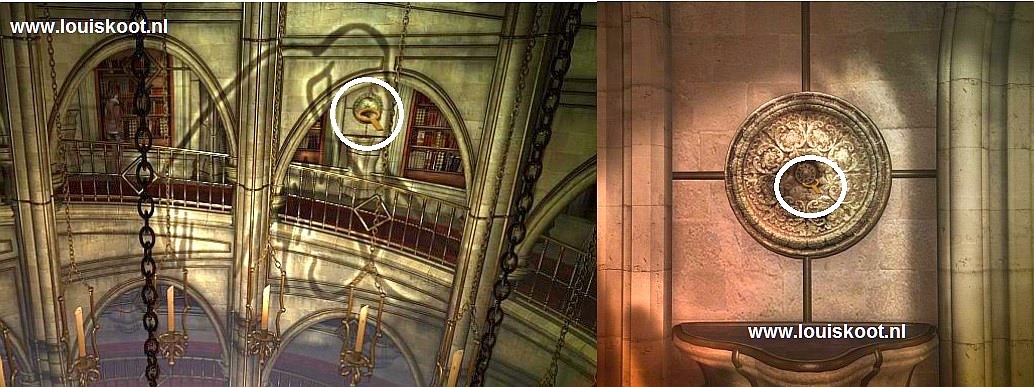
You automatically go out of this close-up and you see that the bookcase, in the niche right of Kate, is sliding away.
The Note Book by Alexei Toukianov
Click in the now opened secret niche and you come in the close-up of 3 shelves hanging on top of each other. You see a Book on the Middle Plank. Click on this book.
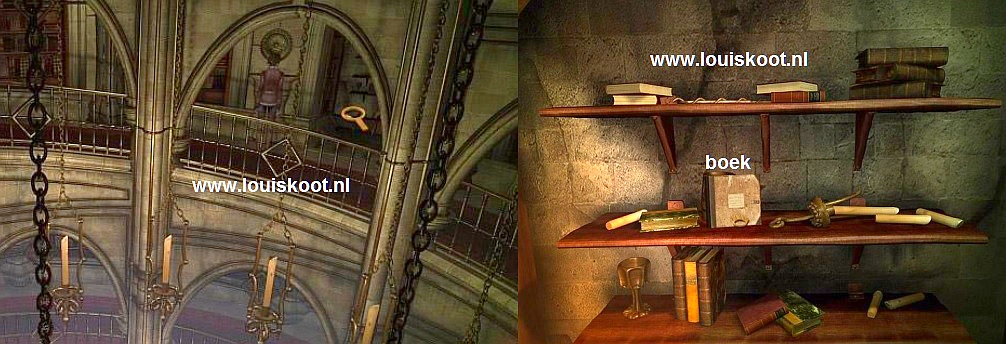
The book will be big in your screen and it appears to be the Sketch and Note Book of Alexei Toukianov. Read it through...... You can browse through the book via the arrows at the bottom right. I'm not writing it all down for you, so read the book. You can always read this Note Book by Alexei Toukianov in your "Documents" part of your Inventory.
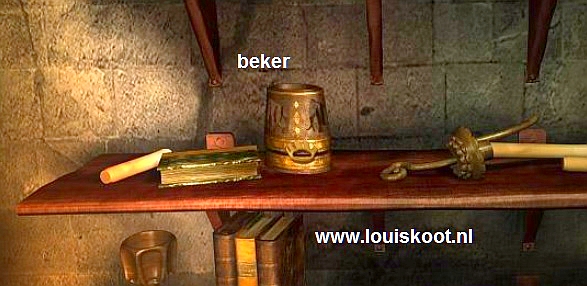
When you close this close-up you come back in the close-up of the 3 shelves. On the spot where Alexei's book stood, you will see a beautiful cup. Alexei's book was leaning against it. It is a Youkol Relic. Click on the Cup and it will also disappear to your inventory. Now close this close-up too.
Follow the gallery 1 screen back to the right. You will see the staircase again, at the top of the gate. Click on the stairs and Kate leaves the library. Outside you go, via the exit at the bottom left, back to the "forecourt". On the "forecourt screen" you take the exit at the top right, at the gate and Kate is back on the path that goes to the elevator tower. You can see that wheelbarrow at the bottom right of the screen. Click on the wheelbarrow. Kate walks towards it and in the close-up screen you can see that there is now also a large hedge trimmer in the wheelbarrow. Grab the Hedge Trimmer and this thing goes to your inventory.
Close the close-up screen. Go back to the "forecourt" and then, through the exit at the bottom right, back into the corner where the library, the gallery and the cemetery are.
Now enter the cemetery.
Cemetery:
In the middle of this small cemetery stand a large bare tree. Behind the tree you see a monk who is busy digging a grave. Click to the left of the tree and Kate walks to the grave digger.

However......Kate doesn't go all the way to the grave digger monk of the monk. To the left of the grave digger stand an open coffin and to the left of this coffin you see that there is a wide crack in the wall. Click with your cursor in that wall crack. Kate walks towards it and looks through the crack. A steep snow slope descends here and Kate sees a pine tree. Click somewhere at the bottom of the pine tree. Kate says: "It's pretty steep, but with a sled I could slide down the slope". Close this close-up screen.
You can click on the coffin and on the grave digger monk, but apart from a comment from Kate, this will bring you nothing. Continue a screen to the right. Kate is standing on the path behind the big tree. Walk a little bit further......you'll see a number of grave stones. Now look for the grave stone you can click on....There is only one grave stone that you can click and it is close to Kate and there is a blackberry bush in front of it. Click on that grave stone.
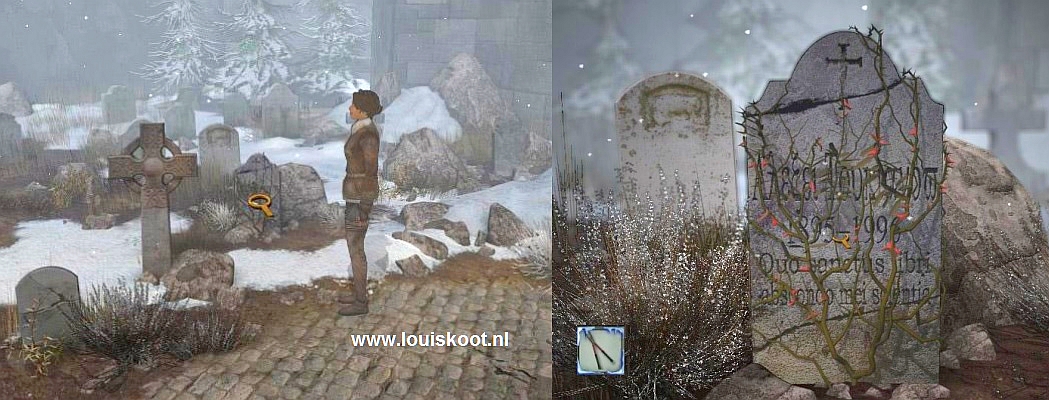
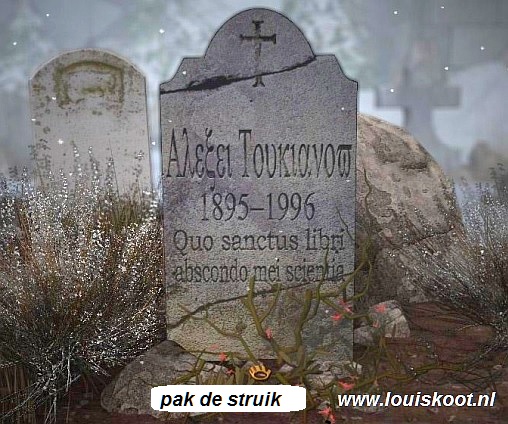
In the close-up screen you can see that the graves tone is overgrown by a blackberry shrub . Take the Hedge Trimmer from your inventory and then click on that blackberry scrub. Kate cuts the scrub out of the way and you automatically return to the close-up screen of the grave stone. This is the grave of Alexei Toukianov and this man was born in 1895 and died in 1996. On the ground, in front of the grave stone, there is now a bunch of "Blackberries and Herbs". Click on it and the "Blackberries and Herbs" move to your inventory. Do not forget this!
Close the close-up and click on the right edge of the screen, to go a screen to the right. Click at the bottom of the screen and Kate leaves the cemetery. Go back to the "forecourt" and then back to the elevator tower. Follow the path via the bottom of the screen to the elevator
Prepare the Medication for Hans:
|
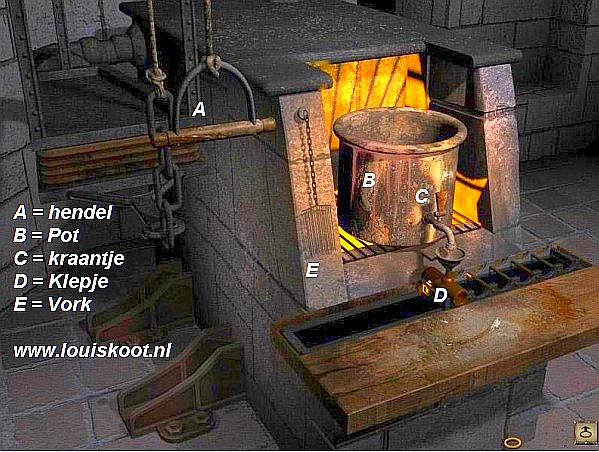
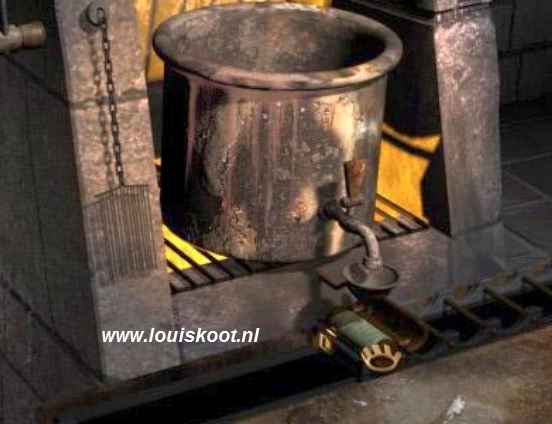
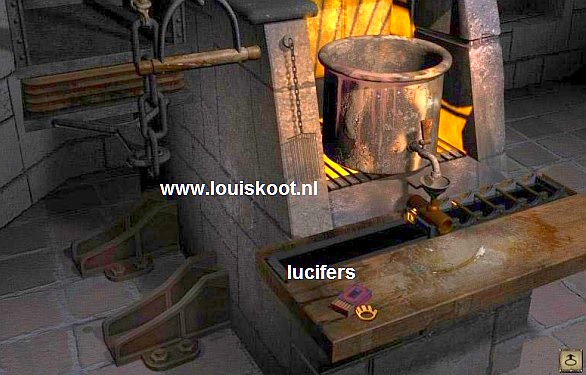
Kate is back at the elevator. Click again on the stove that is located to the left of the elevator. You will enter the close-up screen again. If you had previously forgotten to pick up that box of matches, that was on the edge here, do so now. View the stove briefly. There is a pot (B) on the fire grate. There is a tap (C) at the bottom of the pot. Under the tap you see a funnel and under the funnel you see valve (D) of the casting mold. To the left of the pot is a kind of large "Fork" (E) hanging on the wall and at the far left hangs a pull lever (A).
What did you read in Alexei Toukianov's notebook again? "Blackberries, mixed with Walrus fat or Cheese fat gives medicinal effect", or words with the same meaning. Do the following:
Take the "Herbal Candle" from the casting mold. Close this close-up screen. |
Cure Hans:
Now that you have made the "Herbal Candle" you go back to the "forecourt" and then in to the corner where the Gallery, the Library and the cemetery are located. Then click on the Gallery and go through the rear gate and then enter the room where Hans is inside. Back at Hans Voralberg, click on the corner of the table. You enter the close-up screen of the table. Take that Youkol Cup, the "Youkol Relic", from your inventory and click on the table. Kate puts the cup on the table. Take the "Herbal Candle" from your inventory and click on the Youkol Cup. Kate puts the candle in the cup. Take the Box of Matches from your inventory and then click on the Candle in the cup, and .......
Cut Scene: Kate lights the candle. The Youkol Relic is spinning around and sheds light on Hans and also its healing smoke.
Hans starts to cough and sits up and Hans is now healed.
F: Escape from the monastery
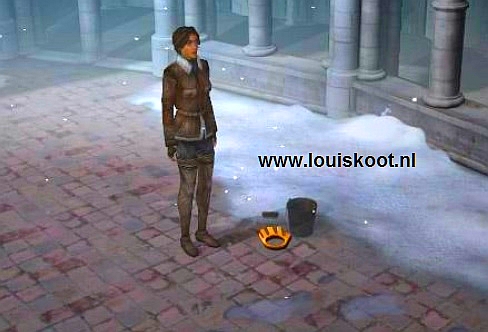
Talk to Hans. Hans does not know what happened in the last hours. Leave the room and return to the "Forecourt" and then take the Exit to the Chapel. Enter the Chapel again. Walk through the chapel to the door on the other side. That is the door were that Patriarch always came through. The Patriarch is not there now, so click on the door and Kate enters the Holy Niche. Under the narrow "Cross Window" is a kind of "Dome" with a Key in it. Click on the "Dome" and in the close-up window click on the Key.
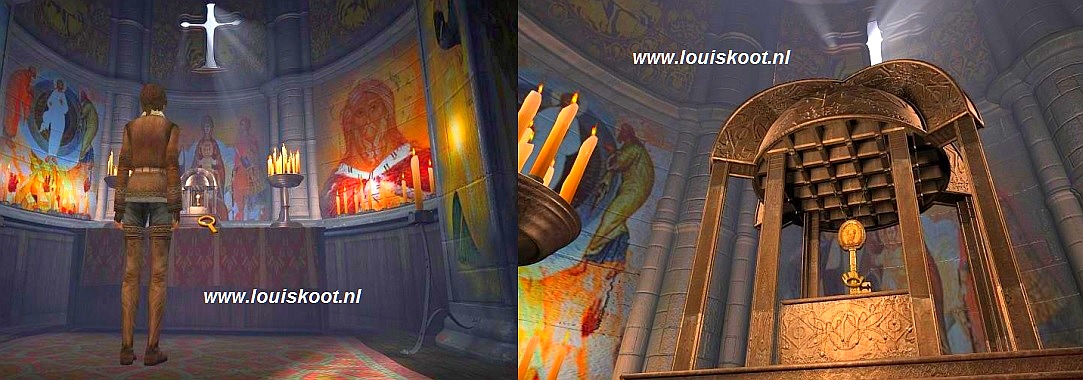
This "Ornate Key" will disappear to your inventory. Close the close-up and go back through the chapel to the front door. At the front door, click again on that fence that is right next to the front door. In the close-up take the newly found key from your inventory and click on the lock of the fence. The gate opens.
Walk to the right through the now opened fence and Kate is at the bottom of the Bell Tower. You see the Bell rope hanging ...... click on the Bell rope and .....
Cut Scene: Kate rings the bell twice, as a sign that all monks have to report in the monastery, including that grave digger monk in the cemetery.
Exit the Chapel and return to the cemetery. Walk back to the crack in the wall and look through it again. Click again or under the pine tree. Kate repeats her remark about the steep slope and the sled. Close the close-up. Click again on the coffin. Because that grave digger is now gone, Kate now slide the coffin right before the crack in the wall.

Leave the cemetery and return to Hans Voralberg in his room on the gallery. Click on Hans. "Let's go" says Kate. "We have to be quick" Hans shout.
Cut Scene: Kate and Hans walk to the cemetery and we see the Patriarch coming after them with a flock of monks.
The Patriarch tries to stop Kate and Hans, but they escape through the crack in the coffin and slide down the slope.
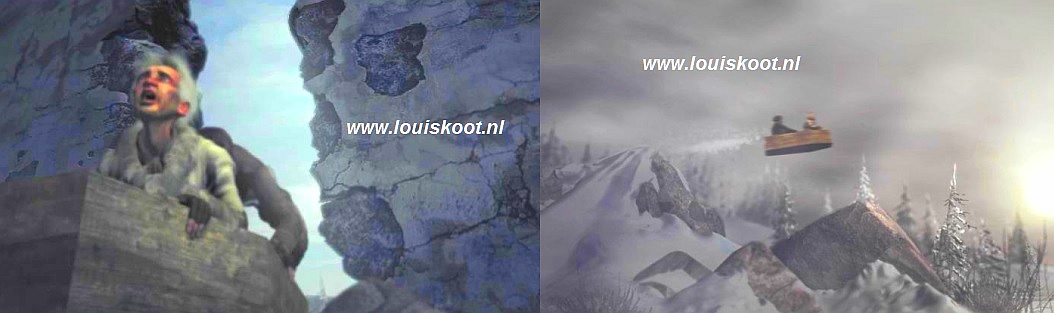
The " sledge ride" ends at the fence of the Bourgoff brothers and then we are back in the sleeping compartment of the train.
G: Train Hijacking
1: A "Heart" for the Horses:
So we are back in the sleeping compartment of the train, after the escape from the monastery. Talk to Hans.
You get 3 options. First use the "Hans" and the "Monster" topic and last the "expensive" topic.
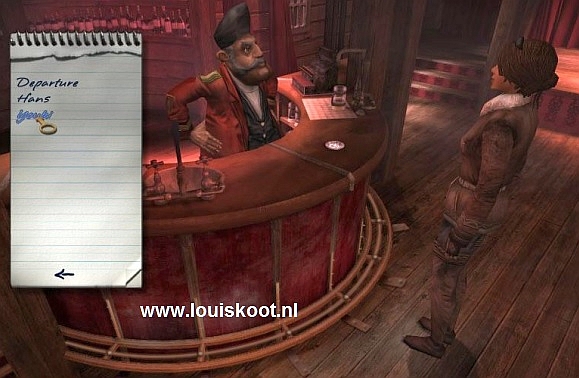
Hans feels fine again, just a bit tired and therefore he can not bring the "Mechanical Heart" to Cirkos himself. Hans has repaired the "Mechanical Heart" for his old friend Cirkos. That "heart" is the machine that triggers the 4 Mechanical Horses that are on stage in the Cirkos Cabaret. Hans asks Kate if she can go to the cabaret and place the Heart in the machine. As soon as it is done , the train can leave to continue the journey to Syberia. Kate now gets the "Mechanical Heart" from Hans. When the conversation has stopped, just talk to Hans again and use the "Mechanical Heart" topic, the "Departure" and the "Mission" topic. Hans tells that Cirkos has no technical knowledge, so Kate will have to put the "Mechanical Heart" in the machine herself
If you have used all the conversation topics again, the conversation will come to an end automatically. Go through the train carriage and then leave the train and enter the platform. Enter the Store and walk to the counters. Talk to the Colonel and use all options. This is a totally useless conversation, but Kate is a polite girl and would like to say goodbye to everyone. After this you leave the store again and walk to the stairs at the end of the platform and go via the stairs back to the:
Lower world:
Malka:
Walk to the left again. Malka is now no longer at her place under the platform. She is now standing at the coal warehouse......so go to the left, to Malka. Talk to Malka.
Kate tells Malka that she is going to fix the "Horses" of Cirkos and invites her to come and see the Show. Malka says that Cirkos has taken care of that "dog" from the Bourgoff brothers. You know, that's that "polar bear" that Kate has let out of the box. Cirkos tries to tame the beast and to learn it to do tricks. Click again on Malka to say goodbye to her.
Then go back and click on the glass doors of the:
Cirkos Cabaret:
Kate enters the entertainment hall again. Walk to the left and .......
Cut Scene: Cirkos is trying to make that "polar bear" jump through a hoop.
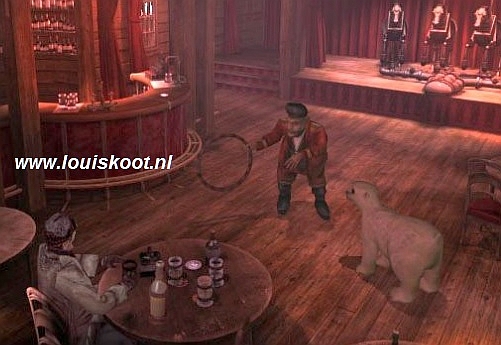
The beast doesn't understand it and clearly does not want to the trick Cirkos gives it up and he goes back behind his bar.
Walk to the bar and talk to Cirkos. First use the "Youki" topic.
Cirkos says that the "polar bear" is a Youki and that these animals are a cross between a seal and a polar bear. The Youkol people have more or less tamed these animals and use them as draft animals. Use the "Hans" topic and finally the "Departure" topic. You will then receive the "Horse" topic. Ask Cirkos about the Horse and then use the "Hans" topic. Kate tells Cirkos that Hans has repaired the "mechanical heart" and that she has come to put it back in the machine. The conversation will automatically come to an end again.
On the big stage are the 4 "Dance Horses". Go to the stage. Kate is standing in front of the stage. You see the 4 horses and you see that they are connected, via a pipe system, to a machine that is in front of the horses on the podium. The front side of the machine is a flap that you can click to open it. Click on the front of the machine and the flap opens and you are in the close-up of the mechanism.
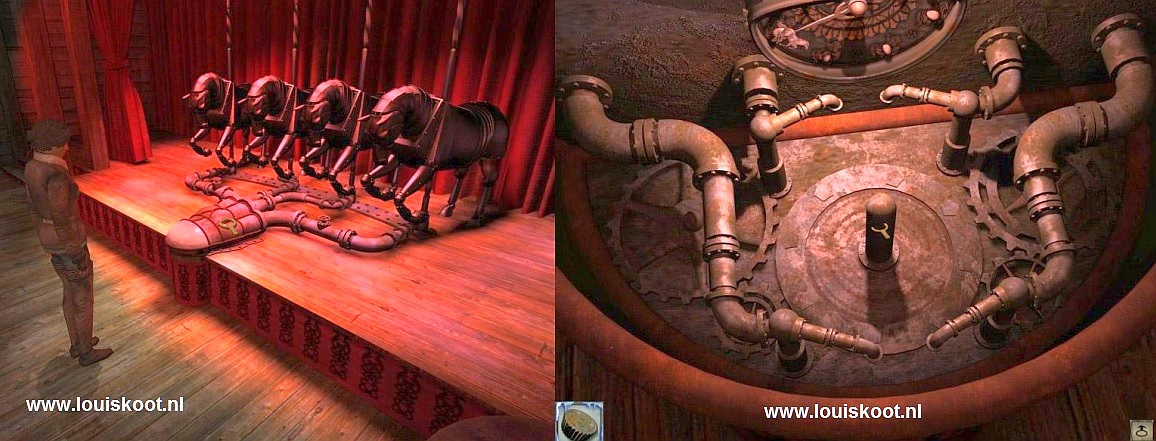
You can see that the Heart has 4 Segments and that there are 3 holes in each segment. You see a pipe for each segment. Each of these 4 pipes is attached to a horse. The intention is that Kate connects the pipes to the heart by clicking them in the right hole. Name the 4 Segments of the Heart now: Top left, Top right, Bottom Left, Bottom Right. The order in which you now click on the holes is not important ......... Click on these 4 holes .....
the 4 pipes click in the holes and each horse is then connected to the heart.....Click now on the PIN and ... .... enjoy the Horse Show! Cut Scene: The horses go up one by one and perform a dance. Kate looks around with pleasure, but .......
...... halfway through the show, Kate notices that the train is moving and she runs out the Cabaret and to the platform but ....... TOO LATE! The train leaves WITHOUT KATE.
|
2: The Hunt for the Train
Kate is standing on the platform. Open your inventory and click on Kate's cell phone. Select the Oscar number and call it via the "Send" button. Oscar answers and tells that the Bourgoff brothers have hijacked the train. So they have kidnapped Hans and Oscar. Oscar will try to drive the train as slowly as possible and then the conversation is abruptly interrupted.
Try to call Oscar again, but he does not answer anymore. Store the phone. Click on the large Lever, which is on the platform at the end ... and ........
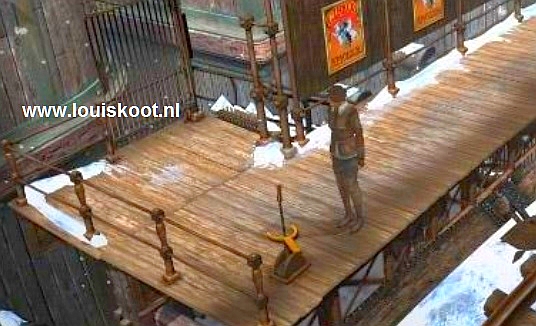
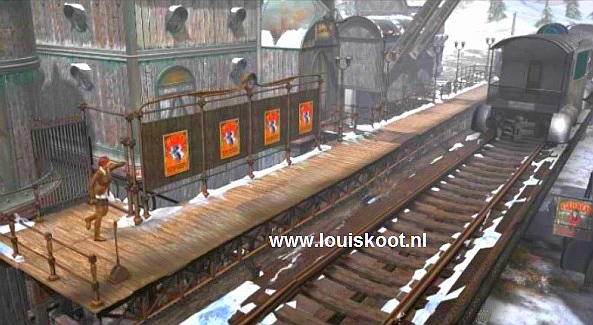
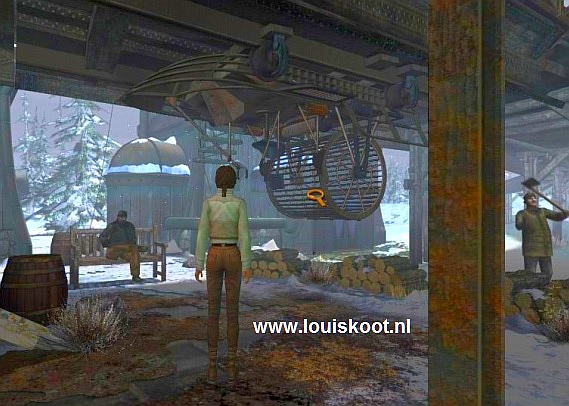
Cut Scene: Do you remember that "Strange Machine", which hangs under the platform is? Well.....that part of the rails is now turning completely and the "Strange Machine" is now on top of the rails.
It is a Rail Cart. Notice the large Round Cage on the back of the Rail Cart. Click on the cart. Kate gets on the cart and the cart automatically sets itself in motion.
But ..... the stupid cart does not get any further than the end of the platform and it stops there..........There is no more power. Go to the store and enter and talk with the Colonel again. Use the "Mission" topic. Then use the "Gang car" topic and keep using it until there is nothing more to ask. The Colonel says that Kate should get the "Big Mouse Wheel" running. Of course he means the round cage that is on the back of the rail cart. Shout there be an ANIMAL in that cage? But which animal? Kate gets an idea about this and the conversation is over. Leave the store and go to the stairs and then down to the:
Lower World
Go to Malka, who is still at the bottom of the Coal Warehouse, and talk to her. You don't get options now, so you have to click on Malka a few times. Each time Kate says something and Malka reacts to that. Malka suggests that Kate should have someone pull the rail cart. Kate says that the wheel on the back of the car does not work either. Then Malka suggests that Kate can use the Youki of the Bourgoff brothers as a "motor" for the rail cart. Malka also says that she has seen the Youki in the courtyard of the Bourgoffjes. And Malka says that Youki's are very fond of fish.
Go back to the left and enter the Cirkos Cabaret again, through the glass doors. Walk to the bar and talk to Cirkos. Use the "Gang car" topic, but Cirkos can not help Kate. Use the "Youki" topic. Kate requests permission from Cirkos to catch the Youki and that is allowed.
Yard of the Bourgoff brothers:
Leave the Cabaret and go to the fence of the Bourgoff brothers. At the fence you see that the gate is half open. Go through the gate into the yard ...
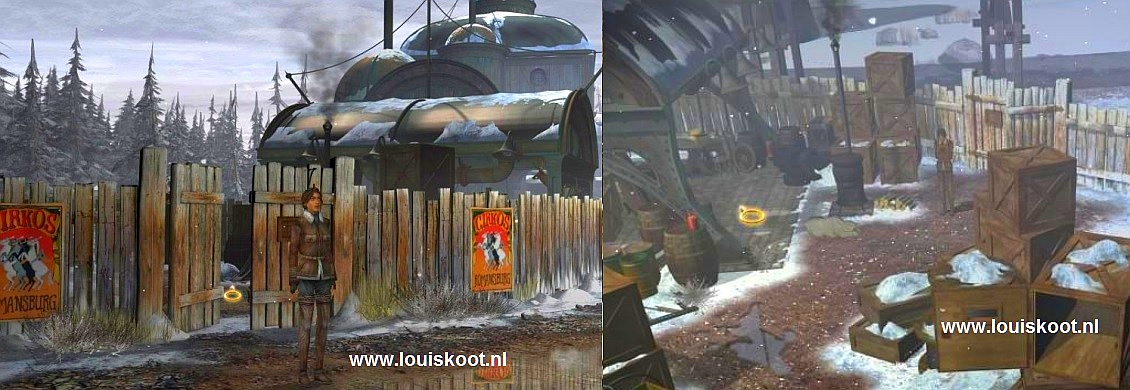
Go to the shed..........the Youki is on the floor in front of the stove. It seems like the animal is whining. Enter the shed.
There is a table in the back of the shed and you can see a paper lying on the table.
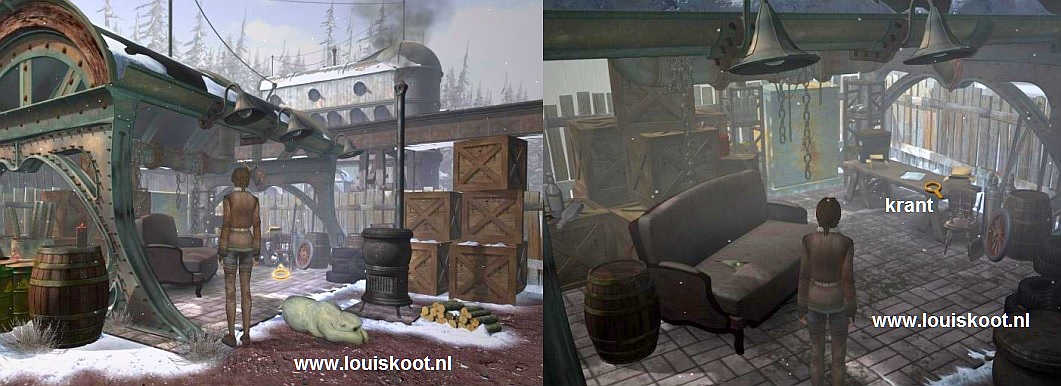
Click on the table. In the close-up screen you see that the paper is a newspaper. Grab the newspaper.

The newspaper comes to stand big in the screen. Read the three articles. The left article tells about the death of one Helena Romanski, a famous singer. The middle article told about the "White Gold of Siberia", the Ivory Tusks of the Mammoths. The right article tells about the observation of a strange oval object that some people have seen raging across the country. Close the close-ups if you have read these 3 articles.
Go back to Youki via the bottom of the screen. In Alexei Toukianov book you have read that Youki's are fond of "orange salmon".
So grab the Fish Sweets out inventory and then click on Youki.

Kate gives the candy to Youki and the beast is grateful for this and it will follow Kate everywhere now.
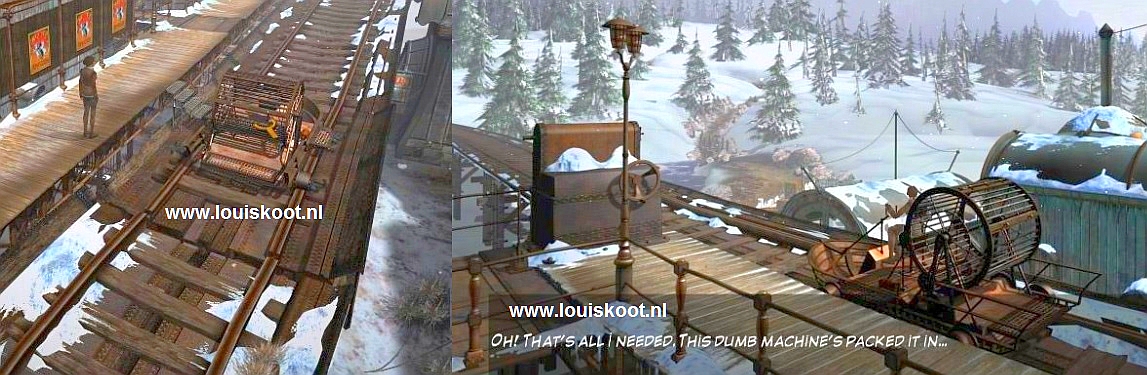
Leave the yard through the gate and return to the platform via the stairs. Walk to the train cart and click on it again, and ...
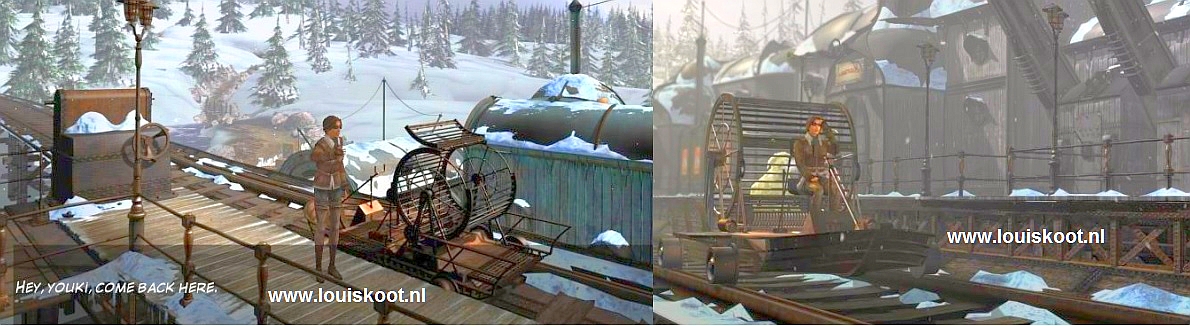
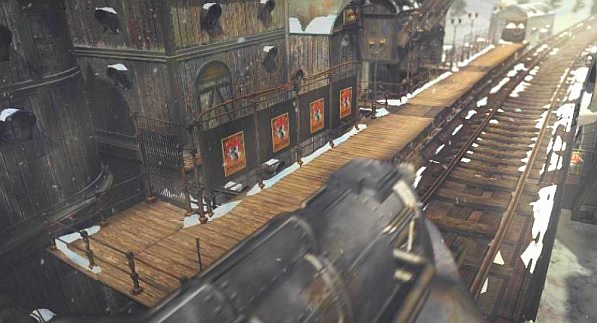
Cut Scene: Kate calls Youki and he crawls into the round cage and starts pedaling. The cart start and the train pursuit has begun ...... The chase is in full swing........ Ivan, in the locomotive, suddenly notices Kate, who is getting closer and closer to the train in her cart. Ivan adds a scoop coals. The train is approaching a wacky bridge and Ivan is trying to stop the train. This fails and the train goes up the bridge and........when the train is halfway across the bridge, the first part of the bridge collapse and the train comes to a standstill. Kate stops the railcar just in time . We have arrived in
2018: Walkthrough by: Louis Koot