
2018: Walkthrough door: Dick Leeuw and Louis Koot
Text by Dick Leeuw and Screenshots and lay-out by Louis Koot
If you have found this walkthrough via google search or via another site then you have probably not visited my site.
A
lot more very detailed
game walkthroughs can be found on my site at: www.pcgameswalkthroughs.nl
Chapter
5: The Hallway with Bedrooms and Bathroom:
Part
2
Bedroom
3: The Master Bedroom

Look
around, there is a lot to see and do here. Above the bed you see the triangular
plate that you need for on the door to the next area, unfortunately you cannot
take it yet.
In front of the bed there is a chest, zoom in on it and open it. There are 4
knives in the box, take the 4 knives.

Zoom
out and turn left, zoom in on the TV, there are 2 coins in front of it. Take the
coins.

Zoom
out and turn further to the left, in a niche is a computer, zoom in but you
cannot do anything with it because you need a floppy disk.

Zoom
out again and continue. To the right of the secret passage is a cupboard, click
on the doors to open it. In the cupboard there is a round disc, zoom in and you
see a button in the center with 7 other buttons around it. You can switch these
buttons on and off but which ones have to be turned on, will we return to that
in a moment. On the other side of the passage you see a mantelpiece with another
painting puzzle, yes there is also a year for this. There is something to be
found in the chimney, but you cannot yet see what.

To
the left of the fireplace is a small table with a book on it, zoom in and click
on the book. Read it through.

Zoom out and walk to the door to the hallway, unlock the door. You now can enter the room from the corridor.

Turn
a little further to the left and you look at the bathroom door, zoom in on it
and click on the latch.
Bathroom:
When
you are inside you look at the sink, go down a little and click on the doors
under the sink.

Zoom
out and turn around, see another book next to the toilet, zoom in and read it.

Zoom
out and look at the painting above, you will see a shield on the painting and a
year under the painting, but that can also be a time on a clock.

Down
in the library we have seen a clock and a shield that you can do something with,
so we will see what that is.
Zoom
out and turn around to the cupboard, open the doors. Zoom in and on the middle
shelf on the right you will find 2 coins, also take these.

Zoom
out and turn to the door, above the left door jamb in the red tiles is a puzzle
hidden again.

Turn
the tiles in such a way that a symbol is created again, and then the tile will
slide up and there is a photo. Take the picture.

We still have a number of things to do here, and we will first solve a few
puzzles here. First the puzzle with the buttons in the cupboard. Look at the
chandelier lamp on the ceiling, in the middle you see a bright light. This is a
yellow Orb, furthermore you can see that 4 of the 7 lamps are burning.

Now
zoom in on the round device in the cupboard ........ Now click on the same
buttons as the lights that are lit, then press the middle button.

You
zoom out and you see that the chandelier is lowered, zoom in on the middle light
and you can grab the yellow Orb.

We
will now do the painting puzzle, you can solve it yourself by turning the
circles or you fill in the code 1787 found in the book in the other room.

Again
such a device appears in the chimney, click on it and the light turns blue.

If
you have followed this walkthrough than there are now 4 blue lights on the frame
of the door to the next area. In this area you still have a number of things to
find and solve puzzles, the order is not important. You have to walk up and down
a number of times. Leave the master bedroom and go to the bathroom at the stairs
to the library.

Bathroom
in the hallway

Drag
the light bulb to the fitting and pull the string again. And there is light.

There is another radio somewhere here that makes a lot of noise, find that radio and turn it off.


The
doors open and you see the star sign twins, only 3 stars do not burn.

Zoom
out and search with your mouse on the right, you see a door laying against the
side.

On
the other side you see a few boxes with cans in front, on one of the boxes lies
a can. Just before that can lie 2 coins, grab these coins.

A
little further to the left you see a bigger can, to the right of this can you
see something lying. Zoom in and press the red button.

You
automatically zoom out and a light is turned on and shines on a painting, zoom
in and grab the painting.

Zoom
out.

Zoom
in and you'll find a key with the roman number 2, grab it.

Look
at the floor of the attic, there you will find a number of drawings. View the
drawings.

To
the right of the drawings you see a chest and how can it be otherwise but here
is also a combination lock on the chest.

On
the table in the library is a poster with a number of 3 figures, that you can
try on this lock.

274
is the right number and the box opens, inside you will find a lever. Take the
handle,


Leave
the bathroom, you are now standing in front of the stairs to the library. To the
left of the stairs is a niche and in that niche is also a holder.
Zoom
in and drag a knife towards it. Here too a green light comes on.


One
more knife to go, the holder is down in the library. We're going down.
Library:
On
a small table you see the last holder, zoom in and drag the last knife to it.
Here too a green light comes on.

Now
zoom in on the clock

Upstairs
in the bathroom you saw a painting with a shield as well as a figure and a
number: 17.05.

Zoom
out and then zoom in on the shield, press the button in the middle of the
shield.

You
zoom out and you see a section of the bookcase open, you have found a secret
space.

Click
in the opening and you enter the room, the first thing you see is a pedestal
with a blue Orb on it. Zoom in and grab the blue Orb.

Zoom
out and turn around to the door, above the door you will see a box standing on
the beam.
To
the left of that, on the beam that supports the staircase, there is again a
symbol code. Zoom in and open the box, 2 coins.

Zoom
out and zoom in on the bar and mark the symbol code.

You
have to enter this code with the 2 levers in the corridor on the floor above and
then you see what happens.

Click
between the two protruding stones to zoom in on it ...... You can then click 11
stones in and out.

A
drawing of these stones you have seen in the bookcase in the room with the
spiral staircase, under the library.

On
the drawing the stones 2, 3, 5, 8, 9 and 11 have a cross.
The
letter you found in bedroom 2 under the cupboard tells you that the last stone
to press is the middle stone in the
3rd row .
First
click all 11 stones forward, the stones with a cross must remain outside.

The other stones must go in but the order is important,

In one of the books or letters you can read this ...... I do not know
what book or letter. If this is done well, a part of the wall will open.

Click
in the opening ....... You enter a secret room that can only be reached through
this hole.

On
the table you see a crystal skull and there is also a letter on the table. Zoom
in on it and read the letter, zoom out and look around. You see a box but it is
locked, how do you get it open? Turn to the bookcase, on the left of the
bookcase you will see a lever at the top. Pull it down and the box will open.

In the box you will find a photo, take it. If you have done everything according
to this walkthrough, you now have all the photos you can find in this section.

Go upstairs
again. Zoom in again on the 2 levers in the wall of the corridor.

Now
turn the 2 levers according to the code that we found down in the secret room,
the dashes are made by putting a lever horizontally.

When
you have 7 green lights push the button below the lights.

Now
go to the alcove opposite the bedrooms, zoom in on the device where a lever
should go.
Drag
the lever towards it, pull it down.

You
see the box opens, inside there is a yellow Orb. Take this.

Return to the bathroom and via the ladder to the attic. Zoom in on the panel
with the star sign twins.
Drag
the third yellow Orb to the last star. The constellation is now finished and the
H turns around and you see the blue Orb. Take this.

Leave
the attic and go to the master bedroom, to the chest in front of the bed.

Zoom
in on the chest, now you have 4 lights on the inside of the lid. Underneath is a
slot and now a floppy disk emerged from that slot. Take that floppy disc.

Go
to the computer and zoom in. Drag the floppy disk to the floppy disk drive.

You
must now enter a password. In the library you have read that the twins are also
called DIOSKOURI, enter this as a password. With the up and down arrows you
choose the letter and with the left and right arrow you move a place for the
next letter, after the last one you click on the enter button.

You
now have access to the computer, read through the log files.

With
the down arrow you can go further down to "display case", click on
enter and automatically you turn around to the bed.

The
glass panel folds open, zoom in and pick up the triangular plate.

We
are actually done here, but we still have something to do in the first area that
you could not access at the time. Go back to the computer and use the arrows to
go to the black rectangle with the green arrow in the bottom right corner, click
on the enter button and see what happens.

To
the left of the TV a panel opens and reveals a secret passage, click in the
opening.

Turn
around to the opening, to the right of which there are 5 coins in the corner.
Zoom in and grab them.

Diagonally
in front of the opening you see a hatch that lights up a passage. Click on the
hatch and you will arrive on balcony 2, above the central hall. You are behind
the table where the 3 tablets were on. Right in front of you is your painting on
easel, zoom in and take this painting.


That
will be a big detour, so go up the ladder. Go out the bedroom
and to the stairs down through the library.

Click
on it and you're in the central hall, go up the stairs.


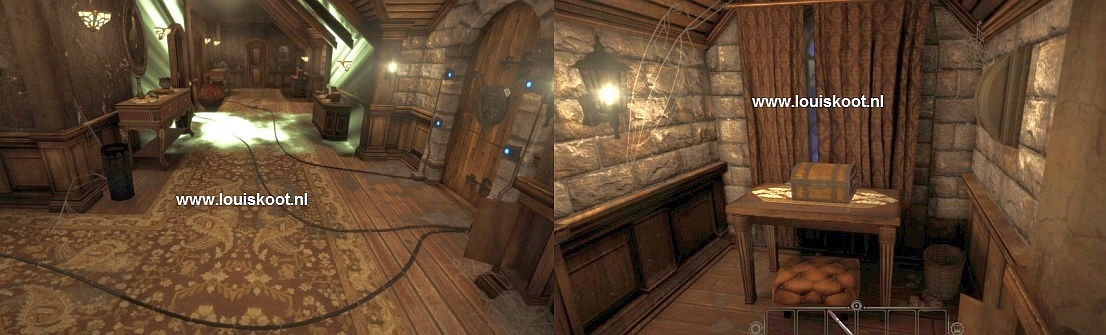
Enter
the room, on the table in front of the window is a box.

Zoom
in and you will see a box with a puzzle lid so click on the squares and make it
the right symbol.


Leave
the skull room, down the stairs and left along the stairs through the green
door. Now through the door with the lock and via the spiral staircase to the
library. Now up the stairs, zoom in on the door with the lock and drag the
triangular plate to the lock. The lock will turn and the door will open.

Chapter
6: The Throne Room and the Laboratory
Text by Dick Leeuw and Screenshots and lay-out by Louis Koot