
2018: Walkthrough door: Dick Leeuw and Louis Koot
Text by Dick Leeuw and Screenshots and lay-out by Louis Koot
If you have found this walkthrough via google search or via another site then you have probably not visited my site.
A
lot more very detailed
game walkthroughs can be found on my site at: www.pcgameswalkthroughs.nl
Chapter
6: The Throne Room and the Laboratory

You
enter a large circular hall, before you see a stage with a number of steps to
it. In the middle of the stage you see a pole, it looks like a pole from a fire
station, but we also have to be able to go upstairs so where is the staircase?
Furthermore you see 2 holders standing on the stage where a lever needs to be
placed. In front of the stage you see two devices that you do not know what to
do with it. On the ground you can see cables that go to those 2 devices. You
also see a number of switches on the ground.
Turn
to the left and you come to a large statue that has a yellow Orb in his hand but
how do we get it?

At
the front you see a mechanism where you have to enter a name, which name?
Between the podium and the statue you see a round disk lying on the floor, what
does that have to be, a staircase? Turn to the left and you will see the door
you just came through. Left next to the corridor is a large vase and just behind
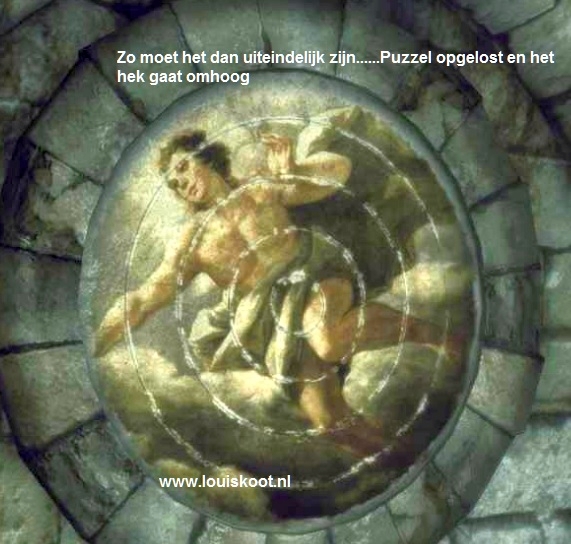
that vase you will find a hatch with a puzzle ...... zoom in on that.

Put
the 4 squares in the correct position, symbol virgin, and the door slides open.
There you will find the first photo in this area, take the picture.

Turn
to the left and you will see another stage with a staircase to it, on the podium
you will also see a door with such a strange lock. This means you have to go
through this door to get to the next area but we are not ready for that yet.
Further on you see another door, which is locked.

For
the stage you see 2 tables, on table in the back is a bowl with 2 coins. Zoom in
on the scale and take out the 2 coins.

Zoom out and zoom in on the first table, only with the switch you can do something. Click on it but nothing happens yet.

If
you look closely and then follow the cable to the floor, you will see that the
switch is connected to the cables on the ground. These cables are also connected
to the 2 devices that stand on the left and right in front of the stage stairs.
There are 4 switches between the cables. Name those 4 switches A, B, C, D.

Now
you have to turn the switches properly so that the power goes to the 2 devices.
You can click the left and / or right arrows in each switch. Zoom in on a switch
and then click the left or right arrow. First ........ Move switch A to the
right, switch B to the left. Switch C should already be on the left, if not move
switch C to the left Zoom back in on the front table and ...... Click the button
on the table again and the device on the left will be activated.

Zoom
in on switch C and move it to the right. Zoom out and then zoom in on switch D
and move it to the right.
Zoom
out and go to the button on the table, click on it and the device on the right
is activated.

On
the 2 devices you have to put the correct symbol ......... But which symbols you
need on each devices.
On
the podium you see 2 pillars against the wall. On the upper part of both pillars
you see a symbol.

So the symbol on the pillar on the right you have to use on the device on the
left and the symbol on the pillar on the left belongs to the device on the right.

Zoom
in on the right device and put the correct symbol on it and ....
the device reacts and you get a lever in front of you, take this lever.

Go
to the left device and also put the correct symbol on it and this device also
reacts. Take the 2nd handle.

Turn
around to the podium, with the pole and the 2 holders. Zoom in on a holder and
drag a lever towards it.
Zoom
out and then zoom in on the other holder and also drag a lever towards it. Then
pull both levers down.

You
automatically zoom out and you see a spiral staircase coming down. Go upstairs.

Anteroom:

Zoom
out and turn to the left, there is a pedestal with a 6-sided stone on top,
enclosed under a glass shade. Of course locked. That stone is reminiscent of the
center of the stone round disc next to the statue. In addition, a steering wheel
of a ship hangs on the wall. Zoom in and notice that you cannot turn the
steering wheel. 2 pins keep it in place. Don’t
know what you have to do with it yet, but you will find out later.

Turn
further to the left. You see the stairs down with a few boxes in front of it. On
one of the boxes is a book, zoom in on it.

You
then see a piece of paper from the book, zoom in on the piece of paper. You see
a drawing of 3 figurines, what to do with it?

On
the left of the floor lamp you see a pillar and on the bottom part you can zoom
in but you still miss something, you come back there later.

Continue
to the left, there is a table, on the right on the table are 3 barometers with 6
buttons in front.

On the left of the table is a box, of course locked again. Notice the symbol on
the lock.

On
the wall to the left of the table hangs a poster with circles with dark and
light stars, what is the purpose of this?

Now
zoom in on the door and click on the handle, the door is unlocked. Zoom out and
click on the door. You come to a laboratory.
Laboratory

In
front of you is a device on a round table, what its function is you do not
know yet but you see that it is connected via cables with an oscilloscope. The
oscilloscope is connected to the computer on the same table. Zoom in on the
board behind the table, on the shelf under the board are 2 coins. Take these
coins.

Zoom
out and then zoom in on the computer, if you press the enter button you get the
message that the access is denied.
The
system is shut down from somewhere else. Also take a closer look at the
oscilloscope.


On
the table is also a book where you can zoom in, do this and read the book.

Zoom
out and slightly further to the left you will see a standing lamp next to a
fence between the two storage cupboards

Zoom
in on the fence and you see in the screen that the server is offline. Zoom out
and continue to the left. There are 2 racks next to each other, in the left
cabinet on the top shelf on the left you see 3 boxes. On the right box is a box,
zoom in and open it. You will find a picture in it, take it.

For
the moment you cannot do anything more here now. You see two doors here, the
left of which brings you back to the anteroom you just came from.

Corridor
with Busts:
On
the right you see 4 busts standing on plinths. Each pedestal has a dial at the
bottom and two years at the top.

On
the pillar between the first 2 busts a shield hangs above 3 swords. Above the
shield you will find a picture, take it.

On
the left side of the hallway there are 5 tables, with the first table you cannot
do anything. Turn to the second table. On this you will find a number of books,
on 2 of them you can click.

Click
on both books and you will see 2 constellations every time.

Only
the constellation dragon (Draco) is important.

Zoom out and turn to the middle table on the box with a metal plate under a
glass lid, of course it is locked.

Above
the box you see a dial, you can move the pointer but it jumps back. Zoom out and
then zoom in on the next table there is a box and there is a note. Open the box
and pick up the key, then click on the note. It is a drawing of a barometer with
a scale, below it is a sum with dark and light stars.

The stars and the barometer you encountered in the anteroom, this is the clue
for the solution of the barometer puzzle. You will solve this later. You first
go to the end of the corridor and through the door, we enter a tower with a
spiral staircase.
Tower:

First
look above the door, you see a stone protruding, click on the stone and it falls
down. Behind it you will find a picture, take it.

We
can now go up or down, we go down first because there is no power upstairs.

You
will see a generator with a push button above it, click on it and the generator
will start. If all goes well, you now have power upstairs.

You
also see a steering wheel hanging on the wall, which is also blocked.

Go
upstairs and look around, you see a projector with 4 panels on the wall opposite
it. You can slide these panels up and down.

On the windowsill of the window on the left you will find a book

Zoom in on the windowsill and then click on the book ..... inside you see a
drawing of a dragon. So here you need the dragon.

Take
a look further, at the top right of the 4 panels you can see a support point for
the roof. Then against the wall you see a picture, take it.

Zoom
in on the projector, in front you see the on / off button.


With
the button at the back you can switch the projections, press just as many times
until you see the constellation Draco, the Dragon.

Now
slide the panels until the lines of the Dragon coincide with the lines on the
panels.

If
you have done well, you look at the floor and you see green lights flashing, the
Dragon now supplies power for the hallway and the lab.

Go
down and back through the door to the hallway with the Busts. Here you can also
see green lights flashing.

Turn
to the right to the last table in the hallway, on the left of it are 2 coins.
You can only get these coins when you enter from the stairs in the
tower.

Continue
to the lab, zoom in on the computer and you will see that you now have access to
the computer.

Click
on the enter button, you will now get a message that the server is offline. So
now looking for the server.

Where
the server is, we do not know yet but you can now solve the barometer puzzle so
go to the anteroom and turn to the table.

Zoom
in on the box and drag the key towards it to open the box

Zoom
out and zoom in on the barometers. The red bars must have the right length but
what is the correct length.

Do
you remember the drawing in the book by the stairs down, there were 3 drawings
on it.
Combine
that and the poster here in the room and also the directions you found in the
hallway to the staircase tower.

In each of the 3 drawings you can see which circles of the poster to use and how
many light and how many dark stars you have. Now subtract
the dark stars from the light stars and you will get the number of bars
you need for the barometer. The upper figure shows 13 light stars and 3 dark
ones, remains over 10. In the same way you also do the other figures and then
get 3 and 6 respectively. So from left to right that will be 10, 3 and 6. Now
you have to set the red bars to the right length, with the left buttons they go
up and with the right buttons down.

If
they are right then zoom out and then in on the box, click on the button and you
zoom out and you will see the lid open above the hexagonal stone.

Take
the stone and take it down to the round case next to the statue.

Zoom
in on the circle and drag the stone to the center of the circle,

the
stones go down and form a staircase downwards. Click on the stairs and down you
will find the servers.

Server
room:

Look
around and you will see a computer and 3 servers.

Left
of the computer you see a passage, through that passage you will enter the
basement.
Turn
around to the table and zoom in on the drawer, click on the drawer. This slides
open and you see a piece of paper,

Take
the paper. on the paper are a lot of numbers and a number of symbols. You cannot
do anything with this now.

There
is also a handle on the table, take it.

Turn
around to the computer and zoom in, you will see on the monitor that you need a
floppy disk. Where to find this floppy disk?

Ceiling
puzzle

You
have to start with the symbol on the floor, you have to click on it until it
points to the pillar. The symbol on the pillar is fixed and points upwards,
follow the direction of the tip. On the ceiling you see another tile. You must
also rotate this tile again so that it points to the next tile with the same
symbol, this must be in a straight line, in the same row of tiles.

From
the tile at the pillar you go to the other side of the room, there is only one
tile with symbol that you can reach in a straight line. Zoom in on that tile and
turn the point to the right to the back of the room, zoom out. Zoom in on the
tile in the same row, 3 tiles down. Turn the point to the right, follow the row
and you will reach the bottom of 2 tiles.

Turn
the point up to the second tile, turn the tip of the upper tile to the left. 5
tiles further you see the next tile, turn the point to the left to the wall
where the picture is in the box. follow this row and you will come to a tile
with a symbol. Turn the point down, close to the wall where the servers are, you
will see a tile with a symbol in the dark. Turn this point to the right, turn
the next tile upwards. 4 tiles to the top you see the next one, turn the point
to the left and at the next turn the point upwards.

In
the dark you can just see the next tile, turn the point upwards, that is towards
the back of the room. There you see 1 tile lower than the 2 tiles above each
other, turn the point to the left. Now turn the tip of next tile upwards and
follow the row. You now come to the tile with symbol above the pillar where the
box with the photo stand, turn the point to the pillar here.

If
all tiles are rotate correctly, the symbol on the pillar is down and you zoom
out and look at the box with the photo.

The
box opens, zoom in and take the picture.

Turn
around again. There is an archway next to the computer. Click in the opening,
you will enter the cellar.
Cellar

You
can see an easel standing on top of a plateau, there is a painting that you have
already caught in the game. You also found a lever behind a pair of shelves
there. You could not come from there to here and you cannot reach the easel from
here. When you pulled over that lever up there, you saw a piece of wall sinking,
in the back of the cellar you see that opening. Zoom in and you will see a
number of gold-colored cups, vases and bowls, in between there are 10 coins.
Take the coins.

To
the left of the niche with the treasure is a steering wheel of a ship, just like
the other 2 this wheel is also blocked.

On
the other side of the cellar is a barrel with a box on it, on the edge of the
barrel a code is written.

To
the left of the barrel is a holder for 3 handles, you now have a half lever so
now looking for 2 ½ levers.

In
the corner where a lamp is standing on a tripod, you see a lever behind a pair
of planks. Take this handle, another half to go.

To the left of the shelves where the handle was behind you can see an arch with
a number of circles in it, below it you can see a fence. Yes this is a very
nasty puzzle again, you have to make it visible first but you need the computer
for that. When you come down the stairs you walk against an arch, to the right
of that arch is a pillar. At the top of the ceiling you can see a chain hanging,
pull it down.

To
the left of the stairs is another chain hanging on the ceiling, also pull it
down.

You
zoom out and you see the wall drop down under the arch.

You
see again a constellation with illuminated stars and also a few not yet
illuminated stars, you have to find 3 yellow Orb's again. Under the zodiac sign
we see a half lever, grab it and combine it with the handle in your inventory.
Click away and you now have 3 levers.

You
will soon start with the 3 levers but first something else. In the
ceiling in front of the arch with the circular puzzle you see a tile hanging not
hanging right, zoom in on it and you can slide this tile backwards. There you
will find another photo, if all is correct you have now found all the photos for
this area.

Zoom
out and turn to the barrel and the holder for the 3 handles, zoom in on the
holder and drag the handles towards it. The code is on the edge of the barrel.

Middle
down, left down, right down, left up, right up and as last left down again.

You
zoom out automatically and turn to the box, which opens.

Server
room:
Go
upstairs and turn around to the computer, zoom in on the computer.

Now
drag the floppy disk to the floppy drive. The computer starts up.

Click
on the enter button and you will see the 8 entries on the monitor, you cannot do
anything with it.
Click
on enter again and go down with the arrow, click on enter again and server will
be initialized but the terminals are still offline.

Click
again on the enter to go back, click on the arrow down. You now come to the
print job, click enter and the printer starts.

A
piece of paper comes out with 6 holes. Take this paper.

Combine
the 2 papers in your inventory. You can move the top paper, you see numbers in 5
holes and the hole on the right you can put above a symbol.

Turn
around to the terminals you see that each terminal has a different symbol and
needs a password.

Look
at the symbol on the left monitor, then click on the papers to put them in your
screen.
Search
with the right hole for the symbol on the left monitor, you will see 5 digits.
This is the password for this terminal.

Now
enter the password with the arrow keys and click enter. The terminal will be
restarted, successfully.

Do
this also for the middle terminal.

Zoom
in on the middle monitor and enter the code just found.

It
is more difficult for the right-hand terminal, you cannot see that symbol. Look
at the symbols on the paper, you can just see that there were originally 6
symbols. Probably the symbol that is missing is the one you need for the right
terminal. Place the right hole in the place where the symbol should be located
and use the password that you find.

Zoom
in on the right monitor and enter the code just found.

When
all 3 terminals work, turn around to the computer and zoom in on the monitor.

The
terminals are now online.

You can now
do several things .......... you can now go to the lab and do the oscilloscope
puzzle or in the basement the circular puzzle. You do not need the circle puzzle
for the endgame, but if you want to find the extra puzzle and hidden space you
have to solve it, you can also do this later. I'll do this puzzle now. Go to the
computer.
Circular
puzzle in the basement
Zoom
in on the monitor, if all is correct you will now see a window in the screen
with 2 options: Boot log and Server online. If you look closely, you will see a
circle in the lower right corner of the monitor screen, that's where you have to
be. Go with the down arrow to Server online and then with the arrow to the right,
then you have selected the circle, then click enter.

You
now get a white screen with a black circle and a black dot below it, with the
arrow pointing up you put the point in the middle of the circle. Click on enter,

.....
you hear something shifting but you do not see anything yet. Go to the basement
to the arch with the circles and the fence underneath.

On the circles you now see an image, only it is twisted. You see a
center point
and 4 circles that you can rotate.

Now first turn circles 1, 2 and 3 until you have completed the whole body in
those 3 circles ........
Circle
1 turns Circle 1 and Circle 3. Circle 2 turns circle 2 and circle 4. Circle 3
turns circle 3 and circle 2. Circle 4 turns circle 4, circle 2 and circle 1
You
will also have to turn circle 4 to get the painting in circles 1, 2, 3 and 4 correct .... As you can see on these 2 screenshots.

This
was the easy part, do not mind the outer circle. The only thing that is still
missing is the top part of the head of the figure, that piece is unfortunately
in circle 4. You now have to turn the lever with the circles to get the figure
complete ......... and that is really not easy. The screenshot below shows you
what it should look like ......... One time you solve this puzzle in 5 minutes,
but you can also spend days plodding along.
Have
you solved the puzzle you zoom out and ........ The fence under the circle
puzzle is now up,

Go
through it ........ You now enter the former brewery.

Zoom
out and turn to the left, you will see 2 barrels. Even further to the left you
see a fence in the corner, of course locked. Turn further to the left and you
are on the other side of the gutter, you will see a banner hanging in the
middle. To the right you see an arch, at the top left in the arch you see a
chain hanging.

Zoom
in on the chains pull and ...........

.....
the fence in the corner goes opens and you see a ladder. Click on the ladder and
you will now enter the basement of the tower with the generator and the wheel on
the wall.

Below
that wheel you can now see a hatch up. Click again in the hatch and you are back
in the brewery cellar
You
have to do one more thing here. Look at the ceiling. There are four tiles with a
figure on them, these tiles can be rotated when you zoom in on them.

Put
the 4 tiles A, B, C, D in the correct position and you zoom out and
automatically turn to the fence above the gutter.

You hear something shift. Click under the fence and you're back in the other cellar
you
immediately see that the fence on the other side of the basement is now also up.
So click in that opening now.

You
now enter another part of the basement, on the left you see a ladder.

Zoom
out and click on the ladder, this also turns out to be a hidden passage to
another part of the castle.
You end up in the room with the workbench opposite the first generator at the
beginning of the game.

The
hatch is hidden under the workbench, click again in the hatch and you are back
in the basement. Go under the fence and you're back in the basement with the 3
levers. We have to do something here, but we can only do that later if we have
discovered a few things. Go back to the server room, via the spiral staircase to
the starting room. and then upwards via the spiral staircase. To the anteroom
and from there to the lab
Laboratory

On
the monitor you see 2 windows open, in the upper window you have 4 choices.
Click them 1 for 1 and read them through, phase 3 shows an error.

Go
through the arrow keys to the bottom window, click enter and you are connected
to the control of the oscilloscope.

Zoom
in on the oscilloscope and you will see 2 buttons next to the screen, here you
can adjust the frequency and the amplitude. But how should it be? Turn around to
the board on the other side and you will see drawings of 3 phases and how it
should look on the screen of the oscilloscope.

Turn
back to the oscilloscope and play with the buttons.

For
phase 1 you need the buttons as shown in the photo. You have to play with the
buttons to get the correct position and result.

If
you have the buttons in the correct position then you have a lot of sparks from
the chimney and you have a small explosion, now there is also a blue spiral
turning in the glass dome.
Phase
2: Now put the buttons as in the picture, you get sparks again but now from the
other chimney

there is a short circuit and the light in the glass dome becomes a blue ball.
Over to phase 3, place the buttons approximately like the picture and start
playing with it.
In
the right position the blue light becomes brighter and lots of things have short
circuit.

The
light gets even brighter and you get an explosion of light and a shockwave.

Go
to the dome and try to grab the blue Orb, unfortunately that thing is locked.

Then
we go up the stairs.

You
end up in:
2018: Walkthrough door: Dick Leeuw and Louis Koot
Text by Dick Leeuw and Screenshots and lay-out by Louis Koot