
The
Room I
2019:
Walkthrough by: Dick Leeuw
Layout
and publication: Louis Koot
If you have found this walkthrough via google search or via another site then you have probably not visited my site.
A lot more very detailed game walkthroughs can be found on my site at: www.pcgameswalkthroughs.nl
Start
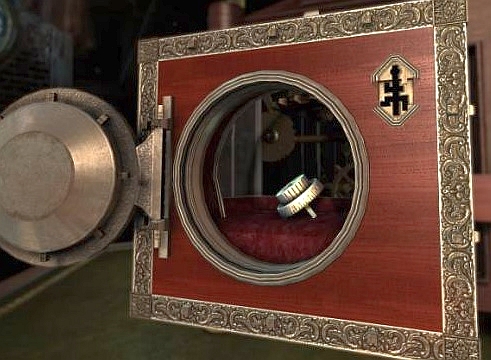
the game and you're in a room with a big safe. The first part is a Tutorial,
clicking and dragging to move things, to turn objects around. Double click to
zoom in and right click to zoom out. In the upper right corner you see II, if
you click on this you go back to the menu. The game saves automatically. In the
course of this chapter you also get a magical eye, when you click on it you see
hidden things and messages.
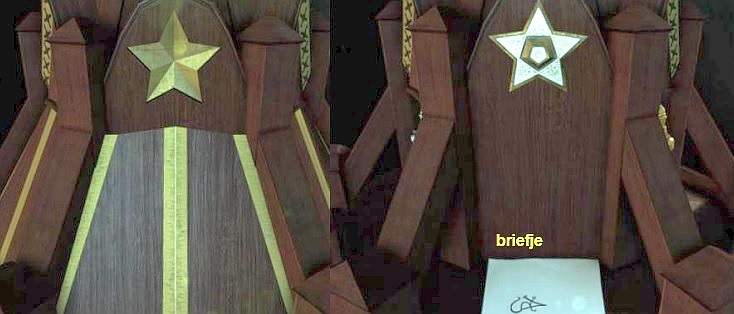
So
first drag the safe to the top and zoom in on the letter you see there. Click
and drag the letter out, read it.
At
the bottom right you see a key, take it. You now see the key on the left in your
inventory.

The
device you see is your magic eye, click on it and the eye is on the right of the
screen and it remains there for the rest of the game. Click on the eye and you
get a message that something is missing. Is not clear what but you still miss a
lens. Click again to close it and then double click on the note. This is a
puzzle and the solution is here somewhere.
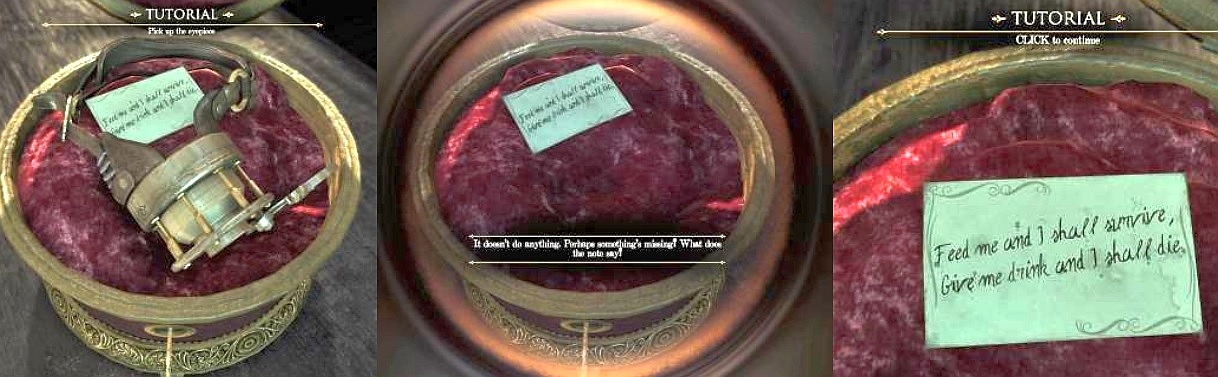
The
solution for this puzzle is Fire.
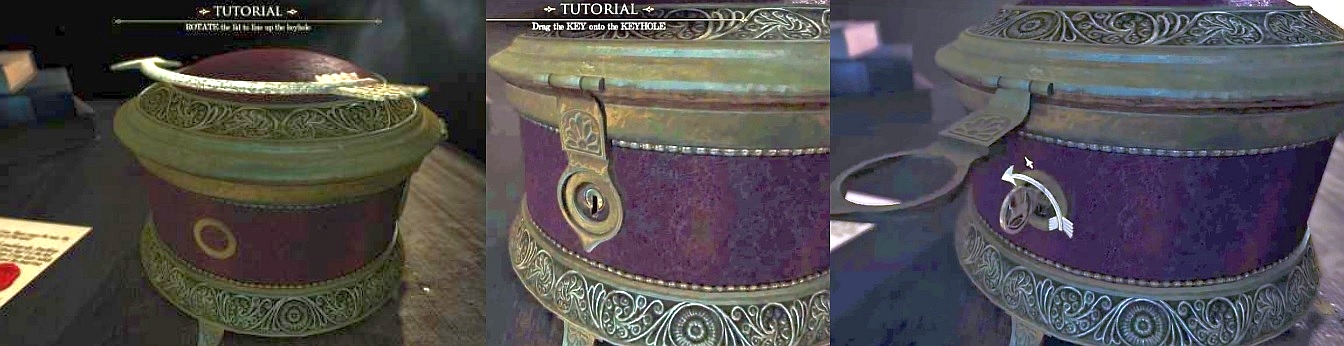
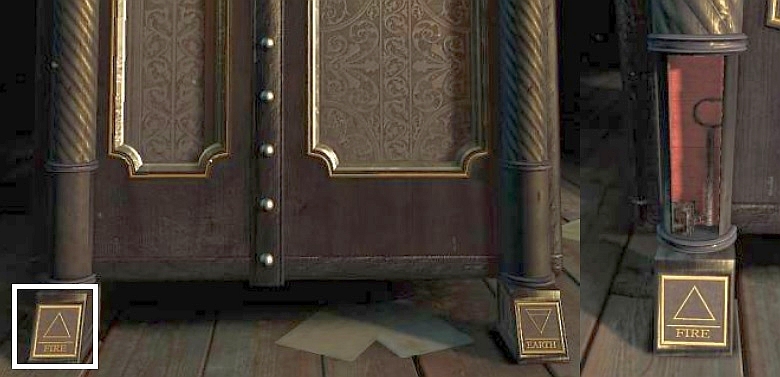
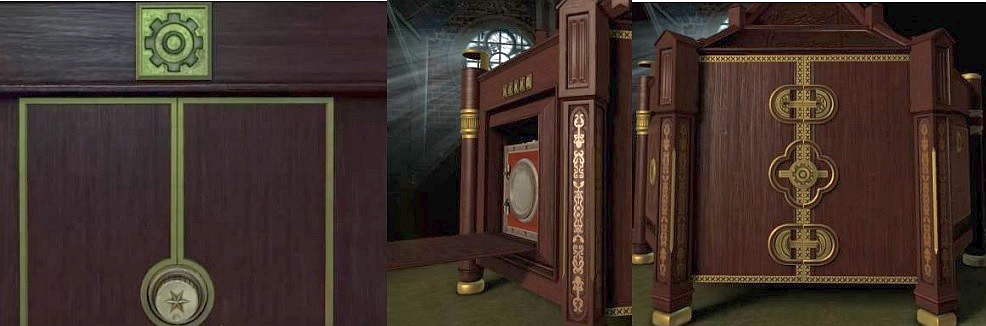
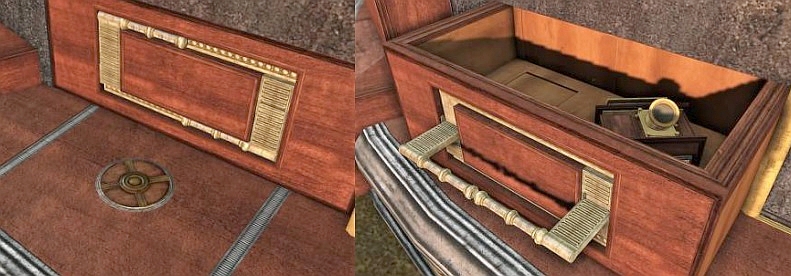
Right click to zoom out. Click and drag with the safe until you have the left
side in sight and then look at the bottom of the safe to the left leg. There you
see a plate with the word FIRE on it. Zoom in on that plateand click on it and
above the plate a hidden space will open. Here you will find a key, take it.

Look at
the middle of the cupboard on the same side, from the bottom to the top you see
a row of rivets.

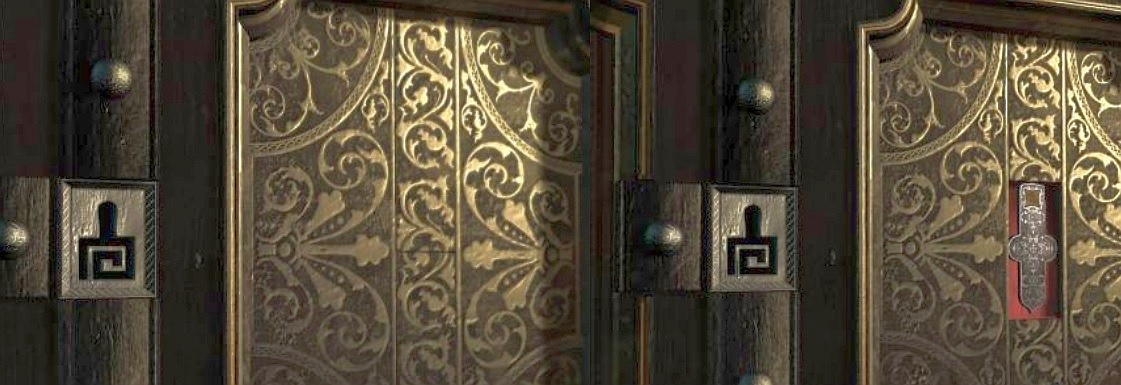
Double
click on the 4th from above rivet and you'll see that you can slide it to the
left, so do this. You now see a strange keyhole. Now drag the key there, it may
be that your key does not fit. Then click on the key and turn the beard over.
Zoom out again and try again. Turn the key, into the keyhole, and ............
on the right-hand panel, opens a compartment. Take the silver-coloured plate
that hangs in in there.
Zoom
out and go to the back of the safe, there you see a nameplate. Zoom in on that.
On the right side of the plate you see a star screw, now drag the silver plate
here.
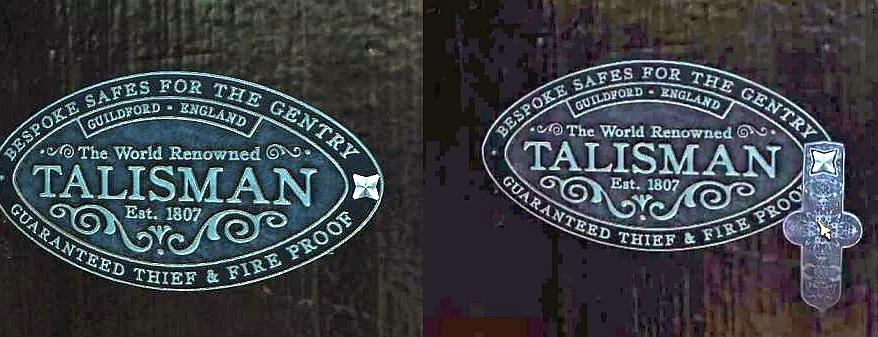
Now click on your magic eye
and you will now see many hidden messages.

By
clicking on the eye againyou see normal again. Now go to the front of the safe.
There you see a plate that you can slide to the left, do this and ..... you see
another strange keyhole. You now have to change your key, click on the key and
twist the beard of the key so that the key fits into this keyhole. Zoom out and
drag the key to the keyhole, turn the key around and the round slider below
opens.
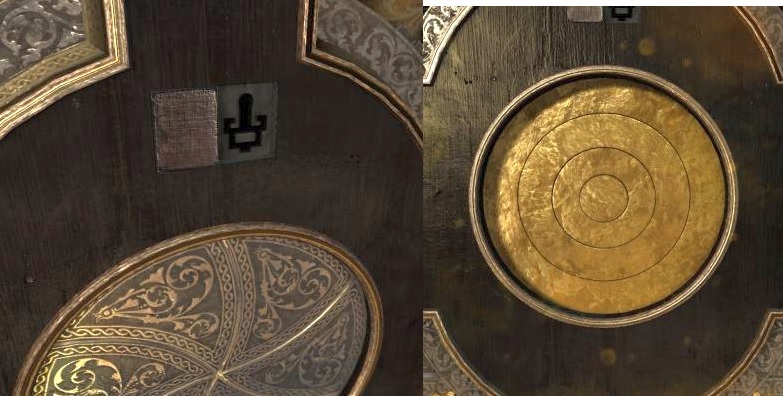
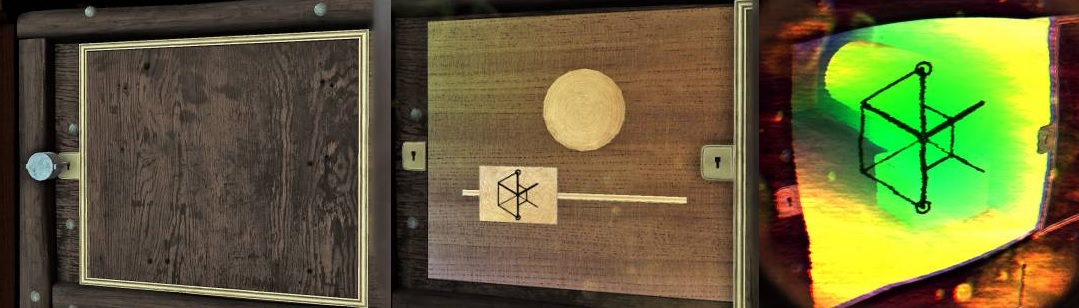
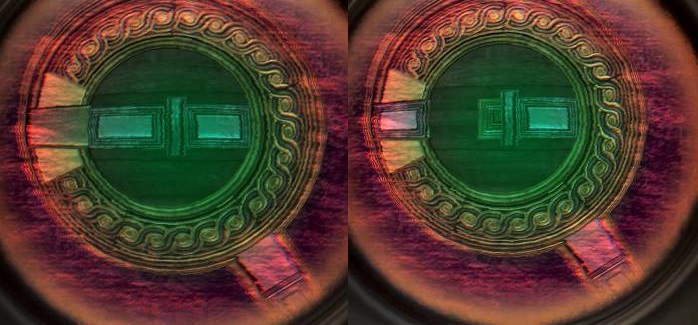
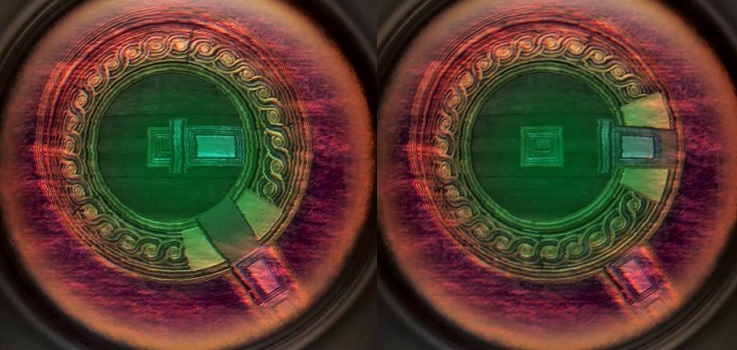
Click
on your magic eye and you will see a lot of stripes, you have to make a pattern
of that. The middle piece is stuck and is correct.
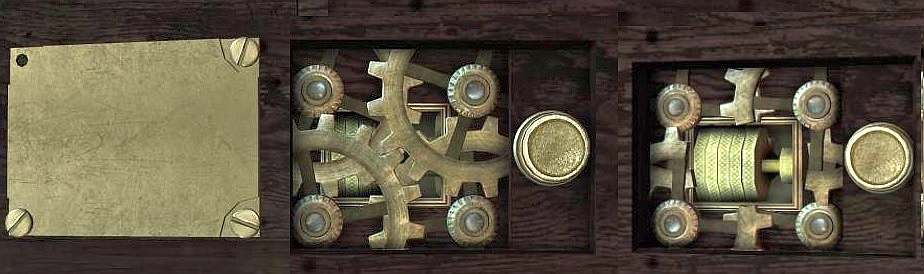
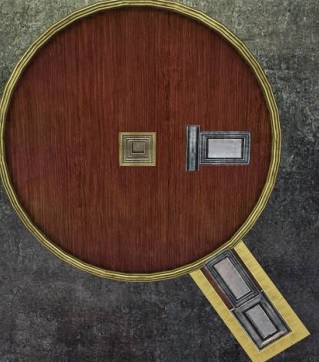
You
now have to set the rings well from the inside out. It should look like on this
picture
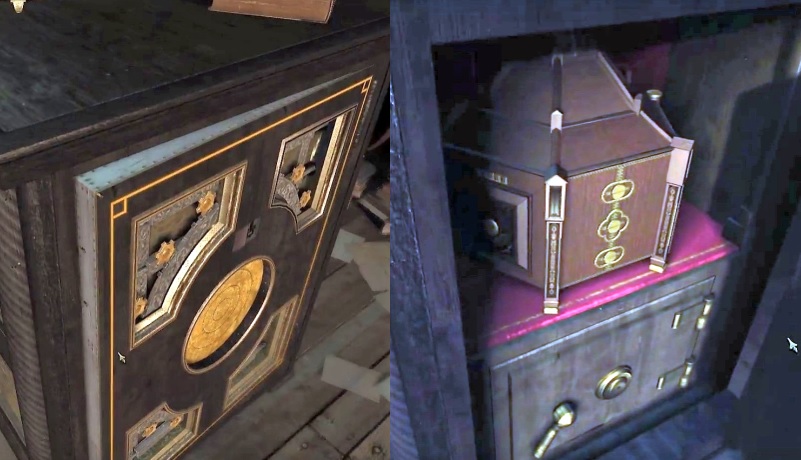
Chapter
2
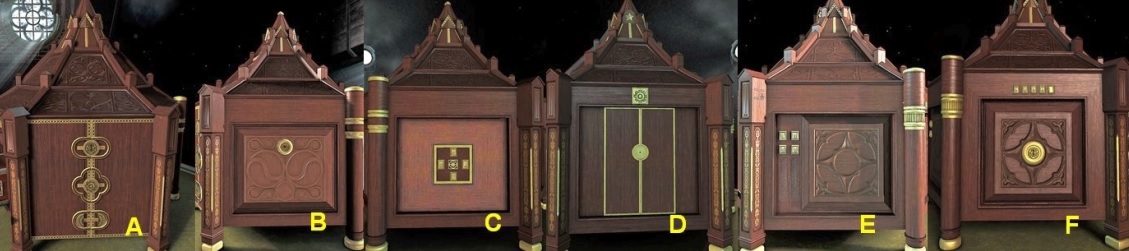
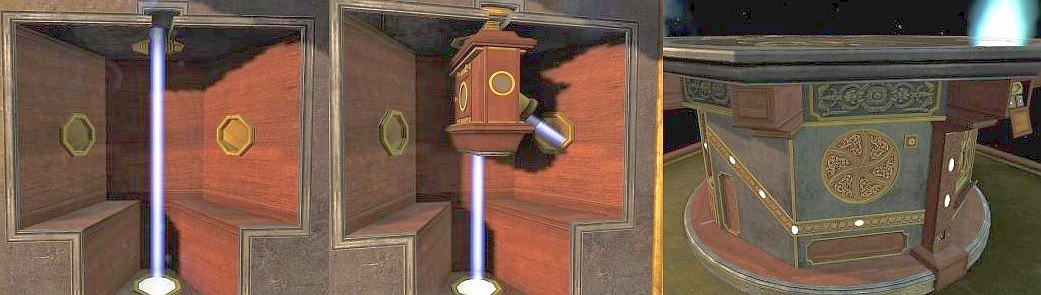
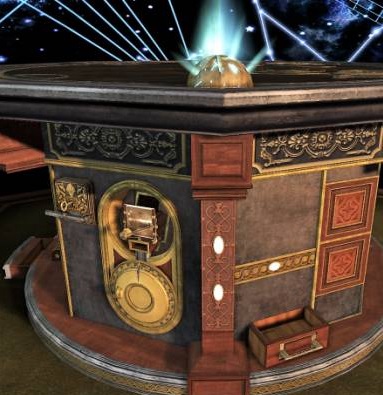
You
see a 6-cornered cupboard on the table, at the front you see 3 locks that you
should get open. Name the 6 sides of the cupboard A to F, clockwise.
Zoom in on that leg and
click in the middle on it, a small board slides up and a book comes out.

Click
on the book and that is in your inventory, it is a book with a strange lock.
Click on the book and it is in the centre of your screen.

If
you now look in the secret box where the book was, you will see 3 dashes and a
symbol at the top right. Go to the cupboard side with the 4 buttons(E). At the
top left of the leg you also see 3 dashes and a symbol at the bottom right. Go
to the cupboard side with the 3 locks(A) and then to the top of the box, there
also see 3 dashes and a symbol at the top left.
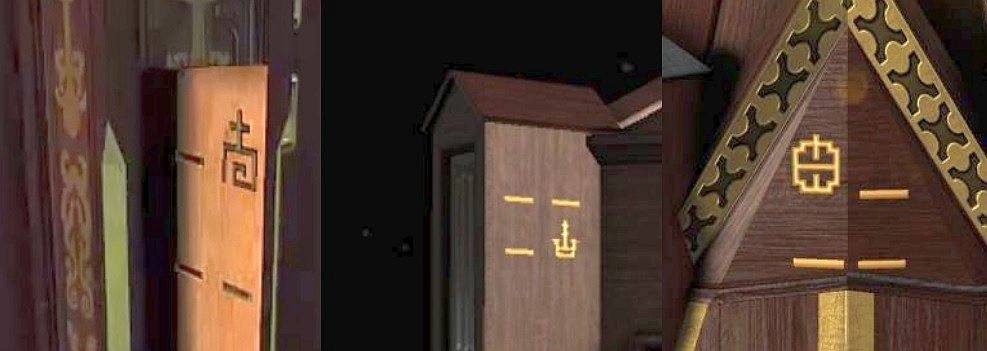
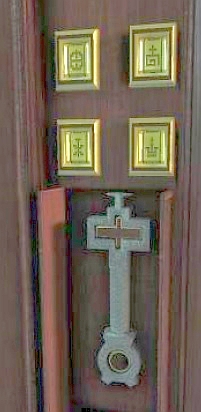
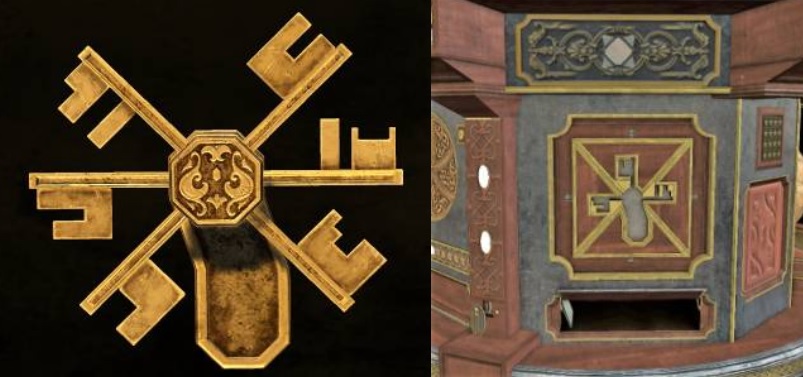
Go
back to the side with the 4 buttons and click on the 4 buttons. There are
symbols that you can twist. 3 symbols you have already found,
for the last symbol you just have to twist the symbol. These are the symbols
that you have found, place them on the correct spot and now move the symbol at
the bottom left. If the correct symbol is there, a door will open underneath. In
it you will find a strange key, take this key.
Go
to side C and you will see 4 number roles in a cross. You can twist these roles
but which code?

Look
with your magic eye at the 4 digit rolls, you will now see a green block with
half numbers around it. Turn the block and from the right angle you see 2
digits, on top 2 and on the right 7.
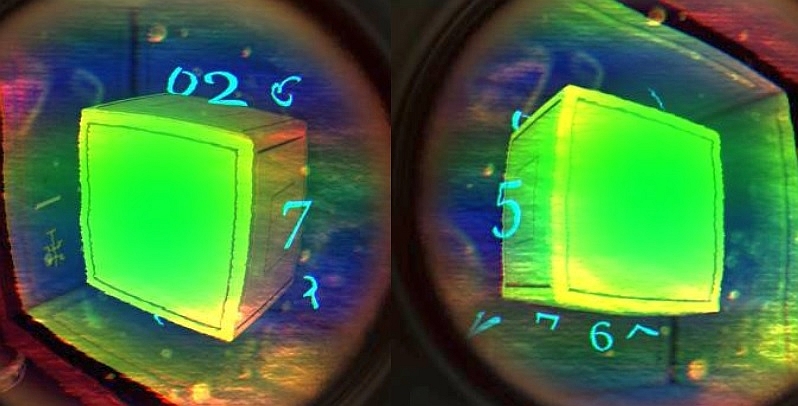
Click your magic eye away and fill in the numbers, a hatch now opens in the
middle. Pull the switch.

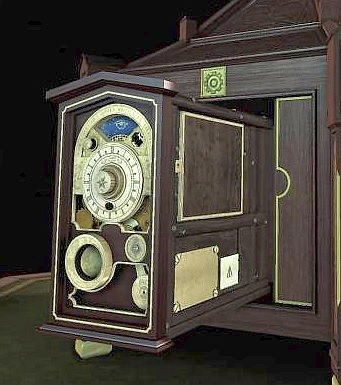
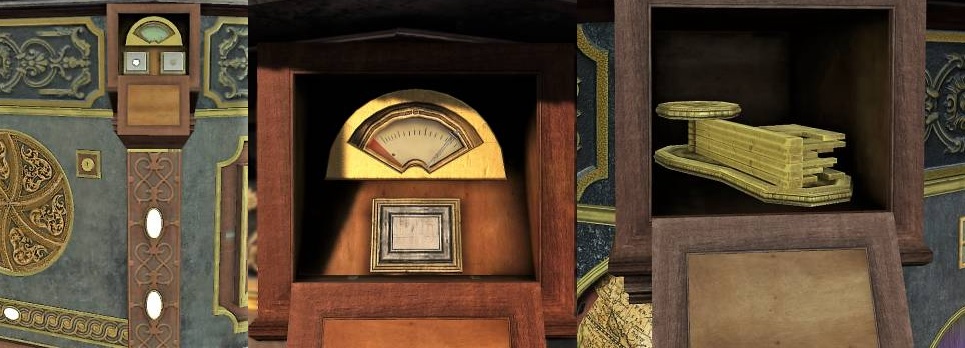
At
side B, a device now slides out, but there are still a few parts missing.

On
top of the device there is a note, read it and zoom out (2x). Then zoom in on
the left side of the device. You will see a hatch that is closed with a hook.
Drag
the hook up and the hatch opens, here you can insert the key and turn it over.

That
does not make much sense because there are more things missing. When you wind
the key, a disc will rotate at the front. You cannot see anything because there
are still more things missing. Zoom out and zoom in on the bottom of the right
leg, you can turn it and you will find a piece of wick. Take the piece of wick
and zoom out, zoom in on the right side of the device.Take the piece of wick and
click on the burner. On the left you see a wheel, click and drag this wheel down
and the wick is lit.
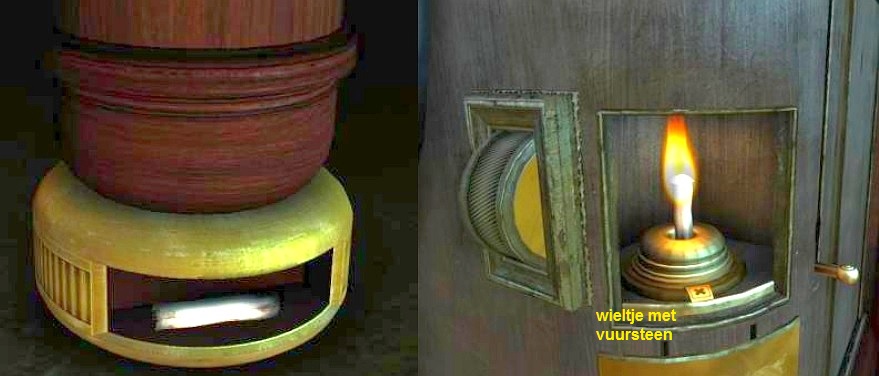
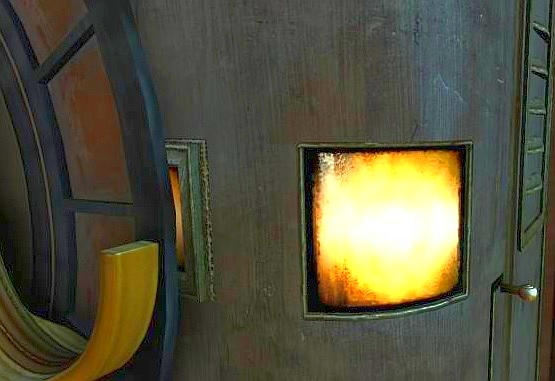
To
the right of the flame you now also see a pawl, which must be raised and then
pushed aside. The flame is pushed up and there is light.
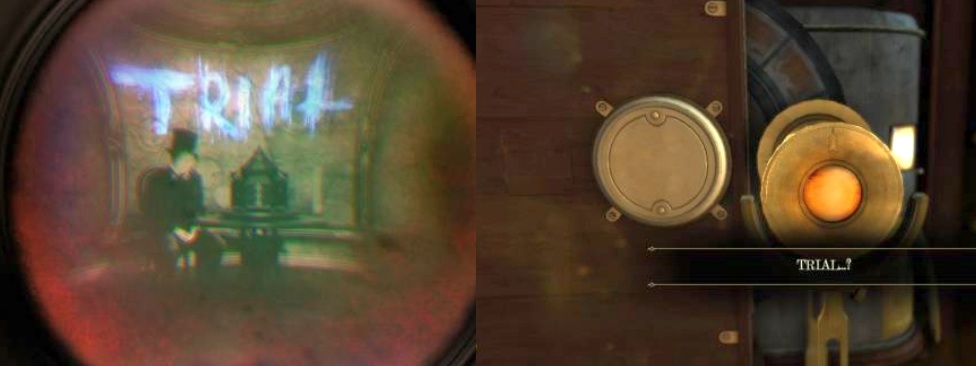
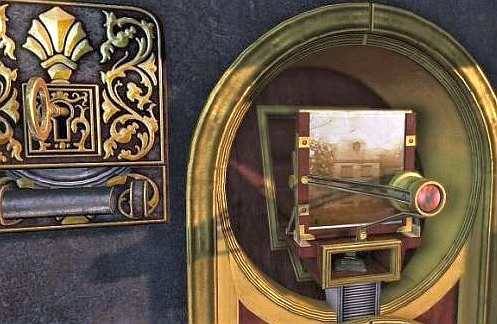
Now
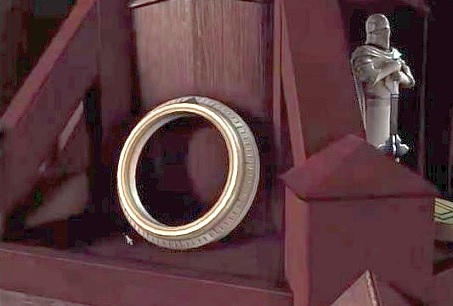
you need a lens to view the pictures. Now go to the leg between side E and F,

Click
on the brackets and then drag the telescope towards it, you can now double-click
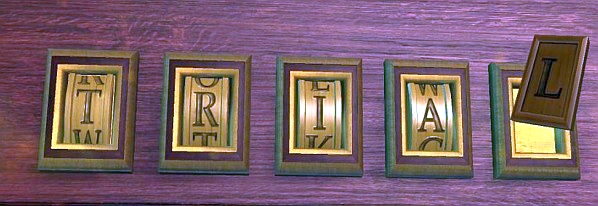
on the lens and you will see pictures but you will not be wiser.
Click on your magic eye and double click on the lens, you will see that picture
again but now you will also see a word: TRIAL
Click the message away and the plate to the left of the telescope will open. You
can put this right without and with your magic eye.
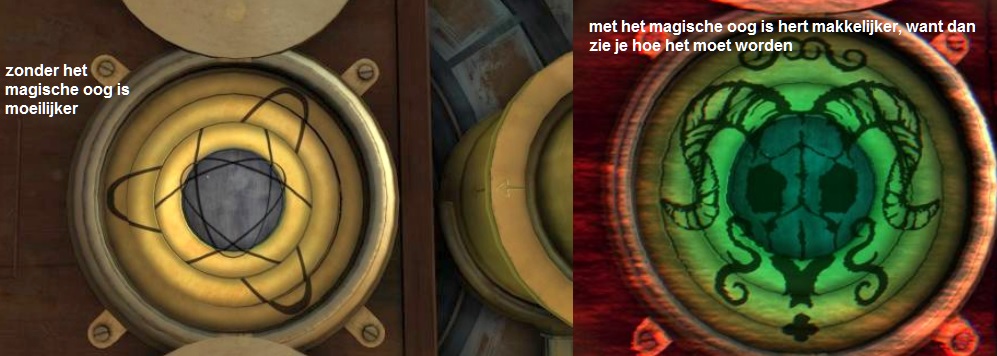
You
have to turn the rings to get it right, with the magic eye it is easier because
of the picture.

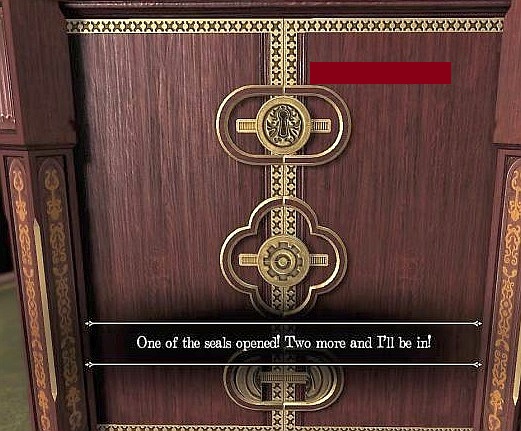
Still
2 to go. Side F now opens and another device slides out.

Zoom
out and look at the top of the device, you will also see a note again. Read
that. Zoom out and zoom in on the top of the device. Drag the slider to the
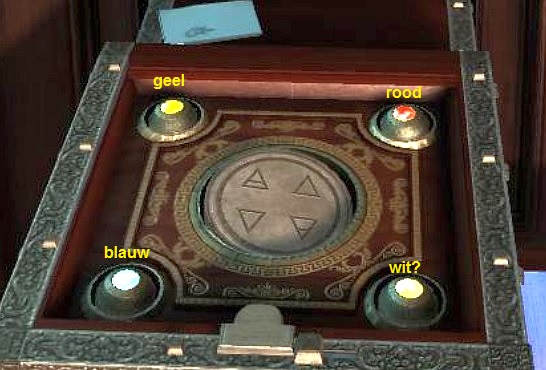
left, the lid opens.

Now, by moving the middle circle, you must ensure that the eyes of the four balls are facing upwards.
If they are in correct position, they will light up, you have to
put them right 1 for 1. Then a plate slides out on the right side.
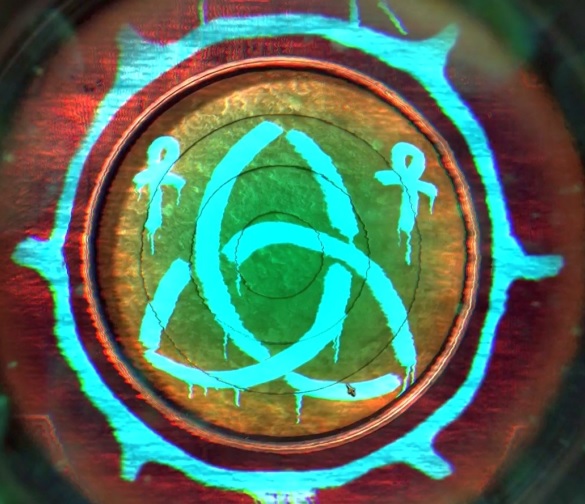
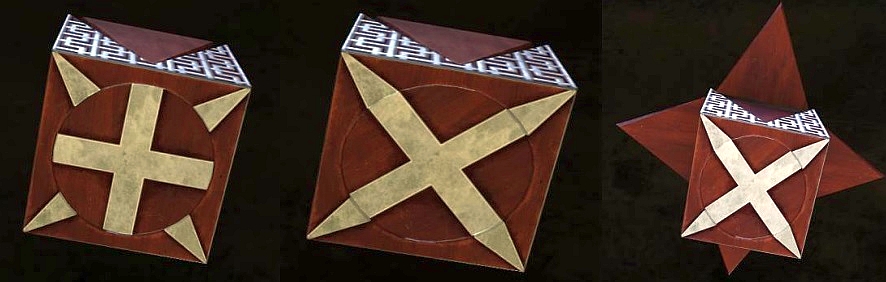
You see a coloured background with a drawing on it. Click on your magic eye.
You see
that drawing as a hologram and in pieces. You now have to drag and rotate until
your drawing is complete.
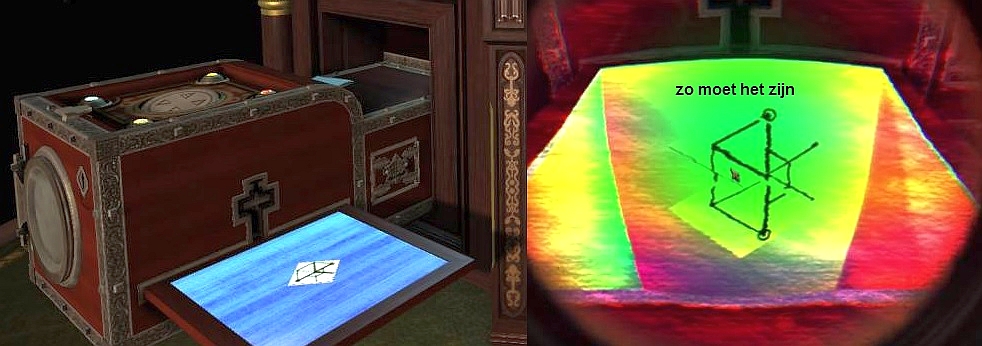
In
the correct angle you see the complete drawing.
The plate then turns white and disappears. You now see a keyhole. Now
drag that strange key from your inventory to that hole, click on it to rotate
the key. The plate slides in and to the right of it a little drawer unlocks.
Double-click to zoom in and pull the drawer open. Inside is a key, pick up the
key. Zoom out and zoom in on the front of the device, there you see a keyhole.

Take the star and then remove the message, the door closes automatically
and the keyhole changes.

Go to side D and then to the top of the cupboard, there you see a star. Now drag
your star from your inventory here. The top
opens now, you see a note. Read this.
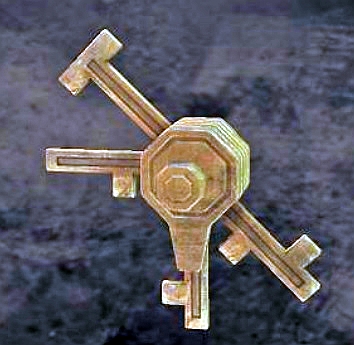
Turn
the spire around and on side A you will see a ring, take this ring. It is a ring
for a combination lock.
You
saw such a lock on the left side of the device on side F. Drag the ring to it,
the ring clicks on it and in the middle above you see an arrow.
·
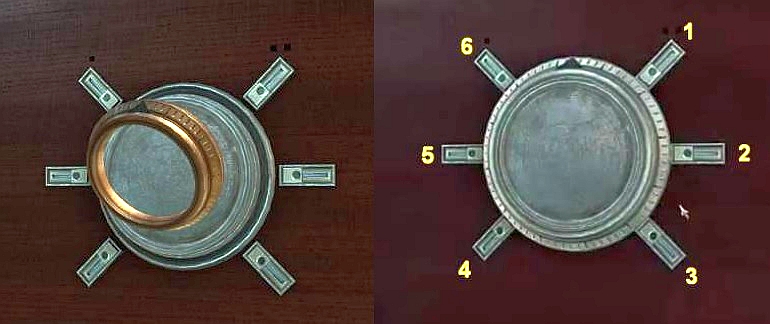
Around the lock
there are 6 sliders that you have to release, this must be done in a certain
order. Number the sliders 1 to 6.
·
Turn the ring
first left to 6 then right to 1 and 2, back left to 5. Then right to 3 and then
to 4.
·
The safe moves
outside but which code. Zoom out and then zoom in on the note. Click on your
magic eye.
·
You see a 2
with dashes to the left and a 5 with dashes to the right, this is the code for
the safe.

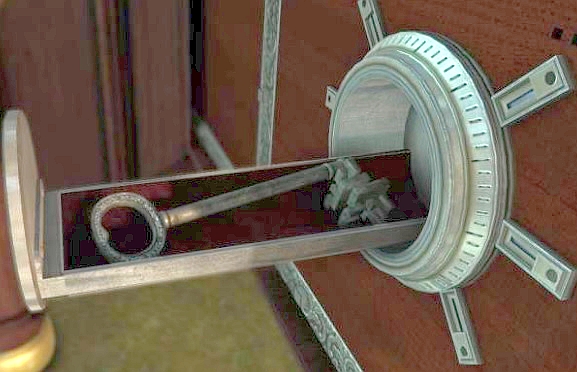
Go
to the front of the device, zoom in on the keyhole and drag the key towards it.
The key does not fit, you have to adjust the key.

Put this well and then drag it to the keyhole, turn the key over. The safe will
open again and you will find a round button there, take it.
Drag
that button to side D there is an opening in the middle for this button. Side F
closes and a second lock openson side A.
A device emerges from side D.
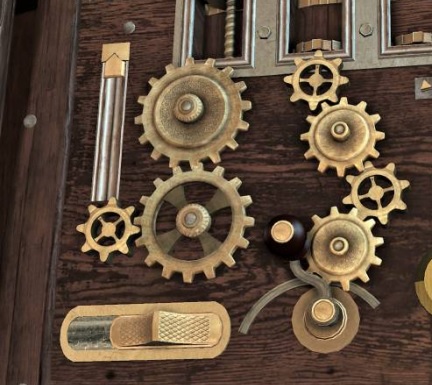
Go to the left side of the device and zoom in on the gears. You miss a few gears
but there is one part that still works. At the bottom you see a slider, turn it
to the left. A small gear is moved and can now drive a larger wheel. Turn the
handle and a pin is turned up, you zoom out and you see that the tip of the roof
is rising.

On
side C you see a drawer only it does not open yet ........ you have to put the
corners well.

You
have to twist these corners somewhere else, 1 is in front of a knight at the top
of the spire, on the leg to the left of the device is 2. At the bottom of the
left side of the device is 3 and on the other side of the device you see 2
plates at the bottom , you have to have the plate with the 3-angle. You have to
drag that plate up and then very quickly turn the knob because the plate comes
down again.

On the screenshots here you see how the knobs must be rotated. If they are all 4 correct you can pull the drawer open.
Inside you will find a larger sprocket and
an elastic band. Take the gear and the elastic band.
Go
back to the left side of the device and zoom in, now drag the new sprocket above
the other large sprocket. Turn the handle again and in the left-hand box a wheel
is turned up ....... on the left a hatch opens and there you will find a
screwdriver. Take the screwdriver.

Zoom
out and go to the other side of the device, there is a plate with screws. Zoom
in on that. Drag the screwdriver to one of the screws and unscrew it, if the
screw is removed the screwdriver will be back in your inventory. Then, drag the
screwdriver to one of the other screws and also loosen it. Do this with all
screws. The plate falls off and you see a few wheels turning, behind them is
something hidden. Press the button to stop the wheels.
Take
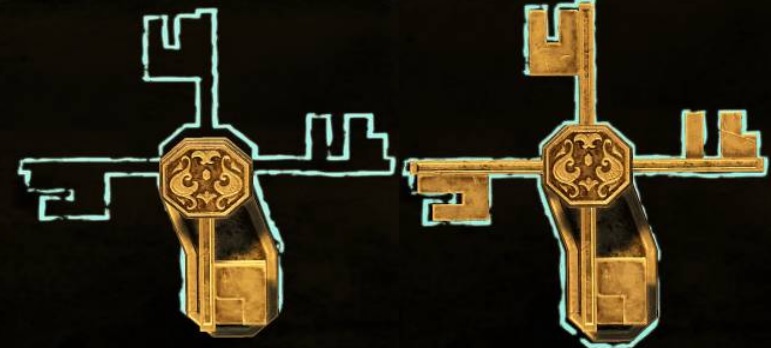
the thing out, it turns out to be a key that you can fold and adjust.
Zoom
out and go to side E in the roof section you will find a keyhole. You have to
adjust the key. Click on the key and twist the beards.
If
they are standing properly, drag the key to the hole, a drawer slides open and
you will find a medium gear.

Now
a couple of things are moving at the front. At the bottom you will find a gear
again. Take this wheel too.

Go
back to the other side and take back the last wheel, you now have 2 medium
wheels in your inventory. Now drag those wheels 1 for 1 to the right under the
right-hand box. You can turn the handle, but the upper wheel does not rotate.
Now drag your elastic band to those wheels and that now connects the wheels
together.

Turn
the lever, the right box is activated. You zoom out on itself and you turn to
the front. Now to the upper part of the device.
Press
the button on the left and the blue disc with star signs will rotate. when it
stops, you will find a tube there, take it.

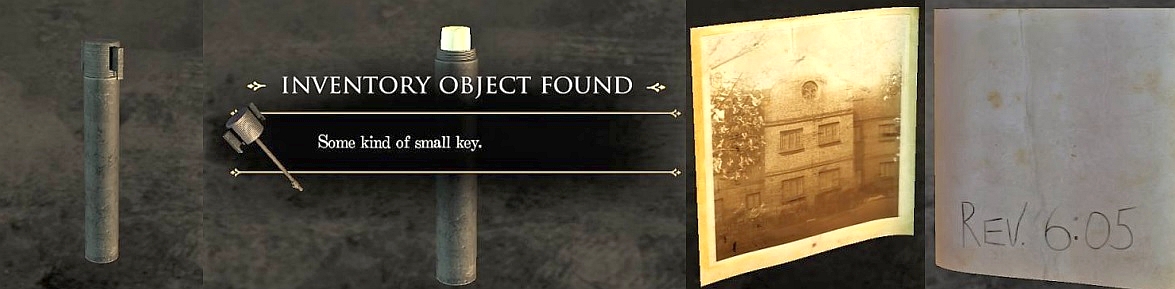
Click
on the tube in your inventory, which comes in the middle of your screen. Then
click on the cap of the tube and drag it up. You then have a narrow key. You
also see a piece of paper sticking out that tube. Also drag this up. It is a
photo, turn it around and at the back you see a time: 6:05, you only miss
clock-hands.
Zoom
out and go to the right side of the device, there you see a plate with a small
keyhole. Drag your small key here and turn the key. This is another slide and
pivot puzzle. Click on your magic eye.
Turn
and slide until you have the drawing complete,
a flash and you get a shield.

If
you put it in the right place the knight turns and you see a blue gem, take it.
You see a hole in the middle of the dial, drag the blue stone to it.
Zoom
in on the middle and use your magic eye. You will now see 2 clock-hands. Turn
the knob and set the hands to 6:05.

Puzzle
solved, the device disappears and the third lock opens.

The 6-cornered cupboard opens and the new chapter begins.

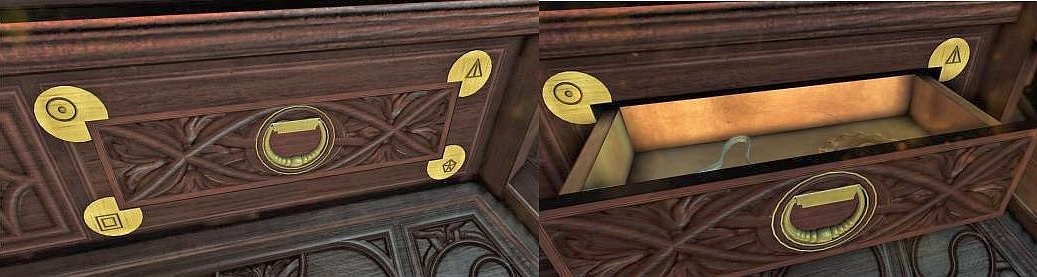
Chapter
3:

Turn the box around looking for an oval nameplate, you find this on 1 of the support poles at the bottom.
Move the nameplate to the left, this will drop down and
behind it is a slider hidden. Put this slider down.
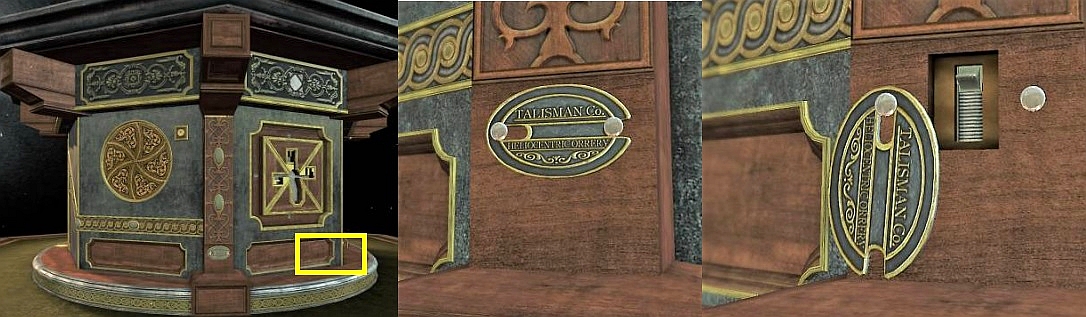
On the right of it a hatch opens, behind it is a note, read this. There is also
a box.
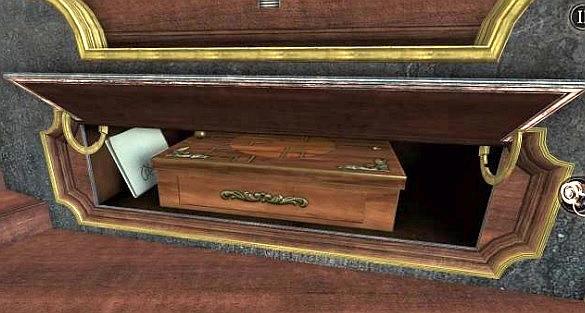
Click
on the box and it is in your inventory. Click on the box to get it in your
screen.
You have to solve the puzzle, the golden ball has to go from left to
right. You have to do this by sliding the ball up and down the circle. In
between you have to turn the circle and so you can ensure that the ball is on
the right side. Slide it to the end and a drawer openswith a key in it, take
this key.

Zoom
out and look for a keyhole, you'll find it next to a large gold disc. Drag the
key to it and turn it over, the steel pin below it slides to the left.
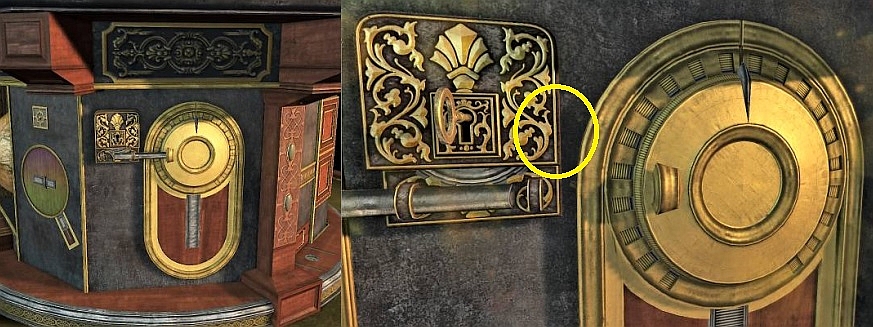
You
now see a large safe lock, you have already opened such a lock before. This
works in the same way. First 5 sliders on the left then 4 sliders on the right,
the rest on the left and then the rest on the right. The lock slides down, you
see a kind of projector.
You now see the interior of the
house and finally you see a word: SIGIL.

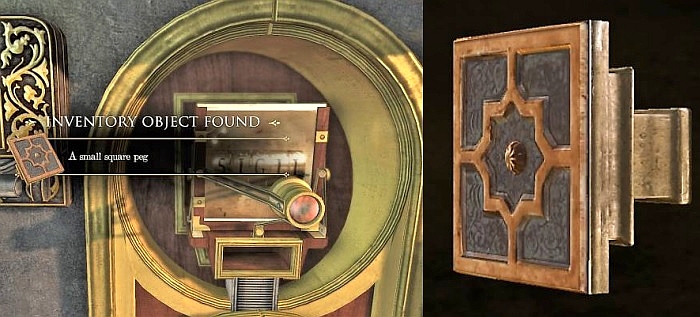
By
itself you zoom out again, look under the lens, you see something lying in a
small box. Click on it and you have a square knob in your inventory.

You
see a space at the top of the circle, turn it to the left. You can now slide one
of the sliders on the round disc.
Now
turn the round disc further to the bottom right and slide that piece out.
Click your magic eye away and you will see an opening in the middle of
the round disc. Drag the knob to that opening.
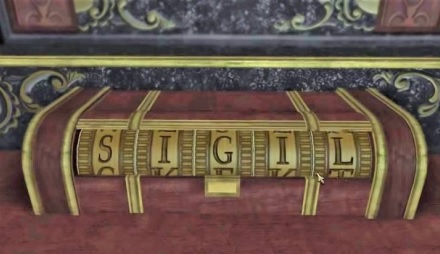
You can enter letters here, enter SIGIL here. The box closes and a
drawer slides out underneath.
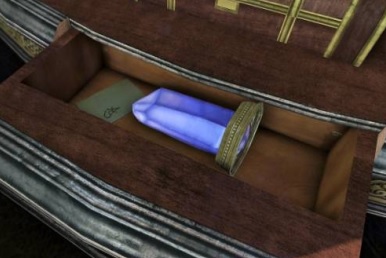
There
is a note and a large blue crystal, read the note and take the crystal.
Zoom in on it and drag the crystal to that disk, the
crystal slides in and you see a ray of light coming up.

You still have to focus this beam, turn the big ring on top of the box to the left just as long as you zoom out by yourself.
You will then see a hatch open with a
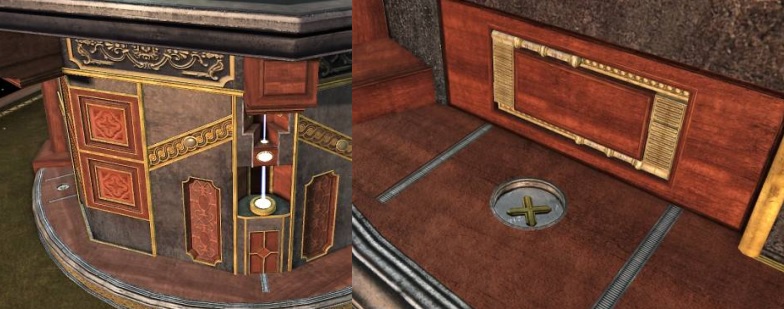
round disc behind it. Grab this disc.

Where should you put that disk now? Zoom out and look to the left and there you see a round opening at the bottom of the floor.
If you do not see it, you have to turn
the box. Zoom in on that hole and drag your round disk here.
The
disc rotates and a handle folds forward, pull the handle to open the drawer. You
will find a device to reflect and deflect light.
Drag that thing towards it, the light is now
transported to the right via a number of lights and goes to the top.
There
is a open hatch and there you see a meter and two buttons. If you press 1
button, you will see the meter swing out and slowly back down, that is, you do
not have all the time. There are 8 buttresses, if you press the right button you
have to turn the box around quickly, on one of the other buttress a lid is now
open with a button and a meter.
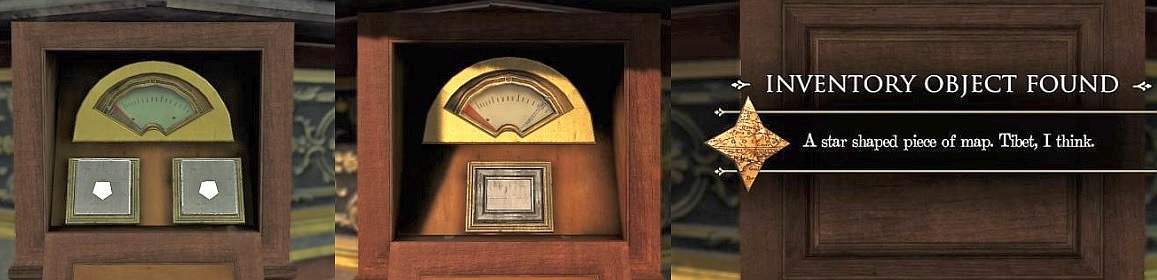
You
now have to press that button and look for the next cover, there you will find
another button and a meter. Press this again and you will find a cover where you
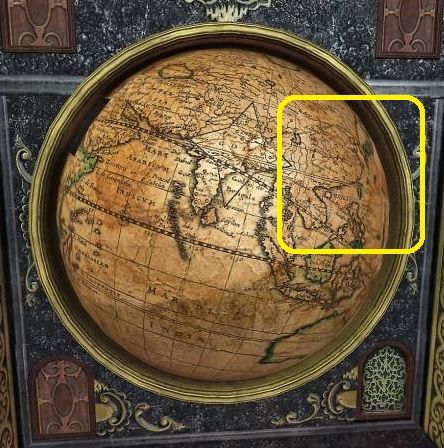
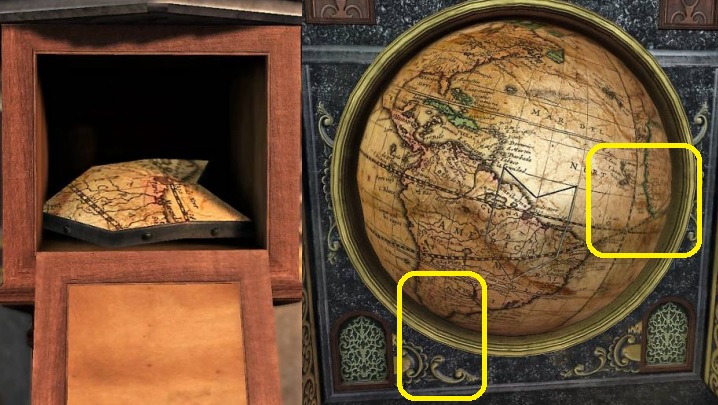
can find a part of your globe. If you are too slow you have to start again. Zoom
out and turn and zoom to the globe, twist the globe until you find the place
where your piece fits. Drag it to it, in the bottom right corner a panel turns
around.
Turn the cupboard around and you'll soon find a
side with a large keyhole with 4 beards.


The
light beam is now also reflected to the left. Follow the lamps to the left. You
come to a cupboard with a pair of reflectors and a slider below, above and to
the left, click on your magic eye and you see a narrow beam of light. You now
have to play with those sliders until the beam goes around a number of times and
finally the beam reaches an eye on the left. Now the beam is forwarded.
You can now see everything on the ceiling and the walls,
constellations and the like.
Take the piece and zoom out, turn to the globe and find the place
where the piece fits. Drag the piece towards it and at the bottom left a panel
rotates.
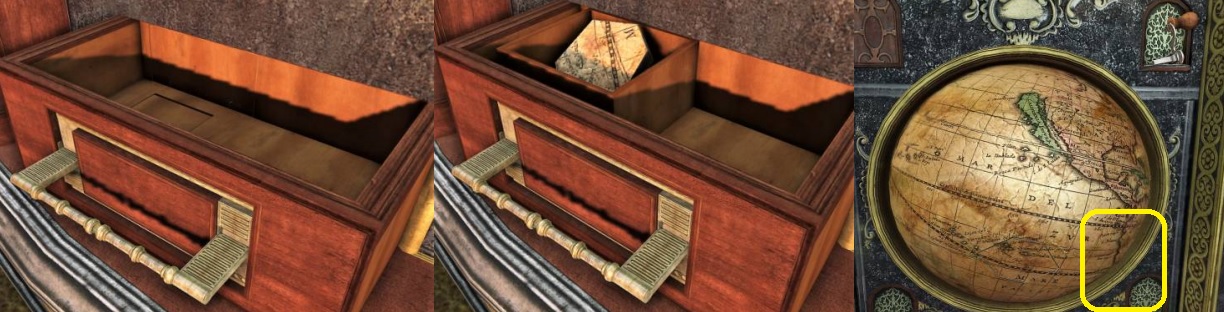
Go
to the drawer on the right of the safe, zoom in on the bottom and there you will
see a box. Click on it and a secret drawer opens. Here is a 6-angled piece of
the globe. Take that piece. Zoom
out and turn to the globe. Find the place for this and then drag it to it.
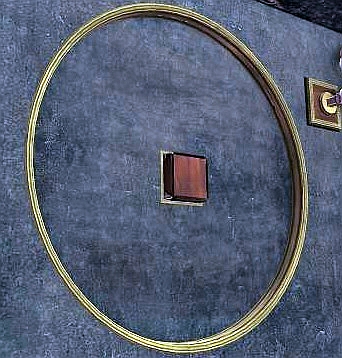
The
small panel at the top right turns around and there is a pivot lever. Take the
handle, it has a 4-sided pin. Turn the box around and you will see a side with a
nice circle, to the right of it you will see a place for that handle. Drag the
lever towards it and then turn with the lever.

The
circle opens and you see a wooden wall, click on your magic eye and you see that
you have another twist and drag puzzle here.
You
can rotate the whole image and move up and down, but you can also rotate the
round disc in the picture.


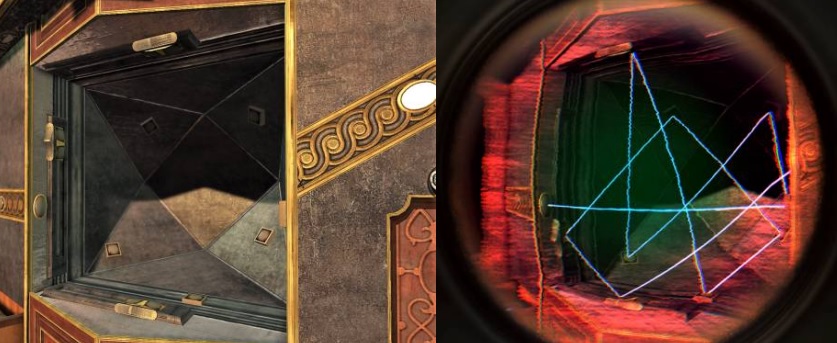
Double
click on the telescope to zoom in on it, you will see through the telescope a
cross with 6 lights and thin lines that forms squares. Click on the drawing to
zoom out. Go to the plane to the left of the globe. Zoom in on the square with
the 16 stars, you just saw 16 squares and 6 lights through the telescope. You
now have to click on the stars in the pattern of the drawing.
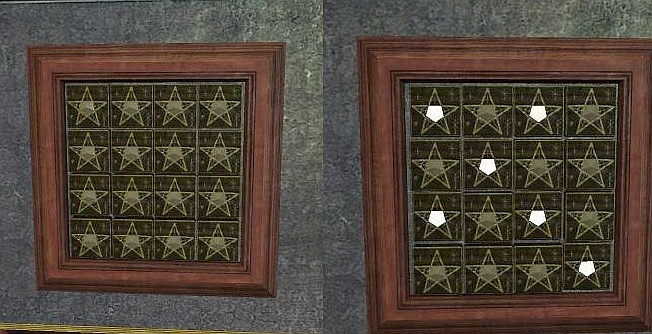

Then
drag this piece towards it, the last panel turns around and a handle comes down
from the buttress.

Pull that lever down and you will see the top of the cabinet change and become
bigger.

You
end up in:
2019:
Walkthrough by: Dick Leeuw
Layout
and publication: Louis Koot