2019 Walkthrough by: Louis Koot
If you have found this walkthrough via google search or via another site then you have probably not visited my site.
A lot more very detailed game walkthroughs can be found on my site at: www.pcgameswalkthroughs.nl
Good or Bad Choices.....
At several moments in the game you will be asked to make a moral choice. The choices you make determine whether you will experience the good ending or the bad ending of the game. If you want to get the "good" ending, you have to make all the "right" choices during the game. If you make 1 wrong choice then you will not achieve the "good" ending. The difference in the "good" ending and the "bad" ending is not another, and better, final movie, but it is in the "reward" that you will eventually get.
If you want to experience both endings once, then you play the game once and do all the morally right things, to get the "GOOD" ending. Then you can start the game again to play it again, from the beginning or from a previous save game, and then you make 1 or more "wrong" choices to get the "BAD" ending.
I do not give a shit about a "good" or a "bad" ending. Actually, I think a "bad" ending is often more fun than a "good" ending. But if you are a person who thinks of himself of making always the morally right choices then by all means....make all the "good" choices in the game. I'll bet you that you'll be disappointed about your reward you get at the end of the game, that is.....if you ever reach the end. During play you will now where and at what time you have to make the above mentioned choices. I will mention this in the walkthrough, but I will not make a "Good" and a "Bad" walkthrough for you.
I also don't give a shit about the STEAM Achievements that you can score throughout the game. I will not mention them. But if you do as I say in the walkthrough then you'll score all those bloody and stupid Steam Achievements
An important thing to know is this.... Via the ESCAPE key of your keyboard you open the menu screen where you can Save and leave the game ......
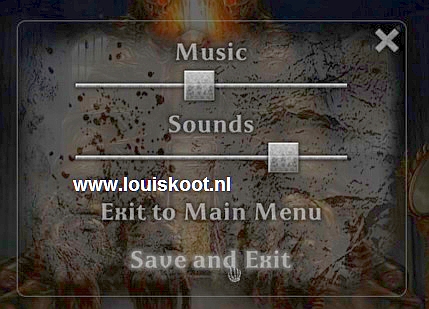
If you want to leave the game, click on " SAVE and EXIT" to save your game where you are..... then when you restart the game click "Continue" to continue where you left off ....
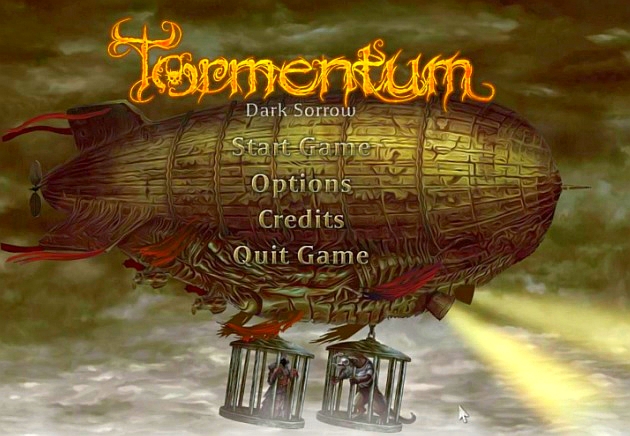
The game begins, as is often the case, with a ......
......... intro.........
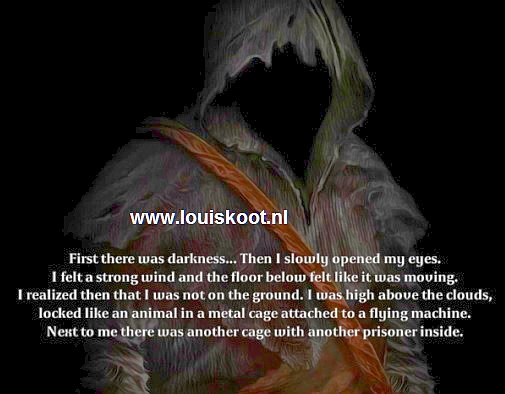
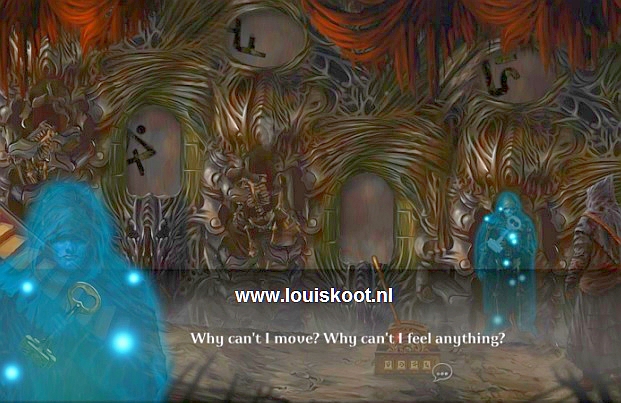
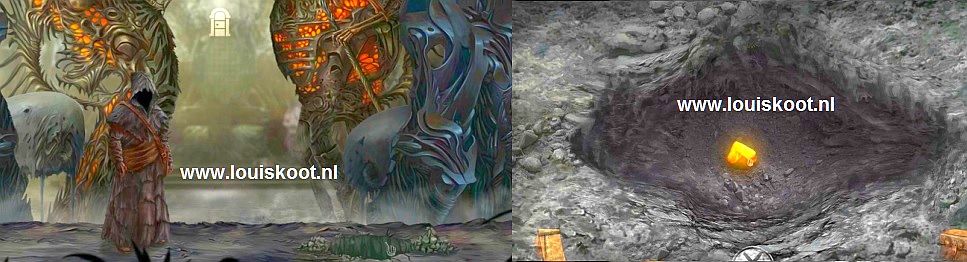
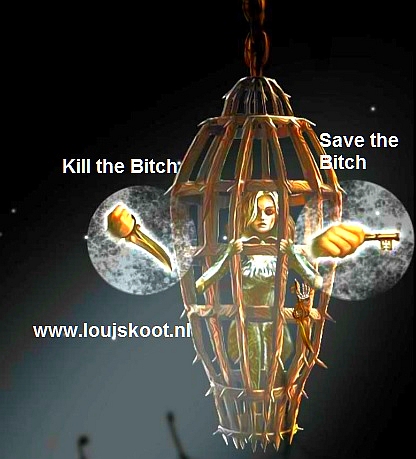
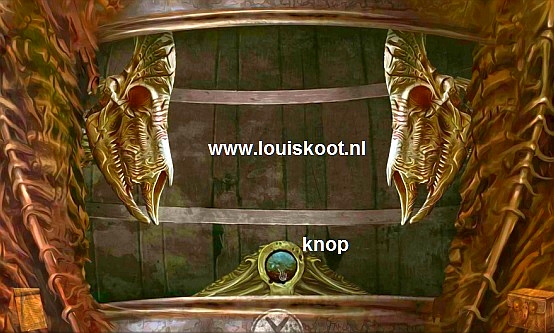
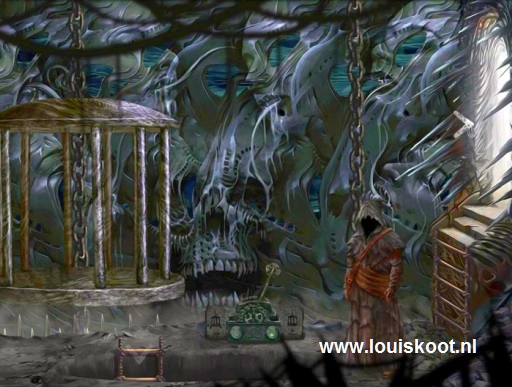
Our protagonist, that will be you, wakes up and, to his horror, notices that he is locked up in an iron cage, hanging under a zeppelin.
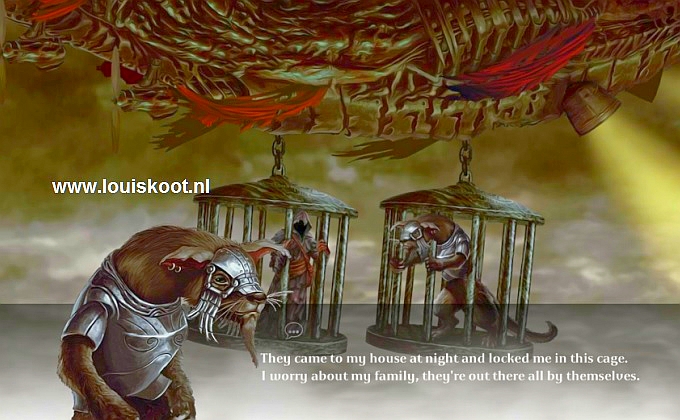
You are standing in the left cage .... you have no face !!! ...... in the right cage is another poor devil and that tells a little bit what is going on .....
You have to click away the text if you want the game to continue, but of course always read everything first.
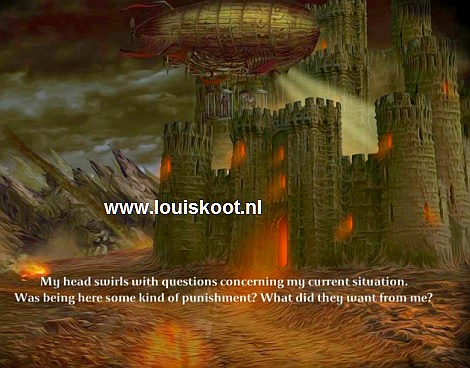
The destination of the zeppelin is unknown. Our protagonist does not know who he is, where he is and where he comes from. The only thing he can remember is some images of a statue on a hill and people's hands that reach the sky. Then the zeppelin arrives at a fairly gloomy castle and .....
..... our main character is locked up in a cell and ...........

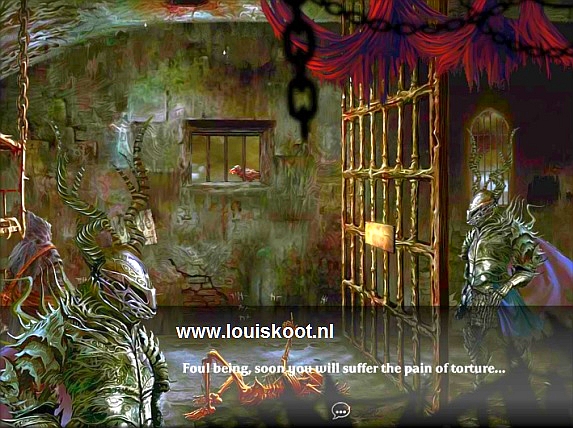
When the guard is gone, you're misery begins .......
Chapter 1: Escape from the Castle
A: Escape from your cell:
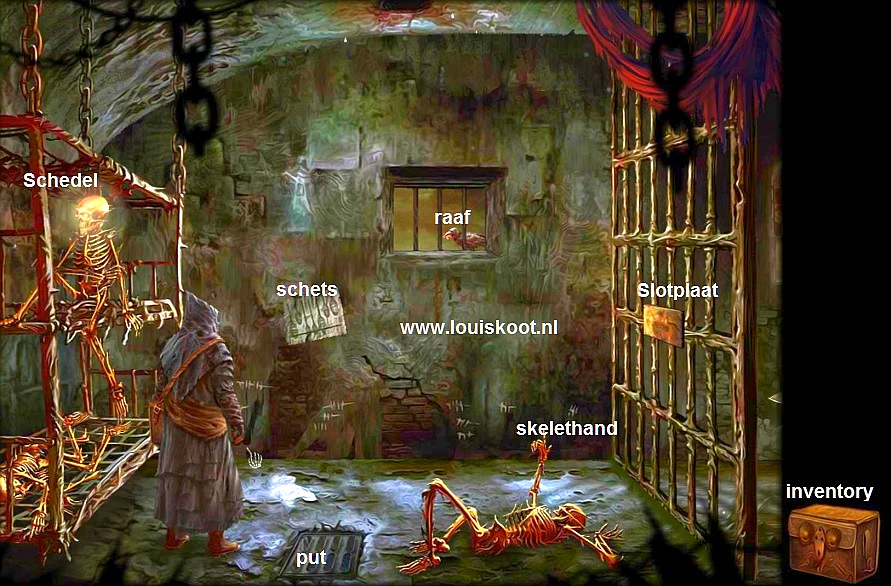
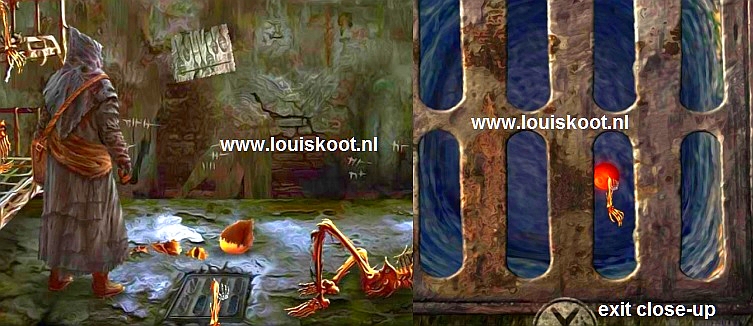
The guard is gone .... You are not totally alone in the cell ..... You are joined by 3 rather skinny cellmates. The 3 skeletons are the remains of your predecessors in this cell .... If you do not want to end up as meager
as the previous occupants of your cell then I suggest that you make some effort
to get out the cell quickly. The crate, which can be seen in the bottom right corner of the black vertical bar, is your storage box in which all the things you pick up are kept for you ..... We
adventurers call such a useful function in a game ...... THE INVENTORY
You will notice that things that you can "interact with" always "light up" ..... that is the "hotspot function" in this game. You will also notice that you can scroll the screen to the left and to the right by moving your cursor to the left or the right edge.
You will have to do this often because often the room in which you are is larger than the play screen. You also notice that you are practically motionless ...... your
can not moved your puppet through the game screen.
To be able to pick up things, you first have to click on them with your skinny hand. You will then enter close-up screens after which you can take the thing. Go and have a look around first. On the upper bed is a skeleton whose skull lights up ... that skeleton has 1 red eye. There is a
hole with a grid in the floor. In front of the cell door there is a skeleton on the floor that
has its right arm / hand up in the air. The cell door is closed and of course rigidly locked. The slot plate protrudes in the middle of the cell door. There is a sketch on the wall. In the wall there is a window with bars ... there is a raven in front of the window and that raven has something in its beak.
Click on the skull of the skeleton that is on the top bed ...... Eh ...... the skull breaks off and falls on the floor and .... the red eye rolls into the hole in the floor.
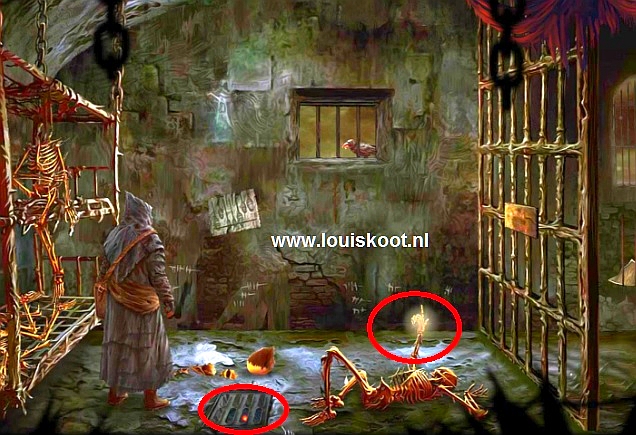
You will soon need that red "eye" in a puzzle, but you can not use your hands to pull out the grid of the pit. Click on the raised arm / hand of the skeleton that lies on the ground and ..... That hand / arm breaks off and then lies next to the skeleton on the floor. Click on the broken off arm / hand and ..... you end up in a close-up of the skeleton and the broken arm ..... Take the skeleton hand
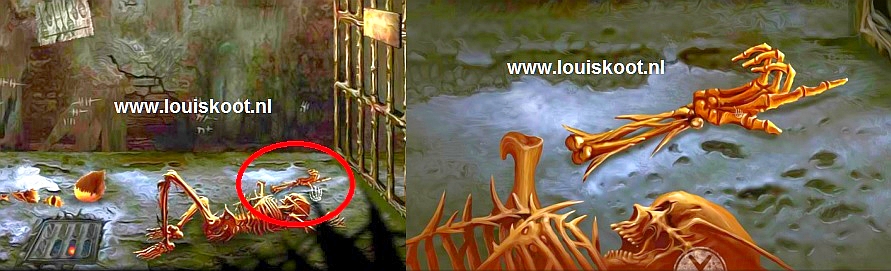
The skeleton hand lands in your inventory box. Click the "V" button to exit the close-up screen. Click on the inventory box and ......
the stuff that you collect in the box are now coming out ..... that is now only the skeleton hand.
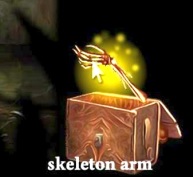
Click on the skeleton hand / arm to stick it on your cursor ....... You have taken the Skeleton Hand out of the inventory ....
Now click with the skeleton hand / arm on the pit / grid .... you get into the close-up of the pit and you see that red "eye" laying under the grid.
Click with the skeleton hand / arm on the red "eye" to fish the thing with the skeleton arm out of the pit the red "eye" ends up in your inventory box. Click the "V" to exit the close-up screen.
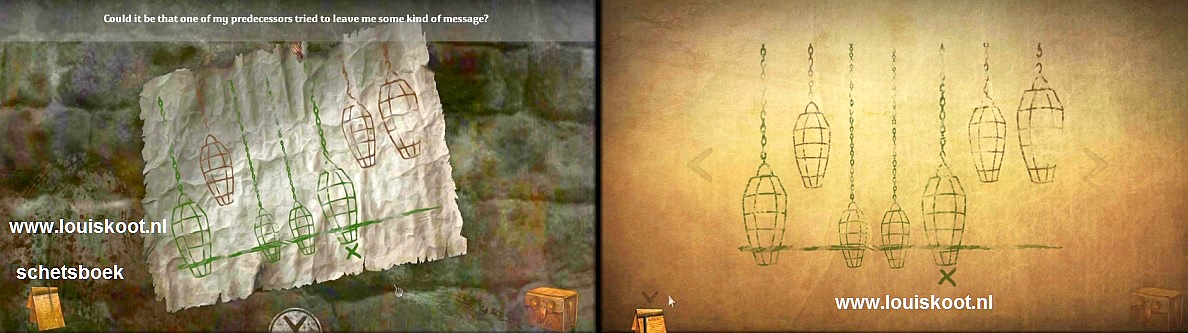
On the wall hangs a sketch ...... Click on the sketch to view it in close-up ....... On the sketch you see 7 cages ....There are. 3 red and 4 green cages. A green X is chalked beneath one of the cages ... You decide that this sketch is important, so you automatically save the sketch in your Sketchbook.
The sketchbook is now also always at the bottom left of your screen. From now on you will automatically save all important drawings in your sketchbook, provided you look at those drawings first. You can always look at your sketches by clicking on your sketchbook. Get out of all close-ups and then go into the close-up of the barred window.
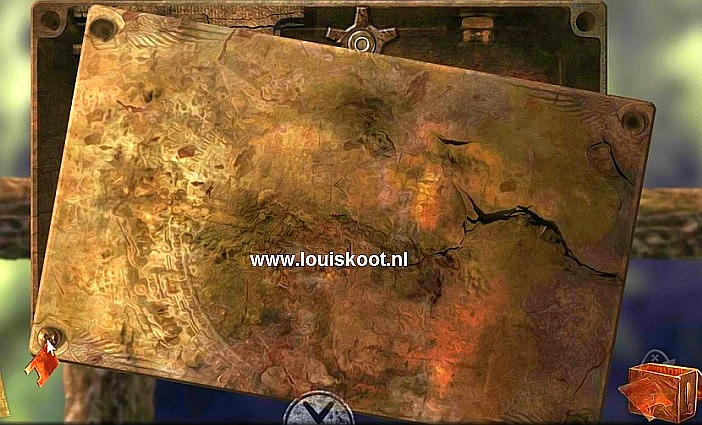
You see the raven ..... the raven has a metal plate in its beak. Take the metal plate ....

Go out of the close-up. Now click on the lock plate of your cell door. In the close-up you see that the lock plate is screwed tight with 4 screws .... a screw in each corner. Open the inventory box and take out the newly captured metal plate. Click with the metal plate on each of the 4 screws to remove them from their screw hole ....
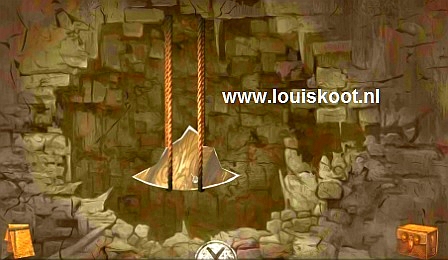
When you have removed the plate, you are in the slot puzzle....It's a cogwheels puzzle:

You have to click the cogwheels, which are at the bottom left, on the right pins so that they interlock and all start rotating, causing your cell door to slide up. Like this...
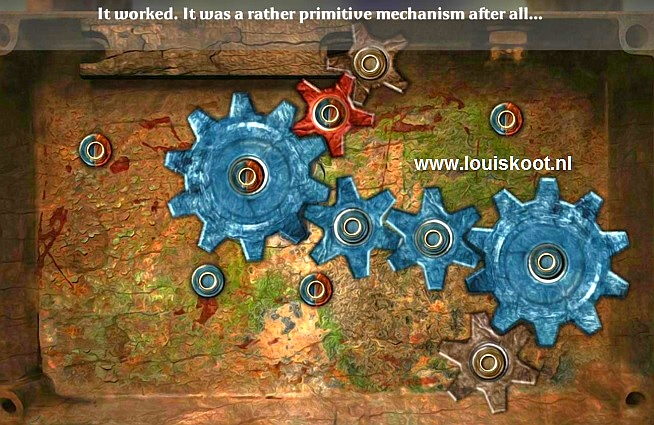
Okay ... your cell door has disappeared so now you can take that mirror shard, which you have greedily stared at all this time but that you could not get because of the closed cell door. You now also get an arrow, on the right edge of the screen. Via those arrows you go to the right, to the left, down or up.
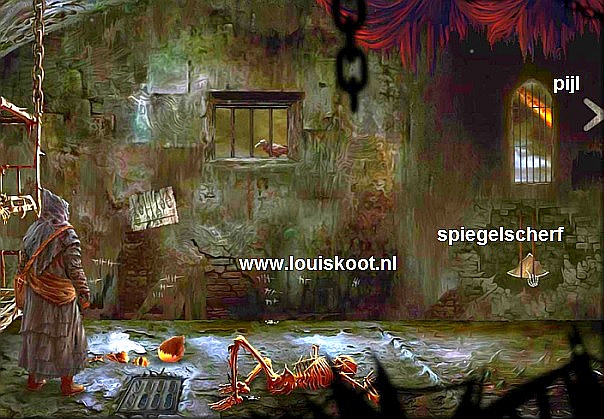
Click on the mirror shard and then take it in the close-up screen.
Get out of the close-up and then click the right arrow and .... you go to the right and you end up at the:
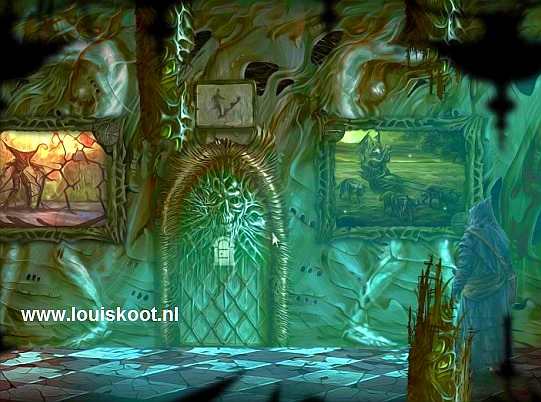
B: The Stone Angel:
Via the left arrow you can go back to your cell, but why in heavens name should you want to do that, after all the work you had to do to get out of the cell.
Scroll the screen slightly to the right .... you will get an arrow to go to the right, but do not do this yet. There is a 2nd mirror shard near the fallen chair. Click on the mirror shard and then pick it up in the close-up screen. Exit from the close-up via the "V" button. Scroll the screen to the right so that you see the right arrow .... Click on that arrow to move a screen further to the right .... You end up at the:
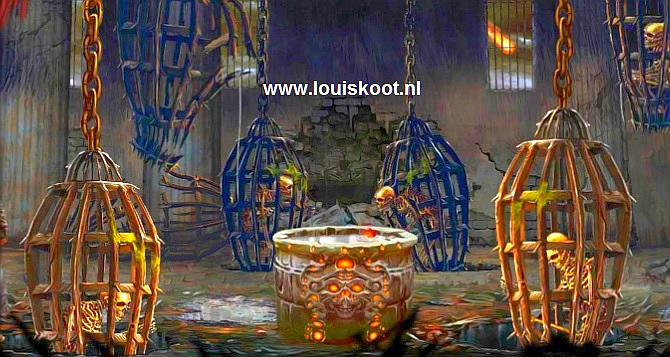
Cage puzzle:
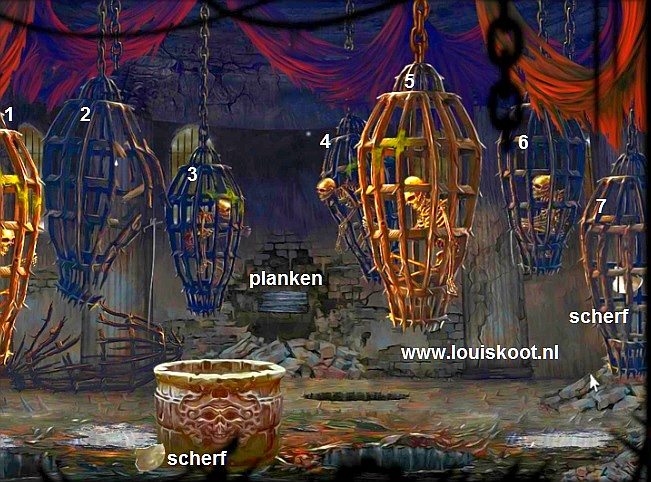
There are 7 iron cages hanging above a well. The 3rd mirror shard is leaning against the well. In the wall, behind the well, you can see a large hole and in that hole are three wooden planks. First take the mirror shard that lies against the well ... So click on that mirror shard to get into the close-up and then pick up the shard to place it in your inventory box. Go out of the close-up screen.
Then click with your hand on the planks in the wall hole, behind the well ... you get in the close-up of those 3 shelves .... Click on each of the 3 planks to remove them from the wall. ... do this from top to bottom and ....the planks were hiding a Stone Heart. Take the Stone Heart and get out of the close-up.
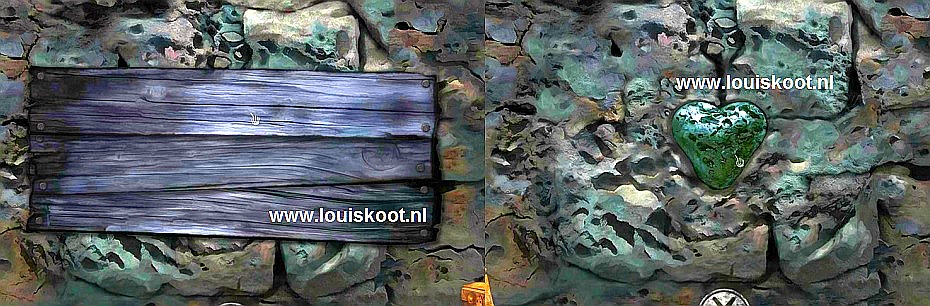
Now click on / in the well ... you then look into the well ... the water level in the well is very low and there is a red "eye" floating in the water ....
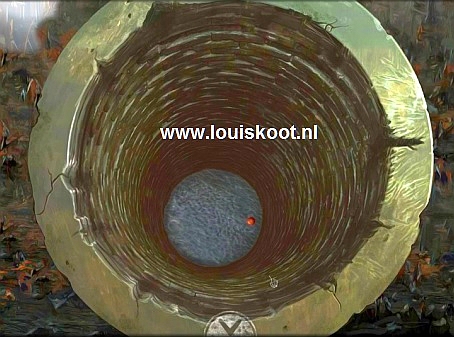
Try to take the red eye .... It is too deep ... you can not take the red "eye" out of the pit .... you will have to raise the water level in the pit to bring that red eye up. Get out of the close-up. Scroll the screen to the right so that you can also see the rightmost cage ... in the rightmost cage lies the 4th mirror shard . Click on the cage to open the door of it and then click on the mirror shard to get into the close-up ....
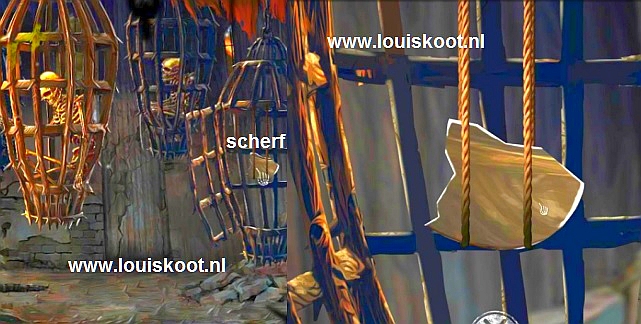
Take the 4th mirror shard and get out of the close-up again. Ok.....lets get to work.......there are 7 cages hanging around the well. Number the cages, from left to right, as 1 to 7. In cage 7 was 4th mirror shard. The cages 1, 3, 4 and 5 are each hanging above a hole in the ground .....
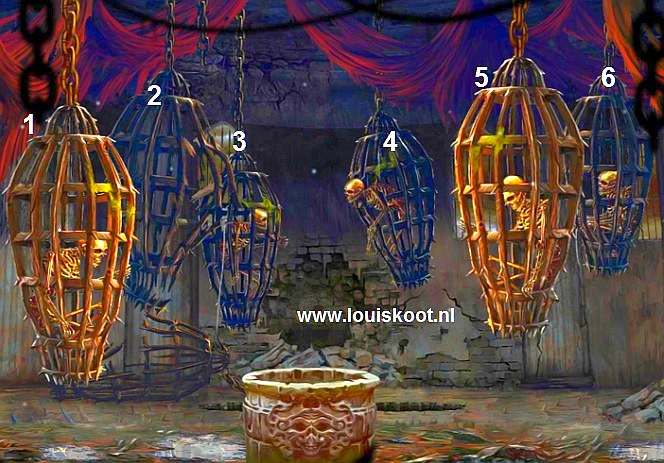
You have looked at a sketch of these 7 cages in the cell .... you have that sketch in your sketchbook now. View that sketch one more time ....On the sketch you see the 7 cages and you see that you must lower the cages 1, 3, 4 and 5 so that they each drop into their hole in the ground. At cage 5 is the X, to let you now that you have to start with cage 5.
If you just randomly click on a cage then that cage will drop down but also another cage will drop down . The cages affect each other and that is why you have to click on the cages in the right order to make sure that only the cages above the holes come down. This only works if you start with all cages hanging up, so if you have already clicked randomly on cages then you first have to make sure that all cages are hanging up again ...
is that the case then you only lower the cages 1, 3, 4 and 5 by clicking them in this order : cage 5, cage 3, cage 4, cage 1 and .....
...... the cages 1, 3, 4, 5 are then lowered in the 4 holes and the water in the well has risen to the edge of the pit, so you can now take that "red Eye" Click again on the well and then take the 2nd red "eye". Get out of the close-up .... You can not go further to the right, so scroll to the left and then click the left arrow to return to the Stone Angel:
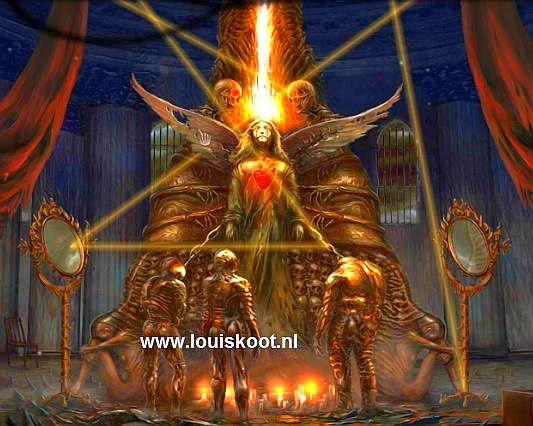
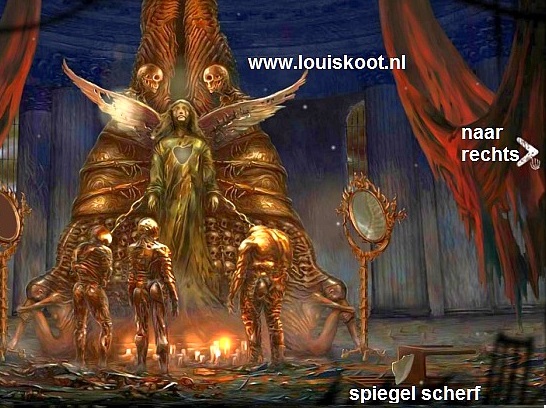
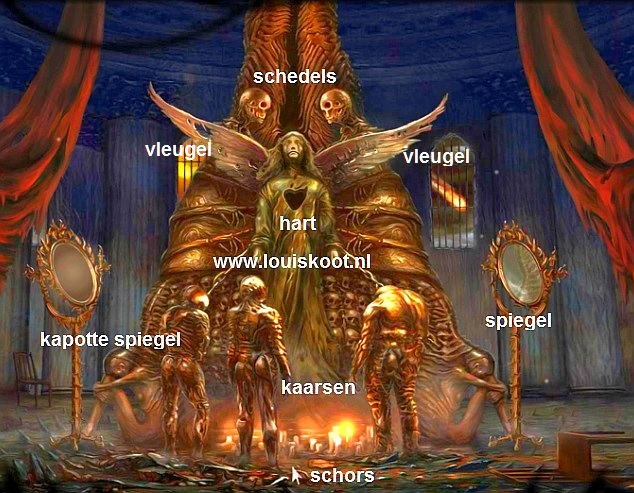
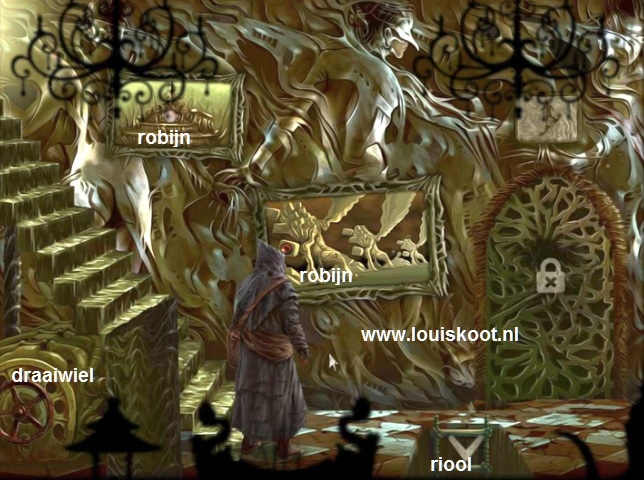
The Stone Angel puzzle:
All hotspots in and around the Angel always light up. The Angel misses her heart and she has 2 wings. Above each wing you see a skull and those skulls miss their red eye. In front of the Angel there are 3 "worshipers" and a bunch of candles of which 1 is lit. There is a mirror on the left and right. The left mirror is broken, the right mirror is whole. The Angel has to collapse the ground in order to be able to access the next area.
Zoom in on the candles .... There are 11 candles but only the right back candle is burning now. A piece of tree bark lies in front of the candles. Click on the piece of tree bark and then hold down your mouse button .... You have taken hold of the tree bark then ... if you release the mouse button, the tree bark will fall back on the ground again. So hold down your mouse button and then drag the piece of tree bark to the flame of the only burning candle ..... You put the tree bark in the flame ..... Now drag the burning tree bark to the pips of each of the other candles, to light all the candles now, with the burning tree bark. Then release the tree bark so that it falls back on the ground ..... you go out of the close-up automatically

Now zoom in on the left mirror. In the close-up you open your inventory box ..... You have 4 mirror shards in your box ..... Take, one by one, the mirror shards out of inventory and place all 4 shards in the oval mirror frame. It is not a puzzle .... just click with your shard in the frame to place all 4 shards in it. When you're done you will leave the close-up again.

Now zoom in on the heart hole of the Angel. In the close-up you take the stone heart out of your box and then you click the stone heart in the heart hole of the Angel ....

The heart immediately start to glow and beating and you automatically leave the close-up again. Now click on the Skulls, above the wings, you come in the close-up of the 2 skulls ... Take the 2 red Eyes from inventory and click them in each of the 2 big eye sockets of the 2 skulls ....
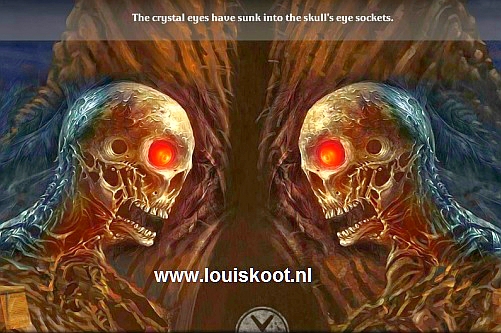
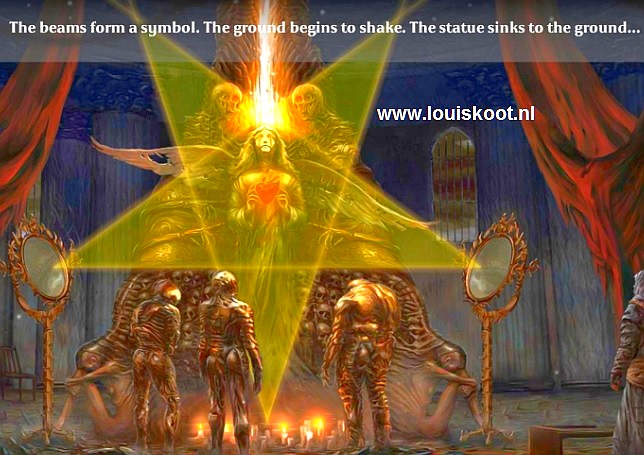
You go straight out of the close-up and .... Look ...... the red eyes now radiate a ray of light and that ray of light is reflected in a certain form through the 2 mirrors ........
You can click the 2 mirrors and the 2 wings of the Angel, up and down, and you must do that to ensure that the light beam takes the form of a Hexagon. Can't give you a exact solution for this....it's a "Trial and Error" puzzle but you can try this solution, it has worked for me
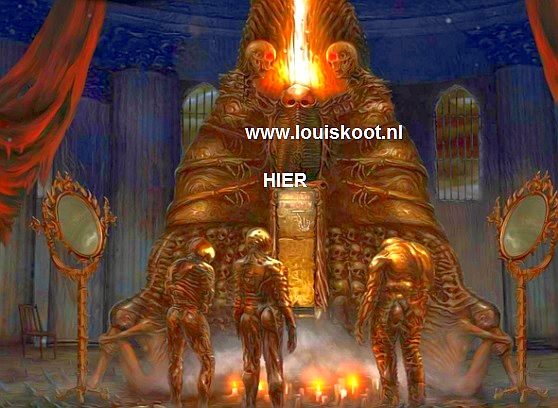
The Angel sinks into the ground ...... Where the Angel stood you can now see, between the two "bodies" of the 2 skulls, a stone with a slit in it ........
Click on the stone / slit to get in close-up .... You end up in the: |
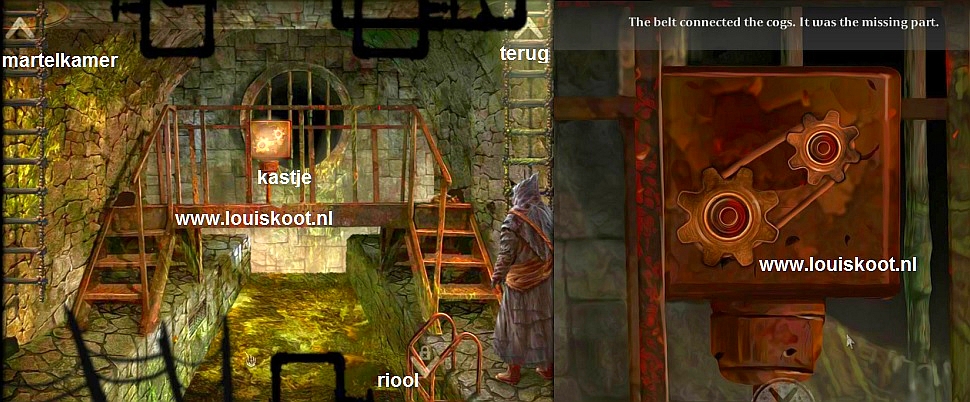
Metal Plates puzzle:
You look at a mechanism ..... A wheel turns. You see two rows of metal plates but here is 1 metal plate missing but you have that in your inventory box because it is the metal plate that you have stolen it from the beak of the raven in your cell. Take that metal plate out of the inventory and click it in the empty space of the bottom row of plates ......
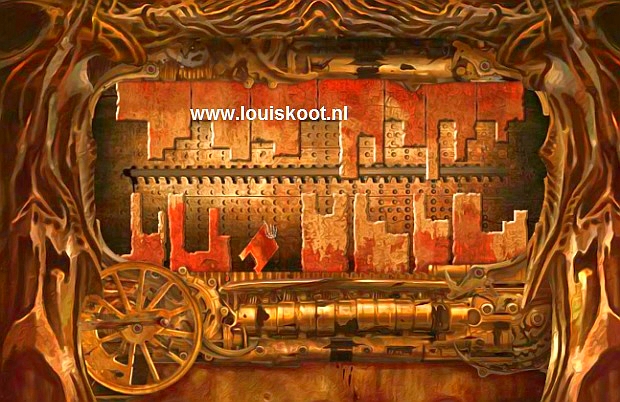
There are now 14 metal plates, 7 in the top row and 7 in the bottom row ... Each metal plate has a different shape and you now have to rearrange the bottom row plates so that the plates in the top row fit exactly in the plates of the bottom row. You have to swap the plates in the bottom row and click them under the right plate in the top row .... You select a plate and then click on another plate to swap places. When you do this right then the top and bottom plates will collide with each other
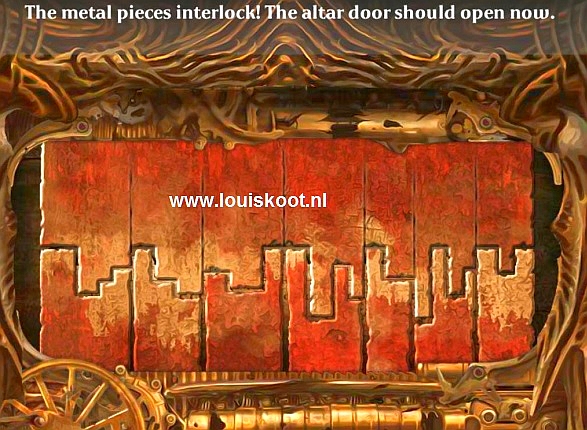
...... you automatically leave the close -up and in the Angel pillar a door to the next area goes open and then it becomes a gate.
Click the gate and ....... You end up in the next area of the Castle
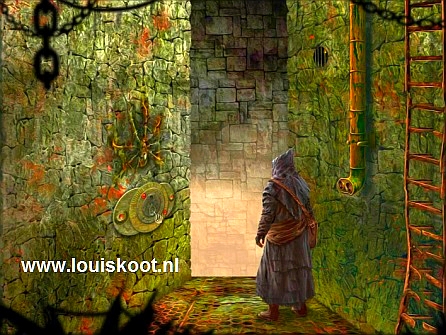
C: The "Lost Soul":
You are standing at the bottom of a staircase in a "corridor". You can not go back to the Angel and the cell anymore because at the top of the stairs the gate is closed again. Your inventory box is empty again because in the previous area you used everything you had collected to solve the puzzles.
In the wall you see 2 skeletons and 4 holes ........When you move the screen back and forth, by moving your mouse back and forth, symbols will appear in the 4 holes. To see the symbols in the top 3 holes, move the screen to the right. To see the symbol in the gap between the two skeletons, move the screen to the left.
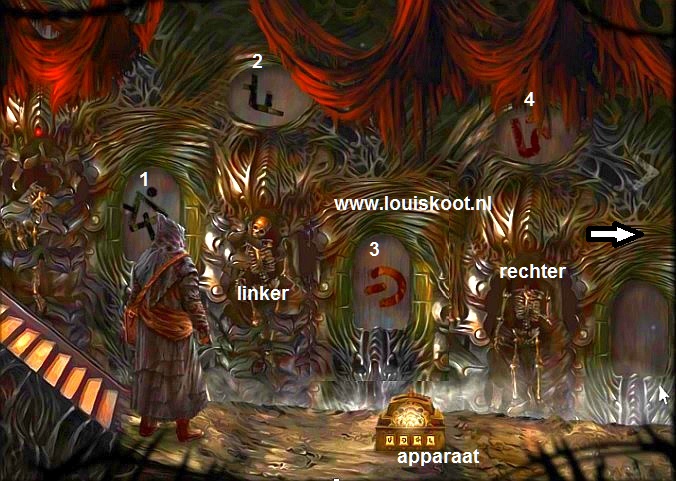
Check the 4 symbols because you have to set them on the device that is on the floor. However, that device lacks a lever.
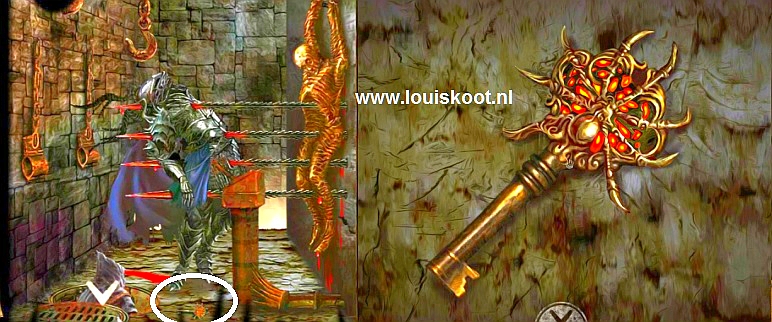
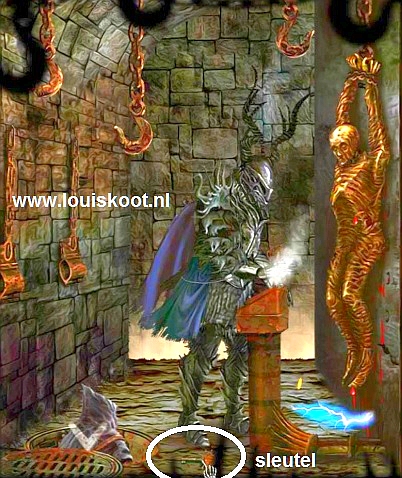
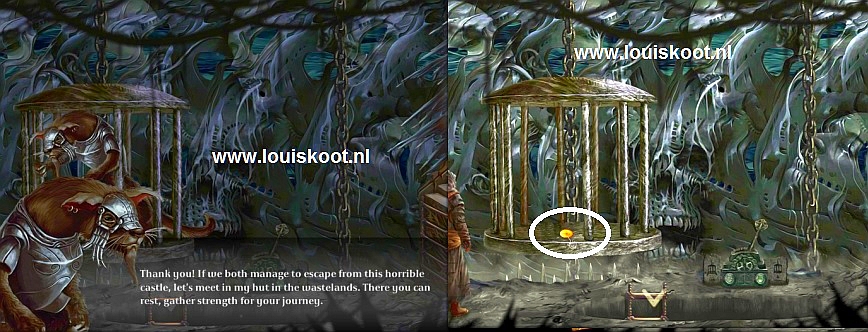
The left skeleton has a skull and is somewhat electric. The right skeleton has no skull. Scroll the screen to the right and then click the right arrow to move one screen further to the right ..... You end up at the "Floating Table" .... You need a key for the "Floating Table" but you don't have the key yet. So go one screen further to the right. You end up with the Monster and a Rodent trapped in the cage. Here you will soon have to make a moral choice, but for now we are here to pick up the lever, which lies on the floor under the cage.
Click on the Lever and take the thing when you are in the close-up.
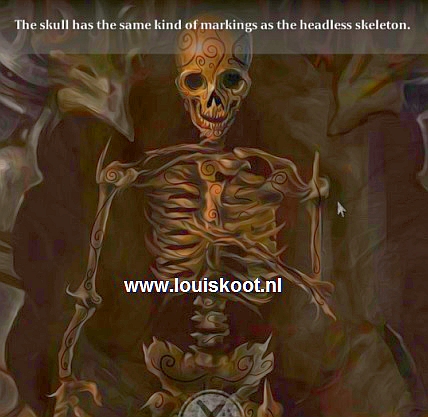
Get out of the close-up and go 2 screens back to the left ... you are then back at the 2 skeletons in the wall. Click on the skull of the left skeleton ... you will enter the close-up of the left skeleton. You see that the design on the skull does not "match" with the design on the rest of the skeleton ...... The skull does not belong on this skeleton .......
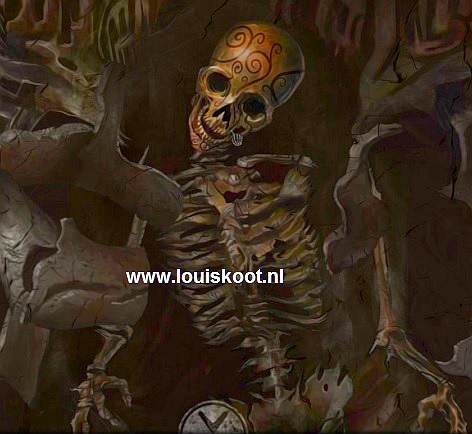
Click on the Skull to break the skull off the neck and store it in your inventory chest. Go out of the close-up. Click on the right skeleton and take the Skull from your chest and click it on the headless skeleton to provide it with the skull .... this skull belongs on this skeleton ... you will go out of the close-up ...
Have you checked the 4 symbols that appear in the 4 holes?
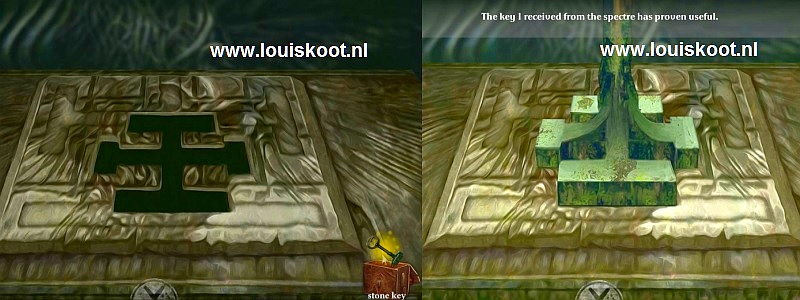
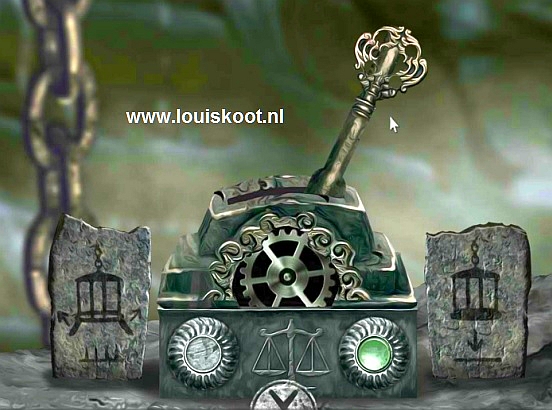
Then click on the device that stand on the floor. In the close-up, take the Lever out your chest and place the Lever on the pin that's on top of the device.
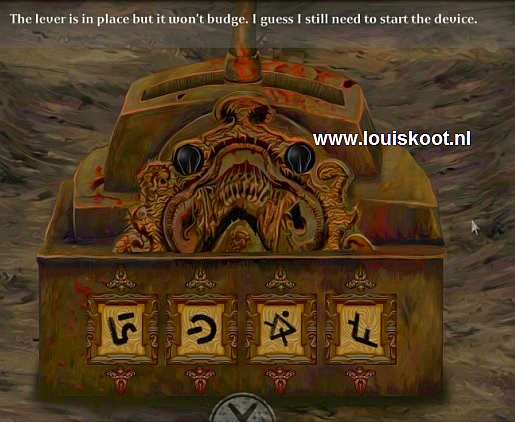
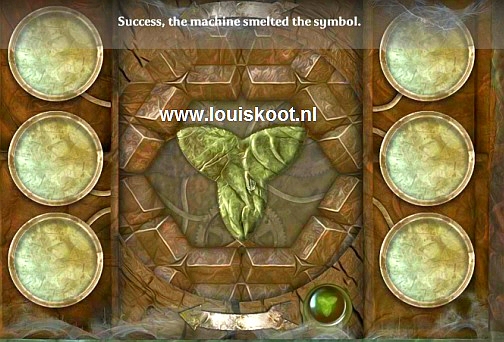
The device has 4 screens in which you now see 4 symbols ... they are the 4 symbols that you also saw in the 4 wall holes .... but on the device the symbols are in the wrong order .... The screens are tumblers, so if you click in a screen then you get another symbol in that screen ...Now put in the 4 screens, from left to right, the right symbol, so in the left / right order as you saw them in the 4 wall holes .... When done the device turns on and the lever goes to the left and a red light comes on
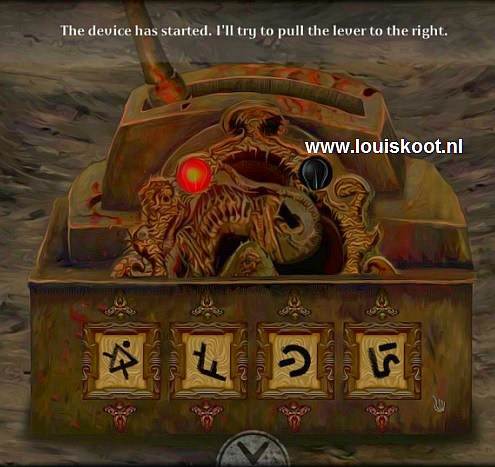
you will automatically exit the close-up, but you have to click the lever to the right, so click on the device again and ..... the lever will go to the right and ....
...... the left skeleton will be covered and then changes into a transparent spirit that carries a Key. Click on the spirit to talk to him ....
Click with the talking cursor to continue the conversation and ..... eventually the poor drunk gives you the key .....
.... the key then floats in the air, so click the Key to grab it and store it in your chest
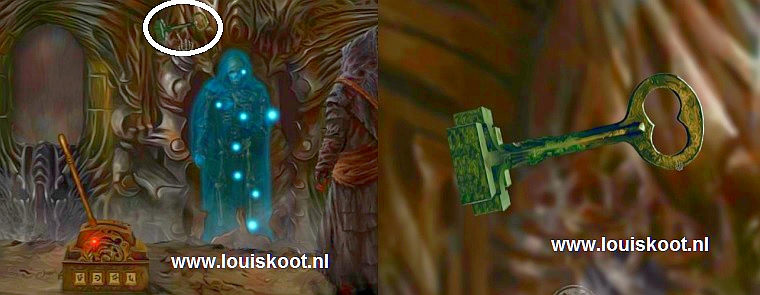
Get out of the close-up .... the spirit disappears and his skeleton shrinks to a pile of bones. The key is for the "Floating Table", but that will come soon ....
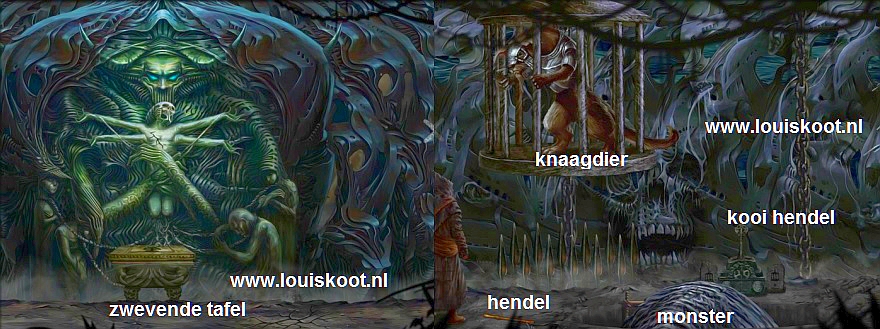
Let us first go back to that poor rodent, who is trapped in the cage above the monster, past the "Floating Table". So go 2 screens to the right again.
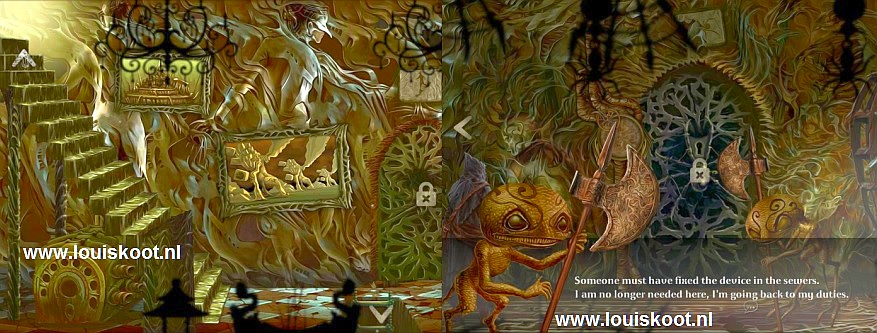
D: The Rodent and the Worm:
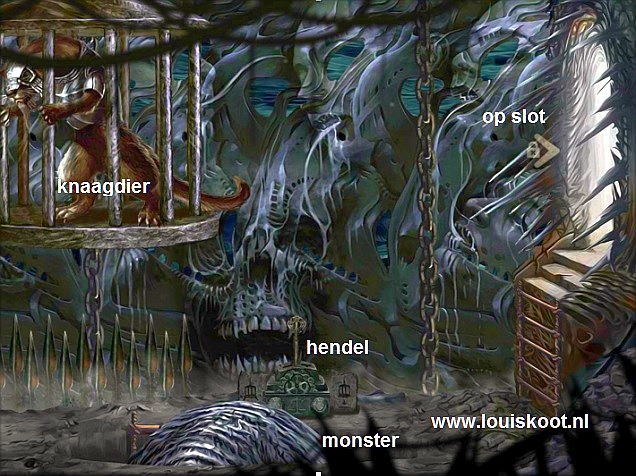
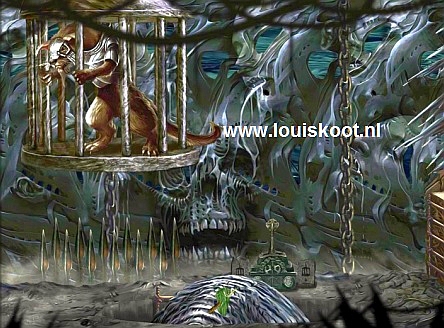
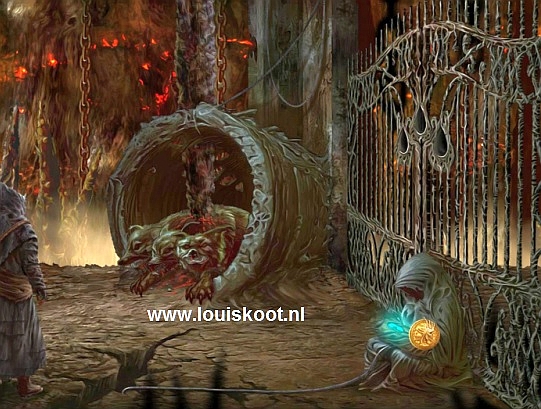
Back at the caged rodent you take a good look around first. If you scroll the screen to the right, you'll see a passage above a ladder. Unfortunately, that passage is locked, as you can see from the padlock on the white arrow. If you click on the white arrow, a huge monster comes up out of the hole in the floor ...... it's a giant worm. Behind the Worm is a lever device .... If you click on that lever device, the giant Worm will also rise up
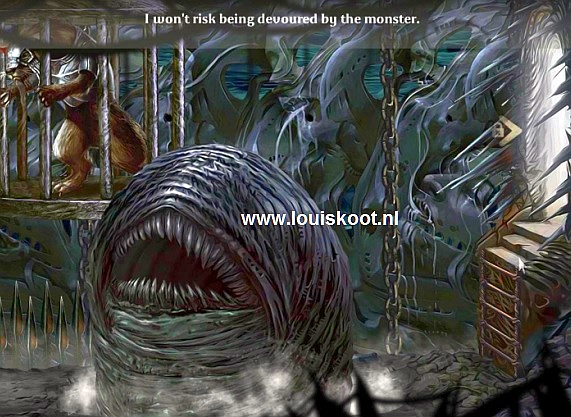
The cage in which the rodent is trapped hangs over deadly skewers. Go talk to the rodent in the cage
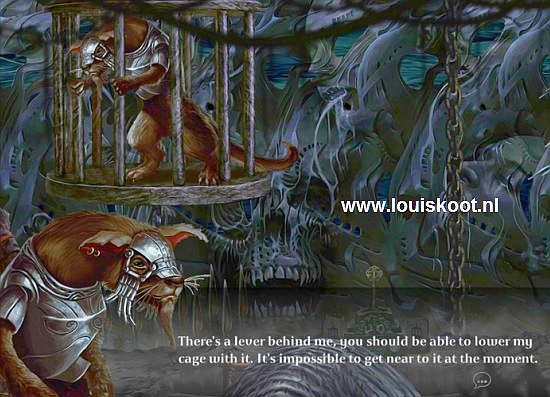
This is the rodent that was brought to this castle by the zeppelin at the same time as you ..... the rodent asks if you can free him from the cage . If you do this then the rodent will give you something that you need to be able to escape from the castle. With the Lever, behind the worm, you can hoist the cage down, but then you will first have to get rid of the worm ....The rodent tells you that you can kill the Worm if you feed it poisoned food ..... somewhere in the castle there must be a kitchen where you can prepare food and then poison it.
Well ..... the rodent has something that you need to escape from the castle. To get that item you have to free the rodent from the cage, but that is only possible when you have killed the giant Worm. When the Worm is dead, the passage to the right of the monster will also become available. Go back one screen to the:
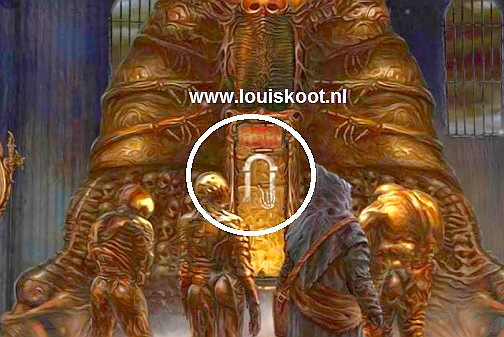
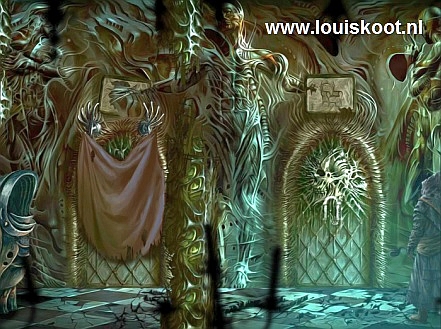
E: The "Floating Table" and the "Demon Gate":
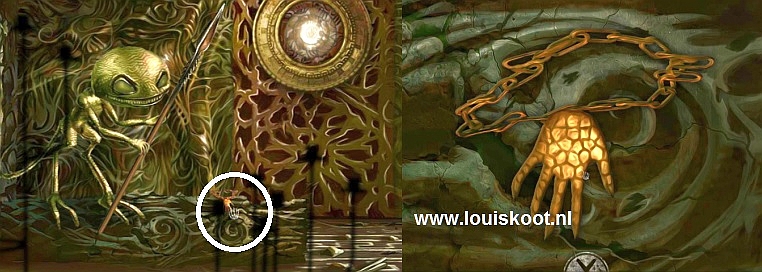
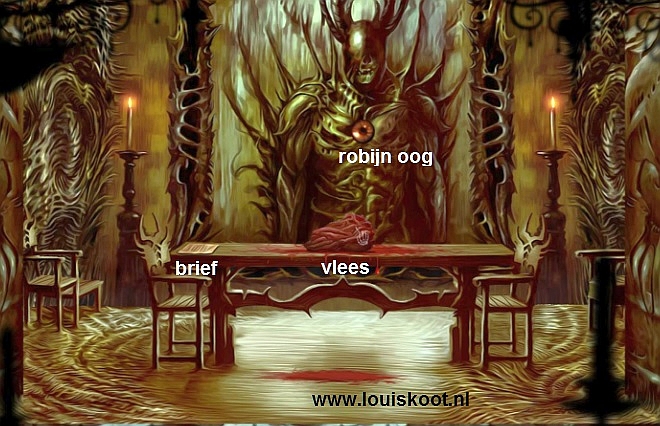
The table floats above a canyon. Behind the table you see the 2 glowing eyes of the Demon Gate. Click on the Demon and listen to what it says ....
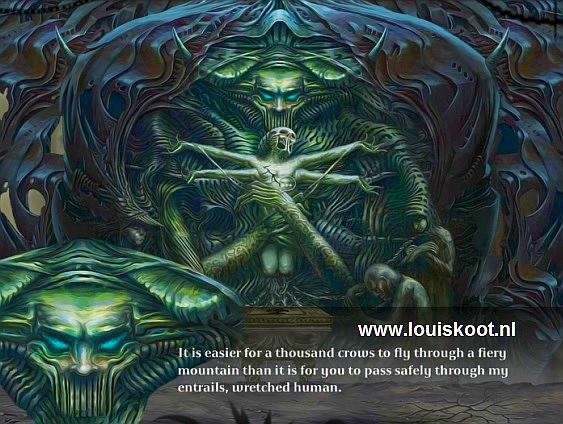
The Demon guards the Gate to the next area and he is not going to disappear voluntarily. A 4-armed devil hangs on the "chest" of the Gate. Click on the floating table to get into close-up ....... There is a keyhole in the table top. Take the Key from your box and put the key in the keyhole and .......
.... you automatically go out of close-up and .... The devil, on the chest of the Demon, sinks into the canyon and you can now see the beating heart of the Demon Gate
 \
\
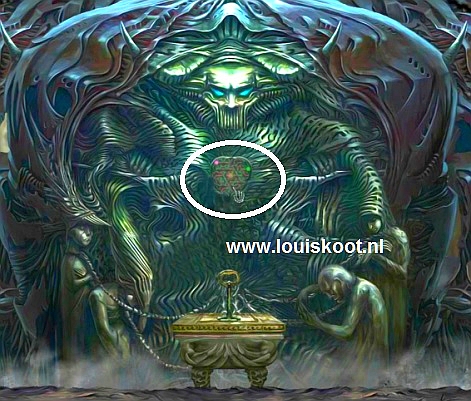
Click on the Heart ..... you end up in the:
"Blood vessels" puzzle:
The heart is fed by green blood and red blood. In the middle of the heart is the "heart chamber" .... the left half of the "heart chamber" is red and the right half is green.
At the top left red blood comes in and at the right green blood comes in. The heart consists of 18 hexagons segments .......
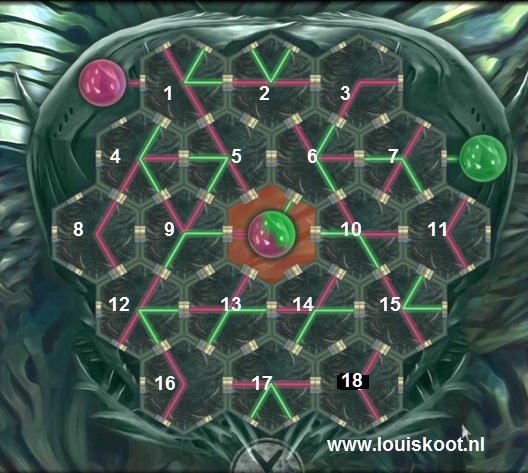
You can rotate the segments by clicking in it ..... You have to make 2 continuous lines so that the red and green blood will flow to the sphere in the middle of the heart ...... Red must go to the left and green to the right of the "heart chamber" ..... it is not very difficult, but it is a bit of work because green and red also cross each other in various places .... here is the solution:
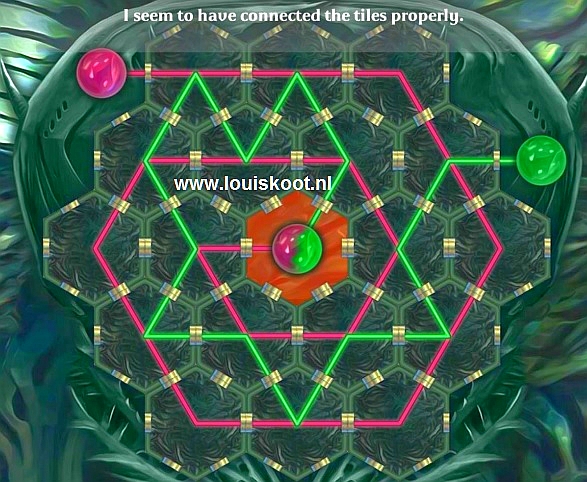
Once you have solved the puzzle, the Demon Gate will open and you see 2 huge guards ..... A medallion piece has now appeared in front of the floating table.
Click on that piece of medallion ..... it's half a medallion. Take it and go out of the close-up and ..
the 2 guards are now sliding apart and a door appears between the 2 guards....
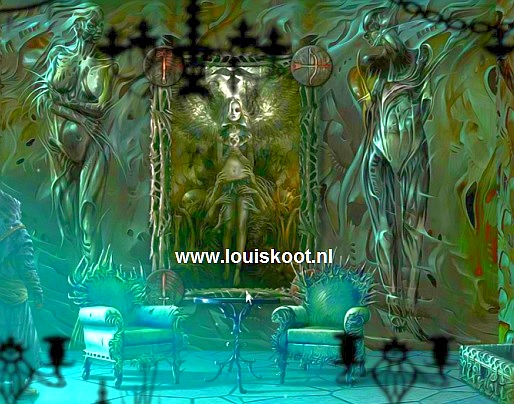
Click on the door and .... you arrive in the area beyond these 2 guards ..... you have arrived in the Witch's throne room:
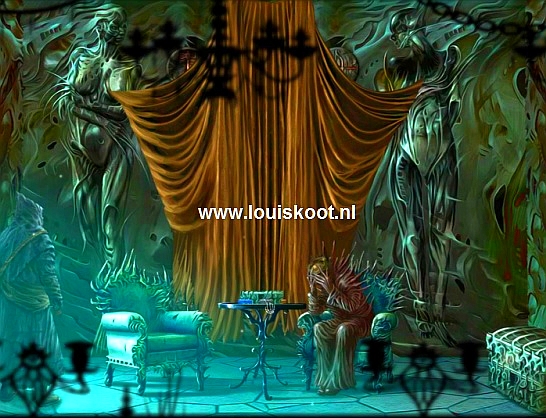
F: the Witch:
Throne room:

The Witch is not on her throne. At the left side of the throne in the Jester and to the right stand the "watchdog" of the witch, who is chained. Talk to the Jester ....
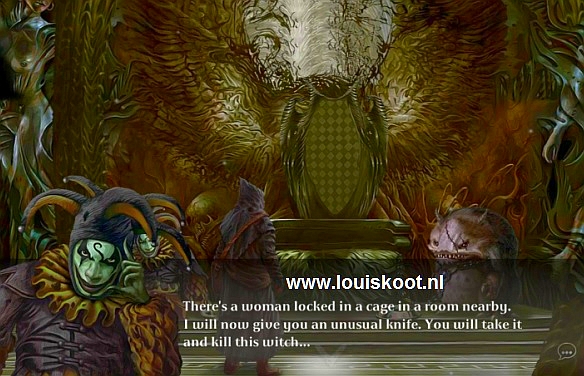
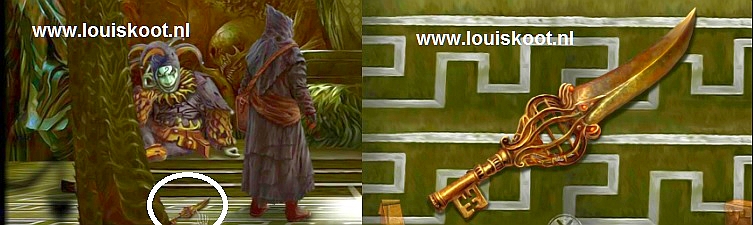
The Jester also has an item that you need and he wants to give you that item, provided that you kill the Witch first. The Jester tells that the witch is locked up in a cage, in a room nearby. The Jester also warns that you should not be influenced by the innocent appearance of the witch and that you should not listen to her ..... Kill the bitch right away, is the Jester's message. The Jester has a strange shaped knife with which you have to kill the witch and he throws that knife on the floor.
The knife is then left on the floor next to you, so pick up that knife .... the knife indeed has a strange shape ... it seems like a key.
Go out of the close-up. You can't talk to the "watchdog" ..... But if you zoom in on the food bowl of the dog you see that it has a weight in it ...
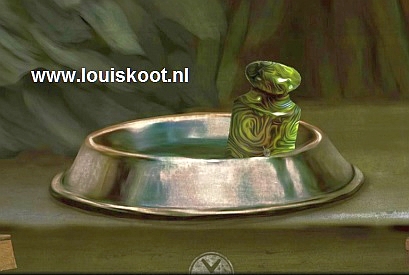
.... You need this weight but if you try to take it then the beast starts to growl ..... You think the beast is hungry and that if you would give it some food you could take the Weight. Go out of the close-up. You return to the previous area via the down arrow. You can also move screens to the left and to the right.
This area of the castle is larger and has more rooms than the 2 areas where you came from ..... It can be a bit confusing because you now have several problems you need to solve. The giant Worm is 1 of those problems and the Witch the 2nd problem. You will have to do a lot of running back and forth to deal with these problems before you have solved them
From the throne room, first move one screen to the right. You arrive at the
Spider Door.
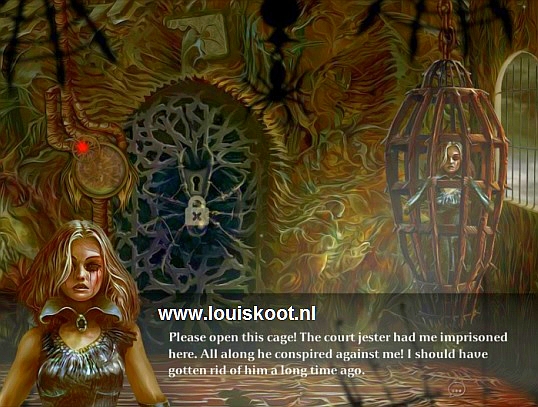
The Spider door is locked, but still moves up and down a bit. There is a guard here who guards the Witch Queen who is trapped in a cage.
So that pretty girl in the cage is the Witch and the Jester wants you to kill her. Talk to the guard ......
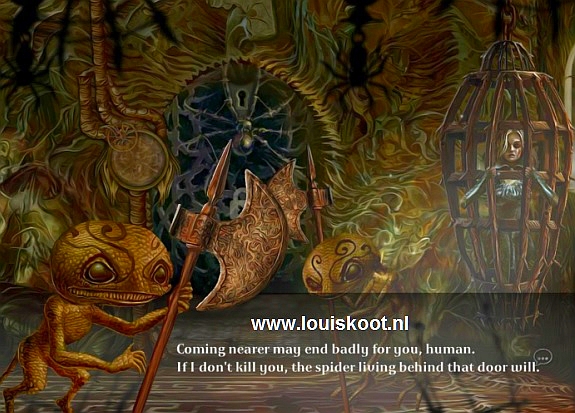
The guard threatens to kill you if you come a step closer. However, the guard also tells about the giant Spider, which has its domain behind the closed Spider Door. With the poison of the spider, this guard has made poisonous arrows and sword tips for the guards in the castle. The guard also says that the mechanism for controlling the correct climate in the Spider Room is broken and he explains how and where you can lay your hands on that spider poison. For this you have to descend into the sewer system of the castle.
You have to get rid of this guard if you want to get to the cage with the girl. To the left of the moving spider door a round mechanism protrudes ... if you click on it you will read that the mechanism is broken. If you can fix that mechanism, the Spider door will open completely and then the spider may remove the guard out of the game...... Go back to the throne room and then one more screen to the left.
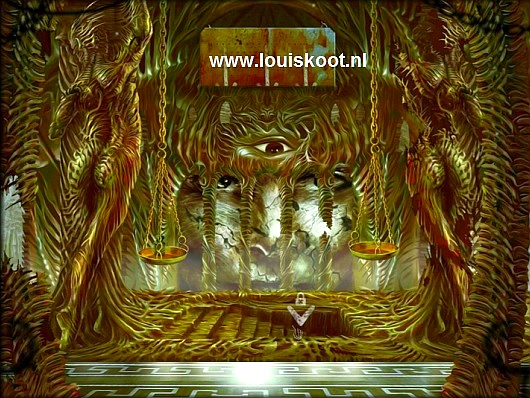
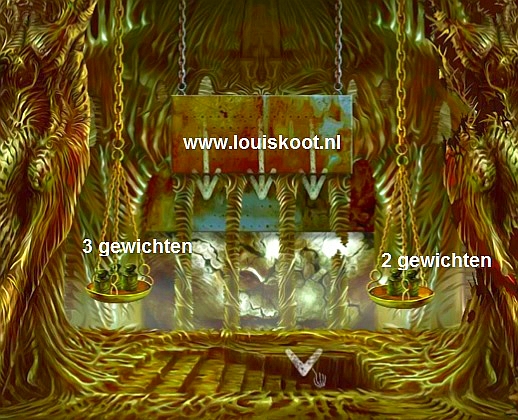
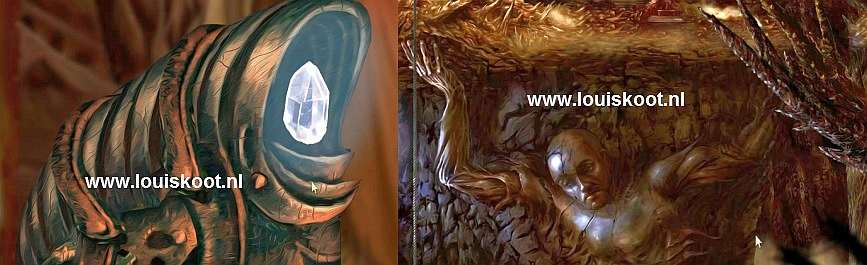
You are at a staircase that goes down. Above the stairs are the 2 scales. On the left scale is such a Weight that you have also taken from the food bowl of the guard dog of the witch. Leave that weight on the scale. Behind the stairs the 3 eyes of a giant statue are staring at you ..... the statue seems to be alive and the 3 eyes are watching you closely through the grating window. A rusty metal plate is hanging above the eyes.
You'll notice that the down arrow, on the stairs, has a lock ..... if you try to go down the stairs then you get almost pinched by the huge claw of the living statue ....

...... as long as that statue is watching the stairs you can't go down the stairs here ...... Could the scales and the weights
help you out here?
Continue one screen to the left ...... You end up at a door with a rotating circle in it ..... a security guard guards the door. Right next to the door you see the fire symbol and above the door 2 red lights are blinking, or are they 2 eyes? You see a hand in the rotating circle of the door. Click on the guard to talk to him .....
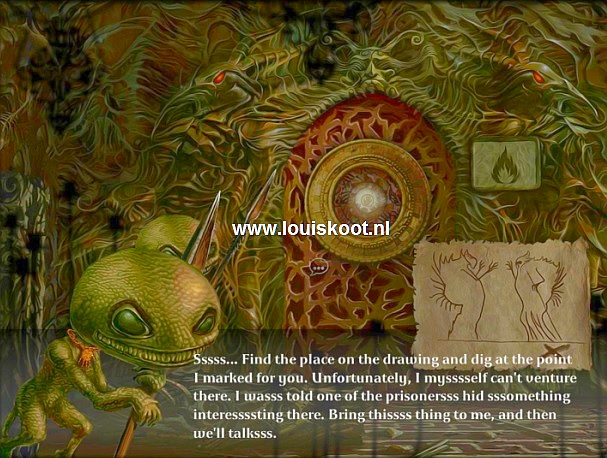
The guard tells that there is an oven behind the door but the oven is broken .... the guard is willing to let you through the door but he want something in return ...... The guard gives you a drawing of the 2 statues that are behind the Demon door. The guard has drawn an X beneath the right statue .... The guard wants you to dig something up at the X, it's a item that another prisoner has buried there. If you give that item to this guard, then you can go through the door here.
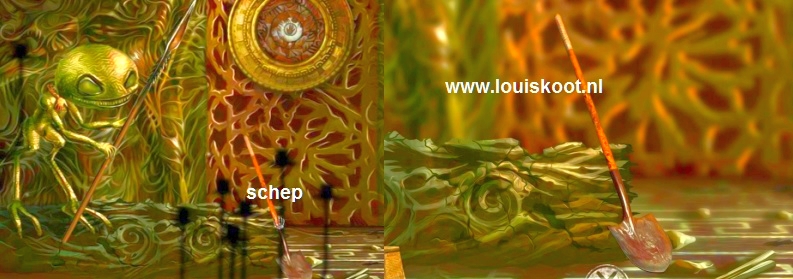
The guard then gives you a shovel, so take the shovel
Go 2 screens back to the right. You are then back in the Throne room .... go down one screen and you're back at the 2 huge Guards. At the right Guard you see cracks in the ground.
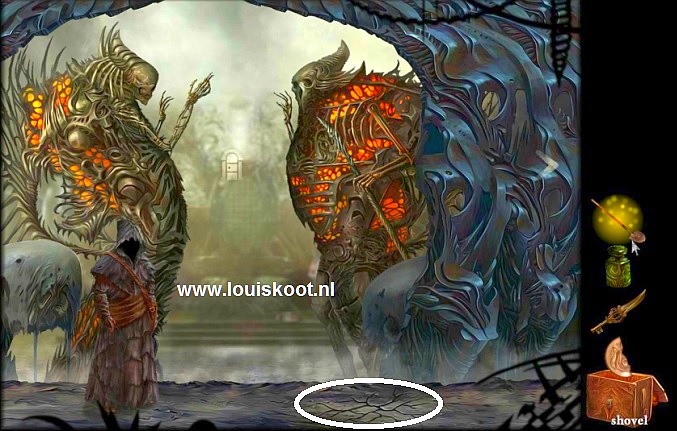
Take the Shovel out of your chest and click it on the cracks in the ground and ........ your screen will go black for a moment while you dig a hole in the ground....
Then click in the hole and then take the gold lump out.
Go through the gate, between the 2 guards,. You are then back in the throne room, so go 2 screens to the left and give the lump of gold to the guard.
The guard will give you a necklace with a Hand .... Take the Necklace and get out of the close-up.
The Hands Puzzle:
Now click on the rotating circle in the door to get into the close-up. The circle consists of 4 rotating rings and there is a hand in the middle.
Take the Hand Necklage from your inventory chest and click the hand of the chain on the hand of the circle and the 4 rotating rings stop rotating ....
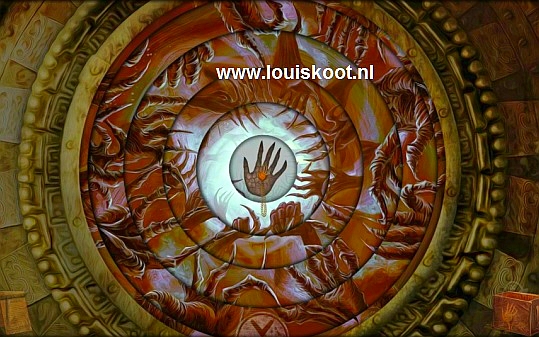
On the 4 rings you see various hands .... you now have to manually rotate the 4 rings to make all hands right, so you have to provide the hands with the matching wrists and fingers ..... it is not that complicated ..... Click on a ring and that ring rotates keep clicking on a ring until that ring no longer rotates .... once you can no longer rotate a ring, that ring is good. Then click on the next ring until it also stop rotating and continue like this to turn all 4 rings properly ...... You automatically go out the puzzle once you have solved it
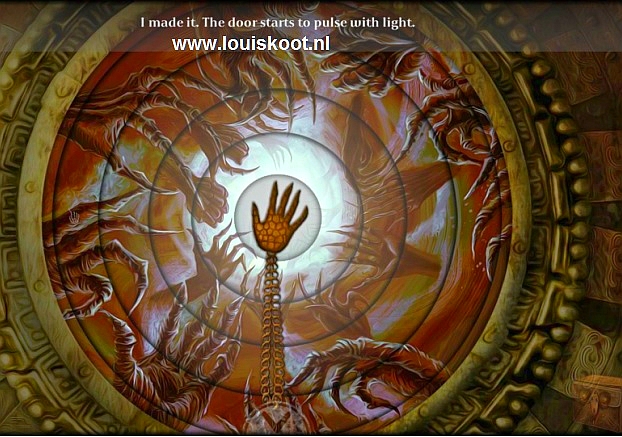
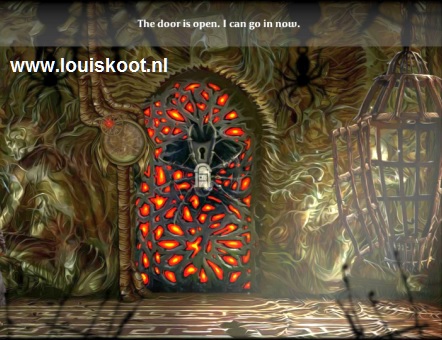
The gate icon then appears in the door circle, so now go through the door and..... you end up in:
Boiler room:
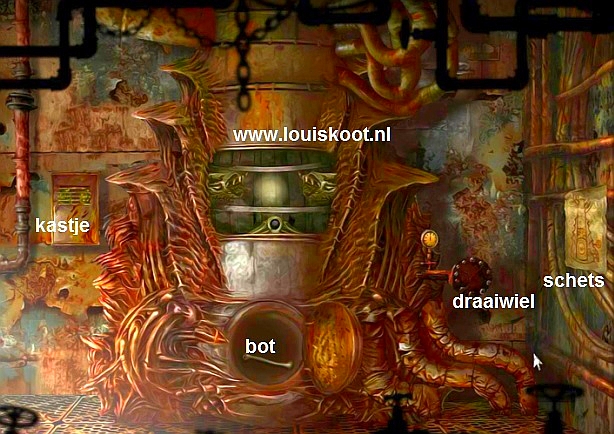
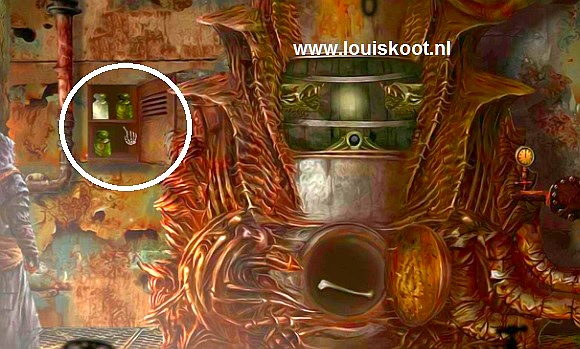
Here is the large oven. To the left of the oven there is a cupboard on the wall. Click on that cupboard to open it. In the cupboard you will find 3 weights .... Take the 3 weights.
You now have 3 of these weights in your inventory box. Go out of the close-up. To the right of the oven is a sketch on the wall .... View that sketch ..... you draw the sketch in your sketchbook .... On the sketch you see the oven and you see that the oven needs 3 things has .... a rotary wheel, something to start a fire and of course fire. Go out of the close-up. On the right side of the oven you see a mano-meter ....... the rotary wheel to turn the oven on has disappeared. There is a bone in the bottom compartment of the oven. Take the Bone out of the oven. Zoom in on the upper compartment and then press the round button .......The 2 snake tubes will move back and forth but those 2 snakes are missing something.
Get out of the close-up and leave this boiler room via the left arrow. Then go 2 screens to the right again, to the Throne Room. Zoom in on the food bowl of the dog again .... Take the Bone from your inventory and put the bone in the food bowl and .... you then automatically take the weight out of the bowl. Get out of the close-up and go back 1 screen to the left. You are back at the down stairs and the statue.
You must now place your 4 weights in the scales. On the left scale there is already 1 weight ....Take the weights from inventory ..... Then click twice with the weights on the left-hand scale to place 2 of your weights on it .... On the left-hand scale there are then 3 weights ...... The metal plate, under the eyes of the statue, is then lowered ..... But the metal plate must cover the eyes, so place your remaining 2 weights on the right scale and ...... the statue can now no longer see the stairs and you can now go down via the down arrow ....
So go down the stairs ..... you end up one floor below in a corridor and at a door but it is locked.
There are 2 paintings on the wall and a turning wheel hangs against the side of the stairs.
In both paintings sticks a red eye ....... zoom in on the upper painting and then take the red eye out .... it is a red ruby ....
zoom out and zoom in on the bottom painting and take 2nd red ruby eye ....

Zoom out again and take the red wheel. Get out of the close-up.
Above the door you see a sign with a man on a staircase .... behind the door there is another staircase to descend further down. However, you can also go down via a ladder in front of the door, but don't do that now. Scroll the screen to the right and then click the right arrow to move one screen further to the right ..... you end up at the dining room.
But the dining room is closed with a fence and in the middle of the fence is the lock puzzle to open the fence .... it is a medallion but you do not have all the fragments of the medallion. Through the fence you see a nice big piece of meat lying on the dining table .... it is apparently just slaughtered because the blood is still dripping out. Behind the table you can see that your 3rd red ruby eye is in the statue. Continue one screen to the right .... you are at the:
Sliding Faces Door:
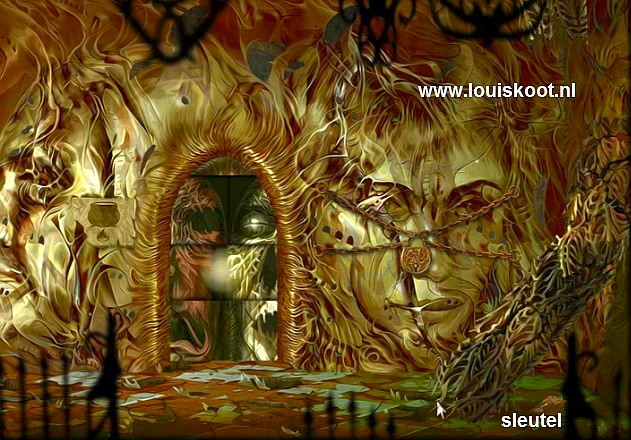
Left and right of the door is a face ..... the right face has chains with a padlock .... on the left you see a sign with a kettle on top of a fire.
In the right in the corner a key is on the floor. Take the Key .... The key was on a note ..... read the note.
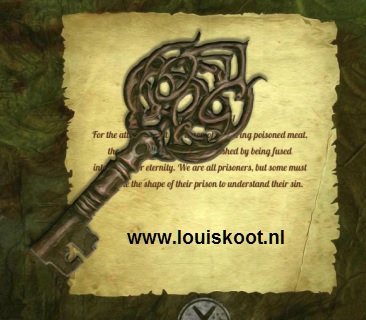
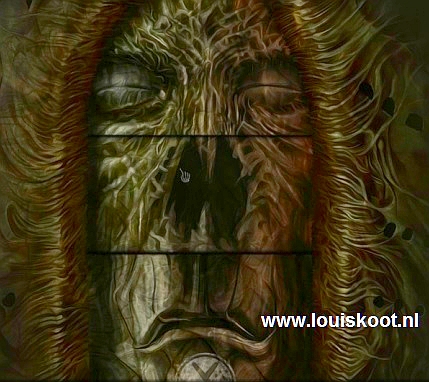
Go out of the close-up. Click on the right head to get into close-up and then use the just found Key on the padlock and ...... the chains and padlock disappear and the wall breaks. You go out of the close-up and ...... you have a conversation with the head, who has been trapped in the wall for many years now.
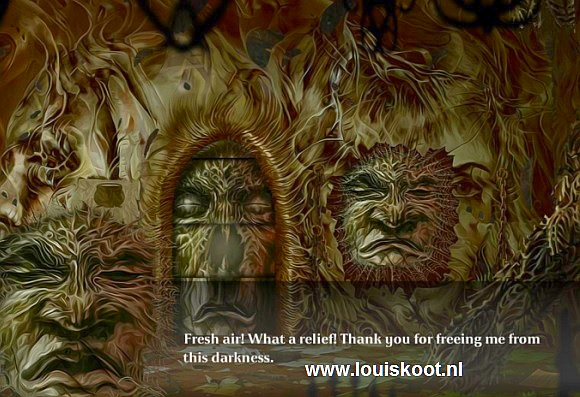
The head is grateful to you and tells you that the sliding face door is his brother and that the door gives access to the kitchen.
To get into the kitchen you have to restore the face and the face in the wall gives you a few instructions.
|
Restore the face: So click on the door and then solve the puzzle.
The face 3 segments that you can shift ..... the forehead with the eyes, the middle part with the nose and the lower part with the mouth. Click on each part to give the face the correct eyes, nose and mouth to give. The face in the wall has told that his brother has large and wide open eyes, a long nose and a closed mouth. So start with the eyes, then the nose and then the mouth .... Click on a segment and then hold down your mouse button and then drag the segment to the left or right to get different eyes, nose or mouth. This is how the face should look .
you automatically go out of the close-up and you can go through the door to the: |
Kitchen:
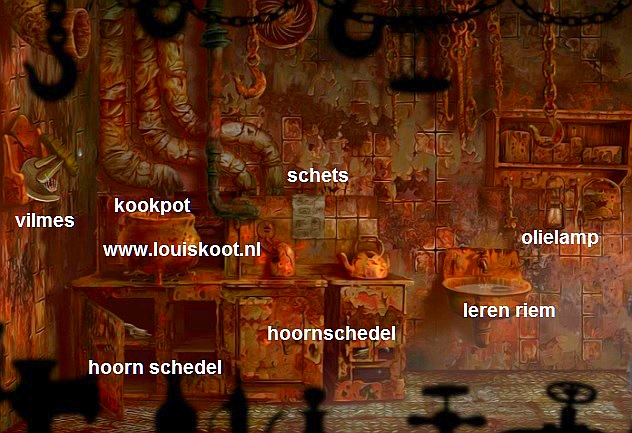
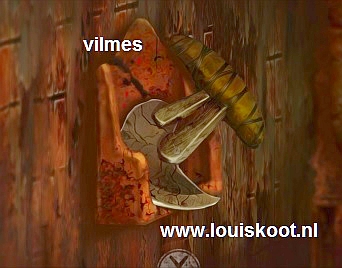
Scroll the screen on the left to also see the left wall. A Felt Knife hangs on the left wall. Take the Felt Knife.
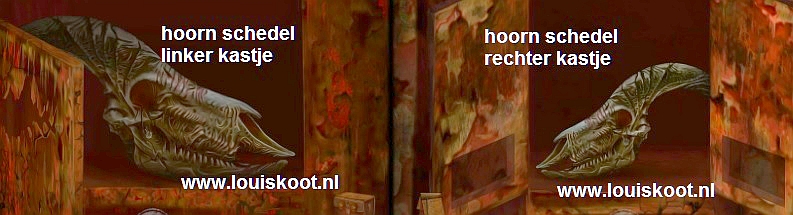
On the stove is a cooking pot. Look in the cooking pot ..... In the close-up you see that the cooking pot contains water ...... press the red button, that's at top right .... unfortunately .... you still have to light the stove, but you need a lighter for that. Get out of the close-up. Open the cupboard under the cooking pot and then take the Horned Skull from it. Open the cupboard under the kettle and then take the 2nd Horned Skull from it.
There is a sketch on the wall .... View that sketch in close-up .... The sketch shows you how to poison a piece of meat with poison from the spider .... you remember that you must feed the huge mole a piece of poisoned meat in order to be able to free the rodent from its cage ...... you draw the sketch in your sketchbook. Go out of the close-up. Something floats in the sink ..... zoom in on the sink and then take the Leather Belt out of it

Above the sink is a cupboard and on that cupboard hangs an Oil lamp .... Zoom in on the cupboard and then take the Oil lamp ...

You don't want the other things hanging on the cupboard. Leave the kitchen and go back 2 screens to the left. You are then back at the stairs and the closed door.
There is a ladder hole in the floor in front of the door ..... Now go down the ladder to the:
Torture room / Sewer:
The room on the left is a torture chamber, where an executioner indulges in torturing a trapped prisoner.
There is a key on the executioner's belt and you need that key. But how to get that key?
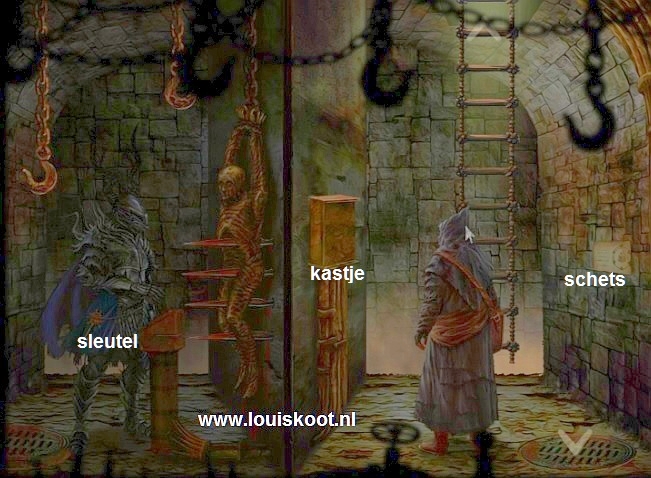
So you are in the right room. There is a cupboard on the left wall and a sketch on the right wall. The manhole cover to the sewer is in the floor. Click on the wall cupboard to open it and then zoom in on it ..... there is a puzzle in the cupboard ... You see 5 standing springs and three cogwheels. A red light flashes on 1 of the springs and there is a symbol on each spring.
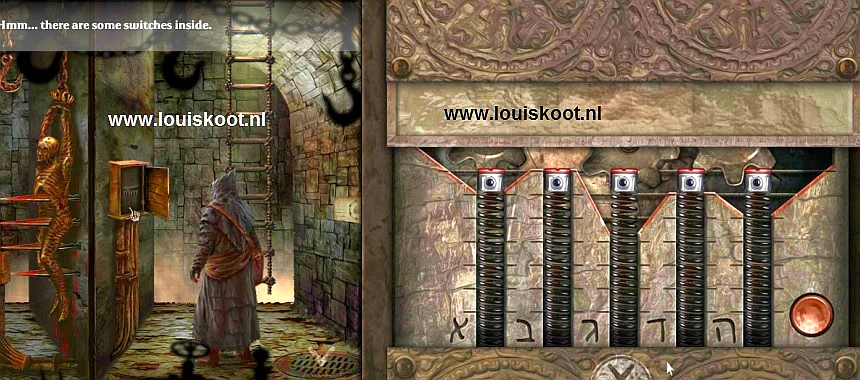
By pressing the lights of the springs you can lower the springs. The red button on the bottom right is the reset button to return the puzzle to the starting position. You'll find a hint for this spring puzzle later, so I'll leave this for now. Zoom out of the cupboard and view the sketch on the other wall.
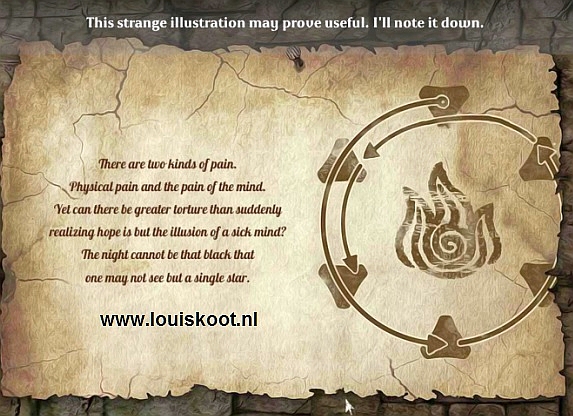
The sketch is a hint for a puzzle that you will encounter later. You also copy this sketch automatically in your sketchbook, so you can always view it again.
Get out of the close-up and now descend via the manhole to the:
Sewer:
The sewer is flooded. Through the right ladder you go back up and through the left ladder you come to the torture chamber. You can descend deeper into the sewer via the iron ladder, but then you will first have to pump the water out the sewer. There is a box on the bridge where 2 cogwheels stick .... the bottom cogwheel rotates .... a drive belt must be put on the box. Click on the box and ...... In the close-up, take the leather belt from your inventory box and click the belt on the 2 cogwheels of the box and ...
..... the belt serves as the driving belt and ... the water is pumped out of the sewer. Now descend further down, via the down arrow on the iron ladder ......
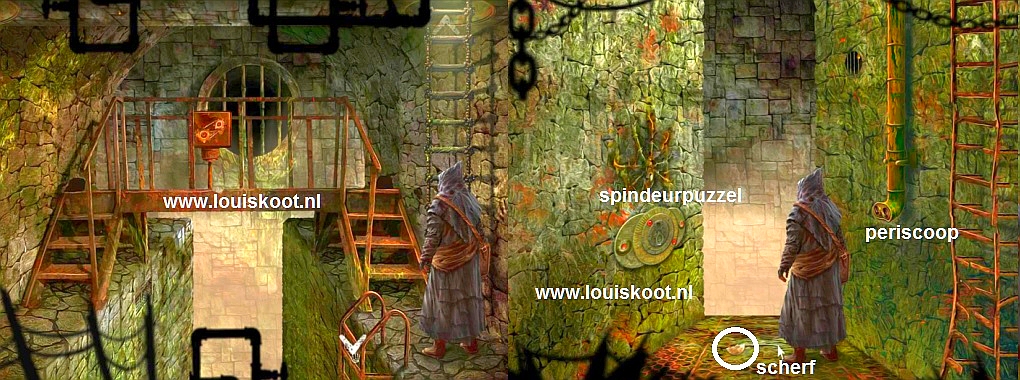
you end up one floor lower and you can't go lower.
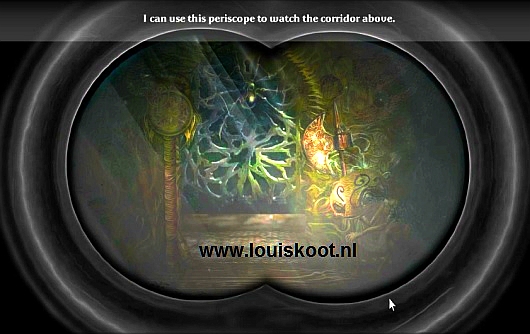
On the right wall there is a periscope that you can look through and when you do that you see the spider door and the guard who is guarding the witch.
On the left wall you see the spider symbol and below it are 3 circles ..... those 3 circles are the puzzle to open the spider door, but you cannot solve it yet because you first have to get poison from the spider. The second half of the broken medallion lies on the floor .... take the Medallion piece .... you now have both halves of the medallion and you need that to open the dining room gate.
So climb back up the ladder to the intermediate floor of the sewer. For fun, you can take a look in the torture chamber via the left rope ladder ..... you then stick out of the round manhole cover hatch in the torture chamber ..... The key hangs in the executioner's belt .. ... Click on the key ..... well ..... you cannot grab the key while the executioner is still standing on strait up. Click the down arrow to return to the intermediate floor and then climb further up via the right rope ladder. You are then again next to the torture chamber. Climb up here again via the rope ladder and you are back upstairs in the hallway near the stairs and the closed door. Walk another screen to the right and .... you're back at the:
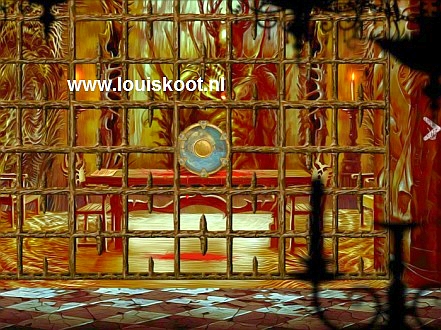
Dining room:
Zoom in on the circle in the fence and then, in the close-up, place both halves of the medallion in the Circle ...
the medallion disappears and the circle is now a clock with 2 hands. 6 colored marbles appear in the edge of the clock. You must now click the pointer hands in the correct order to the 6 marbles. The sketch on the wall near the torture chamber actually gives you the solution to this puzzle. Number the 6 marbles of the clock 1 to 6, ac cording to the clock hands. Then view the sketch of this "clock" in your sketchbook ..... Well .... the arrows on the sketch tell you in which order you have to click on the marbles .... and that is 1, 4, 2 , 6, 5, 3.
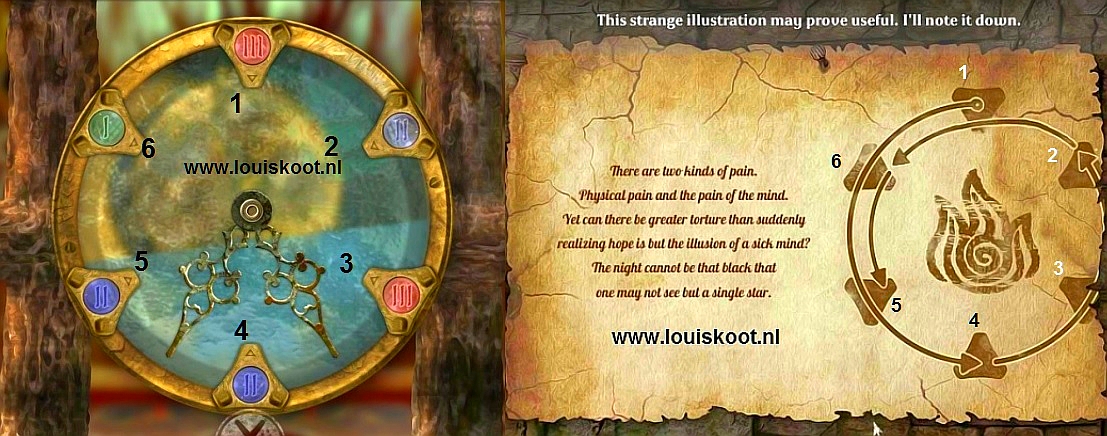
Click the sketch away to get back in the puzzle and then click in the correct order on the marbles ..... each time both hands go to the marble and that "lock" then clicks open ... the hands then go to the next marble that you have to click on ..... the correct order is therefore: 1, 4, 2, 6, 5, 3 and ........ the fence disappears .....
There is a note on the table and a large piece of red bleeding meat. In the chest of the statue, behind the table, is a red ruby eye. Get the meat and get the ruby eye. You now have 3 red ruby eyes in your mission. View the note on the left of the table. At the bottom of the note you see a series of symbols
....... hello .... aren't those the same symbols that you saw on the spring puzzle at the torture chamber? This series of symbols tell you at which position you have to click each of the 5 springs. Get out of the close-up and return to the bottom floor of the sewer, so 1 screen back to the left, then down through the ladder and then further down through the sewer pit and the iron ladder. Back on the bottom floor of the sewer you can take a look through the telescope, if you have not done that before .... you will see the guard at the spider door again.
The Spider Puzzle is on the left wall ...... click on the 3 circles to get in the close-up
Spider puzzle:
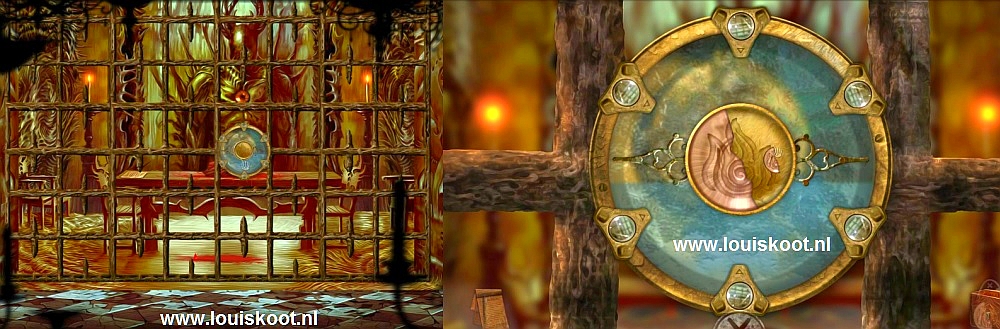
Your 1st Moral Choice:
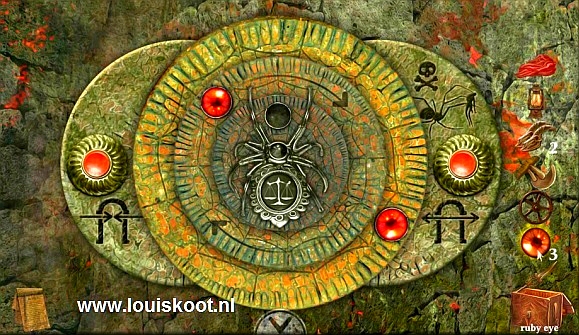
You see 3 circles .... a left and a right circle that are both overlapped by the center circle. In the center circle you see a spider and 2 ruby eyes. Above the head of the spider is a round hole and on the body of the spider is a circle with a scale in it. Open your Inventory chest and take out your 3 red ruby eyes. Place 1 ruby eye in the hole, above the head of the spider, put 1 eye in the head of the spider and place 1 eye in the scale circle ....
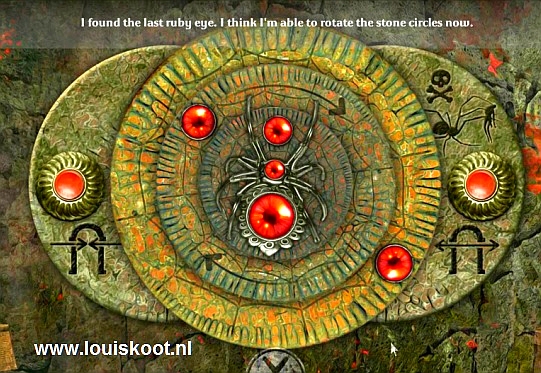
you have now activated the puzzle ...... On the left circle and on the right circle you see a thick red button. The middle circle consists of 3 rings .... the outer ring with 1 red ruby, the middle ring with 1 red ruby and the inner ring with the spider and 3 rubies. You must now turn the 3 rings of the middle ring to put the 5 red rubies on 1 line, opposite the left button or the right button, to activate these buttons
You now have to make a moral choice .... If you choose the right button and press it, the spider will kill the guard at the spider door. If you choose the left button then you save the life of that guard and the spider door is repaired ...... your choice ..... remember .... if you want the good ending of the game then you are not allowed to kill anyone in the game ....... Because you cannot save yourself in the game, the moral choices you make are final from the moment you have make your choice
So make your choice .....
rotate the 3 rings of the middle circle so that the 5 rubies are on 1 line with either the left button or the right button .....Then click on the left or right button .....

Depending on your choice you see that the spider door has been repaired and that the guard remains alive,.....or you see that the spider door has been repaired but the guard is being eaten by the spider. Anyway .... when this is over you look through the periscope again to see what your choice has resulted in .... the spider door has been repaired, because that door no longer moves, and the guard is still there or has disappeared. Climb up the ladder and then the right rope ladder back up to the:
Torture room:
Moral choice 2: Kill the executioner or let him live
Zoom in again on the box where the spring puzzle is. If 1 of the springs is not at the very top then click the red reset button to put the puzzle back to the starting position. There are 5 springs, so number them, from left to right, 1 to 5. At the bottom you see a symbol for each spring ......... you also saw those symbols on the letter in the dining room .... You have drawn the symbol series in your sketchbook ..... Take that sketch ..... read the series of symbols from left to right ..... the series then first has 3 times the symbol of spring 1, then 2 times the symbol of spring 4, then 2 times the symbol of spring 3 and finally 1 time the symbol of spring 5 ..... the number of times a symbol appears in the series is the number times that you have to lower a spring ....
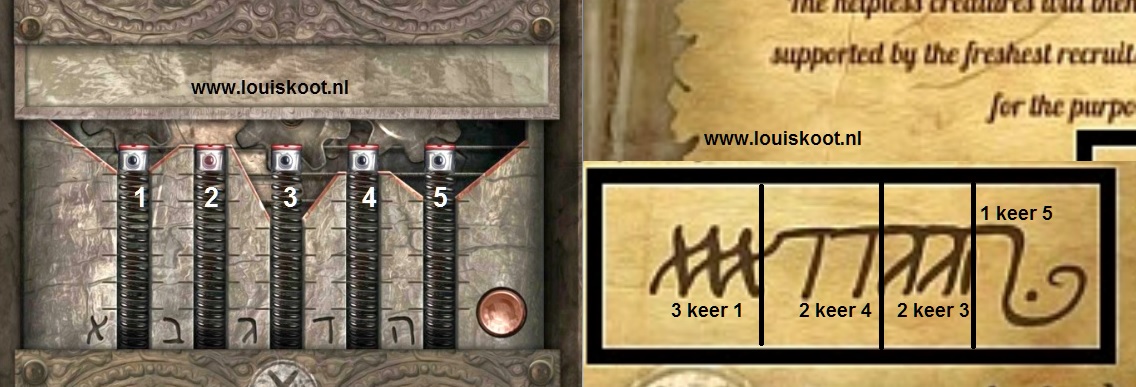
So spring 1 must be 3 positions down, spring 4 must be 2 positions down, spring 3 must be 2 positions down and spring 5 must be 1 position down. Assuming that all 5 springs are now fully raised, click 3 times on the light of spring 1, 2 times on the light of spring 4, 2 times on the light of spring 3 and 1 time on the light of spring 5 and ..........

..2 buttons will appear above the springs
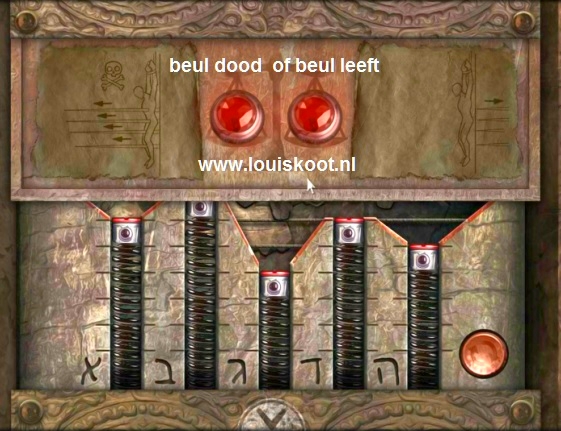
If you click the left red button, you will kill the executioner in the torture chamber. If you click the right red button, you save the life of the guard and you destroy his torture machine ..... Again ..... it is your choice. If you want to experience the perfect end to the game, you cannot kill anyone in the game...Once you've made your choice you can only restore it by restarting the game anew from the beginning
Anyway .... whether or not you have killed the executioner you can now get his key ..... If you have saved the executioner then he is now repairing his torture machine. If you killed the executioner, his stinking corpse hangs dangling in the skewers .... in both cases the executioner has lost his key and that key is on the floor with the manhole cover. Go down on your side again via the manhole cover and then climb via the left rope ladder to the torture chamber .... you then stick out of the round ladder hole in the torture chamber and you can now grab the key .... So....Take the Key
When you have killed the executioner ......
When you didn't kill the executioner ......
Kill the Witch or don't kill the Witch
Get out of the close-up and return via all ladders to the staircase and the closed door. Click the up arrow at the top of the stairs to return to the scale with the weights.
Go 2 screens to the right and .... you are back at the Spider door
When you haven't kill guard via the spider then he tells you now that the door is made and that the spider poison goes through the pipes again.
The guard no longer has to guard the door so he disappears. You can now talk to the witch in the cage.
The witch asks you to free her from the cage in which she was locked up by the Jester centuries ago. However, the Jester has asked to kill the witch and he has given you the "Bladed Key" ...... Take that "Bladed Key" from inventory and click it on the witch and ........
So here is your 3rd moral choice ..... do you free the Witch or do you kill her in the cage ...... If you click the knife then you kill the witch ..... if you click on the key then you free her ...... your choice again ..... I think it is a nice girl and .... I hate the Jester, so I save the girl and click on the key ...... The witch stays alive and she goes straight back to the Throne room .....
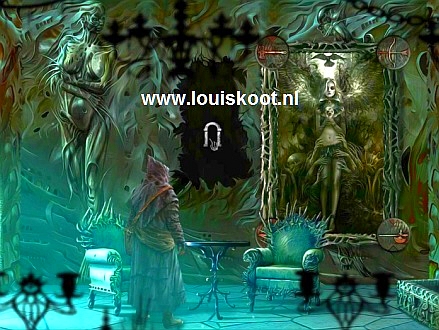
Also go back to the Throne Room for a moment ...... The Witch is sitting on her throne but the Jester is gone .... Talk to the Witch .... well ..... the bitch is not even grateful that you didn't kill her. Your mercy towards the witch, however, will cost the Jester dear because this witchy bitch is quite resentful. Nevertheless, the witch has a reward for you .... a Coin, which the witch throws on the ground.
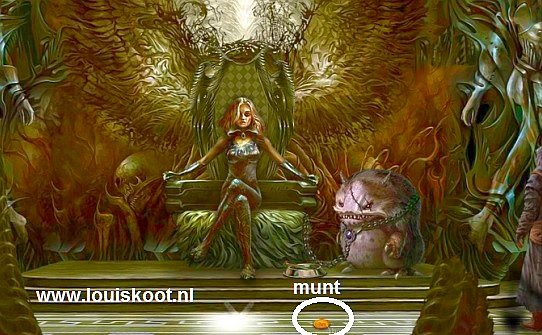
So grab the Coin ..... it's a gold coin. Get out of the close-up and return to the Spider Door.
G: Food for the mole:
Poison room
The spider door has been repaired but is still locked. Take the executioner's key (Guard's key) from inventory and click the key into the padlock of the spider door and .....
the door is then unlocked and you can get through.
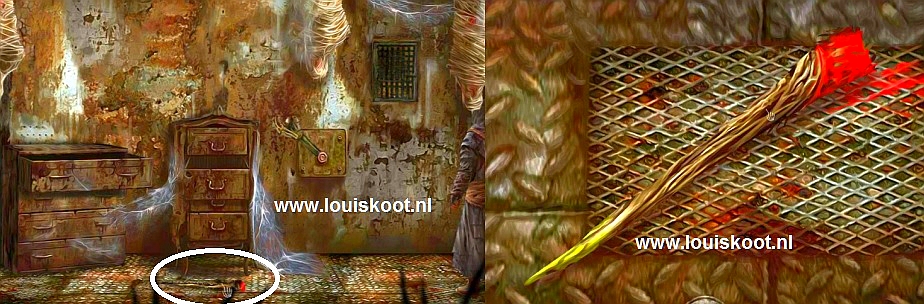
Step through the spider door .... you end up in the poison room. This is the room where the spider encapsulates its victims in its web and hangs them up, to eat them later. There are 2 chests of drawers and there is a Hand Lever on the wall. A puppet in threads hangs above the left cupboard.
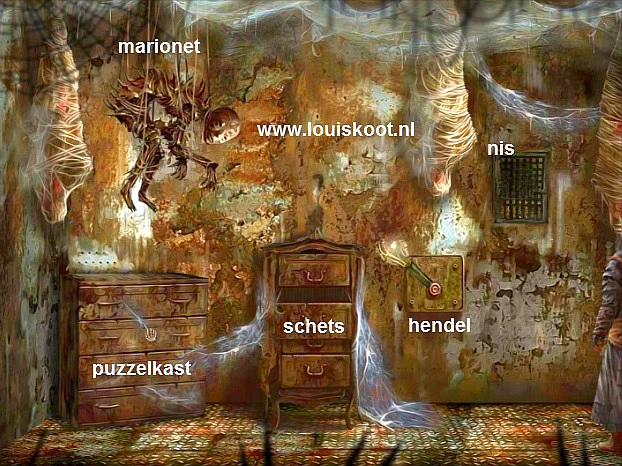
Click on the narrow chest of drawers .... the 2nd drawer opens and you get a sketch out of it. On the sketch you see 3 colored circles 4 times. At the lower right circles is a skull ..... you draw this sketch in your sketchbook. Get out of the close-ups and now click on the left chest of drawers ... the top drawer slides open .... Click the opened drawer to get into close-up .... you are in the:
Colored Circles puzzle:
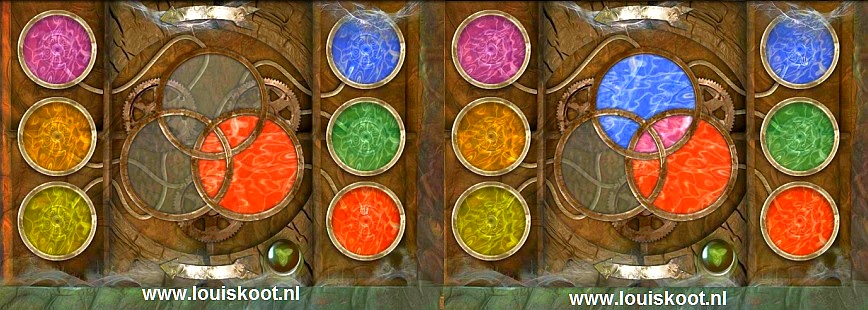
In the middle you see 3 overlapping circles, just like you saw on the sketch. Left and right are 3 colored circles. Below the 3 overlapping circles you see a green button. You have to give the circles in the middle the right color and you saw what it should be like in the sketch .... because it is the circles in the lower right, where the skull is.

|
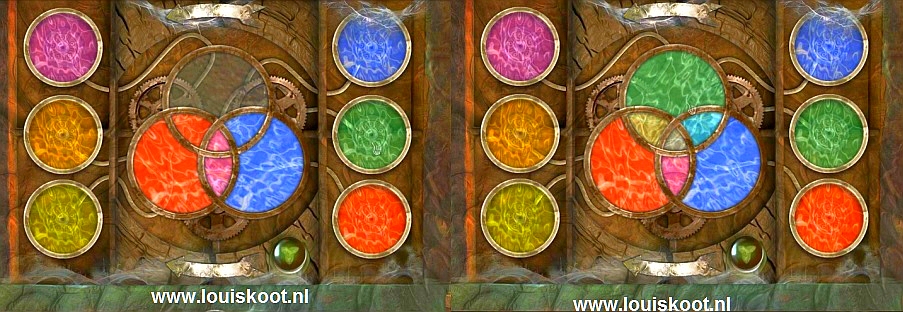
Red must be on top, green on the right and blue on the left. First make the 3 inner circles red, blue and green by clicking on the relevant right circles. To do this, click on the 3 right circles. Click the red circle ...... the right circle in the middle turns red. Click the blue circle ..... the upper circle in the middle turns blue
Now grab the middle 3 circles and turn them around until you have the empty circle on top. The red circle is on the left and the blue circle on the right. Now click on the green circle to make the top circle green in the middle. The circles in the middle are now red, green and blue, but they are still wrong
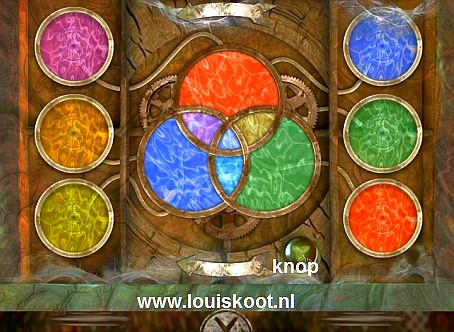
Grab the 3 middle circles again and turn them around until the red circle is at the top. The blue circle is on the left and the green circle on the right ...
Now click on the round green button, right below the 3 middle circles and ...... the 3 circles disappear and a metal 3-leaf clover appears in its place ..... take the "3-leaf clover" and get out of the close-up.
|
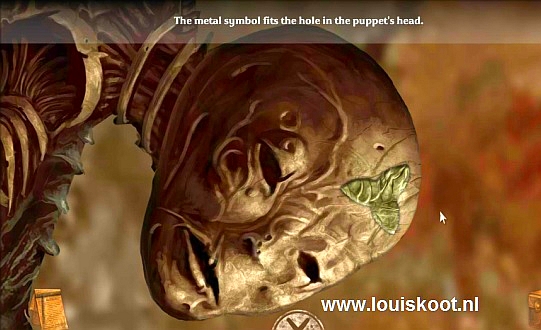
Now click on the string puppet, which hangs above the left chest of drawers .... in the close-up you can see that there is a "3-leaf clover" dent in the forehead of the doll
Take that metal "3-leaf clover" from your coffin and click it in the forehead of the doll .....
you will automatically exit the close-up .... Now click on the Hand lever and ..... well ... see what happens with the doll and the spider .....
.. The spider comes to pick up the doll but .... some spider limbs fall to the floor .... Take the Spider's Leg .... there is red spider venom on the leg.
There is a lattice door in the wall .... Click on the lattice door ..... it slides open and in this wall cupboard is a Bird's nest ....
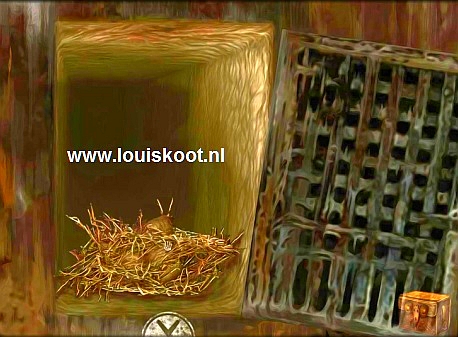
Take the bird's nest .... it serves as fuel for the oven. Get out of the close-up.
H: the Mole and the rodent:
Leave this room and go 3 screens to the left ... you will be back at the:
Boiler room:
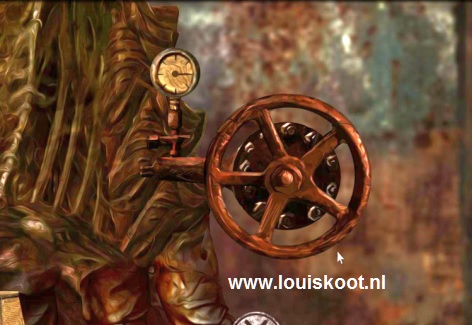
Go inside again. On the right side of the oven you see the pressure gauge and the pipe where you have to place the missing rotary wheel. In the meantime you have found a nice rotary wheel, so click on the pressure gauge and then place the rotary wheel in its place ....... the wheel rotates immediately and the oven gets pressure.
You automatically leave the close-up. Zoom in on the lower compartment of the oven, where you previously removed the bone, and then put the Bird's nest in it ...... the doors will close immediately and you will automatically leave the close-up again. Zoom in on the upper compartment of the oven .... Take the 2 Horned Skulls out your inventory and then click 1 skull on the left snake and the other skull on the right snake ..... then click on the round button and ......
The skulls bang against each other and give off fire and ..... the oven is now lit. Go out of the close-up.
Now that the oven is burning, we can cook poisonous meat to get rid of that giant worm to free the rodent from its cage. So you have to go back to the kitchen now. Leave the boiler room and then 1 screen straight and descend via the scale stairs. Then go 2 screens right and through the sliding face door. You are back in the:
Kitchen:
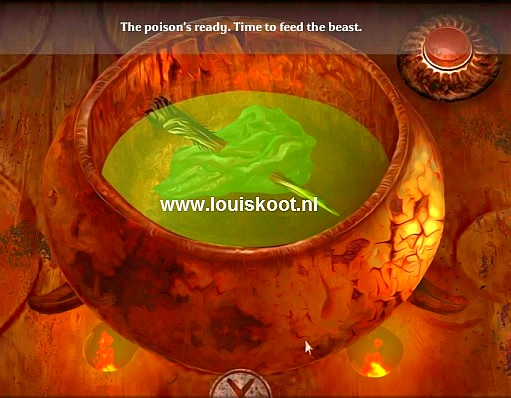
The fire under the cooking pot is burning now. Zoom in on the cooking pot and put your hunk of red bloody meat in the pot and then throw in the poisonous spider's leg and then click the red button and ...... after a few seconds your poisoned meat will be ready. Take the meat back from the pot and step out of the close-up.
Now back to the rodent and the huge worm ..... leave the kitchen and return to the Throne Room. In the throne room, click the down arrow in the middle center to go back through the Demon gate. Then go one screen to the right and .... you're back at the Rodent and the Worm
Free the Rodent or kill it:
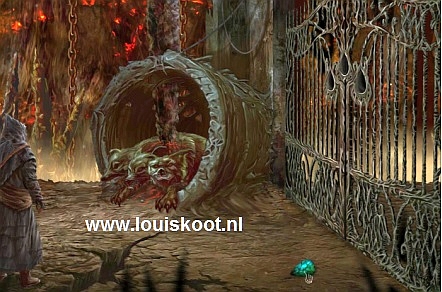
Take the poisoned piece of meat from your coffin and click it on the worm and ...... the huge worm eats the meat and now sinks completely into its hole and....it is dead. You can now reach the lever behind the hole and you can also climb into the hole via the ladder. Click on the Lever and ..... well .... Moral Choice 4 ...... Will you save or kill the rodent ...
If you drag the lever to the left, you will free the rodent but then it will die a miserable one death because it then falls into the skewers ....
If you drag the lever to the right, you will free the rodent and it stays alive ..... it is your choice again ......
So drag the lever to the left or right, then release and then click either the left button or the right button, depending on whether you have moved the lever to the left or to the right .... as you can see I have been merciful to the rodent ..... The rodent is released and continues to live and he invites you to come and visit him in his cabin in the Wastelands .... to show you the way, he will light a lamp at his cabin. The rodent also gives you your 2nd gold coin, which he leaves in the cage.
Well .... Take the Gold Coin from the cage.
Step out of the close-up again and now go down the ladder to the bottom of the worm hole.
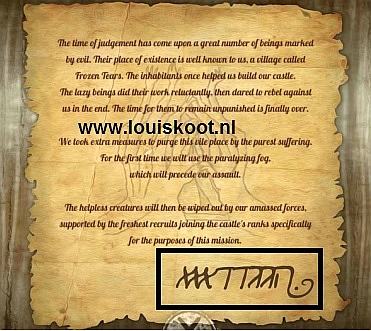
The worm is dead but something is glowing in its belly. On the left is a letter and a lot of bones and skulls.

First read the letter ..... the letter is from another prisoner and he writes that the worm has swallowed a chest key. Get out of the close-up ...
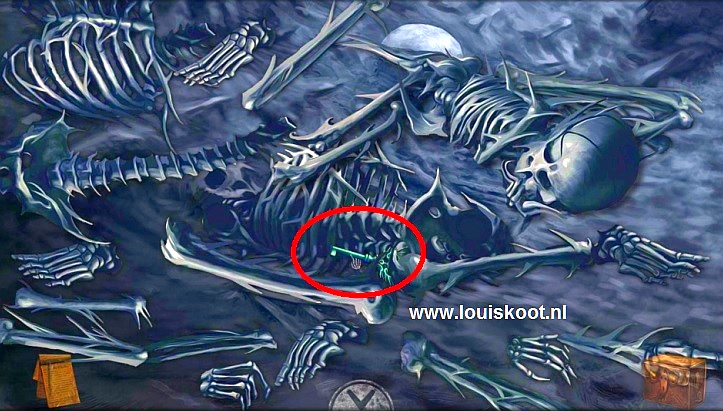
There is something between the heap of bones and skulls ..... click on the bones / skulls to see them in close-up
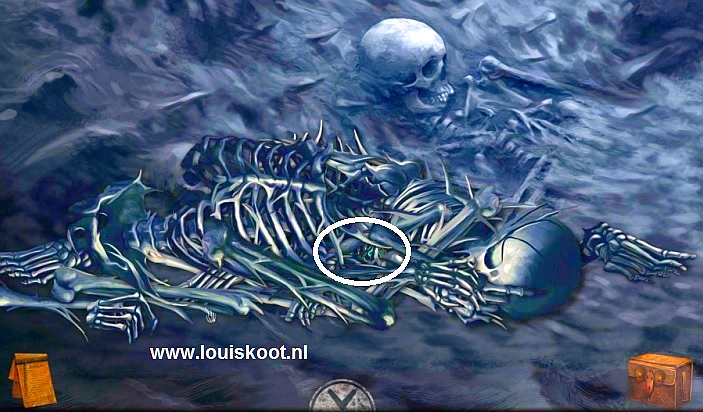
You must now drag the bones / skulls apart to be able to grab the thing underneath .... Click on a bone / hand / leg and drag it off the pile ...... you always have to take a top bone to release another bone ...... eventually you will be able to take the green key .... then take the green key and get out of the close-up
Then click on the glowing belly of the worm to get into the close-up there too.
Take the Felt Knife out of your box and use it to cut open the belly of the worm and then take the tear-shaped Emerald from the stinking intestines of the worm.
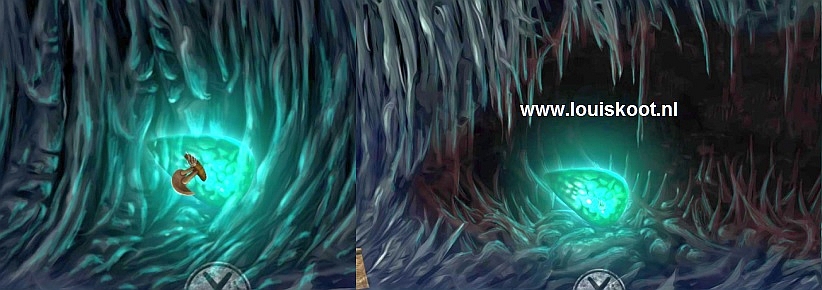
Get out of the close-up and back out of the cave via the ladder. Back from the hole you scroll the screen to the right and see ...
..... you can now go through the round and white glowing door
it is the door to FREEDOM, so click the arrow and ....... you get out on a balcony .....
I: The Gateway to freedom:
Sjees ..... what a desolate world .... .
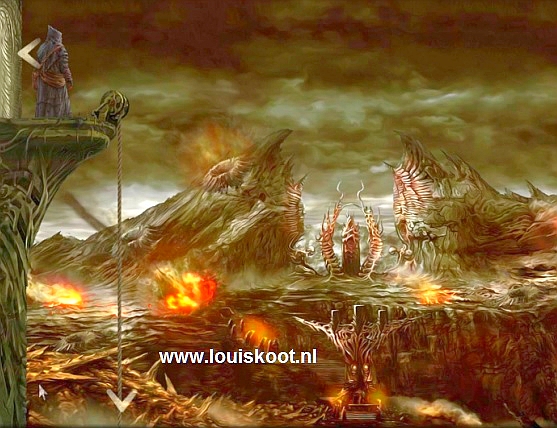
A rope hangs on a pulley and that rope hangs down. You get the down arrow on the rope, so click that down arrow and ..... you climb a bit down the rope. You then hang halfway in the rope. Again you get a down arrow to climb further down ...... A little below you see a round opening in the rock and ..... you hang in front of a huge Atlas that carries the entire world on its shoulders.
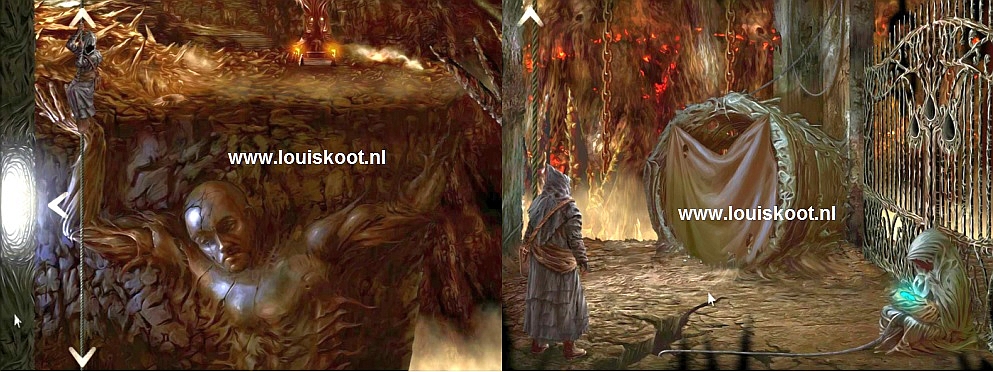
Climb further down via the down arrow on the rope and ..... You end up on the ground and at the Gate. A woman is sitting against the gate .... she has a baby in her arms. A round tube is closed off with a cloth. Click on the cloth to remove it and put it away in your box and ..... A 3 headed Monster "lives" in the tube
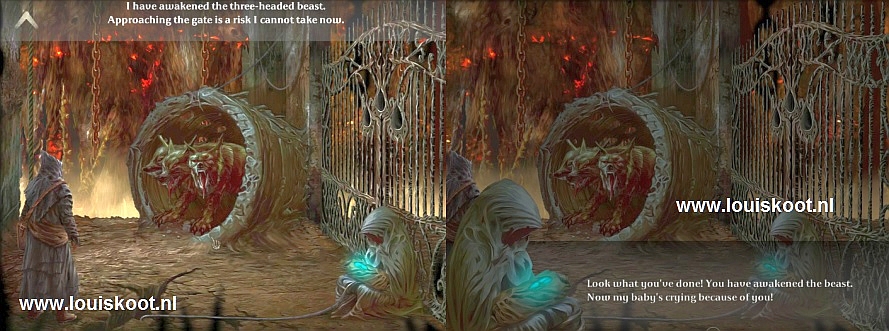
this 3-headed monster is the guardian of the Gate and as long as the monster is there you cannot go outside through the gate. Talk to the woman ......
the woman is angry with you because you woke the Monster ..... now her baby is crying and the woman doesn't like that. The woman tells you to place 3 emerald tears in the gate to open the gate. The woman further explains that her baby can only grow into adulthood if she receives 3 gold coins. If you give the woman 3 gold coins then she will help you to escape.
You now have 2 gold coins and you can now give them to the woman, but you can also wait until you have found the 3rd gold coin and we will now look for it first. Click the up arrow in the rope and ..... you climb up again and then hang again at Atlas and the round hole in the rock. Click the left arrow and .... you crawl back into the castle through the round hole.
You are in a corridor and at a door. to the left and right of the door is a painting.
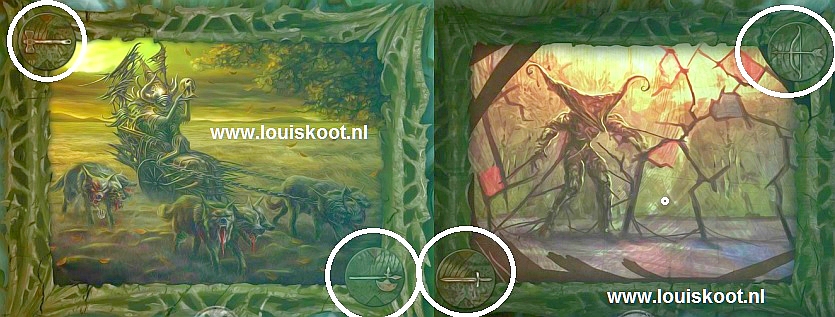
Zoom in on the right painting. There are 2 circles on the frame of the painting where you can see a weapon ... an axe at top left and an lance with an ax at bottom right. You draw it in your sketchbook. Go out of the close-up and zoom in on the left painting. Also 2 circles with a weapon ..... top right an arrow and bow and bottom left a sword .... you draw it again in your sketchbook.
Get out of the close-up and continue a screen to the left. 2 doors .... the right door is locked .... when you click on the right door, dangerous skewers rise from the floor ..... that is because the skull on the left door looks at the right door and sees that you want to go through the door ..... so the skull on the left door is the guard of the right door and the skull on the right door guards the left door, which you can't go through now .

At the far left is a device and there is a sketch on the wall. View the sketch ... you draw it again in your sketchbook .... The sketch shows you Atlas and the device ...... you have to throw something in the device to make Atlas "shake" the "World" . Get out of the close-up. You have to go through the right door, but it will only work if the left skull cannot see the right door .....
Take the cloth from your chest and throw the cloth over the left skull ......
you cover the left skull with the cloth and you can now go through the right door, so do this .... you end up in the:
Chest room:
A poor soul sits in the right seat and there is a big chest. Talk to the poor guy in the chair.
After the wailing of this guy, a box appears on the table ......Do not click on that box yet but click on the large chest first.... you end up in the:
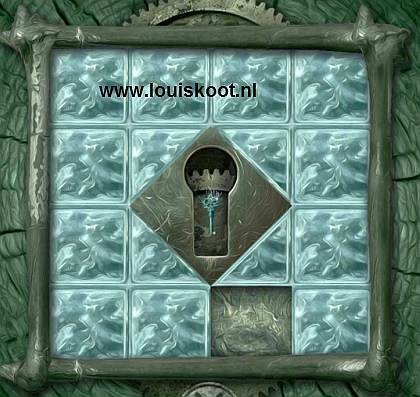
Slider puzzle:
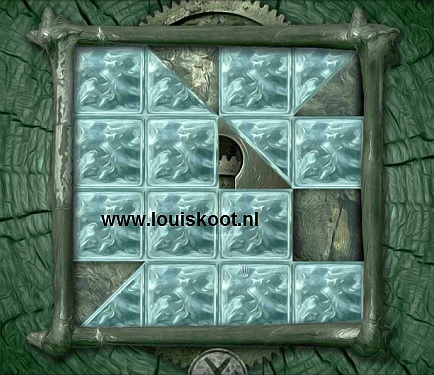
The lock of the chest is a slider puzzle ..... Slide the crystal blocks around to fully reveal the keyhole in the middle. It is a sliding puzzle so you will have to solve it entirely on your own. The 4 half blocks must come around the keyhole. If you've got it done then take the green key, that you have taken from the heap of bones in the Mole hole, from your inventory box and put the green key in the keyhole and ....
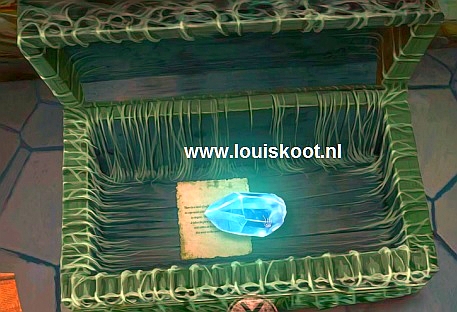
the chest opens .... you go out of the close-up ... click in the opened chest and then take the blue crystal out of it and also read the note.
Get out of the close-up and now click on the box that has appeared on the table.
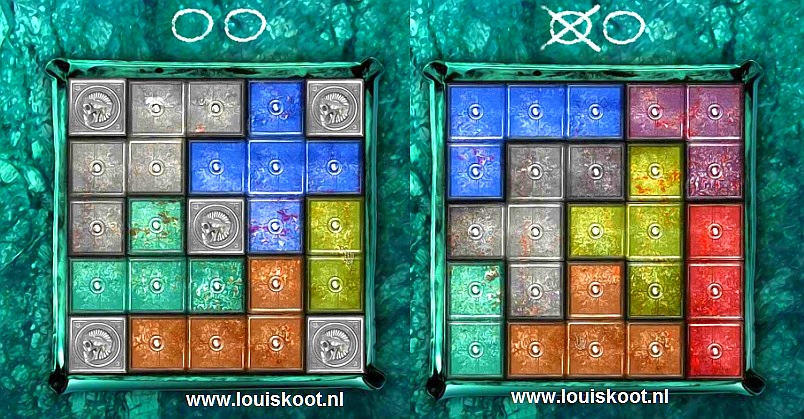
Tetris puzzle:
Ok .... you have 5 Tetris pieces that you have to place on the lid of the box and you have to do this twice because this puzzle consists of 2 parts.
Part 1: Place the 5 Tetris pieces in the lid....... you come in:
Part 2: Now place the 6 new Tetris pieces in the box .... thus:
The puzzle is solved and the ghost in the chair talks to you again and then disappears ....A large painting of the Witch is then revealed behind the table ....
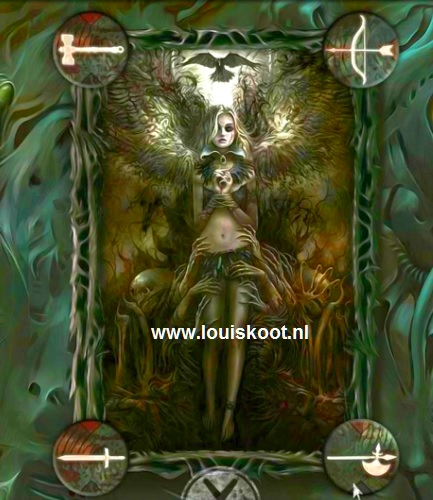
Click the painting to get in close-up ..... The frame of the painting has a circle with a weapon on each of the 4 corners .... Well .... you also saw those 4 circles on the 2 paintings in the corridor. The weapons in the 4 circles are wrong. You have to click the weapons to point them in the right direction, as you saw them in the 2 paintings in the corridor. You have a sketch of what it should be in your sketchbook, so view that sketch and click the 4 weapons on the painting to the correct position.
The painting then slides away to reveal a secret corridor.
Go through the secret corridor to the:
Dark room:
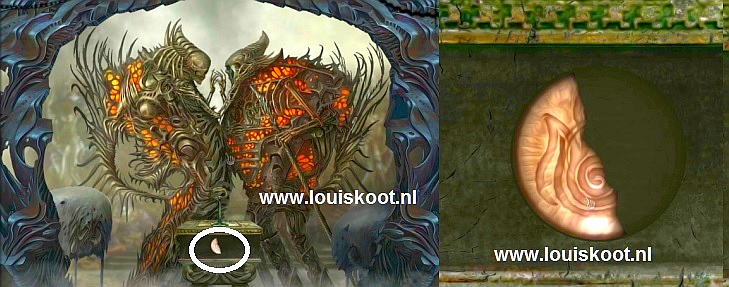
You don't see much, it's dark in here....so click on the left cabinet. Take the oil lamp from your box and put the lamp on the holder, that's on top of the cupboard .... now you have light and you can see everything in the room. There are 2 cupboards in this room and 3 sarcophagus. Open the left cupboard and then take the emerald tear.
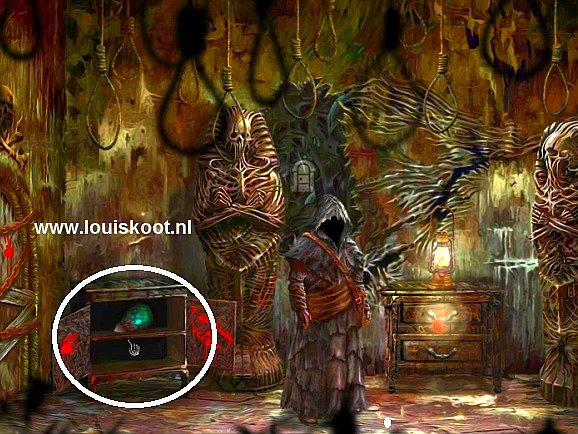
Open the top drawer of the right cupboard and then click in the drawer to read a letter in the drawer.
Open the left sarcophagus .....There is a mummy in the sarcophagus and a gold coin on the skull of the mummy. Take the gold coin.

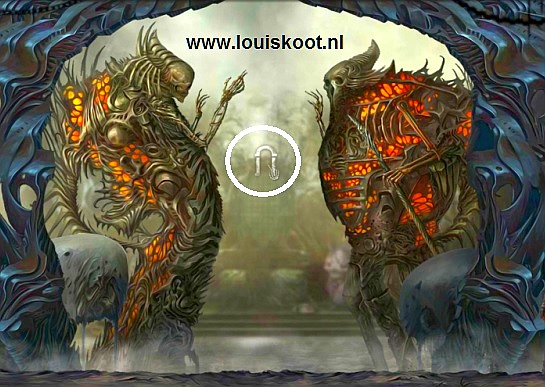
Go back through the secret corridor to the crate room and then back to the corridor. Zoom in on the device.
Take the blue crystal from your inventory chest and throw the crystal into the device and ....... Atlas causes an earthquake .....
You go out of the close-up again. Go back one screen to the right and then crawl out through the round opening and climb down the rope to the ground and the gate. The earthquake that Atlas caused has killed the 3-headed monster. Take the 3 coins from inventory and give them to the woman with the baby ....
... the woman disappears and then your 3rd emerald tear lies on the floor .... take the emerald tear
In the middle of the Gate you see the 3 places where you have to place the emerald tears.
So zoom in on the gate and then place your 3 emerald tears in a hole and ..... the fence will slide open ....
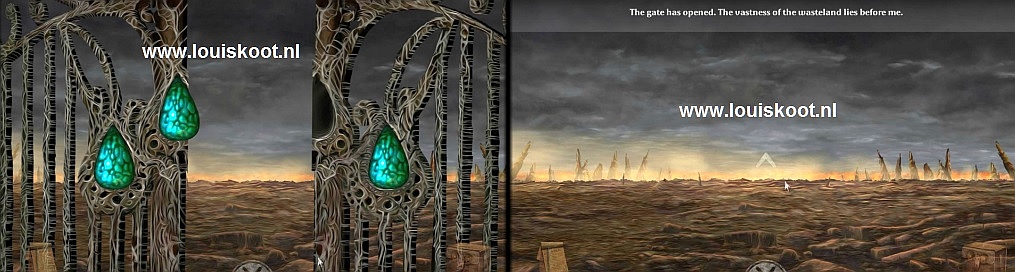
well ..... freedom is ahead of you, so click the arrow to finally escape the torture castle. You end up in
2019: Walkthrough by: Louis Koot